80 Easy Christmas Crafts For Everyone In The Family To Enjoy
Updated on November 16, 2021
Although December is the month most of us celebrate Christmas, there’s no point denying that most of us can sense the holiday’s spirit months away. The autumn leaves are changing; the weather is becoming colder; there’s a Christmas song playing in every shop.
And of course, Christmas decoration shops go up much earlier than usual. It’s clear that before you know it, every store will be selling snow globes and handcrafted ornaments – so why not get in on the fun with some easy Christmas crafts?
You can make them for your family or for your friends, everyone will appreciate them. In this article, we’ve collected a range of ideas for Christmas crafts for kids and adults alike.
Choose from snow globe cookie jars, photo transfer ornaments, Christmas tree centerpieces, or a gingerbread homemade soap – there’s something here suitable for every skill level and taste.
Christmas Crafts
If you’re serious about getting your house Christmas-ready, we have a plethora of awesome craft ideas in our guide below.
The best part about it? Most of the crafts we’ve included in our guide are based on things you could simply stumble upon when you’re cleaning up your house for guests.
Look around your home – what items could be improved by a little bit of decoration? You can make easy Christmas crafts from pretty much anything; match the activity to the season and you’ll find yourself decorating like a pro in no time at all.
So if you’re looking for a way to kill time and decorate your home in the process, we’ve got easy Christmas crafts for everyone; we hope we can help you get into – and stay – into that holiday spirit.
1. DIY Custom Merry Christmas Banner – Christmas Craft Ideas
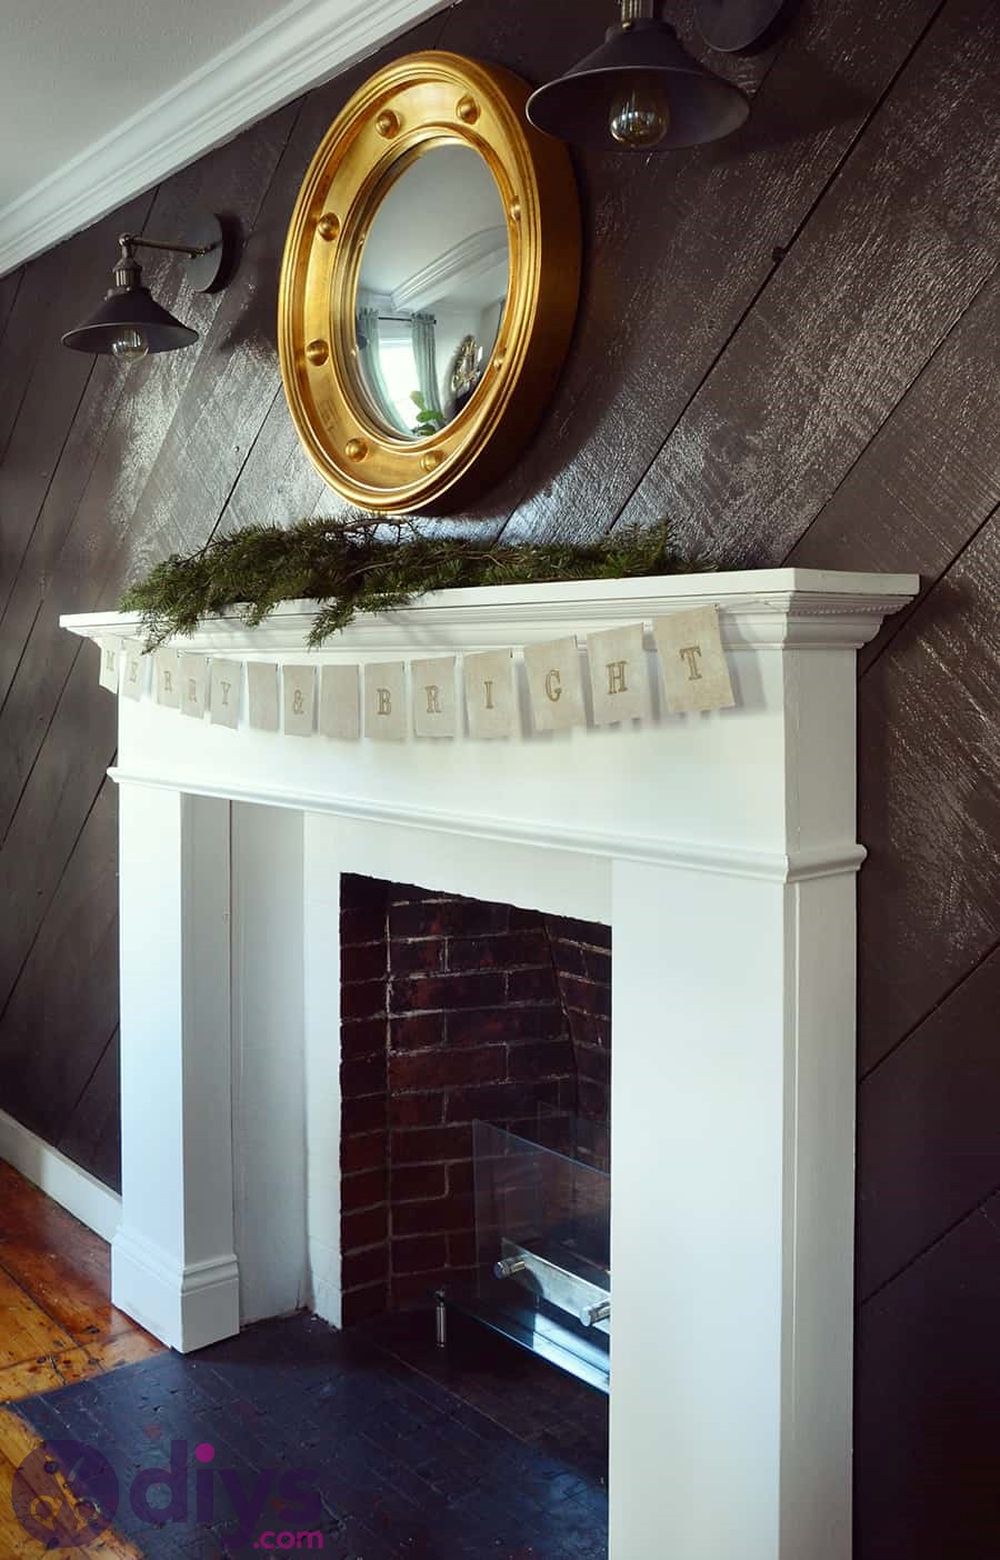
This DIY customizable Merry Christmas banner is a fun and easy DIY project you can do with your family. All you’ll need to make it is some burlap fabric, white spray paint, adhesive letters, a gold sharpie marker, a hot glue gun, a pair of scissors, and some baker’s twine (gold and white preferred).
First, you’ll need to cut the burlap into small rectangles; keep in mind that each rectangle will display a letter when the project’s all finished.
You’ll also want to make sure that the baker’s twine has enough length to run it across the top of each burlap rectangle, and leave a bit of space between each one, as well.
Next, you’ll have to write each letter onto its corresponding piece of burlap fabric using the adhesive letters and gold sharpie marker. Make sure you place your letters in an order that will convey the desired message (M-E-R-R-Y C-H- R-I-S-T-M-A S).
After you finish all of your letterings, it’s time to spray paint your burlap rectangles. Make sure each rectangle is evenly covered by a layer or two of white spray paint before moving on to the next.
Finally, glue each piece of baker’s twine onto the backside of the letter in its designated order before hanging it up for all to see. We recommend using a hot glue gun for this part because it allows you to fix any lettering mistakes you may have made, and the whole project will come together quickly.
In total, this project should take you about 30 minutes to complete. It’s a fun and simple way to decorate your home for Christmas – plus it’ll be a great conversation starter!
2. DIY Twig Christmas Tree – Easy Christmas Crafts
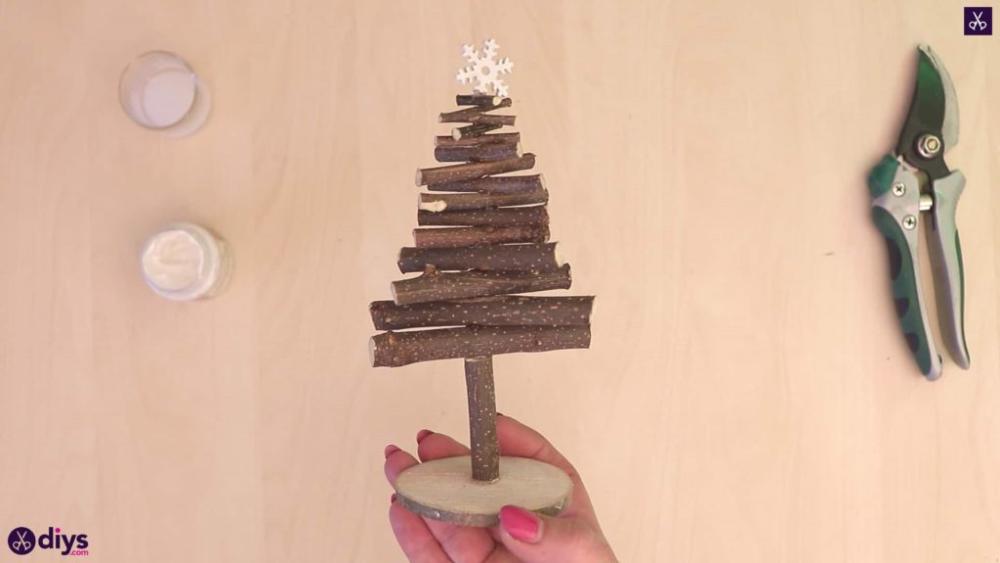
This creative DIY twig tree is a fun and easy way to add some quirky holiday cheer to your home or office space! All you’ll need to get started is a wooden disk, some twigs, a snowflake-shaped sequin, white paint, a hot glue gun (and glue sticks), secateurs, and a paintbrush.
First, you’ll need to use the paintbrush and white paint to cover your wooden disk in a nice, even coat of paint. Make sure that it’s fully covered before letting it dry for an hour or two.
After it dries, glue the longest, thickest twig upright straight in the center of the wooden disk, then start stacking the other twigs to create the shape of your Christmas tree. Place the longest twigs at the bottom and work your way up to the shortest ones.
Instead of simply stacking them, you can rotate the twigs slightly so that they’re sticking out alternatively. If this step is a bit confusing for you, please make sure to check the tutorial we’ve attached above.
Alternatively, you could attach the twigs upright around the edge of the disk (four should do) by gluing them on with your hot glue gun. However, for this design to work you’ll need equally-sized twigs. By the end, your Christmas craft should look like a cone.
Don’t worry about arranging them perfectly; after all, this is a rustic DIY project!
You can place your snowflake-shaped sequin wherever you’d like – we placed ours at the top center of the tree – and voilà: you’ve got yourself a beautiful and simple Christmas tree!
3. Glass Christmas Ornament – DIY Christmas Crafts

This DIY Christmas ornament is a fun and simple way to add some personalization to your decorations this year! All you’ll need is some acrylic paints (you get to choose the colors), a thin paintbrush, and some round glass ornaments. You can either repurpose old ones or buy new ornaments from your local arts & crafts store.
First, you’ll need to paint a design onto your ornament using acrylic paints and a thin paintbrush. You can use any pattern or color scheme that you want!
We chose to cover the glass ornament with a coat of blue acrylic paint, then used the thin paintbrush along with some silver paint to add some little dots at the top. The idea was to make the dots appear like snowflakes in the night sky, but you can go with whatever design you find most appropriate.
Once your design is finished, put at least four layers of clear acrylic gloss medium over the top of your ornament (this will act as a coat of varnish). Let it dry for an hour or so before touching it again.
After you’ve let all of your coats dry, you can go back and add some white stripes or other decorative elements onto the sides of your globe using either a permanent marker or acrylic paints!
This project should take around 15 minutes to complete, which means that it’s perfect for last-minute Christmas decorations. Plus, this cool little keepsake is just too cute not to hang up somewhere prominent in your home once it’s done.
And that’s it! Your new Christmas ornament is ready to be hung up on the tree.
4. String Art Christmas Tree – Christmas Arts And Crafts
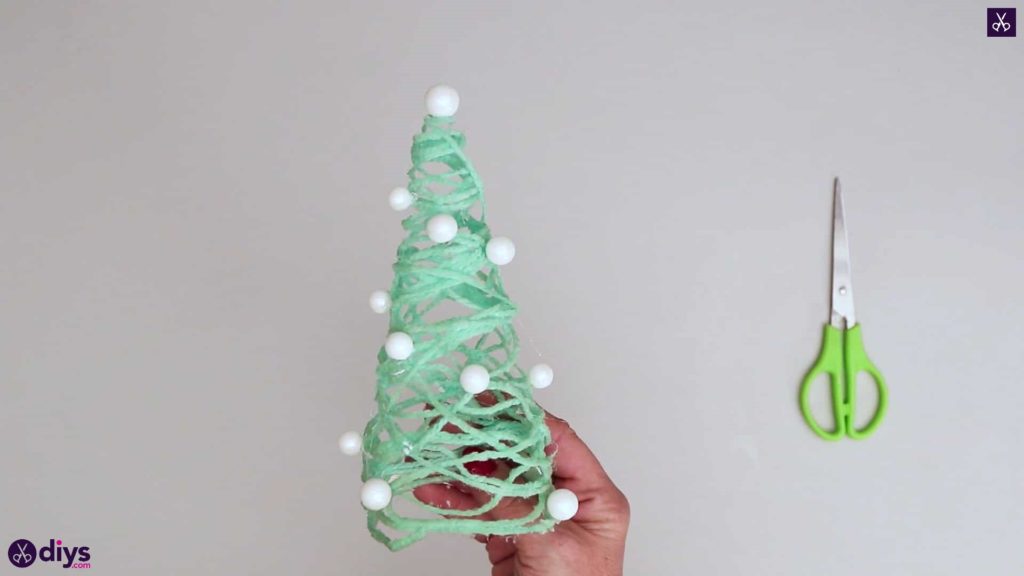
This Christmas craft is perfect for the string-art enthusiast in your family! All you’ll need to get started are some white paper, green yarn, a bottle of textile glue, a pair of scissors, a hot glue gun and some glue sticks, a plastic file sleeve, a bowl, and some pearl beads.
First, you’ll have to shape a cone out of the white paper and secure it with the hot glue gun. Keep in mind that the size of the cone will be the actual size of your string art Christmas tree decoration, so don’t go overboard if you’re not ready to commit.
Wait for the paper cone to dry and use the plastic file sleeve to cover it. Make sure that the binder rings are not to be found anywhere on the surface of your cone, else they will mess up your decoration.
Now pour the textile glue into a bowl and prepare some yarn. Although you could simply use the yarn directly from the spool, it would be better to estimate how much you need and cut it before getting started, but the way you chose to work on this is entirely up to you.
Soak the yarn in glue thoroughly and start wrapping it around the plastic-covered paper cone starting at the base. What you’re going here for is a cone-shaped Christmas tree made of yarn, but we’re sure you already figured that one out.
After a while, though, you’ll want to start adding some pearl beads. These can serve as ornamentation on your string art Christmas tree and will allow for the yarn to stick better to all the crevices of your cone.
Every now and then, put aside your decoration and let it dry for a few minutes or hours depending on how thick the layers of glue were – don’t forget that textile glue is extremely sticky stuff so it’s going to be very hard not to overdo this part.
But once you’re done with gluing, take out a bowl with water and gently clean off the pearl beads from the surface of your starry masterpiece – they may seem like metallic balls at first glance but in reality, these are just beads made of glass or plastic that will be much easier to wash off if you clean them up with water after they’re dry.
Alternatively, you could wait for the yarn to dry before attaching the pearls. Now, this is an important step: once everything dries up completely, remove the paper cone, then gently peel off the plastic file sleeve from underneath your decoration.
You can now hang up your unique string art Christmas tree decoration wherever you want as long as it’s somewhere safe.
And there you have it – a beautiful little starry decoration made out of yarn and pearl beads, perfect for those who don’t have the necessary skills required for woodworking or other DIY projects involving wooden materials.
If you’re having a hard time understanding our instructions, make sure to check out the tutorial above.
5. DIY Modern Cone Christmas Tree – Fun Family Crafts
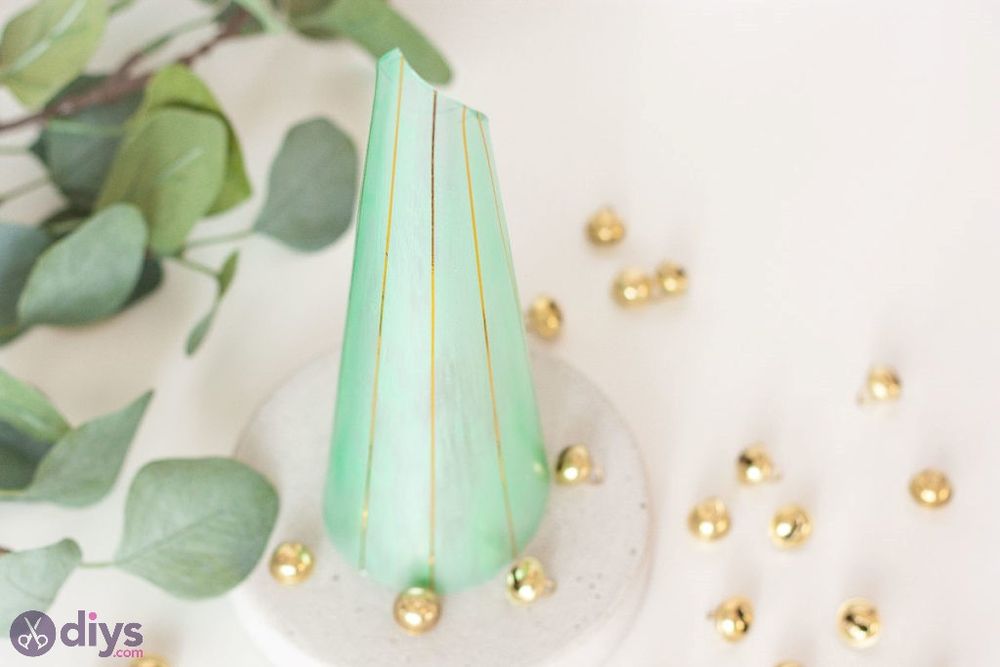
If you want to take a more modern approach to Christmas this year, then this cone-shaped decoration is definitely worth checking out. All you need to make it are some A4 sheets of acetate paper, a brush, some acrylic paints (you get to choose the color), transparent adhesive tape, some gold thin nail adhesive tape, and a pair of scissors.
First, you’ll need to take a sheet of paper and fold it into a cone. Secure its shape with some transparent adhesive tape and make sure that the tip is pointed upwards – that way it will resemble a Christmas tree shape.
Once you’re done with creating the cones, start painting them in the color of your choice. Since it’s Christmas time and the cones resemble Christmas trees, most people choose to go with green paint, but you could also go with burgundy or even black if you’re bold enough.
Let your cone-shaped decorations dry completely, then attach the gold thin nail adhesive tape starting at the bottom all the way to the top. The more you add, the shinier your decoration will get and the more elegant it will look. However, you’ll need to be careful not to go overboard.
For our decoration, we also used some gold plastic beads and glued them to the base of the cone-shaped decoration, at the end of each strip of gold adhesive tape, so that it looks like the tape is stemming from the bead.
And there’s your modern take on traditional Christmas tree decorations – we hope you like it!
As usual, if you’re having a hard time figuring out the steps, please check out the tutorial we’ve attached above. You’ll find not only detailed step-by-step instructions but also a lot of helpful photos to guide you through the crafting process.
6. Wine Cork Christmas Tree – Christmas Art Projects
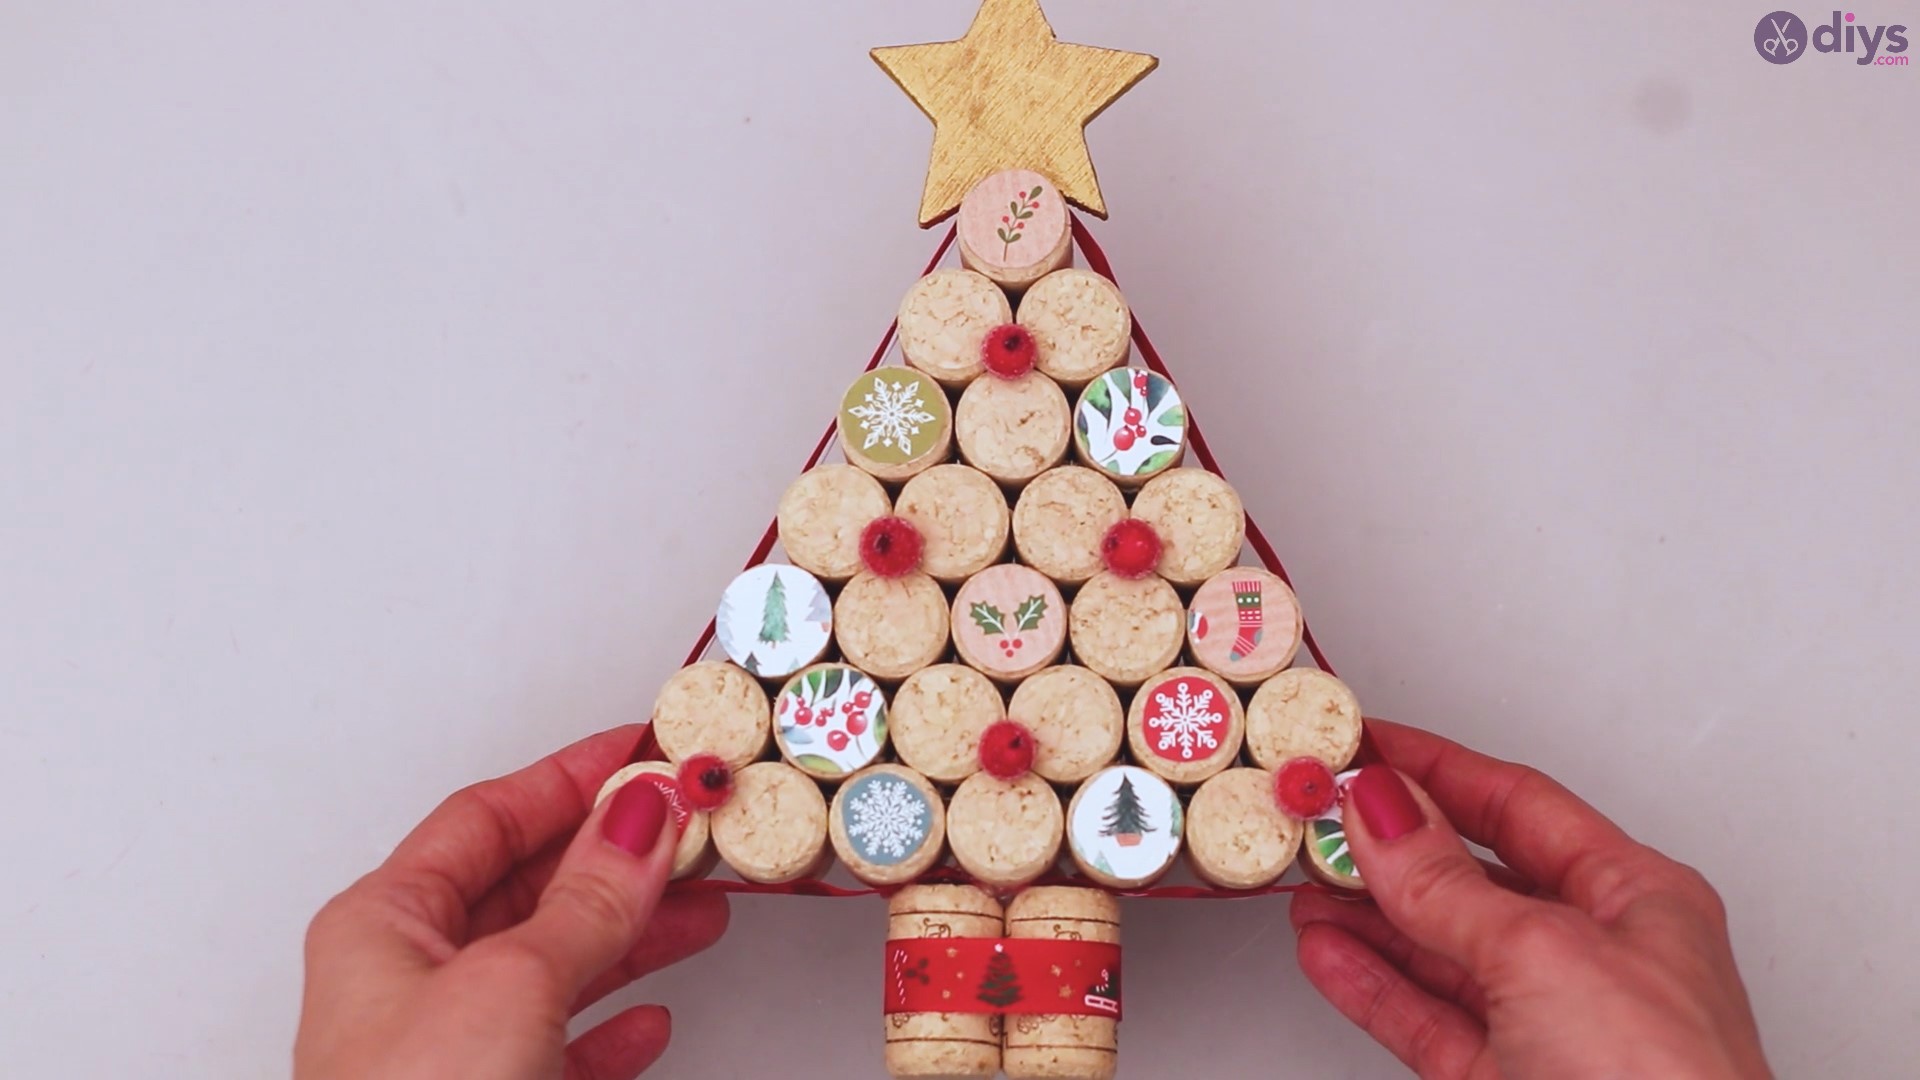
If you’re looking for an alternative to the traditional Christmas tree decoration that’s also easy to make, then this wine cork decoration is definitely something you’ll want to check out.
All you need are some wine corks, a hot glue gun, patterned Christmas wrapping paper, and some ribbon or vellum tags. Start by taking the corks and turning them upside down so that you can see their opening.
Cut cork-size circles out of the wrapping paper (try to find circle-shaped patterns that match the size of your cork top) and glue them to the top of your corks. You can leave some of them without a pattern if you like.
After you finish decorating the tops of your corks, prop them up and arrange them so that they form a triangle (go for a tall triangle instead of an equilateral one). We highly suggest you glue them together in this shape, to avoid messing up the shape and having to start all over again.
Once you’ve got the shape all figured out, use ribbon to decorate it by simply wrapping it around the edges of the triangle. You’ll also want to glue the ribbon, seeing as simply tying it up won’t be enough.
Now use two more corks to create the trunk of your Christmas tree decoration and wrap them in ribbon as well. Make sure you put your glue gun to good use in both scenarios so that you won’t end up with a flimsy trunk or ribbon.
Last but not least, glue the trunk to the triangle you made before and decorate it with some vellum tags. If you’re wondering what kind of tags you need for your Christmas tree decoration, just go with whatever you like most. Don’t put too much thought into it, it’s your decoration after all!
For more detailed step-by-step instructions, check out the tutorial we’ve linked above. It’ll teach you how to make a wine cork Christmas tree that’s easy enough even for beginners who don’t have too much crafting experience under their belt.
7. Cotton Flower Wreath – Christmas Crafts To Make
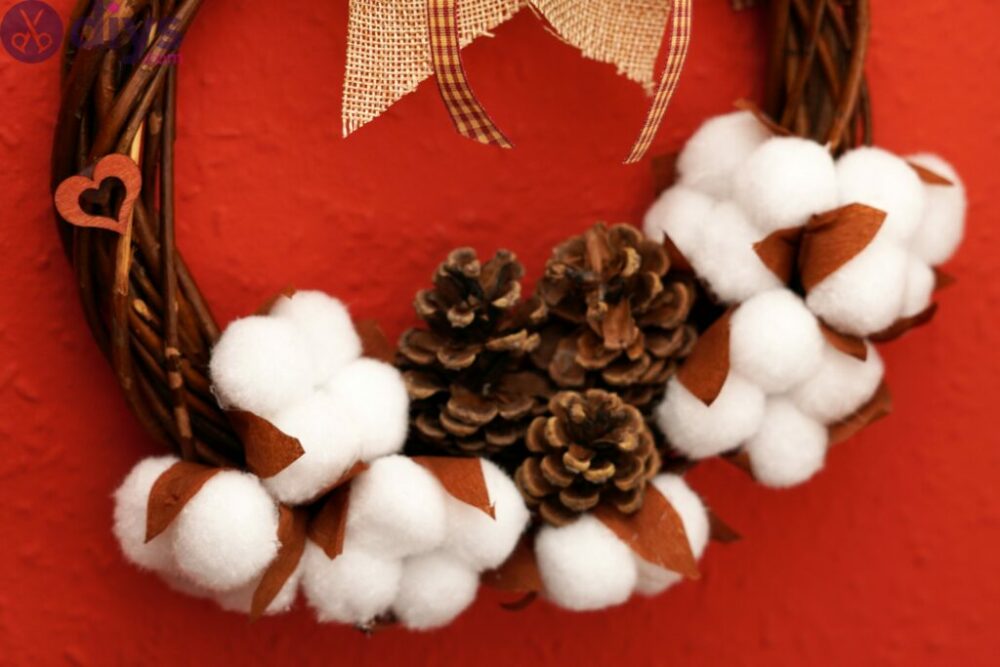
If you’re looking for a simple yet elegant wreath that’s perfect for this time of the year, then you’ll love this cotton flower wreath.
Since it’s made out of cotton flowers, it’s safe to assume that making one will be no problem even if you’ve never done anything like this before in your life. All you need are some cotton flowers (white or cream would work the best), hot glue, scissors, and a wreath shape.
If you can’t find a wreath shape, you can simply make one using wire or some twigs and sticks. So you should start by making your wreath shape if you don’t have one already.
Once you’ve got your wreath shape ready, simply hot glue some cotton flowers to it and arrange them in any pattern you like (just make sure it doesn’t look too cluttered).
However, you shouldn’t limit yourself to only cotton flowers; this wreath would also look awesome with some pinecones, twigs, and sticks, or other similar decorative objects all over it.
Last but not least, attach some ribbons or vellum tags with which you can hang the wreath. If you’re wondering what kind of vellum tags to use for your wreath decoration, just pick something that fits in with the rest of the colors and patterns on your cotton flower wreath.
And there you go! It may be simple to make but also extremely elegant at the same time. Plus it’ll add a nice country touch to your home decoration without making your place look messy or unsanitary (like real straw would).
But wait! That’s not all. The best part about the wreath we’ve just shown you is that it can be used in a variety of ways. You could easily hang it on your door, for example, but it would also look amazing in a vase or a basket. Don’t limit yourself to what you see as the best use for the wreath!
For more detailed step-by-step instructions, check out the tutorial we’ve linked above. It’ll teach you how to make a cotton flower wreath that even beginners will be able to create!
8. Glass Votive Candle Holder With Lace Cover – Easy Christmas Crafts

If you’re looking to step up your decoration game while still making things that are simple enough for beginners to make, then this glass votive candle holder with a lace cover is exactly what you need.
Since it’s made out of plain old glass votive holders, it shouldn’t be too hard for anyone to figure out how to make one. Of course, the only thing you’ll need in addition are some lace doilies, glue, scissors, and a candle.
First off, cut the lace doilies so they fit into your glass votive candle holders. After that simply stick them on top of the holders using some glue (don’t worry about being too messy since you can always wipe away any excess glue with a wet cloth).
If you want to make this Christmas craft even more special, paint the votive candle holders beforehand so they would fit in with the lace doilies better.
To finish your votive candle holder you can either leave it as is (if you like the texture and pattern of lace on top) or paint over the doilies using any color and pattern that fits in with the rest of your home decoration. Sure, it’s not necessary but then again, if you really want to go all out on your decoration game then why not?
You might want to use spray paint for this, but if that’s not available then regular acrylic paints should work just as well. This way you’ll make sure that no matter what colors and patterns your votive candle holders have at first, they’ll end up looking exactly as awesome as you would expect!
Last but not least, once the glue has dried and you’ve painted your votives (if that’s what you decided to do), simply place them on a plate or something similar and put a lit candle inside one of them. Then light up the candles for some instant holiday vibes!
For more detailed step-by-step instructions, check out the tutorial we’ve linked above. It’ll teach you how to make a glass votive candle holder with a lace cover that’s not only easy to make but also bound to look awesome!
9. Glam White Christmas Tree Decorations – DIY Christmas Crafts
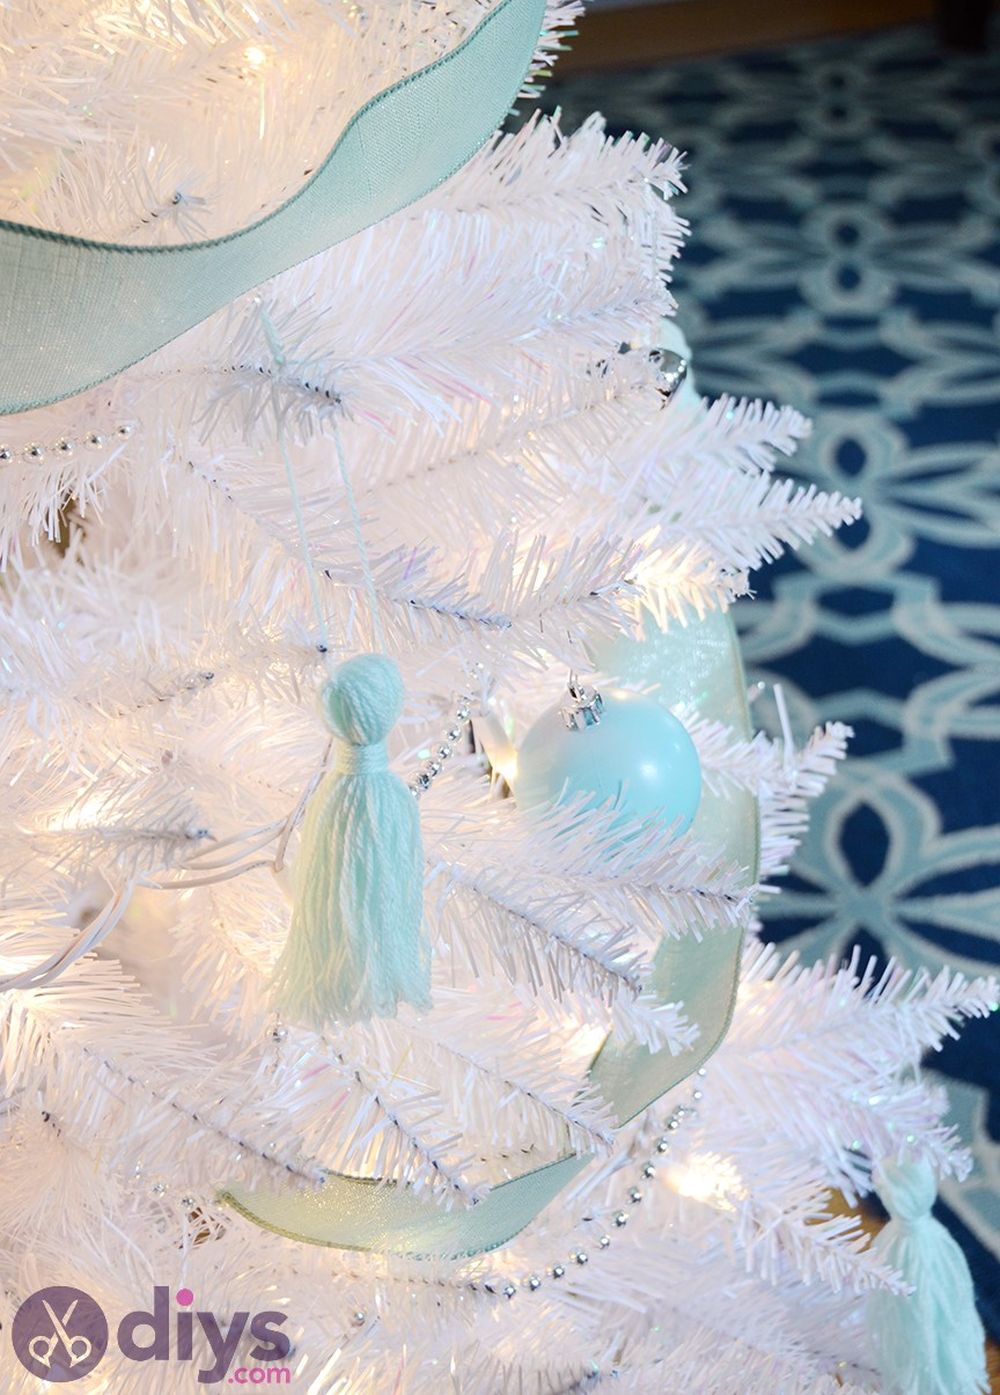
As if decorating your home for the festive season wasn’t exciting enough already, just imagine what it’d be like to have a white Christmas tree!
Although usually associated with snowy Christmases, snow isn’t required to make this kind of Christmas tree look amazing. Sure, you could probably pull it off if you live somewhere cold but even if that’s not the case for you don’t worry—a white Christmas tree is still doable!
To create your own pretty little piece of winter wonderland all you’ll need are some branches (white ones would work best), wire, and some decoration items (like cotton balls, ornaments, lights, etc.).
Start by wrapping the wires around the branches in order to shape them into a Christmas tree. Only worry about doing this until you’re happy with the shape of your branches, as after that you can just decorate them however you want!
For some inspiration on how to go about doing that, check out the tutorial we’ve linked above. You’ll find it teaches you how to make a glam white Christmas tree that’ll look amazing in any home and is bound to make all your friends and family members wish they had one too!
10. Yarn-Wrapped Letters – Easy Christmas Crafts
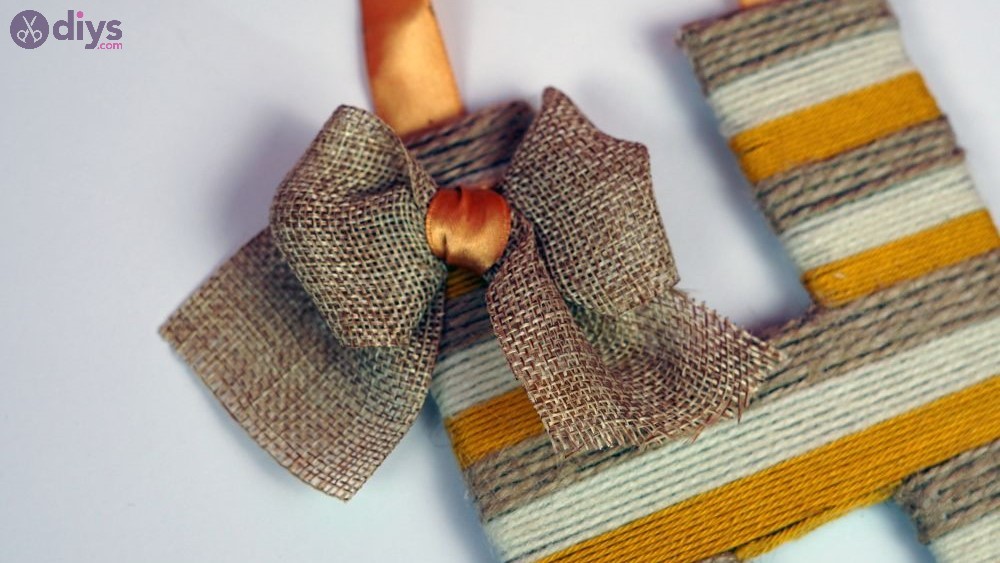
Coming up next, we have a craft that’s both simple and fun to make: yarn-wrapped letters!
Again, you could use these for any purpose whatsoever. Whether you’re going all out with your Christmas decorations or just want to add some cute lettering to your post-Christmas tree cleanup party, these yarn-wrapped letters are guaranteed to act as the perfect memento of your festive celebrations.
All that’s required for this project is some wood (or anything else that’s strong enough), sawdust glue, twine, and—of course—a bunch of yarn in multiple colors.
Start by cutting out some letters using the wood you chose (for reference, one letter per six inches of width should work just fine). Next, paint over the letters with sawdust glue and wait for them to dry. This will seal the wood and prevent it from cracking when you paint over it with the yarn.
Once that’s done, just wrap the yarn around each letter—starting at one side of the letter and then working your way to the other side (so that there aren’t any gaps in between).
You can wrap yarn around your letters as many times as you want (so long as you don’t cover up those letter openings) and tie off with twine.
After you’ve wrapped all of them, wait for the glue to dry again. Then, once everything is fully dried, place them on a table or hang them up using some picture frame hangers. There you have it: a festive reminder of all those cozy Christmases to come.
For a step-by-step guide, check out the tutorial above. You’ll be surprised at how easy it is to make these letter-hanging crafts. They’re super cute and can add a festive cozy touch to any room in your house!
11. DIY Cookie Wrappers – Christmas Arts And Crafts
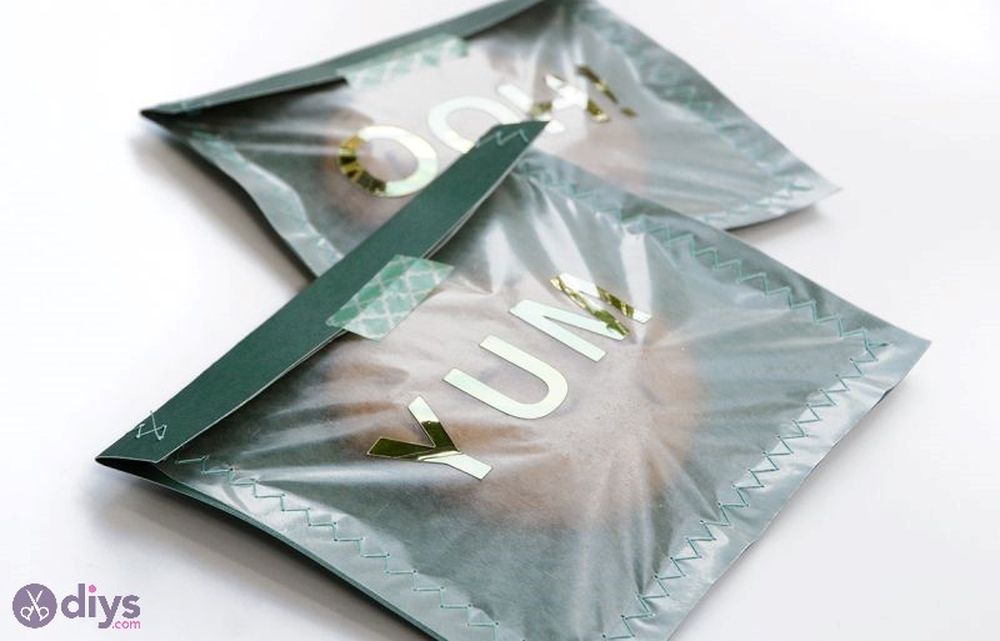
Continuing with the Christmas theme, our next easy craft idea for anyone looking to spruce up their home is this one: DIY cookie wrappers.
Although there are plenty of ready-made cookie packages that can serve as Christmas ornaments, they’re often quite pricey—not to mention not nearly as fun or creative!
As such, if you want to give your tree an added festive touch without spending too much money, why not try making some hand-crafted cookie wrappers? All it takes is a bunch of patterned papers (preferably red and green ones), ribbon, and glue.
Start by selecting two pieces of paper that’ll be used to wrap the actual cookies. Then cut out some shapes from another piece of paper and glue them onto the selected sheets of paper, so that you have a front and back panel.
Next, cut out a piece of ribbon to serve as the string (and tie it around the cookie once you’re done), and then simply glue one end of each sheet together!
Again, these can be used for anything you’d like: Christmas tree ornaments; gift tags; party favors; etc. Just make sure that whatever item they’re attached to is small enough (so as not to pose any choking hazards) and will require minimal effort on your part.
Once everything’s glued up and dried properly, all you’ll need to do is pop some cookies inside—or whatever other things along those lines you’ve decided to use—and tie it up with some twine.
To learn more about making this craft without great effort, check out our tutorial above. And there you go! An easy Christmas craft that’s guaranteed to make your festive season all the more magical.
12. Outdoor Votive Candle Holder – Fun Family Crafts
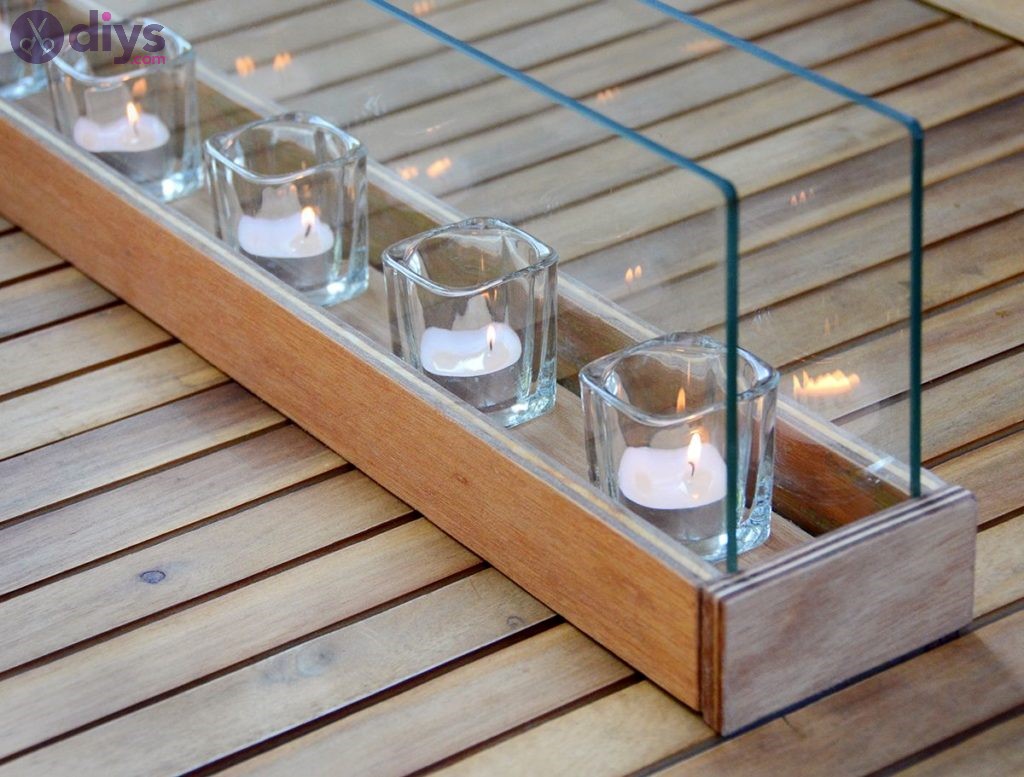
Want to spruce up your garden for the holidays? Well, look no further. Here’s an easy outdoor candle holder craft that’ll do just the trick!
This is actually one of our more creative Christmas crafts, and all you need are some glass votive candle holders, tea light candles, two glass shelves, a 24 x 3″ piece of wood, two 24 x 2″ pieces of wood, two 4.25 x 2″ pieces of wood, wood glue, sandpaper, a brush, tape measure, and a saw.
The first thing you should do is sand down your wood pieces to give them a smooth finish. After that, place each shelf on top of the three 24″ pieces and trace around them (with additional space for where the screws will go).
Next, remove the shelves and use this guide to make 4.25″ x 2″ notches in between where you’ve drawn lines—this is how we’ll be attaching our shelves to our frame later on.
After doing that, cut out holes for your votive candle holders (and sand down any rough edges once you’re done). Then attach the shelves onto the frame using wood glue and wait until it fully dries overnight.
Once everything’s dry, cover your whole frame (sans the glass shelves) with a coat of clear water sealant (Thompson’s WaterSeal works great), and then wait for that to dry. Once it’s done, place the candle holders on the central piece of wood, put in some tea light candles, and you’re all set!
And there you have it: an easy Christmas craft that was quick, fun, and will help set the mood during your holiday celebrations. To learn more about how to do this project with no fuss whatsoever, check out our tutorial above.
13. Gold Christmas Tree Ornaments – Easy Christmas Painting Ideas
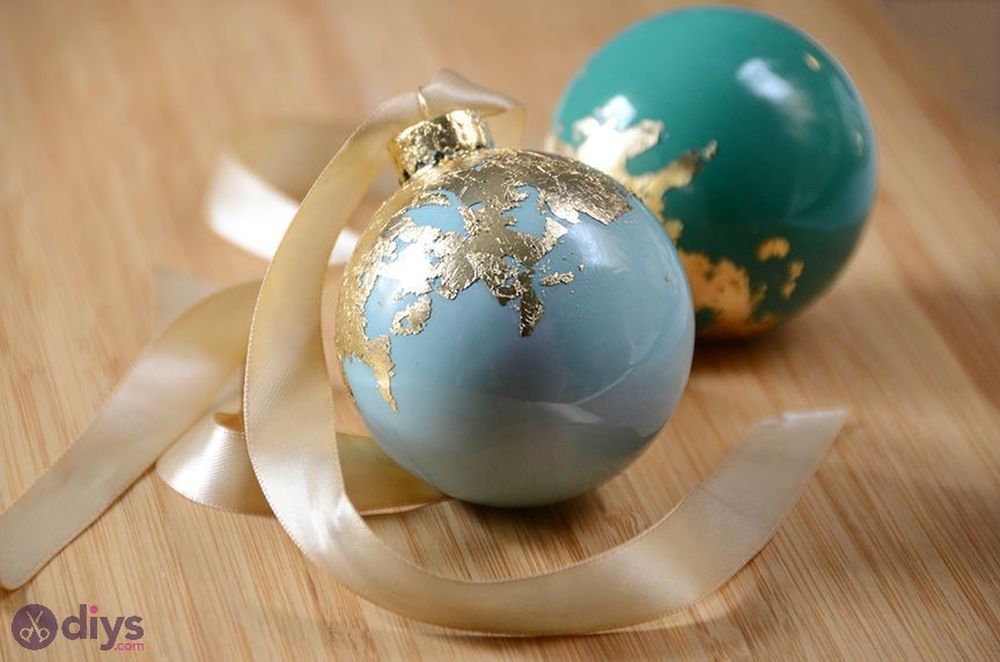
Want to give your Christmas tree a stunning upgrade? Well, look no further. Here’s an easy Christmas craft that’ll do just the trick!
These are actually some of our more creative Christmas crafts, and all you need is some sphere glass ornaments, gold leaf sheets (available at any art supply store), Mod Podge in a matte finish, paintbrush, scissors, and twine.
Start by removing the top portion of the ornament using a pair of scissors (and place it aside for later use). Then take out three layers of gold leaf—making sure to smooth them out properly beforehand—and cut them into small pieces that will fit inside the entire dome.
Place a layer of Mod Podge in the bottom part of the ornament and then add in your gold pieces. After that, lightly dip a paintbrush into some more Mod Podge and apply it to the top part of the ornament until all sides are thoroughly covered.
Repeat this step two more times—using three layers of gold leaf on each application—and then place the top half of the ornament back onto it after drying fully.
Then simply let it dry overnight, screw on the top section you removed before, hang from your tree branch using twine, and you’re all set! Finally, tie some twine around it and hang away!
And there you have it: an easy Christmas craft that’s guaranteed to give your tree a stunning upgrade for this year’s festivities. To learn more about how to do this project with minimal effort at all, check out our tutorial above.
14. Rustic Branch Square Wreath – Christmas Crafts
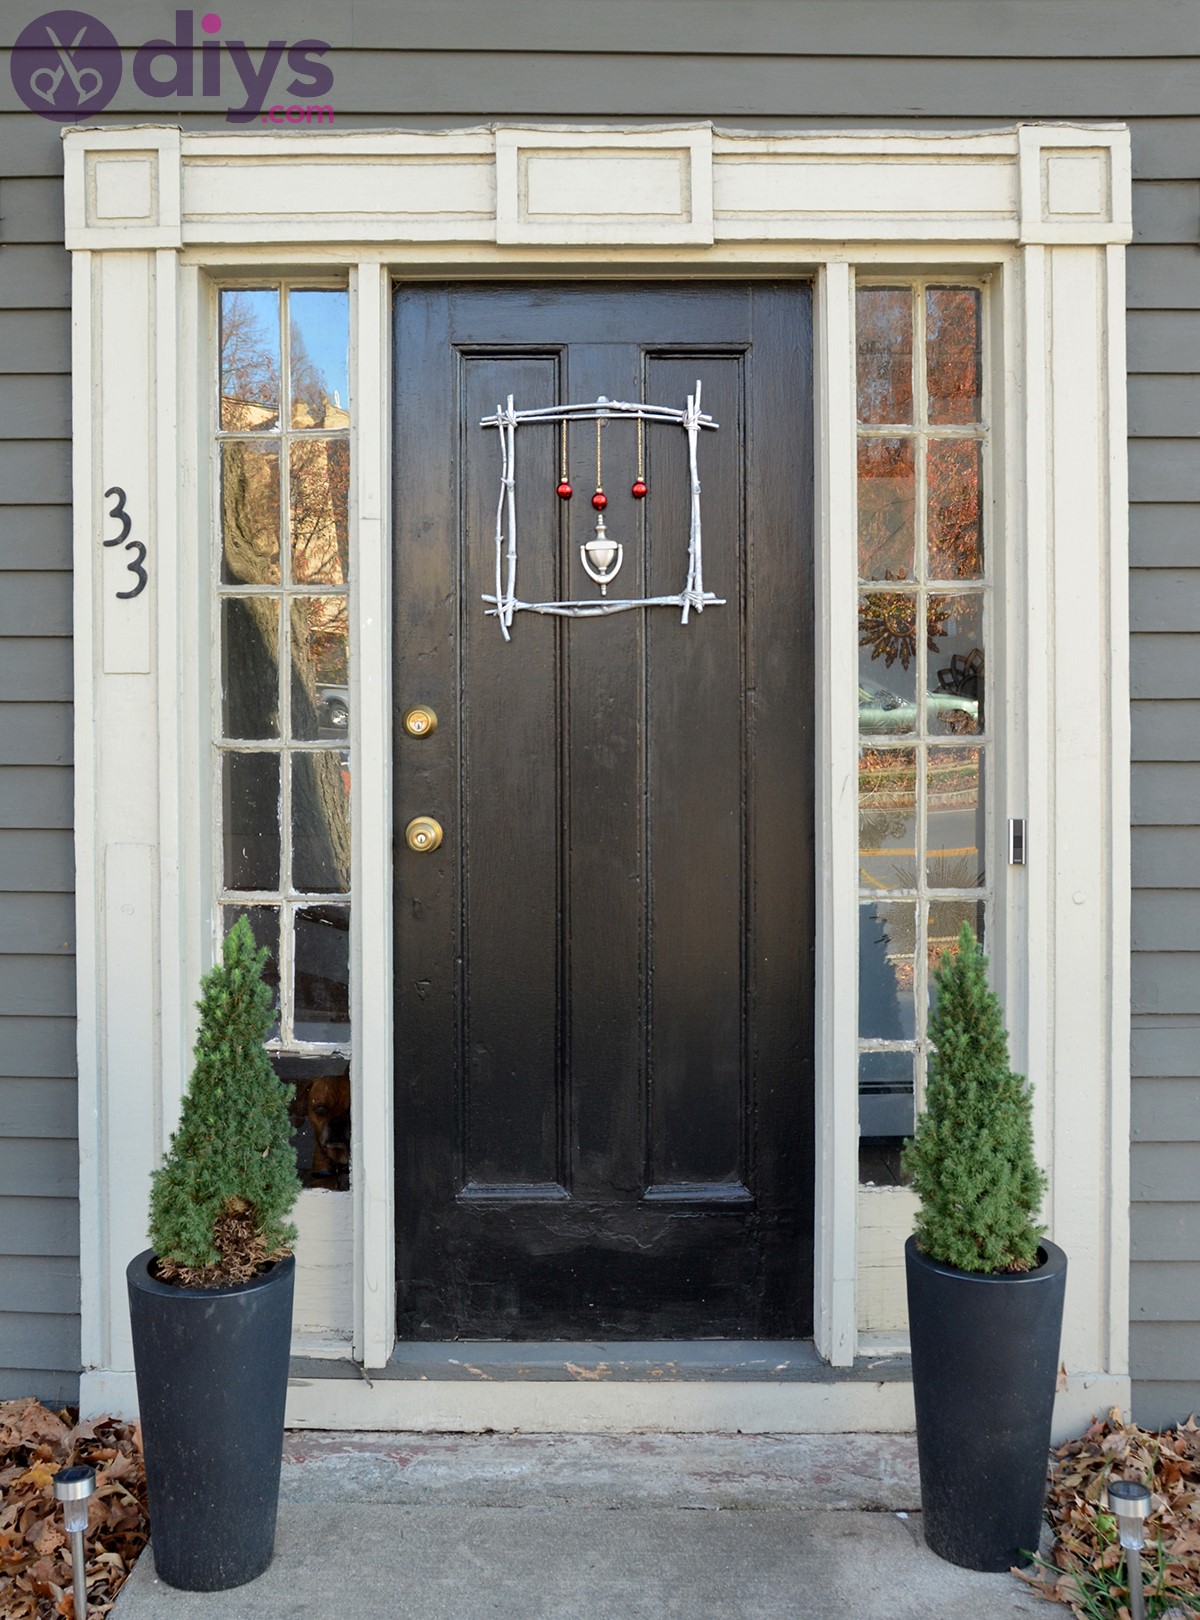
Wreaths are some of the easiest Christmas crafts you can make on short notice. And if you’re looking for an easy wreath craft that’s guaranteed to jazz up your front door (and really help set the mood for this year’s festivities), then look no further! Here’s an easy Christmas wreath project that’ll do just the trick.
However, as opposed to most wreaths you see online, this one will look entirely rustic and somewhat odd, since it won’t follow the classic round wreath shape. Instead, you’ll end up with a minimalistic, rustic square-shaped wreath that everyone will envy once you’ll hang it on your front door.
So if you’re up for the challenge of creating your own wreath, gather a handful of twigs, some metallic spray paint (silver works great), some round Christmas ornaments, some thin chain, suede cord, a hot glue gun with some glue sticks, pliers, and pruning shears.
First, you’ll have to create the shape of the wreath, and you can do that by simply tying up the twigs at 90 degrees using the twine. Then spray-paint the whole thing using the metallic paint and wait for it to dry.
Once it’s done, tie some suede cord around its middle and thread on your ornaments before tying a knot (which will prevent them from falling off). Then use your hot glue gun to attach this ornament cluster to the base of your wreath; trim off any excess cord with pliers, and hang it on your door!
And there you have it: an easy Christmas craft that’ll look great hanging on your front door, and help set the tone for this year’s festivities in no time. To learn more about how to do this project in just 10 minutes flat, check out our tutorial above.
15. Cheap Christmas Tree Wreath Ornament – Easy Christmas Crafts

This cheap Christmas tree wreath ornament is perfect for all those people who are just getting started with their holiday decorating. All you’ll need is a pine garland, a pair of scissors, jewelry pliers, 3-inch metal rings, charms, some fishing line (or string), and some 7mm gold jump rings.
Once you have all of your materials assembled, simply string some charms onto the garland and place them inside the metal ring. Then use some pliers to attach the jump rings to each end of it (one for hanging), making sure that they’re attached securely.
As for the charm, and will do! Here you can use a tiny wreath or an embellished snowflake to really dress up your ornament, but it’s entirely up to you.
Then hang them up on your tree branches, doors, or walls; then let this year’s Christmas spirit take over!
To learn how to make this ornament in a little under 10 minutes, and for a whole lot less than what you’ll probably pay at the store, check out our tutorial above.
So there you have it: an easy craft that anyone can make in minutes. This is just one of those easy Christmas crafts that’ll make everyone jealous once they step inside your home and see how well-decorated it looks this season.
To learn more about how to do this project, as well as why we recommend fishing line over regular string, check out our tutorial above.
16. Chevron Candles – DIY Christmas Crafts
![]()
Here’s another easy Christmas craft that’ll make your house smell amazing, since you can use scented candles in the mix. But if you want to do something a little different this year, then look no further than these chevron candles, which are incredibly simple to make and look great when they’re done!
All you’ll need for this project is some spray paint in two colors of your choice, some plain pillar candles, 3/8-inch dowel rods or bamboo skewers (used as makeshift wicks), scissors, or a sharp knife, tape, and a candle scent of your choice.
Once you have all of your materials assembled, simply cut up each skewer so it’s about an inch shorter than your candle, then tape them to the bottom of each pillar (only one end; you don’t want them to fall out). Then, set the candles down on their sides and spray-paint them using two coats.
After about an hour, they should be dry enough to use. And if not, it won’t hurt to wait another half hour or so for good measure. Then simply place the dowel rods inside each candle using hot glue or wax, before pouring in your favorite scented oil (you can also use melted wax).
If you don’t want scented candles for some reason, you can skip the scented oil part and just focus on painting the bottom parts of your candles so that they’ll look amazing on your Christmas dinner table.
Once done, let these cool completely before lighting up your new candles and enjoying the beautiful scent that comes with them! This is just one of those easy Christmas crafts that are simple enough for anyone to make but look impressive when done.
To learn how to make candles in just a bunch of easy steps, check out our tutorial above.
17. Clear Centerpiece Vase – Easy Christmas Crafts

With just a few simple supplies, you can have yourself a beautiful centerpiece that’ll wow guests this holiday season. All you need is some flowers, a vase with a wide mouth, water, and your Christmas spirit!
To make this decoration, you can use an old clear ornament or any other small glass vase that has a wide mouth; just make sure you wash it first. Then fill it up about halfway with water, before placing your flowers inside.
Then all you need to do is put your centerpiece somewhere where everyone can see it (like the dinner table), and sit back while they take in its beauty! It’s one of those easy Christmas crafts that only look complicated but are actually very simple to make.
Alternatively, if you want to be even more creative about this project, you can choose a clear, round Christmas ornament as a vase. However, if you take that path you might want to know that the round ornament won’t just sit upright if you place it on the table.
Naturally, you’ll need a stable base for it, and we’ve got just the thing: white oven-bake clay. Why white? Because it’s easier to decorate once you mold it into the shape you desire.
Just flatten the clay into a disc shape, roll it gently on its sides to flatten the edges, then use your thumbs to create an indentation where your spherical ornament will be. Now bake it in the oven and voila! You have a base for your vase.
To learn how to make this decor piece for your table, check out our tutorial above. You’ll find detailed instructions, along with some photos that’ll teach you everything you need to know about this easy Christmas craft.
18. DIY Gilded Polymer Clay Triangle Necklace – Fun Family Crafts
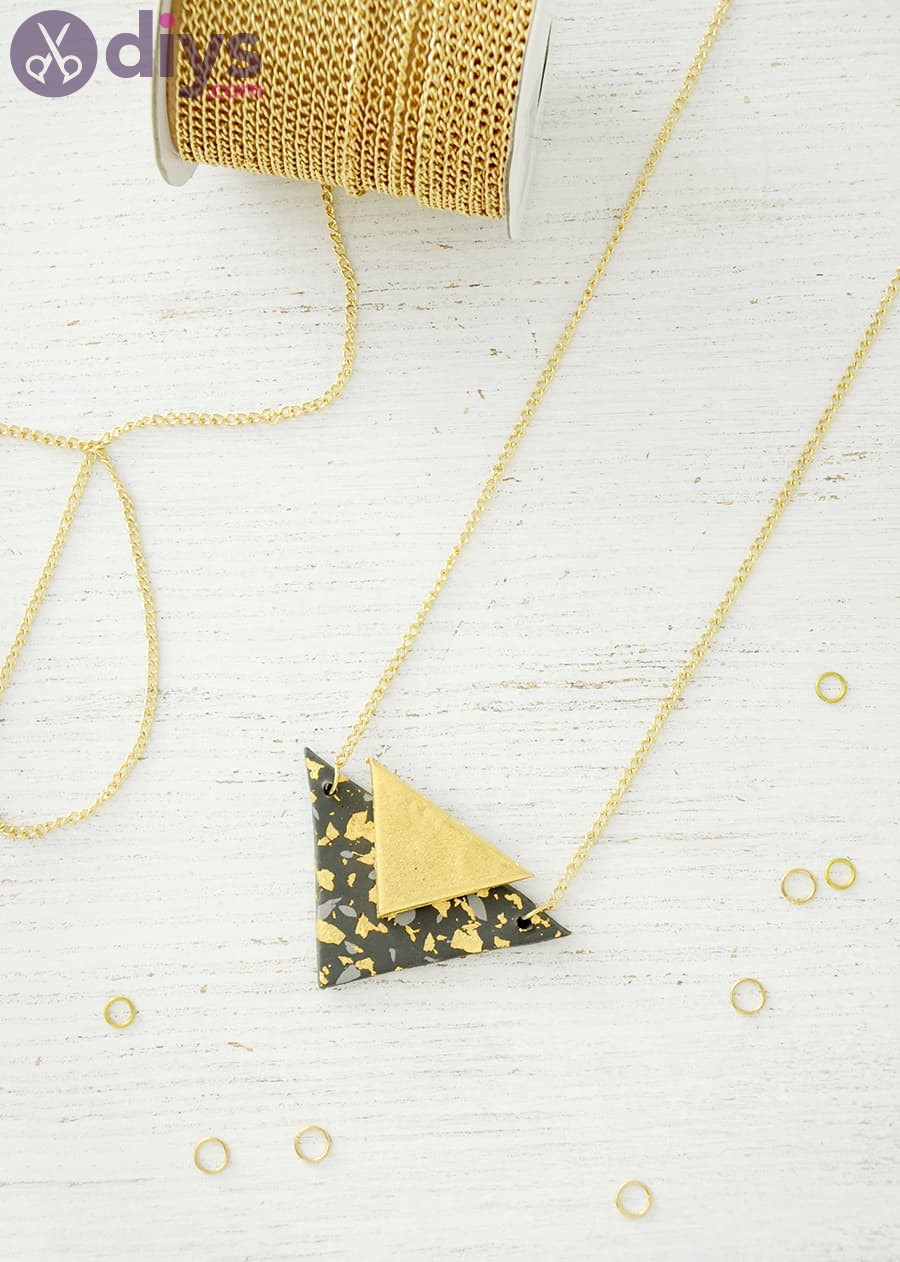
This beautiful and easy Christmas craft is perfect for those of you who want to make a statement and show the world your style and sense of aesthetic. Plus, this fun family project is quick and simple enough for everyone to try!
To start, all you need is some clay in two different colors (gold and white work well), as well as a triangle-shaped mold that can be found at most craft stores near the polymer clay section. Once you have those supplies secured, it’s time to get down to business.
First up, roll out a piece of white clay into a large rectangular sheet. Then do the same with your gold clay but only make it about half as big as your first rectangle.
Finally, press your triangle mold firmly against the gold rectangle and carefully lift it away.
You should now have a triangle-shaped gold sheet. Put that aside and move on to your white clay.
Now repeat the same pressing and lifting process with the white rectangle, except this time do it over your gold triangle instead of a mold.
This way you’ll end up with some pretty gilded triangle designs! Now all you need to do is put the white clay rectangle on top of your gold sheet and press down gently so that your gold design will show through.
Once those pieces are done, all you need to do is put both (attached) pieces into an oven set at 275 degrees Fahrenheit for 15 minutes or so.
If you have leftover clay left after that step, just store it in an airtight container for later use.
To learn how to make this easy Christmas craft, follow our tutorial above for detailed instructions along with some pictures to help guide you as you go.
19. DIY Typography Holiday Wreath – Christmas Arts And Crafts
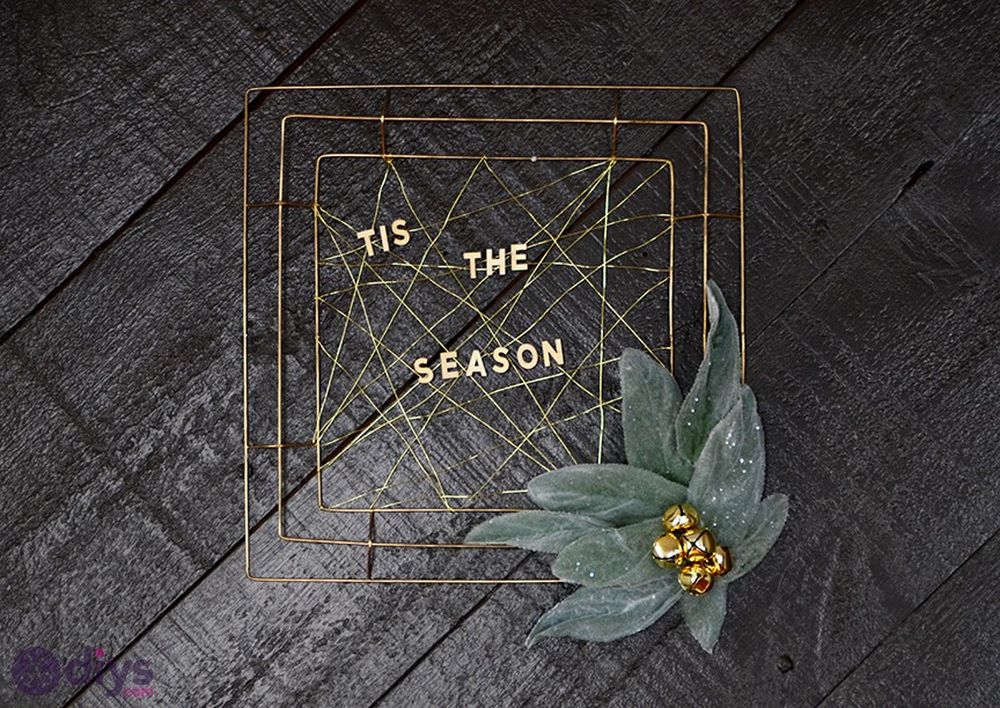
Our next easy Christmas craft is one that’s perfect if you love typography and want to show your holiday spirit at the same time. This fun and simple craft idea is quick and easy enough for everyone to try!
To start, first, purchase a square-shaped wreath form without the decorative mesh on it and a bunch of bags of wooden letters. Make sure you’ll have enough letters to spell out the message you want to display on your wreath.
You’ll also need a hot glue gun, wire cutters, some (preferably gold) jingle bells, artificial greenery, gold spray paint, as well as some thin gold wire.
Next, line a bunch of the letters up on a table and place your wreath form over them so that you’ll have an idea of how it will look once they’re all attached to it. Then, attach them to the wreath form with hot glue and set it aside for now.
Once those pieces are done, place your wreath in a spot where you’ll want to display it and cover it with some greenery and jingle bells.
Use the thin gold wire to secure everything into place on your wreath, including the artificial greenery and the jingle bells. You could also go with several square wreath shapes of different sizes and arrange them however you like.
Once you’re satisfied with the way the wreath shape looks, you can secure them using the thin gold wire and cut the excess with the wire cutters you brought to the table.
Finally, take your spray paint and give the letters a nice coat of gold or glittery paint. If you’re feeling festive, go ahead and add some red too!
Then hang it on your front door during your next holiday party to really show everyone how much fun (and easy) this decor piece is!
To learn how to make this wreath for your own home, follow our tutorial! In addition to a great overview of the entire process, you’ll also get detailed instructions along with some pictures that should help guide you every step of the way.
20. DIY Tassel Christmas Gift Tags – Christmas Crafts For Kids

Before we show you how to make your very own DIY tassel Christmas gift tags, let’s go over some of the benefits of using these instead of regular paper ones:
First of all, they’re reusable. Once you’ve hung up your handmade gift tags with ribbon or jingle bells, you can keep them for years to come and use them every holiday season! You can also give them to friends and family as a cool decoration once the holidays are over.
In addition to being extremely festive looking when made from multicolored papers in different patterns and designs, they look really stylish on presents too.
Plus, homemade is always better than store-bought so it’s pretty obvious why using handmade gift tags is a great idea. They take no time to make and your friends and family will love them!
To begin with this easy Christmas craft, you’ll need several pieces of paper in different colors and types. You can go with scrapbook paper or just use regular printer paper – it’s up to you!
You’ll also need some scissors, tissue paper (or a similar type of thin paper), a hole punch, a ruler if you’re going to use scrapbook paper, ribbon, or jingle bells for hanging your gift tags by the way they connect at the top.
To learn how to make these super simple DIY tassel Christmas gift tags, follow our tutorial above!
You’ll find out what tools and materials you’ll need as well as detailed step-by-step directions that are accompanied by some helpful pictures just in case. This easy Christmas craft is also perfect for kids so it’s great if you want something fun to do with your children this season!
21. Pinecone Wreath – Christmas Art Projects
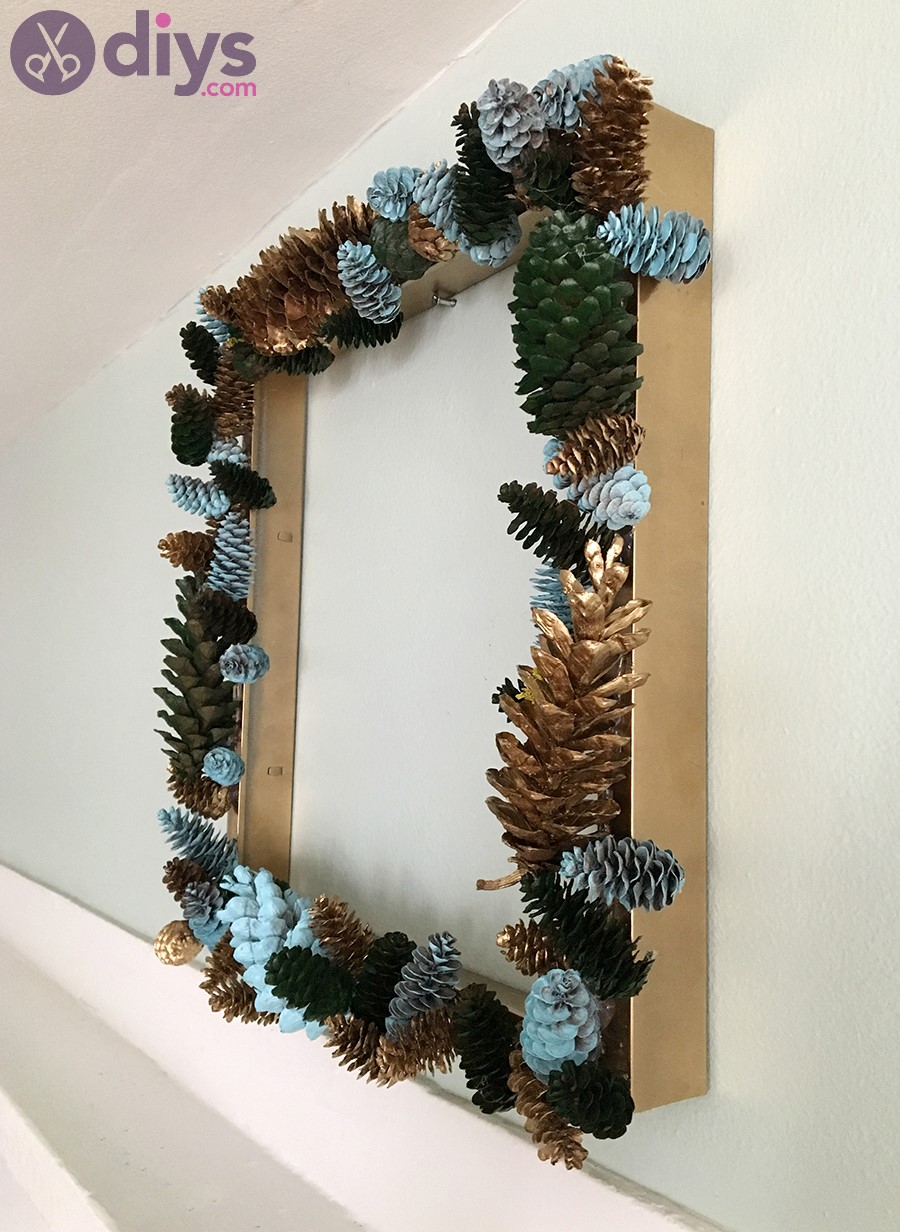
In addition to being a festive and stylish decoration for your home, this pinecone wreath is also easy to make!
To begin with, you’ll need a styrofoam form that’s either square or round, which you can find at any craft store. You’ll also need some goods from the outdoors such as pinecones (you can use synthetic ones as well), twine, and some ribbon. In order to attach everything together, you’ll need hot glue as well as clothespins if using the real deal.
When it comes to embellishing your styrofoam form with nature-made supplies like these, there are plenty of possibilities.
You could go with a huge pile of pinecones all over your styrofoam base or just a few of them. And as for the twine, you can use it to wrap around your wreath and connect everything together.
Next, get the wreath form and attach your pinecones to it using a hot glue gun. The best way to do this is by applying glue between two objects and then putting them together – that’s how you’ll ensure that all of the pinecones are securely attached without any gaps.
Once you’re done with that step, carefully pull off your thread and hot glue string so that the only thing holding the wreath in place is the pinecones themselves. That should solve any issues you were having when trying to keep it in one spot instead of making it spin around on its own!
For an even more unique touch, you could attach other objects besides little pinecone ornaments, such as jingle bells (they’ll make a fun sound when brushing past them over time!), and pieces of ribbon made from both regular and/or metallic materials.
After securing each individual cone into place, add some ribbon or other types of decoration for hanging purposes, if necessary. If you want to do it, try using spring clothespins!
And there you have it – a festive and stylish handmade gift that doesn’t take too much effort!
22. DIY Bath Bombs With Orange Scent – DIY Christmas Crafts
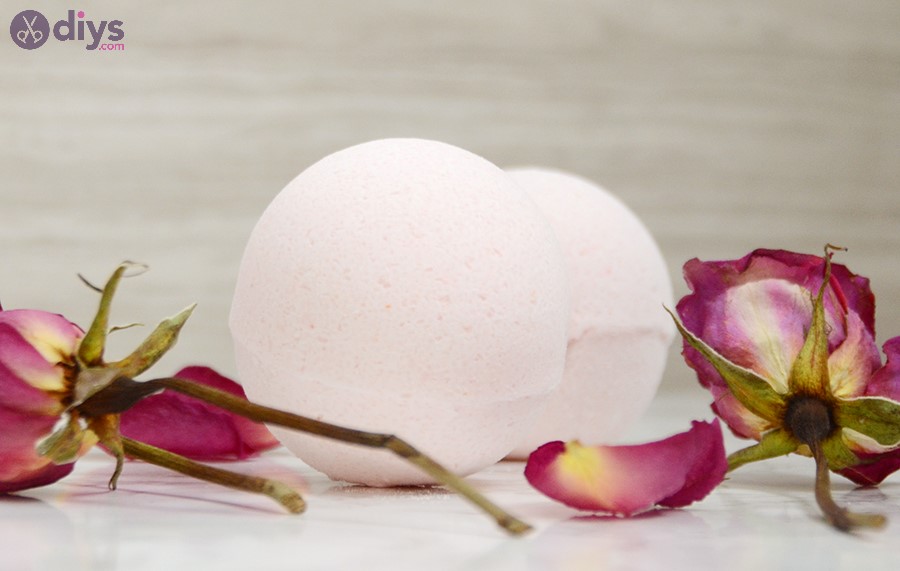
Here’s another easy DIY gift idea, two in fact. To begin with, this article will show you a step-by-step process on how to make your very own orange scented bath bombs!
You’ll need some baking soda, citric acid (you can find it online), coconut oil or cocoa butter, almond or olive oil, an orange essential oil bottle, and a mason jar for shaping the bath bomb mixture into balls.
In order to add color to them as well as give them a nice citrusy smell, lemon juice is also required.
Now that you have all of that stuff together, combine the ingredients starting with the solid ones first – that would be either the cocoa butter or the coconut butter.
Once you do that, add the rest of the ingredients except for the essential oil so as to avoid having it dissolve. If you do end up adding the citrus-scented ingredient too early, though, don’t worry – it won’t ruin all of your hard work.
Once you’ve mixed them together to the point where they look like dough that’s firm enough to shape into balls, go ahead and give them a try! If you find that they’re too dry for shaping purposes, simply add some more oil or even some natural liquid soap until they reach the desired consistency.
After making sure that your bath bomb mixture is moldable, take some mason jars and start shaping them into balls using both of your hands. Once all of the bombs are ready for use, drizzle each one with essential oils so as to give everything a nice fragrance.
Voilà! A Christmas-themed handmade gift that’s perfect if you’re looking for easy Christmas crafts.
If you want to learn more about creating your own orange-scented bath bomb without significant effort, you should check out the tutorial we’ve attached above. You’ll find detailed instructions as well as helpful photos that will guide you through the process.
23. DIY No-Sew Holiday Fabric Banner – Christmas Craft Ideas
Another easy Christmas craft project that won’t take you more than about an hour to make is this DIY no-sew fabric banner!
You’ll need a variety of fabrics that you can cut into any shape or size, as well as some metallic ribbons and a sewing machine.
Start by choosing all of the materials that strike your fancy – whether it’s a gaudy Christmas sweater, a nice plaid pattern, a red dress shirt from your closet, or anything else you might have lying around at home.
In order to begin the process of creating this banner with ease, attach some piece of fabric onto each side of one ribbon so as to keep everything in place. That way you’ll complete the first part for sure before moving on to the next step!
Afterward, it’s time to start cutting out shapes based on what you’ve decided to use as an inspiration for your banner. Since this is a Christmas craft, we decided to cut out some snowflakes, but feel free to use any other shapes – they don’t have to be traditional Christmas ones!
After you’ve finished cutting everything out and making sure that each piece of fabric will look cute on the ribbon, it’s time to start gluing them together one by one. You can use either hot glue or regular thread if you’re confident about not ruining anything.
Glue experience might come in handy when working with fabrics as well as metallic threads, though! In any case, make sure that everything is attached correctly so as to avoid wasting too much time on re-doing poorly executed DIY projects.
A word of advice: try to keep the number of metallic ribbons to a minimum as they may not be very easy to combine with fabrics.
Once you’re done with gluing and/or sewing all of your materials together, just hang up that banner somewhere where everyone will see it – whether it’s in your home or in the office!
You can also use this type of banner as a decoration for a Christmas-themed gathering where you want to bring in some color. The point is that you have yet another easy last-minute Christmas craft project that will help you stay on top of your game as far as holiday preparations go!
24. Wood Basket Made From Twigs – Christmas Crafts

If you want to learn how to make a simple Christmas ornament out of twigs and other natural materials, we’ll show you how it’s done in the tutorial above.
The idea behind this particular project is that you can use it as an eco-friendly gift for your loved ones either during Christmas or some other holiday. It might not look like much at first glance since it’s made with natural materials, but keep in mind that everything is customizable!
Start by choosing the type of wood that will become the base of your gift basket. You can opt for something like birch or pine which are both common types of wood used for making baskets. Once you’ve decided on one type of material, go ahead and cut some branches off from it.
After that, you’ll need some twigs – every basket is made of a combination of some sort of handle and twig branches which are used for decoration purposes. This means that the type of twigs you pick at this stage will define what your final product looks like!
If you’re not sure about where to get suitable twigs or even if they exist in nature, go take a walk through the forest and look around carefully for any trees with abundant branches. Most likely there’s something close by!
You can also use dried flowers, pine cones, fruit peels, leaves, stems… whatever works best for your project! Just keep in mind that anything natural will do just fine so don’t hesitate to get creative with it!
Once you’ve collected enough twigs for the job, you’ll need to make sure that they all fit together. You may be tempted to cut things down or do some other weird stuff like that, but don’t forget about one thing:
Your gift basket is supposed to look rustic and natural! So unless you want to ruin everything – we’d recommend getting a bigger branch for this part of the project.
Attach Everything Together
You can then proceed by attaching everything together using either twine or strong thread which will do the trick just fine. As far as attaching goes, there are no set rules here – go with whatever method works best for your specific project while keeping in mind what you’re trying to achieve in general.
As soon as you’re done with attaching the branches and twigs together, you can move on to creating a handle. There’s not one particular way of doing this, but we’d recommend either getting some wire (which isn’t easy to find) or using something like string or rope.
Then all you have to do is drill a hole in one end of the branch and attach the handle! You could attach handles both at the top and bottom for added stability if necessary – it’s completely up to you and your project requirements.
Also… don’t forget about choosing the right color combinations that go well together! This will define what your basket looks like in general so try picking out neutral colors that blend well instead of contrasting bright shades which might not always work.
For the finishing touch, you could paint over your basket with acrylic or other types of paints. This might seem like a lot of work – but if that’s what it takes to give your gift basket an extra bit of personality… go for it!
25. Real-Looking Paper Roses – DIY Christmas Crafts

Paper roses are a great way to make something beautiful for Christmas or any other holiday. You can make them out of card stock paper and they look very real! To learn how to make these fun flowers, just keep on reading.
To make these flowers you need six pieces of card stock paper. You can use different colors or all-white for a more plain look, but any color combination is beautiful!
You will need scissors, tape, a glue gun with adhesive sticks, and some green pipe cleaners or strips of green card stock. If you are using colored paper you can use any colors that match your taste!
Make sure not to make them too big because they will come out looking like roses if you do.
They should resemble tulips in shape and size. Start by cutting off triangles from all six pieces of paper; five in threes and one in sixths to create the center stem. Then take all of the pieces and cut off little triangle points on the end of each one.
Tape the triangles together in a line, alternating with the six pieces of paper that you cut off for each triangle in the center of them to form a fan shape. You want to tape them so they will open up like tulips!
Do this with all five sets of triangles and then tape the sixth piece of paper on top of one set so it looks like three petals. Cut out another small triangle from another sheet of card stock paper and fold it over several times until it is about 1/4 inch thick.
Tape Carefully
Tape this down around where you taped the last piece onto the cone-shaped rose so that it will stay flat, making sure not to cover any parts of your flower! Now take your green pipe cleaners and make a loop at the top of them, cut off any excess.
Wrap the bottom of your flower around something round, leaving a tail for ‘stem’. Fold up the bottom of the flower so it doesn’t slide off of whatever you wrapped it around.
Press the back side of the folded piece over a pencil or similar object to give it some bend and curve.
You can also put things inside of here if you want taller roses! Just be sure not to leave anything sharp inside your flowers as this will tear the paper if too much pressure is applied.
Loosen up end pieces that are closest to each other at the center area of your flower, then start gently rolling them into each other until they connect on their own. Ta-da! Your flower is complete and you can add in a wire or pin for easy display.
26. Paper Santa Candy Holder – Preschool Christmas Crafts
Paper Santa candy holders are super easy to make and they’re a great preschool Christmas craft idea. They’re also very cheap, depending on what supplies you already own!
If you don’t have any at home then this is an excellent way to get some inexpensively because they only require the following: 1/4 piece of red construction paper, scissors, sticky tape or glue, and of course some candy of your choice!
These are so cute for adult parties or kids’ holiday parties because everyone loves getting yummy treats.
You can even put them in party favor bags if you want to give one out to every guest that comes over – just fill it with goodies inside beforehand. This is also a good activity for kids because they learn how to use scissors and get creative at the same time!
To make your Santa, start by cutting a circle out of the red piece of paper. Make it about one inch thick so that it can hold your candy inside.
Cut out two smaller circles, making sure not to make them too small, or else you won’t be able to fit in your candy! Then cut an upside-down triangle for his hat.
Apply Glue Thoroughly
Glue these onto the round base sheet of paper, leaving space between each shape. Then fold up all four pieces – don’t forget that Santa’s hat is inside-out!
Now open them back up flat again and glue another strip of red paper across where they are connected. This makes it look like the candy is in his belly.
Now cut out a small strip of white paper to make teeth and glue it onto Santa’s face with some yarn hair across the top of his head! To finish off your candy holder, put it on top of some styrofoam or something similar so that it will stand up straight on its own. Then fill him up all the way to the brim with yummy holiday sweets or treats!
The little kids will love making these at their next Christmas party – just be sure to supervise them while they craft because cutting things can be dangerous when done incorrectly!
27. Reindeer Gift Wrap – Fun Family Crafts
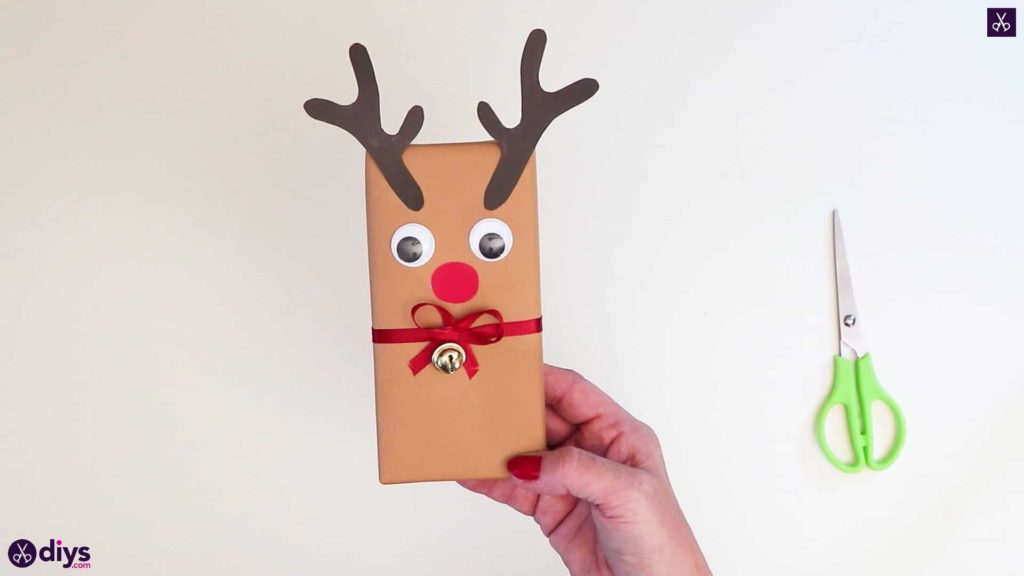
Create these adorable reindeer gift toppers that can be used as a twist on a traditional bow or just as a stand-alone ornament. This is a fun family craft idea for kids, teens, and adults alike!
To begin making this cute reindeer, you’ll need the following supplies: 12 inches of brown card stock paper, 2 googly eyes per reindeer (which should be at least 1 inch in circumference), thread or yarn, scissors, and glue.
Start by folding the paper once diagonally from corner to corner so it forms an X shape. Then unfold and fold each individual end into the center point of the X which you made earlier and press down.
Cut off any excess pieces if necessary. Then use your scissors to cut out a small triangle in the center of the X that you just made.
Next, glue on your googly eyes and allow the reindeer’s head to dry completely before moving on.
Then take your thread or yarn and make a loop halfway down from where it is tied together. Make sure you leave some extra string at each end for tying around different things later.
Secure It With A Knot
Slide the looped end of yarn through this new hole under his head about an inch down from his nose, then tie a secure knot to keep it in place.
Glue a small ball of cotton underneath his chin for a beard if desired – let it dry again before hanging him up! You can also add a little cotton to his antlers if they look sparse at all.
These are especially great when hung from the Christmas tree or on presents underneath – just tie them around your packages in whatever way you want!
Plus, these reindeer would make adorable homemade Christmas card toppers with some festive winter stamps and a nice little poem about how much you love the recipient of said cards. Different colors can be used for different people depending on who they are giving the card to so everyone gets a special one!
28. Paper Plate Wreath With Candle – Christmas Crafts To Make
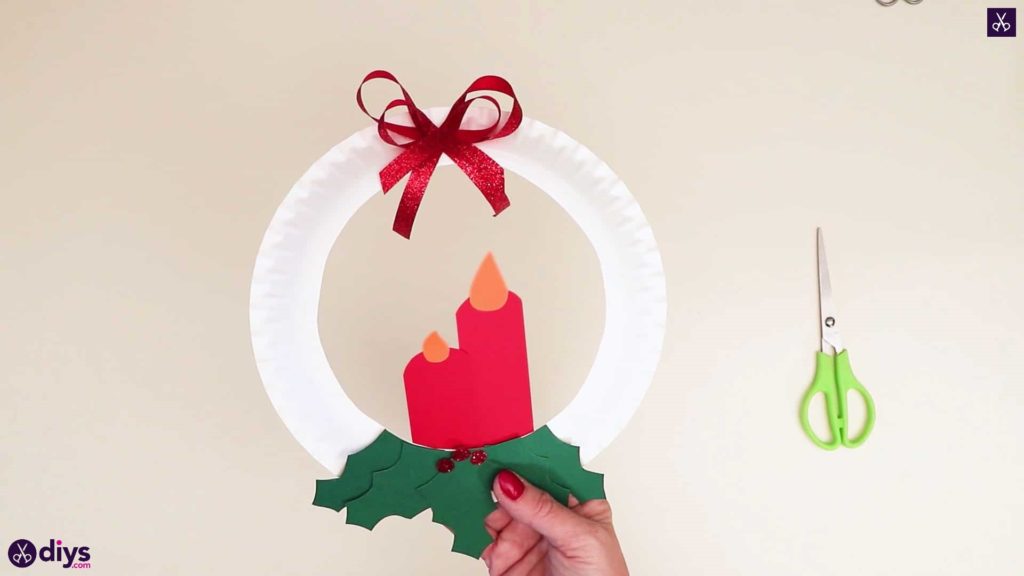
This craft is a very cheap way to decorate your home for Christmas. All that you need is some glue, a paper plate, and some paint or marker pens.
This is a good craft to do with children, but remember that you should never leave them unattended when using an open flame.
You will need to glue the paper plate onto another piece of cardboard or several layers of cards. This will help to support the plate once it has been decorated. You can draw some festive shapes or write messages on the front of your wreath.
If you choose to write messages on your craft, make sure that these are simple messages so that children can understand them.
Once you have finished decorating your wreath, you can hang it onto a nail in an appropriate place (such as above a fireplace).
Create Candle Shapes
The candle or candles should be placed in the middle of the paper plate. However, you could place them anywhere you like, since they’re not actual candles. You cut their shape out of the paper plate using an X-Acto knife and paint them in the appropriate color.
You could also create a candle shape out of various other materials such as crafting paper or cartons and glue it directly on your paper plate wreath.
When you have glued it on, paint it in your chosen color or use marker pens. You could draw on some holly leaves here if you wish. If kids are painting, make sure they paint inside the lines so that it looks good when finished.
When the paint has dried or after your child has finished drawing, stick some ribbon around the edge and hang it up wherever you want to display it for Christmas.
Although this craft is quite straightforward, you could check the tutorial above if you want more detailed instructions and photos on how to make this craft without significant effort.
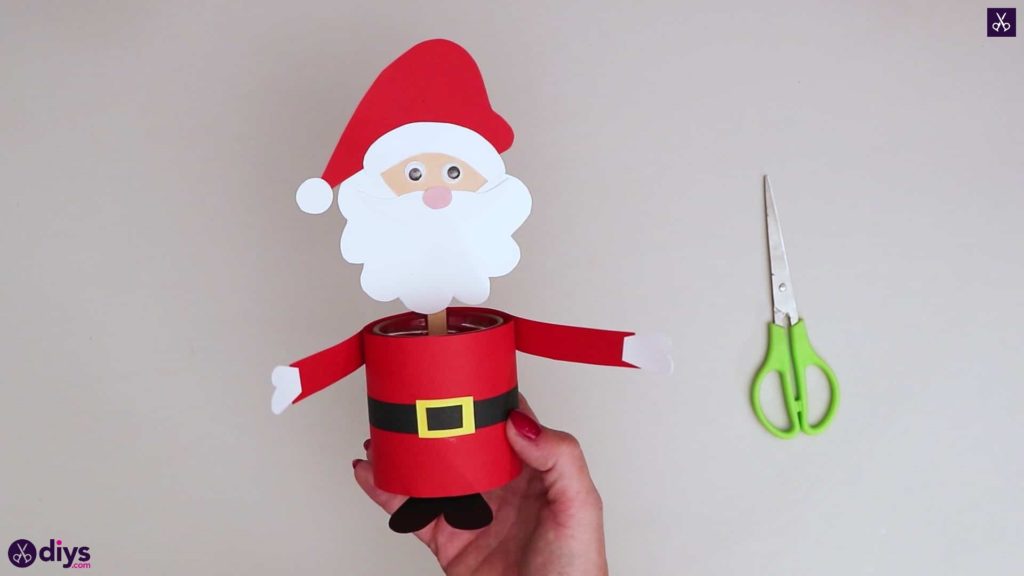
29. DIY Tin Can Santa Candy Holder – Christmas Crafts For Adults

This craft is a great way to recycle and reuse materials and it makes a cute decoration for your home.
If you want to do this as an adult, you will need some tin cans, red, white, and black felt, as well as spray paint. You can also use regular cans of paint, but make sure that they are suitable for your chosen surface.
If the paint is water-based, seal the tin cans with varnish before beginning this DIY project.
Once everything has dried completely after painting, you can decorate the tin cans however you like – drawing on them or writing messages using marker pens is simple enough.
When you have finished decorating, screw the lids back onto your tin cans and then stand them up in a row to form Santa’s belt.
To compose his face, draw two circles on a piece of white felt and use black marker pens for his eyes and mouth. Glue everything in place so that it doesn’t move while moving the cans about – this design is best suited to homes where they won’t be knocked over easily.
Decorate Your Tin Can Santa
You can add some decorative items such as holly leaves or beads if desired before putting something small inside each can (such as chocolate coins wrapped in foil).
When all of this is finished, glue red bow ties onto each of the cans so that they look like Santa Claus’ traditional garb. Then attach a white belly and a black hat.
Lastly, place the lids back on the cans and fill them with candy or other small gifts.
This is a great craft for kids of all ages to complete together, but of course, you can do it yourself if you wish! Last, but not least, check out the tutorial above if you want to learn more about creating your own tin can Santa candy holder.
30. Paper Plate Snowman Head – Easy Christmas Crafts

Everyone loves snowmen around Christmas, so making a craft out of paper plates is a great idea. After all, you can’t go wrong with crafts involving paper plates!
To make this craft, you will need one paper plate (that will serve as the head of your snowman), orange, red, and green paper, a pencil, a pair of scissors, two googly eyes, a glue stick, as well as a black marker.
You can use other types of paper plates if you like, but for this craft you should get the extra large ones that are suitable for adults. They look more professional in any case.
Once you have collected all of your supplies, you can begin drawing a snowman face on your paper plate to use as reference and guiding. Draw on some black dots for the eyes and nose with a pencil first, then fill them in with a marker pen when finished.
Next, cut out two circles from red or green paper for his cheeks using scissors – they don’t need to be perfect shapes since nobody will see them unless you hold up your snowman head directly in front of your face!
Now it’s time to attach the googly eyes using the glue stick. Make sure that the eyes are looking in different directions and also make them as big as possible – this is a snowman, after all!
Once you have finished attaching the eyes, draw on buttons with a marker pen and mouth lines with an orange marker. You can even add some arms to your snowman by cutting out two triangles from black paper and gluing them to the sides of his head.
If these steps seem too challenging for you or your children, check out the tutorial for more information on how to make a paper plate snowman’s head quickly and easily. It really doesn’t take any time at all!
31. Snow Globe Cookie Jar Christmas Craft
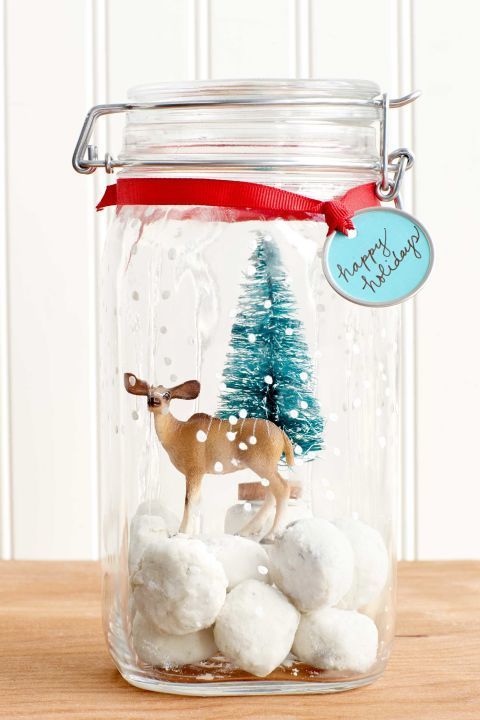
Country Livingshows us how to make the most beautiful cookie jar around! Give the gift of edibles and style with this beauty.
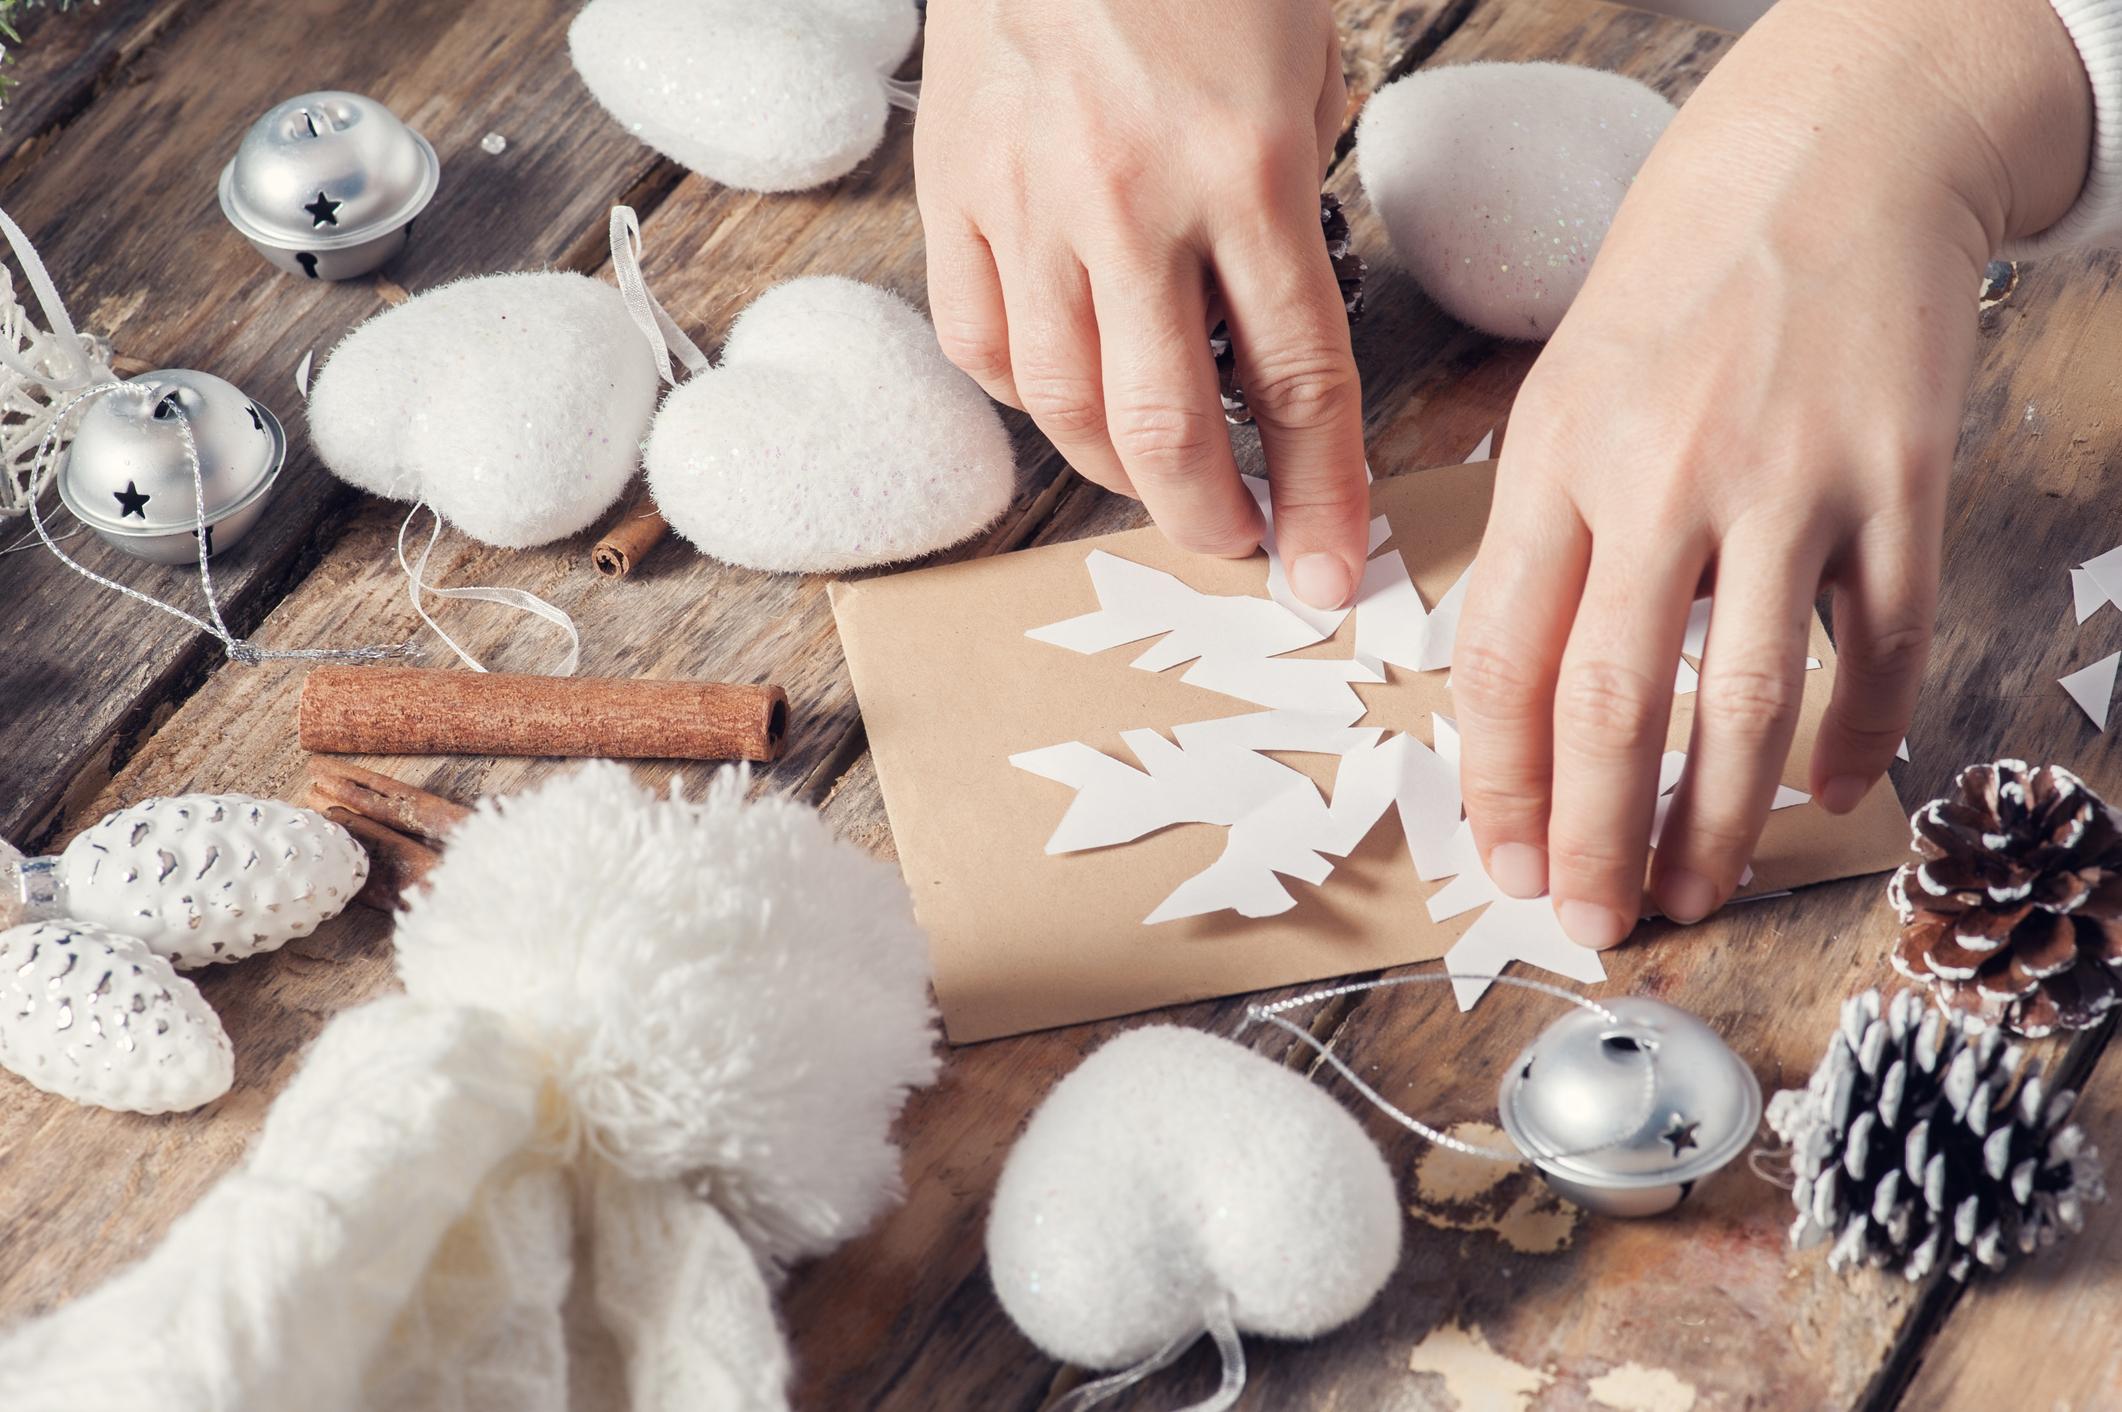
32. Rustic Snowflakes – DIY Christmas Craft
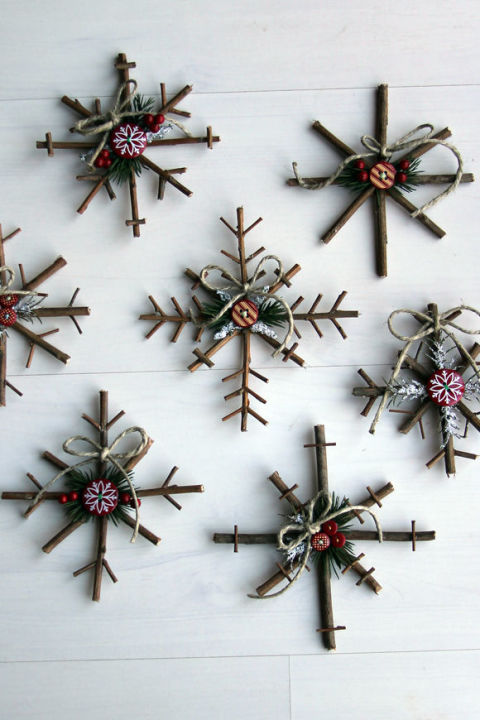
VisitCountry Livingagain to grab the tutorial for these rustic snowflakes. If this is more your style when it comes to Christmas decorating, take the jump!
33. Wood-Burned Snowflake Ornament – Christmas Crafts
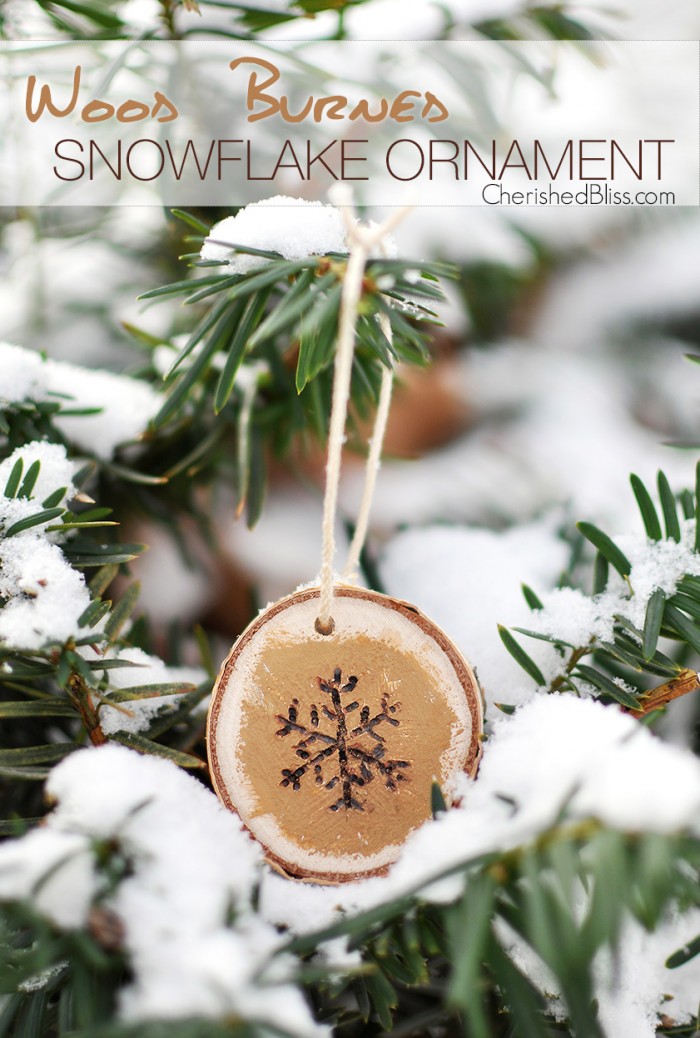
Cherished Blissshows us how to use a bit of our wood burning skills with this DIY. Check out how to make some more rustic snowflakes in a slightly different way.
34. Photo Transfer Ornaments Christmas Craft
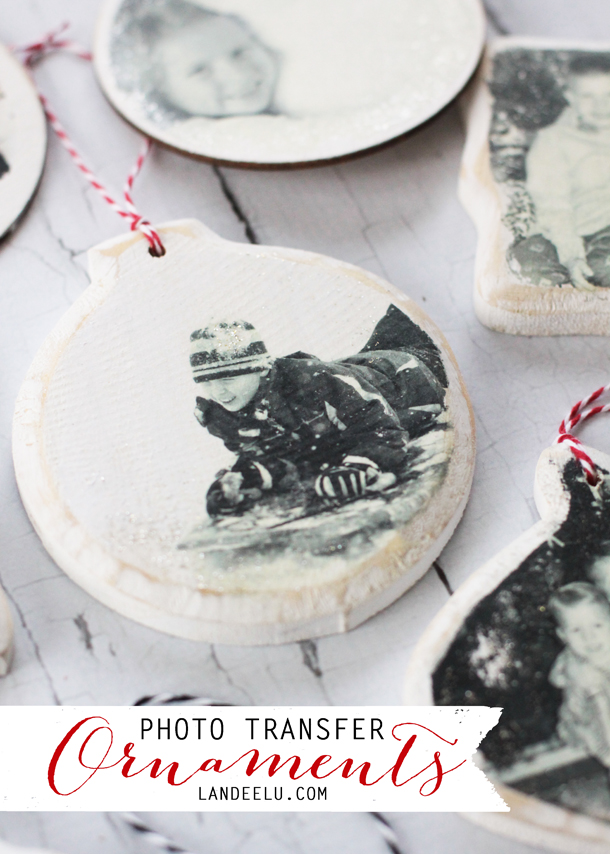
Over atLandeelu, you’ll find out how to take your favorite family pictures and turn them into ornaments! Relive those moments for years to come!
35. Popsicle Christmas Trees – Christmas Crafts for Kids
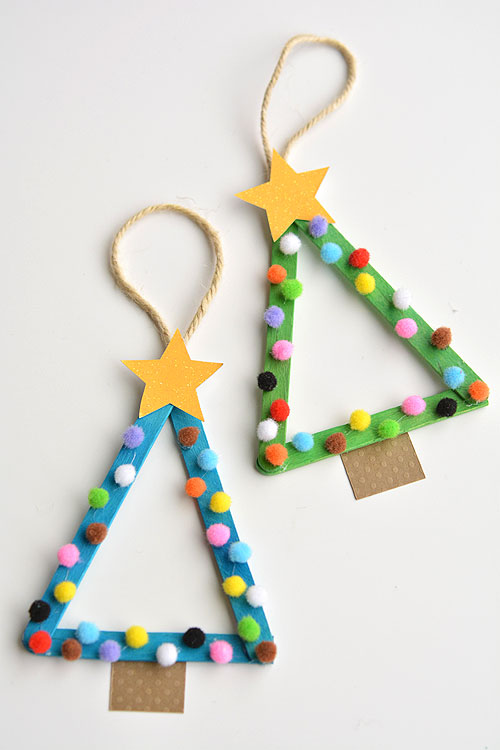
The kiddos will love to dive into this one. Check outOne Little Projectand learn how to make up these adorable little trees with the family.
36. Tiny Snowman – Preschool Christmas Crafts
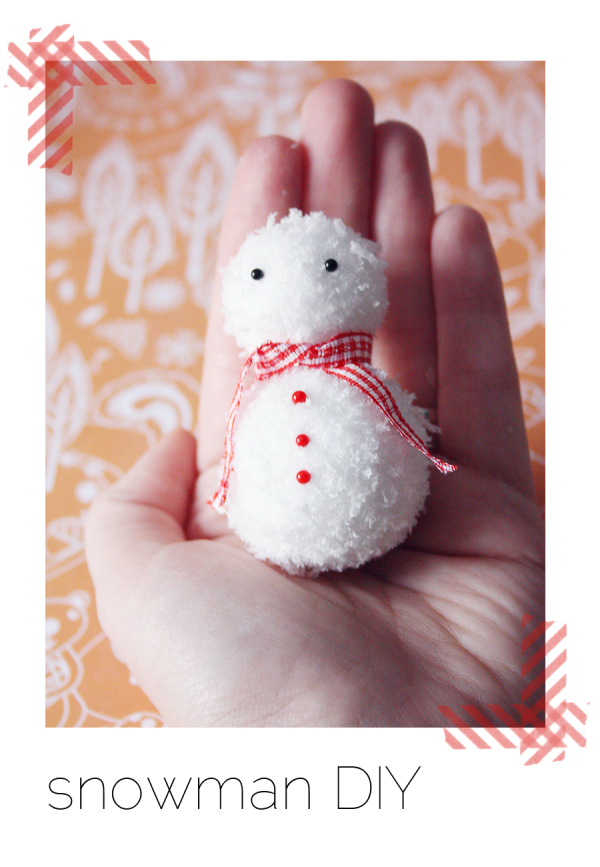 You can whip up your own little family of snowman with your own family. Set the scene on the windowsill or on one of the side tables around the house. (via)
37. Mini Birdhouse Ornaments – Christmas Crafts
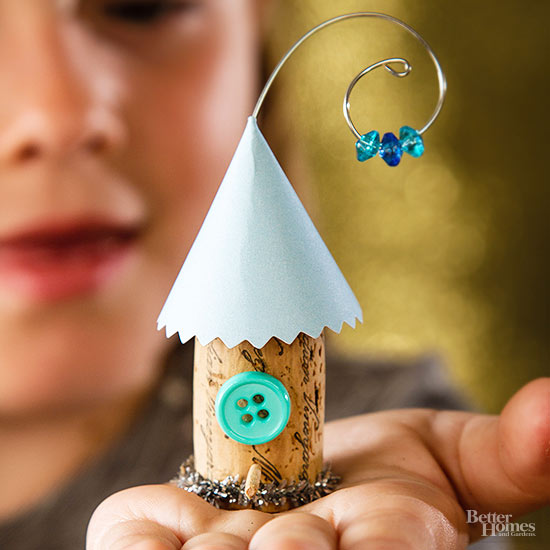
BHGshows us how to put together one of these tiny birdhouses and turn them into an ornament. Everyone can style and personalize their own!
38. Reindeer Thumbprint Ornaments – Christmas Crafts for Kids
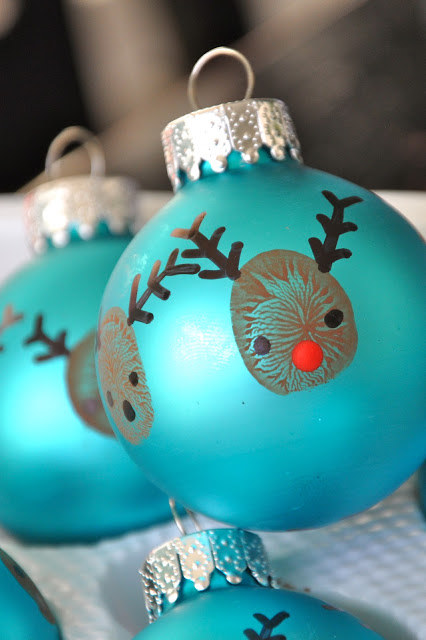
Little Bit Funkyshows us how to utilize all of the little fingers in the house. Turn them into reindeer!
39. Pom Pom Pinecone Christmas Trees – Christmas Art Projects
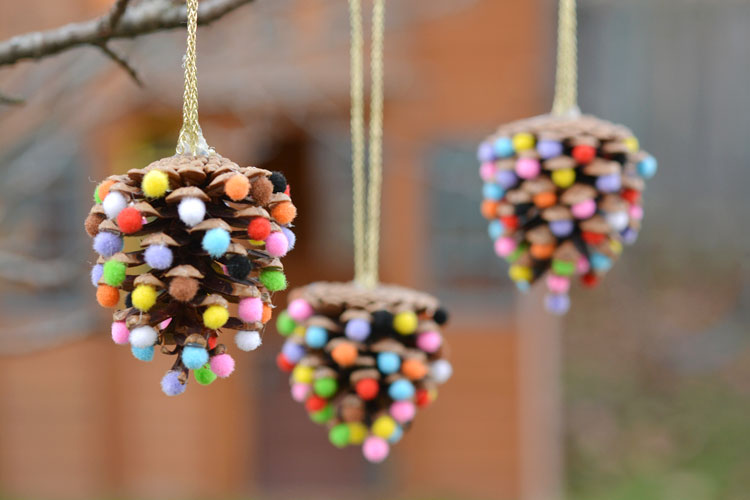
Using some pom poms and some pinecones you too can make these colorful little beauties. Grab all of the details over at One Little Project.
40. Christmas Tree Centerpiece with Kisses – Fun Family Crafts
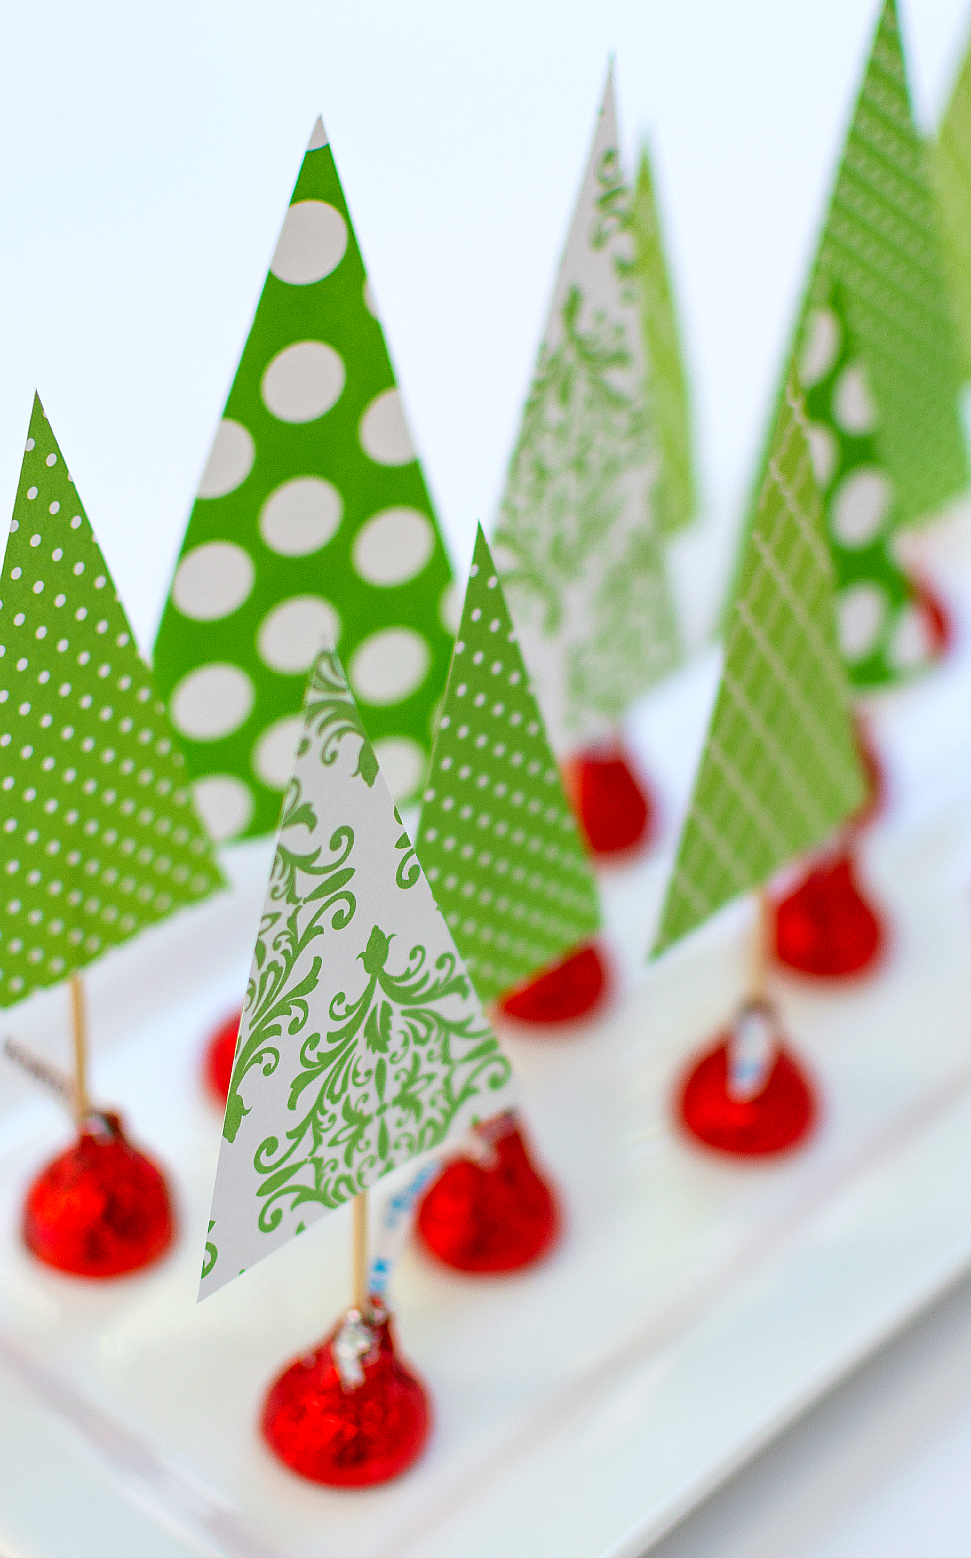
It All Started With Paintused some Hershey Kisses to get their festive centerpiece started. Learn how to whip up these trees after the jump.
41. Ornament Trio – DIY Christmas Crafts
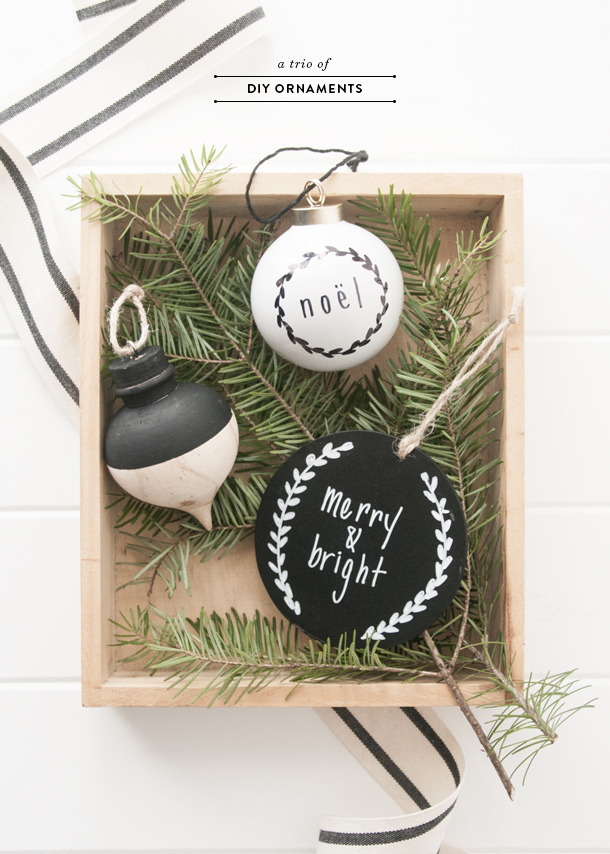
Earnest Home Comakes a classic trio of ornaments that we’re really loving too. If this seems more your style, start crafting tonight!
42. Cut-Out Christmas Tree Cards – Easy Christmas Crafts for Kids
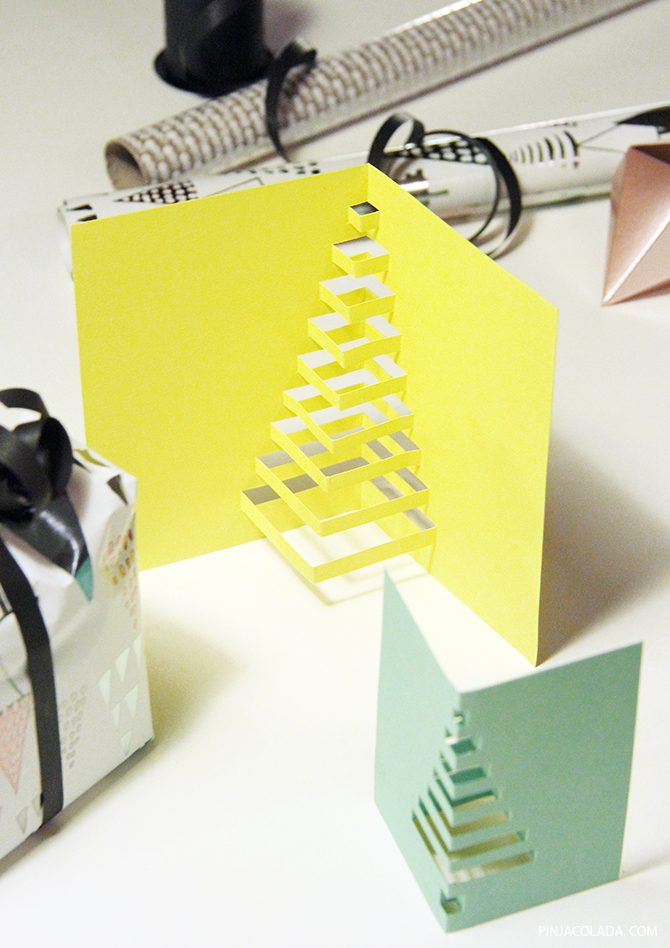
We’re loving these chic modern paper deigns. Learn how to cut them out and whip up some easy Christmas cards in an afternoon. (via)
43. Glitter-Dropped Ornaments – Christmas Craft Ideas
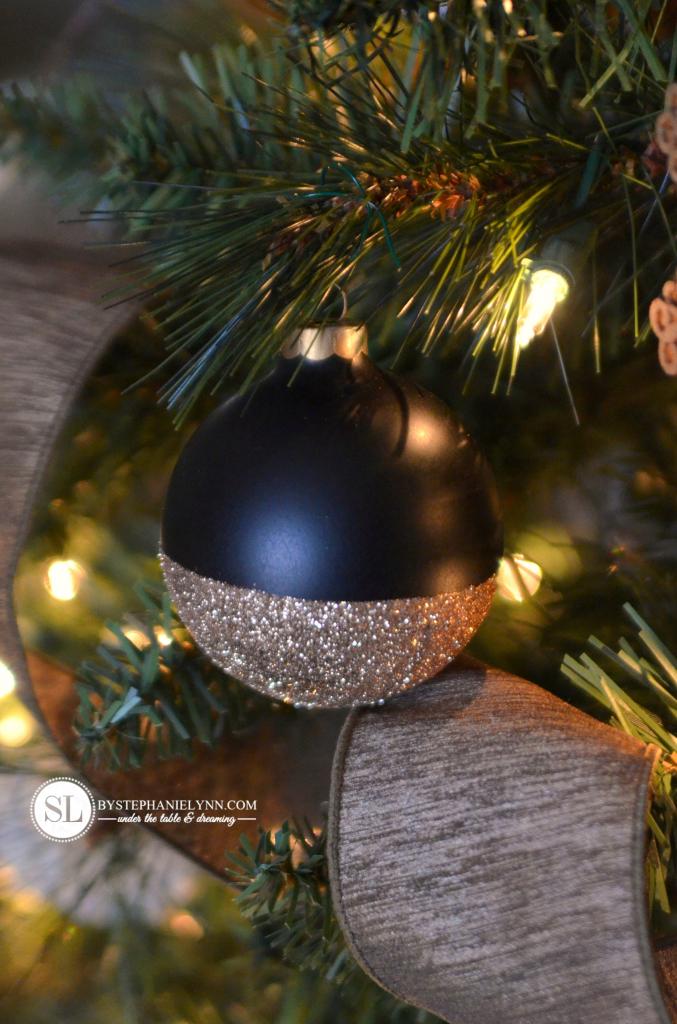
By Stephanie Lynnshows us how to drop ornaments in some glitter to make something brand new and sparkling. Plant these all over your tree for something pretty and festive.
44. Fabric Christmas Tree Cones – Christmas Crafts for Kids

Here’s a fun craft to start on this weekend. Check outThe Creativity Exchangeand learn how to make these fabric-covered cones to decorate the living room or foyer with this holiday season.
45. Glam Wreath – Easy Christmas Crafts
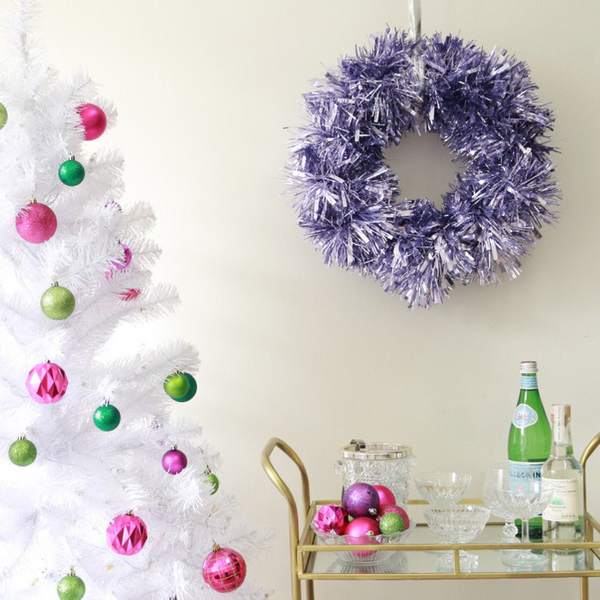
Miss Krismakes a super glam wreath to dress the house for the holidays with. And it’s so simple to recreate at home!
46. Baking Pan Countdown – Christmas Craft Ideas
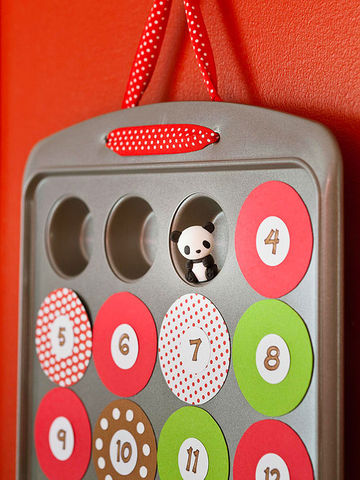
Parentshas a ton of great ideas for you and the kids to get involved in this Christmas. And that includes this easy-to-make holiday countdown you can make with the help of a simple baking pan!
47. Gingerbread Soap – Christmas Crafts for Adults

Oh, The Things We’ll Maketeaches us how to make some gingerbread soap. Have these in all the bathrooms of the house or gift them throughout the season to family and friends!
48. Merry Christmas Garland – Fun Family Crafts
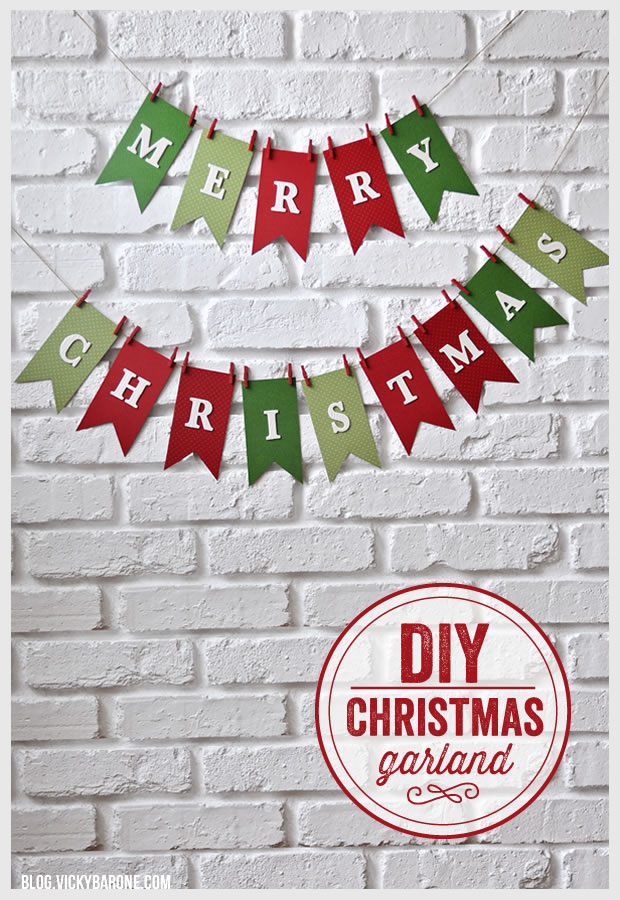
Every home needs a garland to celebrate the season with, especially when there are kiddos inside. Learn how to make this one with the help ofVicky Barone.
49. Sparkling Birch Centerpiece – Christmas Art Projects
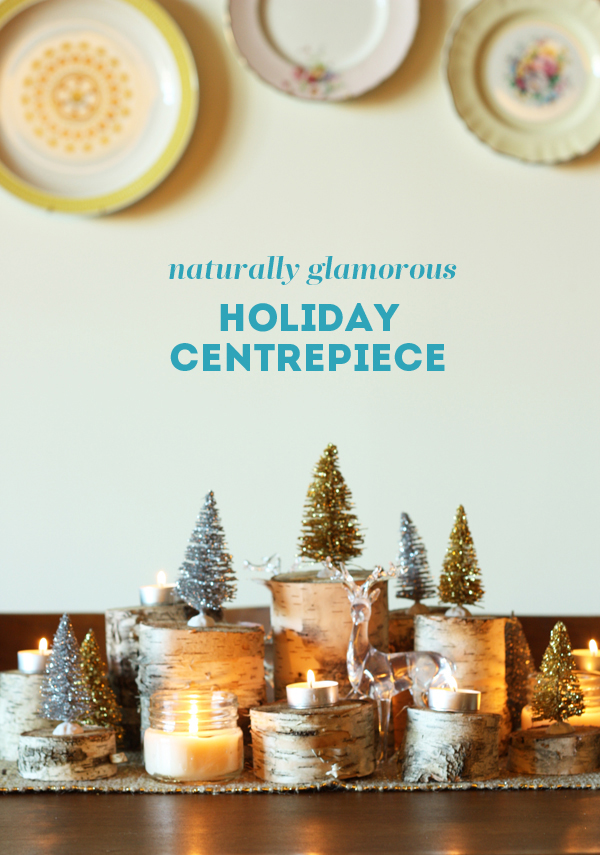
The Sweet Escapemakes this gorgeous centerpiece and we’re swooning over it. If you love it as much as we do, take the leap and learn how to recreate it!
50. Clay Ornaments – Christmas Craft Ideas
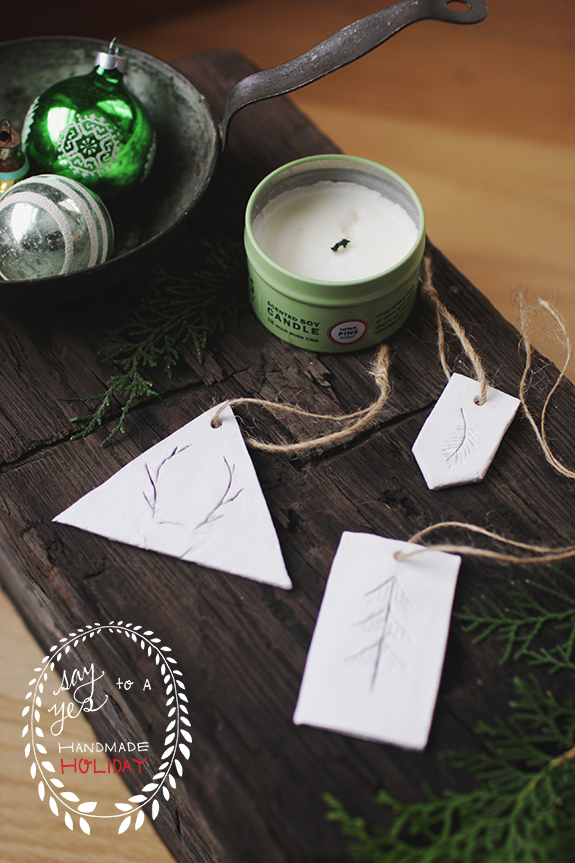
Clay ornaments can be a lot of fun to work with. Check outSay Yesand follow along with their tutorial.
51. Cinnamon Applesauce Gingerbread Garland – Easy Christmas Crafts
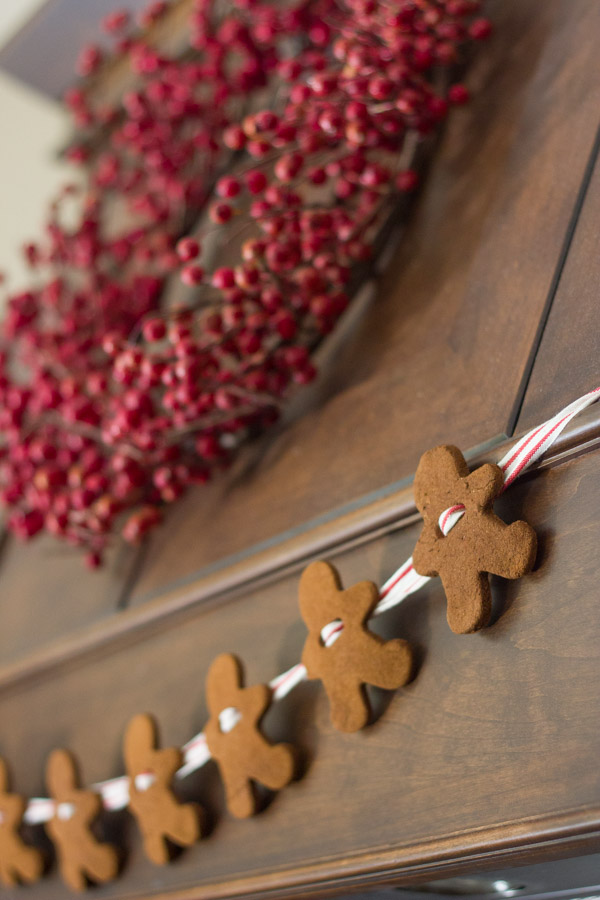
Lovely Little Thingsholds one of our favorite tutorials on the list! Cinnamon applesauce gingerbread men can make some beautiful and delicious-smelling garland to decorate the house with.
52. Sparkle Winter Branches – Easy Christmas Crafts for Kids

If you like a bit of sparkle to decorate with throughout the holidays, check out this idea fromIn My Own Style. Sparkling branches can frame any space around your home.
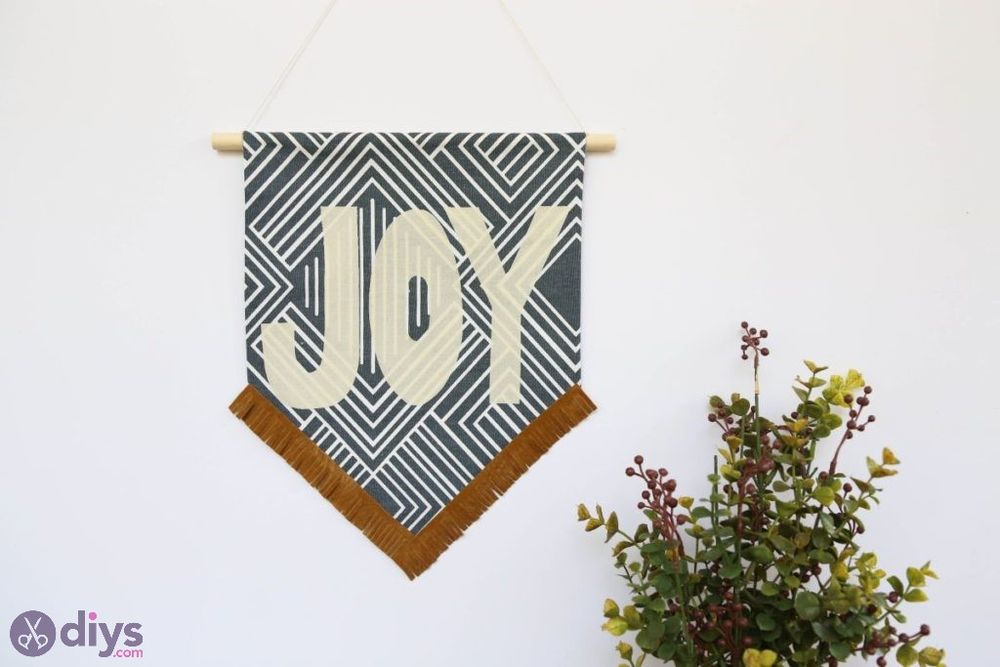
53. Jingle All The Way Wall Art – Fun Family Craft
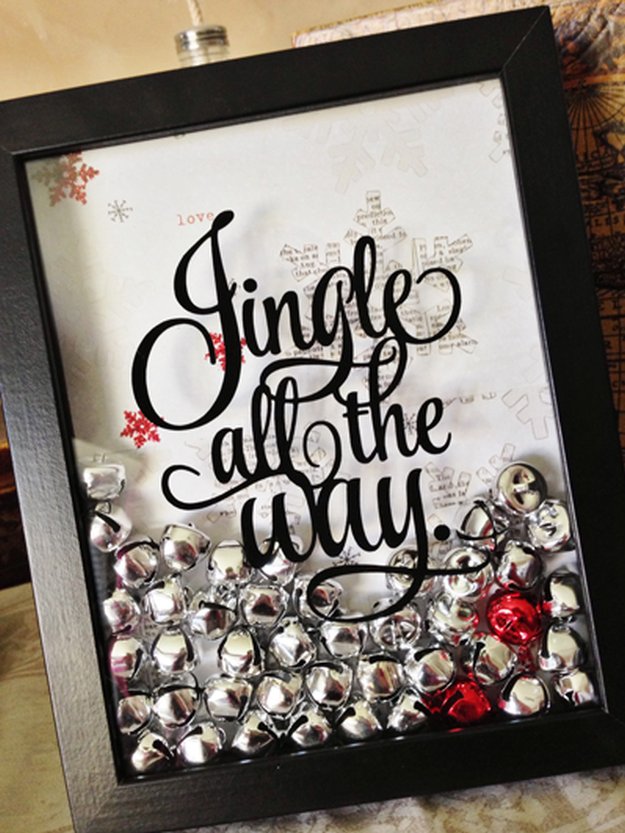
Kerri Bradfordmakes some Jingle Bell wall art that we love too! This one can be used for years to come as well.
54. Felt Ornaments – Easy Christmas Crafts
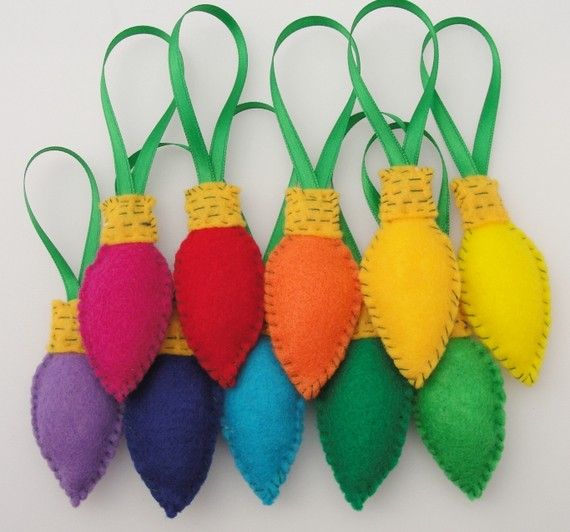
There are so many patterns that you can snatch up around the Internet and create some little felt ornaments with. And we’re really loving these Christmas lights! (via)
25. Peppermint Soap – Christmas Crafts for Adults
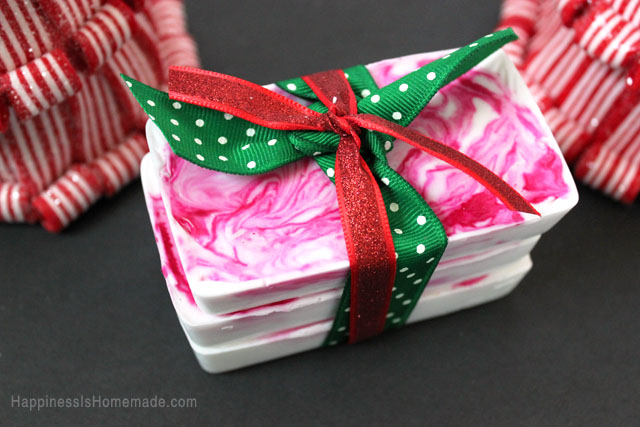
Happiness is Homemadeknows how to make some peppermint soap. And whether you want to make it as a DIY gift or to add some festive flavor to the bathrooms, it’s a great tutorial to try!
56. Washi Tape Wreath 0 Easy Christmas Craft for Kids
Emerald + Ellatook some washi tape and made a special wreath for the season. Whether it’s on the front door or the back, it’ll do its job well.
57. Chocolate-Covered Strawberry Christmas Tree – DIY Christmas Crafts
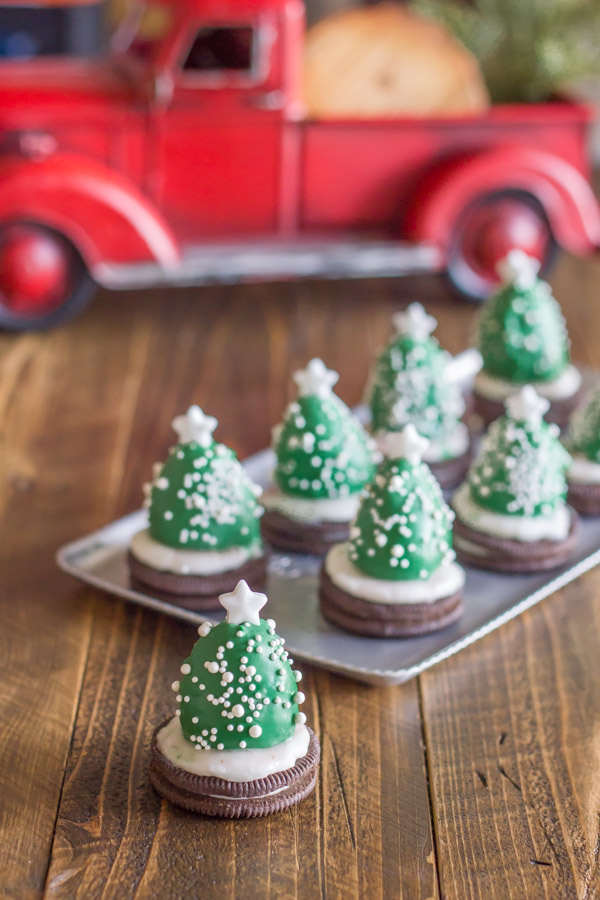
Lovely Little Kitchentook Christmas crafts to an entirely new level because this one is edible! Serve these up to the family on Christmas Eve!
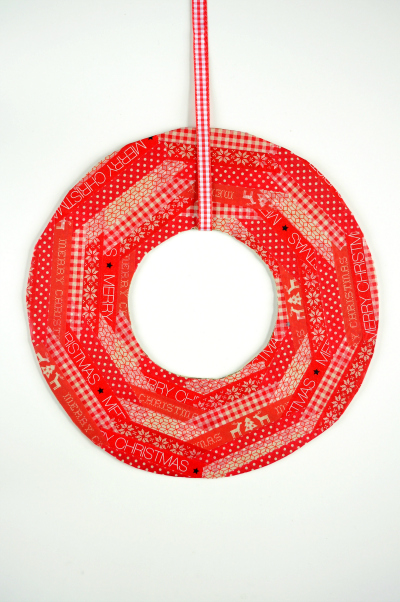
58. Fabric Wreath – Christmas Arts and Crafts
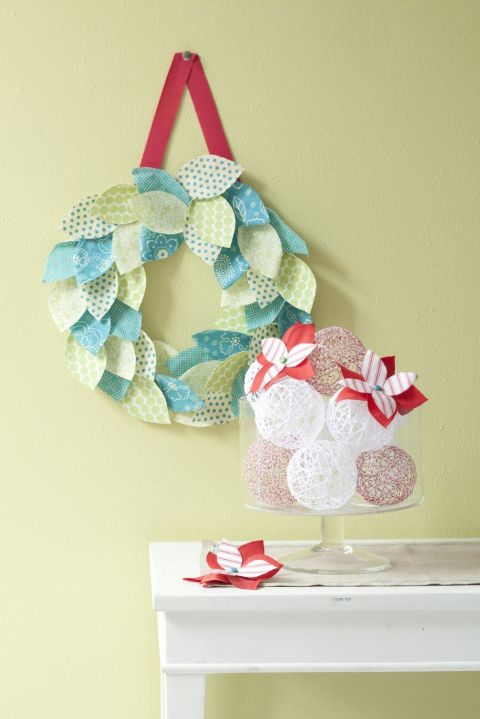
Woman’s Daytook fabric and used it to concoct the most perfect and festive Christmas wreath. Of course, you can use any kind of colors or prints that inspire you.
59. Flameless Fire Pit – Easy Christmas Crafts for Kids
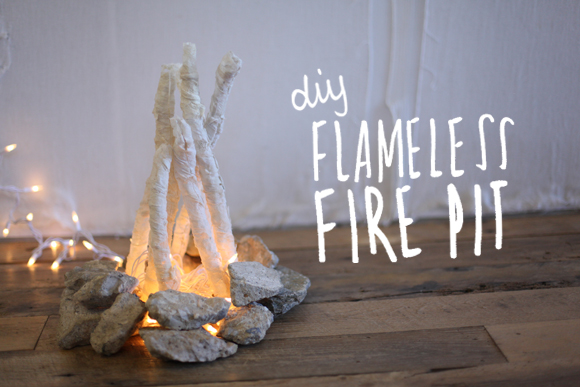
We’re freaking out over this fabulous DIY fromFree People! Have this warming up the bedroom and adding a bit of coziness to your holiday break!
60. Wine Cork Reindeers – Easy Christmas Crafts for Toddlers
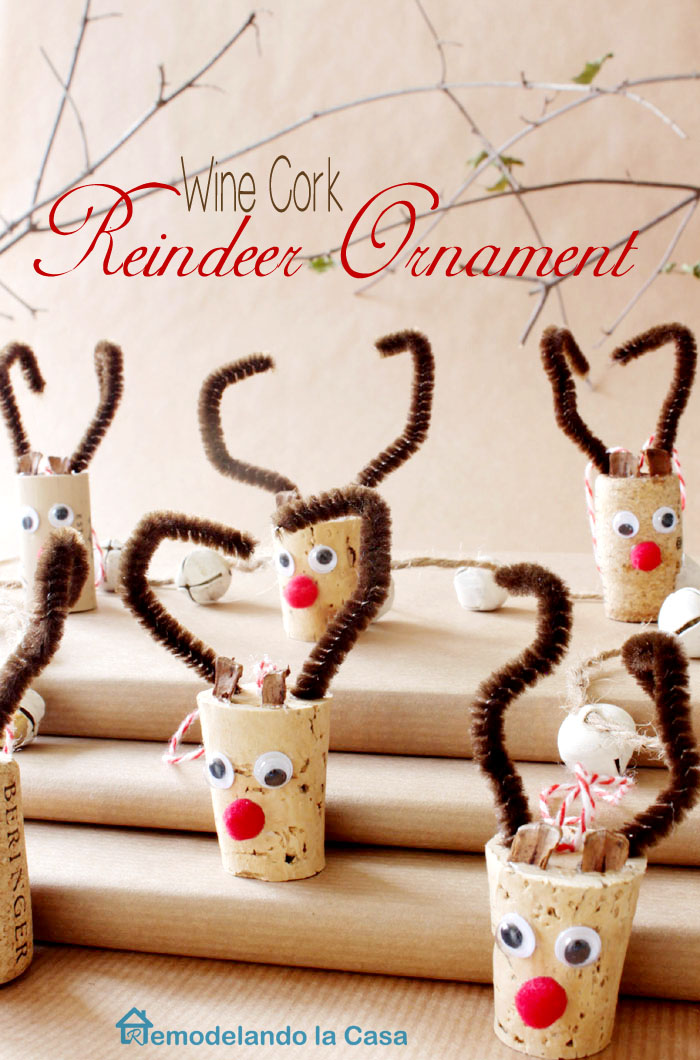
Who knew wine corks could be so adorable? You can even turn these little decorations into ornaments for the tree. (via)
61. Thumbtack Ornaments – Christmas Craft Idea
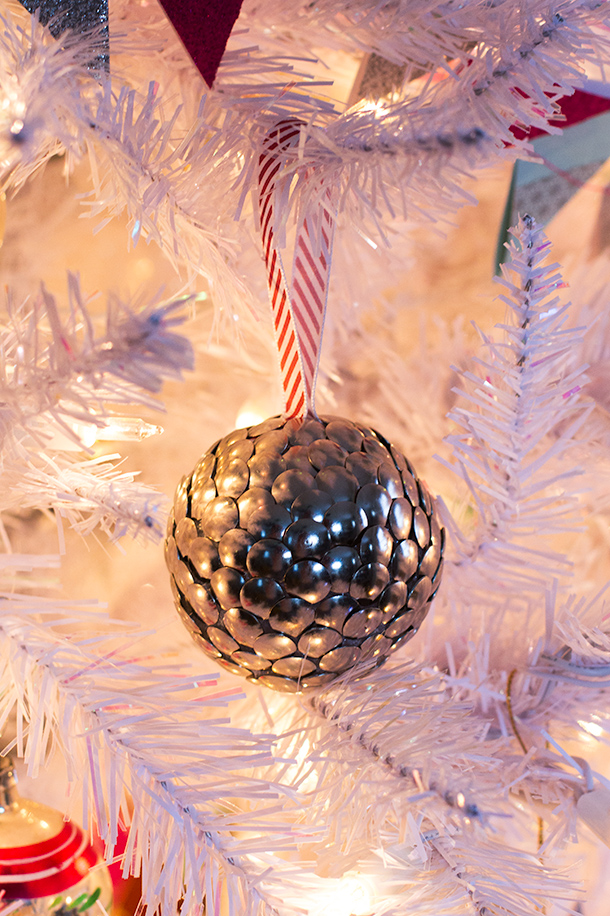
Sarah Heartsgrabbed a box of thumbtacks and got to work. They make quite the chic and contemporary design, don’t you think?
62. Icicle Ornaments – Easy Christmas Craft
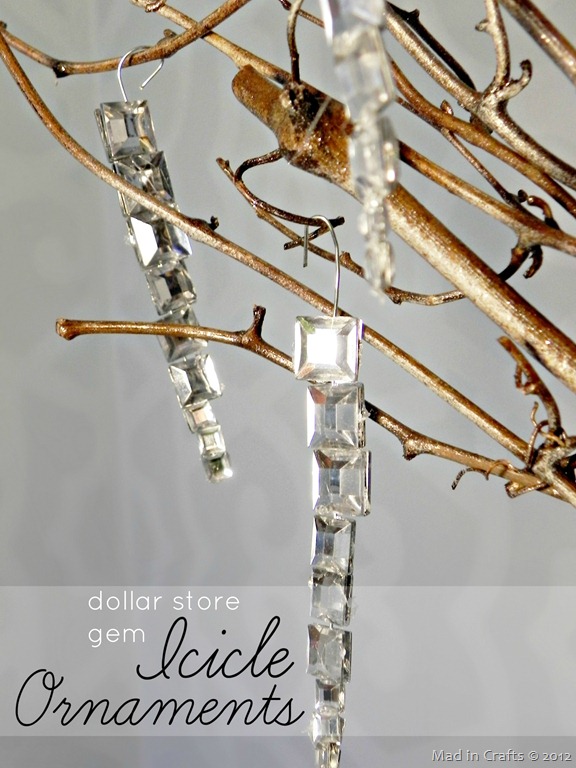
This craft is both stylish and inexpensive to make! Check outMad in Craftsfor all the major details!
63. Jingle Bell Elves – Fun Family Craft

Nalle’s Housemade some adorable little elves out of jingle bells and we’re loving all the ways you could utilize the finished product. On side tables, on mantles, as ornaments or stuffed inside a stocking!
64. Christmas Tree Soap – Christmas Crafts to Make
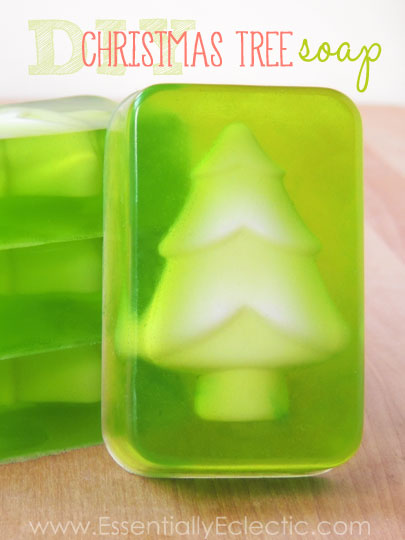
Essentially Eclecticmade some Christmastime soap too! And this time, you’ll learn how to fit a tree right inside.
65. Ski Ornaments – Christmas Craft Ideas
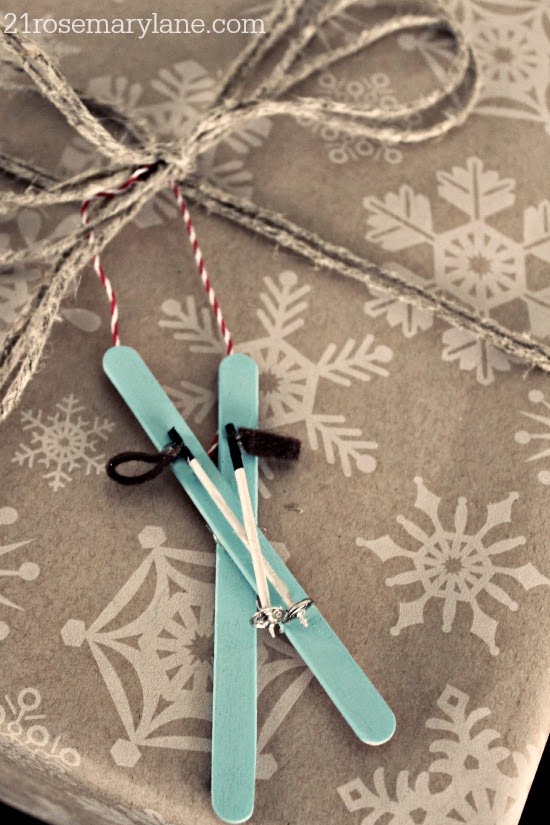
It’s hard not to love these little ski ornaments from21 Rosemary Lane. Take the leap and learn how to make them tonight.
66. Ribbon Candy Ornaments – Easy Christmas Craft
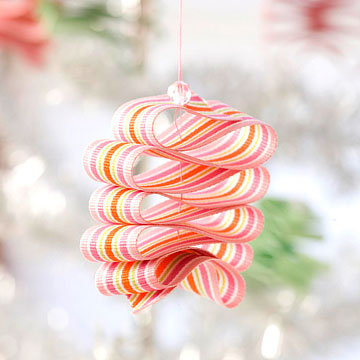
BHGshows us how to make some gorgeous ribbon candy ornaments. It’s a classic way to decorate the tree and we’re loving it!
67. Oh Deer Christmas Sign – Christmas Arts and Crafts
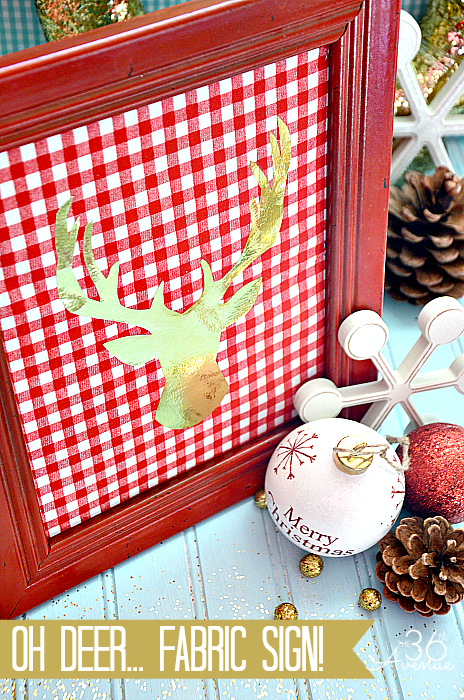
The 36th Avenueshows us how to make some chic wall art for the holidays. This would be a great DIY gift idea as well.
68. Winter Tree Wall Art – Easy Christmas Painting Ideas
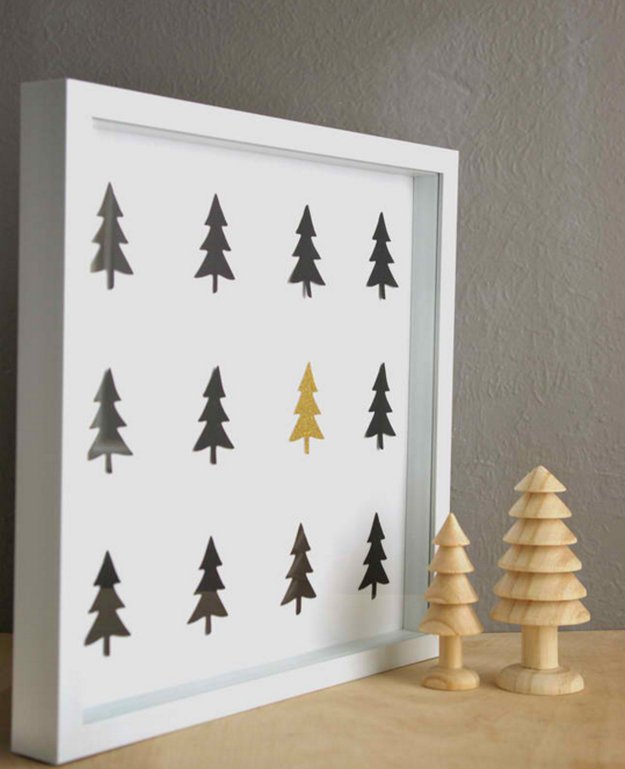
Here’s another modern piece of wall art that you’ll want to learn how to make.Hello Glowwill give you all the details.
69. Christmas Pallet Tree – Christmas Craft Idea
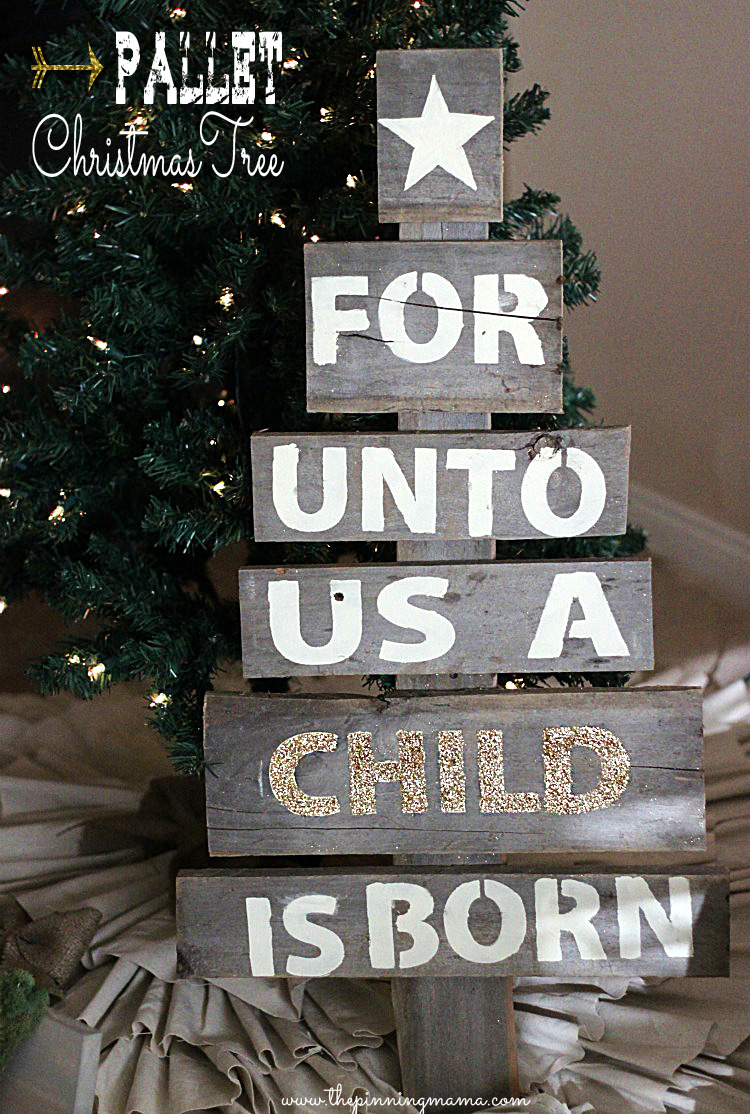
The Pinning Mamamakes a special bit of art as well. And this time, you’ll be using some wooden pallets to get it all started.
70. Polar Bear Paper Scene – Easy Christmas Craft for Kids
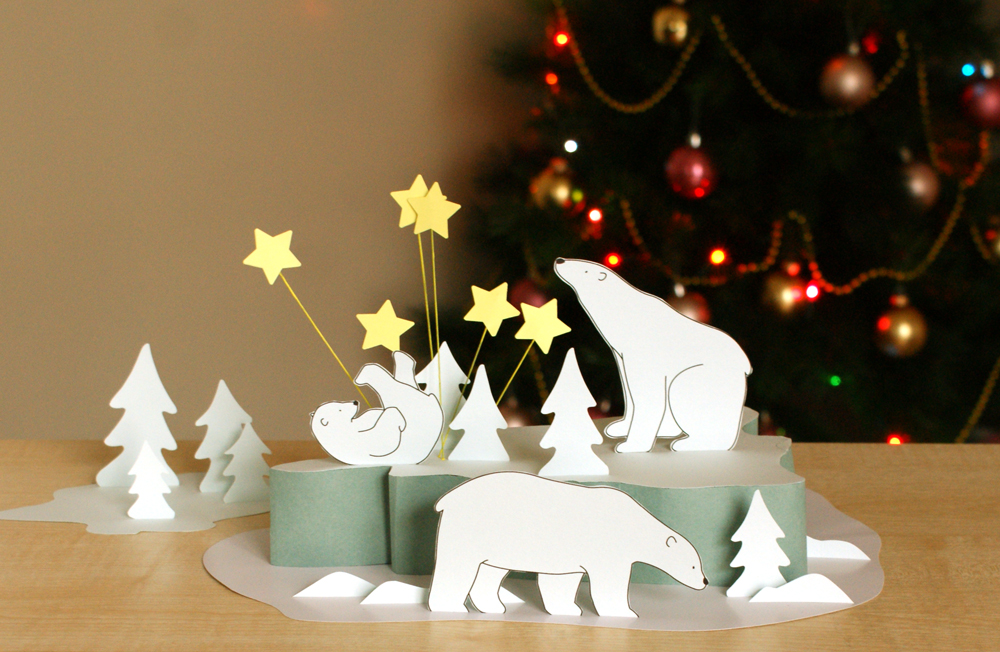
Starting with some paper, learn how to whip up this scene in no time. It’s a great way to get the kvia
71. Snow Globe Ornament – Fun Family Craft

Shelternessmakes some adorable snow globe ornaments that we’re dying to try our hands at. These are easily personalized too!
72. Cinnamon Stick Reindeer Ornaments – DIY Christmas Craft
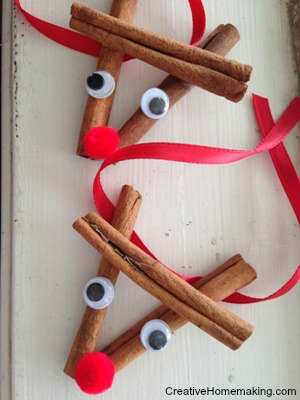
Here’s a classic Christmas craft that every family will need to try.Creative Homemakingwill show you how it’s done.
73. Christmas Napkin Rings – Easy Christmas Craft
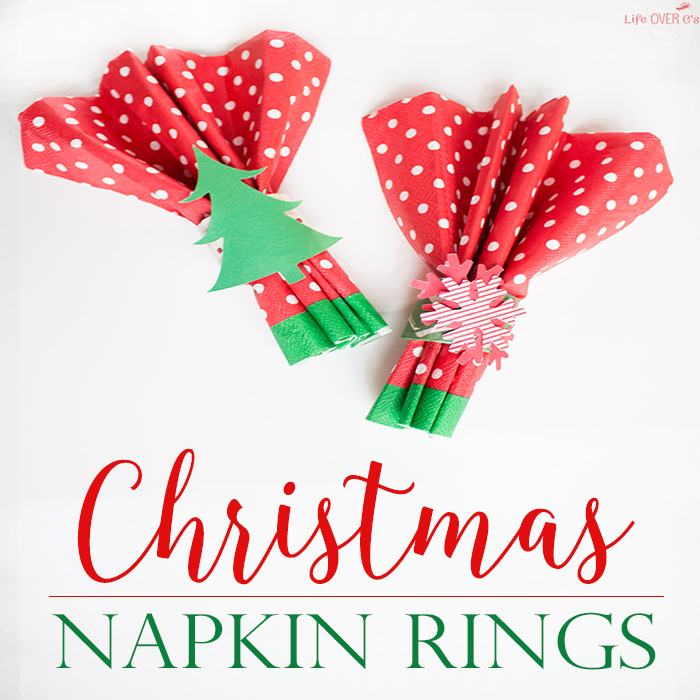
You could even have some fun dressing up the tables. Make Christmas dinner a bit more festive with this DIY. (via)
74. Sweater Snowman – Christmas Crafts for Adults
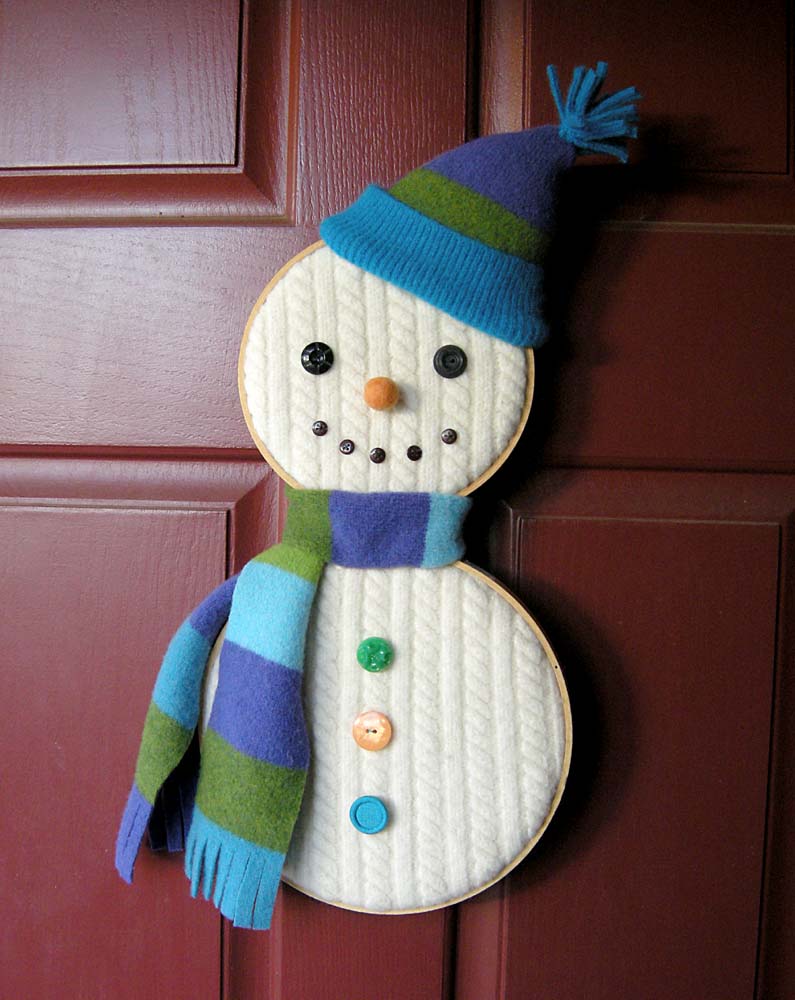
Betz White makes a sweater snowman that becomes a warm and cozy way to dress up any door. And you can personalize him any way you’d want!
75. Bauble – Fun Family Craft
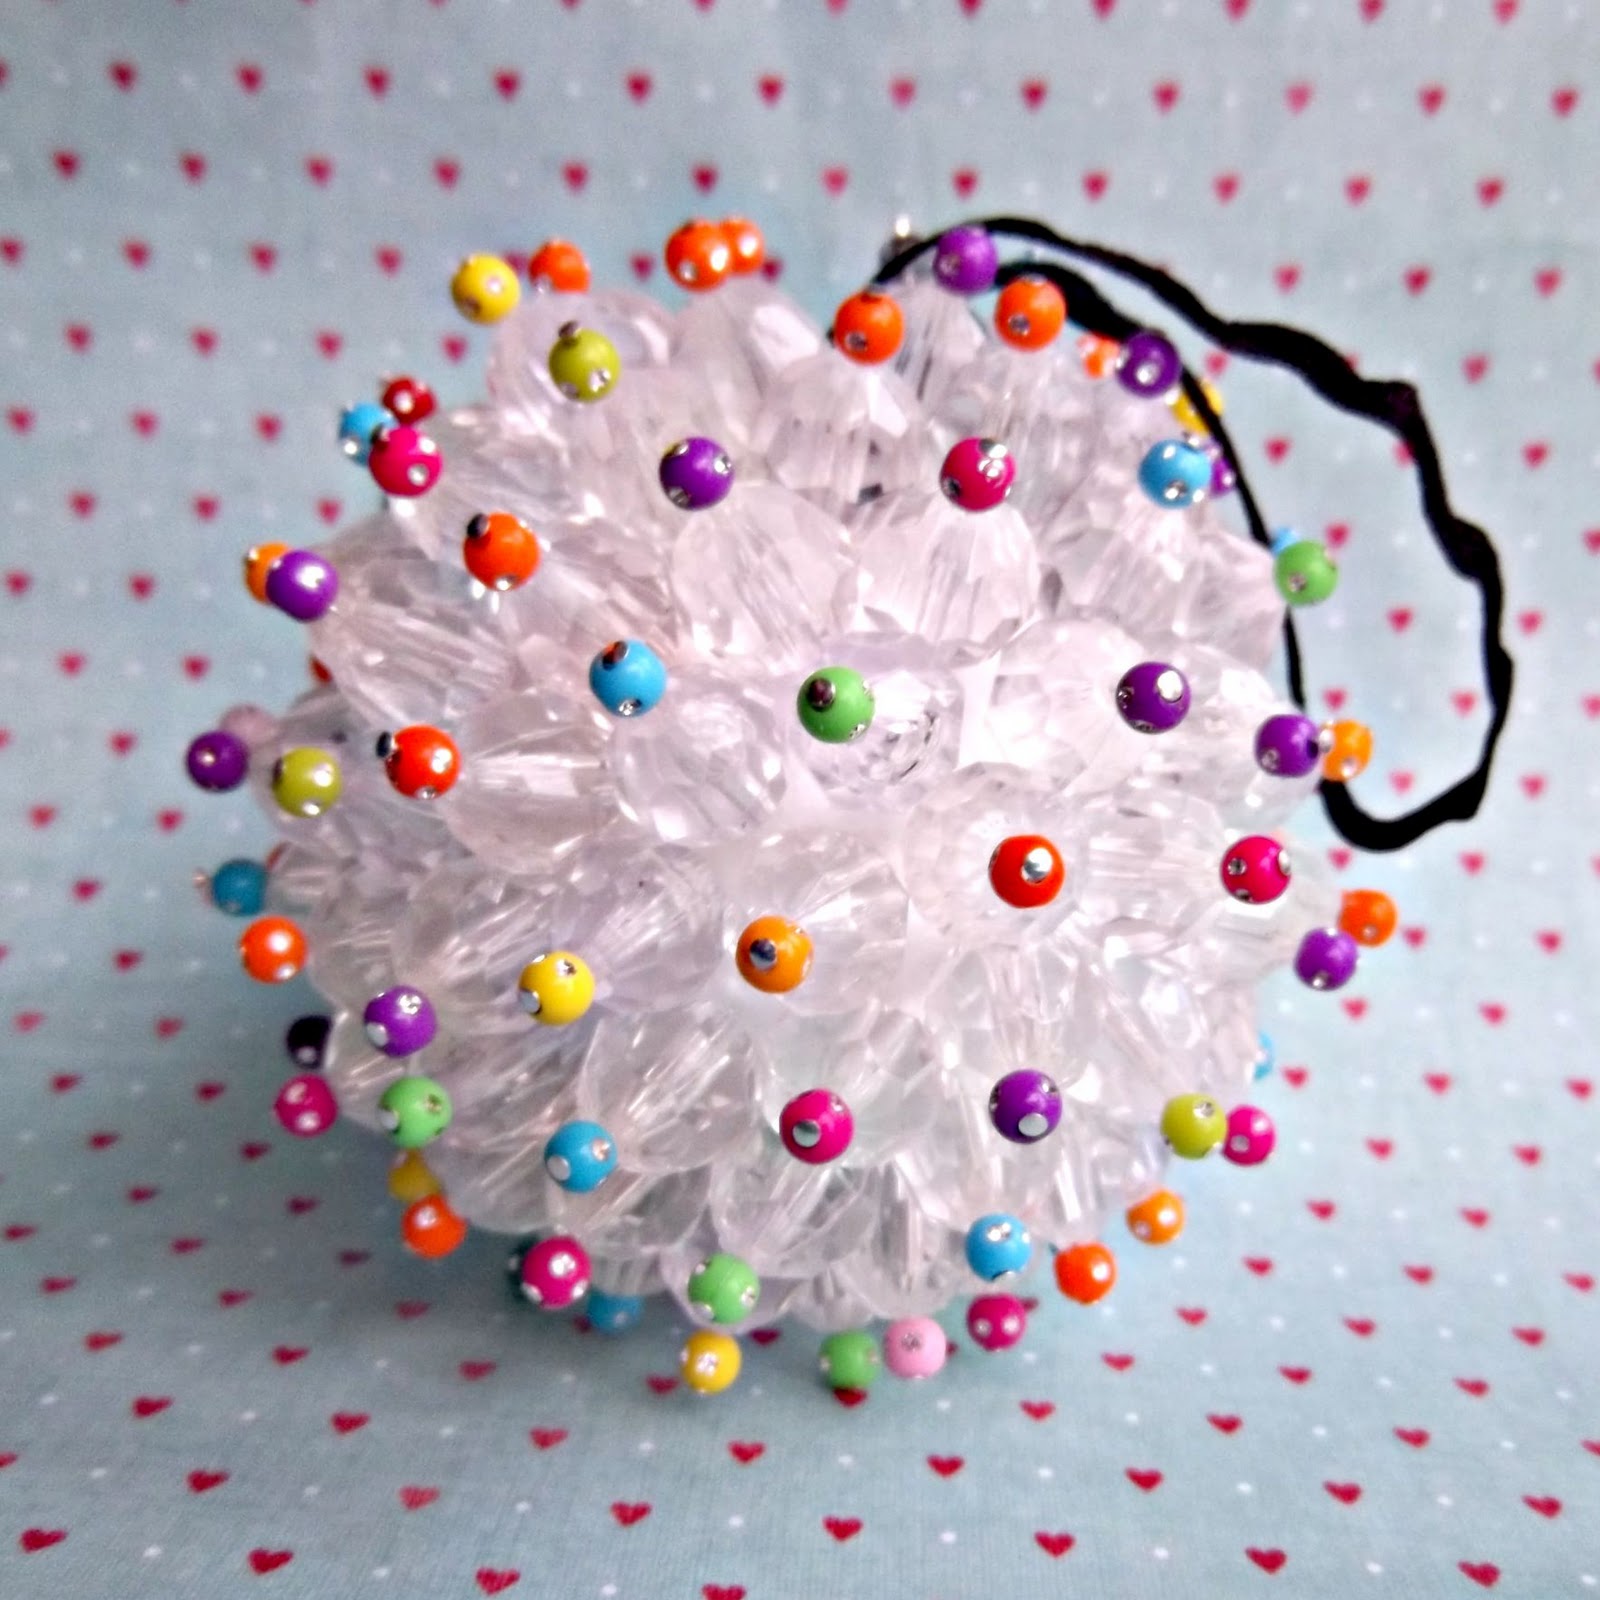
Twinkly Spanglemakes a funky bauble ornament that we’d love to try out too! Colorful or just sparkly, it’s easy to sprinkle your tree with!
76. Etched Coffee Mugs – DIY Christmas Craft
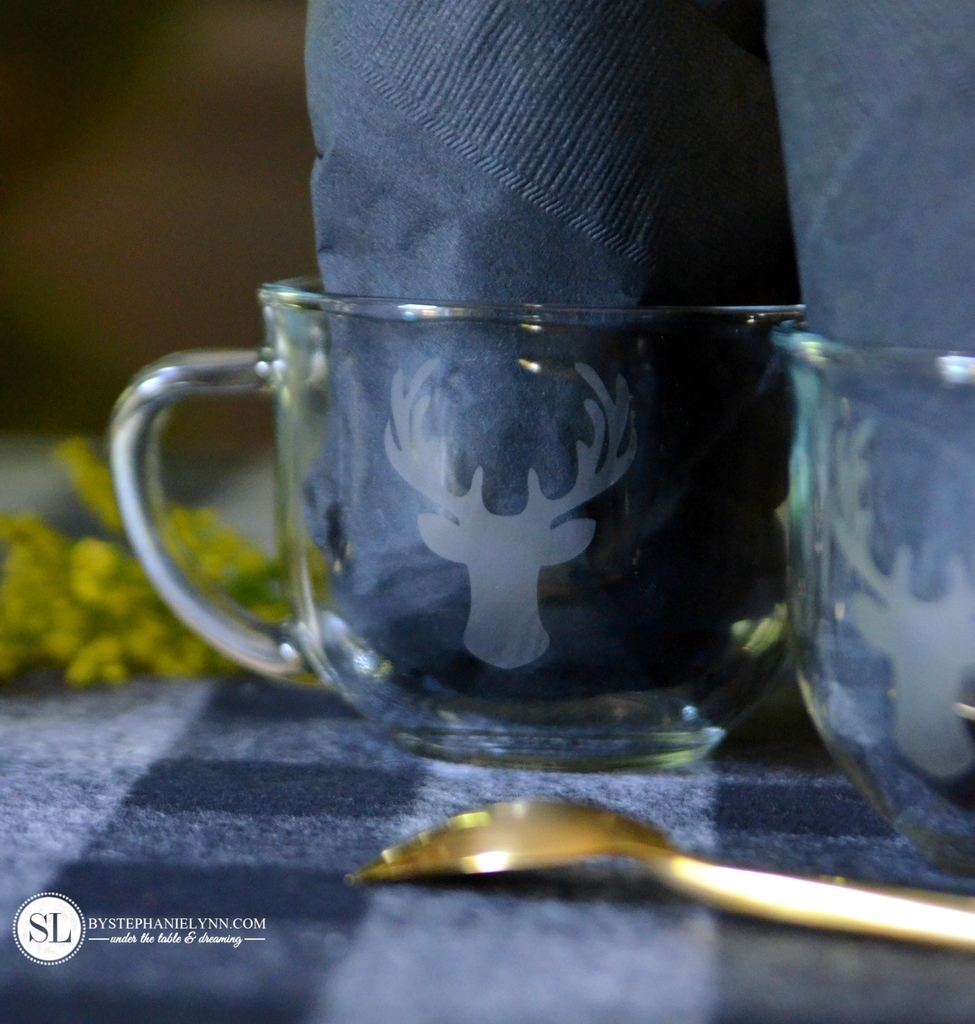
By Stephanie Lynnshows us how to make some etched coffee mugs in Christmastime style. These are great for your own kitchen or to gift away!
77. Gift Toppers – Christmas Art Projects

Country Livingshows us how to jazz up our family’s presents. There are so many wonderful ways to do it too!
78. Mason Jar Lid Ornaments – Easy Christmas Crafts for Kids
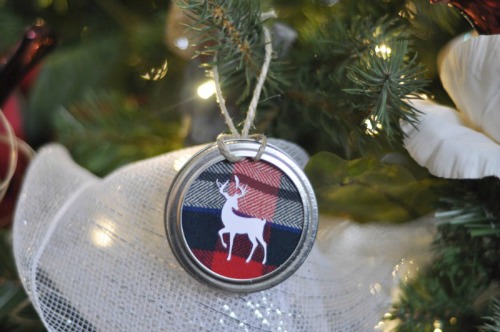
Clean and Scentsibletook mason jar lids and turned them into something special. Decorate the tree with some extra creativity this year.
79. Felt Christmas Tree Ornaments – Fun Family Craft
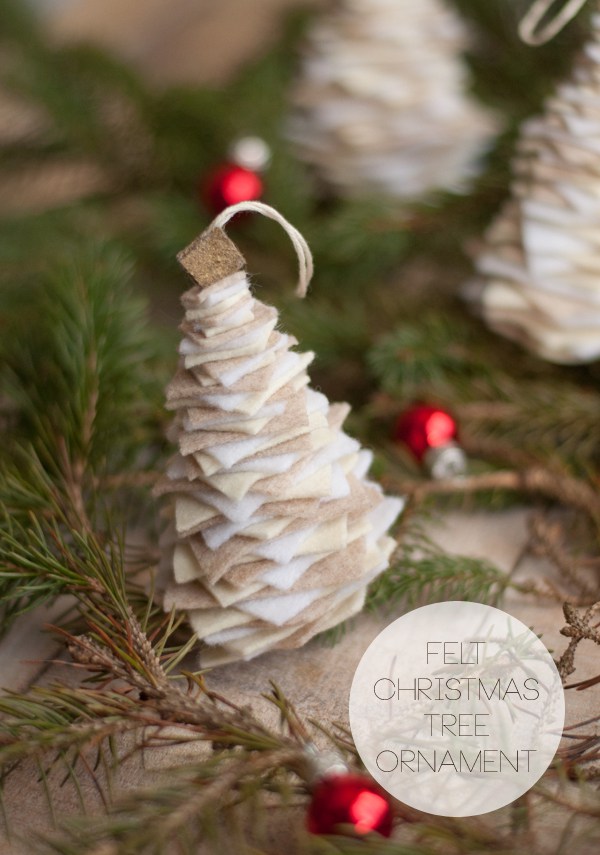
We love the softness and rusticism behind this ornament design. VisitThis Heart of Mineto learn how to make it.
80. Mini Snow Globes – DIY Christmas Craft
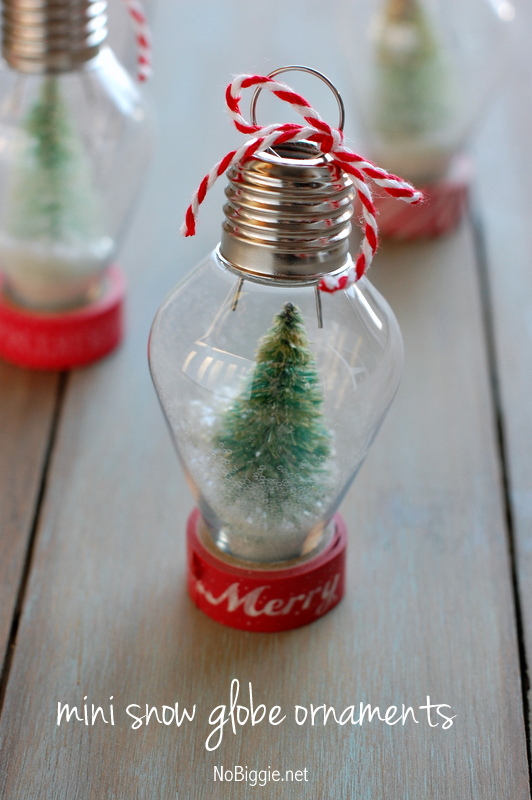
No Biggiemade mini snow globe ornaments that we love too! If you want some extra-small, check this one out!
Conclusion
All things considered, Christmas is an awesome holiday that everyone looks forward to. Except if you’re the Grinch. You’re not the Grinch, are you? Anyway, these DIY ideas for easy Christmas crafts are great because you can do them with either your friends or kids and they’re inexpensive too.
All you need are some basic supplies to get started. If you don’t have much time or money, but still want your home or party to look festive for Christmas, these ideas are perfect!
Possibilities range from paper plate crafts that take under ten minutes all the way up to larger designs that may require help from your family members or children – it doesn’t matter which craft you choose because there’s something here for everyone!
The most important thing is that you make an effort no matter what kind of craft or materials you use for this special season. As long as you prepare for Christmas in whatever way you can, it will be an amazing holiday. So what are you waiting for? Get up and get crafting!
Looking for the gingerbread that was made on a rug that I believe you made on your show. Hope you can help me.
some of the things aren’t showing up!