DIY No Sew Holiday Fabric Banner Tutorial
Updated on November 19, 2025
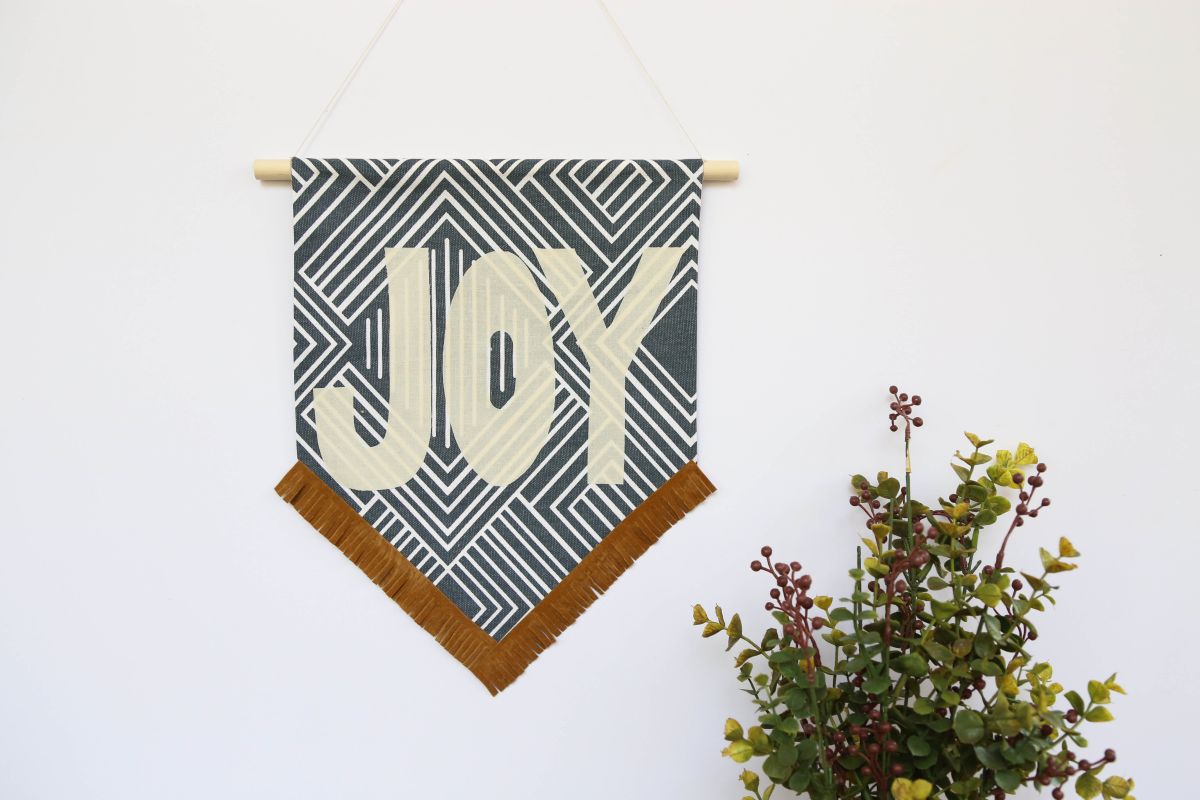
The holidays are just around the corner and that means filling the house with festive and cheerful decoration. Here is an easy-to-follow tutorial on how to create a fabric banner that requires no sewing. Its the perfect way to display festive words and colors on the walls of your home.
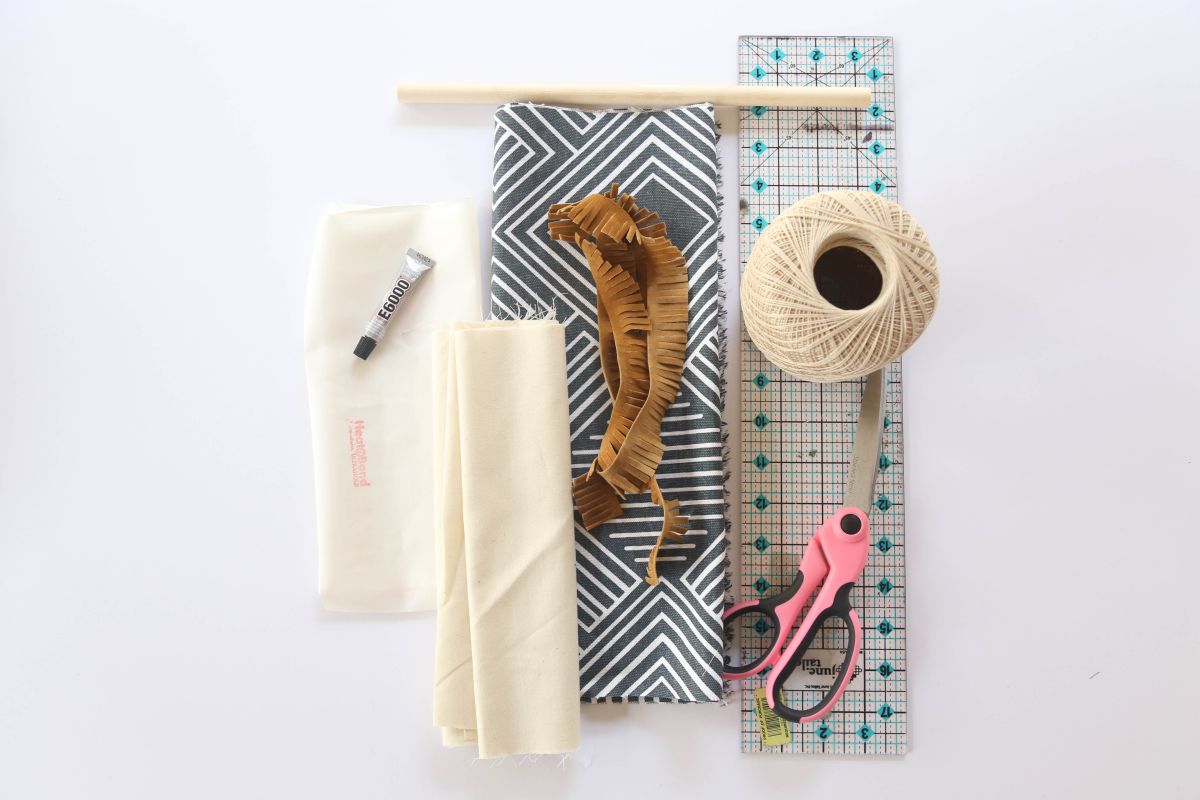
Materials You will need to DIY a fabric banner:
- HeatnBond ultra hold
- Cotton fabric (for letters)
- Canvas fabric
- 12” wooden dowel
- Crafting fringe
- Fabric glue or E6000 glue
- String
- Scissors
- Measuring stick
- Pencil
- Iron
Step by step instruction for a cool fabric banner:
Step 1: Cutting the fabric
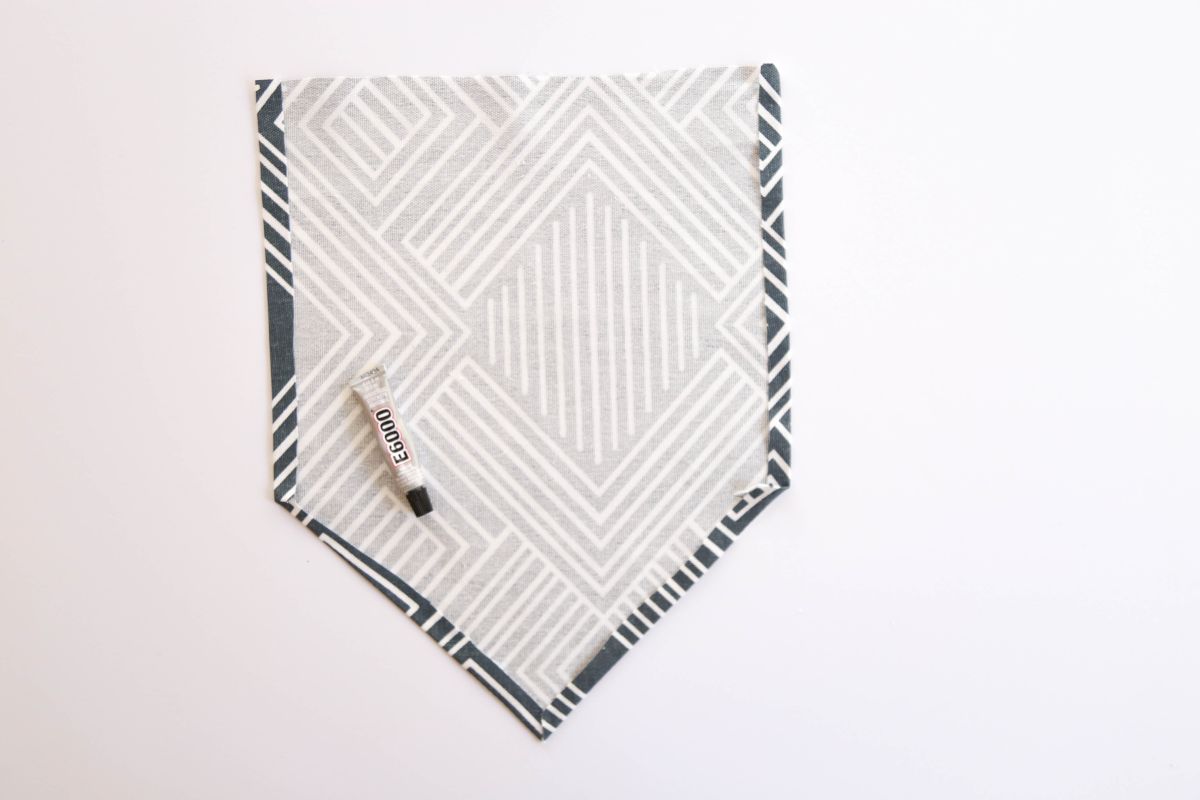
Take the canvas fabric and cut 11”x15”. Fold 1/2” of the fabric on both sides, then iron the folded fabric to ensure that it lays flat. Then take the two bottom corners and fold them to create a triangle (same size).
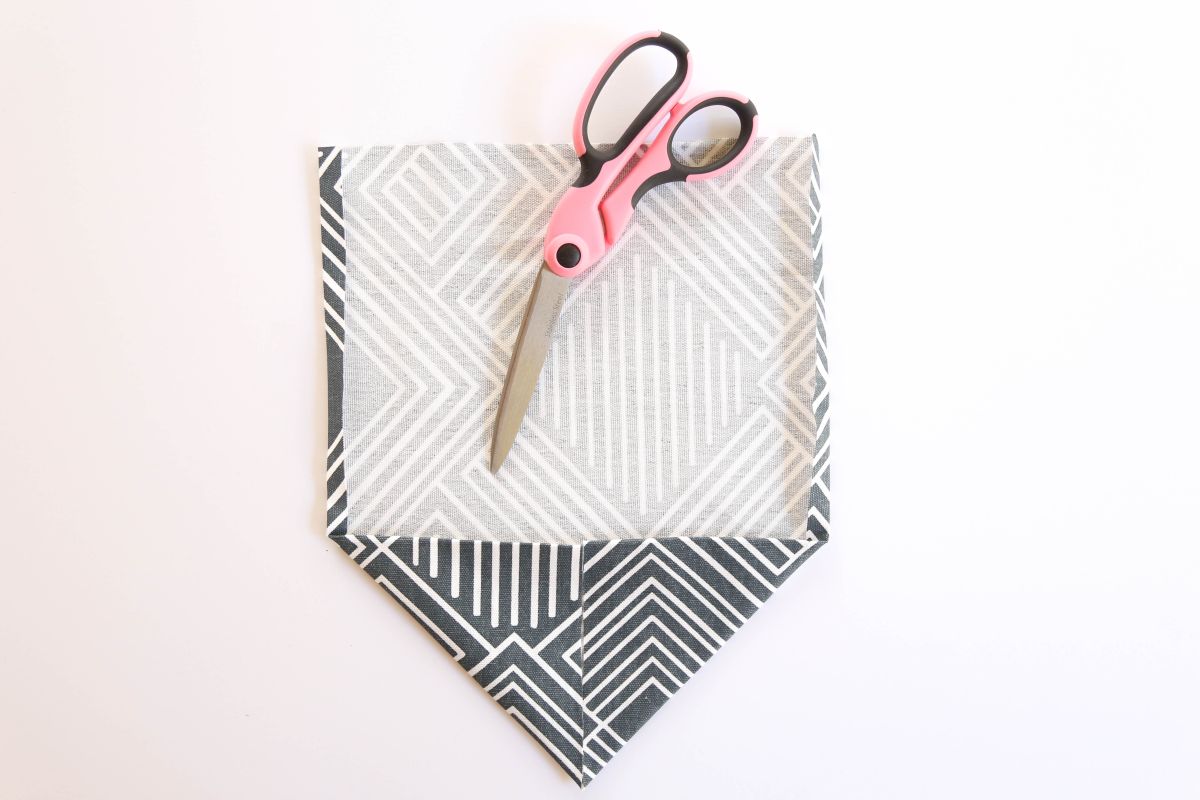
Step 2: triangle folding
After folding down the triangles, take your scissors and cut out most of the triangle leaving only 1/2” of the fabric. There should be 1/2” folded fabric on both sides and the bottom of the canvas fabric. Now glue the folded fabric.
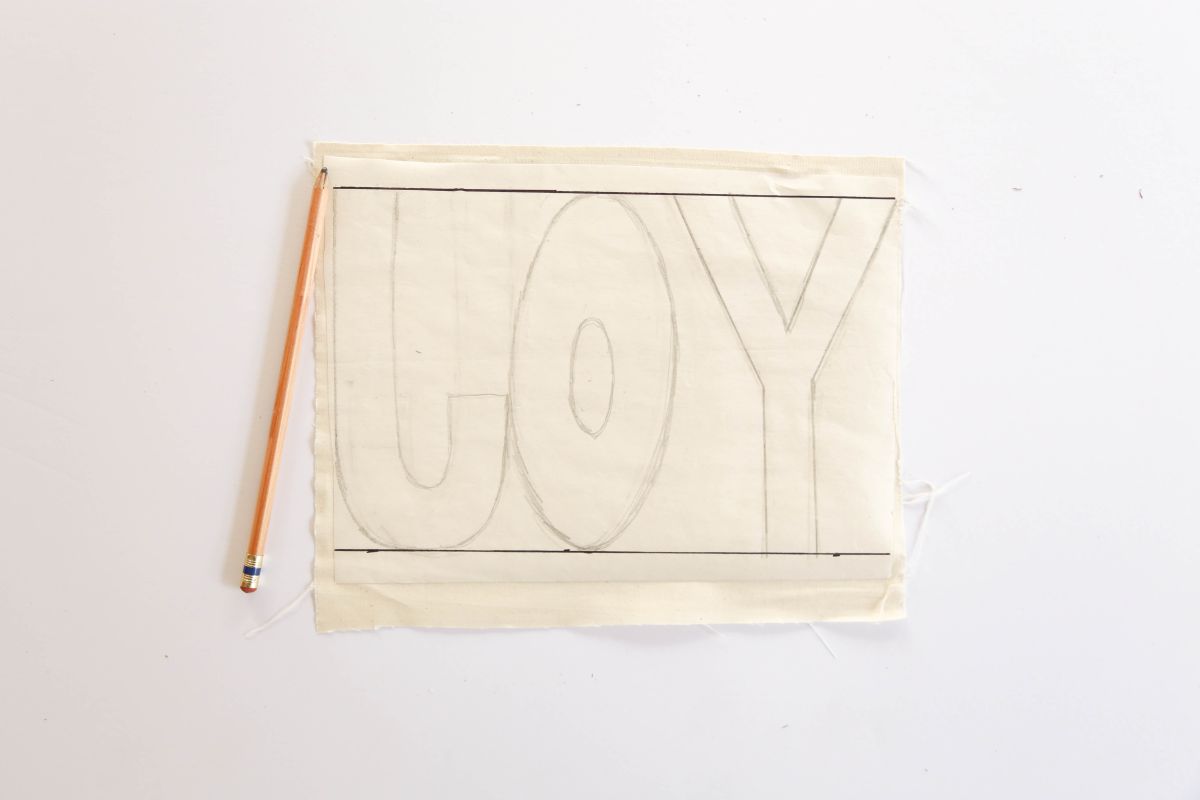
Step 3: choose the word
Once you have decided on the word(s) for the banner, cut the HeatnBond and fabric according to the size of the word(s). Iron the HeatnBond to the fabric and let it cool down before you write on the back. It’s much easier to print out the word(s) on paper and cut the letters out to use as a stencil, but for this project, I ended up writing the word free handed. When tracing the letters make sure to trace the letters backward.
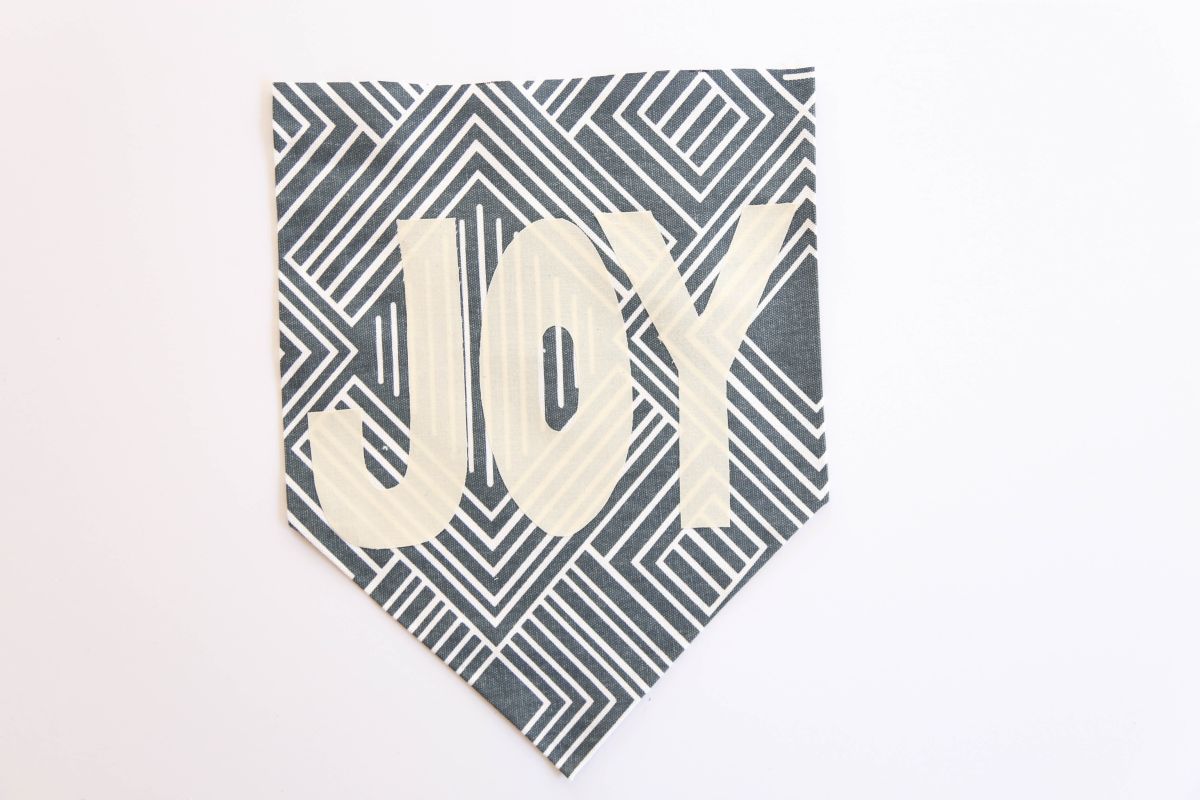
Step 4: Cutting letters
Carefully cut out the letters, then peel the paper off the back. Take all the letters and arrange them on the banner making sure its even. Once you laid out the letters, gently iron the letters onto the banner.
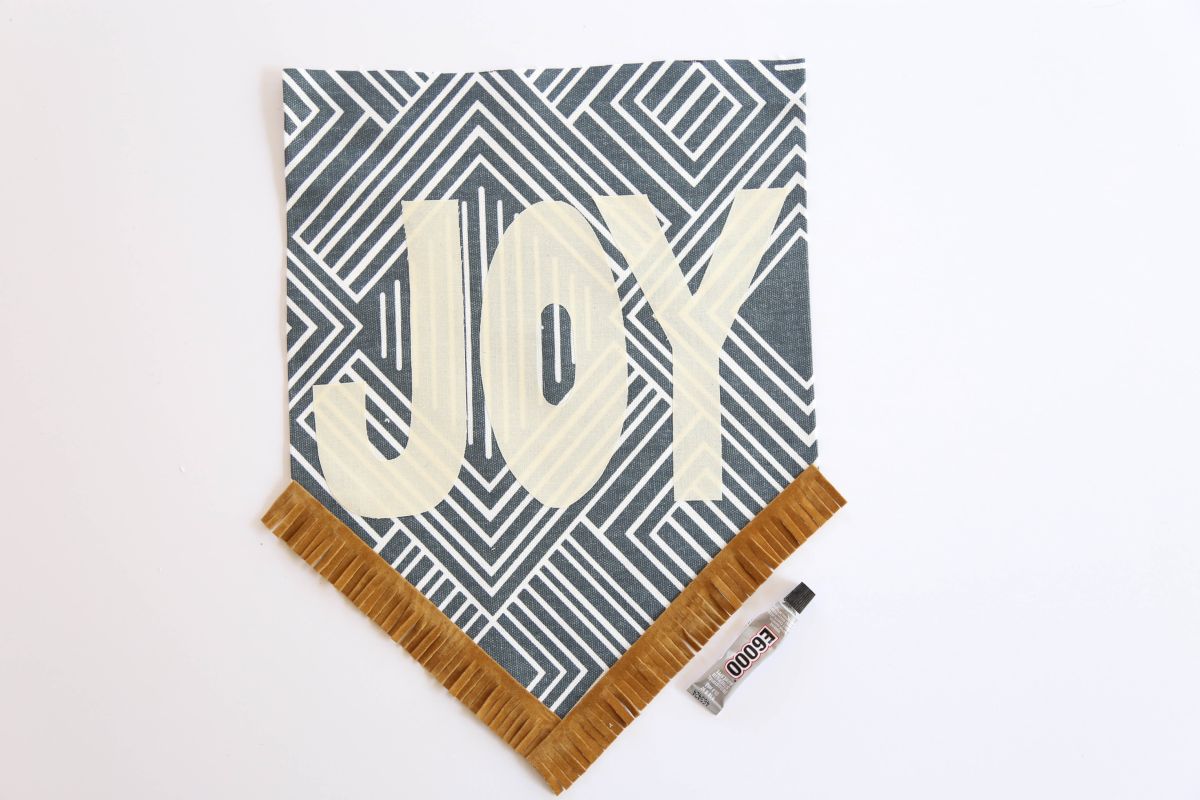
Step 5: Add fringe
Measure and cut the crafting fringe, then glue the fringe on the bottom of the banner.
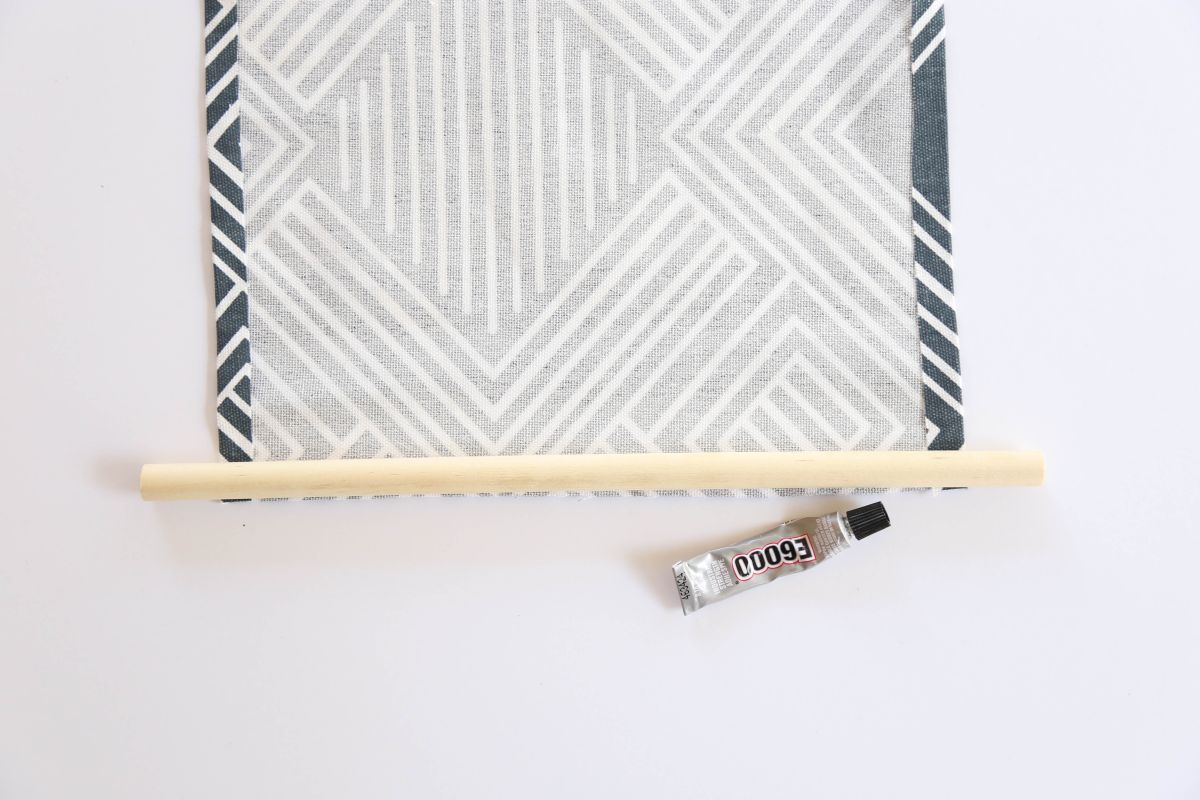
Step 6: Dowel on top
Place a strip of glue on the top of the banner and place the wooden dowel on the glue. Roll just a little of the fabric around the dowel and glue the fabric onto the dowel, making sure the fabric is covering the dowel completely.
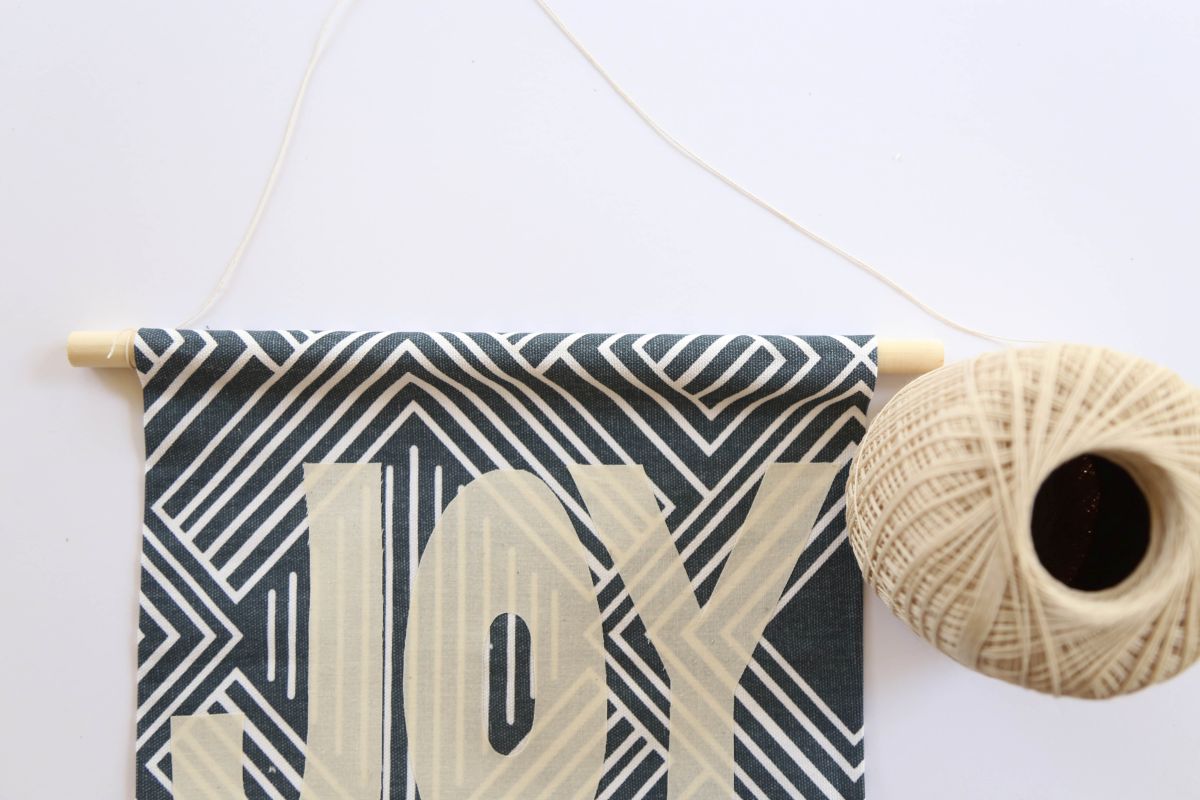
Step 7: Add string
For the last part, cut a piece of string and tie it onto both sides of the dowel.

Conclusion
Now your handmade banner is all ready to hang and enjoy.
Happy crafting!