DIY Macrame-Wrapped Mason Jar
Updated on November 19, 2025
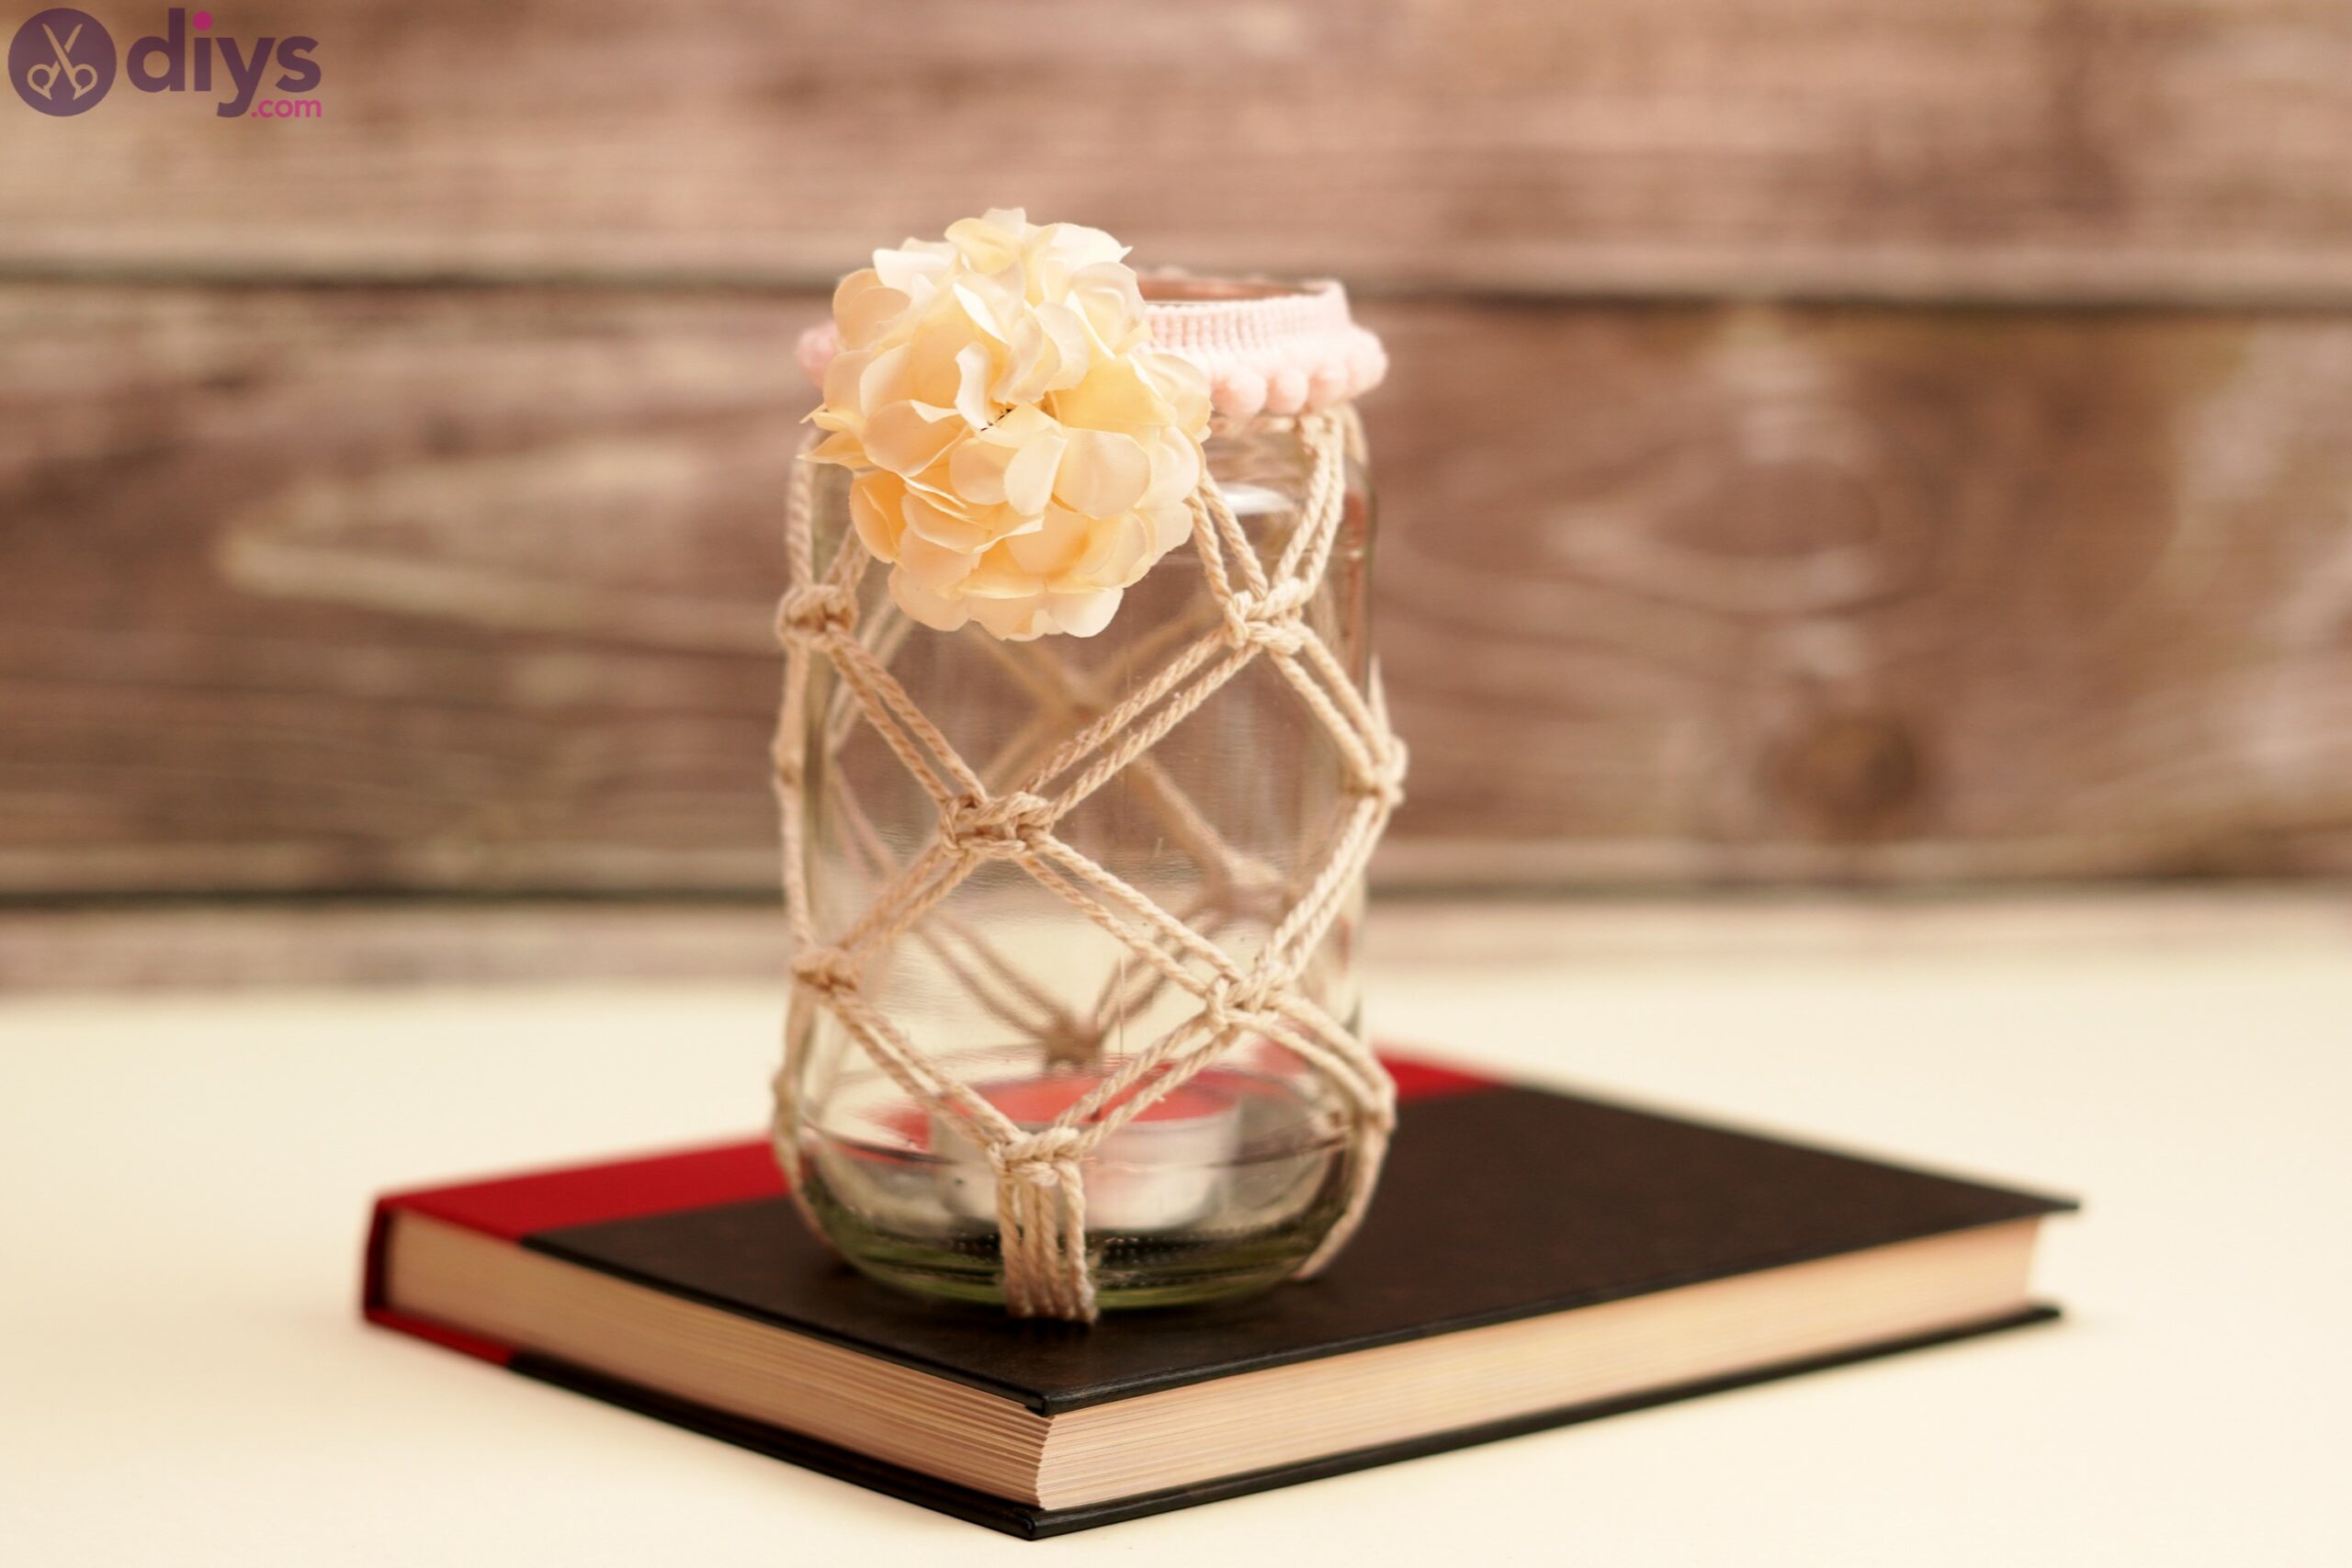
A macrame-wrapped mason jar is a unique way to spruce up your home decor and create lovely gifts for family, friends, coworkers, and teachers. A macrame-wrapped mason jar is a mason jar decorated with macrame yarn tied in knots and other embellishments. The resulting piece creates a beautiful, functional home decor statement with incredible versatility.

For example, it can hold candles, potpourri, dried flowers, jewelry, small office supplies, or spices. It’s a great last-minute gift for Valentine’s Day, Mother’s Day, birthdays, and other special occasions.
Crafting a macrame-wrapped mason jar is a fantastic way to upcycle an old mason jar. This DIY project is easy for adults and kids old enough to securely handle scissors and hot glue. For example, parents or teachers can take this opportunity to teach first graders about macrame, which helps them practice tying knots and following patterns.
Macrame decorations are often seen in rustic, boho-chic, coastal, traditional boho, and bohemian interior designs; they add texture and visual interest to a space without overwhelming it. A macrame-wrapped mason jar works as a standalone piece or in a larger arrangement with other home decor items, such as macrame wall hangings or dreamcatchers, to create a warm and inviting atmosphere.
This tutorial has been refreshed with insights from Ilze Brumele at TheKnotsManual, offering a foundational tutorial on macrame knots, including the square knot. With her expert guidance, we’ve seamlessly crafted a stunning macrame-wrapped mason jar.
Materials:
- Mason jar
- Macrame yarn
- Scissors
- Hot glue
- Pom-pom ribbon
- Artificial flower
Macrame-Wrapped Mason Jar Step by Step?
Follow these step-by-step instructions to craft a macrame-wrapped mason jar:
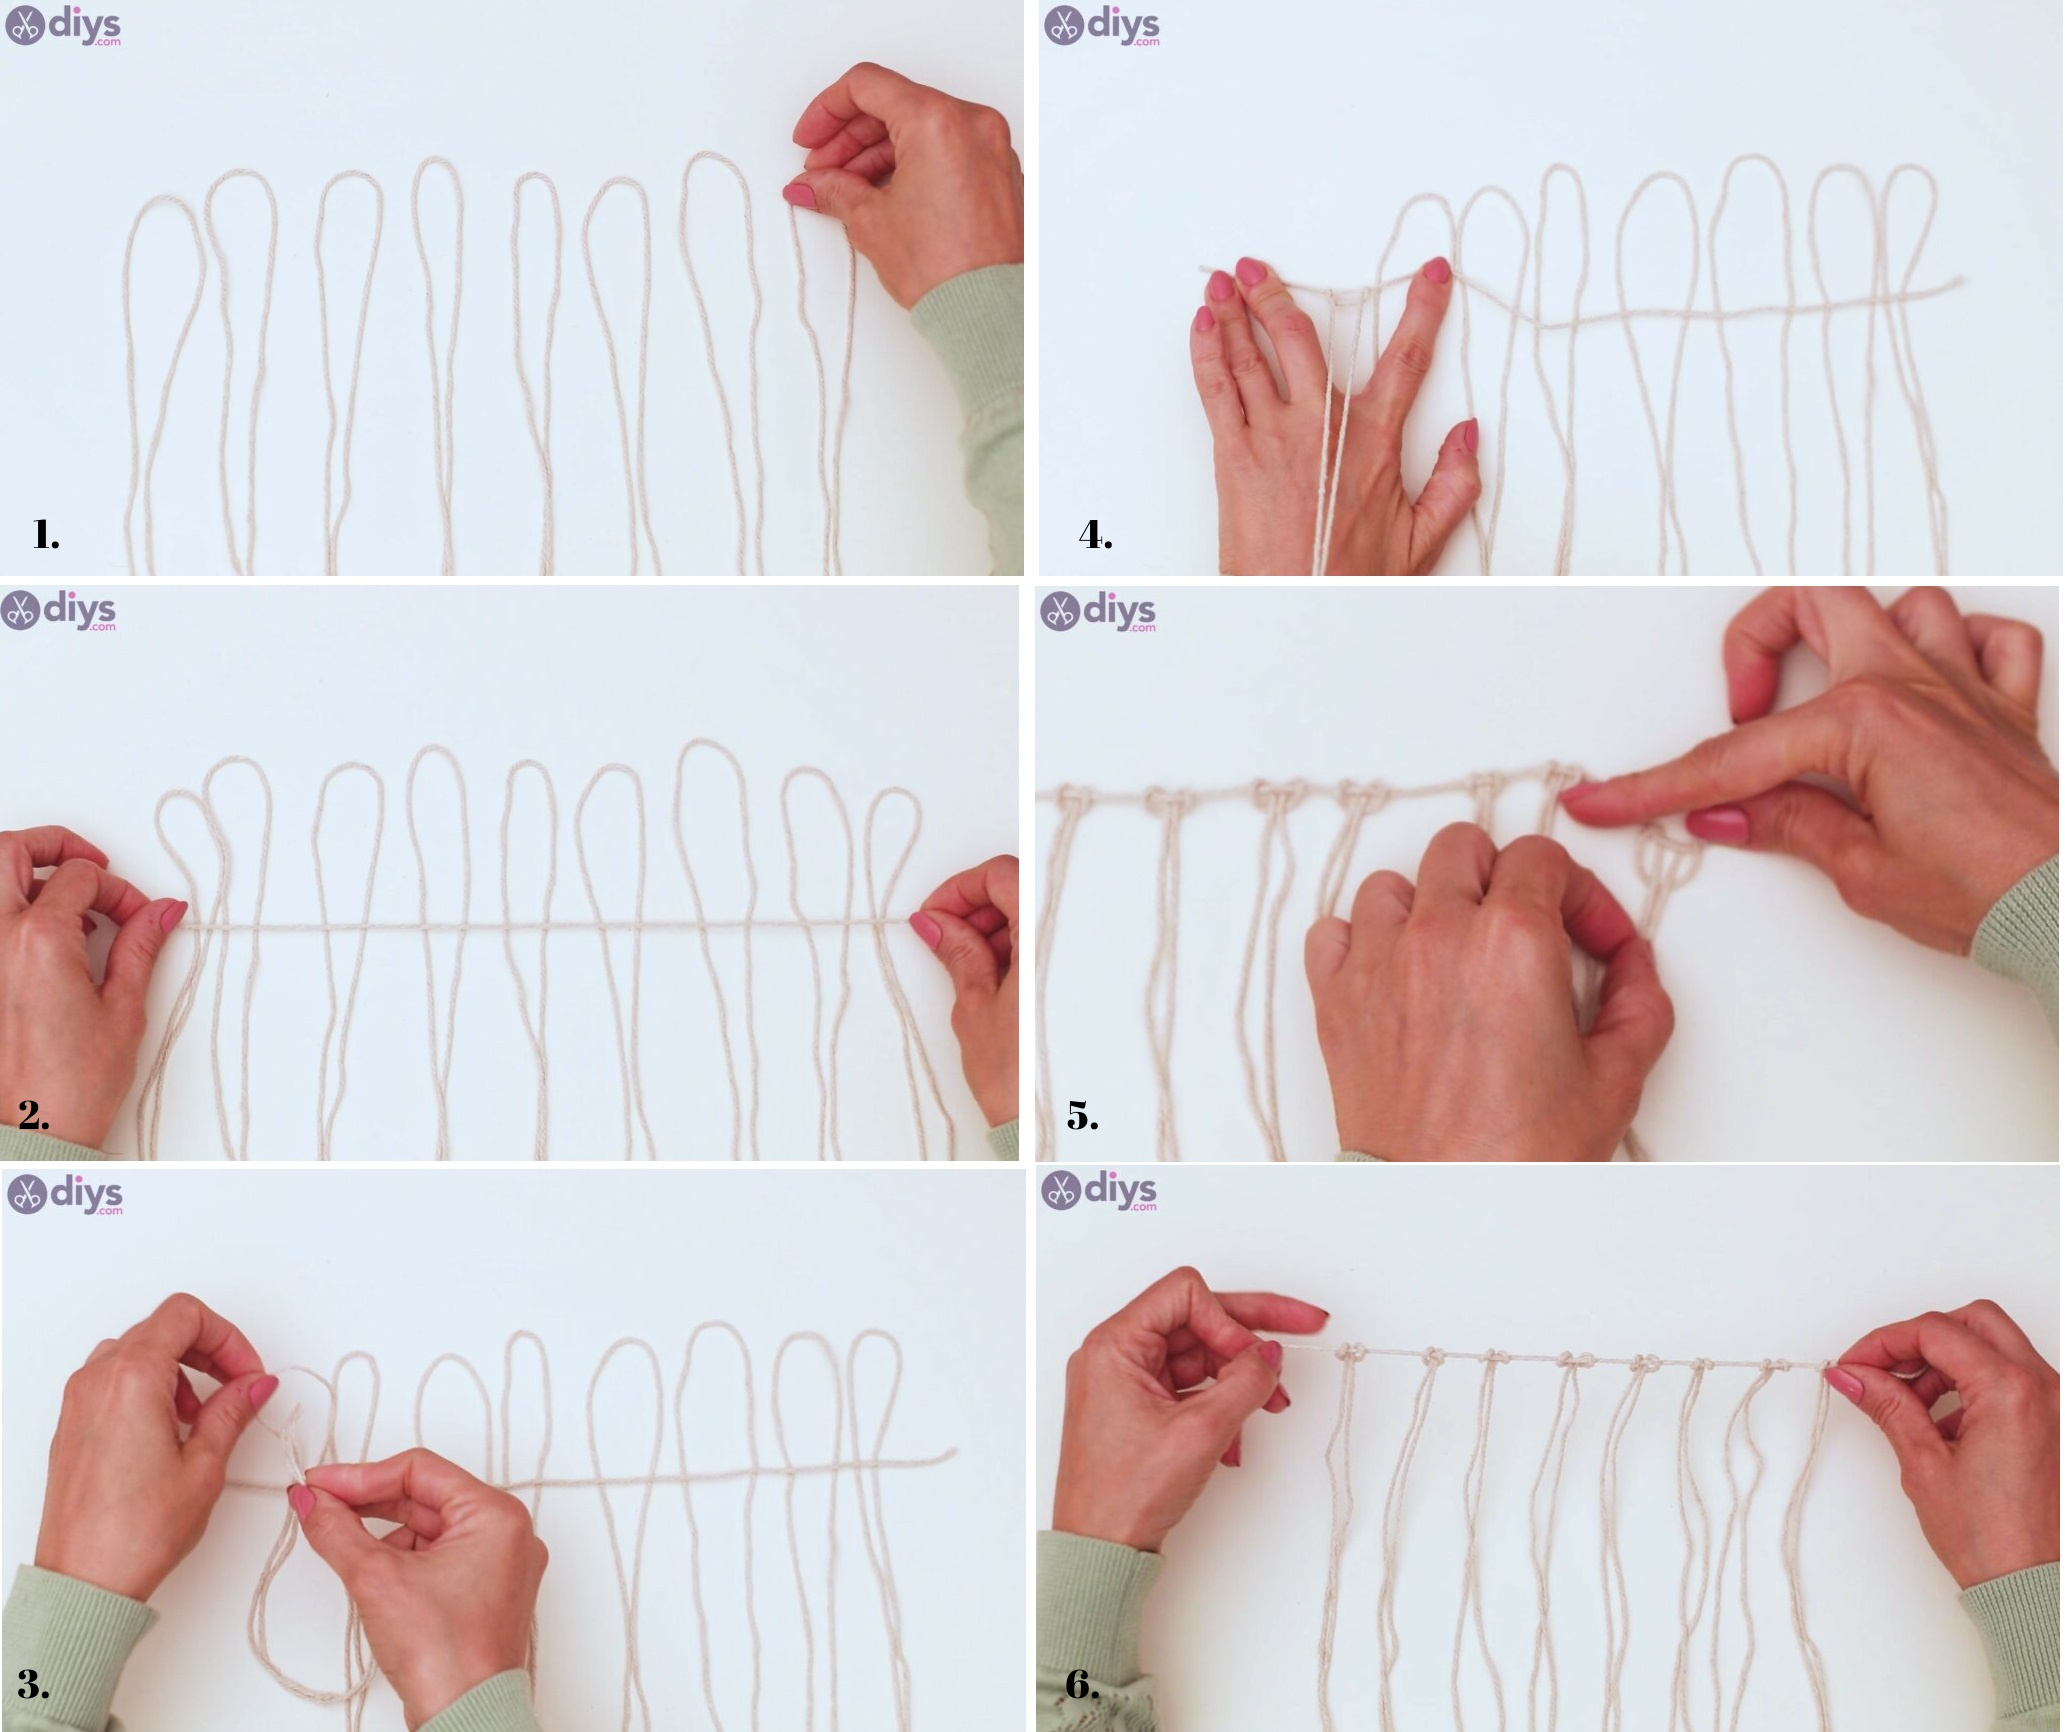
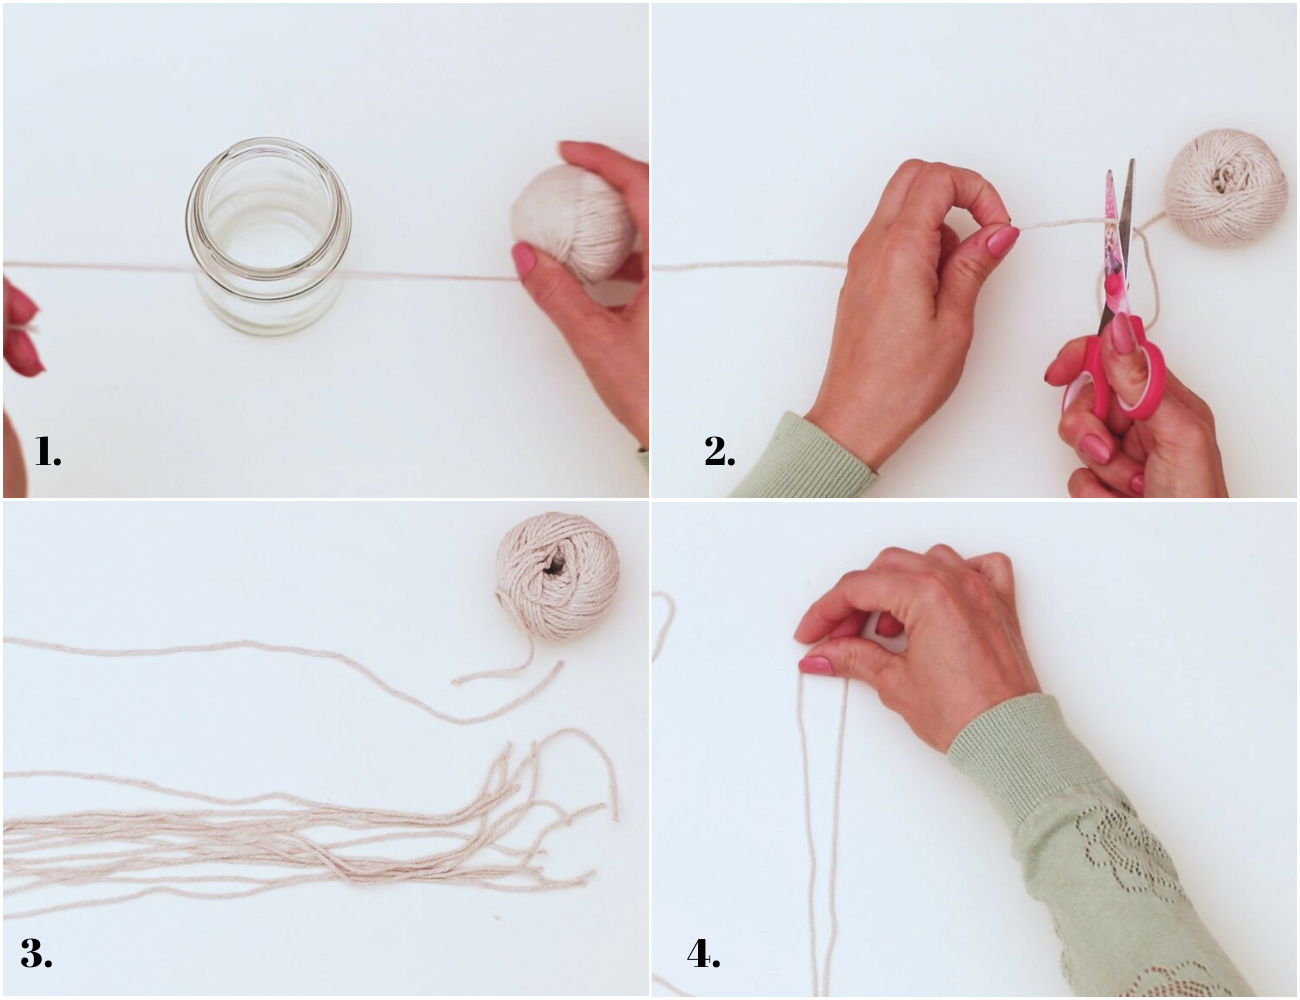
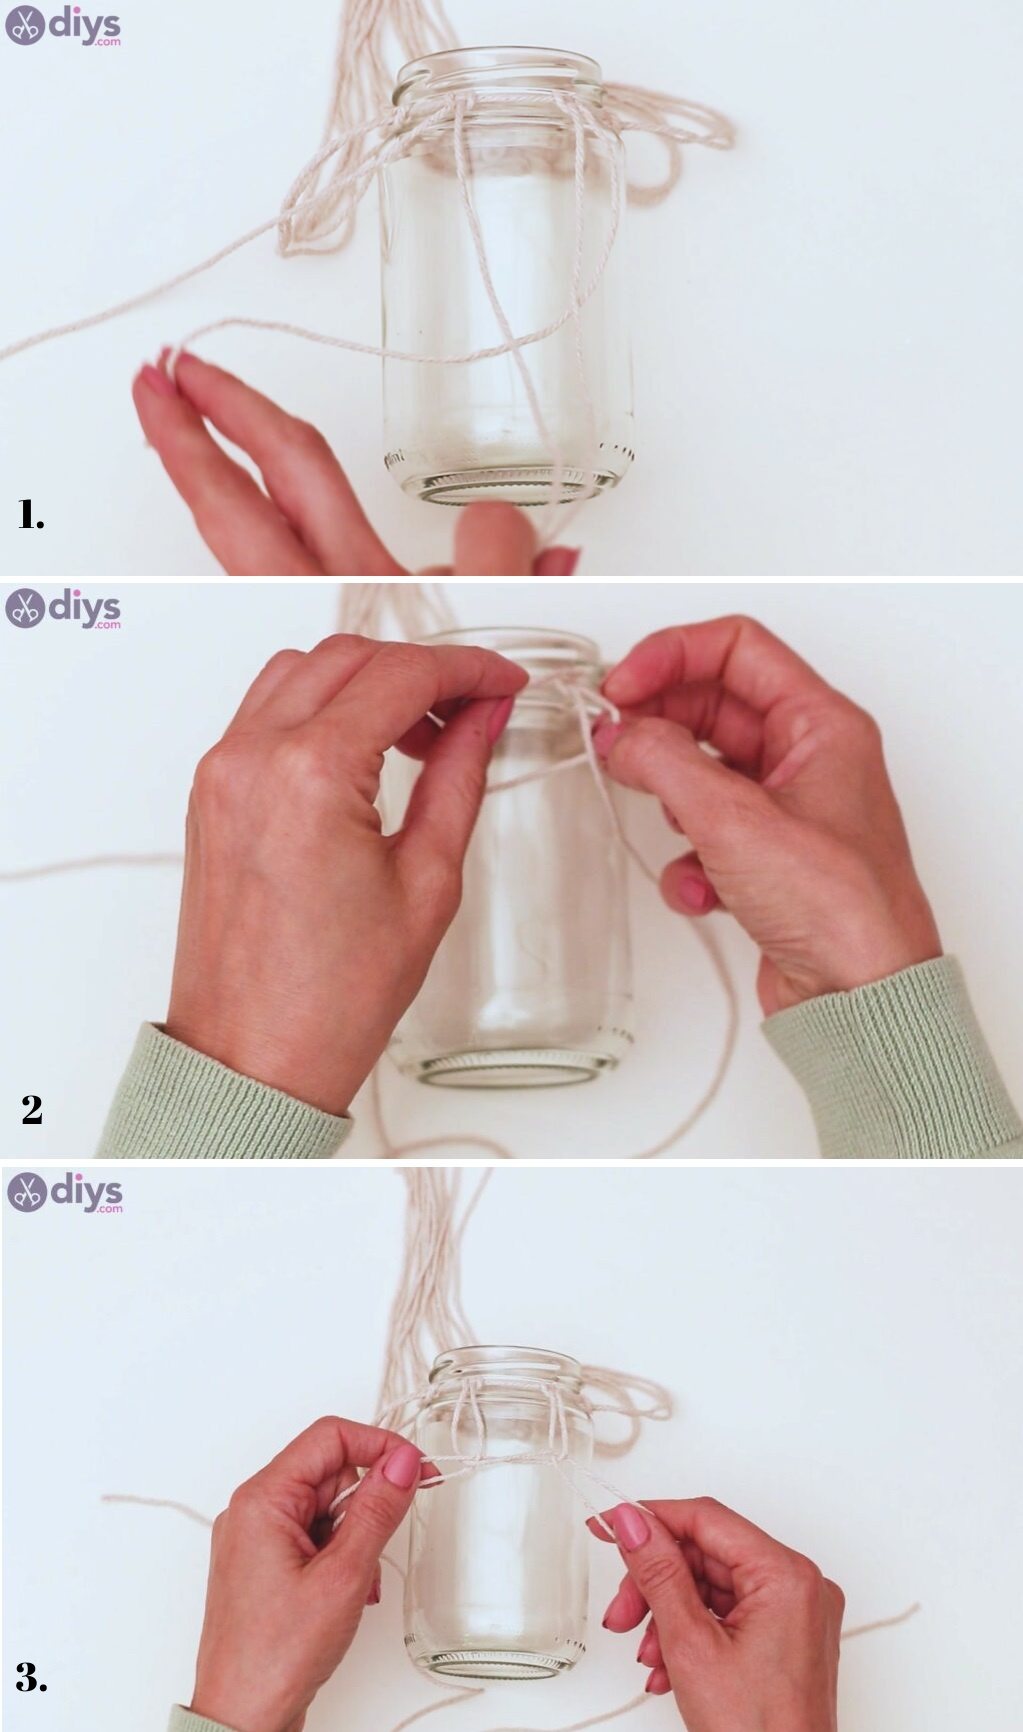
1. Prepare the macrame yarn.

Measure a piece of yarn by wrapping it around the mouth of the mason jar. Cut a piece longer than the jar’s circumference, which we will refer to as the base thread. Next, cut eight extra pieces of yarn roughly six times the height of the mason jar. Make loops of these eight yarn pieces and place them vertically on the table with the tails at equal lengths.
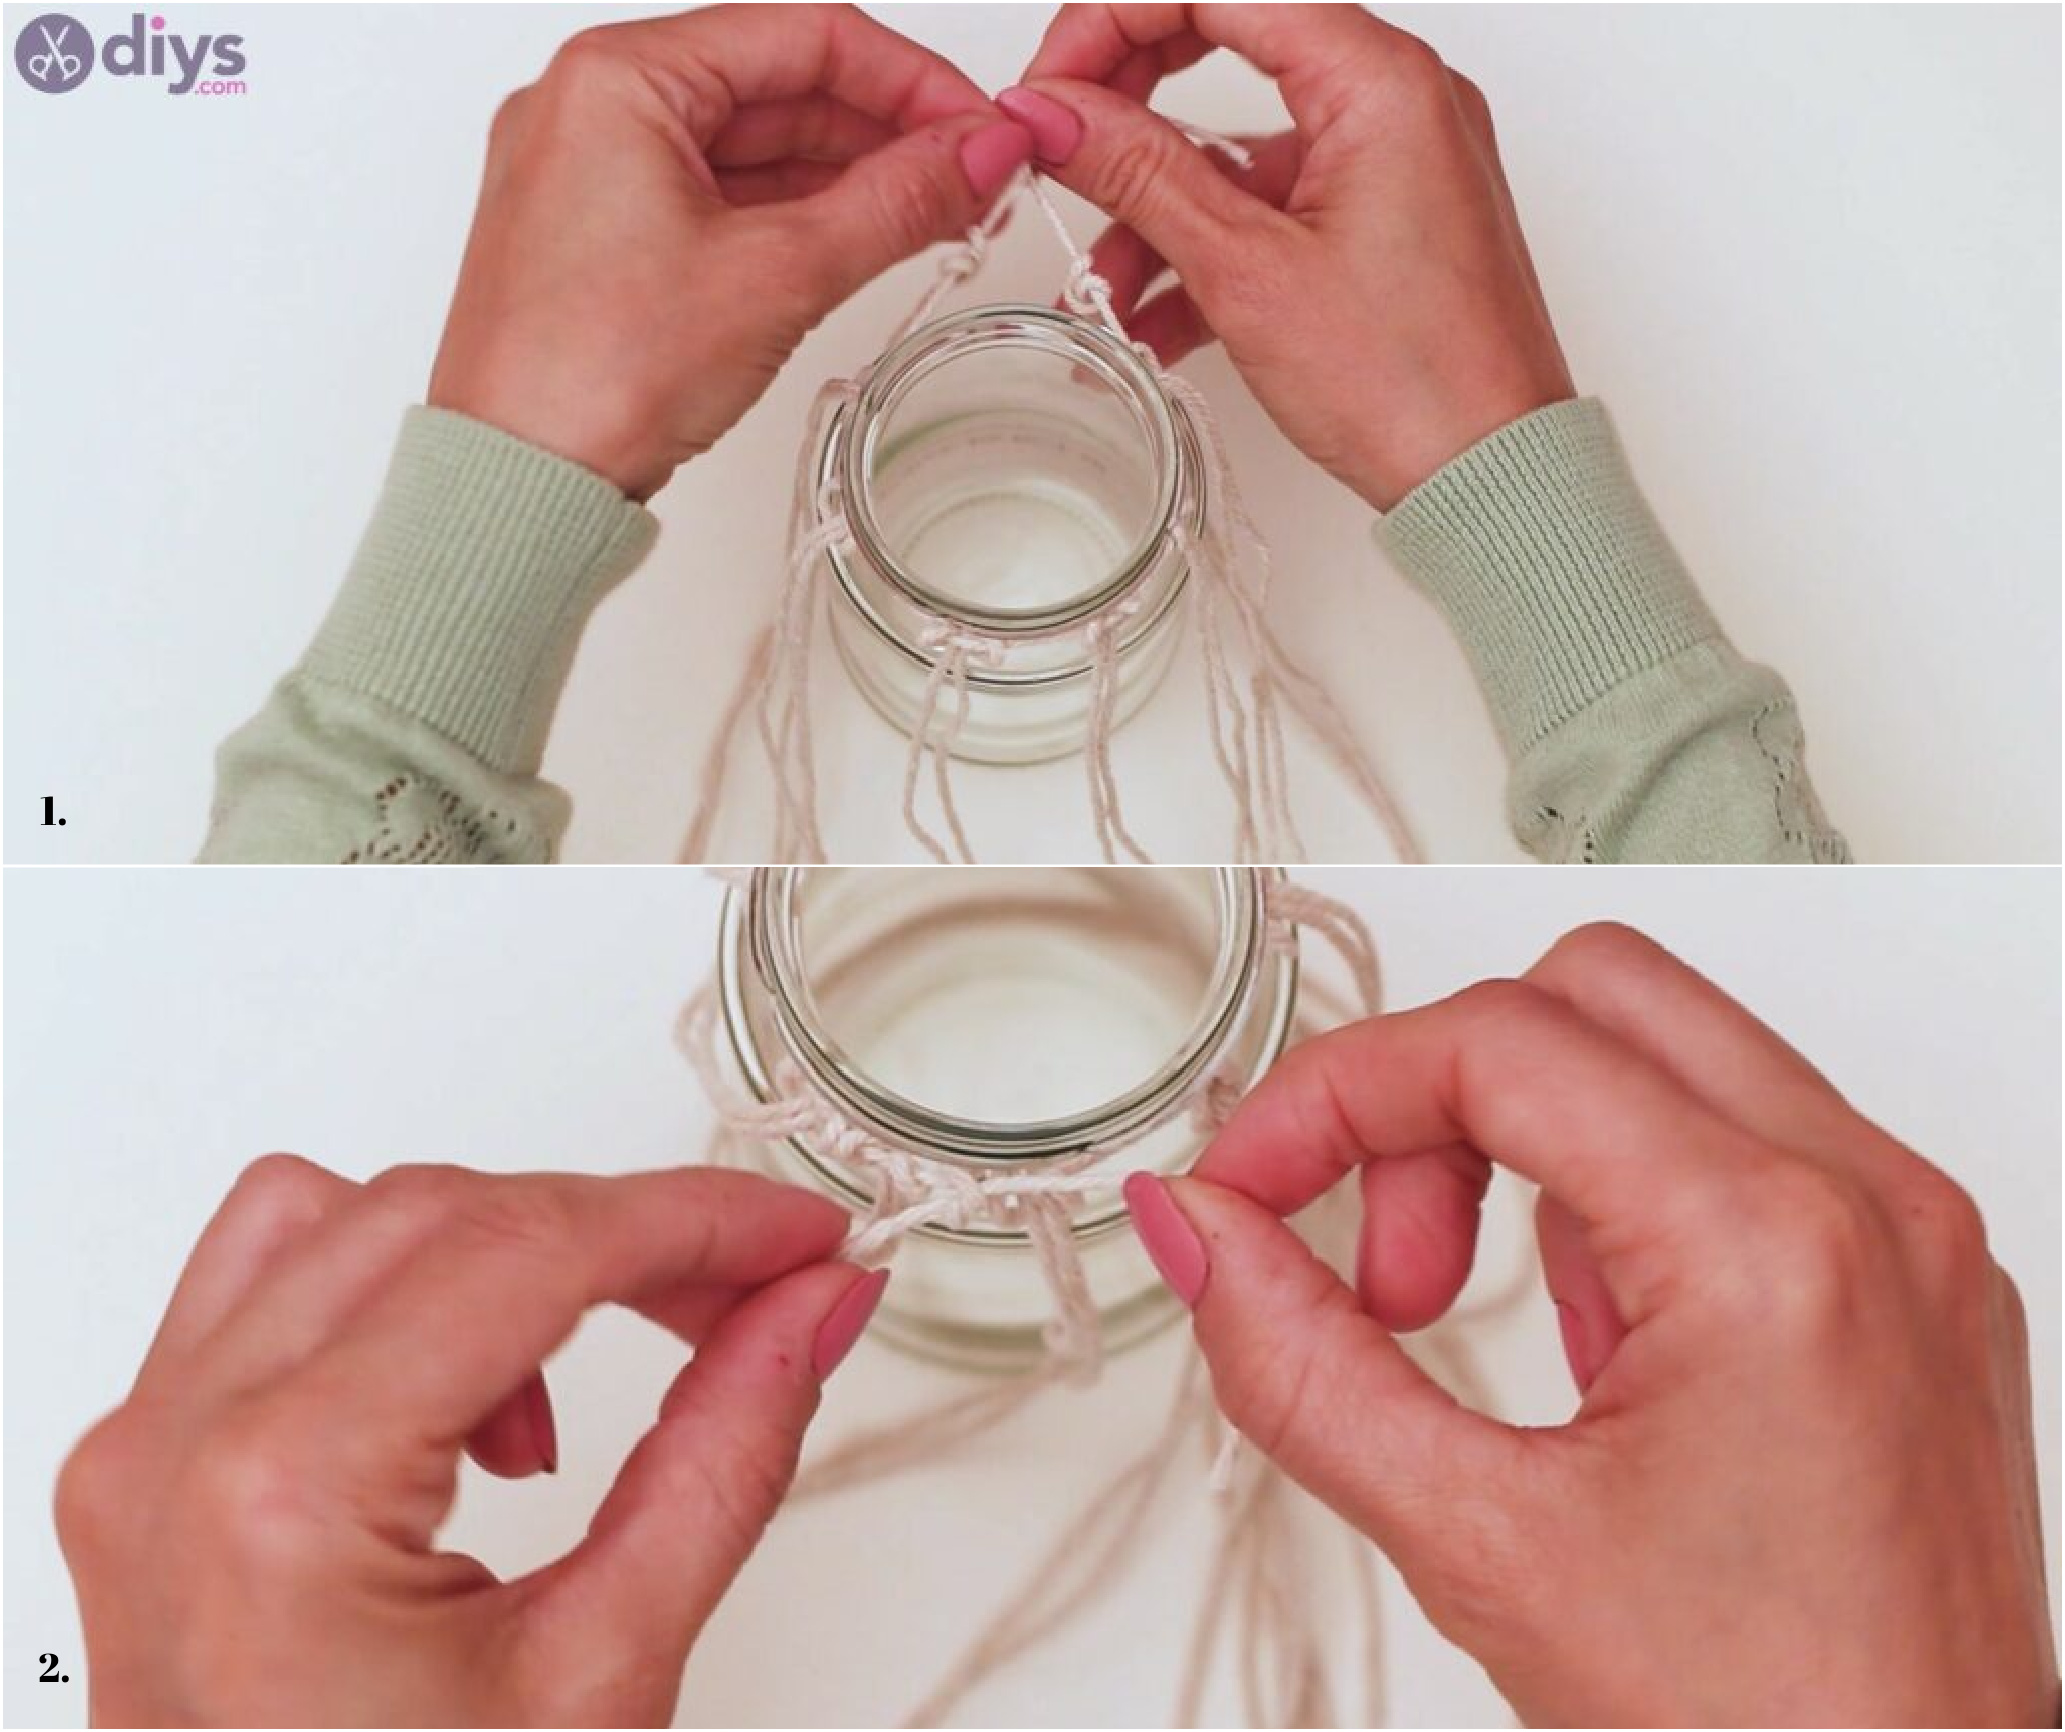
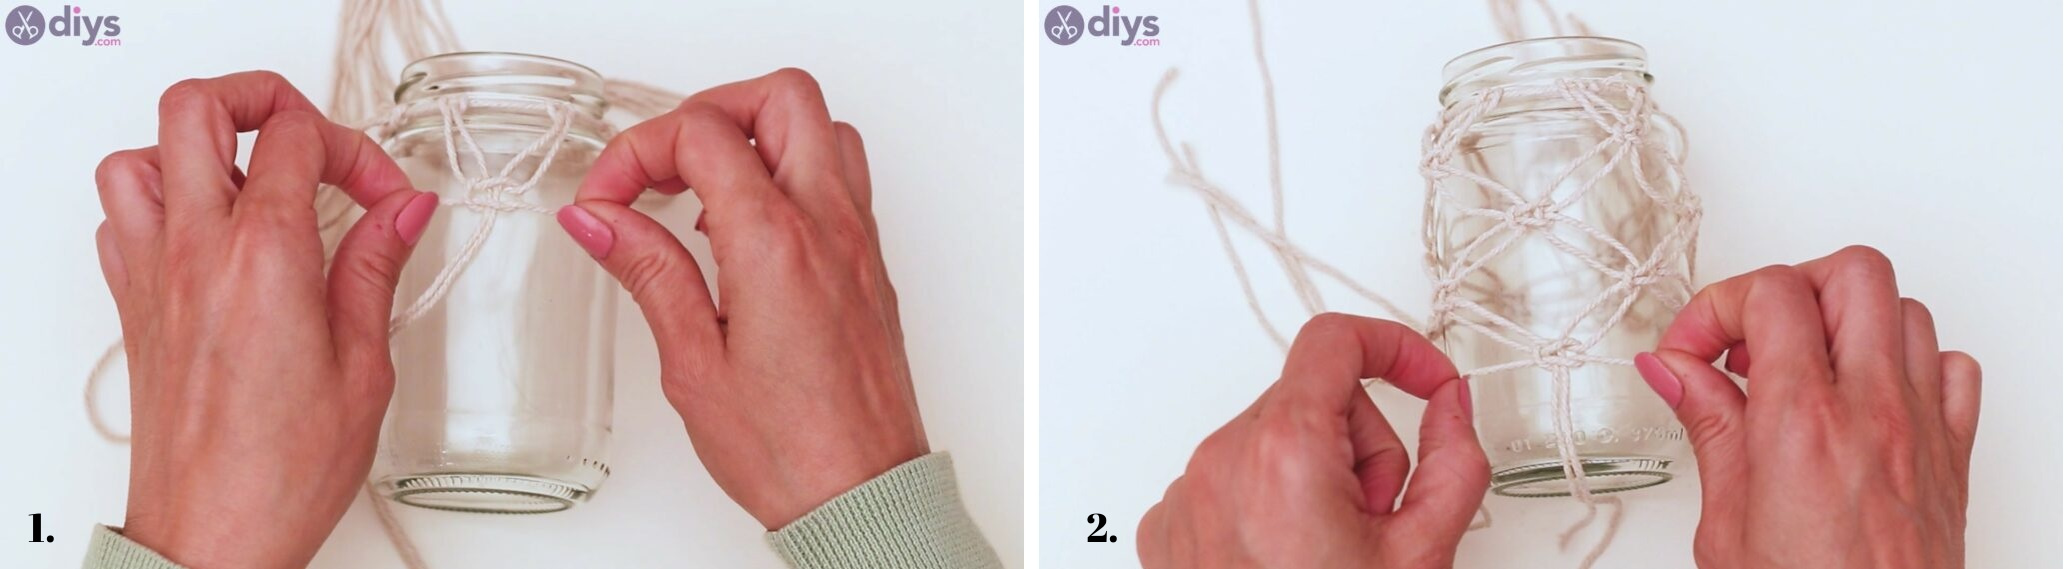
2. Make basic macrame knots.

Take the base thread and place it on top of the eight yarn loops. Pick up the tails and pass them through the top loop, over the base thread; this knot is called a lark head. Keep a couple of fingers on the base thread while pulling the lark heads together. Continue tying the lark head on all eight threads; don’t pull too tightly, or you’ll have to reposition the threads.
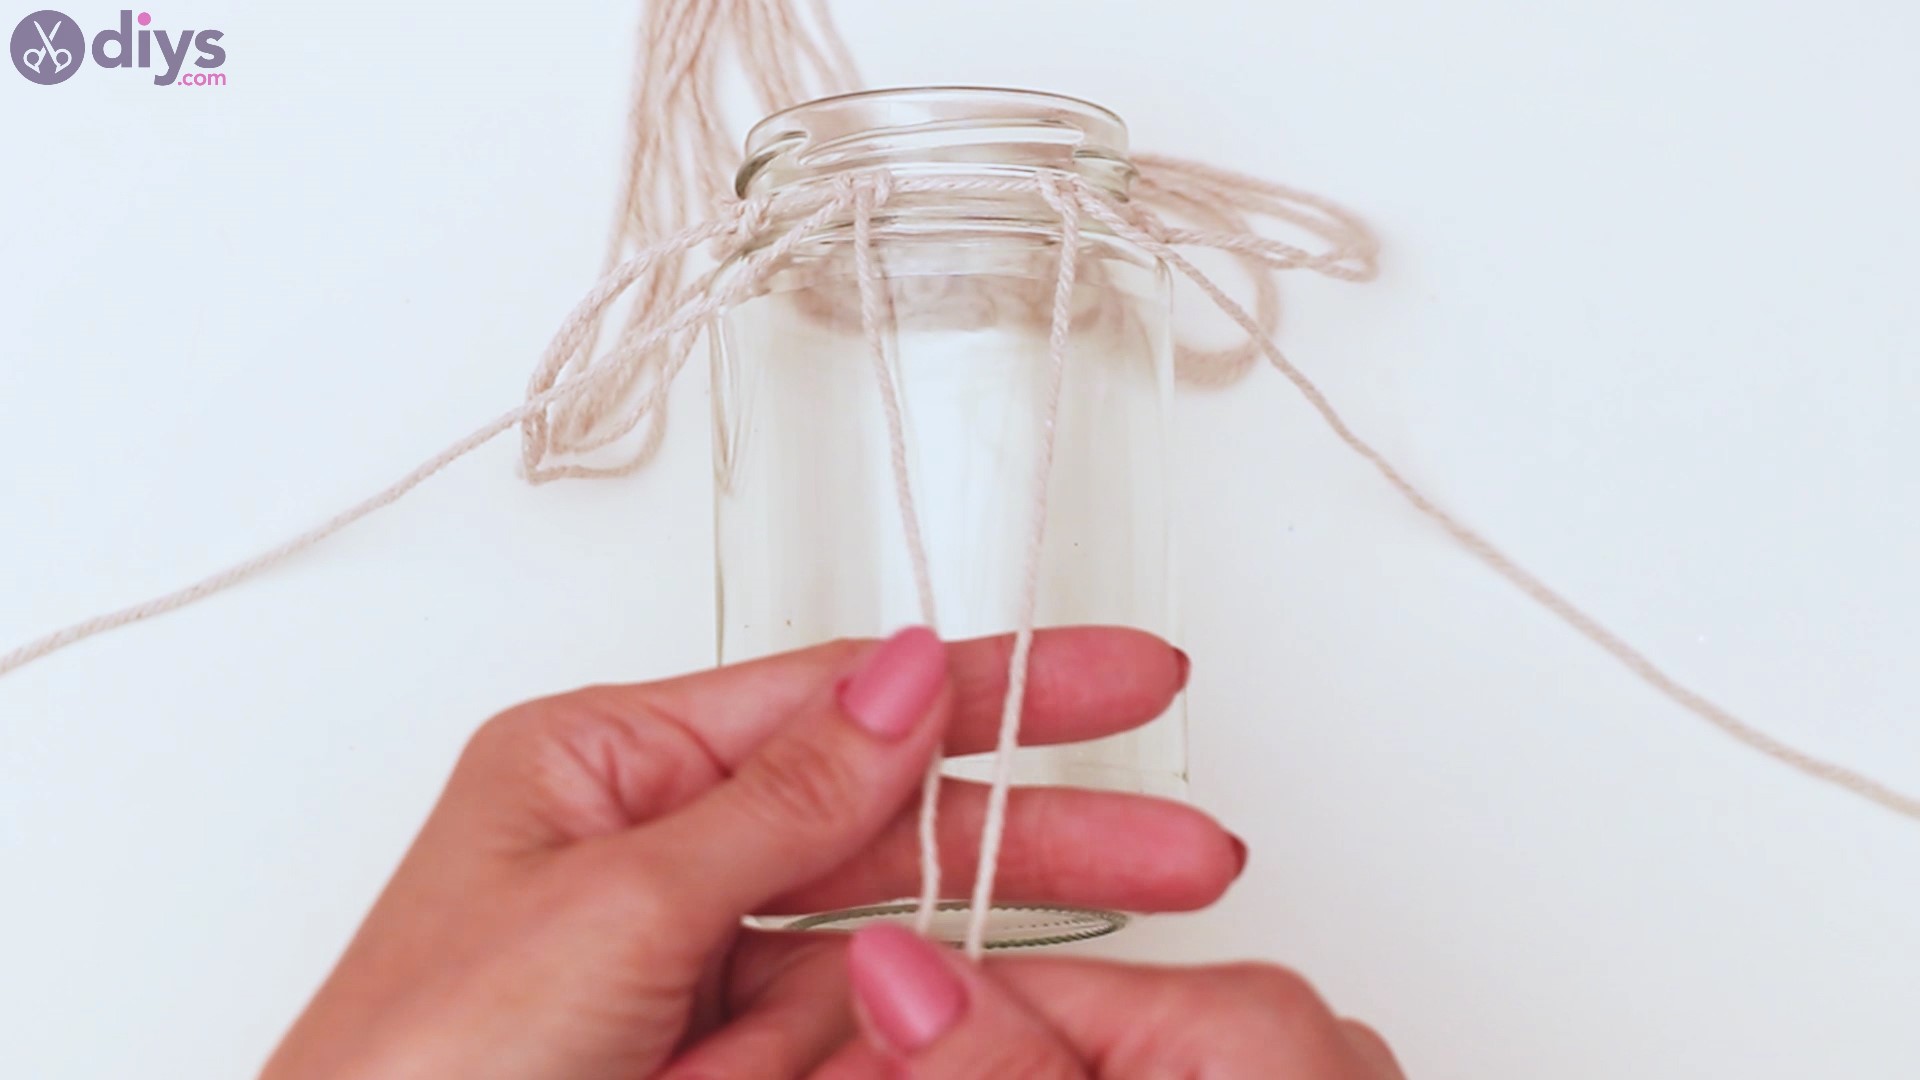
3. Cover the mason jar.
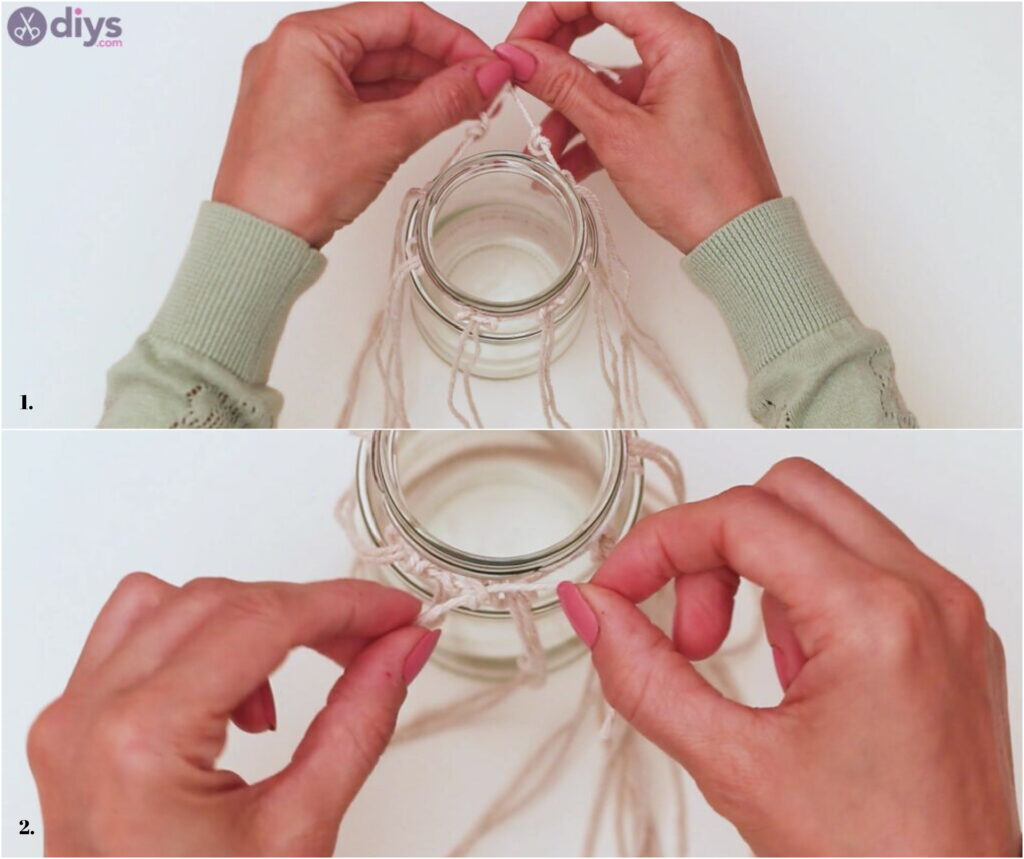
Take the base thread and tie it tightly around the lip of the mason jar. Take care not to let this thread loose at any point, as it will ruin your design.
4. Weave the yarn.

To form the typical square knots, use the thread ends from two knots at a time, totaling four thread ends. To better illustrate this process, we’ll label these threads in the visible order – 1, 2, 3, and 4.
5. Make the square knot.
Start by joining threads 2 and 3. Bring thread number 4 under threads 2 and 3. Next, bring thread 1 over 2 and 3, pushing the end through the loop created between threads 3 and 4. Pull the design together slowly but not too tightly.
6. Prepare the first double knot.
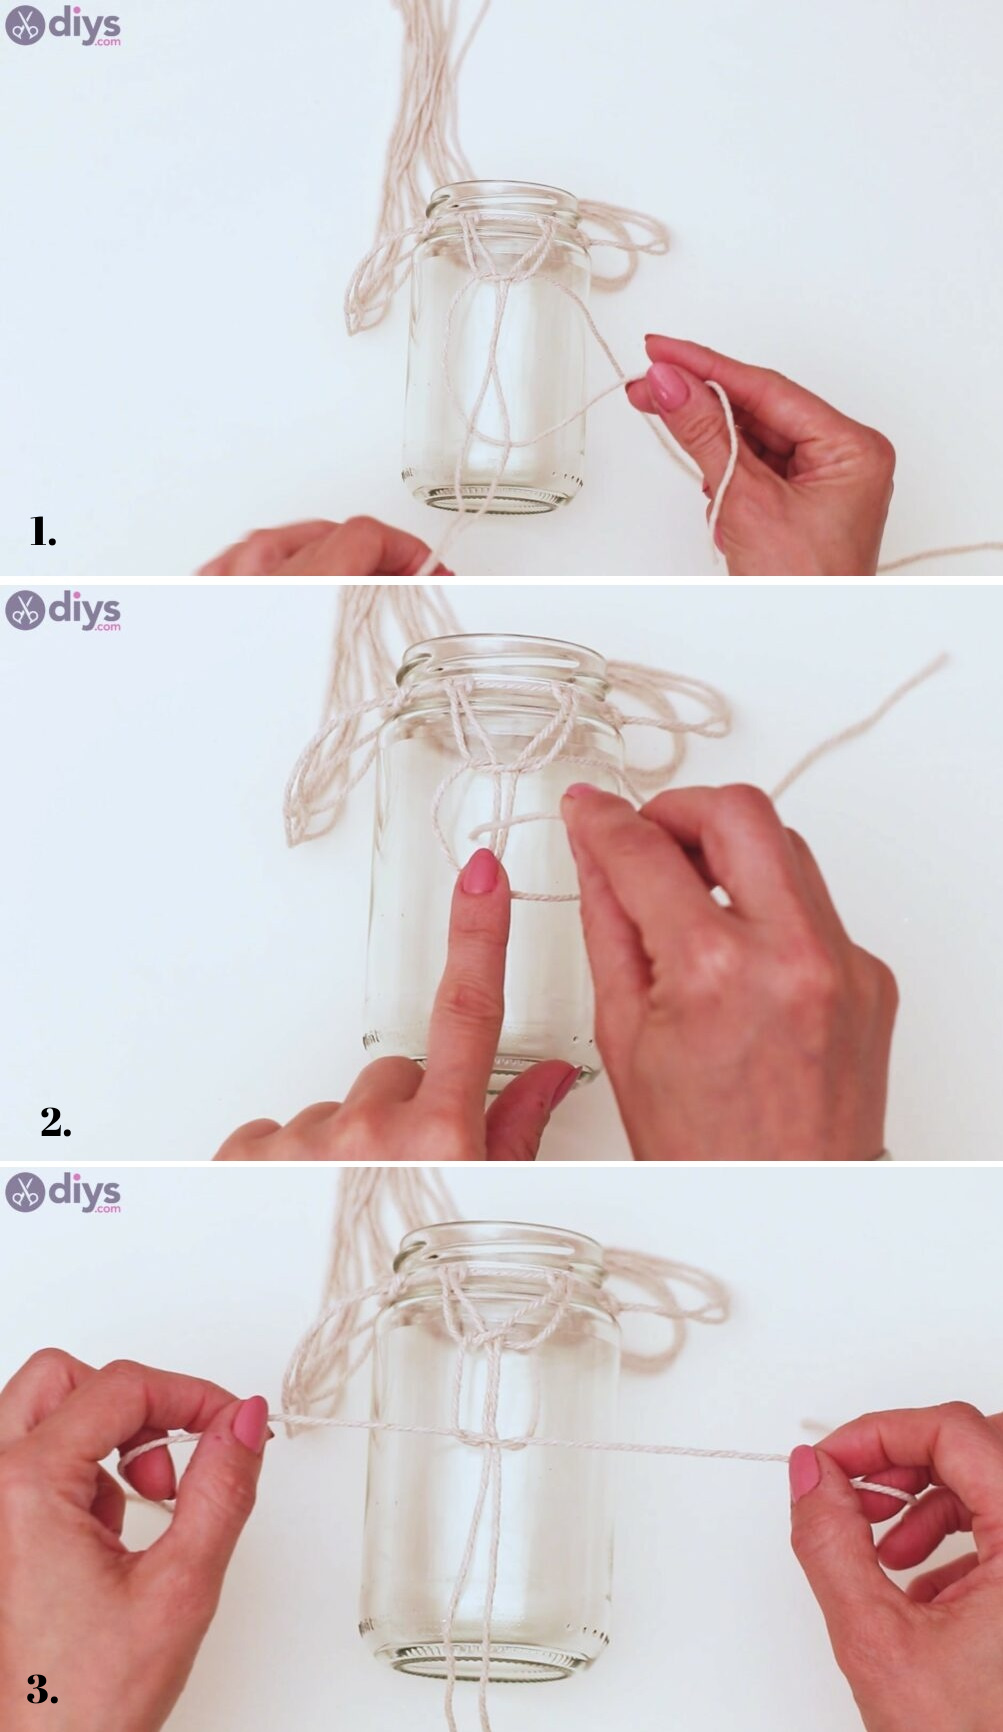
Continue with the same pattern but in reverse. Label the threads in the visible order, again as 1, 2, 3, and 4. Push thread 1 under 2 and 3. Place a finger over the intersection between the threads and pick up thread 4, bringing it over and pushing it through the loop created between 1, 2 and 3. Tighten the knot, but not too tightly.
7. Finish an entire row of square knots.
Repeat the process with all other threads on the jar. After finishing the first set of double knots, proceed with the alternating square knot pattern. Work downward by tying together two by two threads, creating the same double knot mentioned earlier
8. Glue the macrame yarn.
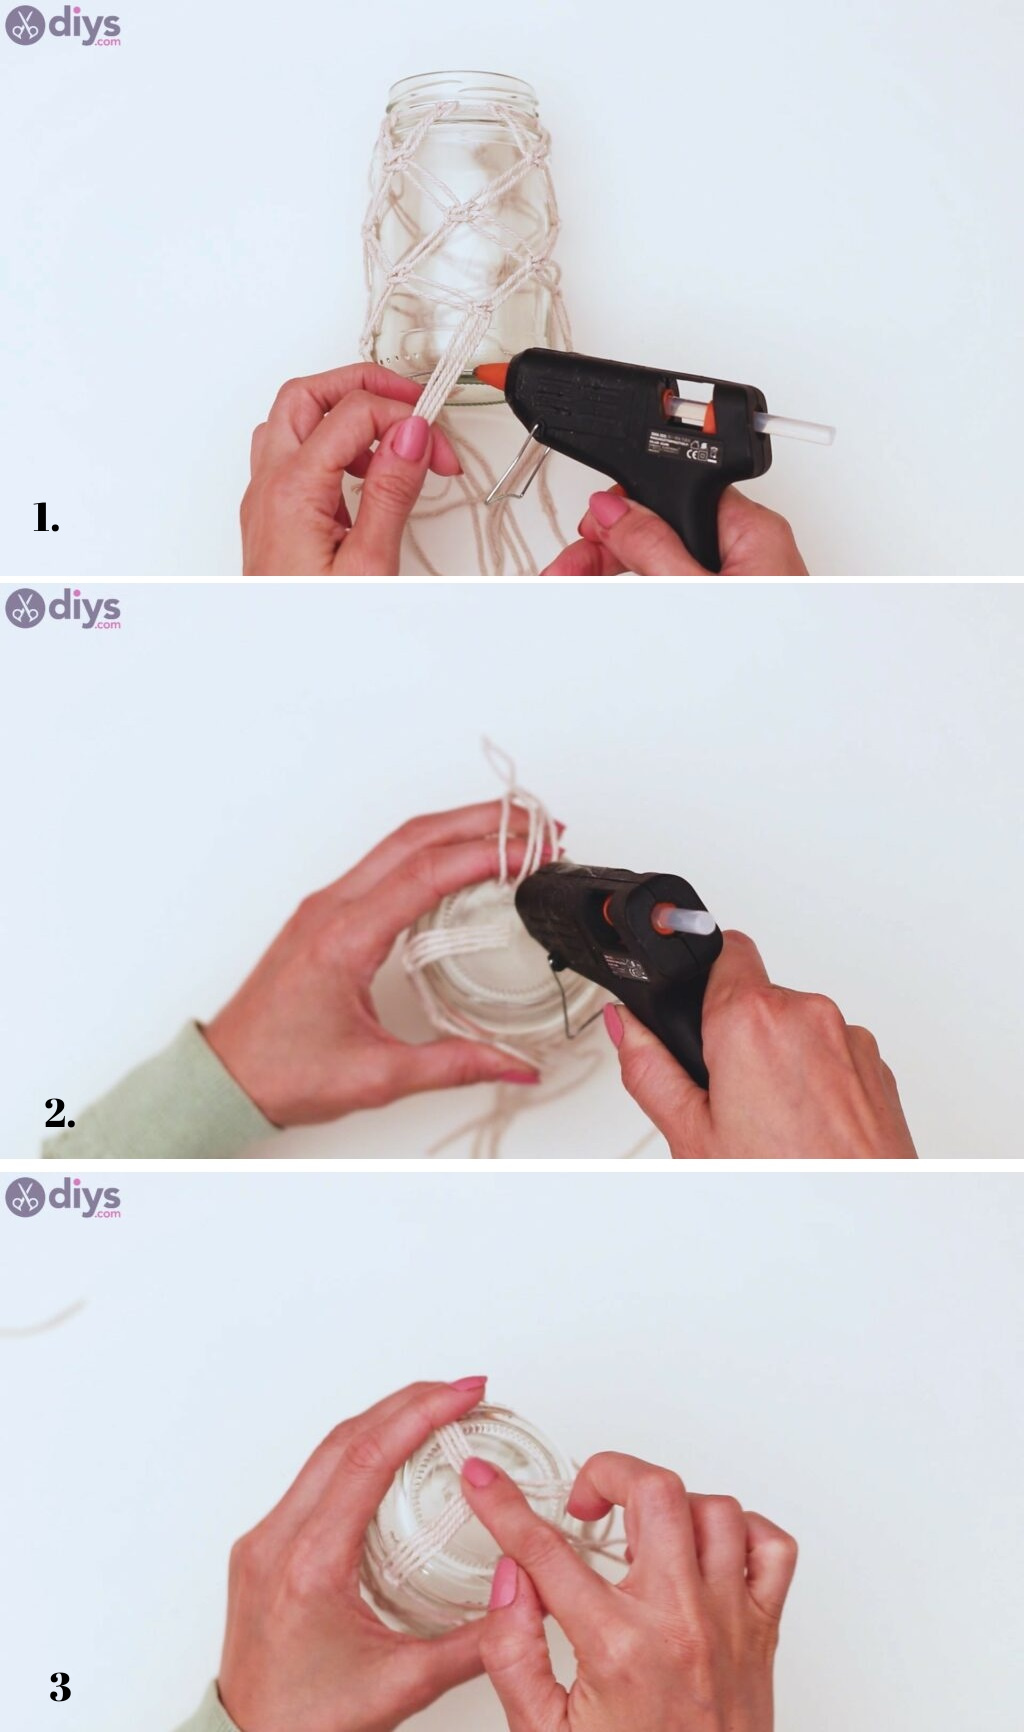
Add plenty of hot glue to the bottom of the mason jar. Then, attach the leftover yarn ends from the square knot pattern. Hold the yarn in place for a few seconds to stick firmly to the jar. Don’t pull on the yarn too much on one side, or your square pattern will look uneven.
9. Attach the pom-pom ribbon.
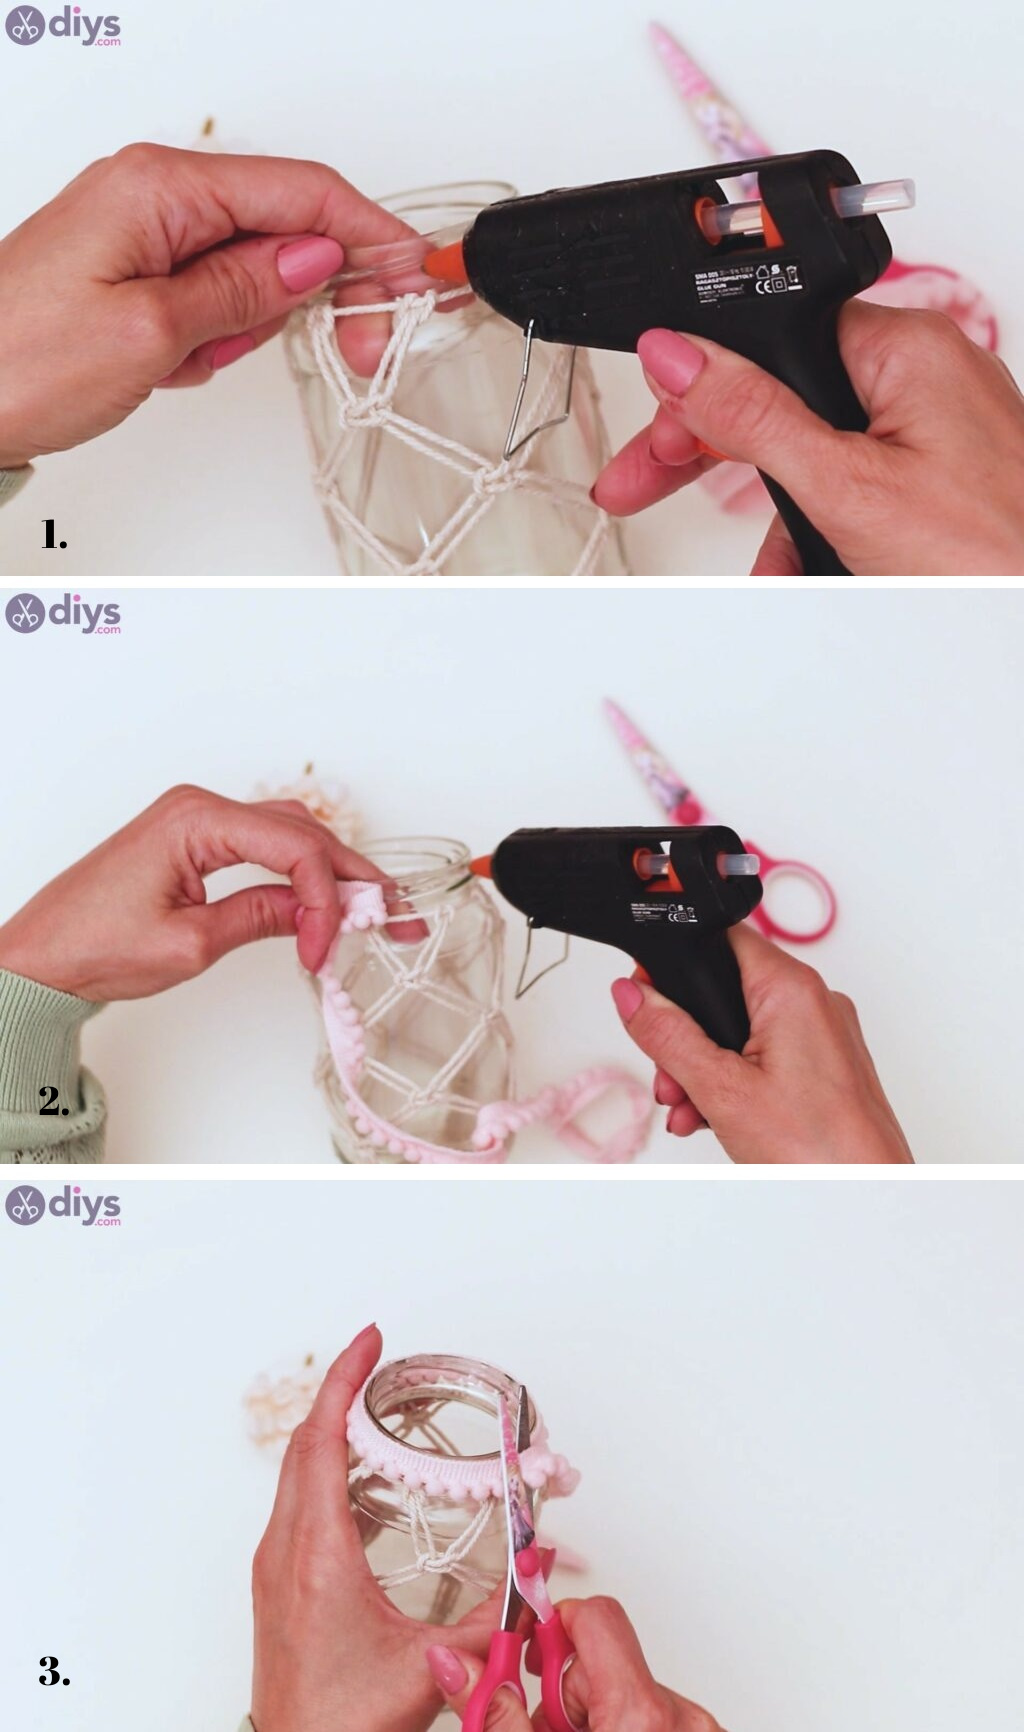
Add hot glue along the mouth of the mason jar. Now, attach one end of the pom-pom ribbon to the mason jar and press down firmly for a few seconds until it sticks securely in place. Slowly wrap the ribbon around the jar’s mouth. Cut off any excess ribbon and firmly glue down both ends.
10. Attach the artificial flower.
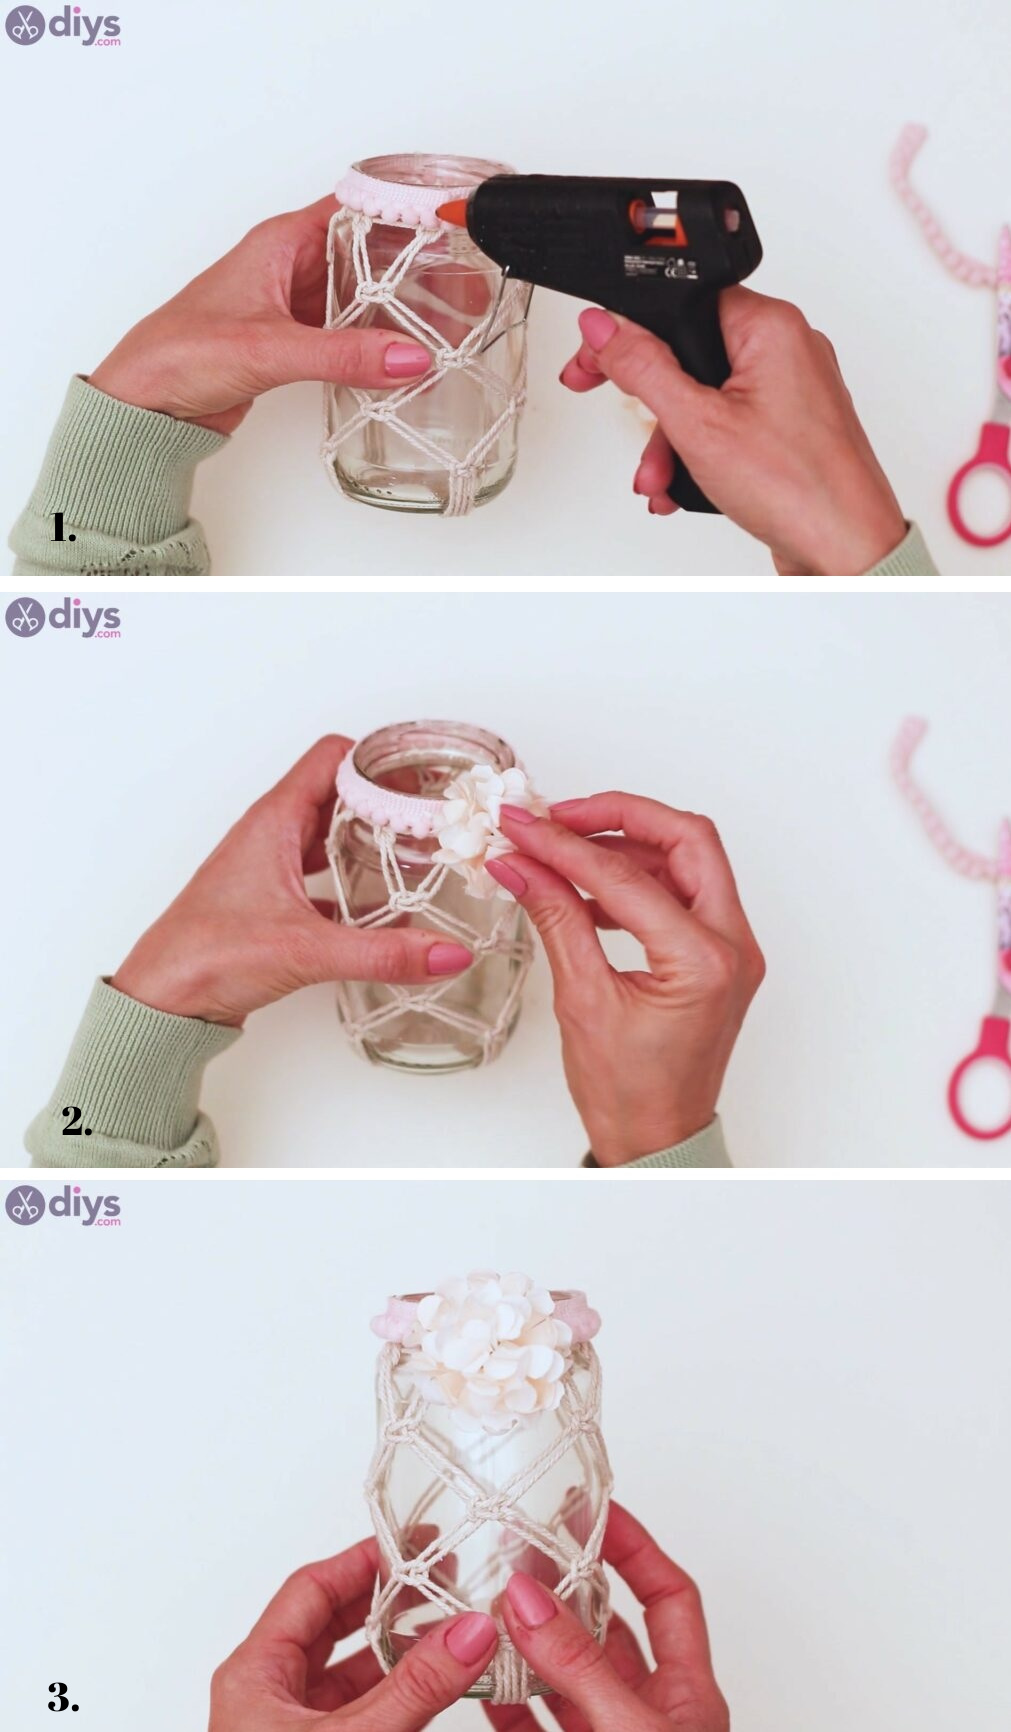
Add more hot glue where you attached the pompom ribbon. Place an artificial flower on top of this spot and press down firmly. Your macrame-wrapped Mason Jar is now ready!
More tips and tricks
Check out our tips and tricks for improving or modifying your macrame-wrapped mason jar:
- Work gently: Be careful not to pull too tightly on any of the threads, or you could ruin your pattern. Also, make sure to position the threads correctly before knotting them together. Otherwise, your pattern will look uneven and wonky.
- Safety first: Hot glue is dangerous, so make sure not to burn yourself while attaching any accessories to the mason jar.
- Ditch the macrame pattern: If you prefer something less challenging than macrame yarn, use wide ribbons. Check out our guide for making a romantic mason jar flower vase since it uses ribbons.
- Use a larger container: A mason jar is quite small, so try using a larger container, like a vase, to apply the macrame-wrapping technique.
- Try different knots: We used a basic square knot pattern in our tutorial, but feel free to try other macrame knots, such as the half hitch knot or the spiral stitch.
Measurement to start the macrome?
Each length to begin with?
5 x the jar length 3x the jar length?