How to Craft a DIY Picture Holder with Heart String Art for Valentine’s Day
Updated on November 19, 2025


A DIY picture holder with heart string art is a lovely home decor item or Valentine’s Day gift. Read on to learn how to craft a photo holder with heart-shaped string art in 6 simple steps.
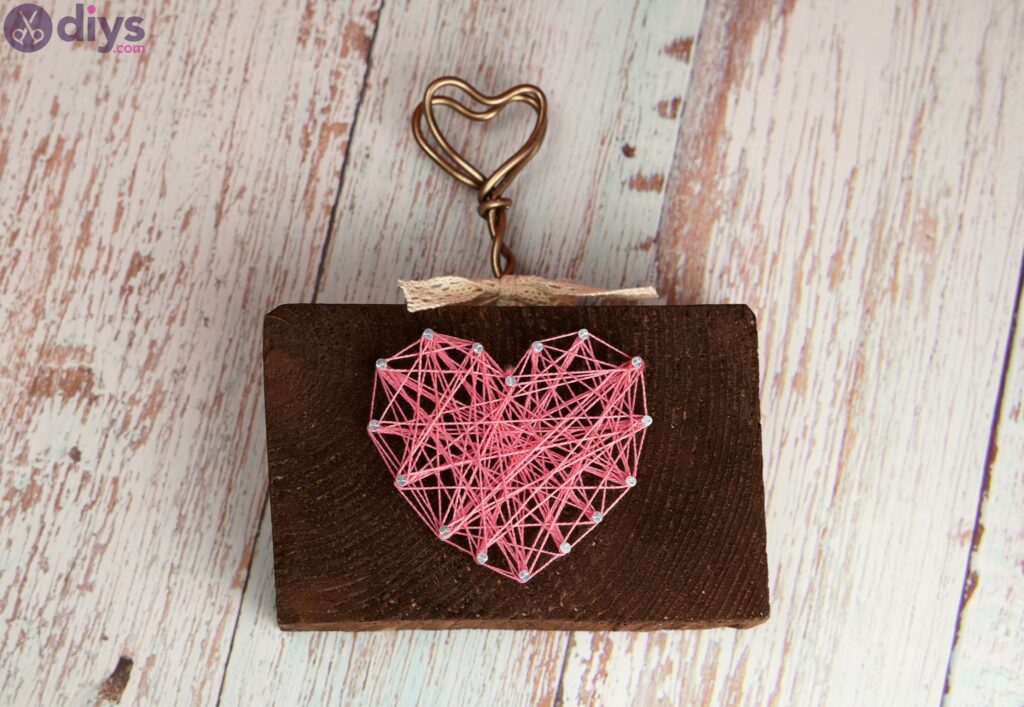
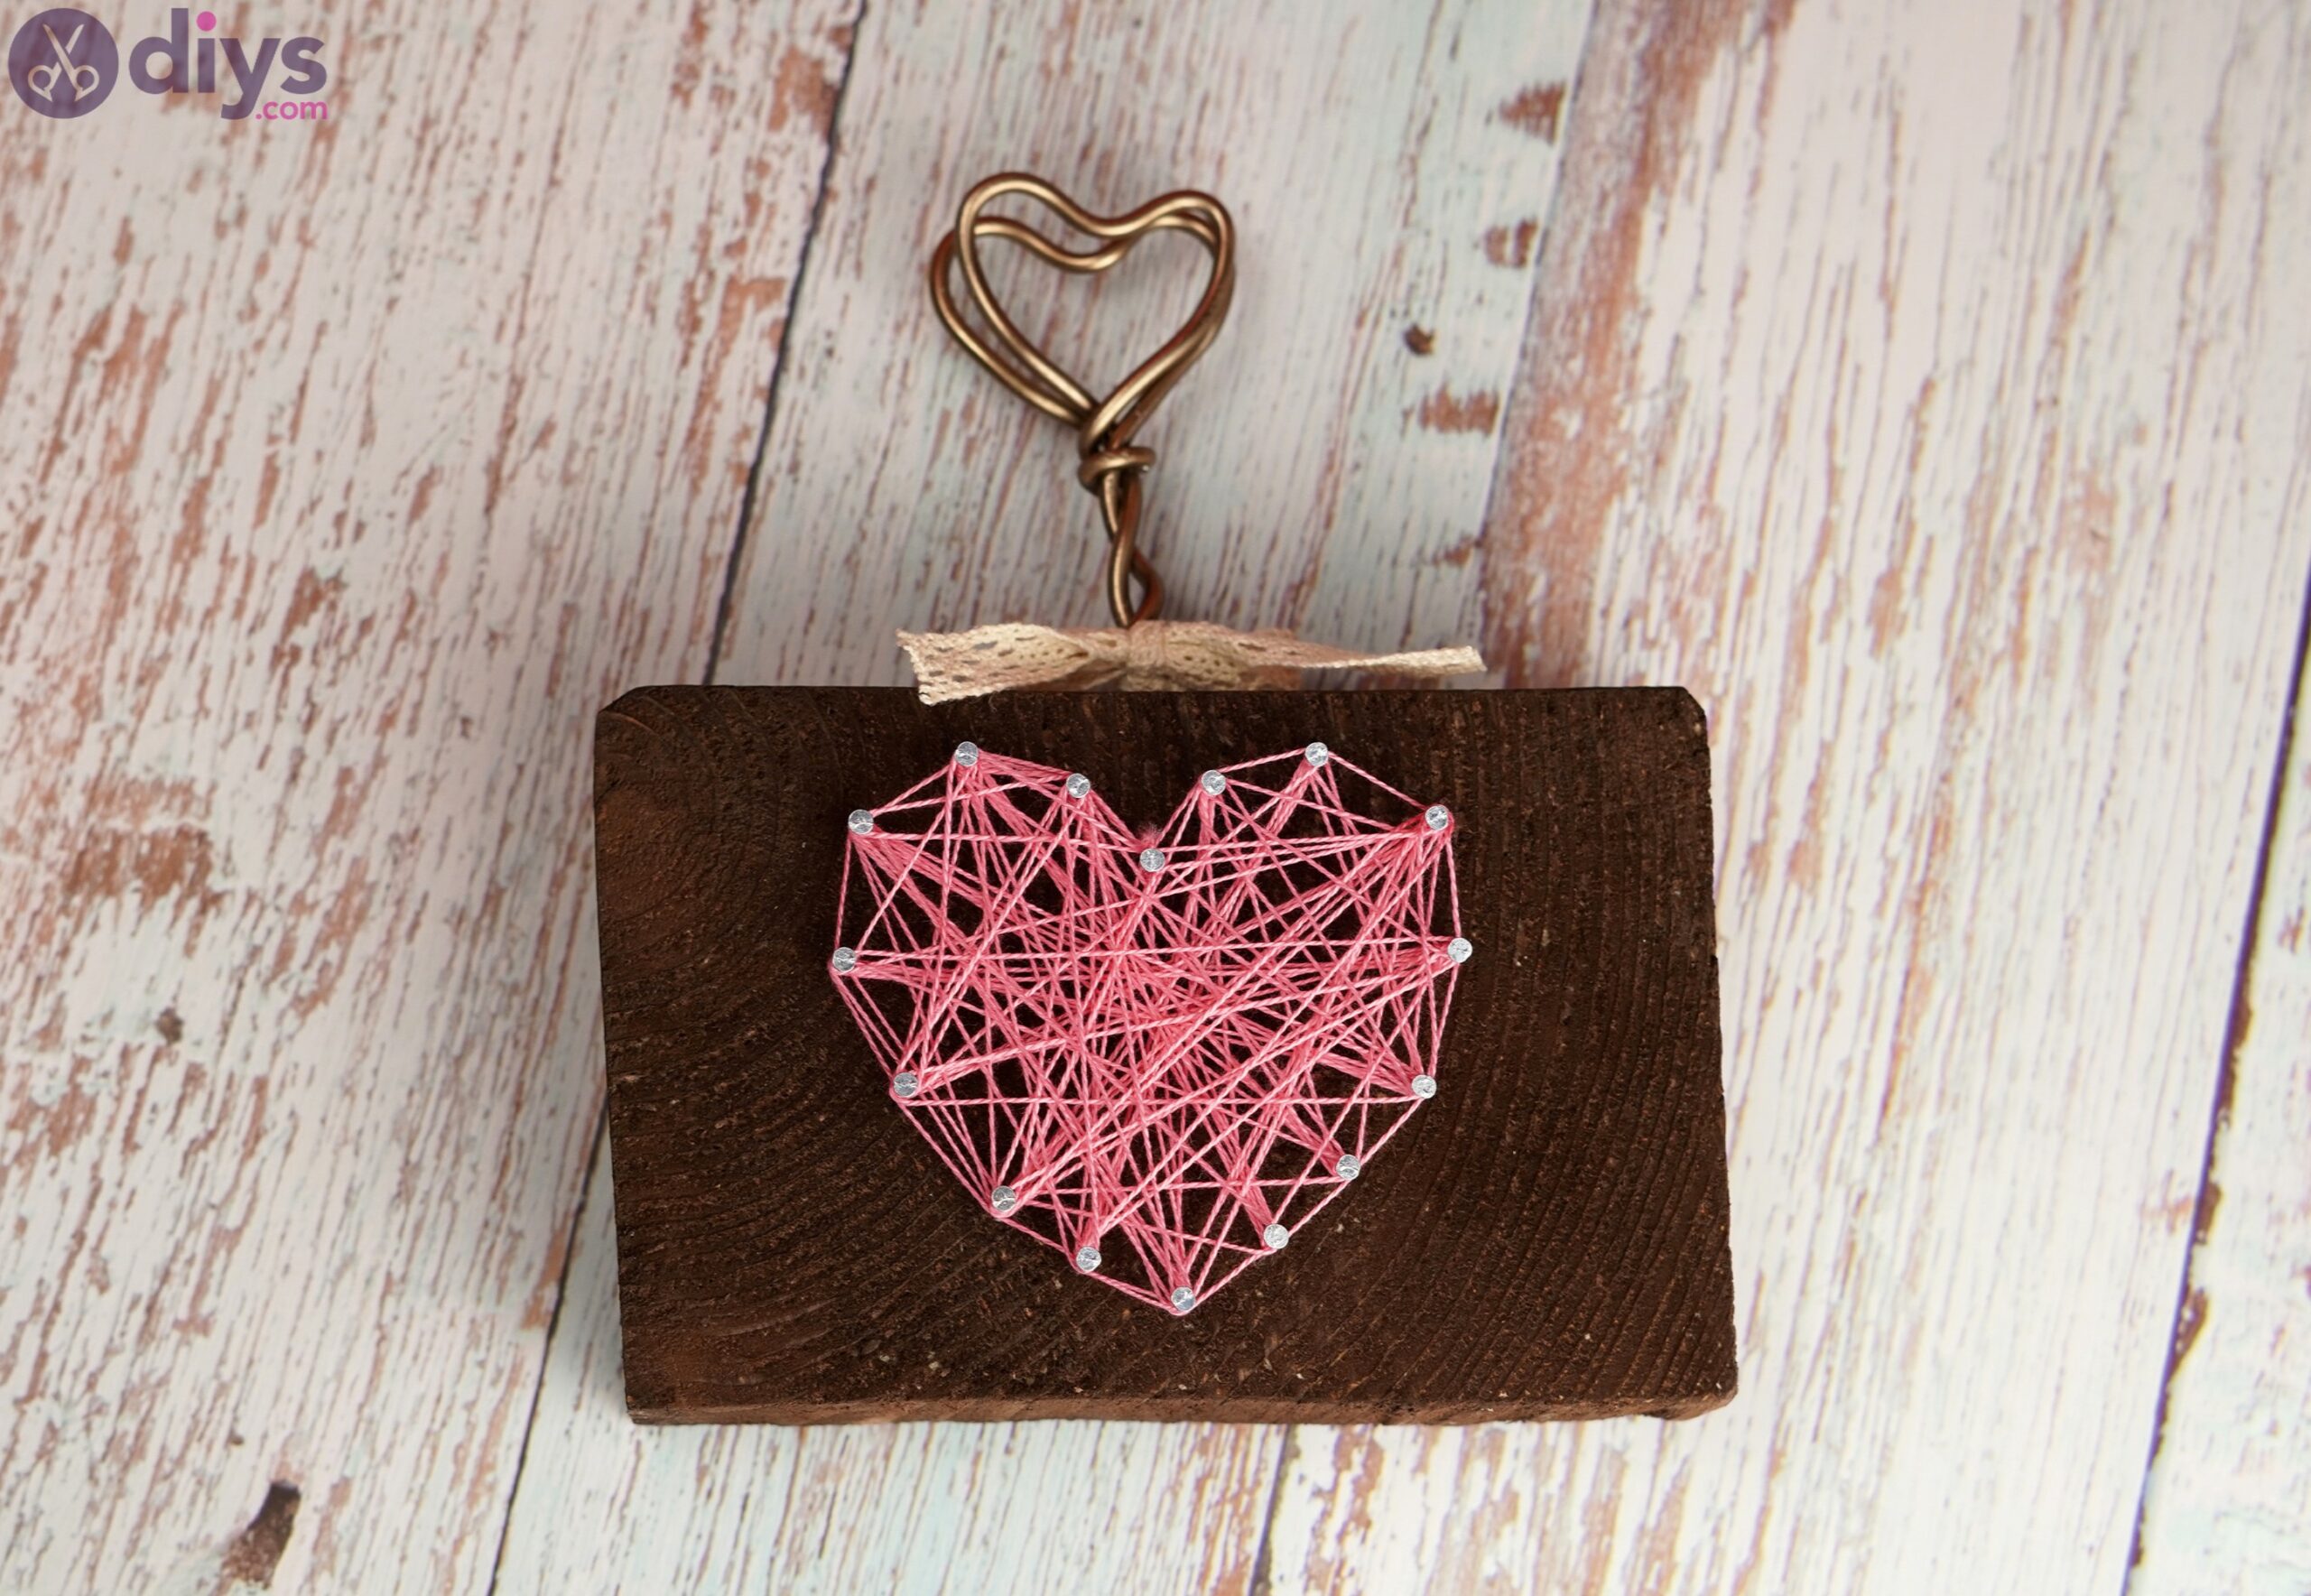
A DIY picture holder with heart string art is a wooden block with a heart-shaped design made from pink string and nails. A photo holder provides an attractive and secure display for a favorite picture, ensuring that your cherished memories are kept safe from dust, moisture, and other environmental factors. It makes it easy to showcase a picture on a surface while maintaining an organized space. String art is a craft technique that uses string to create images, words, and other designs on surfaces, usually wood or canvas. It uses nails as the points of attachment for the string.
This handcrafted picture holder with heart-shaped string art is small enough to fit a desk, shelf, windowsill, or mantel. It has a heart motif, making it an ideal decoration or gift for Valentine’s Day, Mother’s Day, or a birthday.
This tutorial describes the necessary supplies and step-by-step instructions for making picture holder with heart string art. It contains images, a video guide, and more tips and tricks. The project shouldn’t take more than 2 hours to finish.
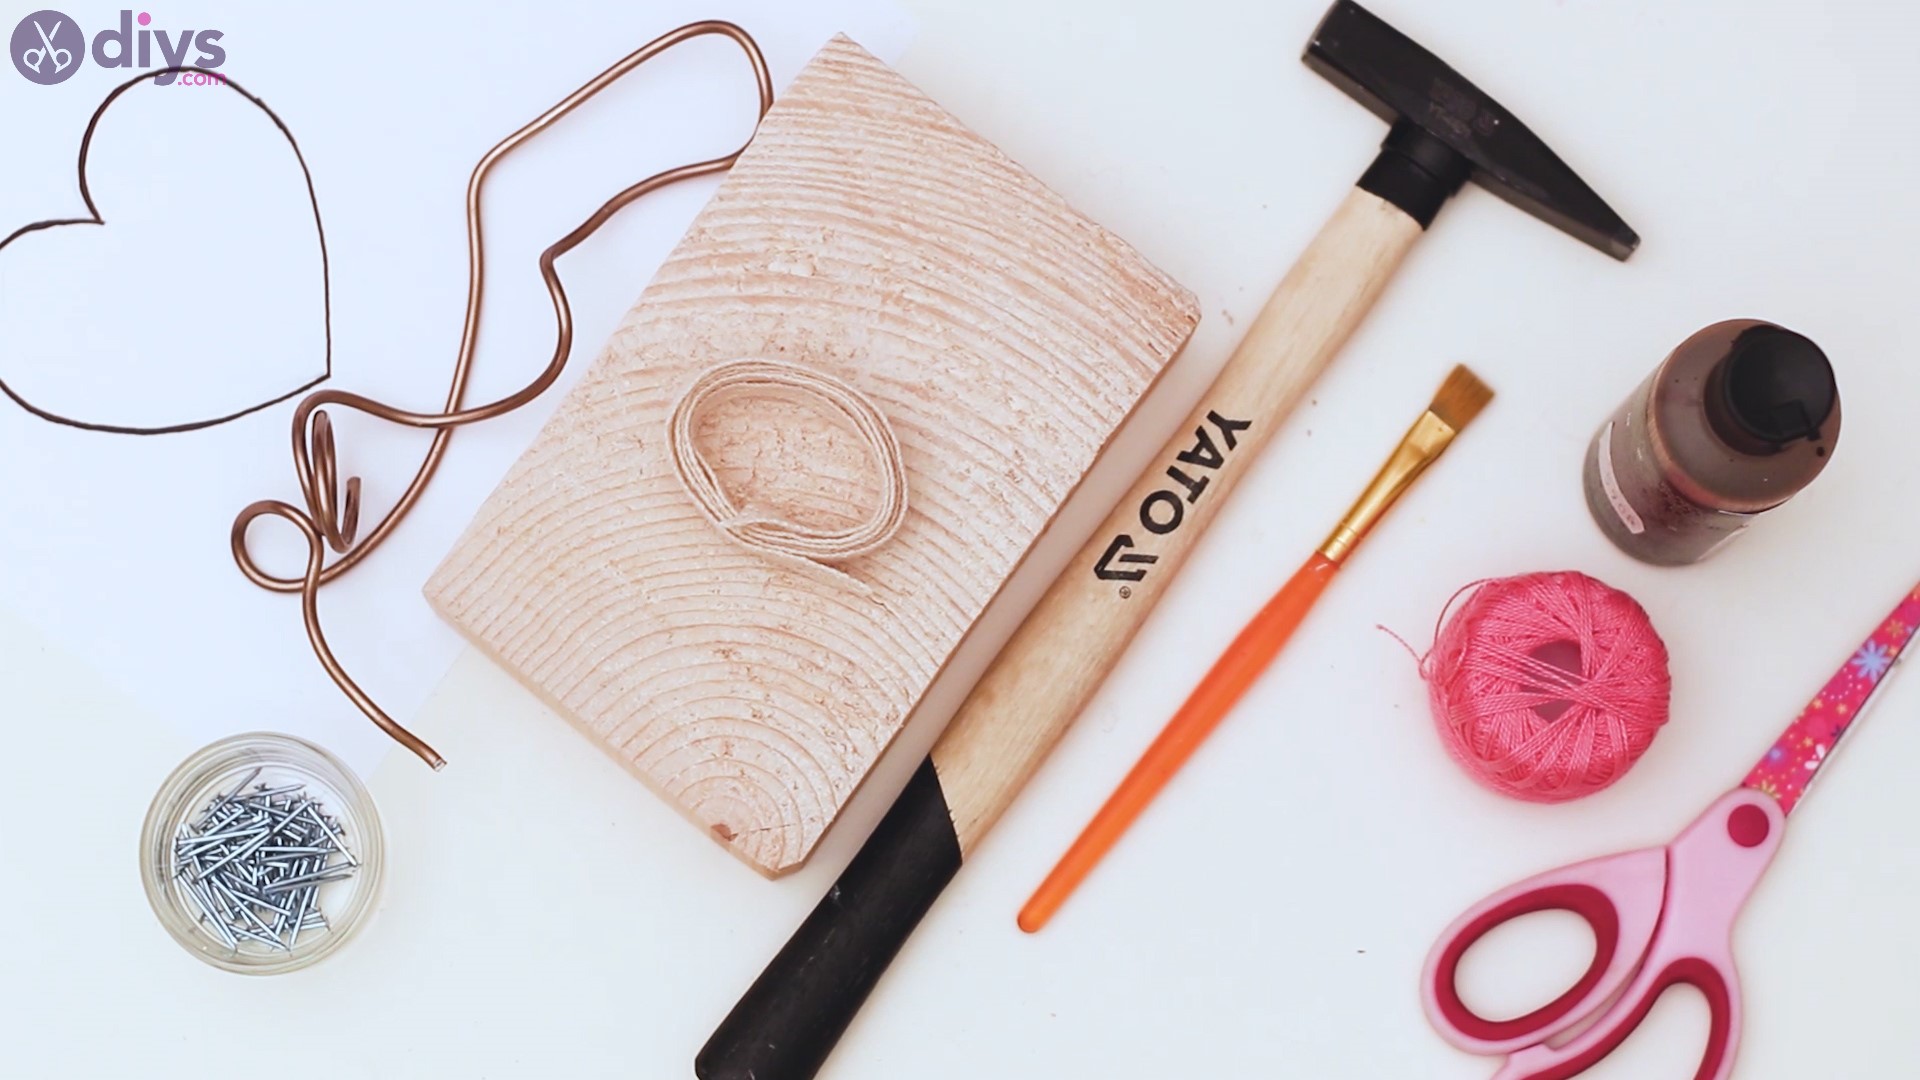
Supplies
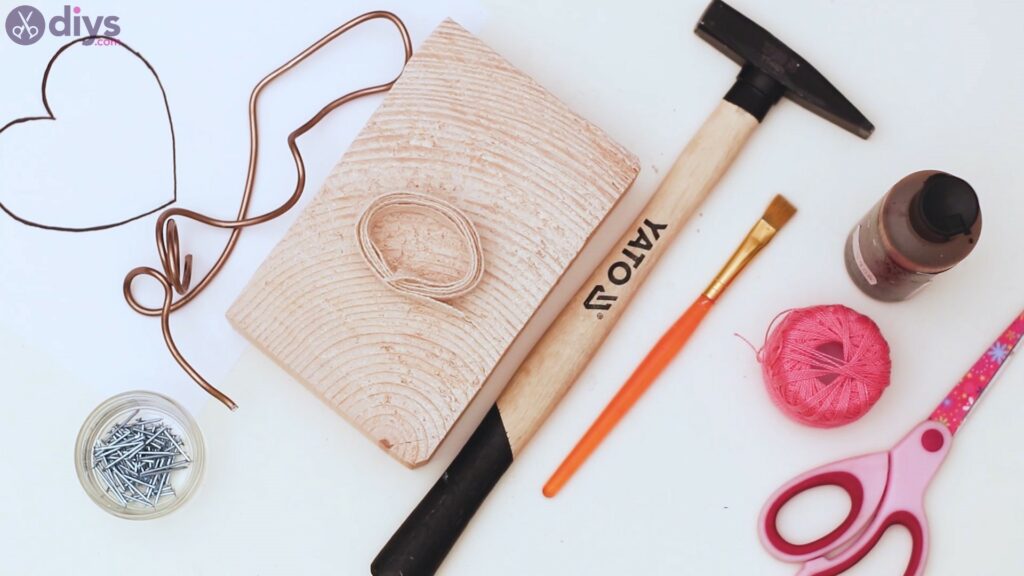
- Wooden block
- Wood stain
- Paintbrush
- Marker or a pencil
- Paper sheet
- Nails
- Hammer
- Pink thread
- Thick jewelry wire
- Lace ribbon
- Scissors
How do I craft a DIY string art photo holder?
Follow these step-by-step instructions to craft a photo holder with heart-shaped string art:
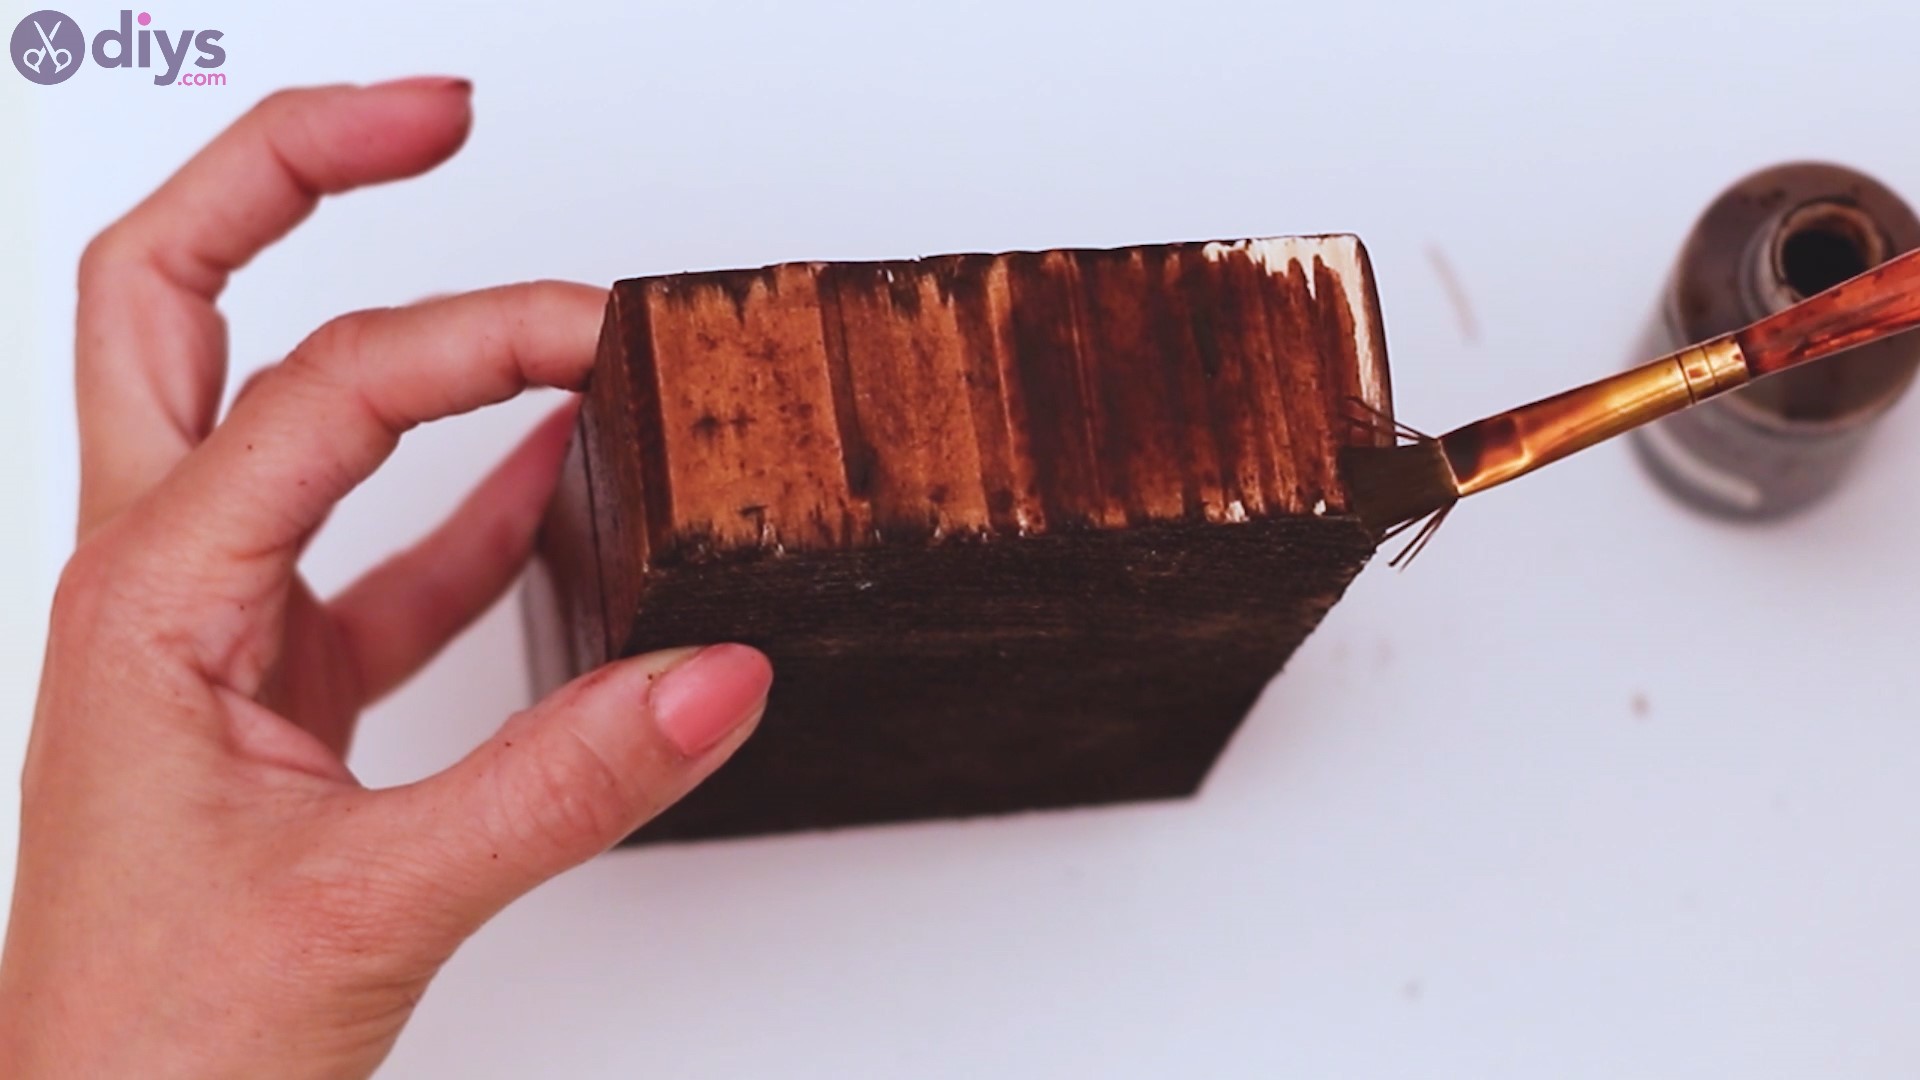
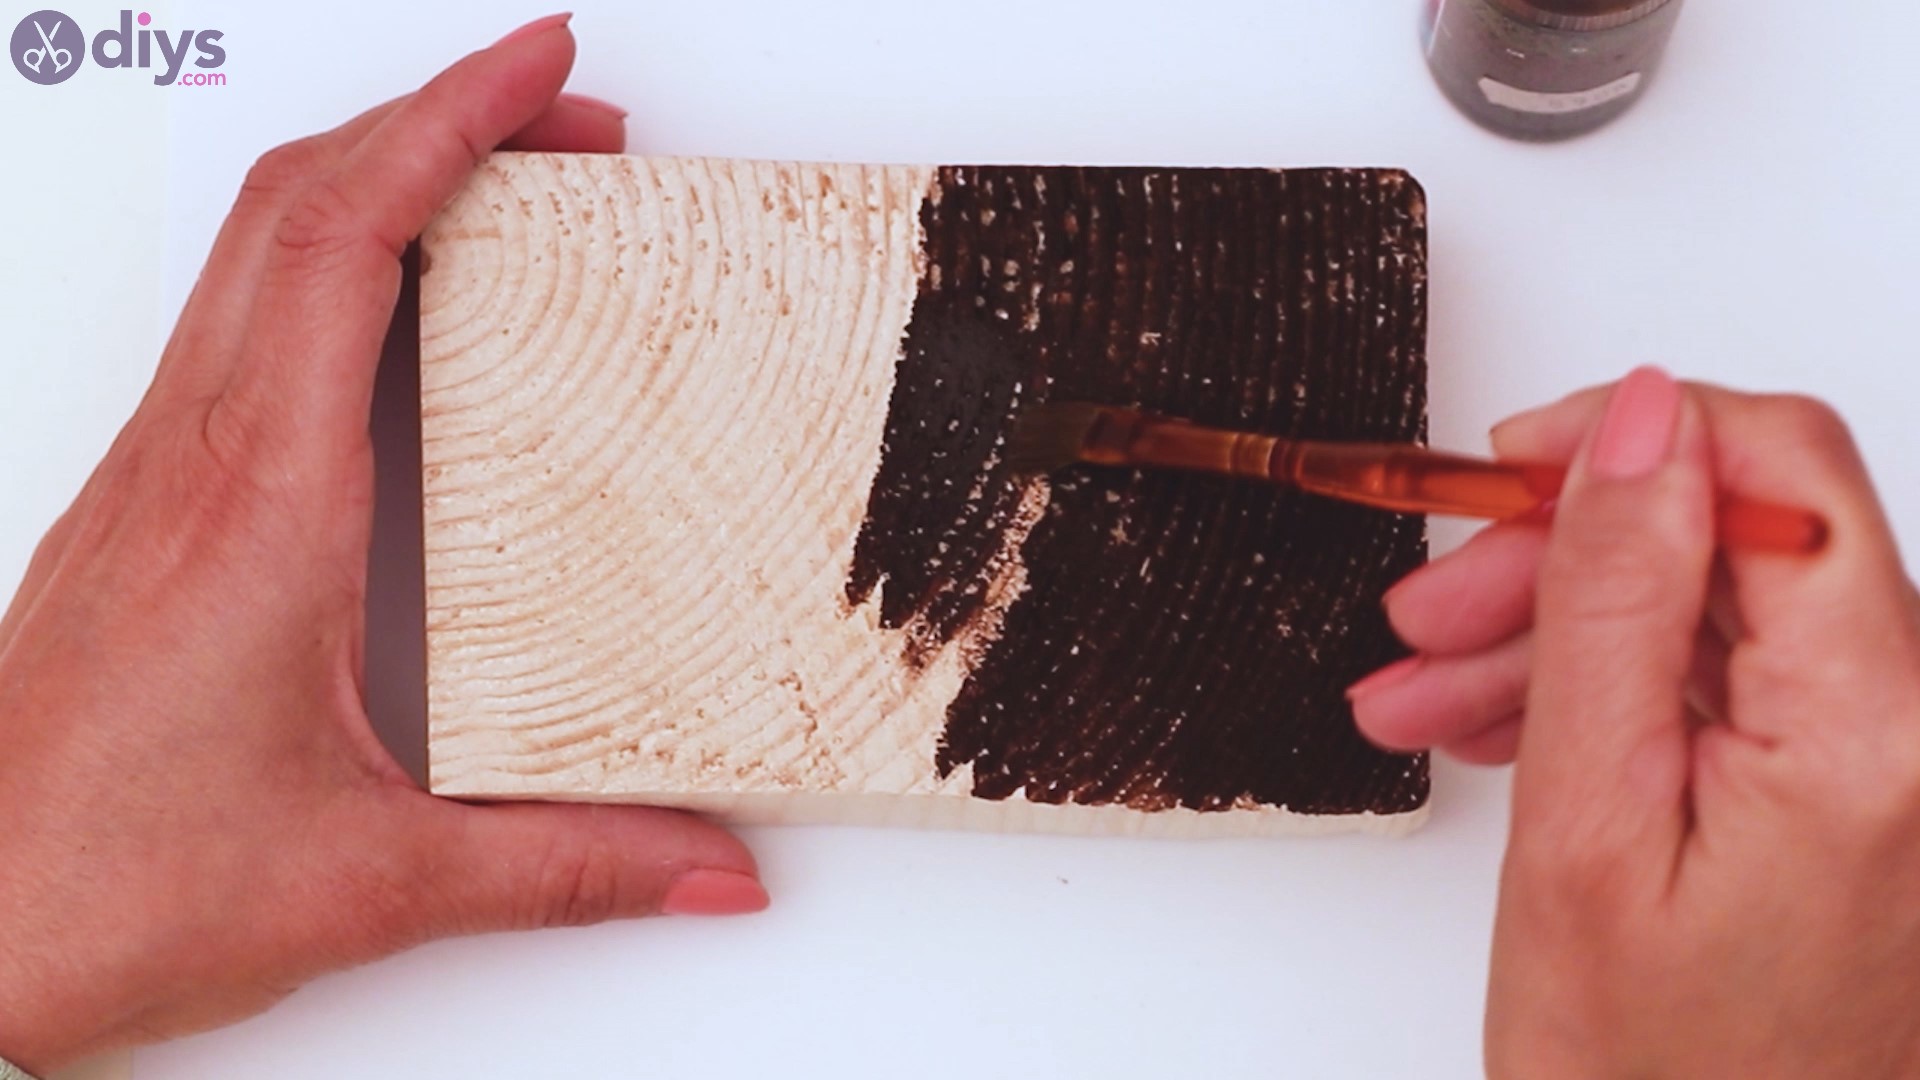
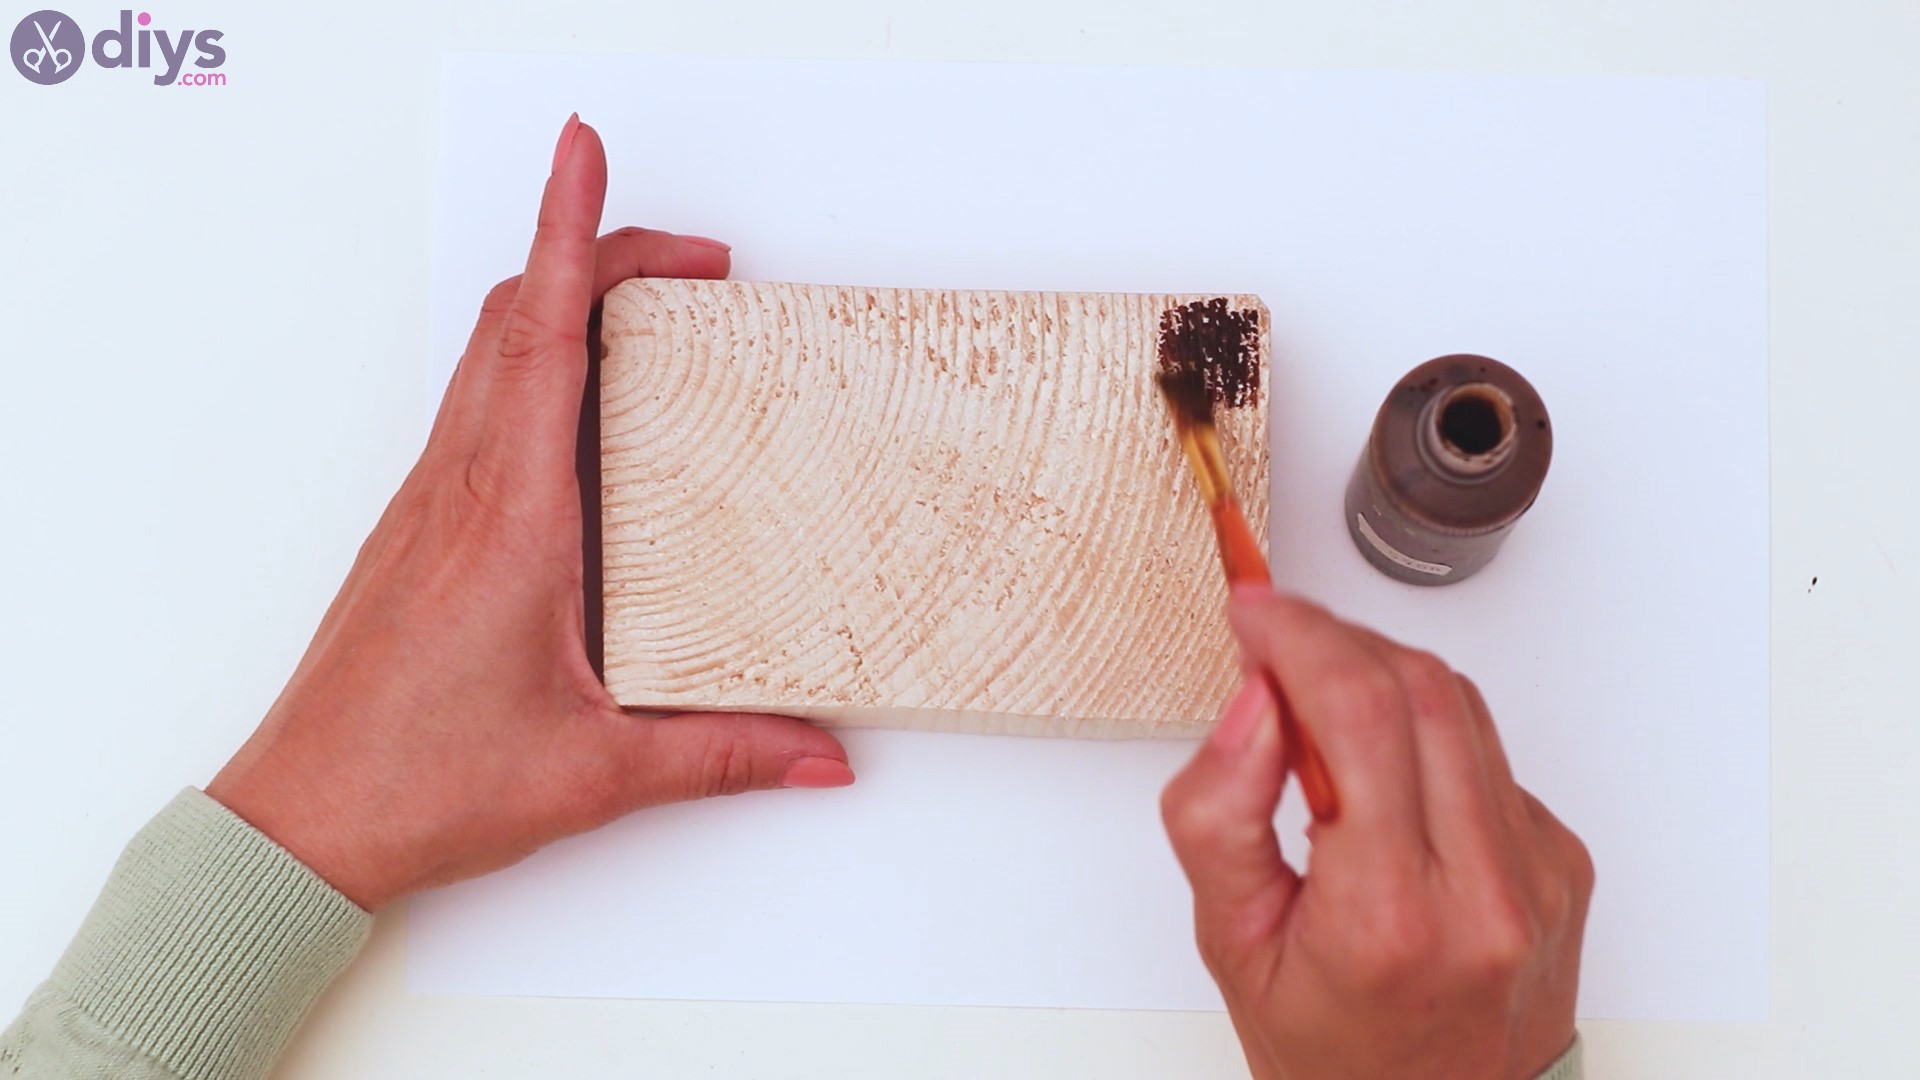
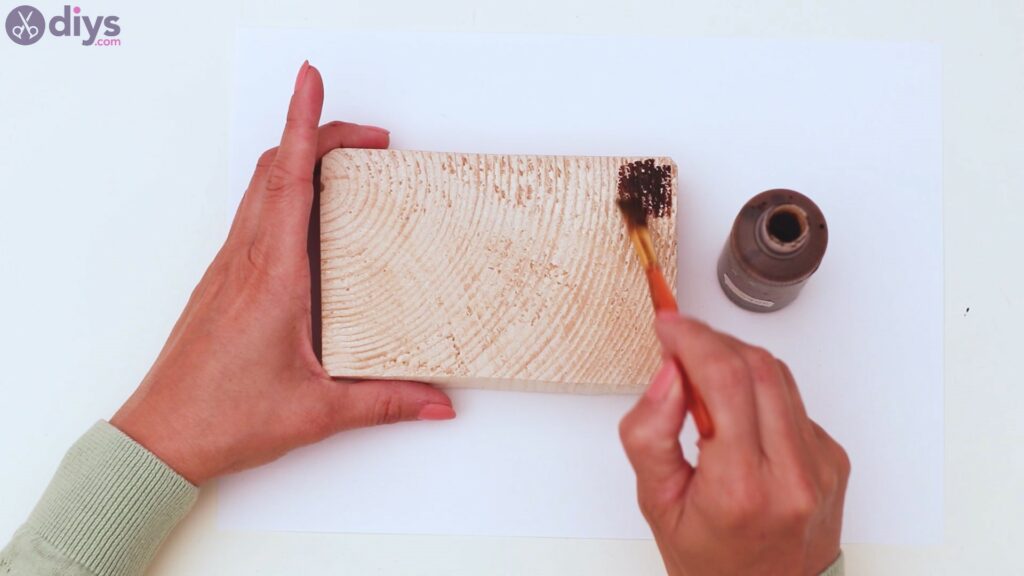
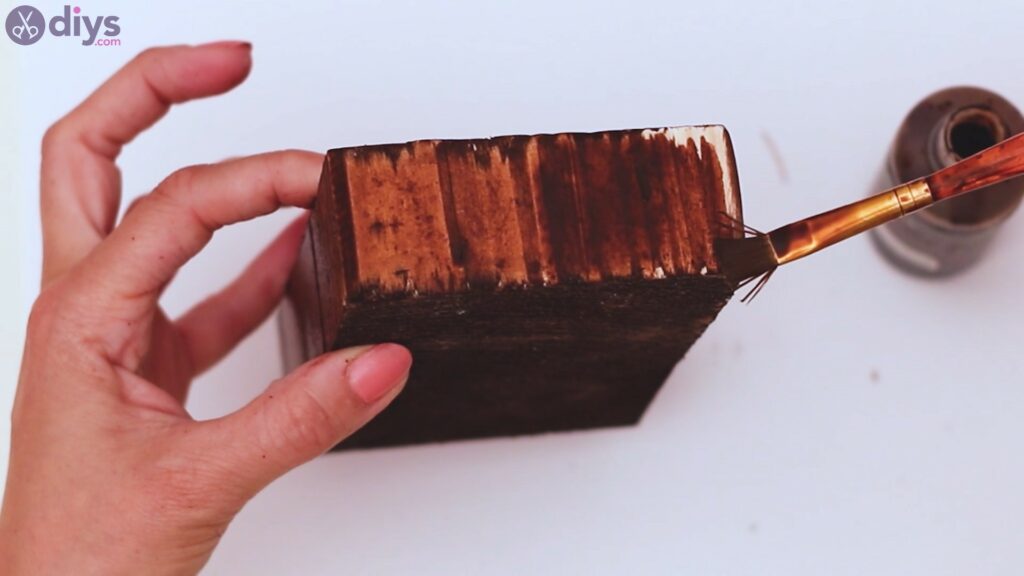
- Stain the wooden block: Apply a thick coat of wood stain onto the block with a paintbrush, covering all sides. While waiting for the paint to dry, proceed to the next step.

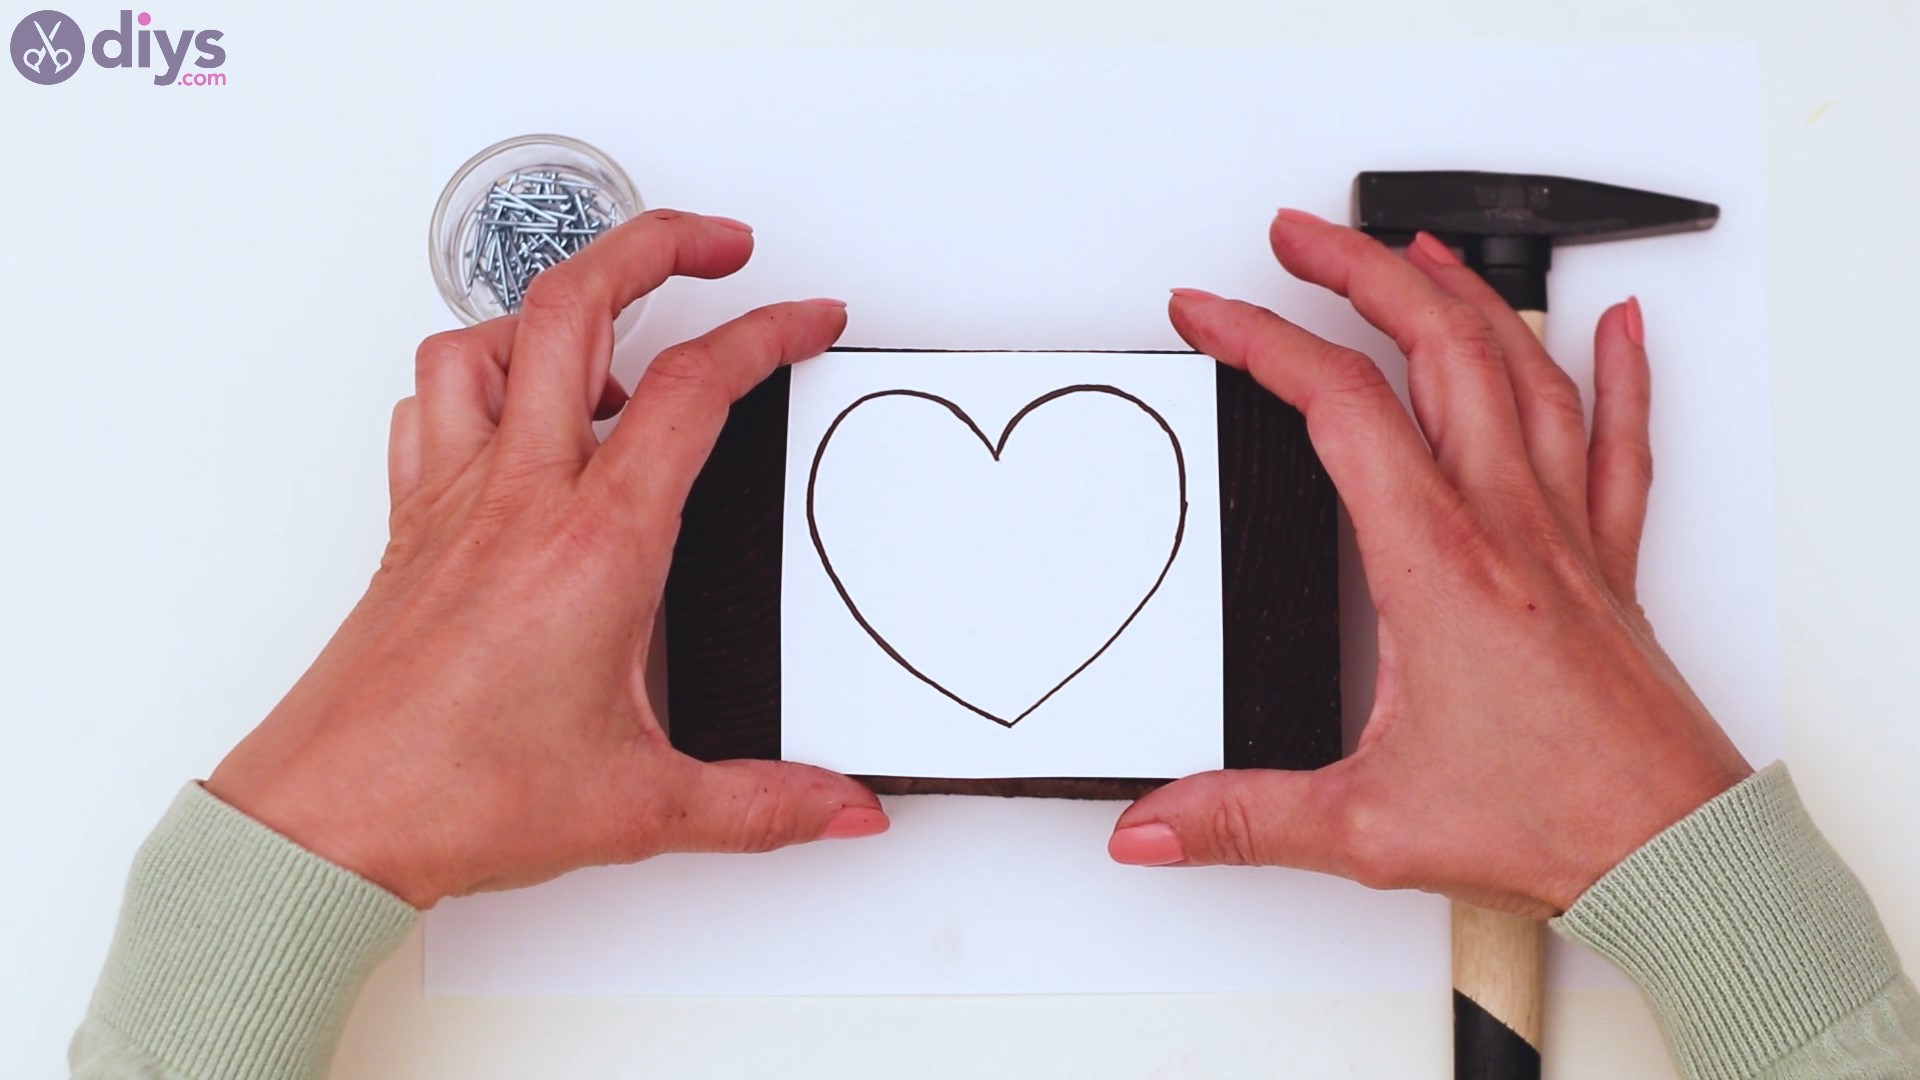
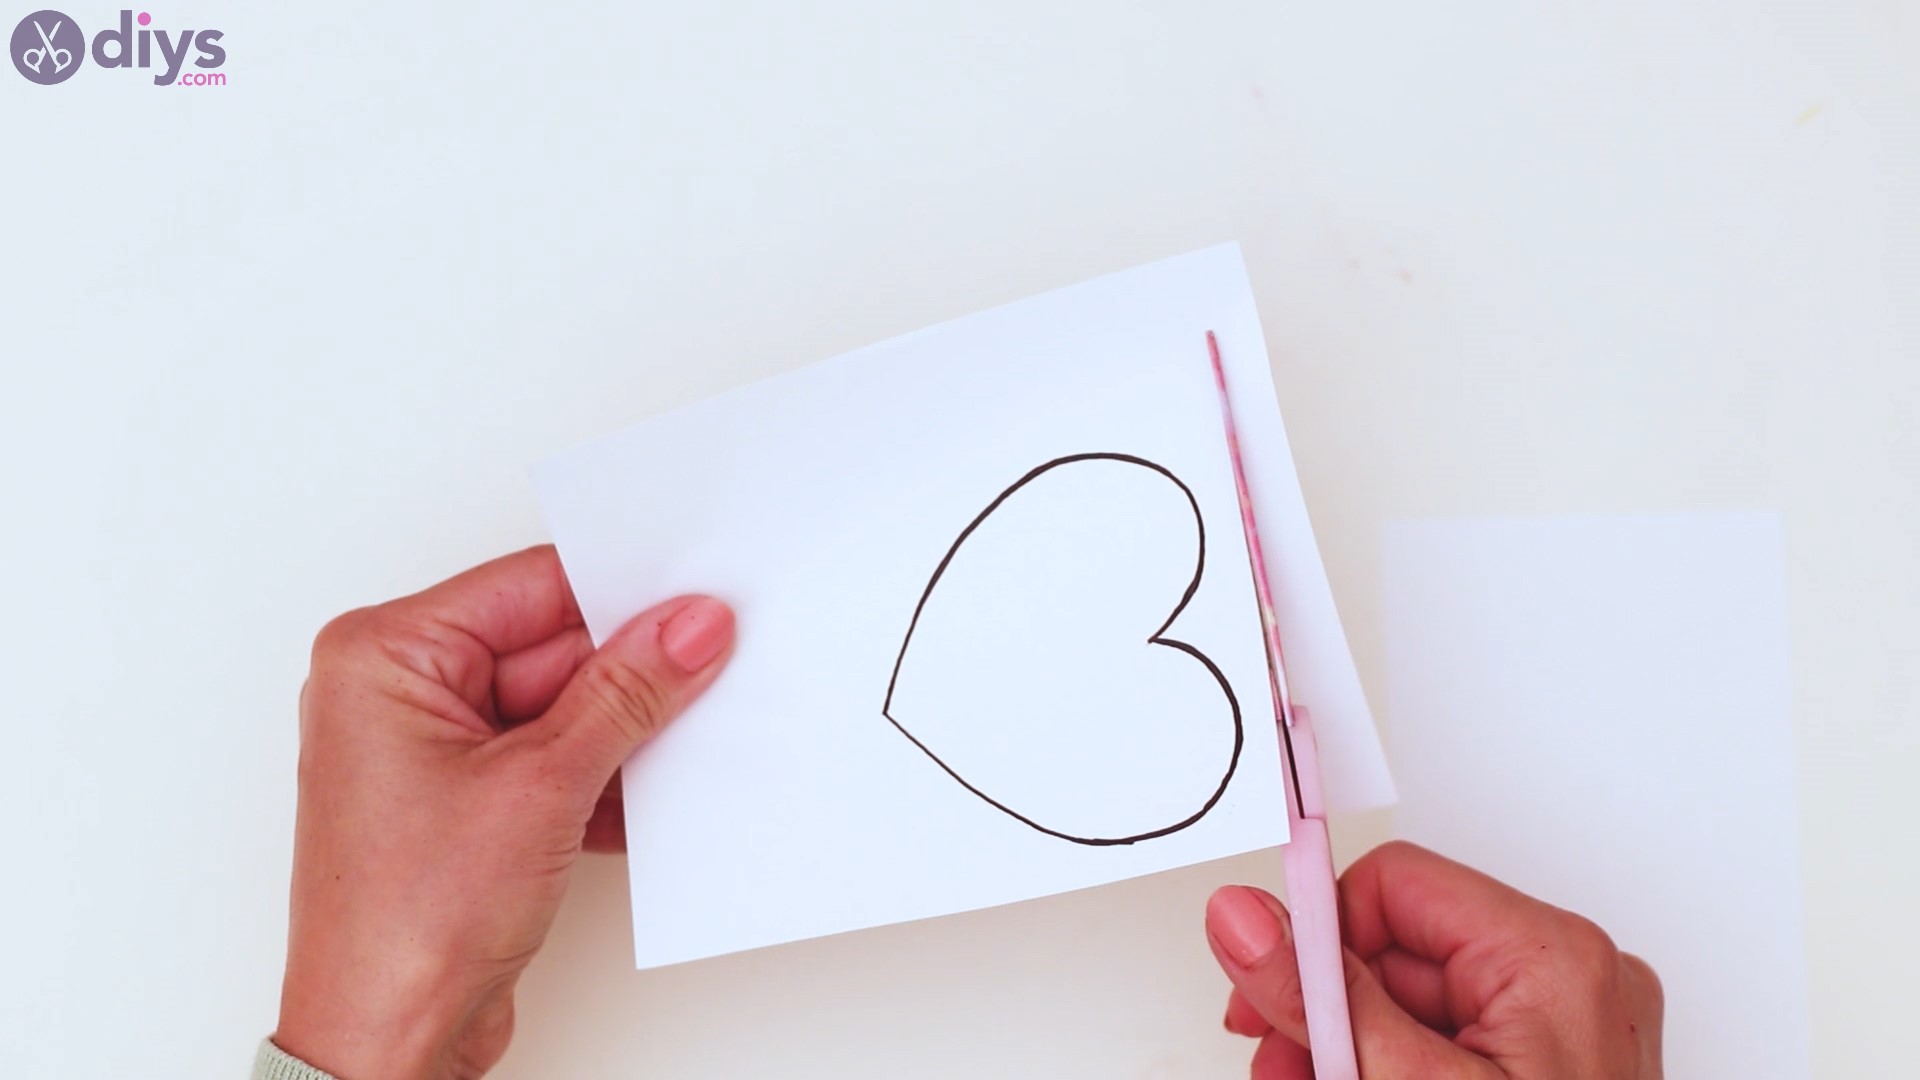
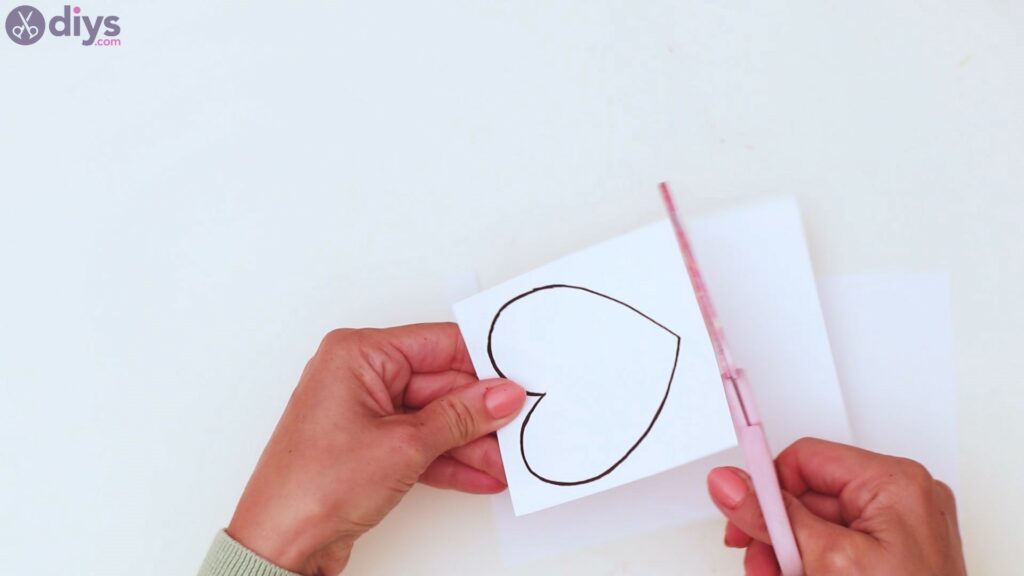
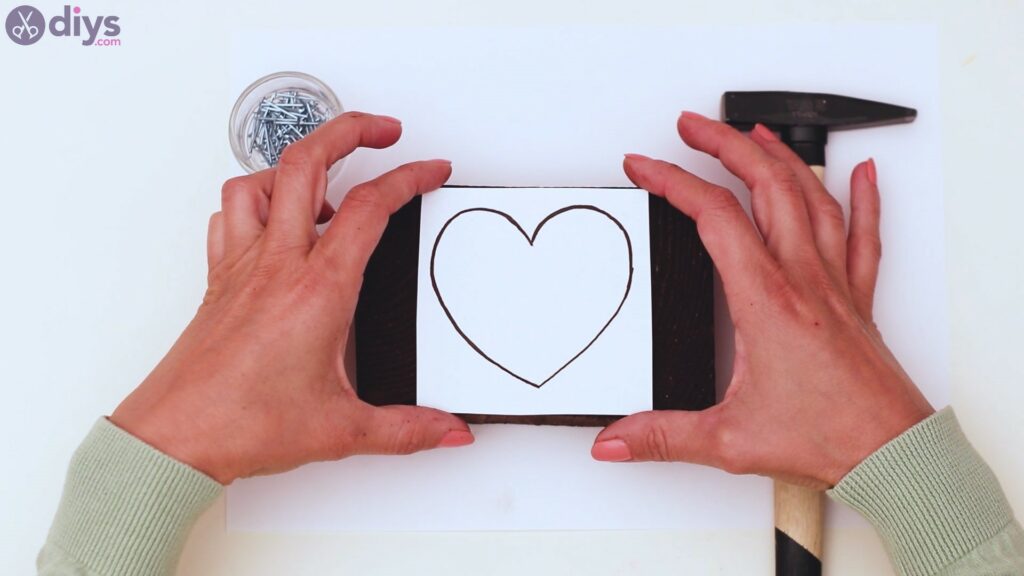
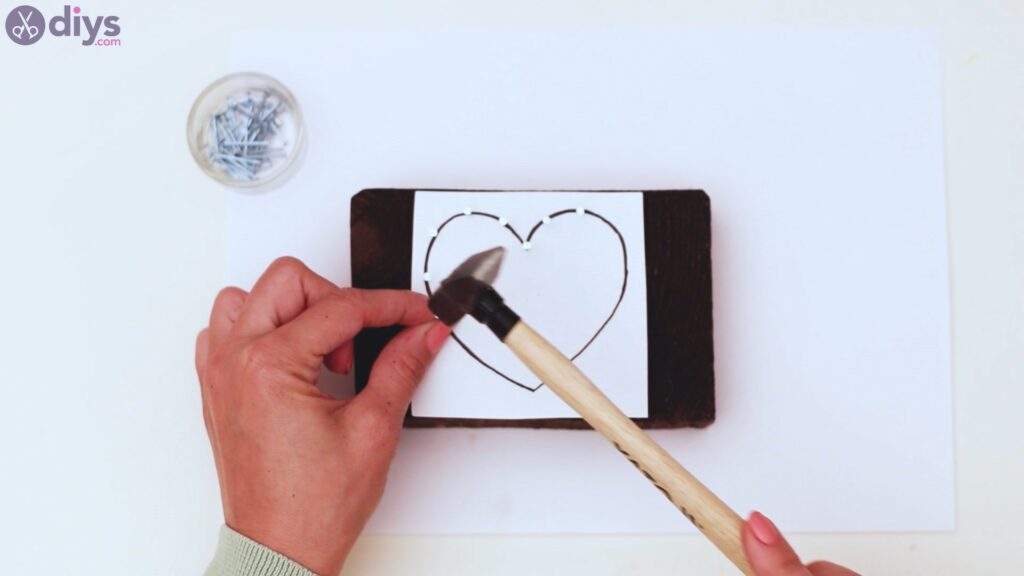
- Make the heart template: Draw a heart on a sheet of paper in the desired size for the string art and stick it to the wood block.
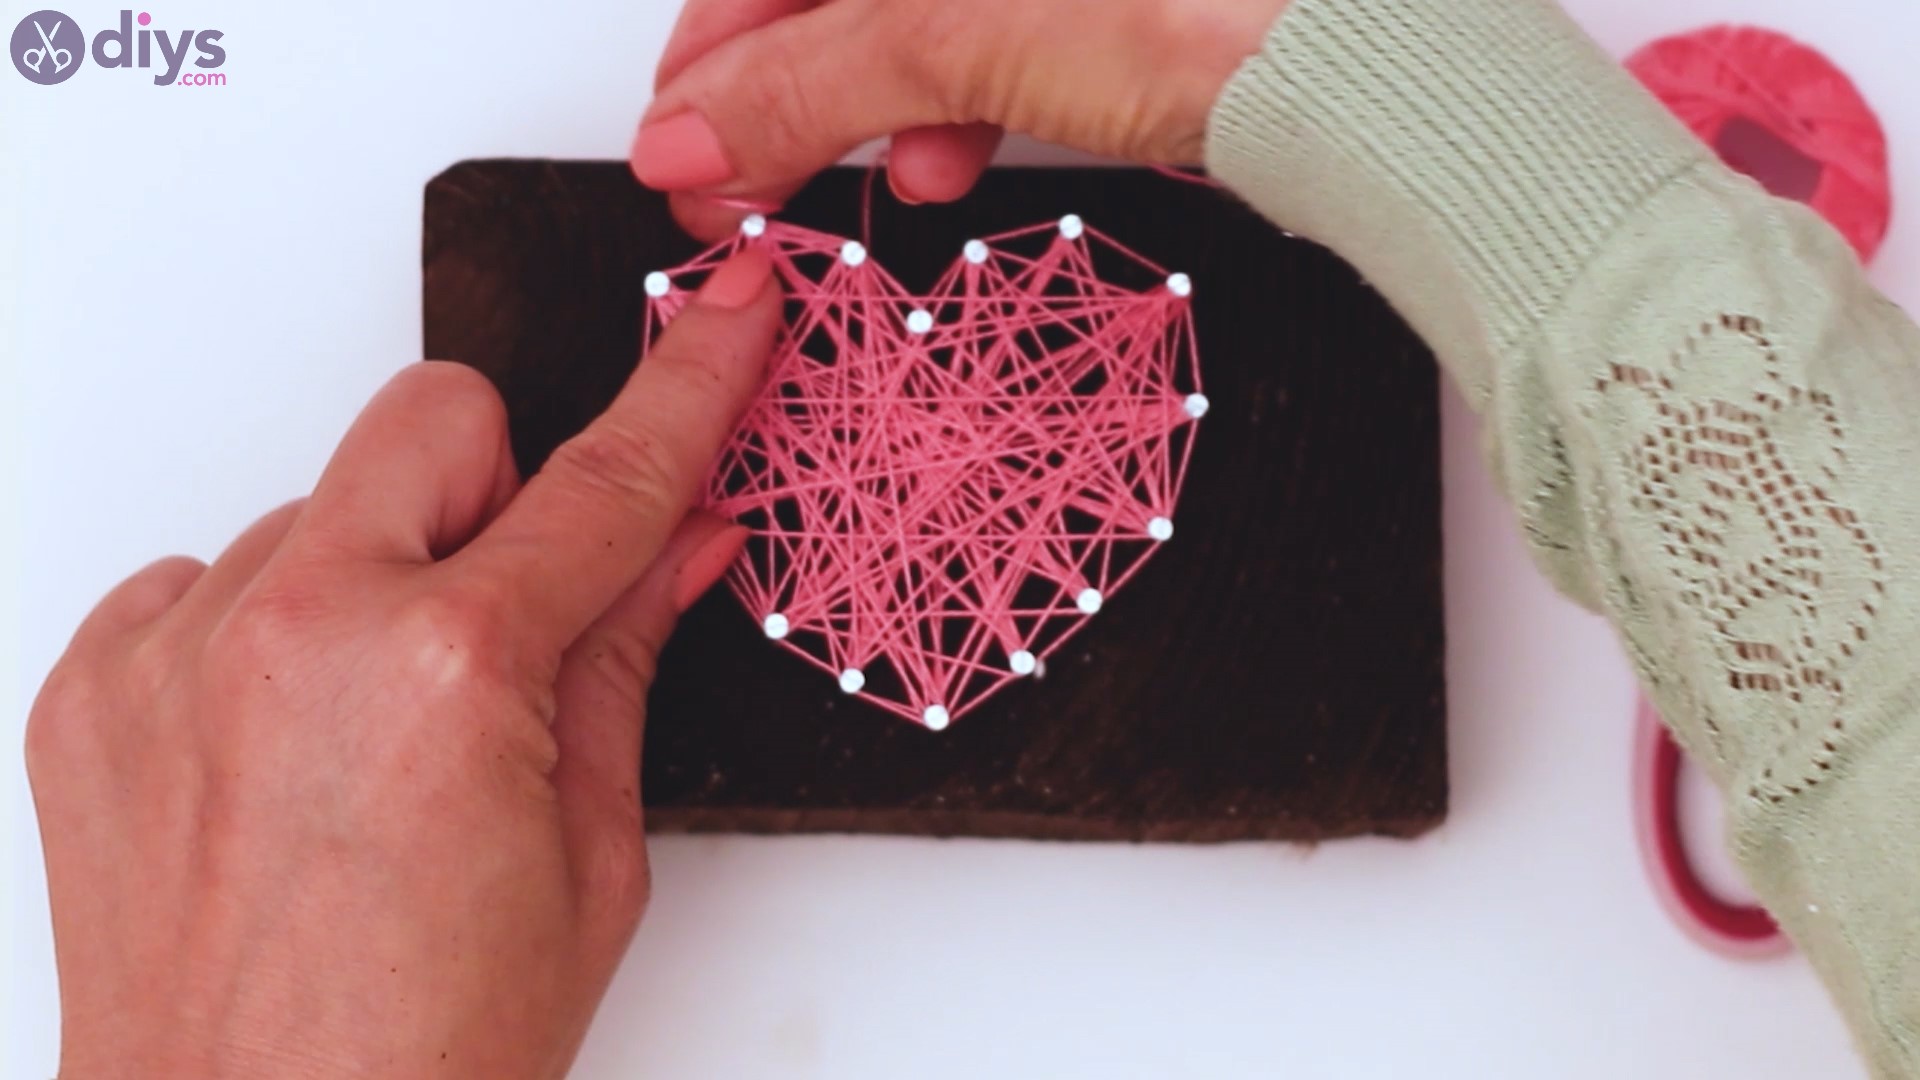
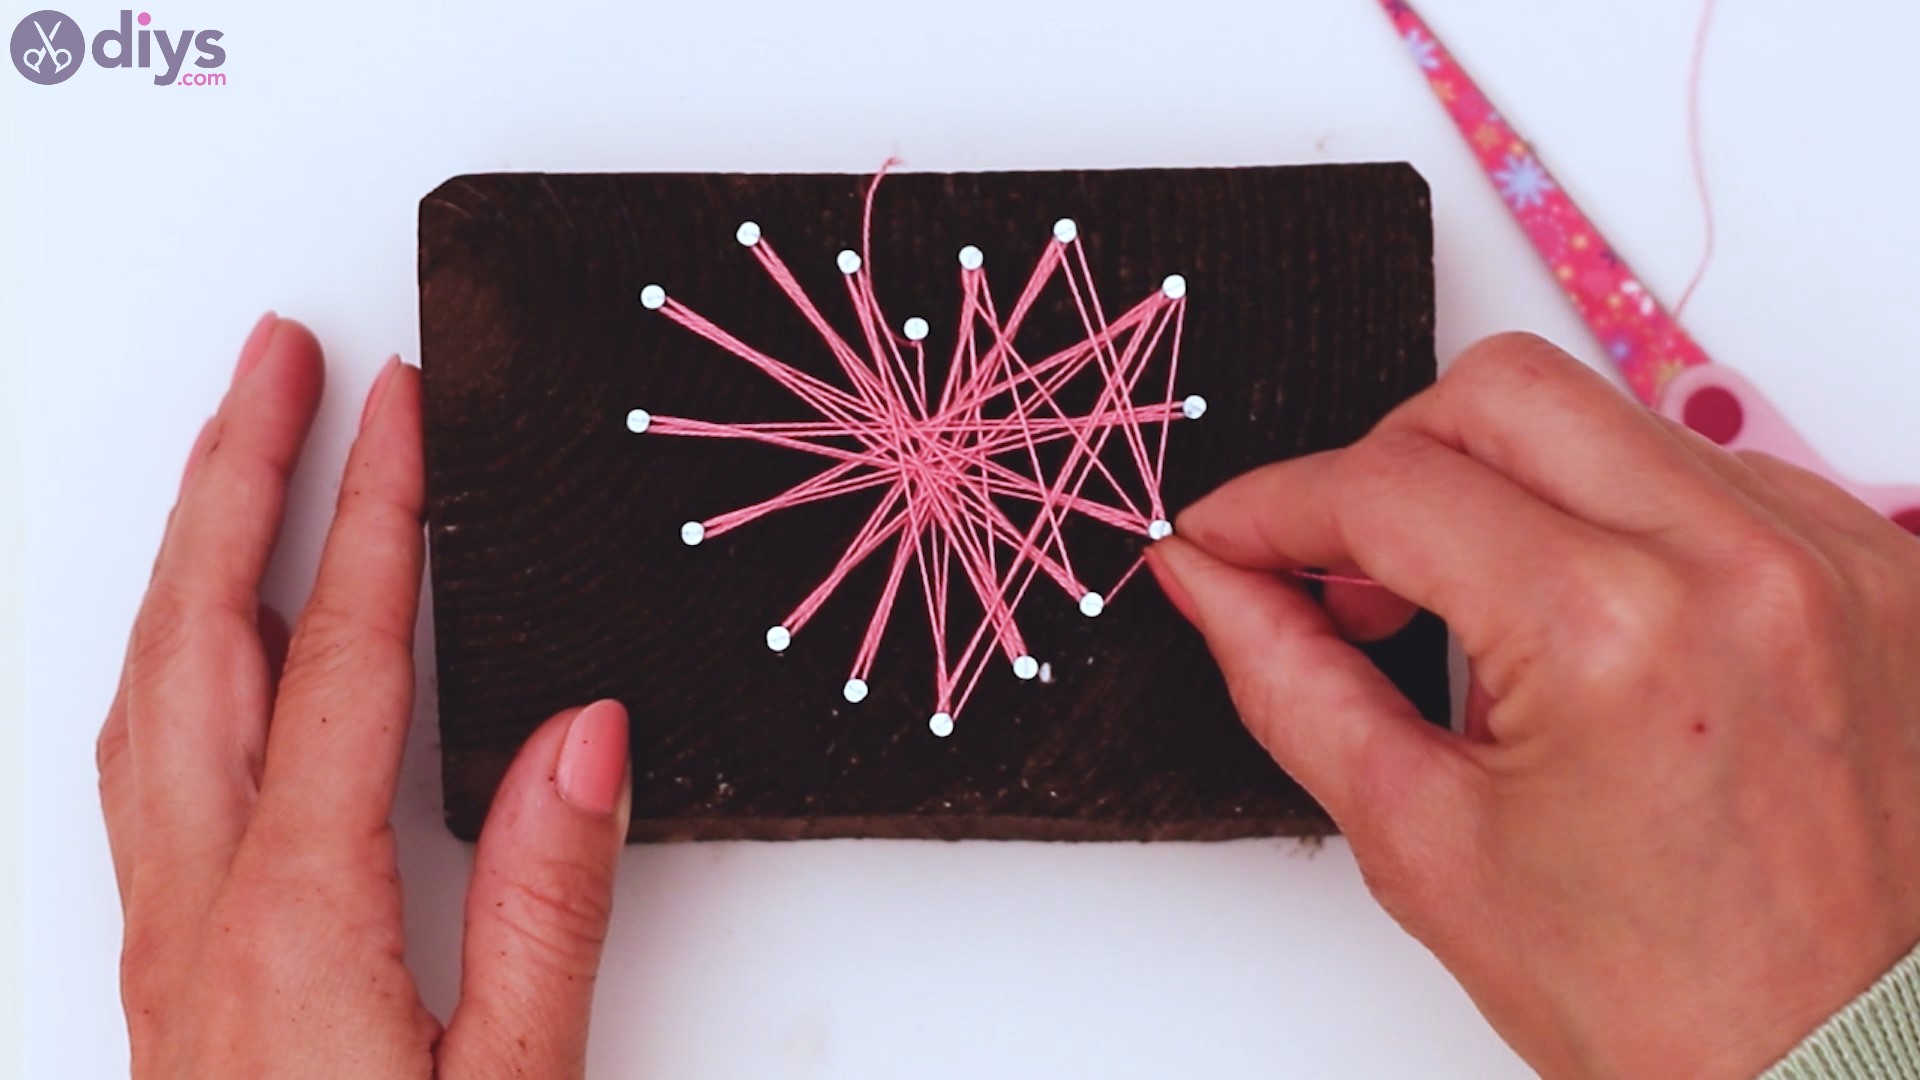
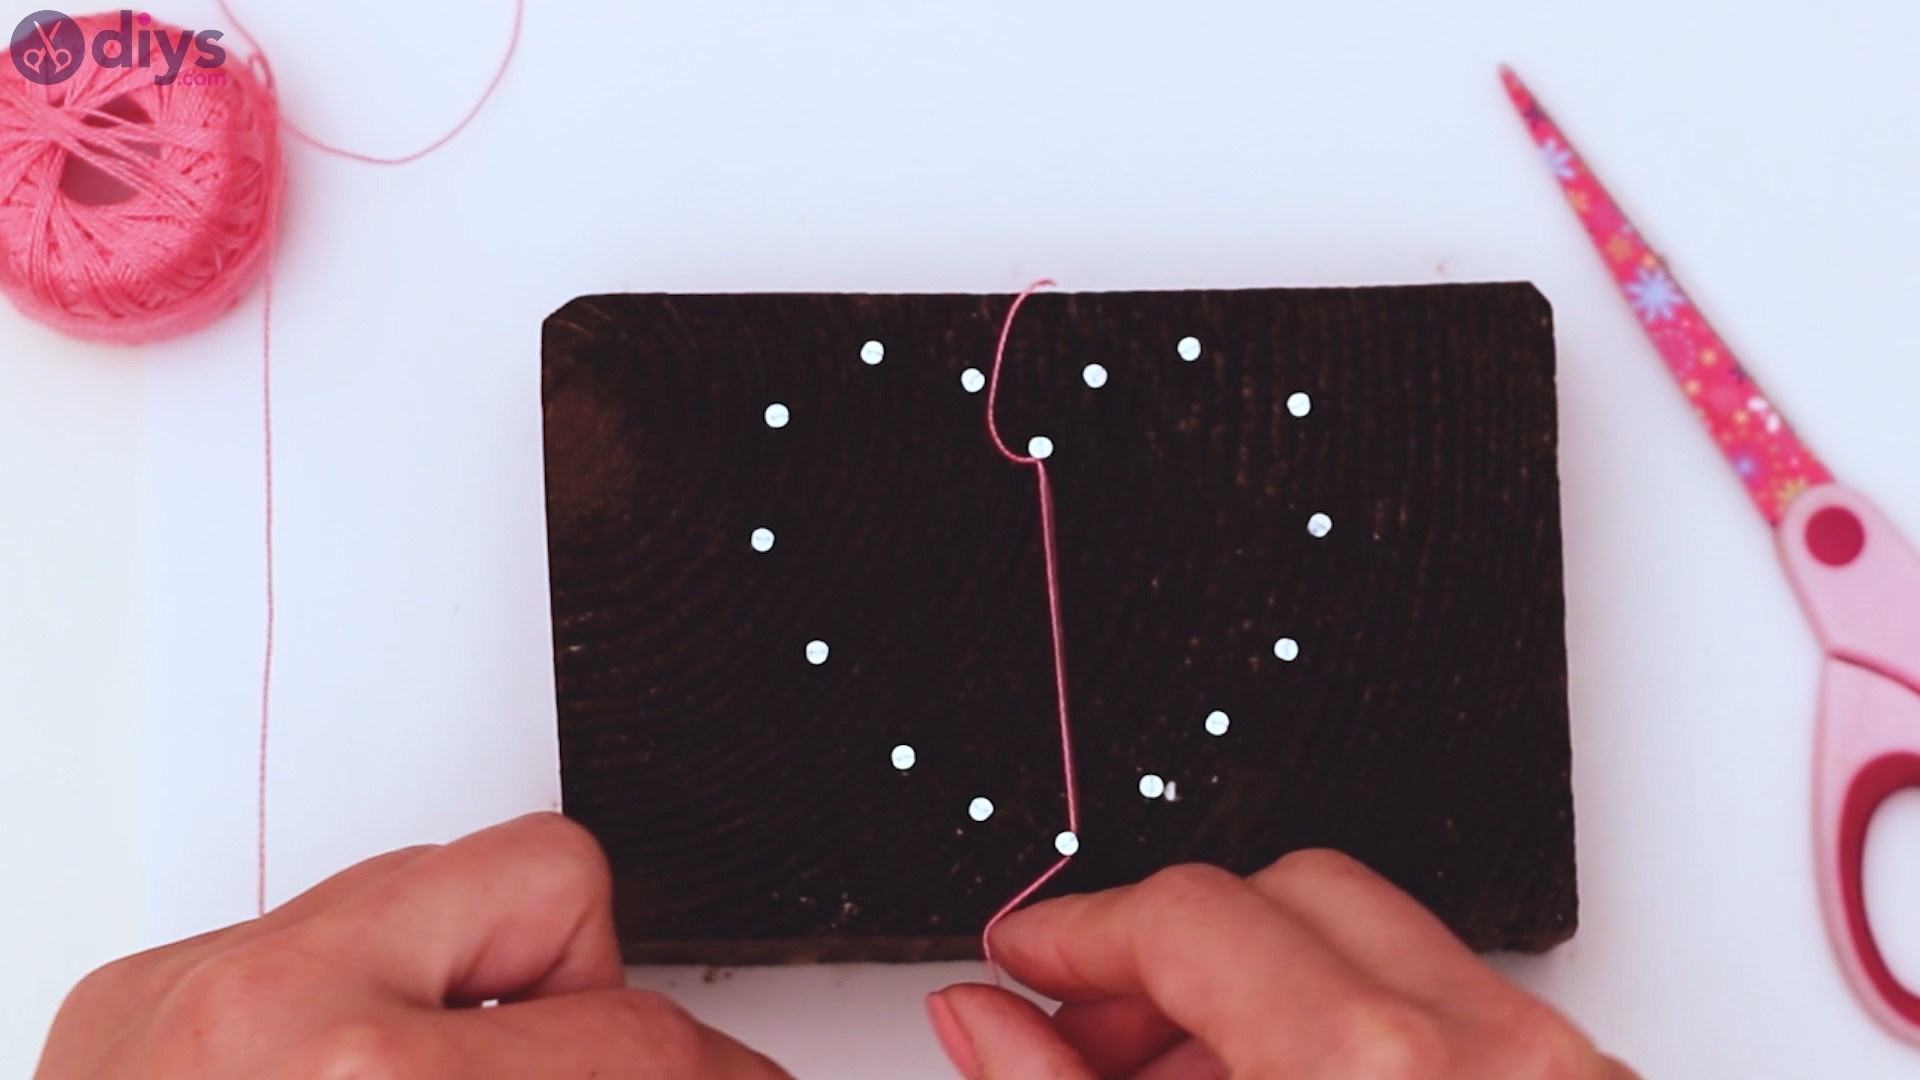
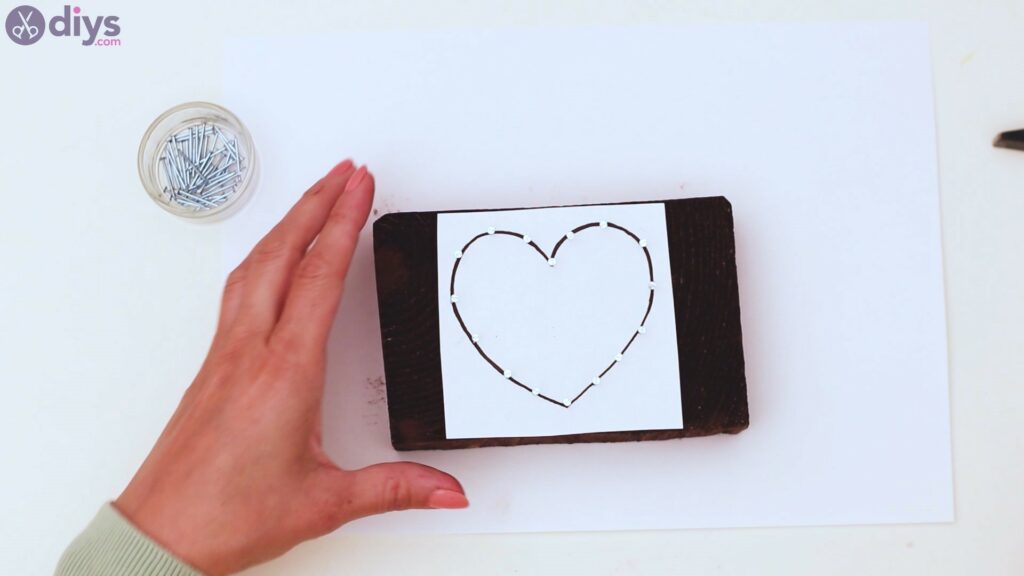
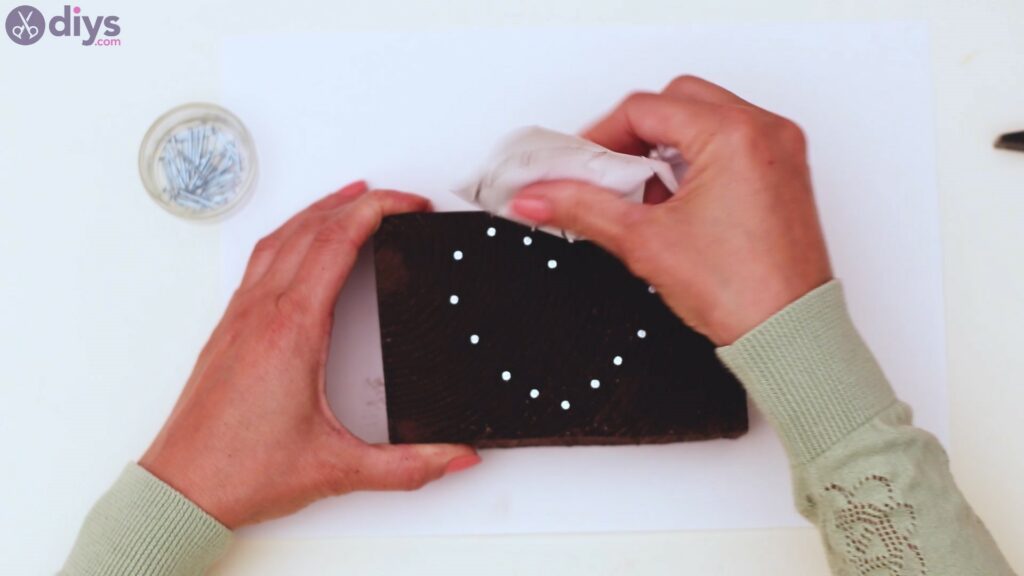
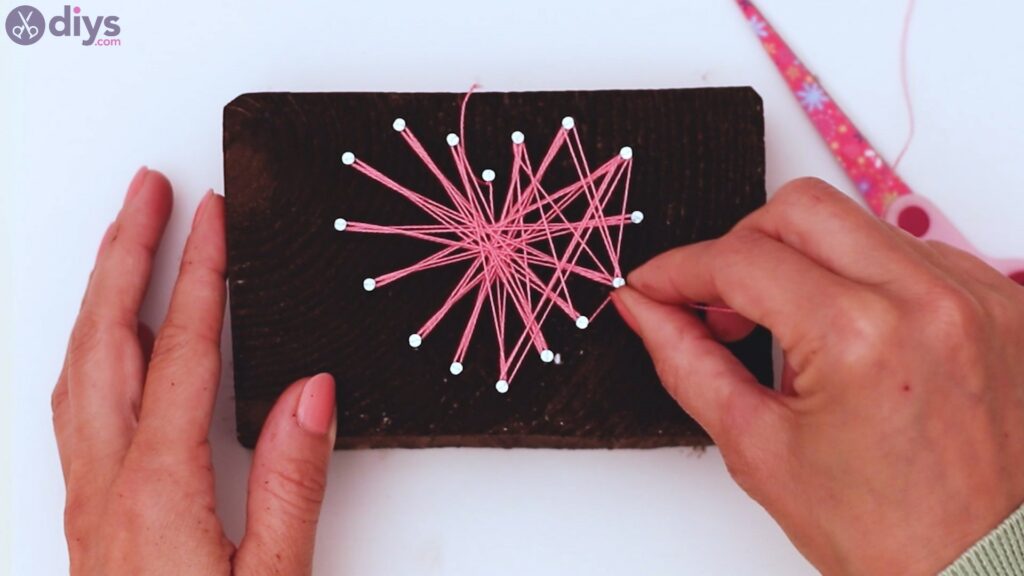
- Hammer the nails: Drive nails into a heart shape by tracing the template. We suggest using a clothespin to hold each nail while hammering to ensure it goes straight down. Otherwise, you might end up with a crooked heart. Leave about half an inch (1-1.5 cm) space between the nails, ensuring all nails are evenly spaced. making sure each nail is evenly spaced. Finally, rip the paper template away to leave only the nails on the block.
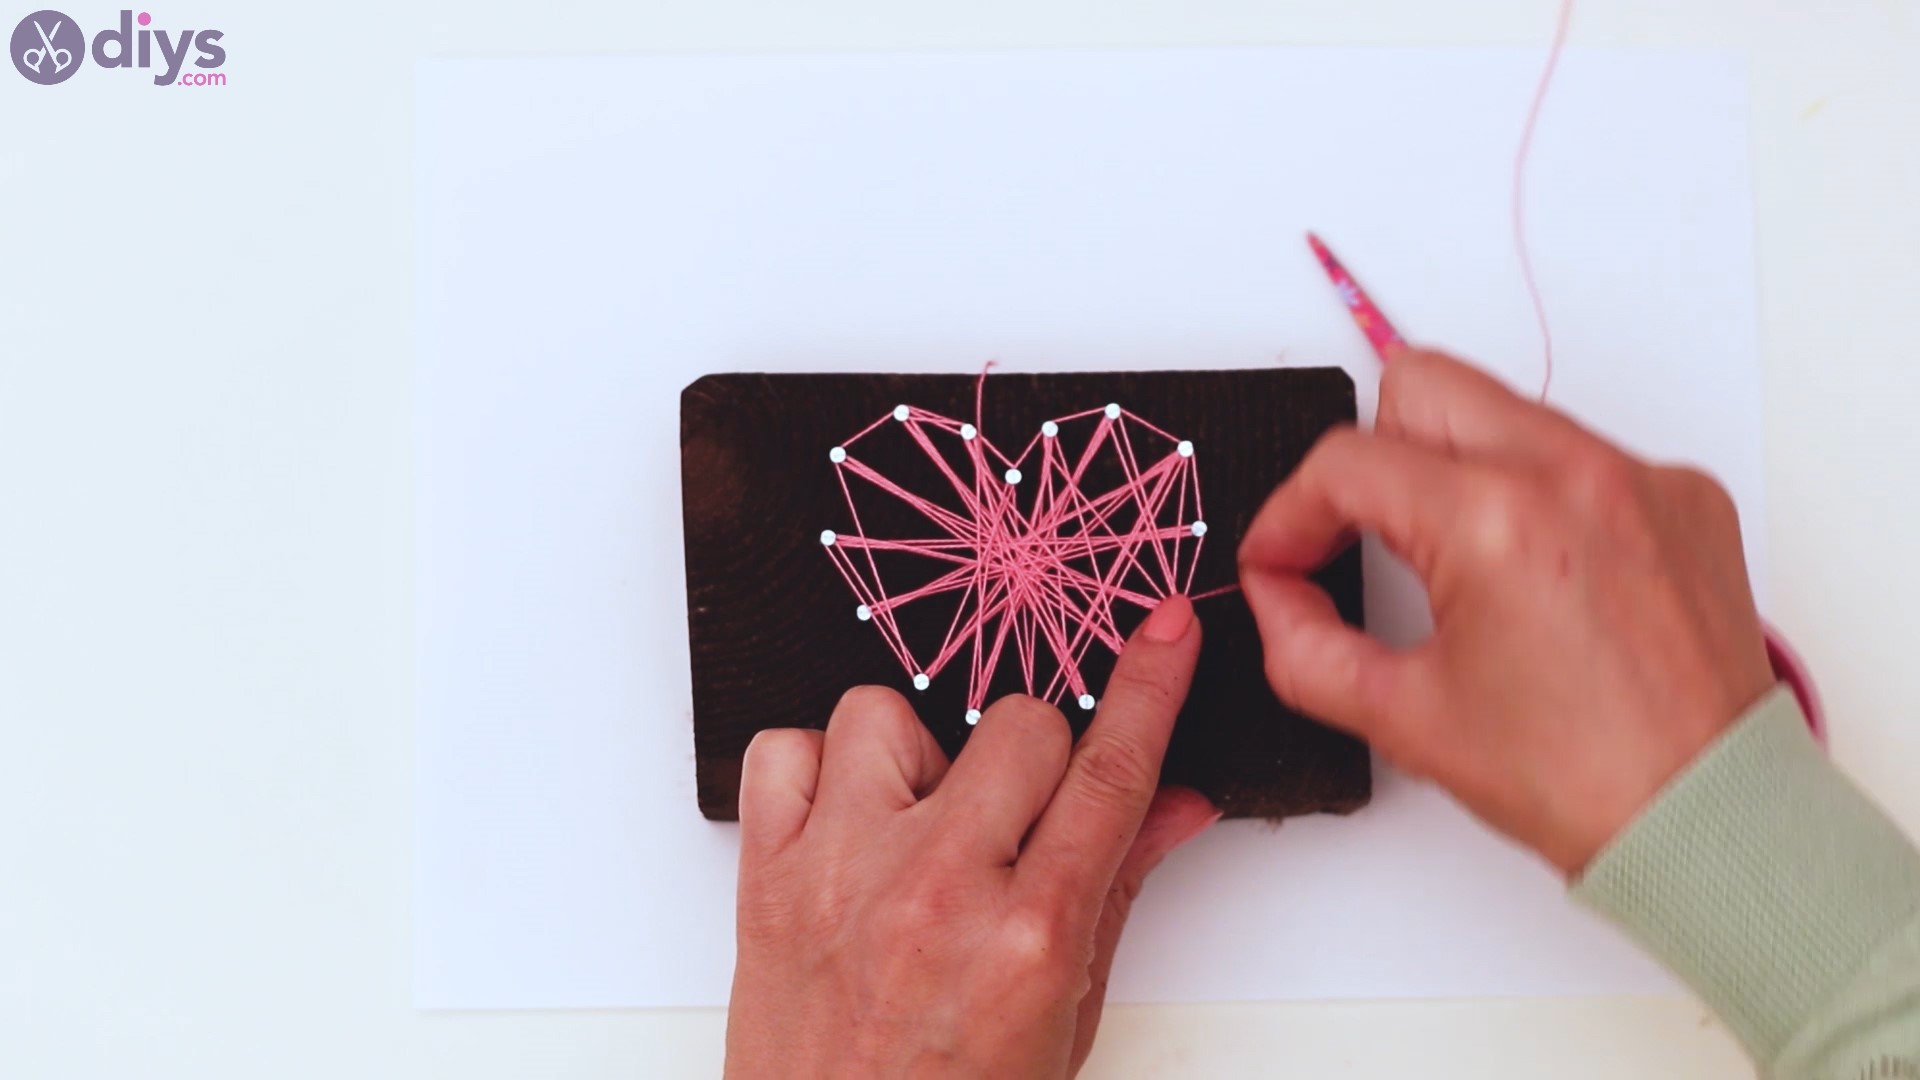
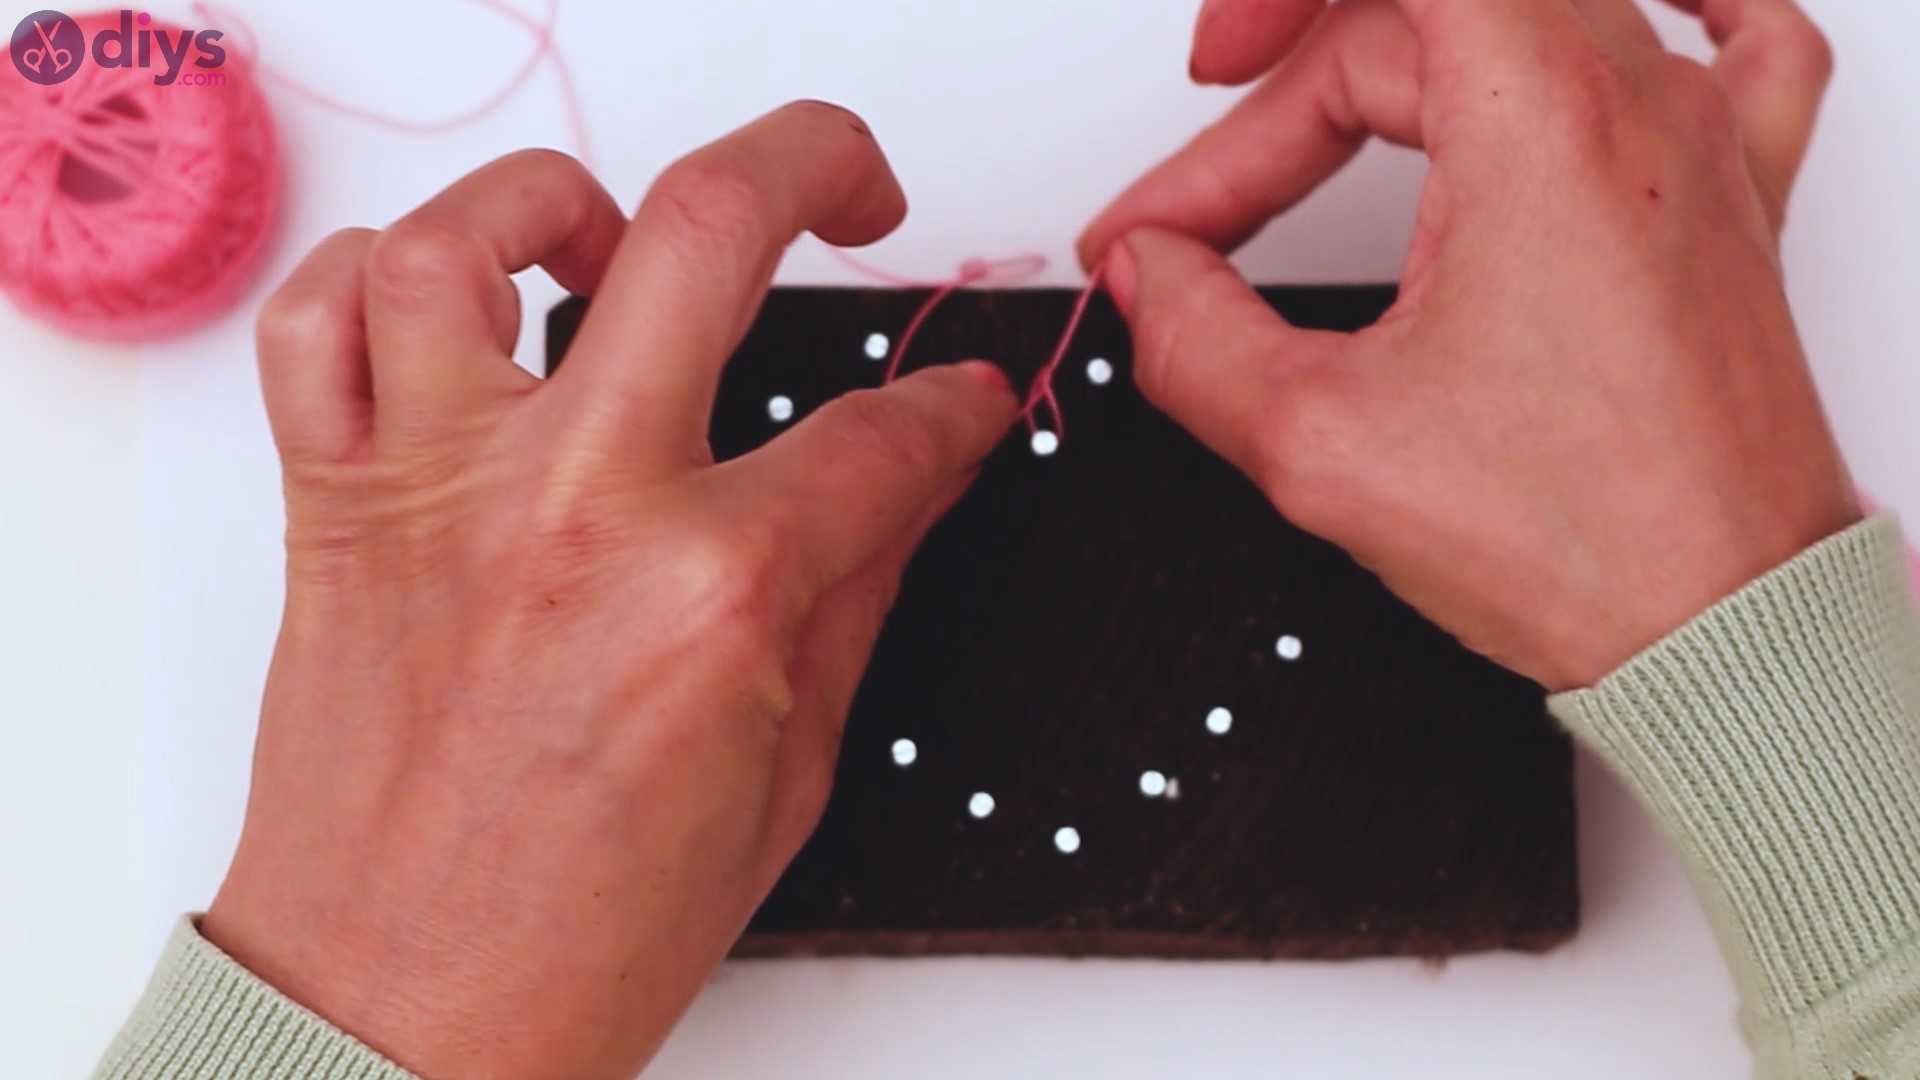
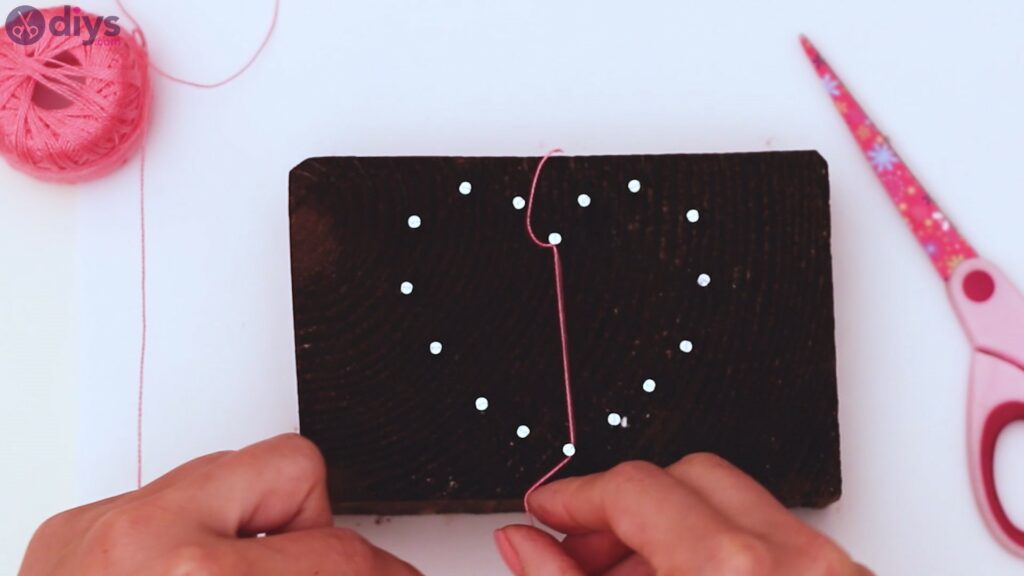
- Craft the heart: Tie one end of the pink thread around the top-middle nail and start weaving the thread along the other nails in a crisscross pattern. Continue doing so until you evenly fill the heart. When you’re done, tie the thread to the top nail and trim away the excess.
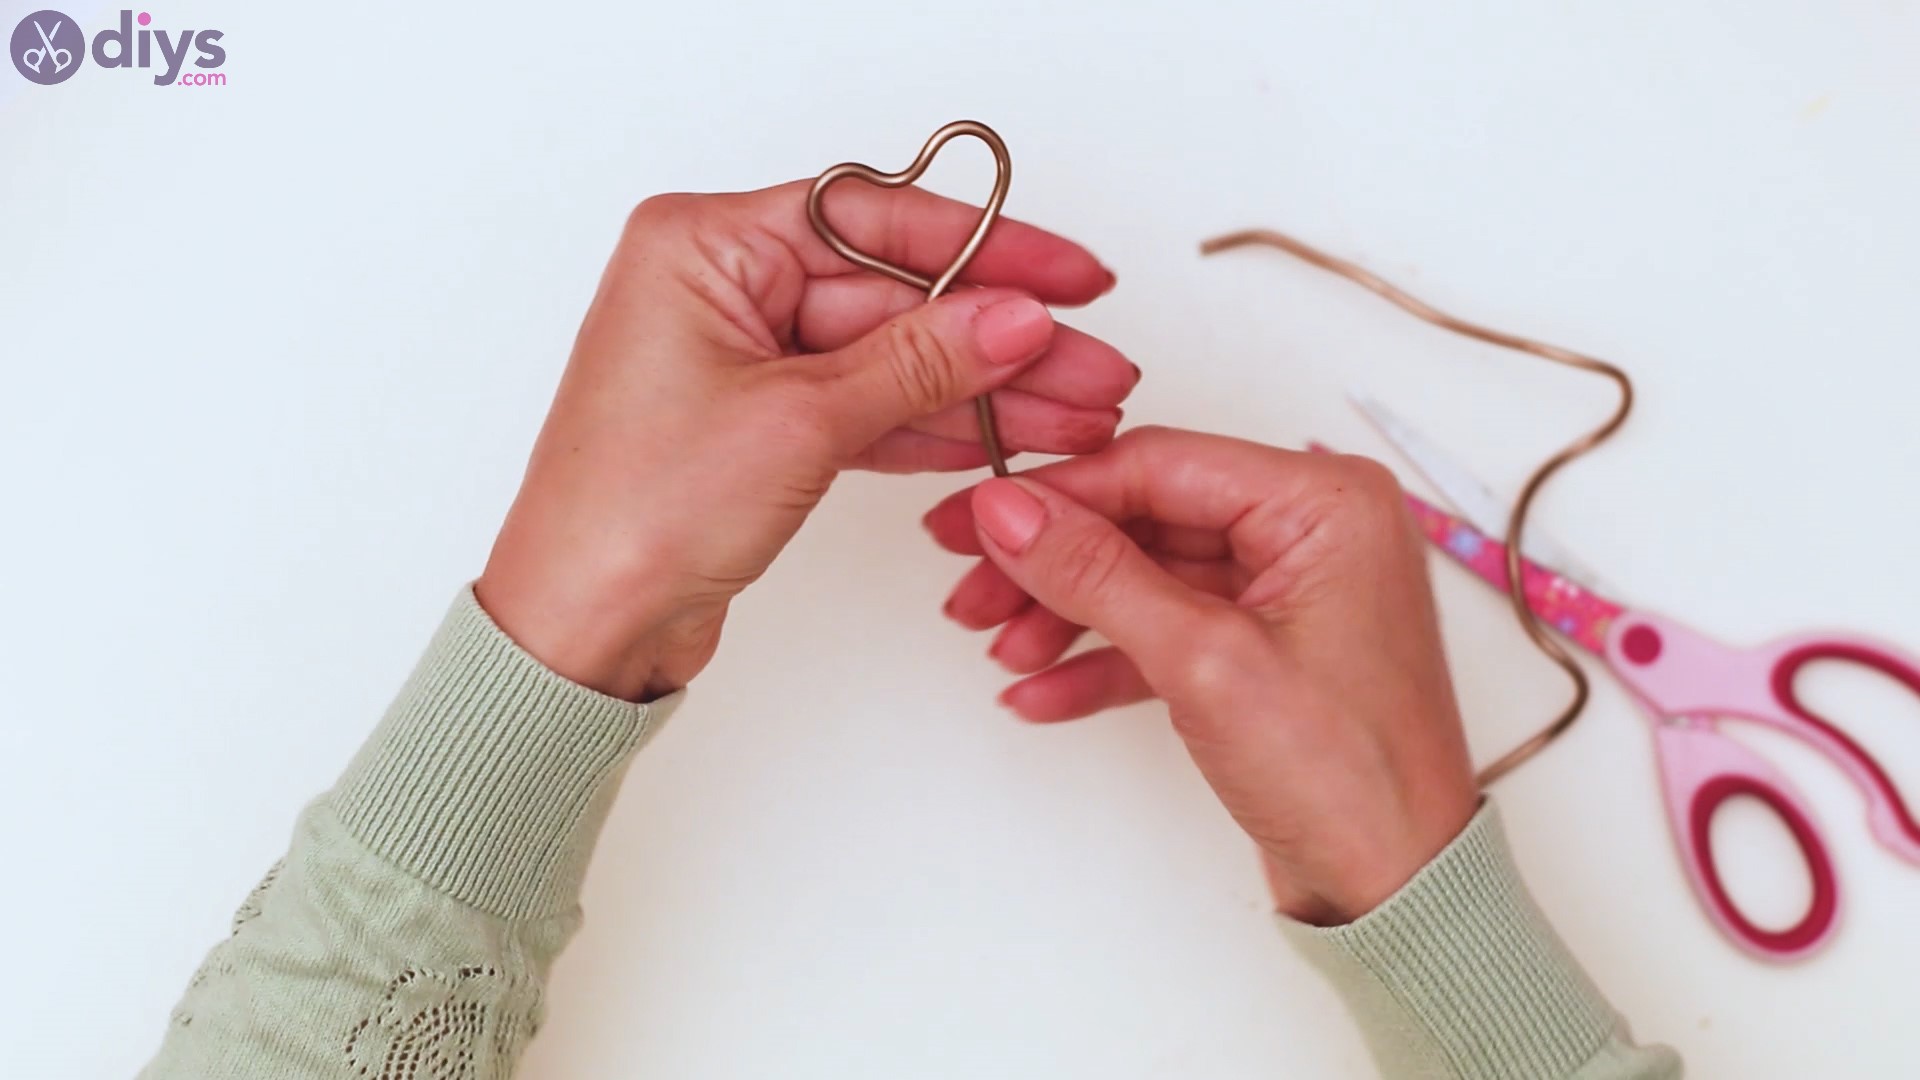
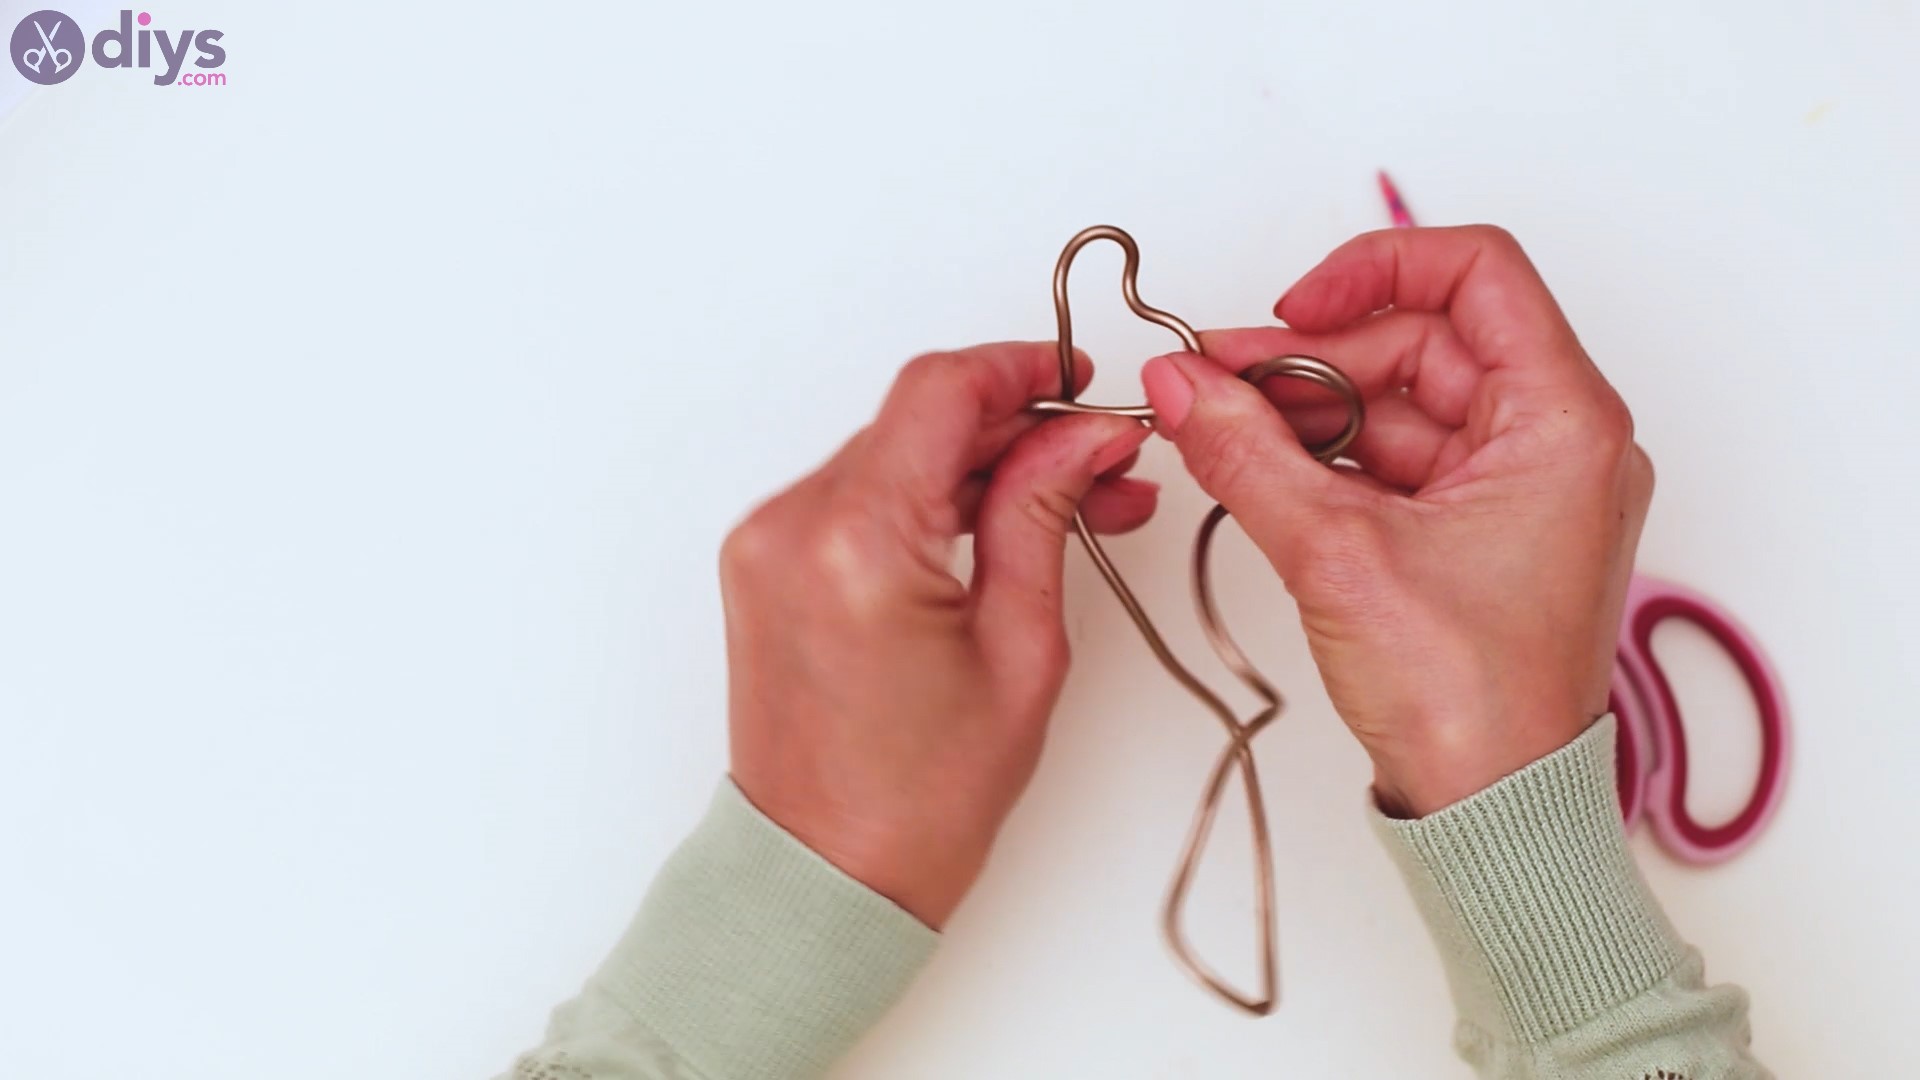
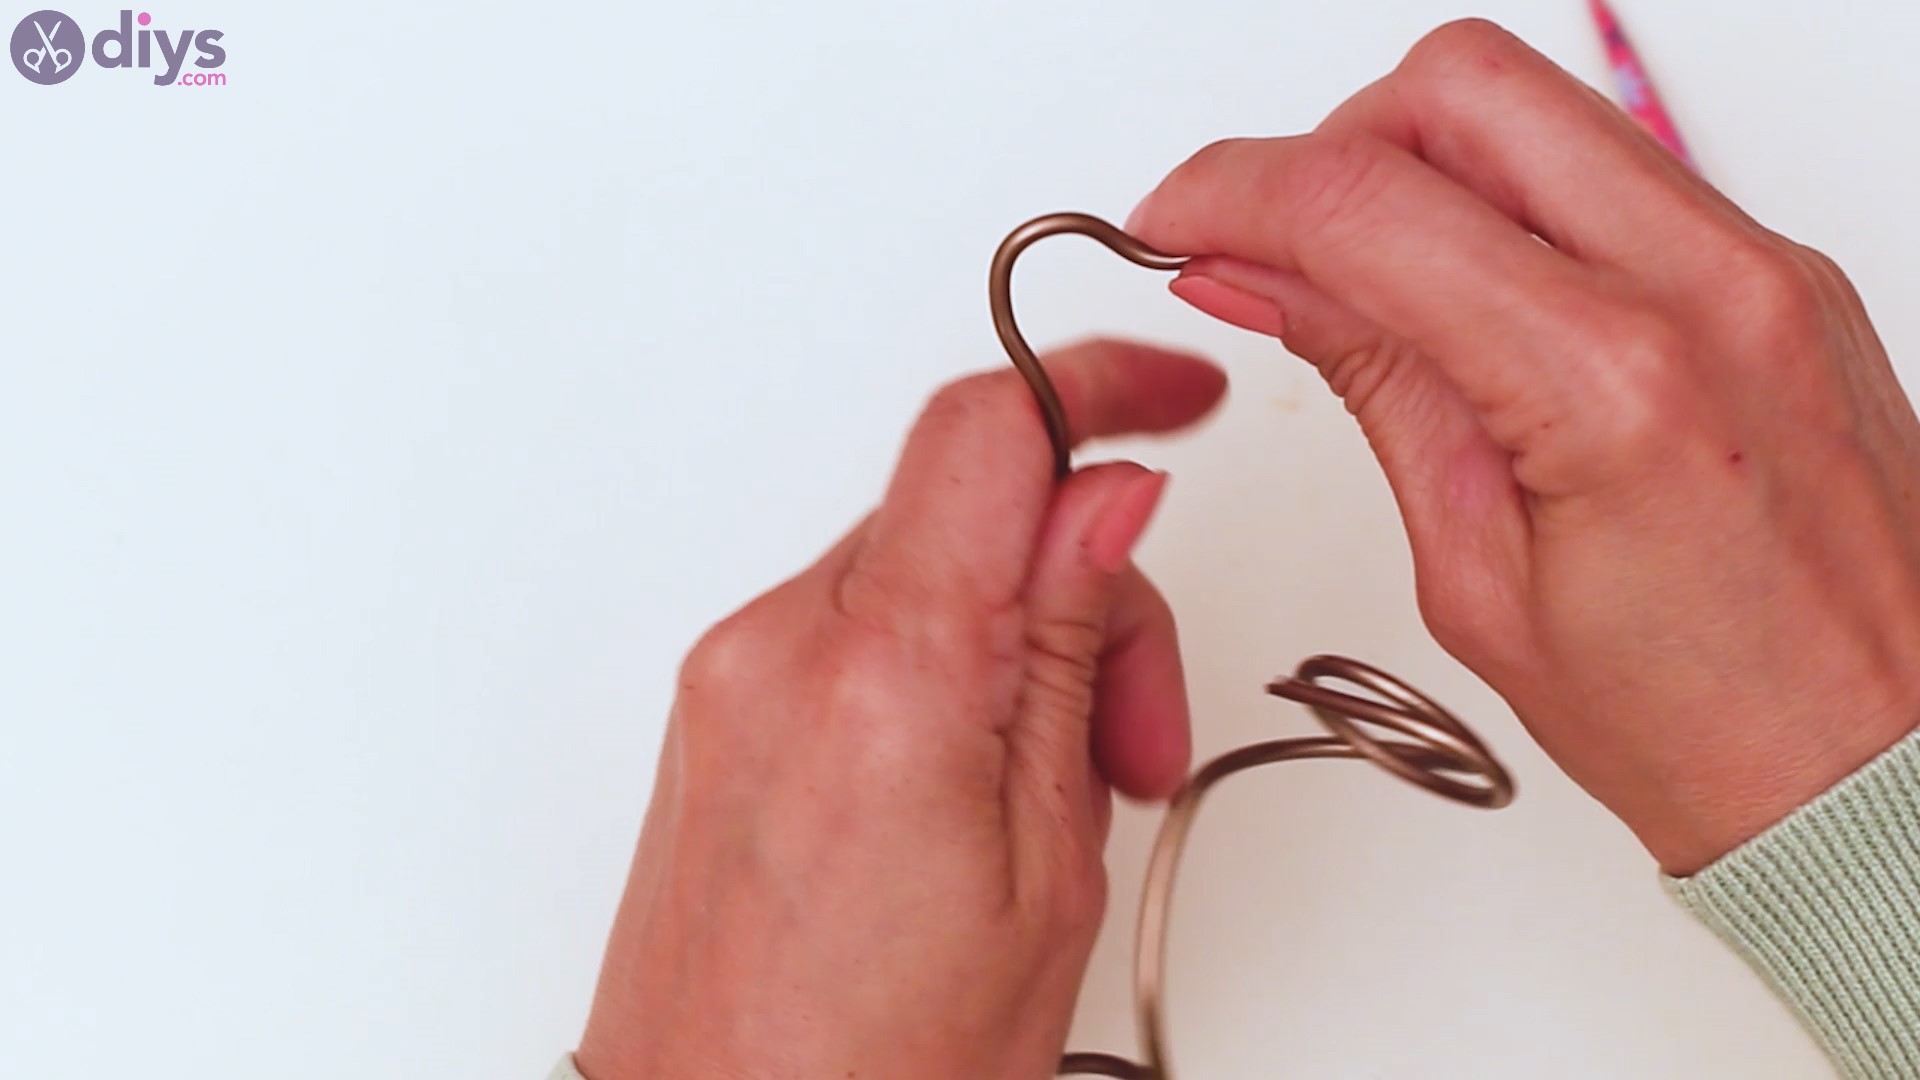
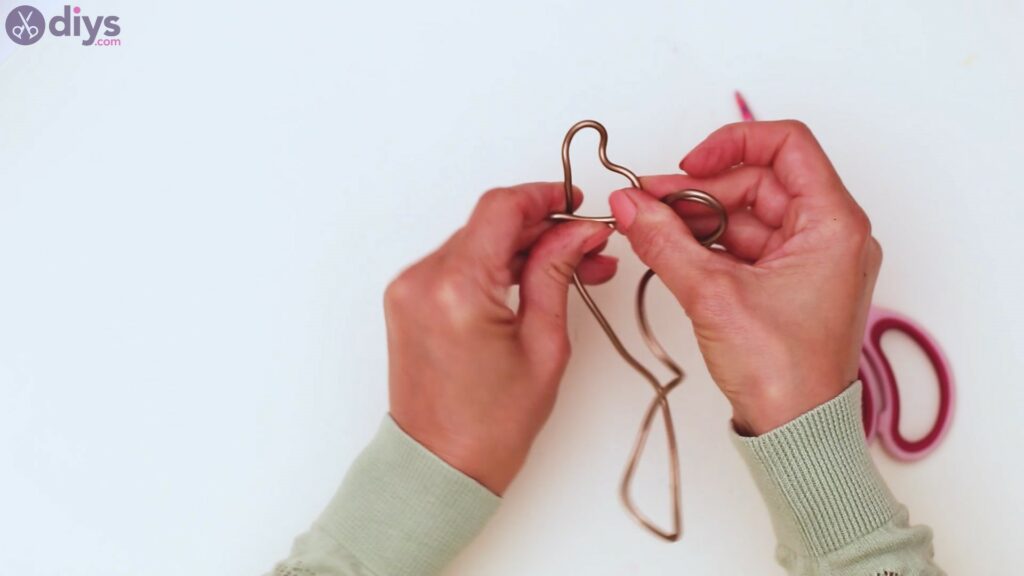
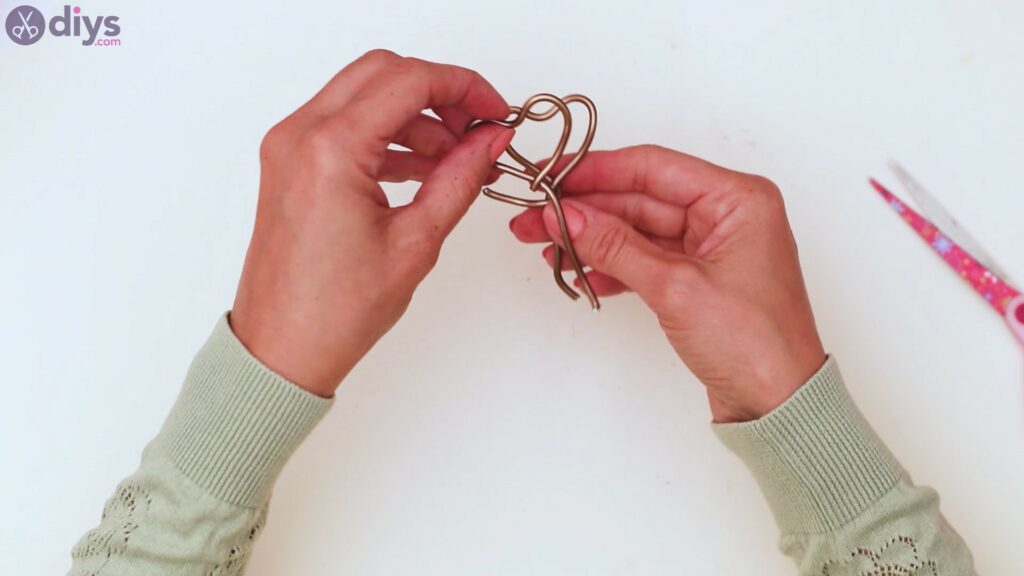
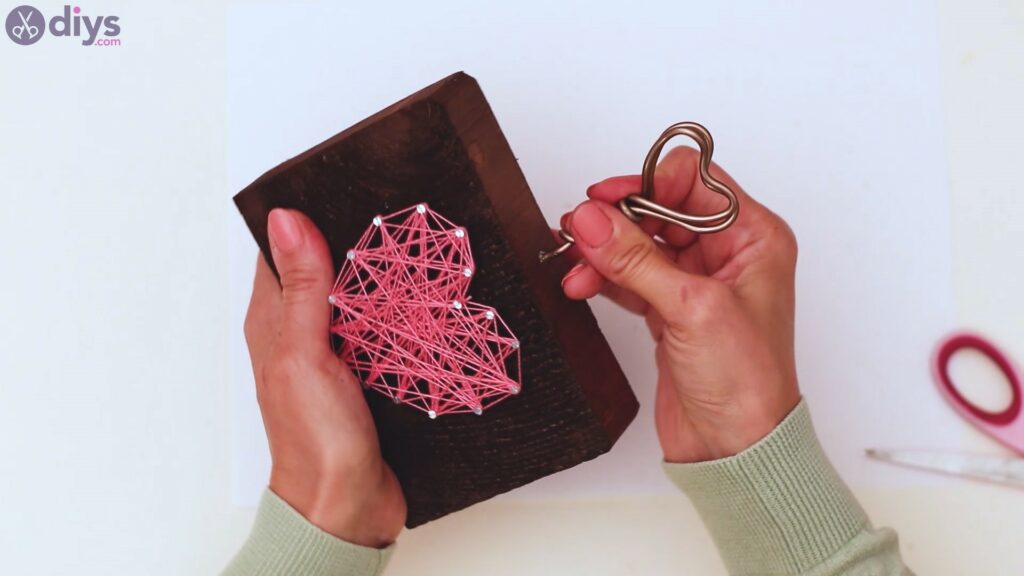
- Create the hanger: Cut a jewelry wire around 7-8 in (17-20 cm) long, bend it to form a heart, and secure the ends by twisting them together.
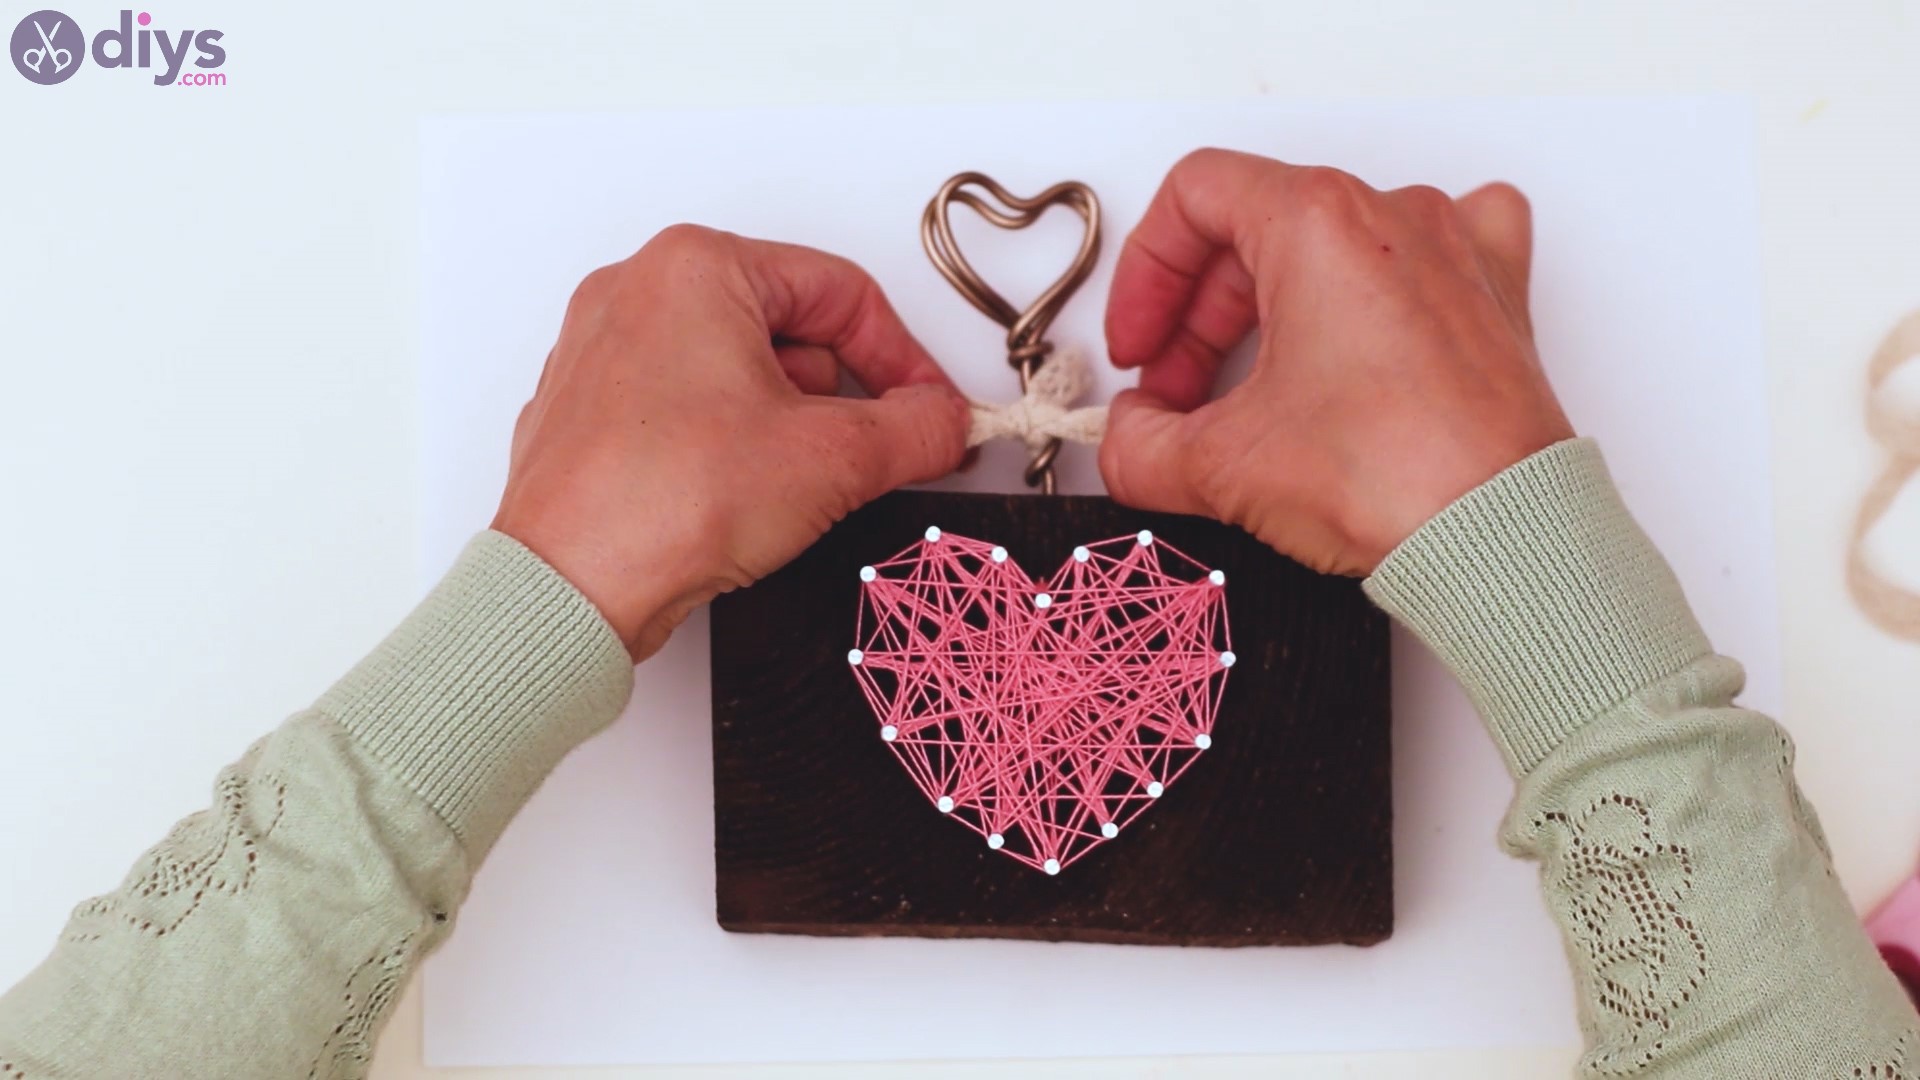
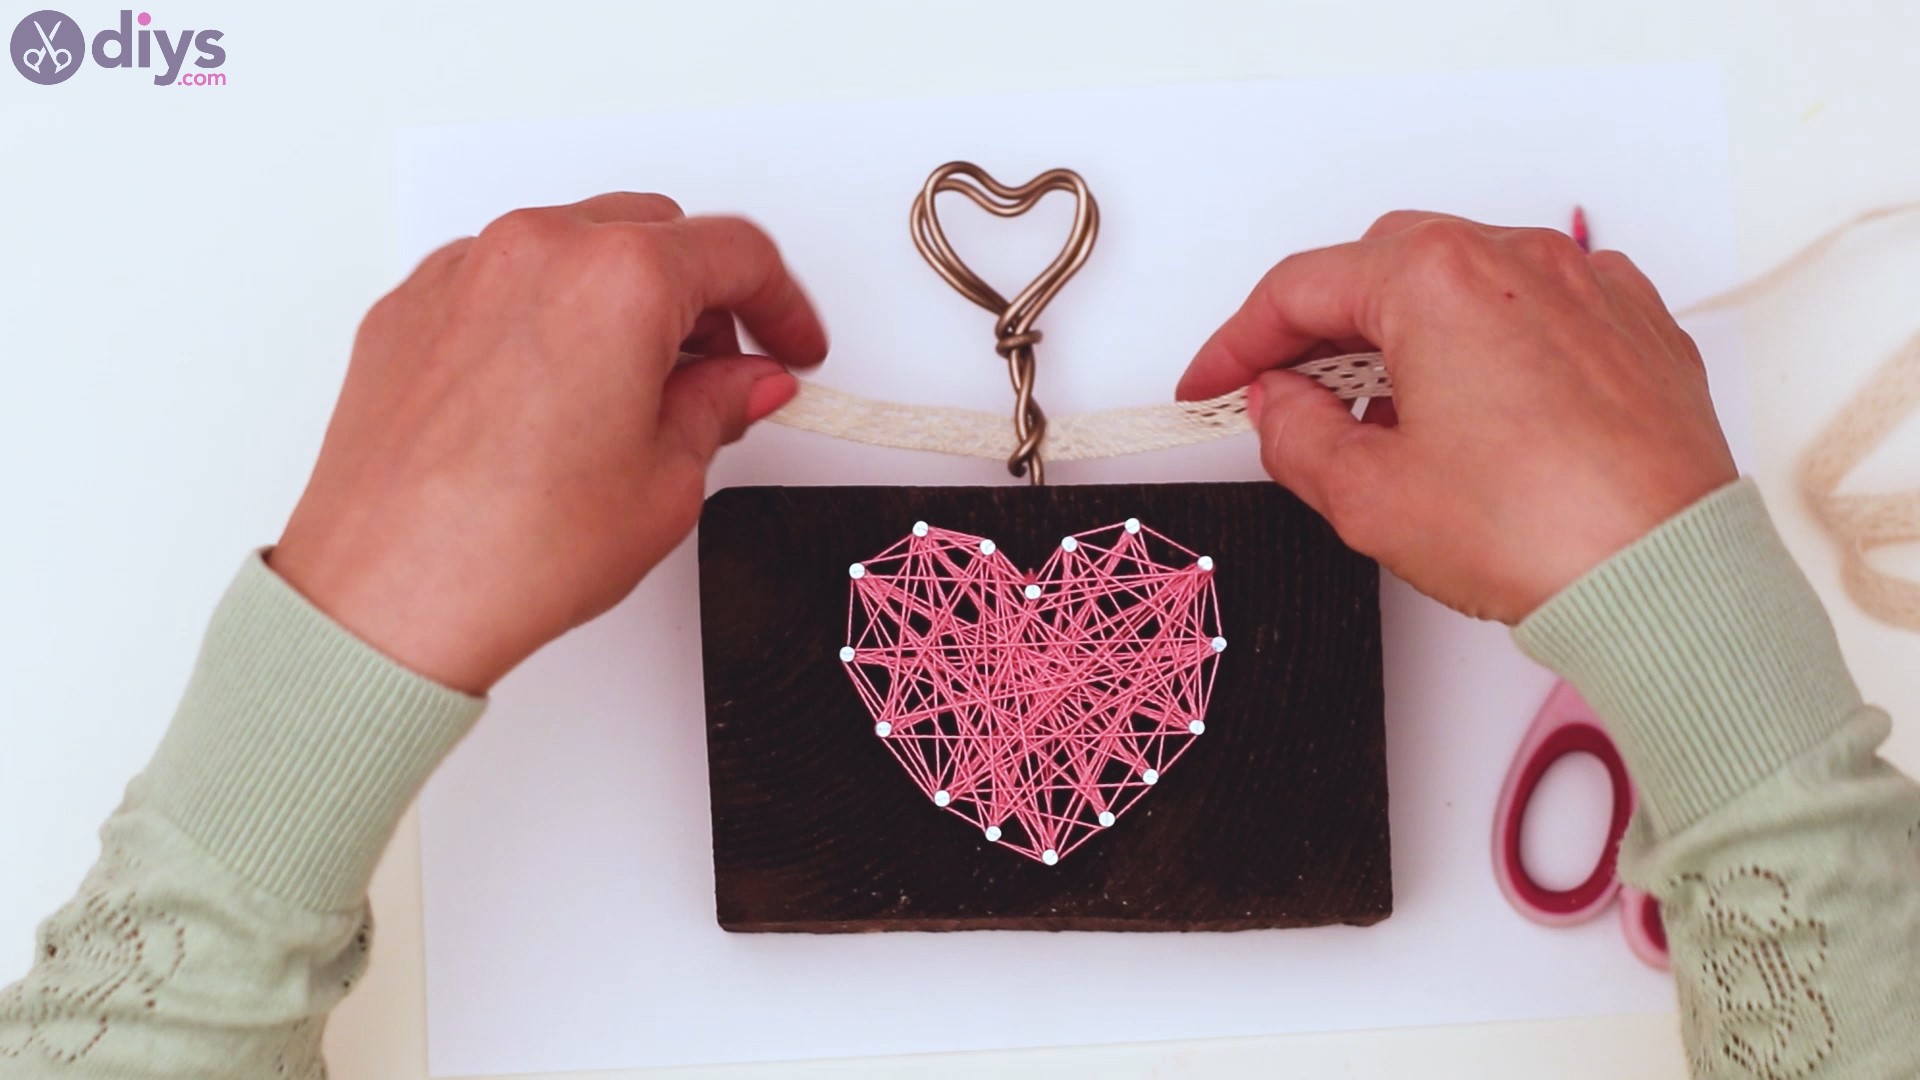
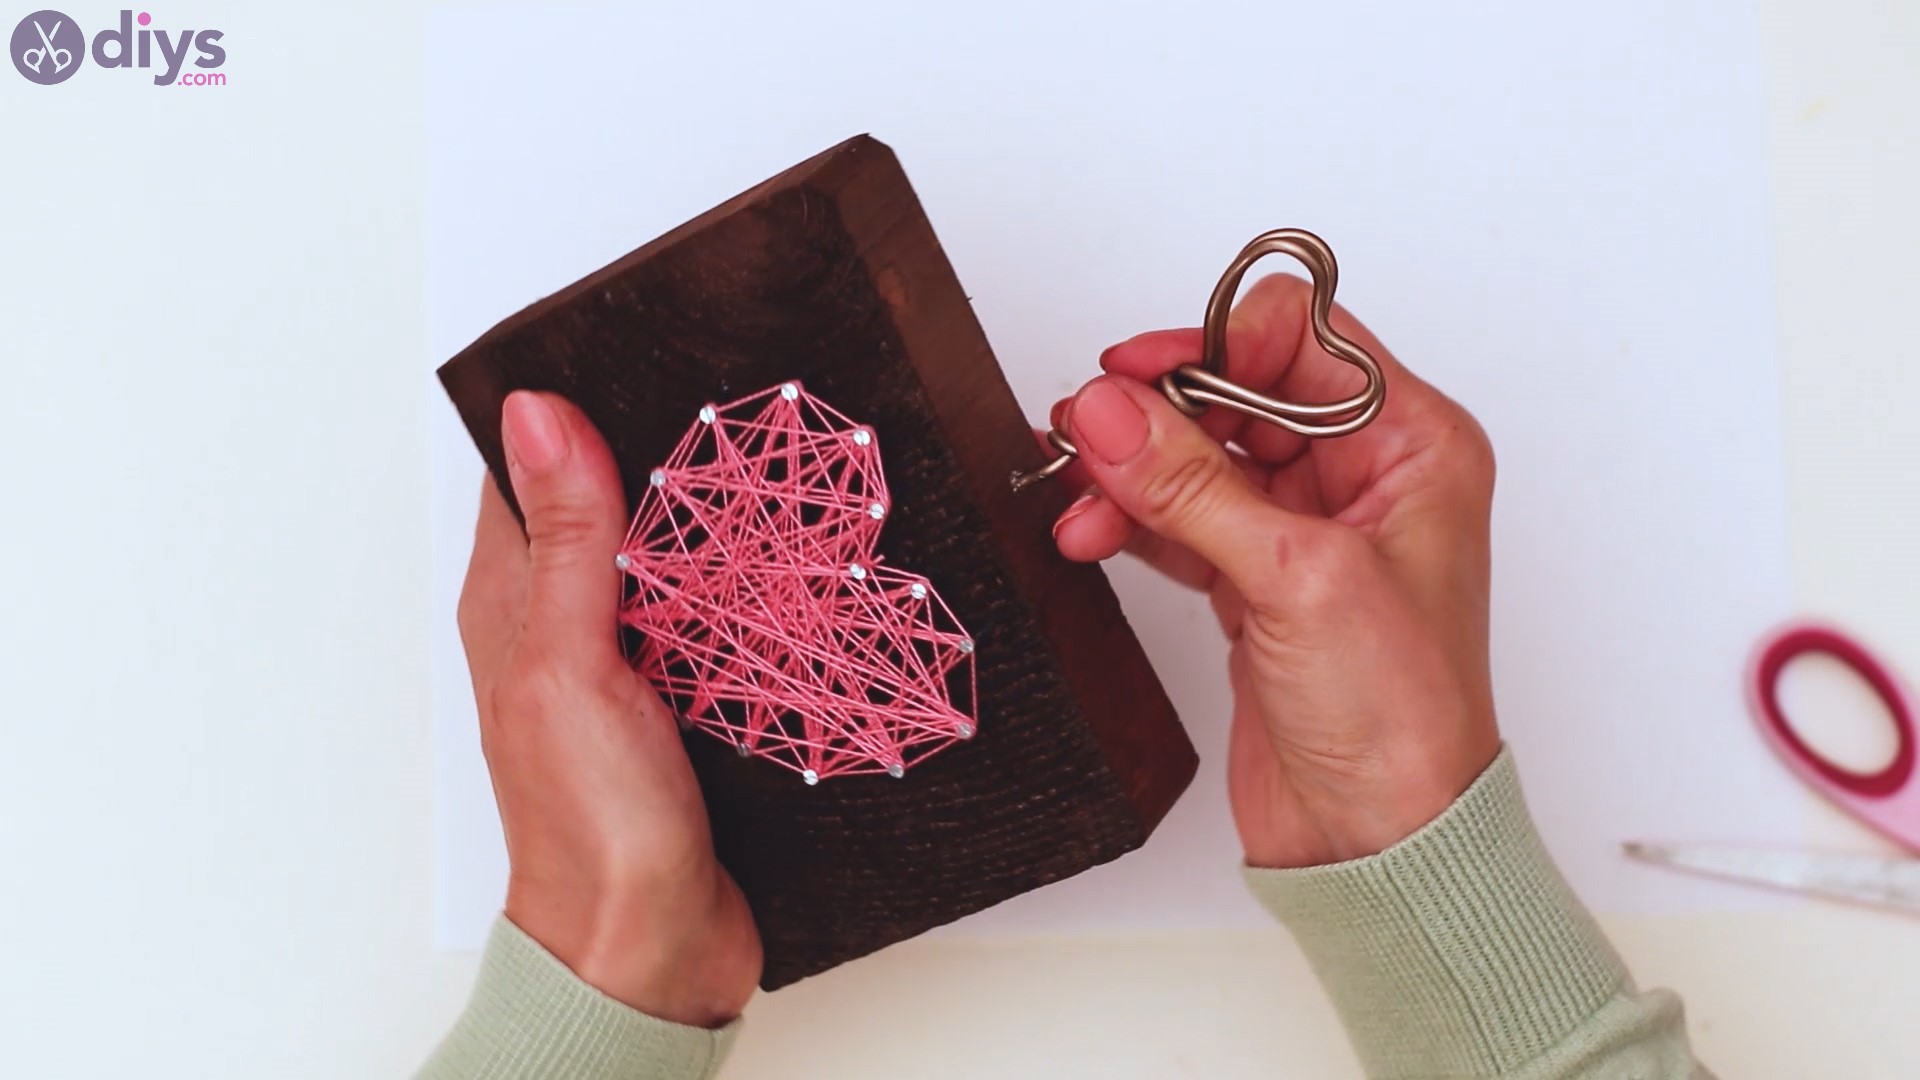
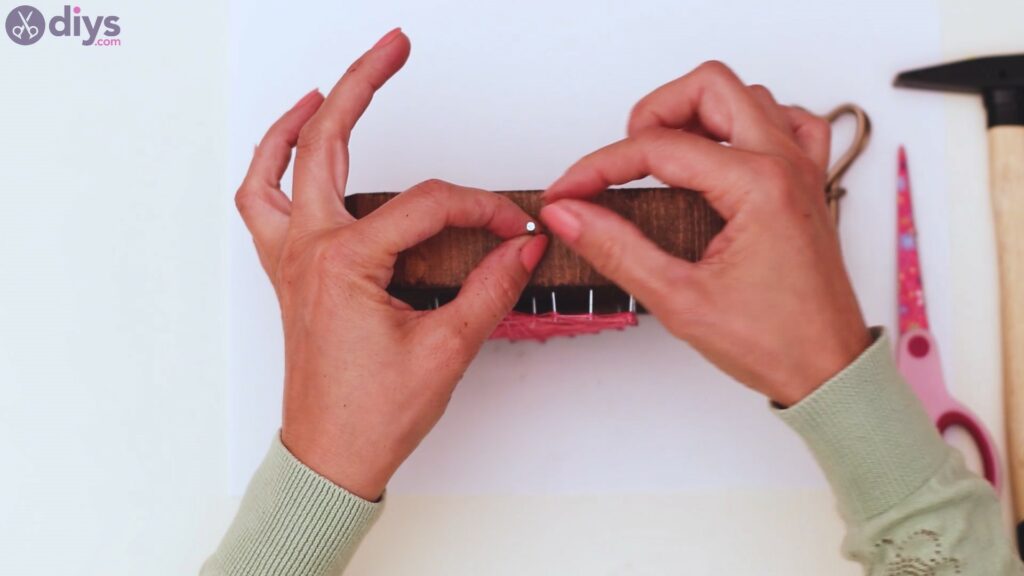
- Finish the photo holder: Hammer a nail into the top-middle of the wooden block to create a small hole. Insert the wire hanger and twist it into a secure position. Finally, wrap the lace ribbon around where you twisted the wire clips, forming a bow. Your DIY picture holder with heart-shaped string art is now complete.


Video tutorial
Check out this 3-minute video guide that better explains the instructions for making a DIY picture holder with heart string art:
More tips and tricks
Check out these tips and trips to improve or change your DIY picture holder with heart string art:
- Use paint instead of stain: Try various paint colors to create a more vibrant wooden block that matches your home decorations. You might have to use a different thread color keep the contrast.
- Use burlap: Replace the lace ribbon with burlap for a rustic appeal that suits the modern farmhouse interior design.
- Try another pattern: Make another shape instead of a heart, such as a star, diamond, or moon. Or personalize this gift by making string art using the recipient’s initials.
- Go for a long wood block: If the wood block is long enough, there will be space to create string art messages that suit any occasion. For example, write LOVE for a Valentine’s Day gift, HOME SWEET HOME for a housewarming gift, or the recipient’s name for a birthday gift.
- Add more thread colors: Instead of just one color, combine several to create a more elaborate look. For instance, use different pink shades to create a gradient heart with added depth. Or use rainbow colors to create a cheerful heart for a kid’s birthday party.
- Use pliers: Pliers help you bend wire significantly easier, especially when it comes to sharp angles, like the ones at the top and bottom of a heart.
- Use office clips: If you’re having trouble finding or shaping jewelry wire, go with steel office clips.
Closing thoughts
Creating your own heart string art photo holder is easier than you might think. It’s a suitable gift for any occasion, especially with a beautiful photo. For more romantic projects, check out this list of Valentine’s Day-themed crafts for couples.