Halloween Witch Finger Cookies And Red Velvet Hot Chocolate Recipe
Updated on November 19, 2025
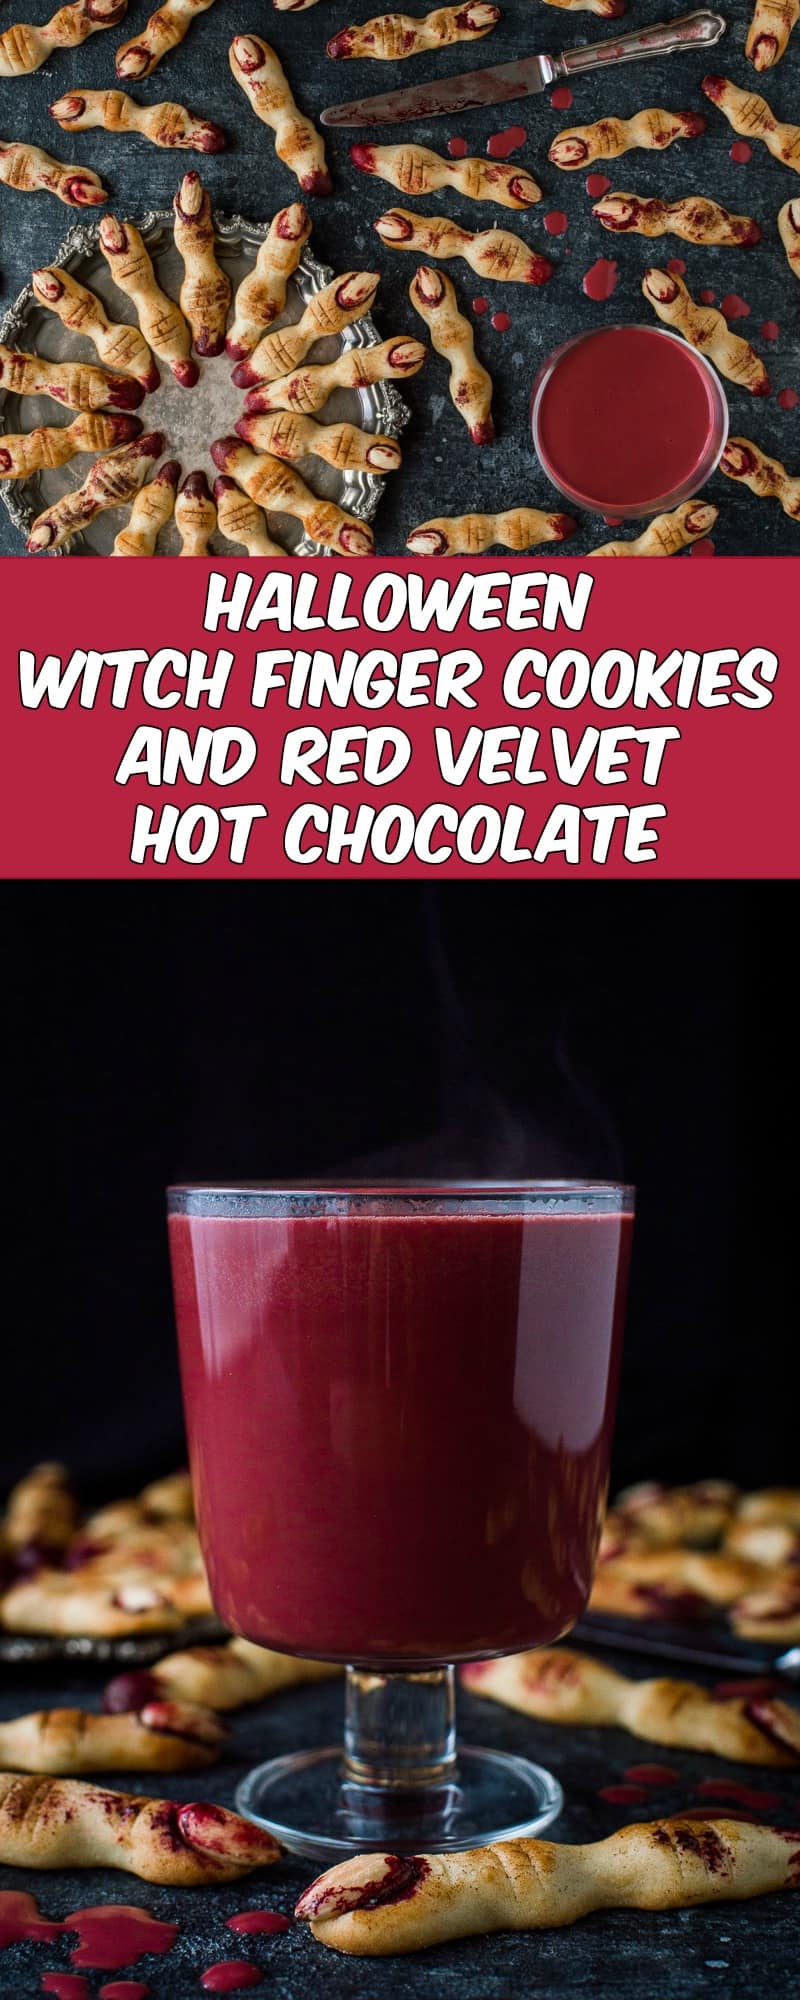
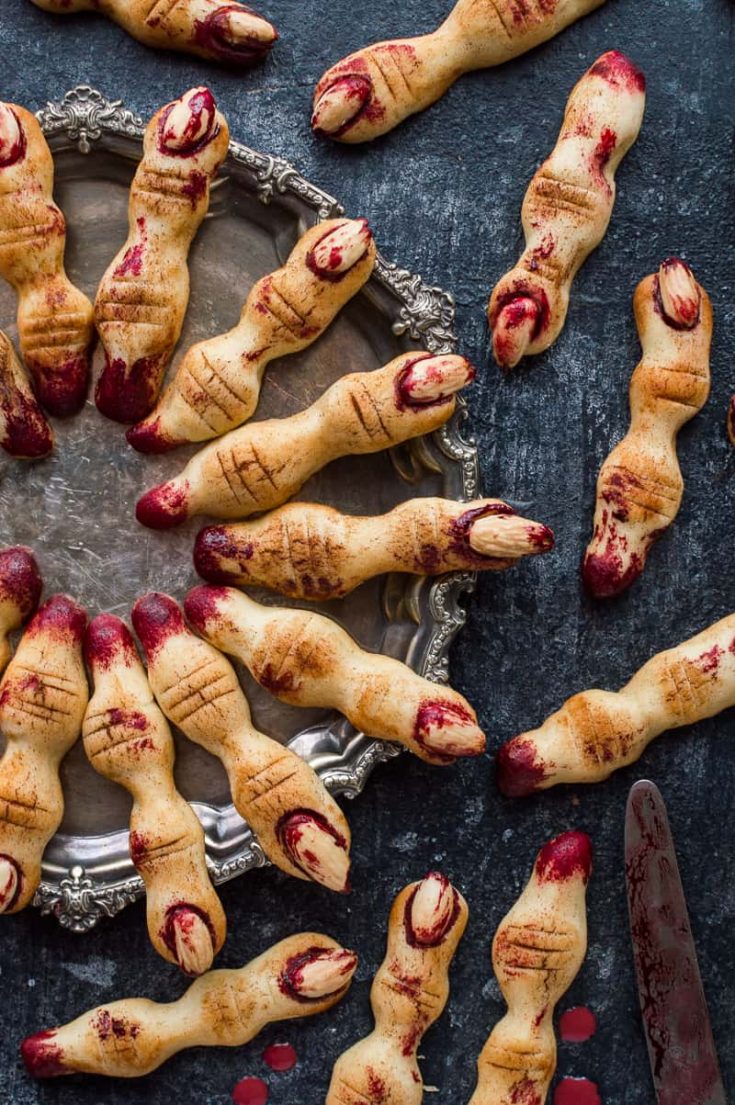
Halloween witch finger cookies and red velvet hot chocolate – a spooktacularly gruesome but delicious Halloween treat!
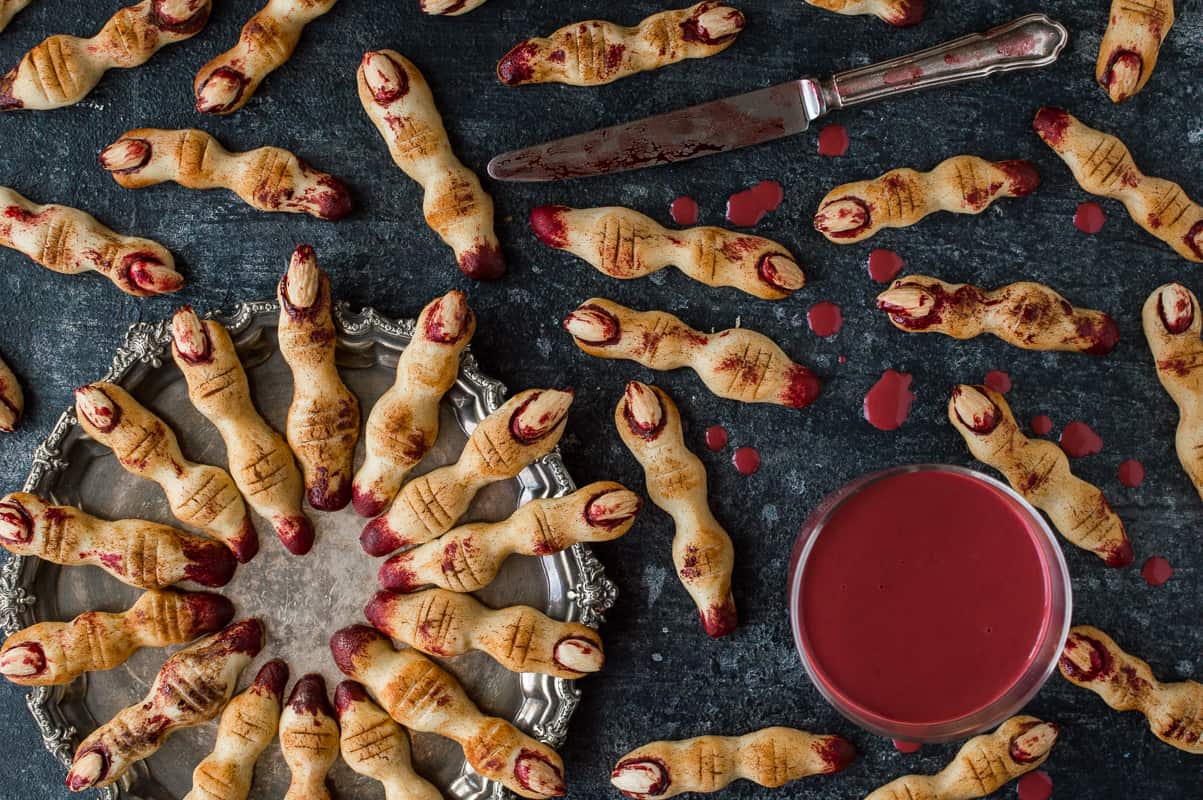
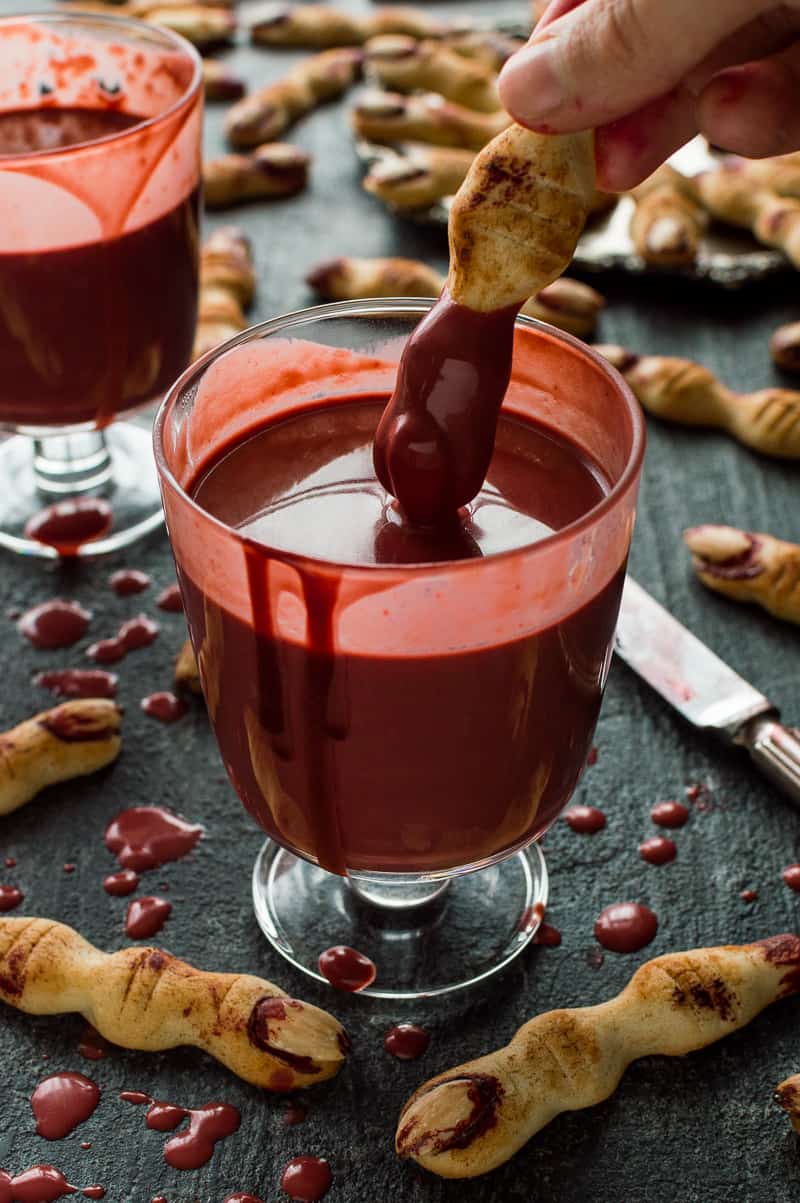
Halloween is getting close now and if you are having a party then it is time to start thinking about what gruesome goodies you are going to serve! These witch finger cookies are easy to make, fun to decorate and very spooky; especially if you serve them with red velvet hot chocolate ‘blood’ for dipping them in!
The cookies don’t just look good – they taste great too! They are made from buttery shortbread with a hint of almond; the fingernails are made with halved blanched almonds; and a little red gel food colouring ‘blood’ and cinnamon ‘dirt’ complete the effect.
The cookies are very easy to make, but it does take a while to shape them all and they need to be frozen before they are baked so that they don’t spread too much in the oven. You could make the dough and shape them in advance and then keep them in the freezer until you are ready to bake them. Once the cookies are baked and decorated they will keep in an airtight container for a couple of days so you don’t need to leave it until the last minute to make them.

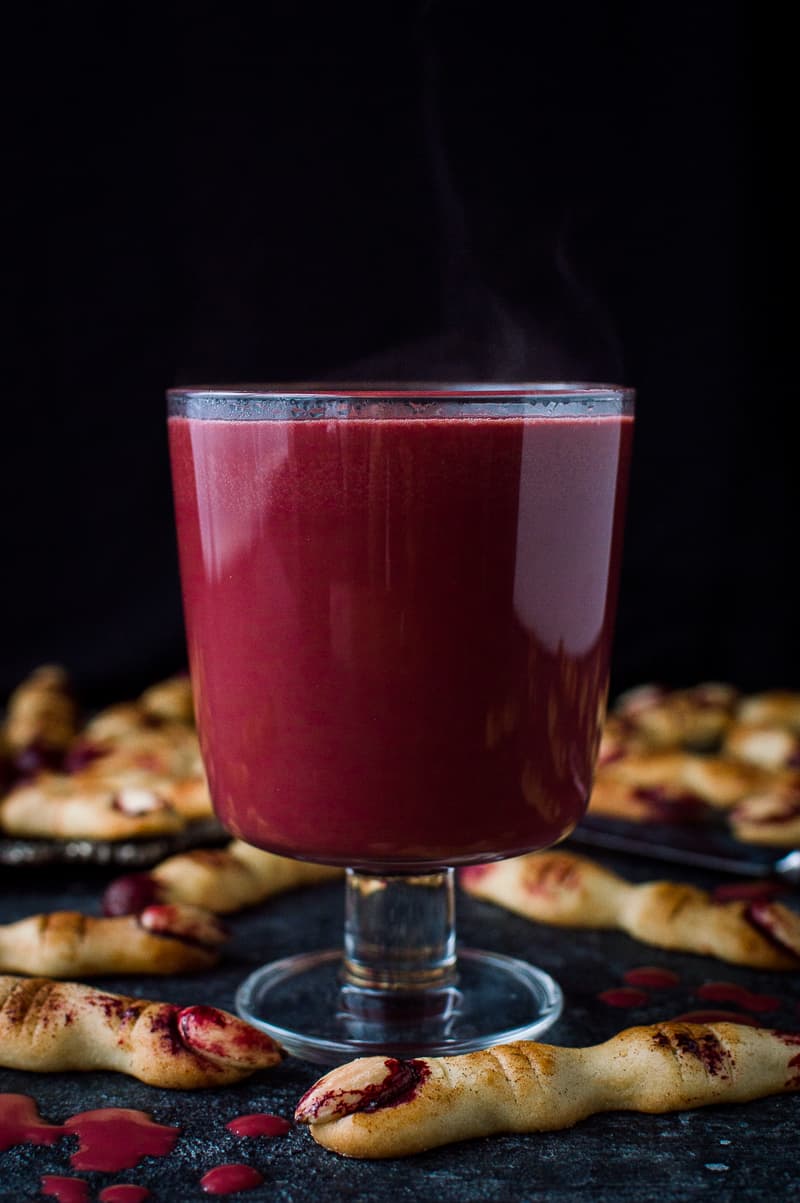
The red velvet hot chocolate is very quick and easy to make; it has a mild, not too sweet chocolate flavour and a hint of tanginess from the cream cheese – just like classic red velvet cake with cream cheese frosting. The recipe I have given makes a thick hot chocolate which is perfect for dipping your witches fingers in! If you prefer your hot chocolate to be thinner then you can just omit the cornstarch. I’ve given the quantities to make one mug of hot chocolate so you will need to multiply the recipe by the number of people you are serving.
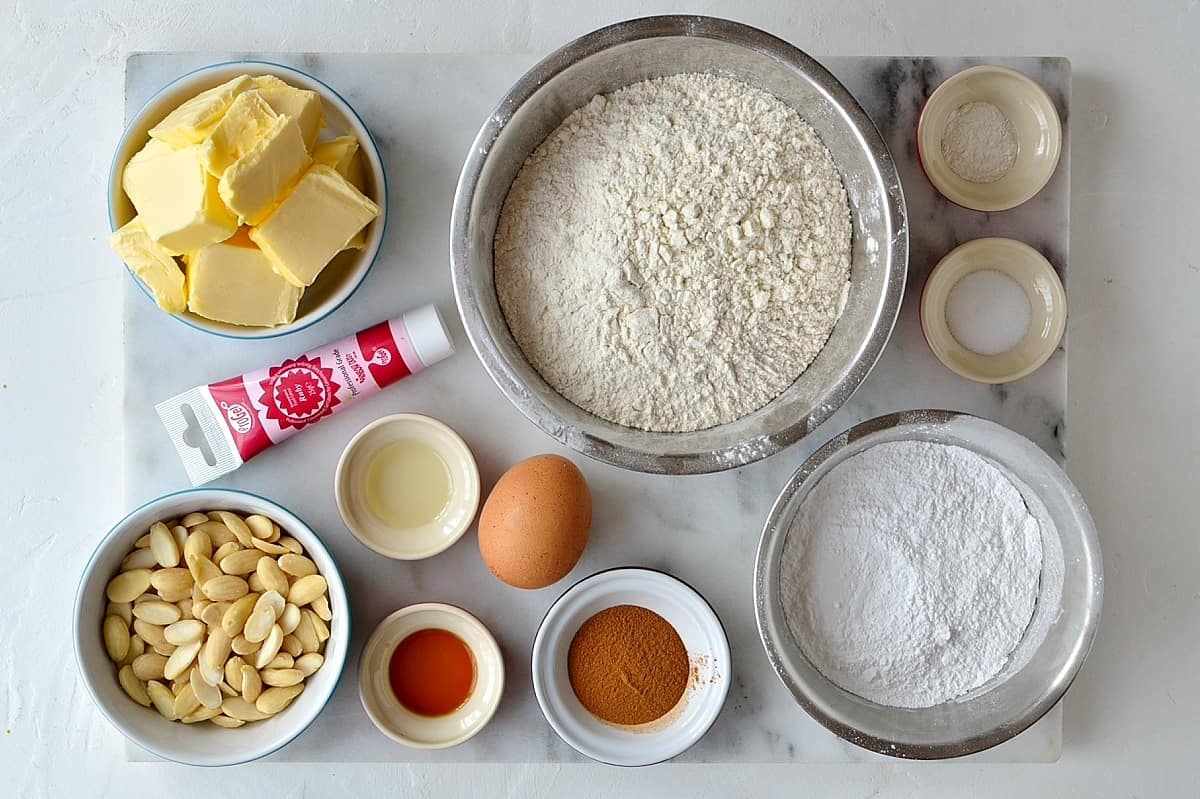
Ingredients for the Halloween Witch Finger Cookies :
(Makes about 4 dozen cookies)
- 2 sticks softened butter
- 1 cup powdered sugar
- 1 large egg
- 1 tsp vanilla extract
- 1/2 tsp almond extract
- 3 cups all-purpose flour
- 1 tsp salt
- 1/4 tsp baking powder
- 3/4 cup blanched almonds, halved
- ground cinnamon
- red gel food colouring
- a little melted chocolate if needed
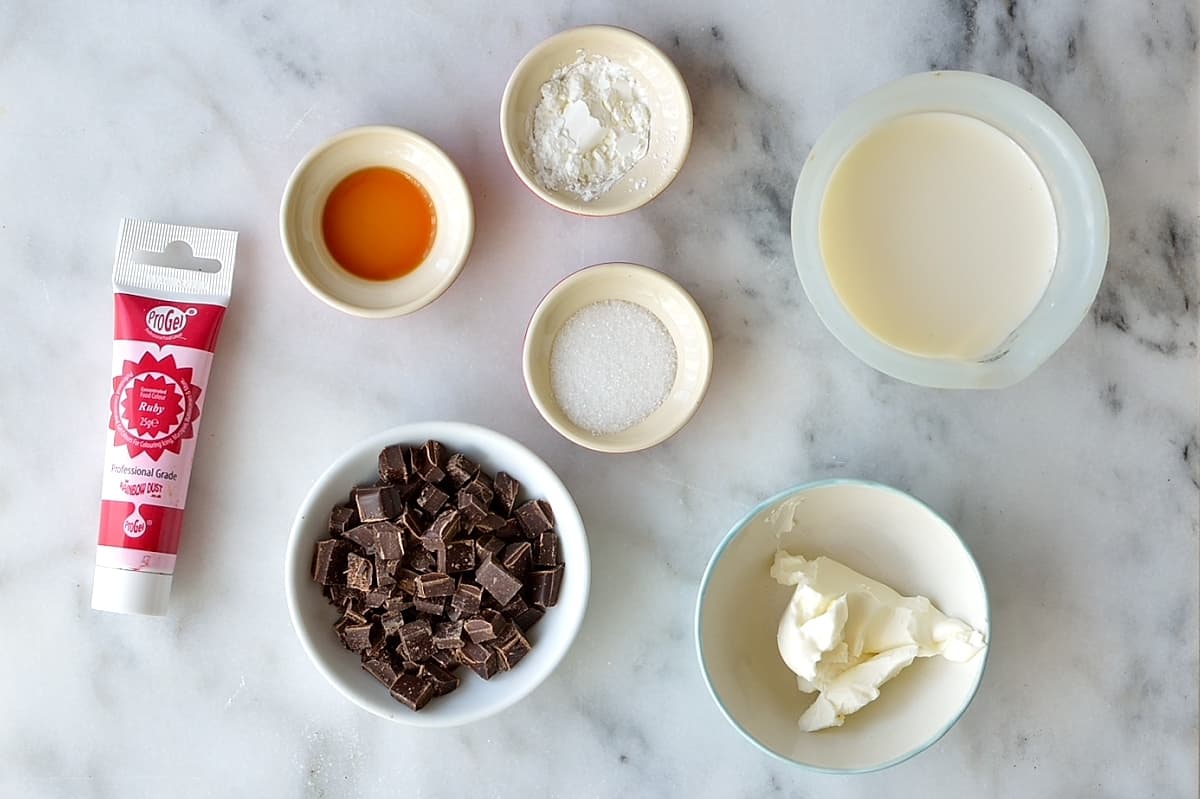
Ingredients for the Red Velvet Hot Chocolate:
(Per 1 cup)
- 2 Tbsp cream cheese (regular or low fat)
- 1 cup milk
- 1 tsp cornstarch (optional)
- 1.5 oz semi-sweet chocolate, chopped
- 1/2 tsp vanilla extract
- 1/2 Tbsp granulated sugar
- pinch salt
- red gel food colouring
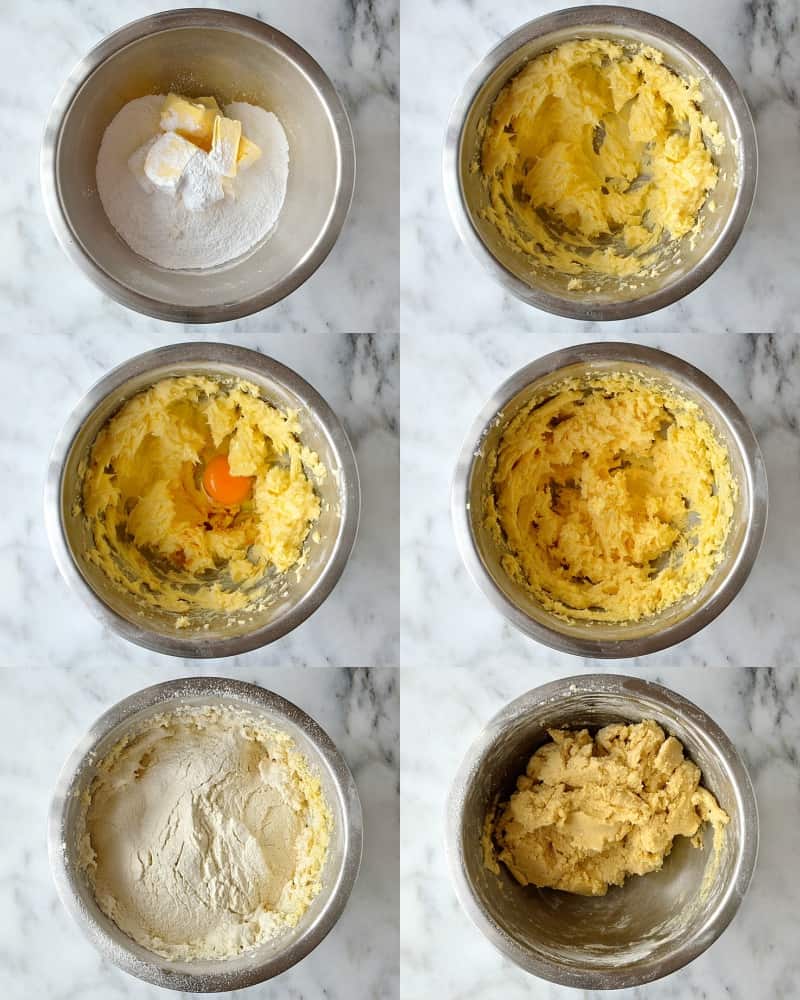
- To make the witch finger cookies: Place the butter and powdered sugar in a large bowl and whisk with an electric mixer until just combined. Add the egg and vanilla and almond extracts and whisk again to mix.
- Sift together the flour, salt and baking powder and add to the bowl; fold it in until it forms a dough. Cover and place in the fridge for half an hour.
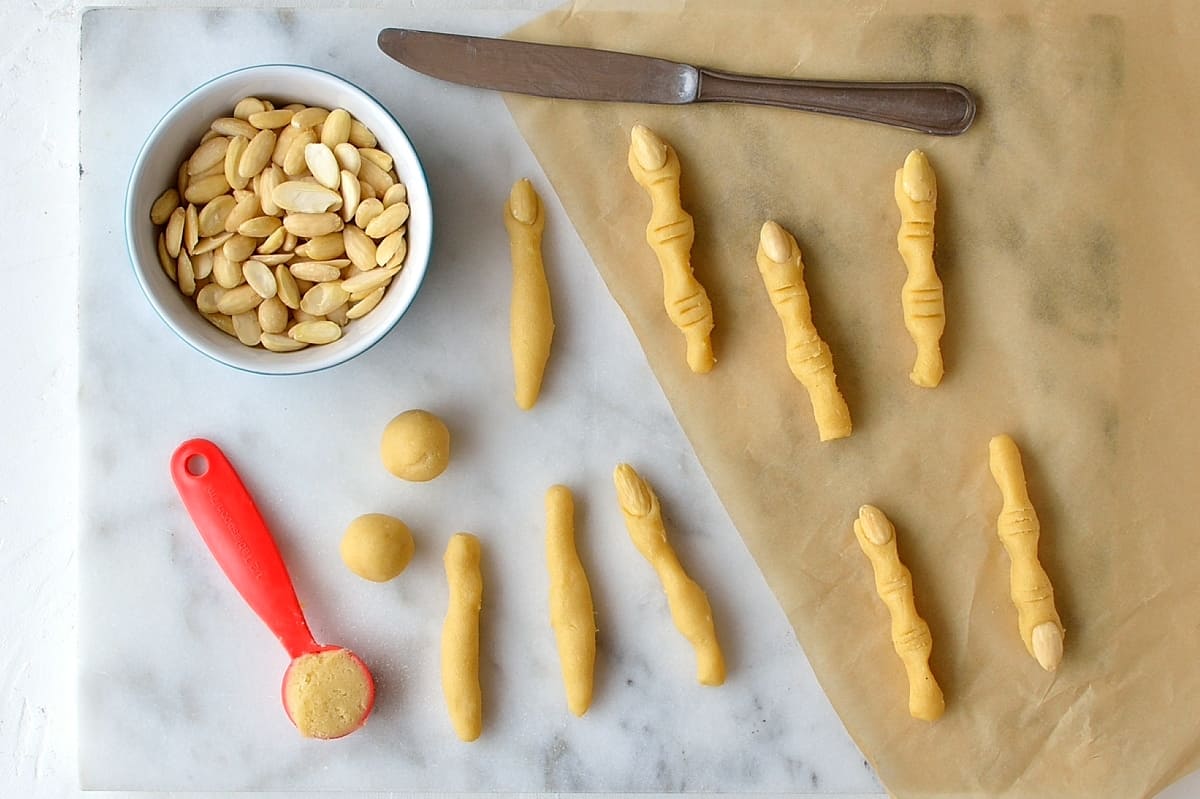
- Line a couple of baking sheets with baking parchment. Working with ¼ of the dough at a time, leaving the rest in the fridge, measure out ½ Tbsp quantities of dough (don’t use more than this or your cookies will end up way too big). Roll each into a ball then roll out into a log shape.
- Press a blanched almond into one end to form a fingernail, then lightly flour your hands and use them to shape it into a knobbly finger shape. The cookies will spread a little in the oven so you need to make sure that you make them quite thin – thinner than you want the cookies to end up. Use the back of a knife to make indentations in the knuckles to make them look more like fingers.
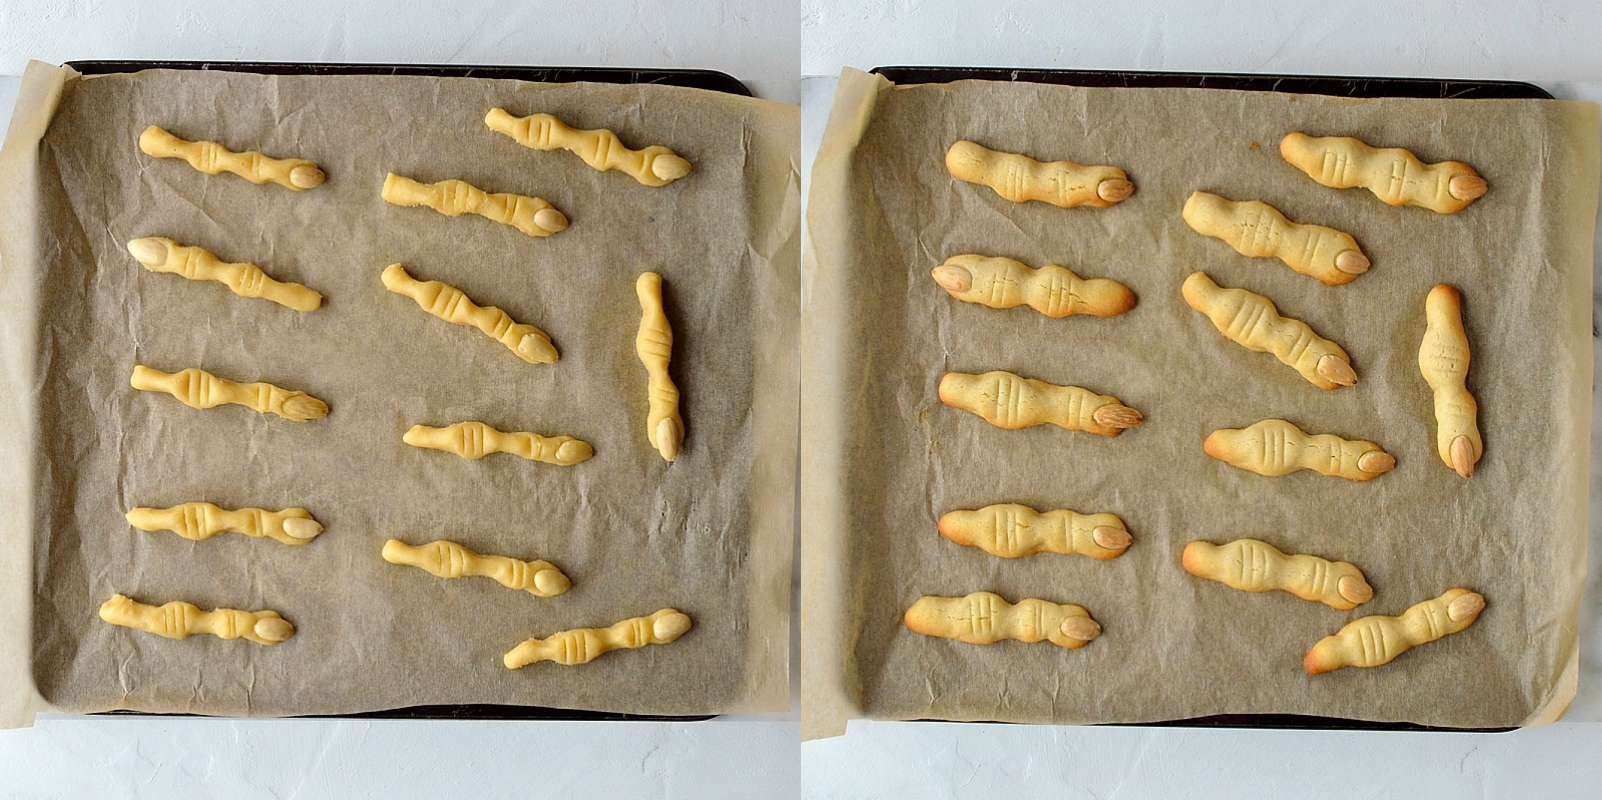
- Place the shaped cookies well spaced apart on the prepared baking sheets then place them in the freezer for at least 20 minutes, until frozen solid (this helps stop them spreading in the oven).
- Meanwhile, heat the oven to 375°F. Bake the cookies for about 10 minutes, until pale golden. You will need to bake them in batches, keep the rest of the cookies in the freezer.
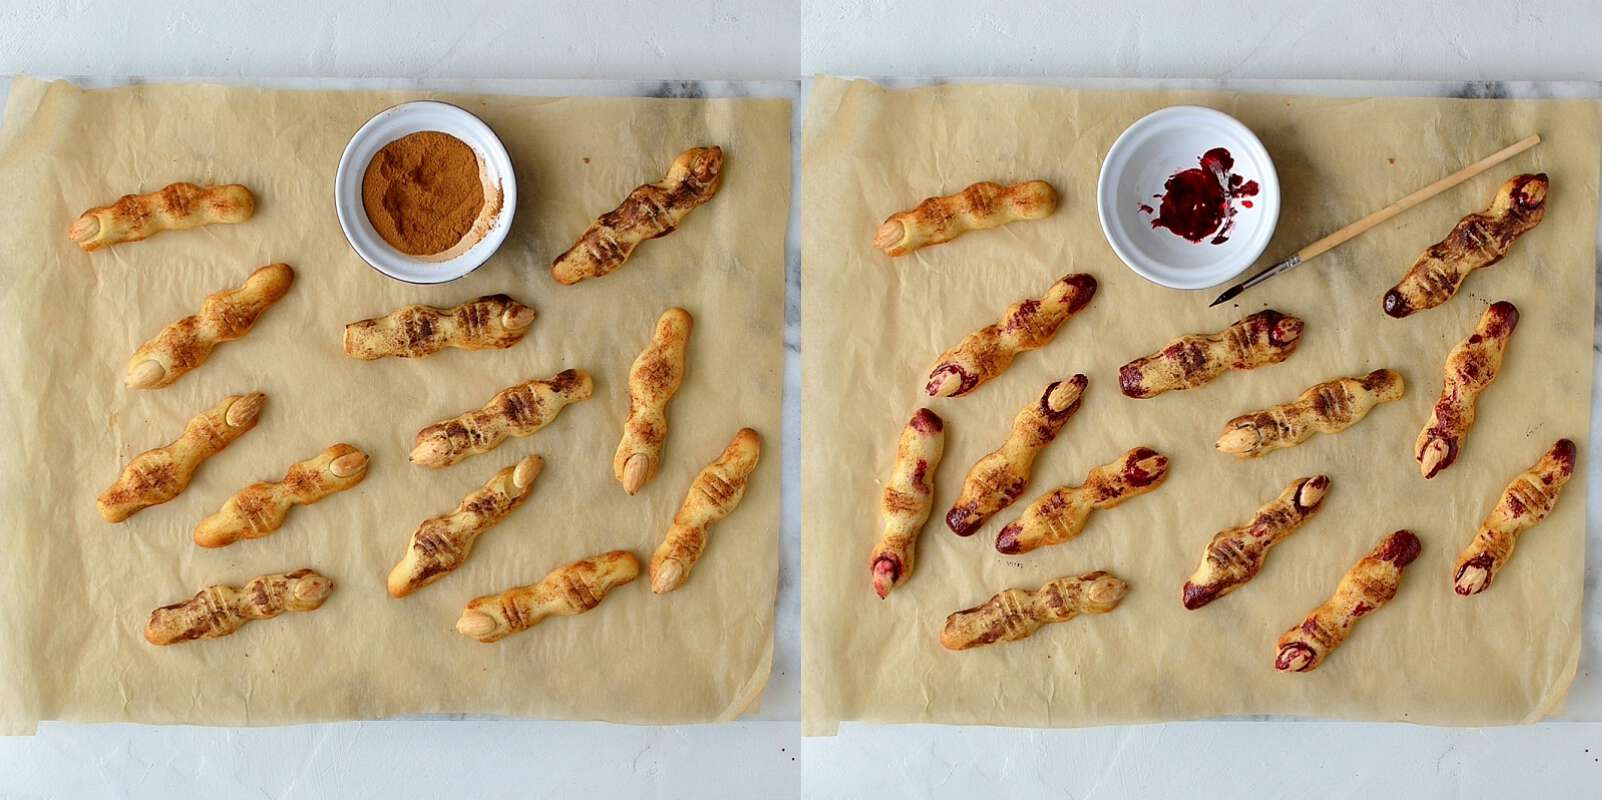
- Leave the cookies to cool on the tray. When you are ready to decorate, use a little melted chocolate to stick on any fingernails that have come loose. Rub a little bit of ground cinnamon into the creases in the joints to make them look dirty.
- Use a fine, food-only paintbrush to paint some red gel food colouring around the edge of the nails and on the ‘stumps’. If you find that the colouring is too thick to paint or too dark in colour then you can thin it with a drop of vodka or water. Once the food colouring has dried, store the cookies in an airtight container.
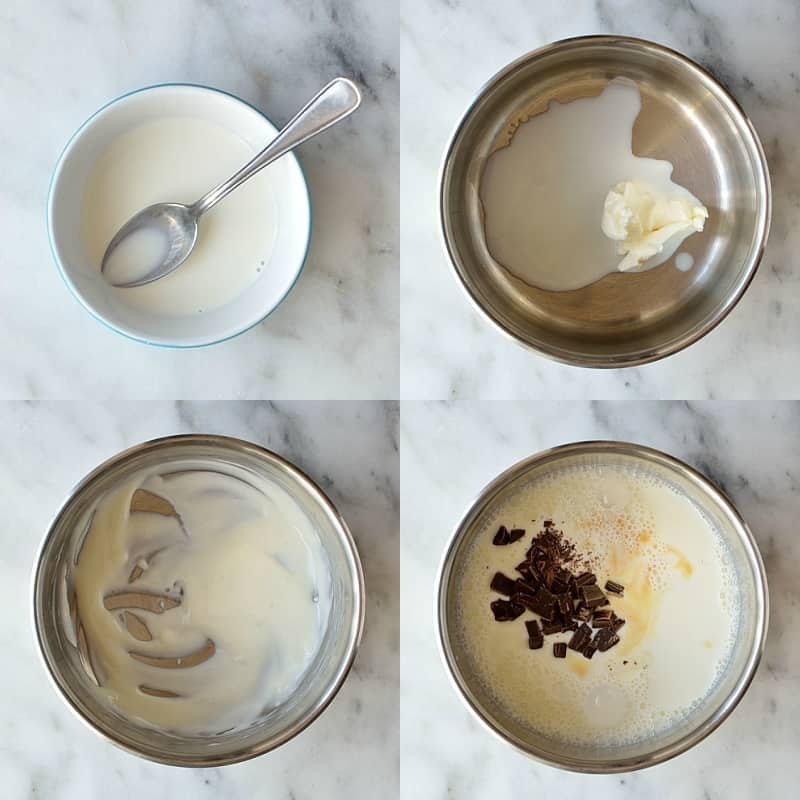
- To make the hot chocolate, stir together the cornstarch and a drop of the milk to form a slurry. Place the cream cheese in a saucepan and whisk in the cornstarch slurry until smooth. Gradually whisk in the rest of the milk. Add the chocolate, vanilla extract, sugar and salt to the pan and place over a medium heat.
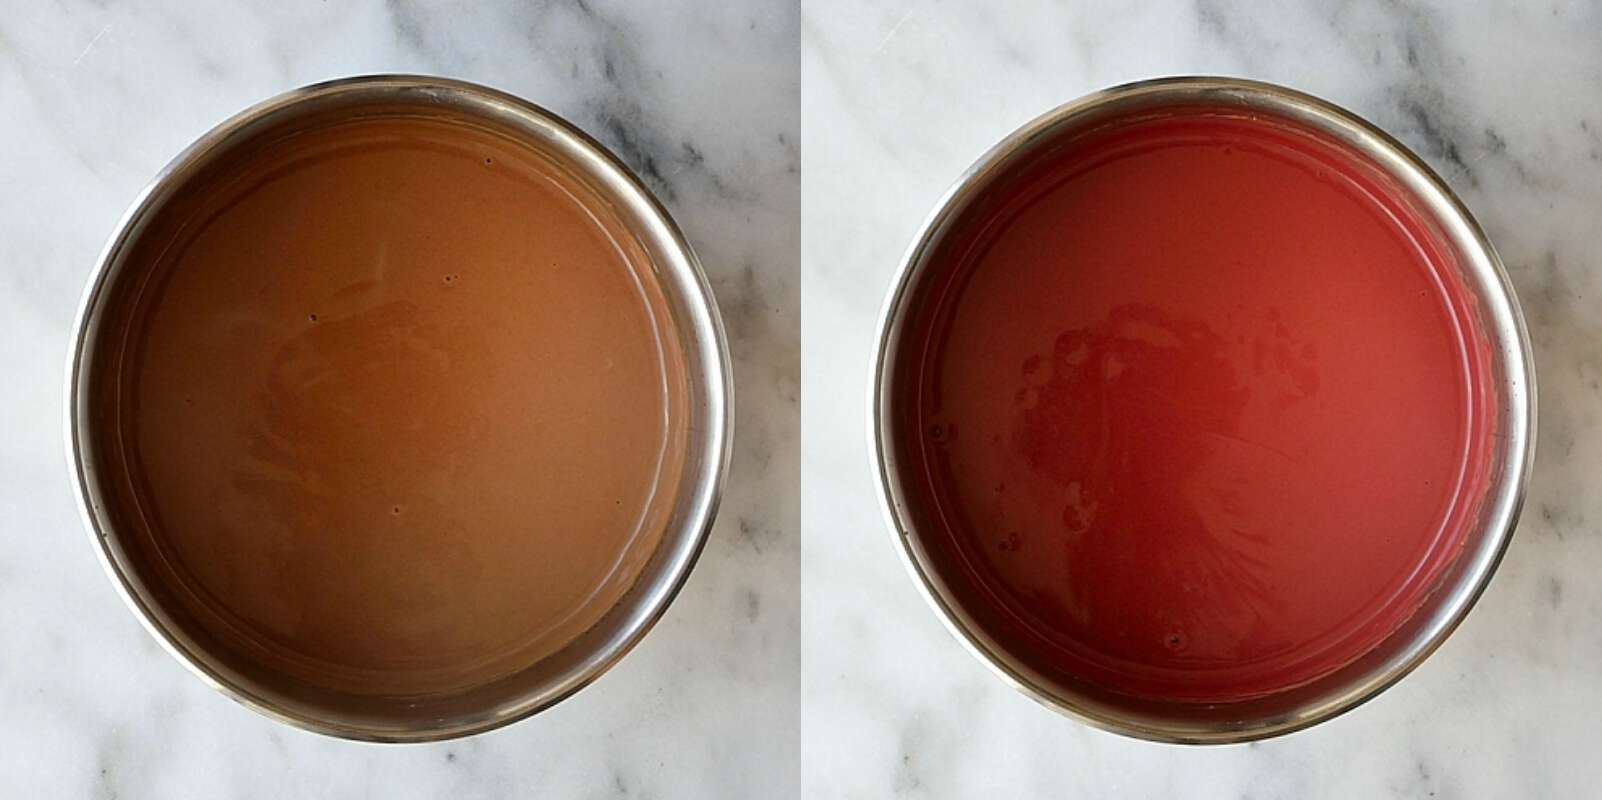
- Cook, stirring regularly, until the chocolate has melted and the mixture has thickened (if using the cornstarch). Remove from the heat and stir in some red gel food colouring, a little at a time, until you reach the desired shade.
Halloween Witch Finger Cookies And Red Velvet Hot Chocolate Recipe
Halloween witch finger cookies and red velvet hot chocolate – a spooktacularly gruesome but delicious Halloween treat!
Ingredients
- 2 sticks softened butter
- 1 cup powdered sugar
- 1 large egg
- 1 tsp vanilla extract
- 1/2 tsp almond extract
- 3 cups all-purpose flour
- 1 tsp salt
- 1/4 tsp baking powder
- 3/4 cup blanched almonds, halved
- ground cinnamon
- red gel food colouring
- a little melted chocolate if needed
Red Velvet Hot Chocolate (Per 1 cup):
- 2 Tbsp cream cheese (regular or low fat)
- 1 cup milk
- 1 tsp cornstarch (optional)
- 1.5 oz semi-sweet chocolate, chopped
- 1/2 tsp vanilla extract
- 1/2 Tbsp granulated sugar
- pinch salt
- red gel food colouring
Instructions
- To make the witch finger cookies: Place the butter and powdered sugar in a large bowl and whisk with an electric mixer until just combined. Add the egg and vanilla and almond extracts and whisk again to mix.
- Sift together the flour, salt and baking powder and add to the bowl; fold it in until it forms a dough. Cover and place in the fridge for half an hour.
- Line a couple of baking sheets with baking parchment. Working with ¼ of the dough at a time, leaving the rest in the fridge, measure out ½ Tbsp quantities of dough (don’t use more than this or your cookies will end up way too big). Roll each into a ball then roll out into a log shape.
- Press a blanched almond into one end to form a fingernail, then lightly flour your hands and use them to shape it into a knobbly finger shape. The cookies will spread a little in the oven so you need to make sure that you make them quite thin – thinner than you want the cookies to end up. Use the back of a knife to make indentations in the knuckles to make them look more like fingers.
- Place the shaped cookies well spaced apart on the prepared baking sheets then place them in the freezer for at least 20 minutes, until frozen solid (this helps stop them spreading in the oven).
- Meanwhile, heat the oven to 375°F. Bake the cookies for about 10 minutes, until pale golden. You will need to bake them in batches, keep the rest of the cookies in the freezer.
- Leave the cookies to cool on the tray. When you are ready to decorate, use a little melted chocolate to stick on any fingernails that have come loose. Rub a little bit of ground cinnamon into the creases in the joints to make them look dirty.
- Use a fine, food-only paintbrush to paint some red gel food colouring around the edge of the nails and on the ‘stumps’. If you find that the colouring is too thick to paint or too dark in colour then you can thin it with a drop of vodka or water. Once the food colouring has dried, store the cookies in an airtight container.
- To make the hot chocolate, stir together the cornstarch and a drop of the milk to form a slurry. Place the cream cheese in a saucepan and whisk in the cornstarch slurry until smooth. Gradually whisk in the rest of the milk. Add the chocolate, vanilla extract, sugar and salt to the pan and place over a medium heat.
- Cook, stirring regularly, until the chocolate has melted and the mixture has thickened (if using the cornstarch). Remove from the heat and stir in some red gel food colouring, a little at a time, until you reach the desired shade.
Nutrition Information:
Yield:
48Serving Size:
1Amount Per Serving: Calories: 96Total Fat: 6gSaturated Fat: 3gTrans Fat: 0gUnsaturated Fat: 2gCholesterol: 15mgSodium: 101mgCarbohydrates: 10gFiber: 1gSugar: 3gProtein: 2g