Create a DIY Felt Pinecone Ornament in 5 Easy Steps
Updated on November 19, 2025


Finding a new felt craft to enjoy with the kids is challenging, but a DIY felt pinecone ornament is a great way to put their creativity to the test for Christmas. Read on to discover how to make a pinecone Christmas ornament out of felt. This project is simple, quick, and easy enough for even the most novice crafter.

Pinecones have long been a popular symbol of Christmas and holiday décor, with some even using them as Christmas tree ornaments. The reason for this popularity lies in the unique properties of pinecones, which have incredible resilience and natural beauty that can be enhanced with decorations such as glitter, ribbons, and other festive trims. Pinecones also possess spiritual significance, often used as fertility symbols; because of this connotation, they signify hope and abundance during the holiday season. Additionally, many cultures associate pinecone shapes with divinity and divine energy due to their resemblance to ancient religious symbols like the spiral or an open eye. Pinecones in holiday decorations are believed to bring good luck into the home while simultaneously celebrating winter’s natural beauty. As such, it is not surprising that pinecones become festive ornaments throughout the year.
This tutorial describes the supplies, step-by-step instructions, images, a video tutorial, and tips and tricks for crafting a DIY felt pinecone ornament.
Supplies for a DIY felt pinecone ornament

- Brown and blue felt
- Polystyrene egg
- Pencil
- Scissors
- Pins
- Silk ribbon, string, or jewelry wire
- Hot glue gun
- Wire or pipe cleaners
- Artificial berries (optional)
How do I create a DIY felt pinecone ornament?
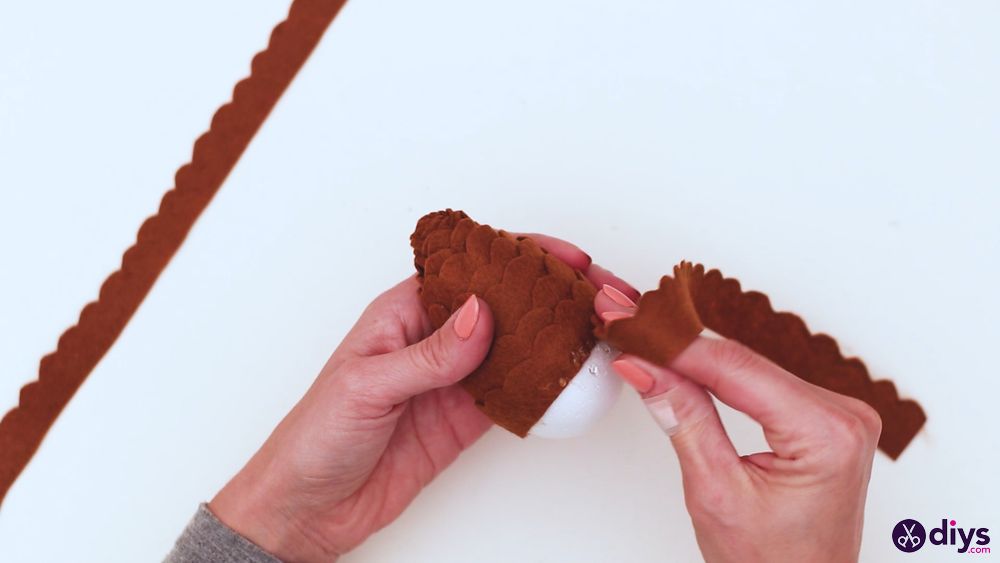
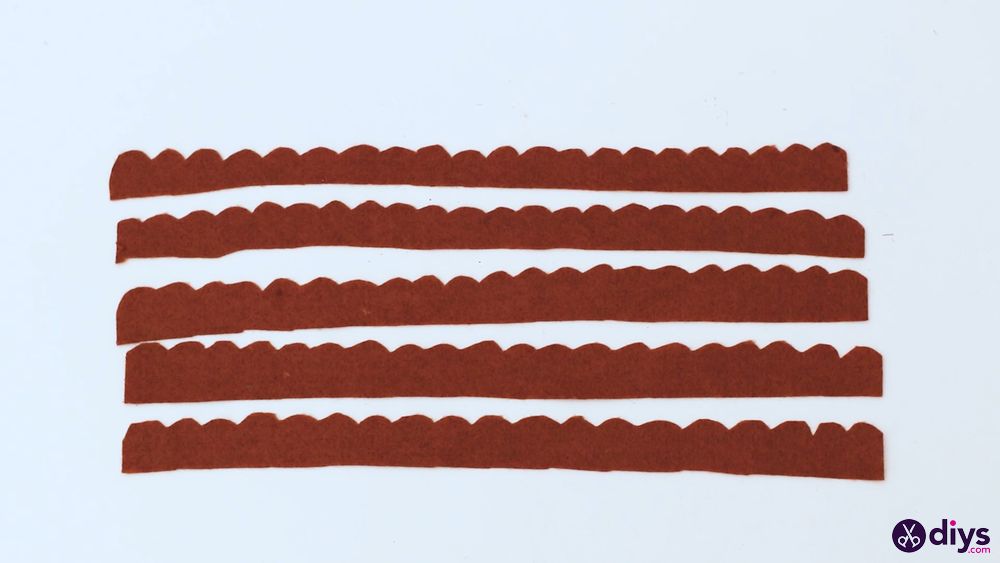
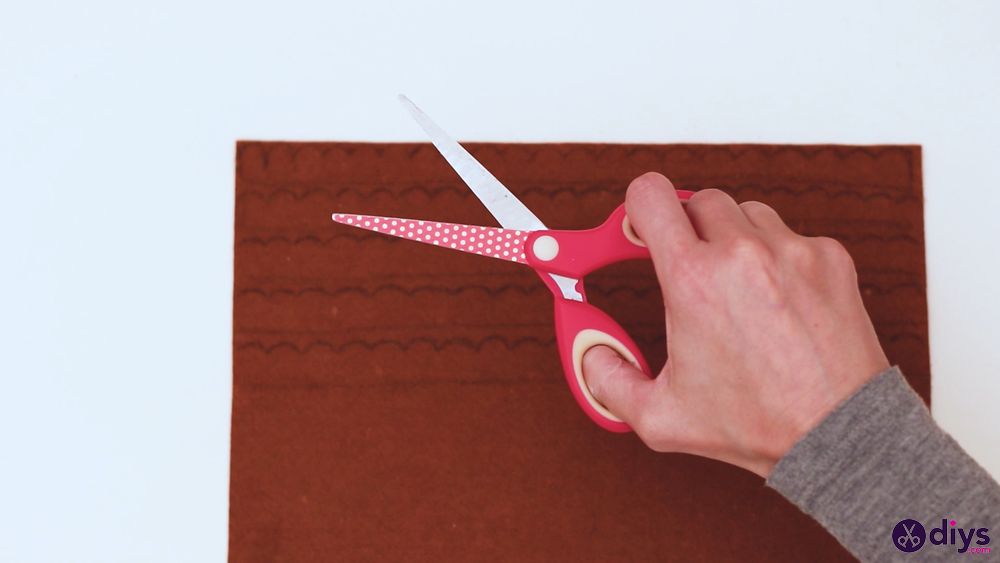
- Prepare the brown felt: Start by outlining the brown felt to cut it into long strips, where one side is straight and the other is curved. The curves should be symmetrical. When you finish, cut the felt by tracing the outline.

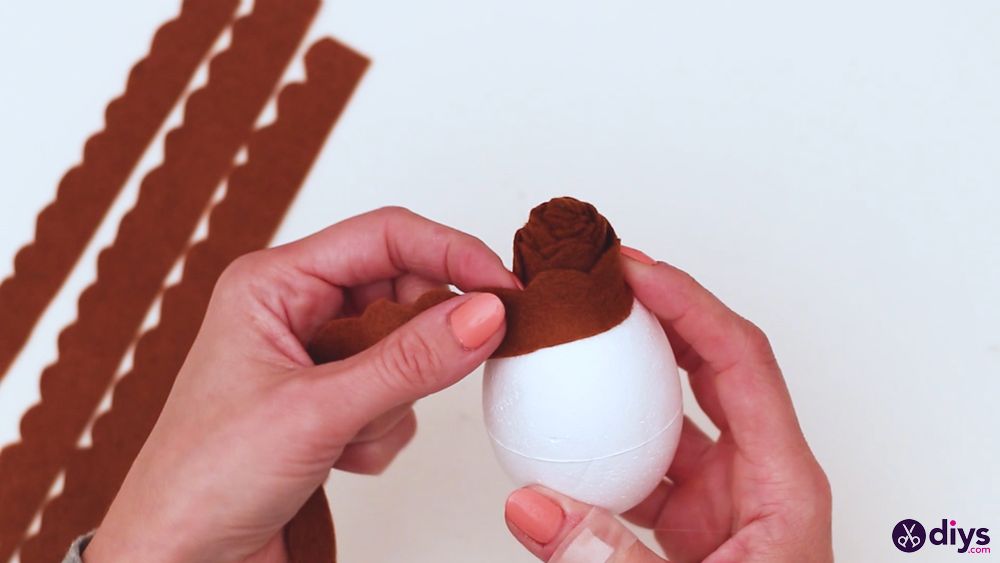
- Wrap the egg: Take a brown felt strip, apply glue to one side, and tightly wrap it around the egg, from top to bottom. Continue doing this with the other brown felt strips until the egg is completely covered.
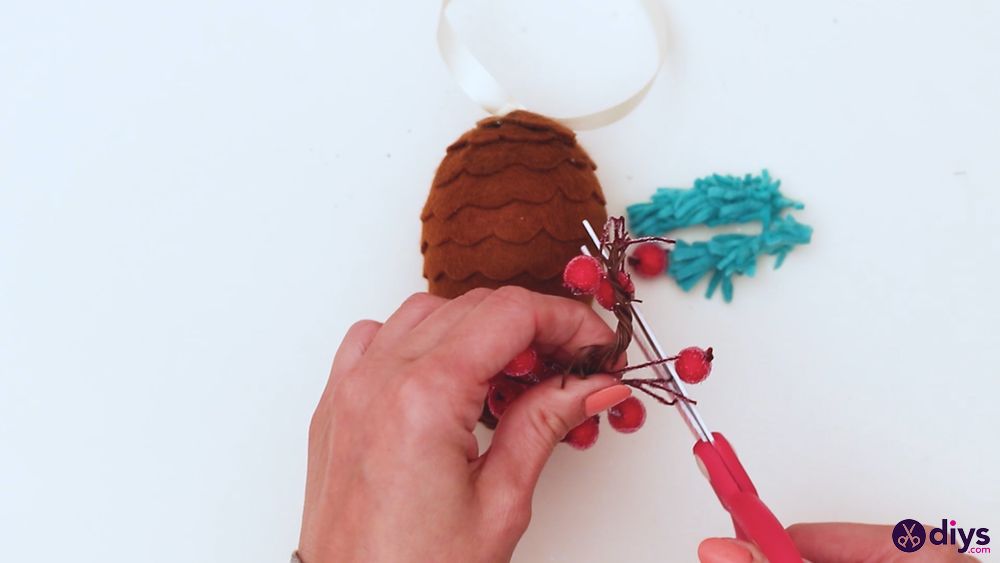
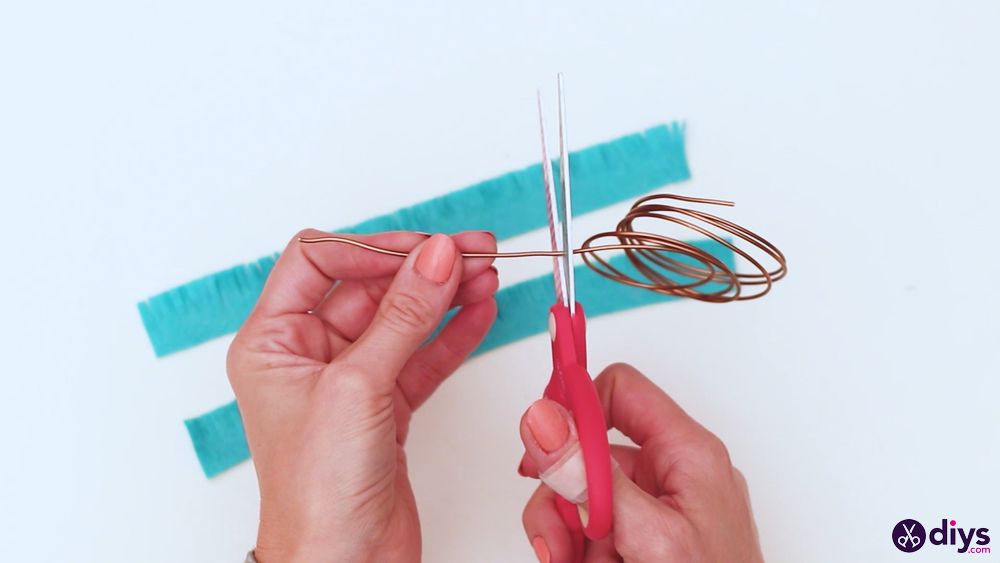
- Create the pinecone branches: Cut long, 1-inch wide strips of blue felt and fray them on the sides. Next, add glue to the unfrayed side of the blue felt strips and wrap the strips around a piece of wire, from top to bottom, to create a pinecone branch. Repeat this step to create one more pinecone branch.
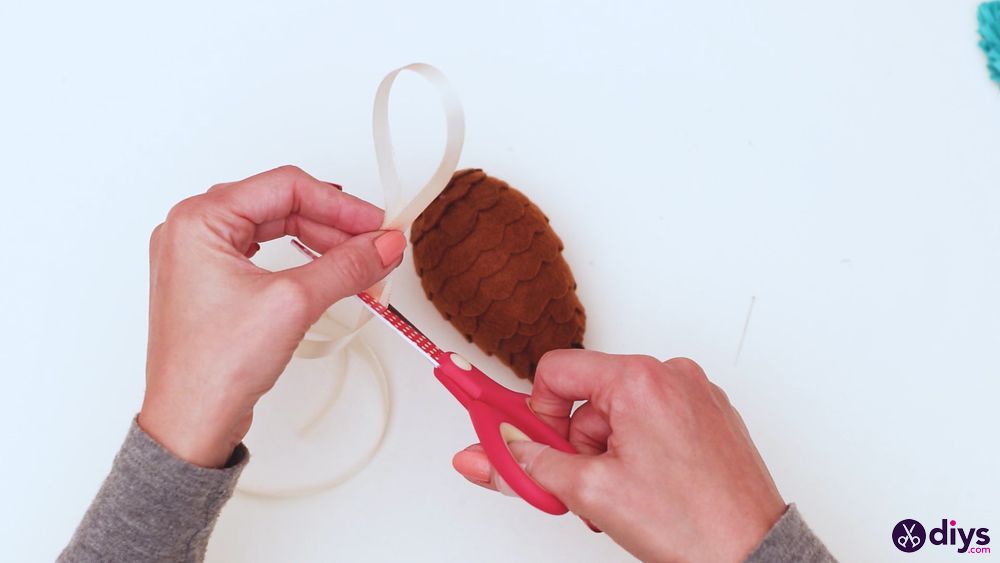
- Make the ornament hanger: Cut a piece of silk ribbon, make a loop at one end, and secure it with glue. Next, glue the other end of the ribbon to the top of the pinecone and then the branches to the pinecone.
- Attach the berries: Secure the artificial berries to the top side of the pinecone, in between the branches.
Video tutorial
Check out the video guide below to better understand our DIY felt pinecone ornament:
Tips and tricks
Here is useful information for improving this DIY felt pinecone ornament:
- Instead of using one long strip of brown felt to cover the entire egg, try shorter strips in various colors to create zingy pinecones.
- Use buttons, beads, pom-poms, or pins with large rounded red heads if you don’t have artificial berries.
- For extra flair, attach sequins, glitter, feathers, or other unexpected decorations to your pinecone ornament.
Closing thoughts
We hope you enjoyed this tutorial on making a DIY felt pinecone ornament. It’s a unique and festive way to decorate your holiday home. Check out more ideas for Christmas felt ornaments.