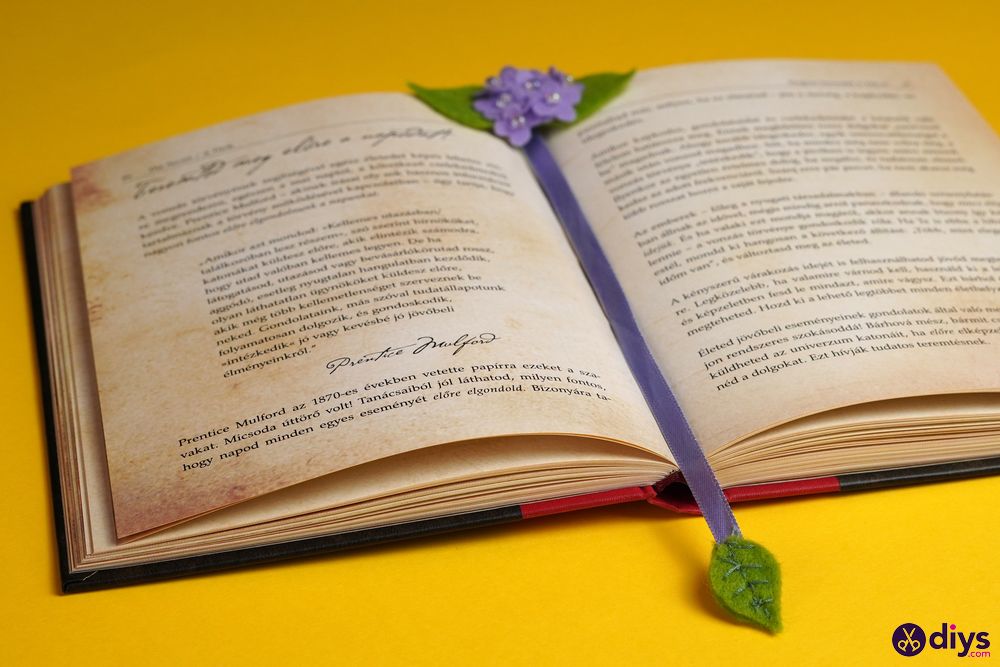
How to Craft a DIY Felt Flower Bookmark in Just 8 Steps
Updated on November 19, 2025

Knowing how to make a DIY felt flower bookmark is an excellent way to start better organizing your life and adding some personal touches to your daily routine.
Felt flower bookmarks are not only pretty but also very practical. You can use them to mark your place in a book, keep track of notes, or even use them as a unique gift tag. Also, most bookstores sell generic-looking bookmarks that are often over-priced. If you want something with a little more personality, making your own is the way to go!
Today’s article aims to teach you how to make a DIY felt flower bookmark step by step. Not only will we provide instructions, but we also have detailed illustrations and even a video tutorial that you can follow.
This project requires very few supplies and can be completed in under 30 minutes, making it perfect for even the busiest crafters.
Supplies for a DIY felt flower bookmark
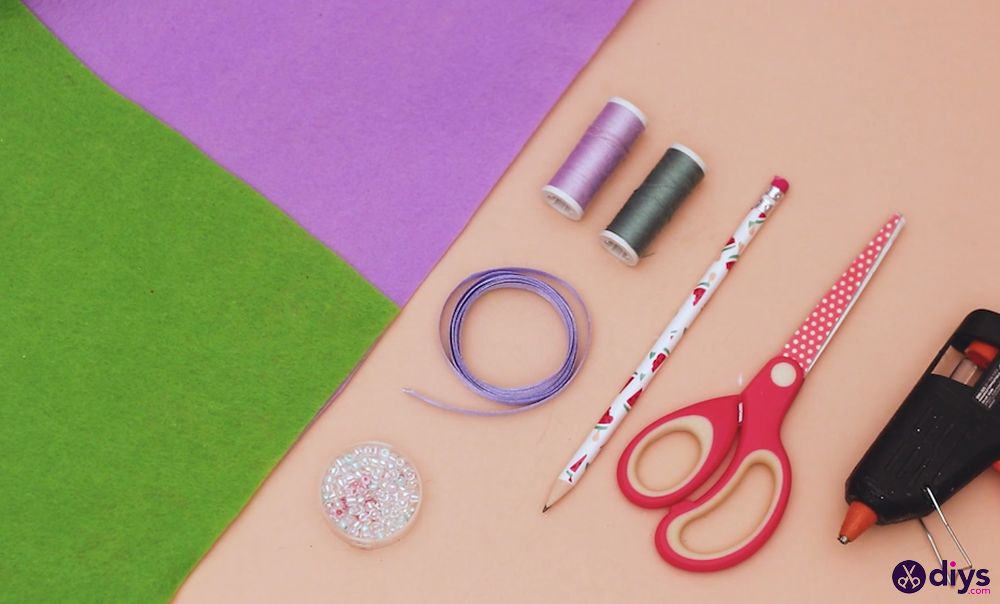
To make a DIY felt flower bookmark, you’ll need to have the following supplies on hand:
- Felt in your choice of colors: we used purple and green felt to make the flowers and the leaves, but the choice of colors is completely up to you since flowers come in almost any color imaginable, and even leaves come in several colors, not just green.
- Scissors: You’ll be cutting paper, felt, thread, and ribbon, so sharp scissors are a must!
- Thread:You’ll need the thread to sew the flowers and leaves together.
- Needle:A needle is required to sew the felt pieces together and create a beautiful leaf vein pattern that we’ll discuss later.
- Hot glue gun and glue sticks:The hot glue gun will be used to stick pieces of felt together to add the finishing touches. Using a low-temperature hot glue gun is best to avoid burning yourself or melting the felt.
- Silk ribbon: You’ll need a ribbon to make the main body of the bookmark. We recommend that the color of the ribbon matches the colors of the felt.
- Pen or pencil:You’ll need a pen or pencil to draw templates for cutting out the felt pieces.
- Seed beads: You’ll need these to make the centers of the flowers. You can find seed beads at any craft store.
If you want to add a bit of extra flair to your bookmark, you can also glue on some fake gems or sequins.
How do you make a DIY felt flower bookmark?
Our design chooses felt as the main material, and as far as designs and motifs are concerned, we went with a purple flower. However, you can get as creative as you want with this project!
Now that we’ve got all that out let’s move on to the tutorial.
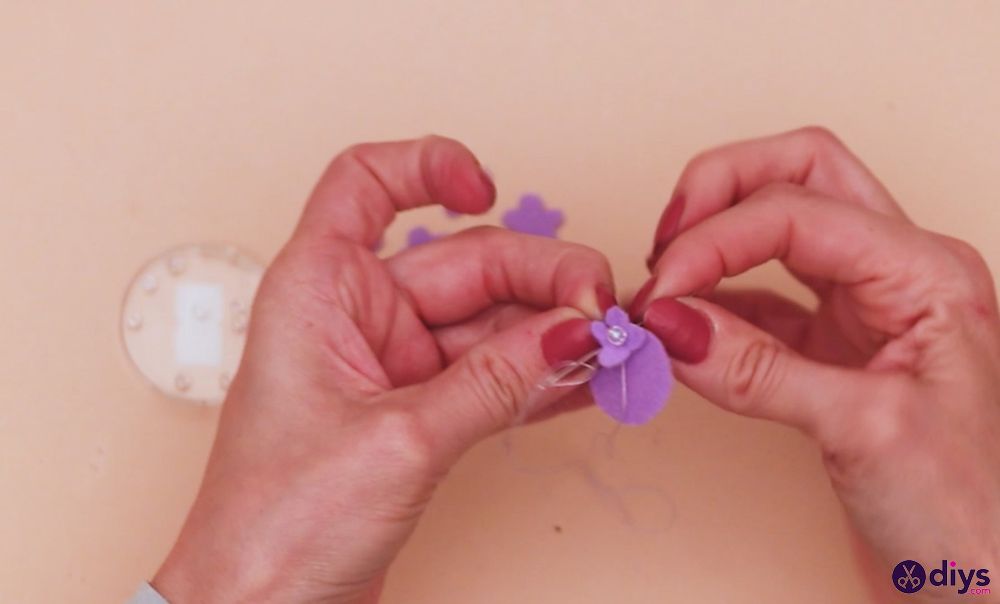
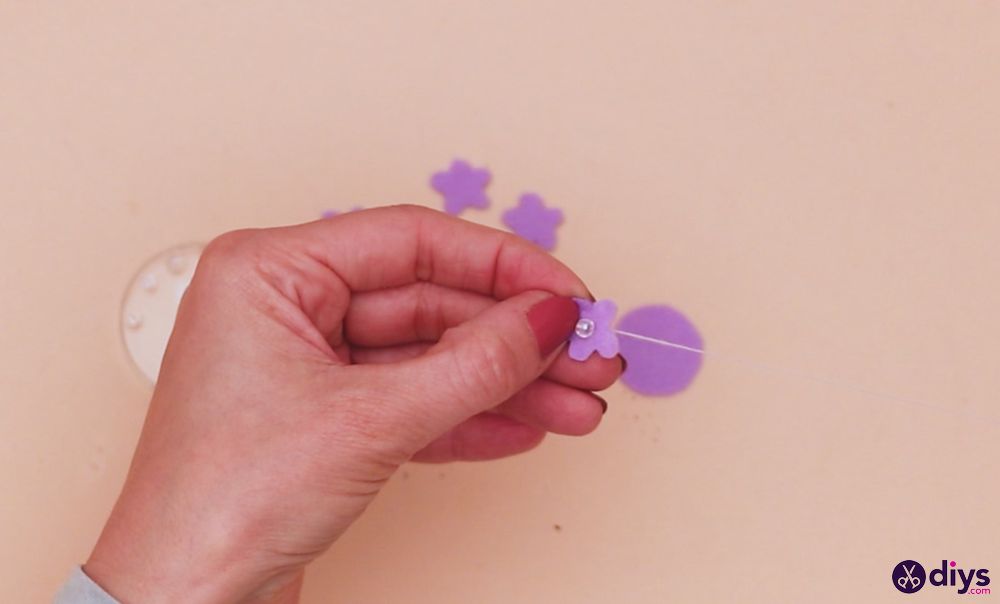
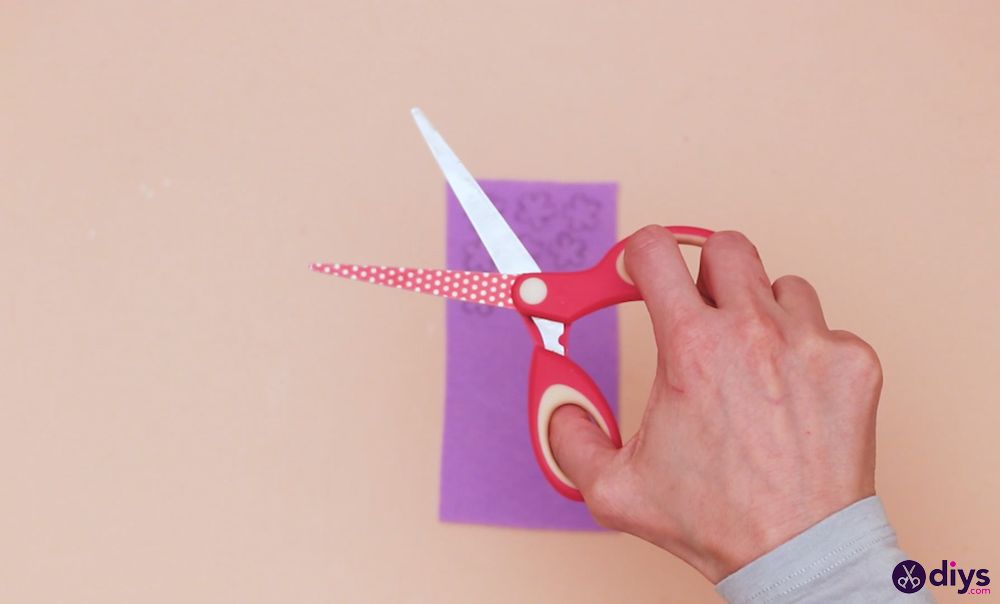
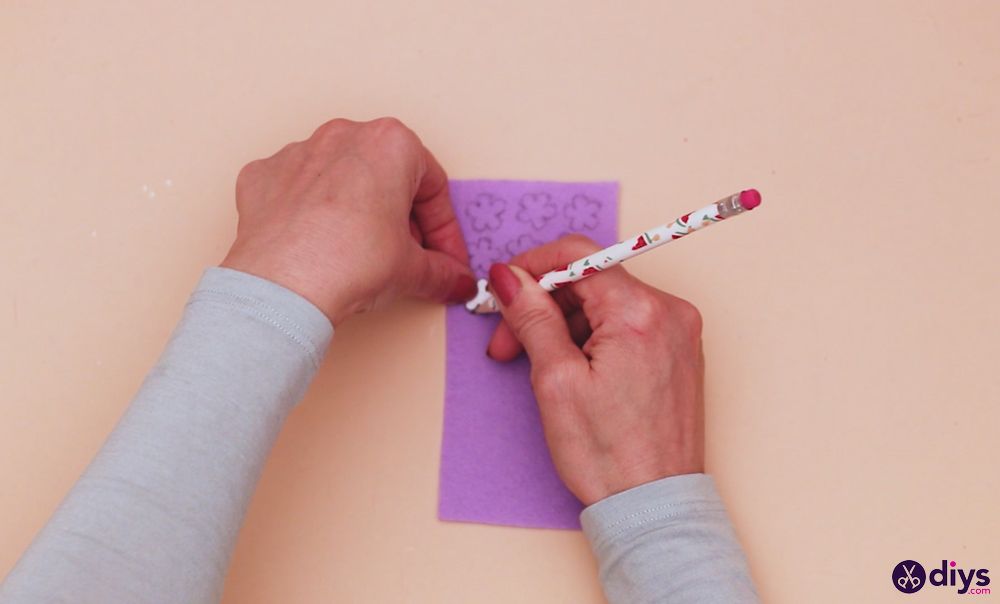
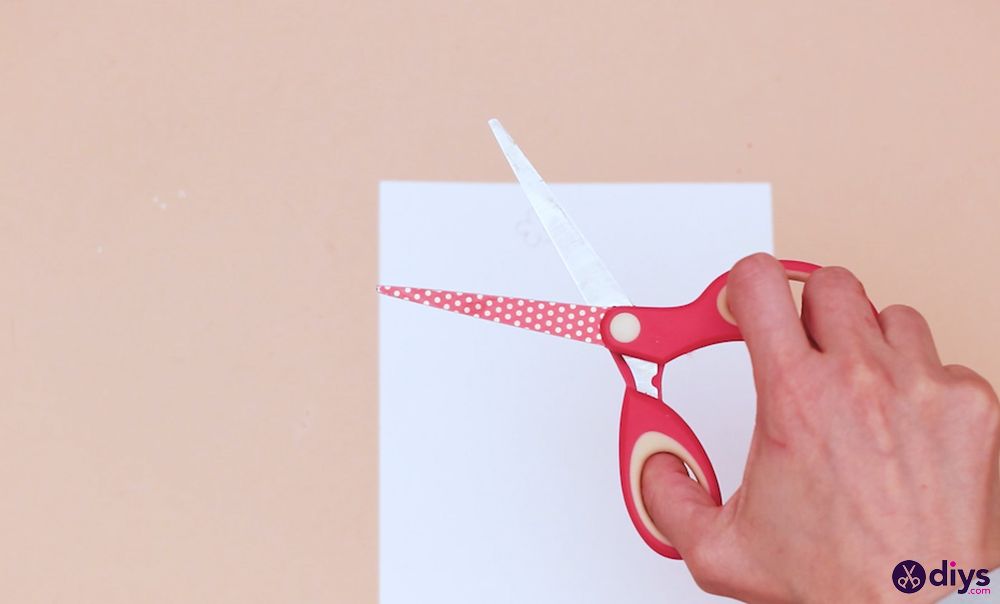
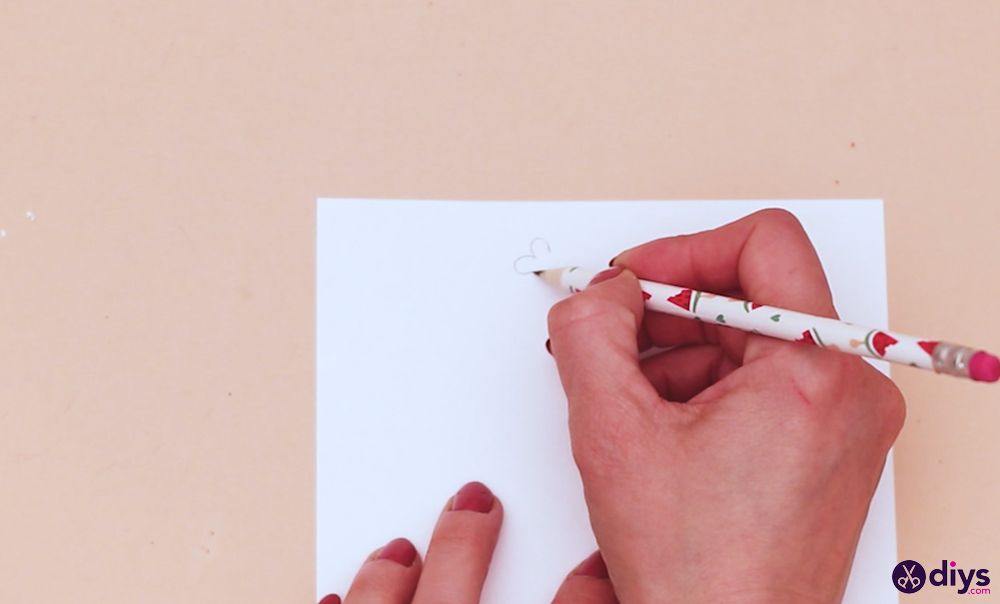
- Create the smaller flowers: Start by drawing out the flowers using a pencil on a white sheet of paper, and use scissors to cut out the flower templates. Then, use the paper flower cut-outs to trace and cut out the felt flowers.

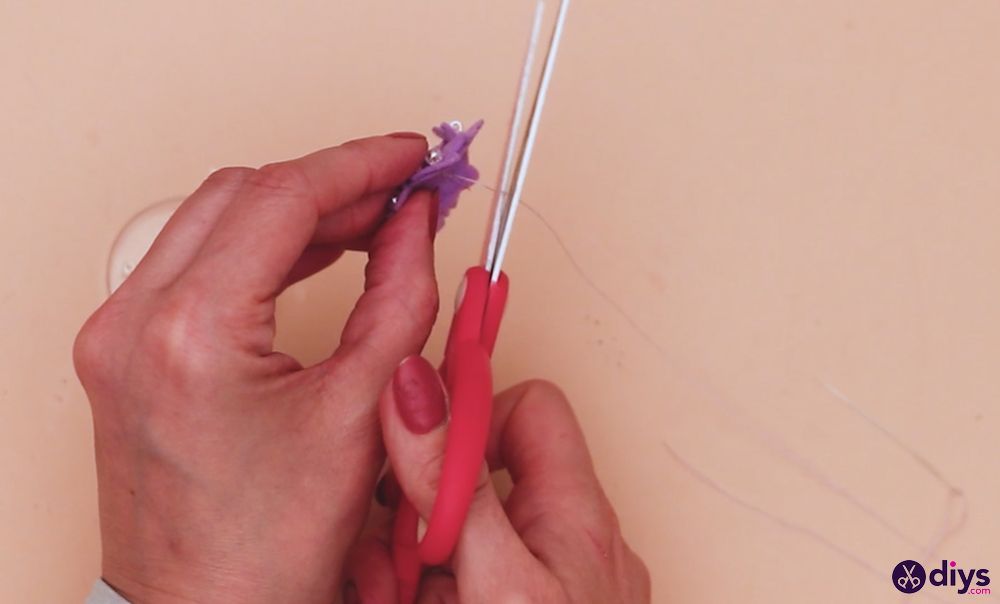
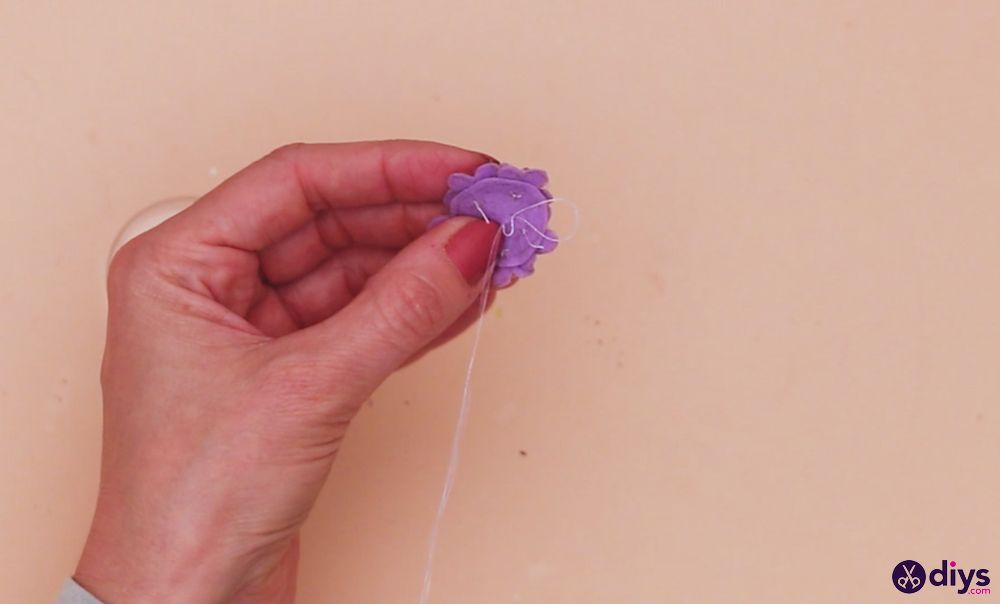
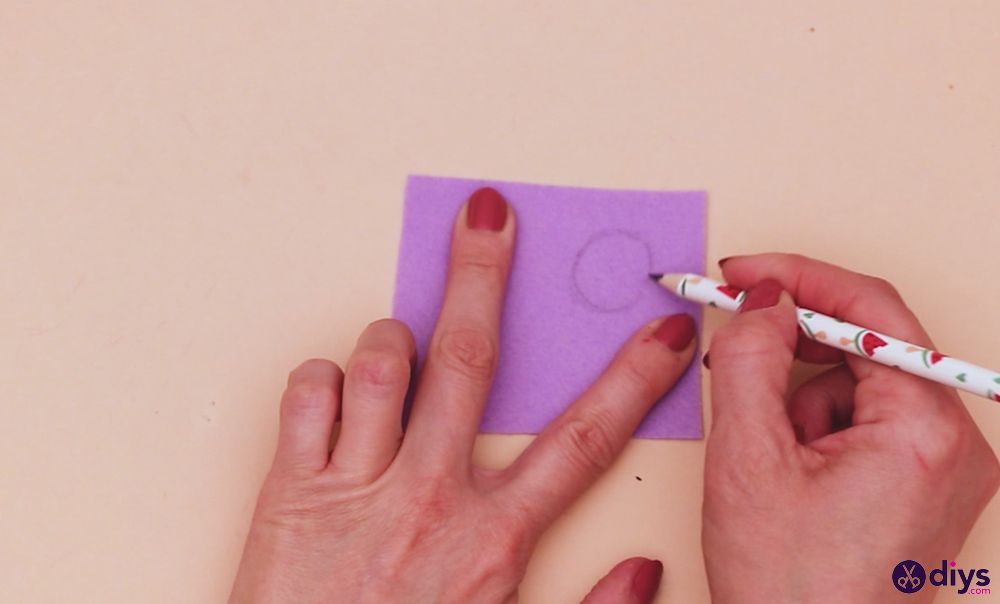
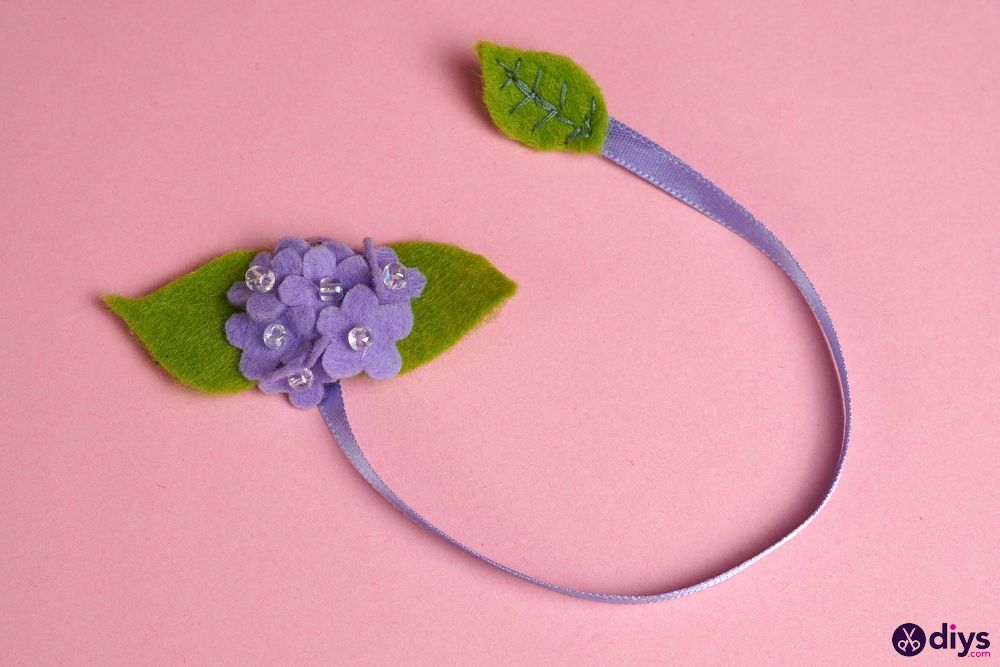
- Assemble the larger flower: Use your pencil to draw a larger circle in the purple felt; this large circle acts as the flower’s central base. Use a needle and thread to sew one seed bead to the center of each purple felt flower, and then sew the purple felt flowers to the edge of your purple felt circle.
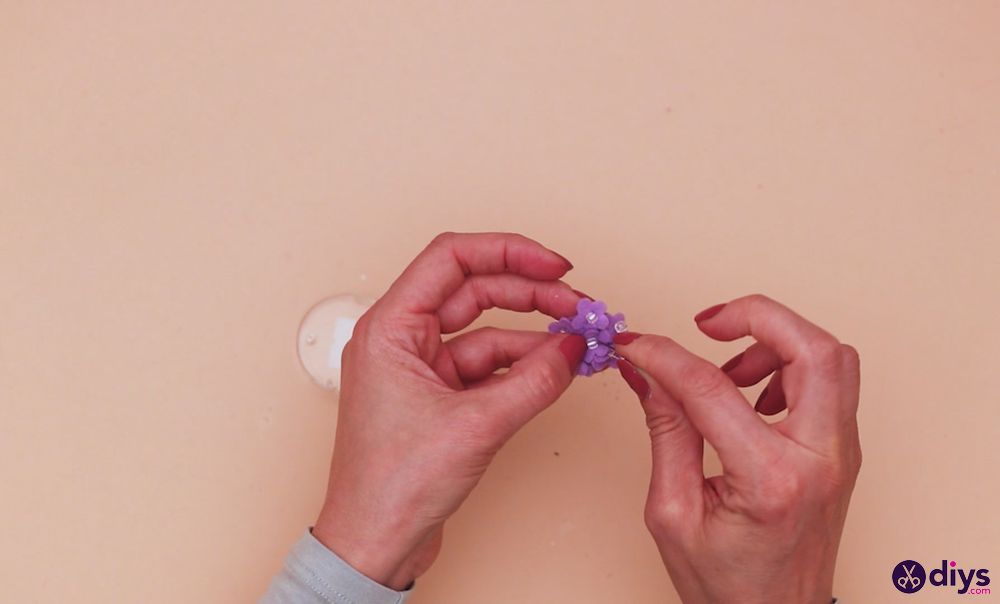
- Create the purple flower cluster: Continue sewing the small purple flowers onto the felt disk, starting from the edge and working toward the circle until the purple disk looks like a purple flower cluster. Then ensure the thread is tied securely on the back of your flower cluster and cut off any excess.
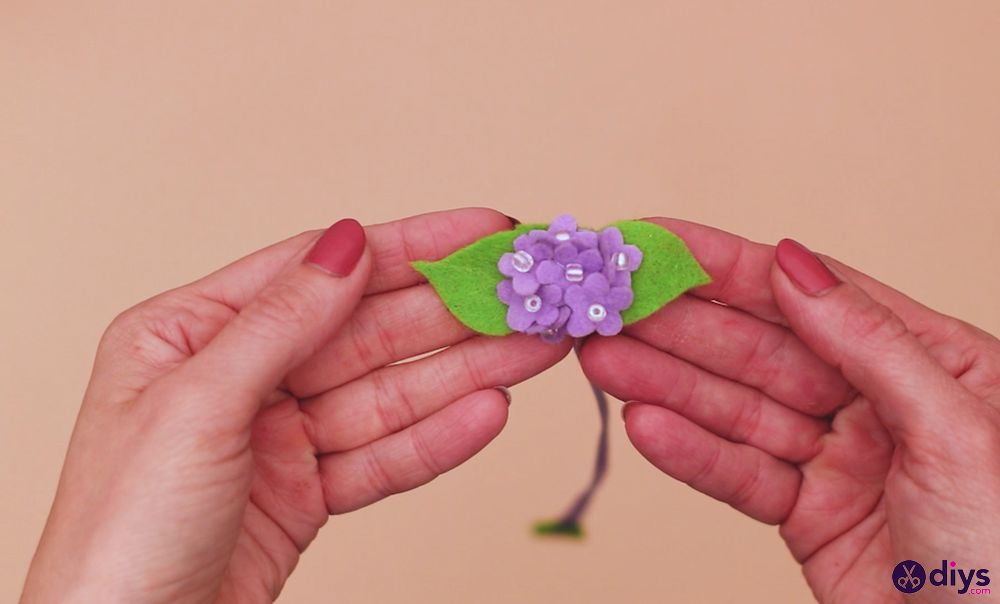
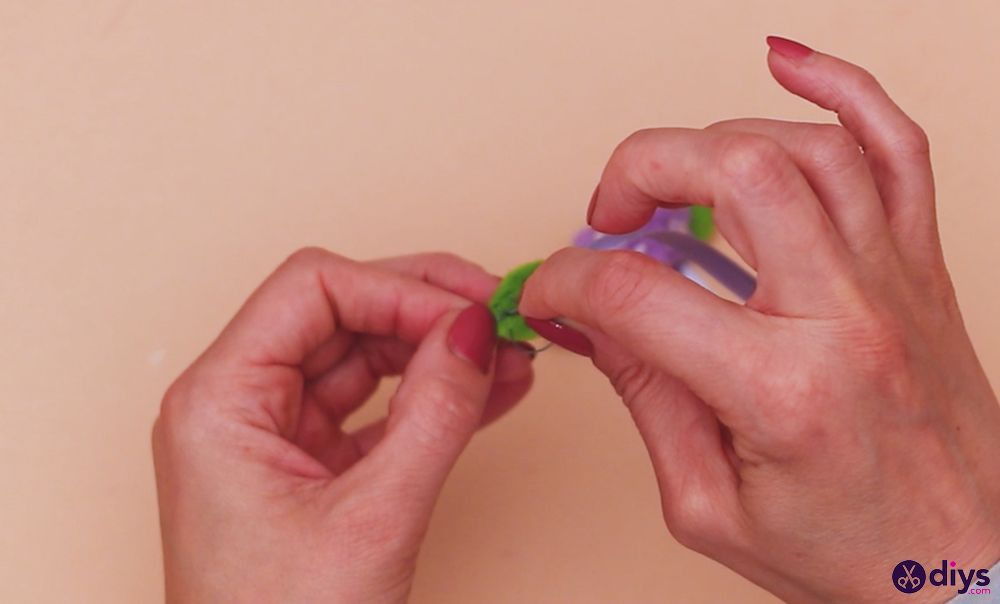
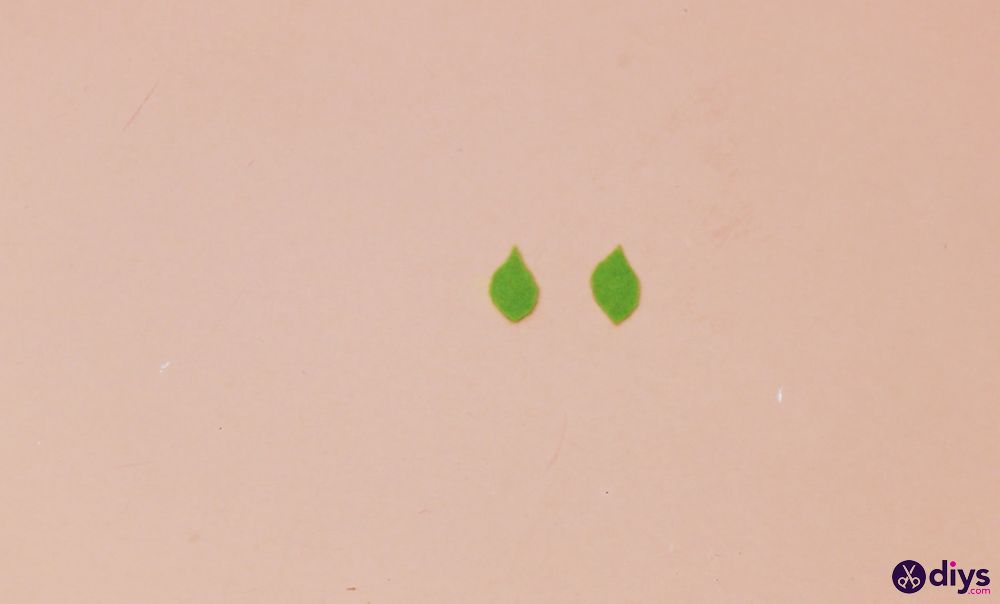
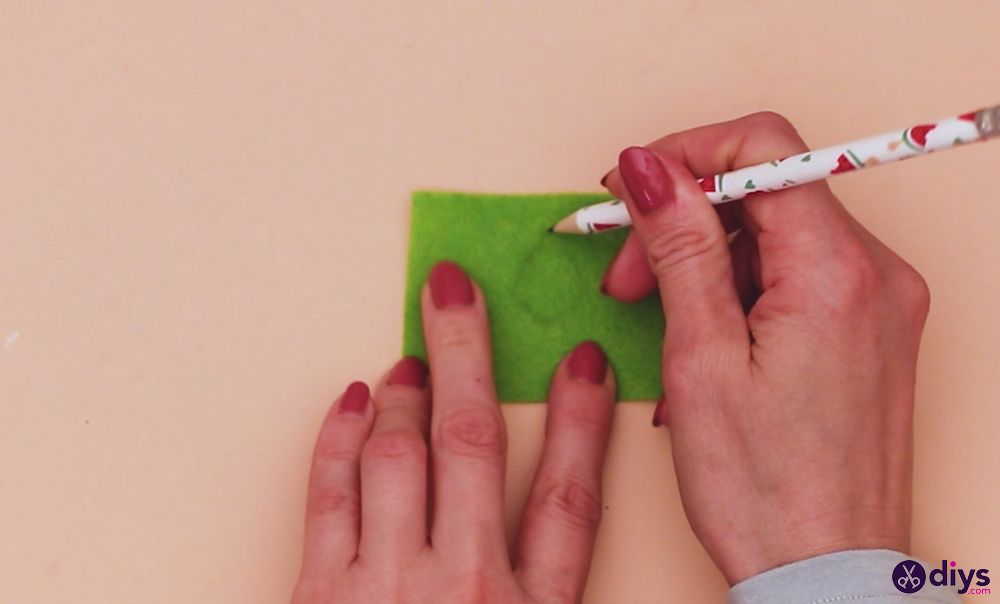
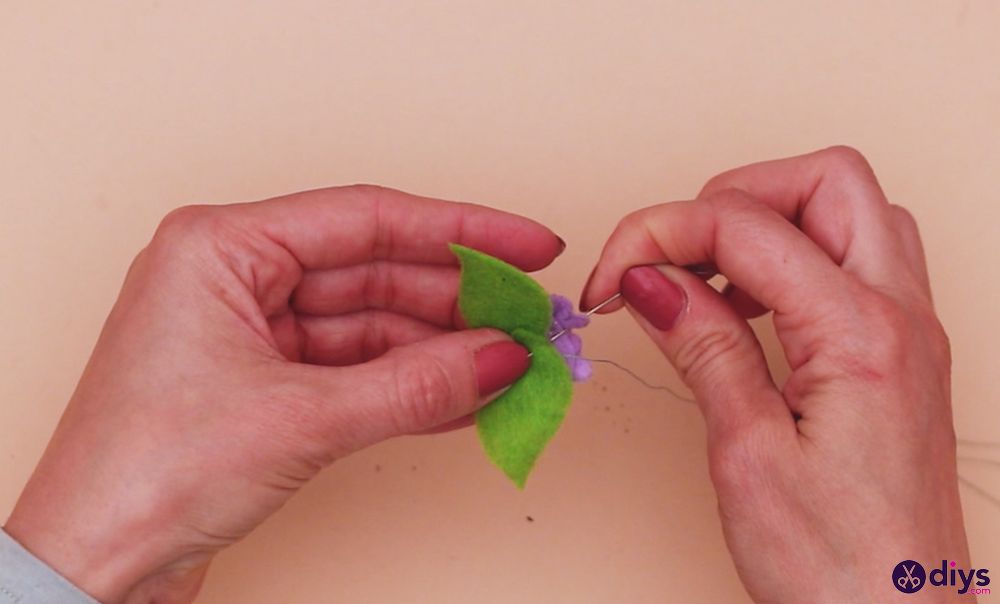
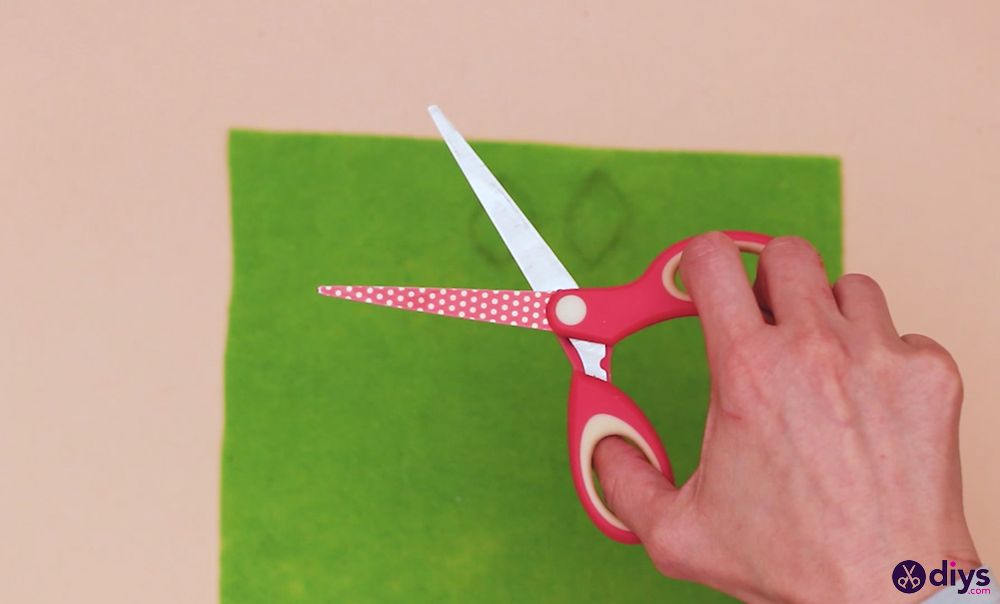
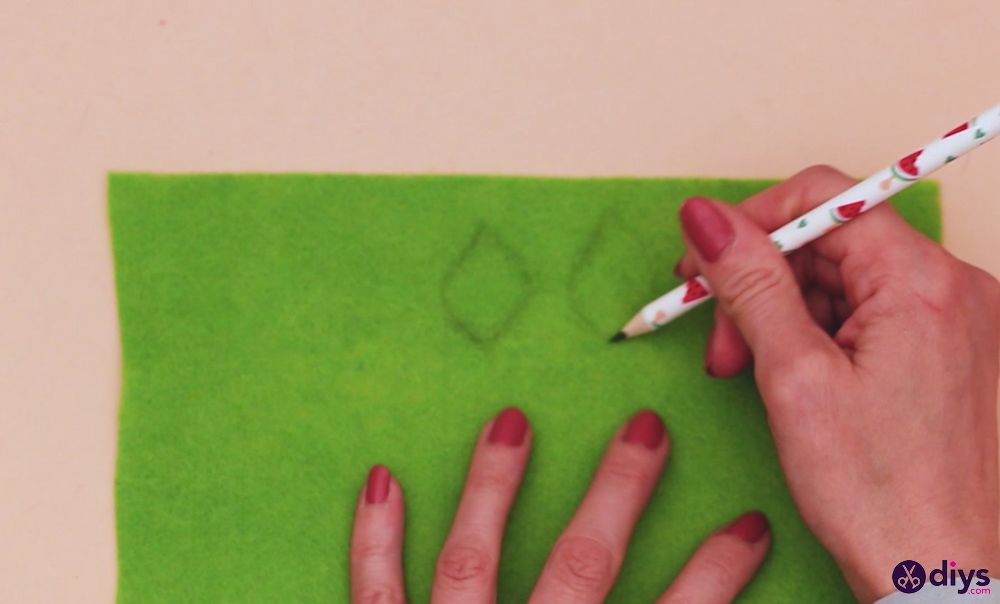
- Create and attach the green leaves: Use a pencil to draw out the outlines of 2 leaves of equal size using green felt, and use scissors to cut out the leaf templates. Use thread and needle to sew the base of the two leaves to the backside of the purple flower cluster.
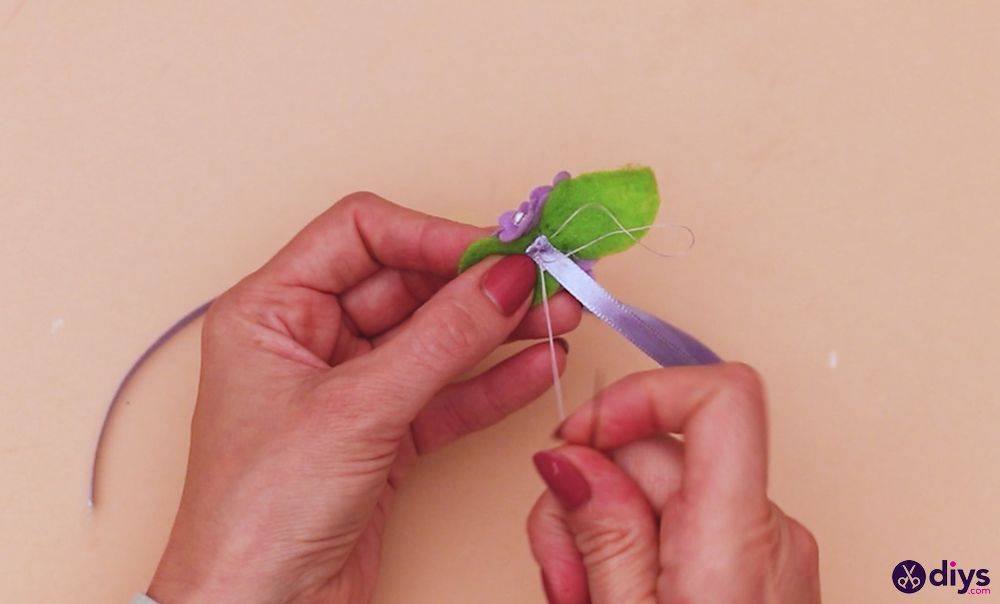
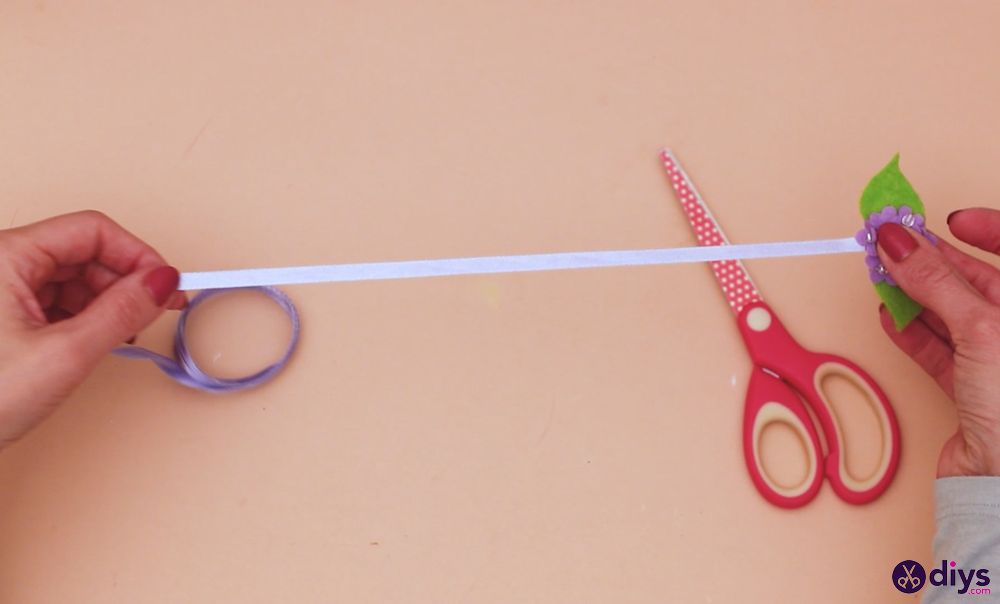
- Create the bookmark’s ribbon body: Use scissors to cut about 15 inches of ribbon, and use needle and thread to sew one end of the piece of ribbon to the backside of your purple flower cluster. Ensure the ribbon is tied securely on the back of your flower cluster and cut off any excess thread.
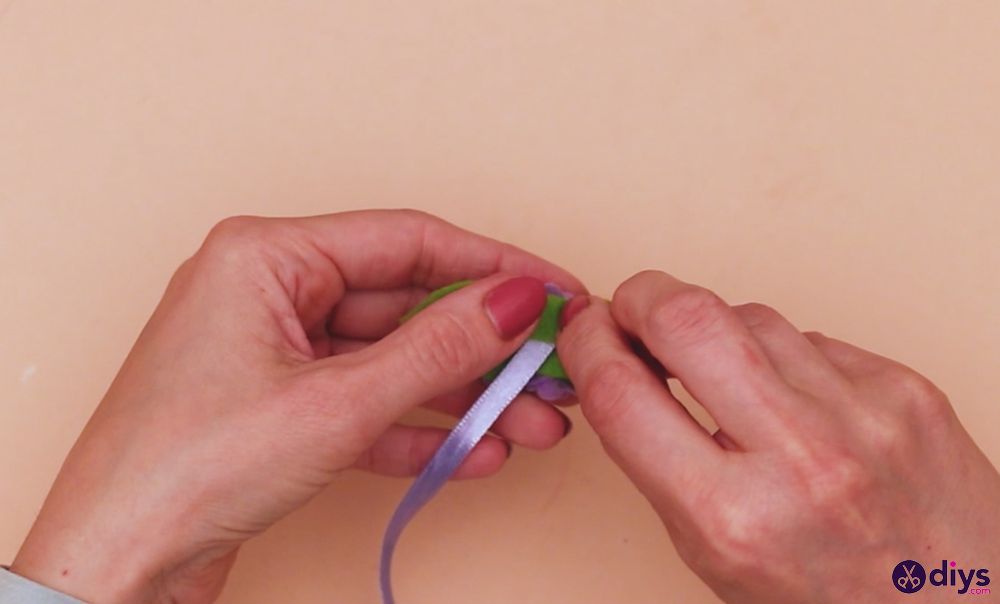
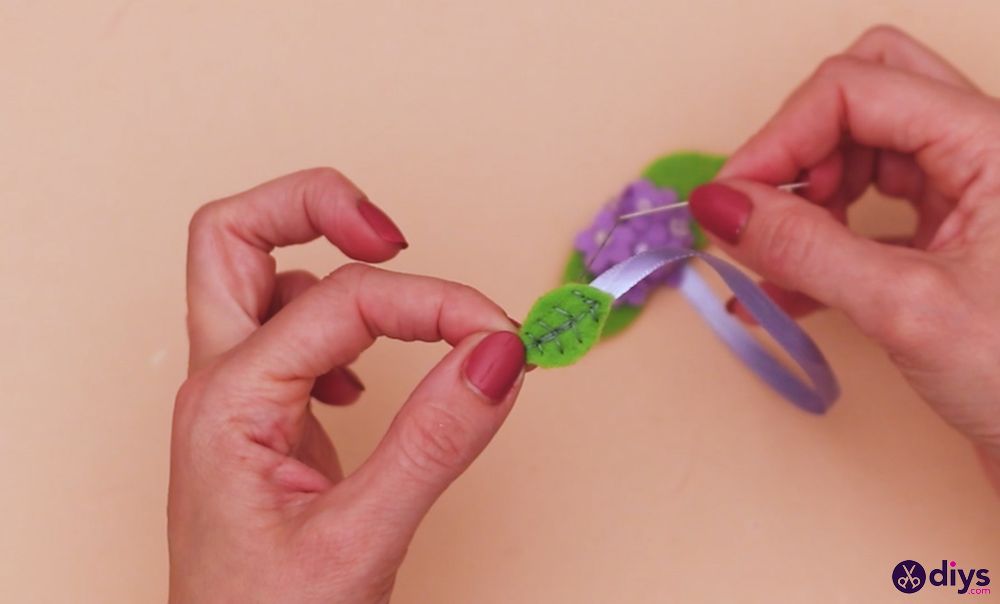
- Prepare the bottom felt leaf: Use a pencil to draw the outlines of 2 leaves in the green felt; the two outlines should be of equal size but smaller than the other 2 leaves you cut out earlier. Sandwich the other end of the ribbon between the two smaller green felt leaves.
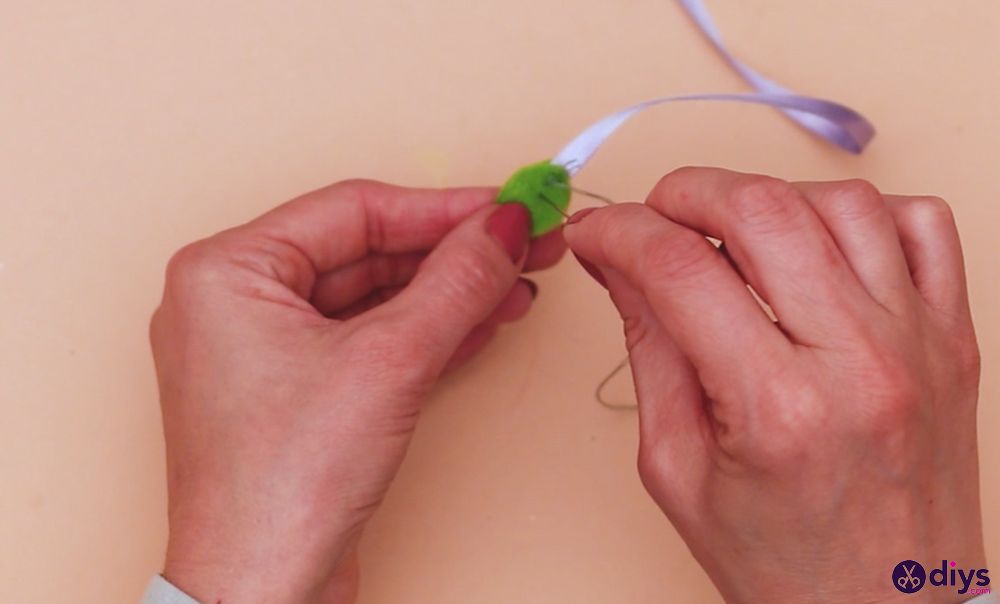
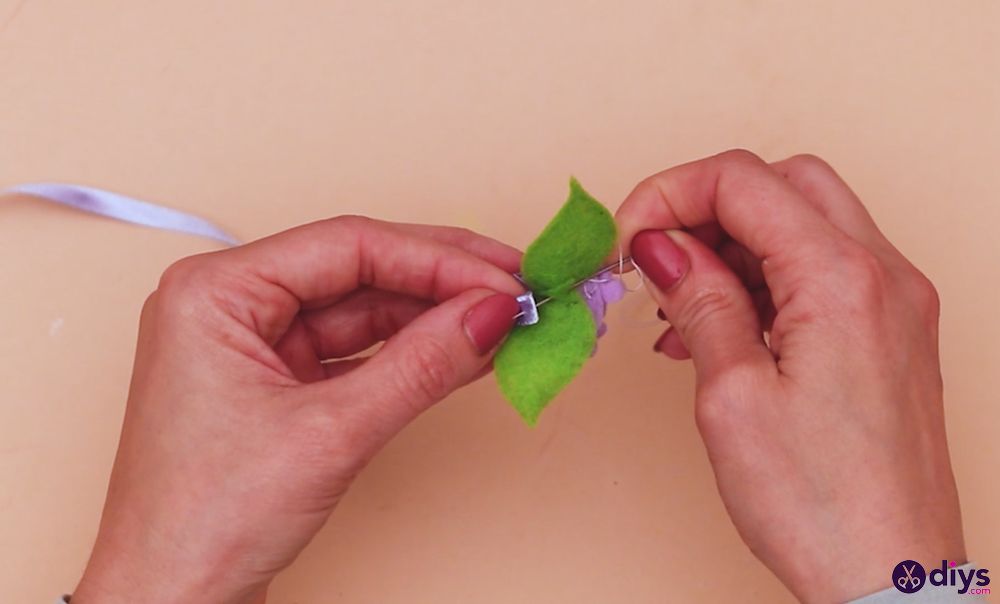
- Create the leaf’s veined pattern: Use thread and needle to stitch the two leaves together with the ribbon in between them, making the stitching pattern look exactly like a leaf’s veins. Ensure the ribbon is tied securely between the two felt leaves and cut off any excess thread.
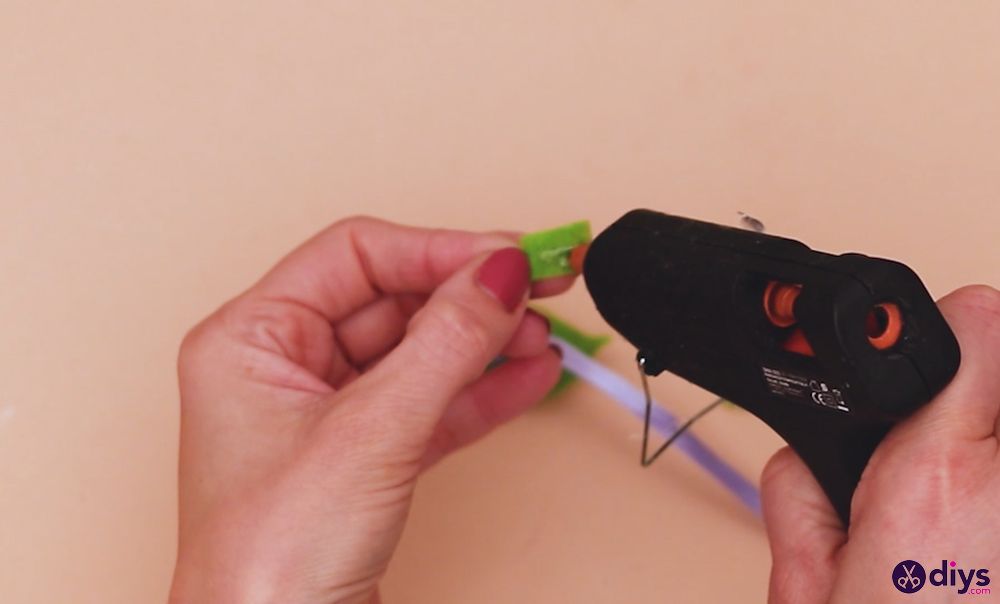
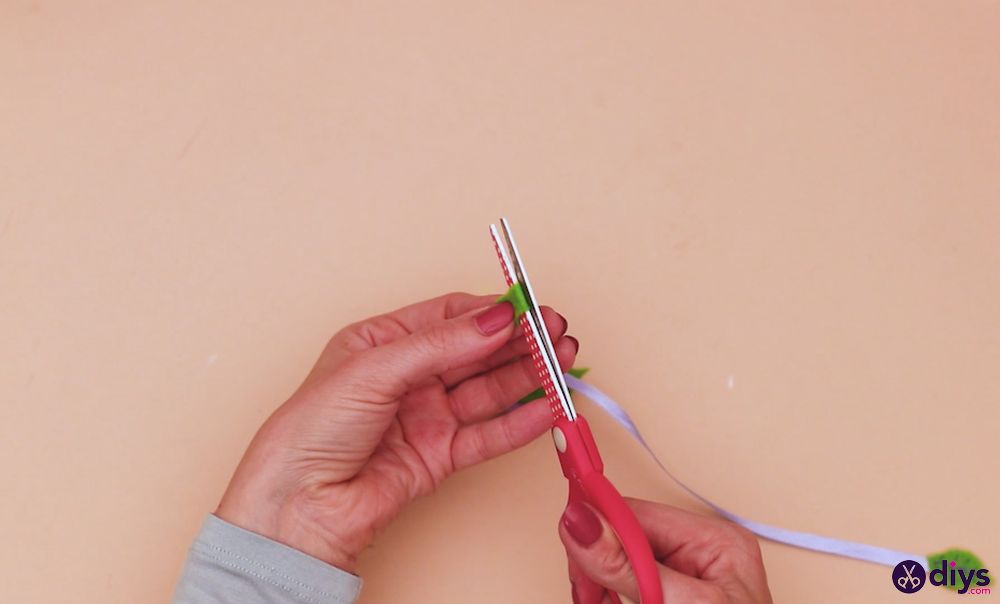
- Add the finishing elements: Cut out two strips of green felt, approx 0.5 x 2 cm in size. Use a glue gun to attach the two green felt strips over the stitching on the back of your purple flower cluster. You’ll use these two pieces to hide the stitching on the backside of your purple flower cluster.
Your DIY felt flower bookmark is now complete!
Video tutorial
We also included a video tutorial in our guide on how to make a DIY felt flower bookmark, in case you prefer visual instructions. Check it out!
Why should I make my own bookmarks?
There are several reasons you should make your own bookmarks, and while it may sound like a lot of work for just one bookmark, the truth is that it’s more about the creative process, not the bookmark itself.
- Excellent hobby– Crafting DIY items is quite therapeutic and a great way to show your personality and style.
- Expressing creativity– You’d be amazed at how many ways there are tocreate bookmarks using day-to-day items.
- Higher quality products– Since you have complete control over what materials to use and how to put it all together, you can be sure that your finished product will be higher than what you’d find at the store.
- Saving money– Making your own bookmarks costs much less than buying them from a store, especially when you realize that you’re paying $10-$15 just for a printed piece of cardboard.
- Personalized gifts– If you’re ever stuck on what to get a friend or family member for their birthday or Christmas, considermaking them their own personalized bookmark.
Whichever the reason, making your own bookmark is a fun, easy, and rewarding process that anyone can do.
Frequently Asked Questions
The following section will answer some of the most common questions about bookmarks and how you can make some of your own at home.
What is a bookmark?
A bookmark is a thin strip of material, usually paper or cloth, that marks the page in a book where you last left off reading.
What material is best for bookmarks?
Some people prefer paper bookmarks because they are lightweight and easy to carry around, while others prefer cloth or felt bookmarks because they are more durable and can be reused multiple times.
How thick should a bookmark be?
The thickness of a bookmark should be based on your personal preference and the type of book you are using. For example, if you are using a paperback book, you might want to use a thinner bookmark so that it does not add too much bulk to the book.
On the other hand, if you are using a hardcover book, you might want to use a thicker bookmark so that it can more easily mark your place in the book.
What size is a bookmark?
Bookmarks can come in various sizes. However, if the bookmark’s length is shorter than your book’s height, place it so that at least one end of the bookmark sticks out of the top or bottom of the book.
This will make it easier for you to find your place when you’re ready to start reading again.
What else can I use as a bookmark?
There are other clever ways to mark your place in a book besides using a traditional bookmark. For example, you can use a post-it note, a paperclip, or even a spare button.
Closing Thoughts
There are lots of ways you can create your own homemade bookmarks. The most important thing is to choose a method that you’re comfortable with and that produces results that you’re happy with.
If you’re not satisfied with the way your bookmark looks, don’t be afraid to start over or try a different method. Remember, there are no rules for making bookmarks, so have fun and be creative!