DIY Pinecone Skiing Snowman
Updated on November 19, 2025


If I’m being totally honest, I’ve beenobsessed with crafting with real pinecones lately. My kids have been getting a real kick out of it too, so I’ve been doing my best to come up with all kinds of child-friendly things we can make together! That’s why, when we planned a family skiing trip later in the winter and the kids got all excited, I had the idea to turn pinecones into funny little skiing snowmen as a way to sort of celebrate their excitement and combine it with their recent favourite crafting technique. I even documented the process on one of the snowmen, just in case other people want to try it out as well.
Check out these step by step instructions complete with photos! If you’d rather follow along with a video tutorial instead of written words, scroll to the bottom of this post to find just what you’re looking for.
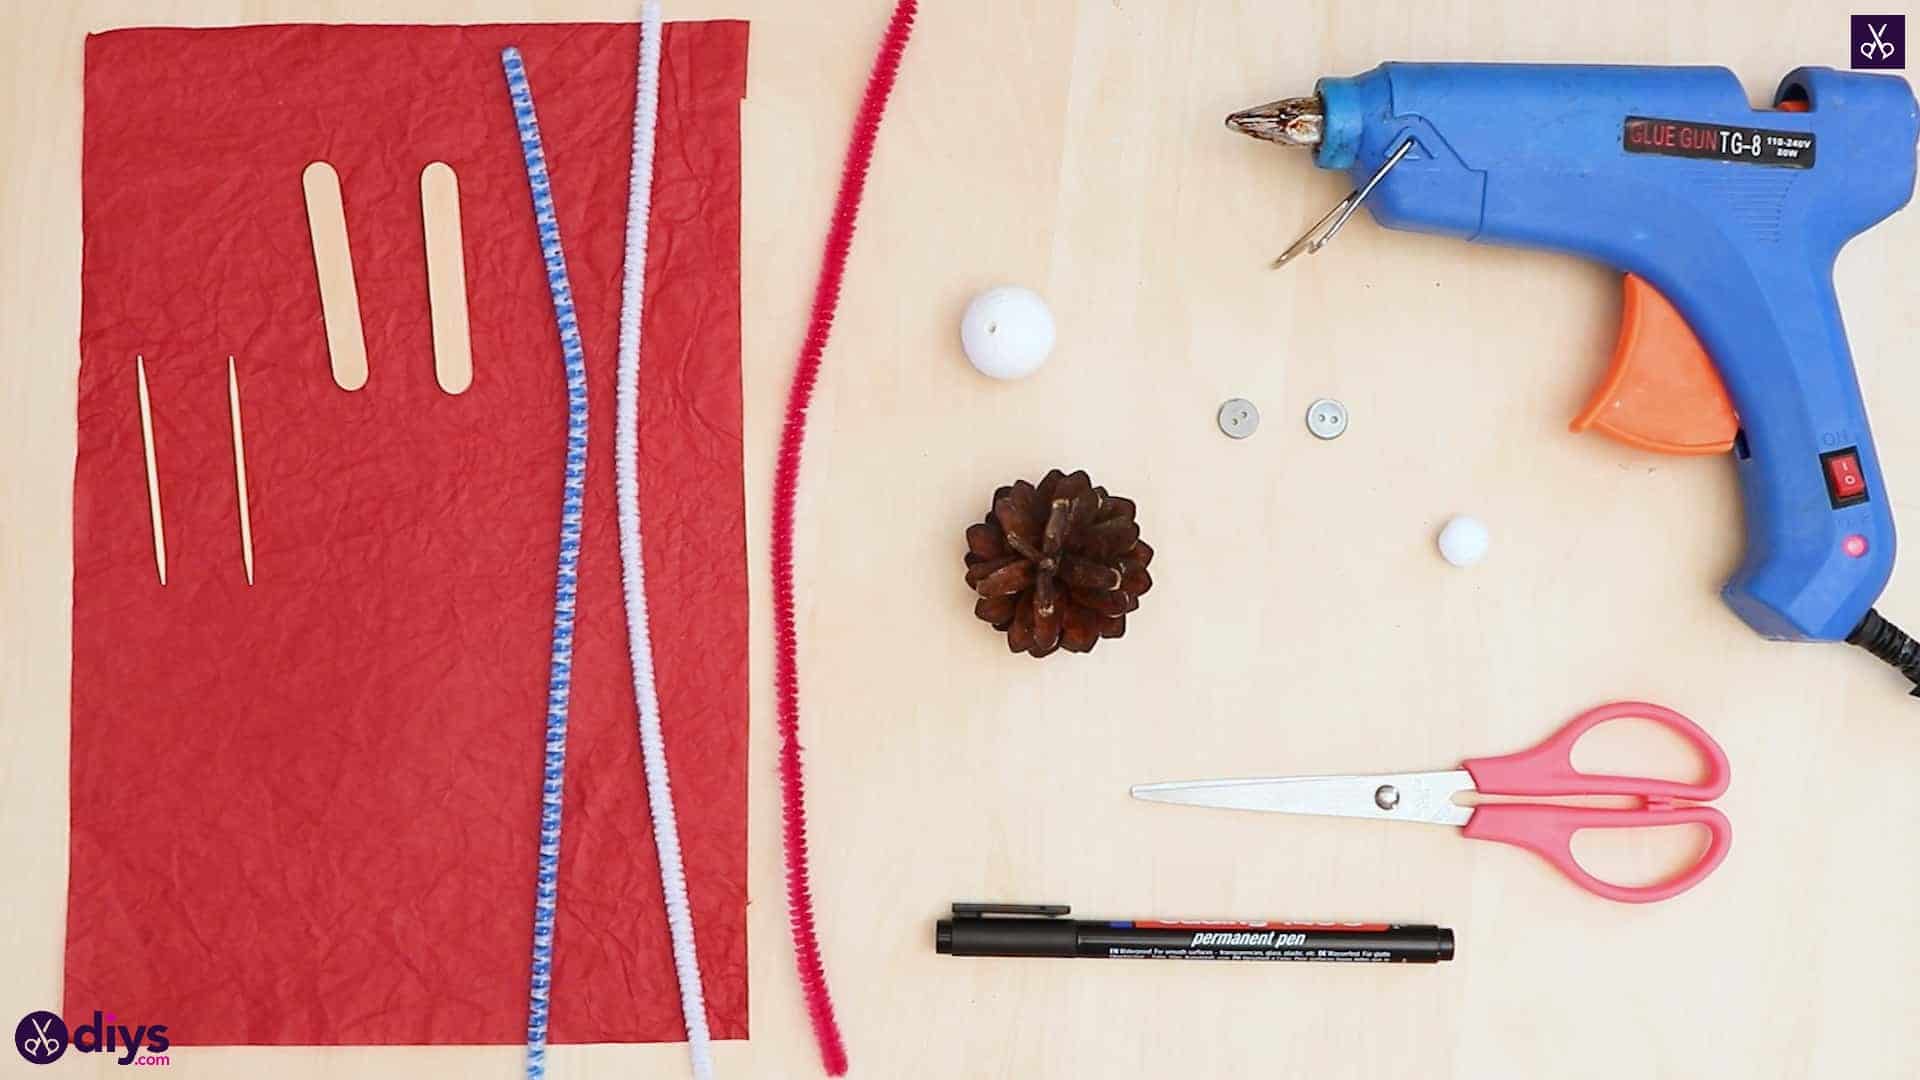
For this project, you’ll need:
- A pinecone
- A miniature white pom pom
- A black marker
- Piper cleaner (white, red, and blue with white stripes)
- Two mini popsicle sticks
- A spun cotton ball
- Two toothpicks
- Red tissue paper
- Two very small buttons
- Scissors
- Hot glue
Step 1: prep
Gather your materials and make sure you have all that you need!

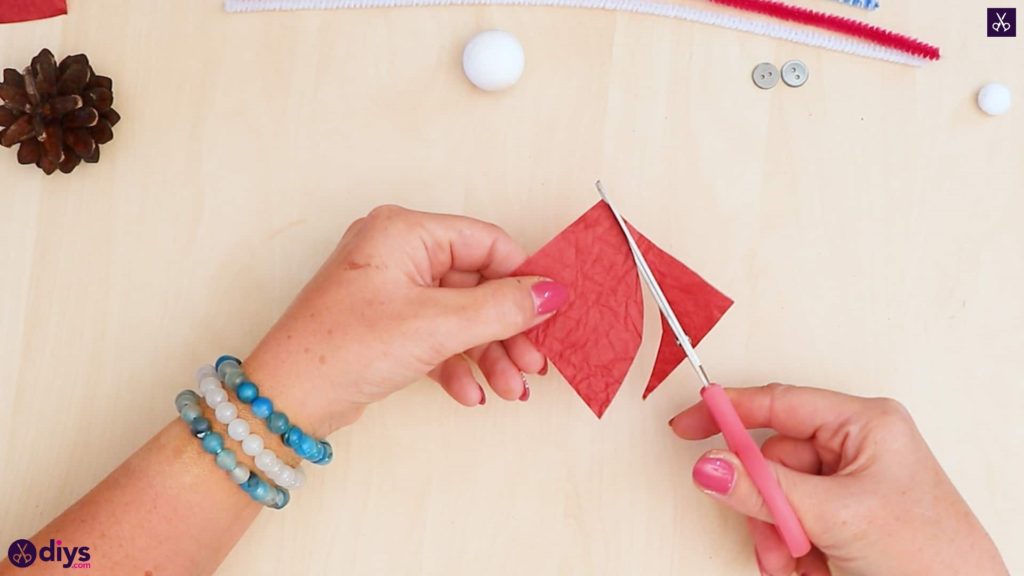
Step 2: make the hat
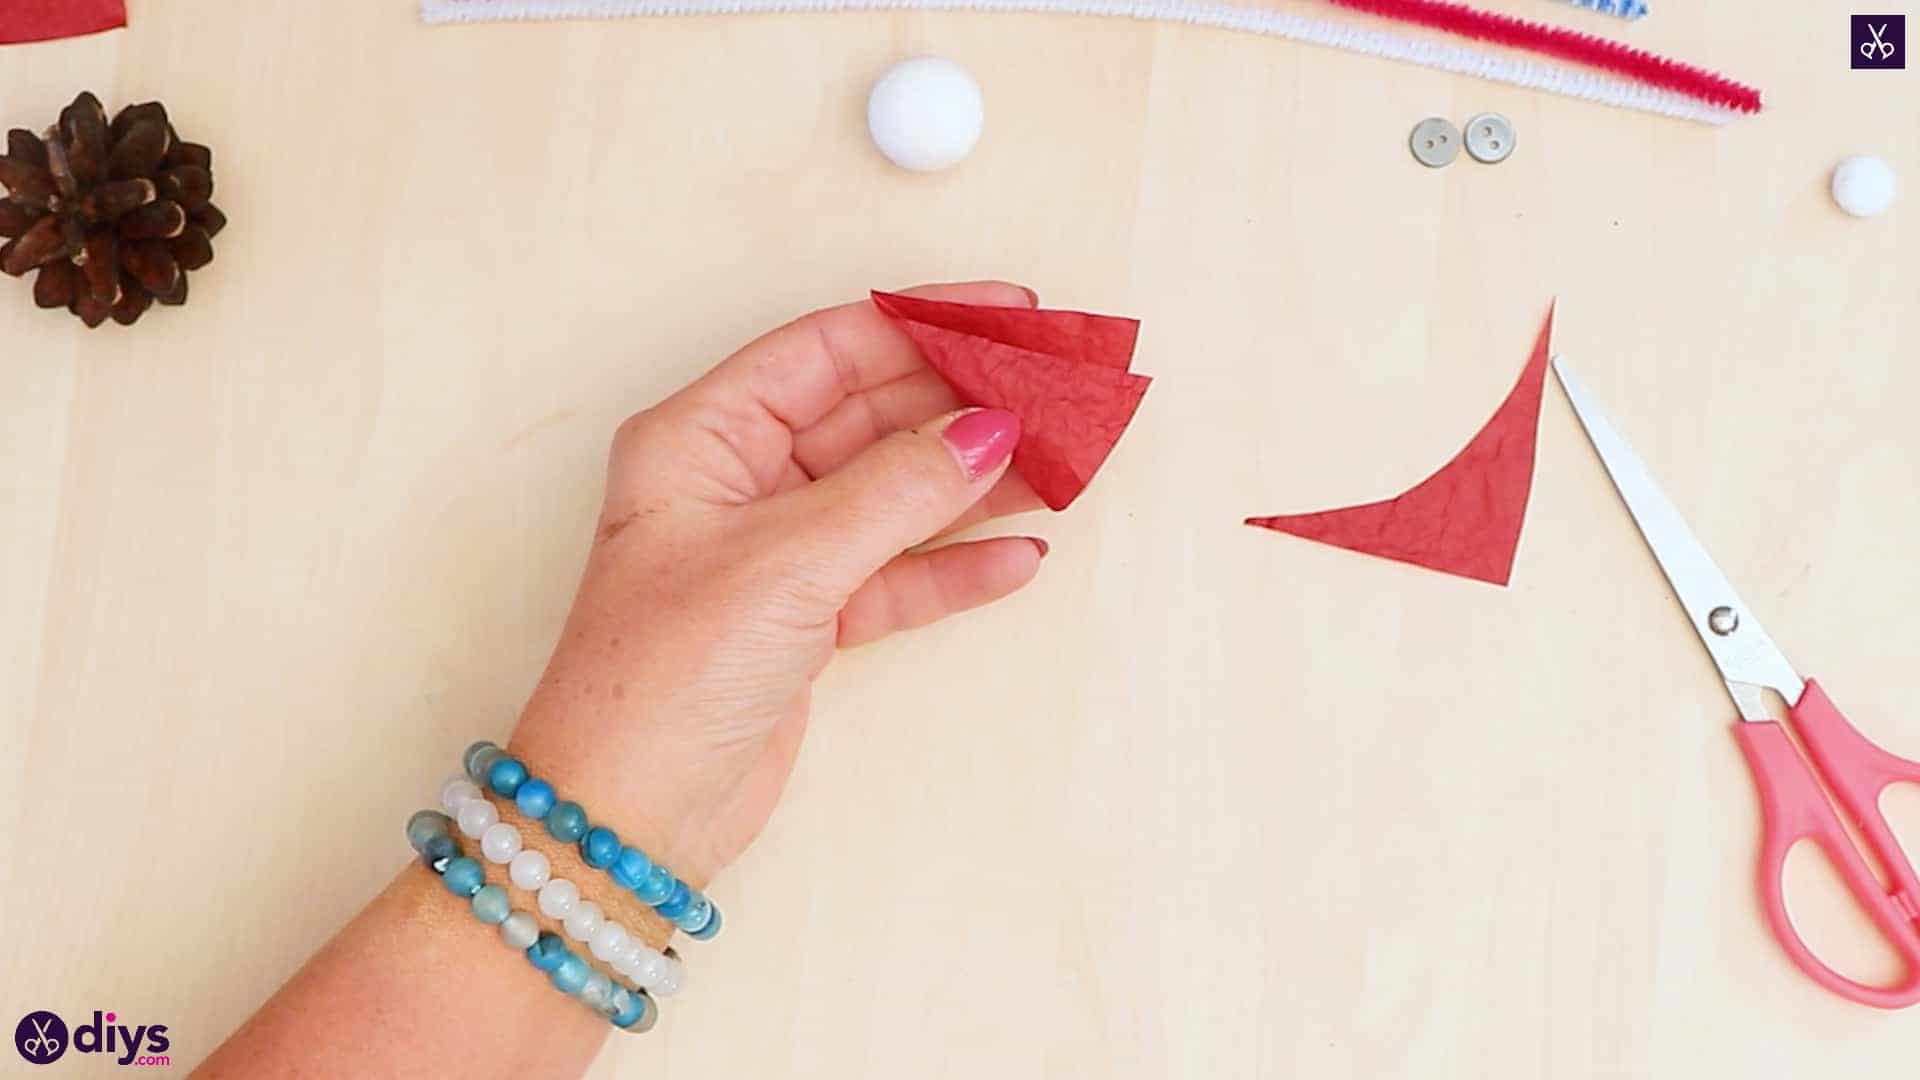
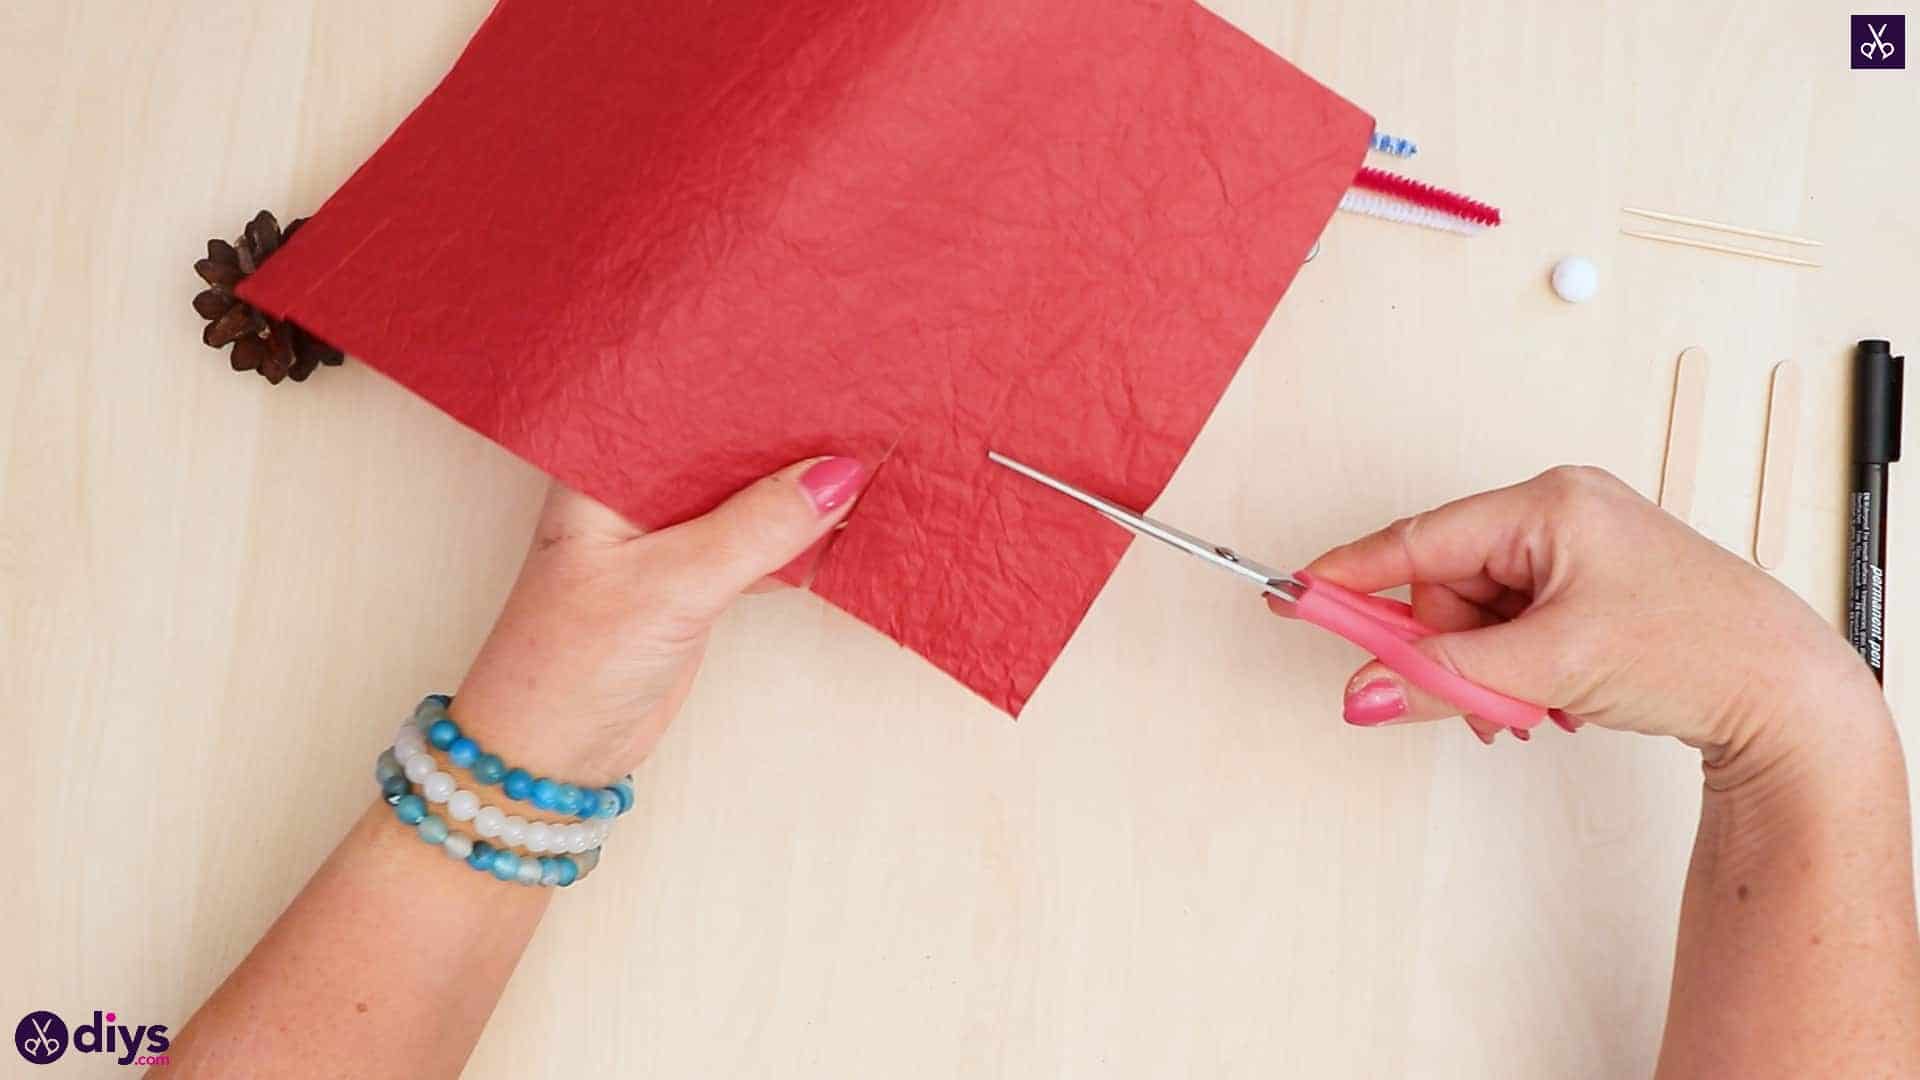
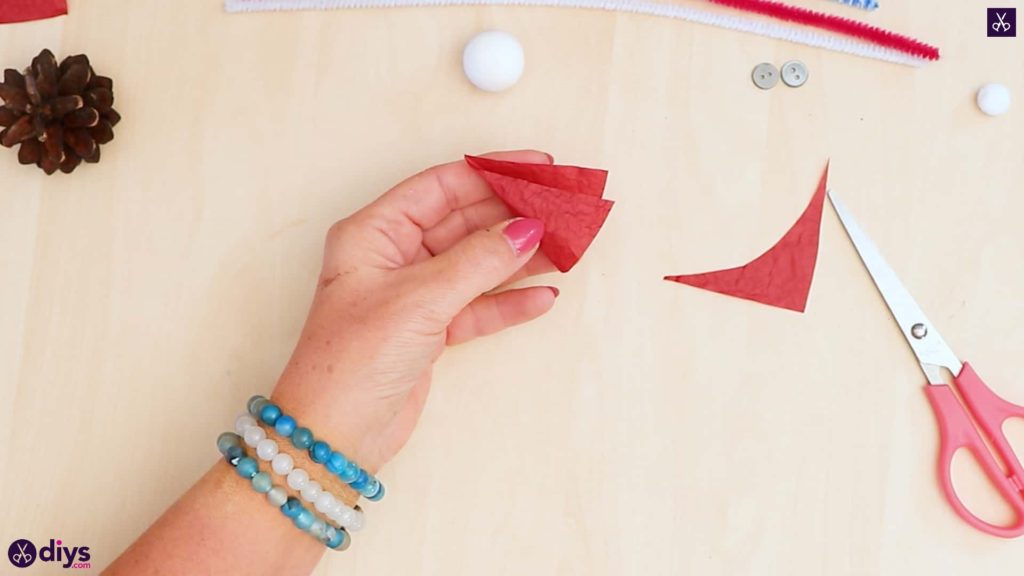
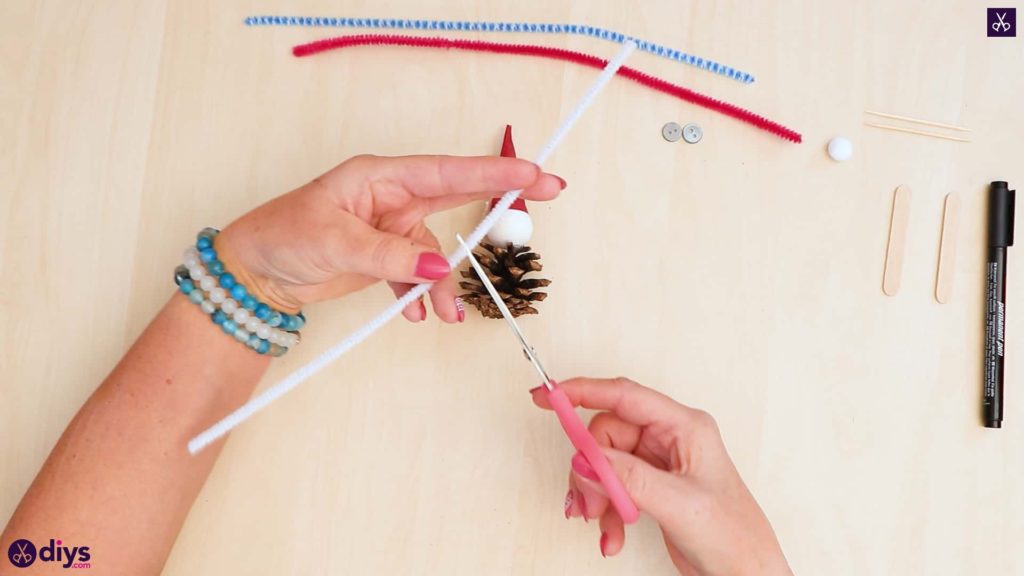
Make your snowman a pointed hat! Cut square from the bottom right corner of your red tissue paper page that’s about one inch by one inch. Turn the square at an angle so you have a corner at the bottom, the top, and each side like a diamond. Use your scissor to cut a curved shape on one side by starting at the bottom corner, rounding off the right hand corner smoothly and evenly, and finishing at the top corner. You’ll leave the corner on your left side points, as that will by the pointed top of your hat.

Step 3: shape the hat
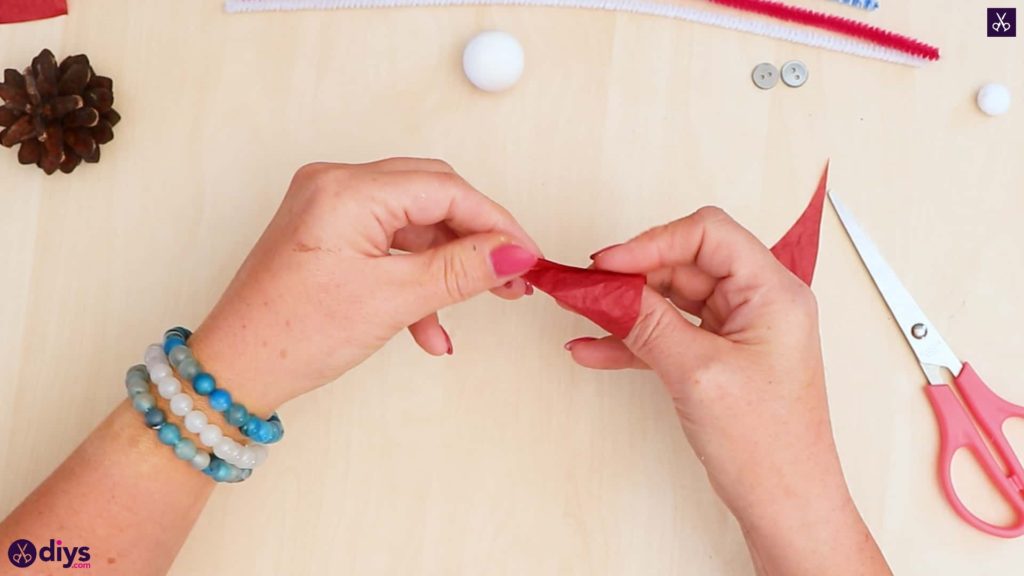
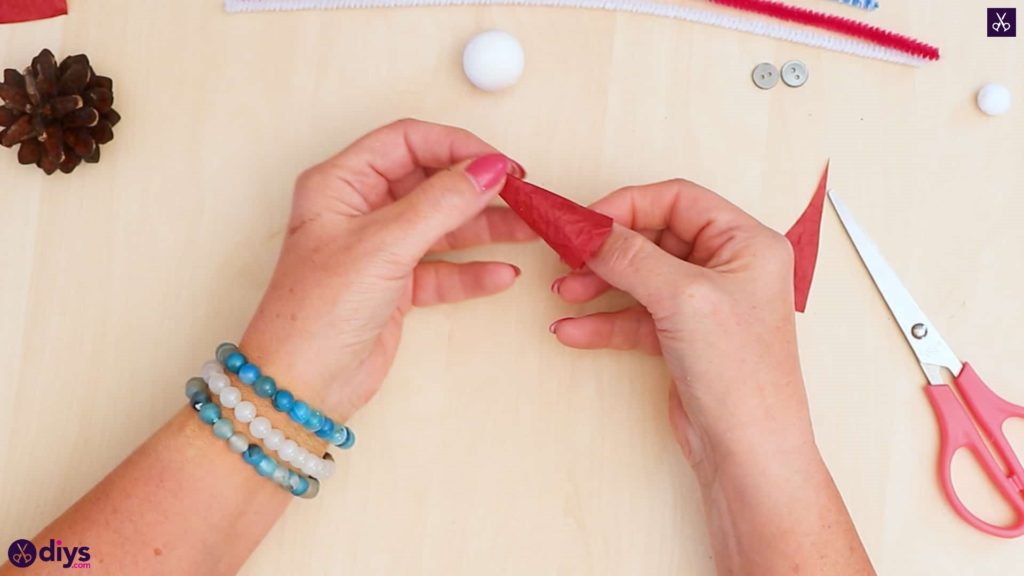
Curl your new red shape into a cone-like hat by bringing the bottom side up and inward so it curves in towards the top side, making a more pronounced point our of your left hand corner. The right side where you cut the arc will be a wider circular opening that will sit on your snowman’s head. Apply glue along the straight edge at the top and stick it down to the surface of the left side you just curled inwards to anchor your cone shape in place.
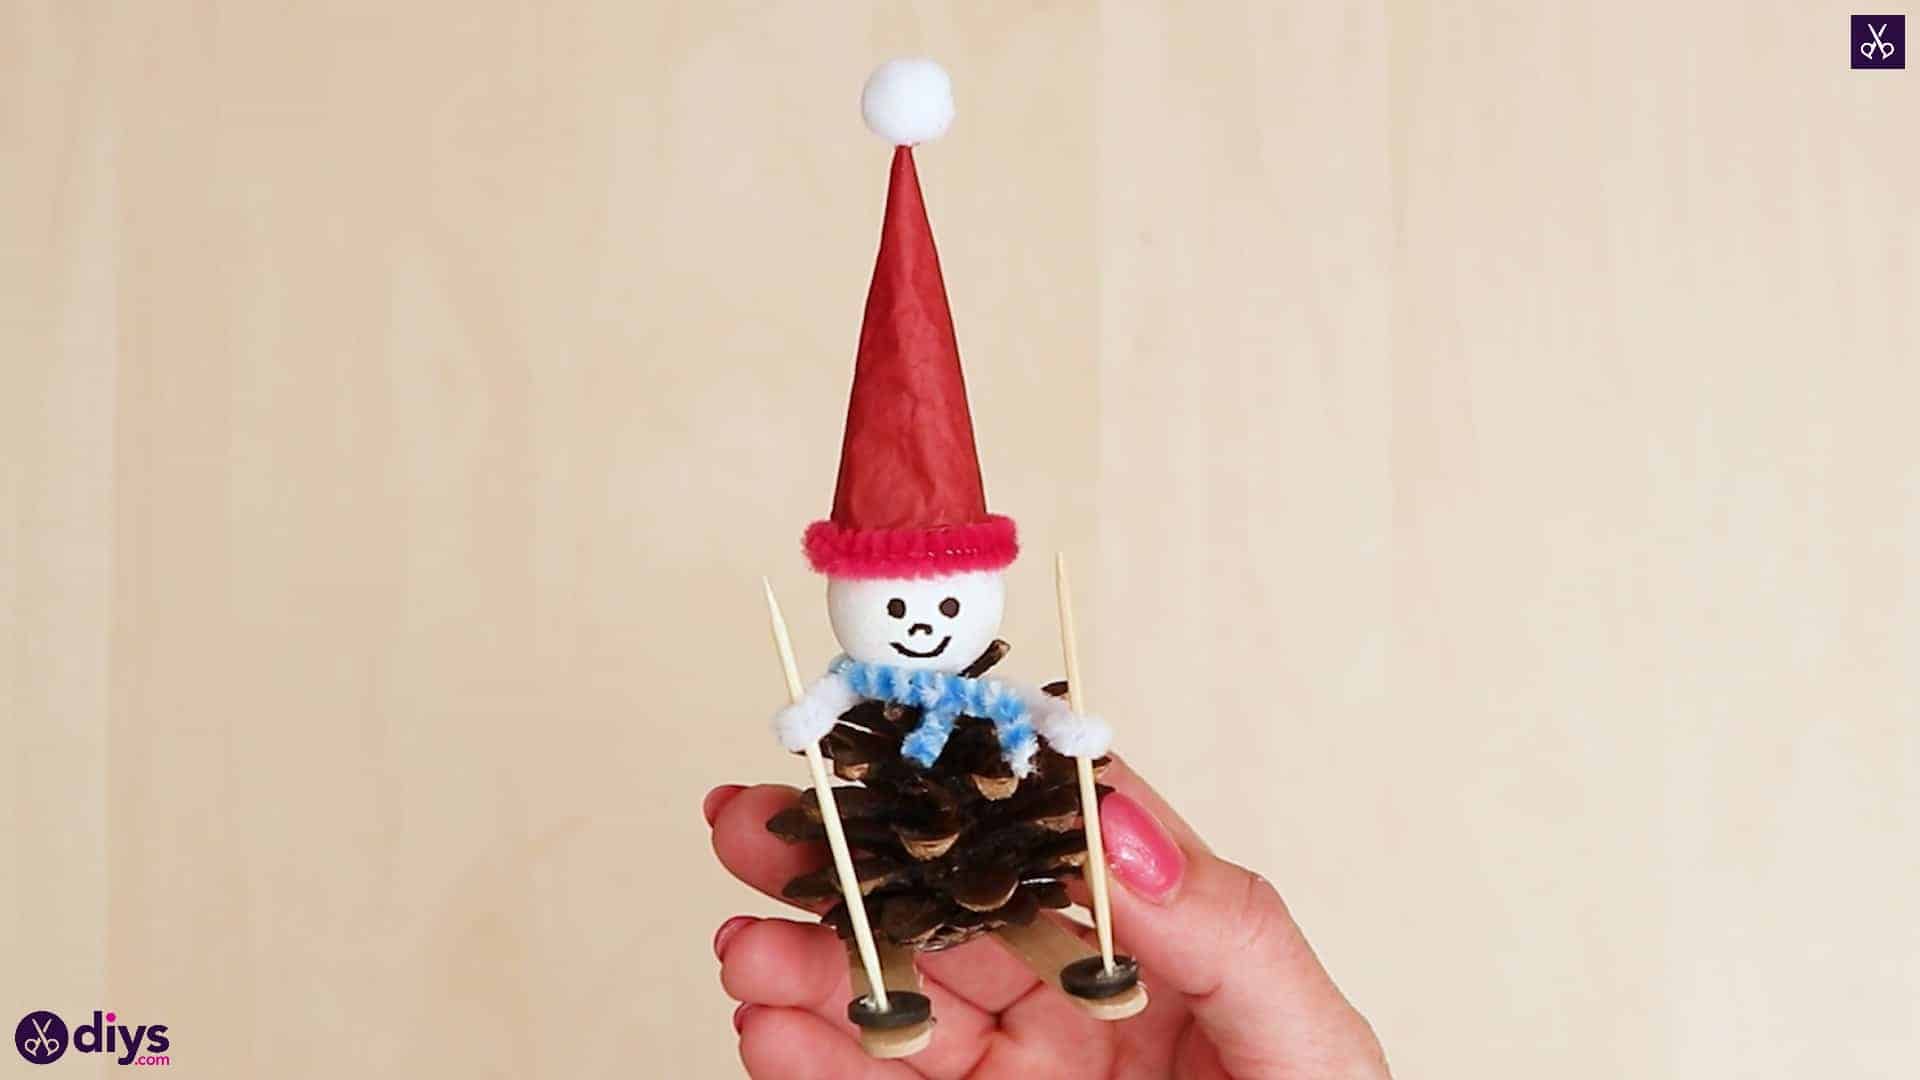
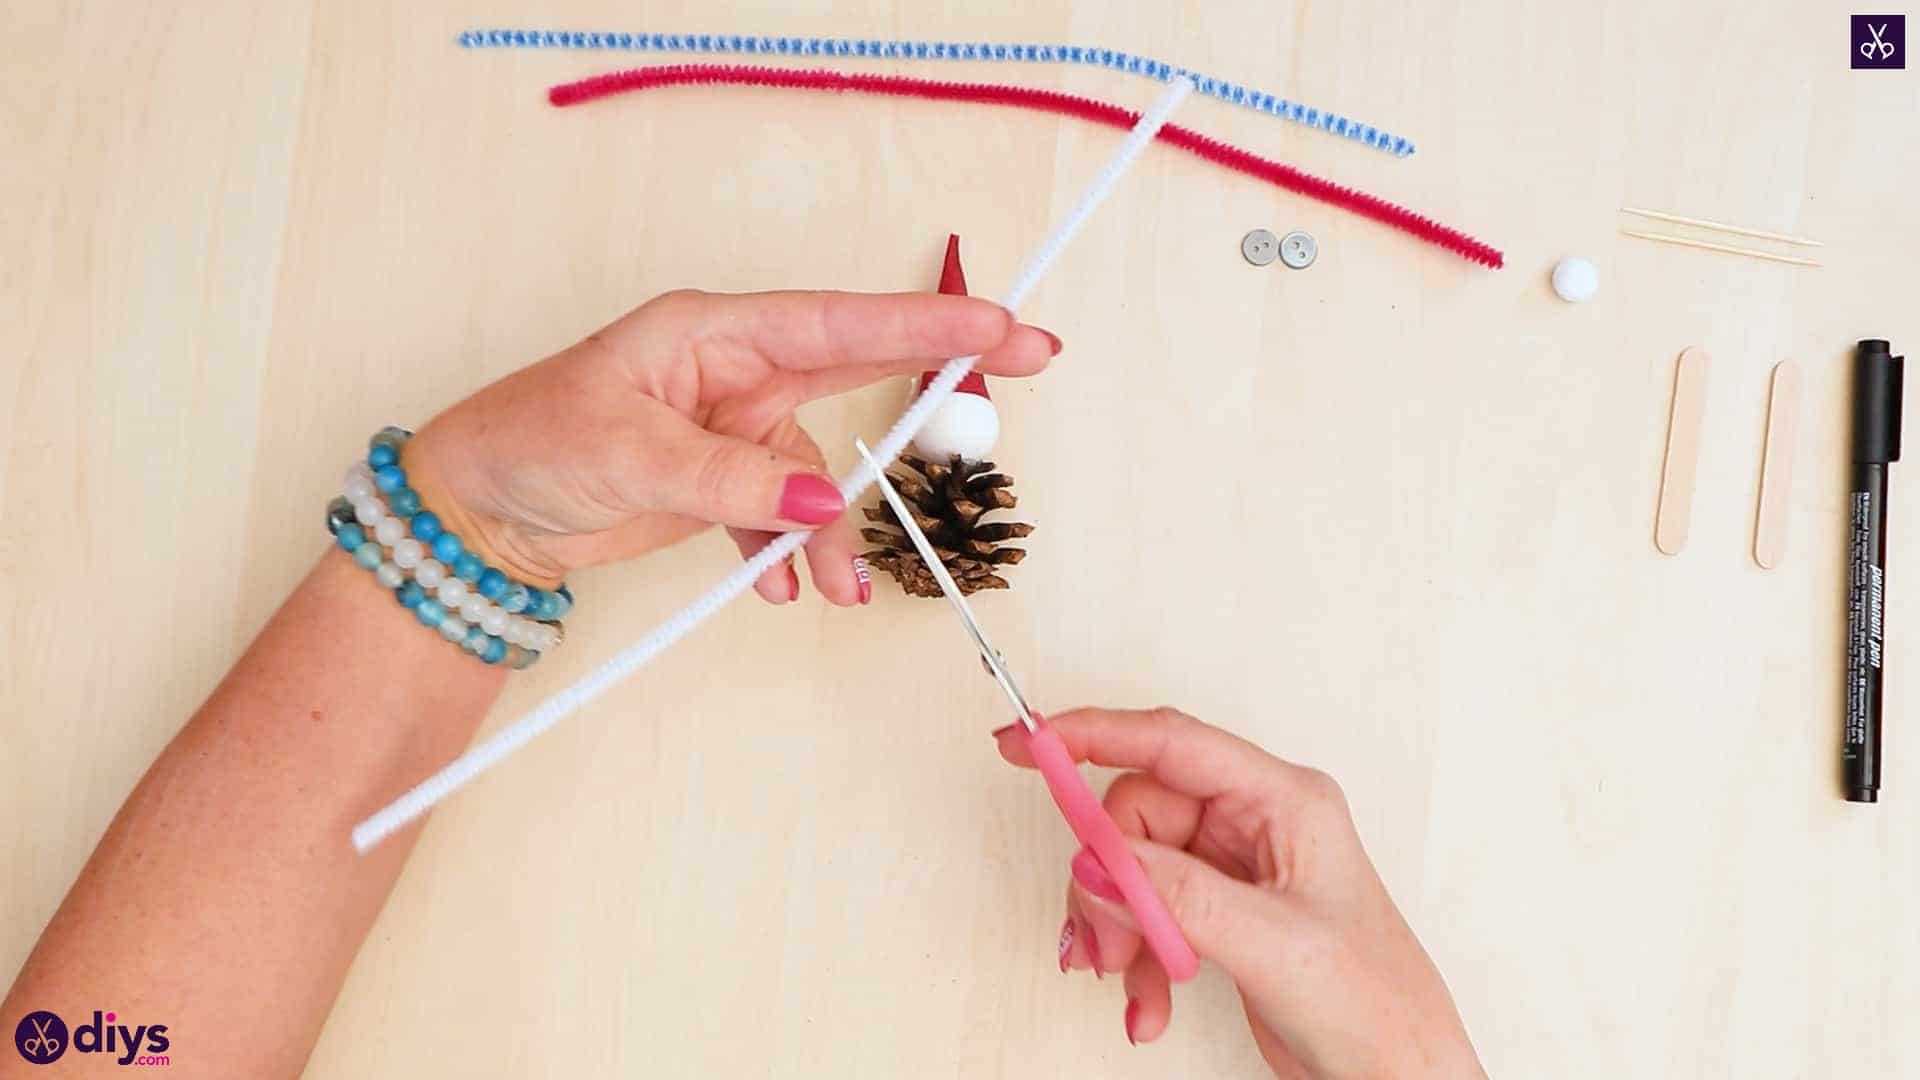
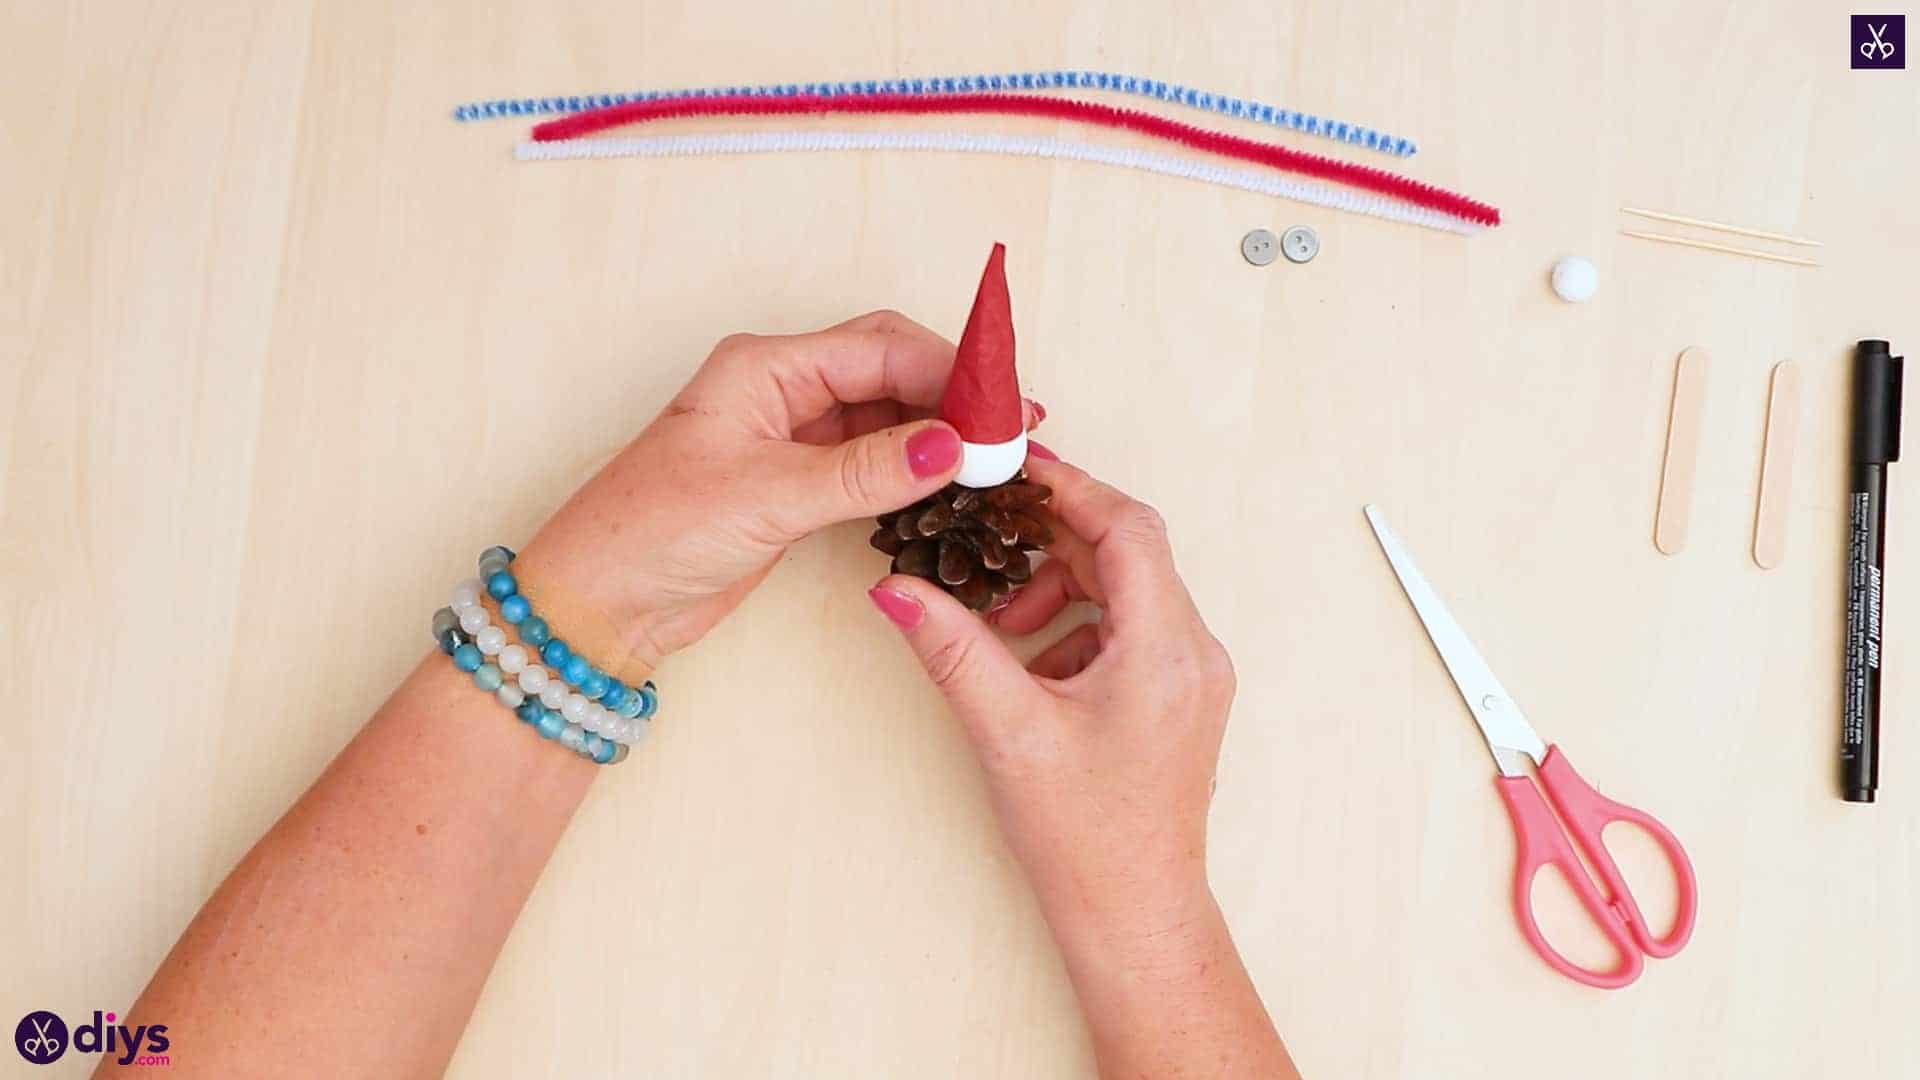
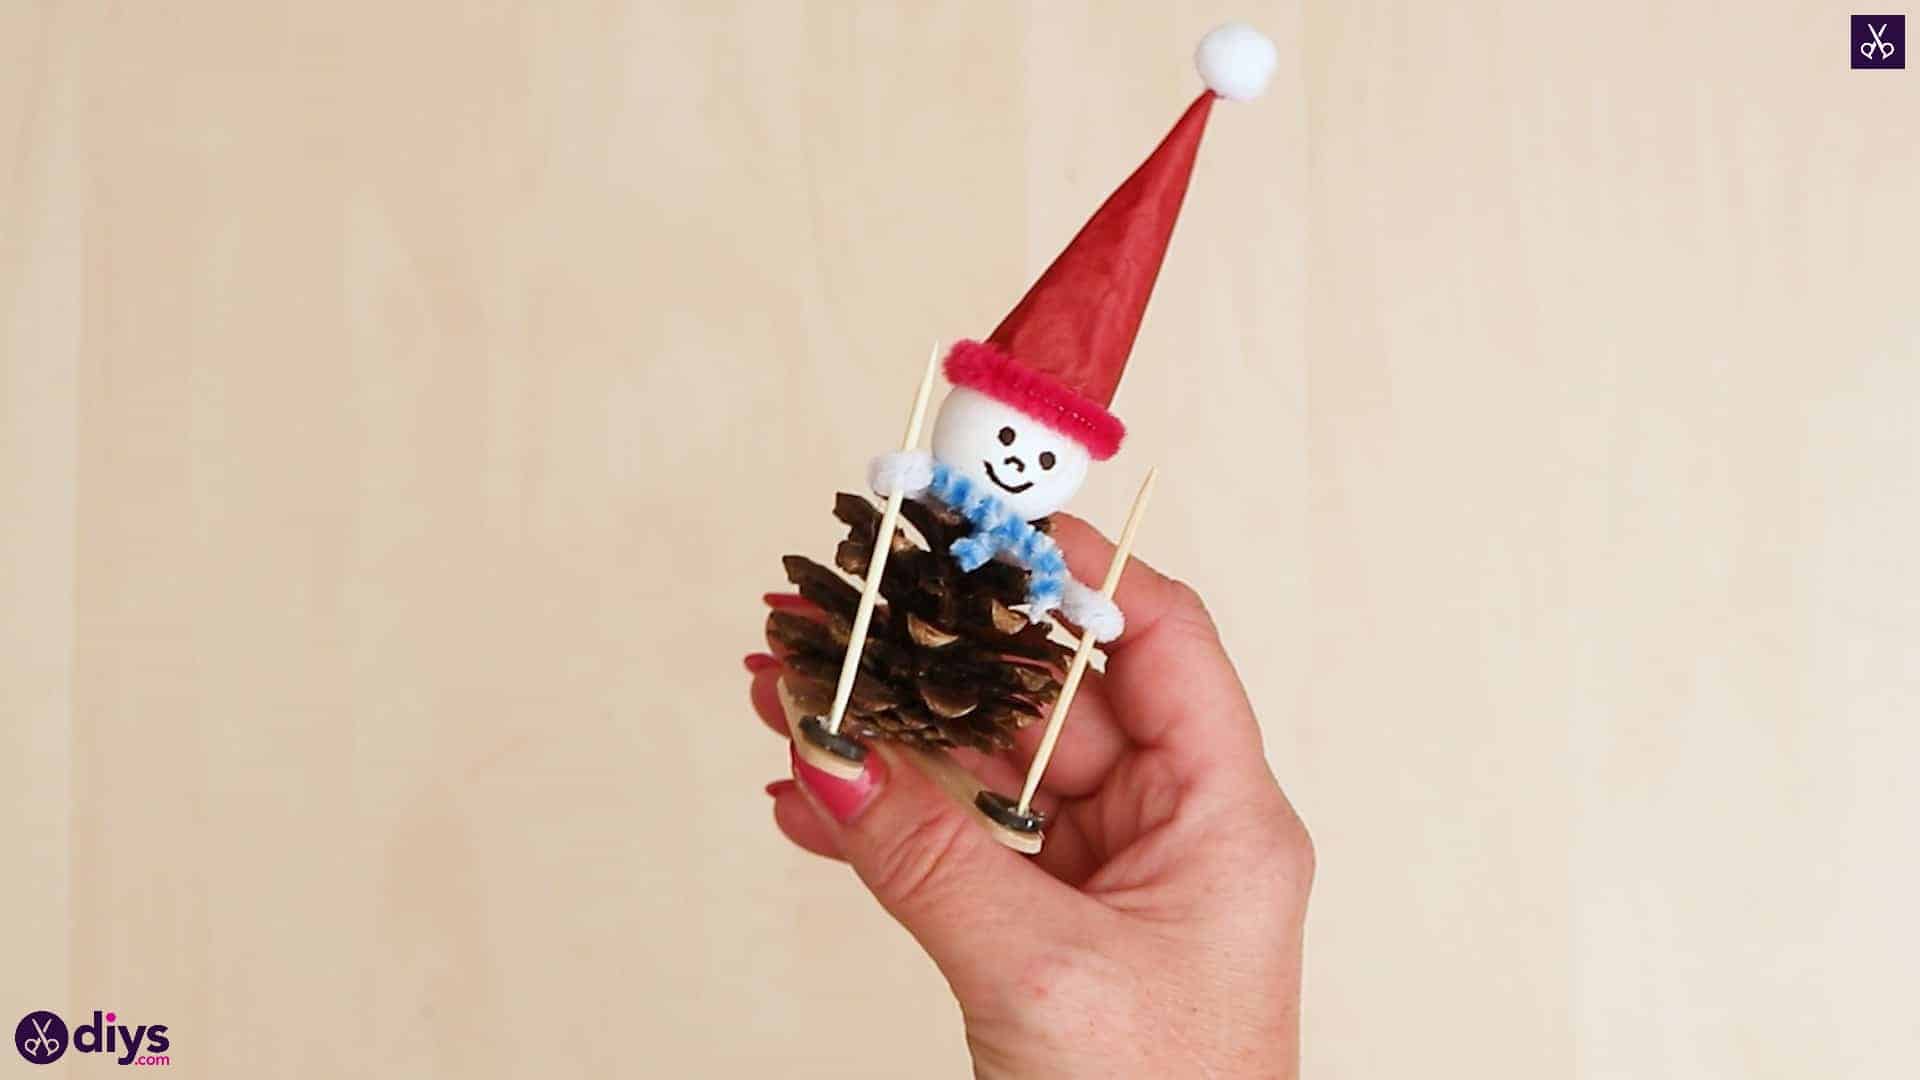
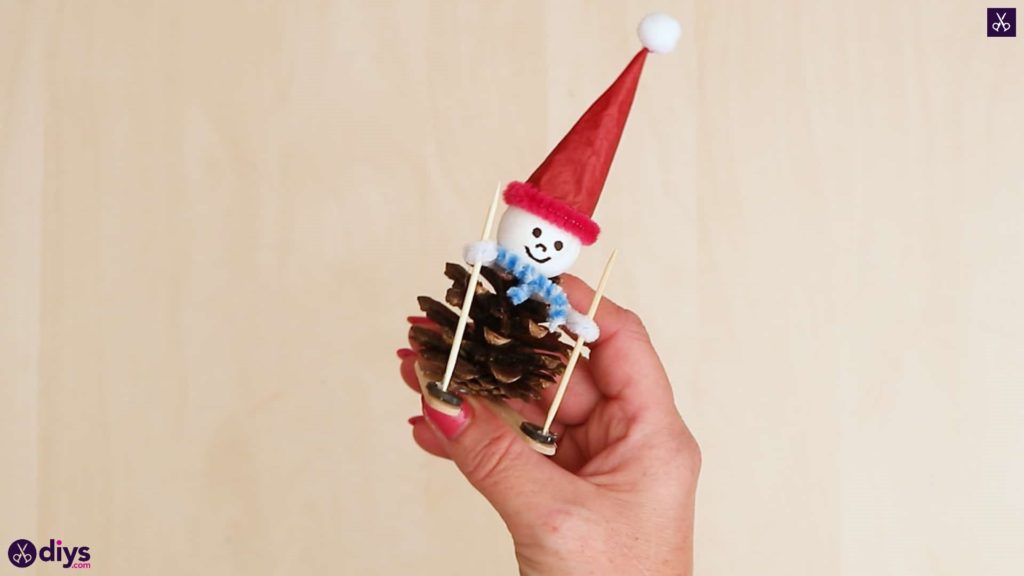
Step 3: assemble the body
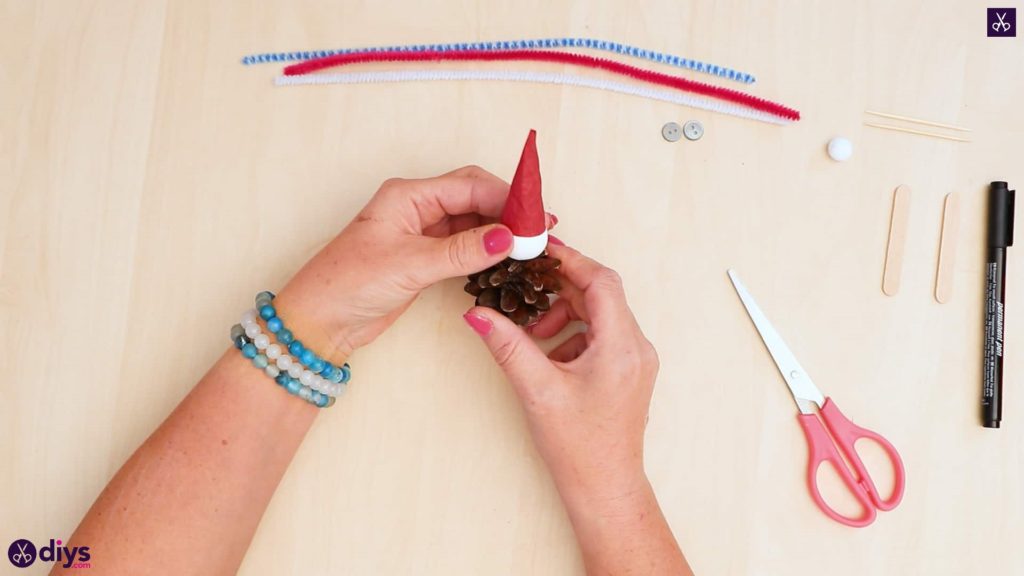
Apply hot glue to the bottom of your spun cotton ball and stick it to the tapered top of your pinecone to make the snowman’s body and head. Then, apply hot glue just on the inside of your hat’s opening, all the way around the rim, then place it carefully on the top of your snowman’s head.
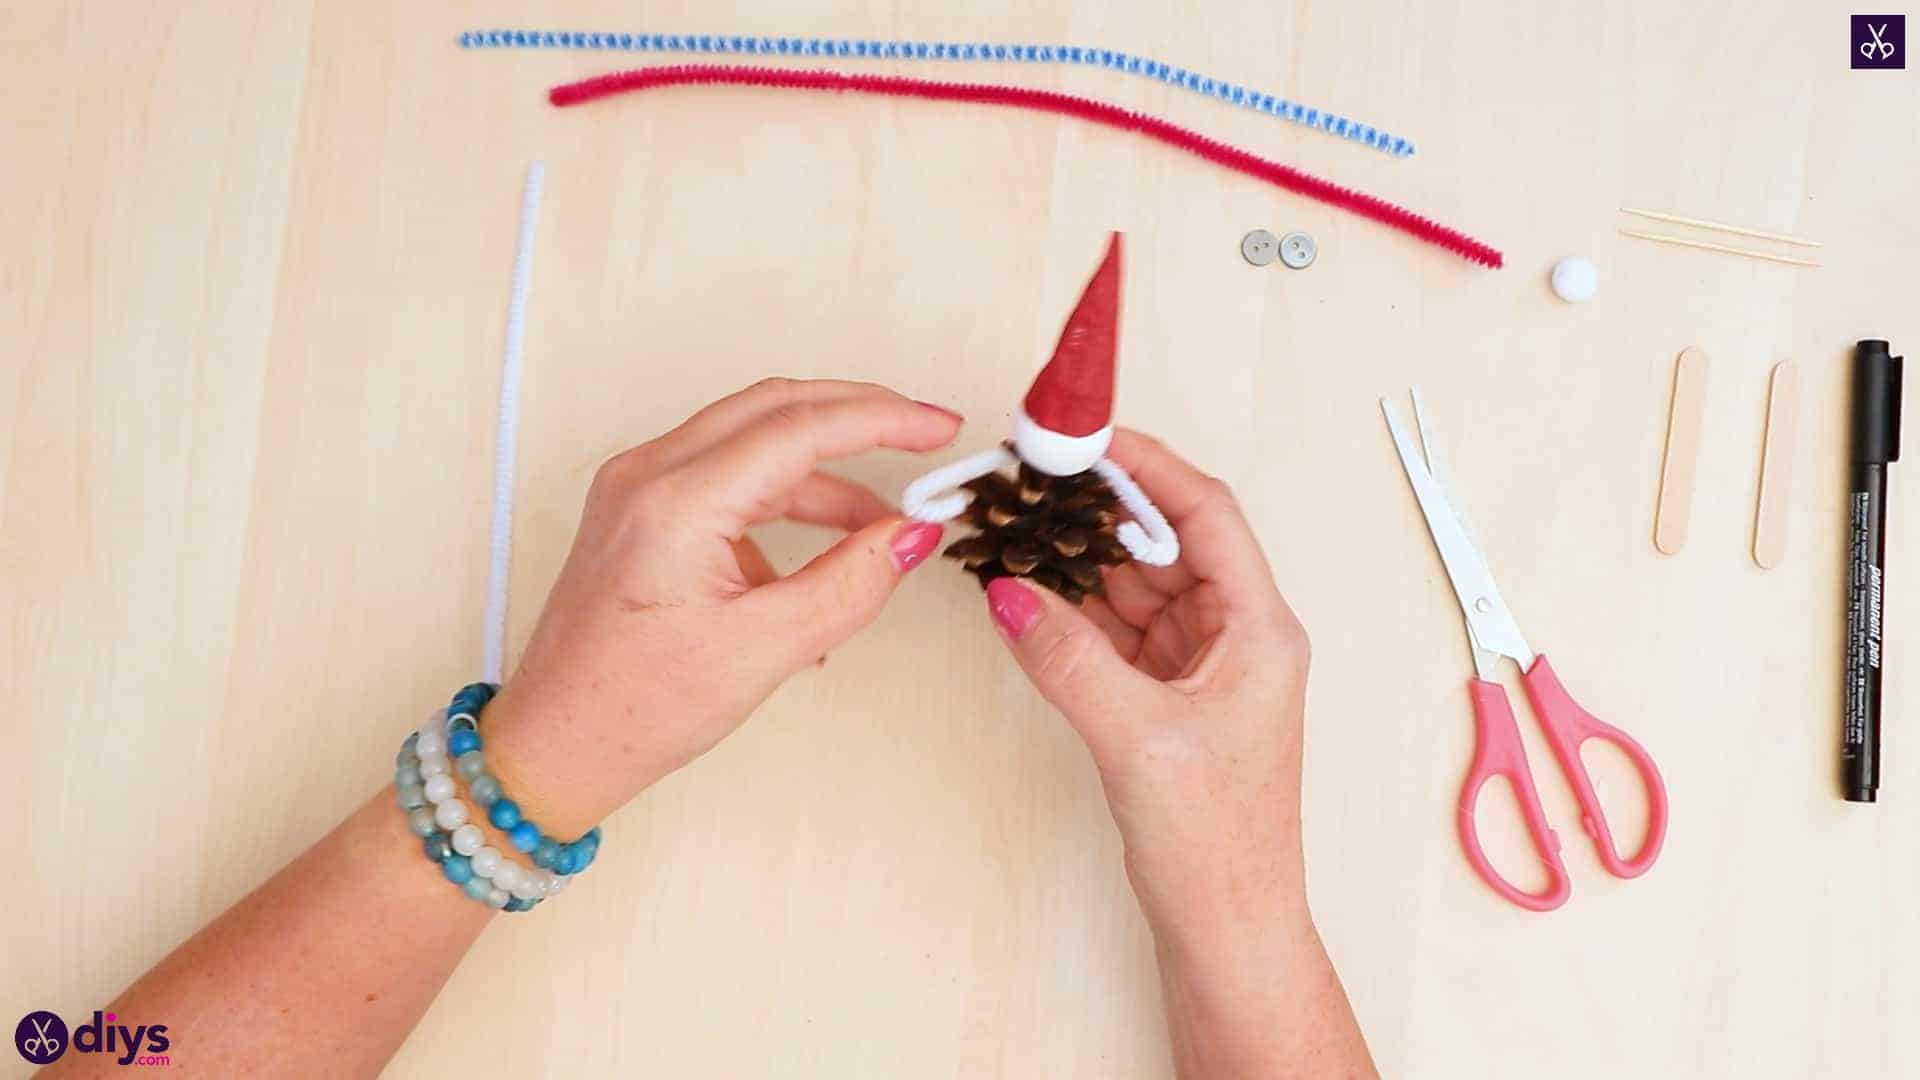
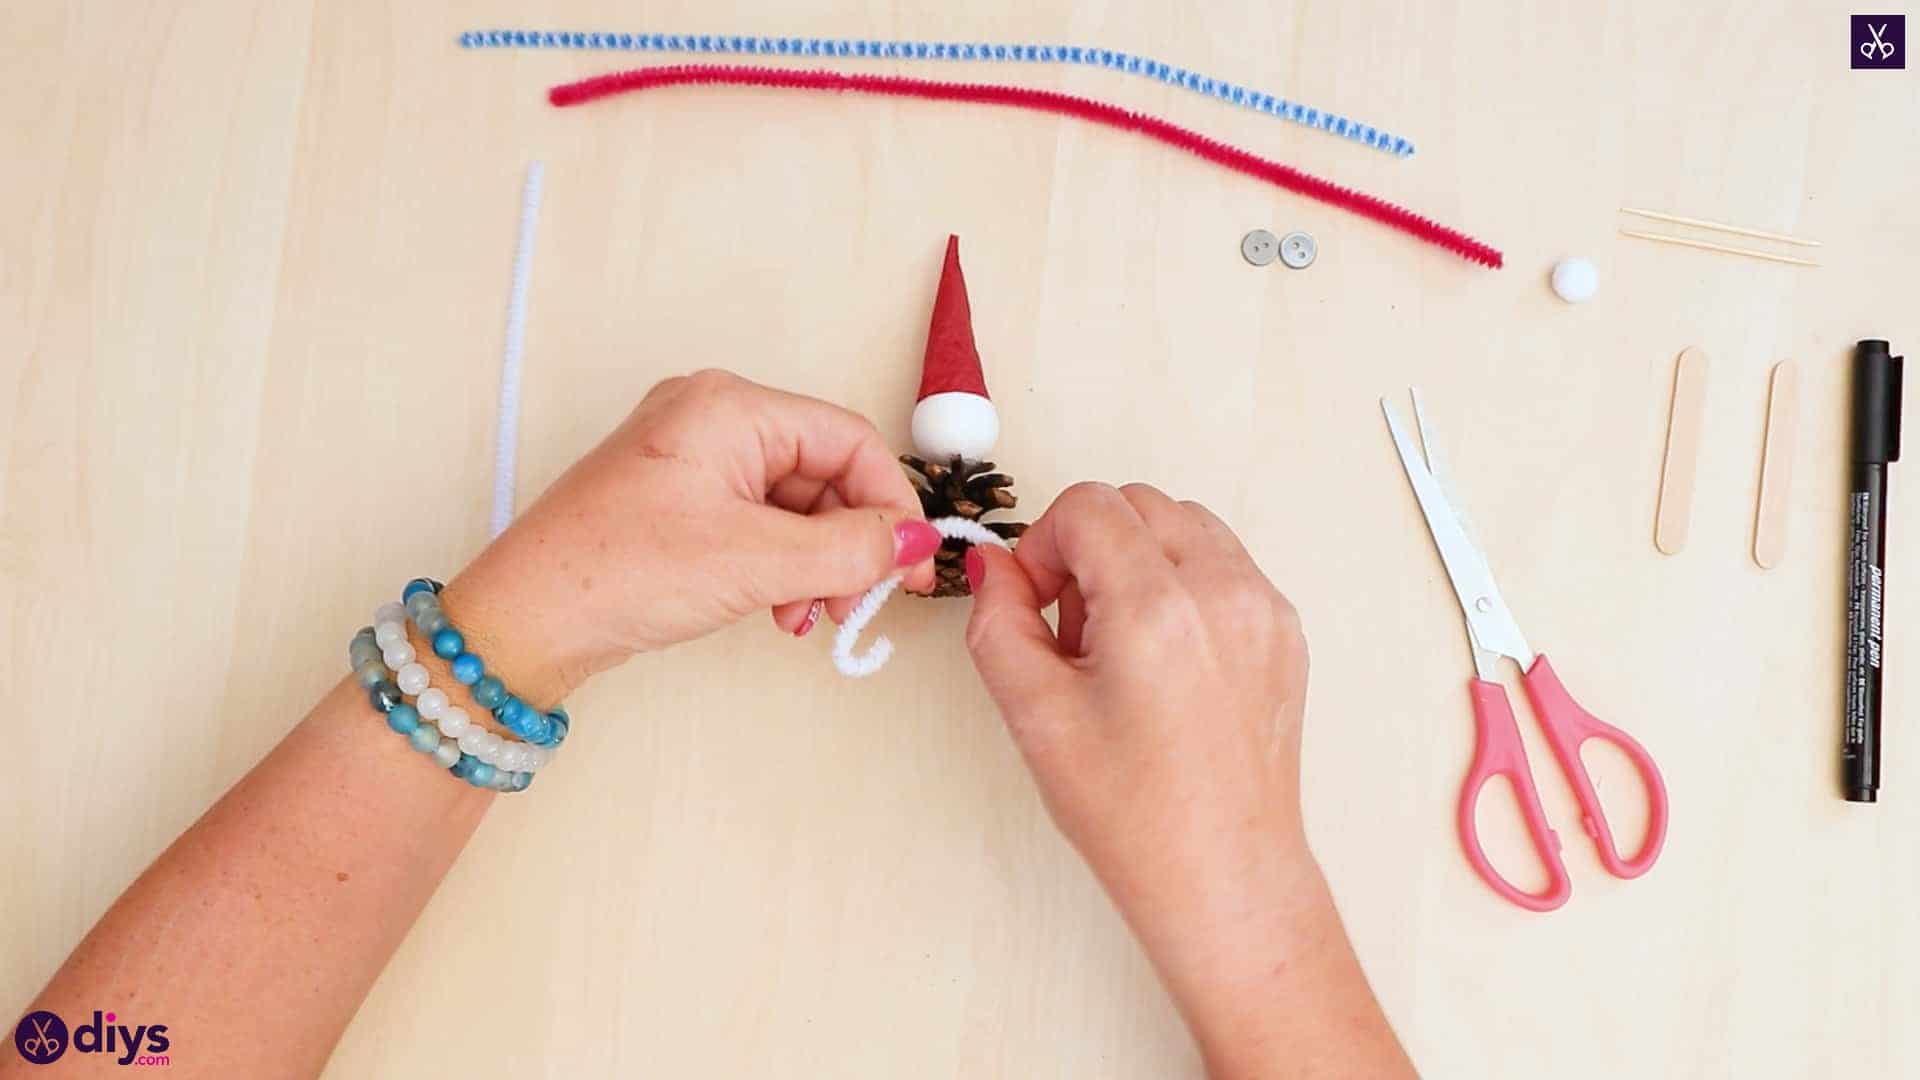
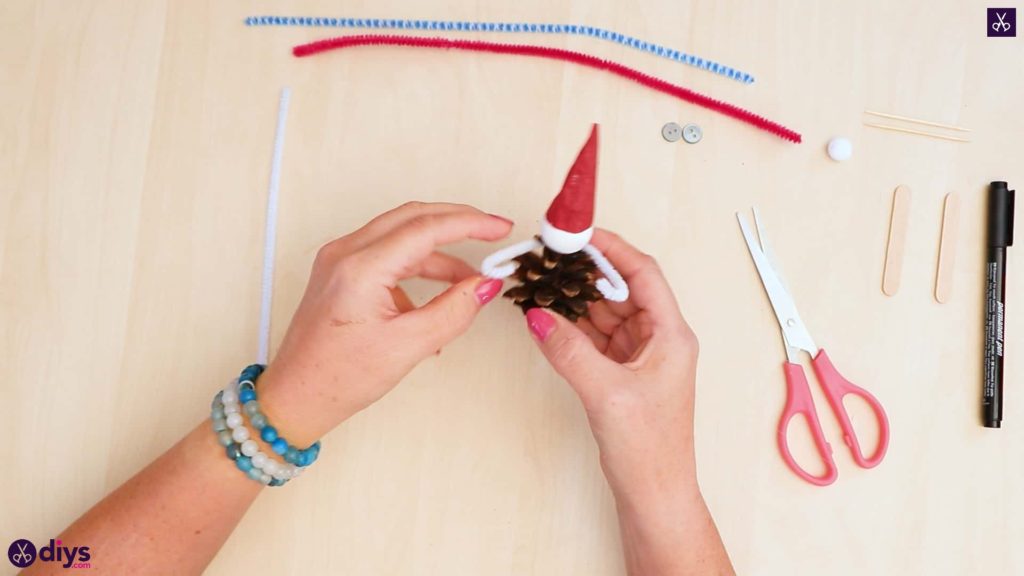
Step 4: make the arms
Cut your white pipe cleaner in half and turn one half into your snowman’s arms. Curve each end inward from the side to make a loop that will be his hands and bend the whole length a little in the middle so the hands curve forward. Apply a dot of hot glue in the center of that curve and place the hands around the back to sit nestled where the snowman’s head and pinecone body meet. The pipe cleaner arms and hands will stick out forwards like they’re reaching.

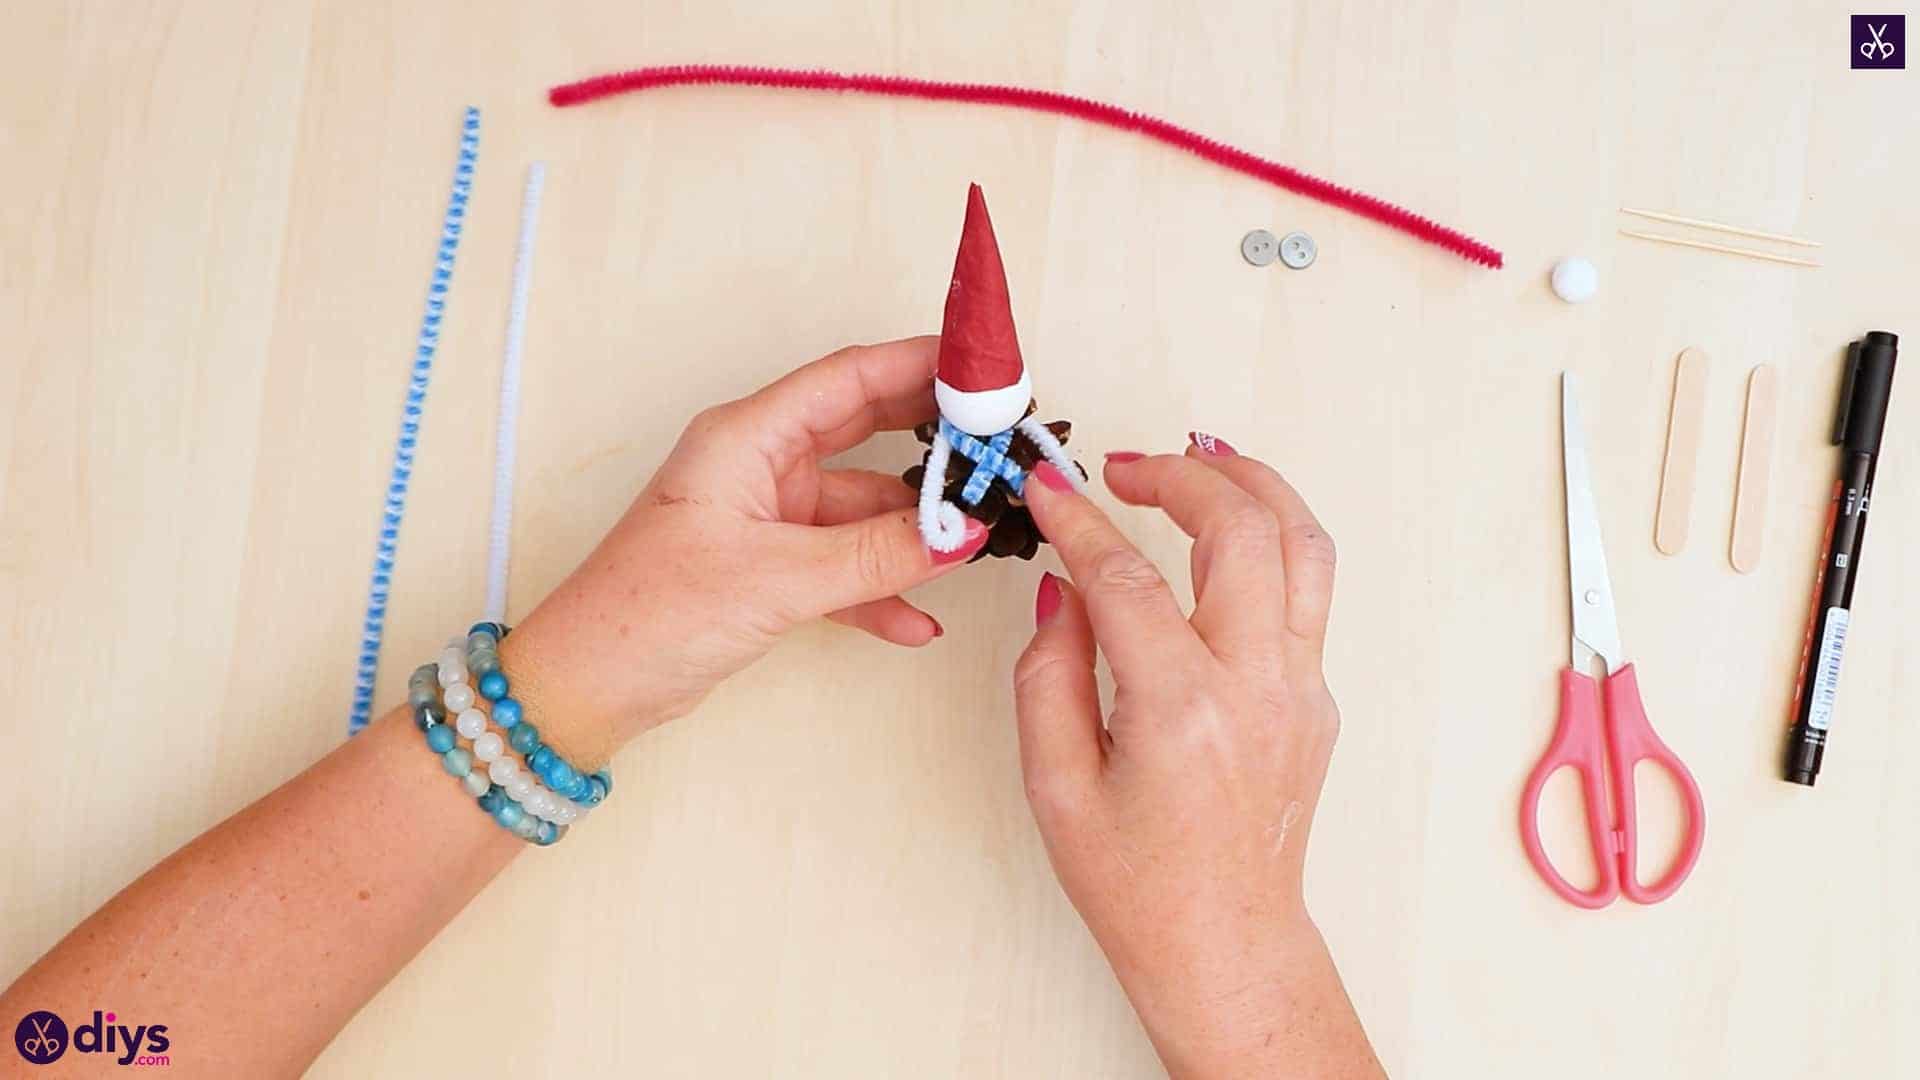
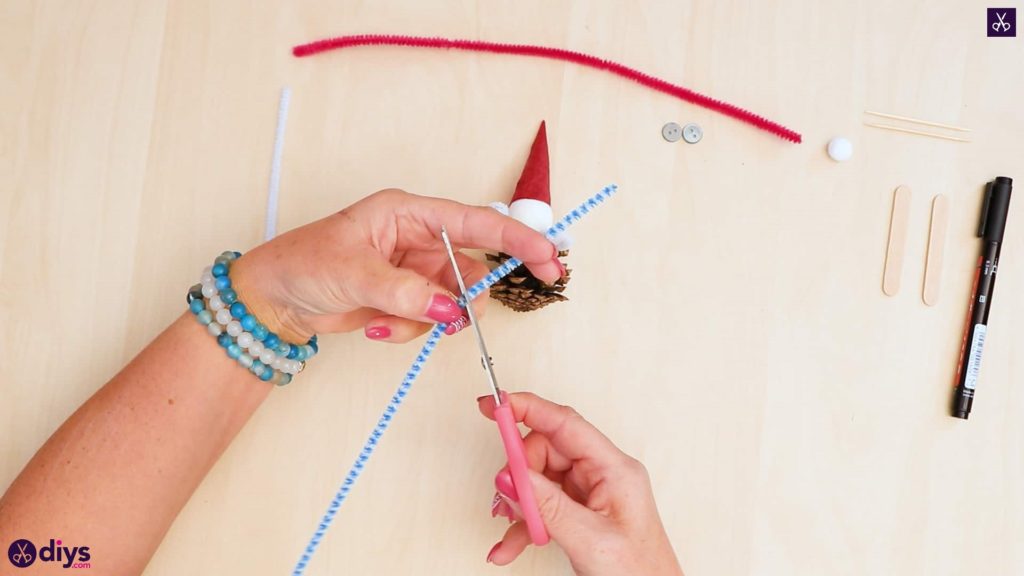
Step 5: make the scarf
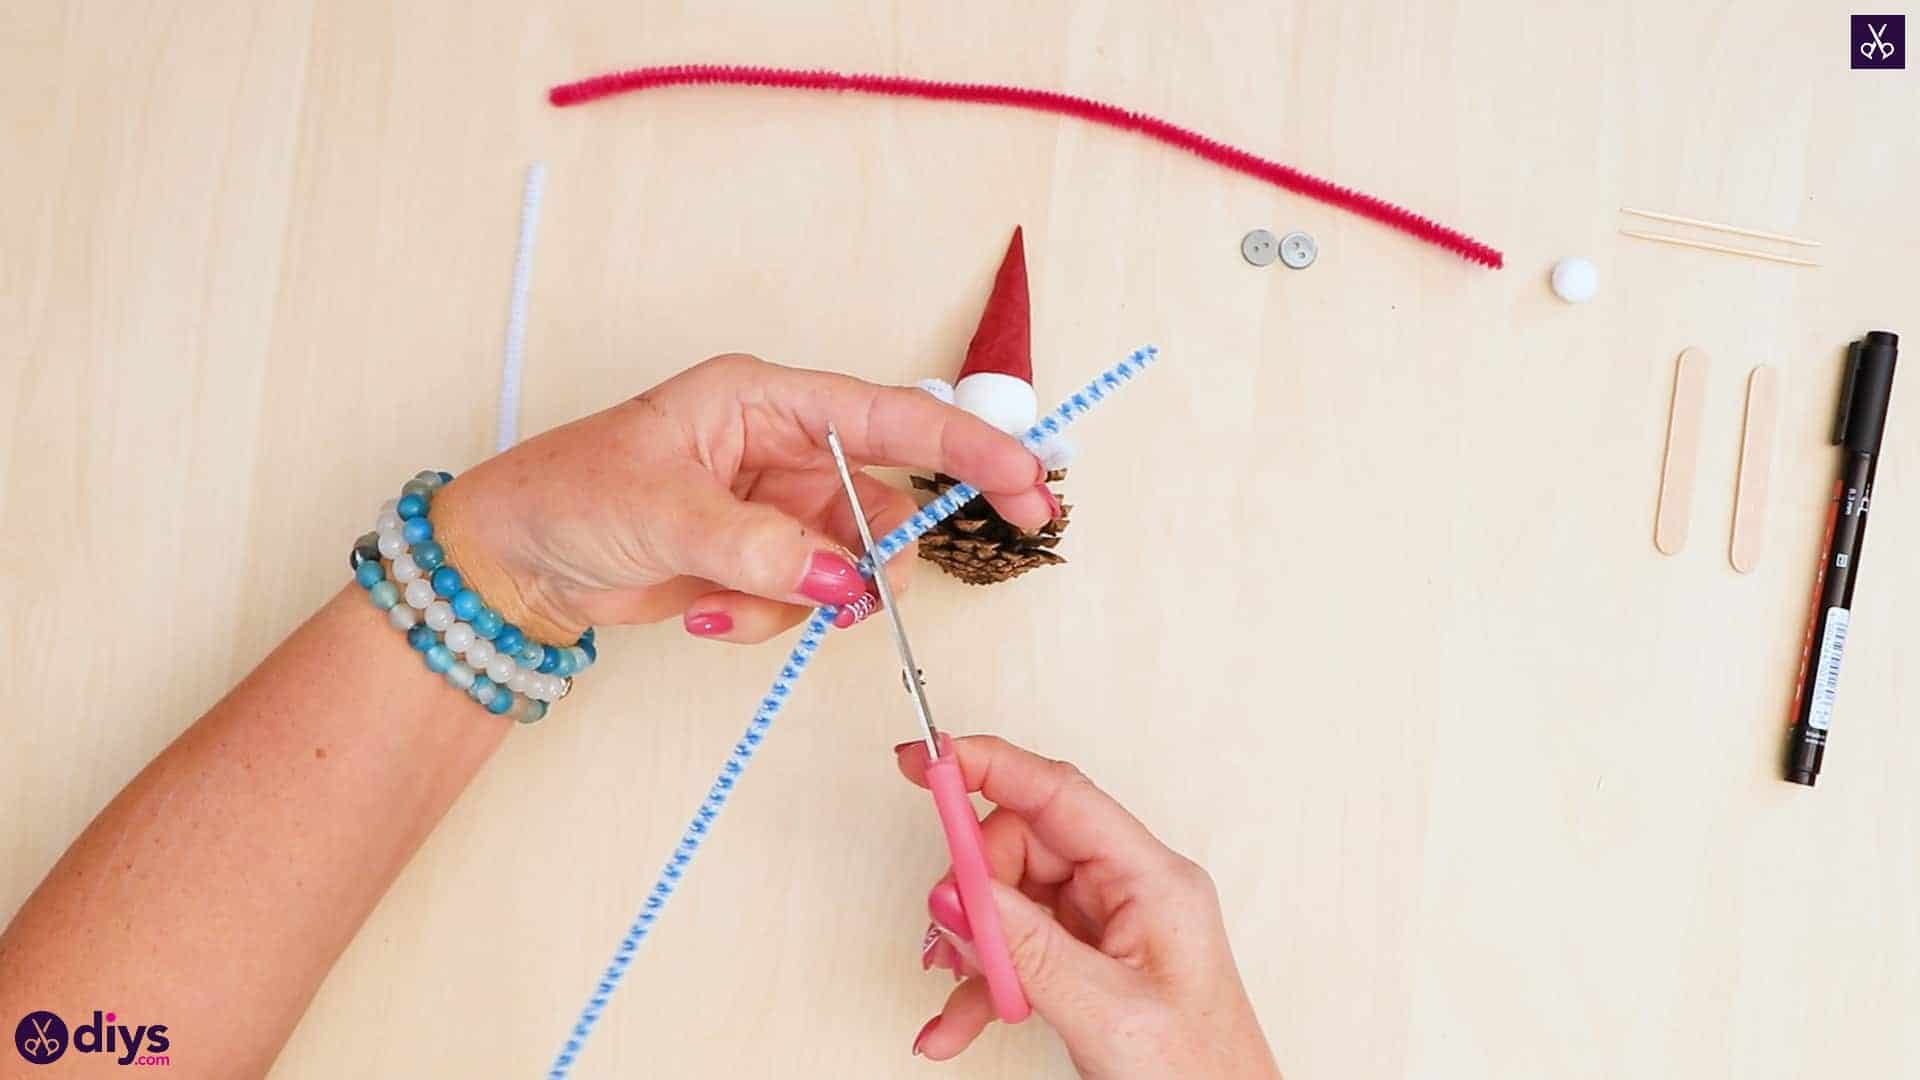
Cut a two inch piece from the end of your blue and white pipe cleaner and turn it into your snowman’s scarf! Curve it in the middle like you did with the arms and bend it around the back of your snowman’s neck just like before. Bend the tips of the scarf around the front to cross over each other under his chin and glue or twist them where they meet to keep them crossed in place.
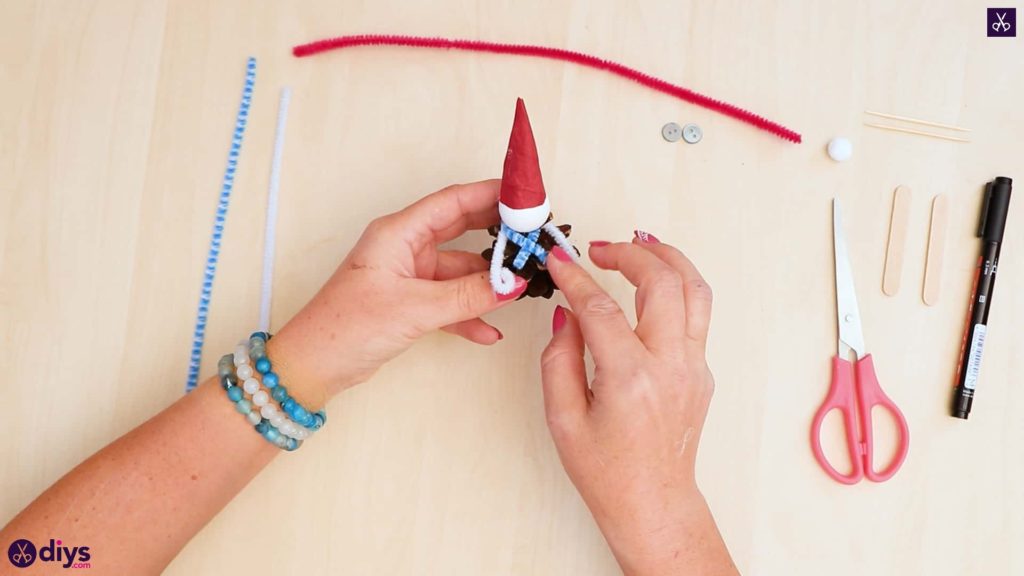
Step 6: trim
Cut a two inch piece from the end of your red pipe cleaner and bend it into that same curved shape you’ve been working with all along. Apply a dot of glue at the front of your snowman’s hat, right along the rim, and anchor the center of your red pipe cleaner’s curve there. Wrap the two ends around the snowman’s head to meet in the middle at the back. Trim them so they meet evenly, apply glue along the back rim of the hat, and stick the ends down there. Your snowman’s hat now has a fluffy edging! Next, apply glue to the tip of your snowman’s hat at the top and stick your little white crafting pom pom in place there.


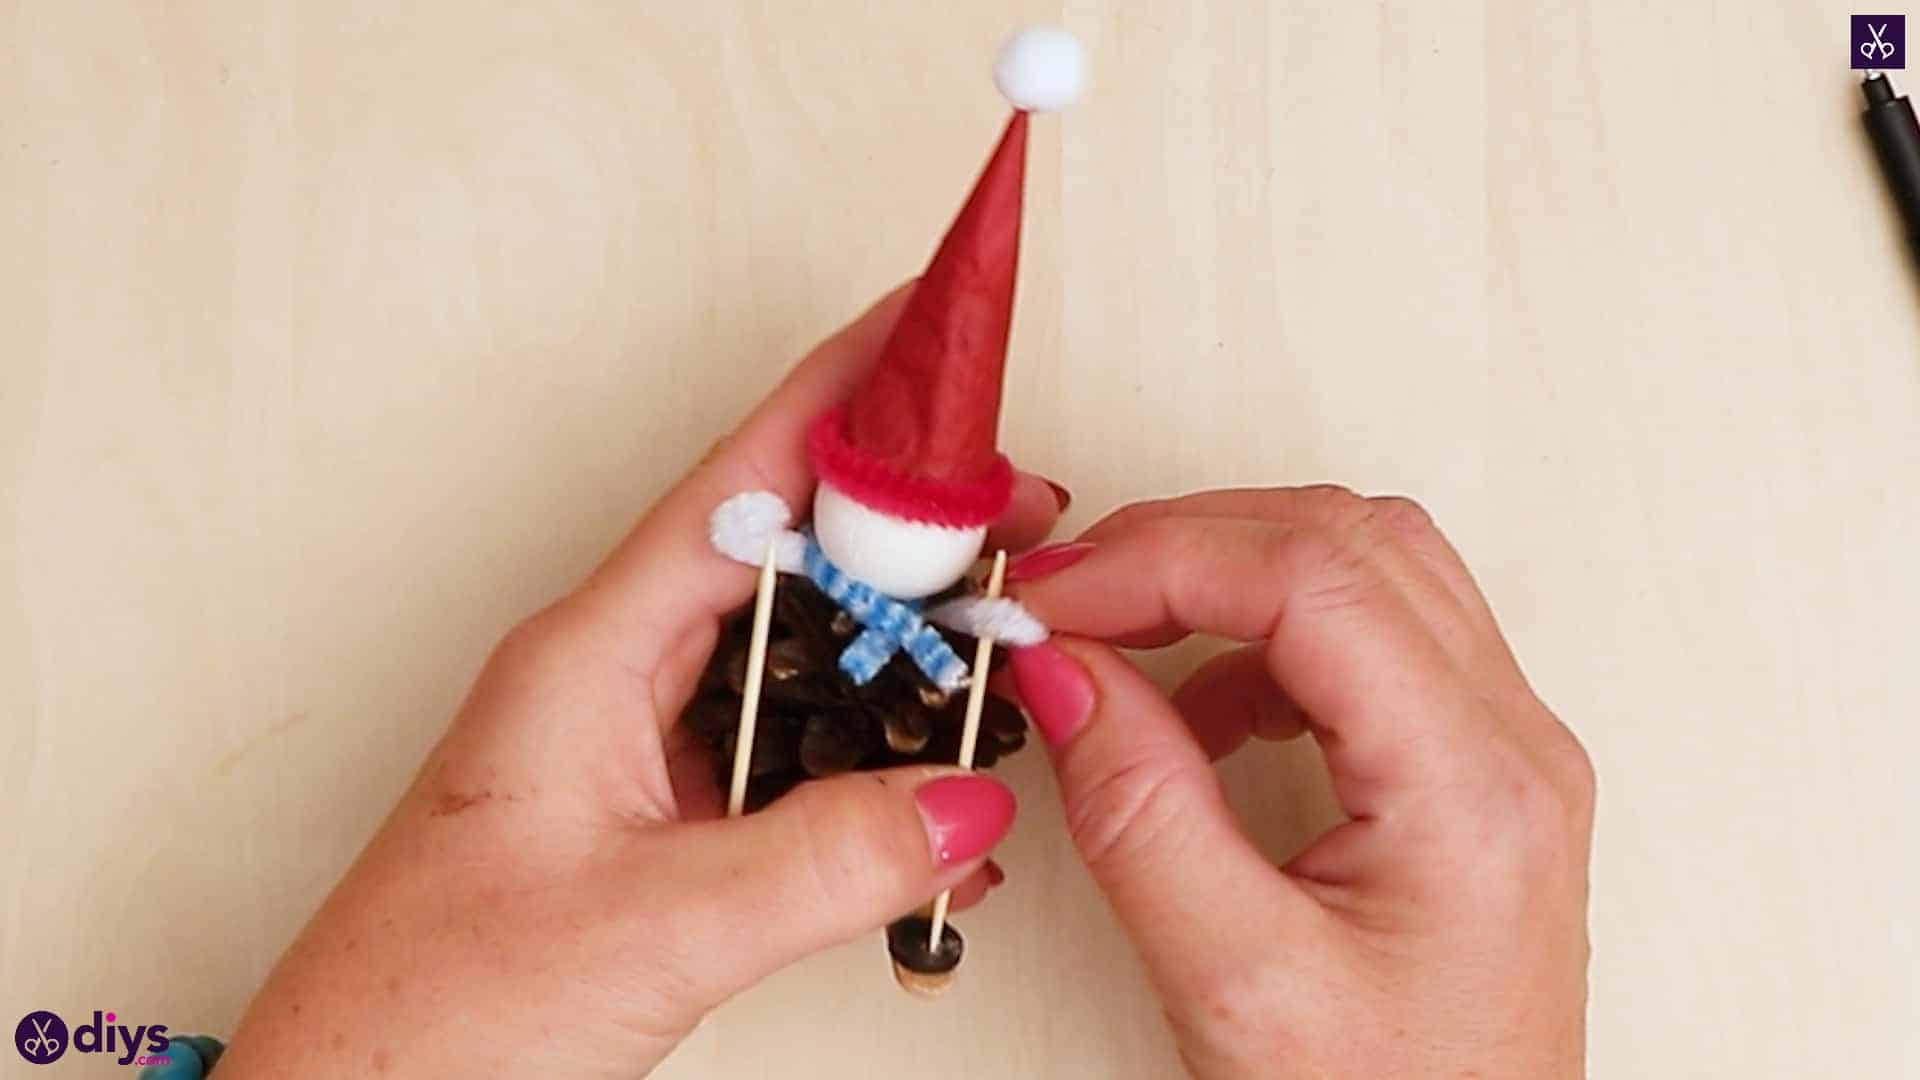
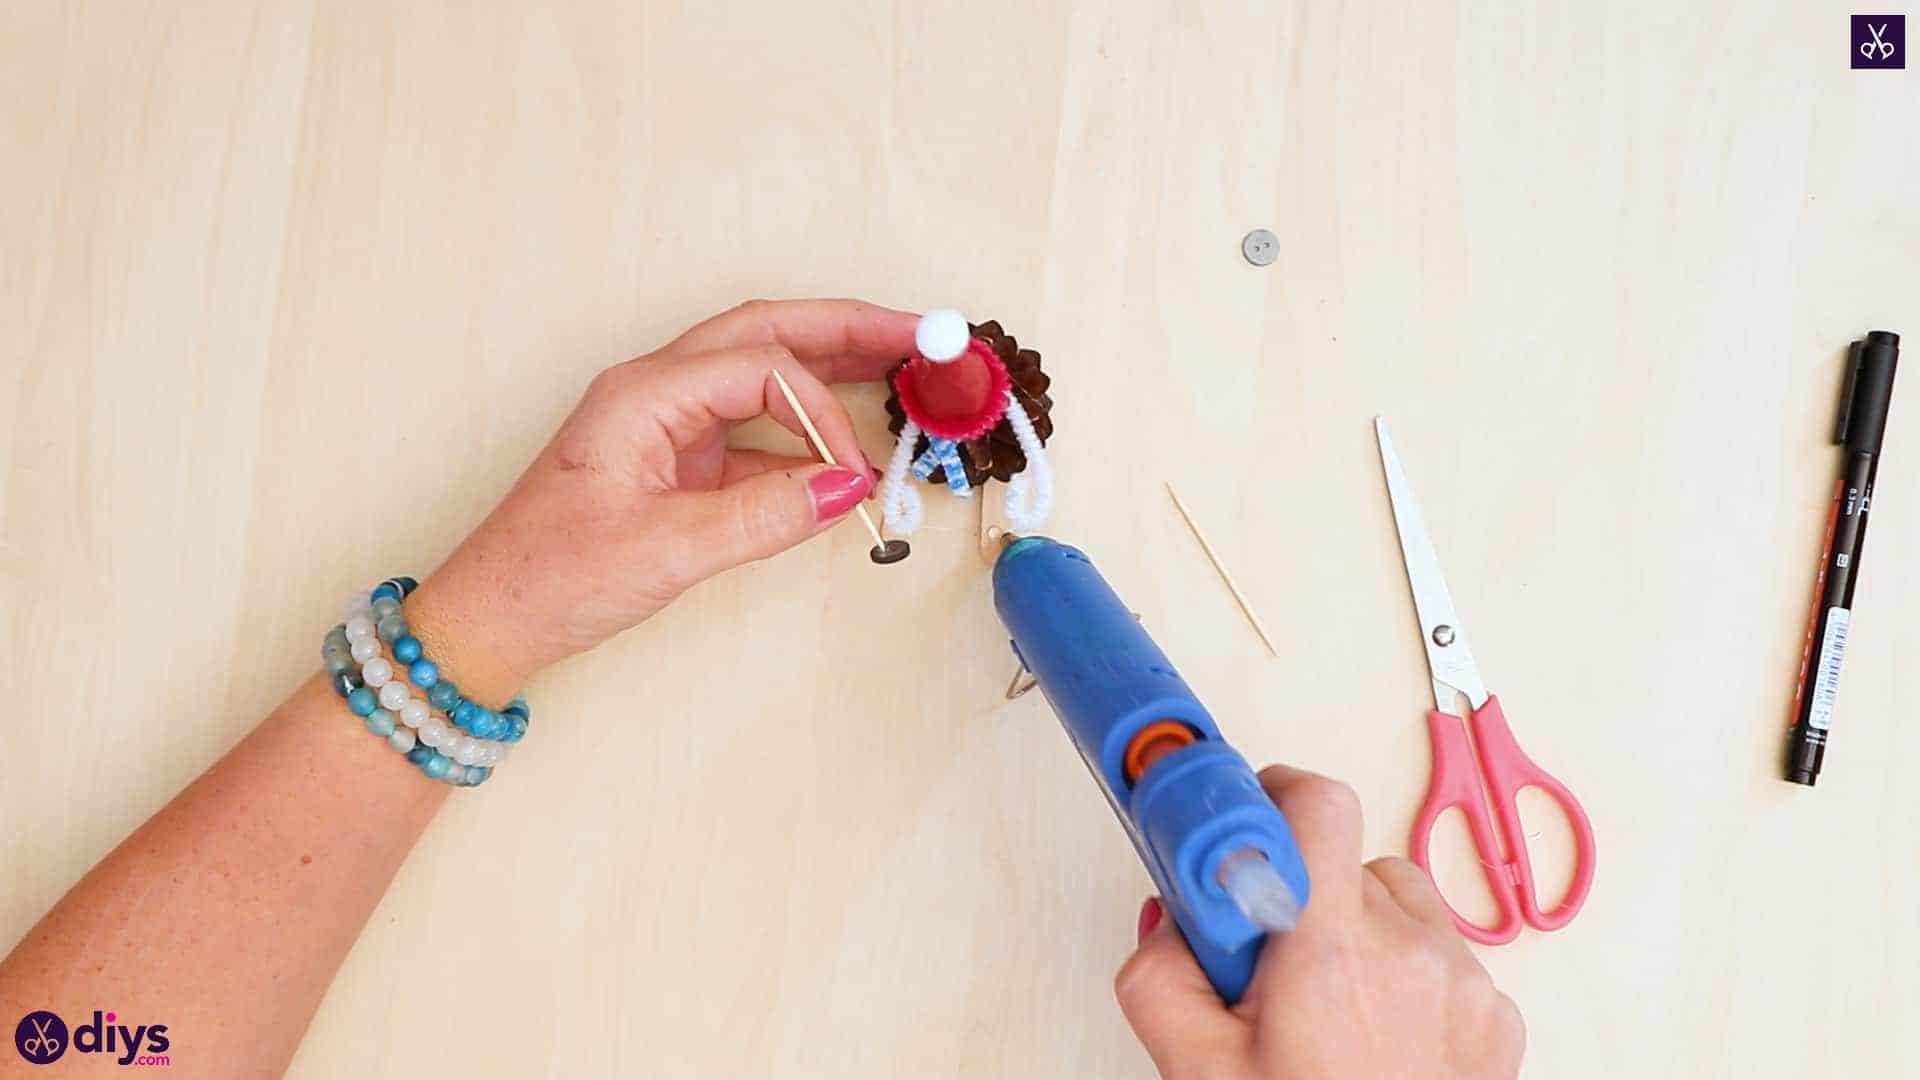
Step 7: add the skis
Apply hot glue on either side of the center on the side bottom of the pinecone. Stick your miniature popsicle sticks there to make your snowman’s skis, placing each one so their ends are even with each other, with a little more sticking out the front than out the back.


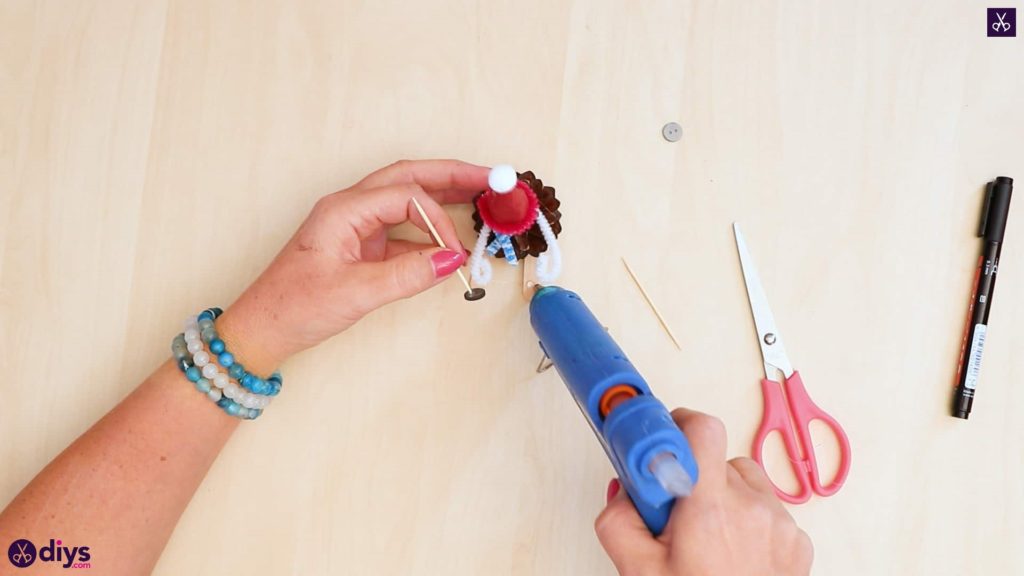
Step 8: attach the poles
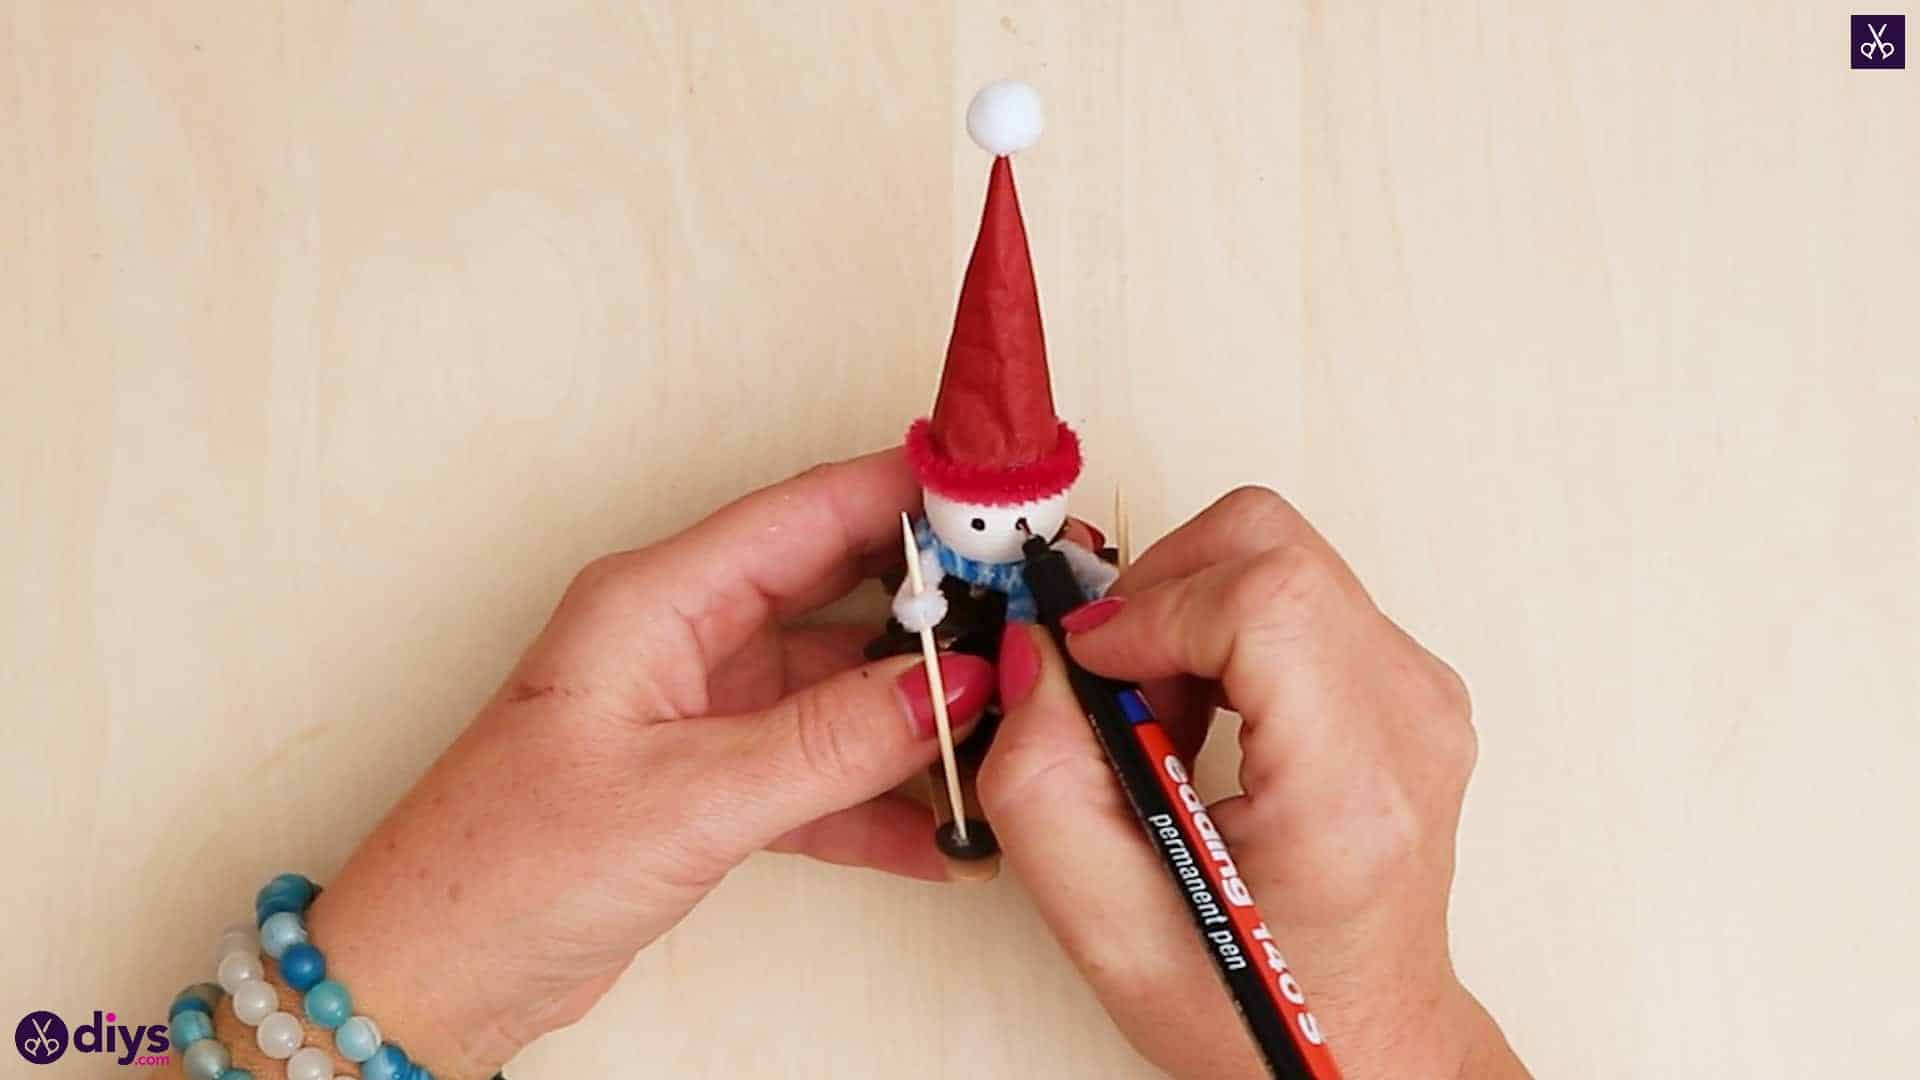
Apply glue to the center of one of your buttons and stick down one tip of a toothpick there so it sticks up. Pass the top end opposite the button through the loop of one of your snowman’s hands and then apply a bit of glue to the wooden ski below that hand and press the button there so it stands straight up. Your snowman now has a ski pole. Repeat the whole process on the other side so he has two.

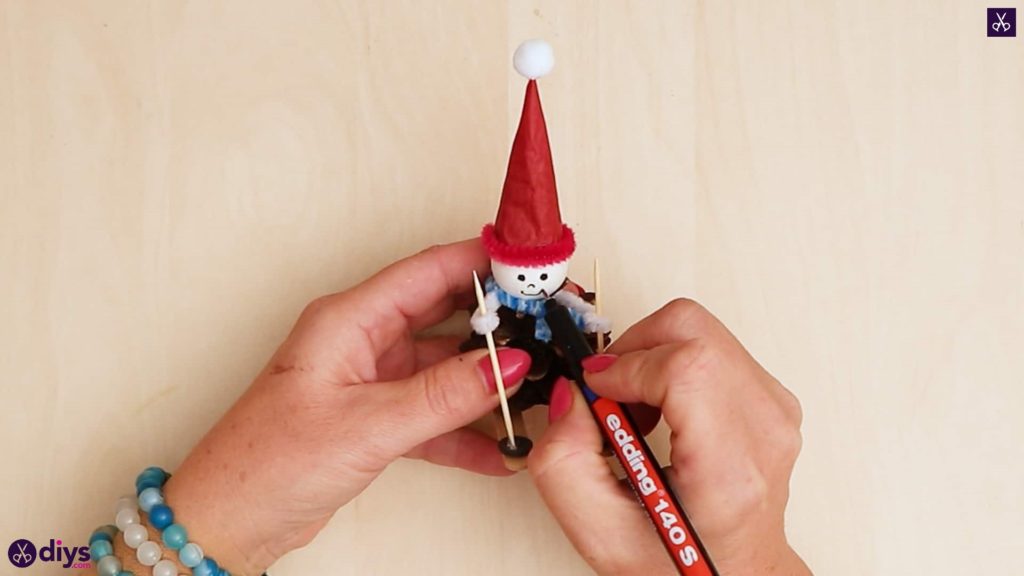
Step 9: draw the face
Use your black marker to give your snowman two eyes, a nose, and a smile.

You’re all finished! Just in case you’d like to try this project out for yourself, here’s a fantastic tutorial video to help you!
