How To Recycle a Tin Can – Simple Desk Organizer
Updated on November 19, 2025


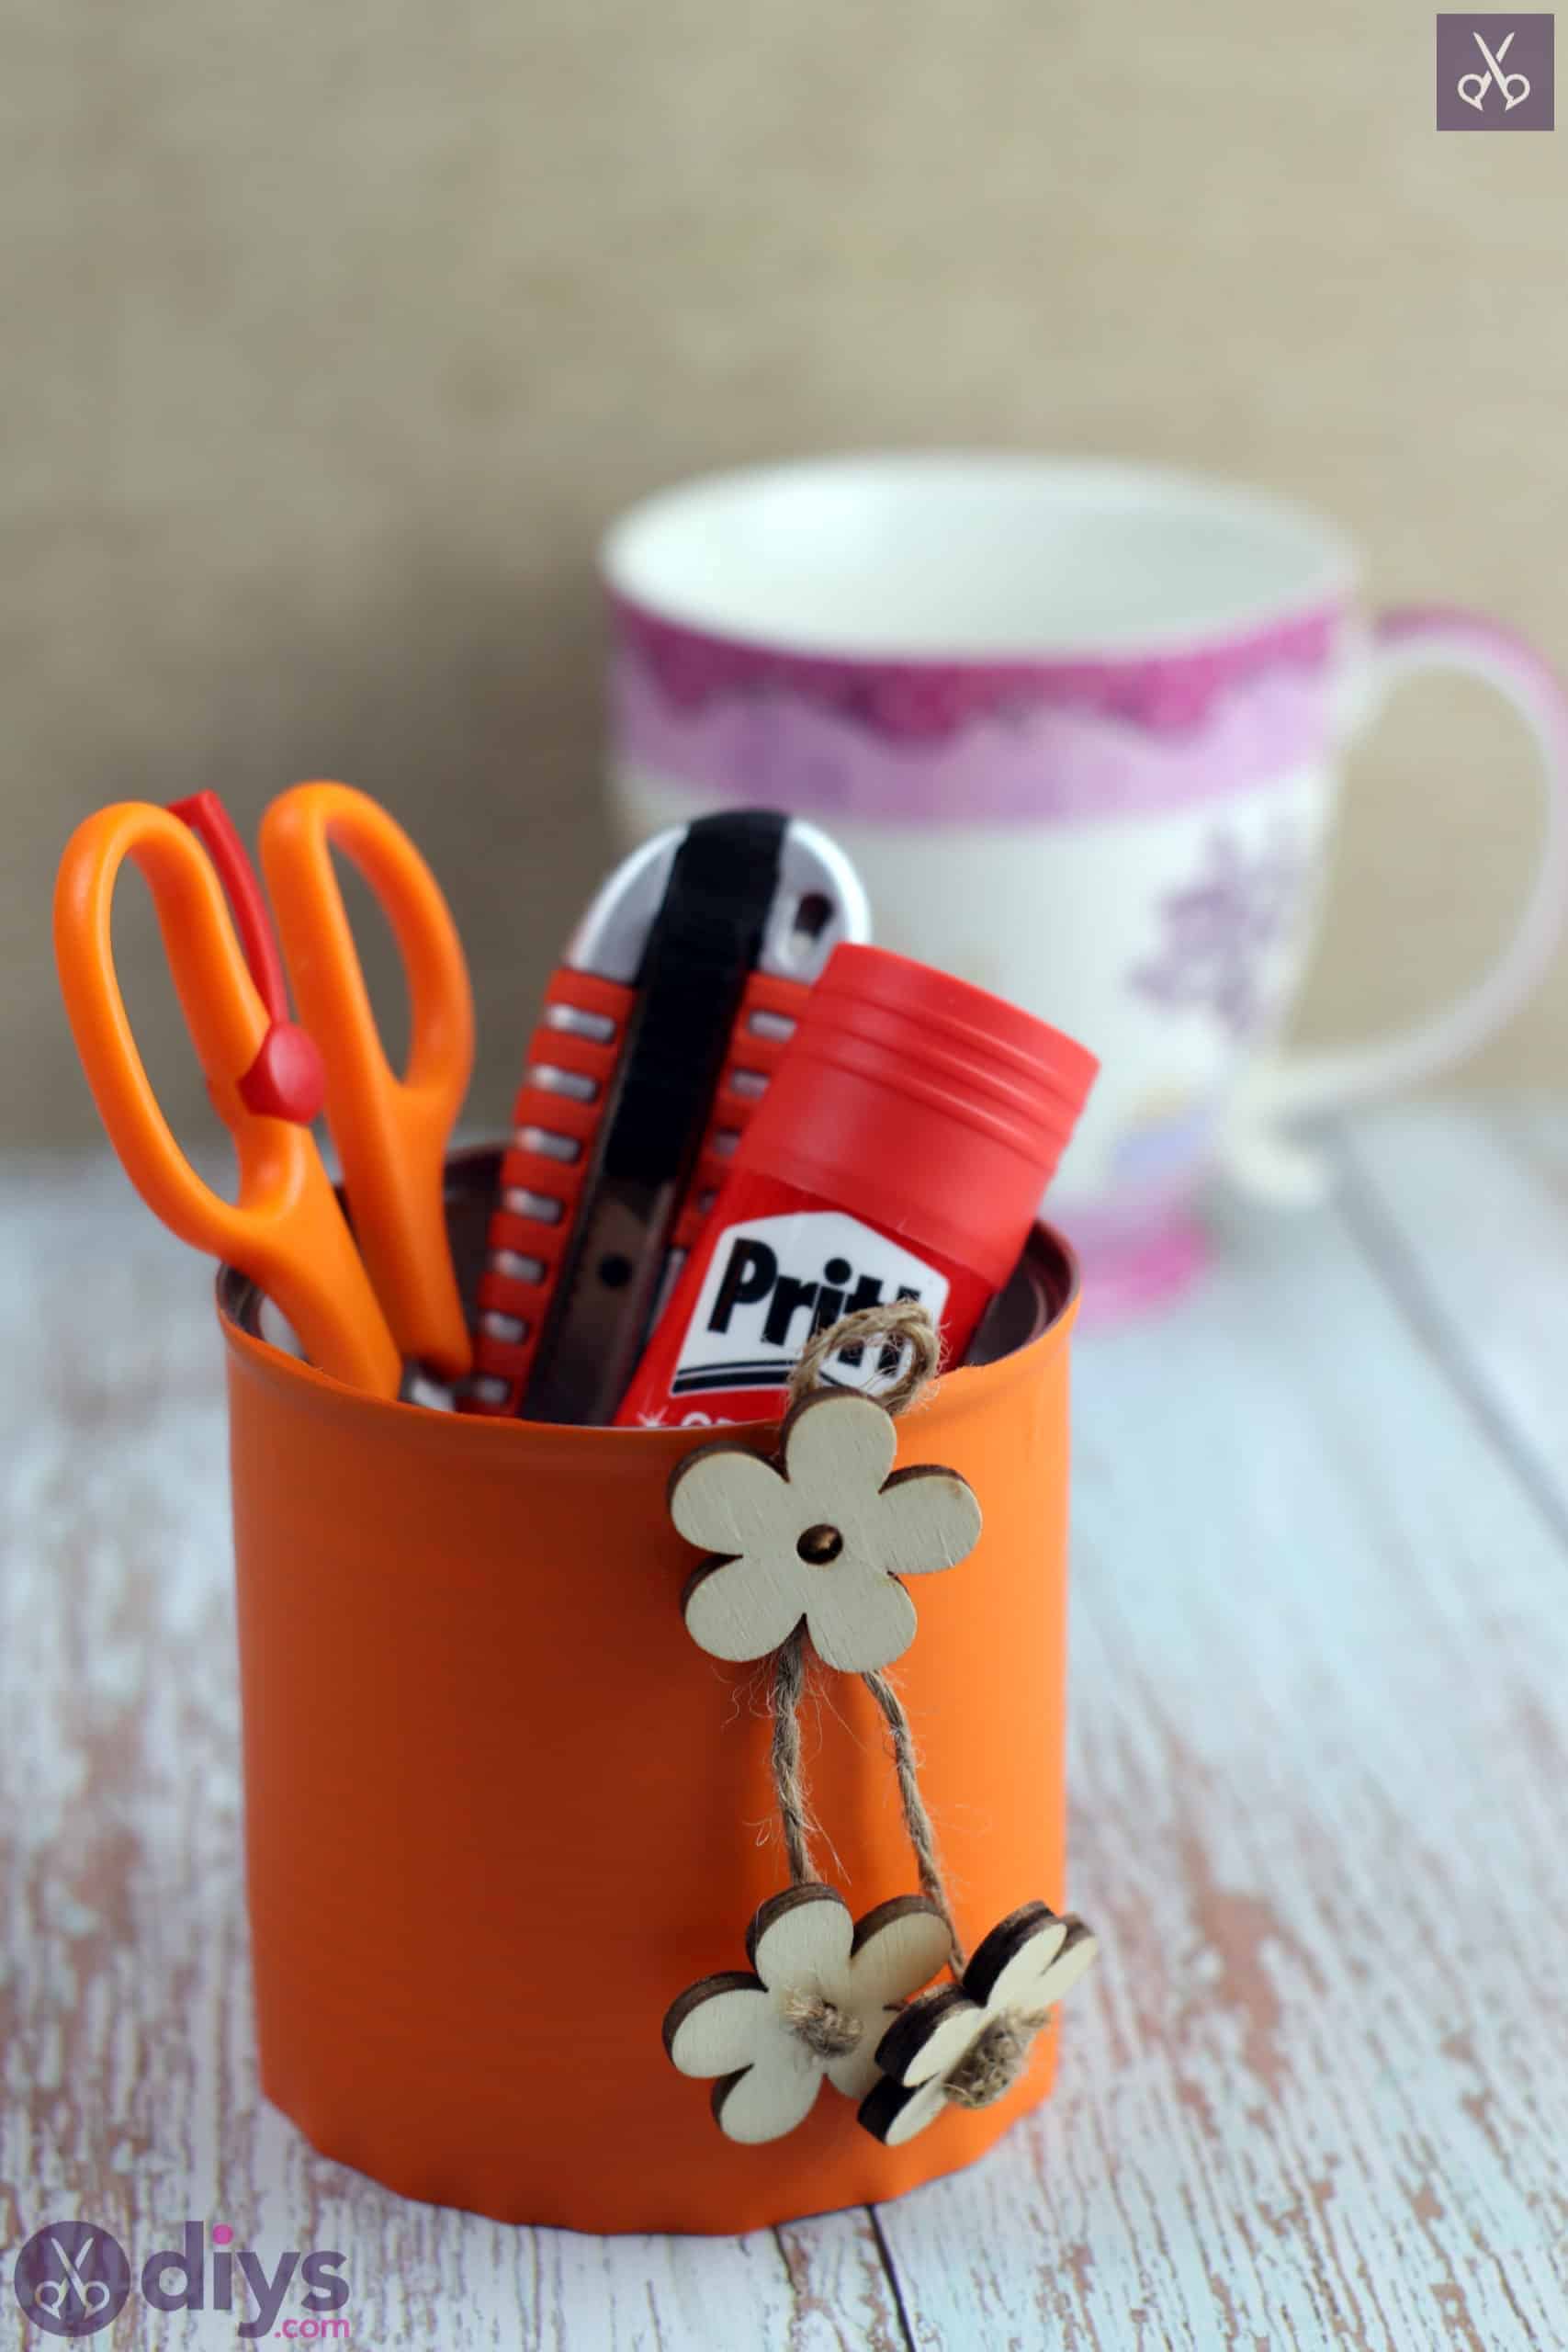
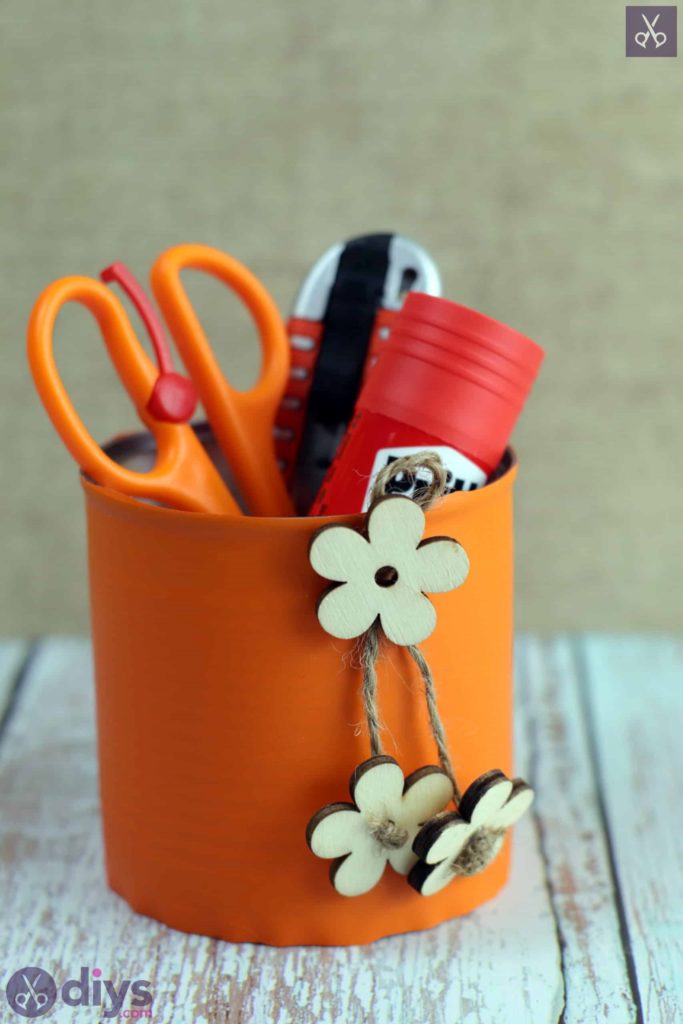
If you ask me, the ability to make just about any craft an opportunity to do some upcycling is one of the best parts of being a DIY enthusiast. There’s just something so magical and satisfying about being able to turn something that might otherwise be thrown out or not get used into something that might actually have some potential! That’s why, when I saw how scattered my kids colouring pencils were across their playroom table, I decided that it was time to do a bit of upcycling in order to give them a new place to keep their pencils and clean the place up a little bit. There’s never any harm in de-cluttering, right? That’s how my kids and I found ourselves making these cute tin can containers covered in wooden flowers, which were a crafting store embellishment I happened to find in a drawer and wanted to use creatively.


As I always do, I decided to document the process of making one of our pencil tins (we made one for each child and one to keep by the phone in the hall) because I love seeing what other parents make with their kids as well, so I like returning the favour with tutorials of my own sometimes. Check out these step by step instructions complete with photos! If you’d rather follow along with a video tutorial instead of written words, scroll to the bottom of this post to find just what you’re looking for.
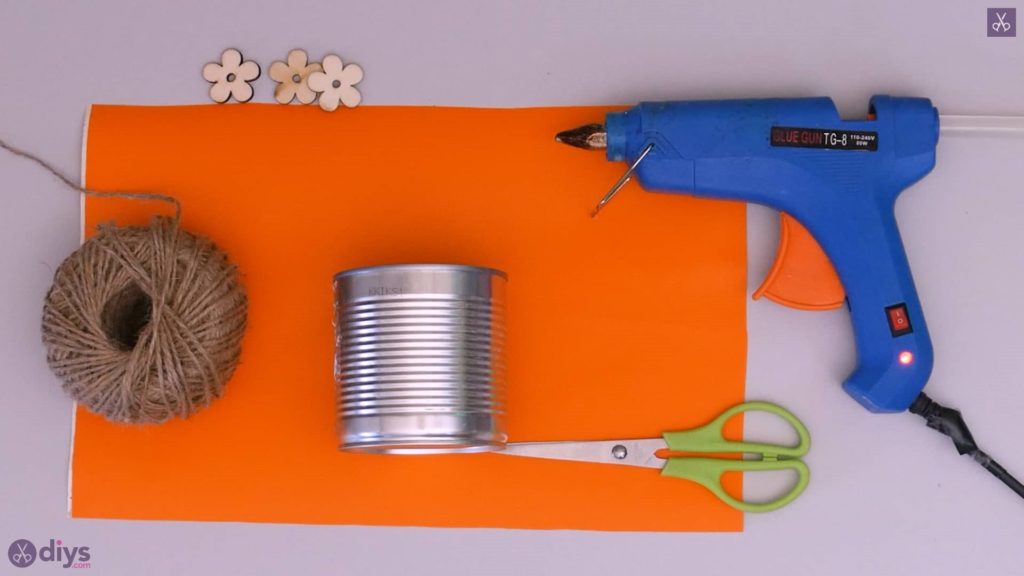
For this project, you’ll need:
- An empty tin can
- PVC sticker for furniture
- Jute twine
- Scissors
- Hot glue
- Wooden flowers
Step 1:
Gather your materials!
Step 2:
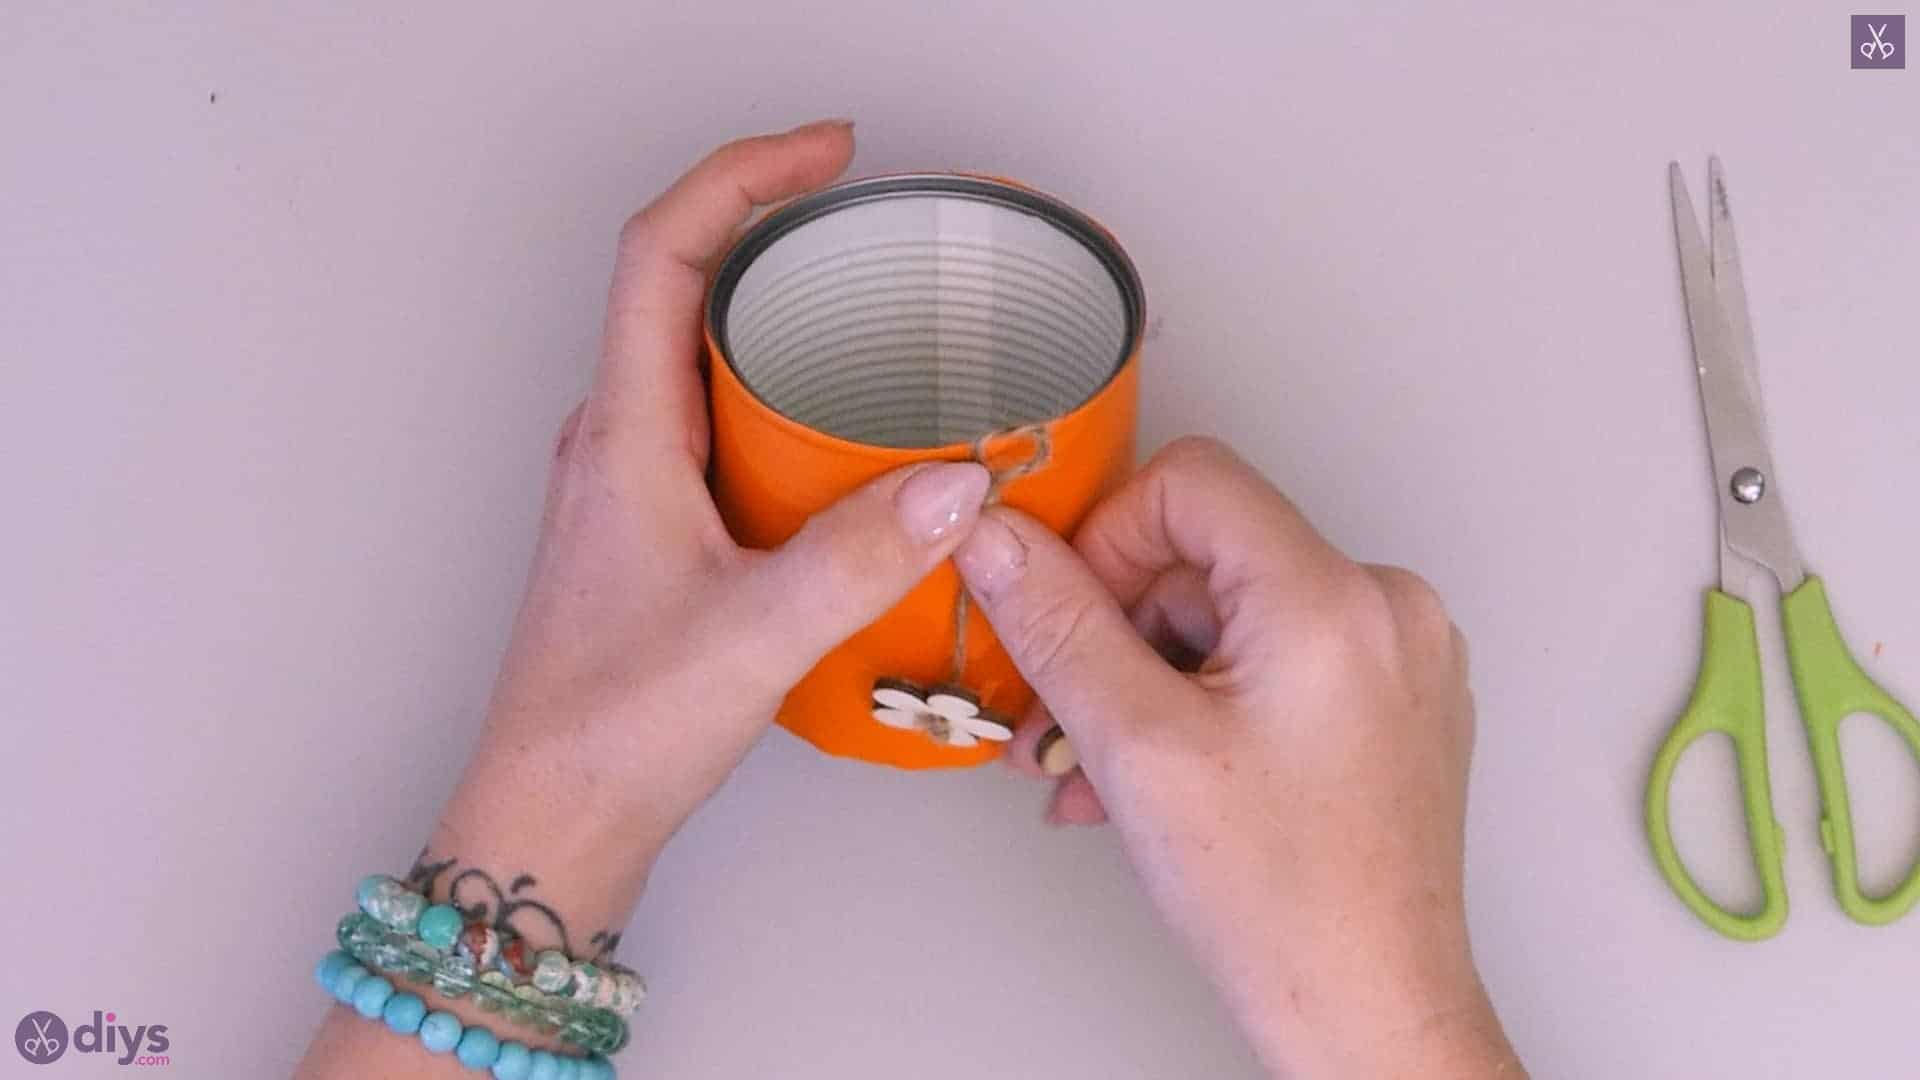
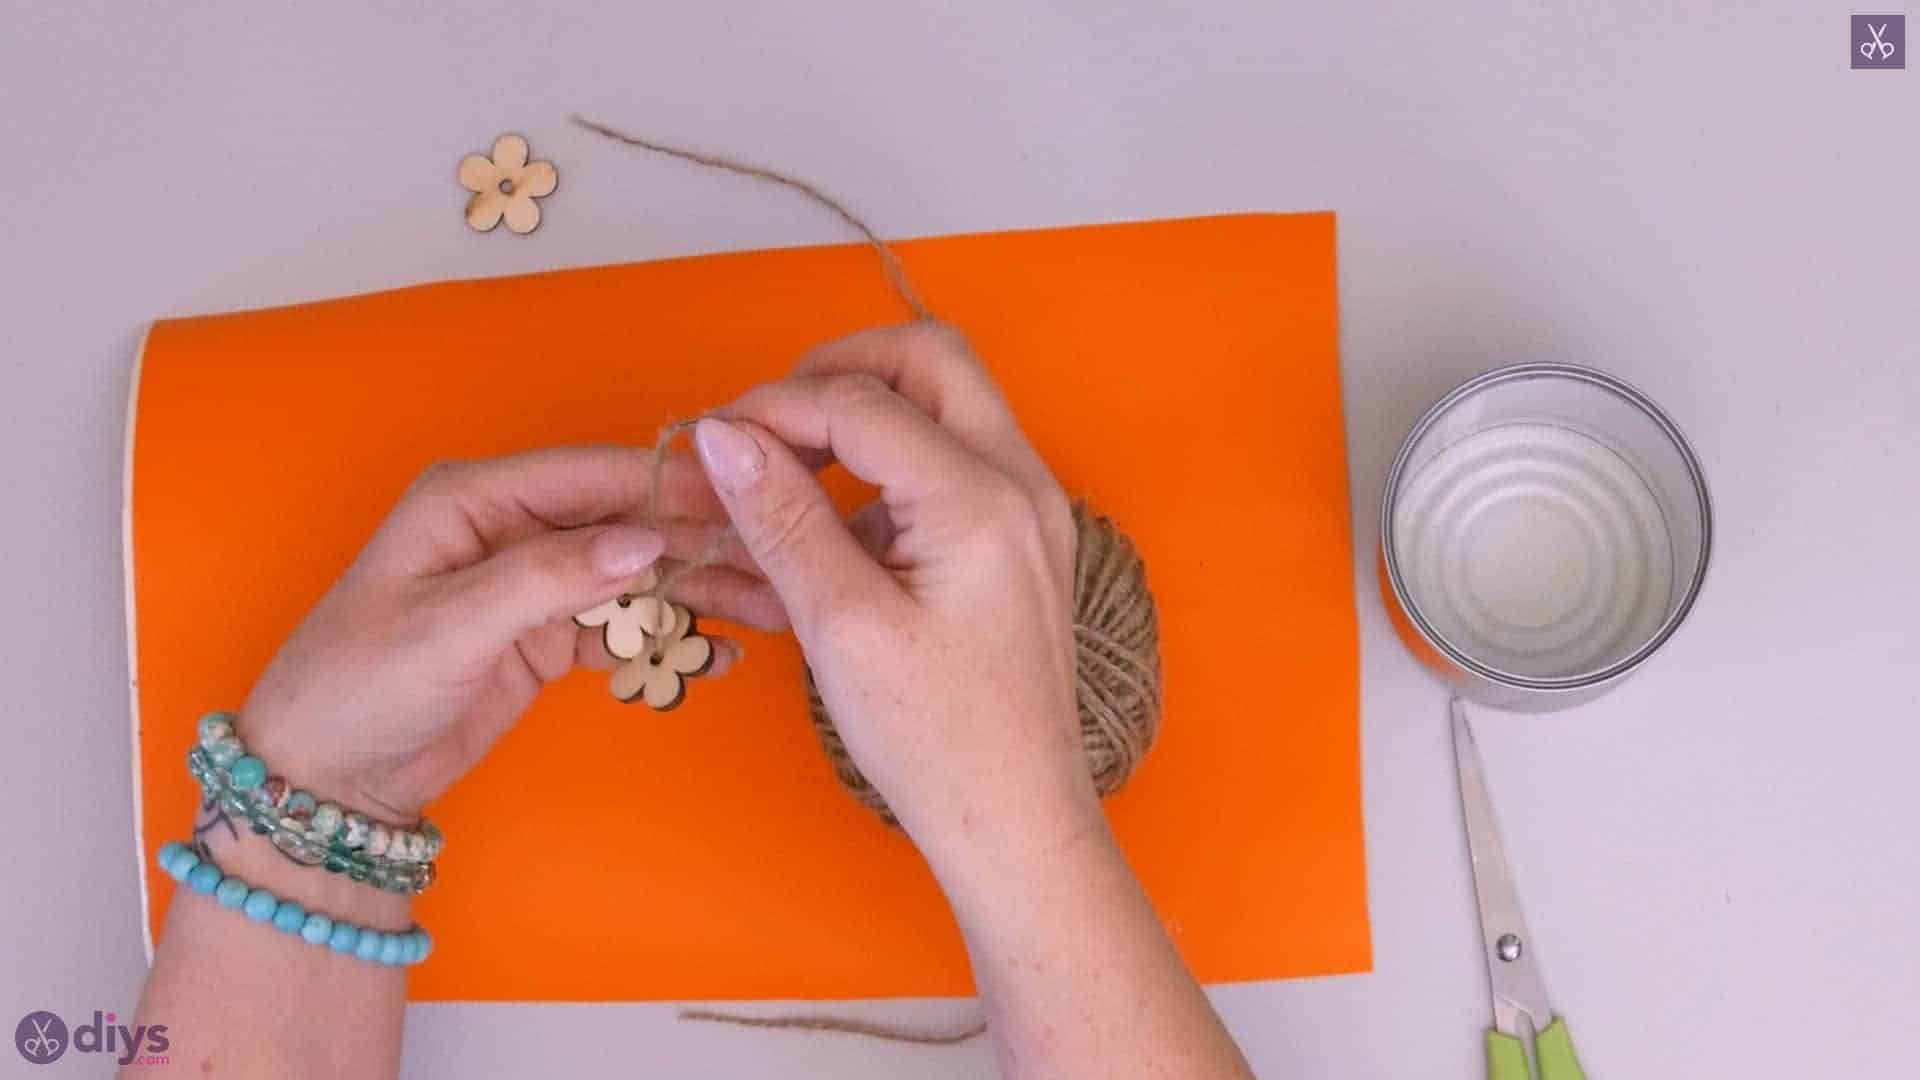
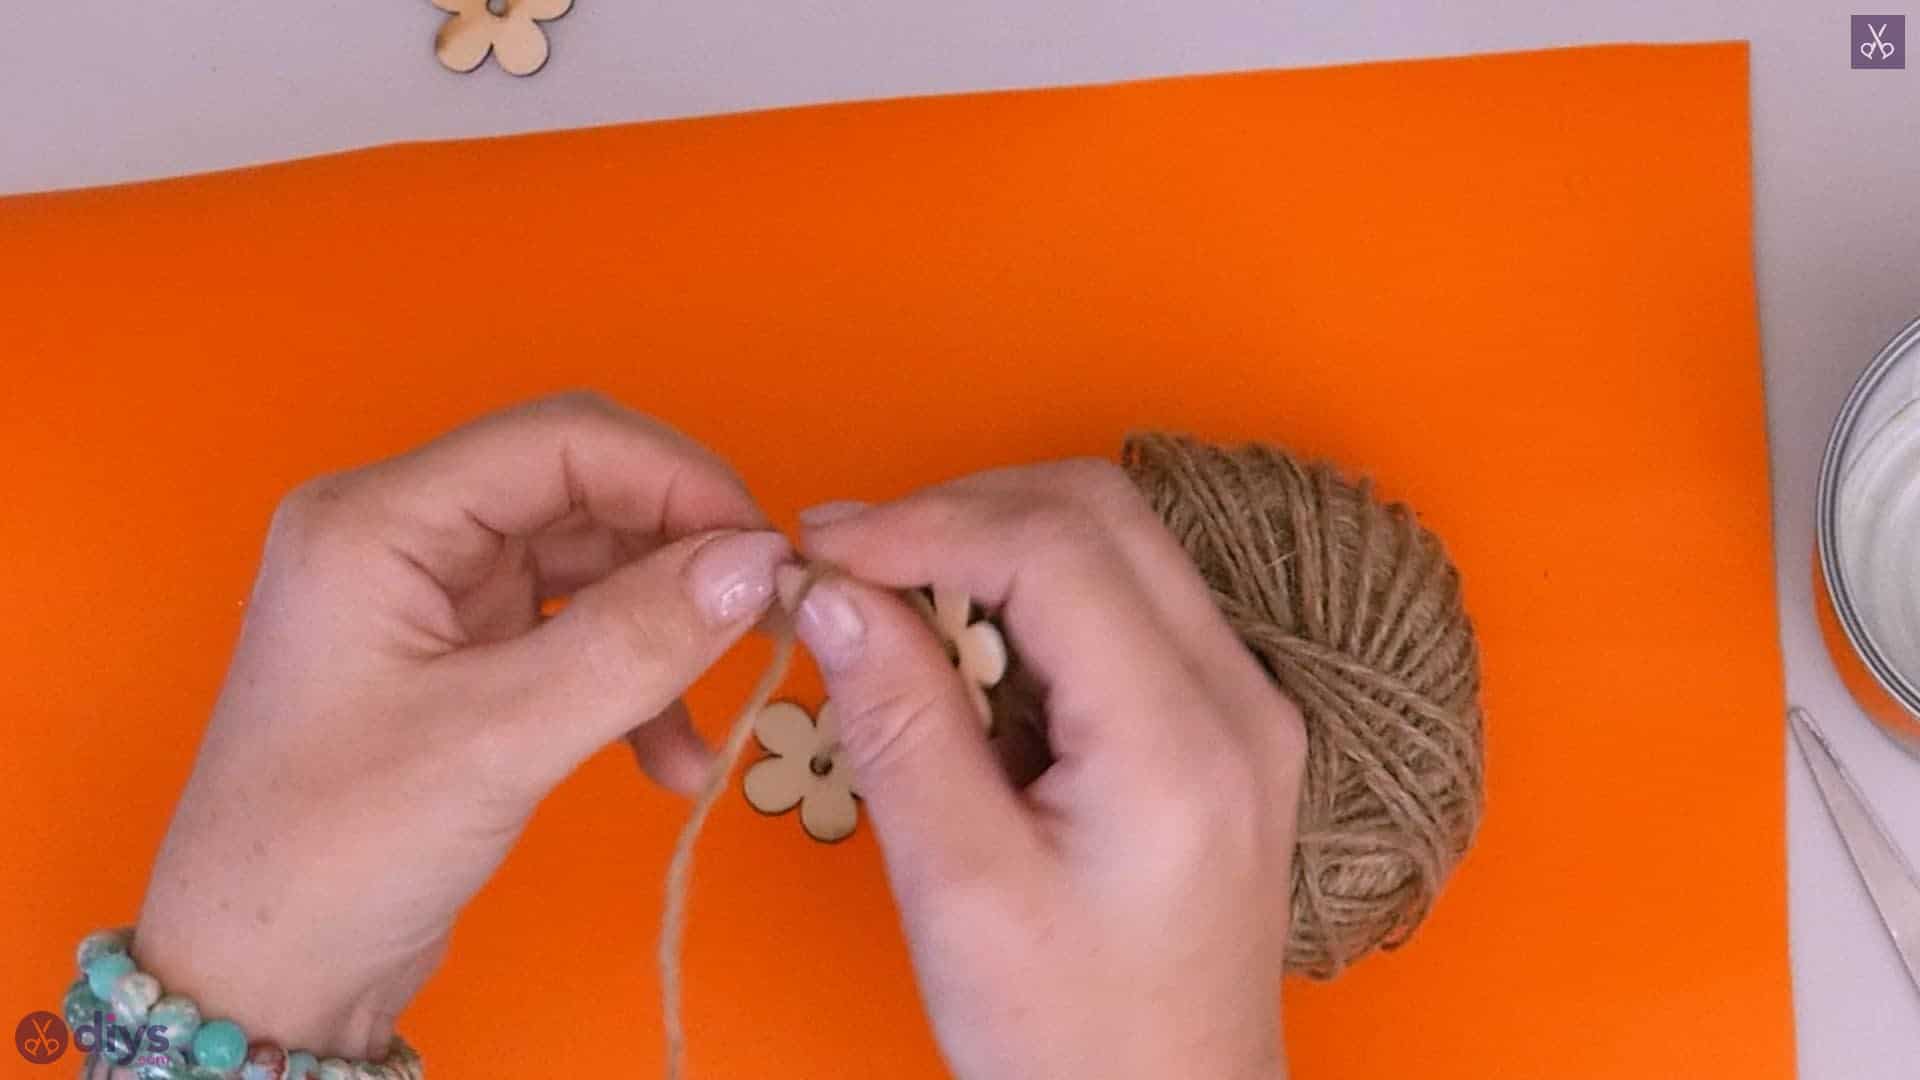
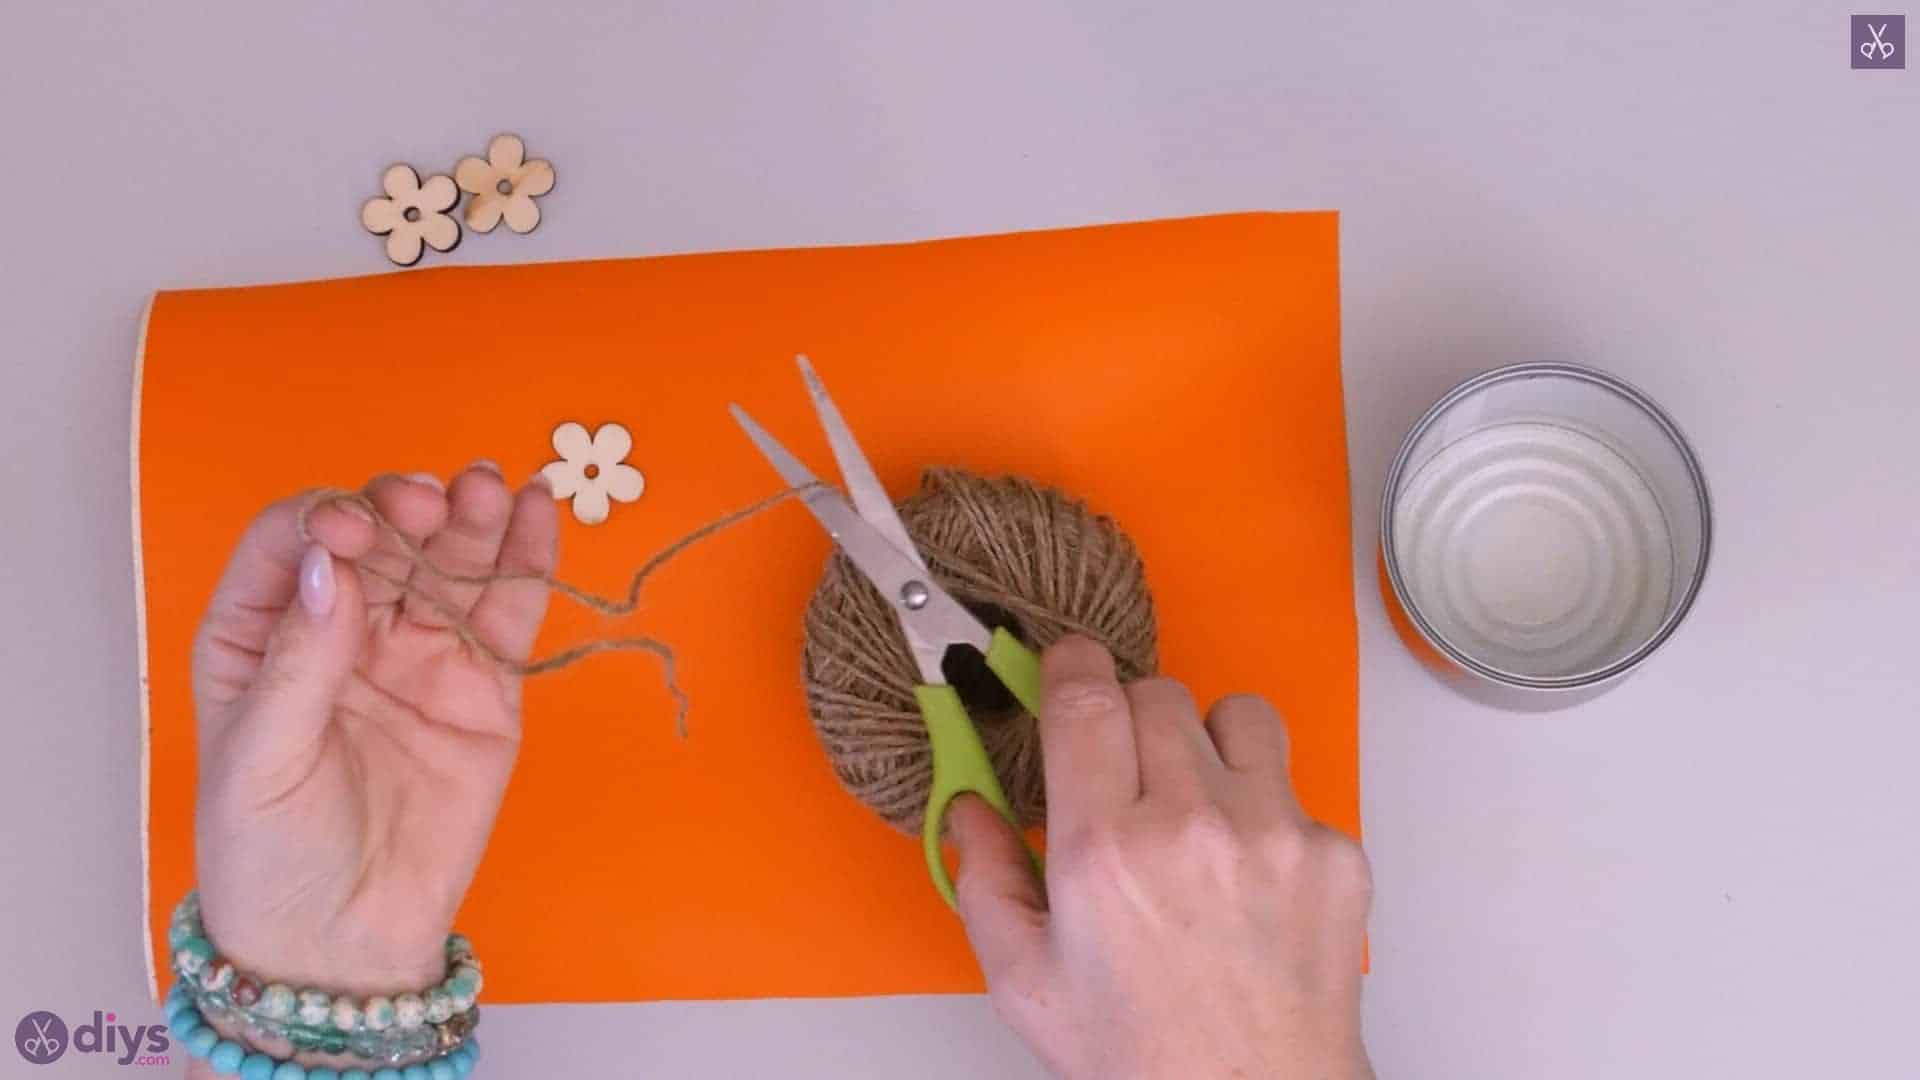
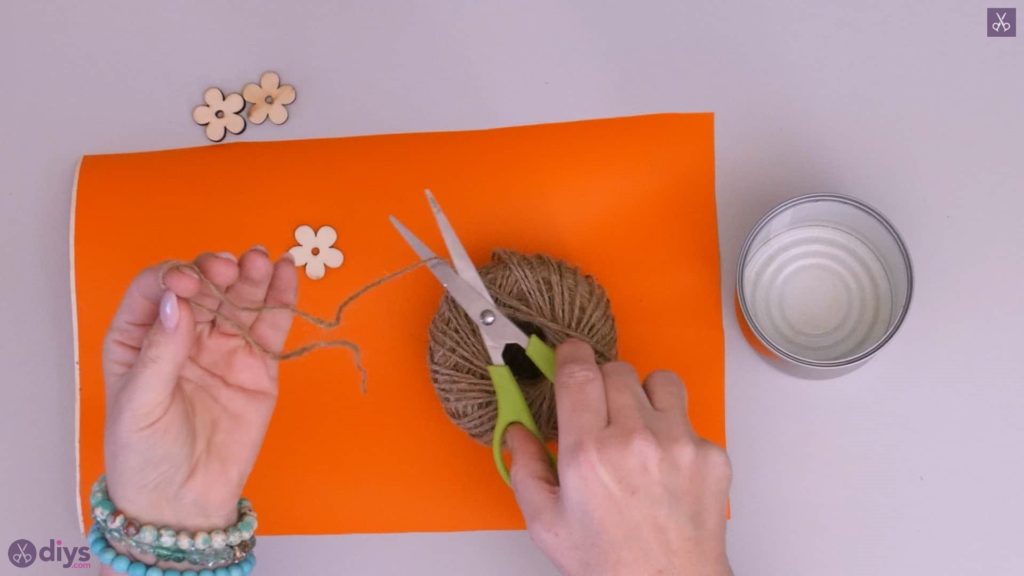
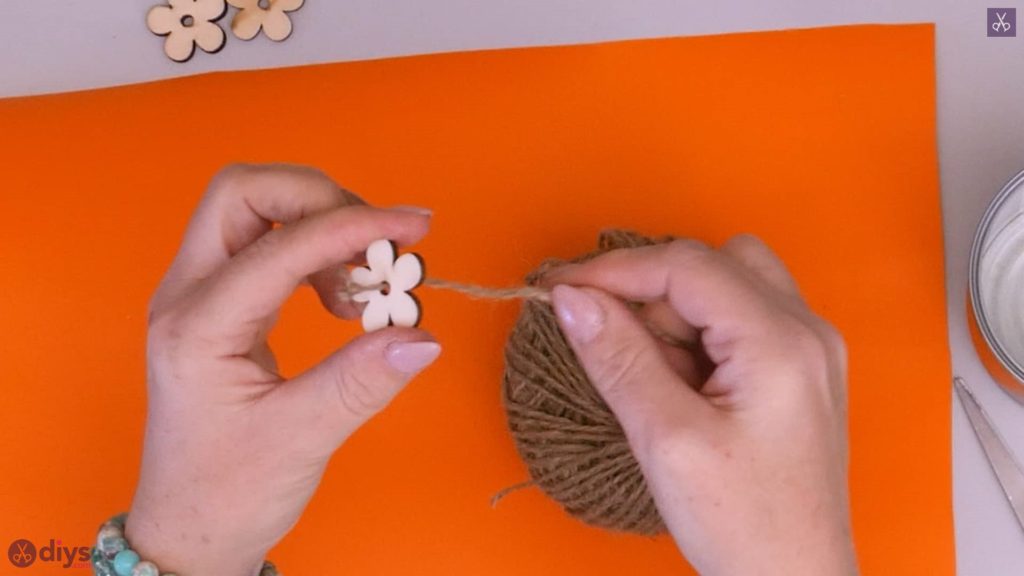
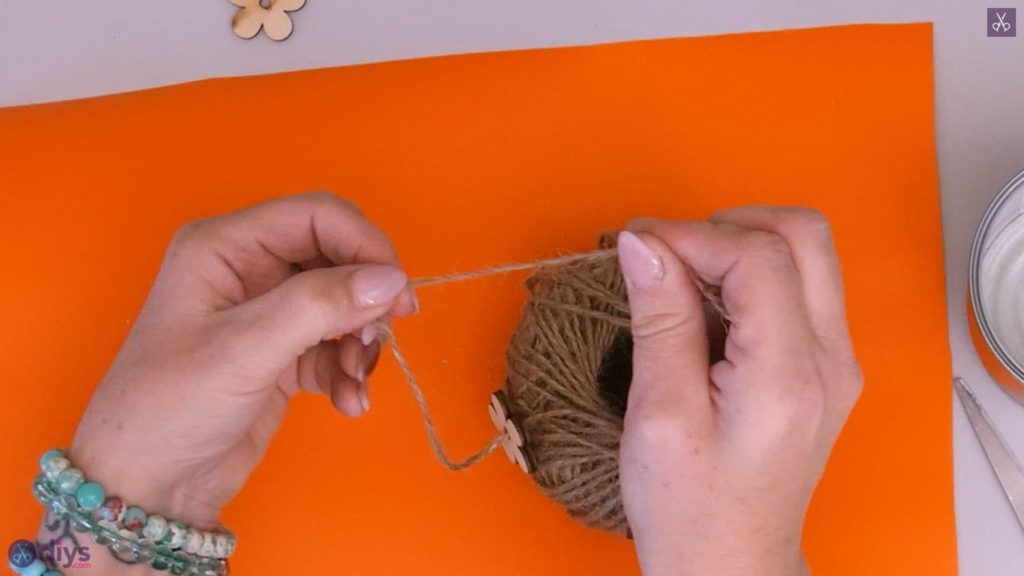
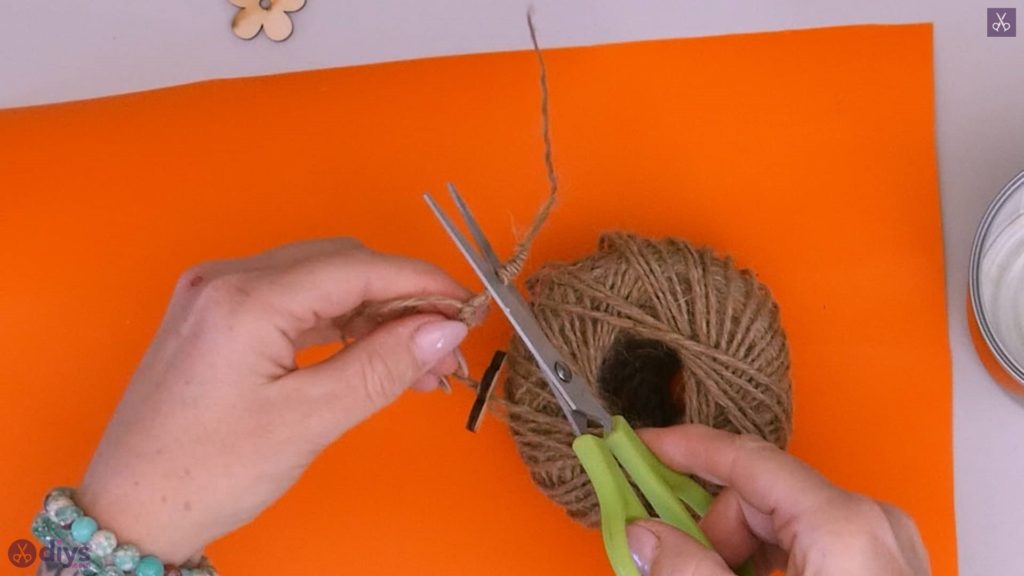
Cut a piece of jute twine that’s just less than double the height of your tin can. You’ll fold this in half and let the ends dangle down, so you want them to be long but not long enough to drag on the table. String one of your wooden flowers onto the jute twine through the hole in the middle and tie the end in a knot several times until it’s big enough to stop the flower from sliding off. Then string the other end through the hole in the middle of a second flower and repeat the knotting technique. Now fold the jute twin in half do you have a loop at the top and a flower hanging against the knot at each end. Tie a knot in the top halfway point to anchor the loop and keep the flowers apart. Set this piece aside for the moment while you cover your can.


Step 3:
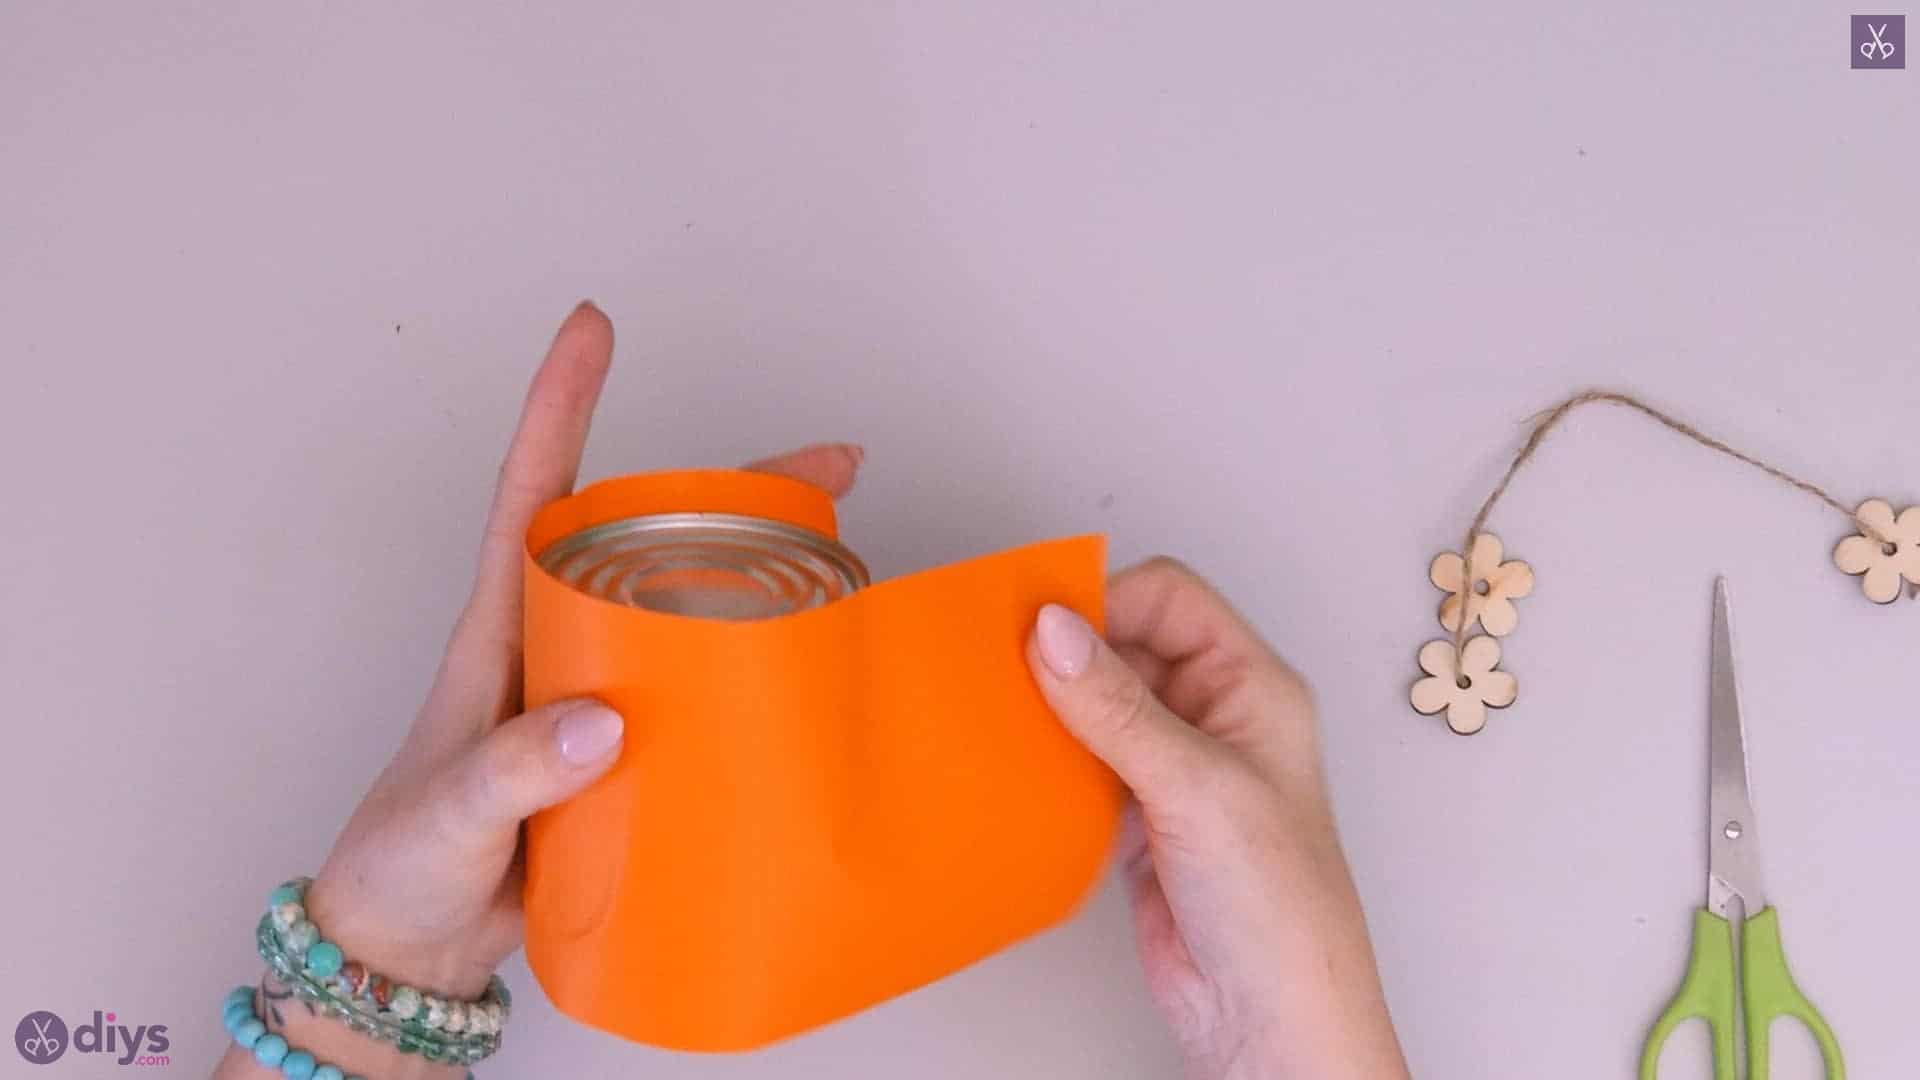
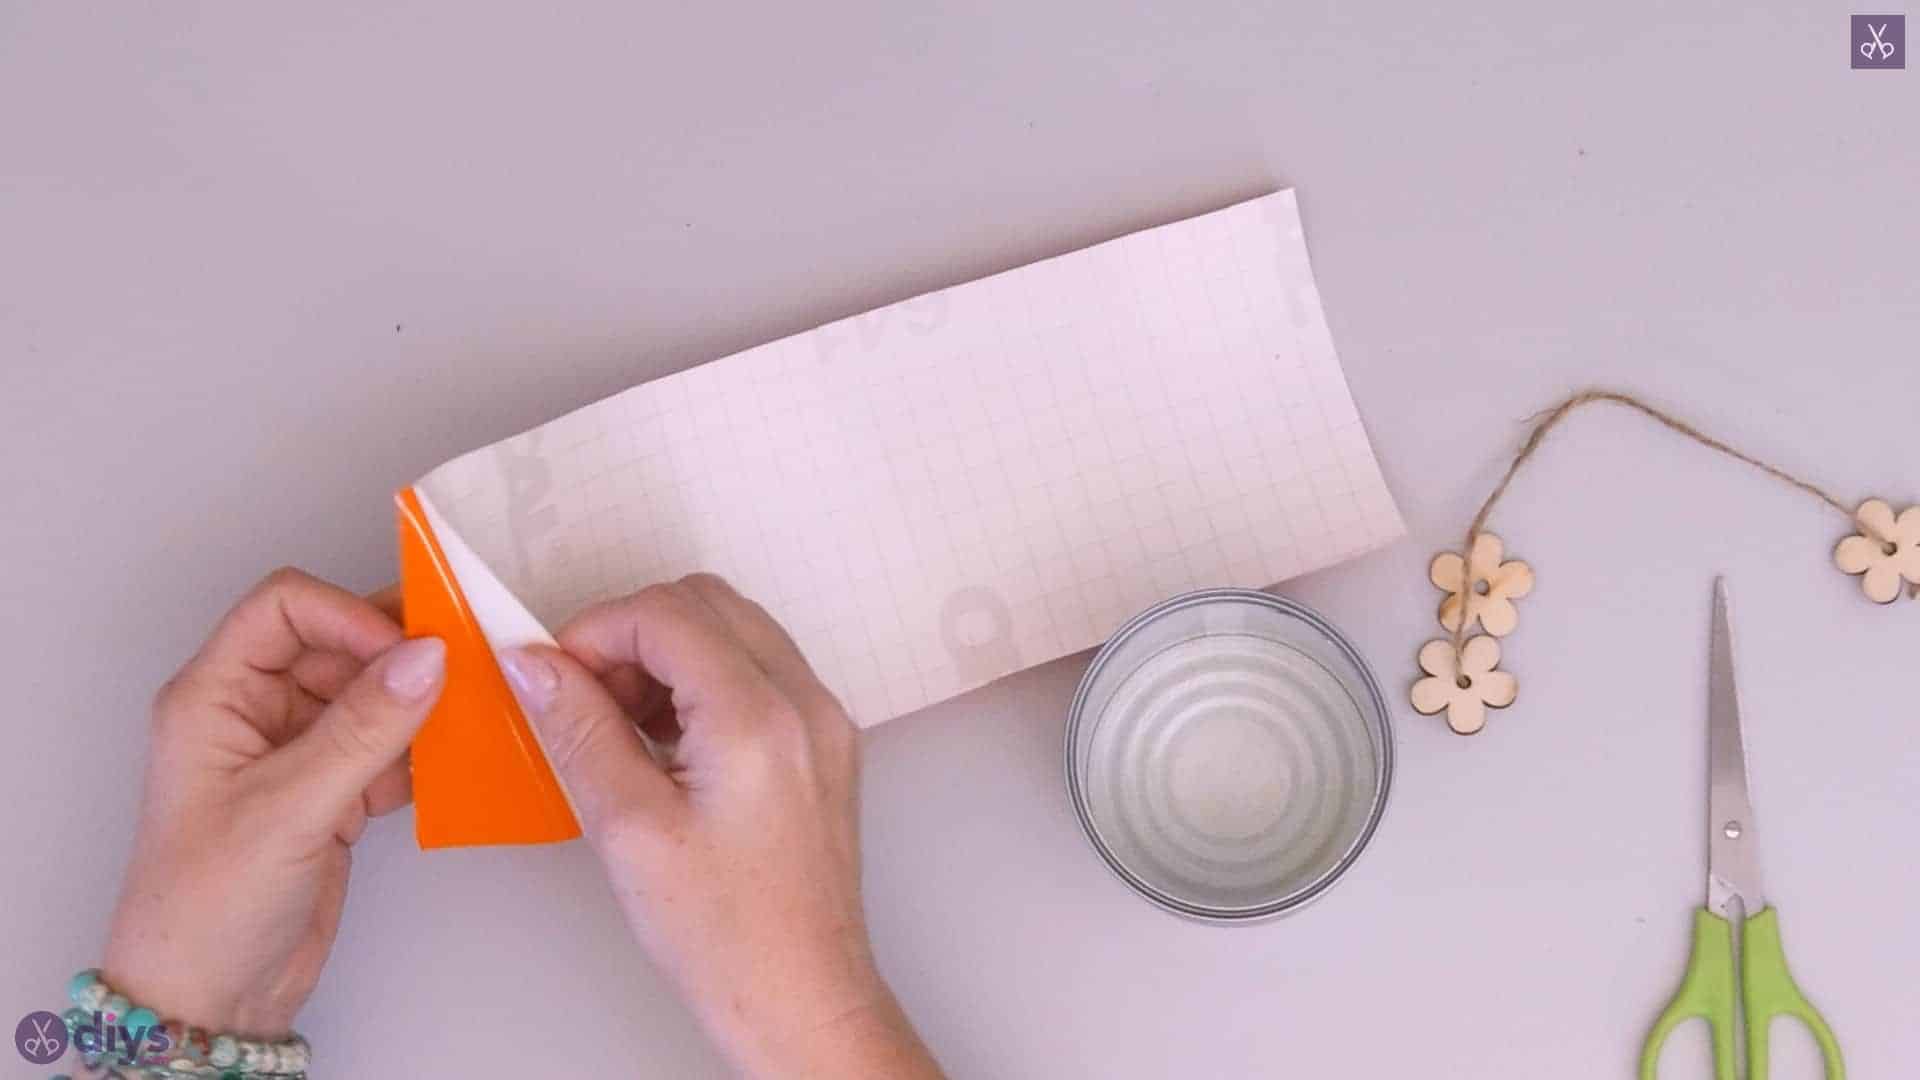
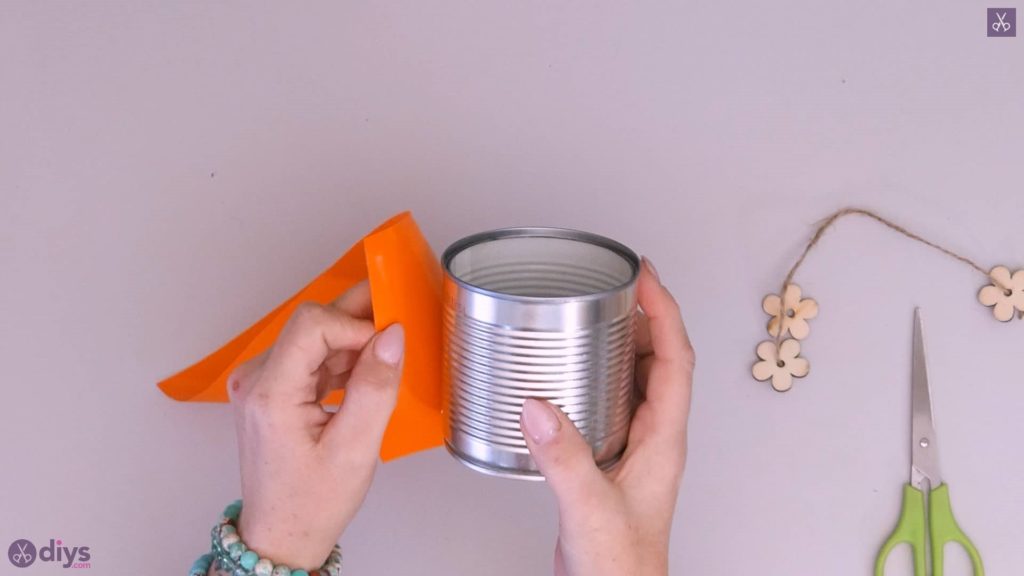
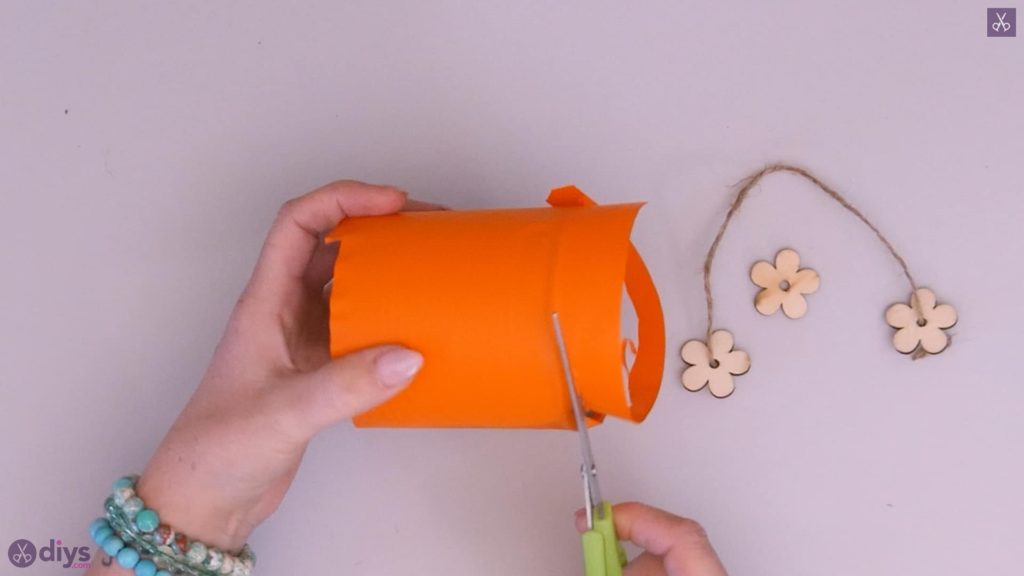
Turn your piece of sticky PVC landscape-wise so the long edges are at the top and bottom and the short edges are at the sides. Lay the can on its side on the PVC so its bottom edge lines up perfectly with the bottom edge of the PVC sheet and the top edge of the can hits a spot along the left side edge. Make a mark there with a pencil or your scissors so you know how tall the can is. Then use your scissors to cut all the way across the PVC sheet to make a rectangle shape the same height as your tin can. Now peel off the back of your PVC sheet and line the top and bottom long edges up with the top and bottom edges of your can once more, sticking the height down there and carefully wrapping the rest around your can to cover its whole surface (smooth it carefully as you go to get rid of air bubbles). When you get back to where you started, overlap that first edge a little and then use your scissors to cut the excess off, smoothing your new edge into place. If you have any excess at the top or the bottom of your can despite having measured your height, trim that off here as well.


Step 4:
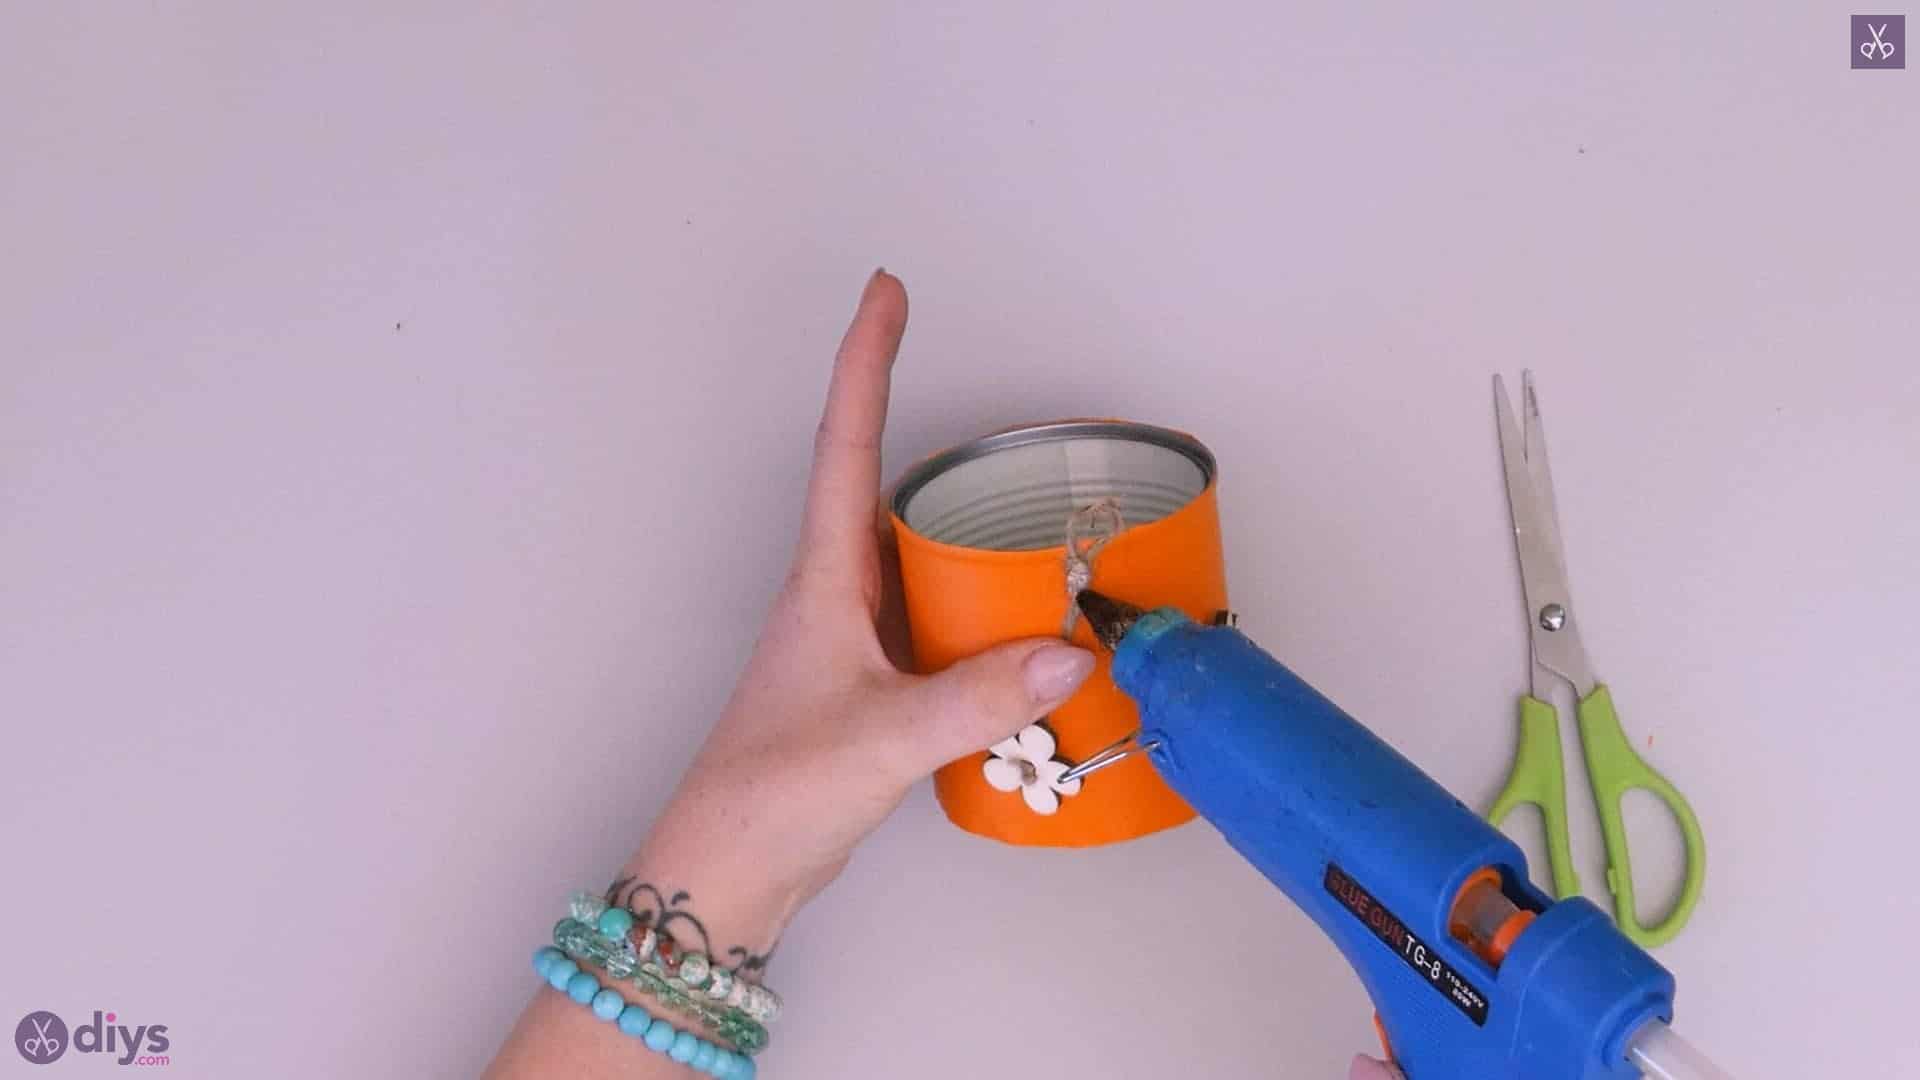
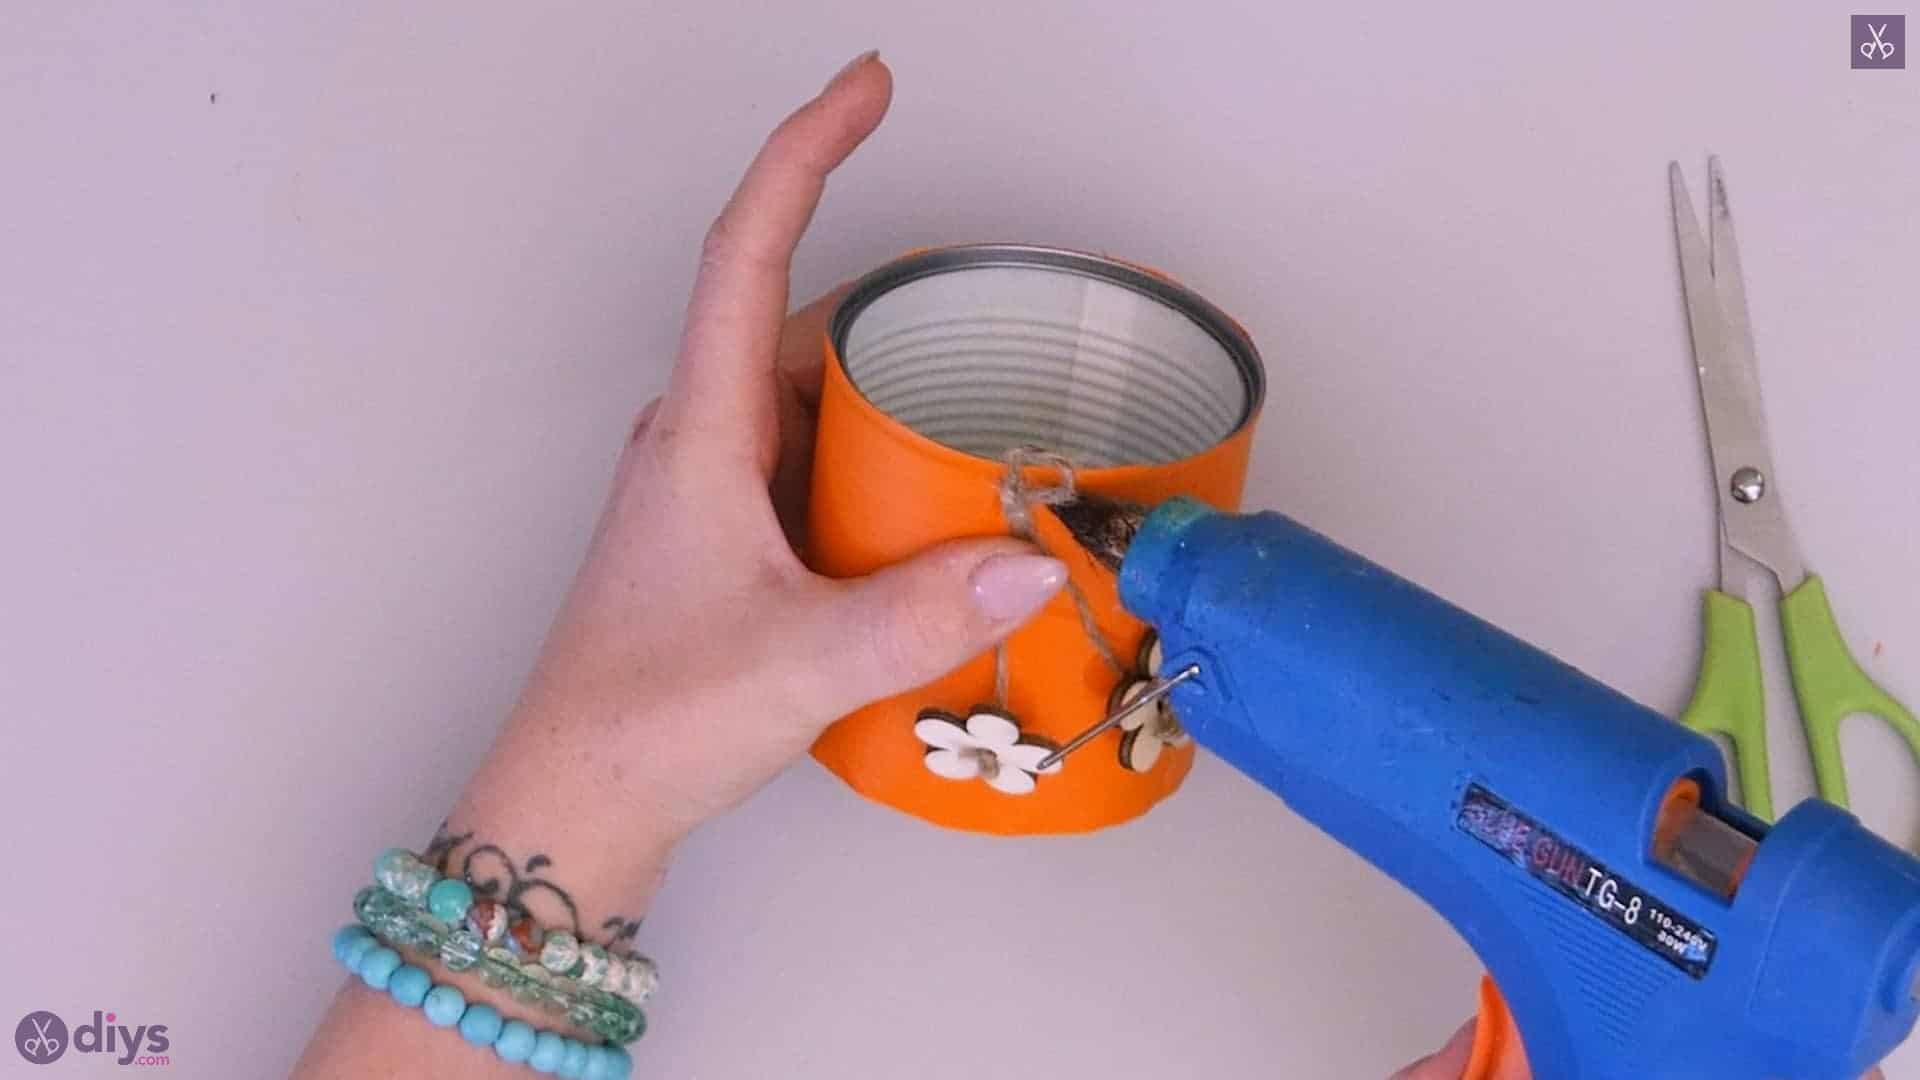
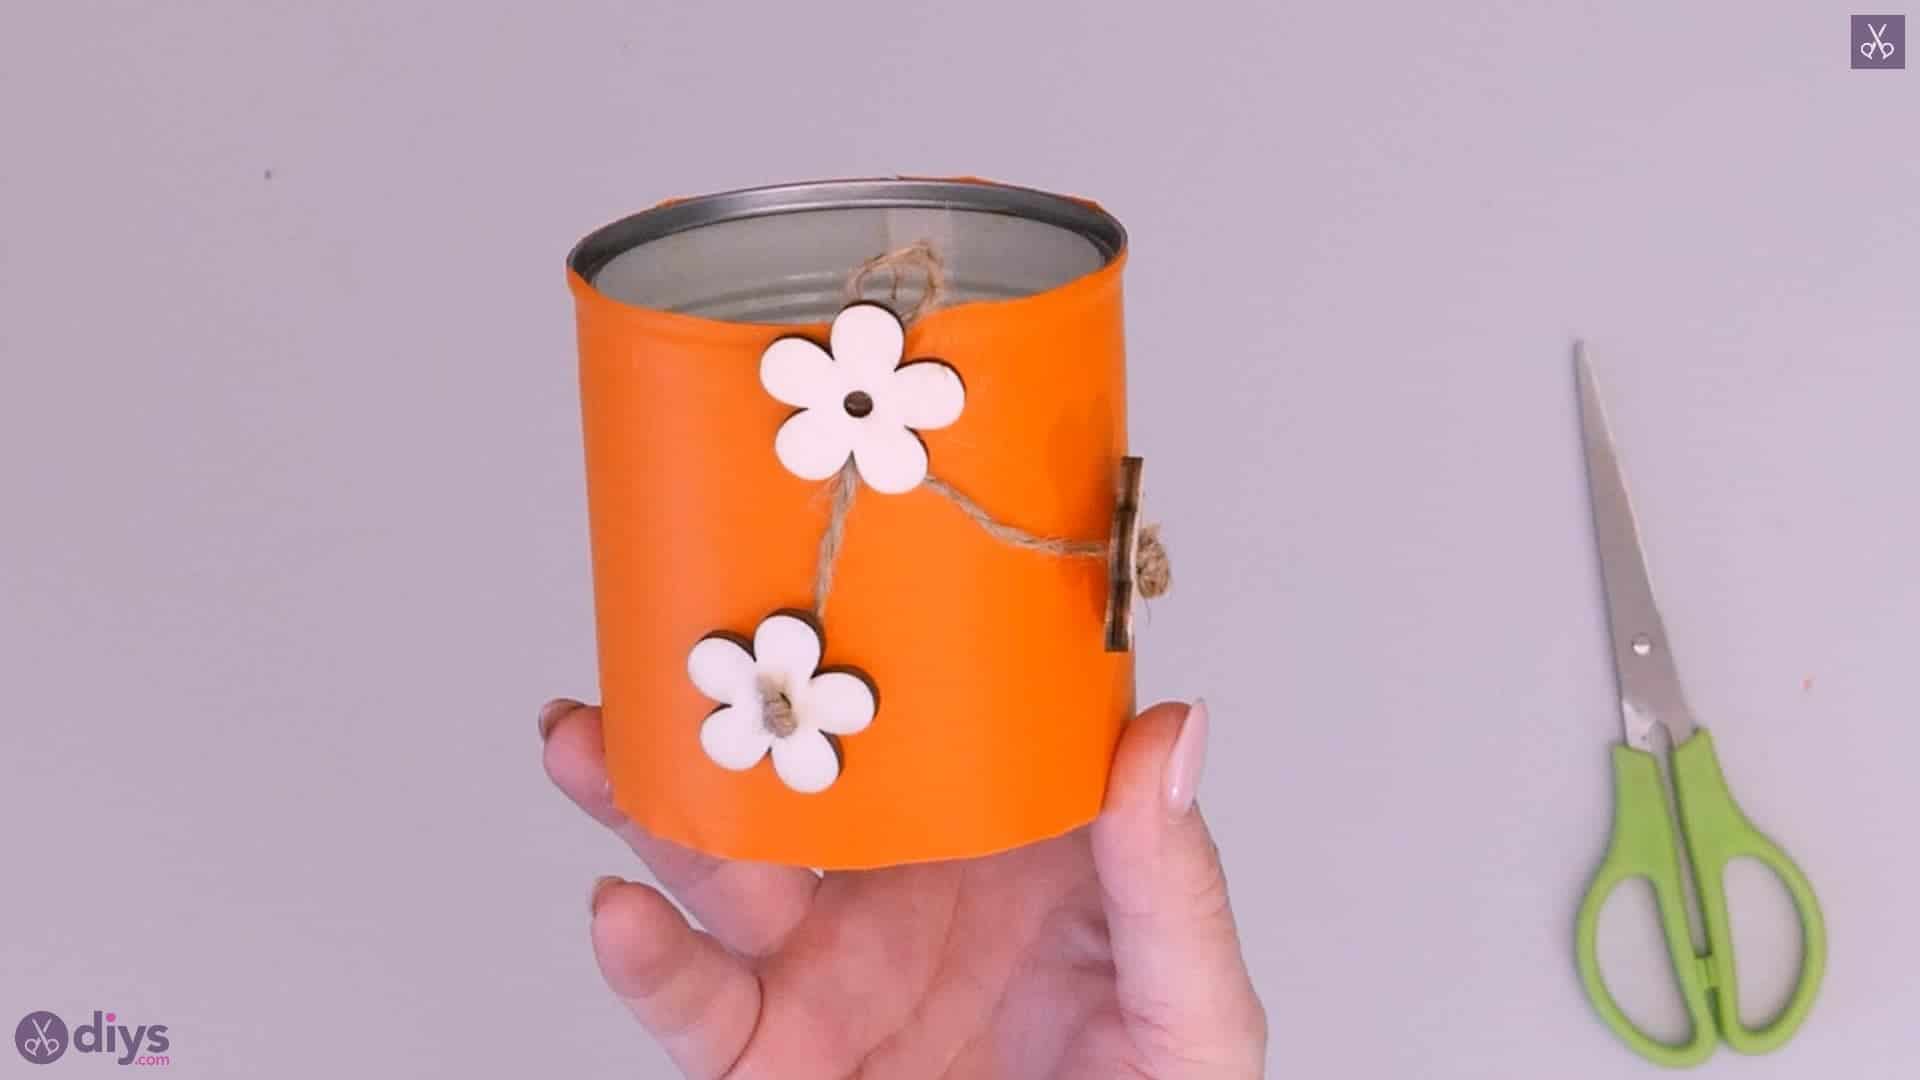
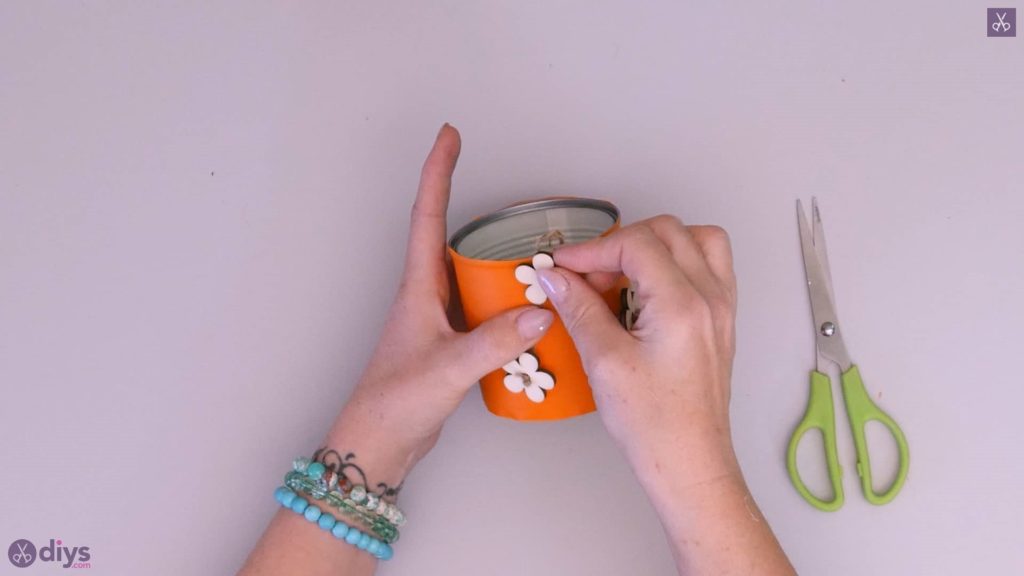
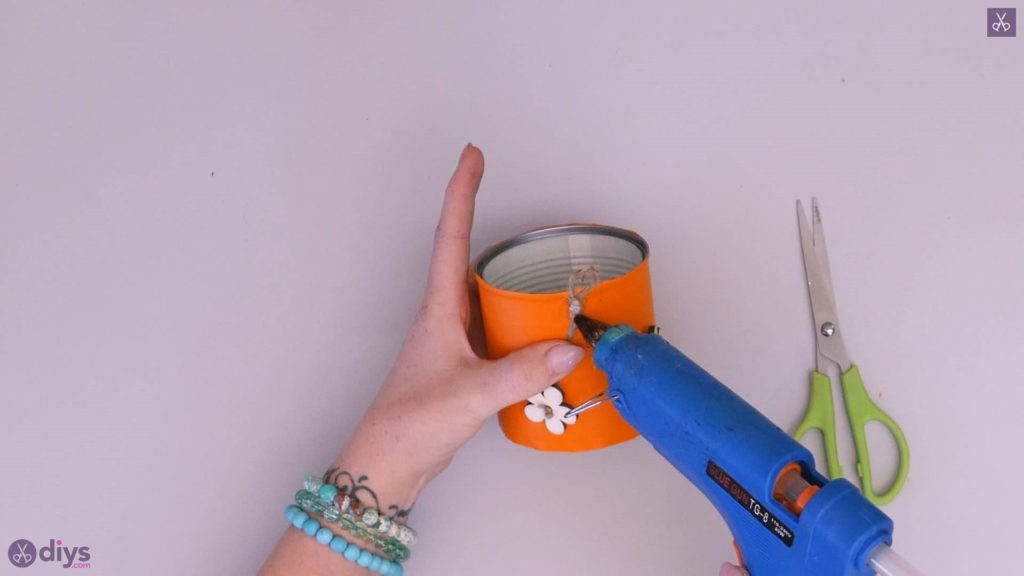
Choose which side of your tin can you want to be the front and apply a dot of hot glue near the top, just below the edge. Pick up the wooden and flower jute twine piece that you set aside before and stick it into place in that glue, right at the centre where you knotted the loop, letting the wooden flowers hanging down.


Step 5:
Apply a dot of glue over the knot that you just glued down and stick a third wooden flower down flat there to cover the knot and really finish the look.
That’s really all there is to the project! Of course, you can feel free to play with colour and embellish the container differently than you see here, just using the basic concept as a guide. Just in case you’d like to try this project out for yourself, here’s a fantastic tutorial video to help you!