How to Make Pom Pom Letters
Updated on November 19, 2025


If you’ve seen any of my other posts lately, you’ve probably picked up on the fact that we’ve had a little bit of a pom pom obsession going on lately. We taught our kids how to make them recently and they’ve been making them just about non-stop ever since, so I’ve been trying to think of as many ways as I can to put all those cute little pom poms to good use. I’ve also always been a pretty big fan of personalized lettering and monogram crafts, so I doubt it will surprise you that we thought almost immediately about how cute pom pom covered letters would look.
Once I’d made one version, I liked the craft so much that I decided to map out the steps for making another version as well, so other people can try it out and learn! You’ll also find a full video tutorial at the end of this post, in case you’d rather follow something visual instead of reading the instructions.
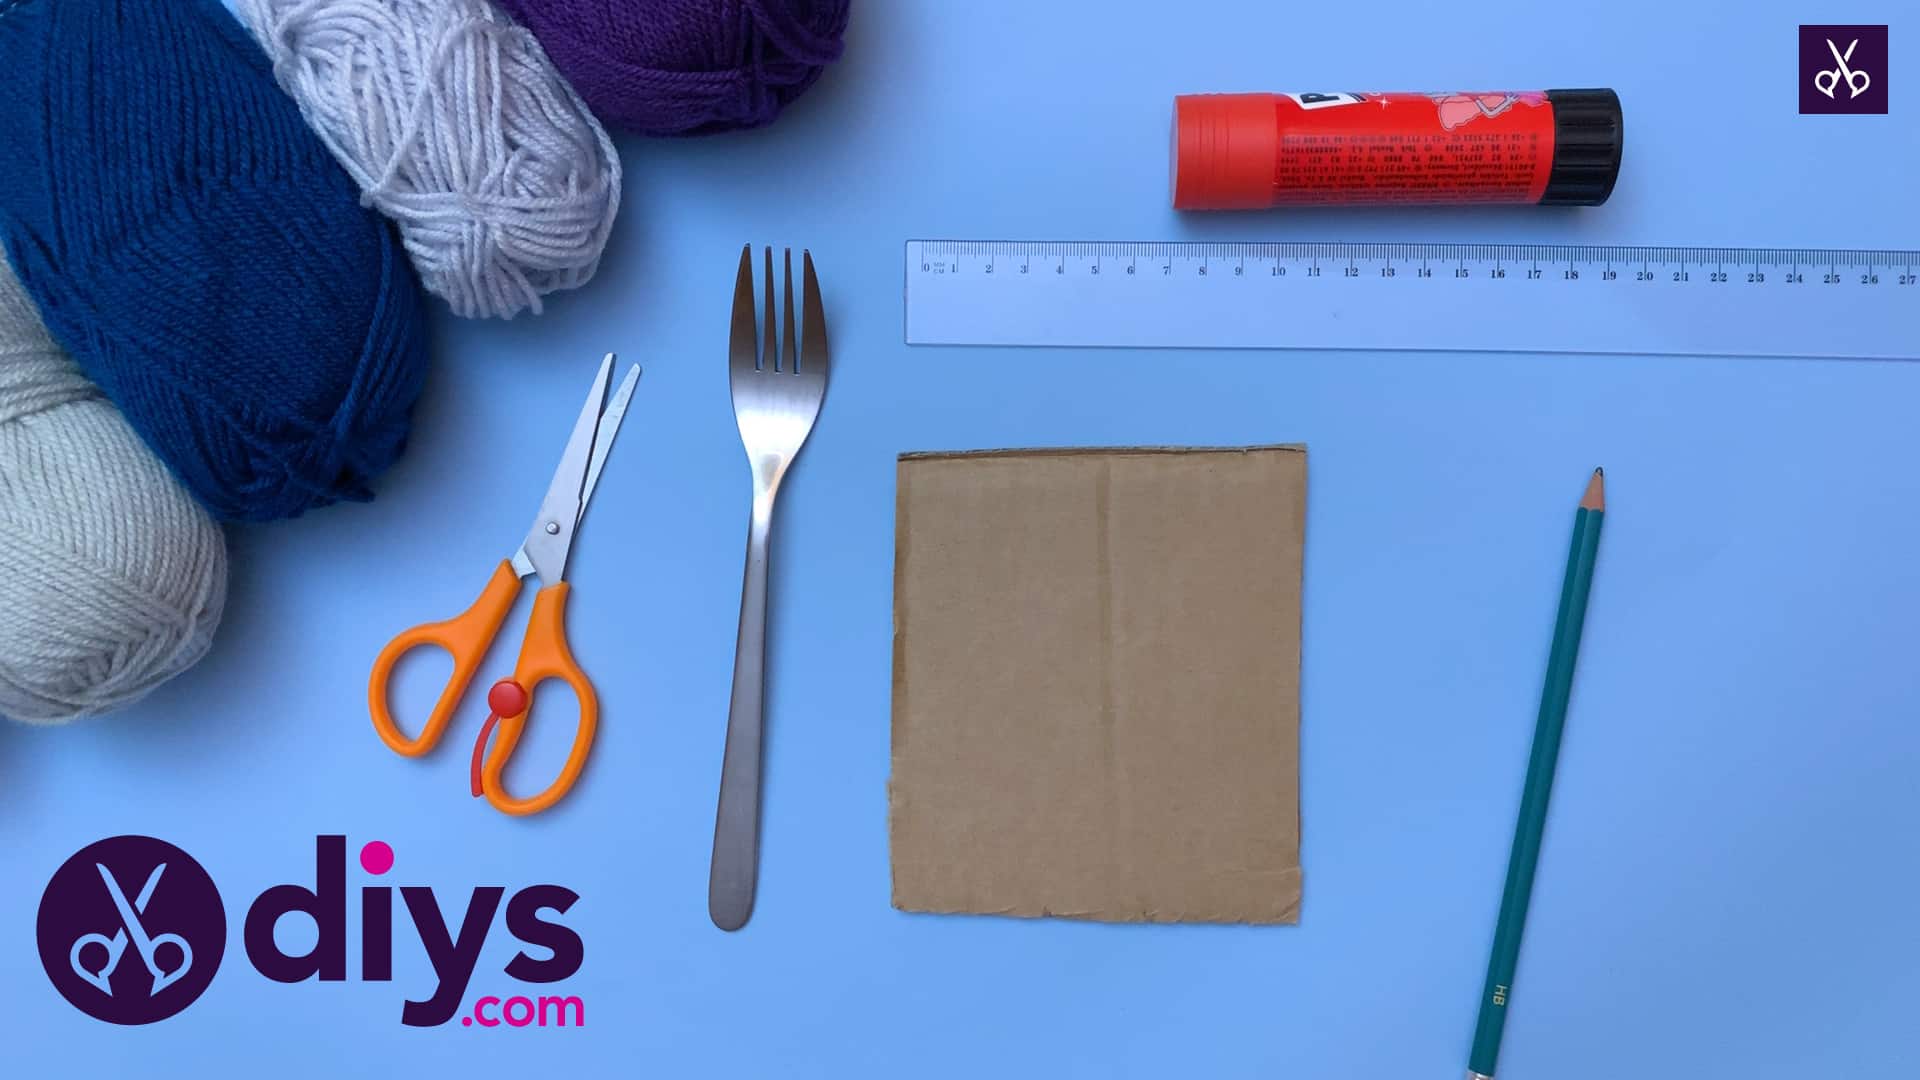
For this project, you’ll need:
- Yarn (whatever colour you like best)
- Cardboard
- Glue stick
- Scissors
- Ruler
- Pencil

Step 1: Gather your materials!
Get everything from your list and have it within arm’s reach.

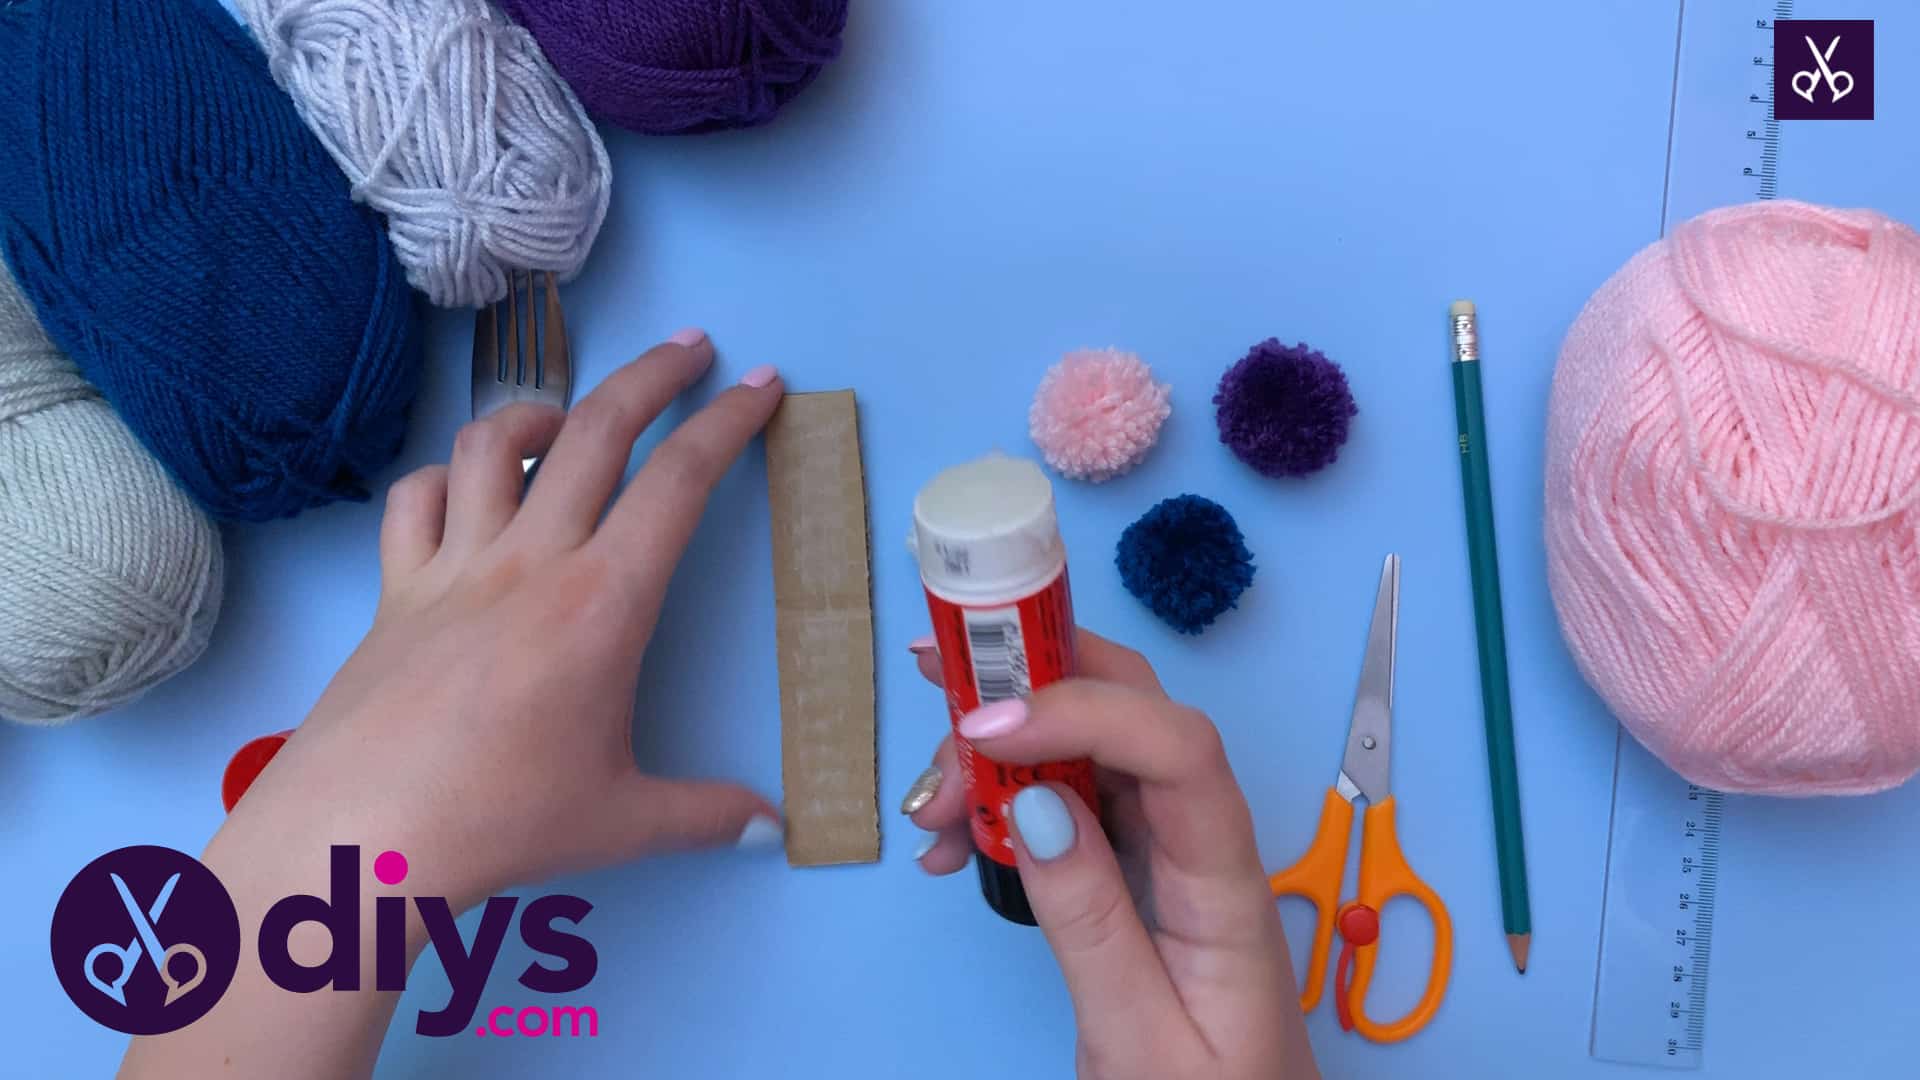
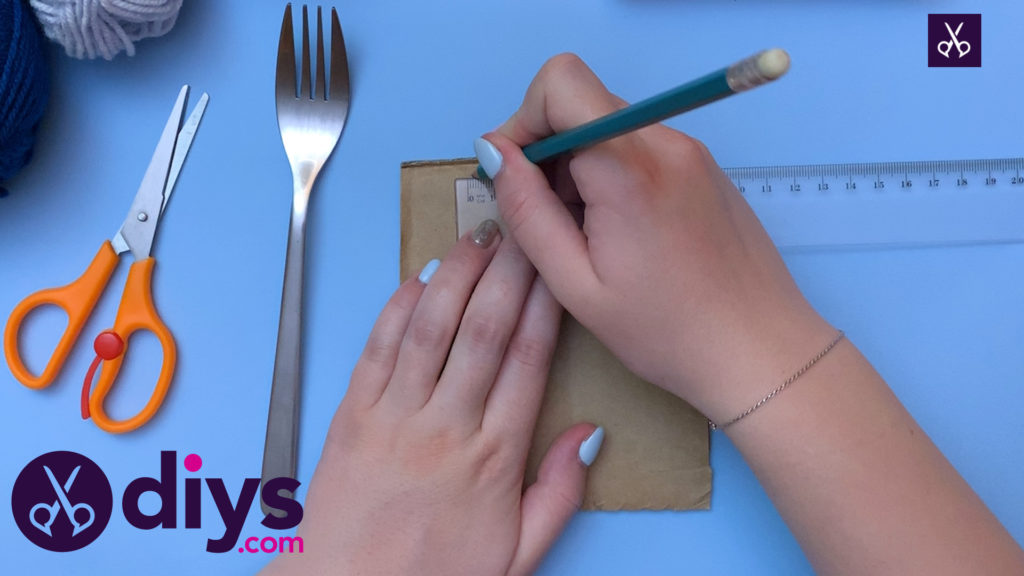
Step 2: measure
Use your ruler to measure out the shape of a rectangle in your cardboard. I made my shape 2 cm wide and 6 cm long. Make the lines clear enough that you can see them clearly on the cardboard (I used pencil to help this process because it shows up well but it’s also erasable).
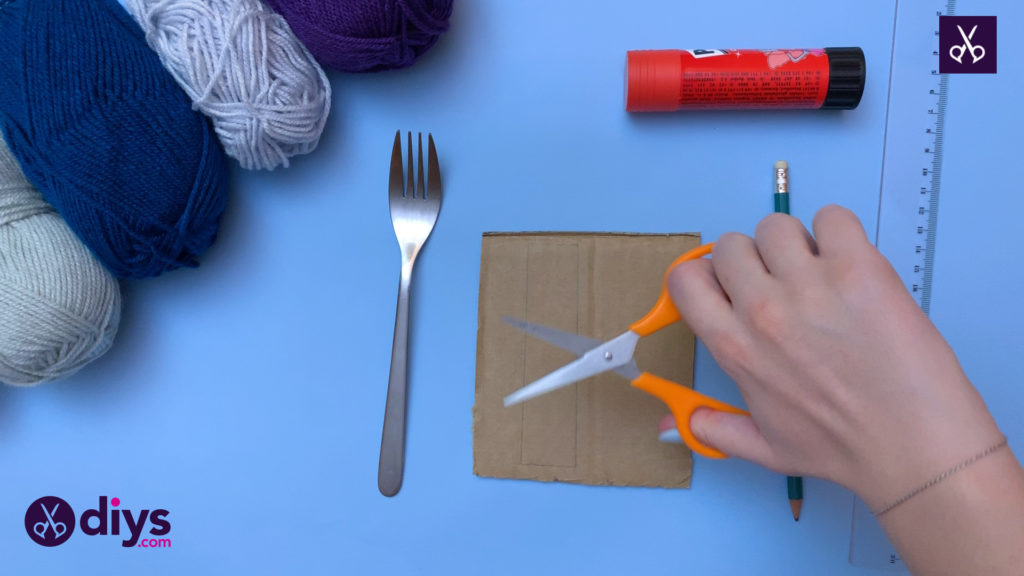
Step 3: cut
Cut the rectangle you just drew out of your cardboard, keeping the edges nice and straight. Set the cardboard rectangle aside.
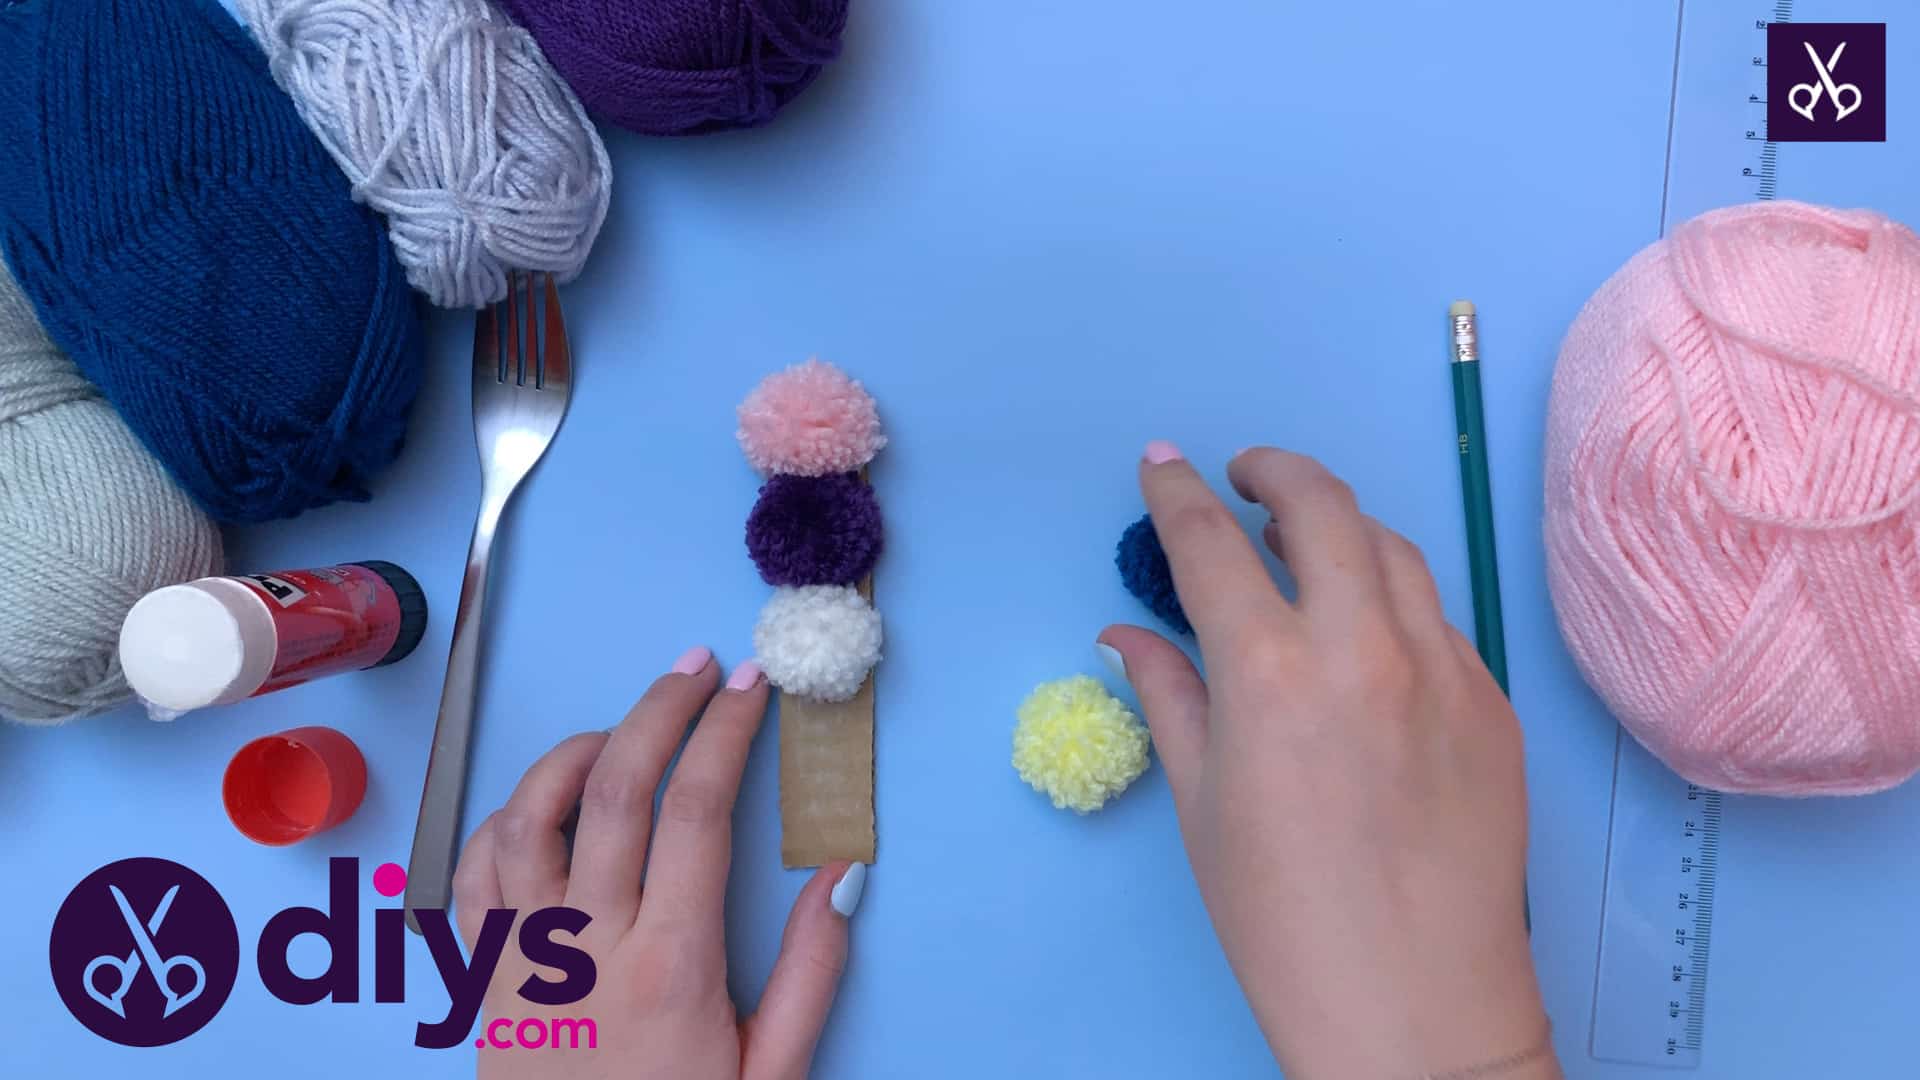
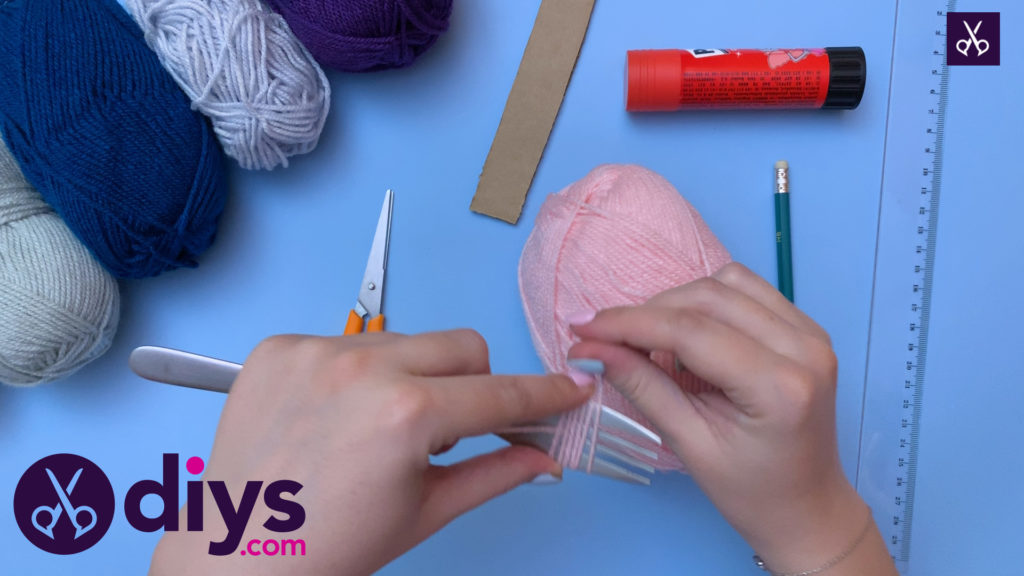
Step 4: Start making a miniature pom pom!
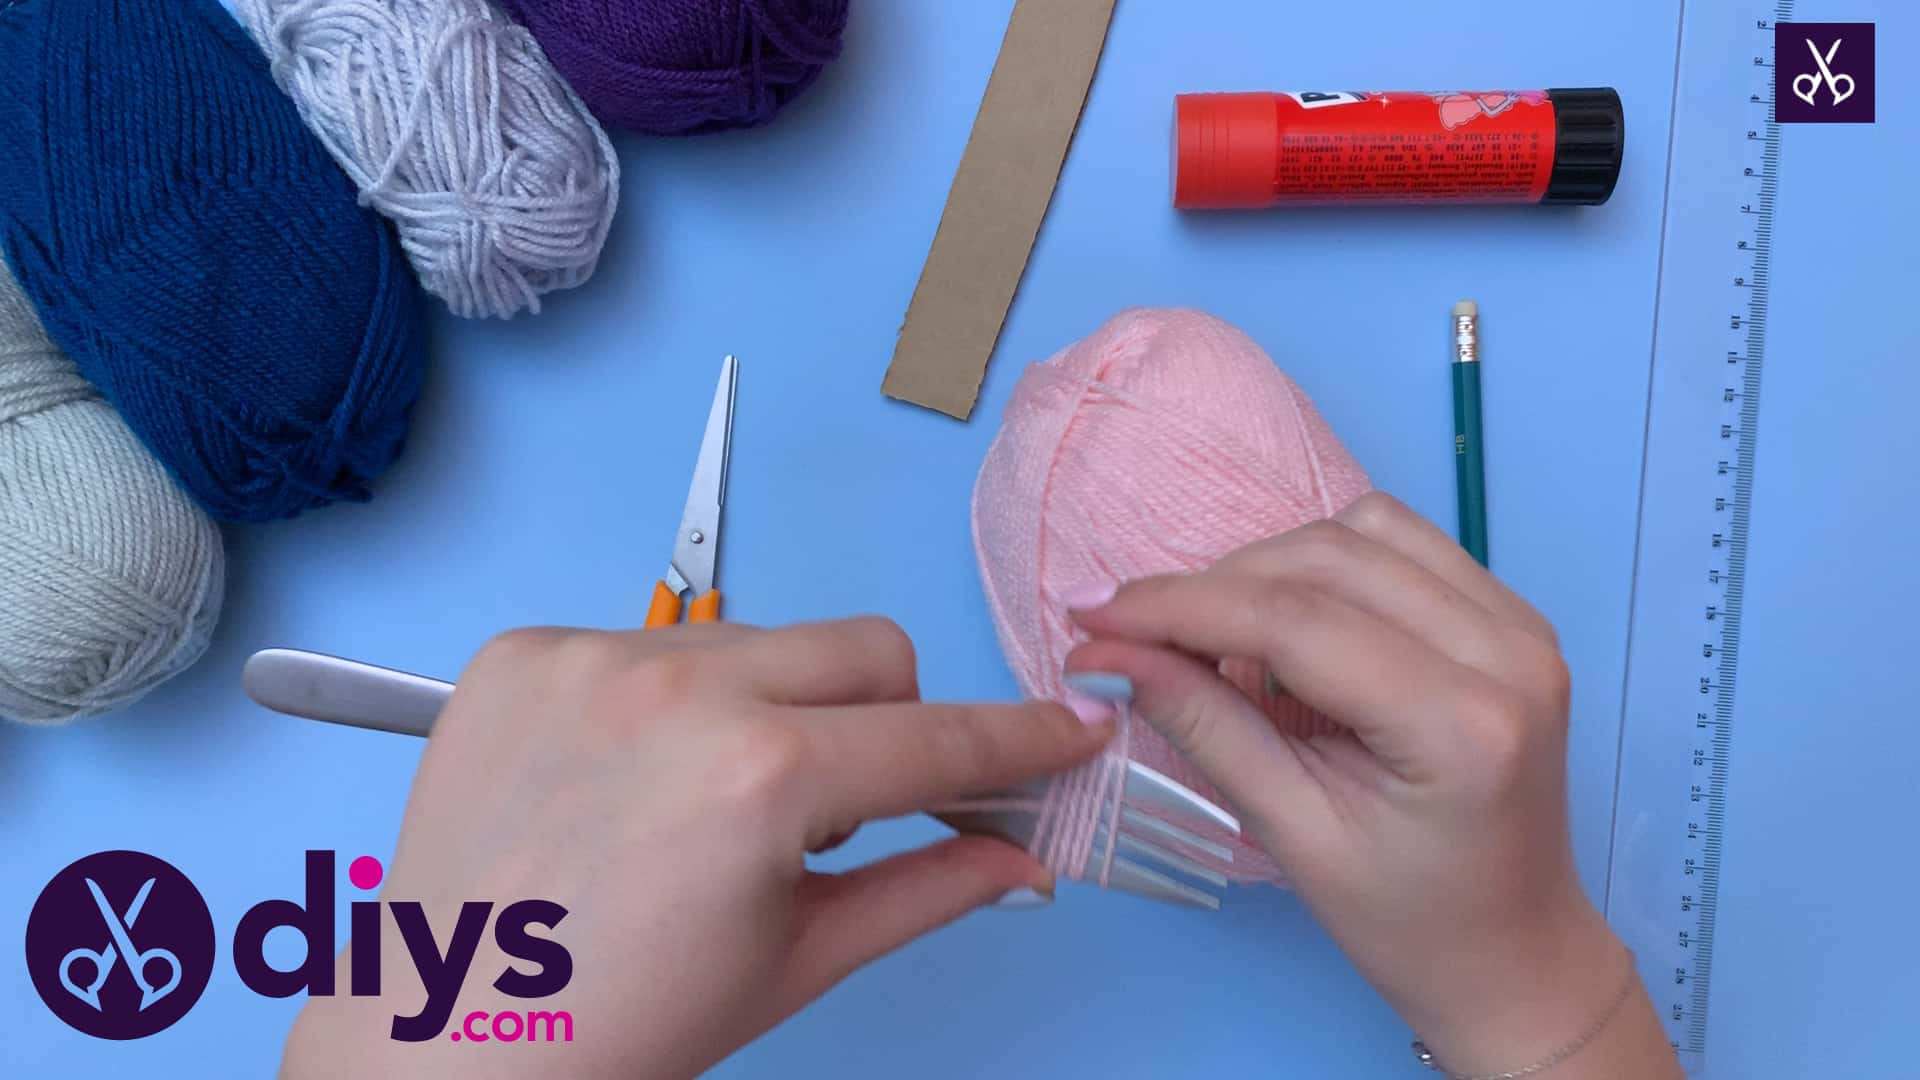
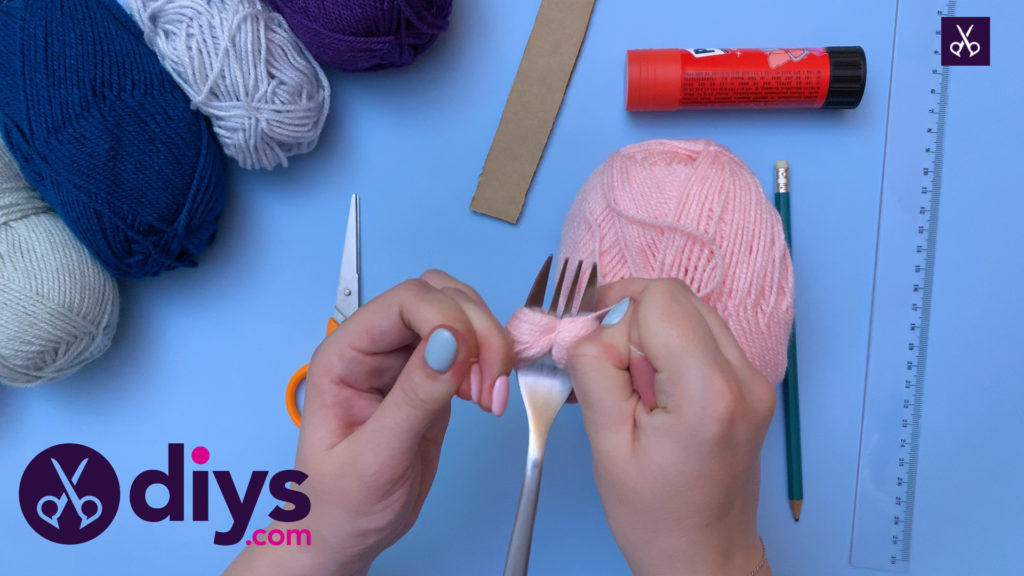
I used the fork method to get a nice shape and size. Holding the end against the inside of the fork with your thumb and start wrapping the yarn around and around all of the prongs of the fork at once. Wrap until you have quite a number of layers. I stopped at a thickness of about 3 cm from the fork prongs and the outside layer. Cut your layers free from the yarn ball and hold the end in place so it doesn’t start unraveling.
Step 5: finish with a tie
Cut another strip of yarn about three inches long and pass it between the middle prongs, below and above the layers you just wrapped. Tie it and pull tight, cinching the layers in the center. Tie your ends in a tight knot once you’re happy with how pinched the middle is.
Step 6: cut
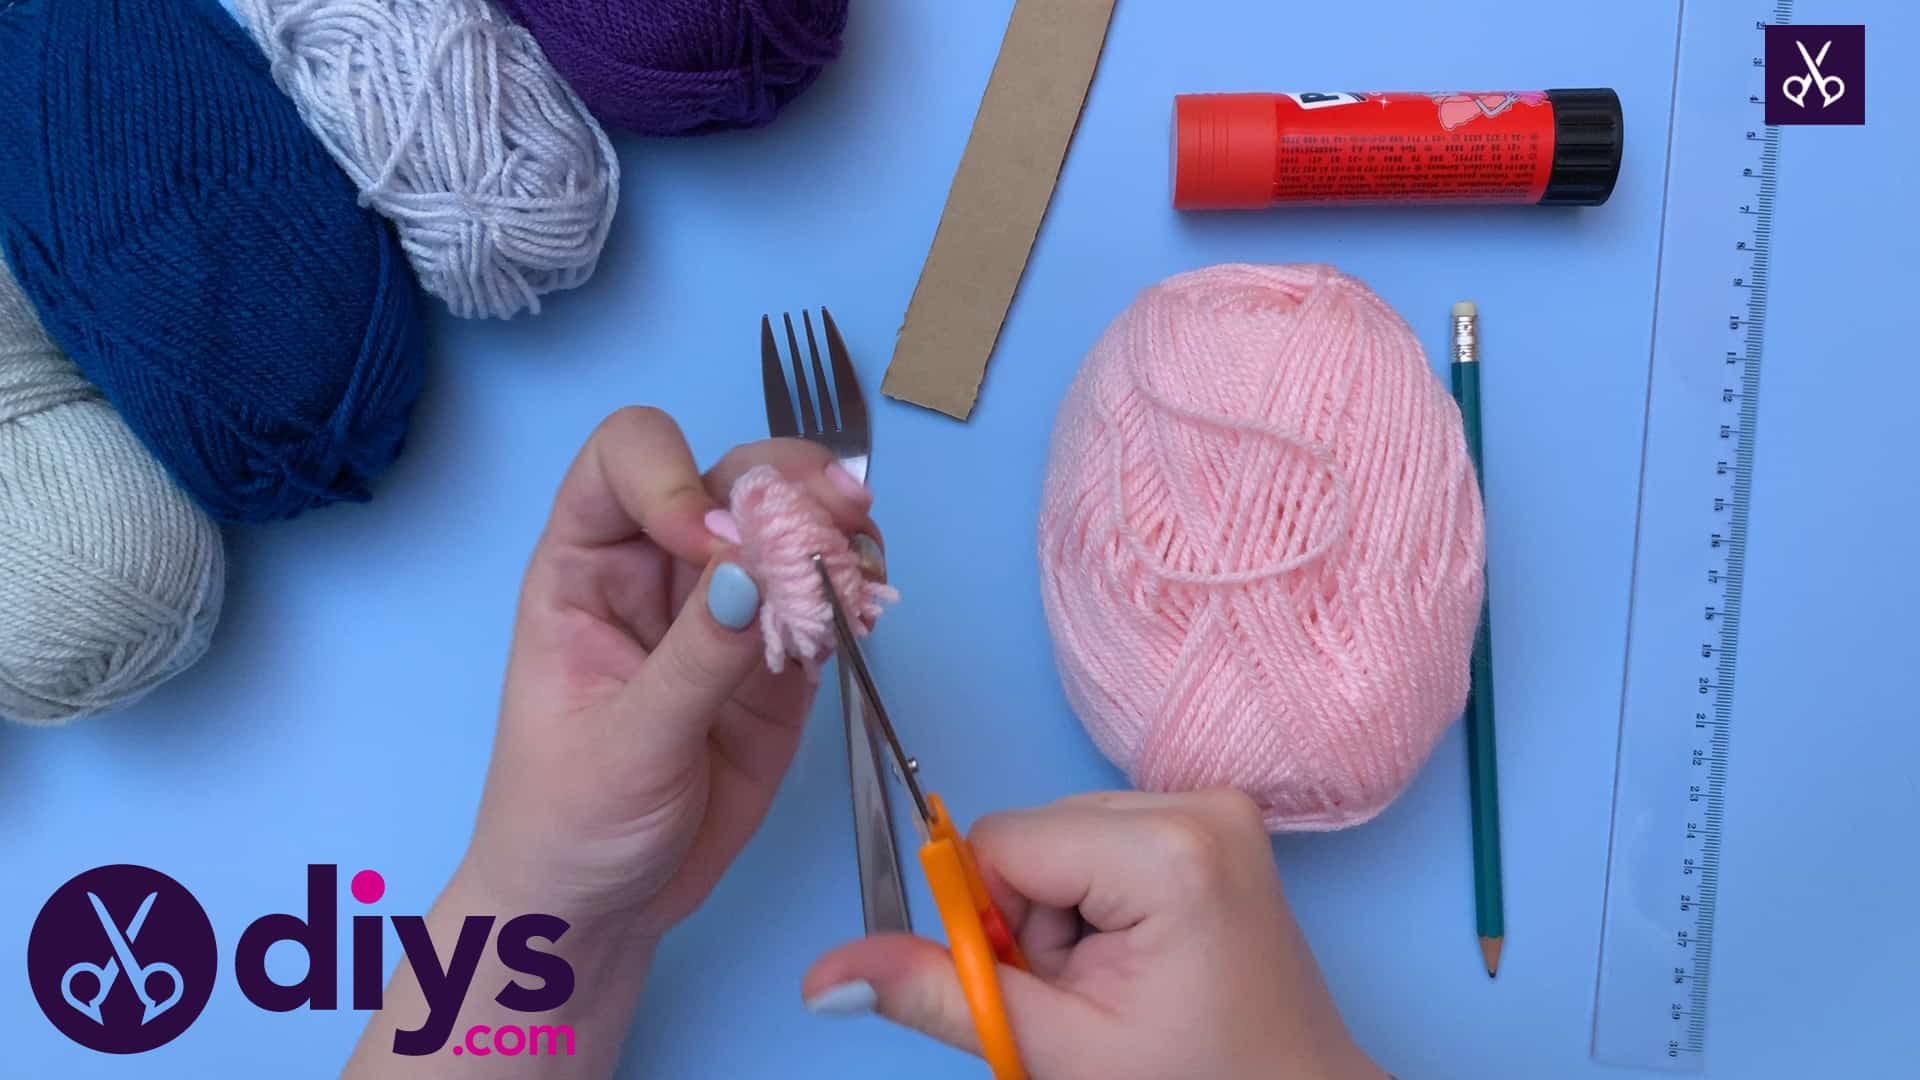
Slide the forming pom pom off the end of the fork and cut the loops on each end so they become fringey looking loose ends. They will spring outward thanks to the wrapping and cinching you did before. You can help the process out a little bit by fluffing out the ends and separating them for a more spherical shape.
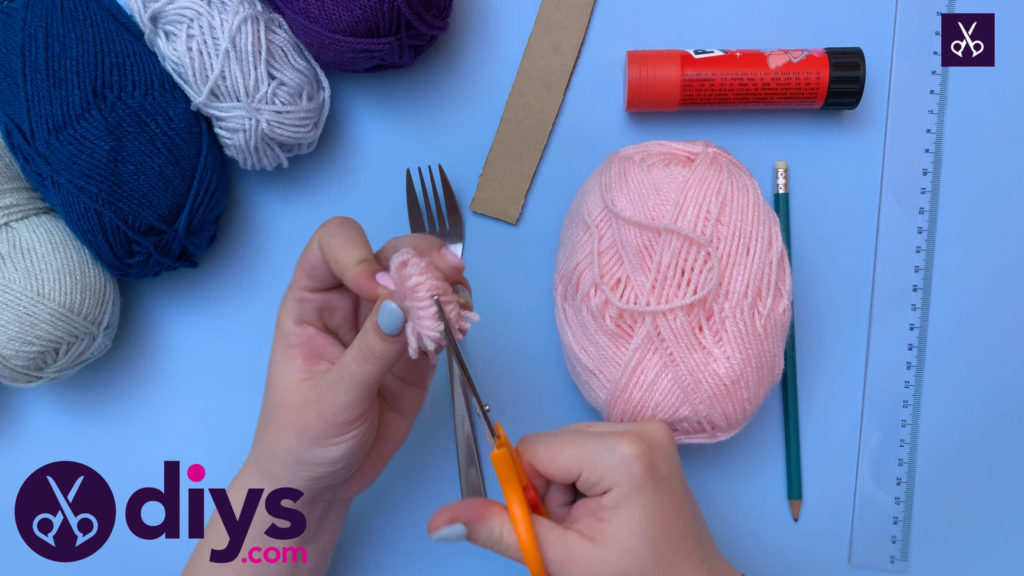
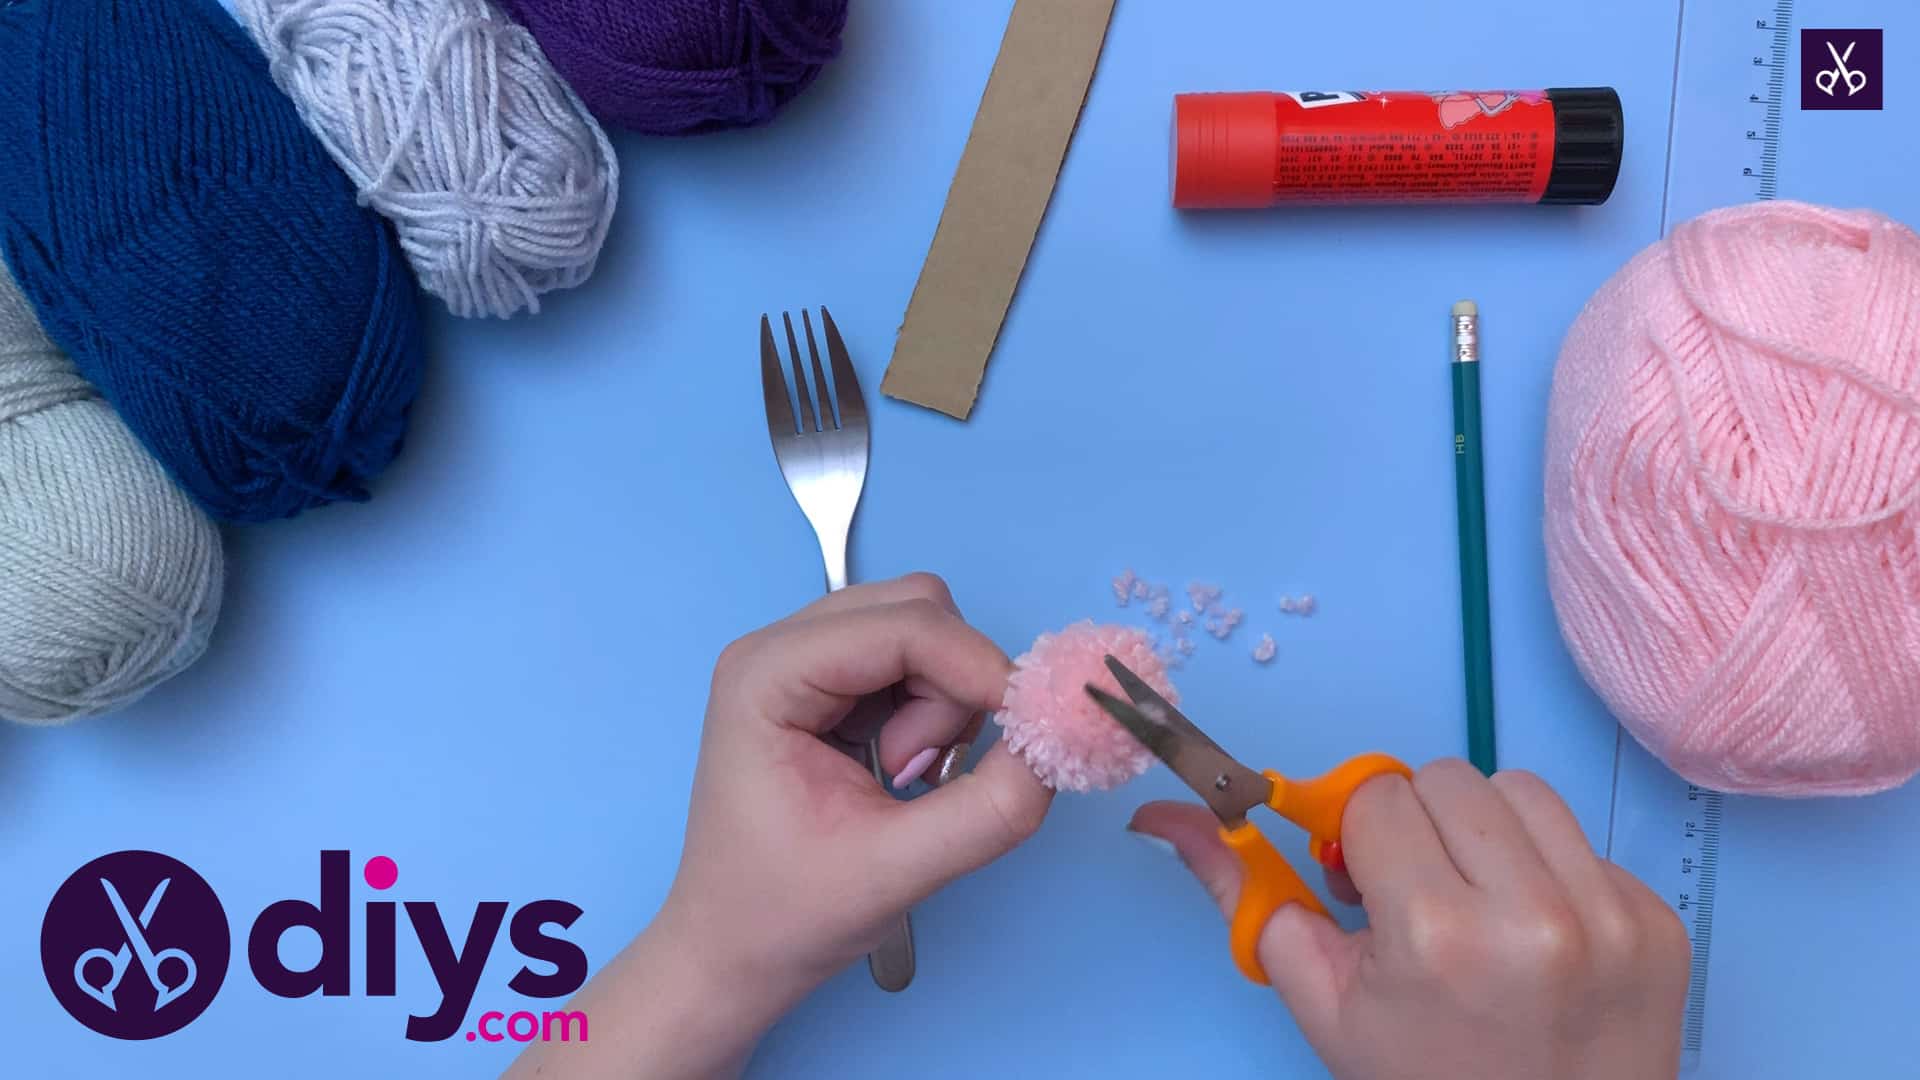
Step 7: trim
Make your pom pom’s shape even better by trimming the edges so they are nice and even all the way around, rather than leaving some bits and pieces longer and shorter so the pom pom looks shaggy. Repeat this whole pom pom process with other colours (or the same colour, if you prefer) until you have enough to stat covering your letters.

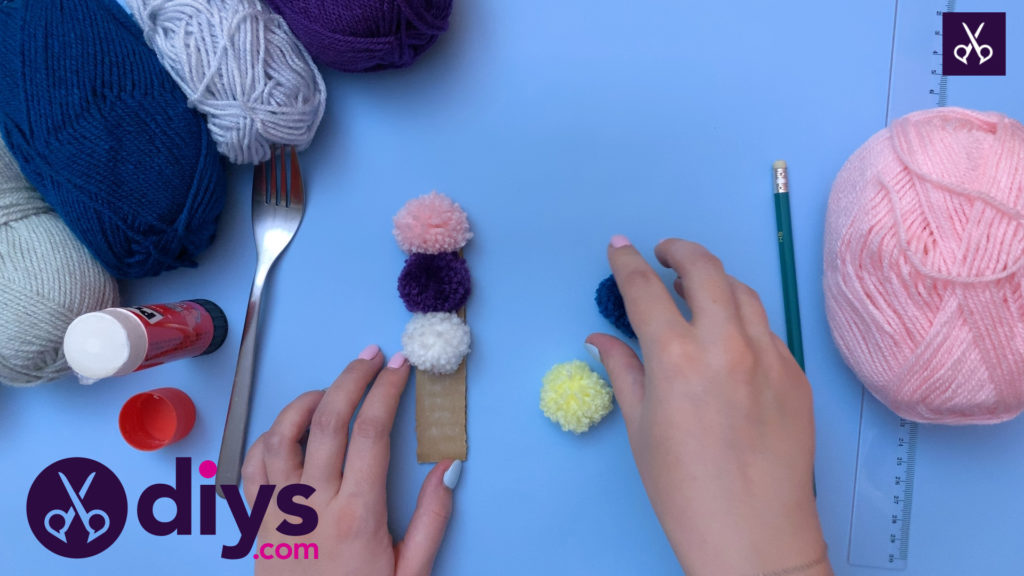
Step 8: glue to cardboard
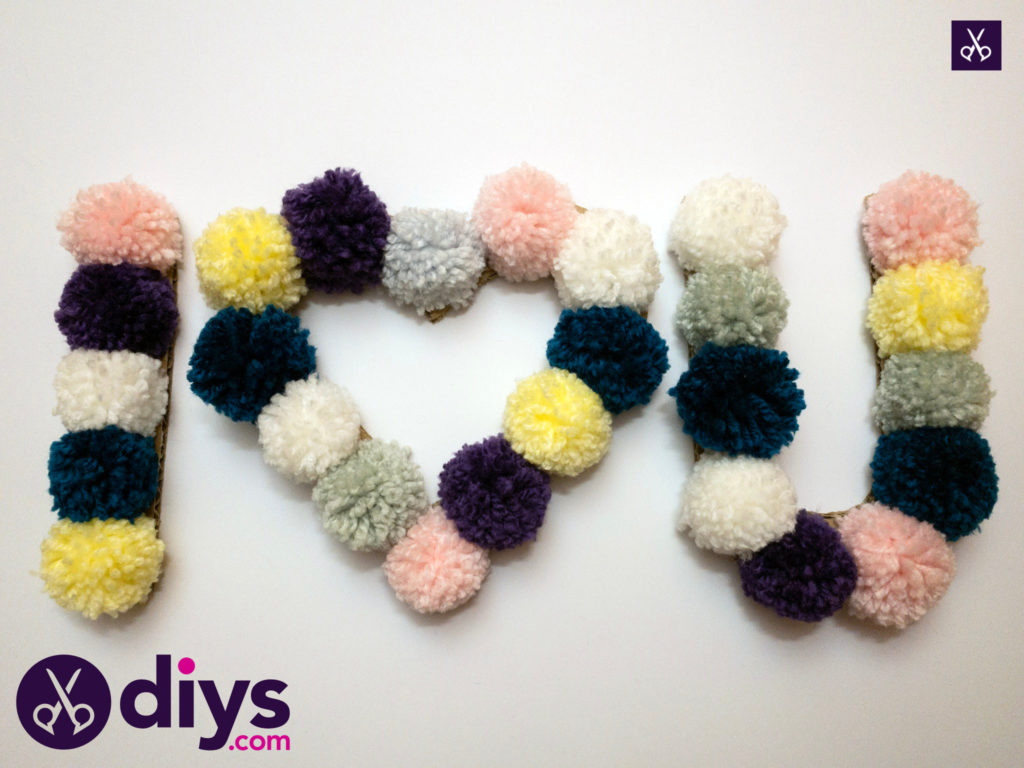
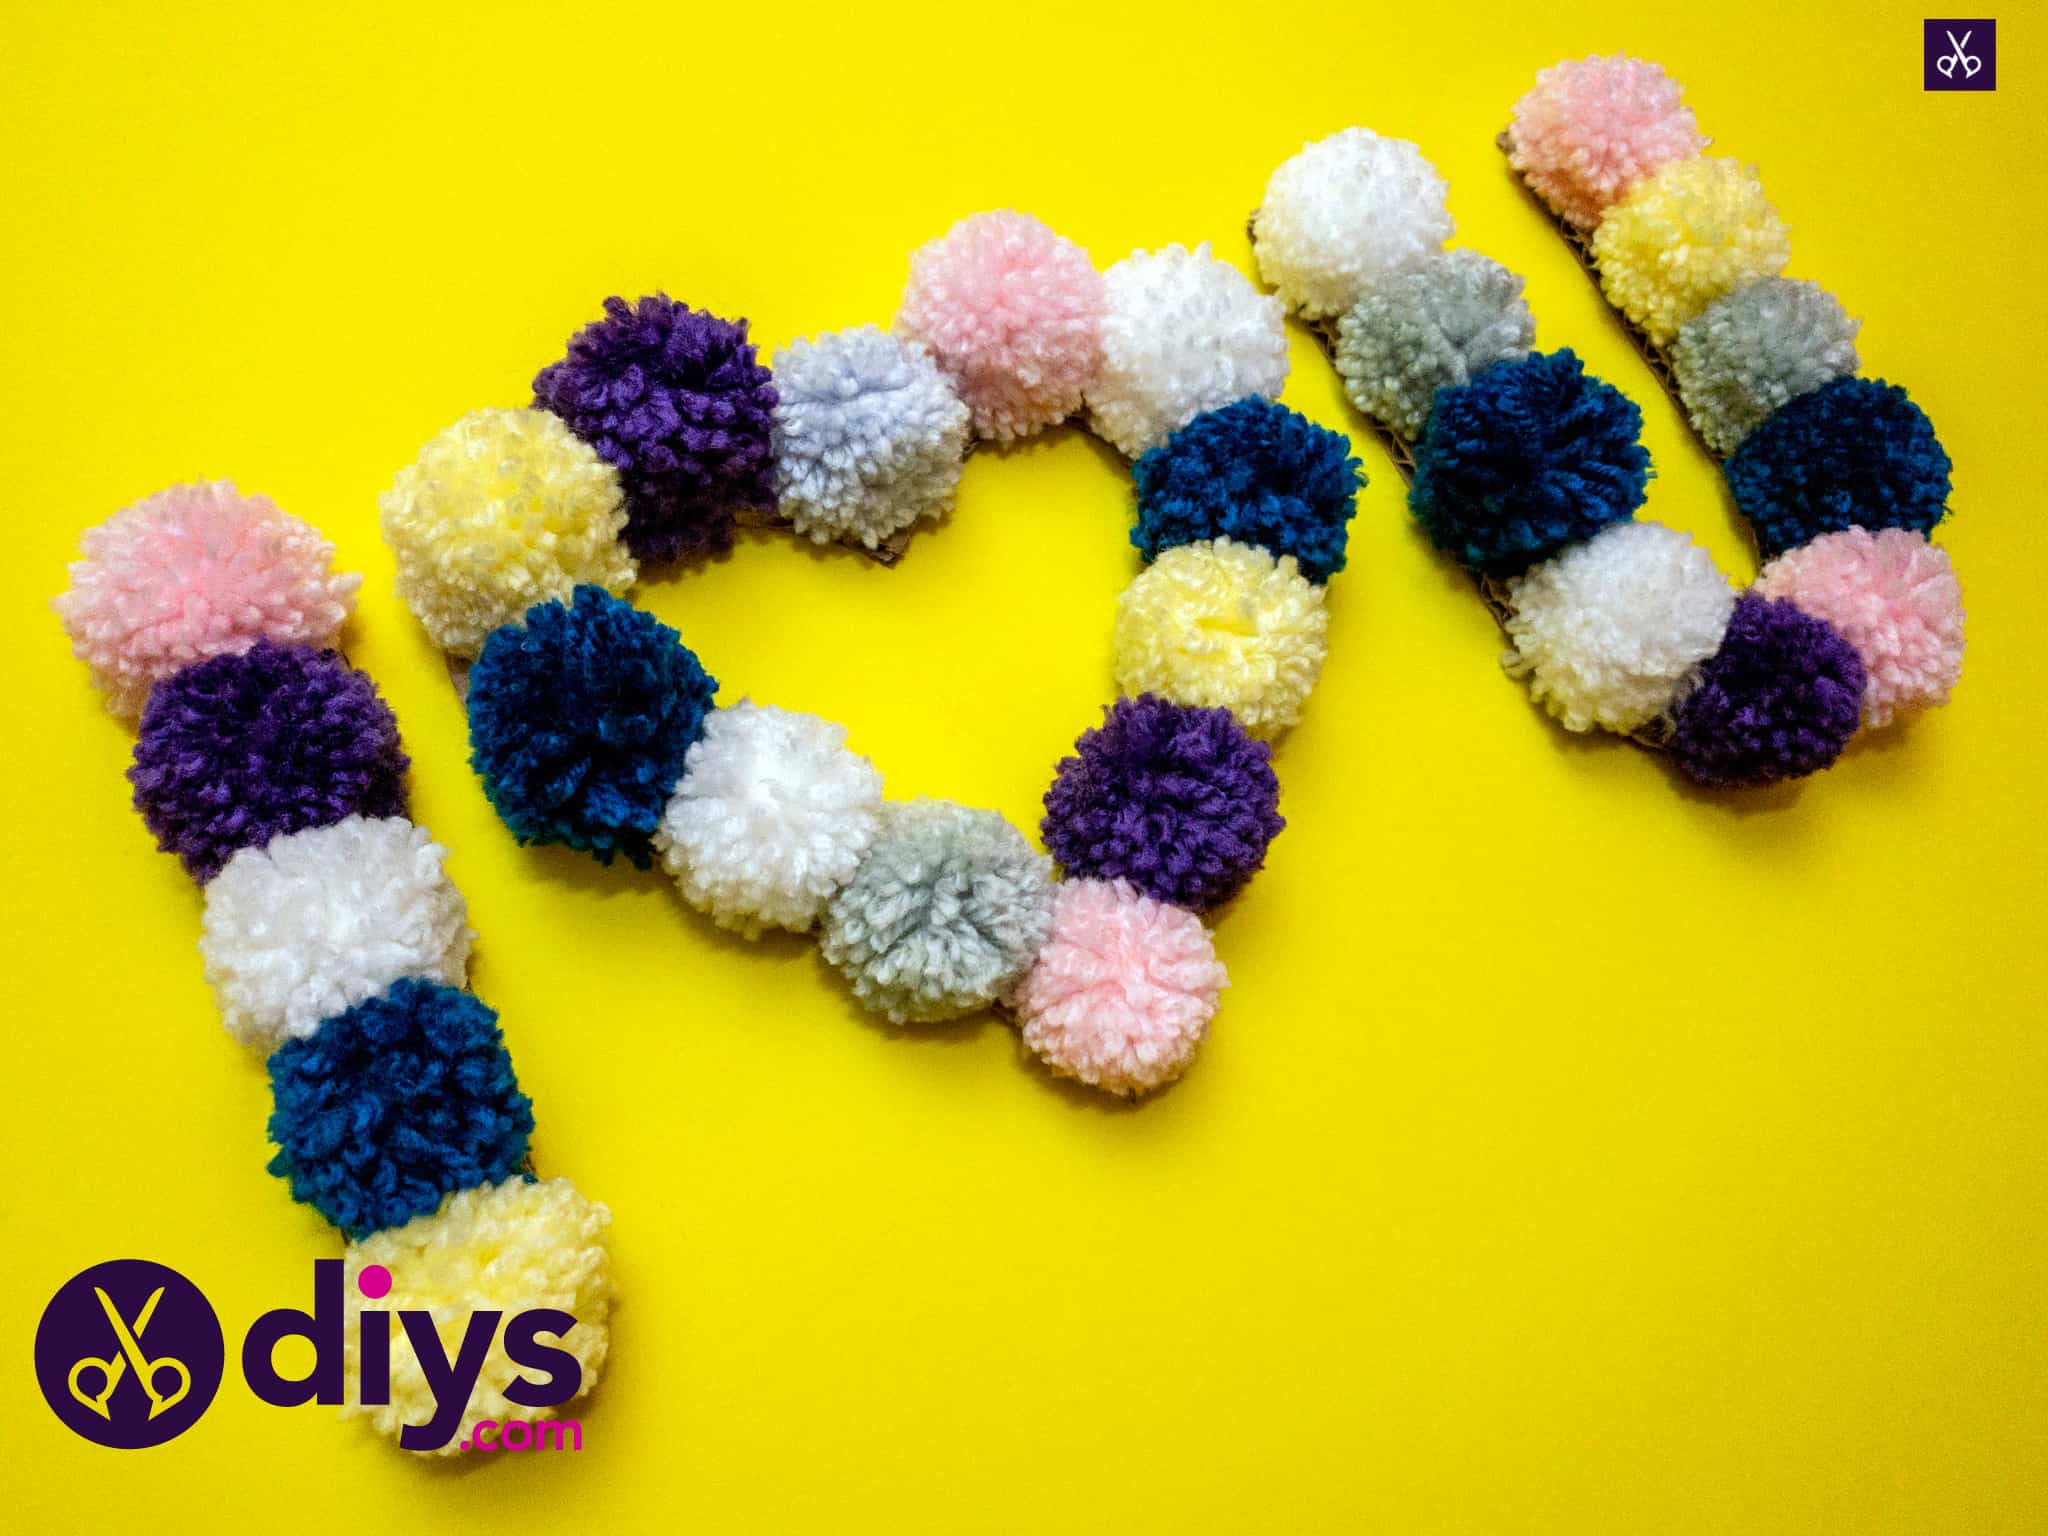
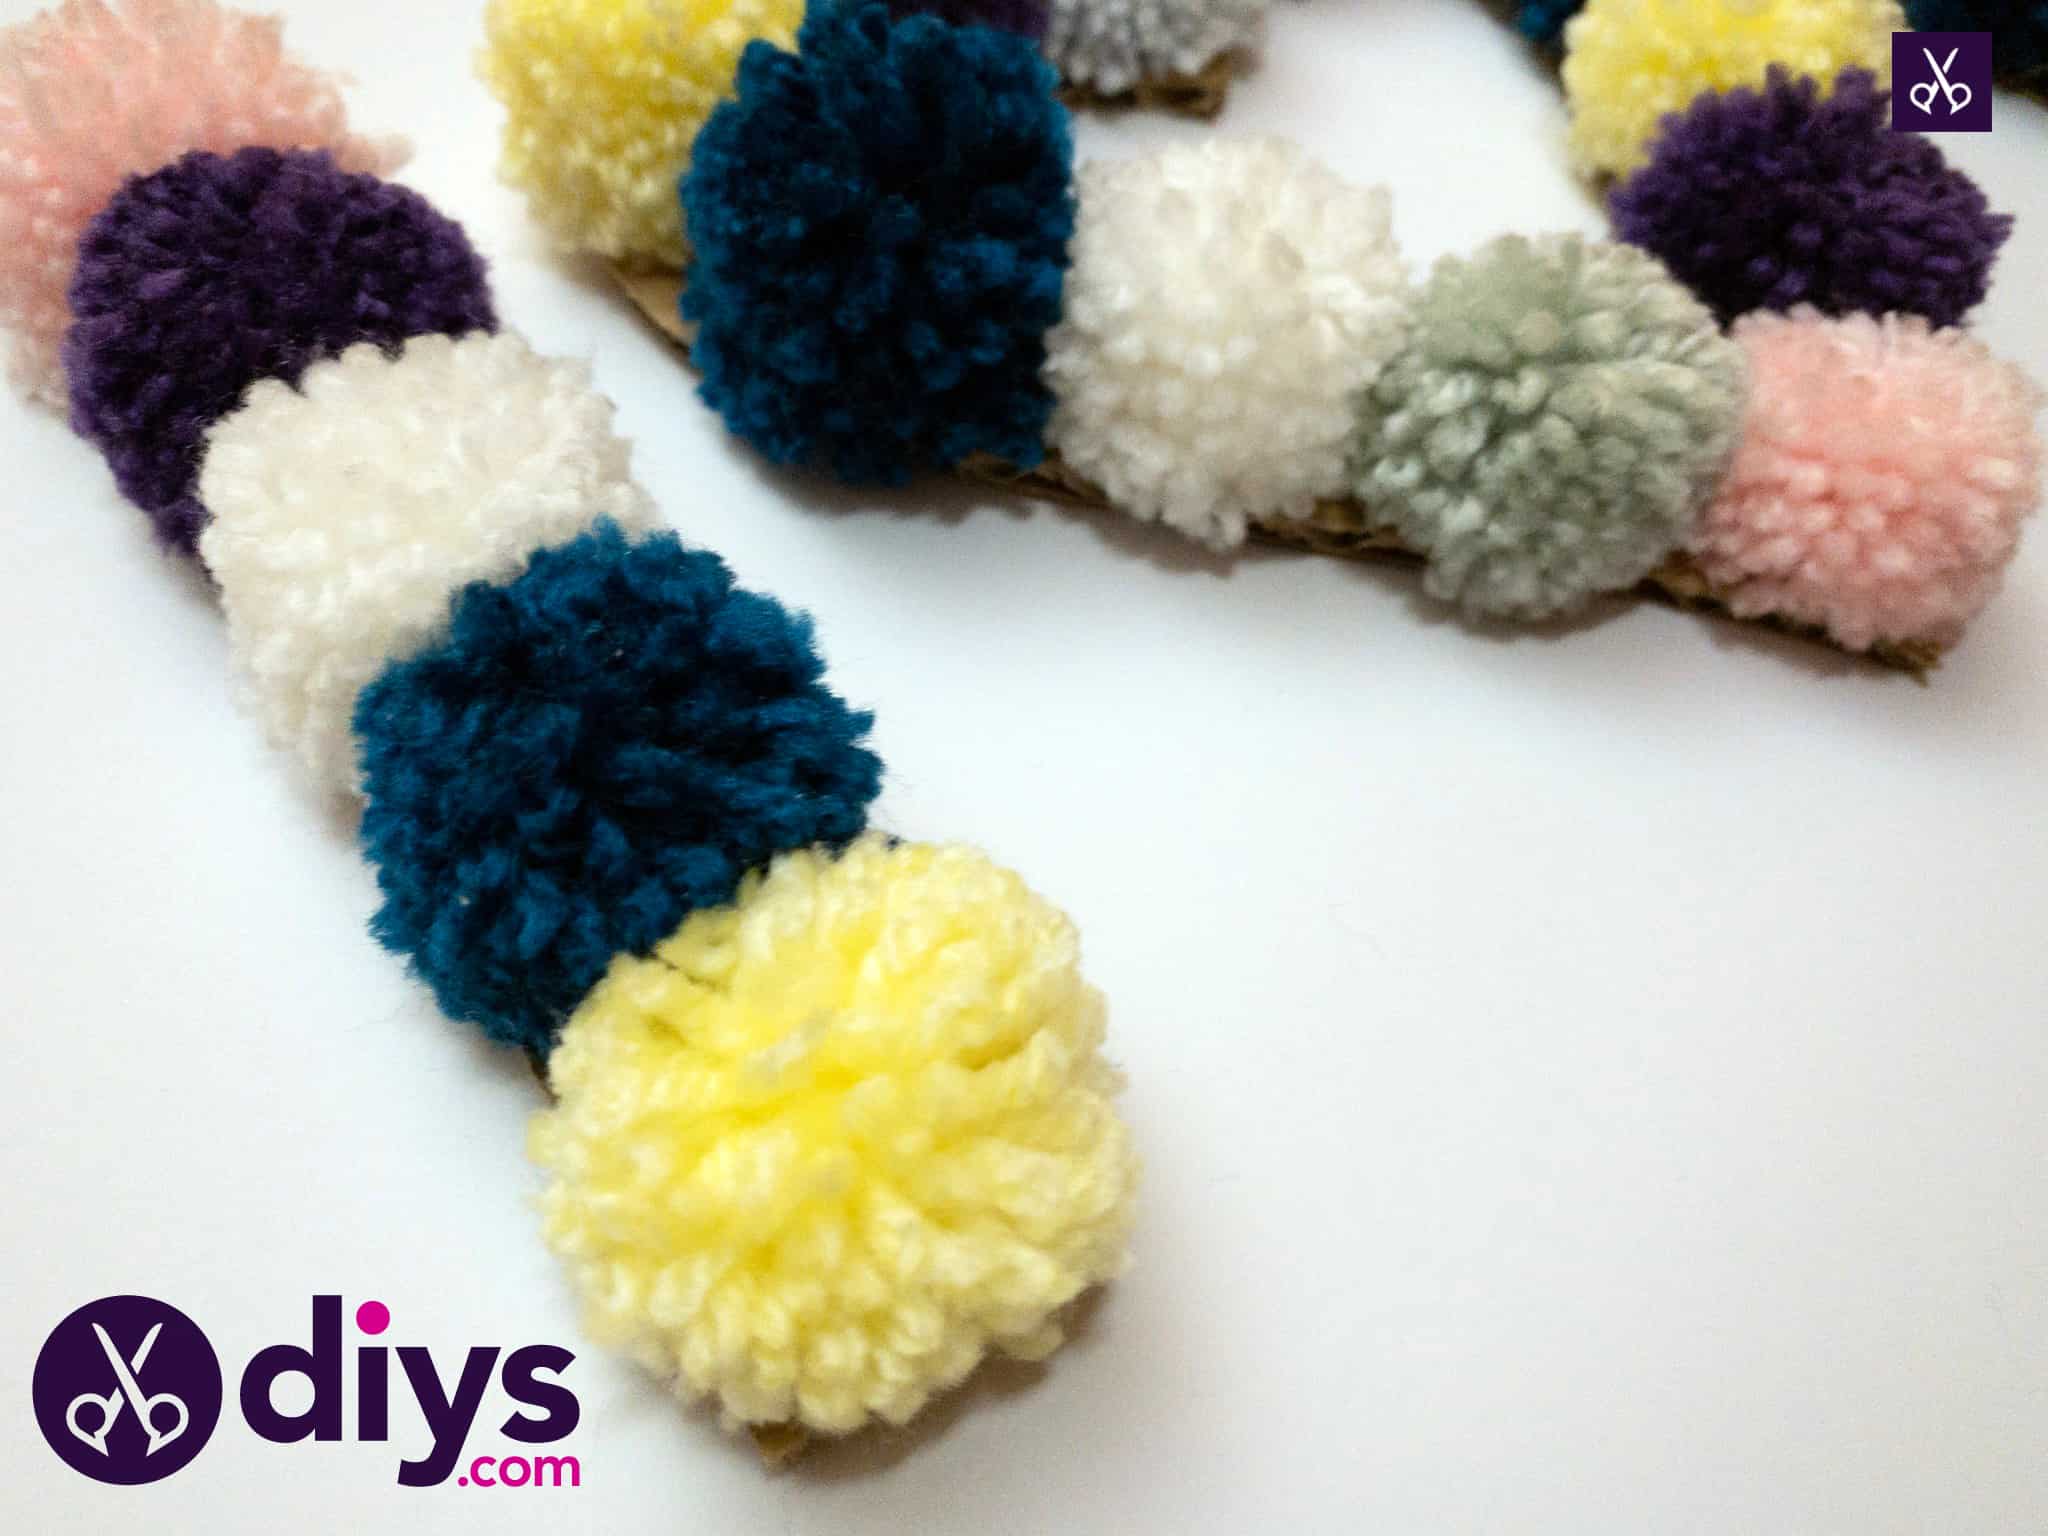
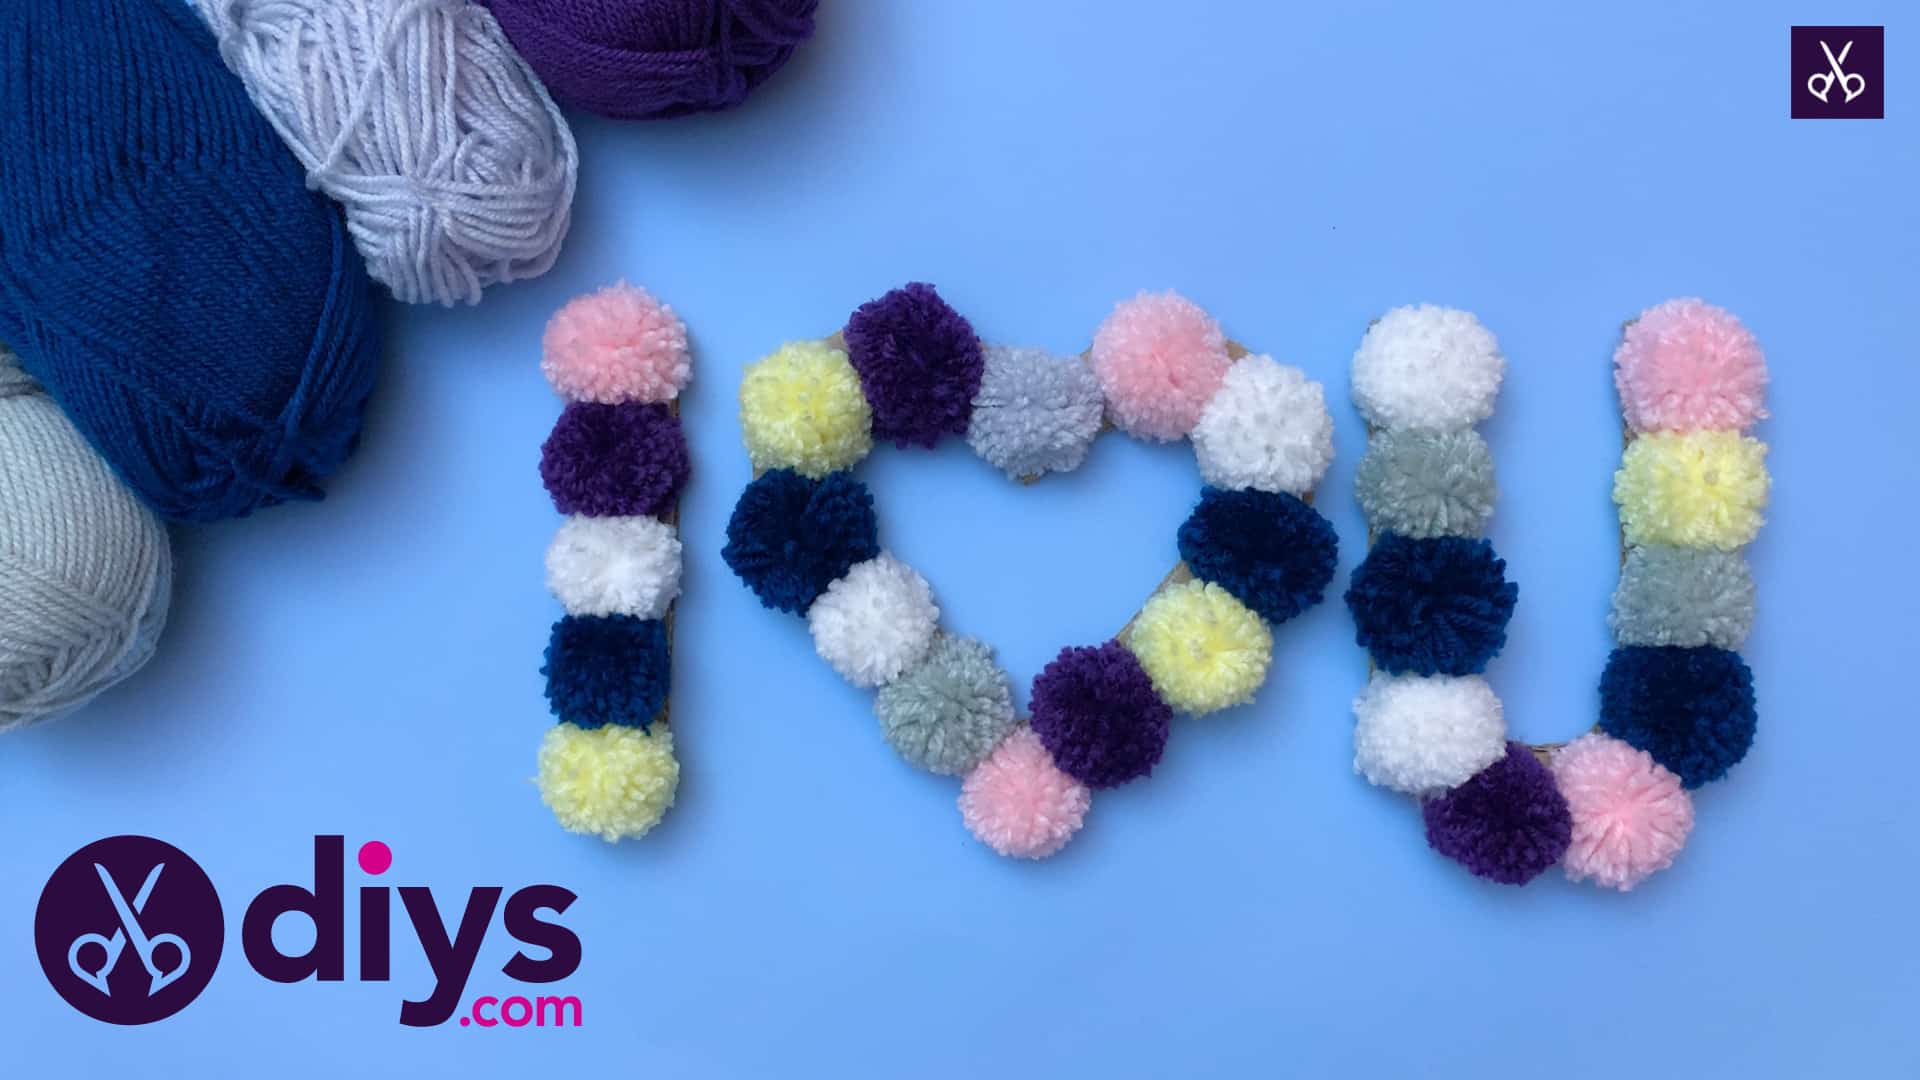
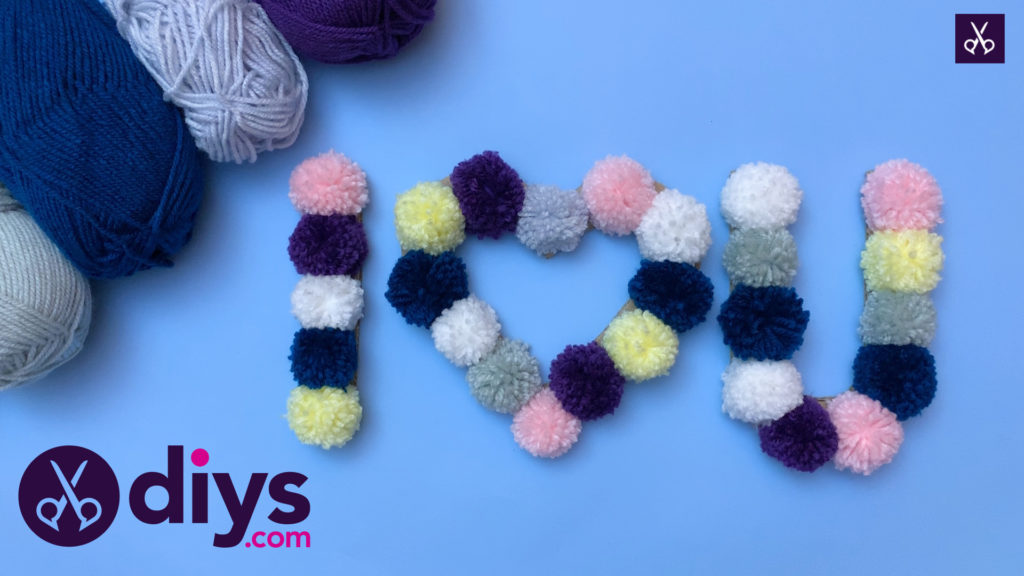
Grab the cardboard rectangle you set aside before. This is actually your letter I (if you’ve chosen to make the same phrase I did). Use your glue stick to apply glue all up and down your I, across its full length and surface.

Step 9: repeat
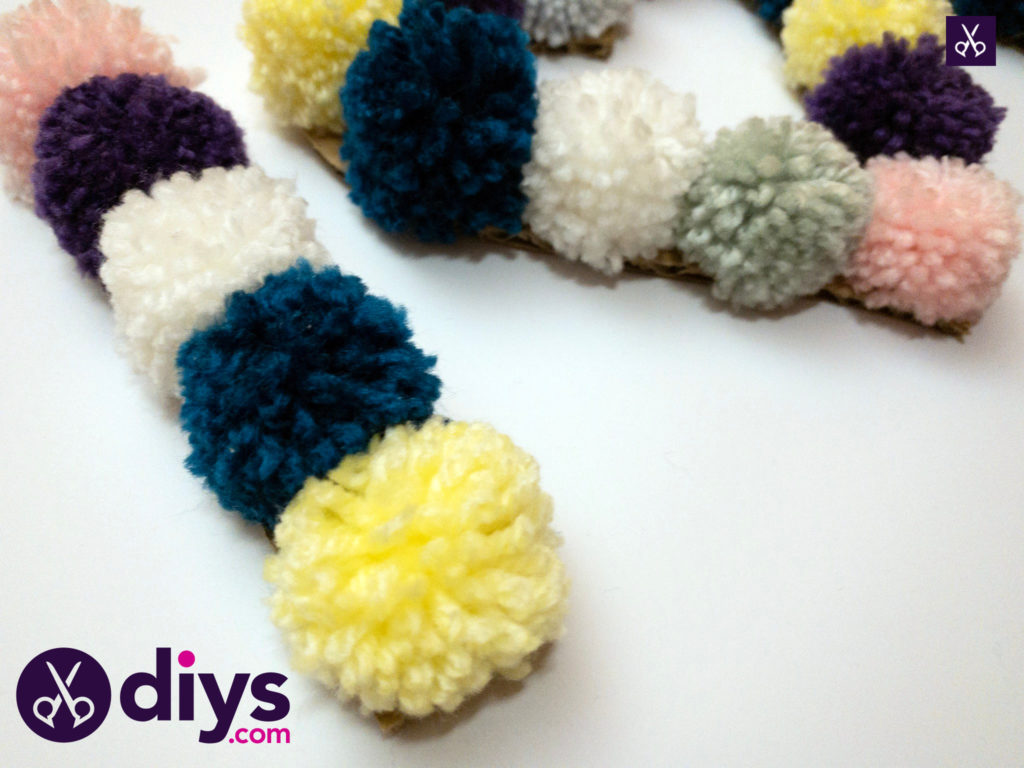
Before the glue can dry, press your pom poms in place down the I’s full length, alternating colours for a fun eclectic look. My I fit five miniature fork pom poms in total.
Step 10: repeat steps for all letters
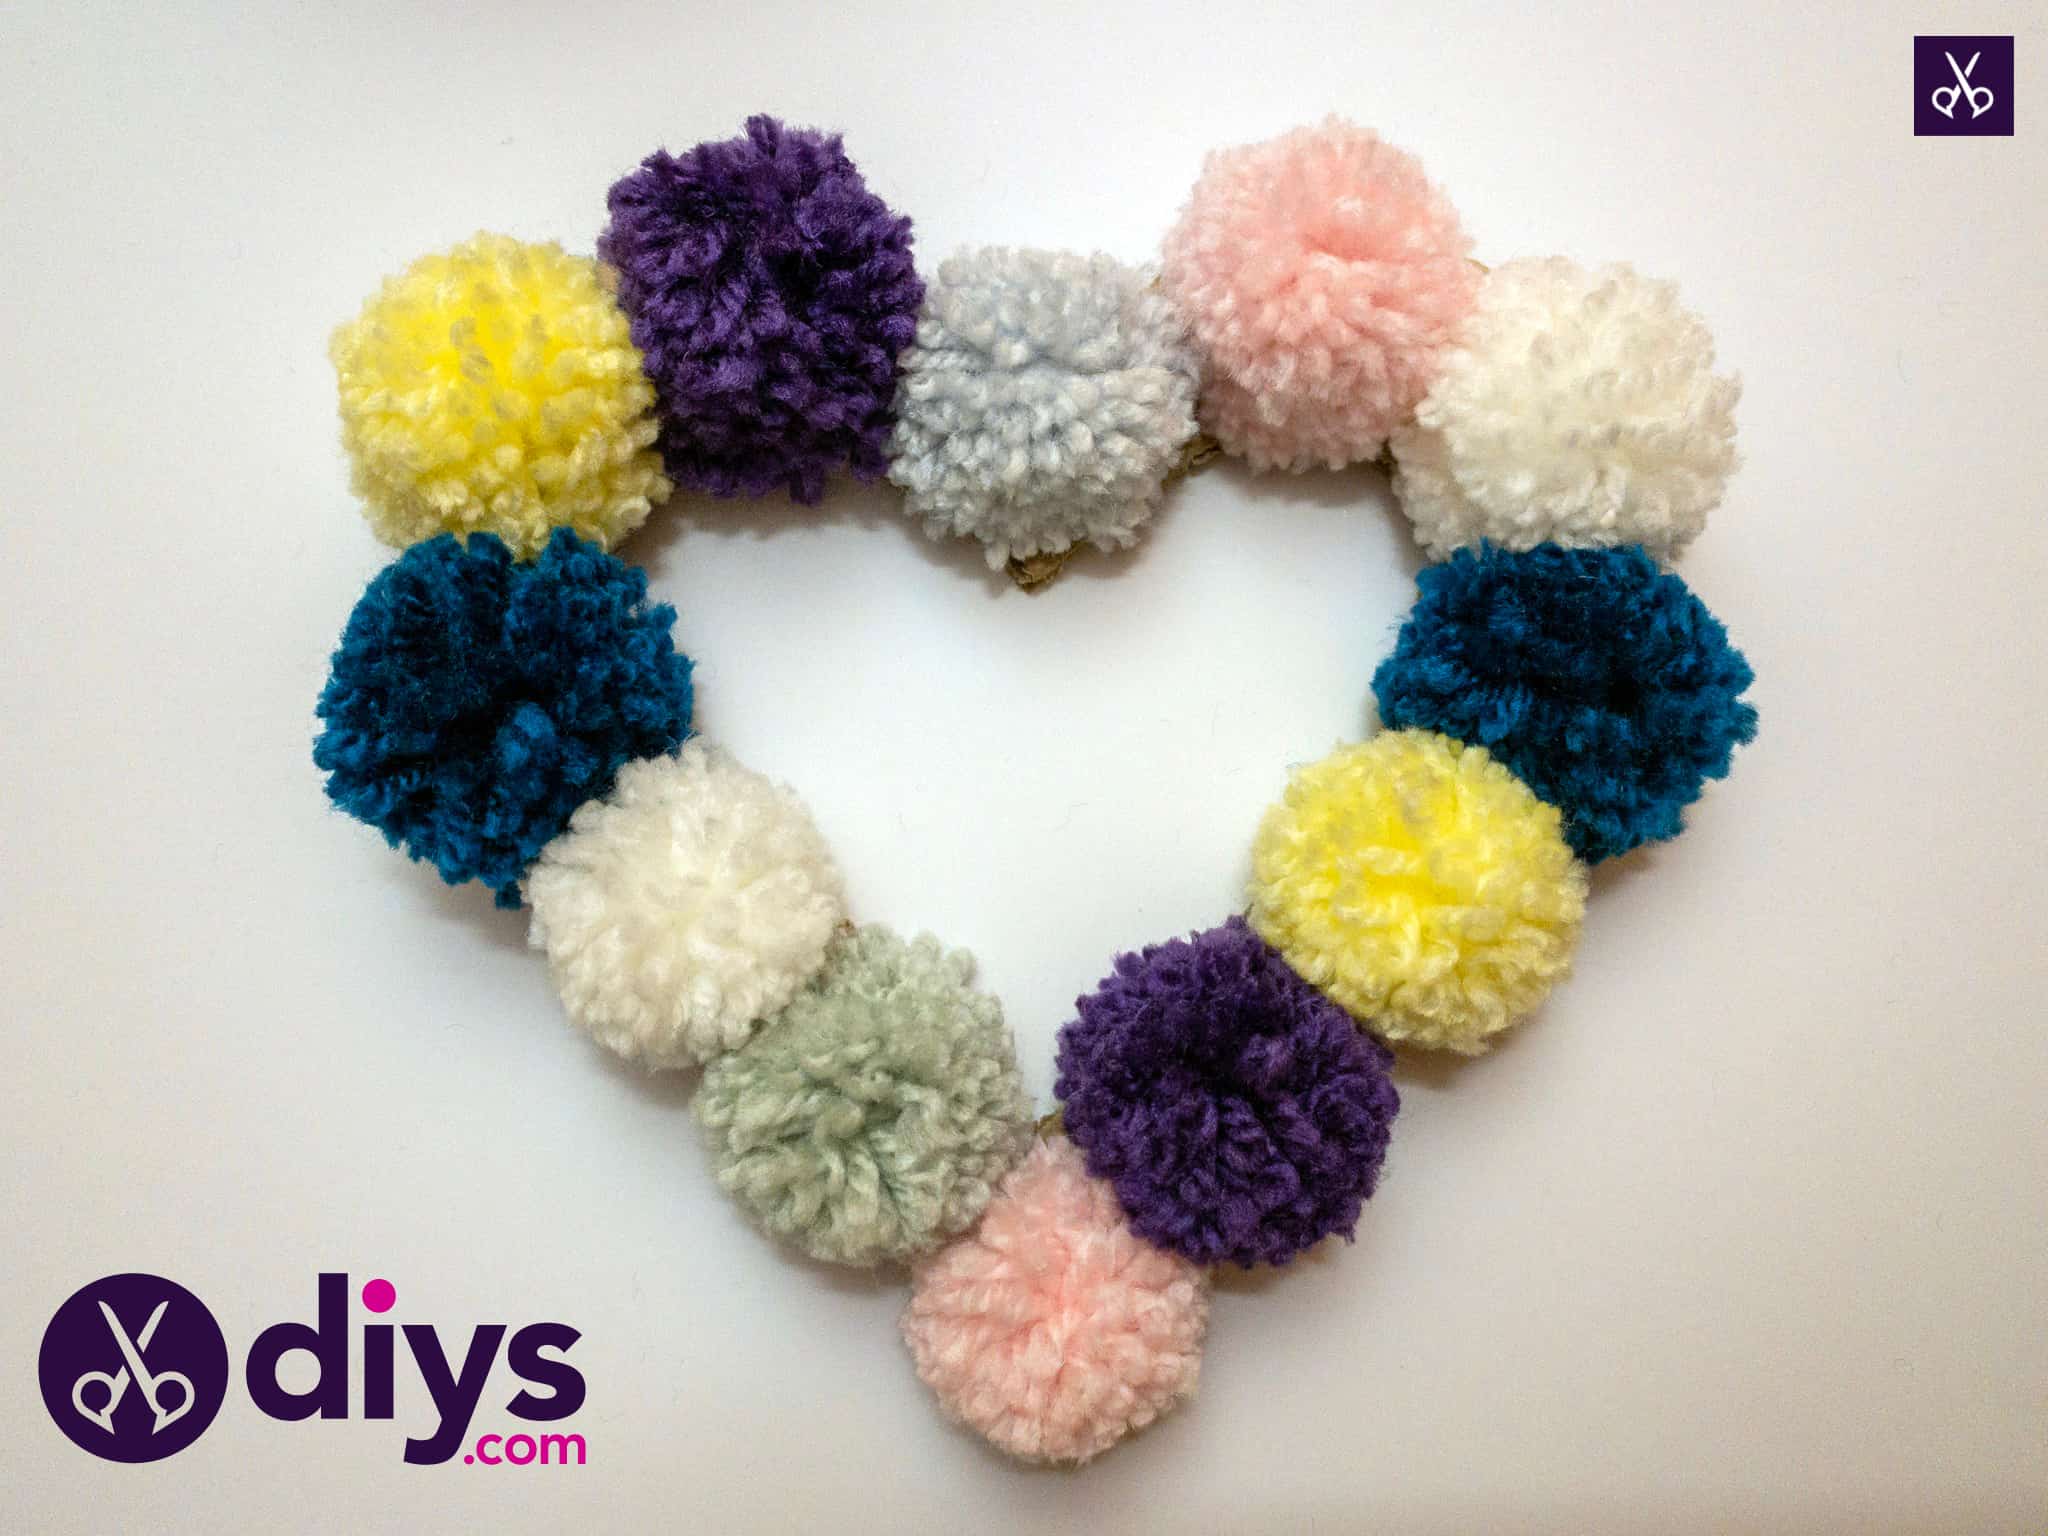
Make more pom poms in as many colours as you please. Draw out the shape of a heart and also a U in your cardboard, using the same width and height dimensions of your I to make the look of the finished piece consistent. I cut out the center of my heart to make it more consistent with the letters, and to cut down on the number of pom poms I’d have to make compared to how many I’d need if I kept the cardboard and filled the center entirely. Once your shapes are traced and cut, apply glue to their surfaces and press your yarn pom poms down until the shapes are completely filled.

You now have a full pom pom phrase that you can use as wall art, turn into magnets, or whatever else you please! Feel free to use my same basic techniques but play with the letters and sayings you make.

Just in case you’d like to try this project out for yourself, here’s a fantastic tutorial video to help you!