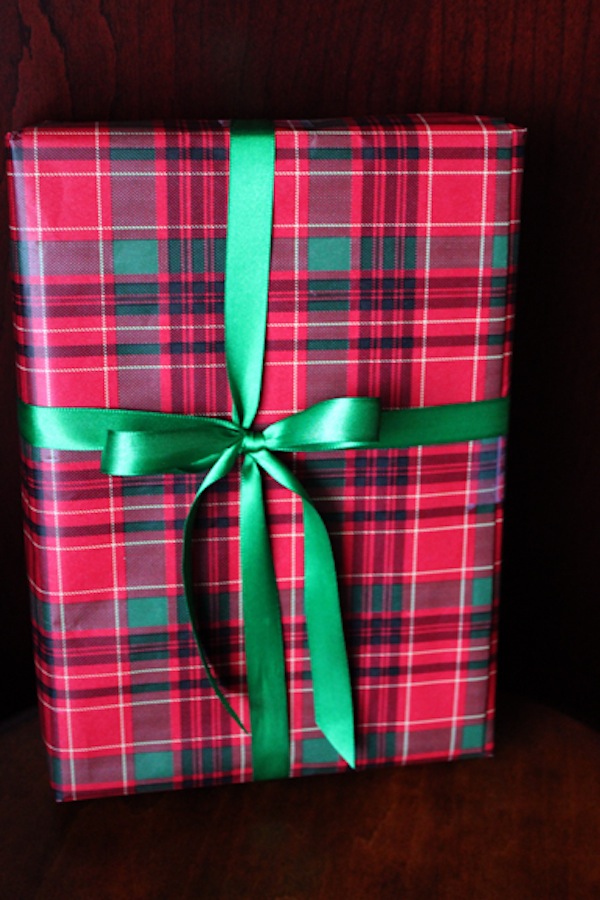
25 DIY Christmas Bows You’ll Absolutely Love
Updated on November 18, 2021
When it comes to decorations, the secret to making everything look perfectly lies in paying attention to the details, even if it means having to look up Internet tutorials on how to design the perfect Christmas bow.
In fact, that’s why we’re here today, to teach you how to make a basic Christmas bow, and then showcase 25 different variations that you can try for yourself using nothing more but ribbons, paper, or any other household supplies.
The entries from this list were chosen based on the response we got from social media, and we hope they’ll provide you with enough inspiration to create a wonderful Christmas bow perfect for your own decoration.
Keep in mind that this type of bow looks best on modern home designs, so if you’re looking for something that suits more traditional styles, then you can try other variations featured below.
One thing all of these entries have in common is ribbons being used as their base material, which means choosing the right kind will be important for your final product to succeed, especially when considering what color or pattern to use.
The good thing about these types of bows is how easy they are to make, by simply folding paper into triangles or other shapes before adhering them together.
We do recommend using thicker paper for increased durability and sturdiness though, as otherwise they might not be firm enough for larger setups like trees and may also require glue to hold them together properly.
How to Make a Christmas Bow: The Basics
If you’ve never done this before, and are actually interested in the topic of how to tie a Christmas bow, know that all you need is some ribbon, and you start out by making small loops using it before adhering them together at the center.
Remember to use thick paper if you want your bow to have great durability when using it on trees or other setups with added weight.
There are plenty of ways to create unique designs when trying out how to make a Christmas bow, like choosing different patterns and styles for each segment in an attempt to come up with one unique creation.
If you want the individual loops to have a sharper shape, then you will need to use smaller paper squares that are easy to fold into triangles.
This is especially relevant for designs where each loop is completely separate from its adjacent ones, as they won’t be held together by anything but glued edges.
These bows look great on simpler setups like wreaths and garlands where a more basic design with a single color gets to take center stage, ensuring your work doesn’t go wasted even if it isn’t very flashy.
To make the process easier on yourself, print out large patterns onto paper, cut them up along their respective lines, and trace them wherever necessary until the final product looks exactly how you imagined it in your mind’s eye.
Like we’ve already mentioned before, ribbons are great base materials when it comes to learning how to make a bow for a Christmas Tree and other setups because they can be easily attached by using hot glue.
As you can see, making Christmas bows isn’t hard at all, and with the right tools, like high-resolution patterns and solid paper, you can make one as big as you want.
The most important thing to remember is that the design has to be symmetrical but it doesn’t have to look identical at all angles; in fact, various designs work best on setups placed around a room and viewed from different distances.
Best Christmas Bow Designs for a Fancier Christmas
Trends come and go, and the same applies to bows as well, so for those of you that are interested in being as trendy as possible, know that when we did our research, we ended up with a list of 25 different entries that we organized into two sections:
- The first 10 entries are the ones everyone is talking about in 2021
- The next 15 entries were very popular back in 2020 and 2019
However, keep in mind that a source of inspiration can still give you somewhere to start from, no matter how old it is, so if you don’t find something that you like within the first 10 entries, take a look at the other 15, you might find exactly hat you are looking for!
Note: The original design was intended to be a har bow, but we adapted it to be a decorative Christmas bow instead.
1. How to Make a Christmas Tree Bow Topper

When it comes to decorating the Christmas tree, most people use either big golden stars or statuettes of doves as tree toppers, but a bow can be just as effective, especially if the rest of the tree is decorated with other bows as well.
As you can see in the image above, the topper looked very nice, especially thanks to the sparkly red ribbon, and it will make the tree look like one giant Christmas presents for everyone that’s watching it.
If you want to make something similar, you’ll need the following supplies:
- A length of high-quality ribbon (color and texture are entirely your choice)
- A few safety pins to lock the bow in place
Start off by making a loop with the ribbon, and then place another one next to it.
Secure the two loops together using a safety pin and continue adding more loops until they’re all attached like in the image above.
To make the design even more interesting, you can add small bells between each loop, but be sure not to use too many of them, or else they’ll end up weighing down your creation which will keep it from floating gracefully overtop of your Christmas tree.
2. Christmas Tree Bow Topper – Red Ribbon Topper
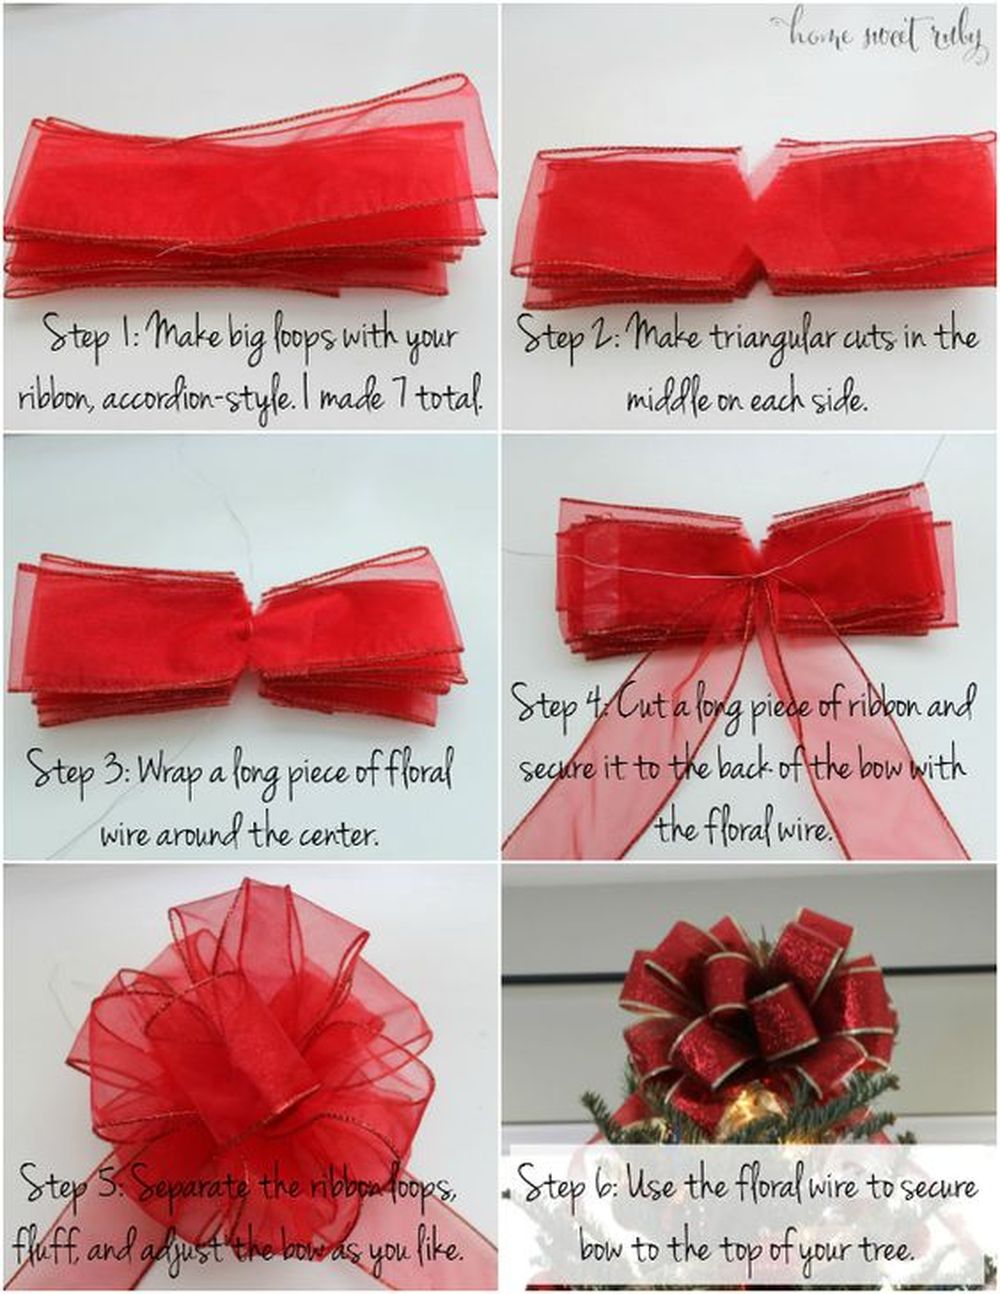
Another great bow topper design that you’ll really like is Home Sweet Ruby’s Red Ribbon topper that uses a less solid material in favor of something that’s more lacey and comes in 2 different colors.
This design is a lot more DIY-friendly than the previous one, and all you need is the ribbon itself and some floral wire, and you only need to follow these steps:
- Make loops with the ribbon as if it were an accordion
- When you’re done, create 2 triangular cuts down the middle of the layered ribbon, top the point of almost cutting it in half.
- Use the floral wire to wrap around the middle of the ribbon, and then tighten the knot
- Cut some extra ribbon, fold it at an angle, place it behind the bow, and secure it to the bow using floral wire
- Separate the ribbon’s loops to give it a fluffier, more floral look
- Use some extra floral wire to secure the bow at the top of the tree
For those of you that want to make the bow look even fluffier, simply make more loops (more loops equals more “petals”).
Additionally, if you want to make a multi-colored bow in the same style, simply glue or sew together two ribbons, and then proceed with step 1 using the mixed ribbon you now have.
3. Christmas Bow Designs – Triple Layered Bow
Decorations are all about being beautiful, and the more complex they are and the more attention you pay to the smaller details, the better.
That being said, if you’re looking for Christmas bow designs that will definitely enrich the holiday atmosphere with color, go ahead and try a triple-layered ribbon bow.
To make a bow like the one made by Jane Crafts, you’ll need silks and satins in 2 or 3 different colors (ideally, we’d choose Christmas-specific colors, like red and green), some double-sided lace, and a lobster clasp that will allow the bow to hang from the tree.
Once you have the materials, you can start by hot gluing the straightest edge of the lace to the center of one silk or satin ribbon, then continue doing so with each additional layer.
To make sure that all layers are properly glued together, just use a large paintbrush and force them into contact with each other; it’s easier than gluing individual pieces that may not want to touch.
Once you finish assembling the bow, attach a lobster clasp at its top end and you’re ready to decorate your Christmas tree (and pretty much anything else) without worrying about the bow falling apart because there’s no way such an intricate design could fail.
4. Christmas Bow Designs – Yarn Bow
While talking about how to make a bow at the beginning of the article, we stated that the most common material that you can use is a ribbon, but that doesn’t mean that you can’t try something else instead, such as wool.
To make something similar to the image above, you’ll need just two things:
- Roving yarn
- Some tape
To make the tarn bow like the one made by Flax & Twine, you’ll only need two fingers, so you don’t have to worry about having to use any knitting needles, especially if you’re the clumsy type, and once you’re done, you can use the bows as either tree decorations, or even gift box ribbons.
One thing to keep note of is that if you follow Flax & Twine’s tutorial on how to make this type of now is that you can only make it in one color, but if you want to make one big ribbon that has several different colors, make several different-colored bows and group them together as tightly as possible.
If you like things to be fuzzy and cute, then you should try this one, since it’s one of the cutest Christmas bow designs that we’ve showcased!
5. Christmas Bow Designs – Pinched Center Bow
If you’re interested in the easiest bow that you can possibly make, then you should definitely try making a pinched center bow since you don’t even have to make any loops to pull it off (ok, just one loop). We loved this one from Megoosta Fashion.
You’ll need the following supplies:
2 pieces of rectangular fabric (one large, one small)
- Pins or needles
- Some string
- A lobster clasp
The first step is to make this simple bow is to follow these steps:
- Fold your fabric in half, with the insides facing out, but leave a gap at the edge
- Invert the fabric and straighten it out then sew the gap
- Use a pin or a needle to make some pleats with the fabric
- Pin through to obtain the basic bow shape
- Sew through it and around it a few times to secure it
- Cut out a smaller strip of identical fabric, fold itin half and sew a running stitch
- Invert it when done, then wrap the smaller fabric around the center of the bow
- Sew it into place
Once you are done making the bow itself, you can either sew the lobster clasp to the back of the bow, or you can make an extra-large loop of string, both of which will allow you to hang the bow from a wide variety of places.
As you can see, the bow is simple, and the best part is that this type of bow is always balanced and symmetrical, since you’re not making any actual knots that may look clunky at all.
6. Christmas Bow Designs – Fluffy Feather Bow
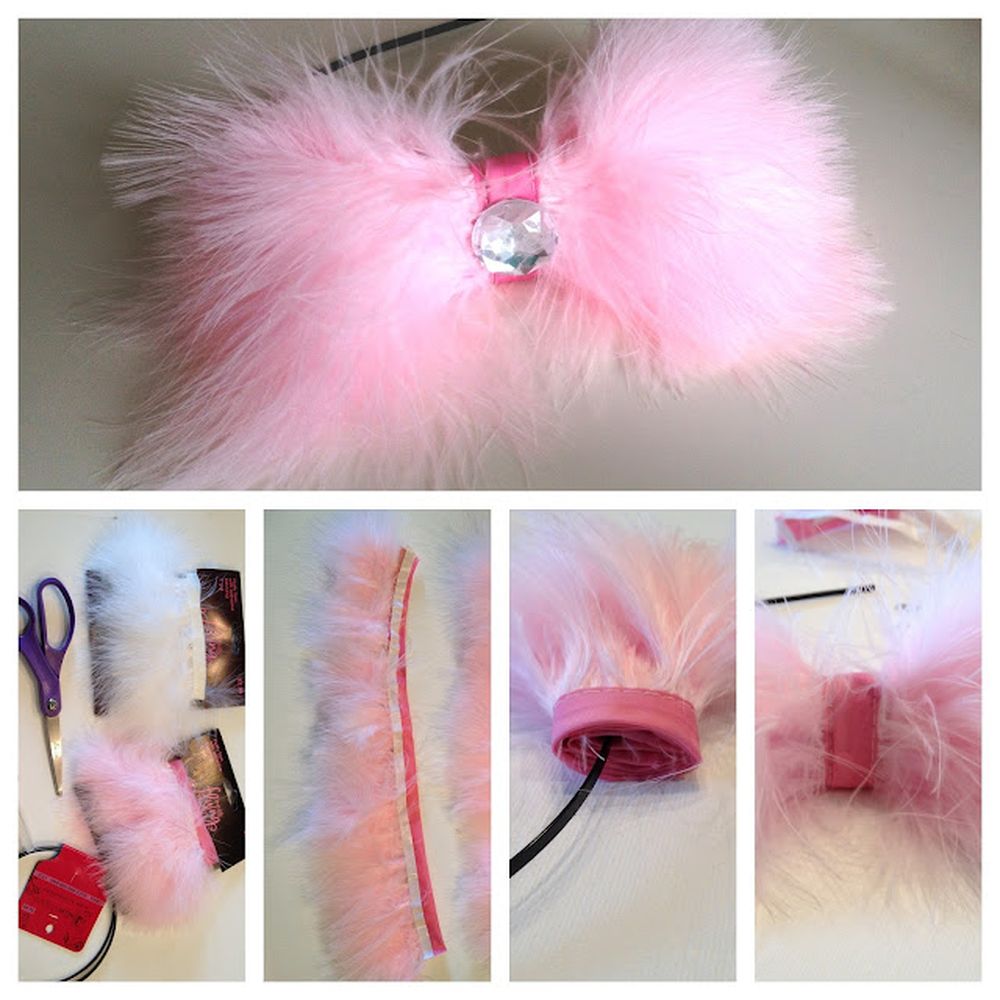
If you’re looking for even more Christmas bow designs that are from the “fluffy” department, then you’ll definitely love the fluffy feather bow, from Running with Glitter.
You’ll only need some fluffy feathered ribbon (what color you choose is completely up to you), a pair of sharp scissors, some glue, and a lot of imagination.
You can start off by cutting two even pieces of feather ribbon, removing their adhesive strip, sticking them together at their end, and rolling them up.
Then take a piece of fabric, and roll it around the place where the two rolled-up ribbons are joined to hide the seam, and you’re pretty much done.
Admittedly, this particular bow idea goes better is hung on the walls, ceiling, or drapes, since the Christmas tree itself is mostly reserved for more “solid” looking decorations.
Another reason why you shouldn’t hang these from the Christmas tree is that pets can be tempted to knock them down and try to eat them (especially if you have cats), so it’s best if you hang them in hard-to-reach places.
7. Christmas Tree Bows – Gem-Encrusted Bow

Ever since the dawn of time, man has always perceived things that are shiny as being attractive and valuable, and since we’re now talking about Christmas decorations, it’s only natural that we’d learn how to include shiny things into bows as well.
That being said, there’s nothing that’s shinier than a gemstone, so the best Christmas tree bow design that we’d like for you to try is a gem-encrusted bow similar to the one displayed above.
Sure enough, these can be easily bought from any store, and they’re pretty cheap too, but for those of you that want to make their very own gemmed bows, you could simply make a regular ribbon bow in whatever style described so far and then use some regular glue to stick the gems to the bows by hand.
Admittedly, this process is quite time-consuming, especially if the bow, the gems, or both are very small, so if you’re in need of more than a handful of them you’re better off buying them than making them.
If gems are not really your thing, you could also look or try making bows that have pearls on them, and you can usually find these at stores specialized in wedding supplies.
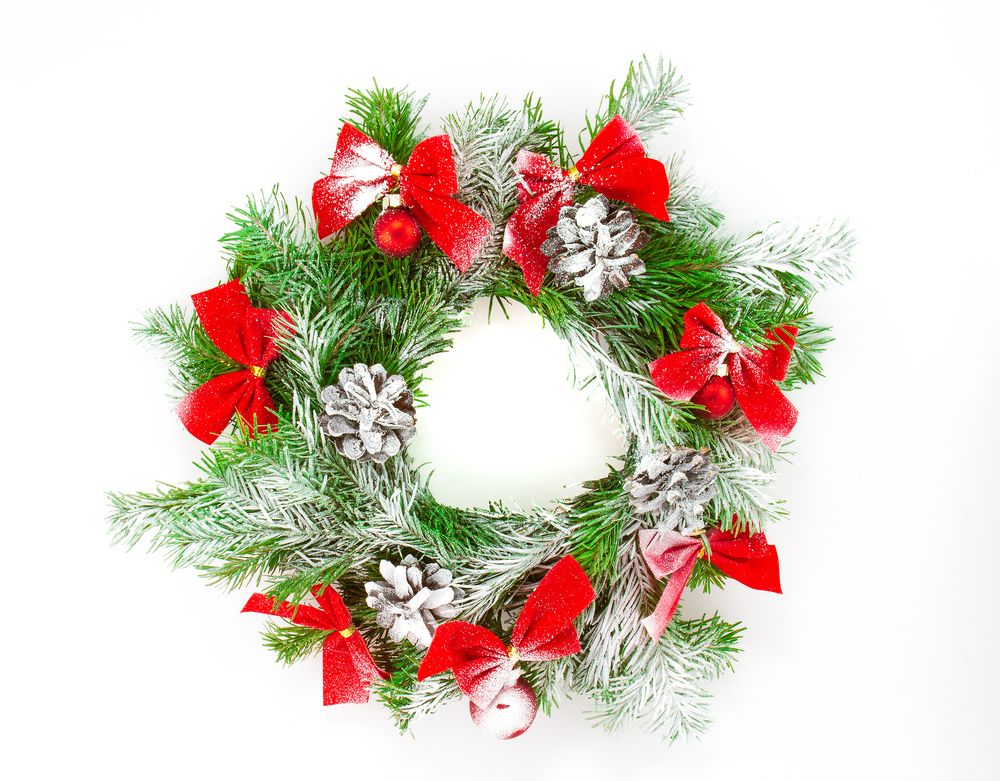
8. Christmas Bows for Wreaths – Snowy Bows
The finishing touches are the most important in any decoration, and if you’re particularly interested in making your bows look as Christmasy as possible, one way to do so is to sprinkle them with some fake snow to make them look like they’ve been outside.
These snow-covered bows work best with outdoor decorations, such as the Christmas wreath that sits outside on the front door ready to greet your guests.
For those of you that are interested in making their own snowy bows, we recommend that you get your hand on the following supplies:
- A few bows
- A canister of white spray paint
- Some white sprinkles or sparkling dust
All you need to so take your bows and spray them white.
However, make sure that only their upper portion is painted, make sure that the layer of paint isn’t solid at all, instead of aiming for it to look more like a gentle brush of paint touched the bows.
Another way to create the snowy effect is to dip a regular brush in white paint, and then gently flick it above the bows so that small white droplets cover them.
Once you’re done with the paint, simply cover the bows in white sprinkles and sparkling dust, and you’re pretty much done.
9. Red Christmas Bow – Veiled Bow
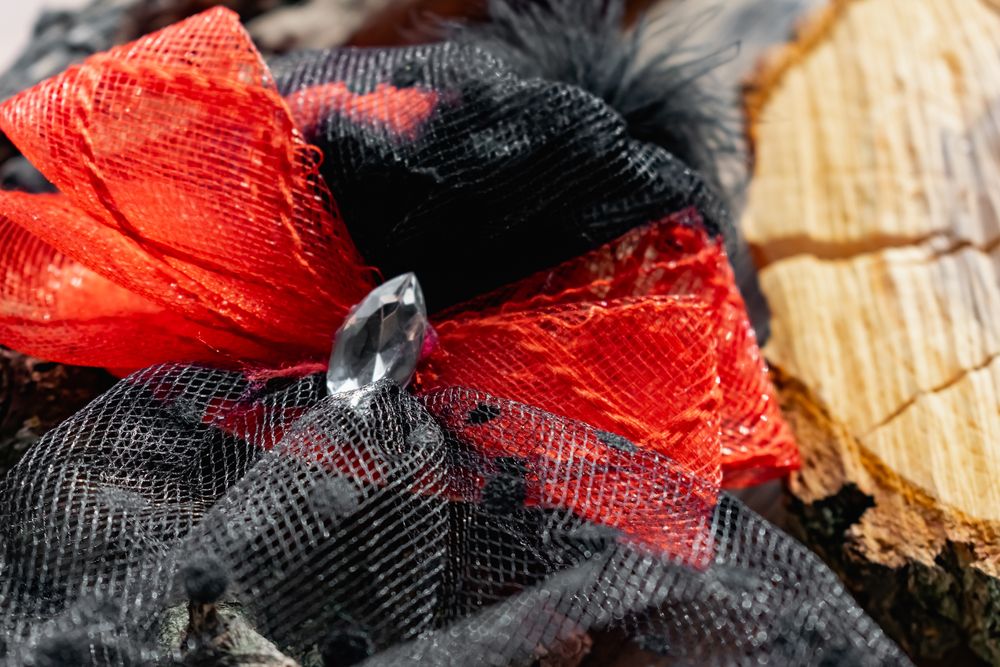
Veil material is very popular during the holidays, and even during special occasions like weddings and funerals, and it’s been a very popular choice for making bows for a very long time as well.
That being said, if you want to try out something new and elegant this Christmas, you can go for a red Christmas bow made out of veil material.
Sure enough, you don’t have to limit yourself to using just red, but let’s not forget that red is the go-to color during the winter holidays.
However, if you want to mix things up a bit, you can make a bow using both a red and green veil or a red and gold veil.
Another neat way of making the bow more interesting is mixing up the materials, such as making a bow made out of a red veil with a green satin ribbon base.
These kinds of bows have the advantage of not being too Christmasy, so even when the holidays are over you can still use them to decorate your house, or you can make some minor adjustments to them and turn them into hair bows instead.
10. Christmas Gift Bows – Tulle Flower Bow
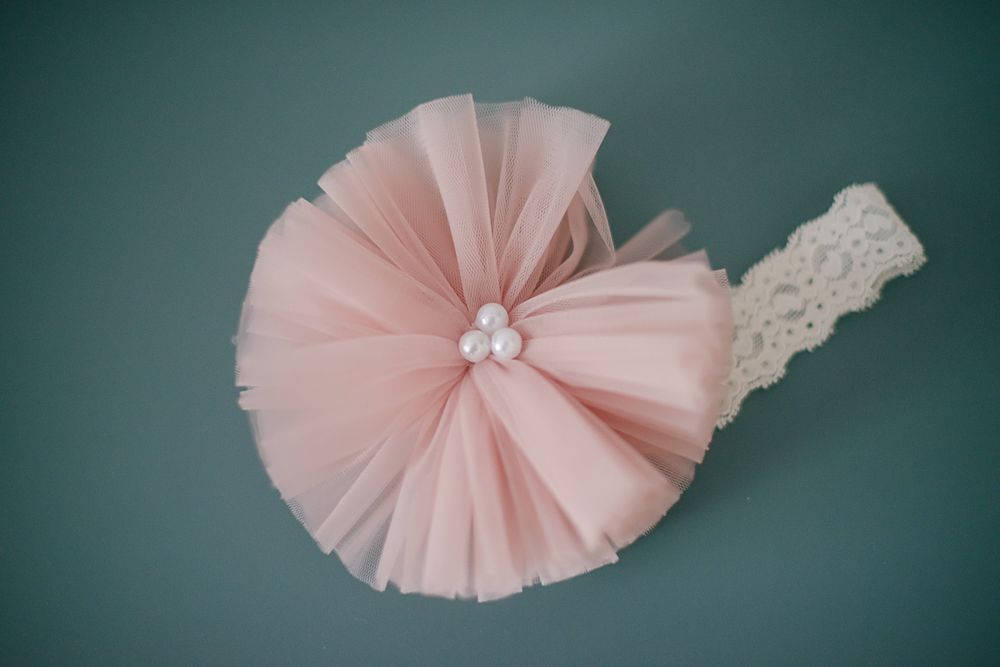
This last entry is a favorite among the girls, and it’s the tulle flower bow.
As you can see from the picture above, it looks less like a bow and more like a flower made out of pink fabric, and that’s precisely what makes it so popular.
To make something similar, you’ll need the following supplies:
- Tulle
- A lobster clasp
- A pair of sharp scissors
- A cardboard wrapping frame
- A glue gun with plenty of glue sticks
All you need to do is cut a piece of cardboard and wrap it with layers and layers of tulle. Once done, all you have to do is attach the lobster clasp on one end and your creation will be ready.
The great thing about this design is that you can cover virtually anything in tulle fabric, including Christmas gift boxes or ribbons. Furthermore, you can also create small bows using just a few pieces of tulle material if that’s all you’ve got left.
More Amazing Christmas Bow Designs
If you’ve reached this point of our article and concluded that none of the most popular Christmas bow designs were to your taste, then we’d like to invite you to check out these other 15 entries, since they’re all classics anyway.
11. Perfect Christmas Bow
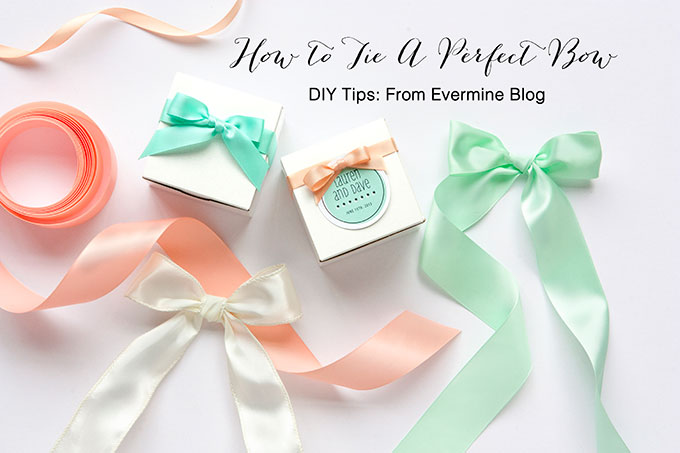
Perhaps you’re looking to make a simple but beautiful bow in the classic shape and style, but you just want to do it really well? Then Evermine Wedding has the perfect tutorial for you! There’s nothing wrong with giving gifts that are traditional in the style. In fact, those are often the most beautiful ones! When you’re done practicing this technique, your bows will be neat, clean, and pristine, no matter your colour or scheme.
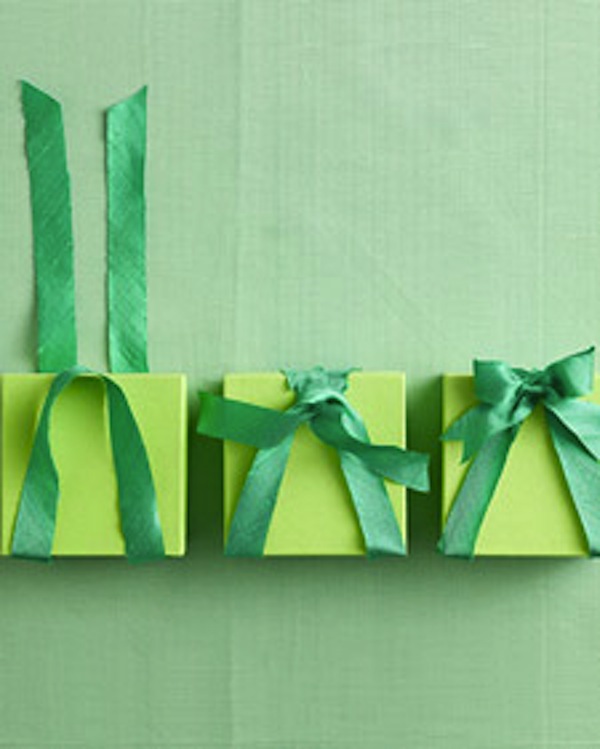
12. Double Wrapped Gift Bow – Cool Christmas Bow

Do you love the look of the simply tied bow above but you want to display the gorgeously coloured ribbon you’ve chosen even more? Then try this double wrapped style from Chatelaine! This way of tying ribbon uses more length and lets the colour shine by wrapping across the gift from underneath on each side.
13. Pom Pom Christmas Bow Present Topper
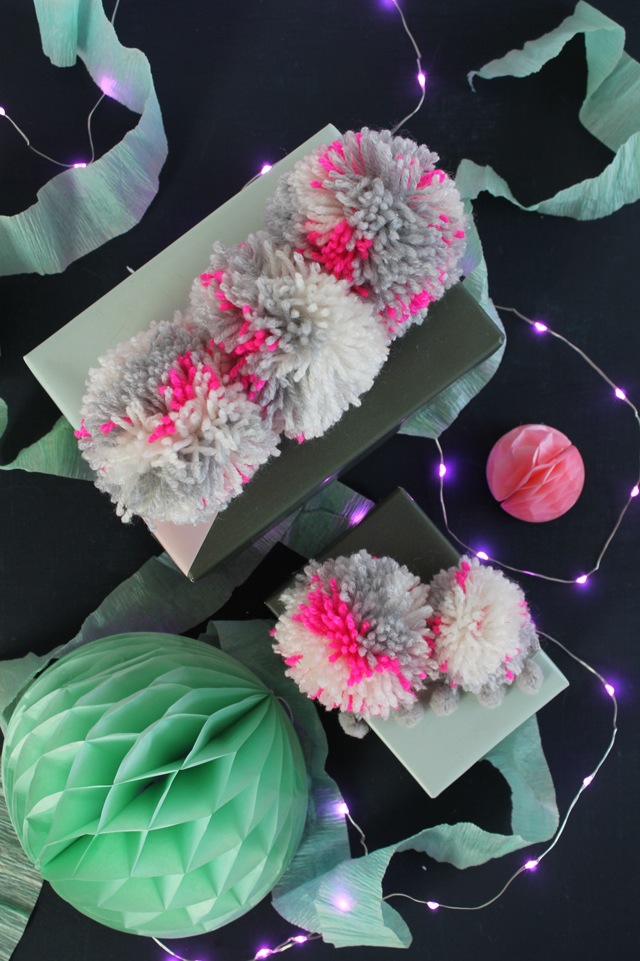
Are you and the friend you’re gifting to both avid fans of knitting, crochet, or other yarn based crafting techniques? Maybe you’re just a fan of fun, fuzzy textured stuff? Then this is definitely the gift topper for you! It’s not technically a bow, but we couldn’t help putting these awesome pom pom gift embellishments on the list. See how they’re made on Lotts and Lots!
14. Mini Christmas Bows

Maybe your idea of a well wrapped gift is one with small, subtle detail rather than one with big, eye catching bells and whistles? Then these tiny little bows created in each corner of a gift are something you should definitely try!
Martha Stewart Weddings guides you through the process of wrapping ribbon around and under a gift box, similarly to how you would have in the double wrapped design above, but tying four mini bows on top instead of just one.
15. How to Make a Christmas Bow
Do you love the look and style of a simple, classic bow but you’d like to change at least some aspect of using ribbon up a little bit? Then maybe it’s the part that wraps around the gift that you should get creative with instead of the actual bow itself?
Martha Stewart Wedding has the perfect alternative for you. Check out how they make the bow rise to the top of the gift in a pyramid (or a Christmas tree) shape!
16. A Tiffany Bow – How to Tie a Christmas Bow
When you think about gift bows, do you automatically picture the perfect, skinny little bows that you see in the holiday windows at beautiful high end stores like Tiffany’s? Well, you can definitely mimic that same bow style, with it’s long, pretty tails, by following this easy tutorial from Fashion Meets Food!
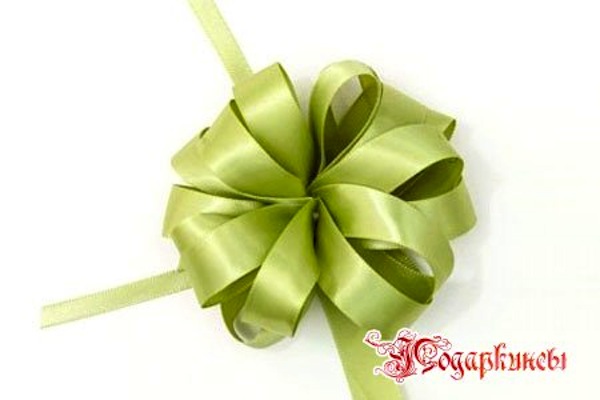
17. Triple Color Bow – Beautiful Christmas Bow
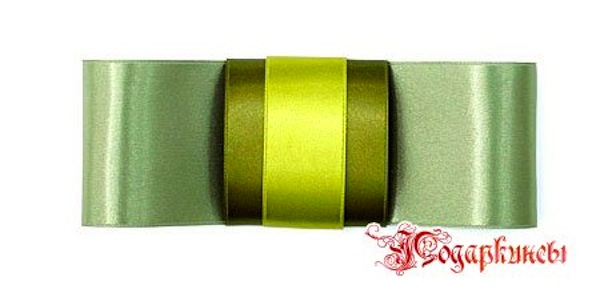
Maybe your color scheme follows a fairly monochromatic style but you still want to make sure it features varied shades in your main color? Then this triple color bow is the perfect gift decor project for you! Choose ribbons in three different greens (blues, reds, purples, or whatever color you’ve chosen) and wrap them in a layered way around the middle. It’s easier than it sounds! Check it out in more detail on Podarkinci.
18. Fork Bow – Easy Christmas Bow
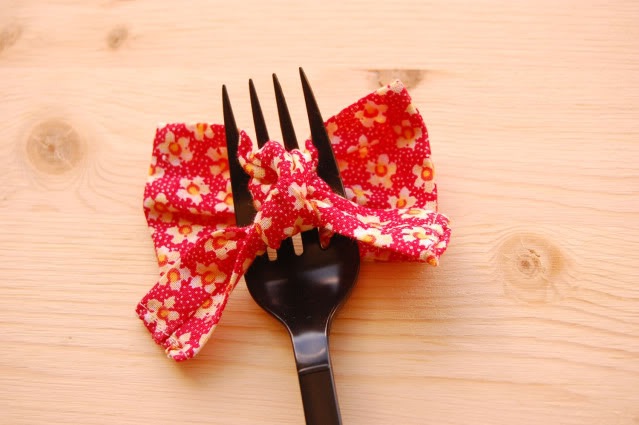
Have you tried all kinds of bow tying techniques that just didn’t work for you, but you’re still intent on getting that classic look? Then try this little trick from Zakka Inspired instead of struggling with just trying to do it with your fingers over and over again! They teach you how to intertwine your ribbon around the tongs of a fork in order to get the right shape.
19. Massive Christmas Bow

All of these cute, classy little bows are great, but maybe you’re looking for something a little bit more glamorous and eye catching? Then check out how Modcloth used a long length of thick ribbon to tie a bow with countless loops! We love how, the more loops you create, the more the bow starts to look like a big poinsettia flower.
20. “Store-Bought” Christmas Bow

Do you love the look of the classic stick-on store bought bows but you’d rather make your own? Maybe you’ve got a large length of thick gift ribbon you’ve been hoping to use up, or perhaps you’re just feeling extra creative and DIY today. Well, making your own “store bought” gift ribbons is a lot easier than you might think! Get the full details on how to wrap and fold them on A Life of Geekery.
21. Ruffled Christmas Gift Bow
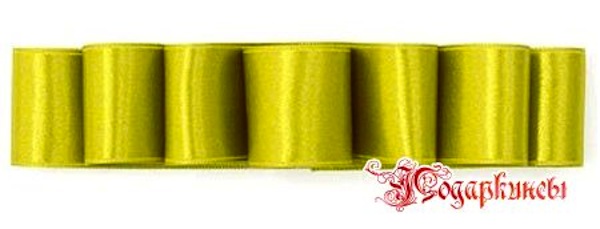
Are you looking for something a little more unique when it comes to DIY gift wrap but still kind of classic rather than gaudy? Then try making a gorgeous vertical standing “ruffled” bow! Podarkinci guides you through the process of making a “bow” that arches over and over in a bigger arched shape, creating adorable little loops across the top of the gift.
22. Christmas Bows for Wreaths
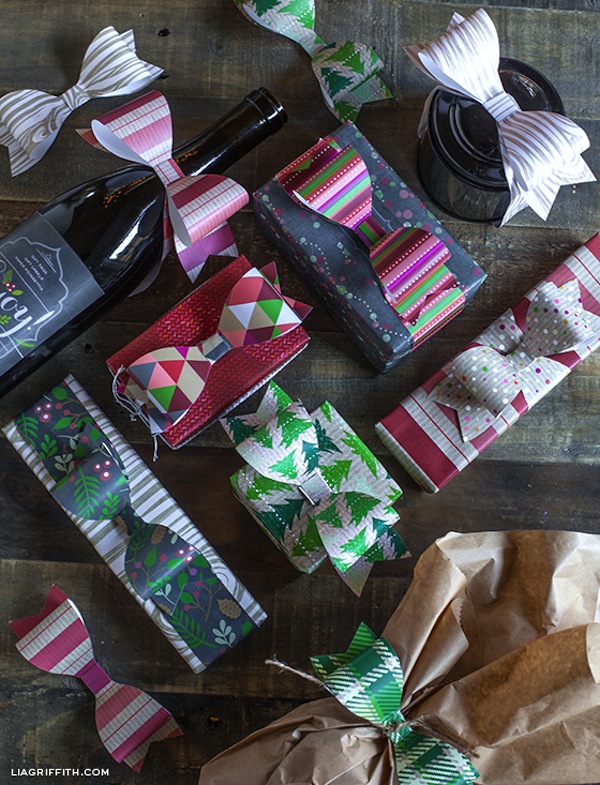
Do you have a whole collection of decorative paper or seasonally themed gift wrap but no ribbon or gift ribbon? Don’t panic! You can still make adorable bows to top all of your family and friends’ Christmas gifts with, and these ones might be even cuter than the other kinds we’ve been talking about. Check out how Lia Griffith cut and folded these adorable little bows.
23. Christmas Tree Bow Garland
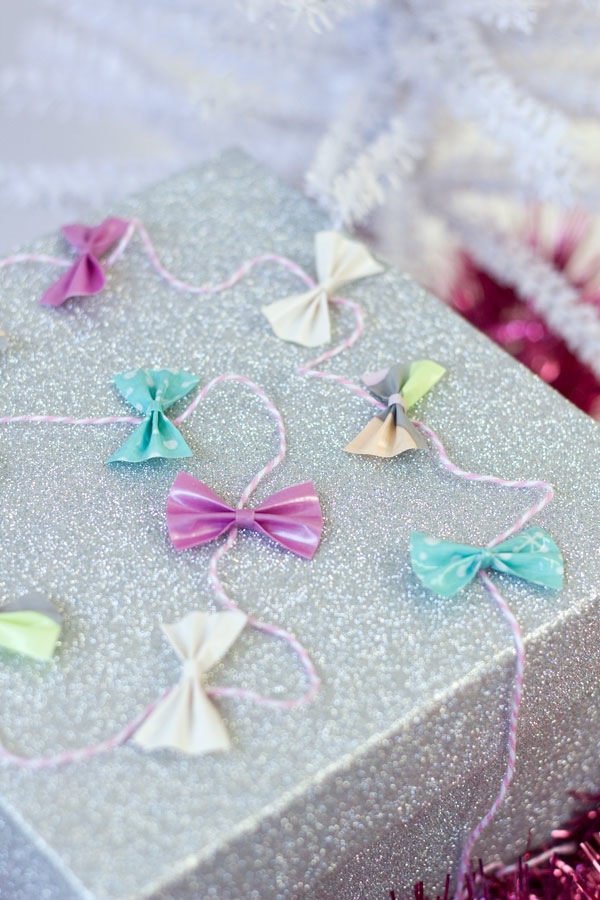
Are you looking for something really unique and a lot more whimsical than specifically holiday-themed? Then you definitely need to check out these adorable little bows strung together on a colored garland! Studio DIY shows you how to make each little piece from duct tape, as well as how to attach them along a cute little string and wrap them around a gift in a playful way.
24. Classic “Gift Gow” – How to Make a Christmas Bow
Do you love the classic shape of the kind of gift rosettes that you’ve probably seen on Christmas presents in TV shows and movies? Then you definitely need to check out this brief tutorial on Podarkinci! They teach you how to wrap your own adorable looping rosette shape out of silk or gift ribbon gathered and fastened in the centre.
25. Brown Paper Bag Christmas Bow
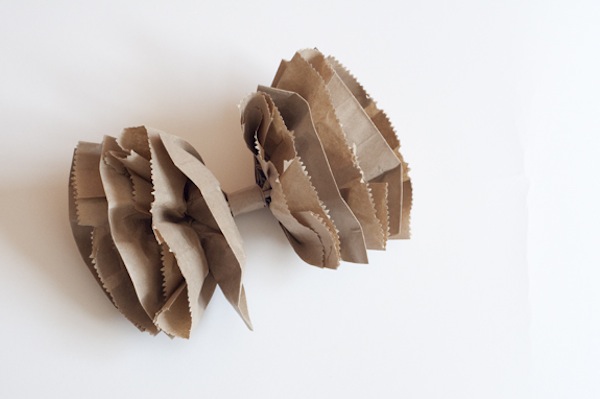
Are you having an awesomely affordable thrift shop Christmas and trying to upcycle as many things as you possibly can, right down to the gift wrap? Then paper bags are about to become your best friend this season! Just because you’re using unconventional materials to adorn your gifts doesn’t mean you can’t fasten adorable bows on top that totally follow the theme. Check out how these great little paper bag gift bows are made on The Bottoms up Blog!
Best Christmas Bow Designs: Closing Thoughts
As you can see for yourself, making a Christmas bow isn’t that hard at all, just as long as you have the right supplies, a bit of guidance, and just a bit of practice.
In fact, you’ll notice that after making just 2 or 3 of them, you won’t have to follow the instructions at all anymore, and you’ll be on your way to making bows to decorate your entire house, not just the Christmas tree.
All in all, we hope that our article served its purpose and that at least one of our 25 entries managed to inspire you with a new idea that you can use to decorate your house for the holidays.
For more great articles featuring ways to make your Christmas all the more festive, don’t forget to check out some of our other Christmas-related articles, since we’ve covered a wide variety of topics, from meal recipes to decoration ideas.
Not only that, you can help make this article better by leaving a comment featuring new suggestions that are worth adding, or by sharing it with your friends and family.
In other words, we’ll see you next time, and Merry Christmas!