How To Make A Botanical iPhone Cover
Updated on November 19, 2025
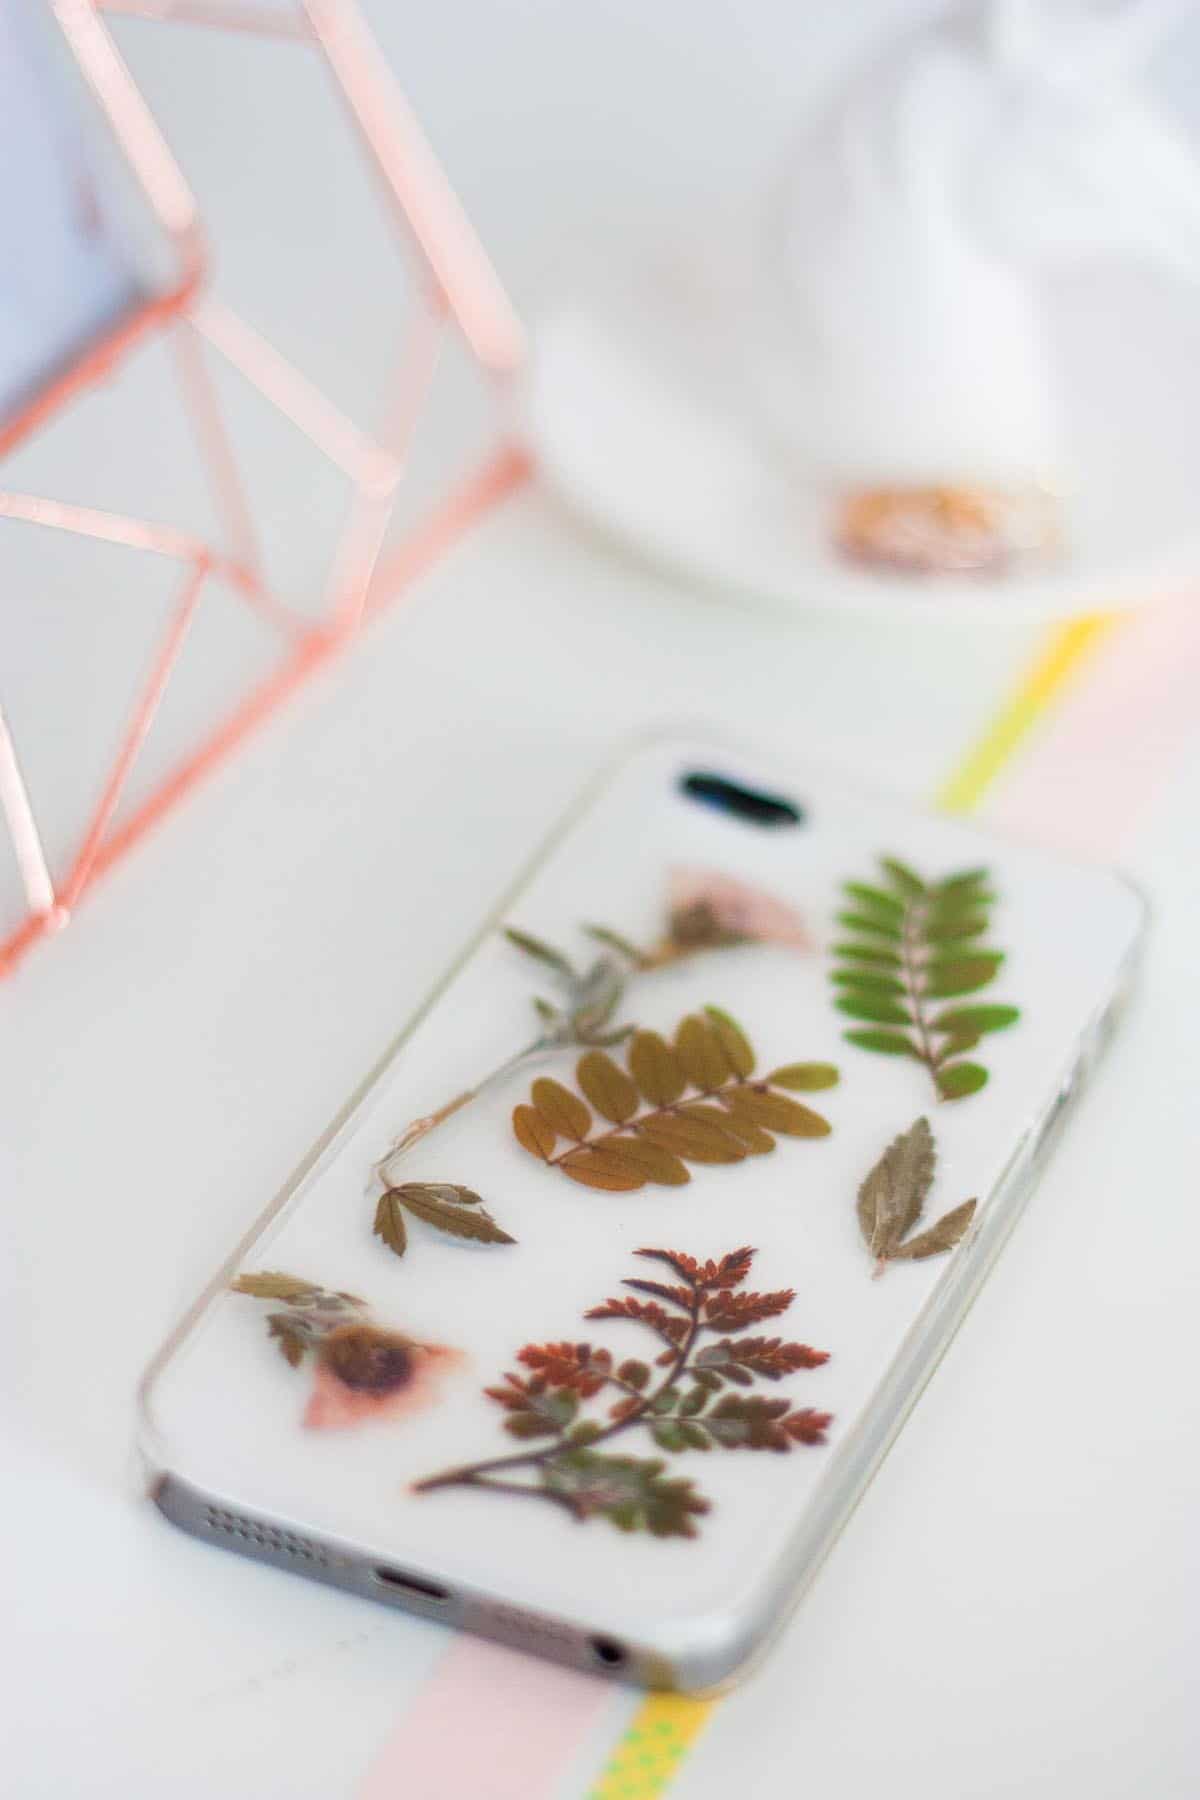
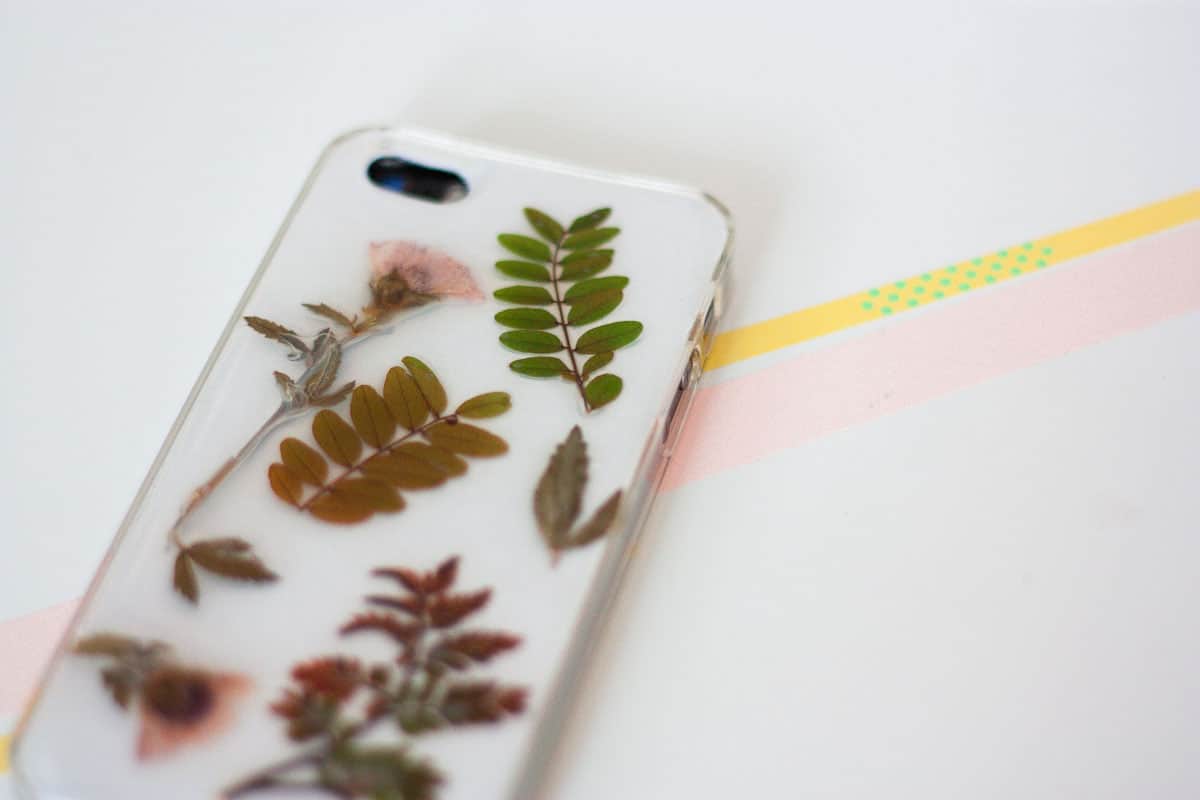
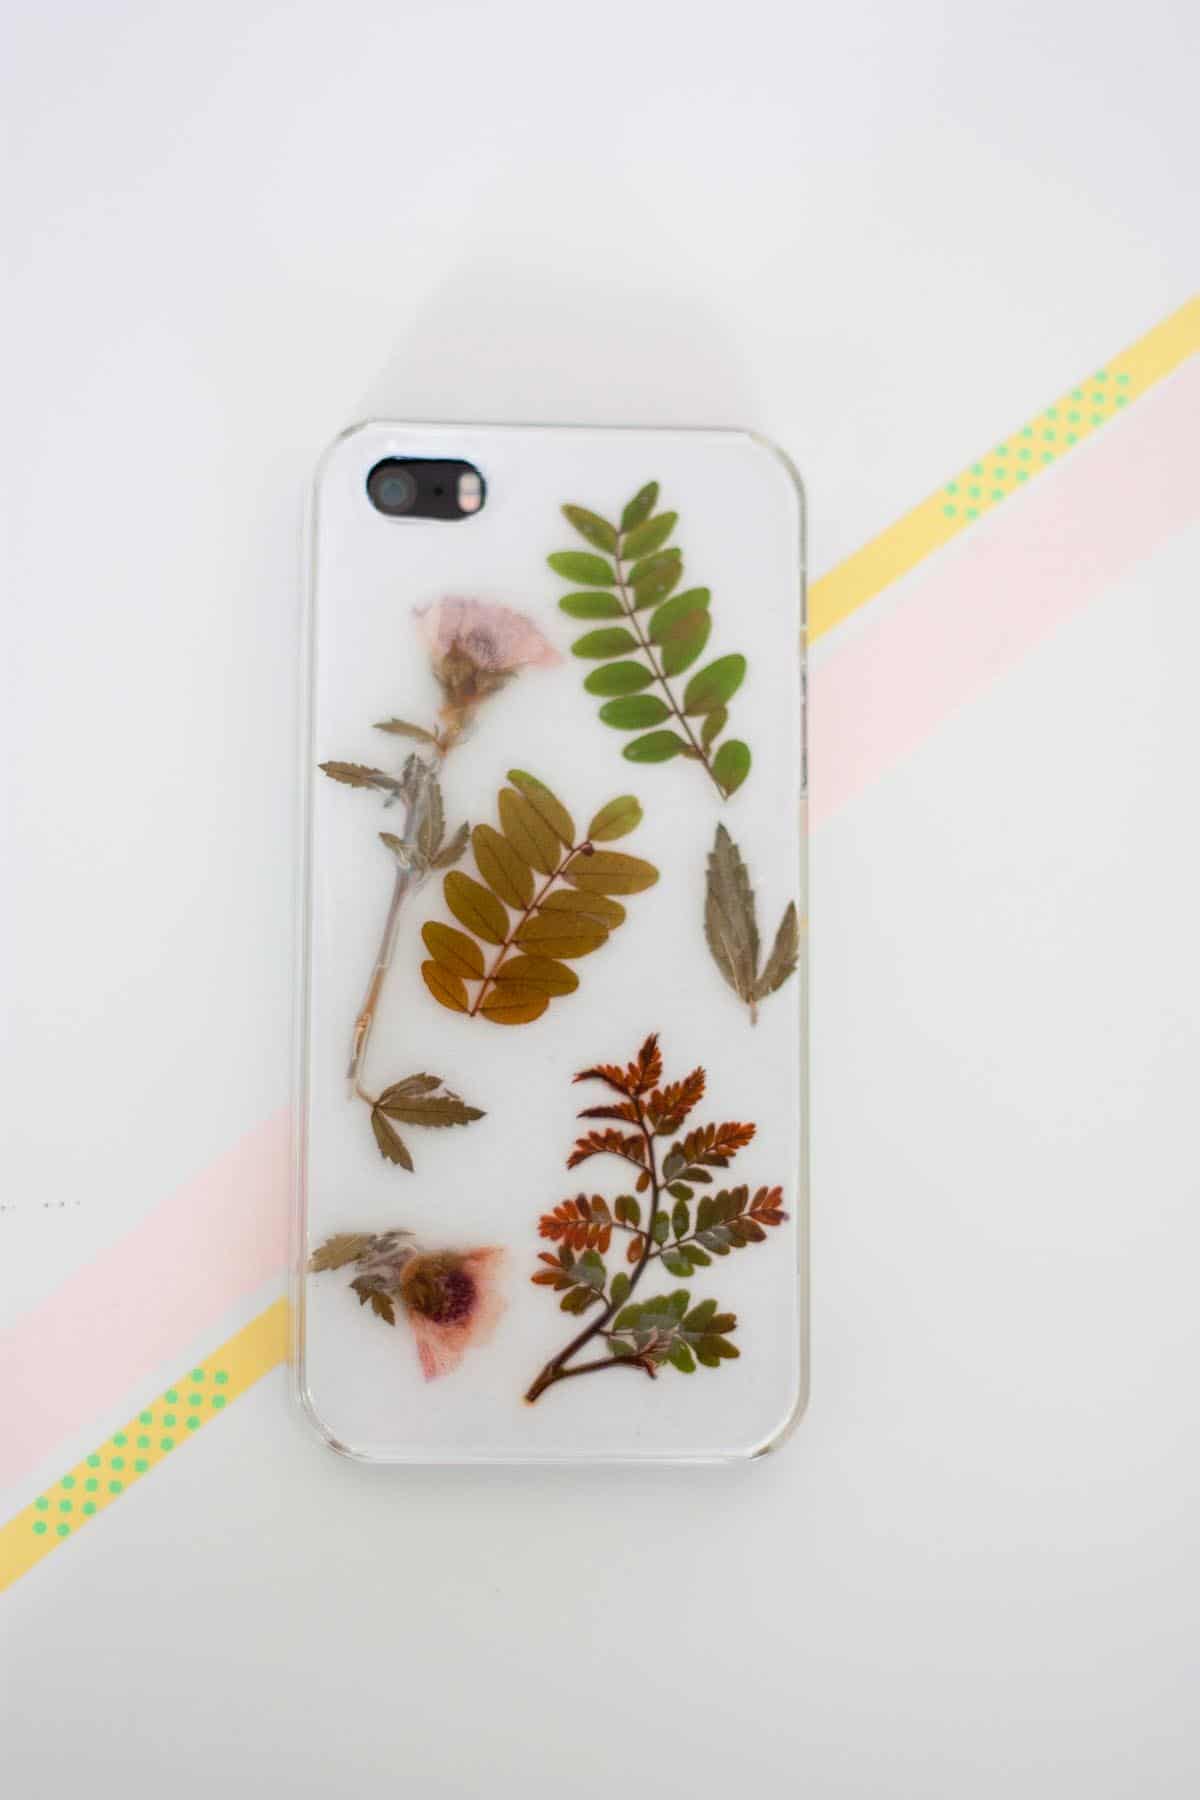
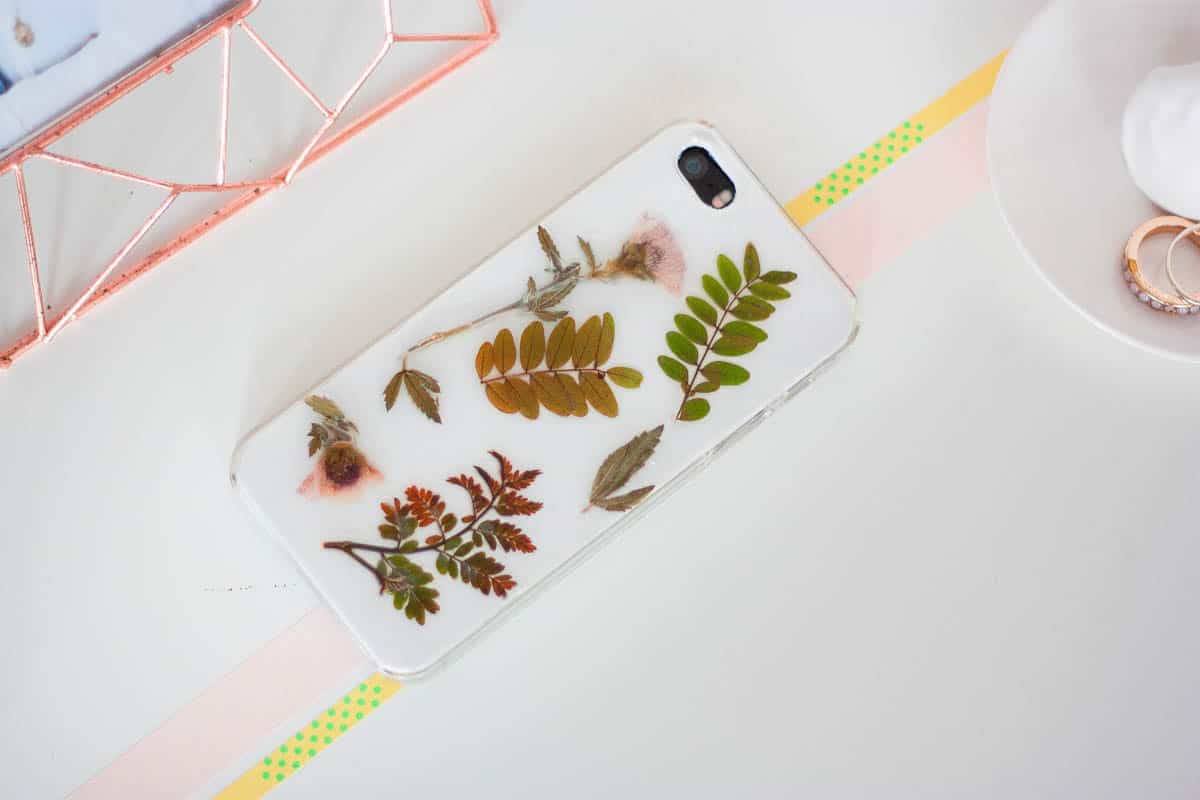
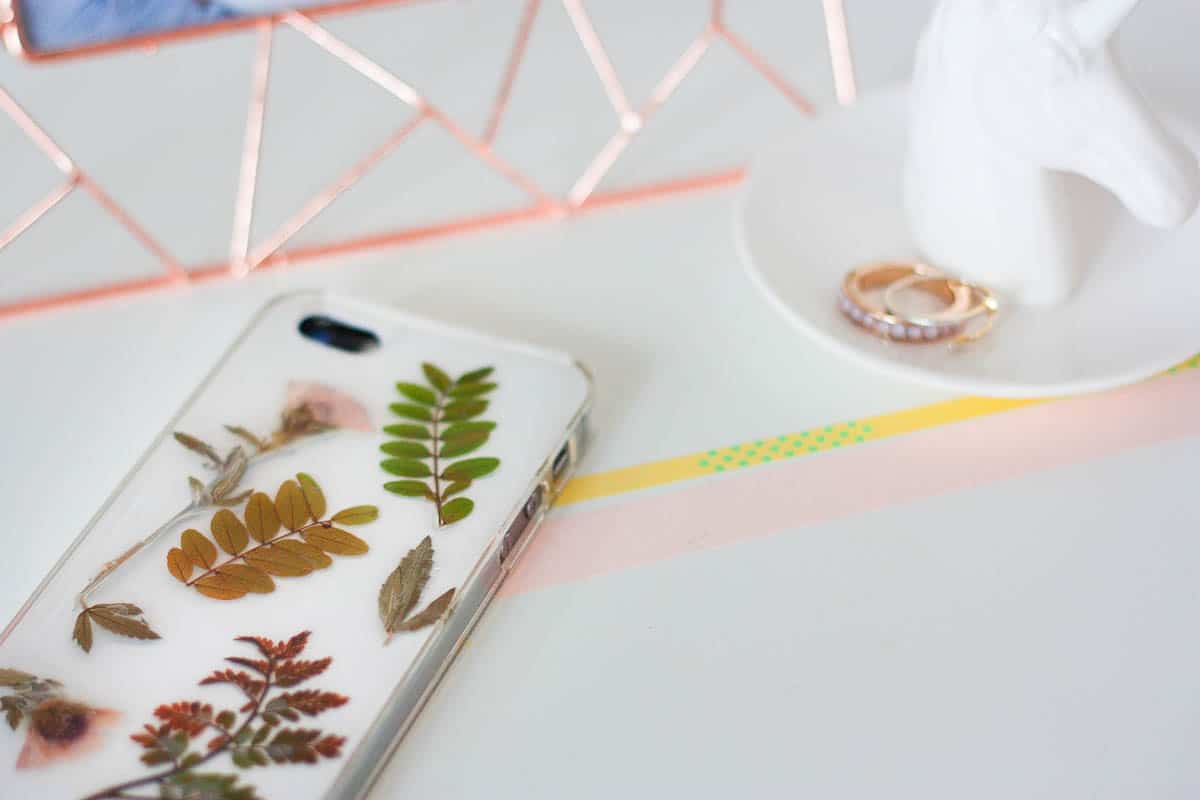
An iPhone cover made with natural parts of your place, picked here and there maybe while having a walk: this is exactly how the idea of this tutorial came to my mind. There couldn’t be a cover more personalized than this: it will be really just yours! A little tip I can give you is to choose really small leaves with a particular shape or layout and if you want flowers they should be really small. Avoid placing parts of twigs because they’re thick and would prevent your phone getting into the cover. Depending on the original color of your phone, you can either choose to leave the leaves overlapping or just add a white sheet of paper on the back to make them more stand out, just like I did. Let’s make!
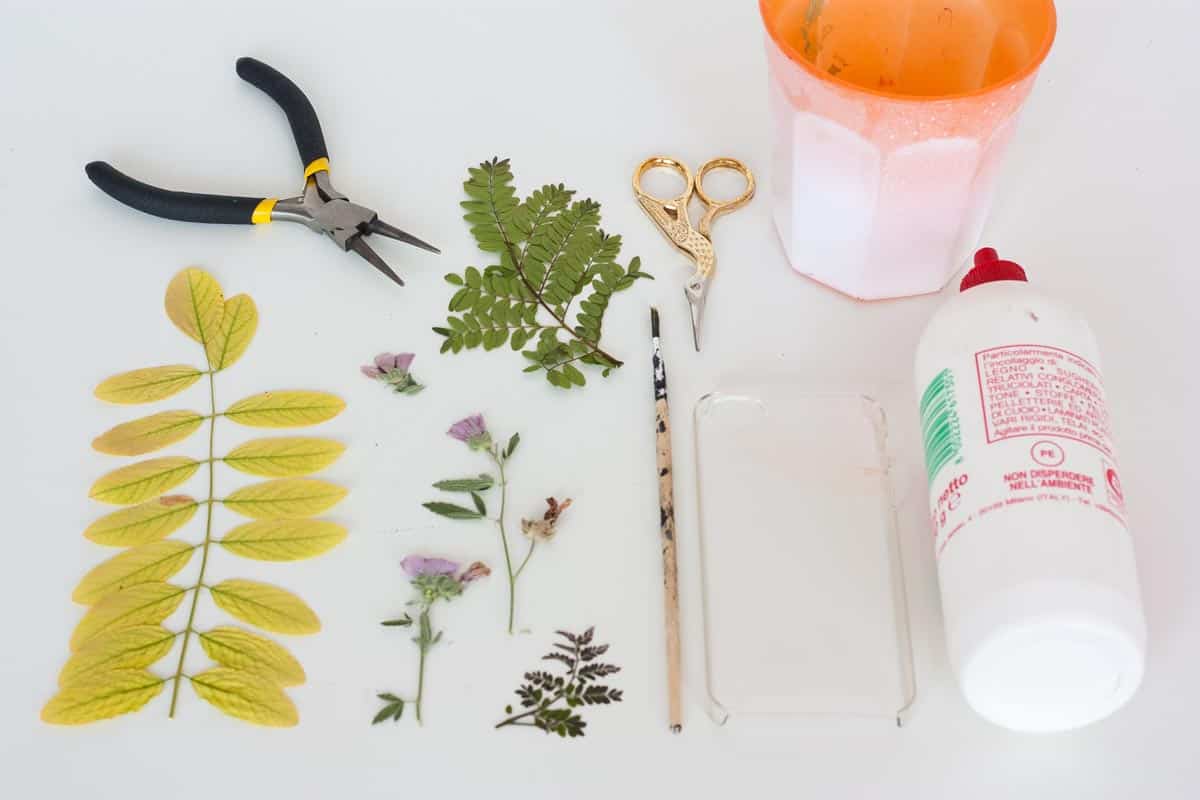
Supplies
- transparent iphone cover
- vinyl glue
- scissors
- tweezers
- botanical elements found in your area
- brush
- cup
1. Your botanical elements should have been left for at least 1 week between the pages of a book to get flat and dry. Take them out of the book, play around with different layouts on the cover and cut the parts that you like most. Make a photo of the layout so you can recreate it in the next steps.
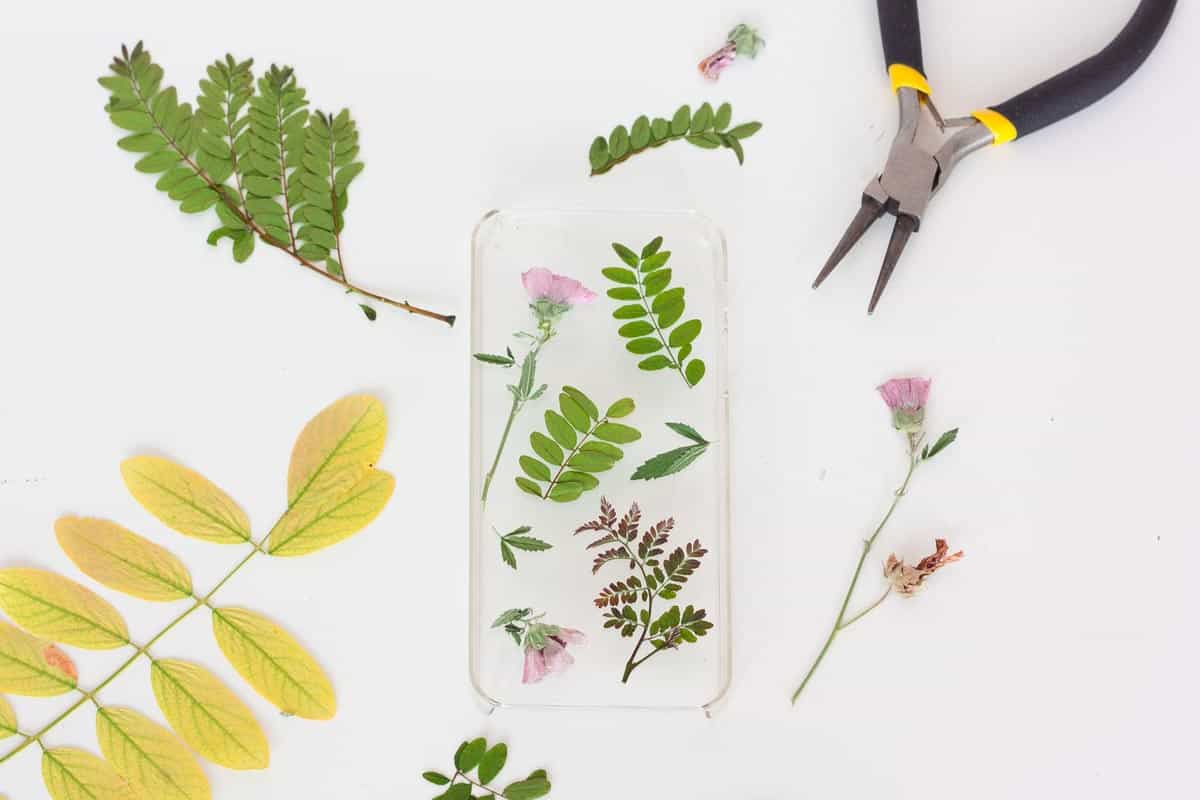
2. Prepare a mixture of 50% vinyl glue and 50% water, well stirred. Turn the cover upside down and start painting it with a little layer of glue so that it becomes sticky. Now place the botanical elements on it helping yourself with the tweezers and recreate the design you chose before. Let dry a few minutes so they will stay in place.
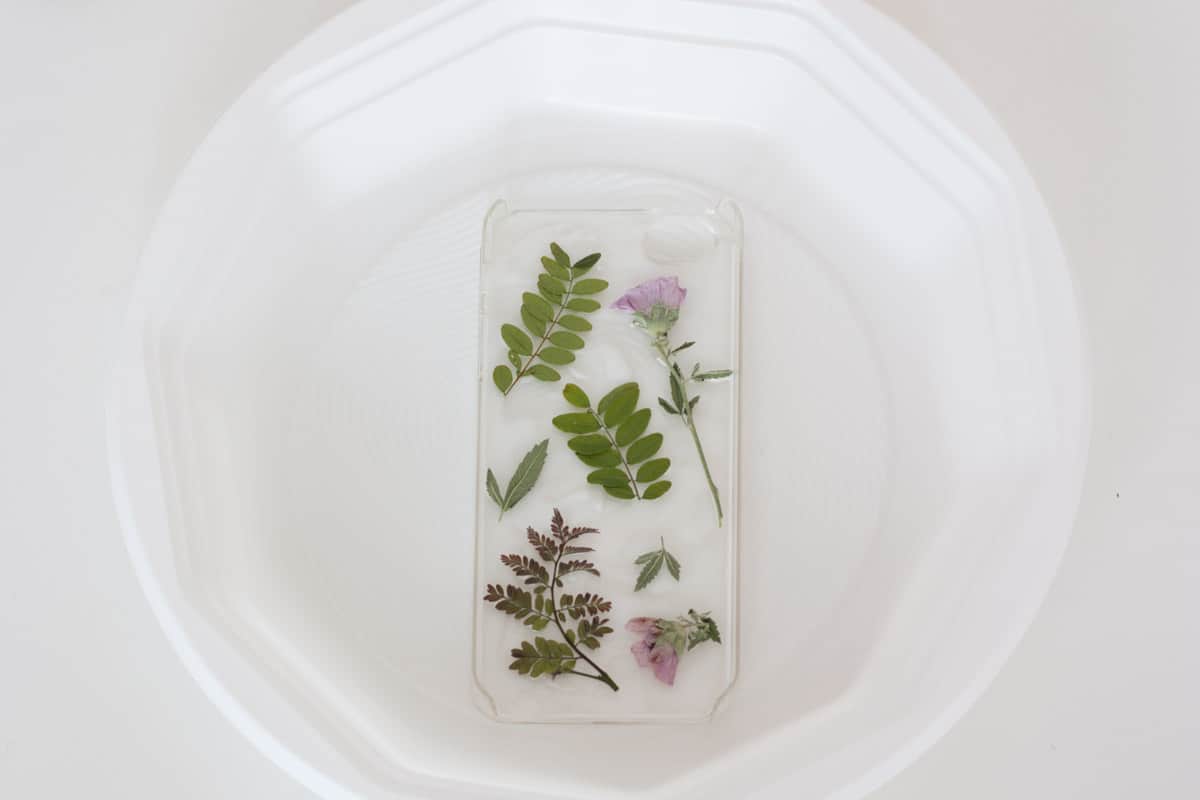
3. To avoid spilling glue on my desk I decided to work inside a plastic dish. Next step is to fill the cover with glue, pouring it very very slowly and helping yourself with the brush if your leaves start moving around. Make sure you fill it but it doesn’t spill out of the cover’s borders, or you’re going to stain the external part with glue (which means clean everything and start over from step 1). Leave it to dry for at least 48h. It will take something like 3 days before the yellowish of the glue becomes transparent, so don’t panic in the beginning.
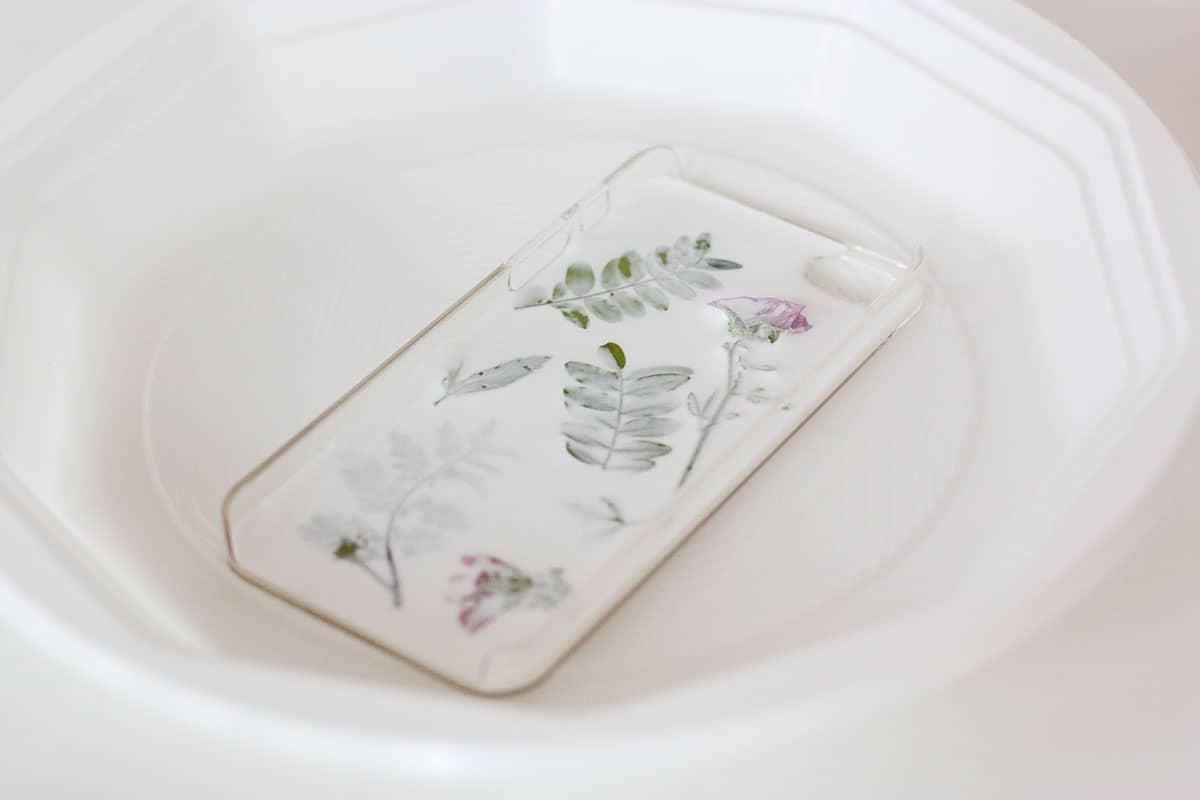
As you can see from this picture, my leaves are well covered under the glue, even if initially they tend to come up and float: with the brush, push them gently back down. The glue changes slightly the color of the elements, so some leaves turned brown and another that started out brownish turner red: cool! In the end, I think the result is naturally wonderful and you have the chance to bring a little piece of your land always with you.