Common Artichoke Growing Problems And How To Deal With Them
Updated on November 24, 2021
Some people can’t get enough of artichokes. They come up with the most outlandish recipes just so that they can unearth the hidden flavors and aromas of this delicious veggie. Others wouldn’t touch it with a long stick. But that’s alright. It’s hard to get foodies to agree on anything these days, let alone a garden vegetable.
If you have tried to grow artichoke in your garden, you probably have come across many issues that reduced the quality and quantity of the crop. Some of the common artichoke growing problems include overwintering the veggie, growing it in containers, deciding the right companion plants, and dealing with the lack of buds and dropping leaves. That’s a lot to handle on your own. So we’re here to help you fix these problems with easy-to-follow solutions.
Artichoke Winter Care
Although artichoke is a cool-season vegetable with a preference for zones 5 and 6, it has a low tolerance for cold winters. If your winter is mild with no threat of frost, then you probably won’t have to do anything. The plant can take care of itself until the spring when new growth emerges.
But the harsh winters of zone 5 can prove to be too much for the artichoke to handle.
For a plant that originates from the Mediterranean, the artichoke has a low tolerance for cold winters and may not survive the long cold months. If your winters feature regular frosts, then you’ll need to overwinter the plant and provide it with proper care.
How to Fix It
If you live in zone 5 with its long and bitter winters, then you need to select the right cold-hardy artichoke varieties and still overwinter them to ensure they will not perish and freeze to death. Here are a few solutions to the problem of overwintering artichoke.
- Plant artichoke varieties that mature early and are suitable for short growing seasons. The best candidates are Imperial Star and Green Globe among others.
- If you worry about the frost and frigid winds and their impact on the vegetable, consider growing it in containers and placing the pots in a dry and sheltered spot such as the garage or shed. The temperature should be between 35 and 50 degrees throughout the winter. More on growing artichoke in containers below.
- For frost-free winters, you can keep the veggie in the garden but cover the bed with a thick layer of mulch. You can use fallen leaves, pine needles, or shredded bark. The mulch will keep the soil temperature from freezing over.
- In severe winters, you might have to dig up the vegetable and store it in a sheltered place. Shake off the soil and keep the crowns and roots in peat moss.
Container Grown Artichoke Plants
Container growing is more than a gardening fad for people with limited gardening space or those who only have a balcony to grow plants. In more ways than one, growing plants in containers make them easier to care for, and being mobile allows you to protect the plants against inhospitable or unpredictable weather conditions.
When it comes to container-grown artichoke plants, all of the above benefits apply. Since the vegetable demands specific temperatures and light conditions that only mild winters and foggy summers can provide, it stands to reason that you should grow it in a pot just to be on the safe side. No gardener likes to see their hard work gone to waste when the vegetable succumbs to a sudden heatwave or an unpredictable frost in the middle of spring. So how can you grow artichoke in containers?
How to Fix It
Timing and adhering to container caring are the two main keys to success as far as artichoke container growing is concerned. The following tips will help you get it right the first time and save your crop even if you have no prior experience with artichoke growing.
- While planting artichoke in the garden should be in the early spring, if you want to grow it in a container, you should start it in the fall.
- Select a pot that’s about 3 feet wide and one foot deep to provide space for the roots of the artichoke to develop. Keep in mind that the root system develops fast and repotting the perennial artichoke is part of its care.
- Fill the pot with high-quality potting mix and add one-third portion of organic compost or homemade fertilizers.
- Water the pot regularly to keep the potting mix moist since dry soil can impact the taste and growth of the head of the artichoke.
- Feed the vegetable with aged manure or homemade compost. You could use chemical fertilizers to speed up the growth in a short growing season, but that would come at the cost of the flavors.
- Provide the vegetable with one inch of water a week and factor in the rainfall you get during the growing season.
- If the weather changes suddenly and the temperature rises or drops sharply, bring the container indoors and keep it in a dry and sheltered area.
Artichoke Companion Plants
When it comes to vegetables growing in your garden, you can’t possibly plant each vegetable in its own bed away from other herbs and plants in the garden. No matter how big your garden space is, you still need to group together a few plants in the same patch.
This can create problems as the plants compete over the resources. Or it can be a blessing as the companion plants work it together and help each other in more ways than one. But in the case of artichokes, they hardly provide an advantage to the plants growing along in the same bed. For one thing, artichokes don’t repel any pests. In fact, pests don’t even bother the veggie so artichokes have no need for herbs such as mint or marigold that repel common pests.
How to Fix It
So if artichokes have no use for companion plants, why would you want to grow other veggies with them in the same patch? The answer is saving gardening space. So which plants will make great companions for artichokes?
Since artichokes prefer slightly alkaline soil, you’ll need to pair them with other veggies and plants that favor the same pH levels. Peas are good candidates. Not just because they too thrive in soil pH above 7.0 but also because they fix the nitrogen in the soil. Heavy feeding artichokes would benefit from the high nitrogen in the soil.
You can also plant it with members of the cabbage family along with sunflowers and tarragon among others.
But whatever you do, don’t plant artichokes alongside smaller plants that would be smothered under the sheer weight and size of the 4-foot artichoke. Not just that, but the large veggie can cut off the sunlight from the smaller plants which would prove fatal for them.
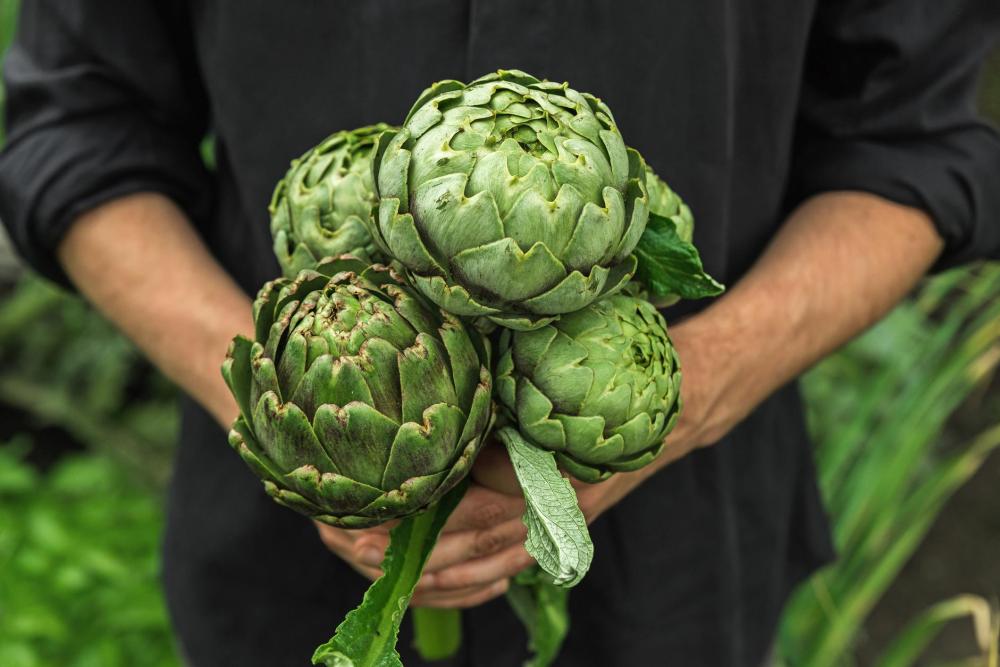
Harvesting Artichoke Plants

Whether you grow the Globe artichokes with their round buds or the Violetta with a bud that tapers off, knowing when and how to harvest your vegetables is crucial for the success of the crop. After caring for the veggies all season, it’s time to reap the fruits of your labor and taste the fresh veggies that you grew with your own hands.
And if this is the first time you grow artichokes, then you need to know which part gets harvested and how to tell if the bud is ripe or not. So many questions need a lot of detailed answers.
How to Fix It
First and foremost, you need to know what type or variety of artichokes you’re growing. Each variety and cultivar has its own harvesting time. But if you’re not sure of the exact planting date or the variety, then you can follow these guidelines to help you get the most out of your artichoke patch.
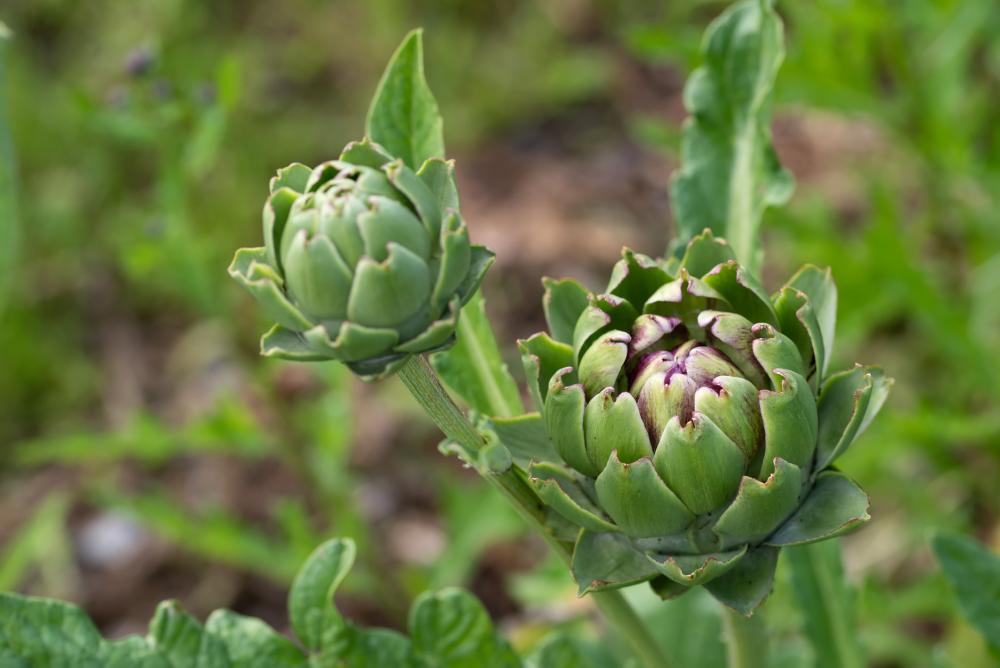
- The general rule of thumb is to harvest the artichokes from late July until early August. Some varieties can ripen late in September.
- One of the clues that the bud is ripe is when it reaches its full size. Again this varies by cultivar and species so you need to check with the local nursery where you bought the seeds or saplings.
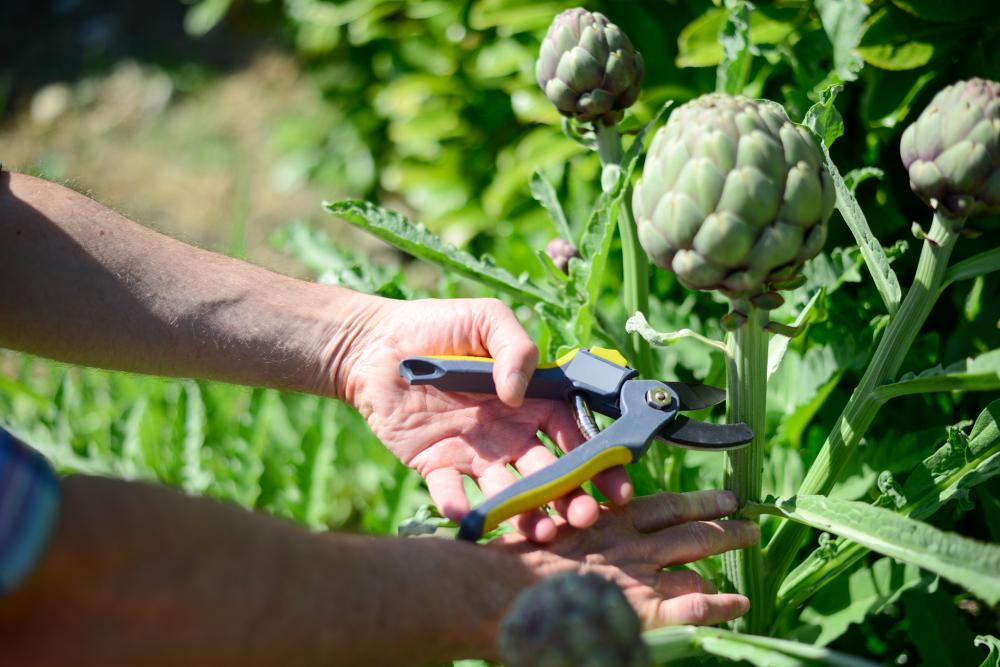
- The right time to harvest a fully grown bud is right before the bracts open. If you allow them to open and spread, the flavors and taste of the bud change and it loses its quality.
- Use a sharp and sterilized blade to cut the stem 3 inches below the bud. The plant will continue to grow even after the bud has been harvested.
- Water and mulch around the plant to protect it against the winter and frost.
- To prepare the artichoke for the winter, cut it back and cover it with mulch. By the next spring, it will come back to life.
- Perennial artichokes need a number of chilling days to flower the next season.
- In cold zones where the artichoke is unlikely to survive the winter, you can grow it as an annual. After harvesting the bud, uproot the plant and turn up the soil.
Artichoke Leaves Yellowing and Dropping
Some other common artichoke growing problems have to do with the growing conditions. The plant is quite sensitive to changes in the temperature, the absence of adequate light conditions, and whether it has received enough chilling hours the previous winter or not.
All of these growing conditions can impact the vegetable in unpredictable ways. For example, you could notice the leaves of the vegetable turning yellow. Or the leaves could drop on their own even though it’s still early in the growing season.
Another problem might have to do with the buds. The vegetable won’t grow buds even though everything else about the plant looks normal and in good condition. So what causes these problems and what can you do about them?
How to Fix It
The lack of bud development is an indication that the perennial vegetable has not received enough chilling hours during the previous winter. If the winter was mild or even warm and the temperature stayed above 20 degrees F. that would limit the plant’s chances of developing buds the next year.
As for the problem of yellowing leaves, that’s often the result of overwatering the soil. As a vegetable with sensitive roots that don’t like to sit in waterlogged soil, the roots will rot as a result. Root rot cannot be detected until it’s too late. The leaves would turn yellow and while you’re wondering what could be wrong with the plant, the rest of the root system will die. So don’t overwater your artichokes. Give them one inch of water every week during the growing season and keep the soil moist.
Dropping leaves means that the vegetable is stressed. This could be the result of lack of enough light or dry soil, or overwatering. Check that the plant is not in the shade of a large tree and that it’s getting at least 6 hours of sunlight a day. If you’ve overwatered the vegetable, hold off watering until the soil dries out.