DIY Whimsical Halloween Wreath
Updated on November 19, 2025

Are you ready for a fun kids craft to create for Halloween? Try this whimsical Halloween wreath filled with some spooky craft items, sure to add a creative element to your October home decor. Hang it from your front door or above your party table for all your guests to see.
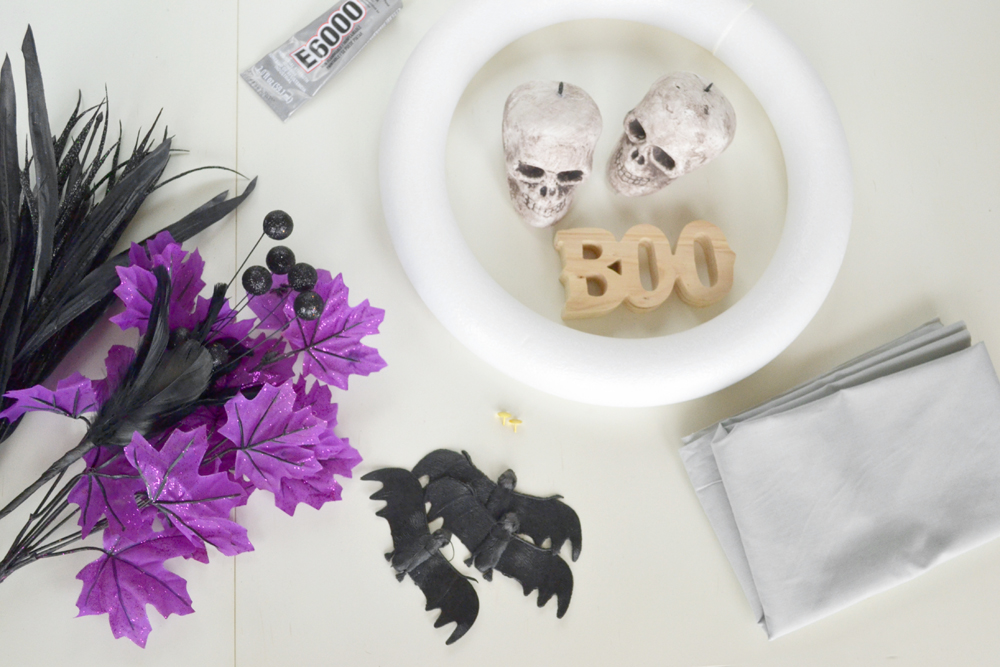
For this Halloween wreath you’ll need:
- A styrofoam, circle wreath,
- Strips of fabric
- Push pins
- Scissors
- Decorative Halloween elements (B-O-O letters, skulls, black feathers, bats, spiders, etc.)
Step by step craft instructions:
All of these crafts you can get from your local craft store, but the items may vary depending on what’s available. But you can go crazy creative with this craft. The ideas and possibilities are endless. This tutorial just gives you a basic idea of how to create a wreath with a few accent items.
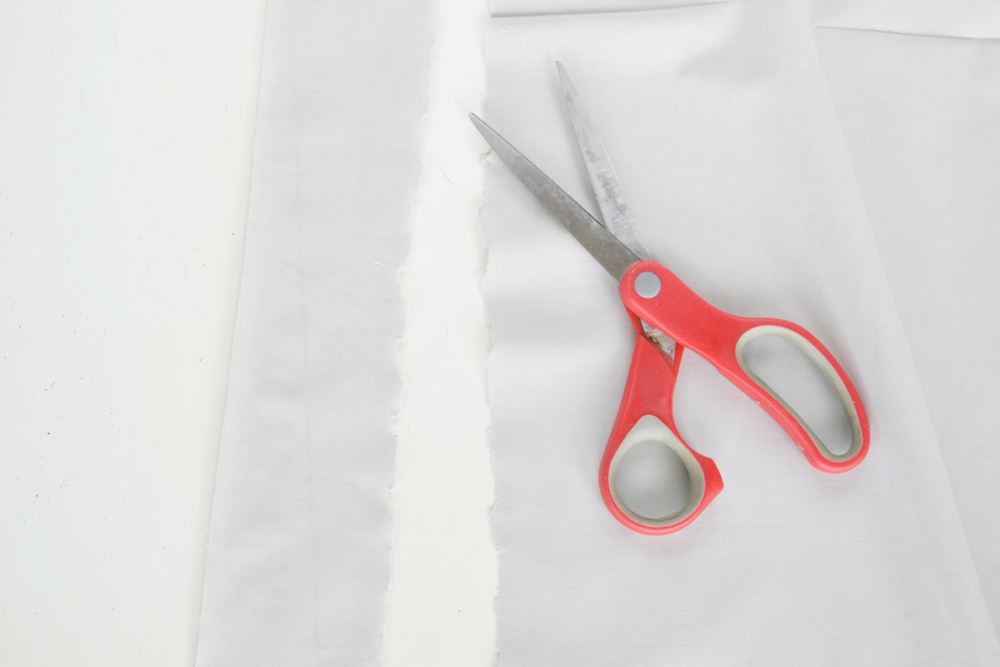
Step 1: cutting frabric
Cut 2-3 inch strips of fabric to wrap around your wreath. Don’t worry about frayed edges here. The frays add to the Halloween look and feel (like a mummy).
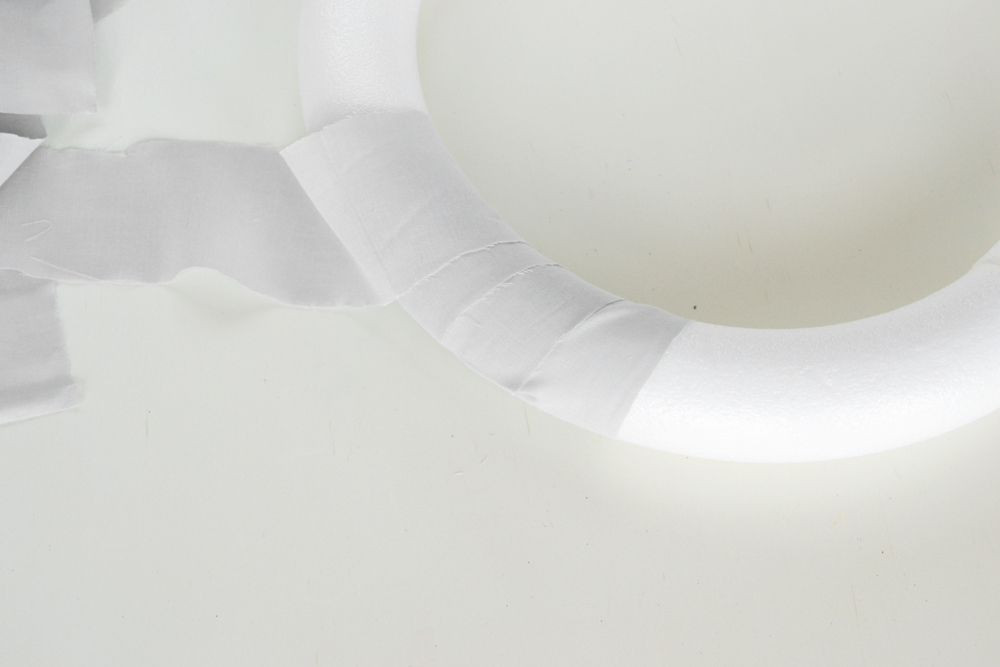
Step 2: wrap around wreath
Wrap the fabric around the wreath, overlapping the edges so the white styrofoam does not show through. Continue wrapping until the entire wreath is covered.
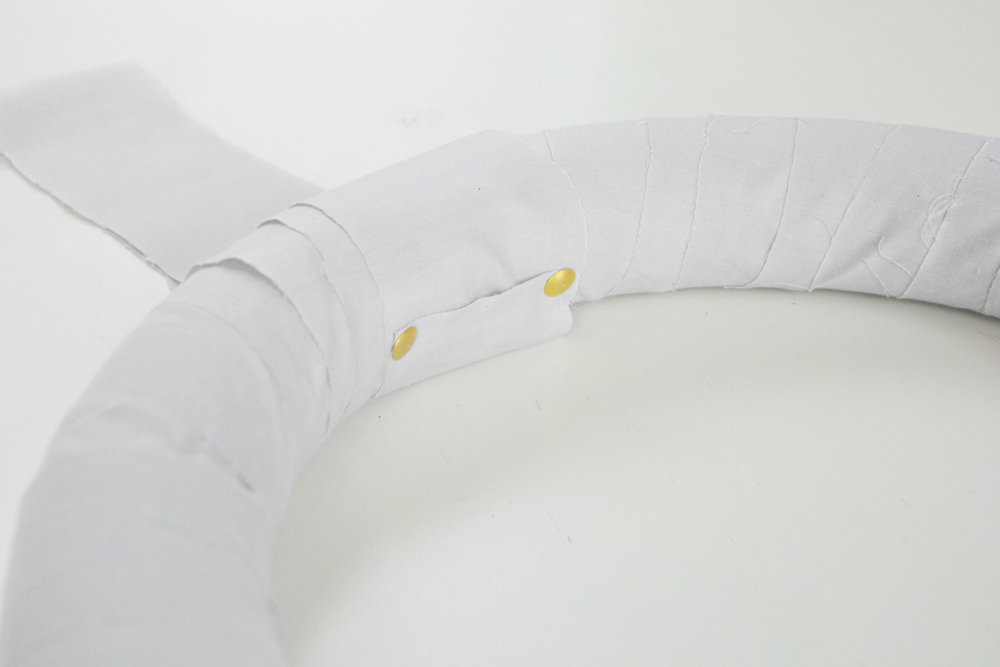
Step 3: Secure with pins
If you have extra fabric left over, create a loop at the top and secure it with push pins. If you don’t you can still create the loop- just cut a short piece of fabric and secure it with push pins on the underside of the wreath.
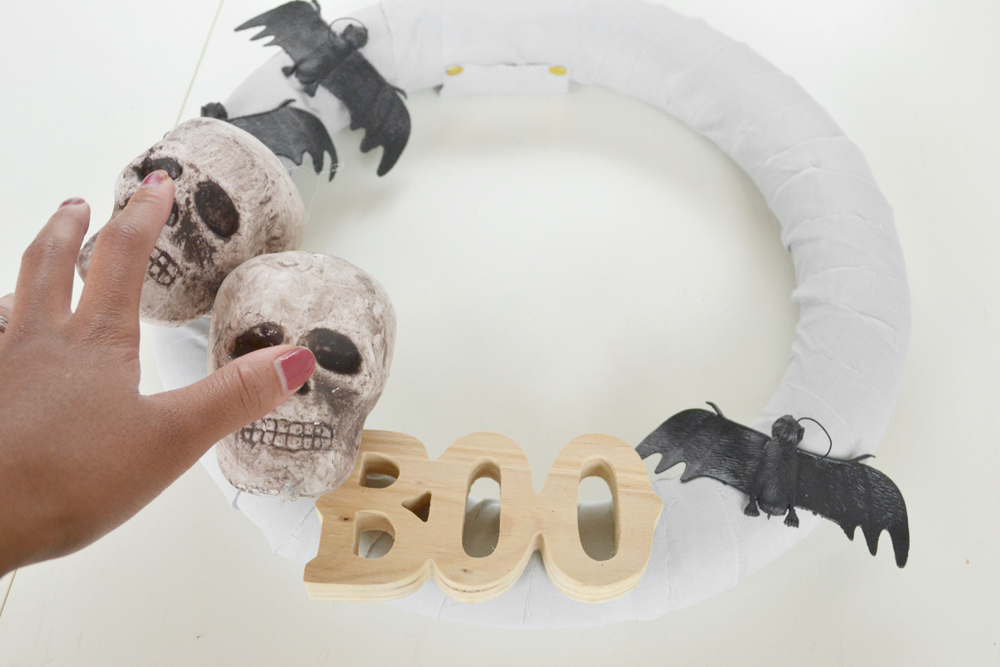
Step 4: arrange the skull
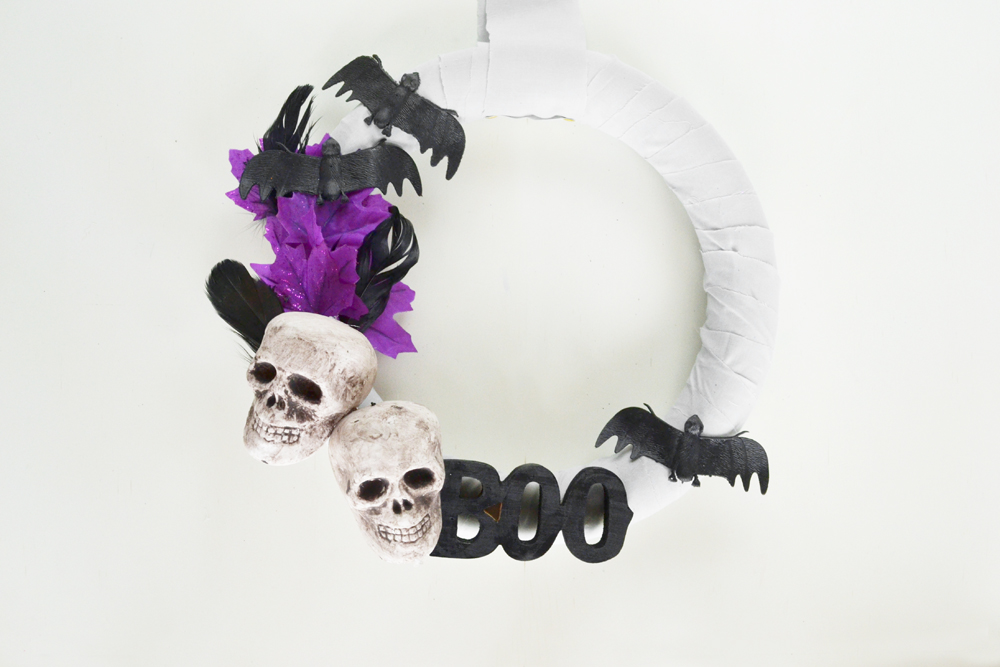
Next, you’ll want to lay your accent pieces down to get a general idea of how you want it to look. A tip is to glue the pieces down so they “crawl” up one side of the wreath, with a main accent piece at the bottom.
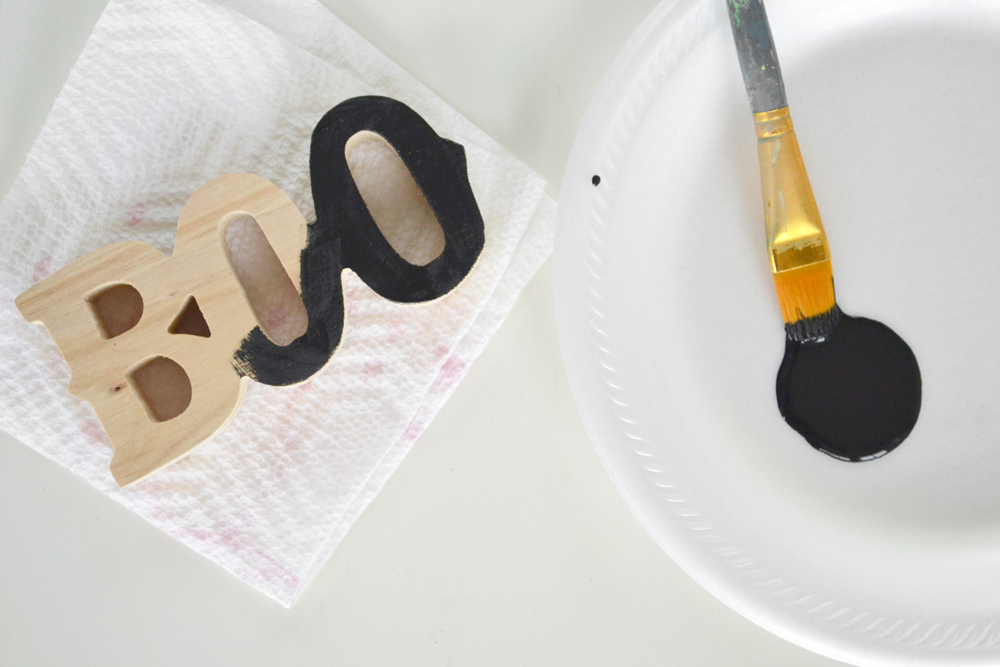
Step 5: paint letters
Paint your letters black if you have them. Any accents that need painting, paint them before adhering them to the wreath. Allow a drying time of 30 minutes or so.
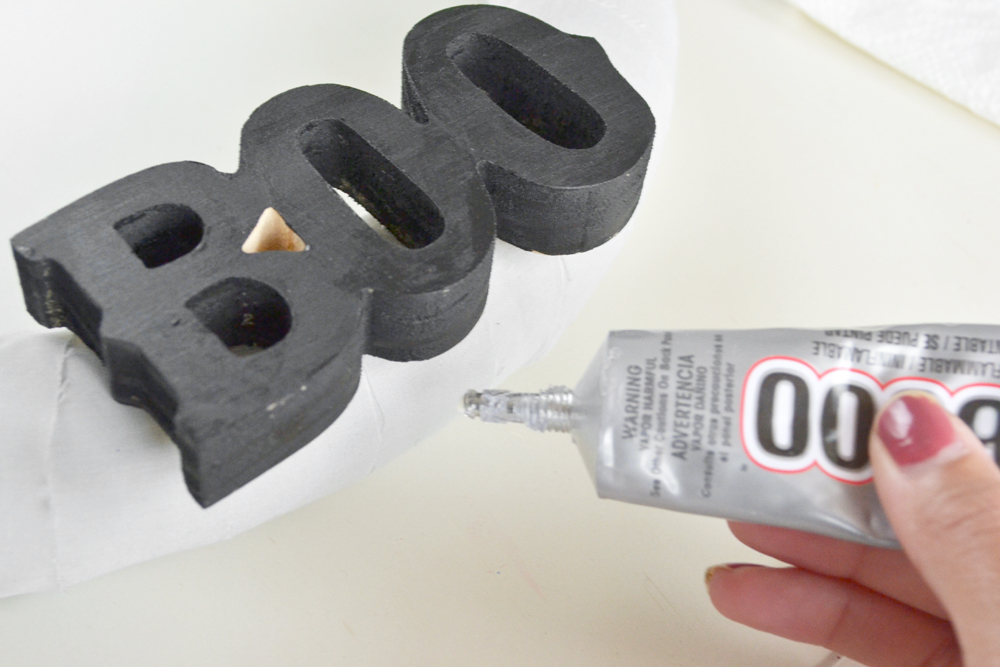
Step 6: glue down
Glue the accent pieces down with a heavy-duty glue. E-6000 or Gorilla glue works well. I placed the “Boo” letters at the bottom of the wreath as the main accent.
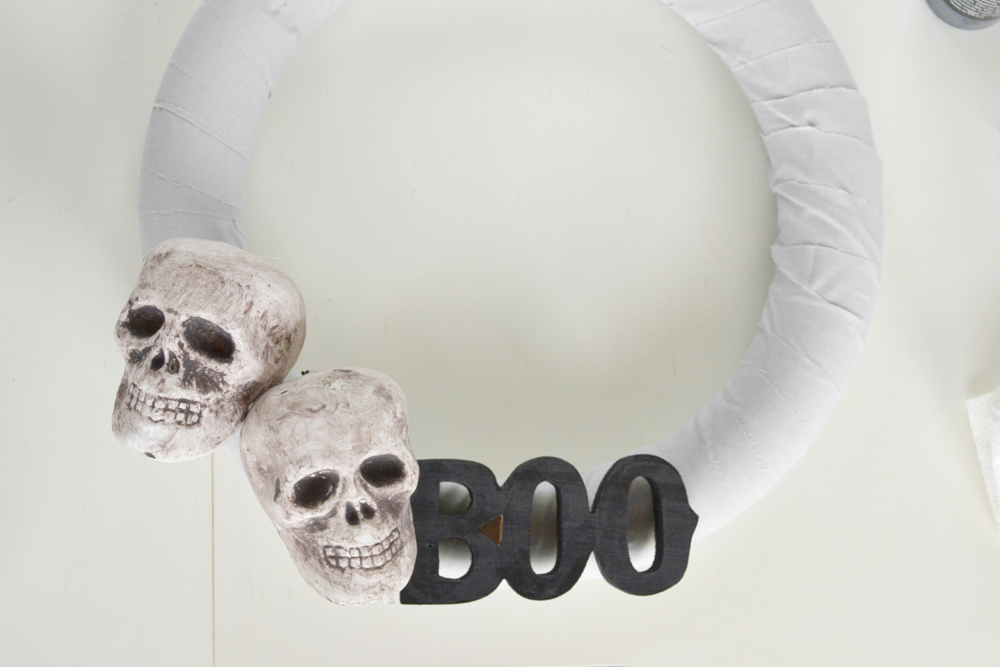
Step 7: Glue skulls
Next, I glued down my skulls. They were slightly hard to keep upright, but I found that after holding them in place for 5 minutes or so, it adhered well. I turned the skulls slightly for variation. With the heads turned, it helped keep them in place- each one held up the other.
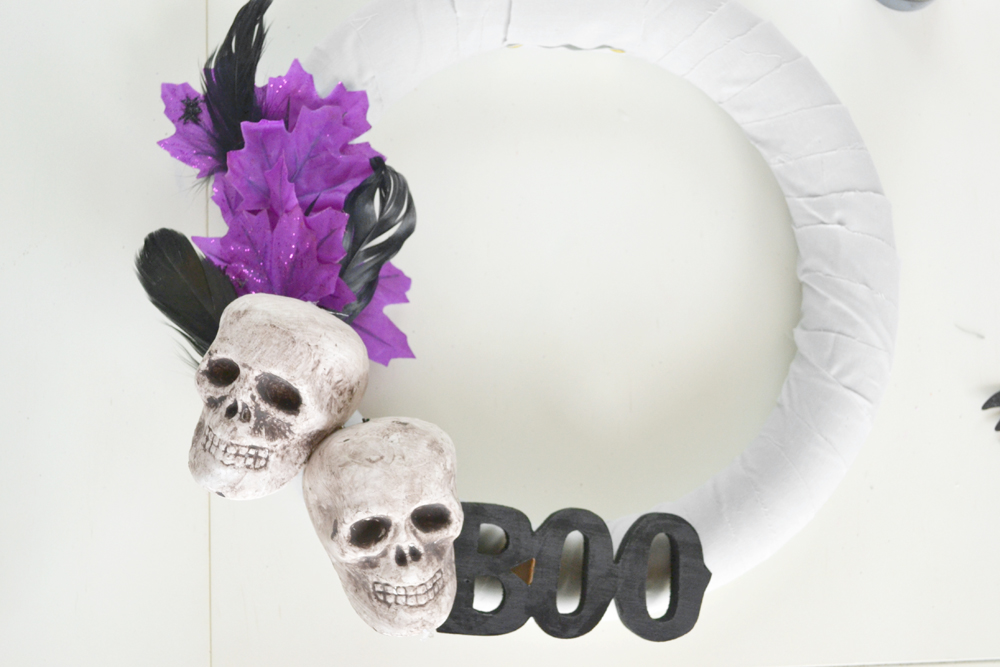
Step 8: Glue the feathers and purple leaves
Then I glued down the feathers and purple leaves. Be sure to spread these out to create a fuller look.
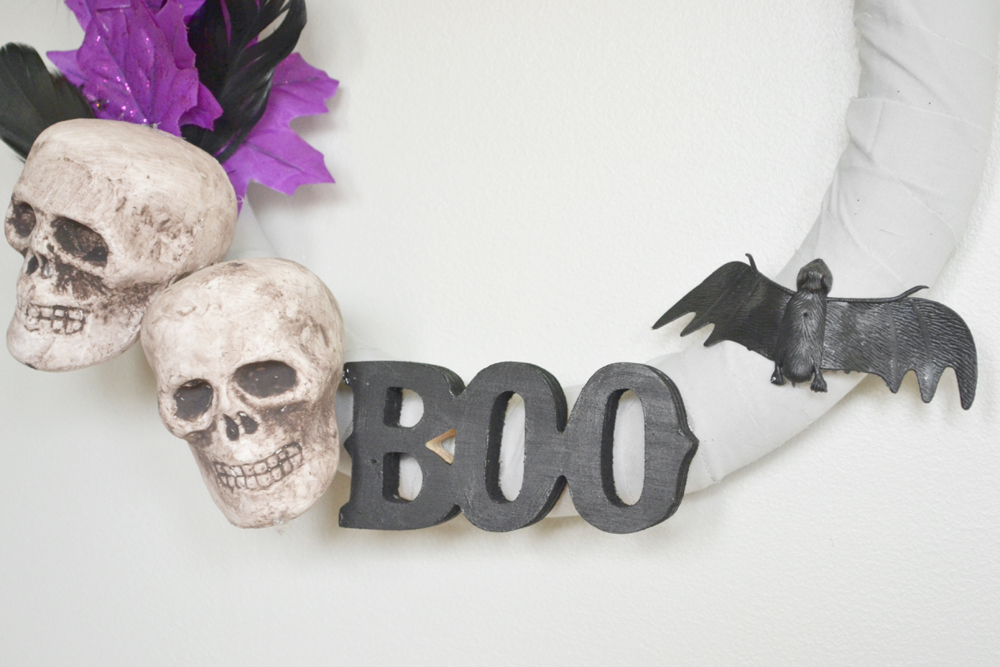
Step 9: add more glue and secure the bat
Lastly, I glued down the bat accents, and turn them slightly to create the effect that they were flying sporadically.
Make sure the glue dries completely before hanging. Even though this type of glue is tough, if it’s not completely dry, the accent Halloween pieces will slide down. Follow the manufacturer’s instructions, but typically it takes a full 24 hours to cure.
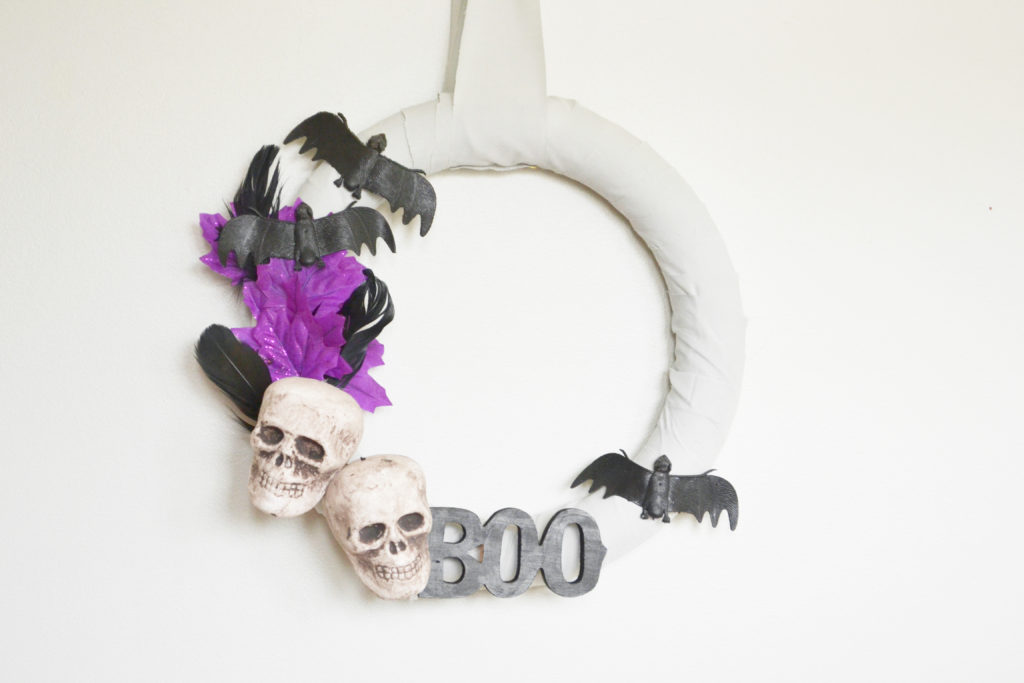
And that’s it! Be sure to hang this wreath on your front door to welcome all of the children to your house on Halloween!