How to Craft a DIY Wooden Photo Frame for Valentine’s Day in 6 Easy Steps
Updated on November 19, 2025


A DIY Valentine’s Day wooden photo frame is wonderful for displaying your fondest memories in a personal and meaningful way. Read this guide to learn how to easily create a wooden photo frame for February 14th.

A DIY wooden photo frame is a customized picture frame made from cardboard, wood slices, and other natural elements. The wood slices have the word LOVE painted over, making the picture frame suitable for the most romantic day of the year. A homemade picture frame has more emotional value than a store-bought photo frame since it shows how much thought and effort you put into making it, so it’s a great gift idea for February 14th.
This guide describes the supplies and step-by-step instructions for making a wooden photo frame for Valentine’s Day. It has images and a video guide. Check out tips and trips for improving or changing this design. This DIY project is suitable for parents and kids old enough to safely use a hot glue gun since it’s simple: just a matter of assembling various materials. It shouldn’t take you more than an hour to complete.
Supplies
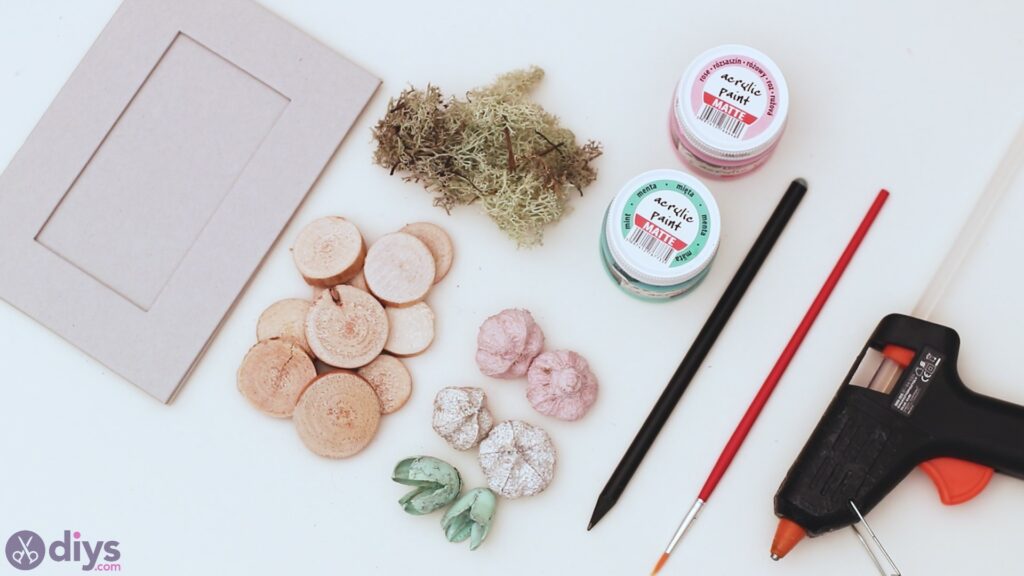
- Cardboard picture frame thick enough to withstand painting and gluing. Alternatively, prepare two sheets of cardboard.
- Box cutter (optional) to cut the cardboard if you have to make the picture frame from scratch.
- Dry plants such as flowers and leaves. You can also use desiccated fruits.
- Moss
- Small wood slices
- Acrylic paints. We used rose, green, and white.
- Wire paintbrush
- Thin paintbrush
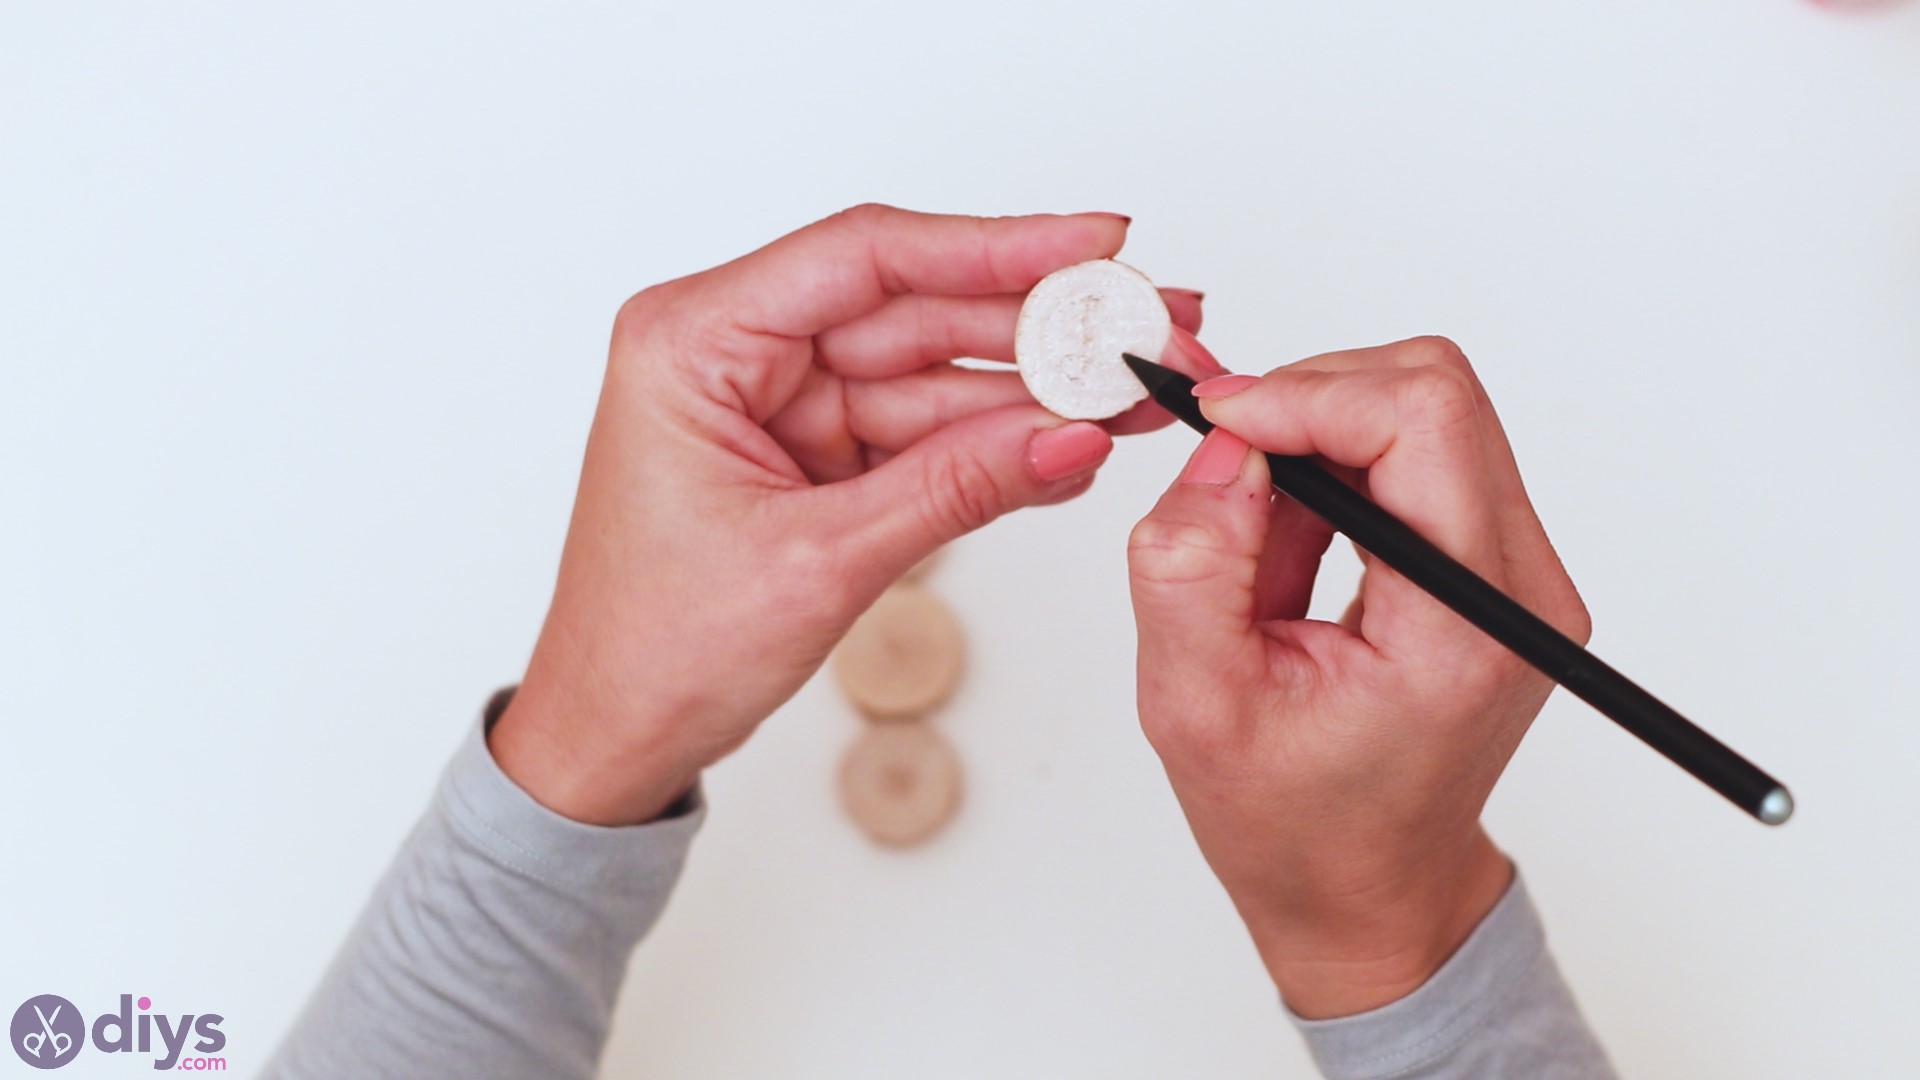
- Pencil for writing text before applying paint. A carpentry pencil works best for wood slices.
- Hot glue gun and glue sticks
How do I craft a DIY Valentine’s Day wooden photo frame?
Follow these step-by-step instructions to craft a DIY wooden picture frame for February 14th:
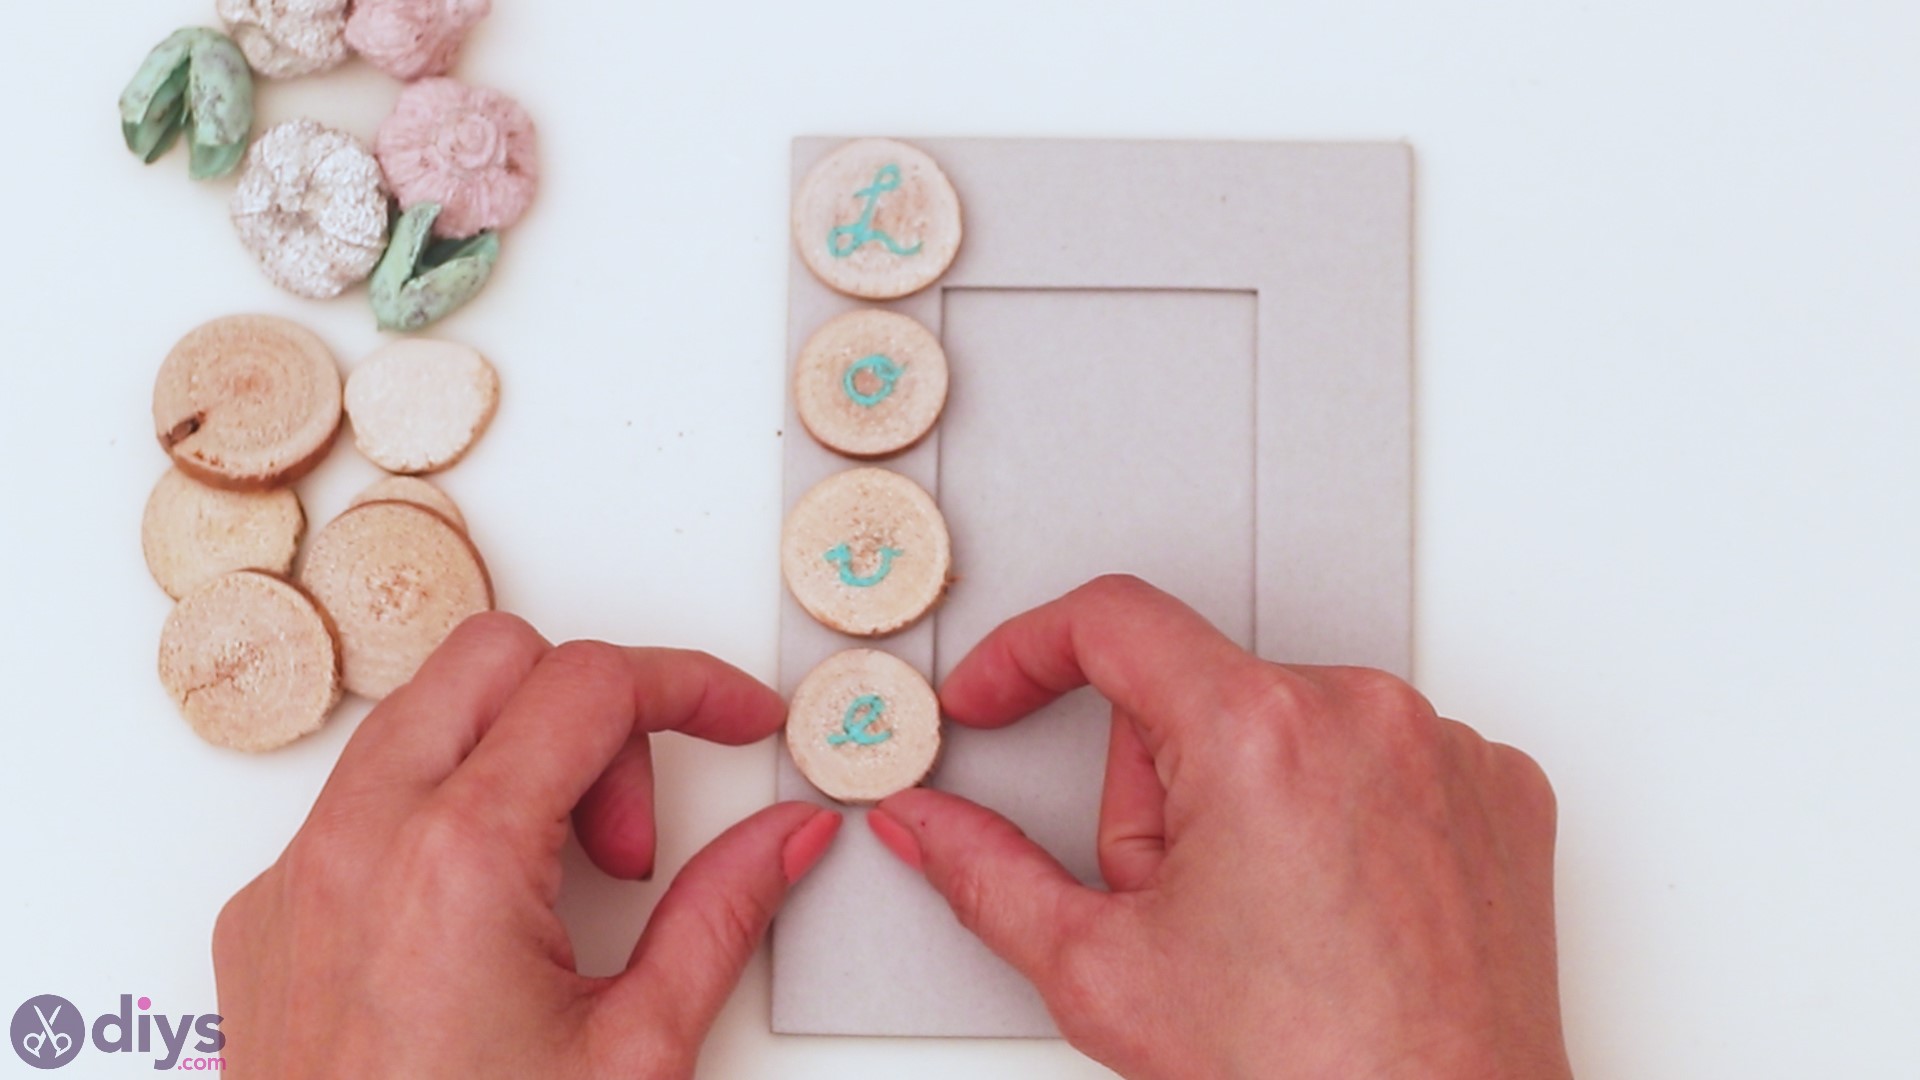
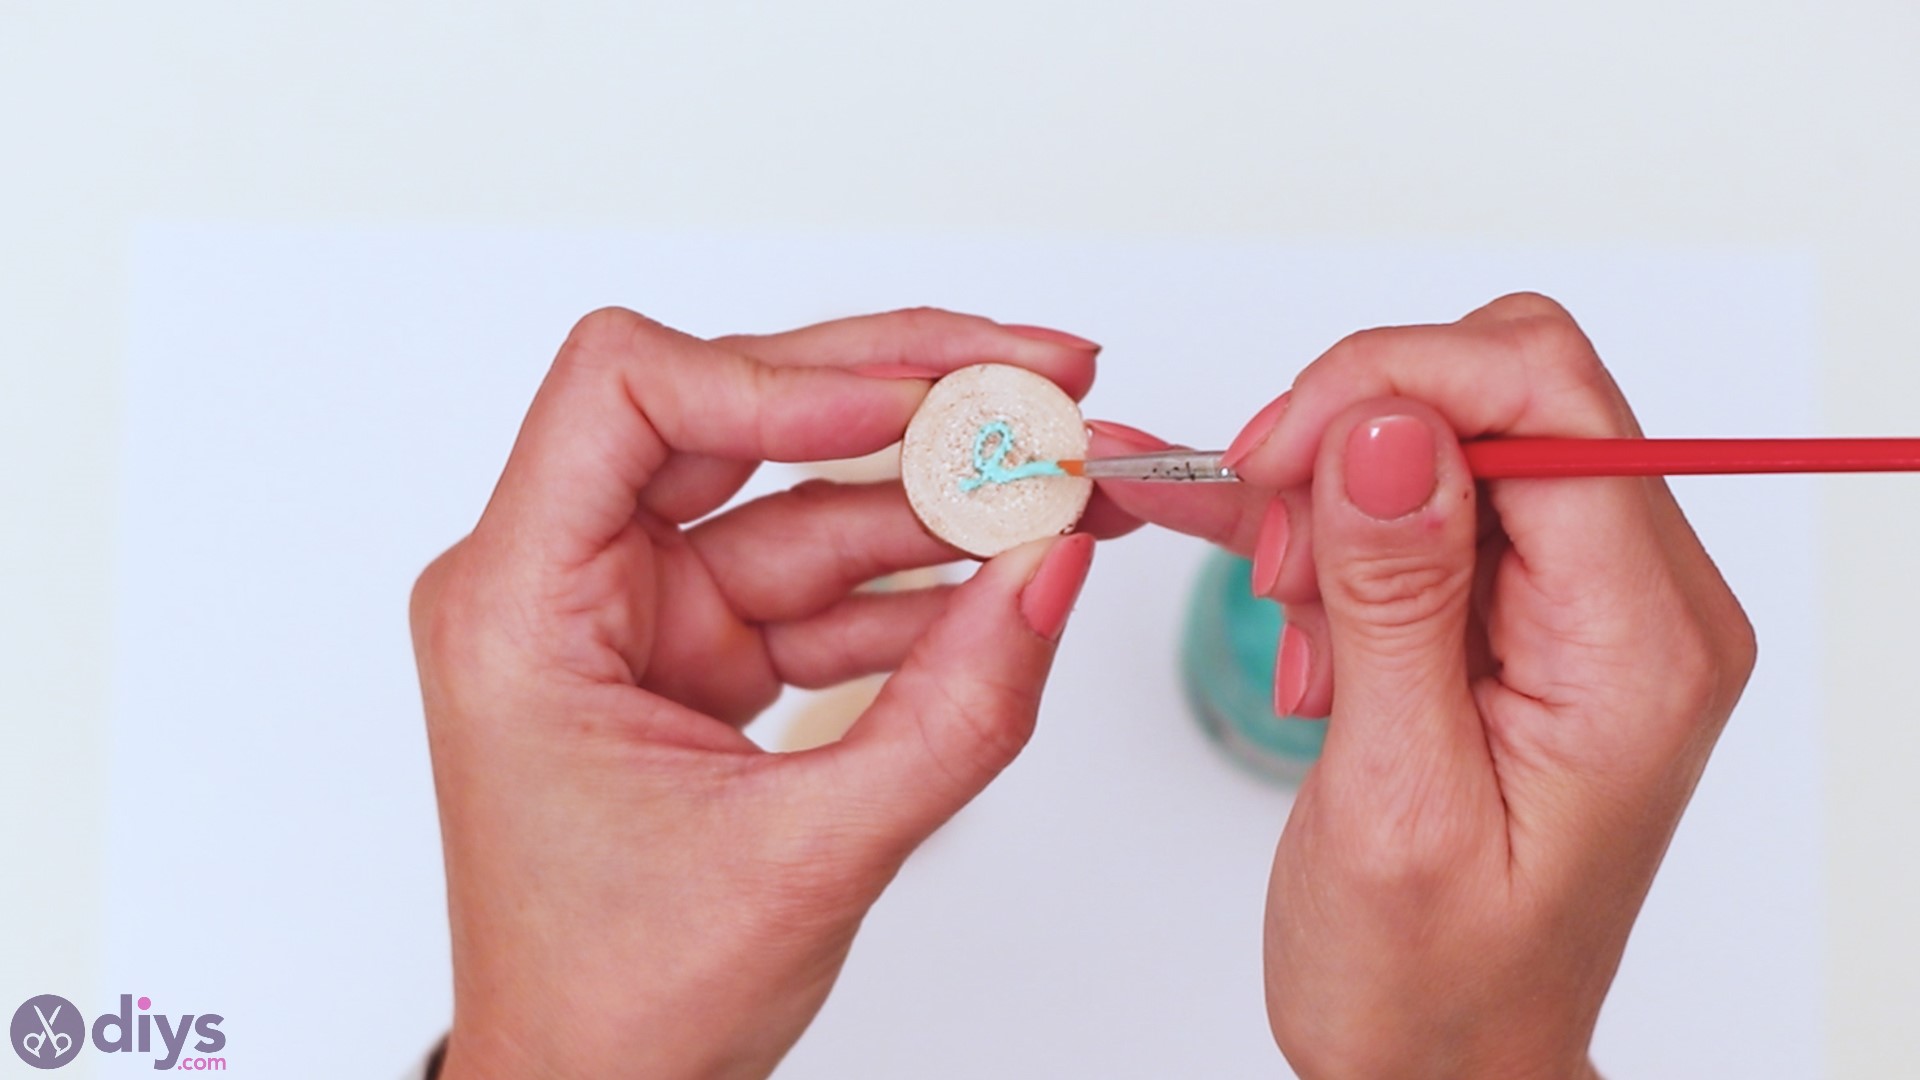
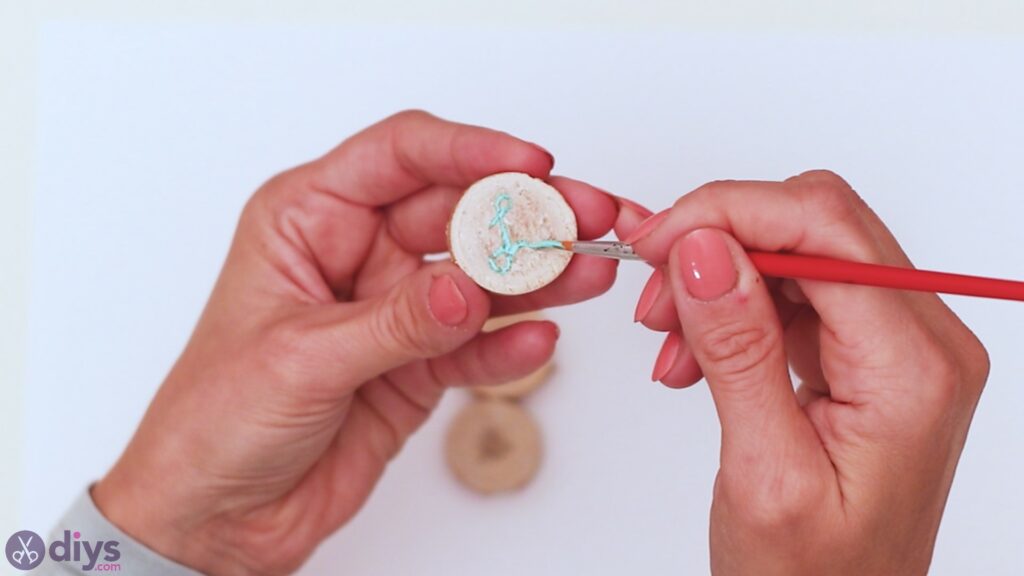
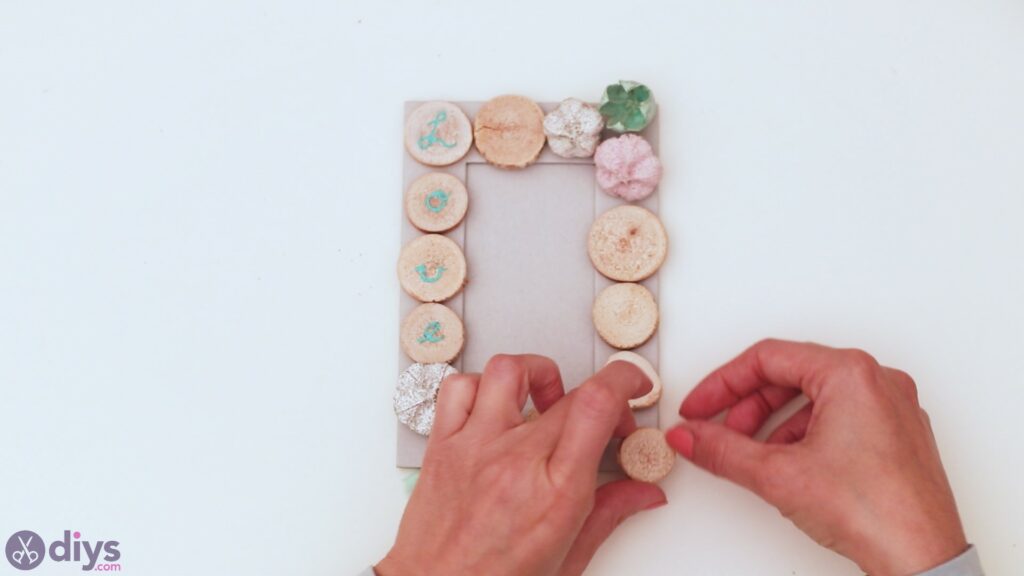
- Create the lettering: Sketch the lettering on wood slices, experimenting with different writing styles. Then, use the thin paintbrush and green acrylic paint to paint over the letters. While waiting for the paint to dry, proceed to the next step.

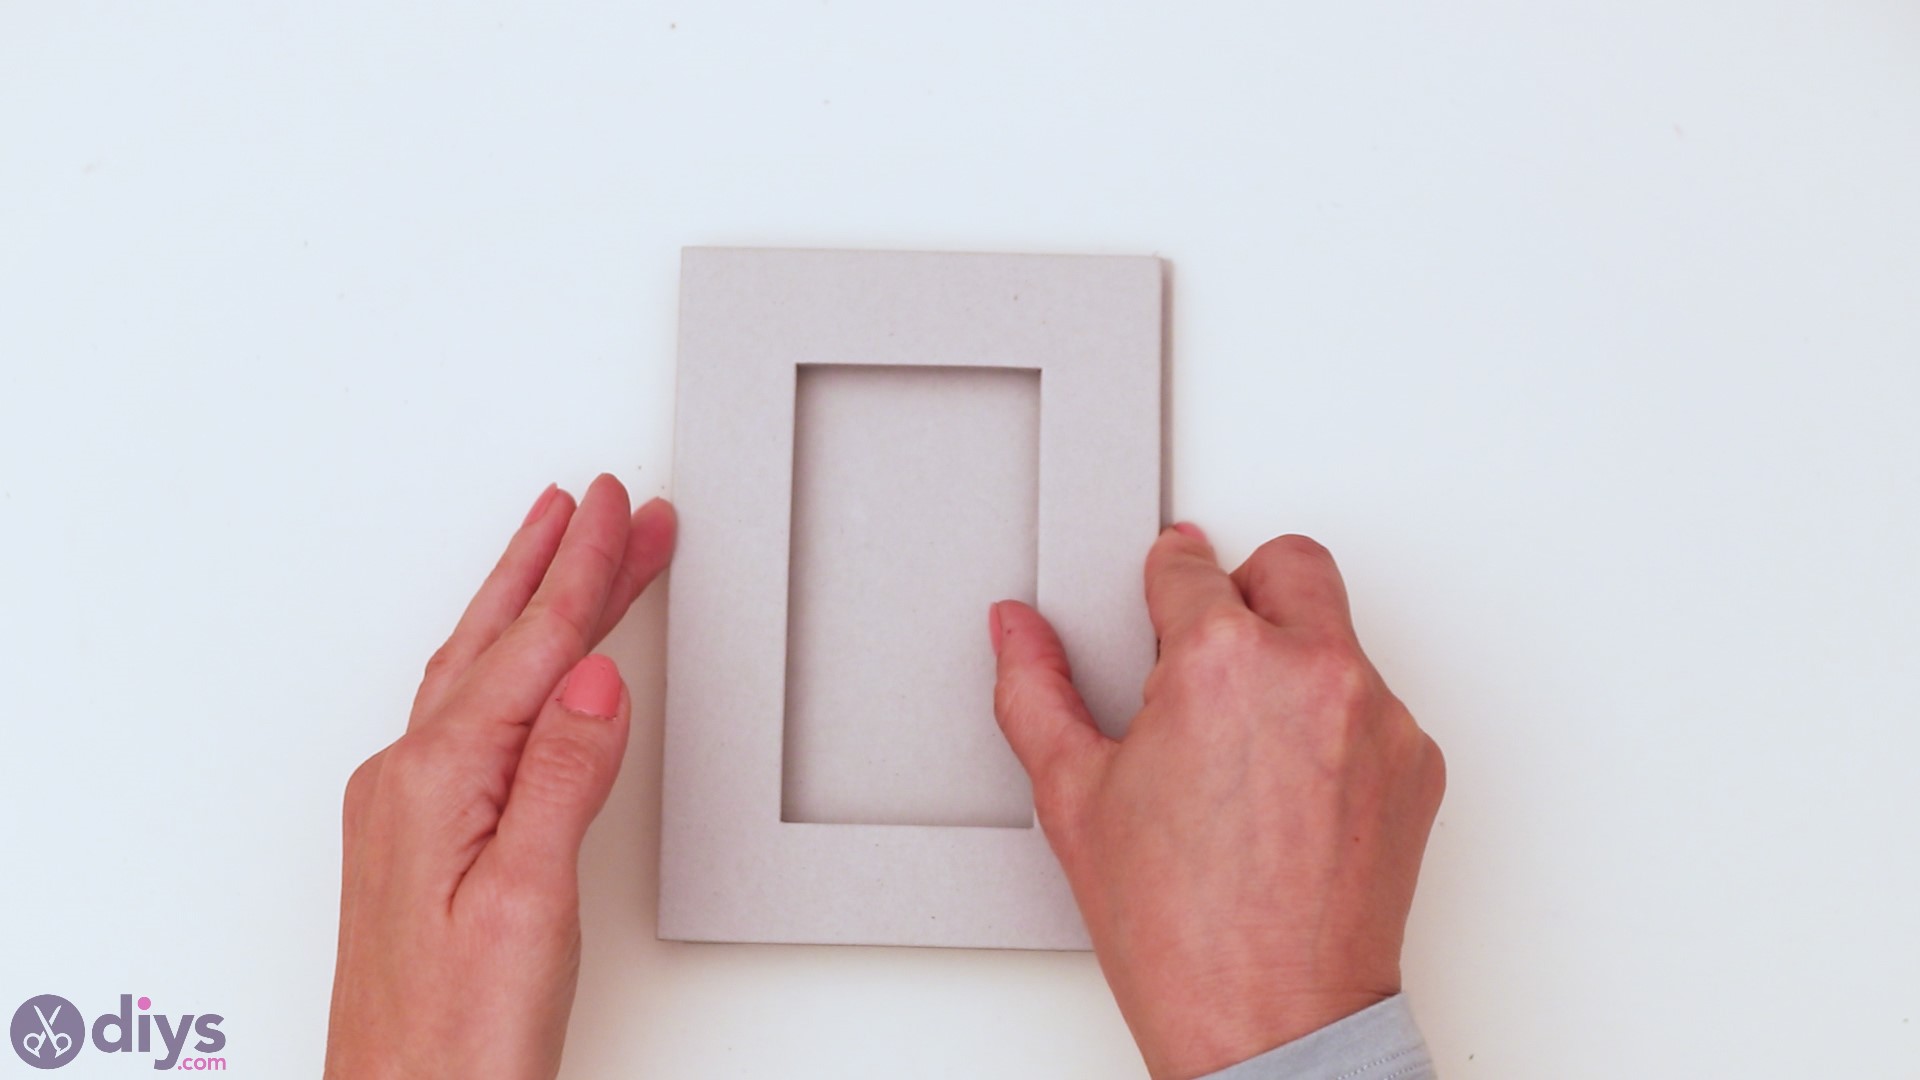
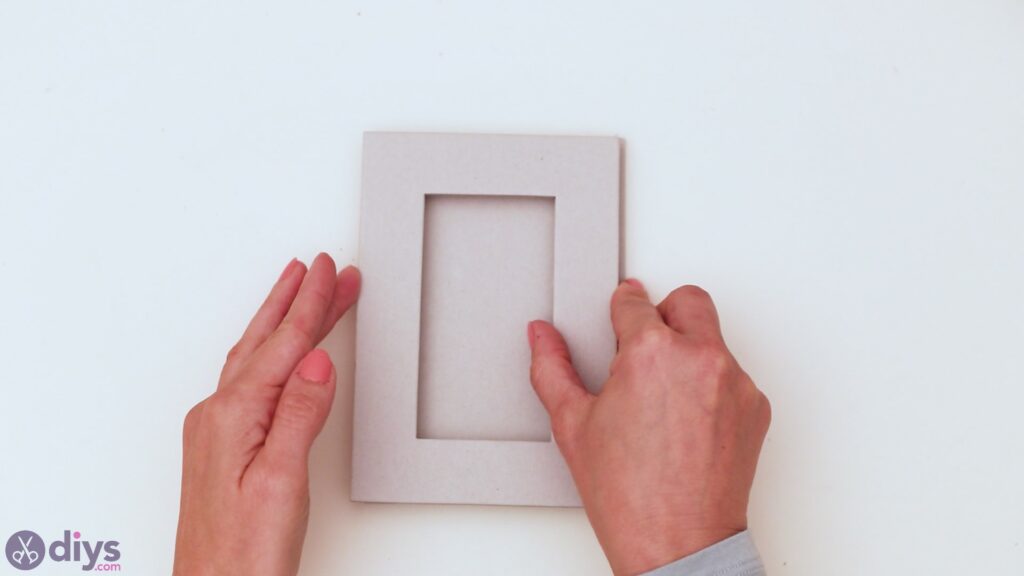
- Assemble the photo frame (optional): If you don’t have a cardboard picture frame, use the box cutter to cut out a large window-shaped hole in a cardboard sheet. Glue this piece on the other cardboard sheet, creating the picture frame
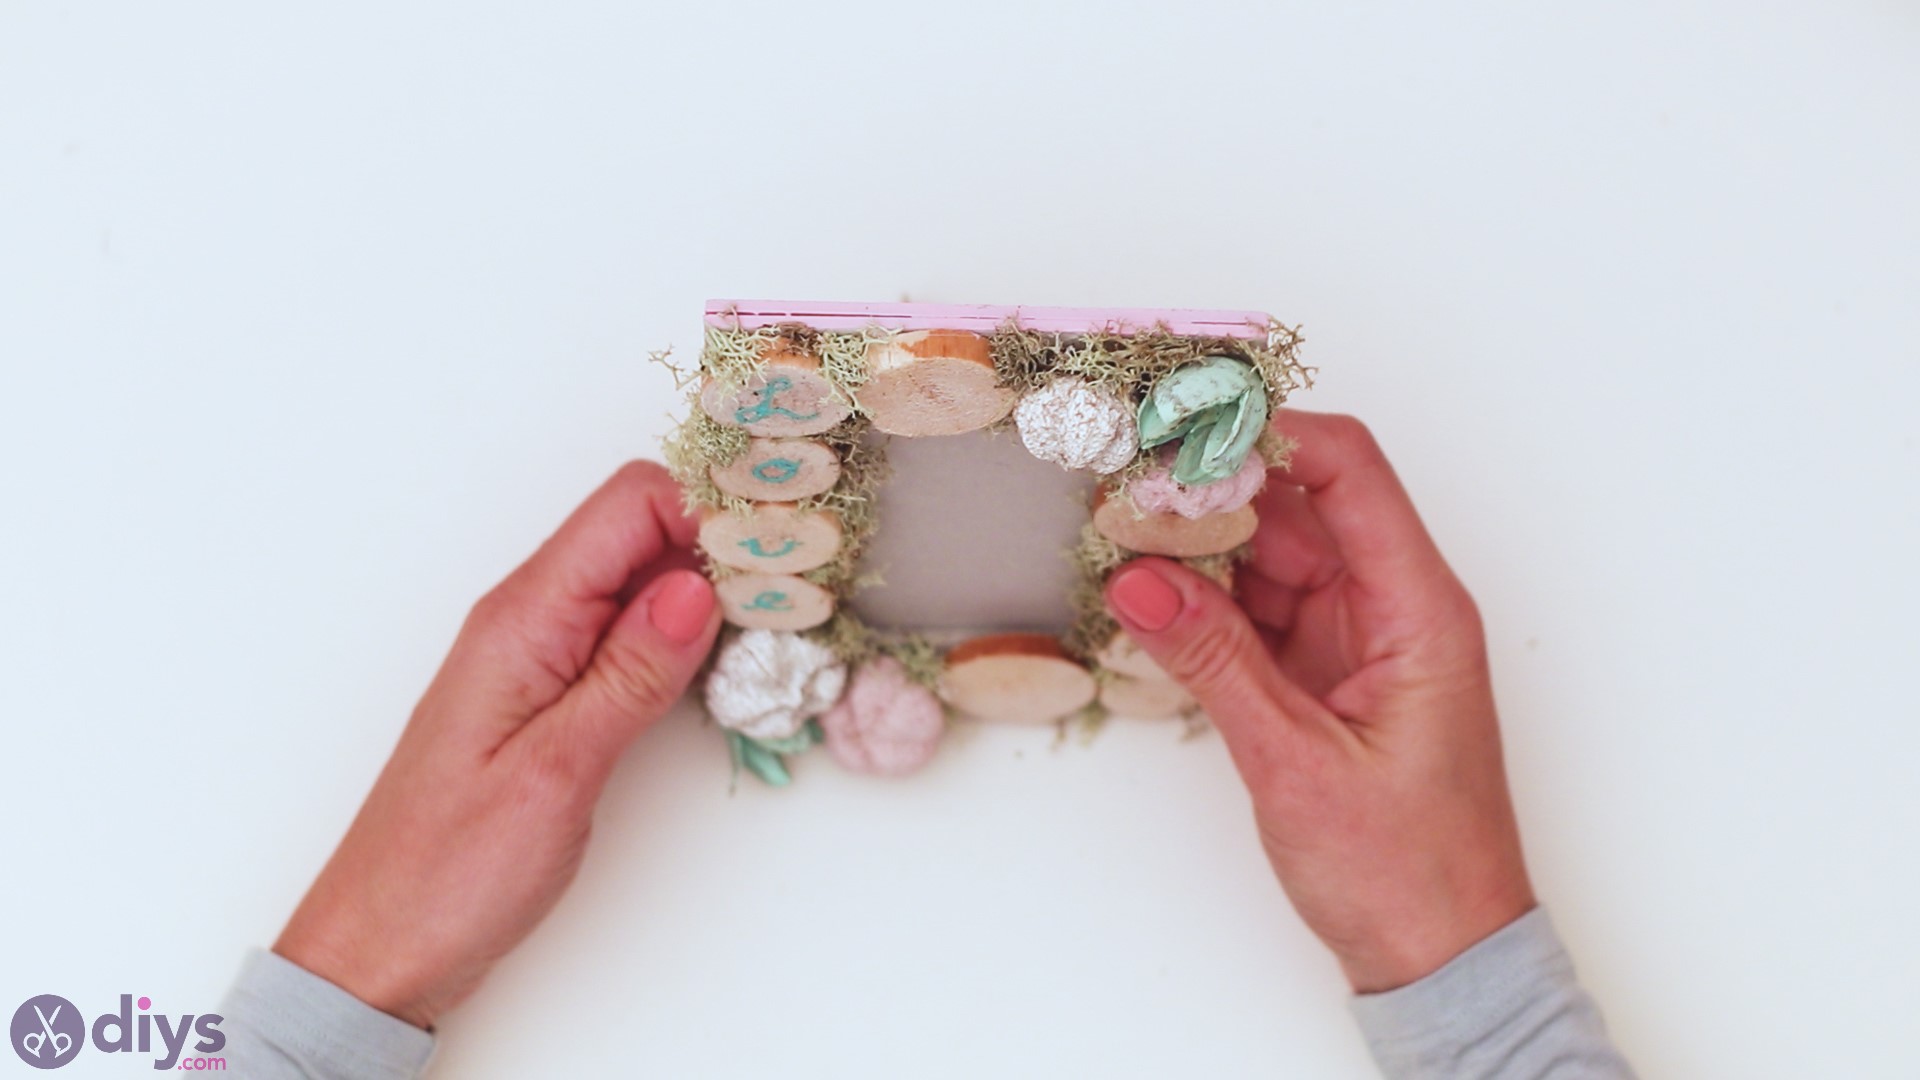
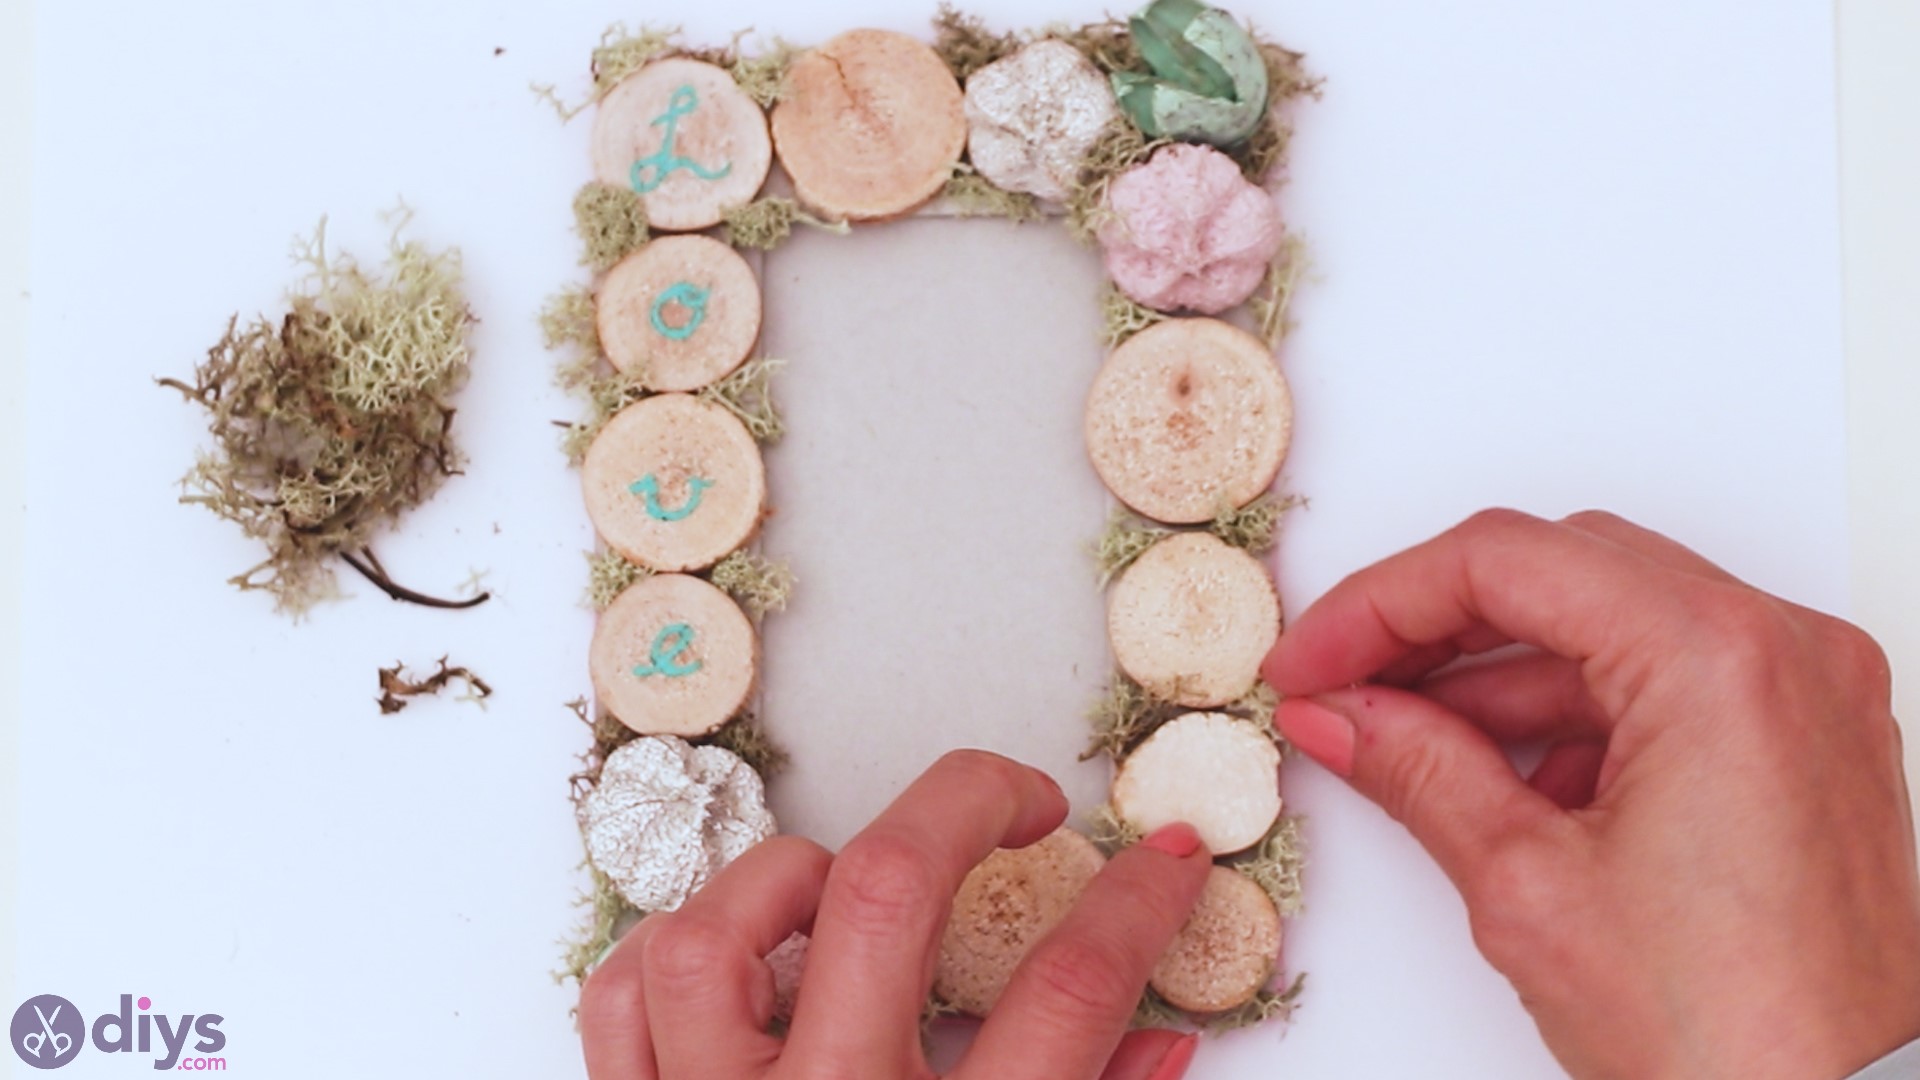
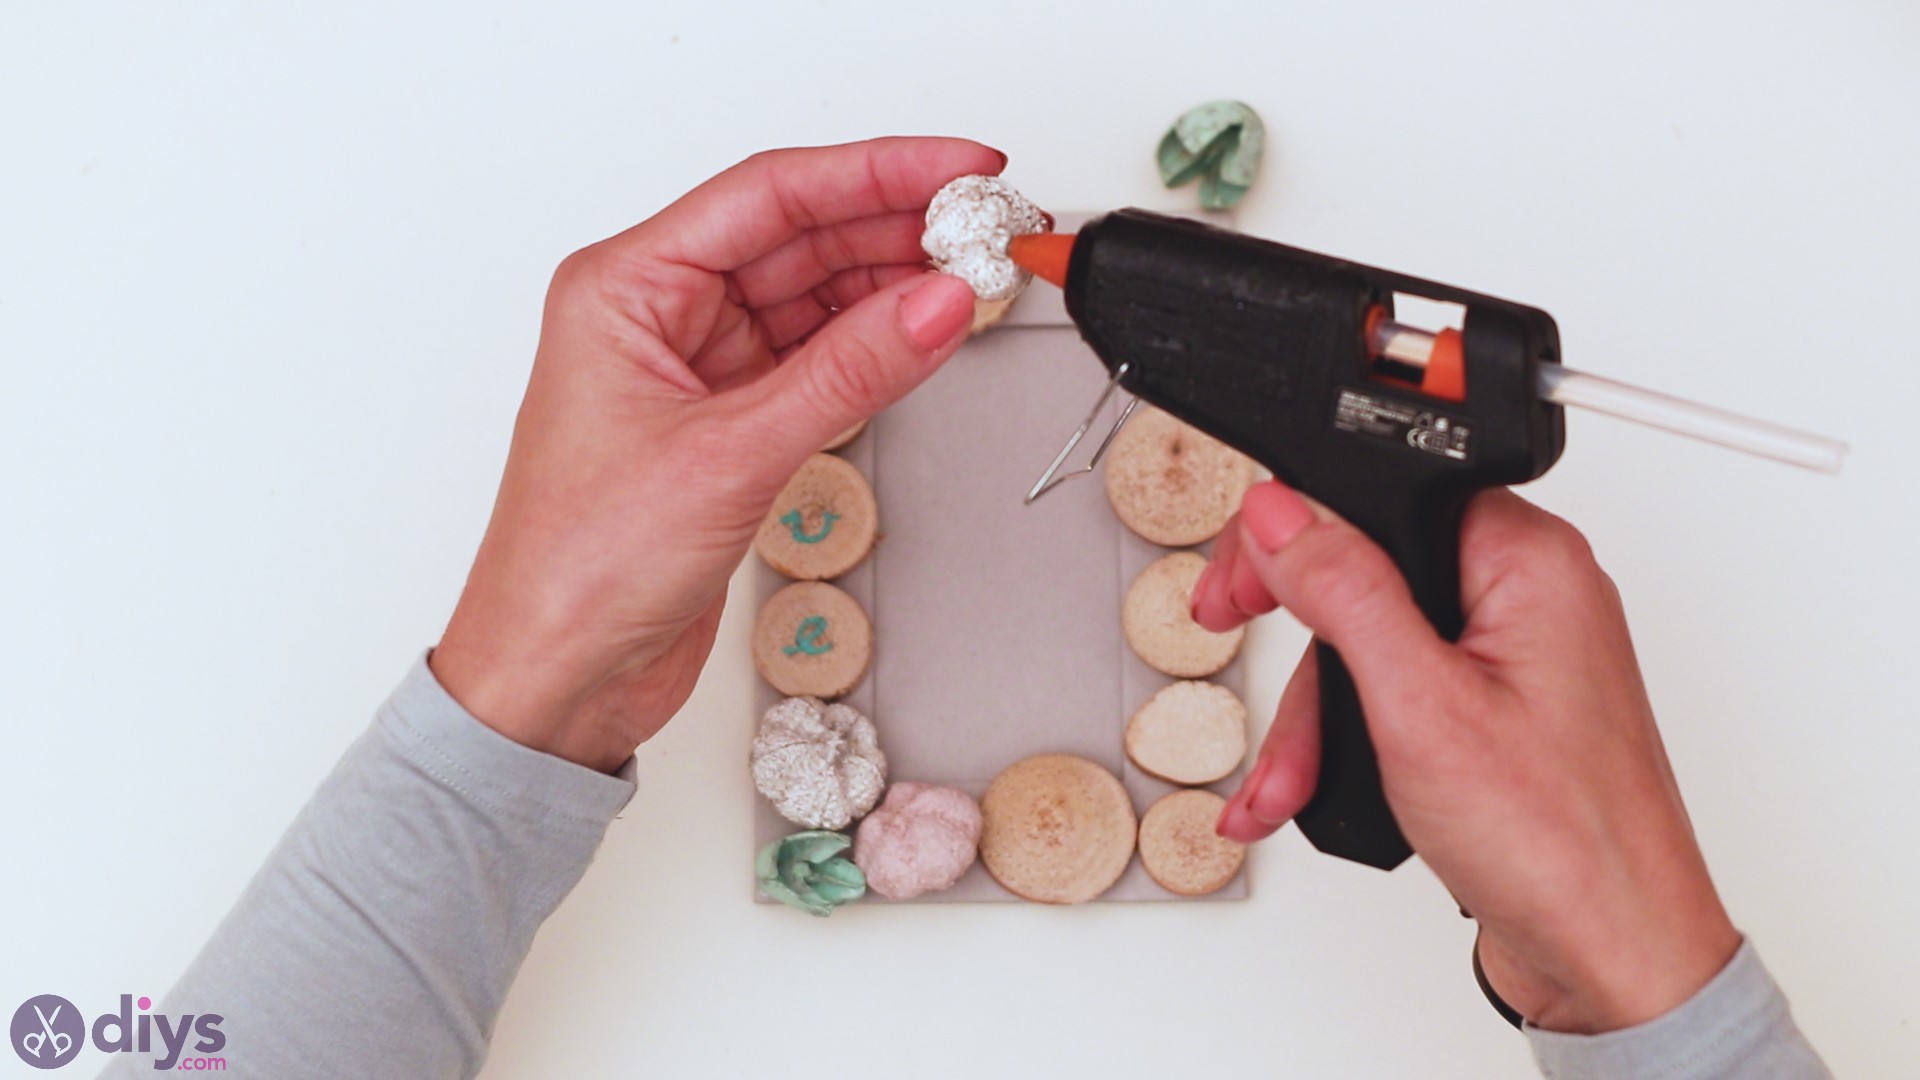
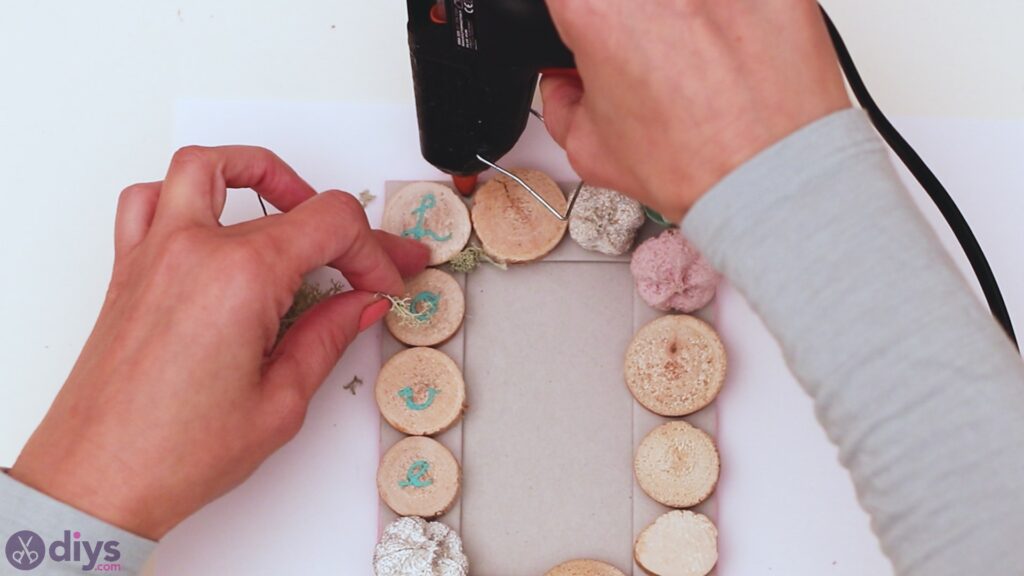
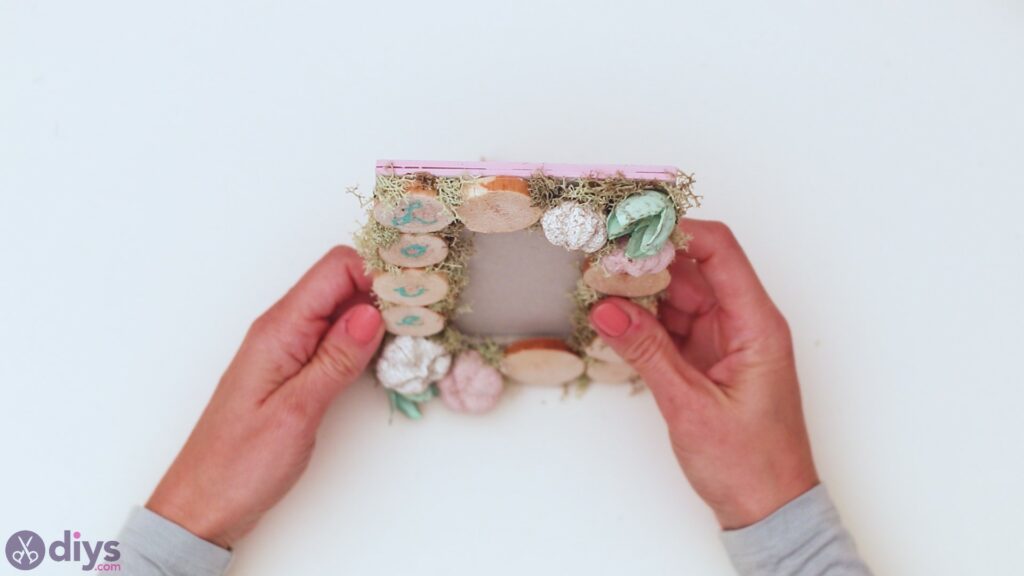
- Attach the decor: Glue the painted wood slices, arranging them to form LOVE. Then, add the rest of the wood slices, along with the dried plants.
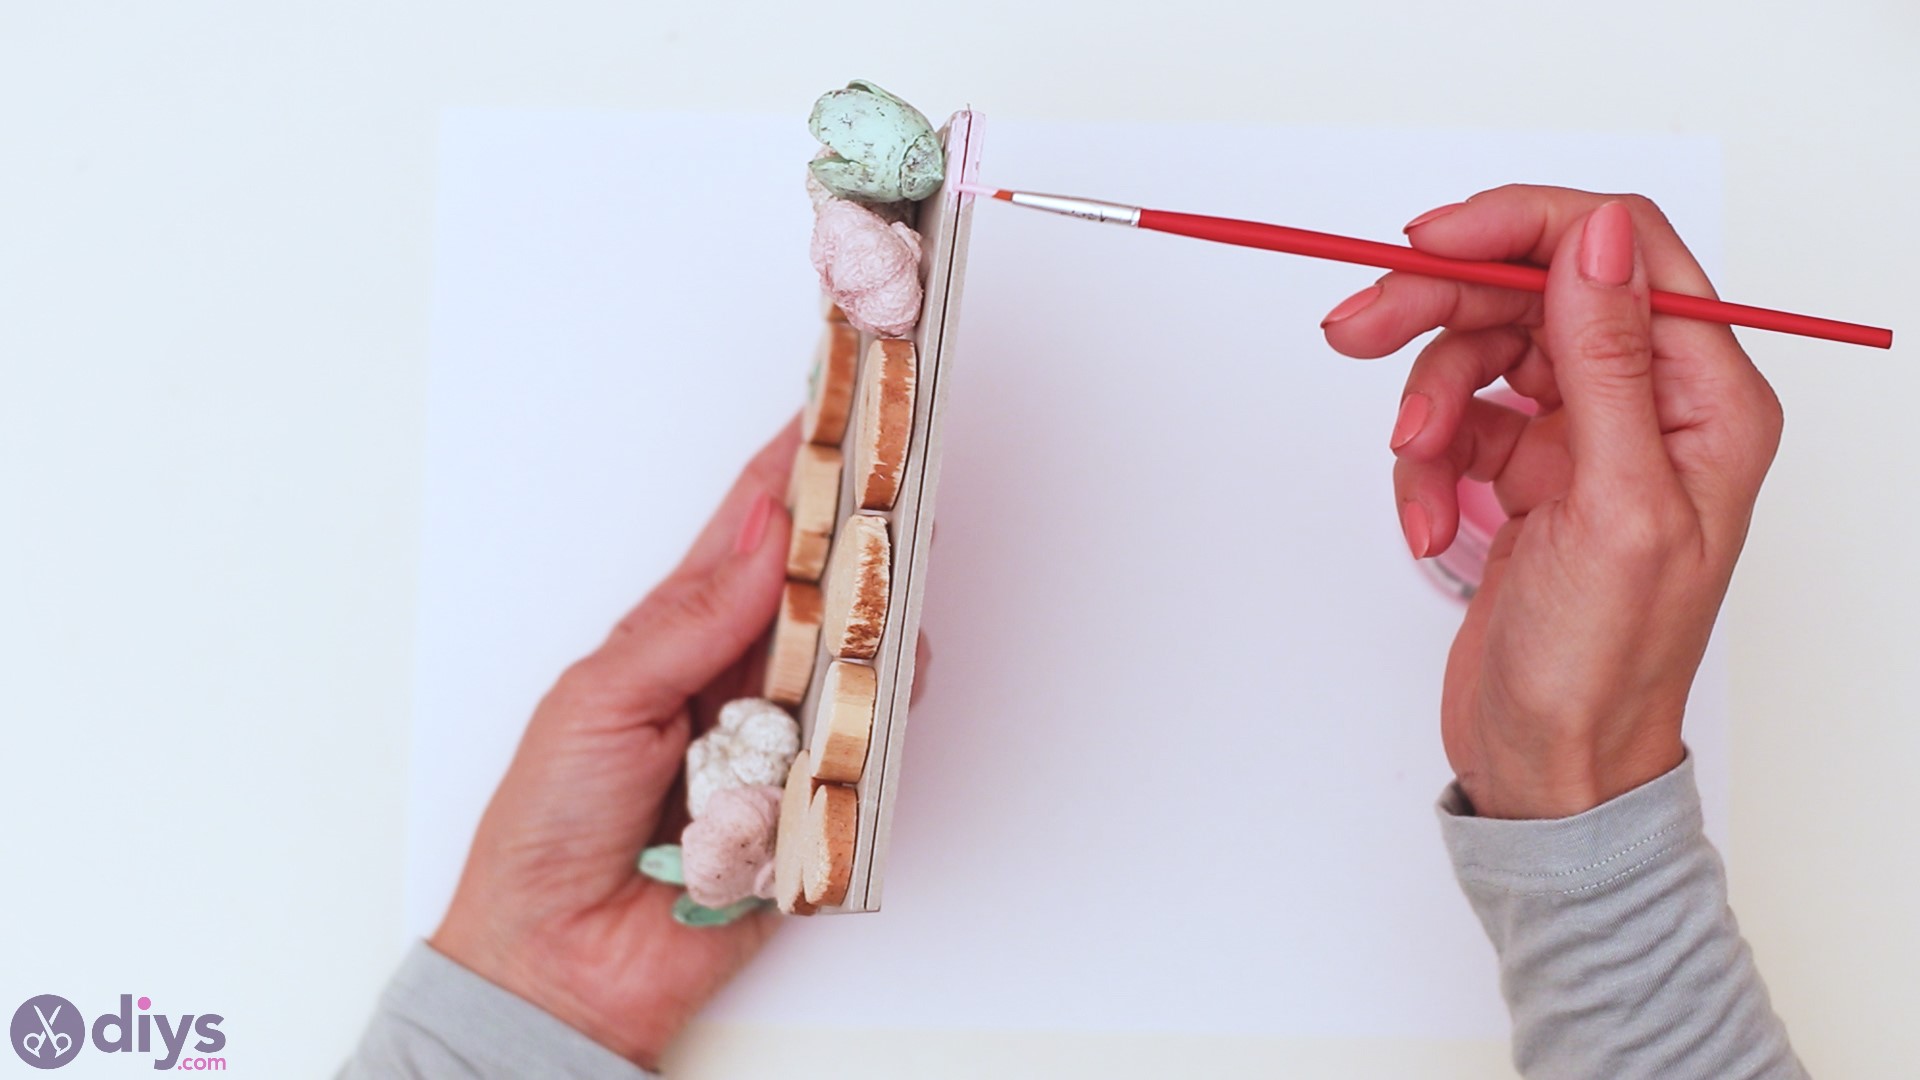
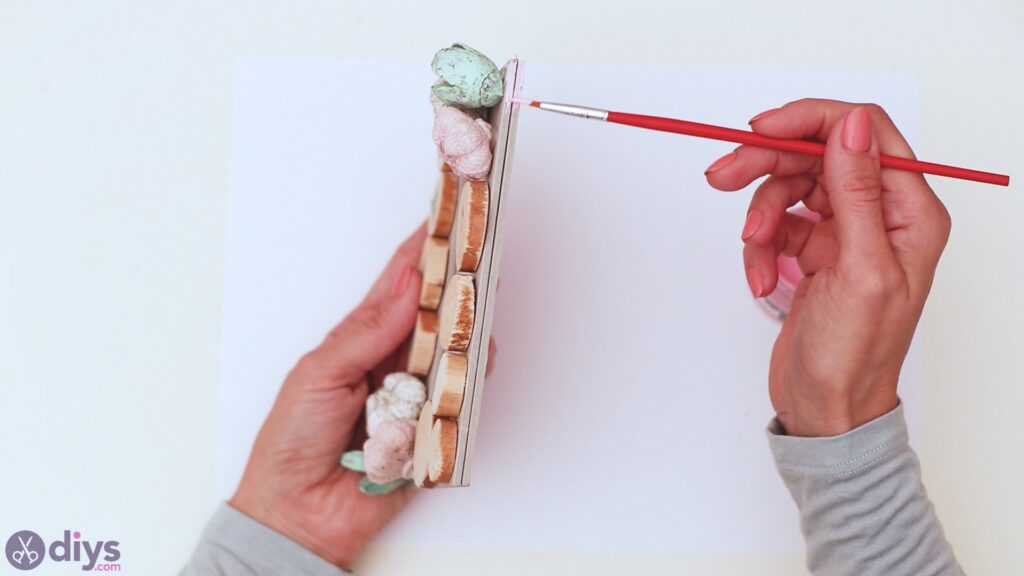
- Paint the frame: Use pink acrylic paint along the edges of the picture frame, covering both cardboard sheets. Be careful not to get paint on the front side of the picture frame, wood slices, or flowers. Let the paint dry before proceeding to the next step.
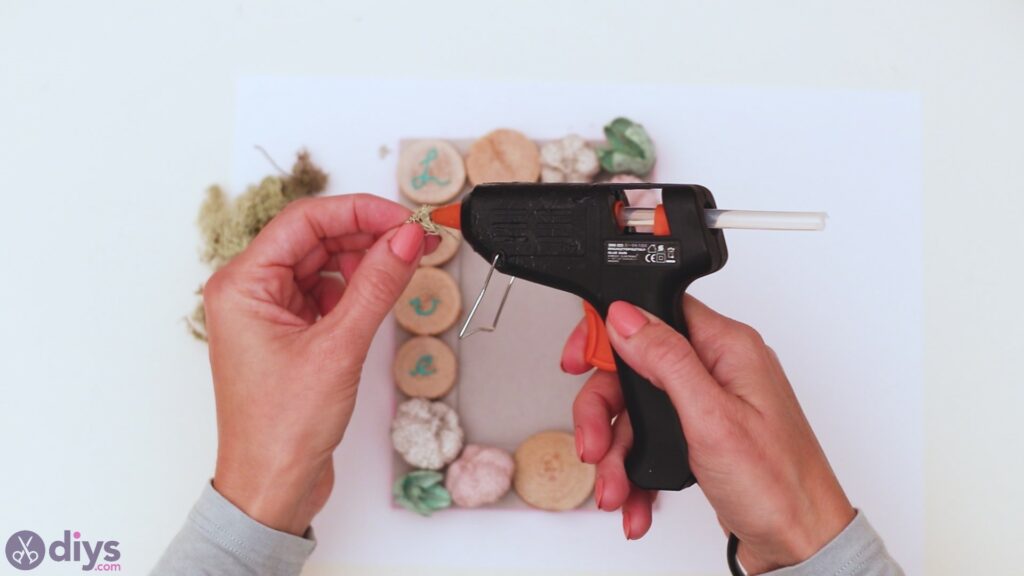
- Add finer details: Attach moss pieces to all empty spaces between the wood slices and the dried plants. Cover the entire front part of the picture frame until the cardboard underneath is no longer visible.
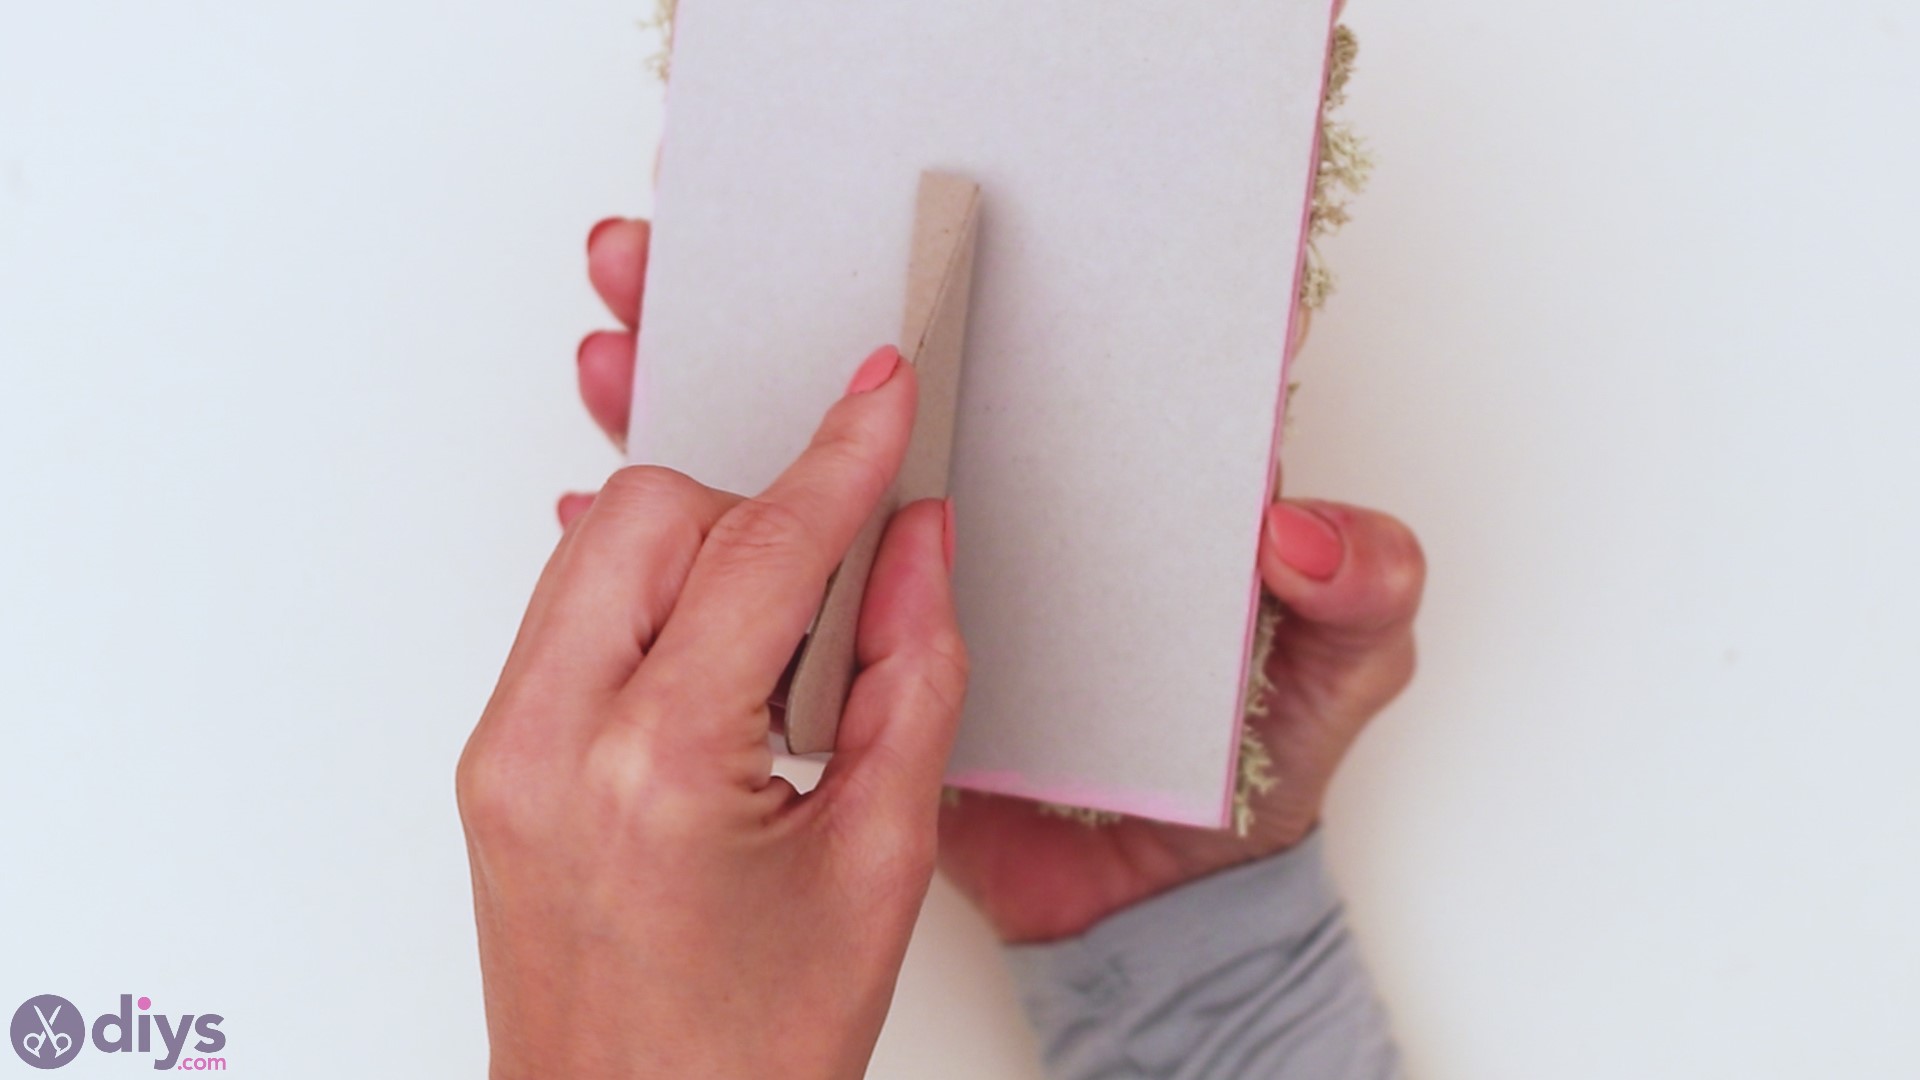
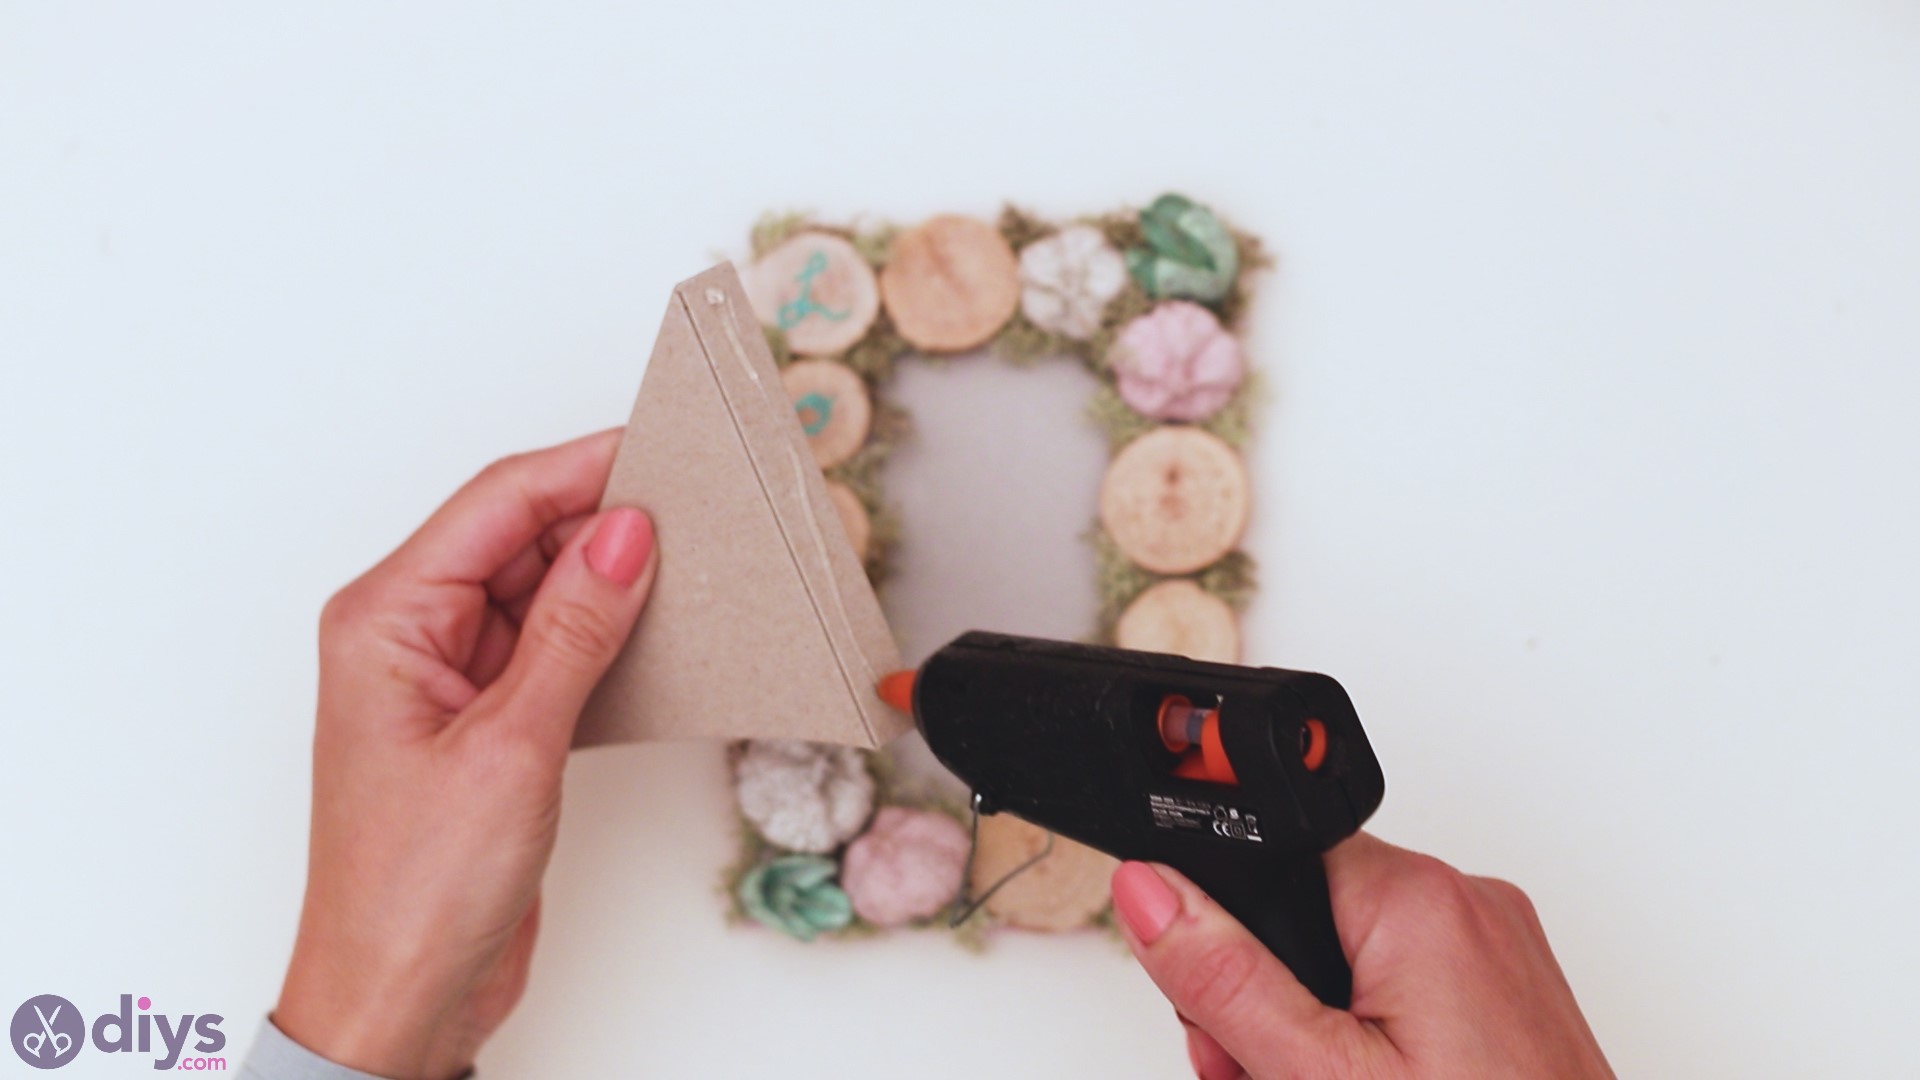
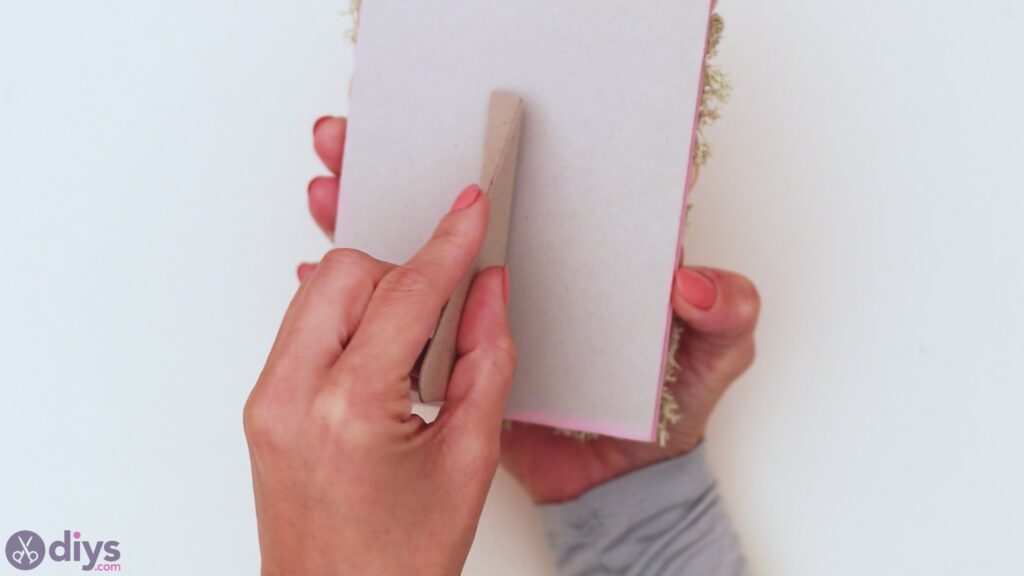
- Attach the picture frame stand (optional): For the makeshift picture frame version, cut a triangular piece of cardboard and fold it on one side. Then, glue it to the back of the picture frame. Your DIY Valentine’s Day wooden photo frame is complete!


Video tutorial
To better understand the process behind making this Valentine’s Day-themed wooden photo frame, check out the following video guide:
More tips and tricks
Check out the following tips and tricks for improving or changing the DIY Valentine’s Day wooden picture frame:
- Use a genuine wooden frame: Wood is more beautiful and durable than cardboard, so it can truly elevate your design.
- Add more natural elements: Try pinecones, feathers, seashells, or other natural elements that create an organic look. It depends on the theme. For example, seashells work well for a beach theme.
- Emphasize the rustic appeal: Distress the wood slices with sandpaper and coat them with varnish for a vintage charm. The darker tones of the varnish will contrast nicely with the lighter elements of the picture frame.
- Try pyrography: A pyrography tool delivers more polished results than wood slice painting. And the first-burned letters will have an interesting texture. But it would help if you had a steady hand since there’s no room for mistakes in pyrography.
- Add more romantic motifs: Use red or pink ribbons, heart shapes, glitter, sequins, or even fabric to make your picture frame more suitable for Valentine’s Day.
Closing thoughts
Crafting a DIY Valentine’s Day photo frame using wooden slices is easy, fun, and rewarding. Whether you’re making one for yourself or as a gift for someone else, your handmade wooden frame will certainly make any room look a lot more welcoming. Check out this list of the best Valentine’s Day crafts for more fantastic ideas.