How to Make a Toilet Paper Roll Bee
Updated on November 19, 2025


If you ask me, sometimes the classic kids’ crafts that every child learns how to do in preschool are the absolute most fun to make! Toilet paper roll projects are the perfect example of what we mean. There’s just something so simple, nostalgic, and fun about making them, especially now that I have kids of my own. They actually fell completely in love with the whole basic concept of toilet paper roll crafts after the first few we made together, so now I’m always trying to think of new shapes, themes, and ideas, since doing something as simple as upcycling our empty rolls instead of throwing the out makes crafting with my kids a lot more convenient affordable. We already have almost everything I need to help them get creative!
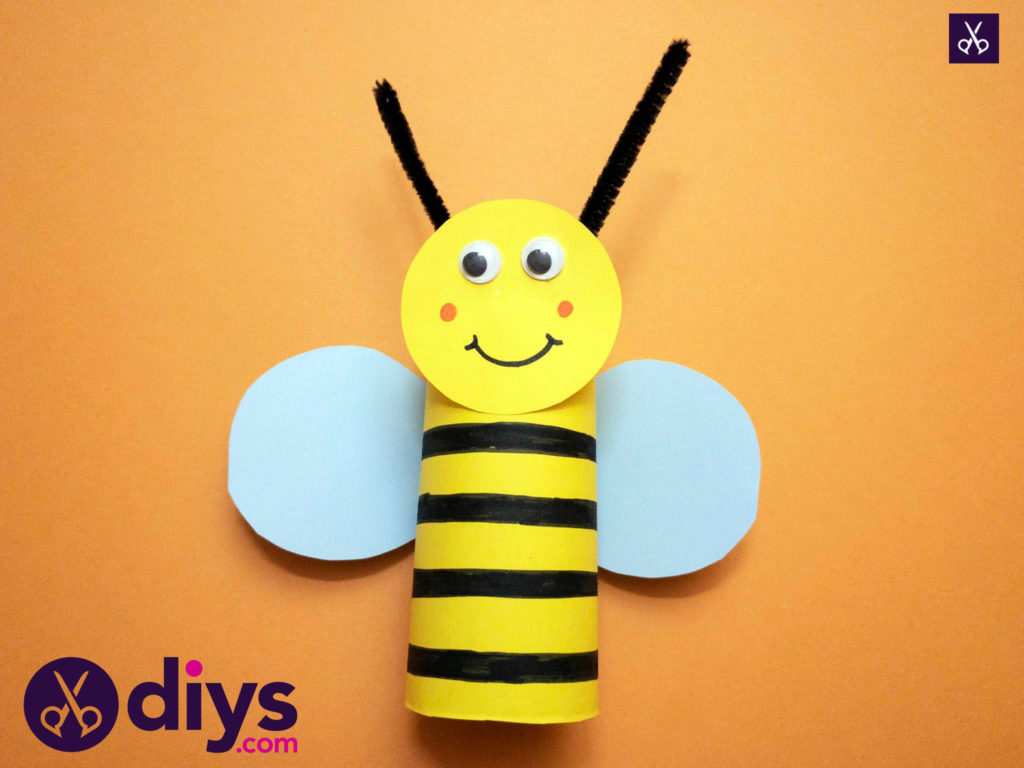
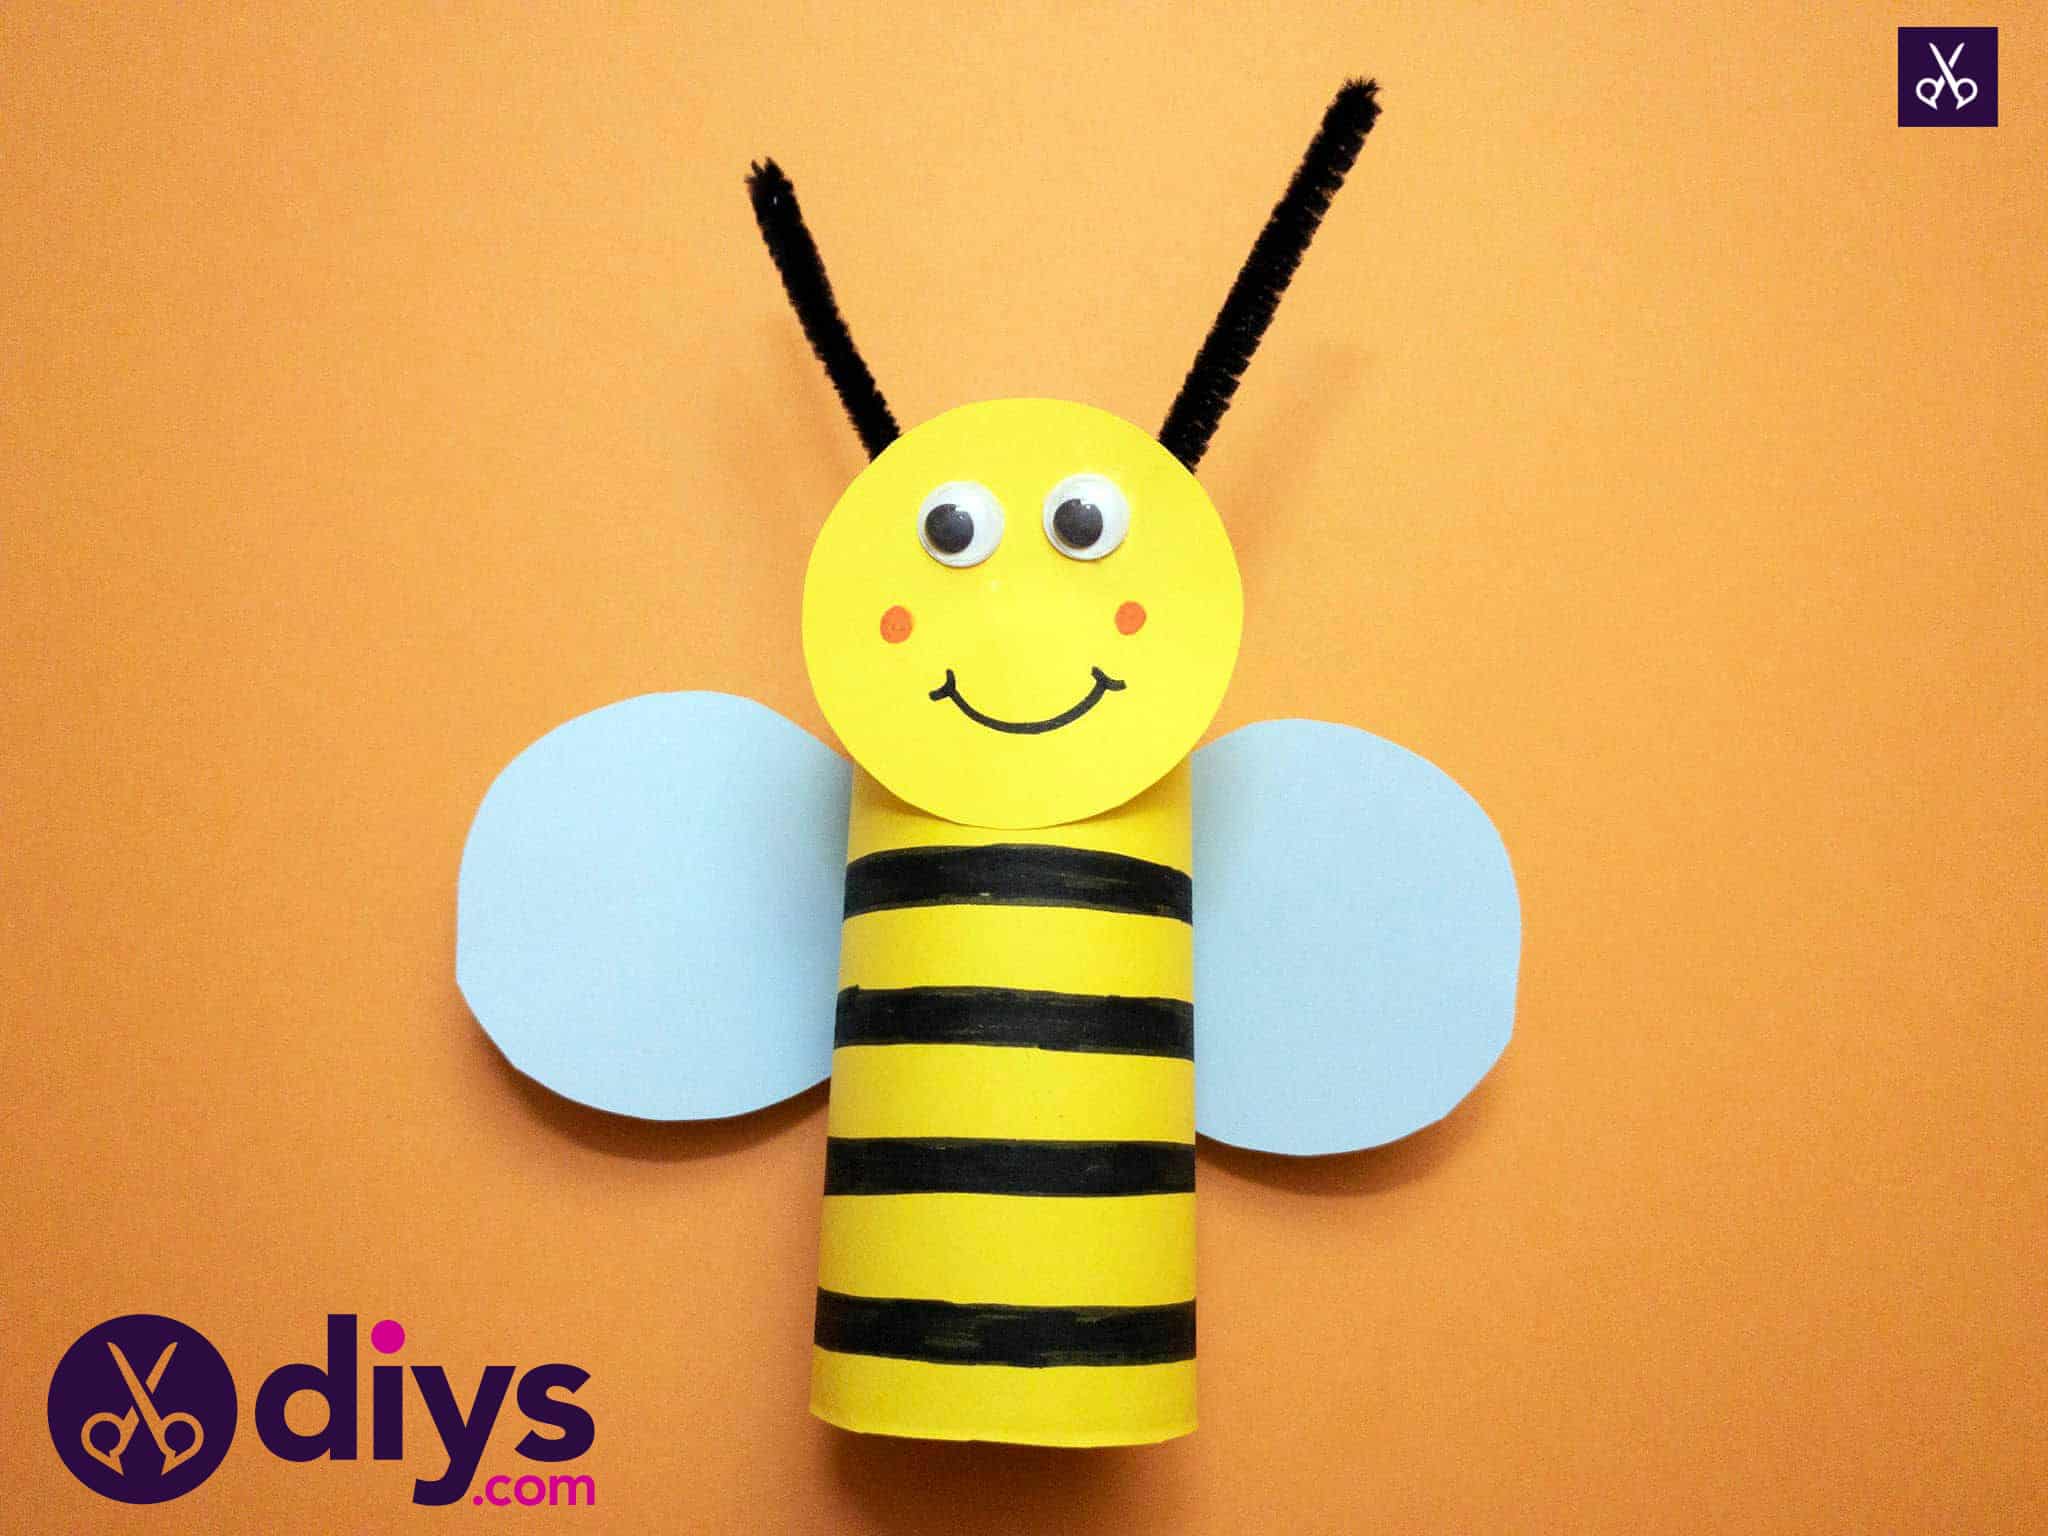
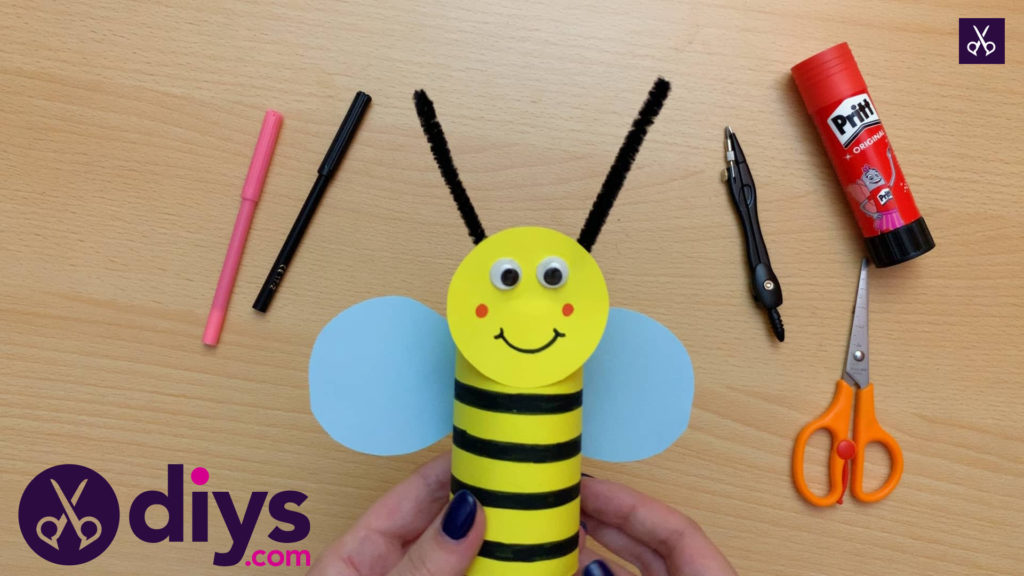
My most recent idea for keeping the idea of making things from toilet paper rolls interesting for my kids was to make an adorable bumble bee. Just in case you’d like to try that out too, here are all of the steps we took to make it happen! You’ll also find a full video tutorial at the end of this post, for those who prefer to follow along visually.
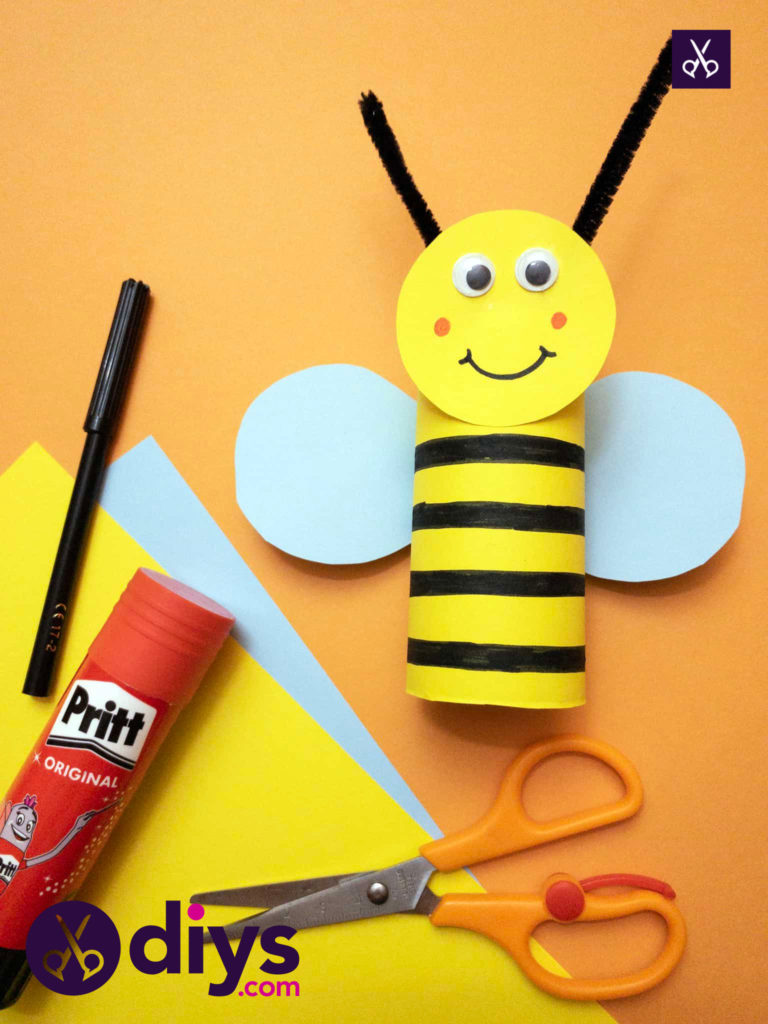
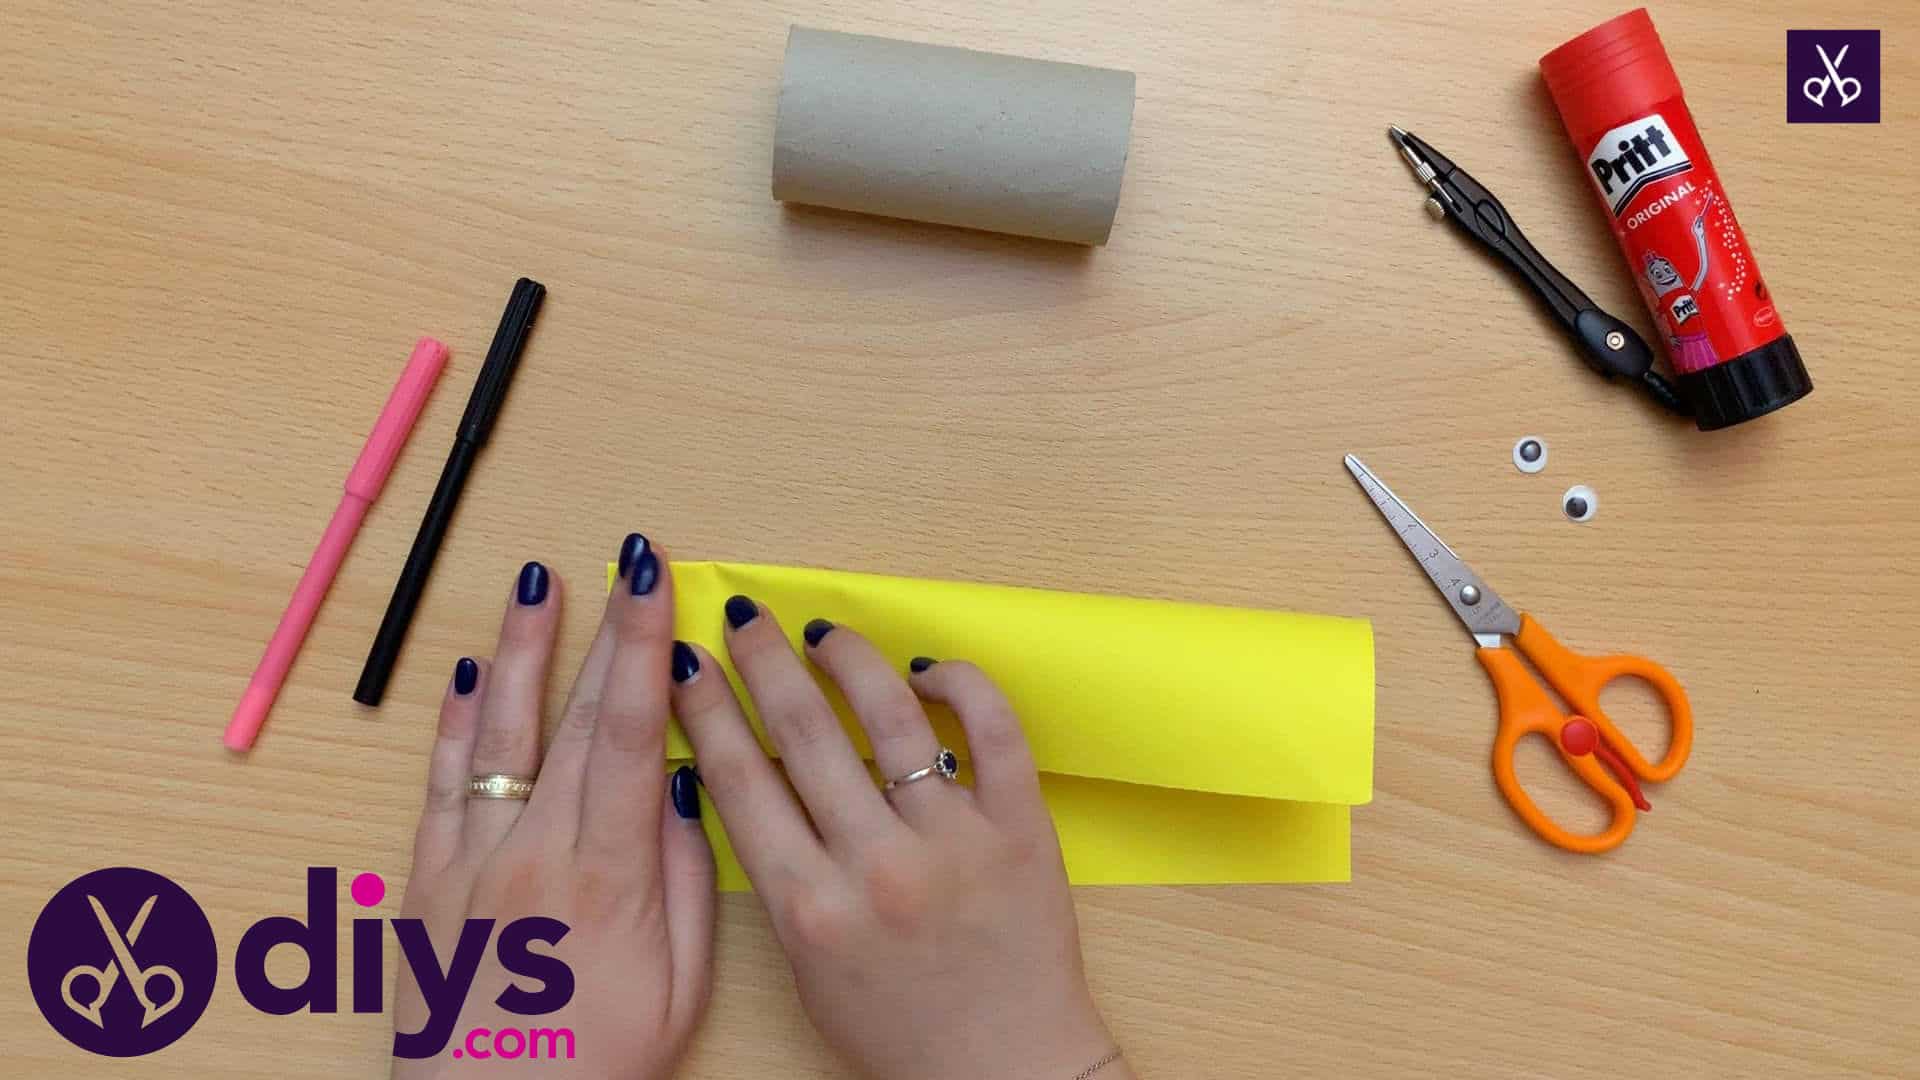
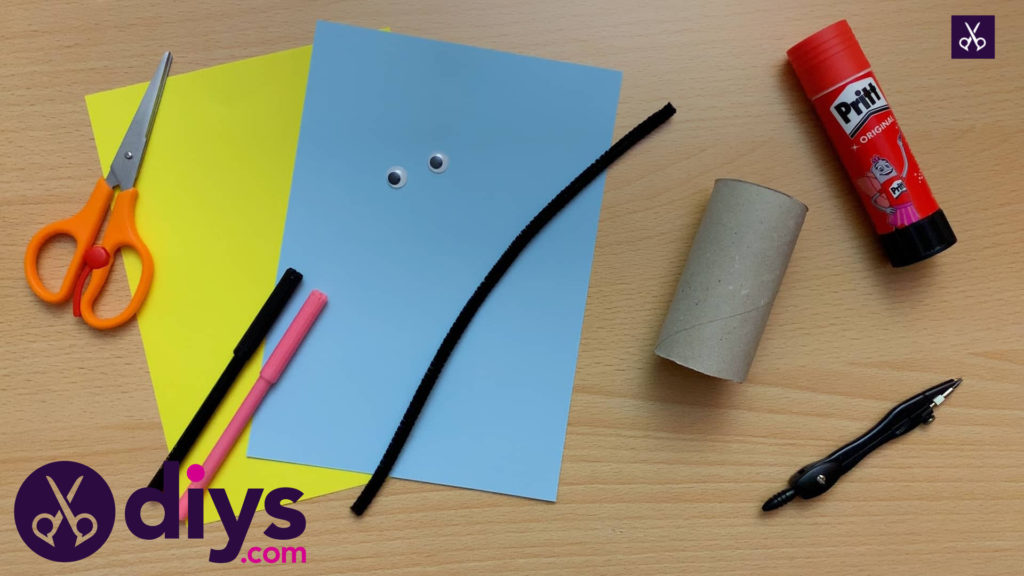
For this project, you’ll need:
- Toilet roll
- Blue and yellow paper
- Googly eyes
- Scissors
- Glue stick
- Black and pink markers
- Black pipe cleaner
Step 1:
Gather your materials!
Step 2:
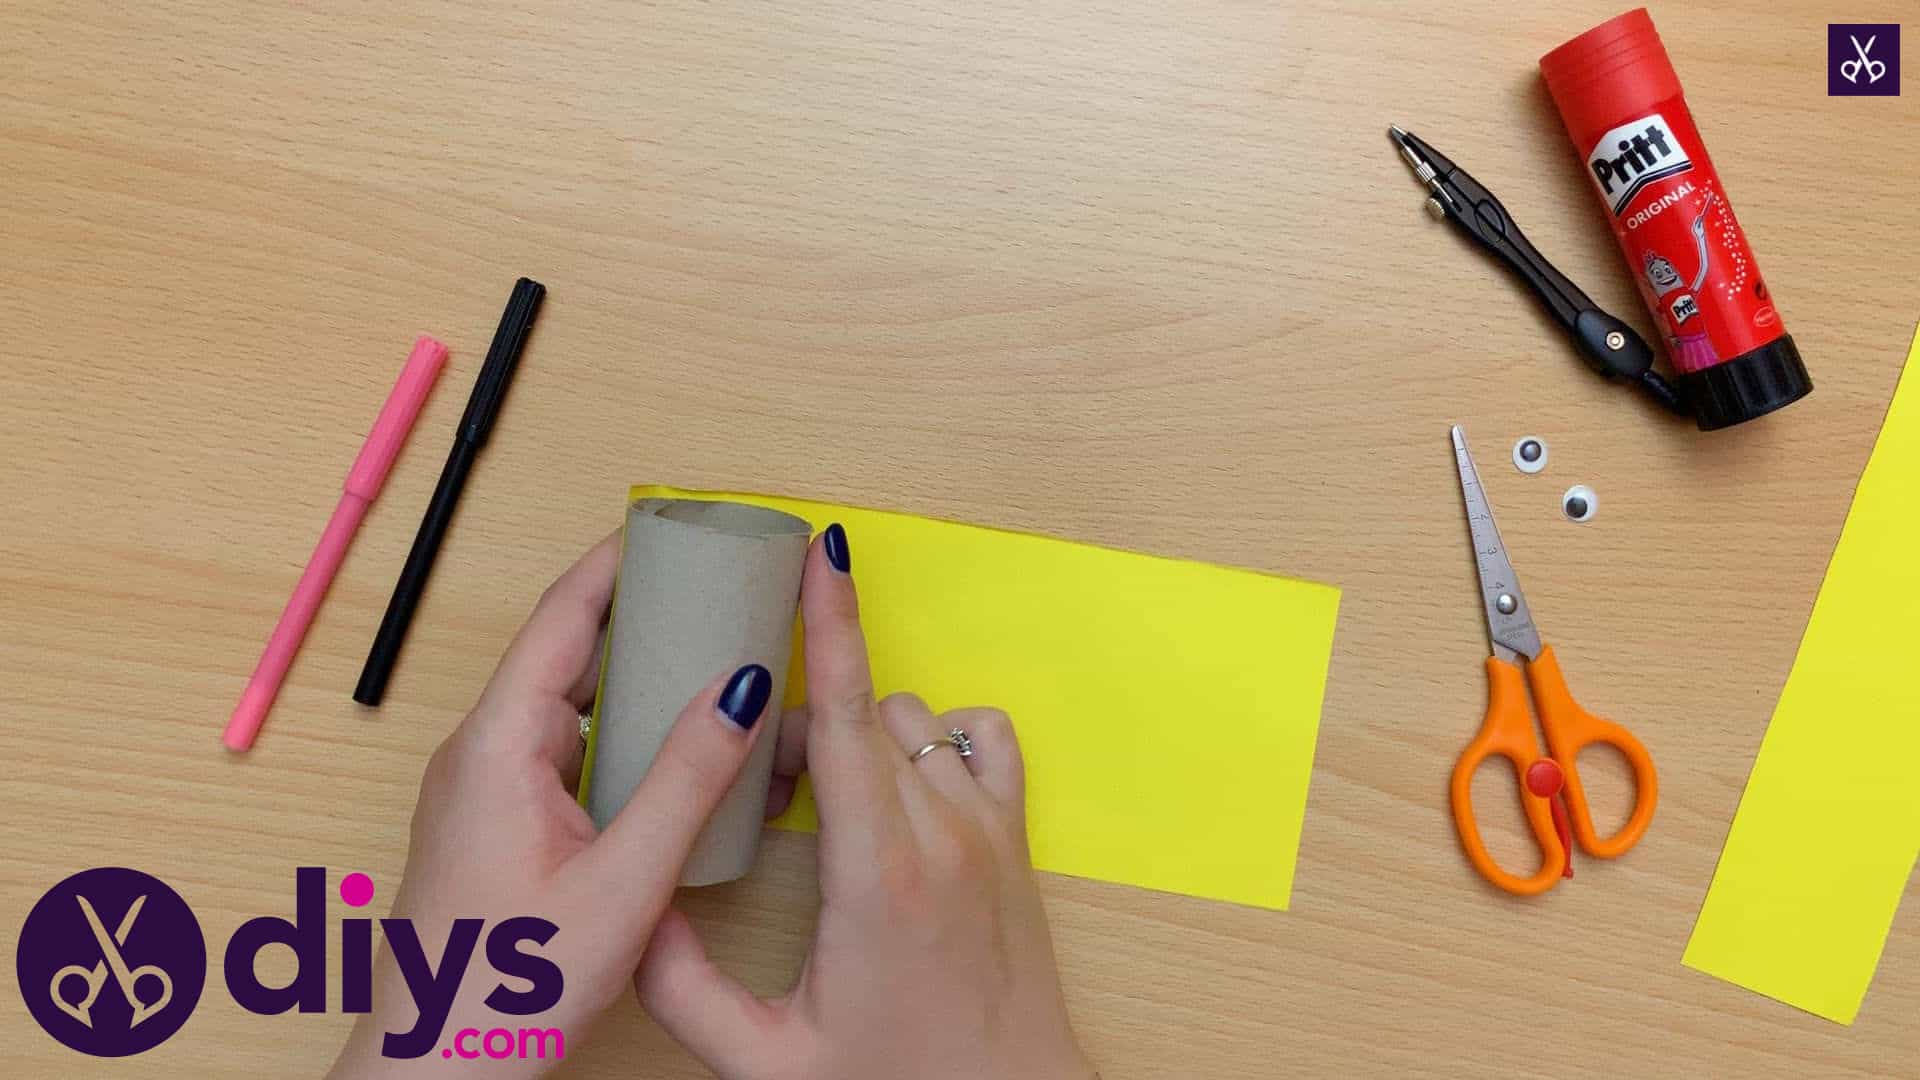
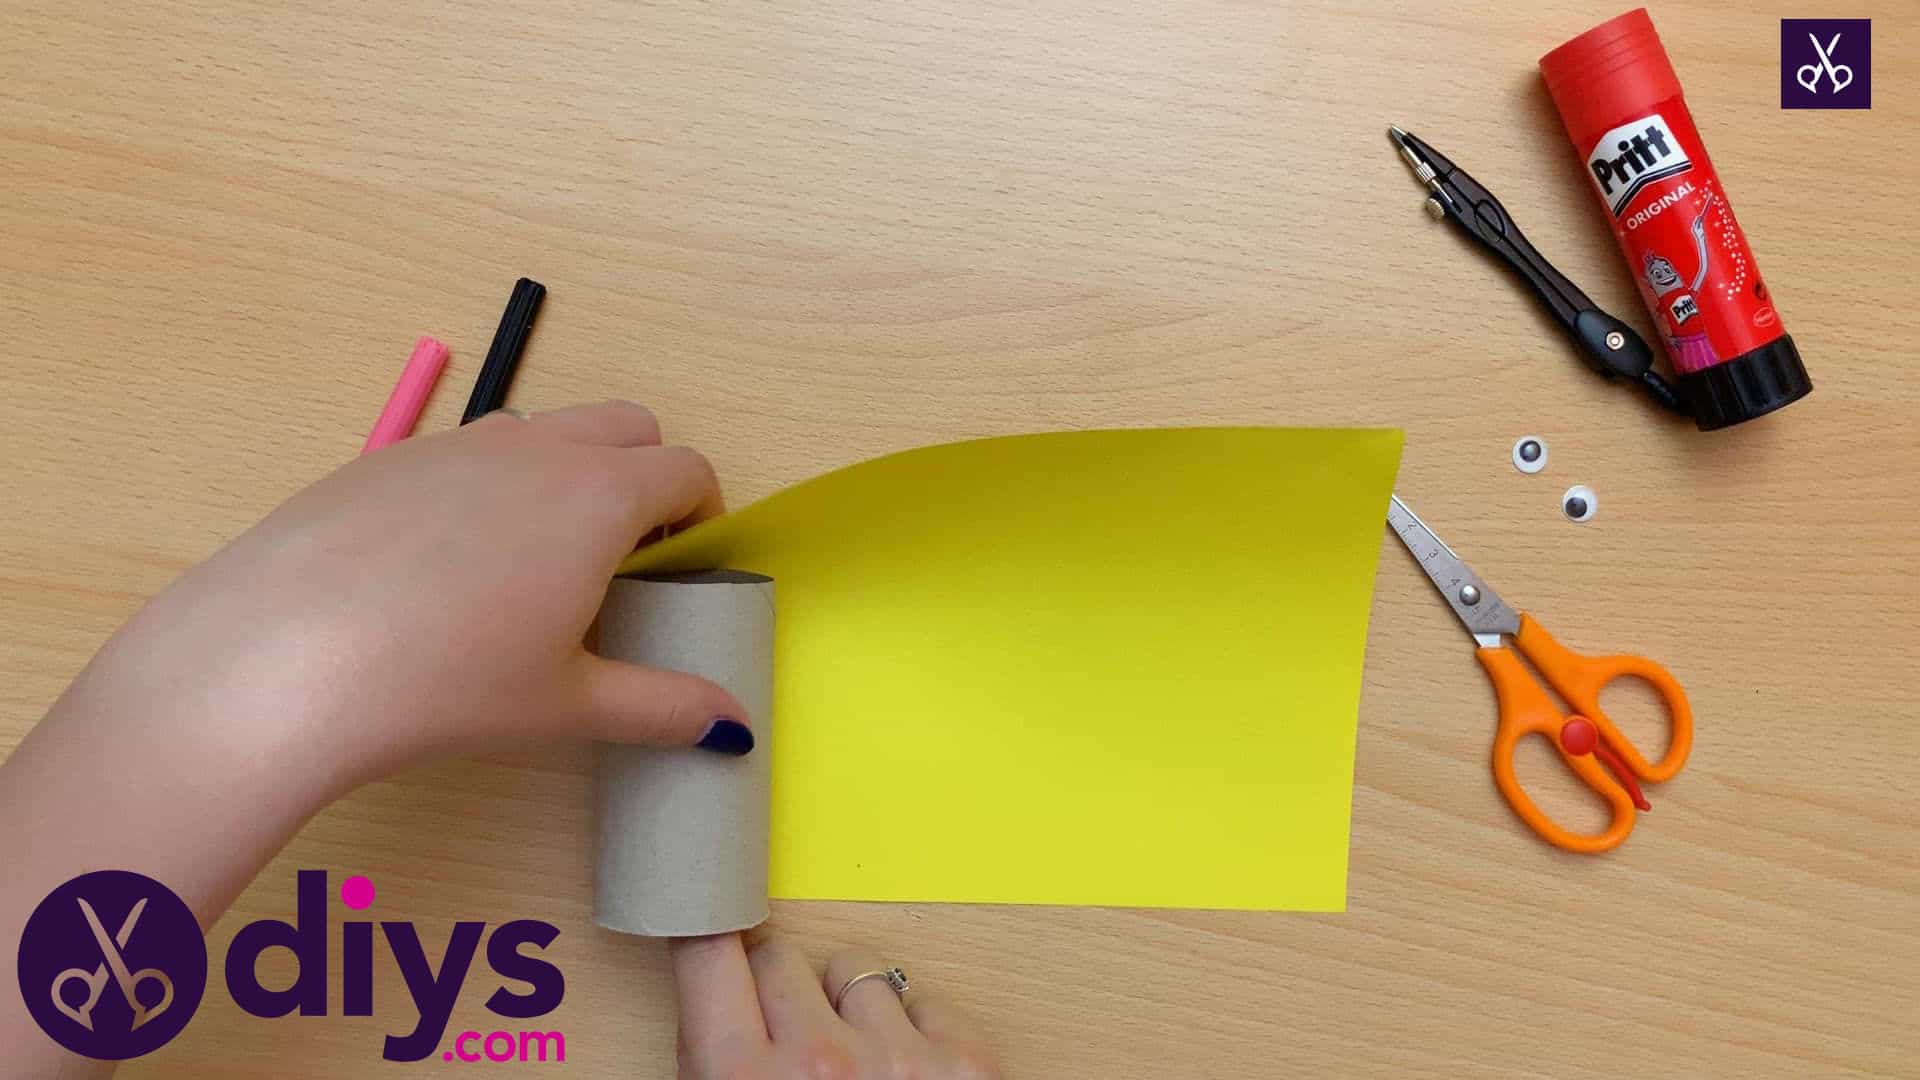
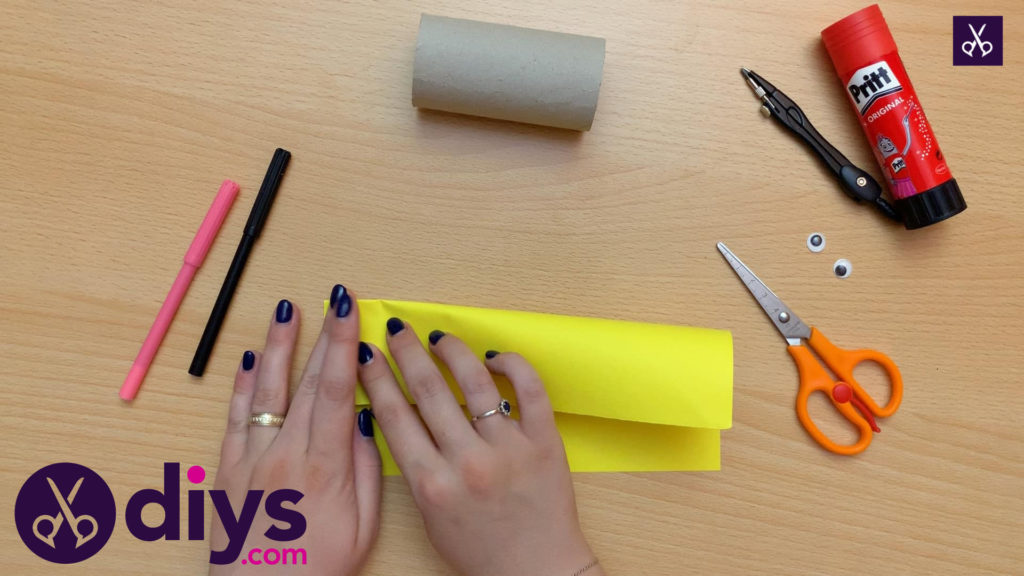
Measure the height of your toilet paper roll onto your yellow page in order to make it easier to cover. Set your paper down flat horizontally and then lay your roll down on the page so its bottom edge lines up flush with the bottom edge of the paper. Make a fold where the top edge of the roll meets the page. You’ll use this mark as a guide to get the right height all the way across the page.

Step 3:
Make a proper fold all the way across the page to mark where the proper height of your roll falls. Feel free to use a ruler and a pencil to get a very straight line if you’re not feeling quite confident enough to eyeball it based on your initial fold mark alone. Crease the page over along that long, open it out again, and cut the top portion of extra paper off.
Step 4:
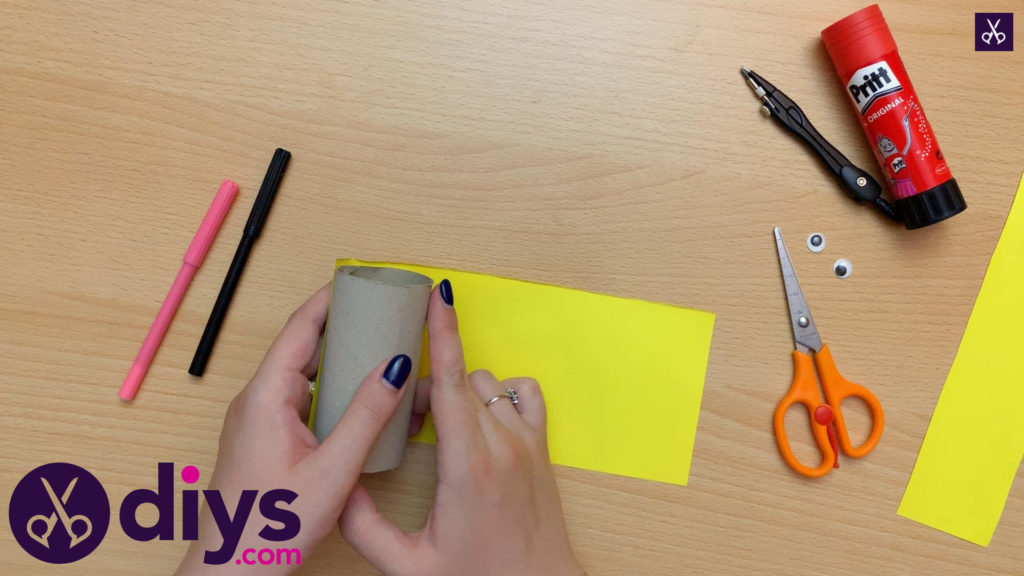
Set your roll back against the section of paper you’ve cut to size, just to verify that you got the height right. It should now fit perfectly from and to end on your roll.
Step 5:
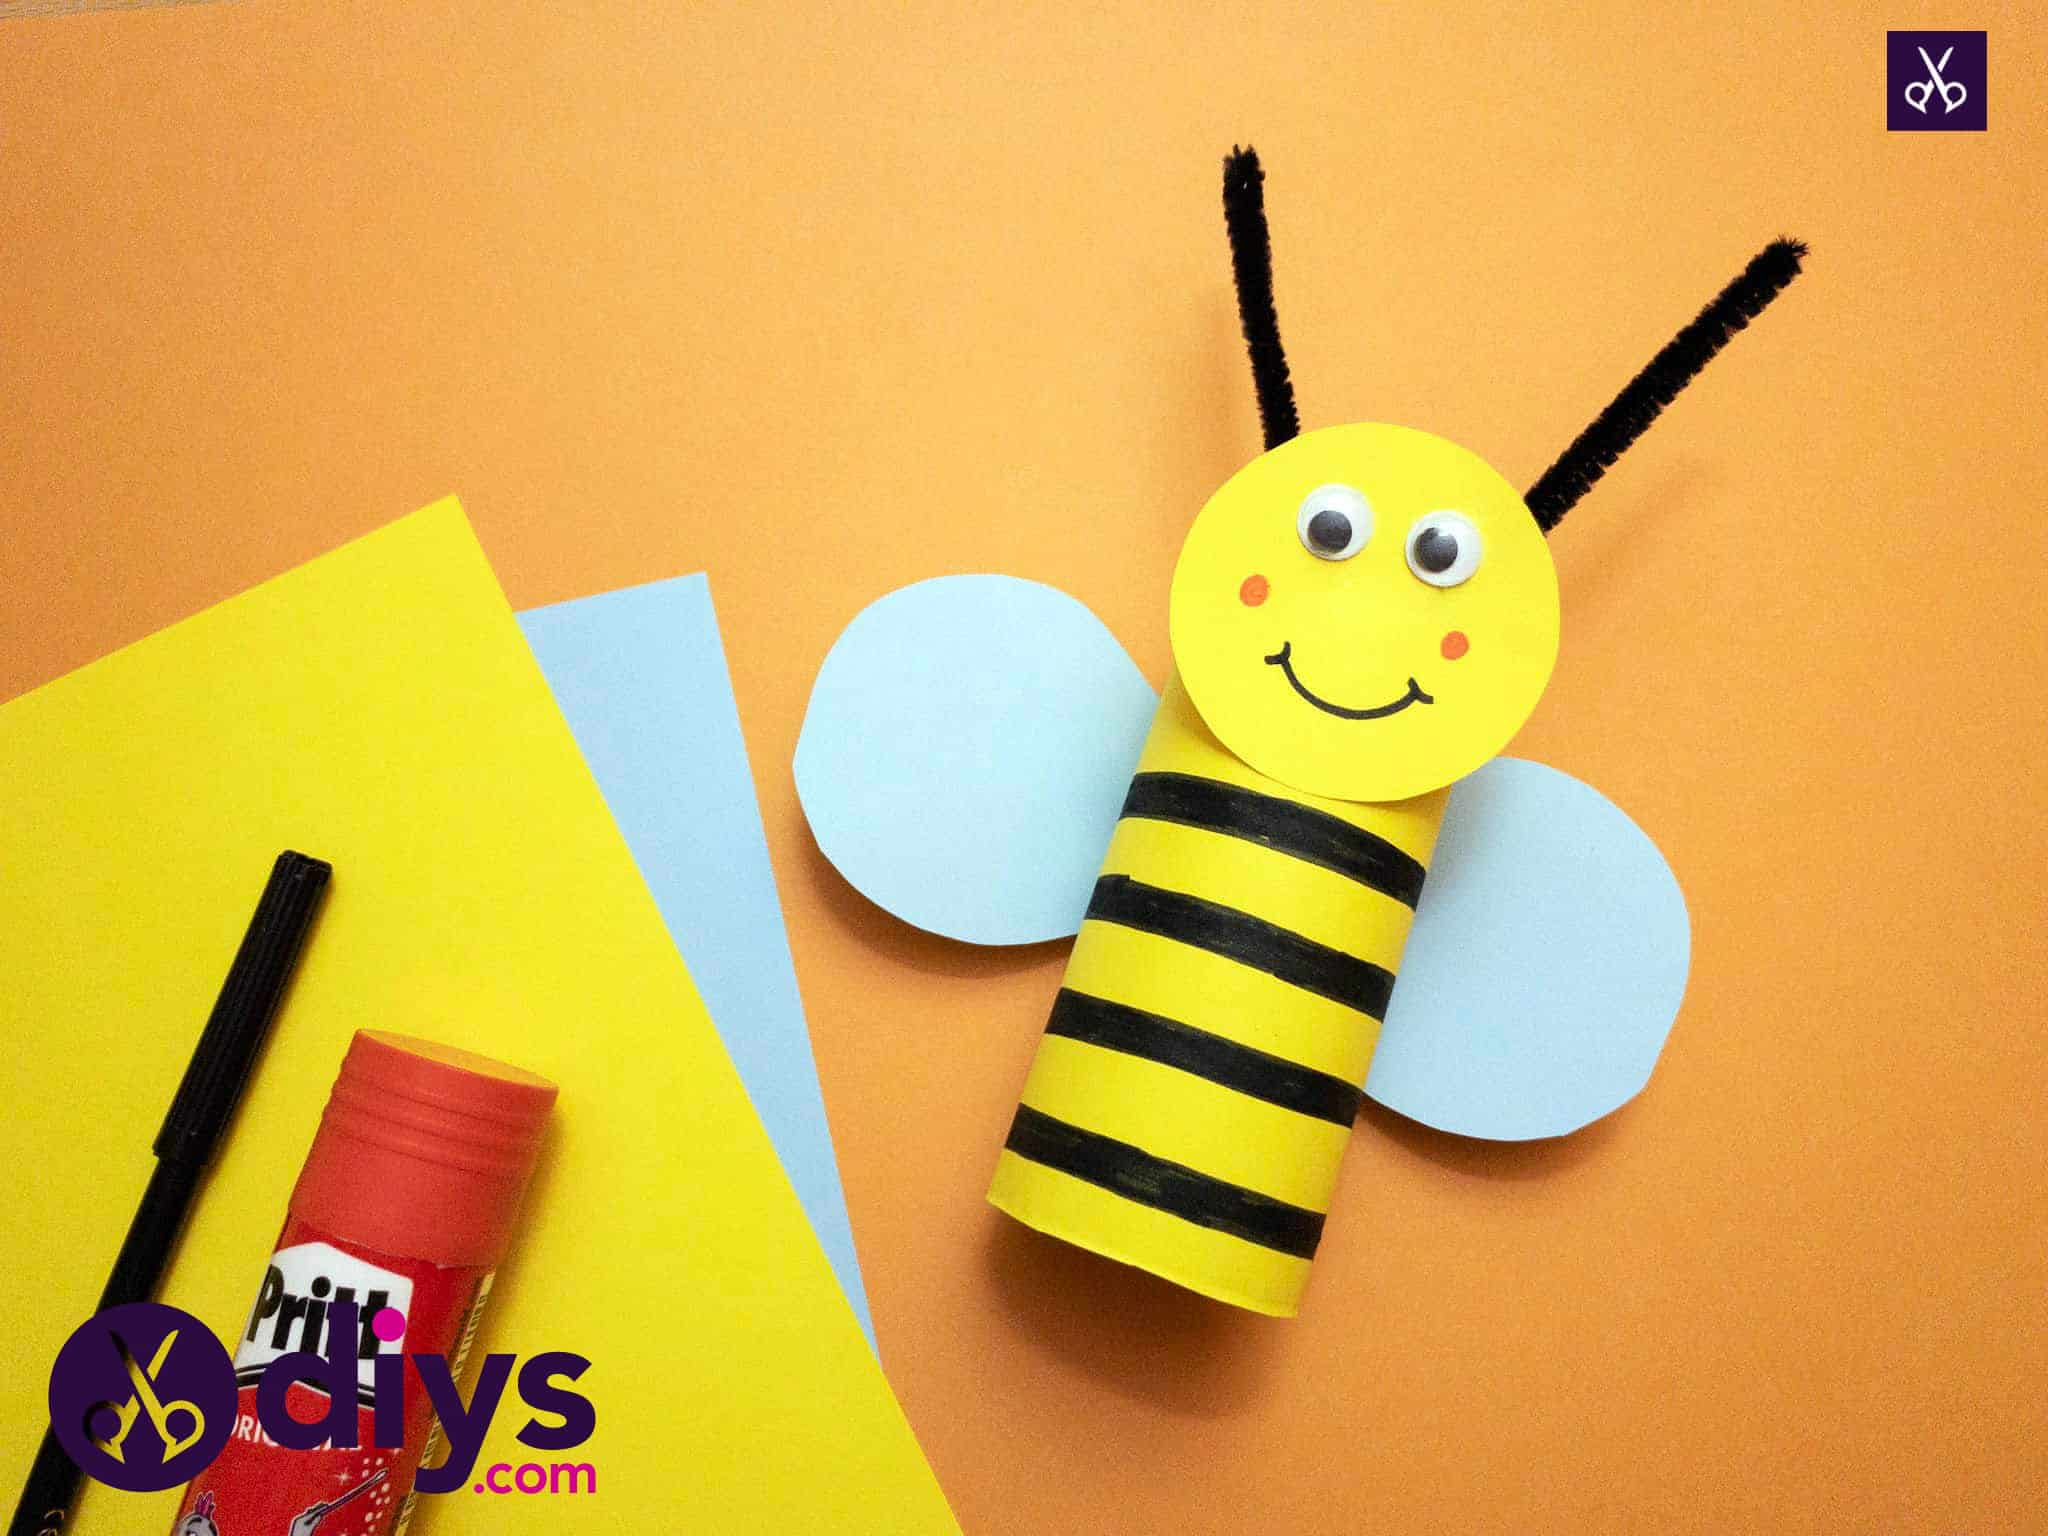
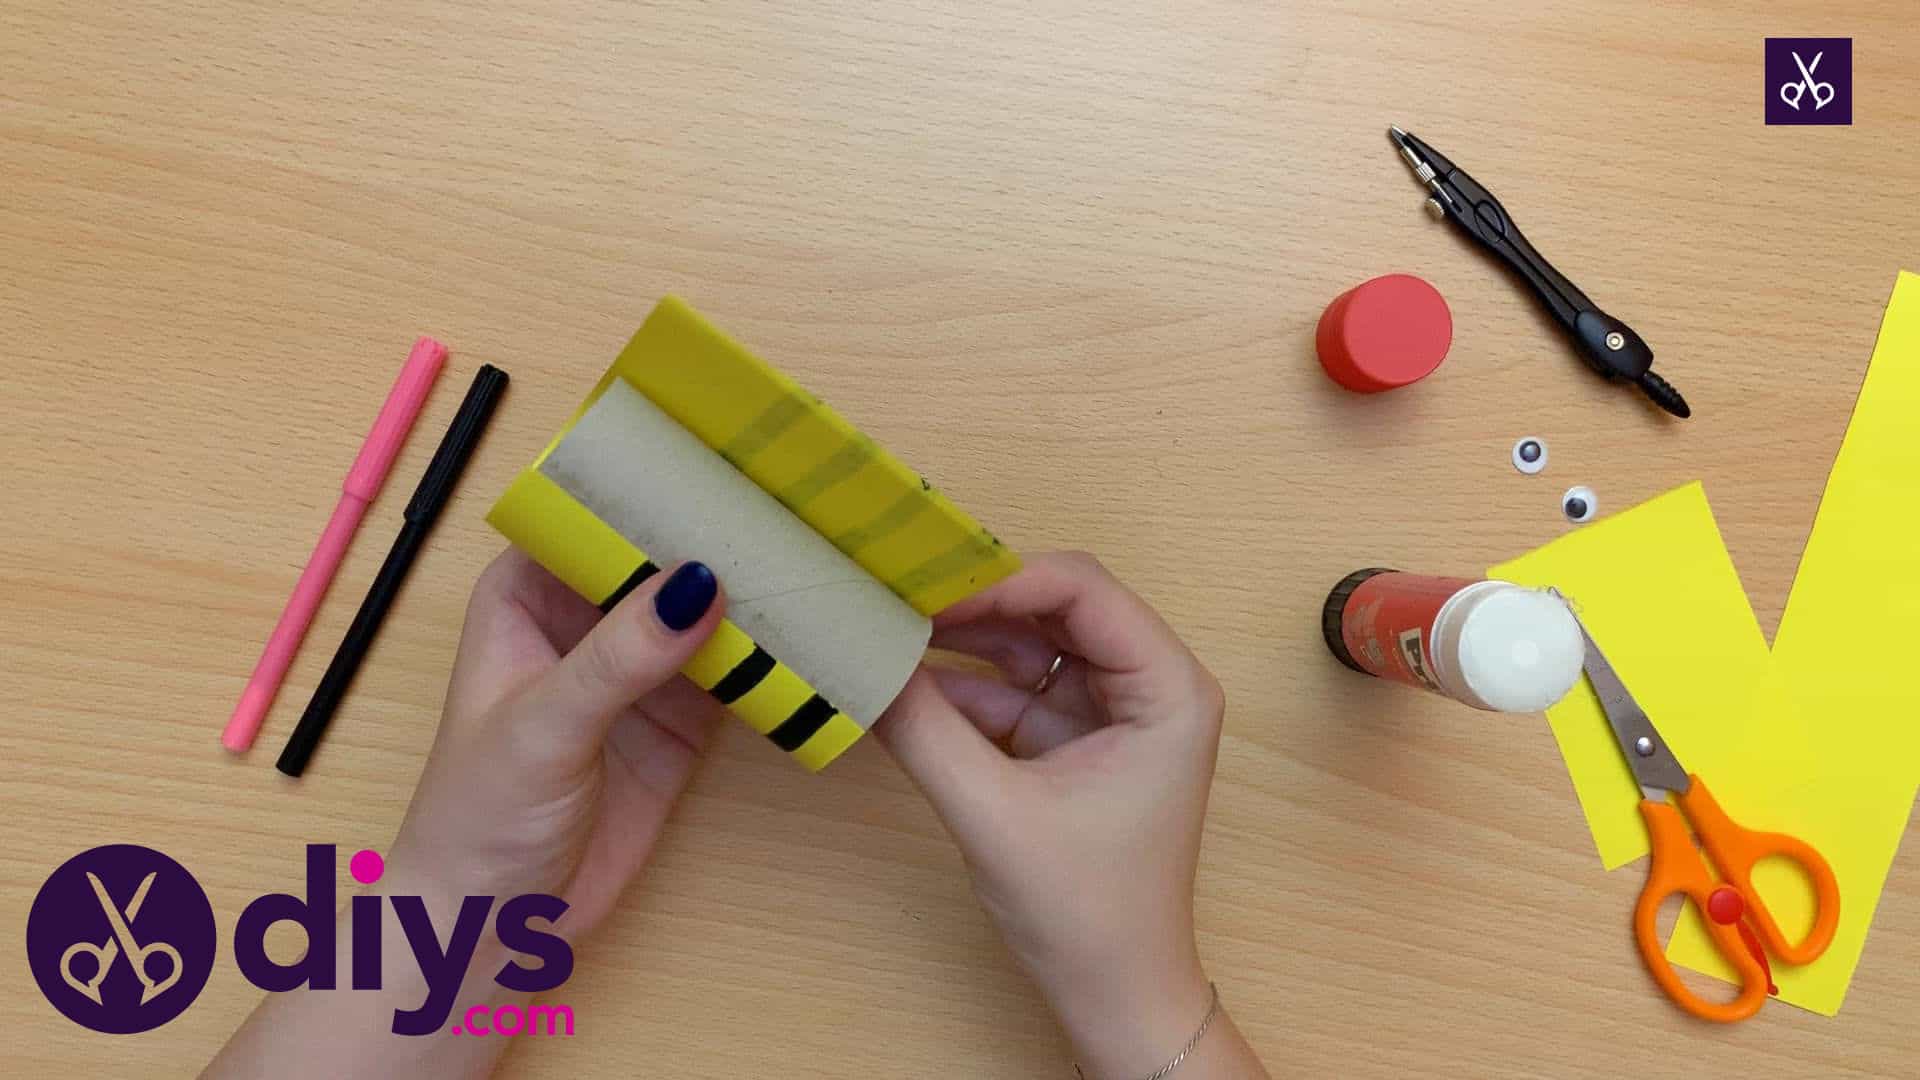
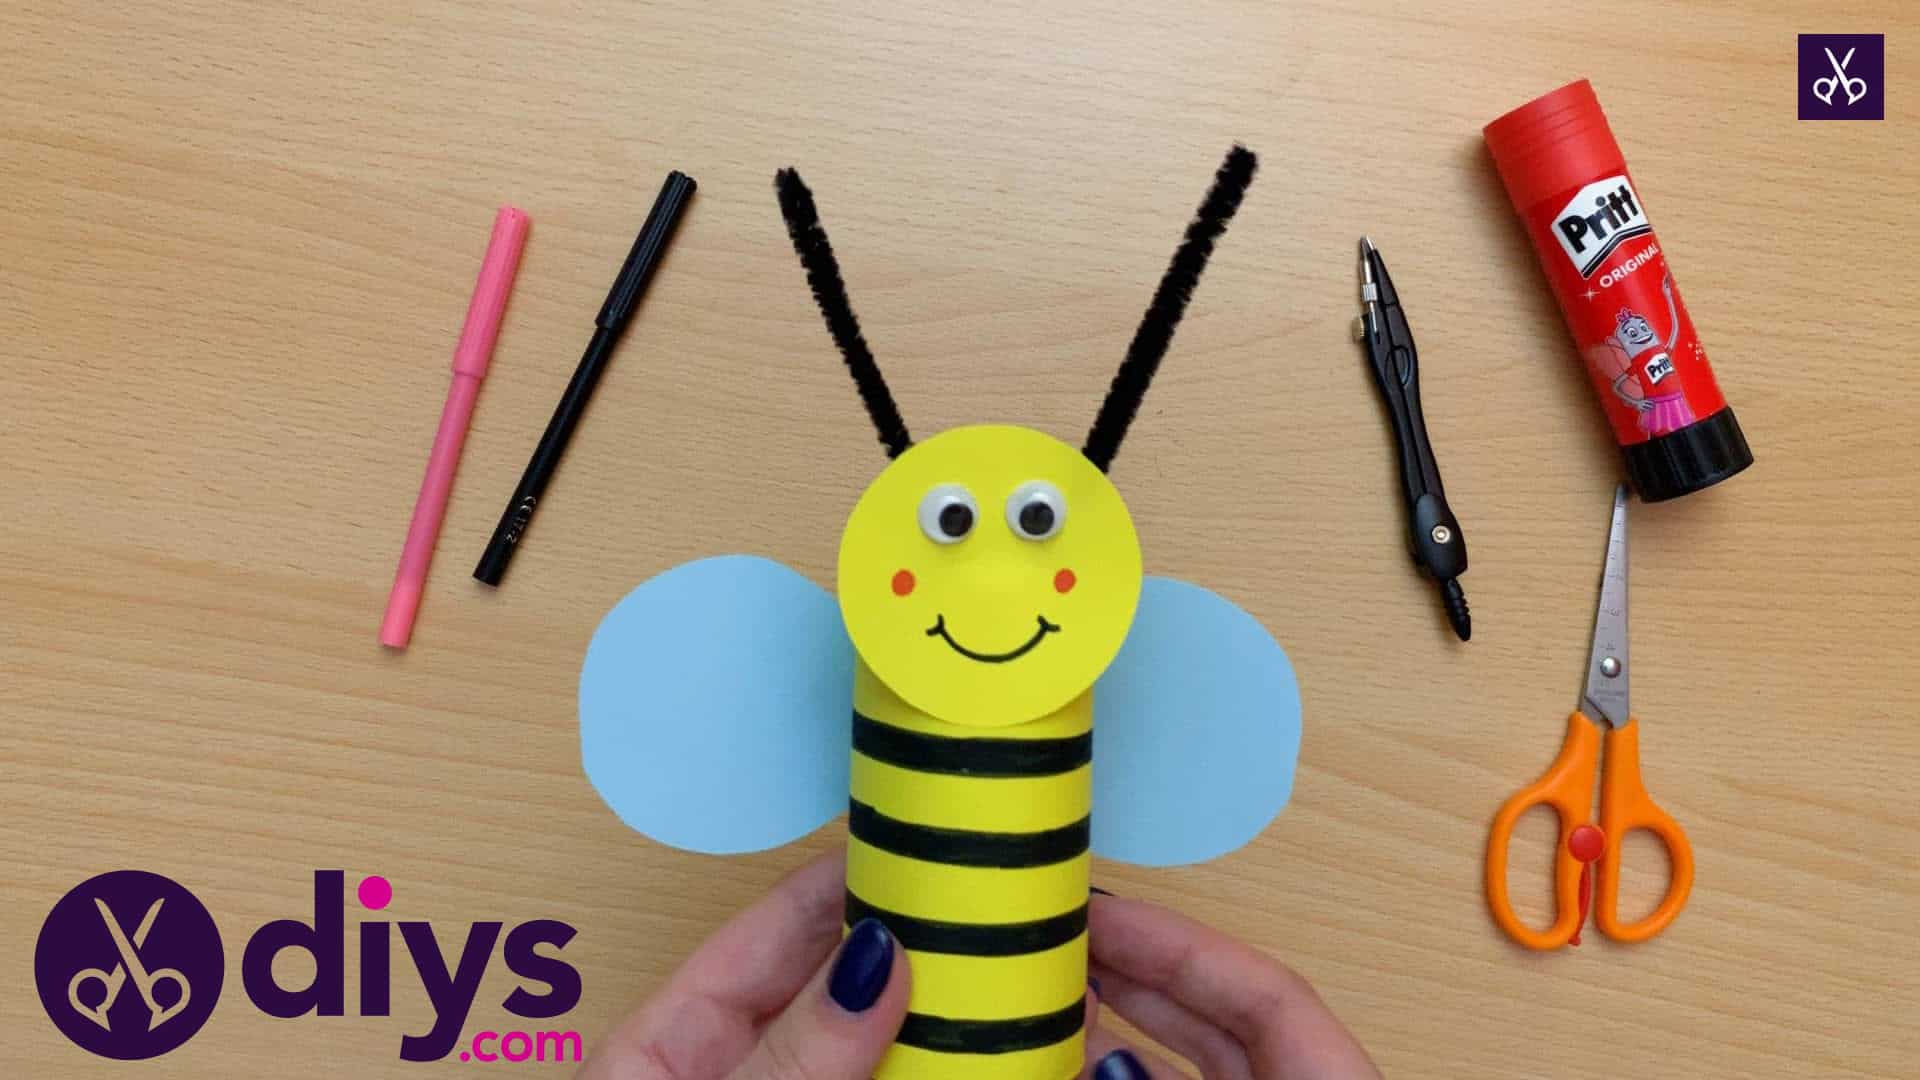
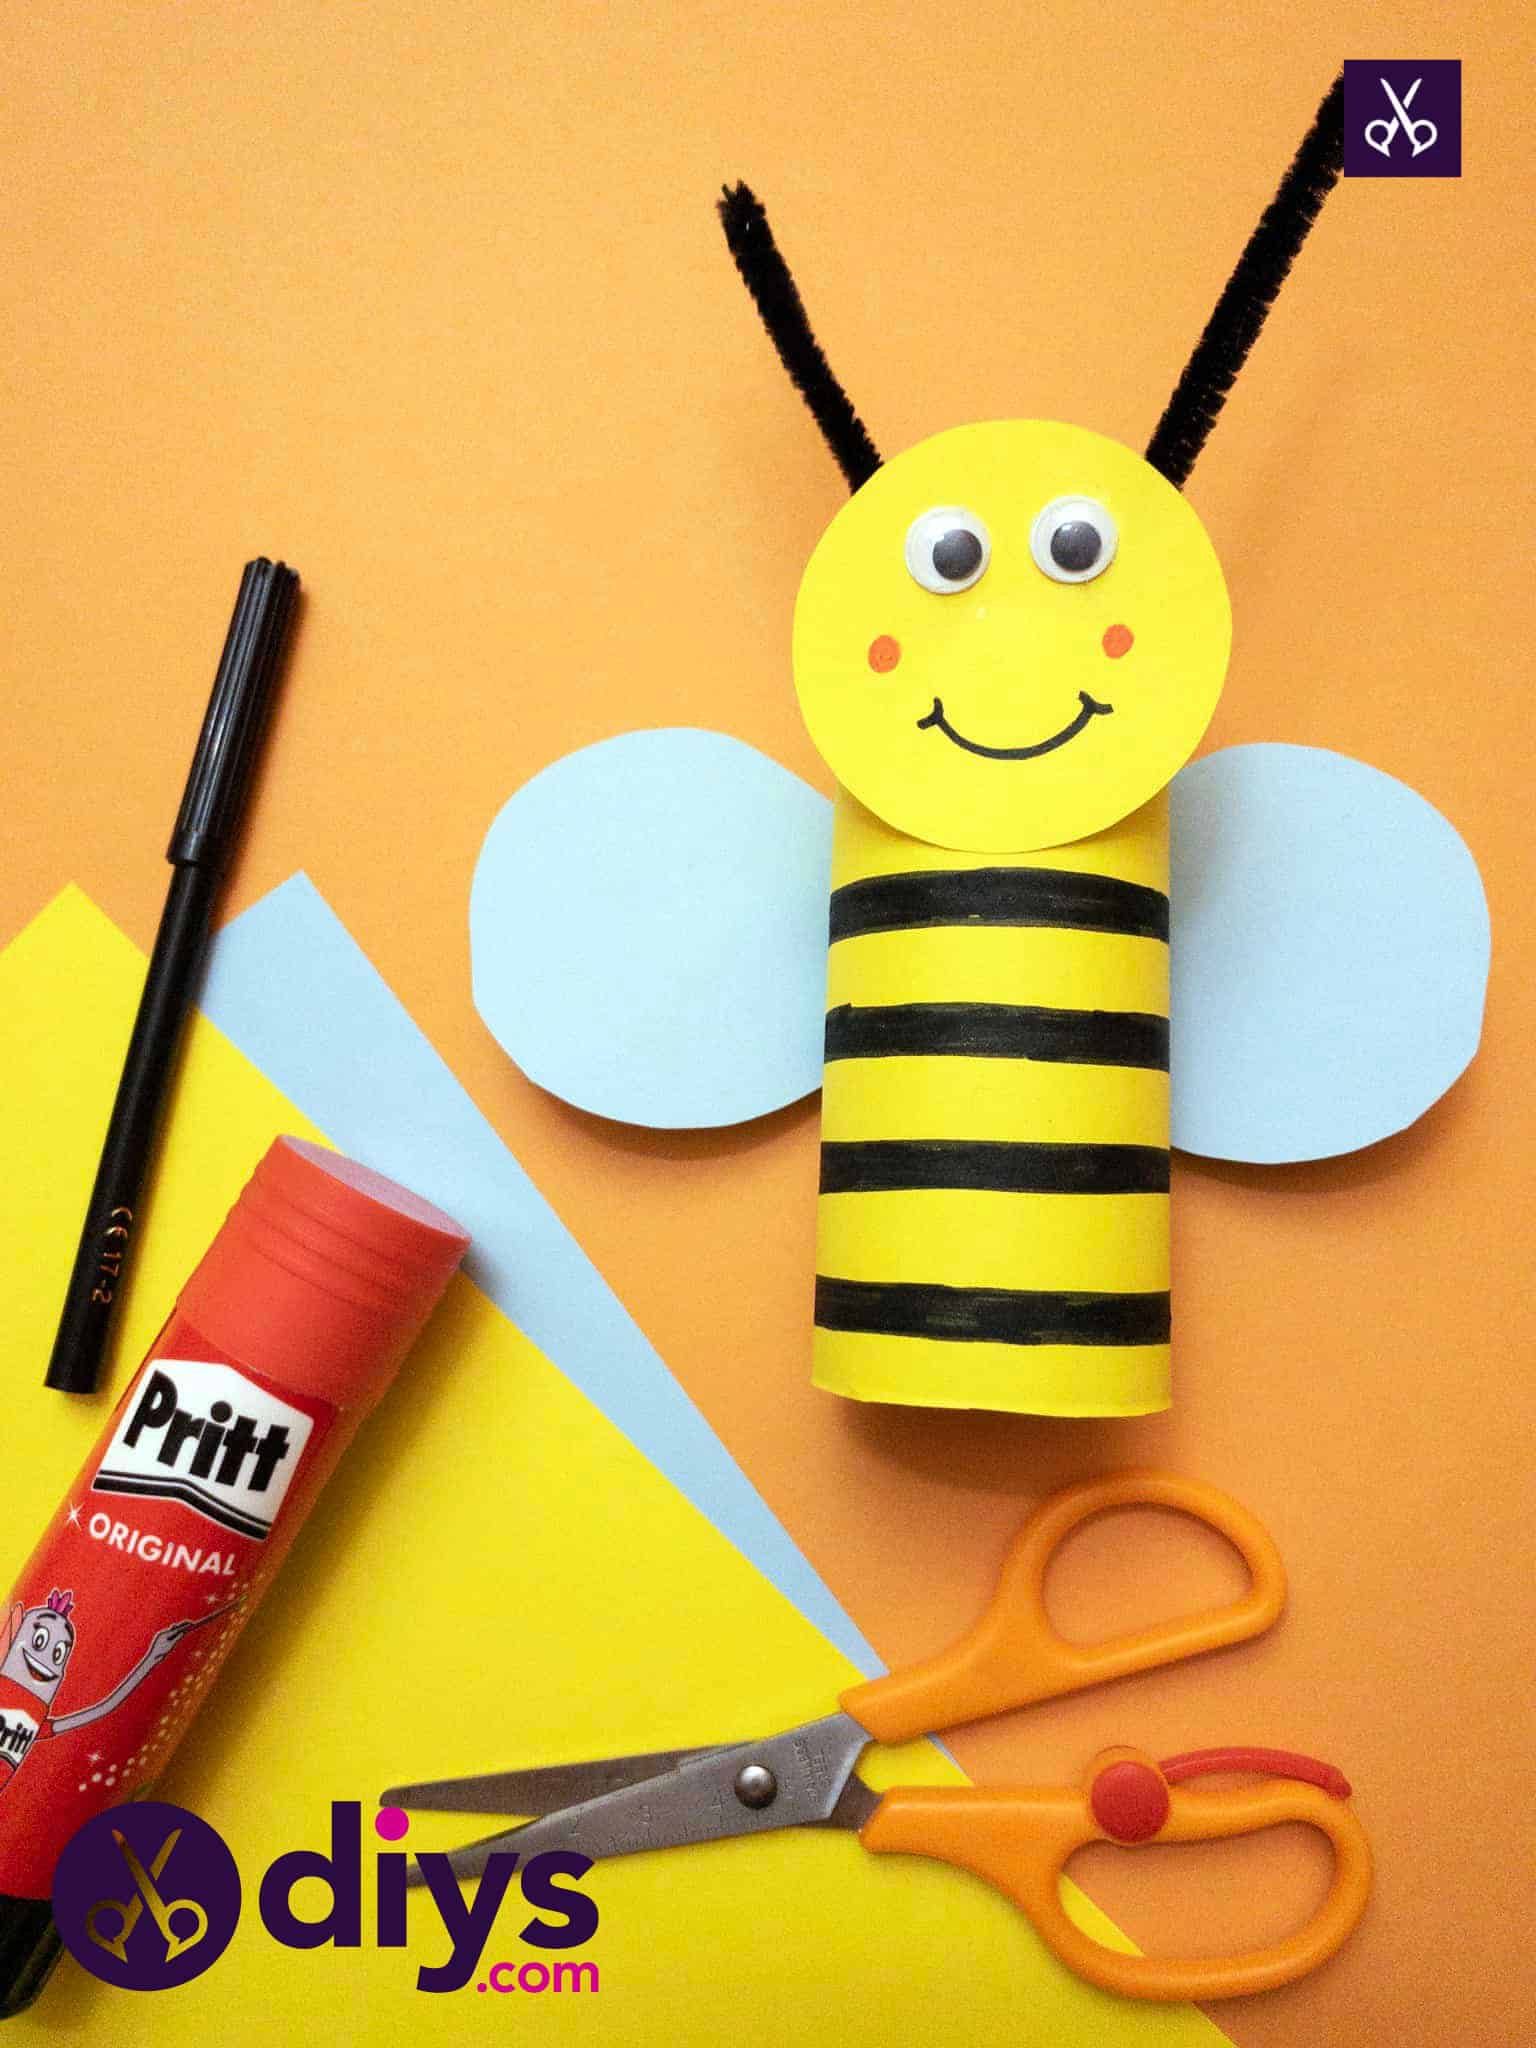
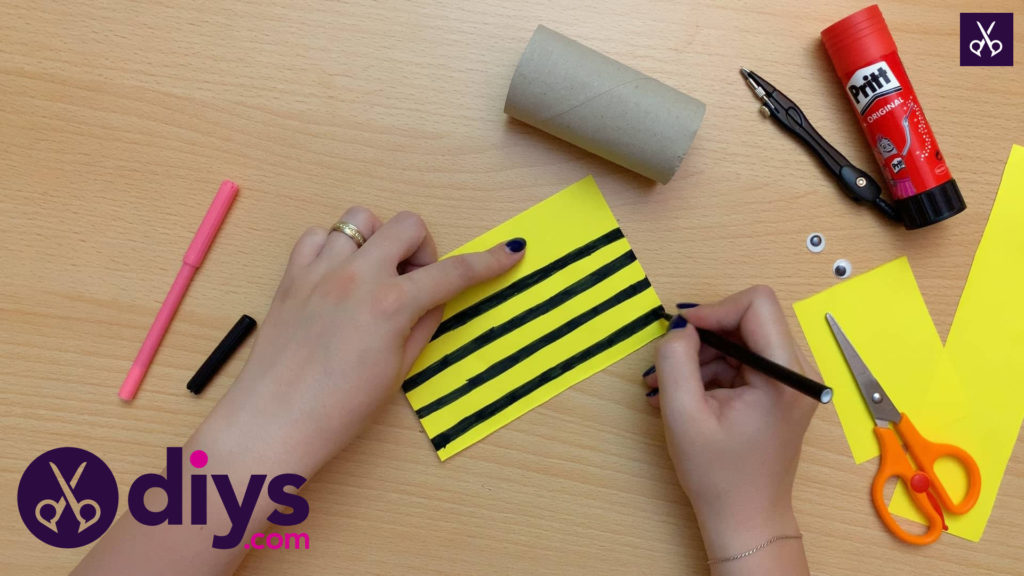
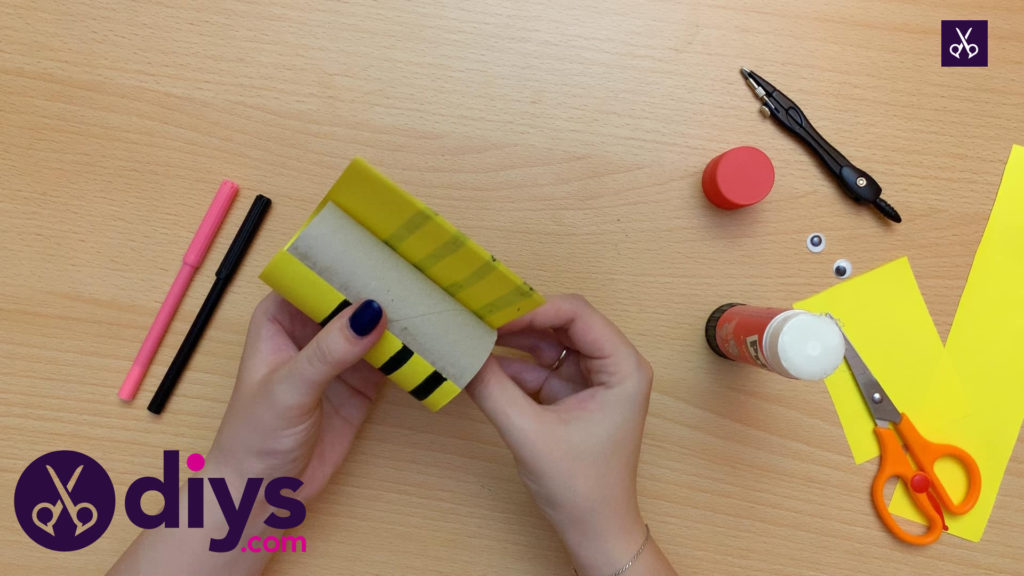
Remove the roll again and set your piece flat on the table once more. Using a black marker, draw black horizontal lines all the way across the piece, creating stripes like a bumble bee has. I chose to draw four slightly thick, coloured in stripes, leaving a larger chunk of just solid yellow at the top with no stripes. That’s where your bee’s face will go!
Step 6:
Apply glue to the back side of your yellow piece, on the flip side of where you just drew your stripes. Line one side up with the bottom and top edges of your roll and smoothly glue the rest of the yellow piece to the outer surface of your roll, keeping the edges even all the way around. You can cut the excess of the page off and make the ends meet flush against each other if you’d like, but mine only overlapped a little bit and my stripes lined up well because I drew them nice and straight, so I just pressed the page down all the way around the roll. Try to keep it as smooth as possible to ensure that it’s wrinkle free!
Step 7:
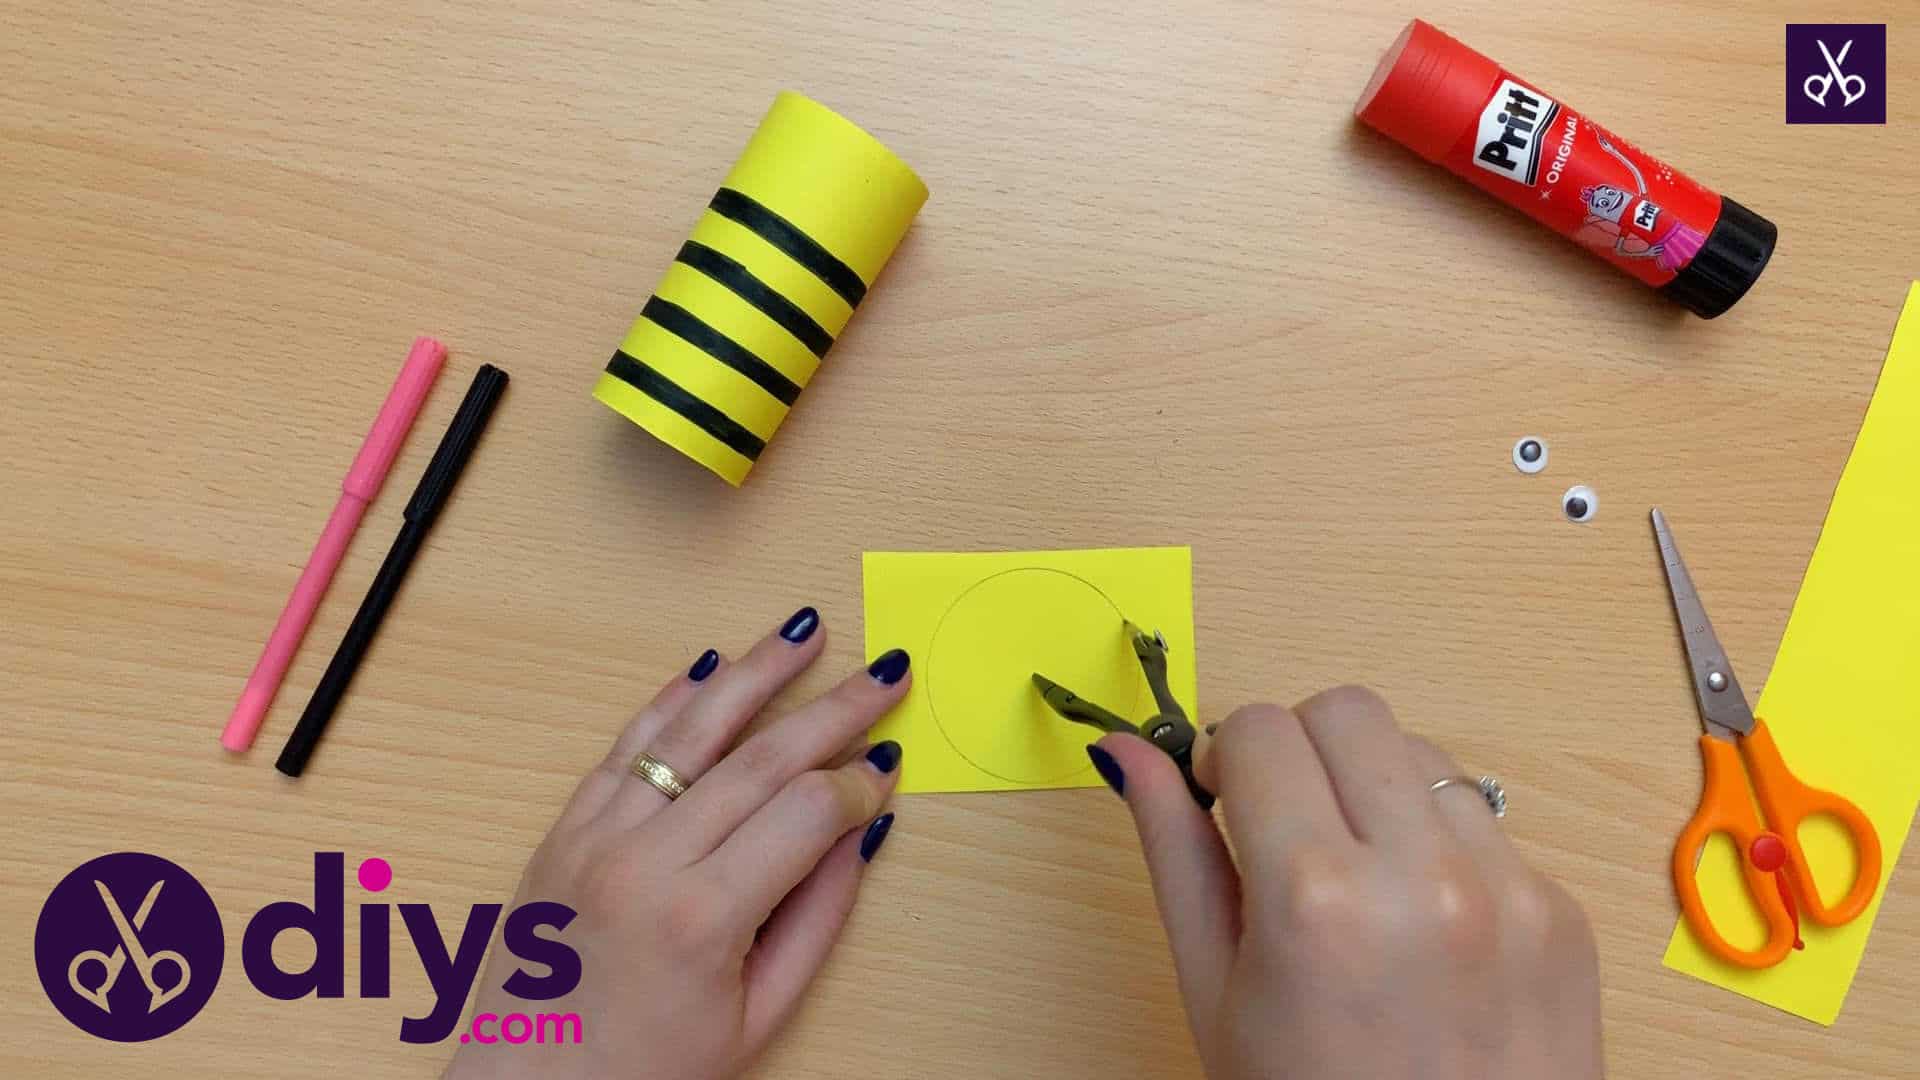
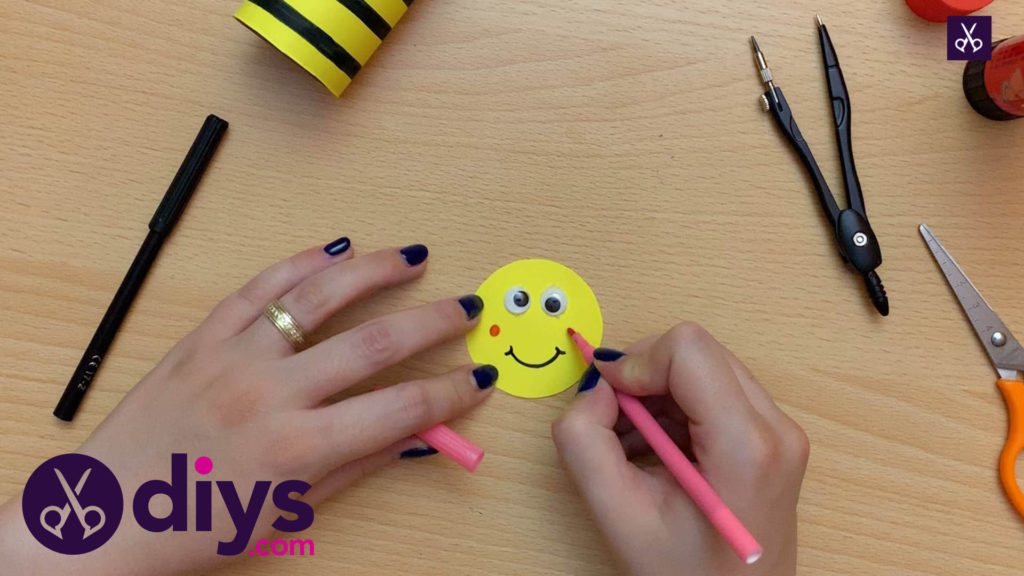
Set your covered toilet paper roll aside and take another piece (or a scrap) of your yellow paper. Take your calipers and position the points about half an inch away from each other, then use them to draw a circle. Cut the circle out. This will be your bee’s head!

Step 8:
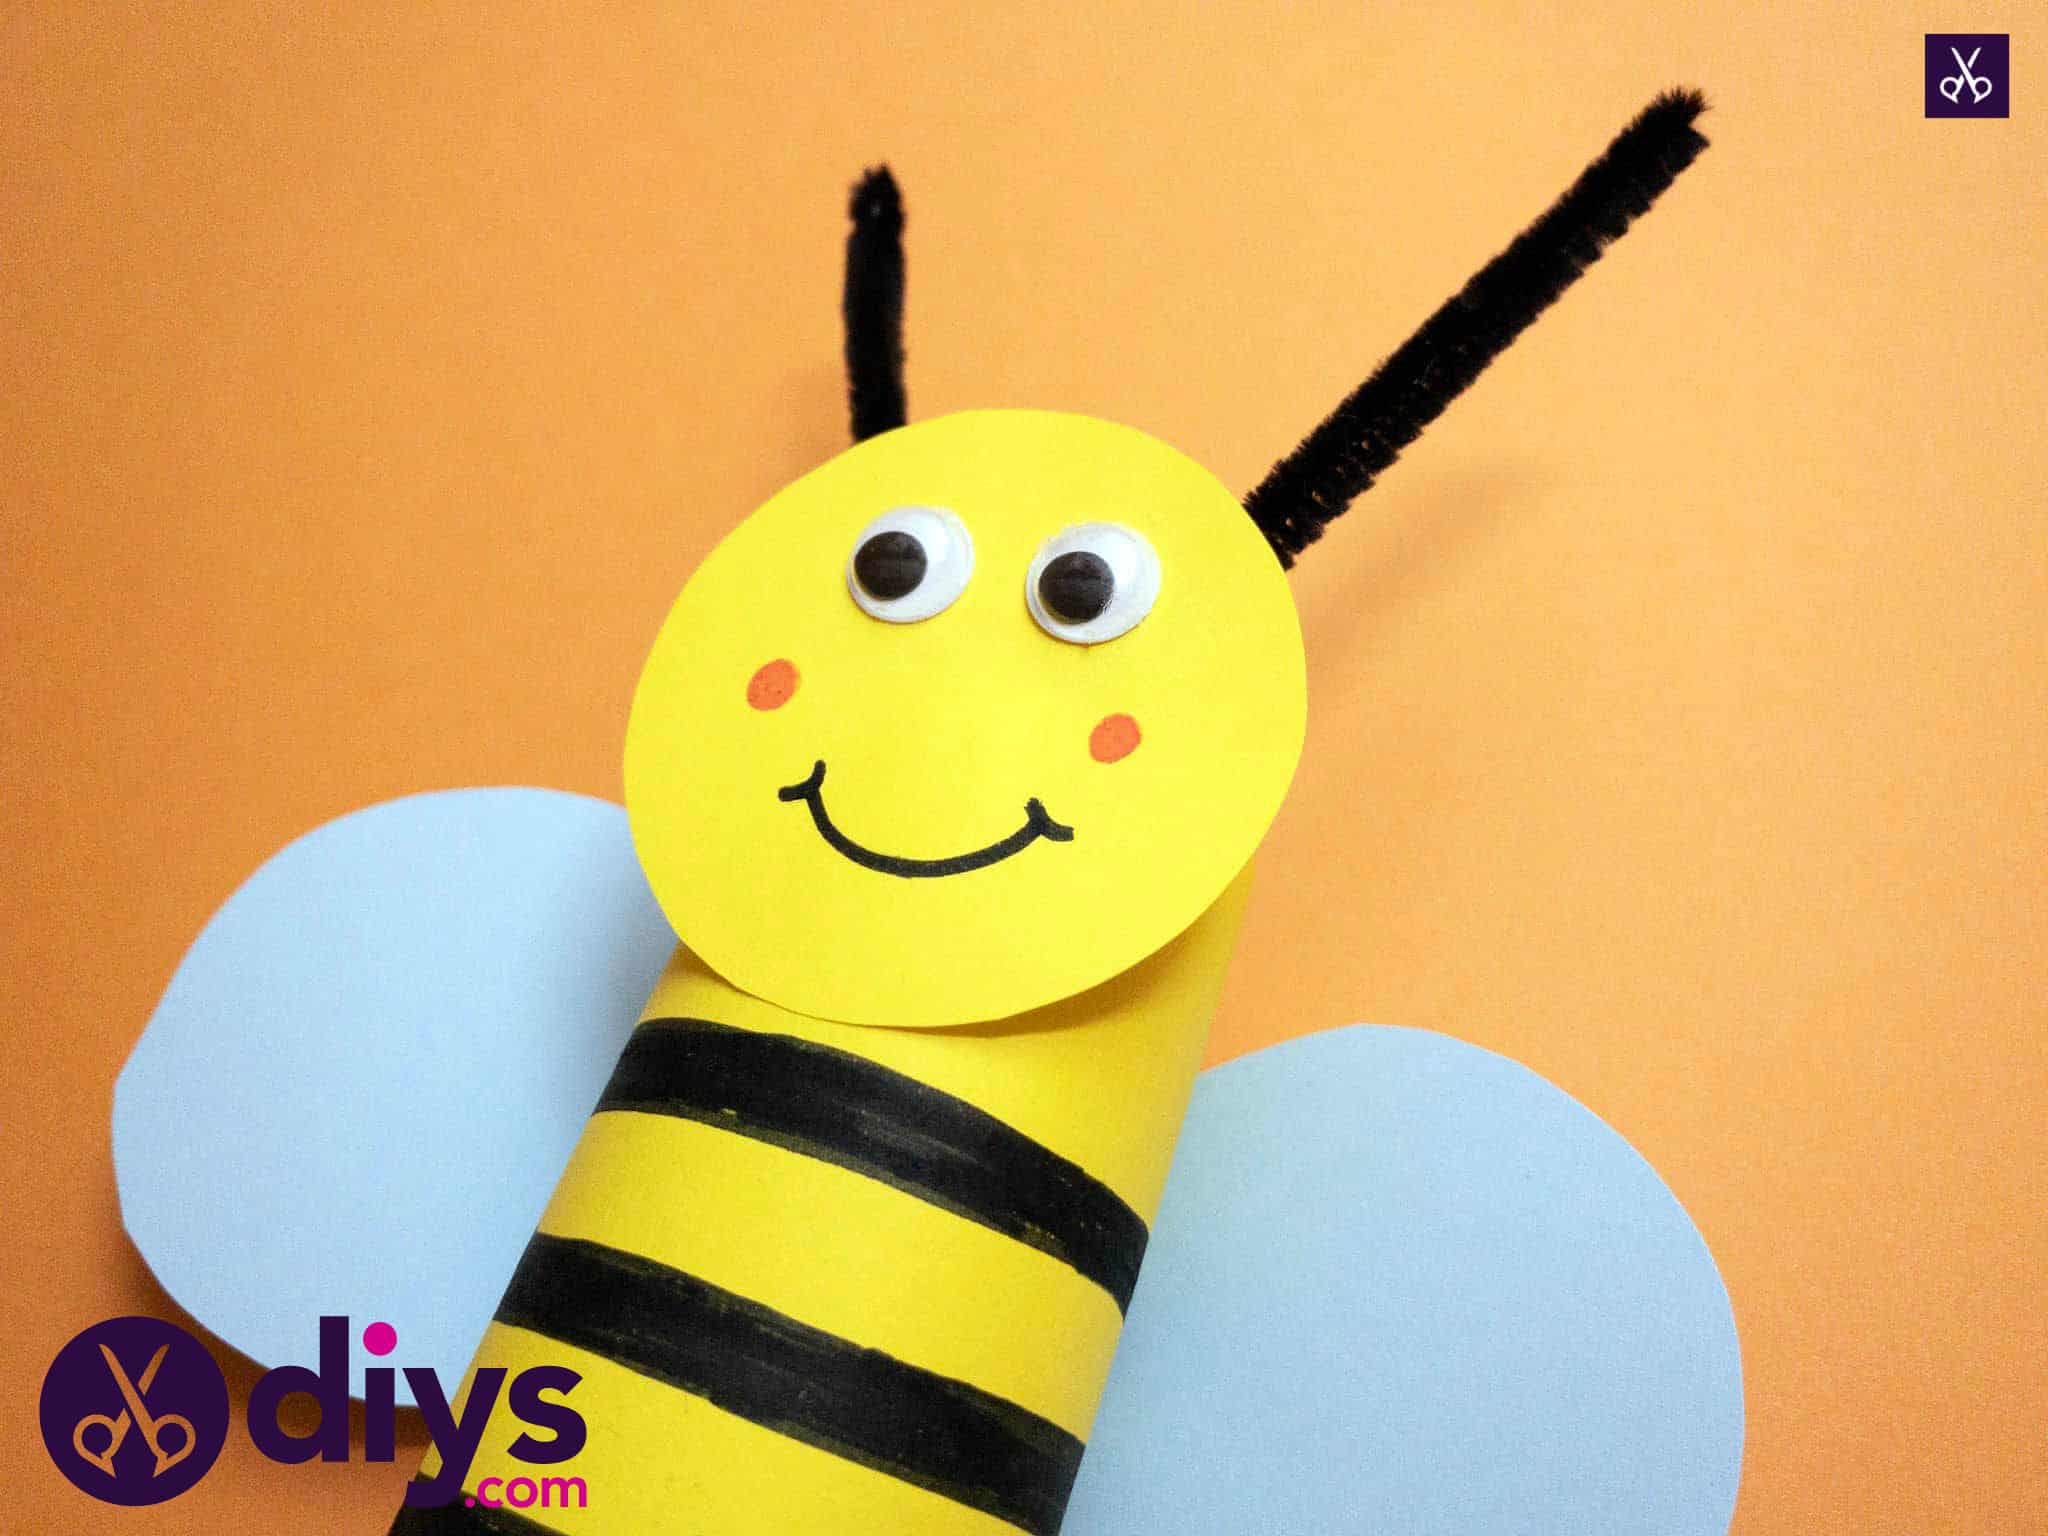
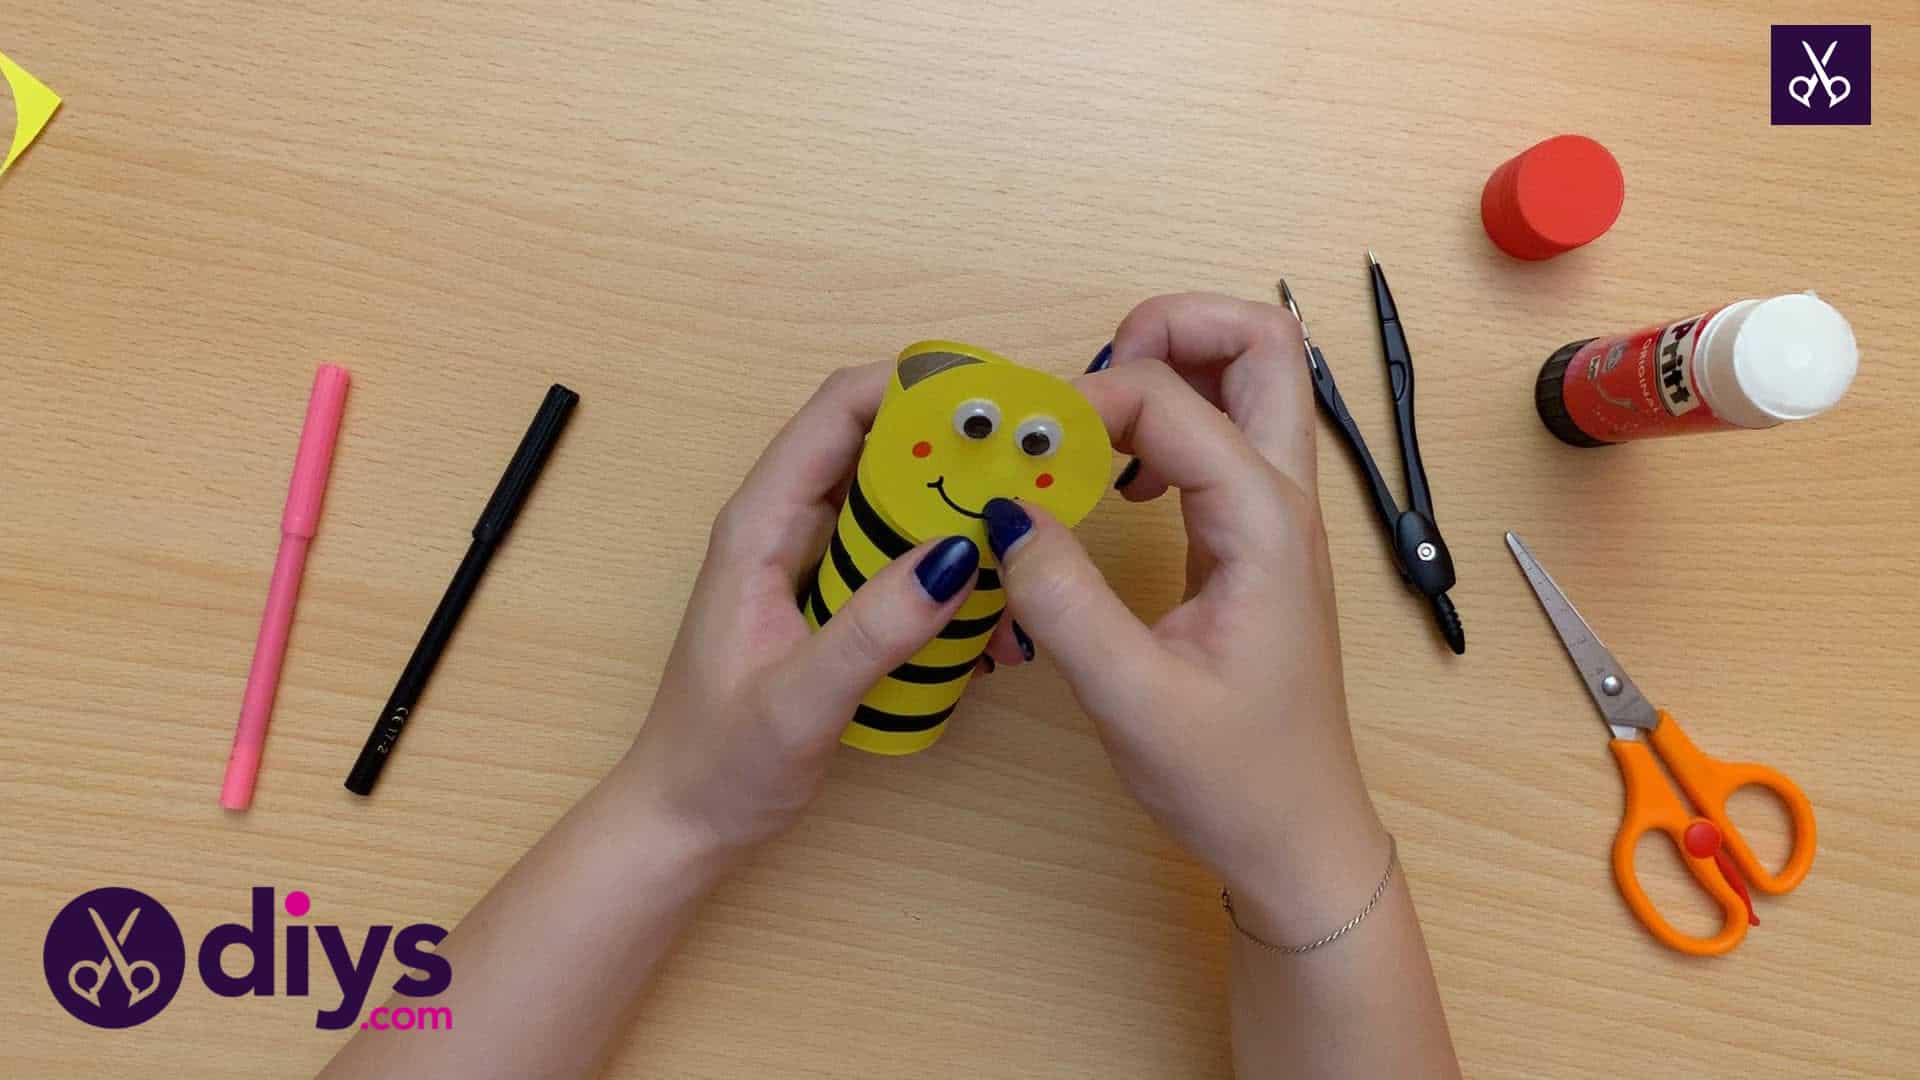
Add your bee’s facial details to the head! Glue your googly eyes near the top, leaving you space to draw a smile with your black marker and rosy little cheeks with your pink marker.
Step 9:
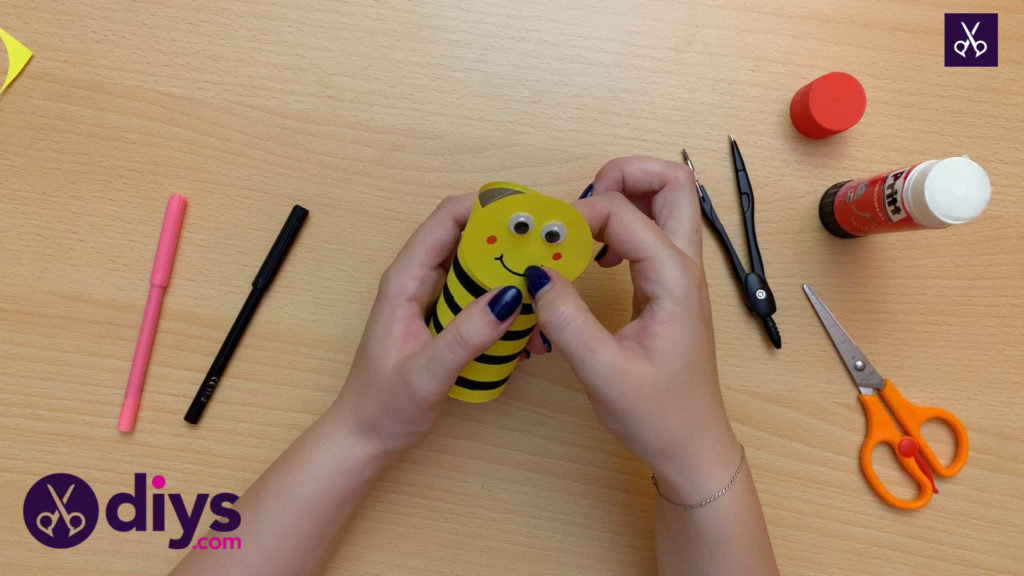
Apply glue to the back of your bee’s head and glue it on at the top, where you left some blank yellow space when you drew your stripes.
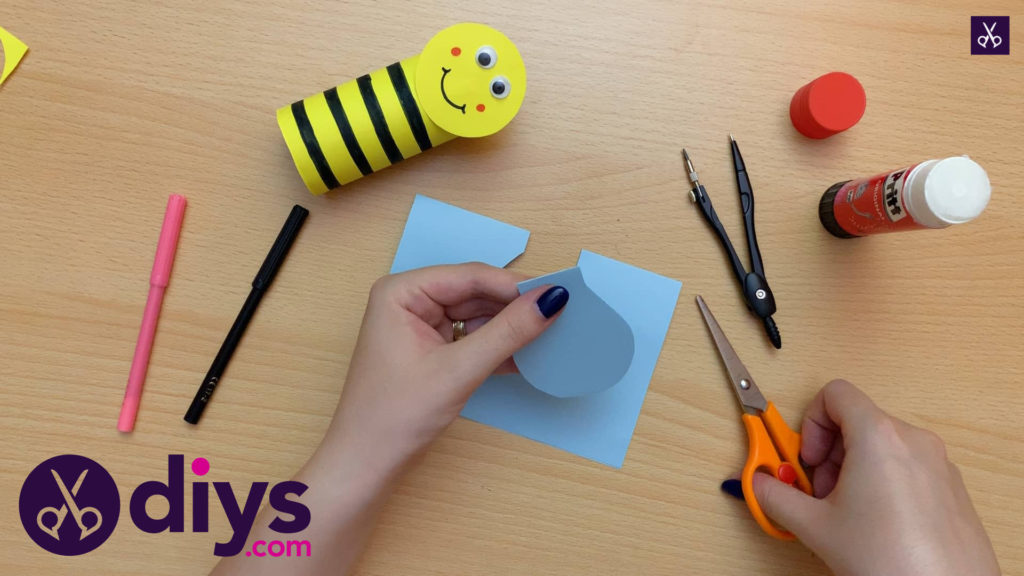
Step 10:
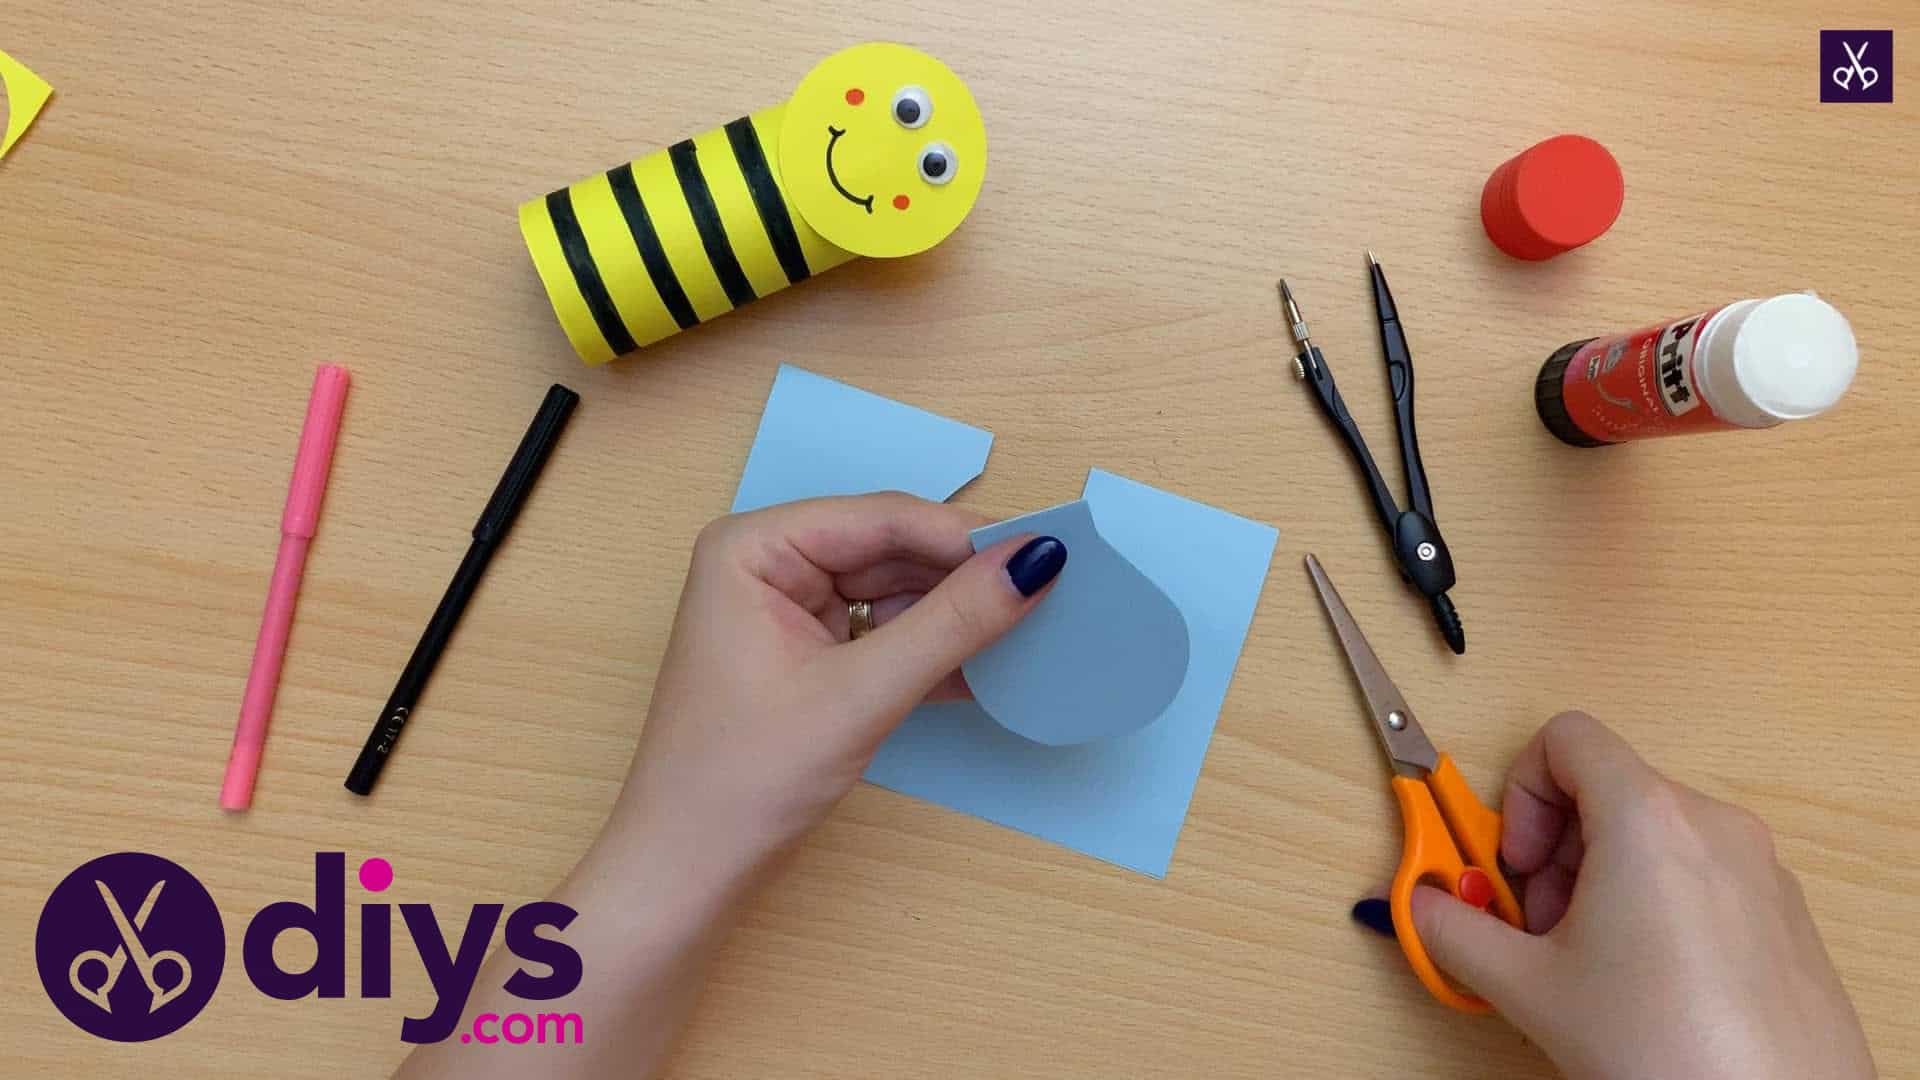
Take your blue paper and draw the shape for your bee’s wings. I started with a slightly rectangular tab piece (which I used for gluing the wings down later) and extended a circular wing from there. Draw two of them and cut them out when you’re done. Apply glue on the tab and stick the wings to the back of the roll, on the opposite side from where you glued your bee’s head.
Step 11:
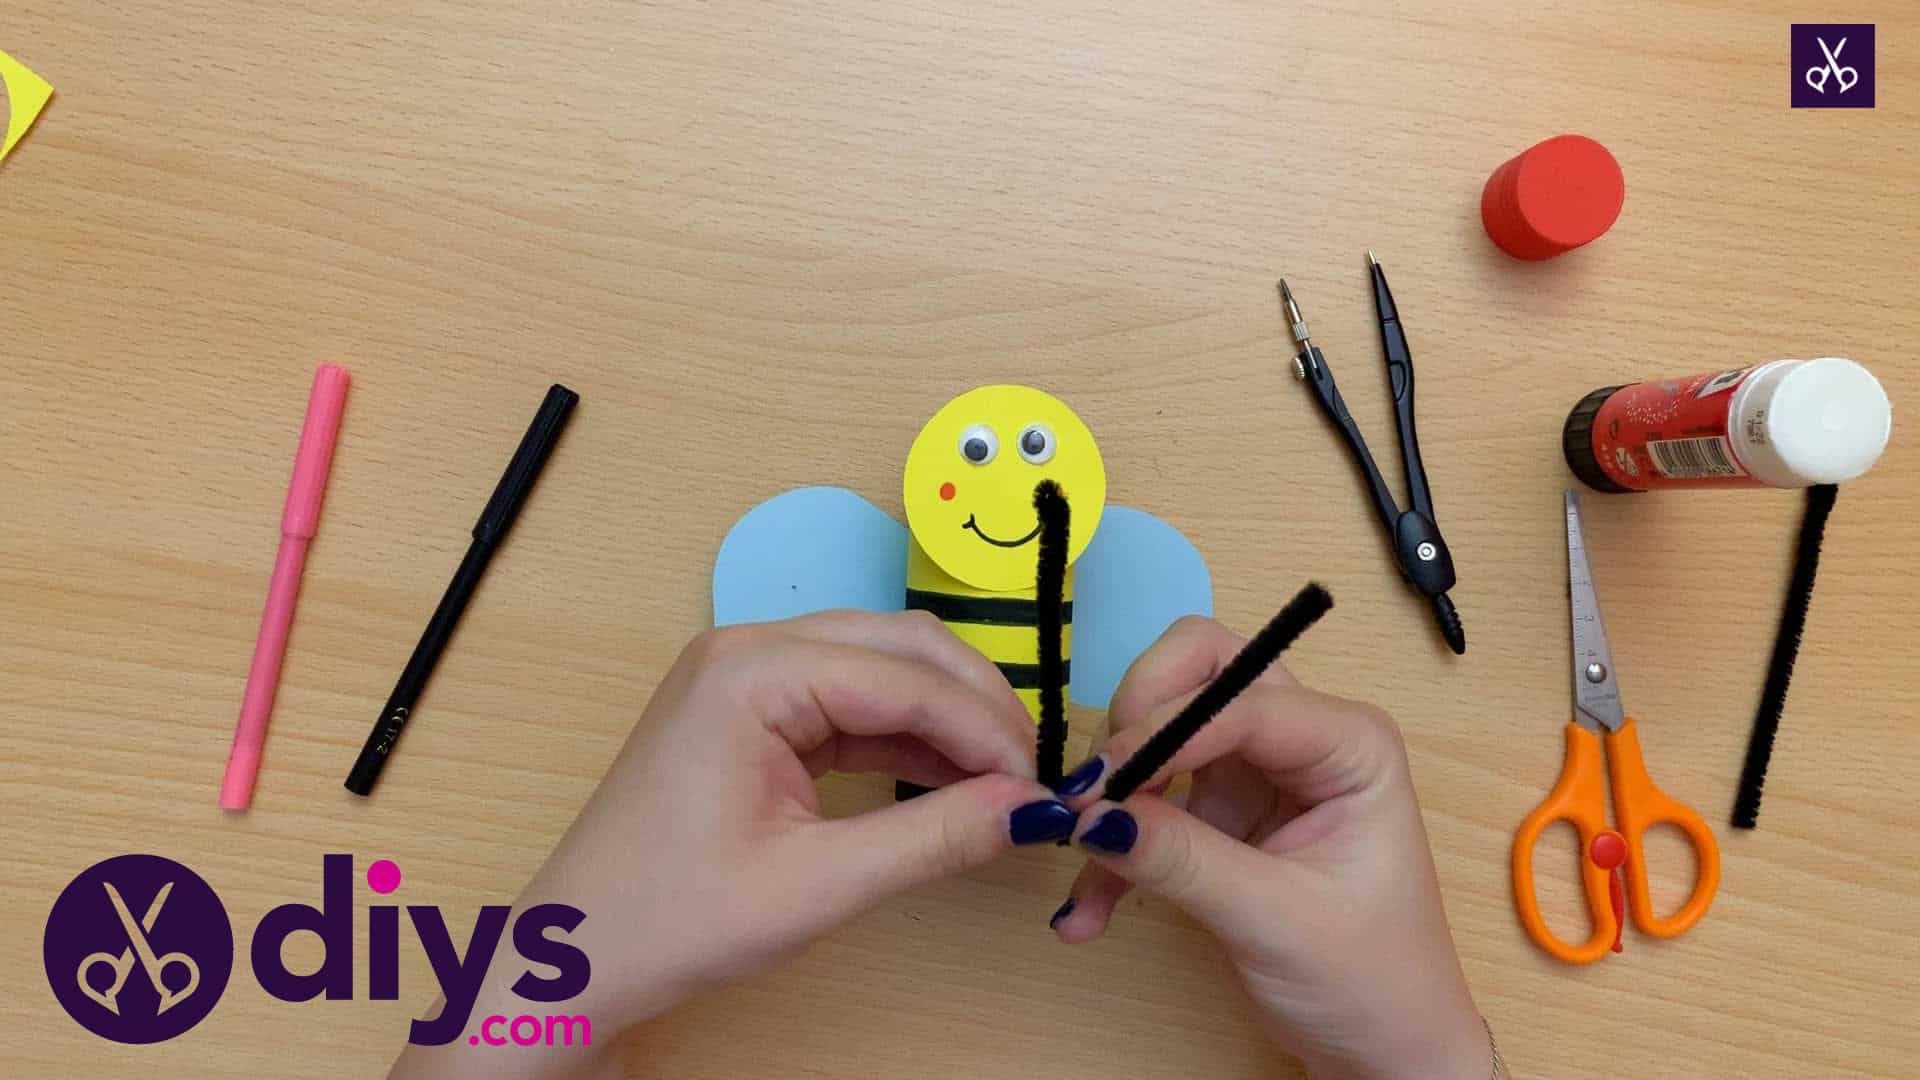
Make your bee’s antennas! I did this by cutting my black pipe cleaner in half (I bent it to find the centre point and cut there) and then bending one of those pieces in half again, but this time without cutting it. The result was a V-shape. Apply glue to the bend in your V and then stick it to the back of your bee’s head so the ends stick up from behind like antennas.

That’s all there is to it! My kids actually got so much of a kick out of the toilet roll bees we made that not only have we made them together more than once, but they’ve also used the same basic techniques to make other toilet roll animals too!

Just in case you’d like to try this project out as well, here’s an awesome tutorial video to give you a hand!
