DIY Rustic Jute Gift Box
Updated on November 19, 2025


Level up your gift giving game with this gorgeous DIY rustic jute gift box! We’ve laid it all out here for you in this easy to follow step by step tutorial. Scroll down and see how we made it!
Before I even started, I knew I was going to love this project, so I set up my camera and documented all the steps required to create it. If you’re a person who does best with instructions then check out the written outline and photos below. Otherwise, scroll to the bottom of the post for a full video tutorial!

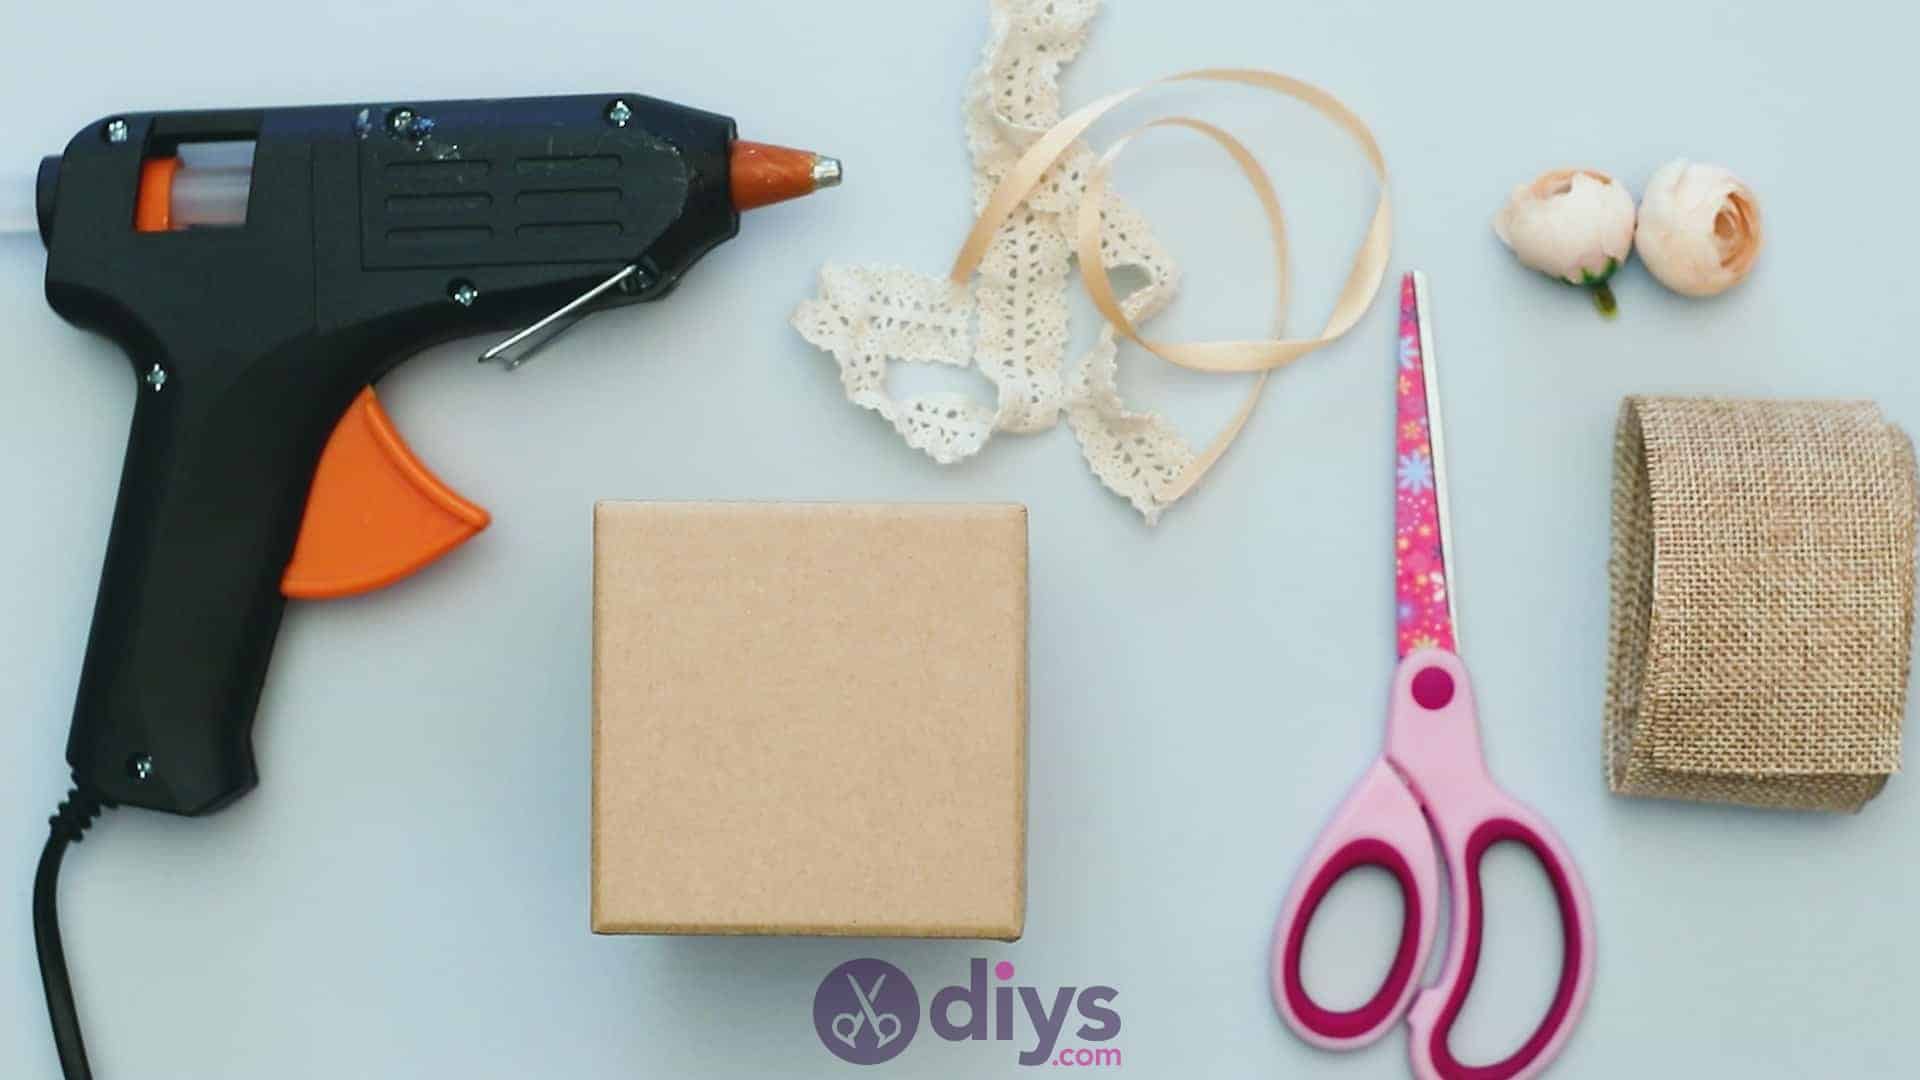
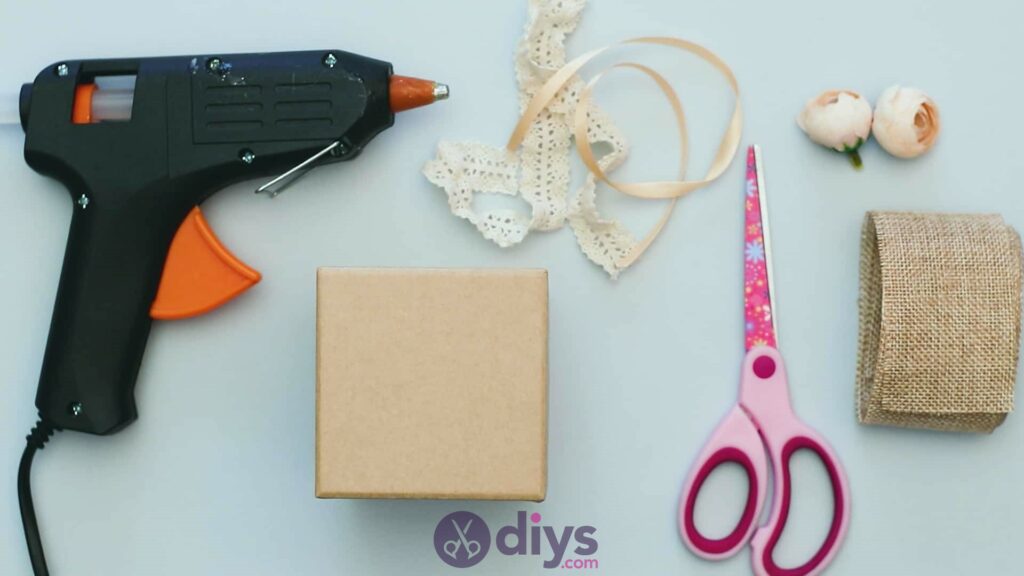
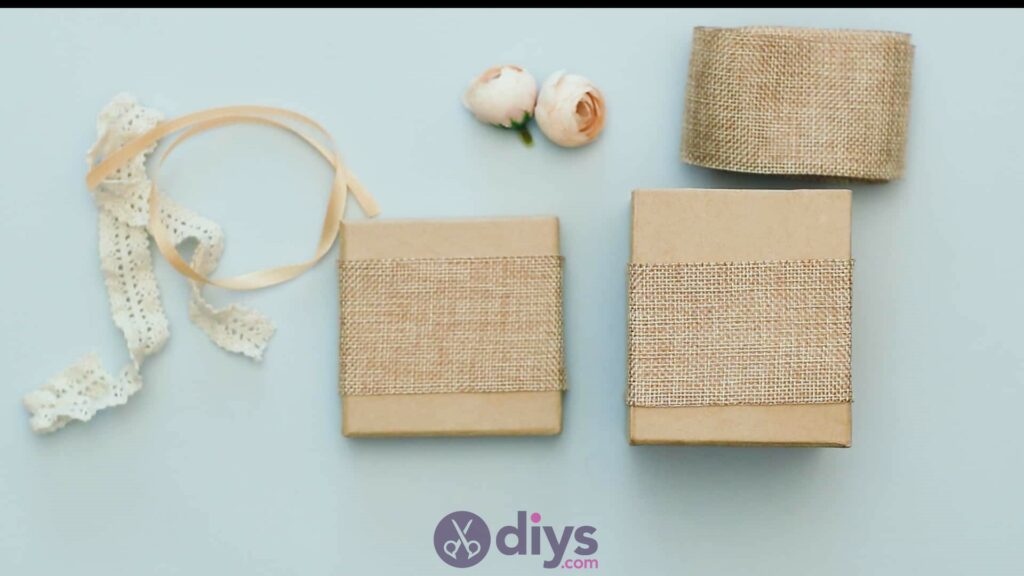
For this project, you’ll need:
- Paper box
- Jute trim or ribbon
- Lace trim or ribbon
- Thin neutrally coloured ribbon (gold or bronze)
- Artificial flowers
- Hot glue
- Scissors

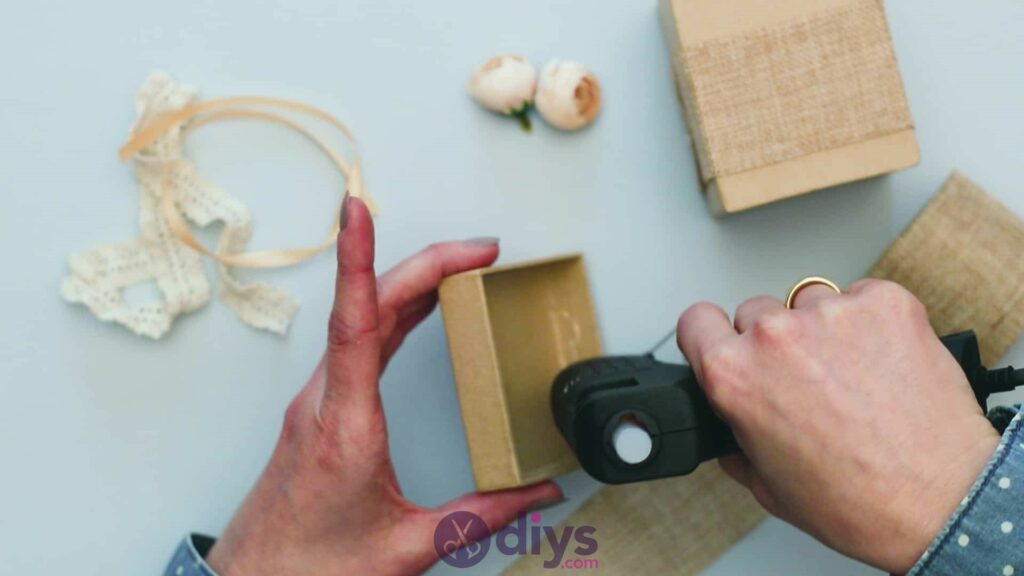
Step 1: Gather your materials!
Trust me, you’ll be happy you had everything in front of you once you begin this project.
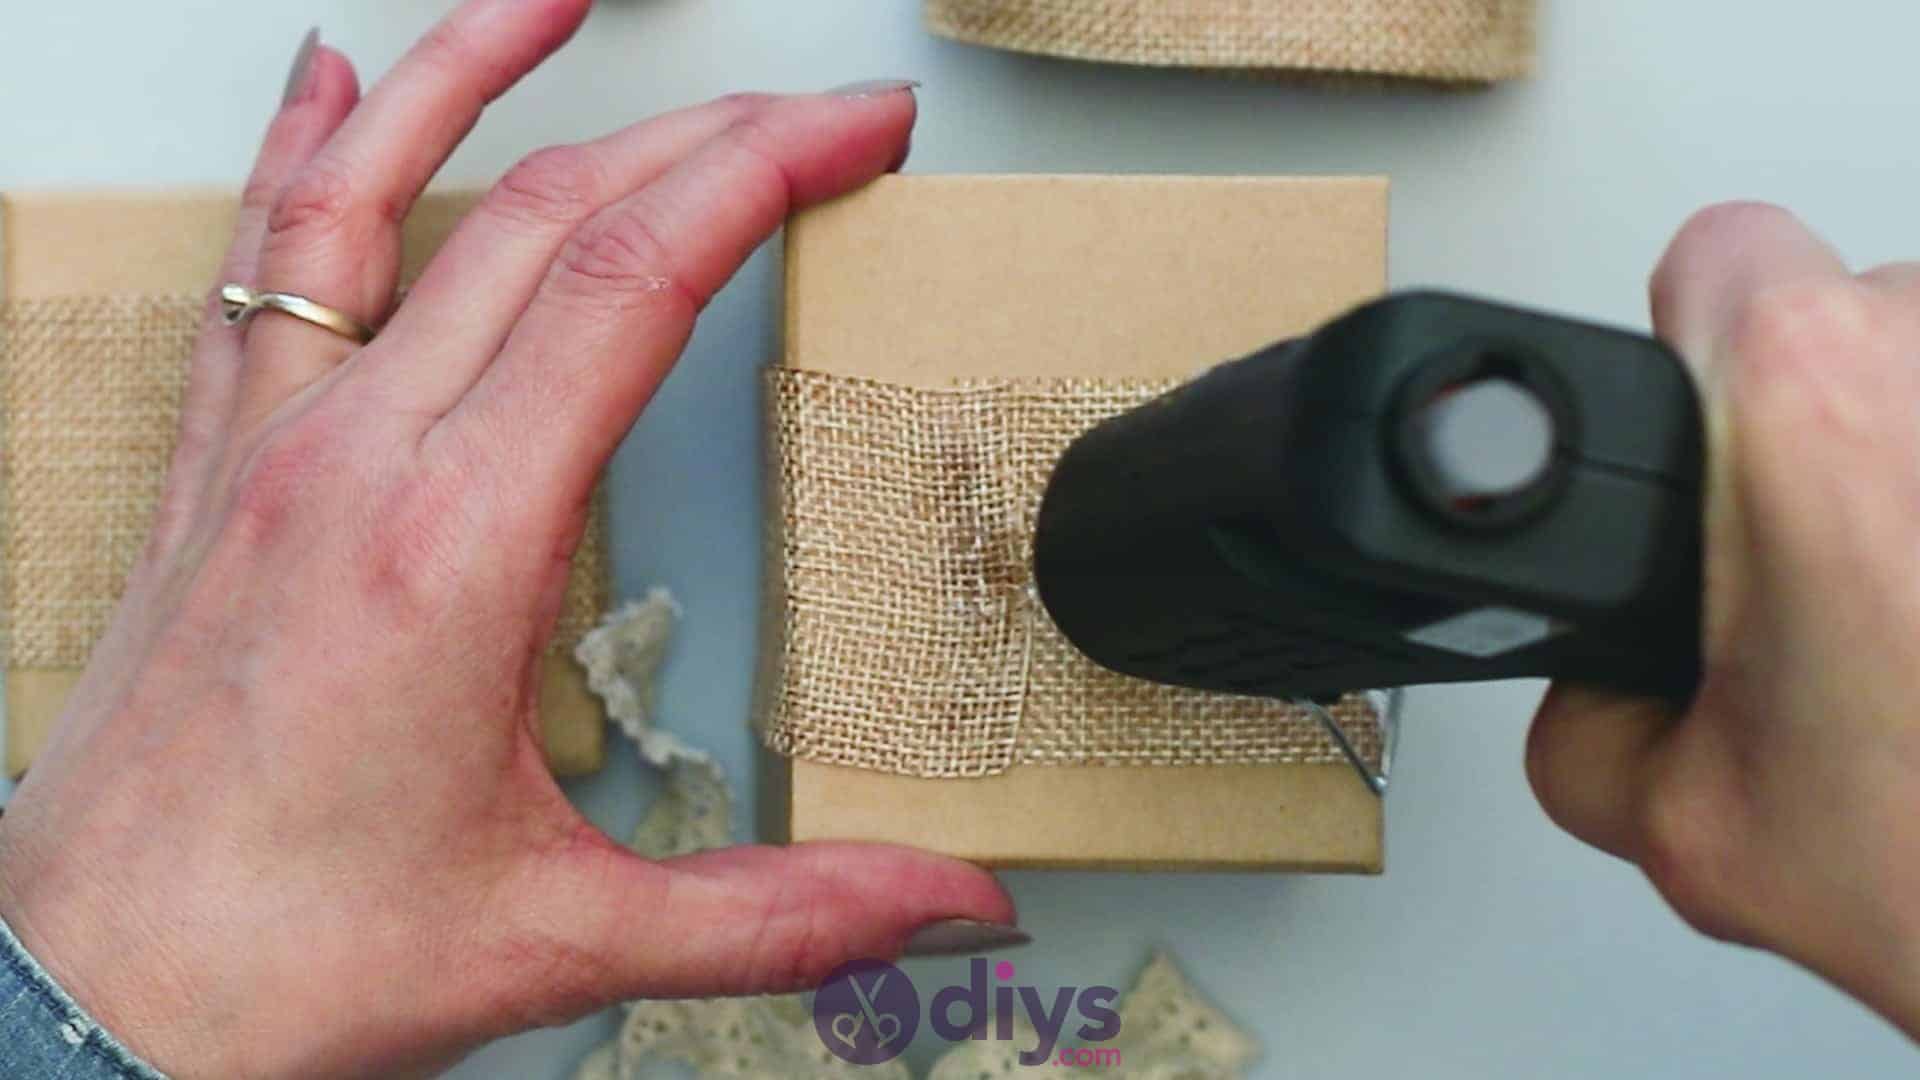
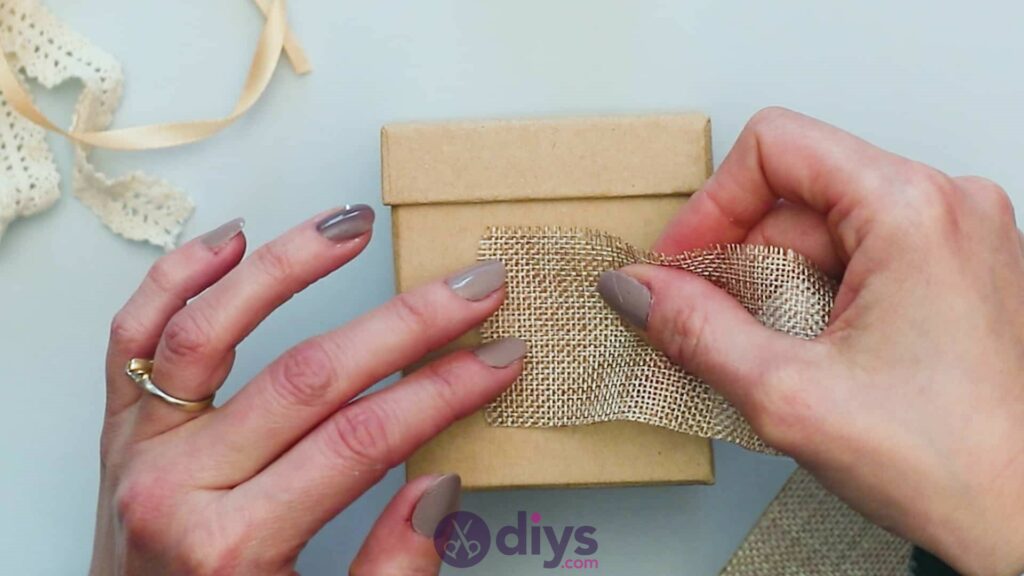
Step 2: start applying the jute
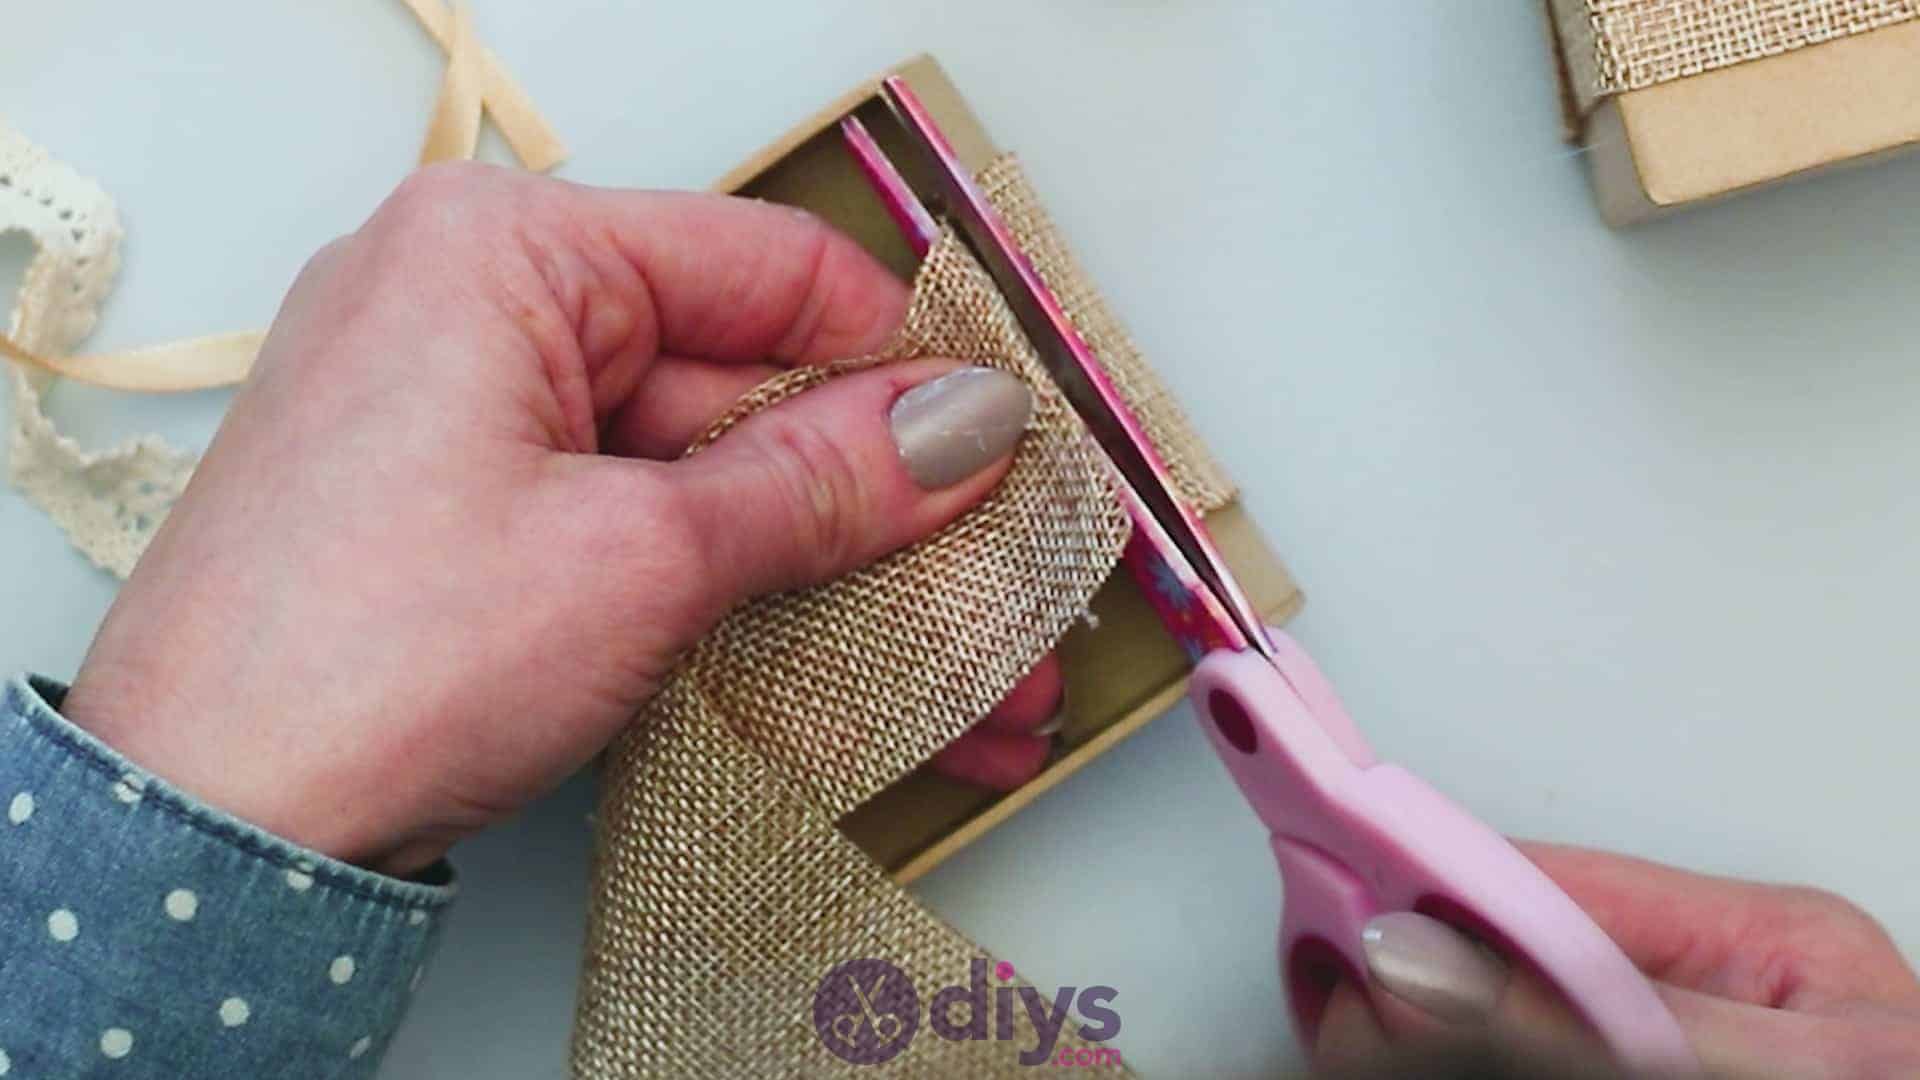
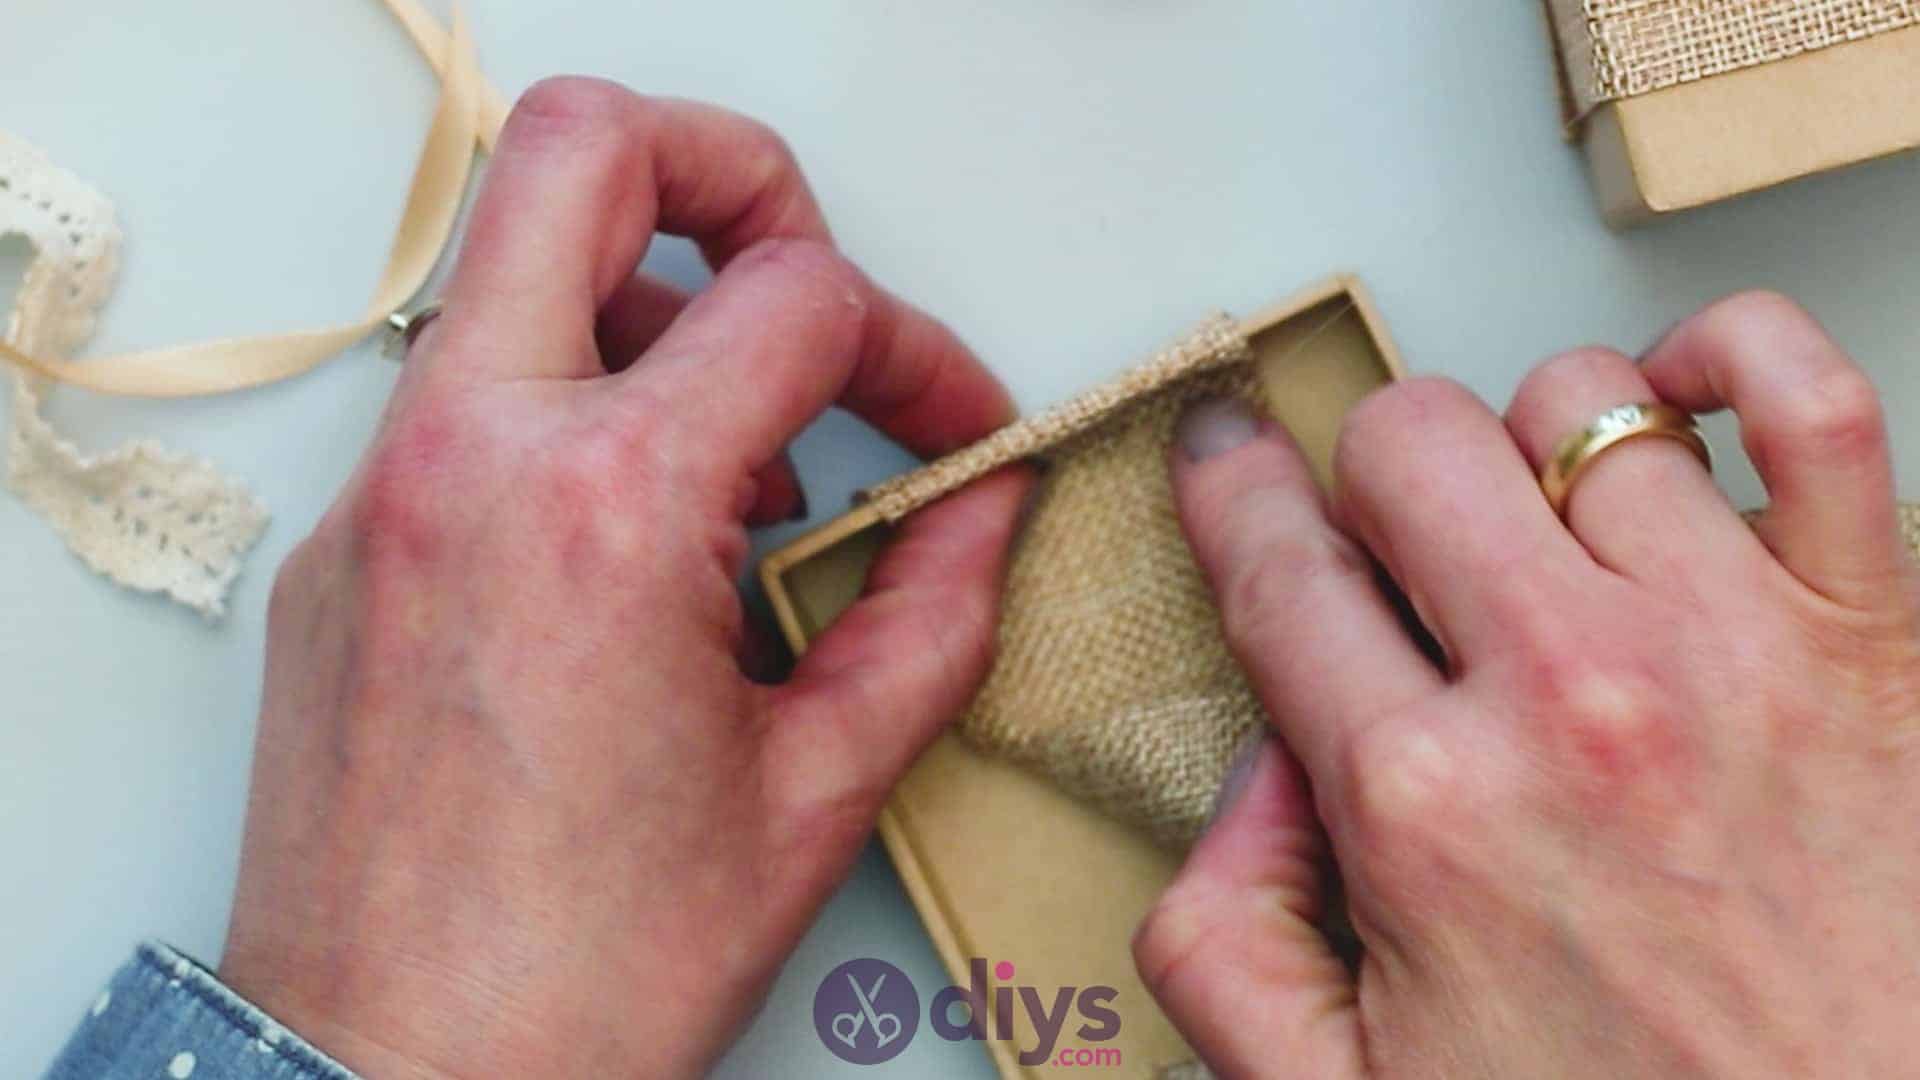
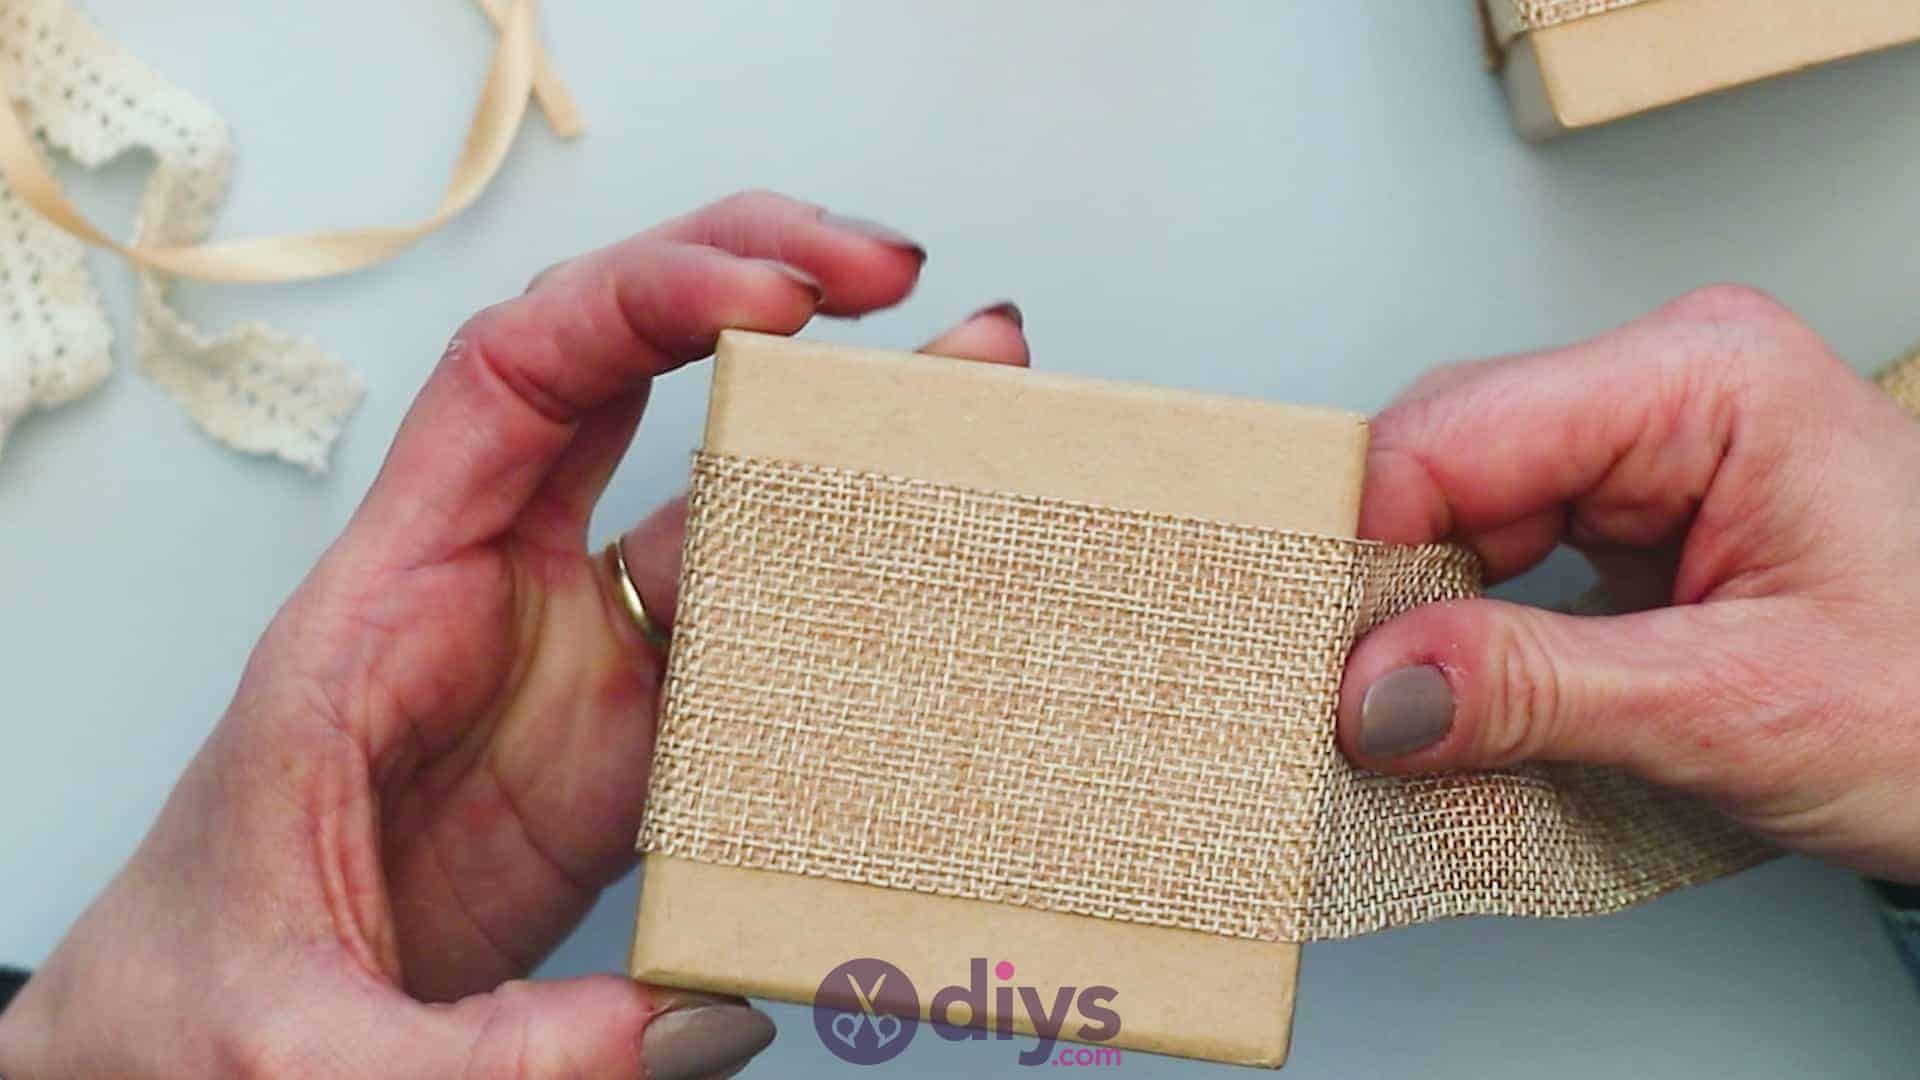
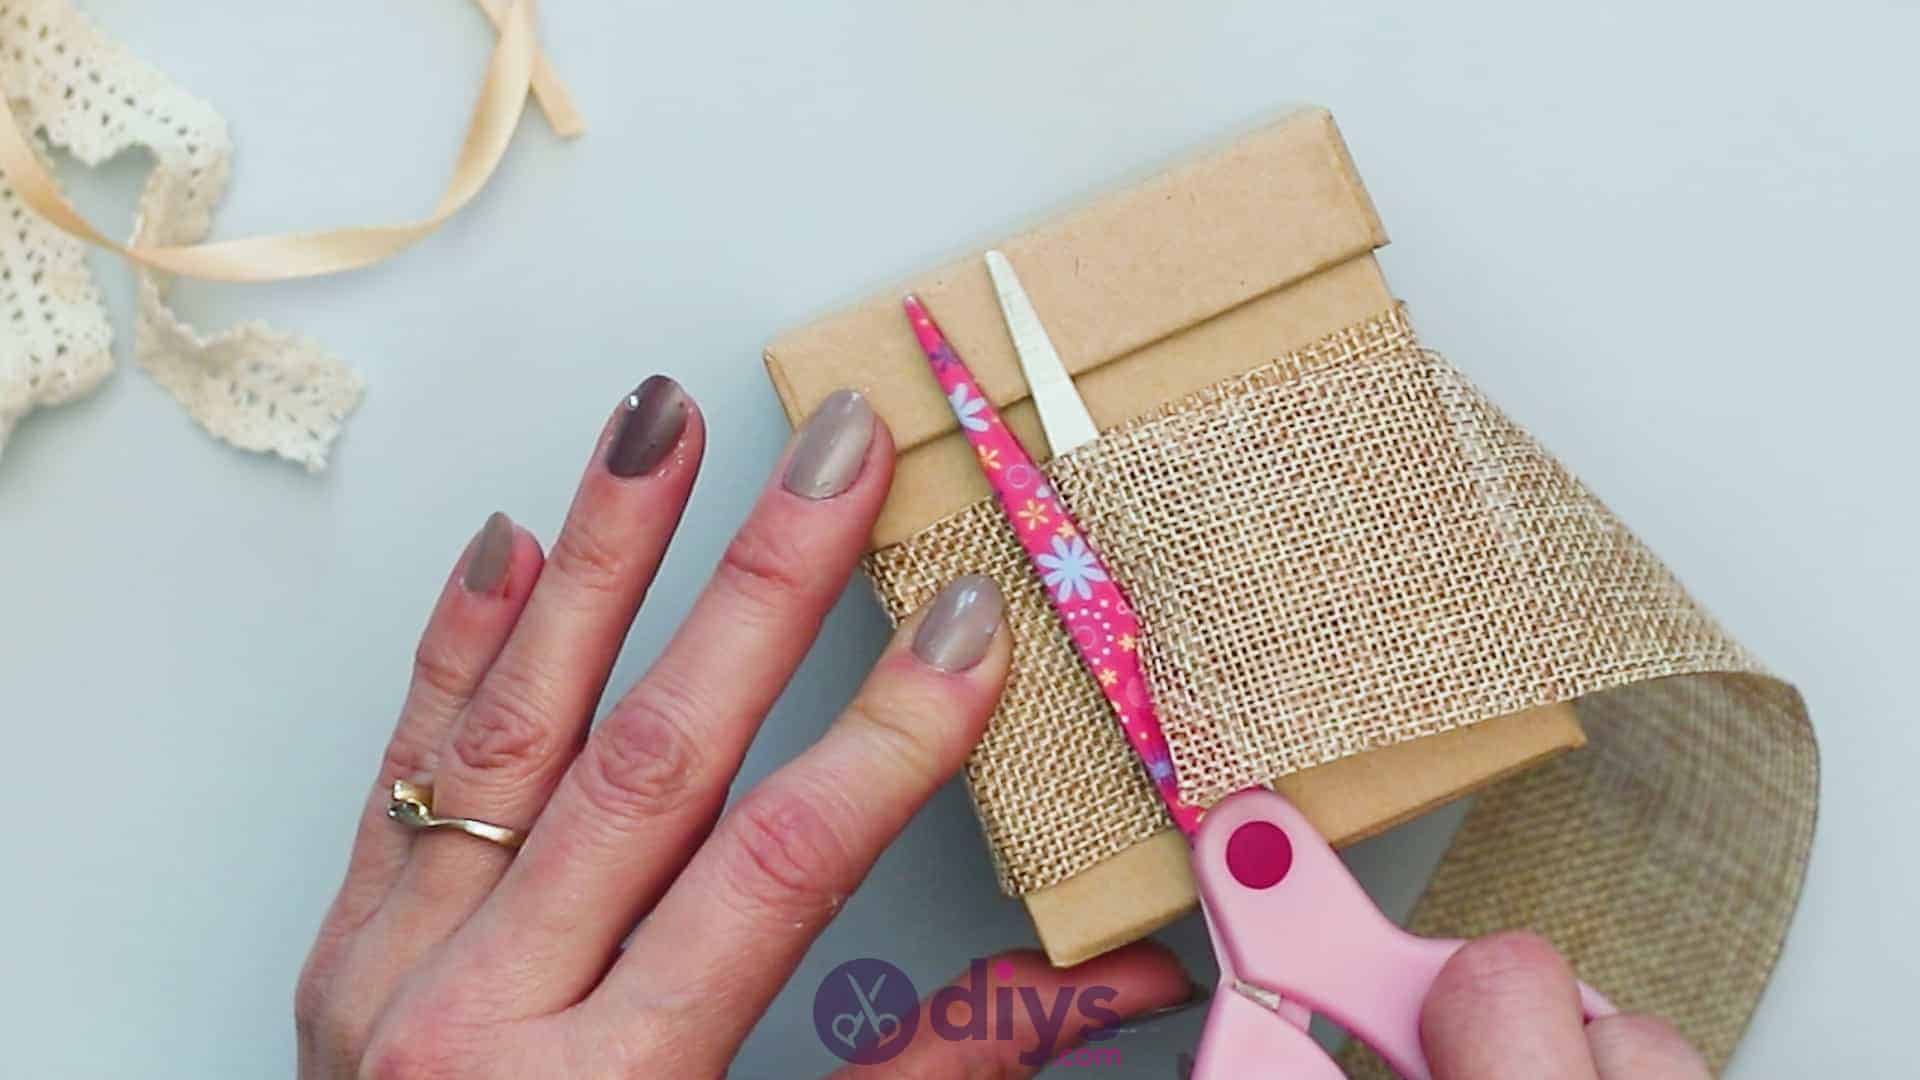
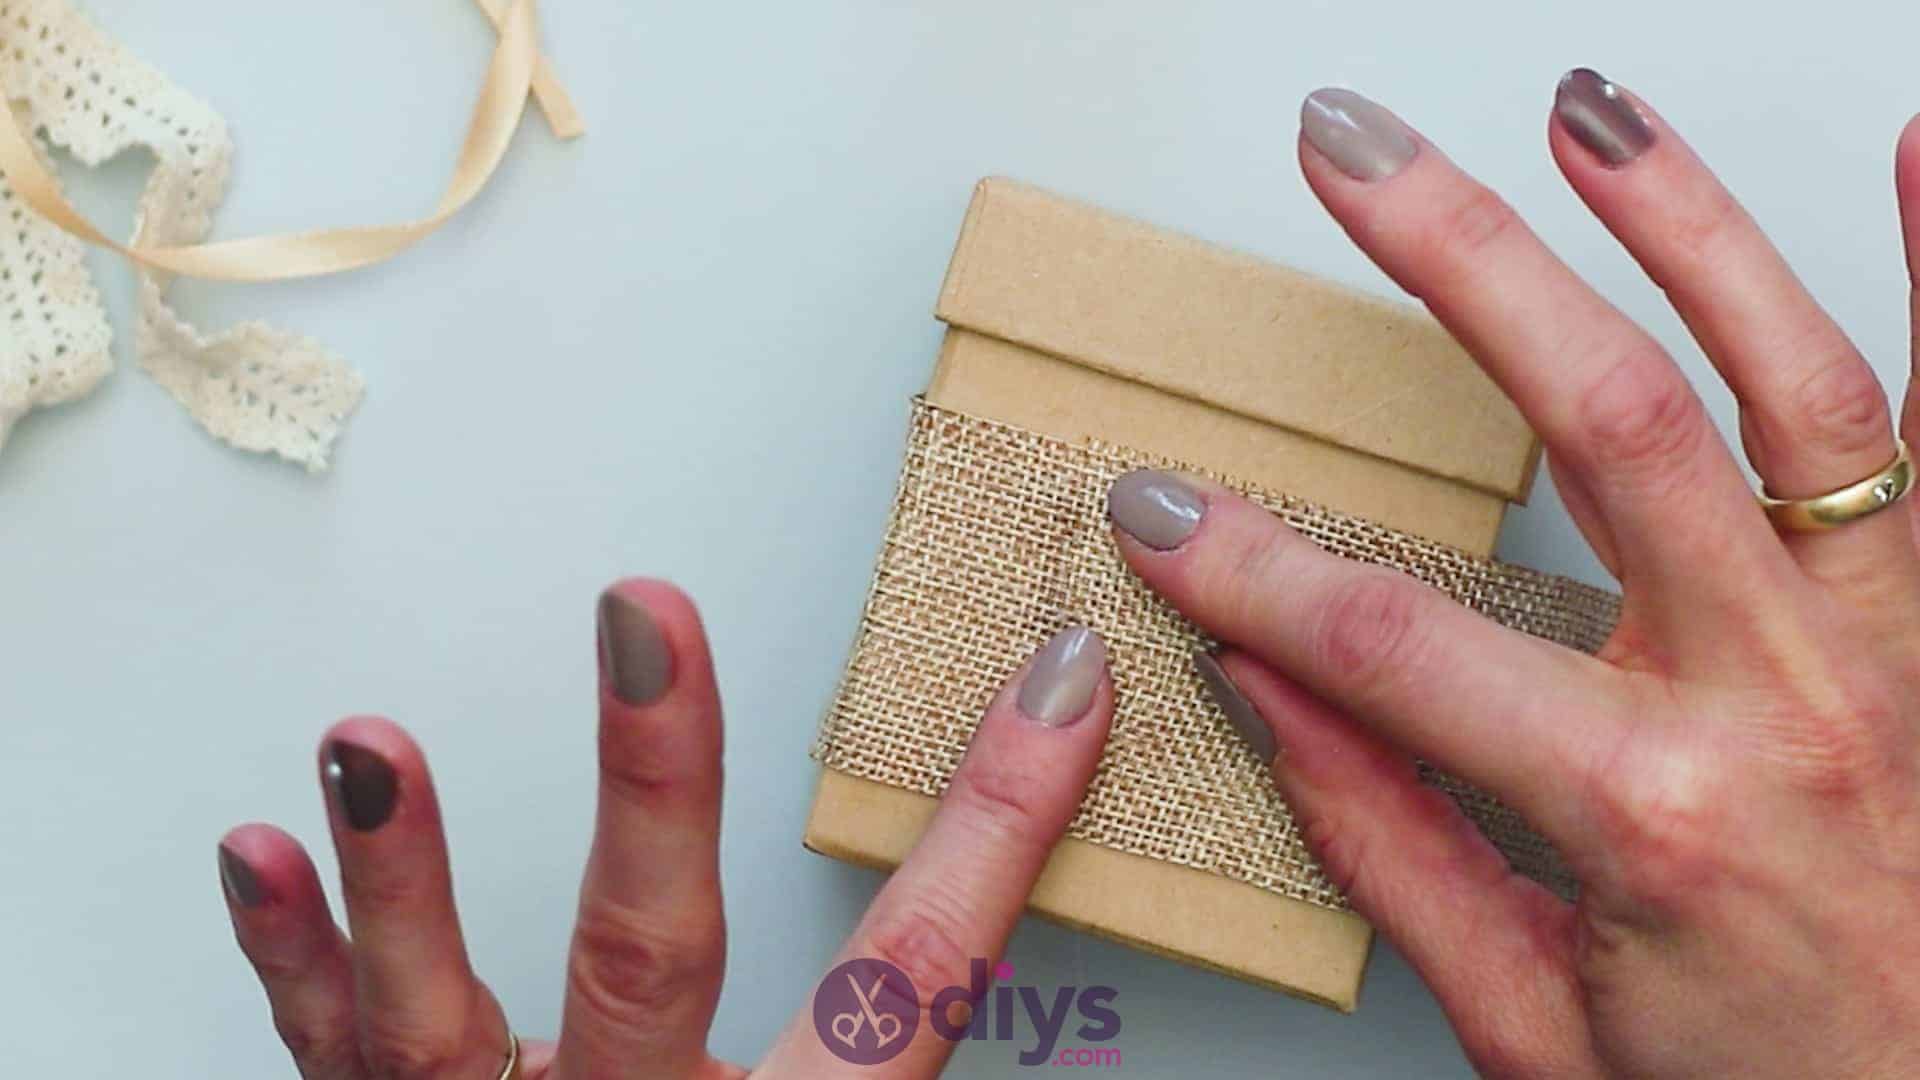
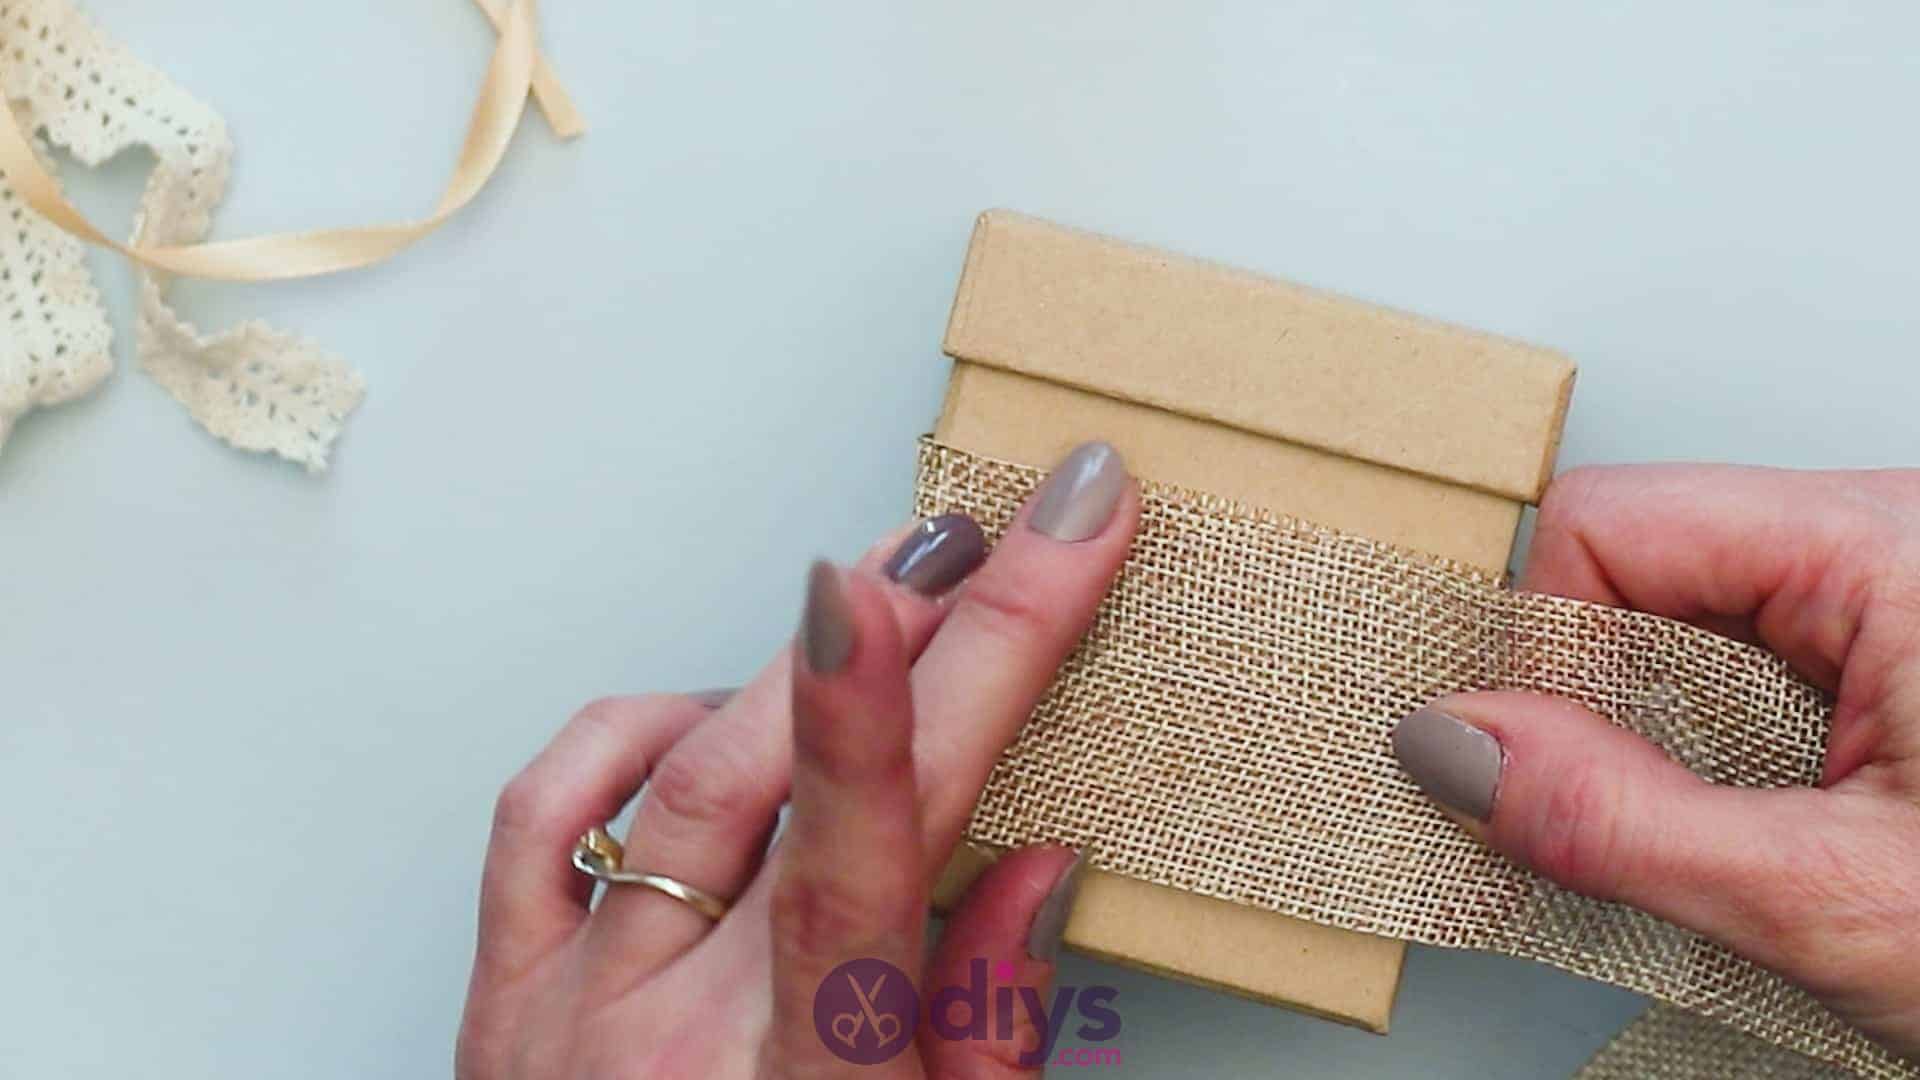
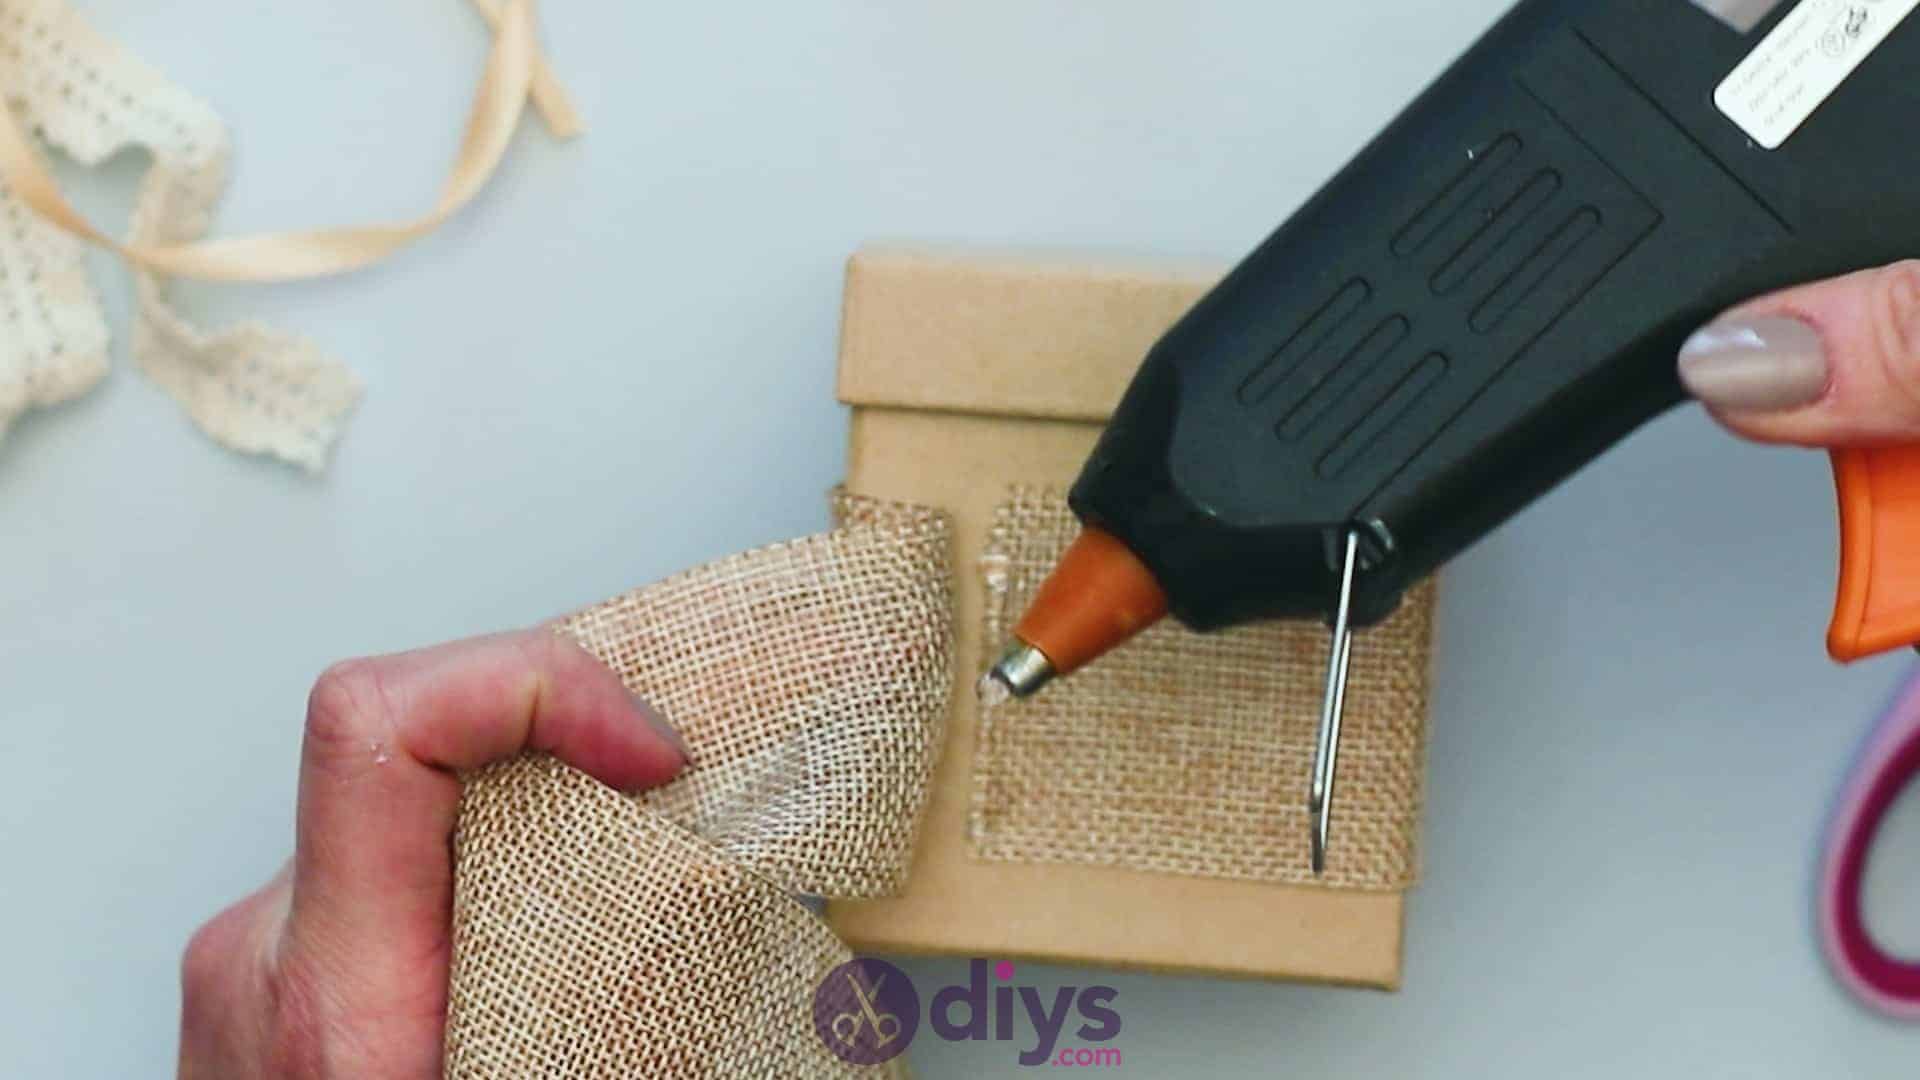
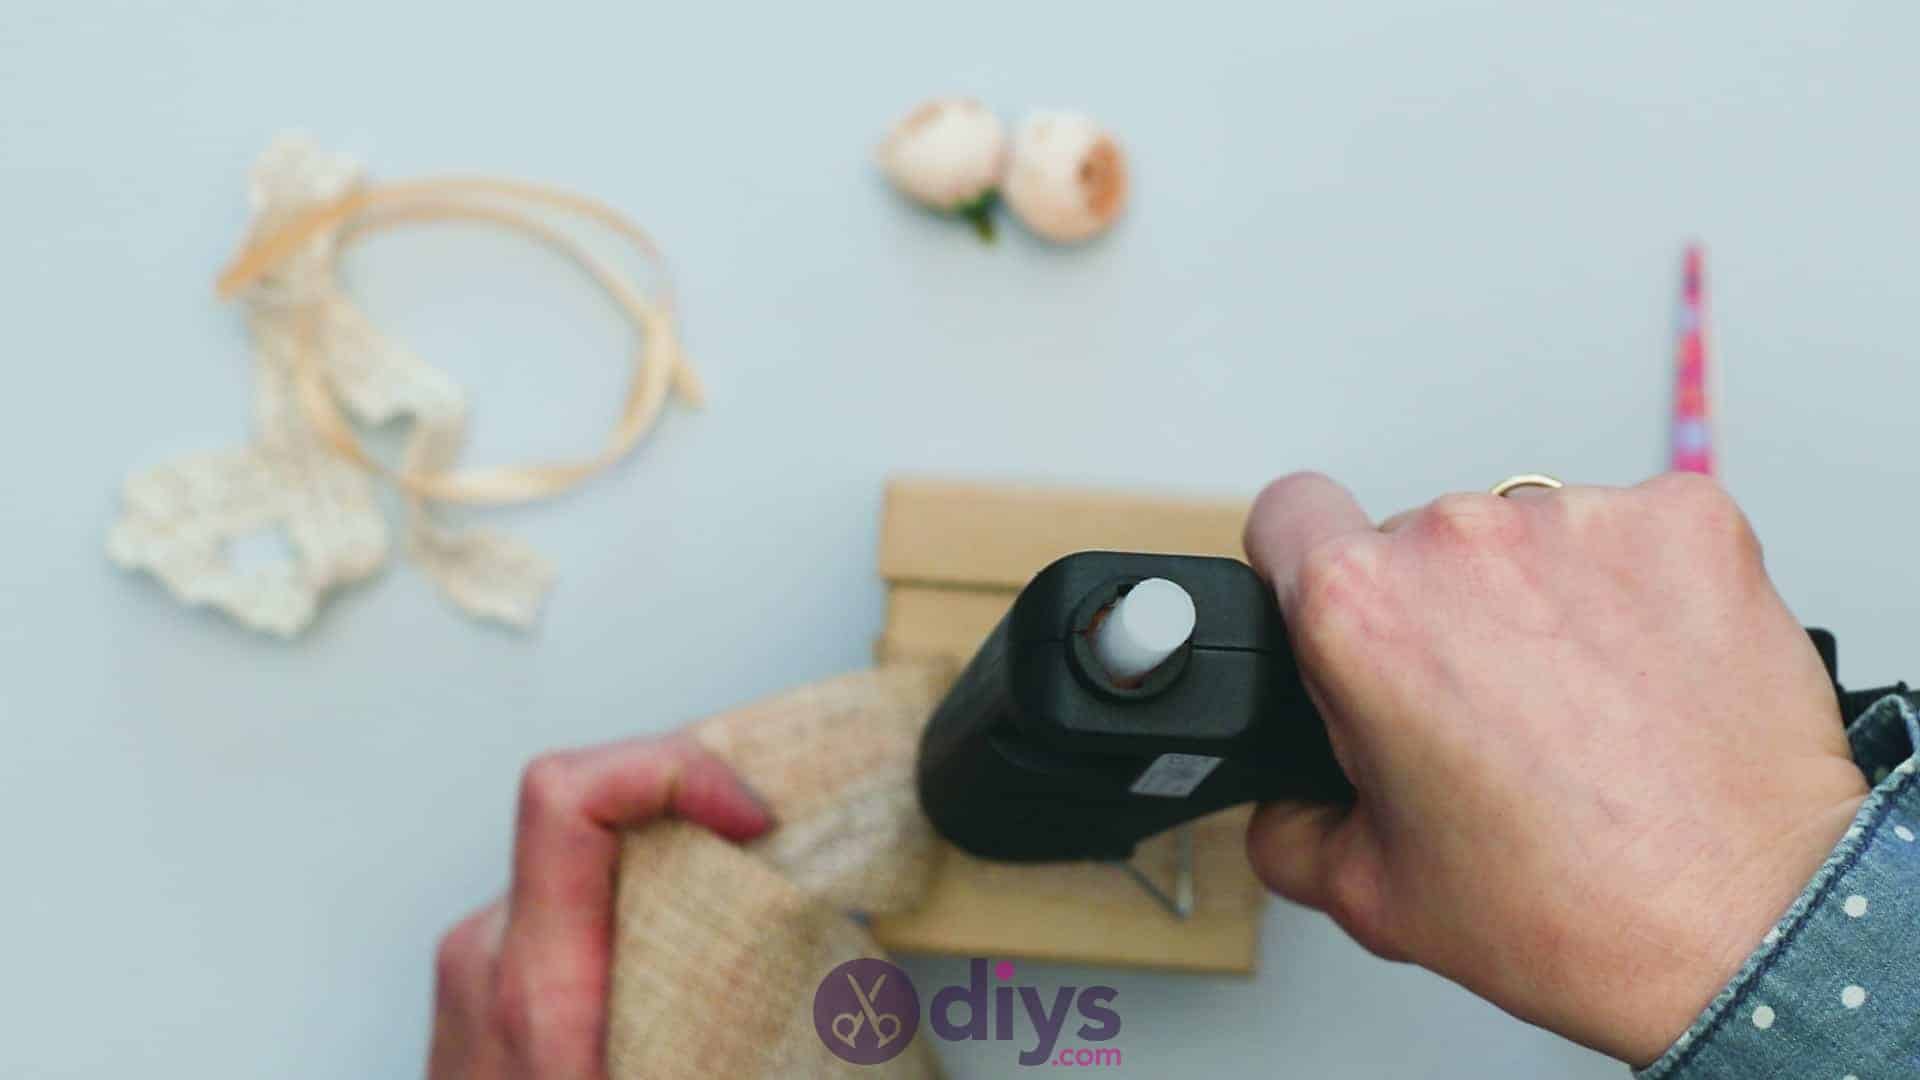
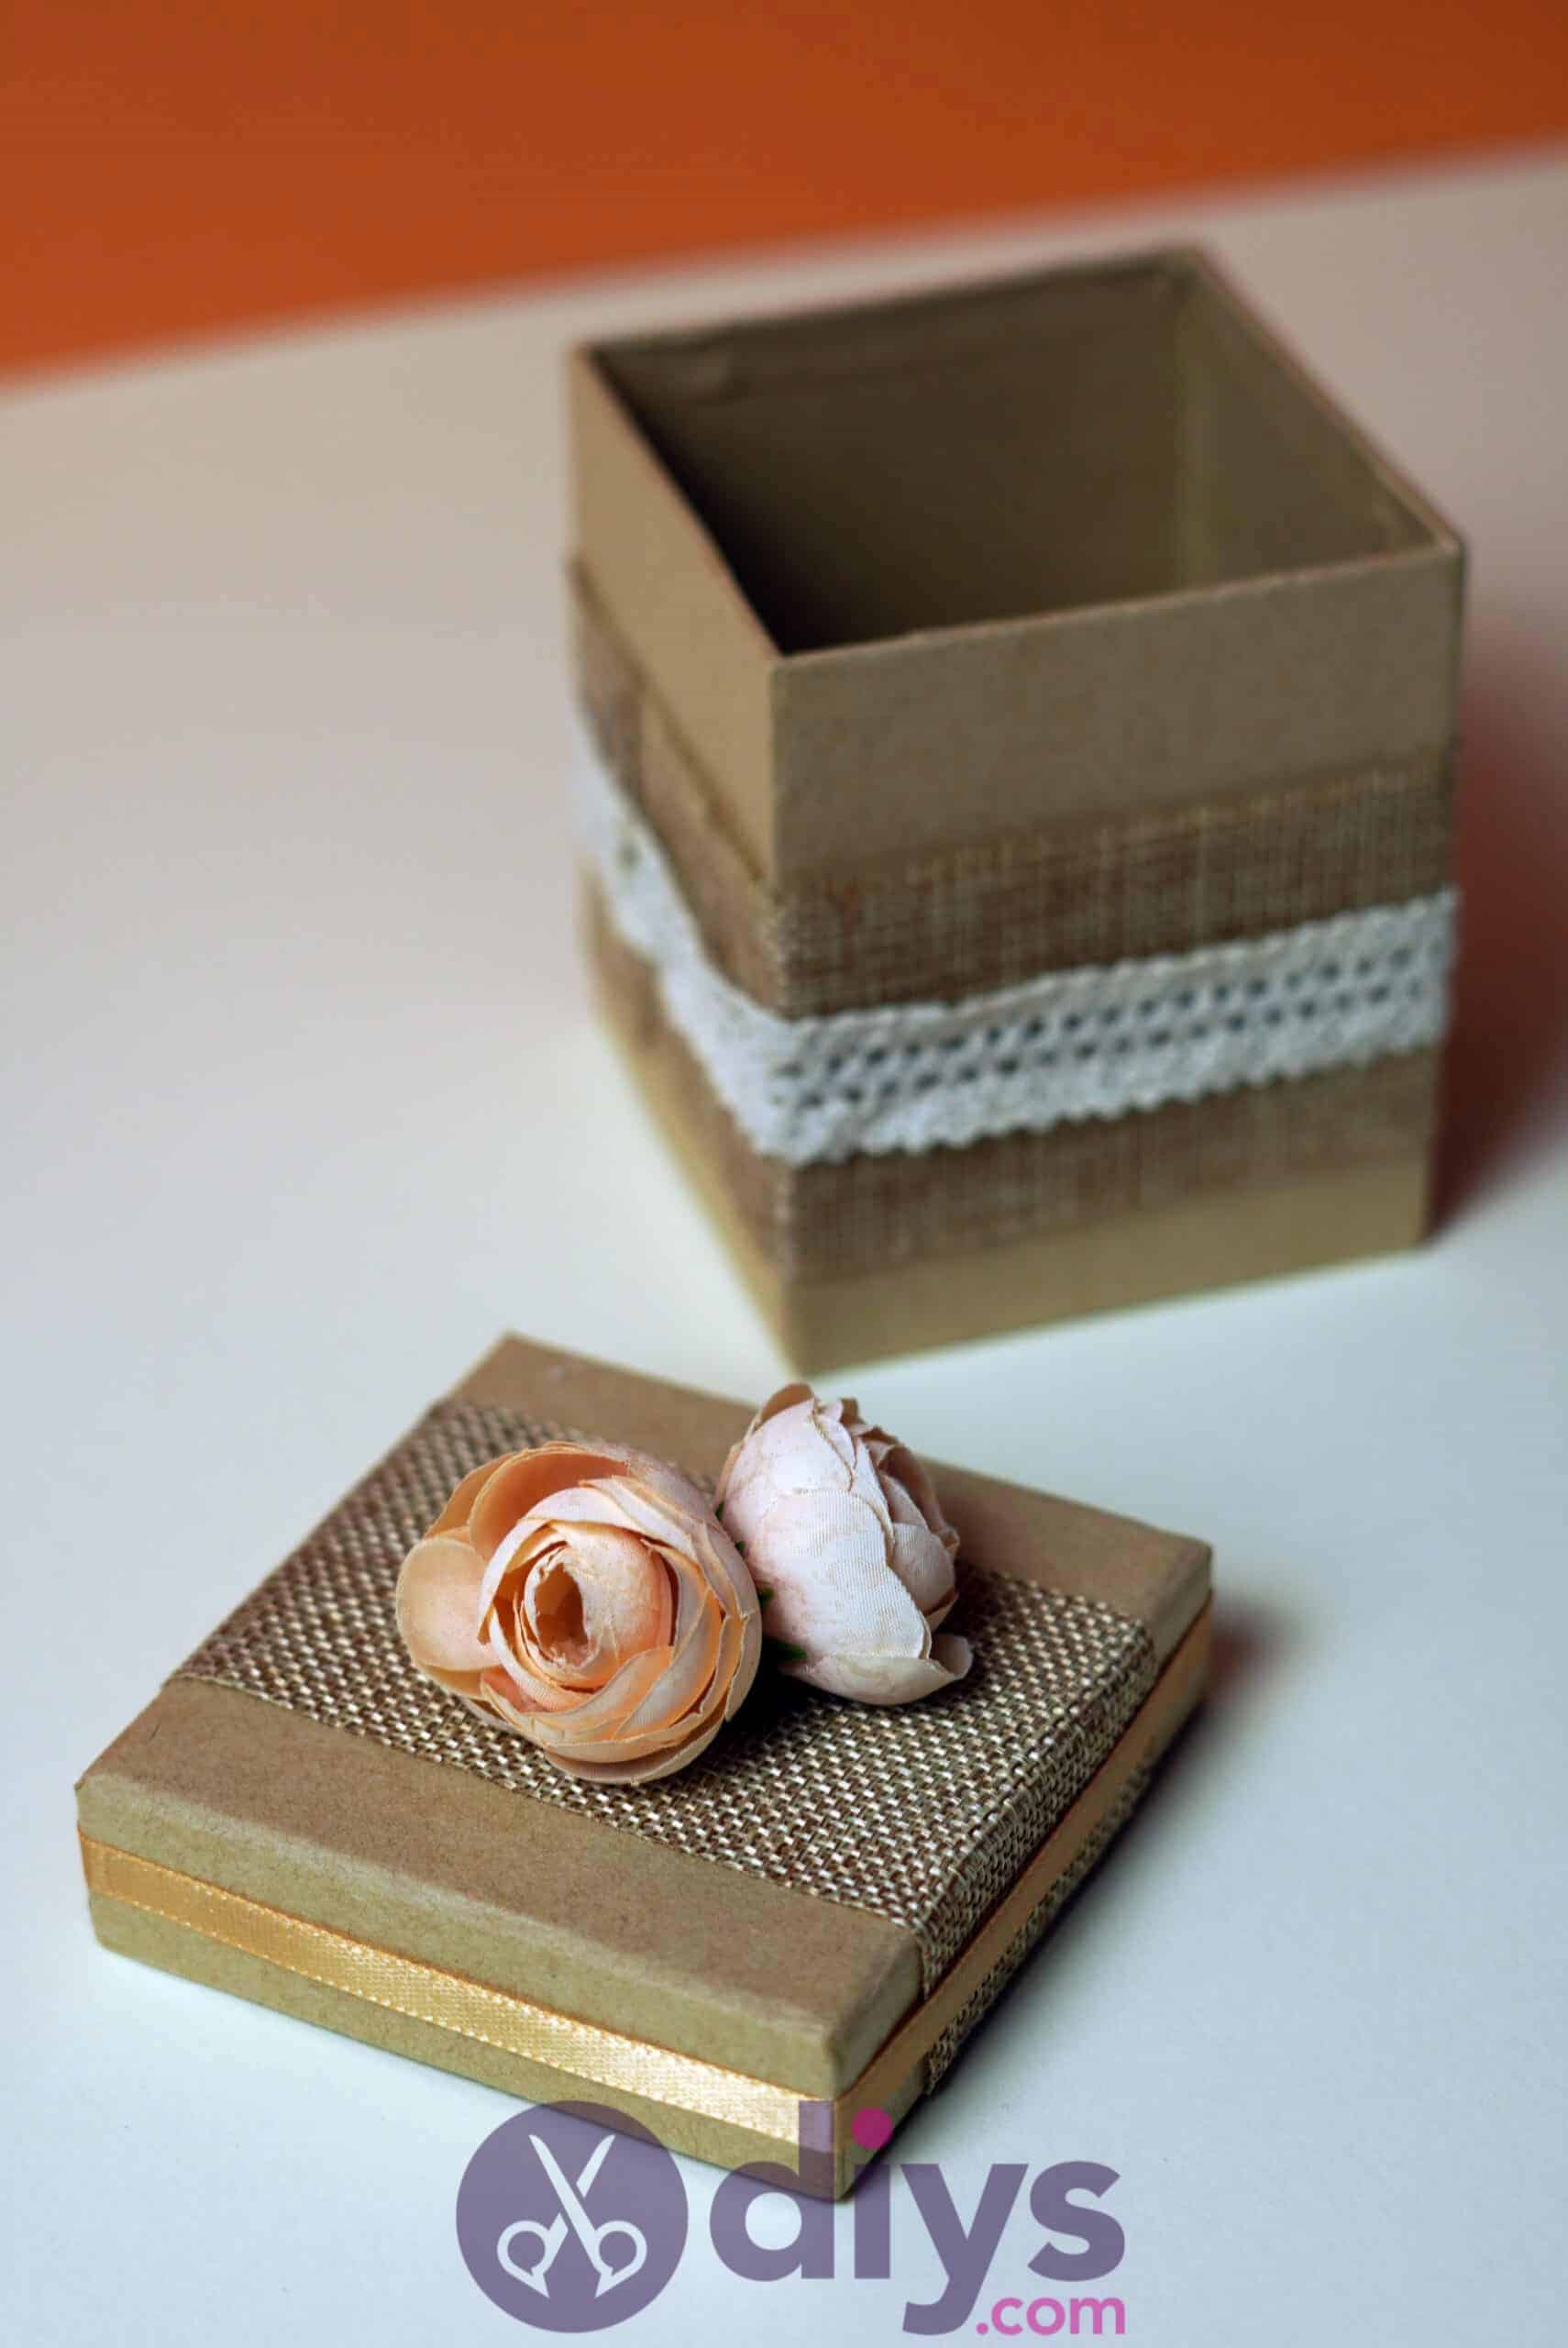
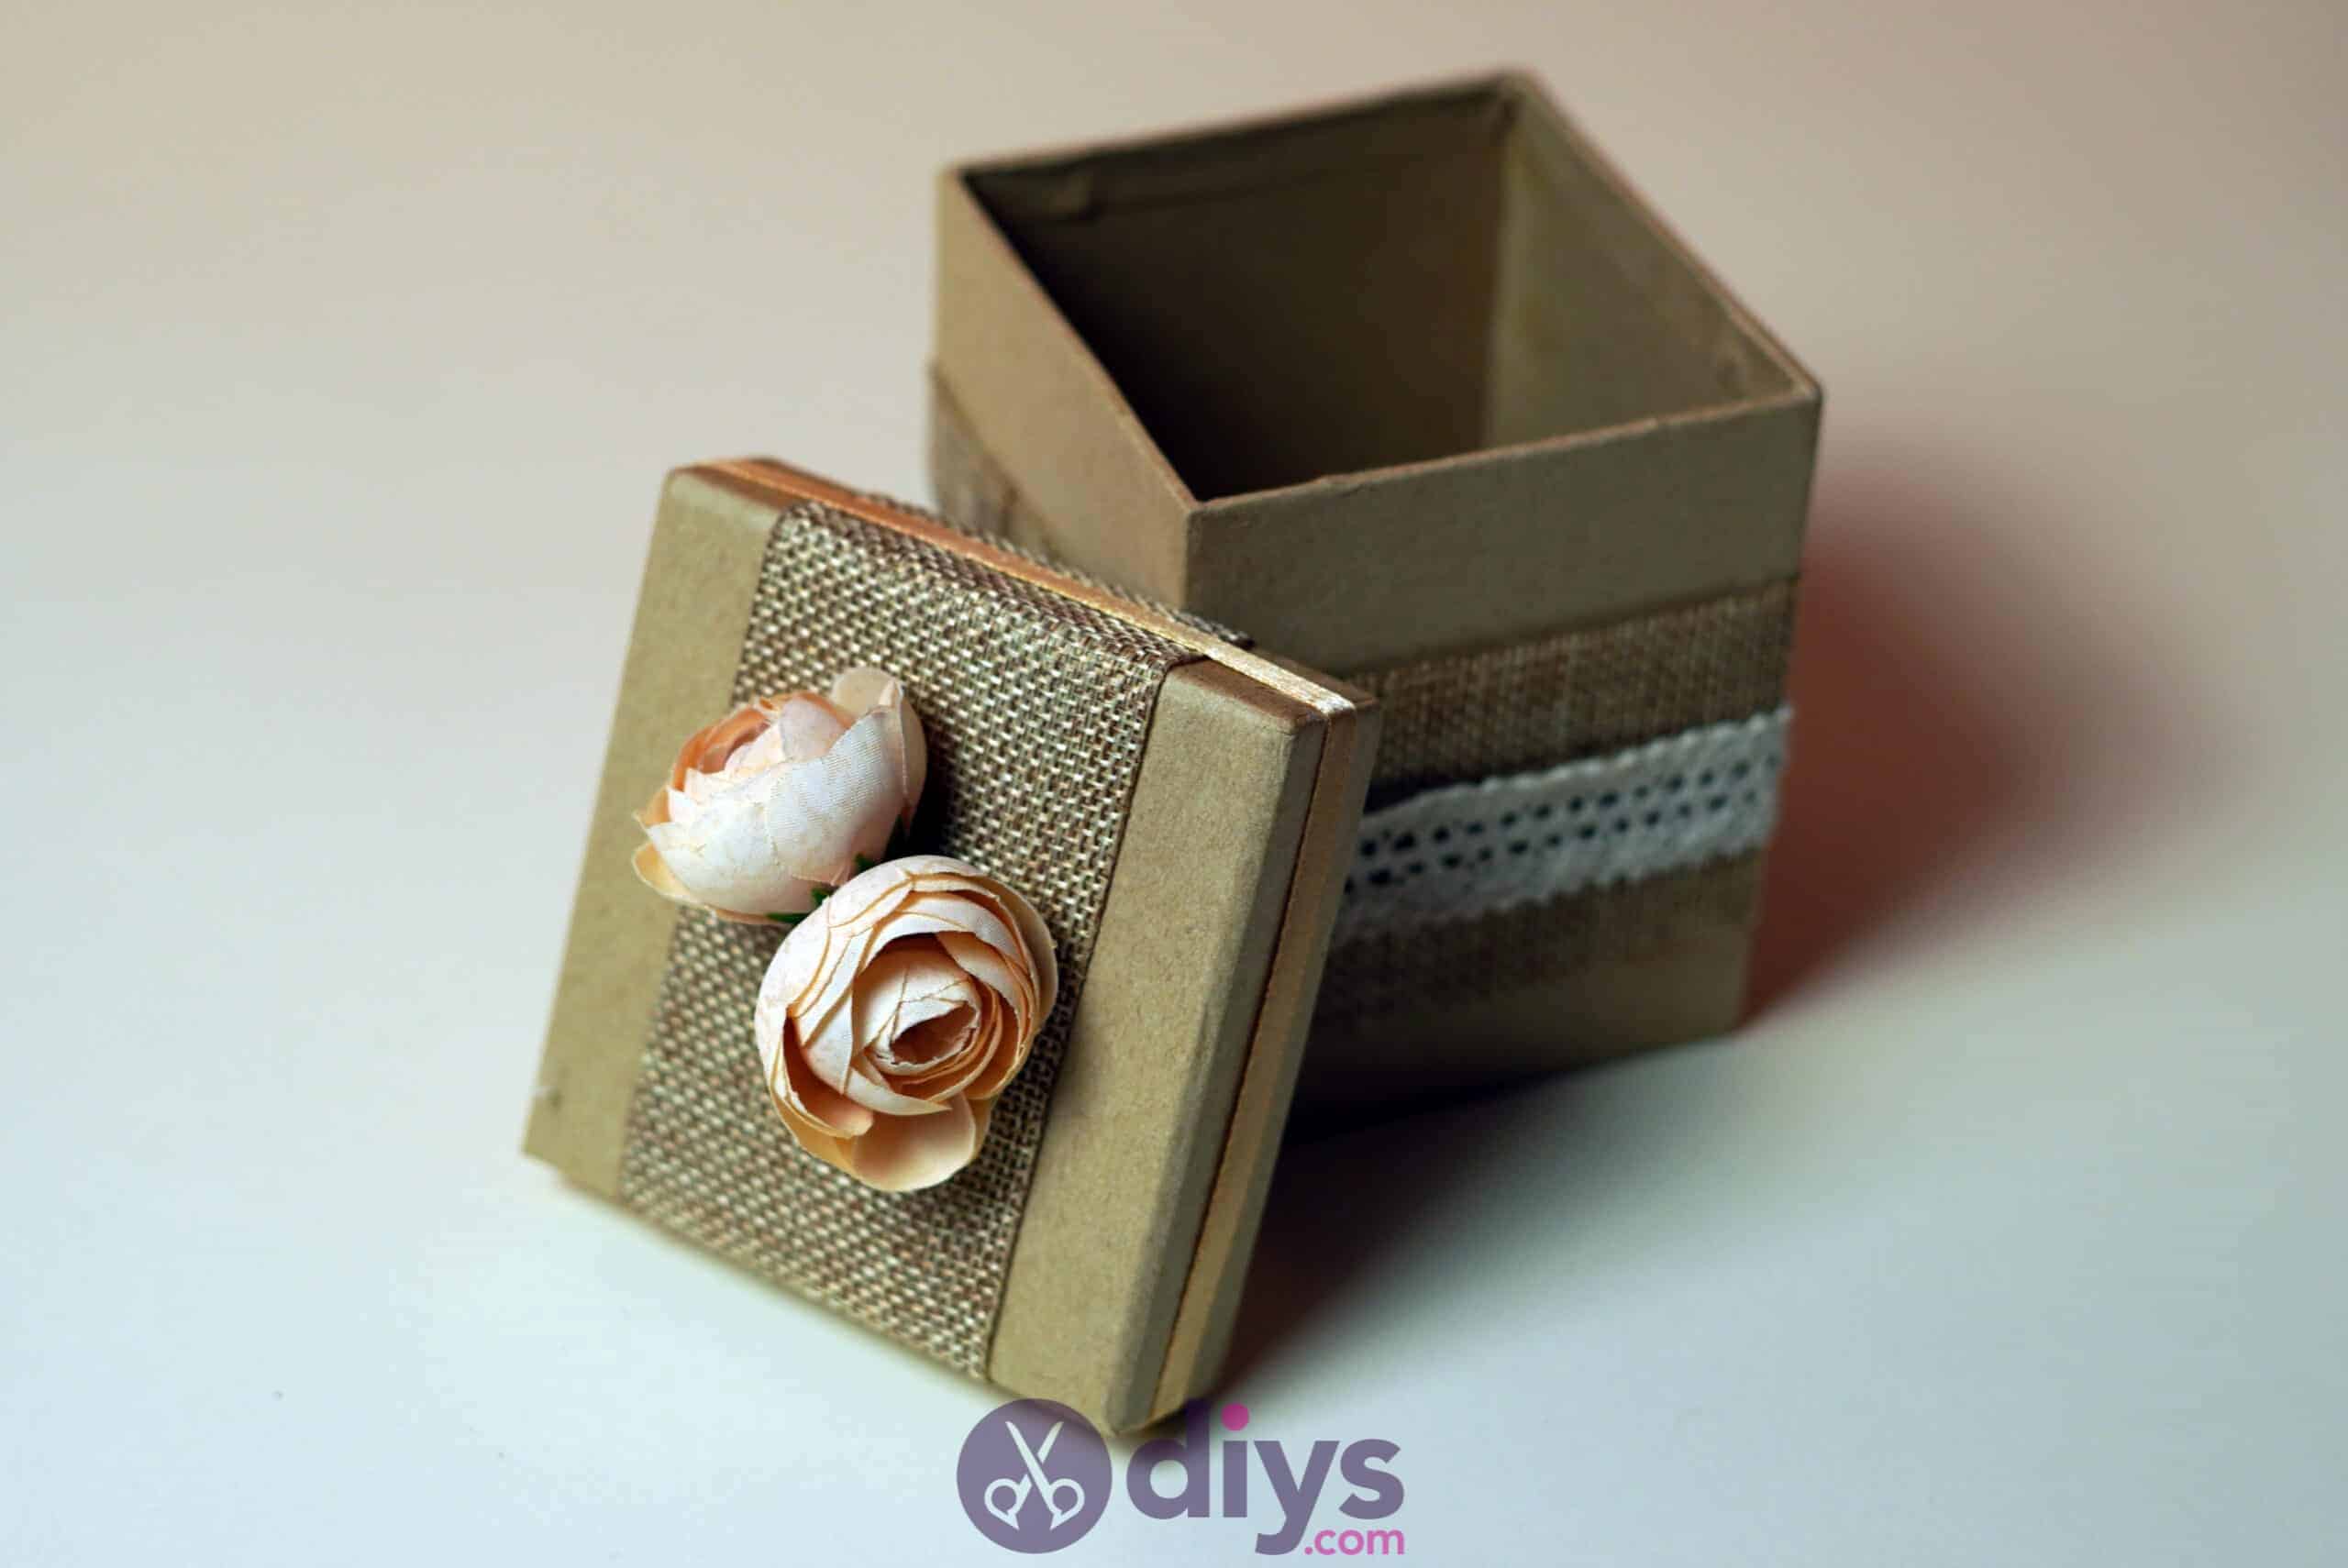
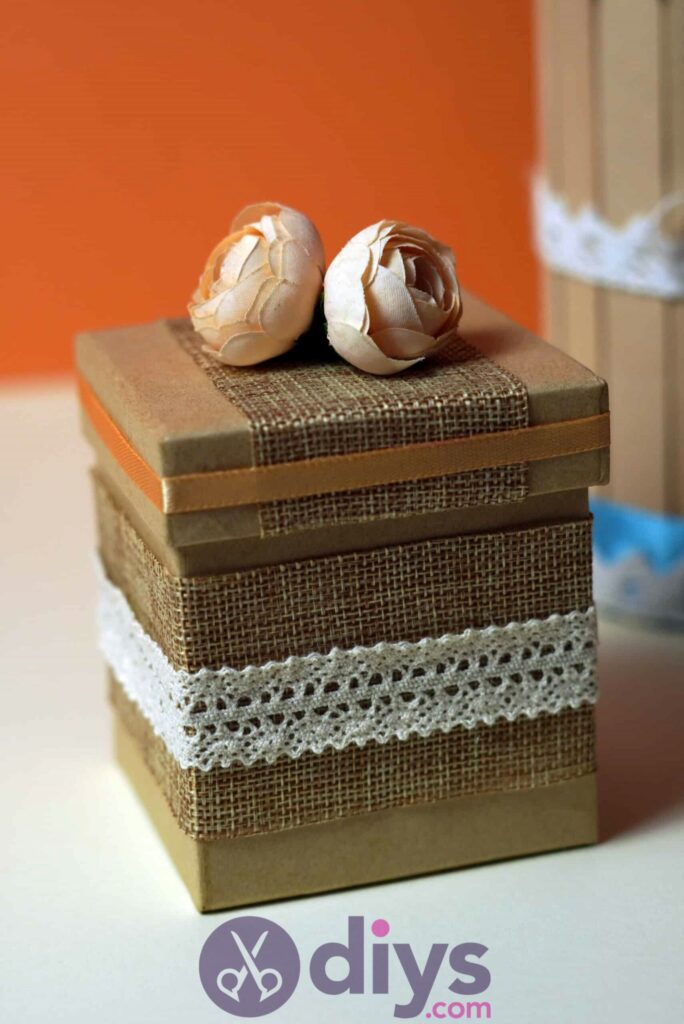
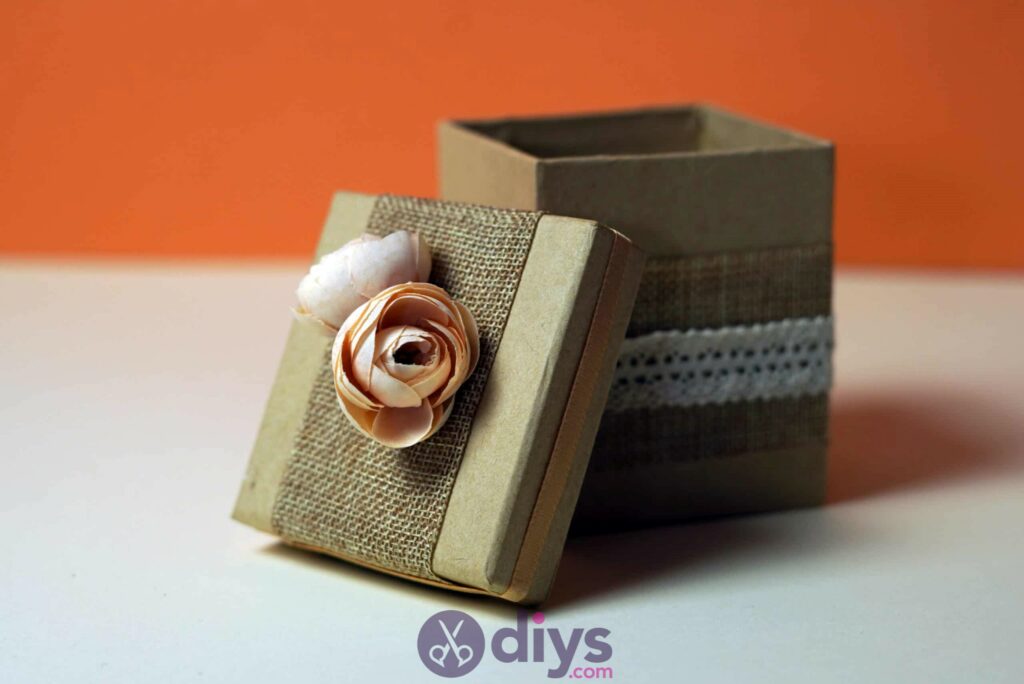
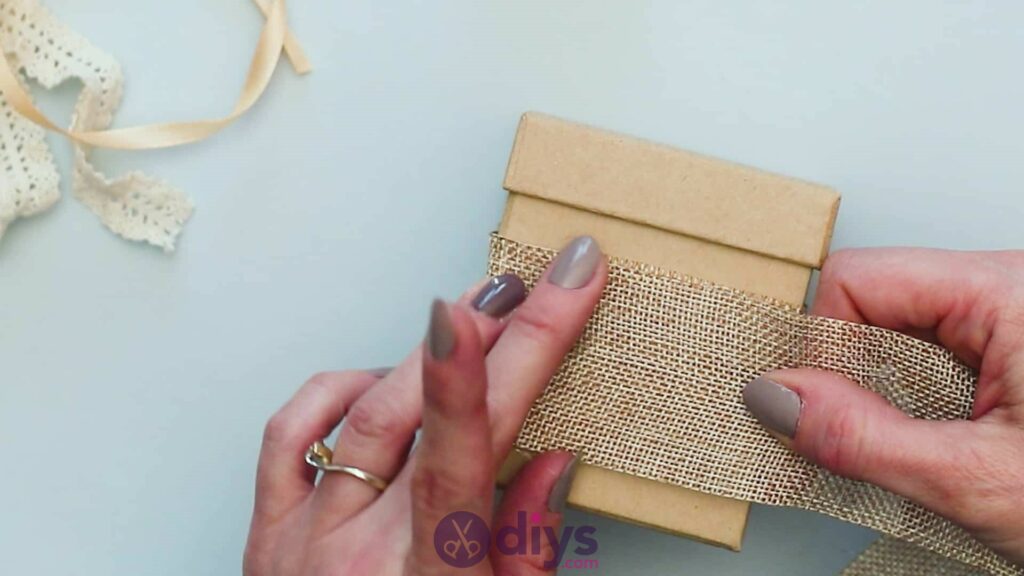
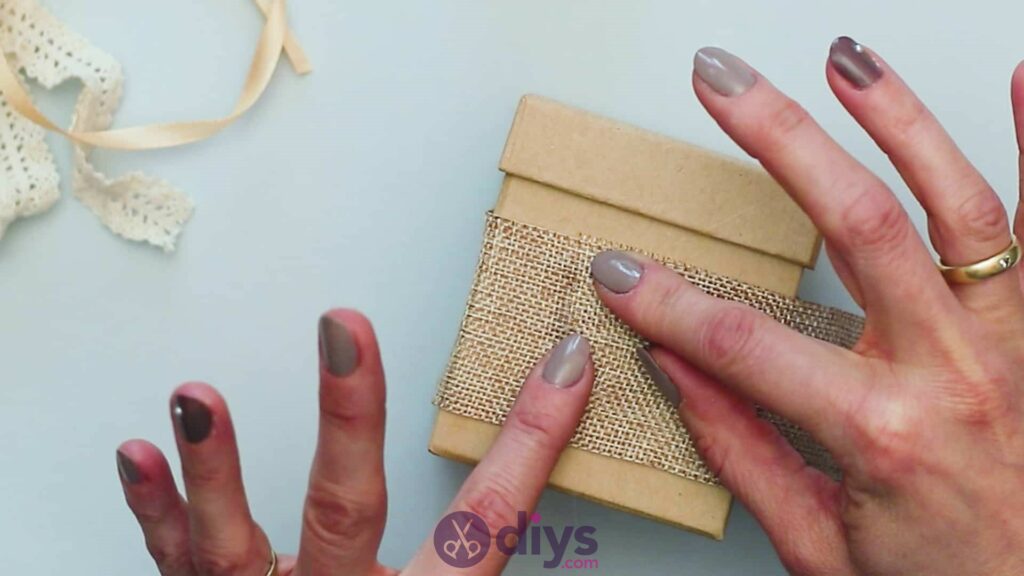
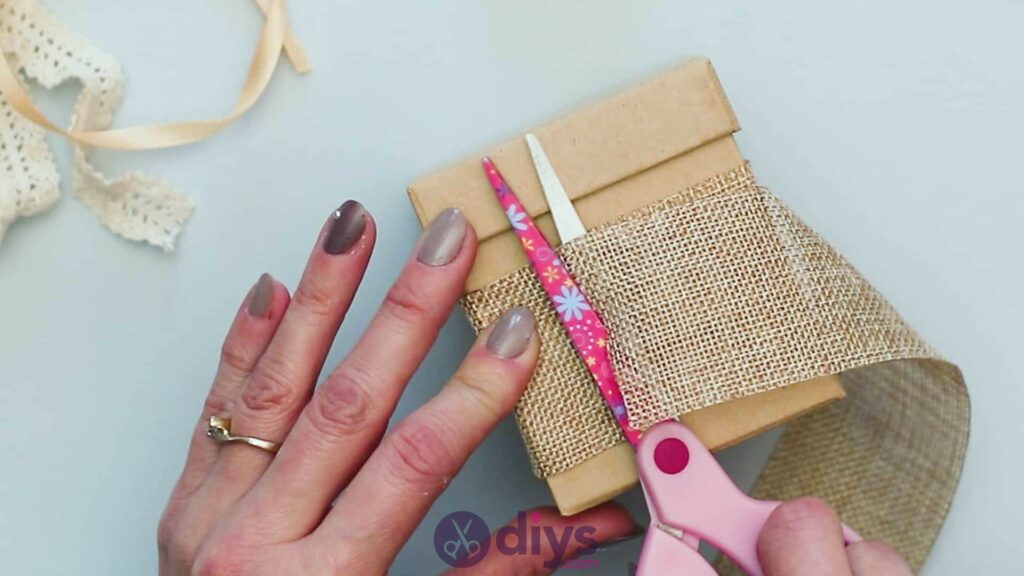
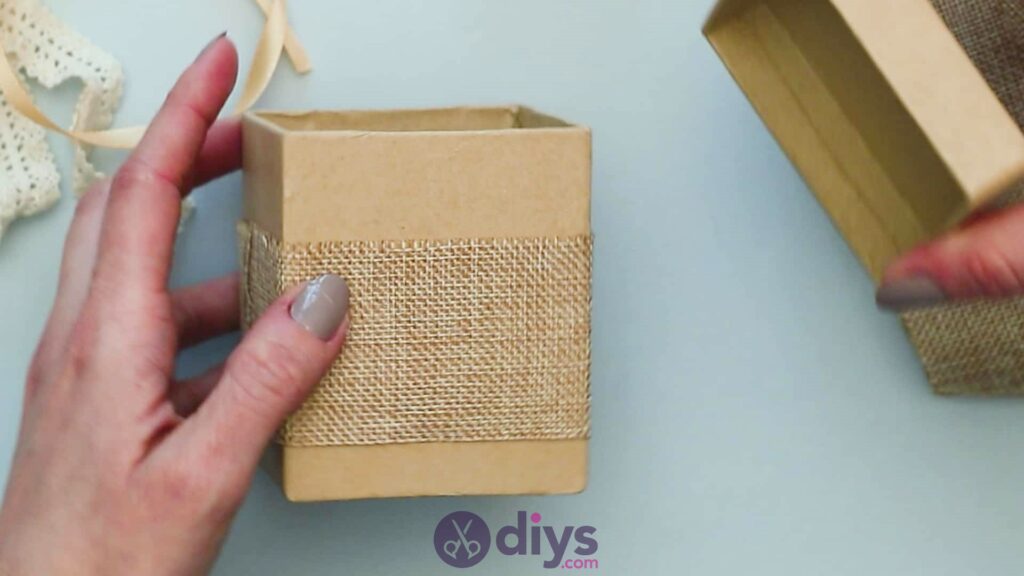
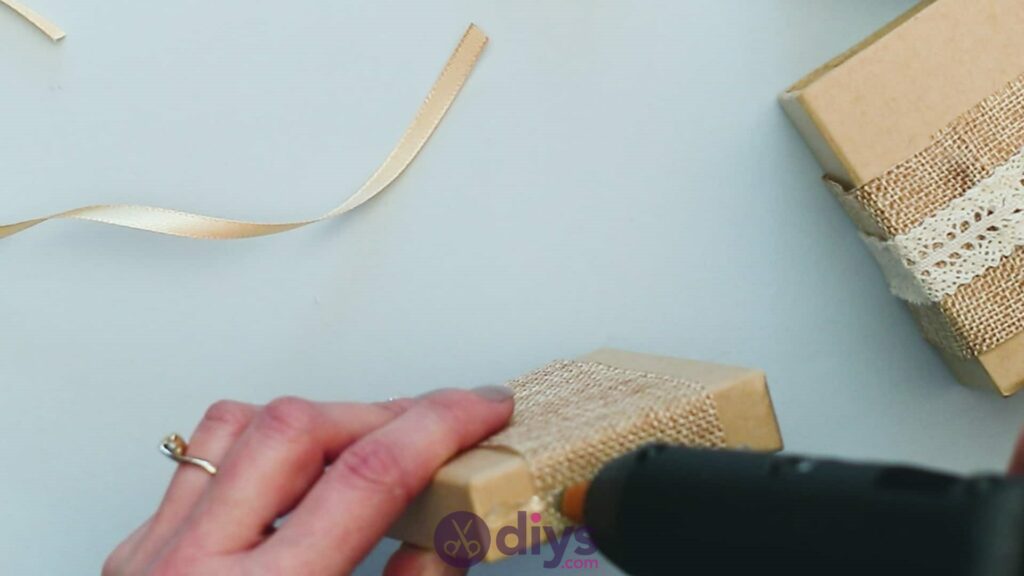
Choose a side of the box that you’d like to keep as the back. This is where you’ll anchor all of your embellishment layers with glue so the seams are all on one side. Apply a line of hot glue on the box that is the same length as the edge on the end of your jute ribbon or trim, placing it equidistant from the bottom and top of the box so that, when you wrap the trim around the box in a moment, it will be in the middle of the box’s height. Stick the edge of your jute trim or ribbon’s edge down into that glue and wrap the jute all the way around the box until you meet back up with your starting edge. Use your glue gun to apply more hot glue, this time on top of the first edge you glue down. Stick the part of your jute that meets that spot down in the glue to create a small overlap for neatness and trim the excess with your scissors. You now have a jute band wrapped around the middle of your box!


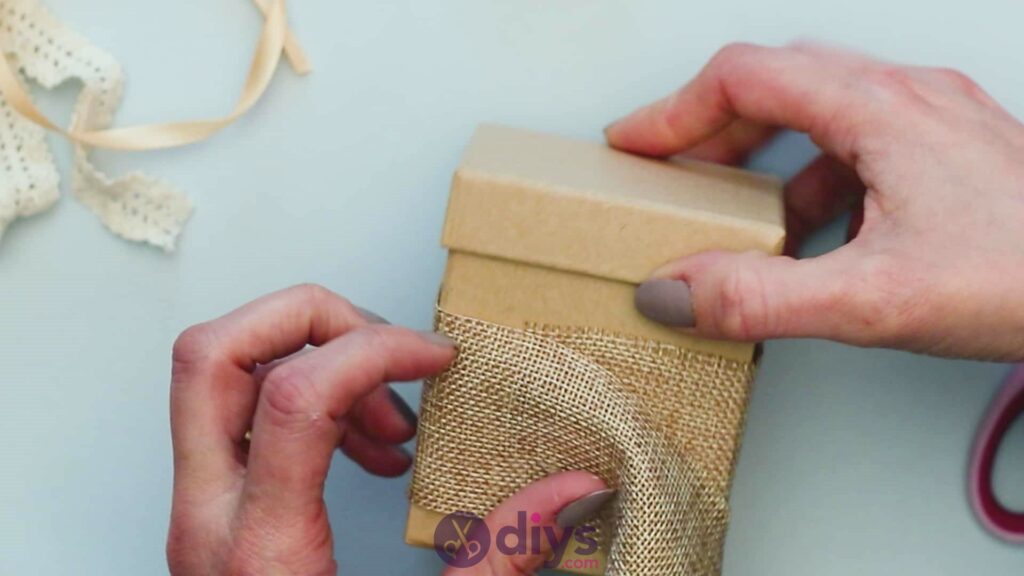

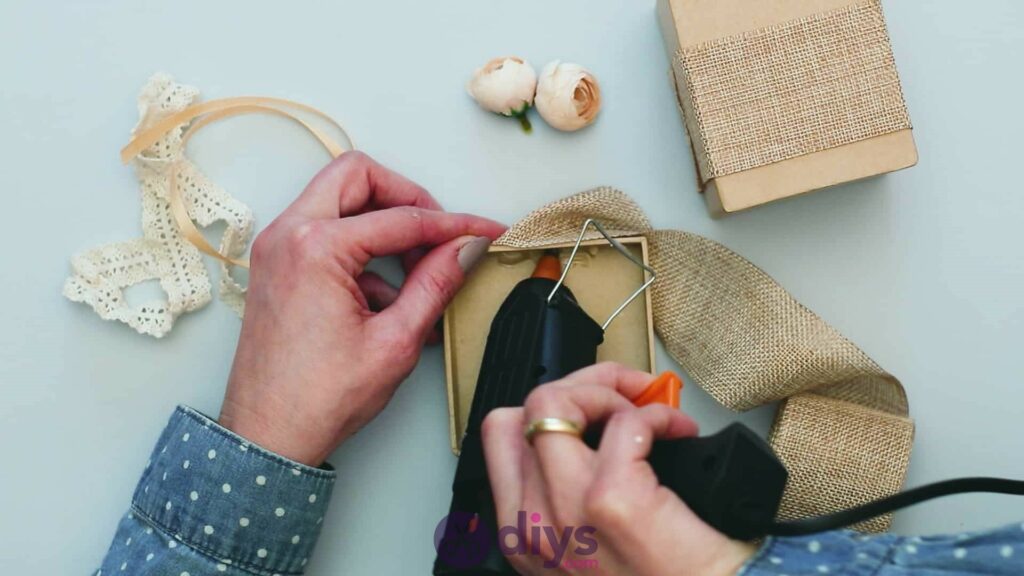
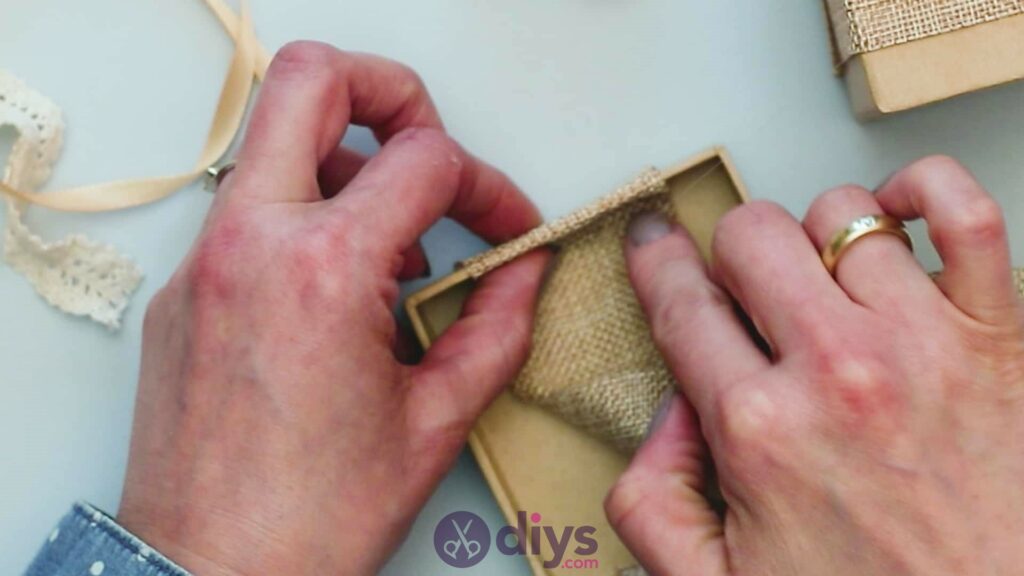
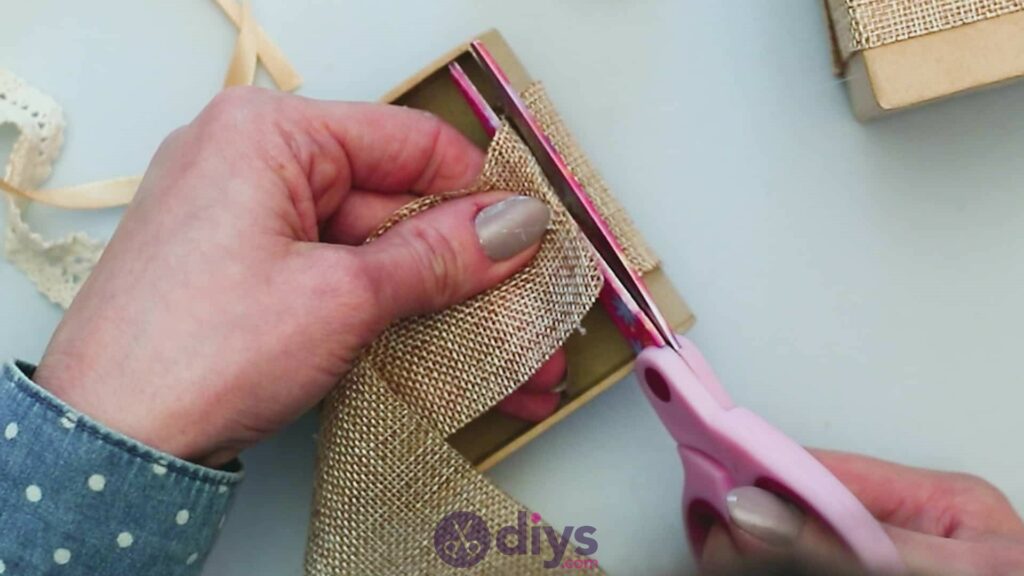
Step 3: the lid
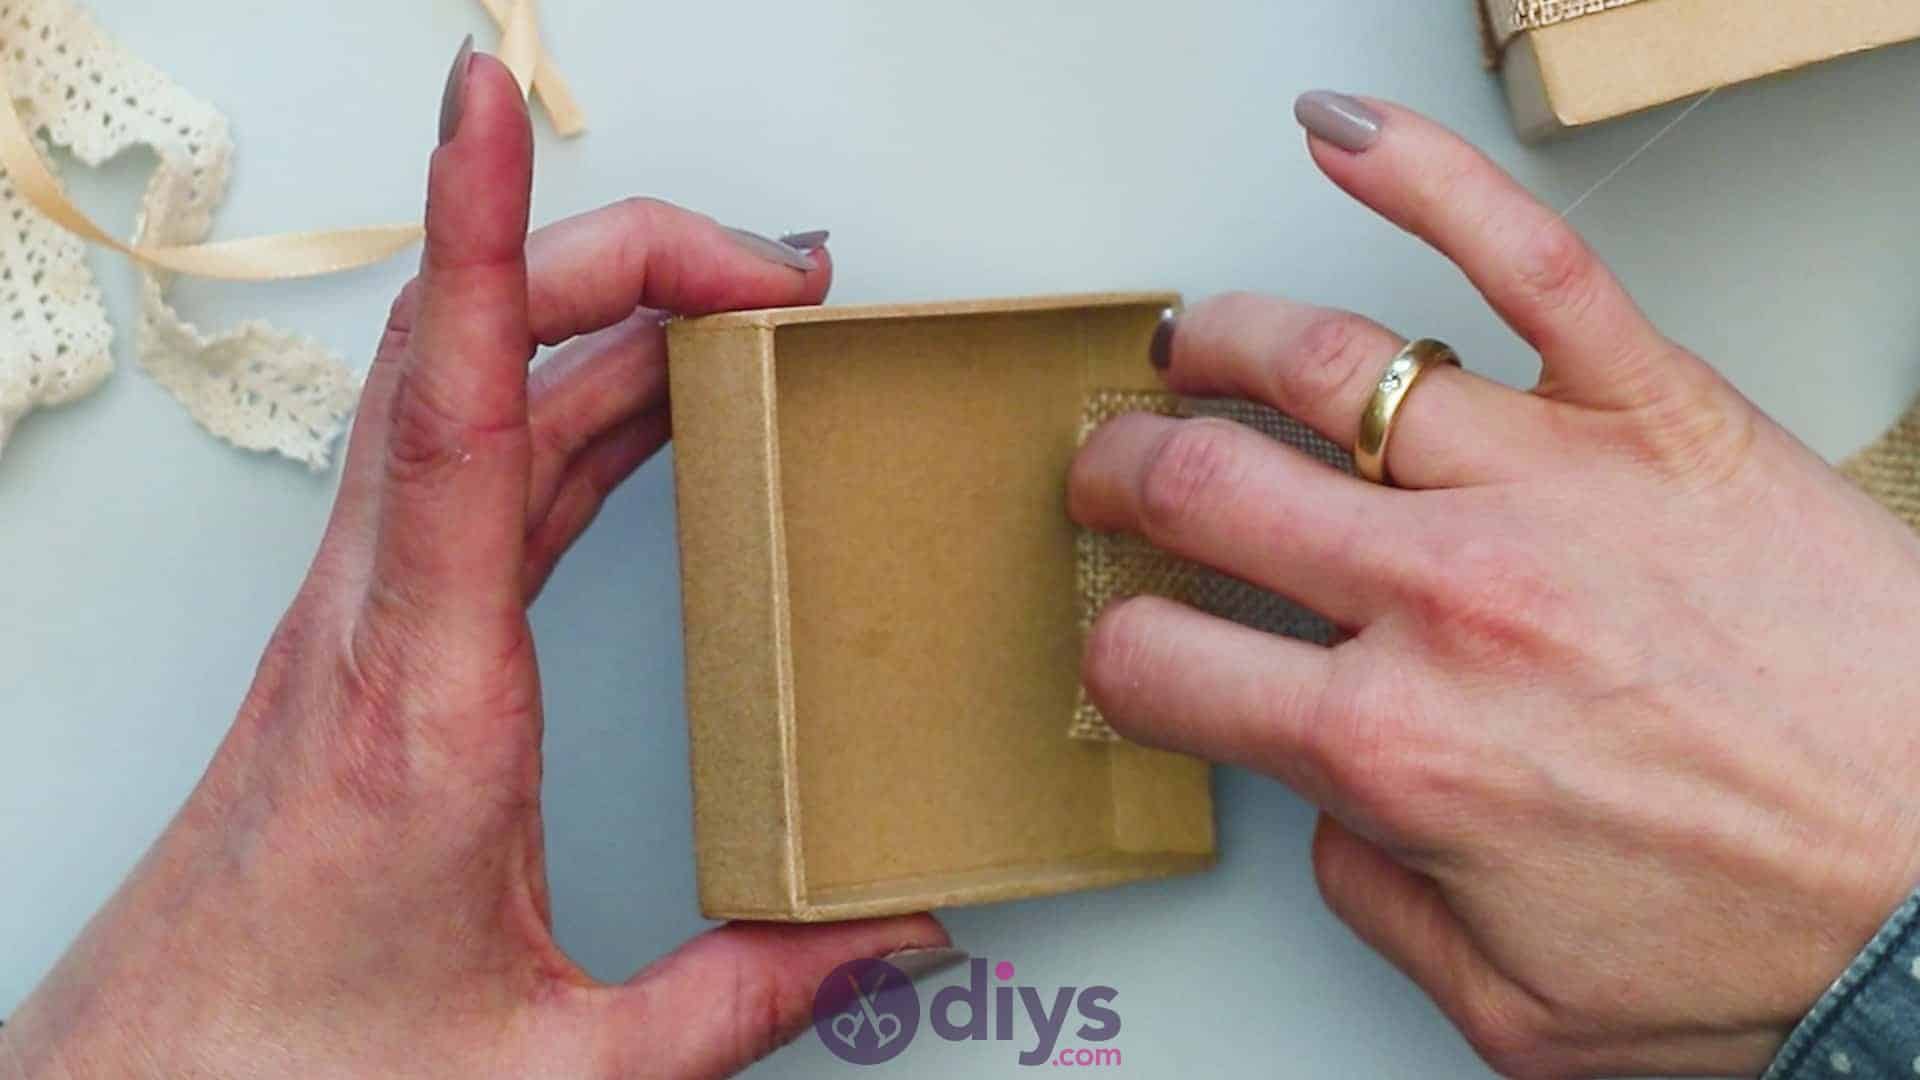
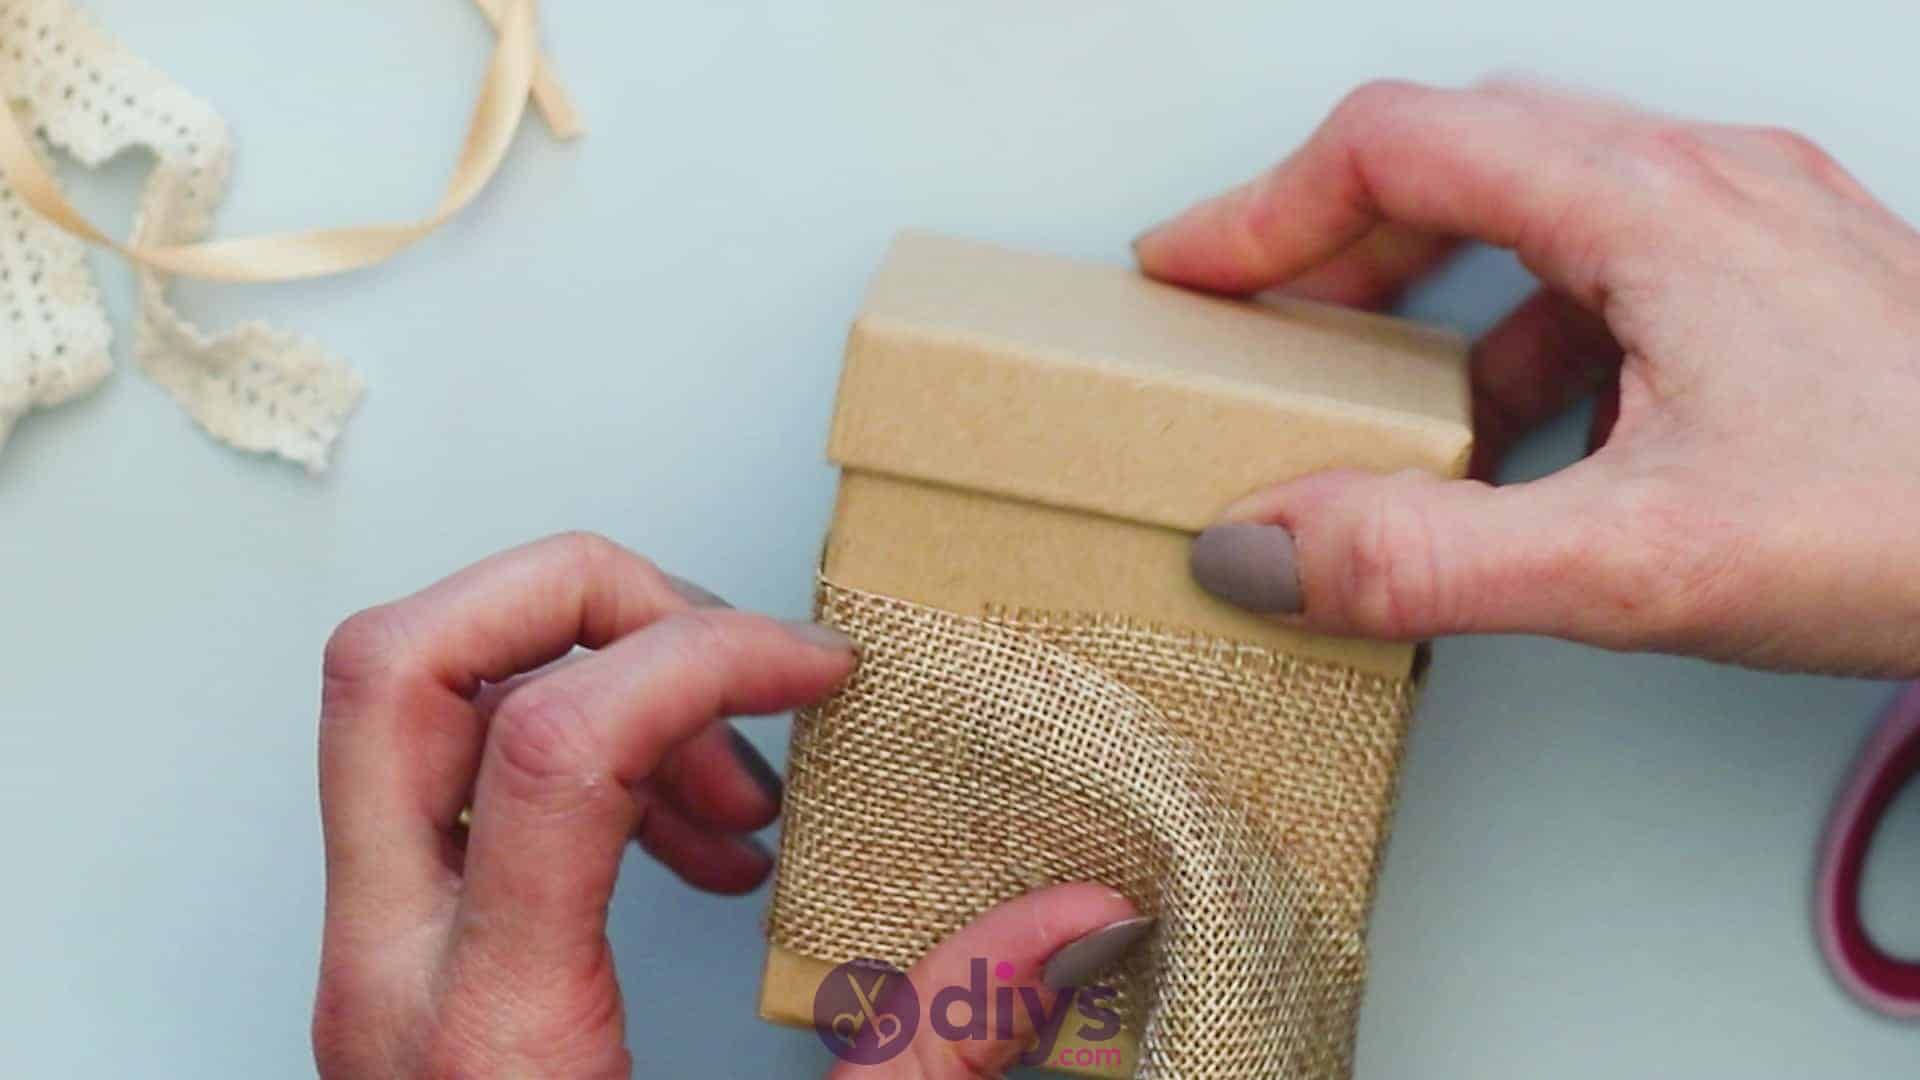
Take the lid off your box and turn it over so you can see its underside. Apply glue along the top crease in the centre at one of the sides, where the top of the lid bends down into the edge of the lid. Stick the edge of your jute trim or ribbon down into that glue, pull it lightly under the edge of the lid and out around the top of the box, then down and back under the edge of the lid on the other side, opposite to where you started. Now apply glue in the crease on that side in the same way and stick the jute down there, then use your scissors to trim the excess. If you flip your lid over, you’ll see that you have a stripe of jute across the top just like you have around the box.


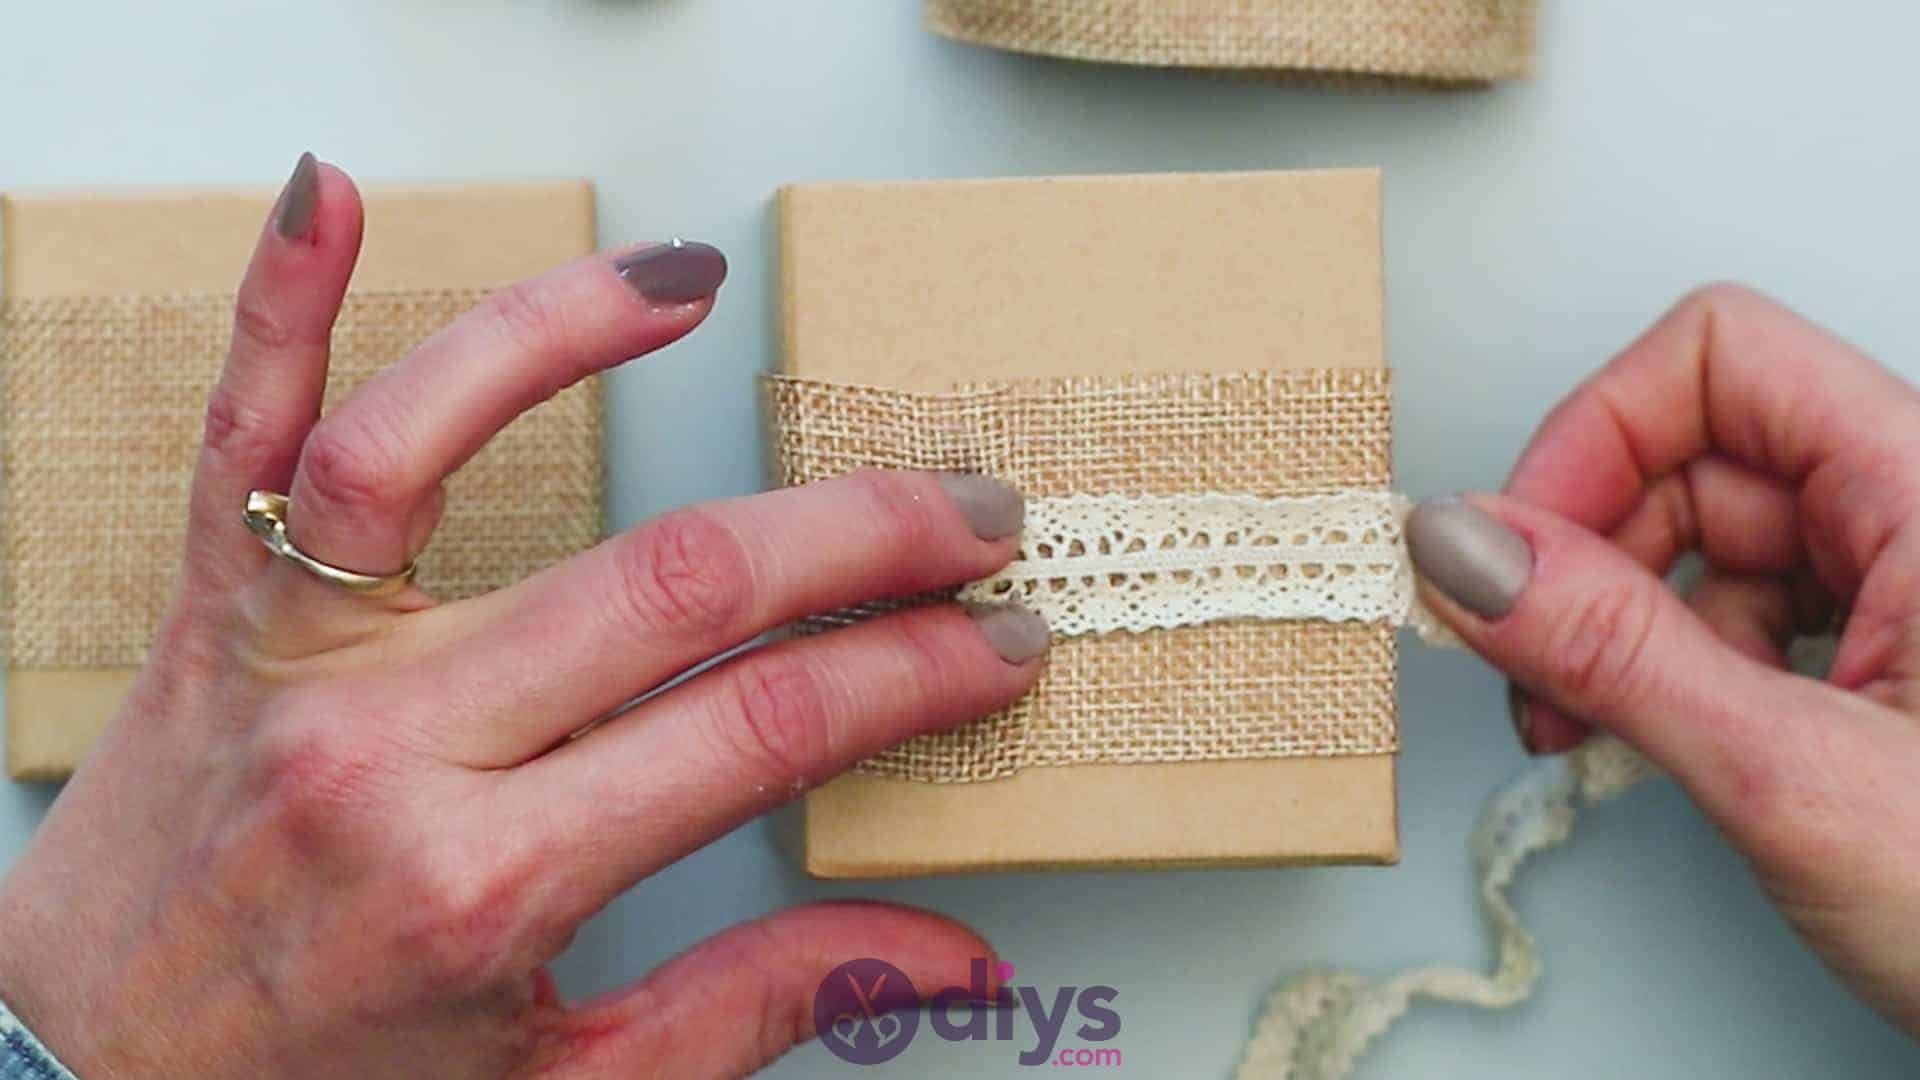
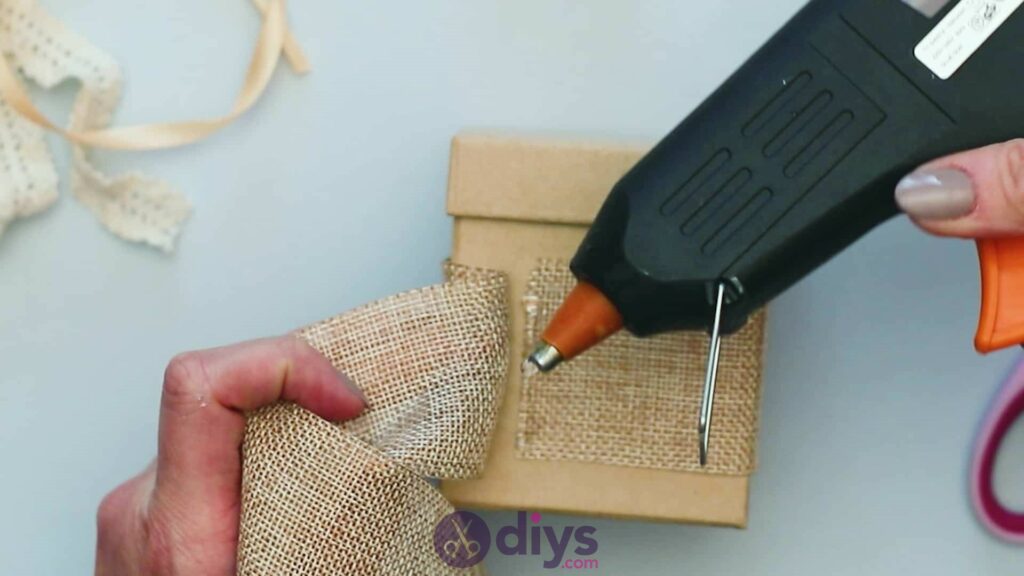
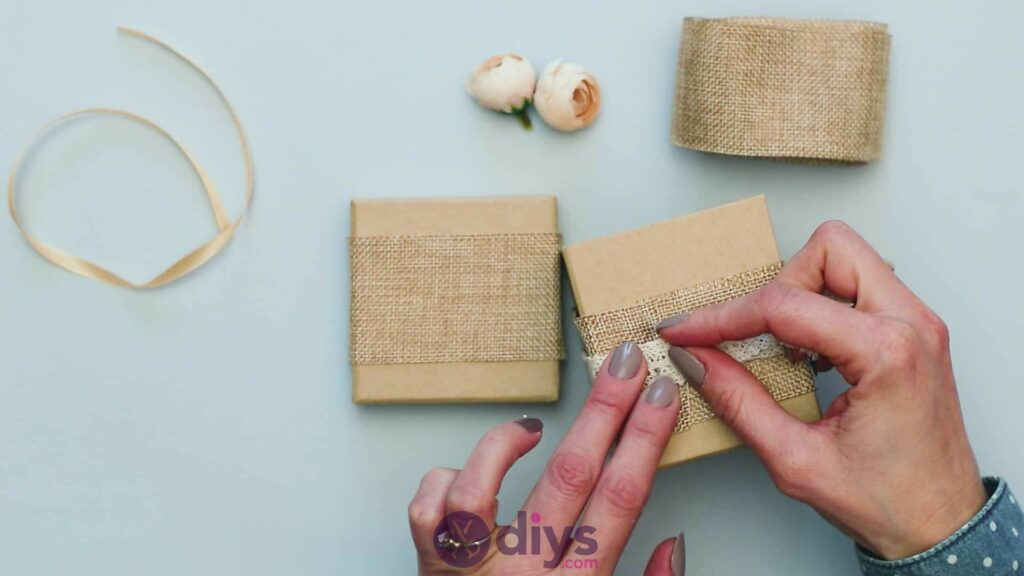
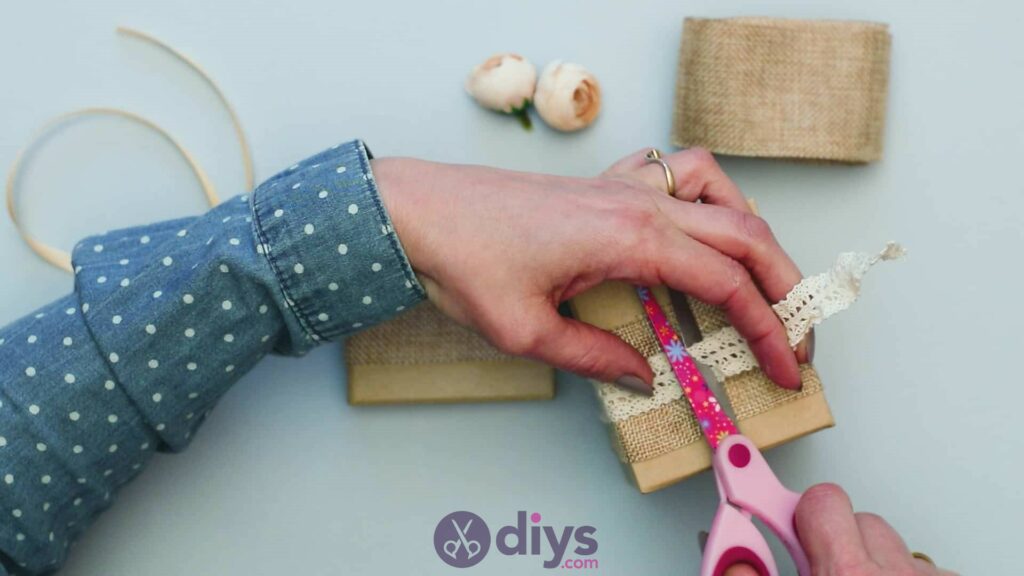
Step 4: glue on the lace
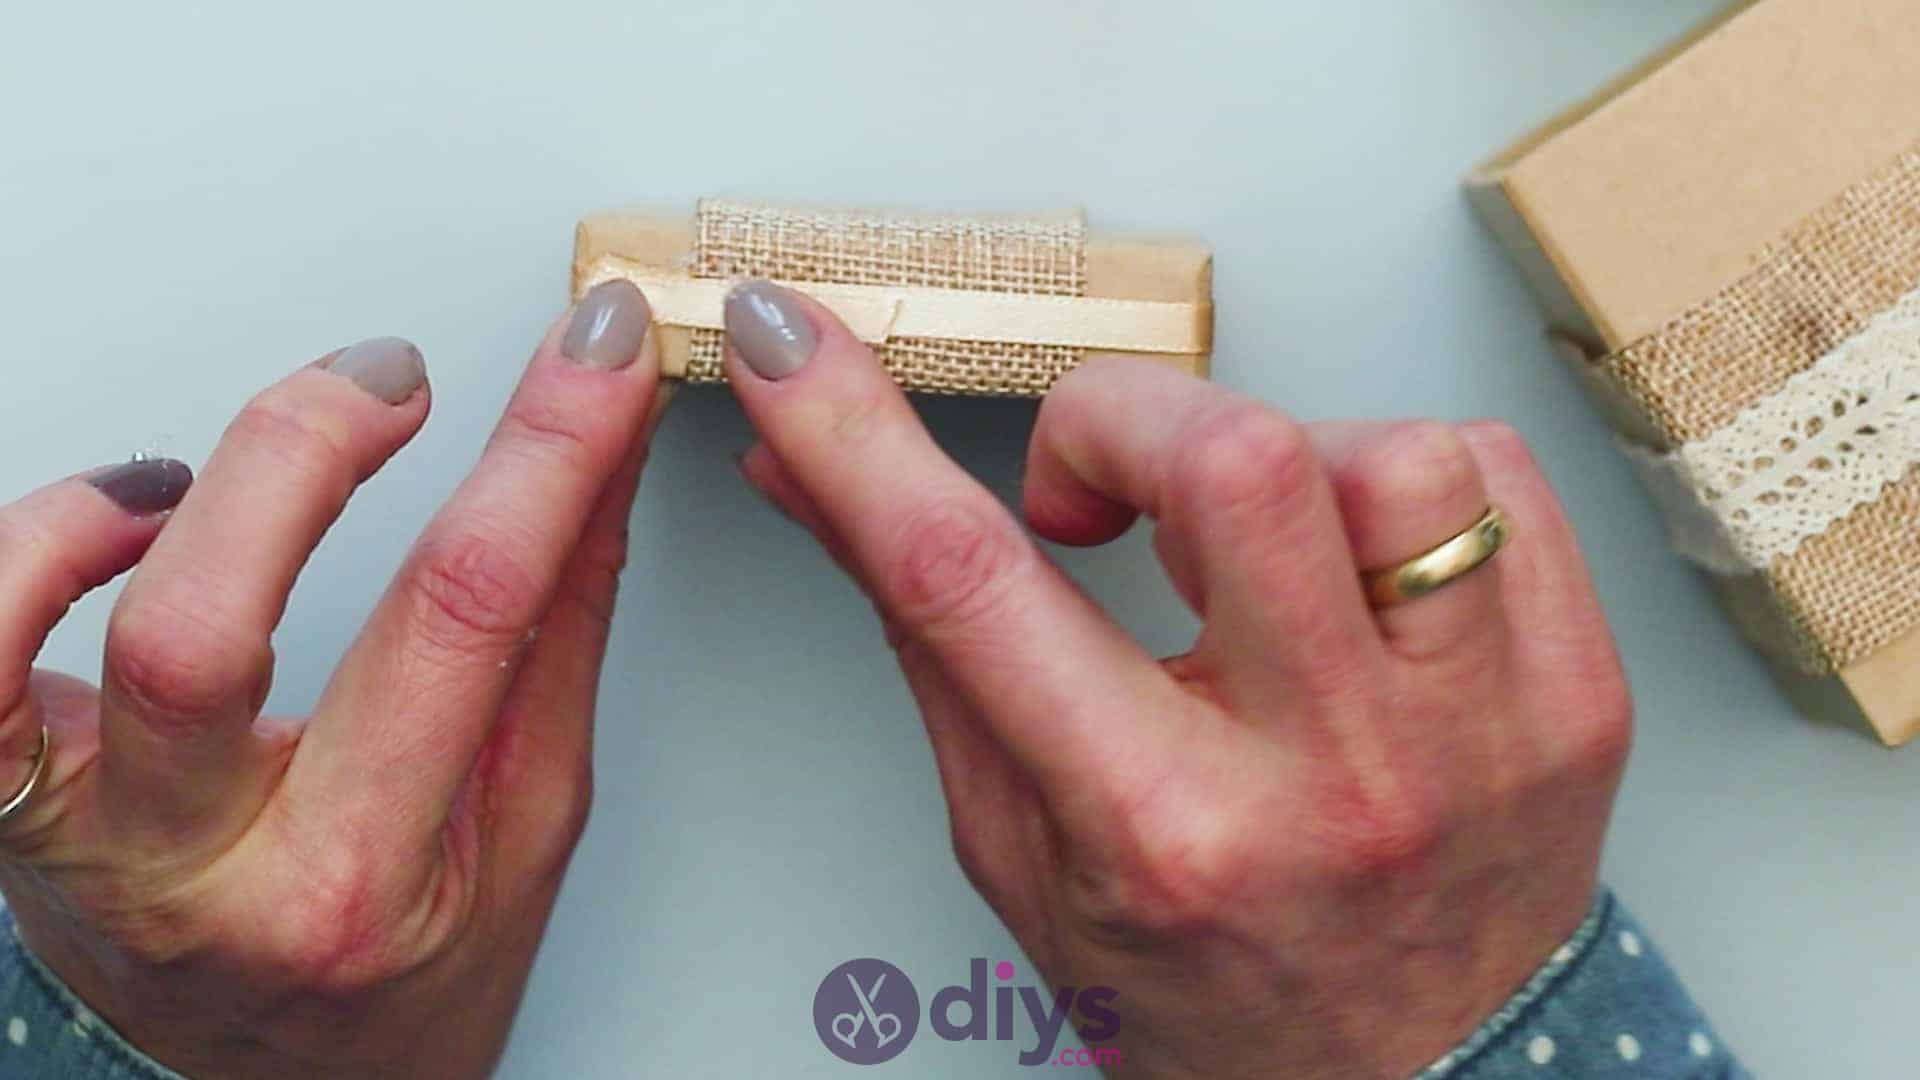
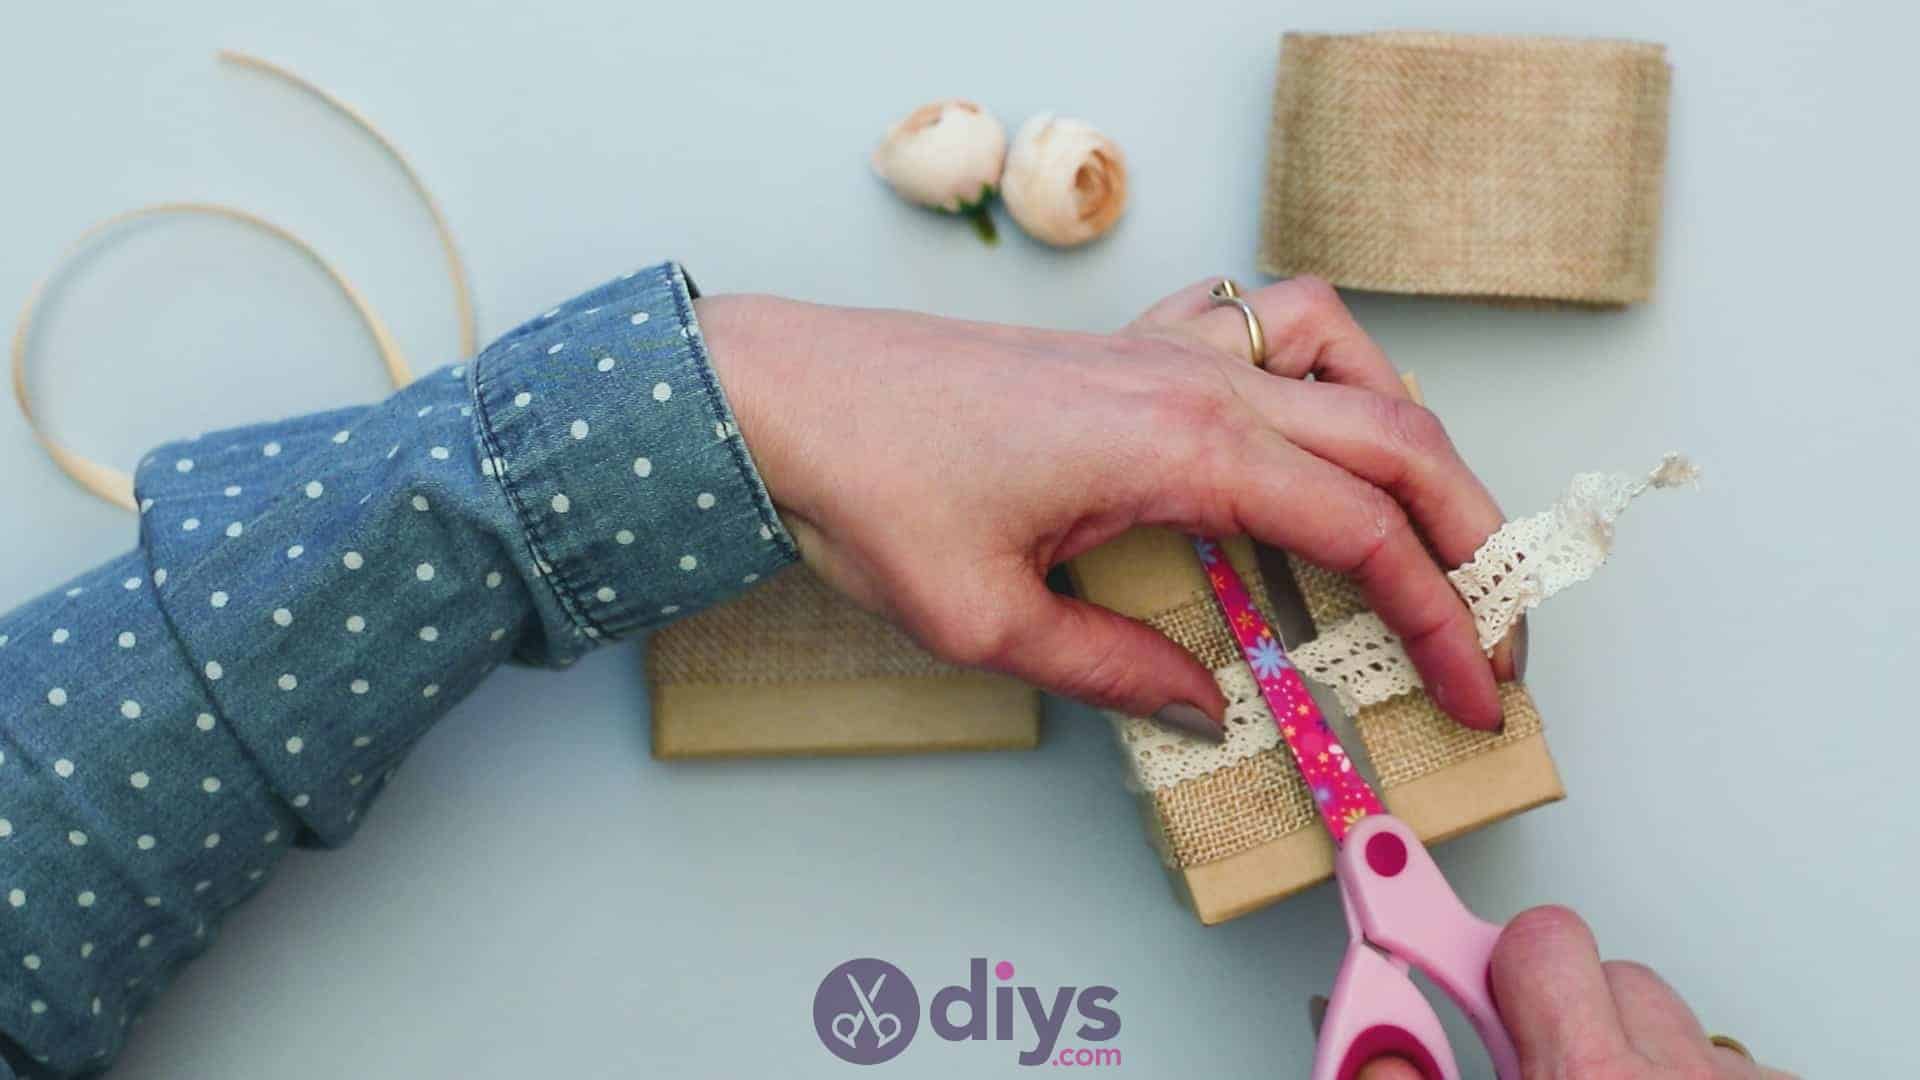
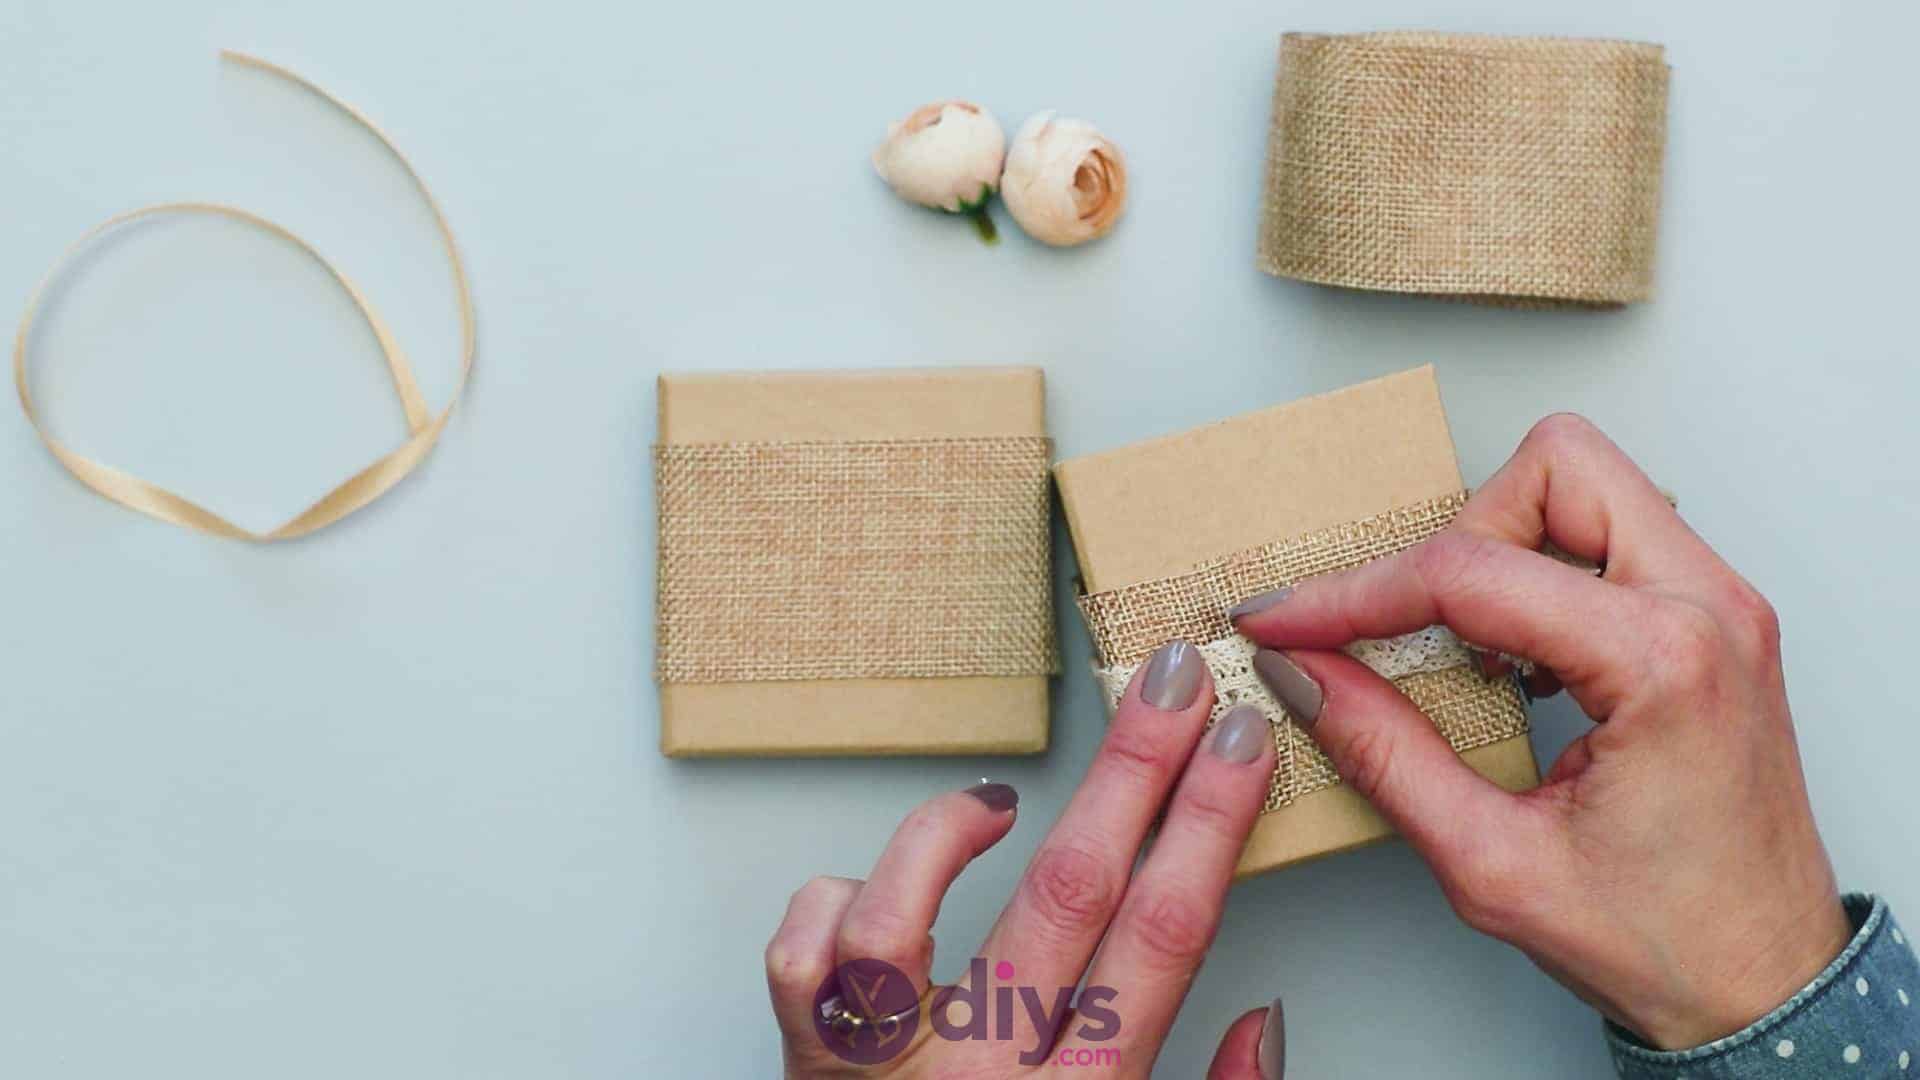
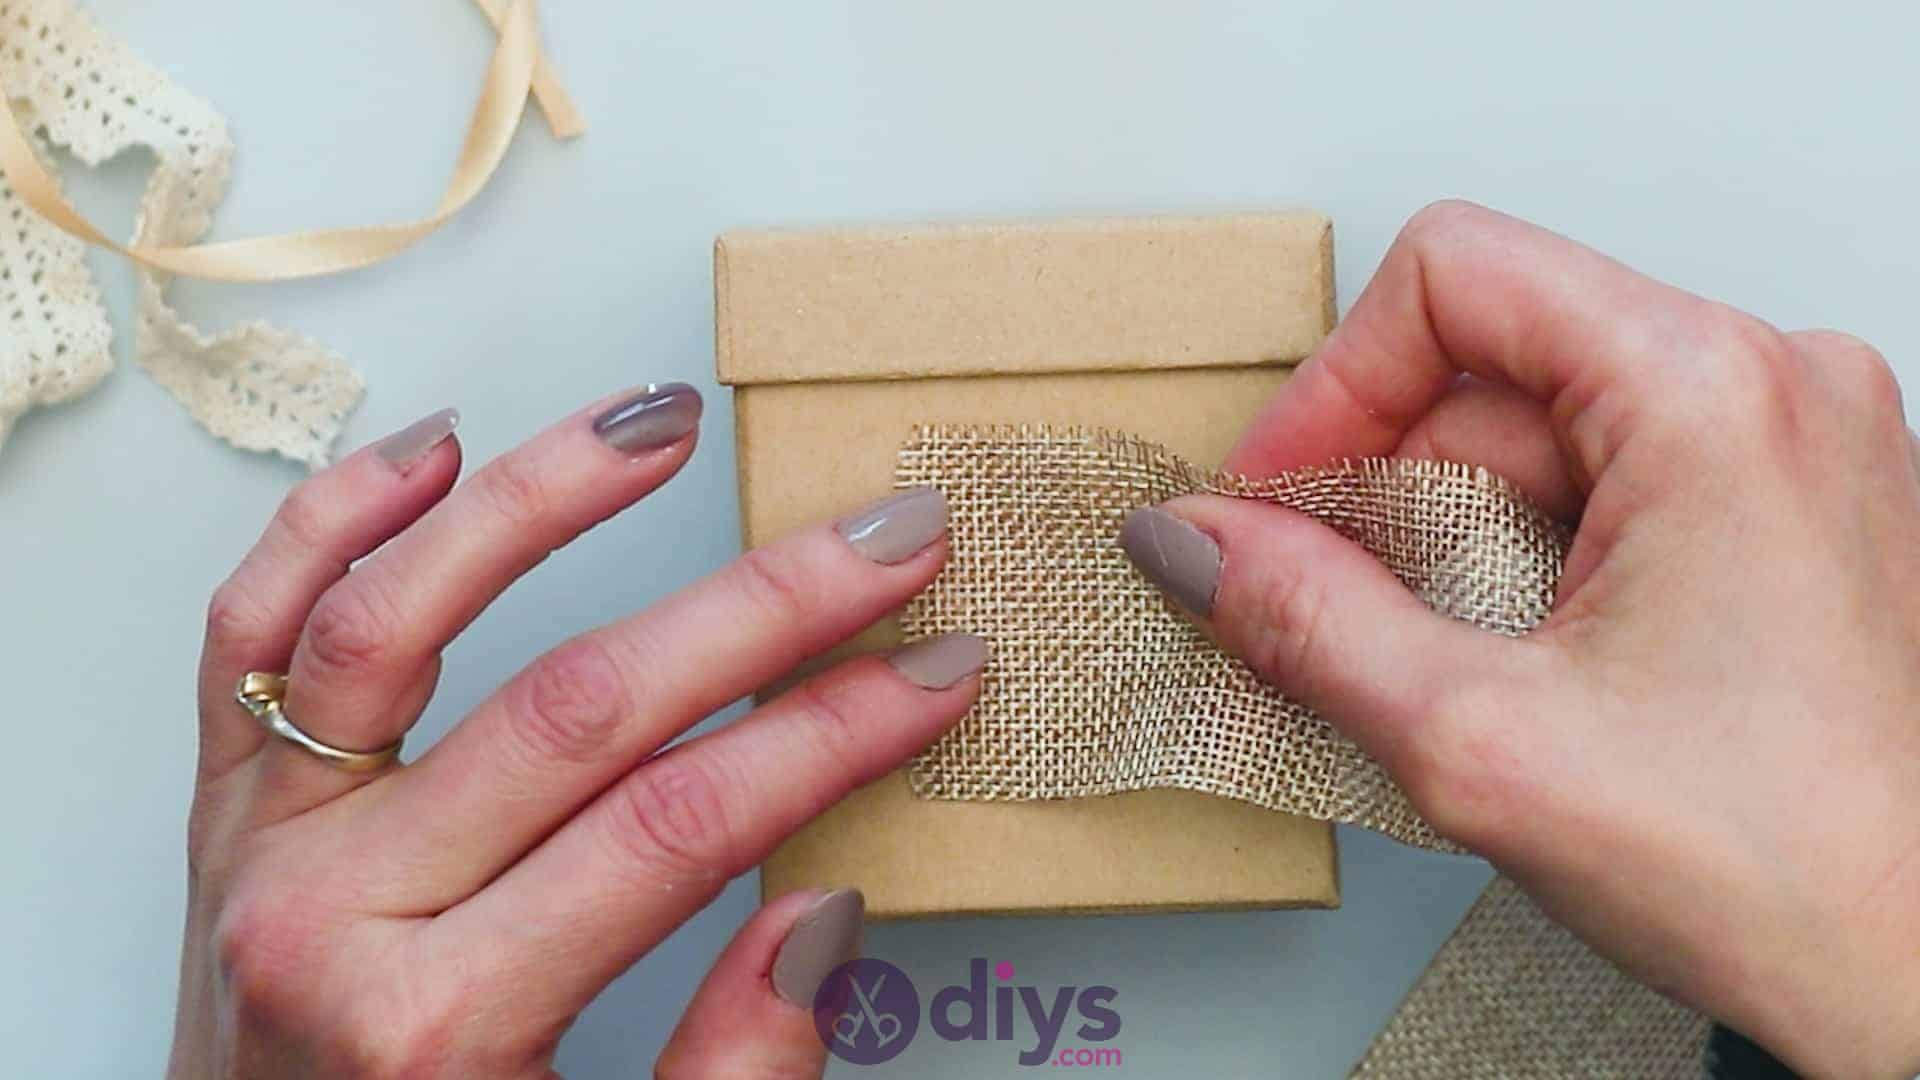
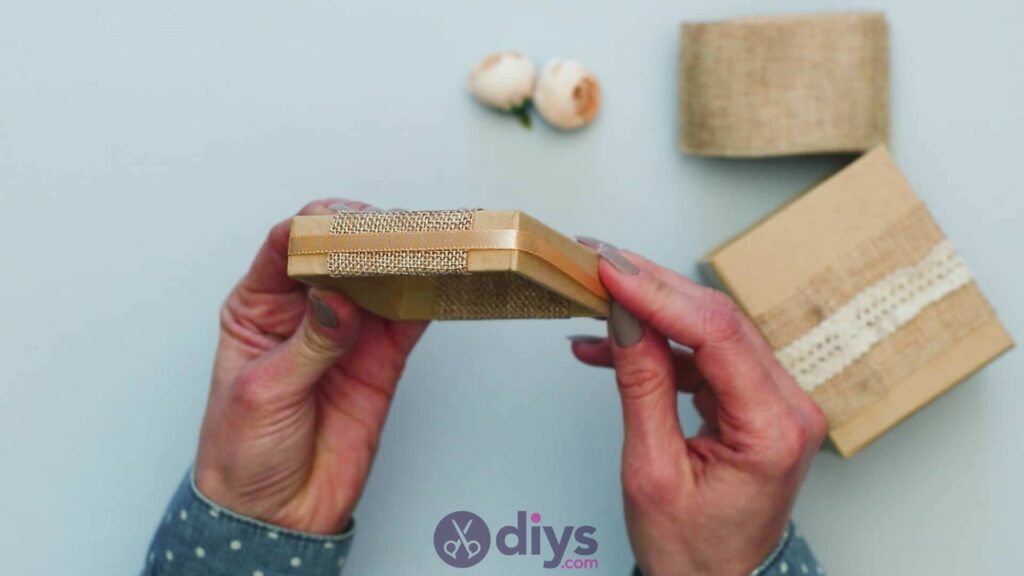
Now turn your attention back to your gift box itself. Repeat the wrapping process that you did before with your jute, but this time with your lace ribbon of trim. Do so ontop of your jute to create layers, gluing the end of your lace down in the middle of your jute edge’s height so the laces lies in the center of the jute all the way around. Finish, glue, and trim the end of the lace in the same ways as you did before with the jute.


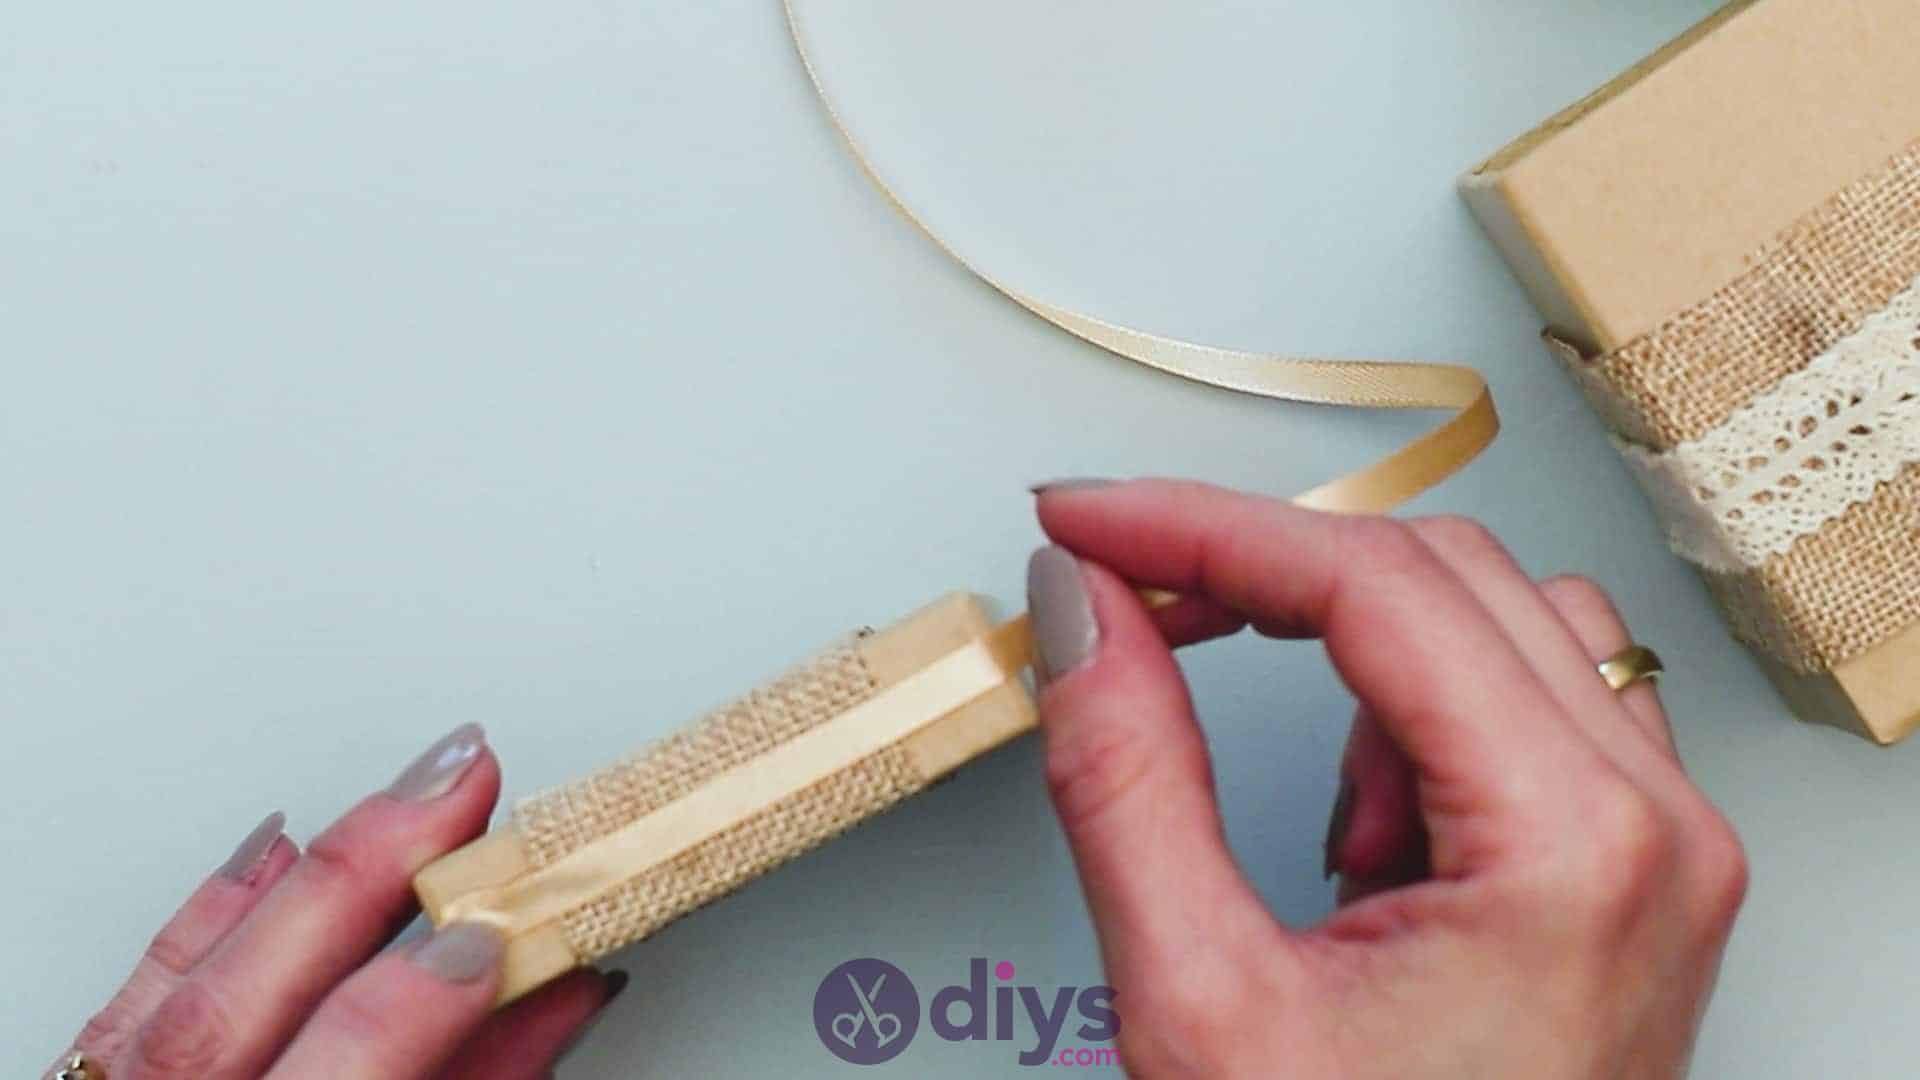
Step 5: repeat with lid
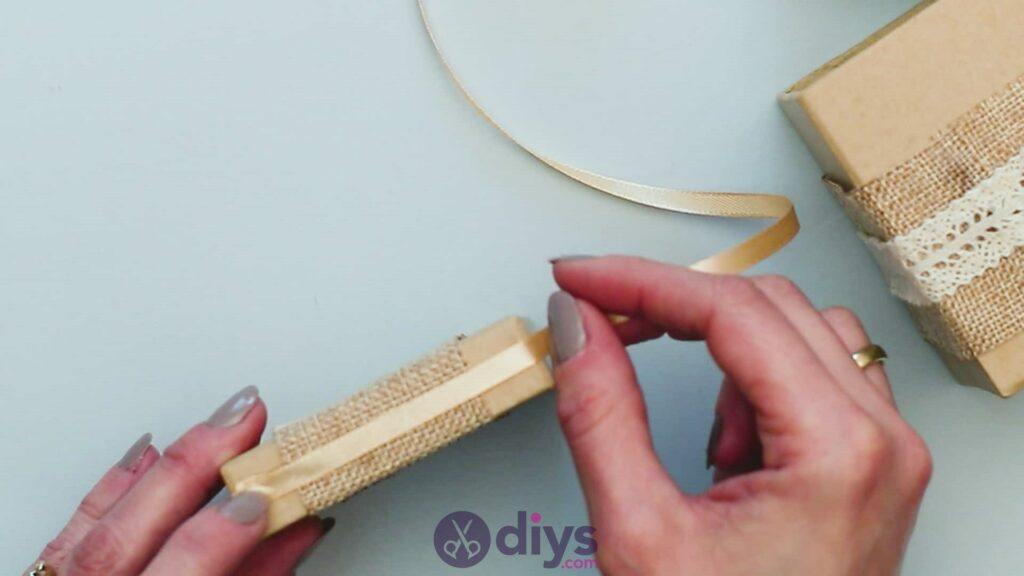
Turn your attention back to your lid. You’re going to repeat the same wrapping process as you just did, but this timearound the edge of your lid, on the outside. You’ll do this with your thinner ribbon, in whatever complementary neutral colour you chose. I lined my end’s edge up with one of the corners to keep things a little neater looking. Wrap and finish in the same way as before.

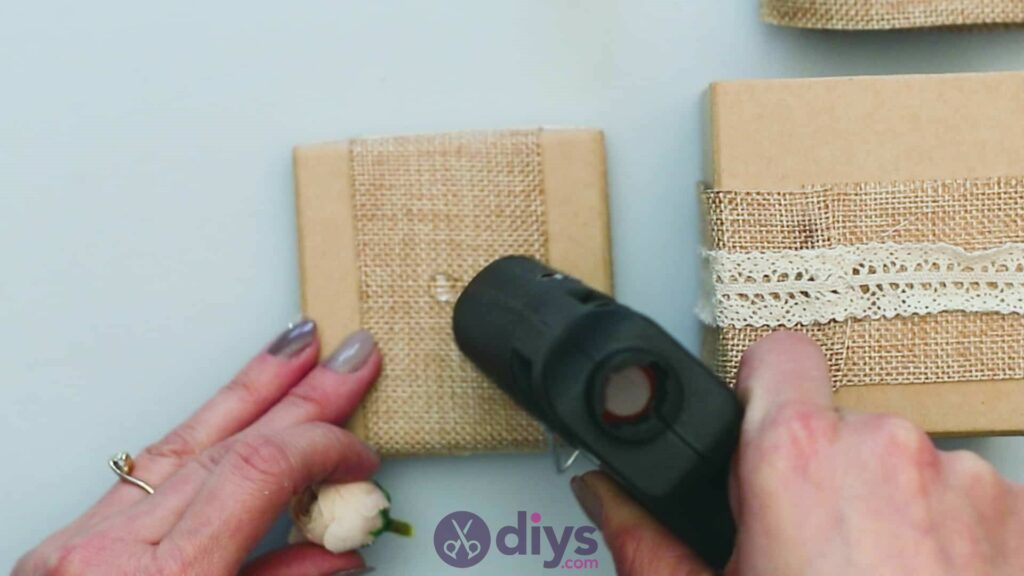
Step 6: glue flowers
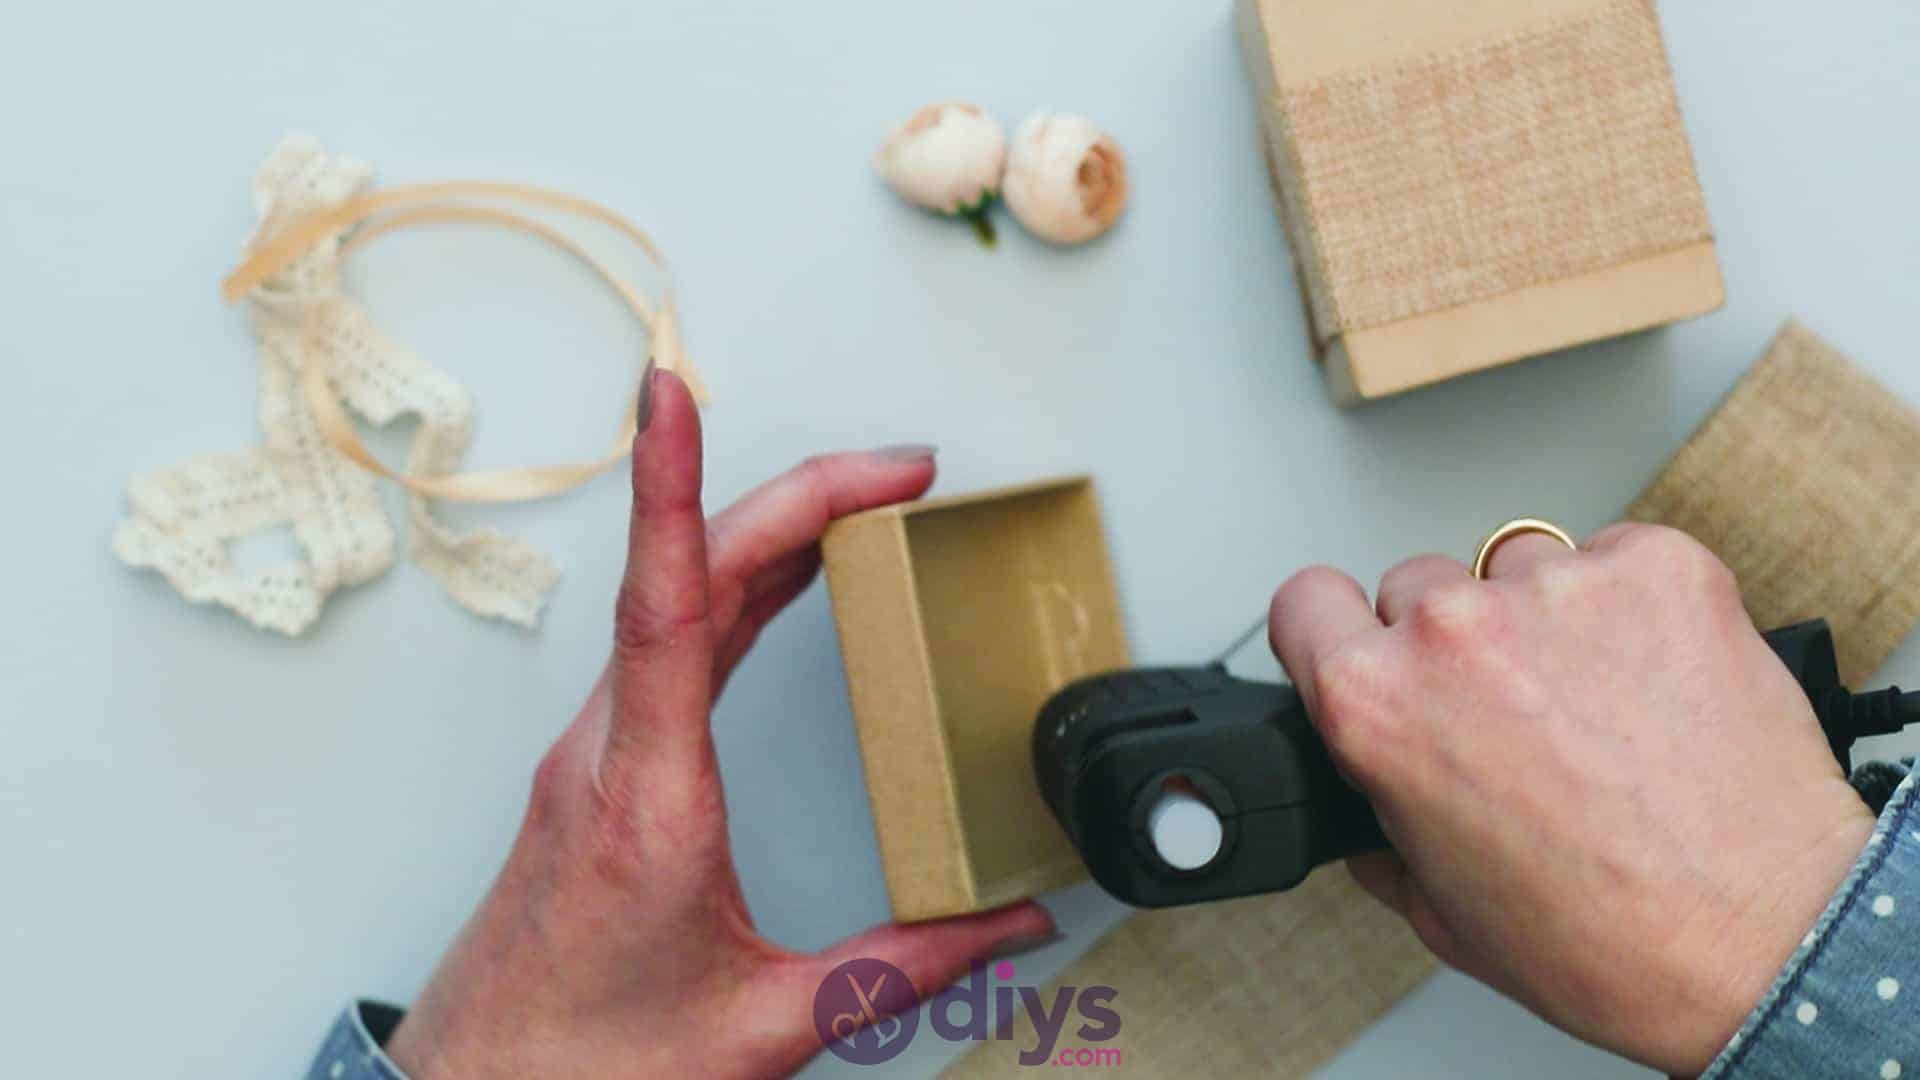
Turn your lid over so you can work with the top. Apply dots of glue in the center, right on top of the jute, and stick your fabric flowers down there. I chose two little blossoms and fit them together like a little bunch.
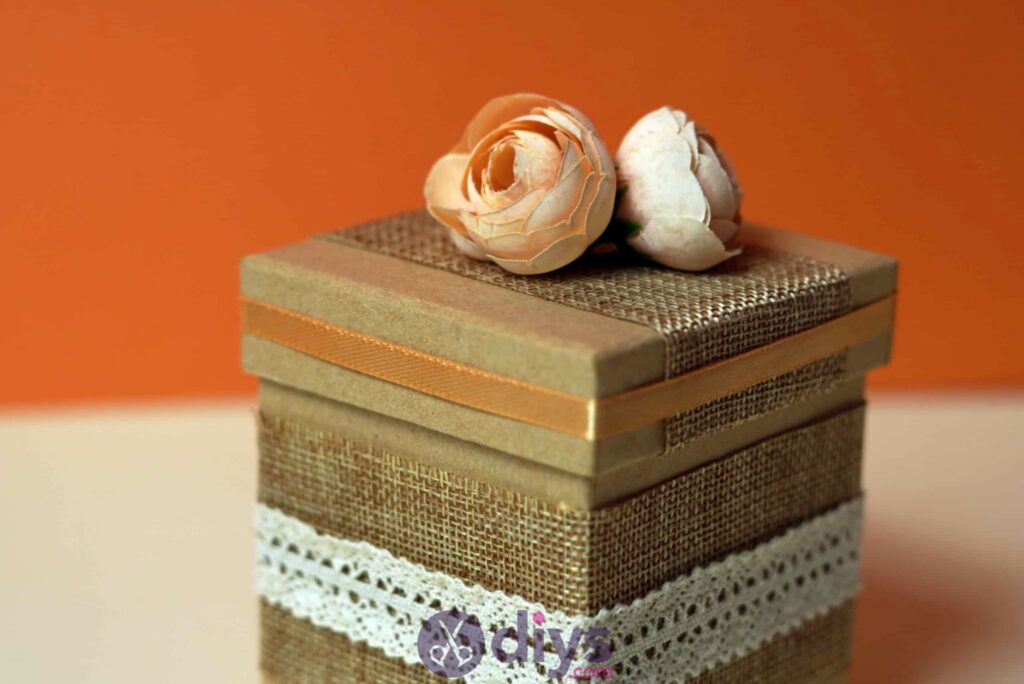
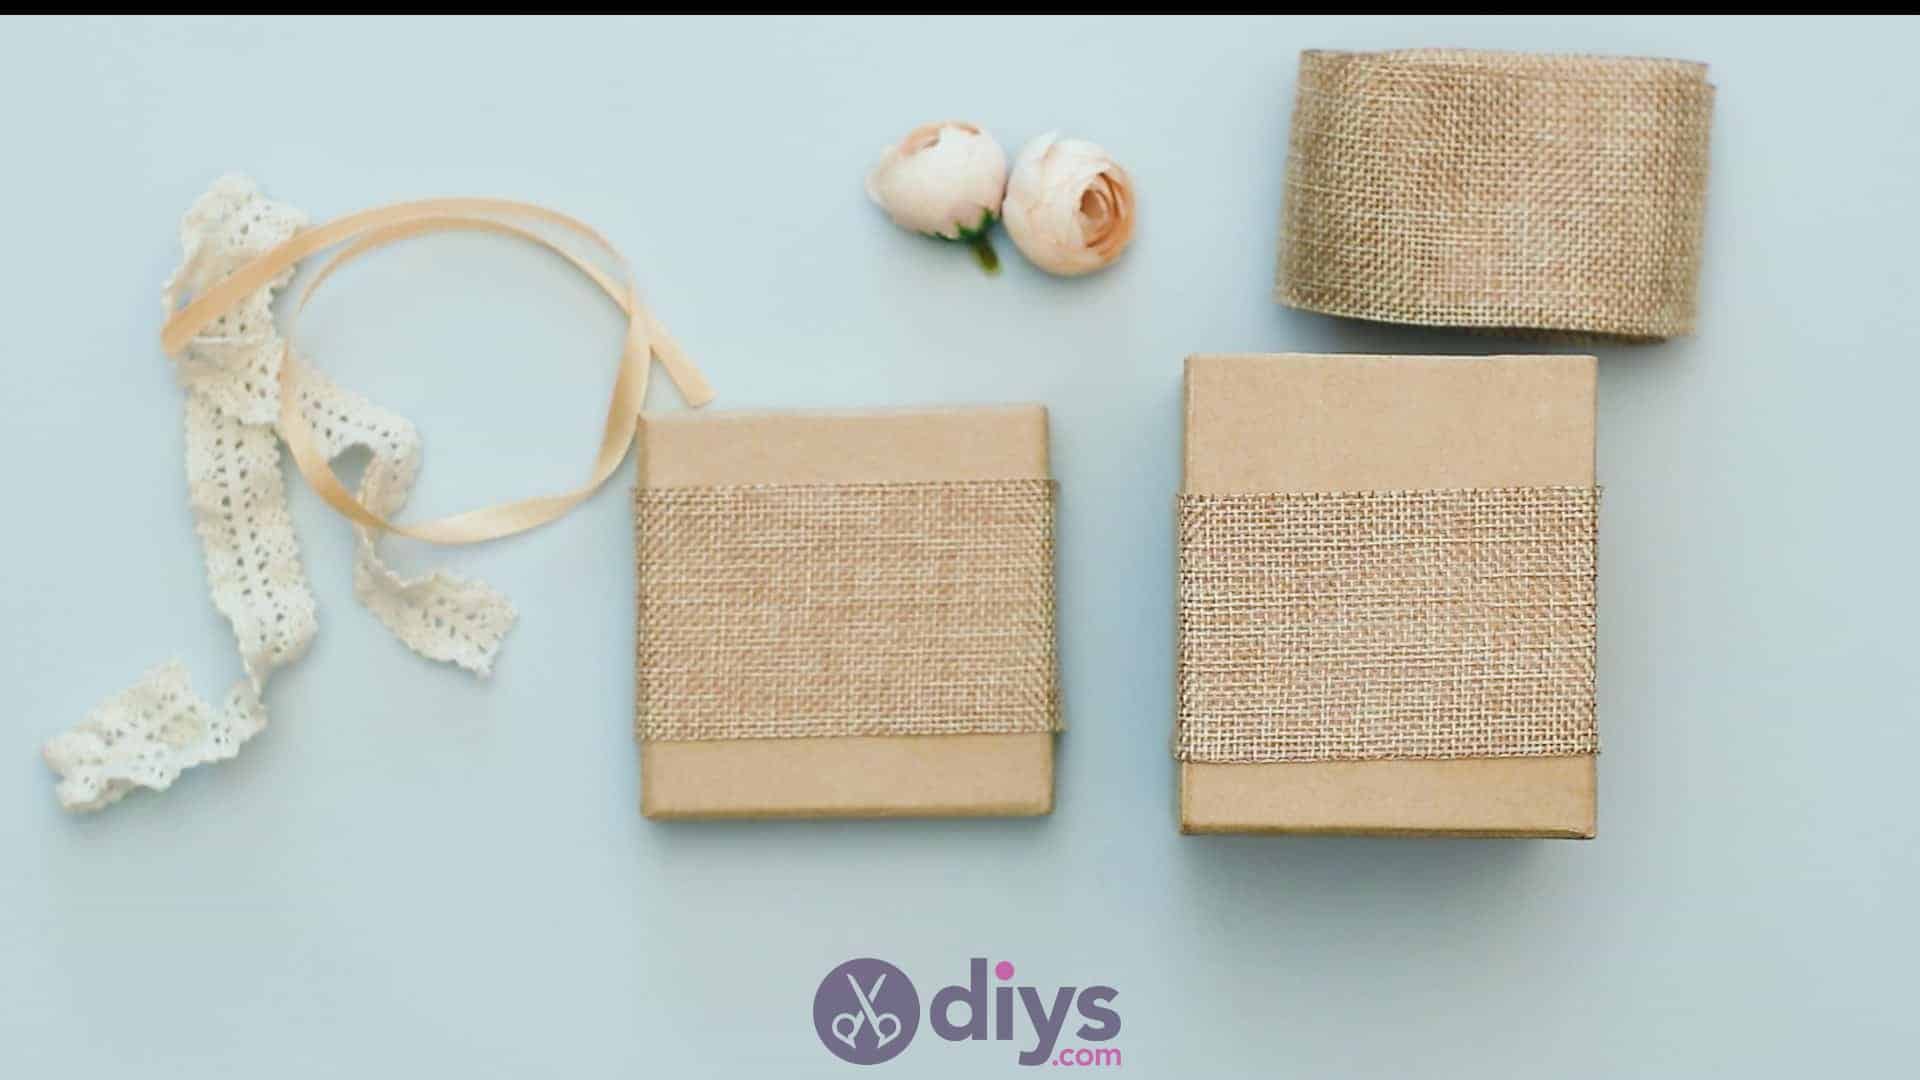
Your box is officially ready to be filled and gifted! When I packaged mine up, I filled the inside with crushed white tissue paper and nestled the gift into that before putting the lid on. If you’d rather see a video of how this gift box was made, check out the tutorial here.