Quinoa Care – How To Grow And Harvest Quinoa At Home
Updated on May 15, 2021
The quinoa health craze started a little over a decade ago but is still going strong. While rice and other natural carbohydrate sources are taking a back seat, quinoa is emerging as the front runner in the race for healthier foods. Although you can buy quinoa at any Whole Foods store near you, it’s not the same as growing this grain at home.
There are many quinoa varieties you can try in your garden. The plants are super easy to grow and care for, even if you haven’t grown grains before. Read on to find out all about quinoa, its many varieties, and how to start it from seeds in a container or in the garden.
All About Quinoa
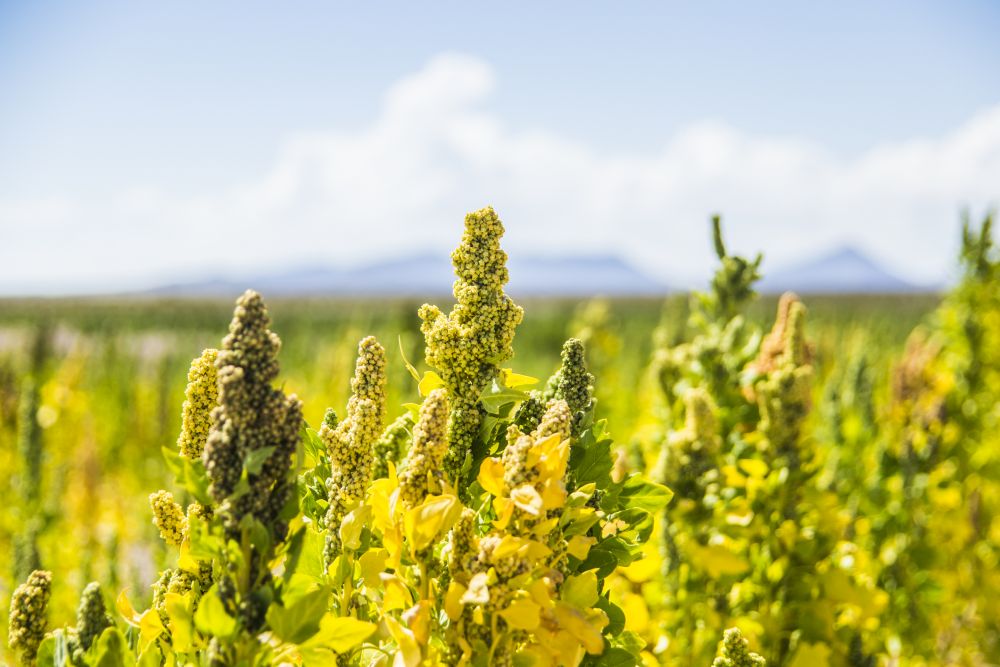
Quinoa (Chenopodium quinoa) is a herbaceous annual that originates in South America. At first, it was a good food source for livestock, but a shortage of other grains forced humans to develop a taste for it in Bolivia and Peru. After the Spanish invasion of South America, the conquistadors brought it back to Spain. From there, it spread to the rest of Europe, then later to Asia and North America. And as its popularity grows, so does its retail price.
The mature quinoa plant grows to about 3 feet tall, although some varieties can reach 7 feet easily. The stalk of the plant is woody and can be red, green, or purple. Some species have a single main stalk, while others grow more than one stalk. And with its tolerance for temperate and cold zones, you can grow in zones 4 and above.
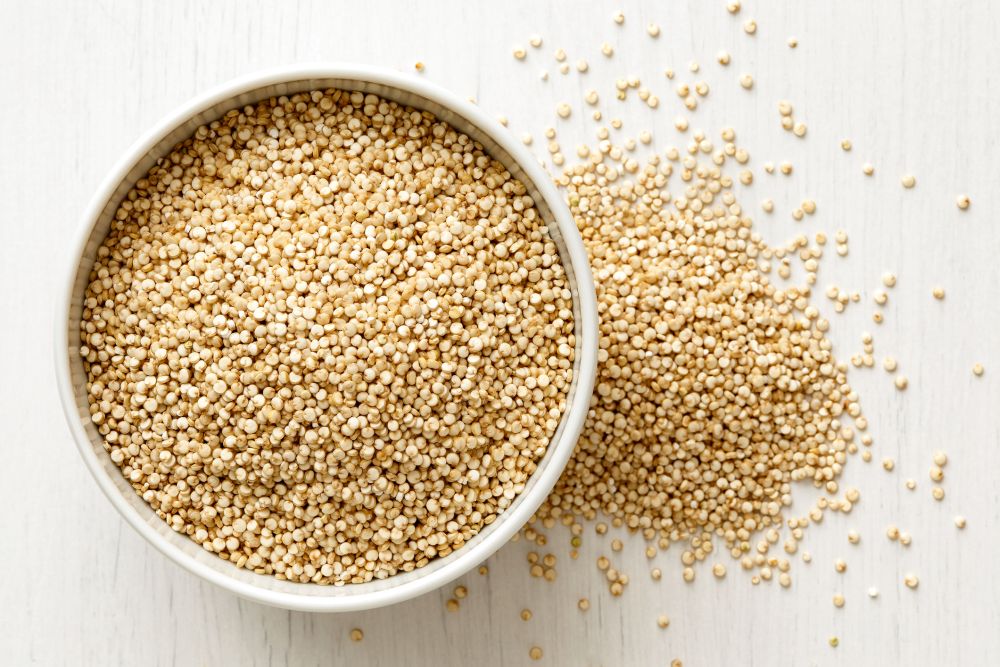
The flowers of quinoa are self-pollinating. Although having bees and other pollinators in the garden can help increase your crop. The seeds are the only edible part of the plant, and they vary in color between black, red, and white.
Quinoa Health Benefits
Some food fads are fleeting and have dubious benefits at best. They’re like all the new diets that pop up on social media only to fade as quickly as they started. But quinoa has established itself as a rice alternative that offers more options in the way of how you cook it and its many health benefits. Here are some of those health benefits
- More Fiber: On average, quinoa contains about 5 grams of fiber for every 200 grams. Eating quinoa on a daily basis improves your digestive systems and nurtures the good bacteria in your guts.
- Carbohydrates: Unlike other grains we consume every day, quinoa is packed with complex carbs. These are carbs that take longer to digest, which keep you feeling full for a long time and reduces the need to have snacks between meals.
- Protein: Rich in amino acids, quinoa is a filling and highly nutritious grain. For every 200 grams of quinoa, you get 9 grams of protein. This is higher than rice and is healthier than animal-based proteins.
- Vitamins: With high concentrations of minerals such as magnesium, phosphorus, zinc, manganese, and copper, quinoa is wholesome and nutritious grain. In addition, it contains vitamins B1, B2, B3, B6, and E to make it a healthier and better alternative to rice and wheat.
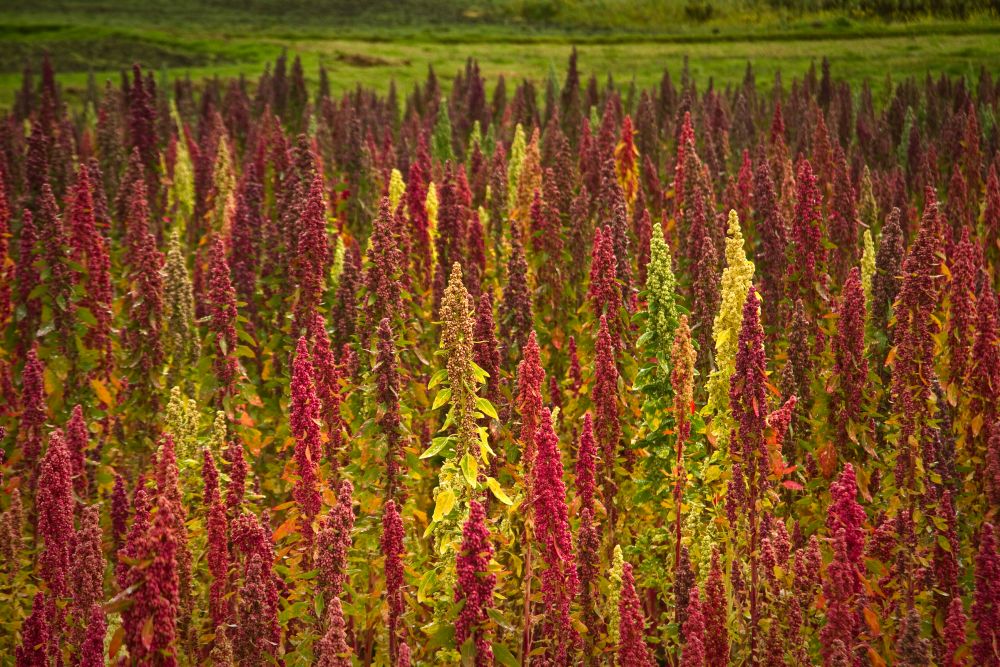
Quinoa Varieties
As quinoa spread across the world, both old and new, new cultivars were developed. This explains the wide variety of quinoa seeds’ colors and flavors. Here are some popular quinoa varieties you can grow in your garden.
- White Quinoa: A fluffy variety that goes into lots of dishes and salads. The light seeds are a good alternative to rice and cereals, and you can use them in grain salads or baked dishes. Unlike other cultivars and varieties, it doesn’t have sharp or off-putting flavors. It’s also easy to grow and doesn’t require special care.
- Red Quinoa: Less versatile than white quinoa as far as baking or cooking is concerned. It still offers a good replacement for rice in the absence of white quinoa. However, when it comes to taste, it has a faint flavor that might put you off. It also has a grainy texture that gets a little abrasive on the tongue.
- Black Quinoa: Not as popular or widespread as the other two. Not many farmers grow it because it offers less crop than white or red quinoa. When you cook it, it feels gritty and a little crunchy. Healthy food aficionados sing the praises of black quinoa, but outside that tight circle, not many people cook it, let alone grow it.
- Rainbow Quinoa: Not exactly a cultivar or a species. Bags of rainbow quinoa sold in grocery stores are just a mix of the white, red, and black grains. It looks better when cooked, and the different textures of the three types complement each other.
How to Grow Quinoa
As with many grains, the best way to grow quinoa in your garden is to start them from seeds. They have a high germination rate, and the seeds are readily available online. You can’t use the seeds you get at the grocery store as they have been processed and cured, which inhibits their germination. Here’s how to start your quinoa patch from seeds in easy steps.
- Immediately after the last frost has passed and the air temperature has risen to 60 degrees Fahrenheit, that’s the best time to start the seeds. The earlier you sow the seeds, the better crop you have since the seeds don’t develop well in hot temperatures.
- Pick a spot in your garden that gets full sun and till it. Mix in rotten manure or compost since quinoa thrives in rich soil.
- Prepare the patch into rows about one foot apart.
- Plant two to three seeds about a quarter-inch deep and cover with a thin layer of soil.
- Space the seeds about 12 inches apart.
- Water the seeds to get the soil moist.
- After the seeds germinate, allow the seedling time to grow to about 4 inches high before you thin them out. Keep one seedling out of the two or three seedlings you planted together.
- Allow the barren patches about a week to sprout. If that doesn’t happen, replant the seeds in these areas following the same pattern above.
Quinoa Care
Quinoa is easy to care for, and as long as you have the air temperature below 90 degrees Fahrenheit, you can expect a strong crop out of your small patch. However, before you get there, you have to fight off weeds, protect the plants against pests and diseases, and provide adequate water and fertilizer.
Soil
To harvest a decent yield, you need to make sure the soil is both rich and loamy. Loamy soil is well-drained but retains moisture long enough for the roots of the plants to absorb it. You can still get away with growing quinoa in sandy soil, but you won’t have good results with clay soil. Check the pH levels of the soil and make sure they’re hovering around neutral to slightly acidic. If you’re using a soil testing kit, the numbers that flicker on the panel should be between 6.0 to 7.5. Use mulch to improve the moisture retention of the soil and keep the soil temperature cool around the roots.
Temperature
Out of the litany of quinoa care factors that are beyond your control, temperature features high on that list. To improve the seeds’ germination rate, make sure the temperature of the air is above 60 degrees during the daytime. In hot zones, spring comes early, so you need to take advantage of that and start your seeds as early as you can. Quinoa plants are more tolerant of cold temperatures as low as 25 degrees F at night. But they have a low tolerance for high temperatures above 90 degrees F. In fact, excessive heat has an adverse effect on the growth and development of the seeds. So time your quinoa planting so that by the time the summer heat starts roaring, your plants have already matured and are ready to harvest.
Water
Early on, your quinoa seedlings will need consistently moist soil, at least until they have been established in the soil. Based on the soil texture and how fast the moisture dries out in the soil, you need to adjust your watering patterns. In loamy soil and temperatures averaging between 60 to 75 degrees F, you can water the plants a few times a week as long as the water doesn’t exceed one inch overall. As the plants mature, they become more drought-tolerant and won’t require the soil to be moist all the time. Allow the top 2 inches of the soil to dry out completely before you water it thoroughly.
Fertilizer
The richer your soil, the better crop you’ll get out of your quinoa patch. As with most edibles, you should focus on using organic compost and aged manure instead of chemical fertilizers. This improves the taste and flavor of the crop. So before you plant the seeds, mix a generous portion of compost and organic materials in the soil. Check your soil to make sure you have enough basic nutrients in it. If that’s the case, you won’t need to apply any further fertilizer until the quinoa seeds are ripe.
Pests and Diseases
Although quinoa seeds have natural protection in the form of a thick layer of saponin which deters birds, other pests go after the leaves and their rich sap. Aphids, cabbage loopers, leaf miners, and flea beetles feed on the tender leaves and disrupt the growth of the young plants. You can use an organic pesticide to get rid of these pests. If the plants are mature, then you can ignore the pests since they won’t cause much damage to the seeds.
Pay attention to molds and mildews since they play havoc with the plants and the seeds than viruses and bacteria. Most fungal infections are caused by high levels of humidity and poor airflow around the plants. Hold off watering for a while since dry soil discourages the spread of fungus and other pathogens.
Harvesting Quinoa
You can start harvesting your quinoa between 90 to 120 days from the time you plant the seeds. This large spread on harvest time spectrum is dependent on your zone and the variety you grow. You will know your plants are ready to harvest when all the leaves have fallen, and only the seed heads are left on the stalk. Make sure the seeds are fully dry before you harvest them.
To test their dryness, pinch a seed between your fingers, if it yields under the pressure, give it a few days in the dry weather. To harvest the seeds, put on thick gloves and grasp the base of the stalk, then move your hand up to collect the seed heads. Or you can give the stalks a vigorous shake to free the seeds. Place a clean blanket under the stalks to collect the dry seeds.
Spread the seeds out in the sun to ensure they’re fully dry before you can store them in tight and sealed jars.