How to Make a Paper Plate Scarecrow
Updated on November 19, 2025


If I’m being honest, I’vealways loved crafting with paper plates. It’s a classic kids’ craft that keeps its charm even once you’re an adult helping your own kids make them. I’m also the kind of DIY enthusiast who loves doing seasonal crafts as the weather changes outside, and that’s how I found myself helping my kids make cute paper plate scarecrows for fall! In fact, they wereso cute that I decided to do it again and document the process so other people can learn how to make them too.

Keep scrolling for full photos and instructions! Just in case you’re the kind of crafter who has always preferred following video tutorials rather than written ones, there’s a video at the end as well.
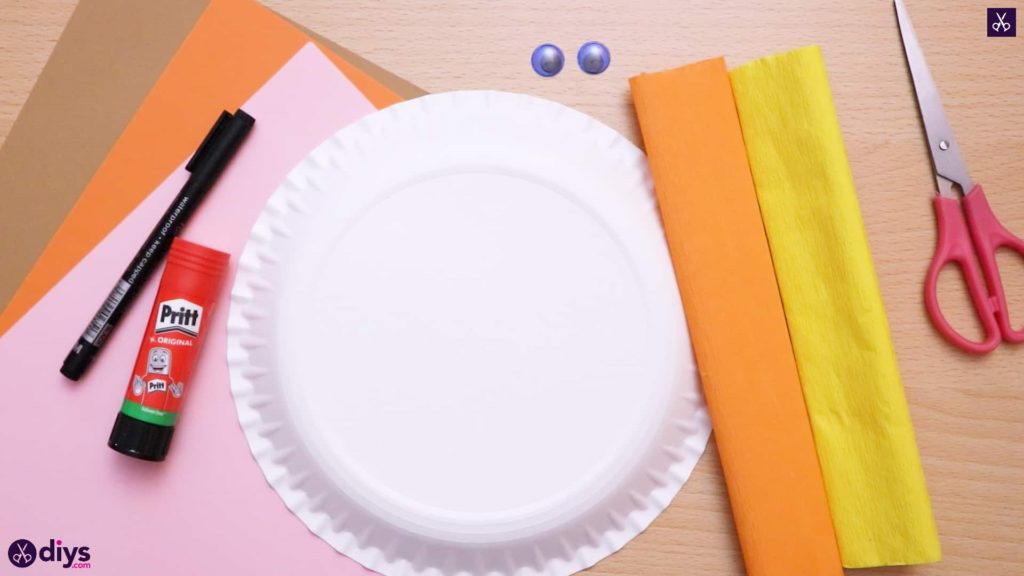
For this project, you’ll need:
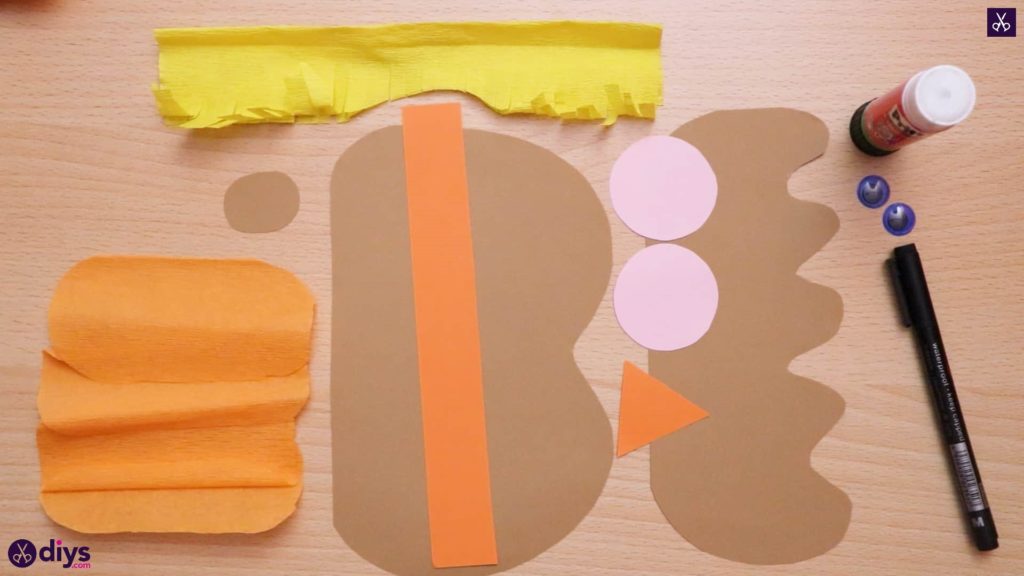
- Construction paper (two tan, one orange, and one light pink)
- Crepe paper (orange and yellow)
- Two googly eyes
- Scissors
- A paper plate
- A black felt tipped marker
- A glue stick
Step 1: get what you need
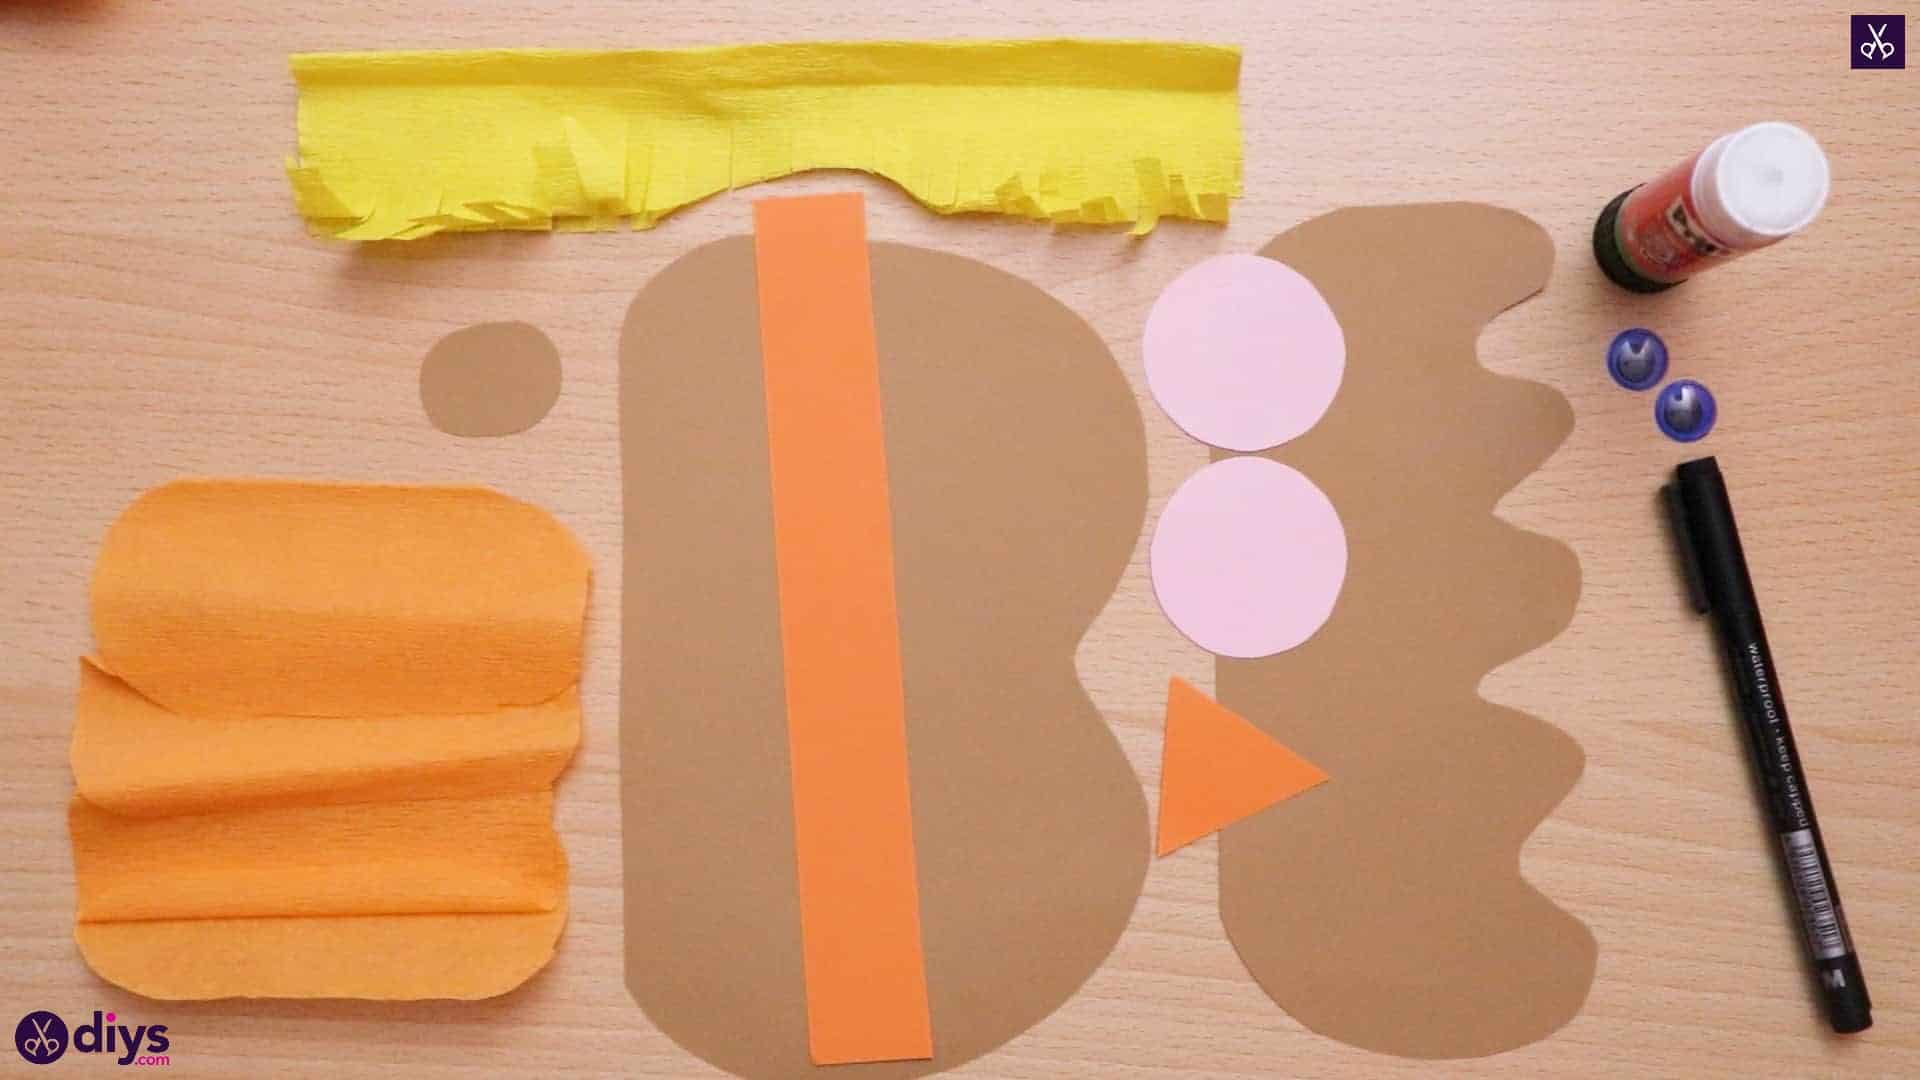
Gather all your materials together.
Step 2: cut the cheeks
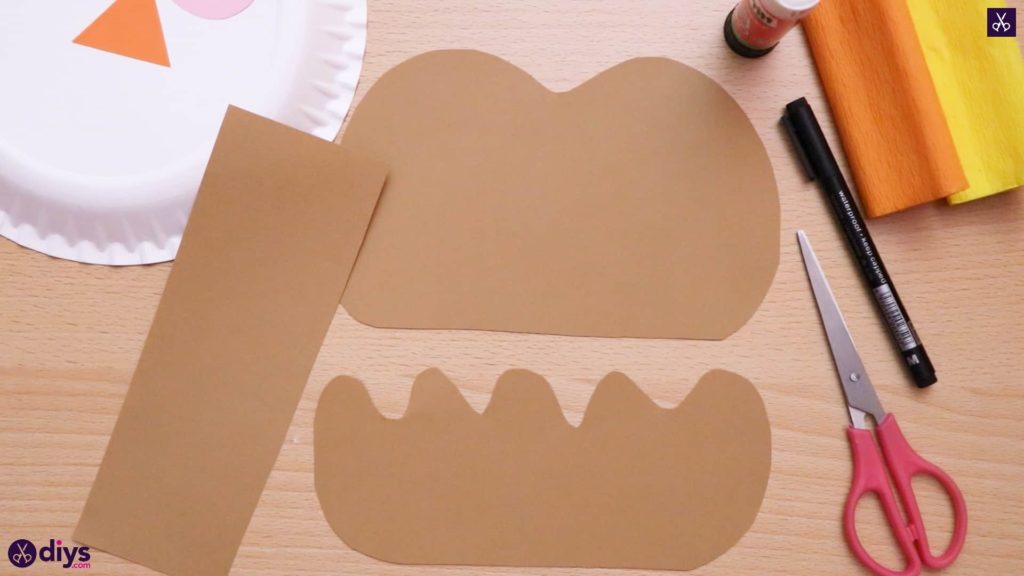
Cut two equally sized circles from your light pink paper. I did this by cutting two small rectangles, stacking them on top of each other, and rounding the corners off of both pieces at once until I got a perfectly rounded circle shape in the size I wanted.

Step 3: cut the nose
Cut a thin rectangle from your orange paper about the length of how wide your page is. Then cut out an orange triangle similarly sized to the pink circles you cut out before.

Step 4: stripe of yellow
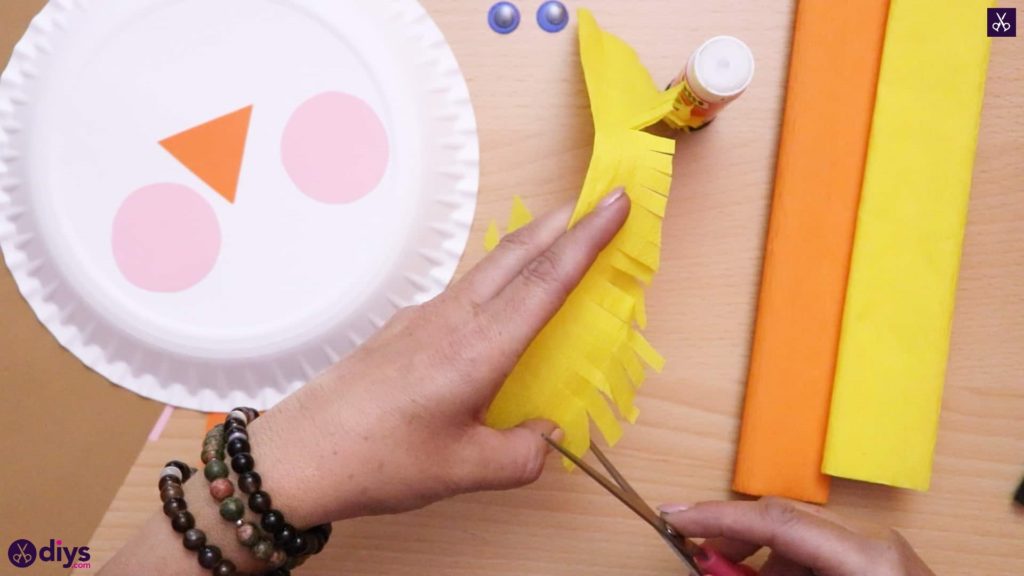
Cut a strip of yellow crepe paper from your roll. I made mine the whole width of the roll and about four inches wide. Next, apply glue to the surface of the piece and fold the yellow piece in half length-wise, so you have a new rectangle that’s the same length as before but only about two inches wide now. In one side, I cut a small curved shape, almost like a semi circle, from the middle of the strip. This whole piece will become your scarecrow’s straw hair and the arch will make sure the hair doesn’t cover his eyes, like bangs in a haircut.

Step 5: make fringe
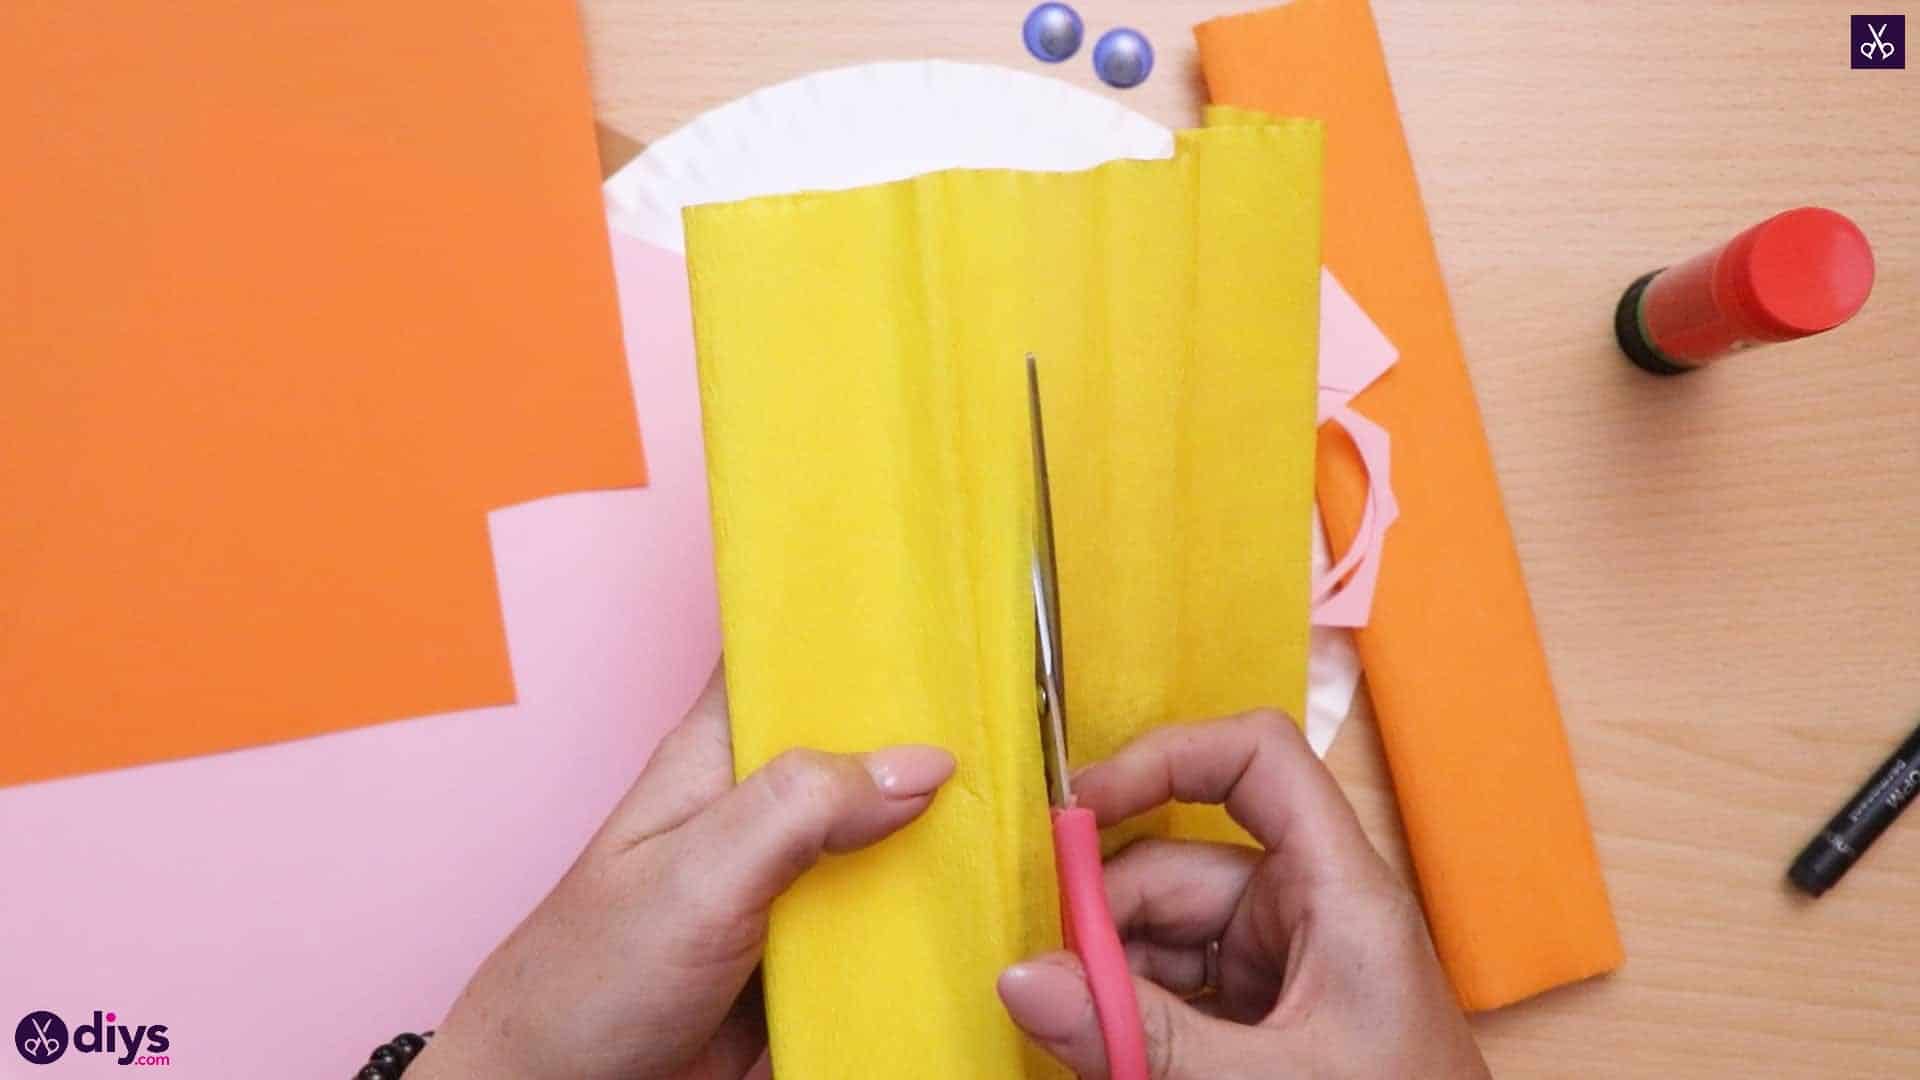
Make small cuts all along the long side of your newly doubled yellow crepe paper rectangle, on the side where you cut out the semi circle piece earlier. Your cuts should only reach about half the width of the strip so that one side becomes like a fringe.
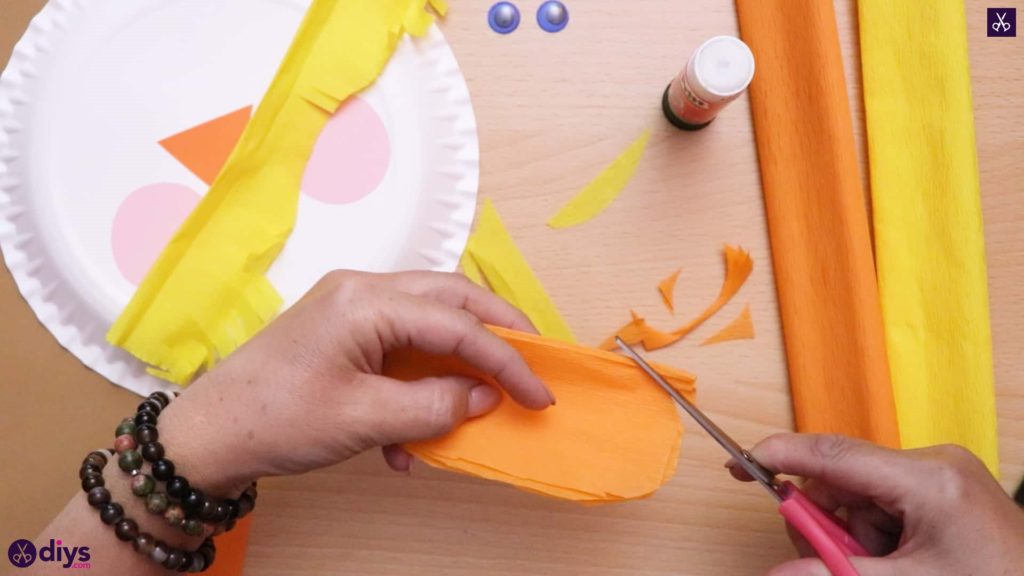
Step 6: bow tie
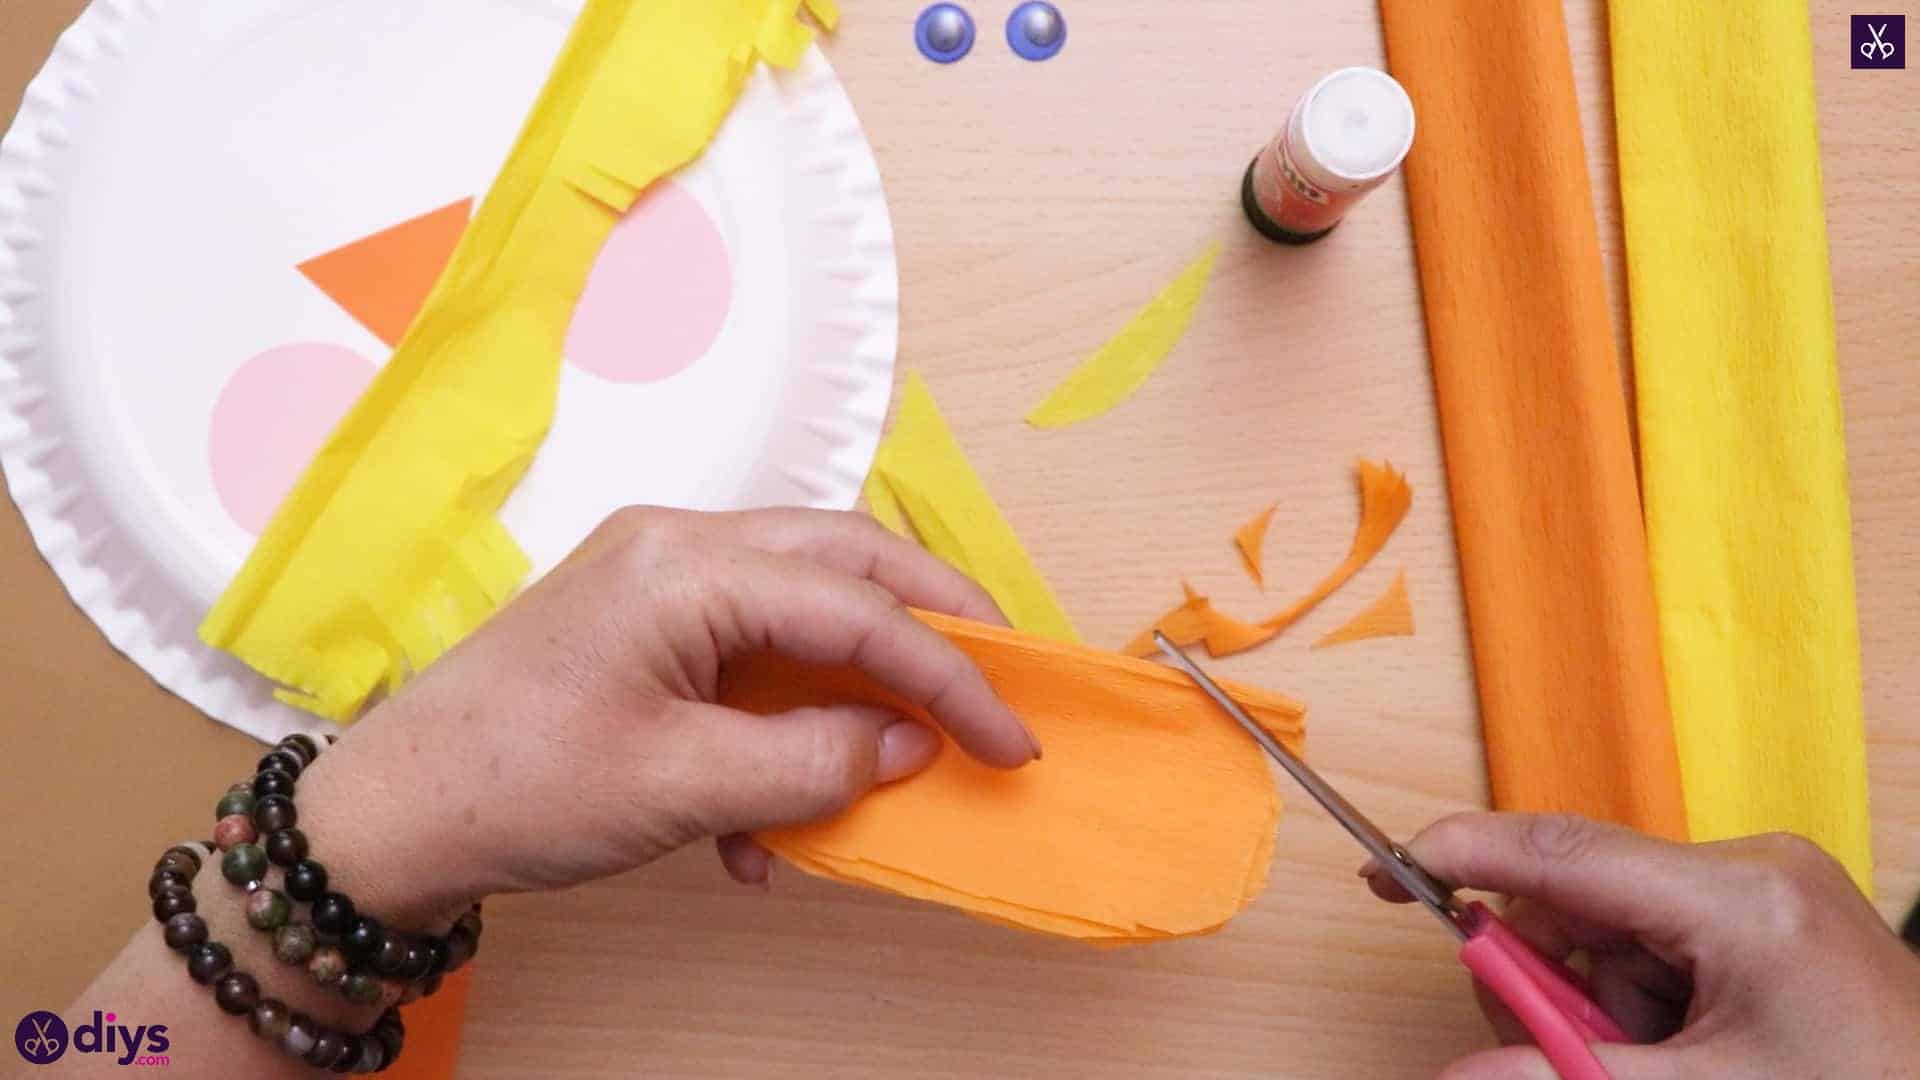
Cut a piece of crepe paper from your orange roll that’s about the same size as your yellow one was. You’ll fold this one as well, but you don’t need to glue it because you want the layers to be separate this time. Fold your piece in half length-wise and then in half again width-wise and round off the corners form the resulting shape. This will become your scarecrow’s bow tie later.
Step 7: all the pieces
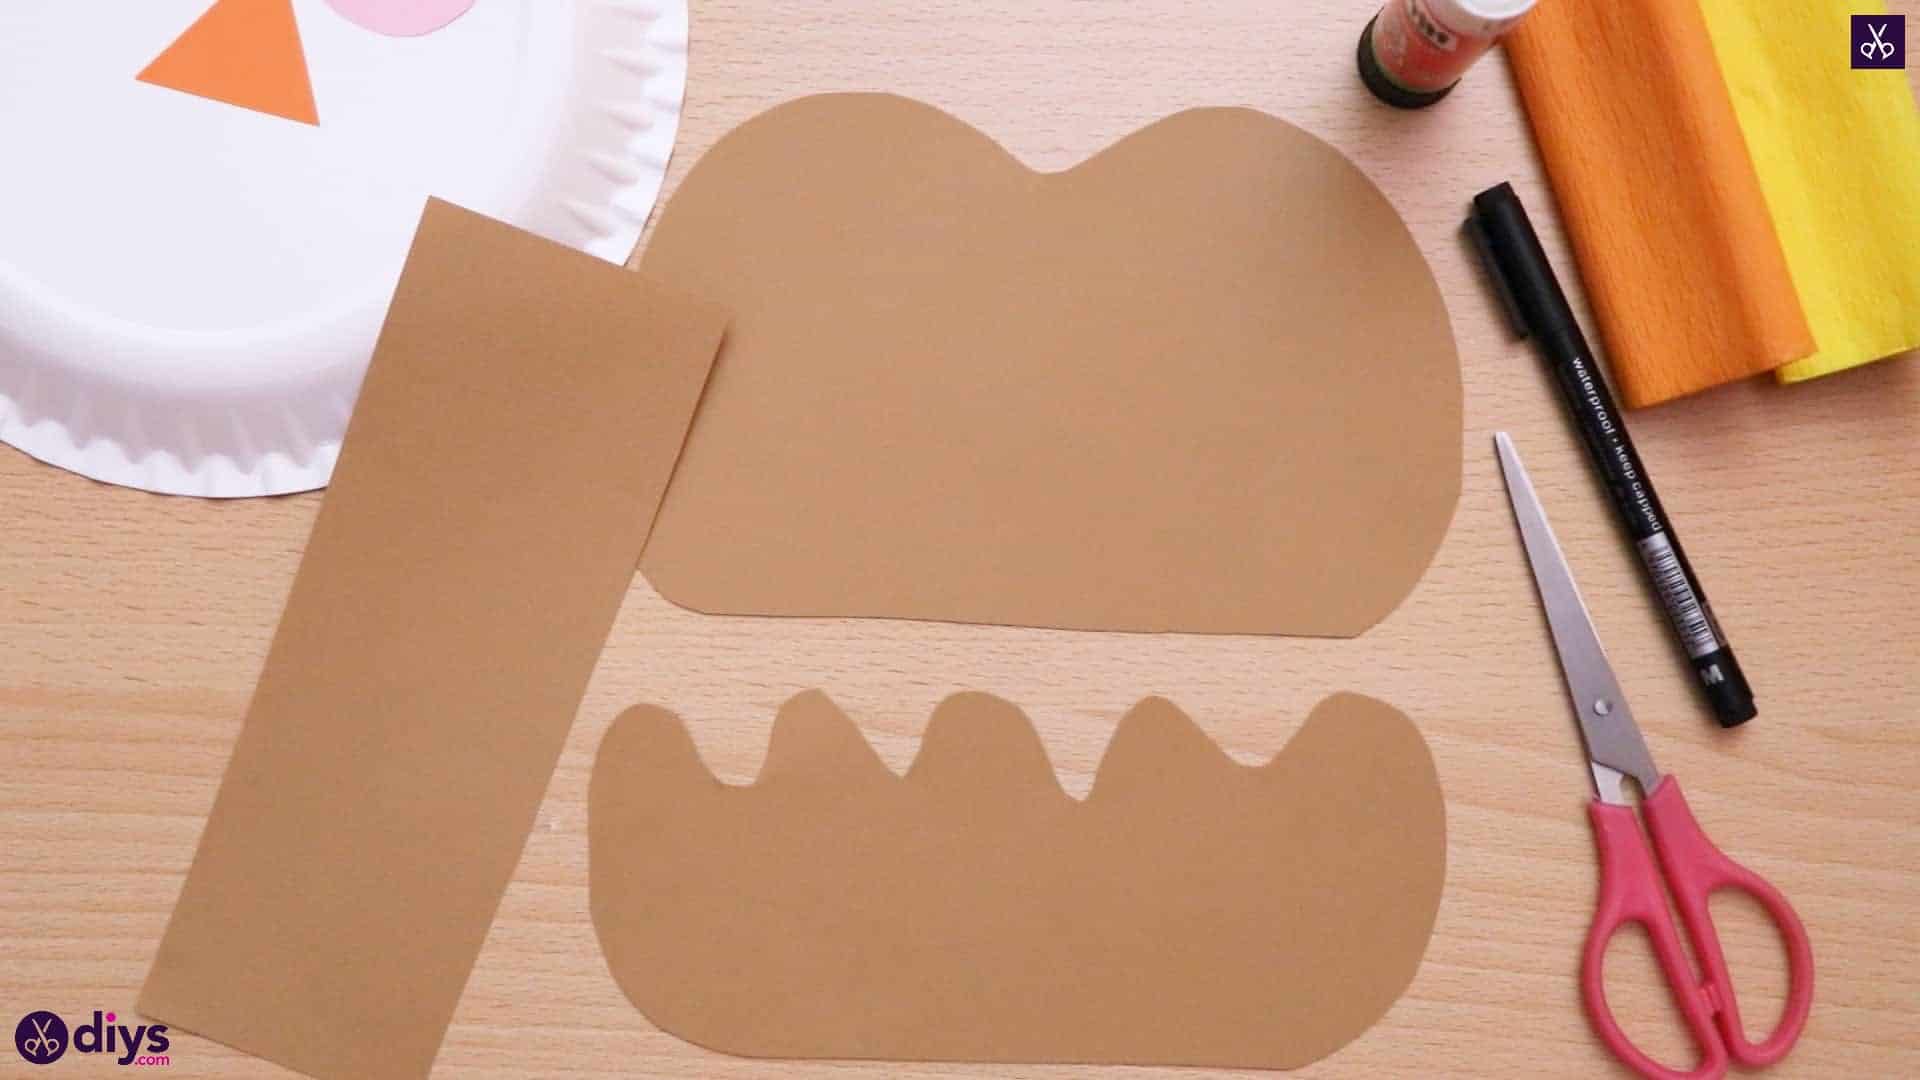
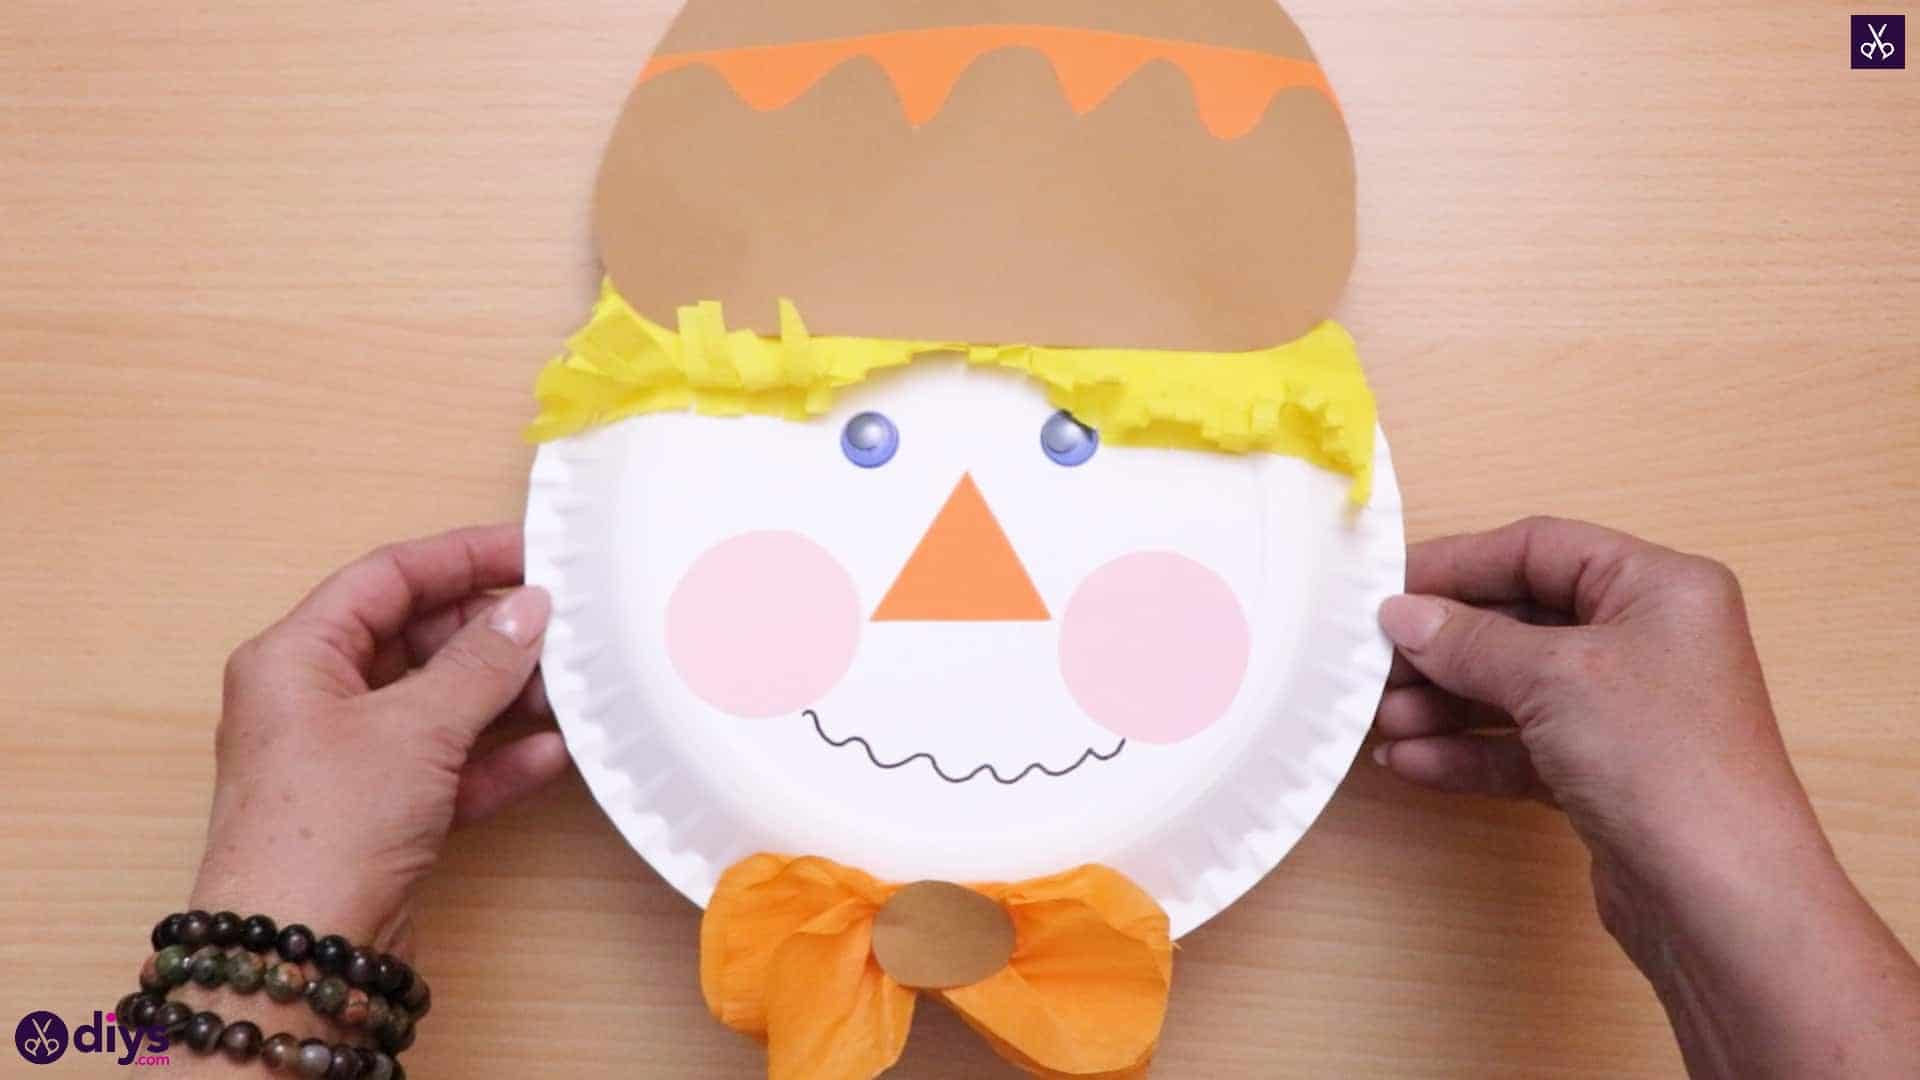
Use one of your tan pieces of paper to make the top of your scarecrow’s hat! I turned the sheet landscape, or long-ways, and kept the bottom edge nice and straight but rounded off the corners. I continued that rounding to soften the straight edges on the sides, as well as the top corners, and then cut the straight top edge into two rounded humps with a rounded dip in the middle. I then cut my second piece of tan paper in half the long way, setting one half aside and using the other to make the bottom of the scarecrow’s hat. I followed the same process as I did with the top but this time, instead of cutting the top of the hat into only two rounded humps, I cut it into a soft waving line with five humps. Finally, from the tan piece that you set aside, cut a small oval shape. You now have all of your pieces cut out and ready to assemble!
Step 8: start assembling
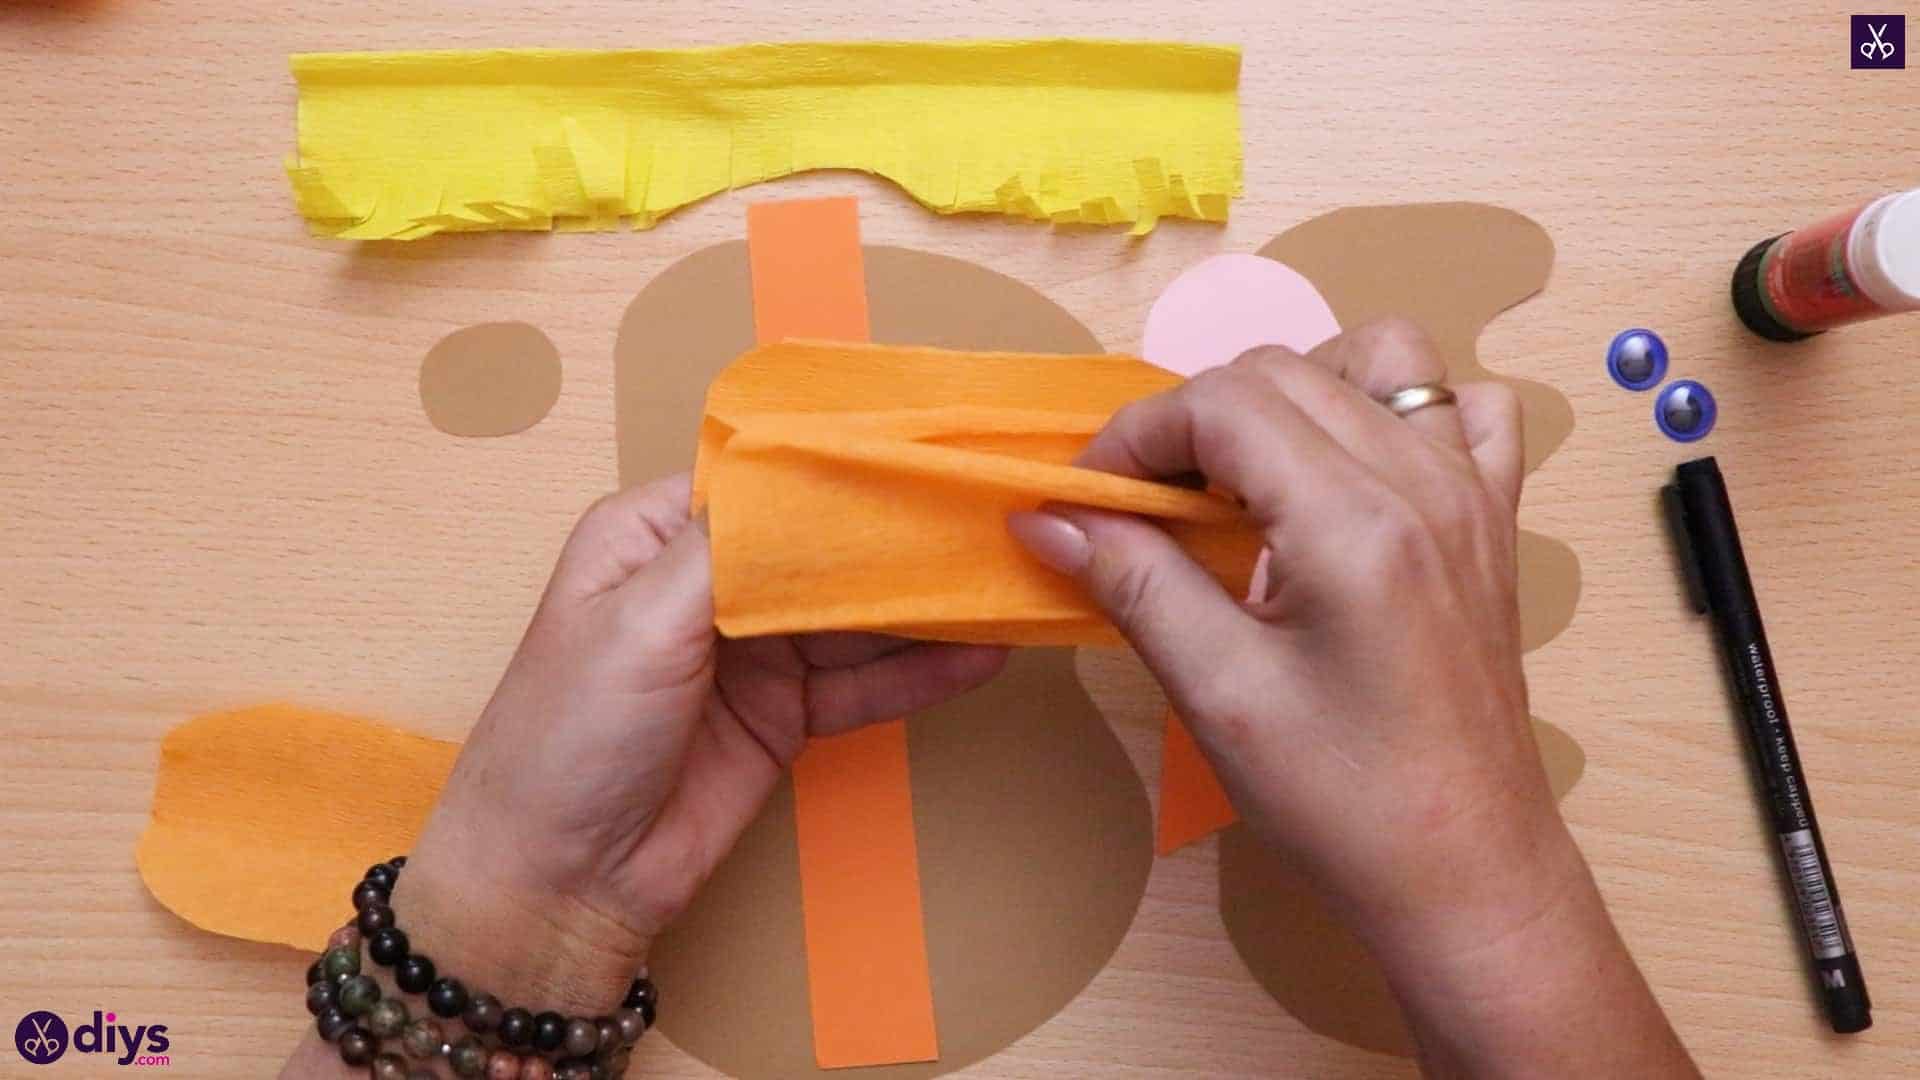
Separate the layers of orange crepe paper you cut earlier and re-layer them, but this time stuck together with glue. I applied glue to the center of each one and stuck the next one down with the middle anchor point, leaving my edges to make a bowtie that looks like it has been folded over and looped like the real thing. Sew the bowtie aside once more.

Step 9: the hat
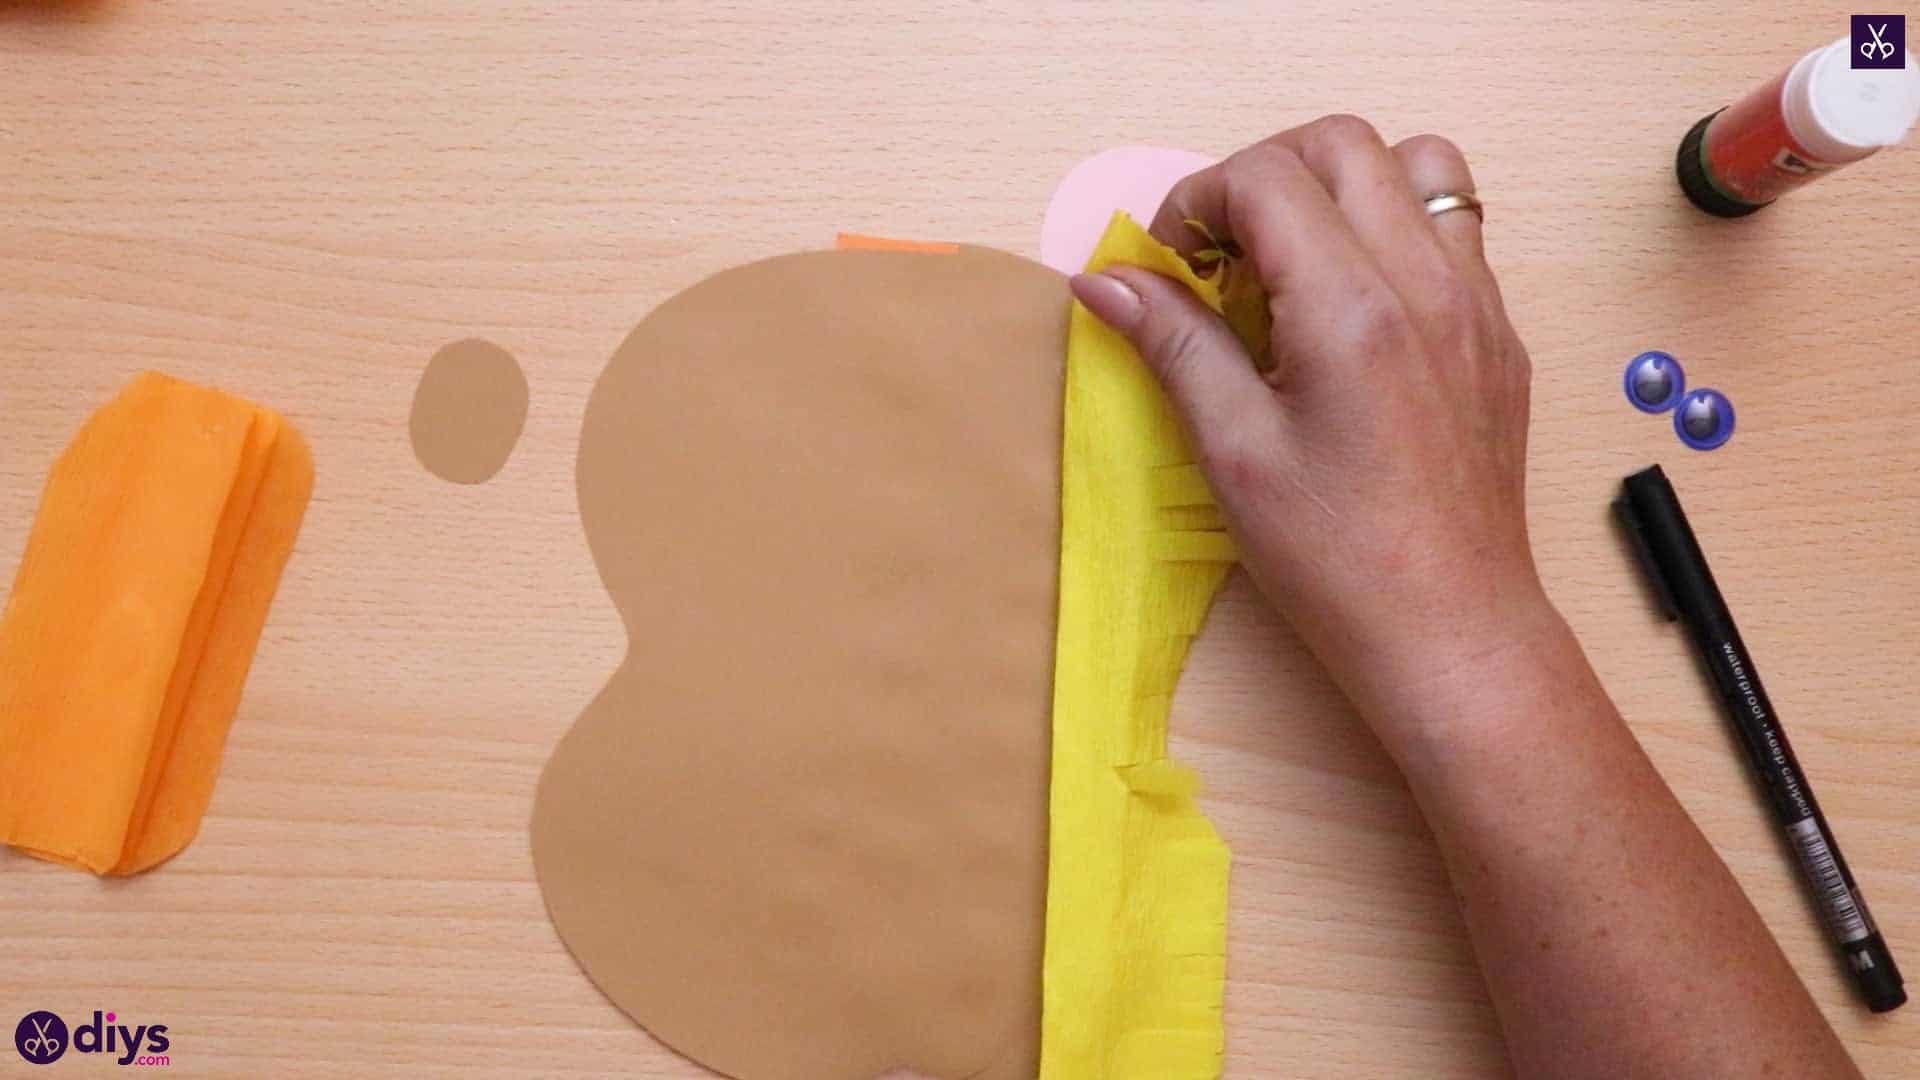
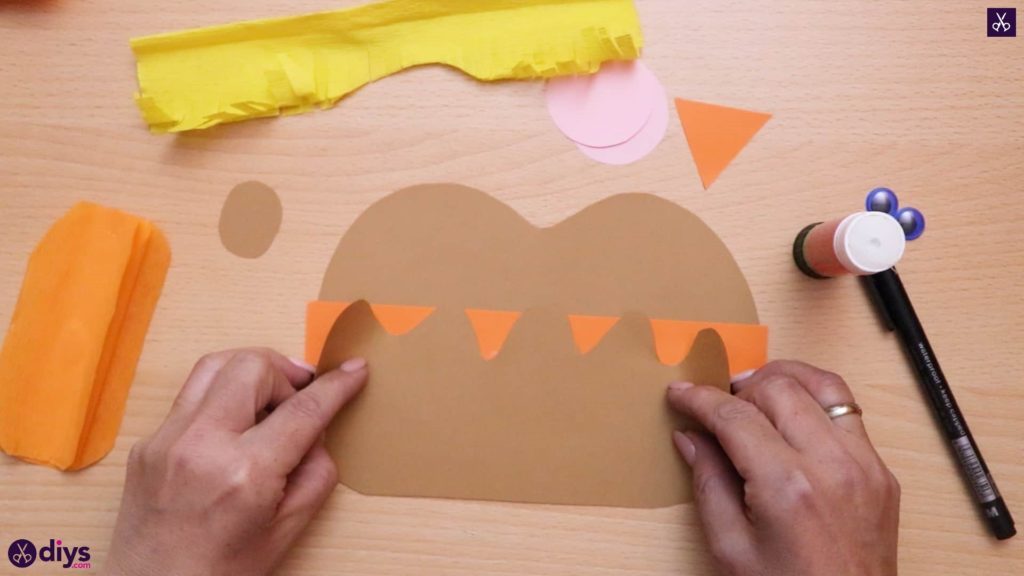
Put together your scarecrow’s hat! I glued the orange rectangle along the middle of the hat’s top like a hat band. Then I glued the bottom of the hand on overlapping the orange band, with the wavy part facing up like a tattered straw hat’s upward turned edge.
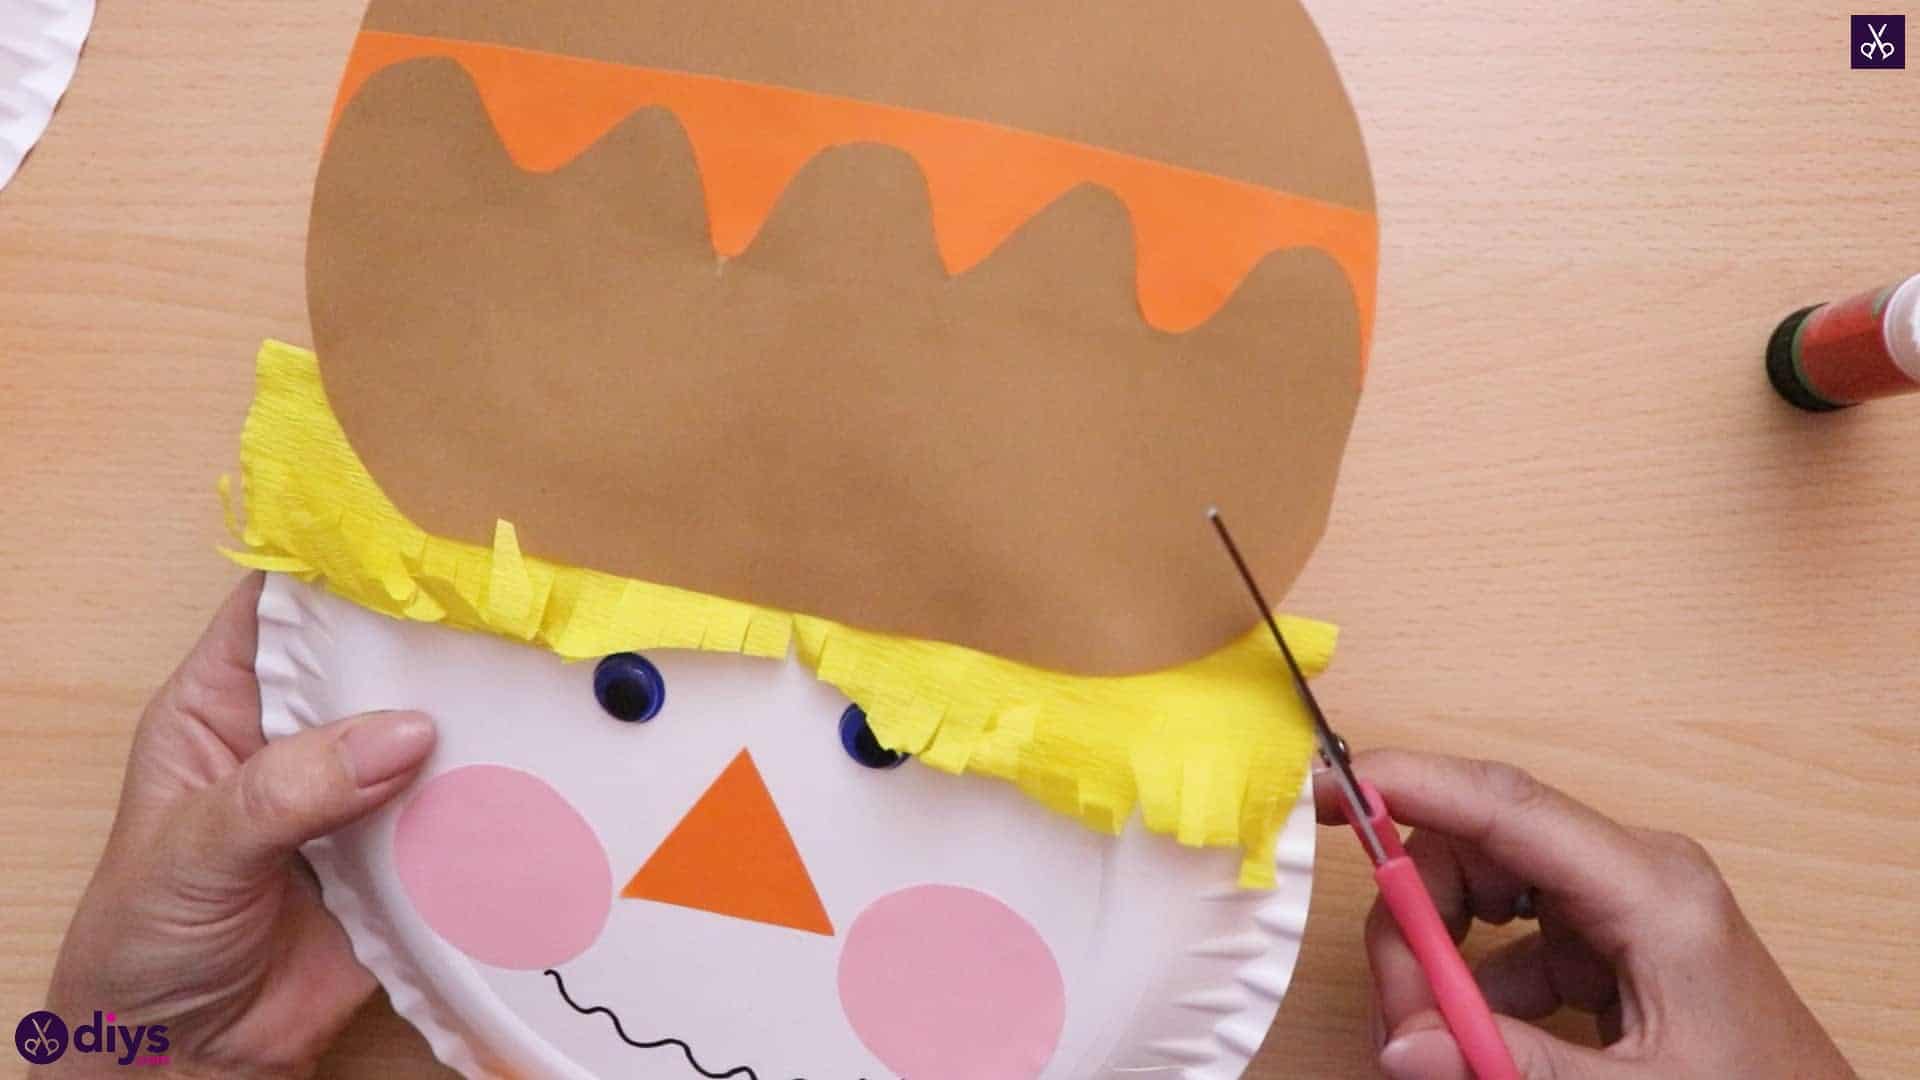
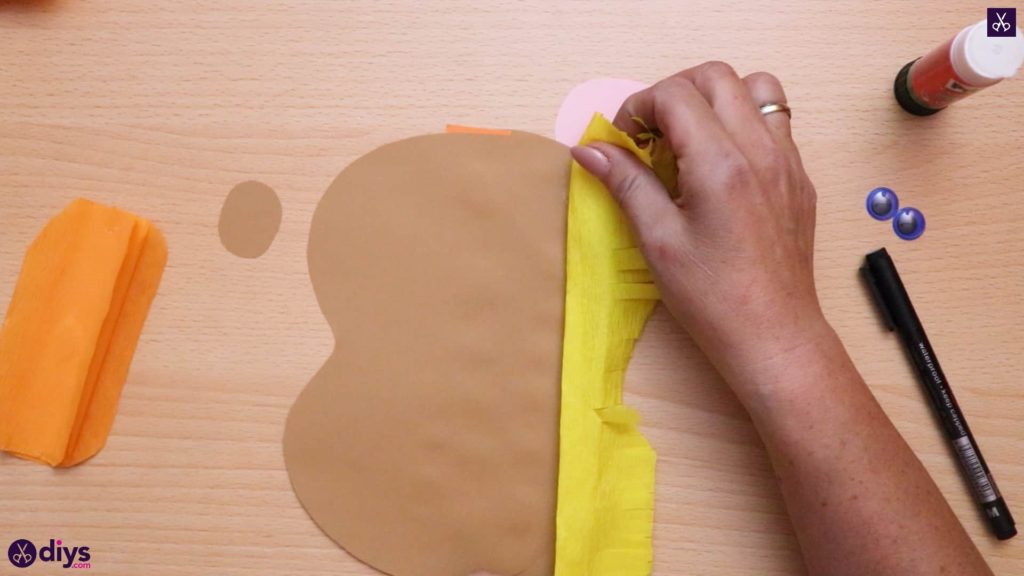
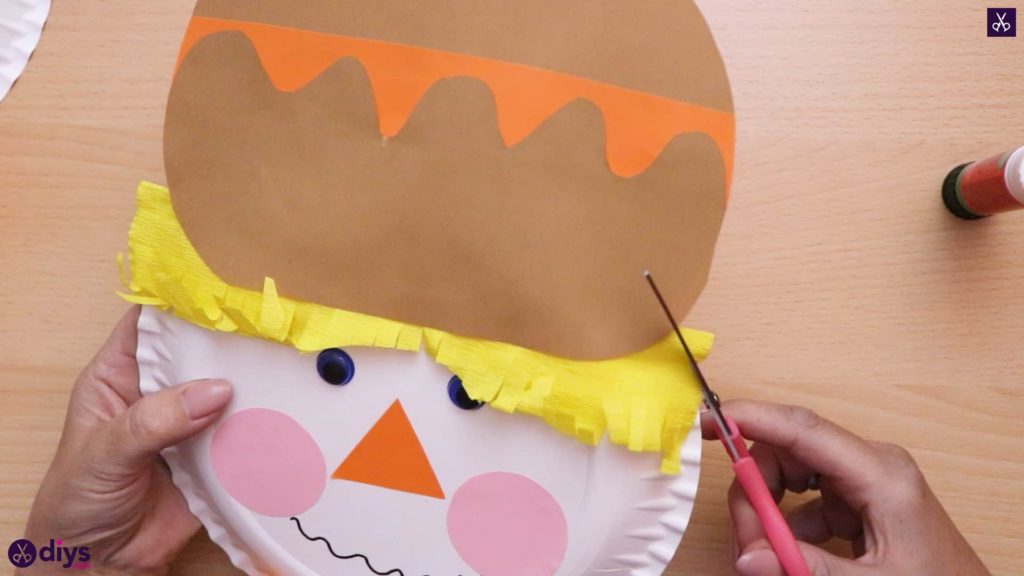
Step 10: add the fringe
Flip the hat over and apply glue along the bottom edge. Press the straight edge of your yellow crepe paper piece into the glue, sticking it so the fringed side sticks out from the underside of the hat like hair when you flip the whole thing back over.
Step 11: create the face
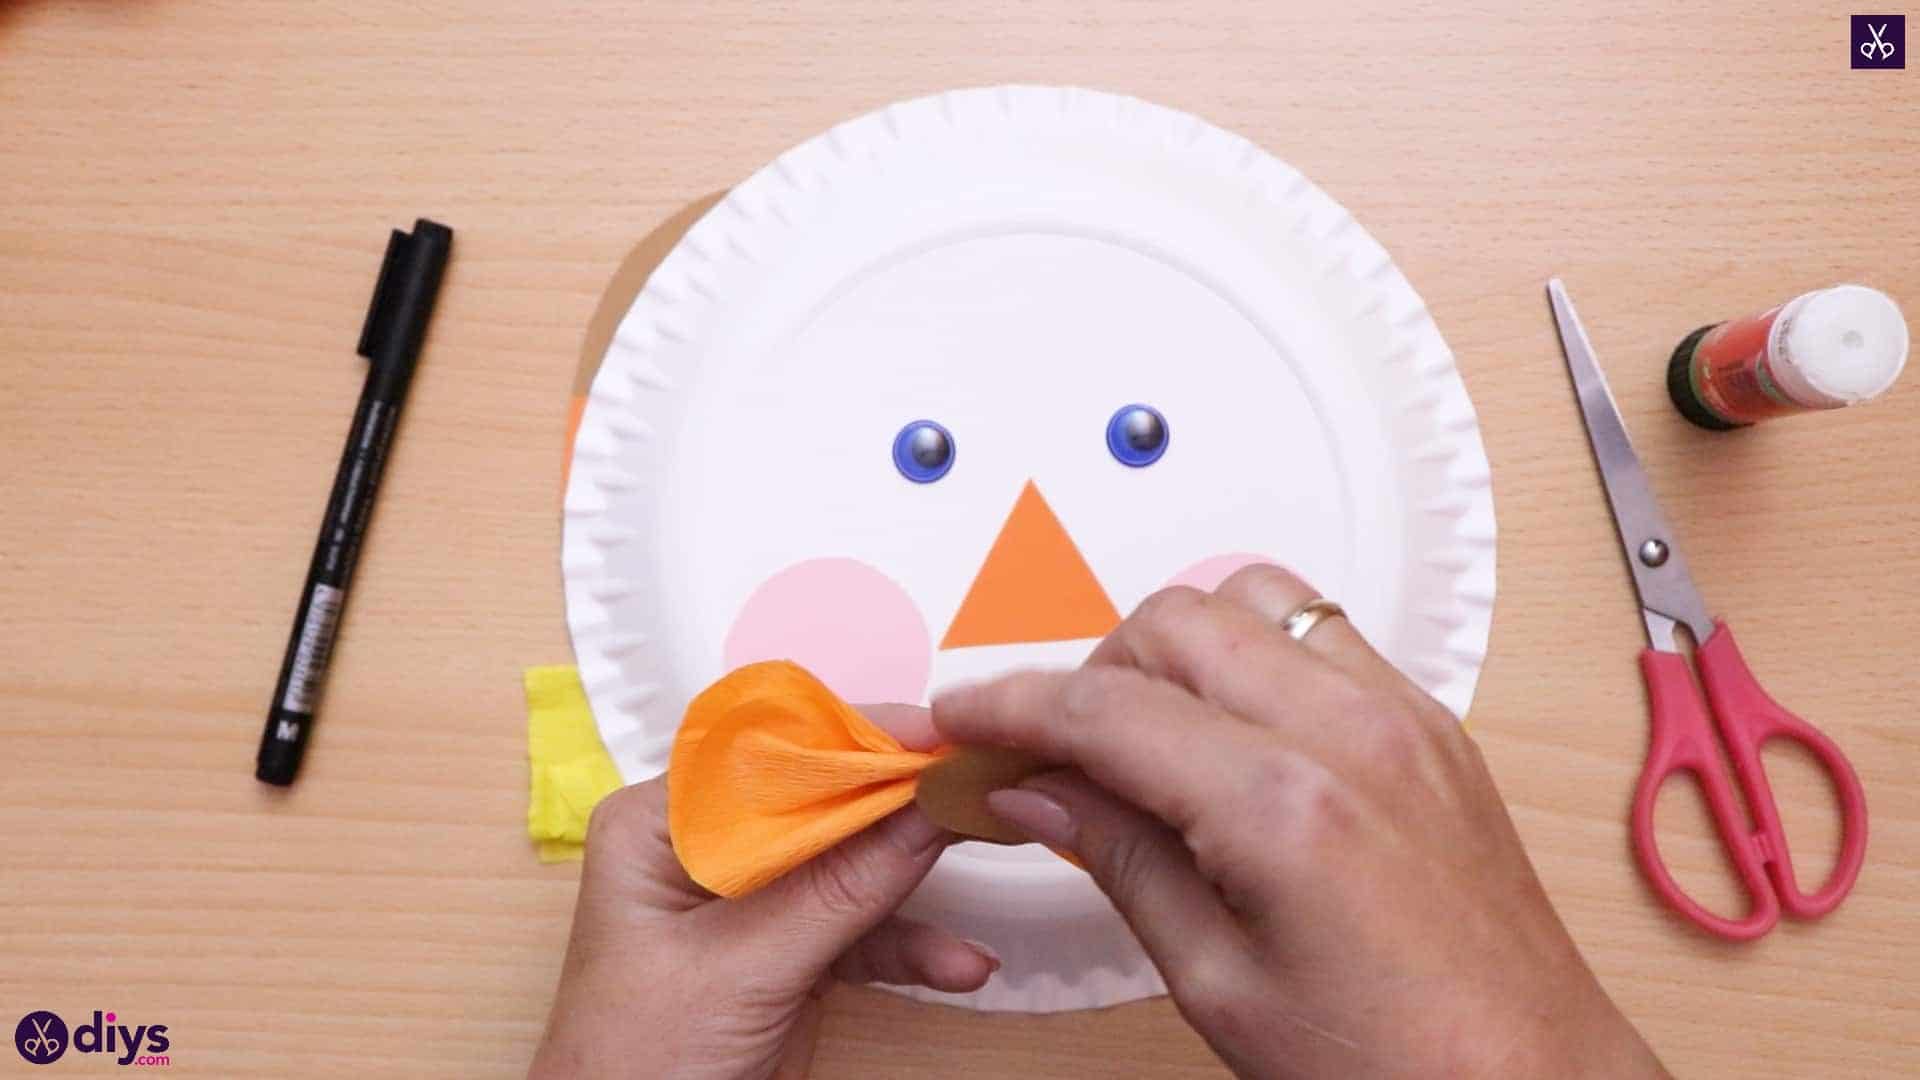
Glue all of the scarecrow’s facial features onto the raised underside of your paper plate! We started by gluing the orange triangle in the center for a nose and used that as a guide to place the rest of the face. Then we glued the pink cheeks near the bottom corners of the nose on either side and the googly eyes on either side of the nose’s top point. Finally, we used our felt tip pen to draw a wavy smile, starting and ending near the bottom of each pink cheek along the bottom of the paper plate face.

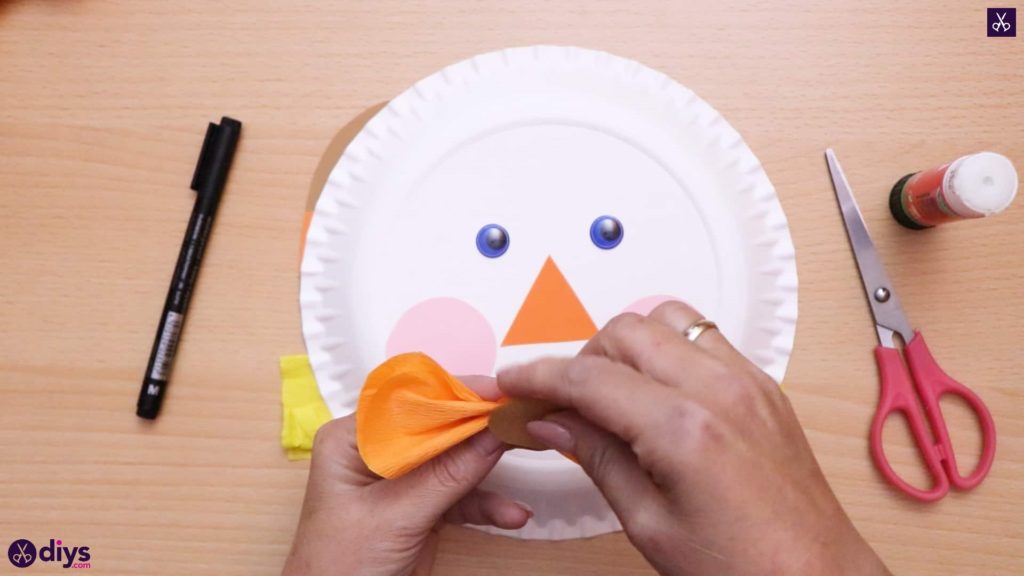
Step 12: bowtie
Make your scarecrow’s bowtie! Take your layered orange crepe paper pieces and pinch them in the center so they gather tightly in the middle just like a real bowtie does. Apply some glue to the pinched part and stick down the little tan oval you cut out earlier to hold the center in place. Glue the finished bowtie to the bottom edge of your paper plate, right under the scarecrow’s smile. Feel free to separate and fluff out your bowtie’s ends for volume.
Step 13: voila!
Finish your scarecrow by applying glue to the back of the yellow hair and then turning it back over and pressing the piece onto the top edge of your paper plate, so the scarecrow’s face shows beneath the yellow fringe. Trim off the excess edges of the yellow crepe paper if they stick out a little too far beyond the hat and plate.
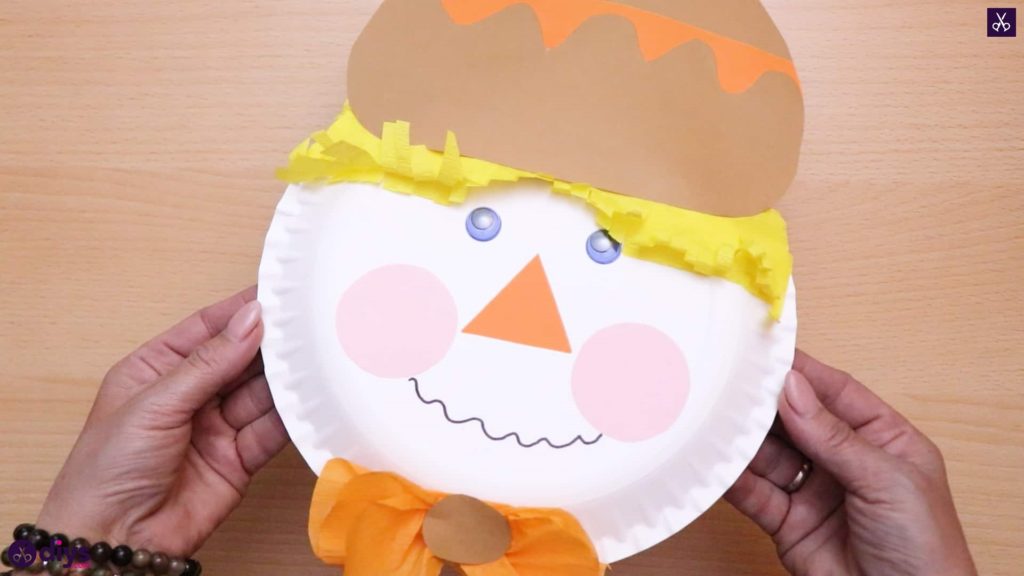
Ta-da! Your scarecrow is finished. Just in case you’d like to try this project out for yourself, here’s a fantastic tutorial video to help you!