How to Craft a DIY Lovely Heart Decoration for Valentine’s Day in 7 Easy Steps
Updated on November 19, 2025


A lovely heart decoration is a fine example of how a small and simple DIY project can bring cheer and happiness to any household, especially around Valentine’s Day. Read on to discover how to craft a lovely heart for your home decor.
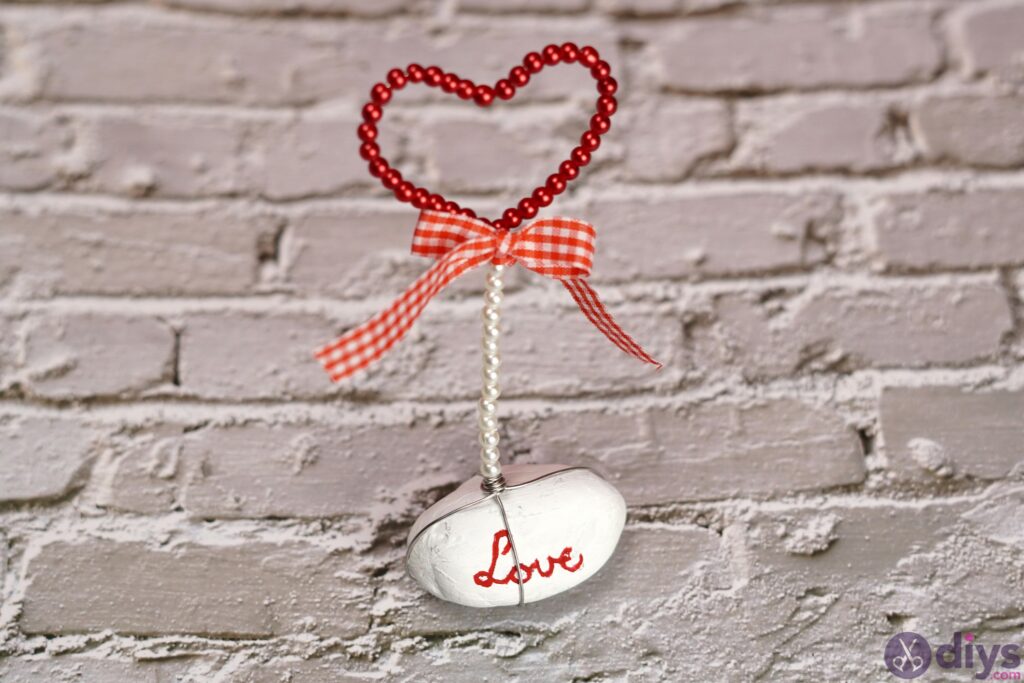
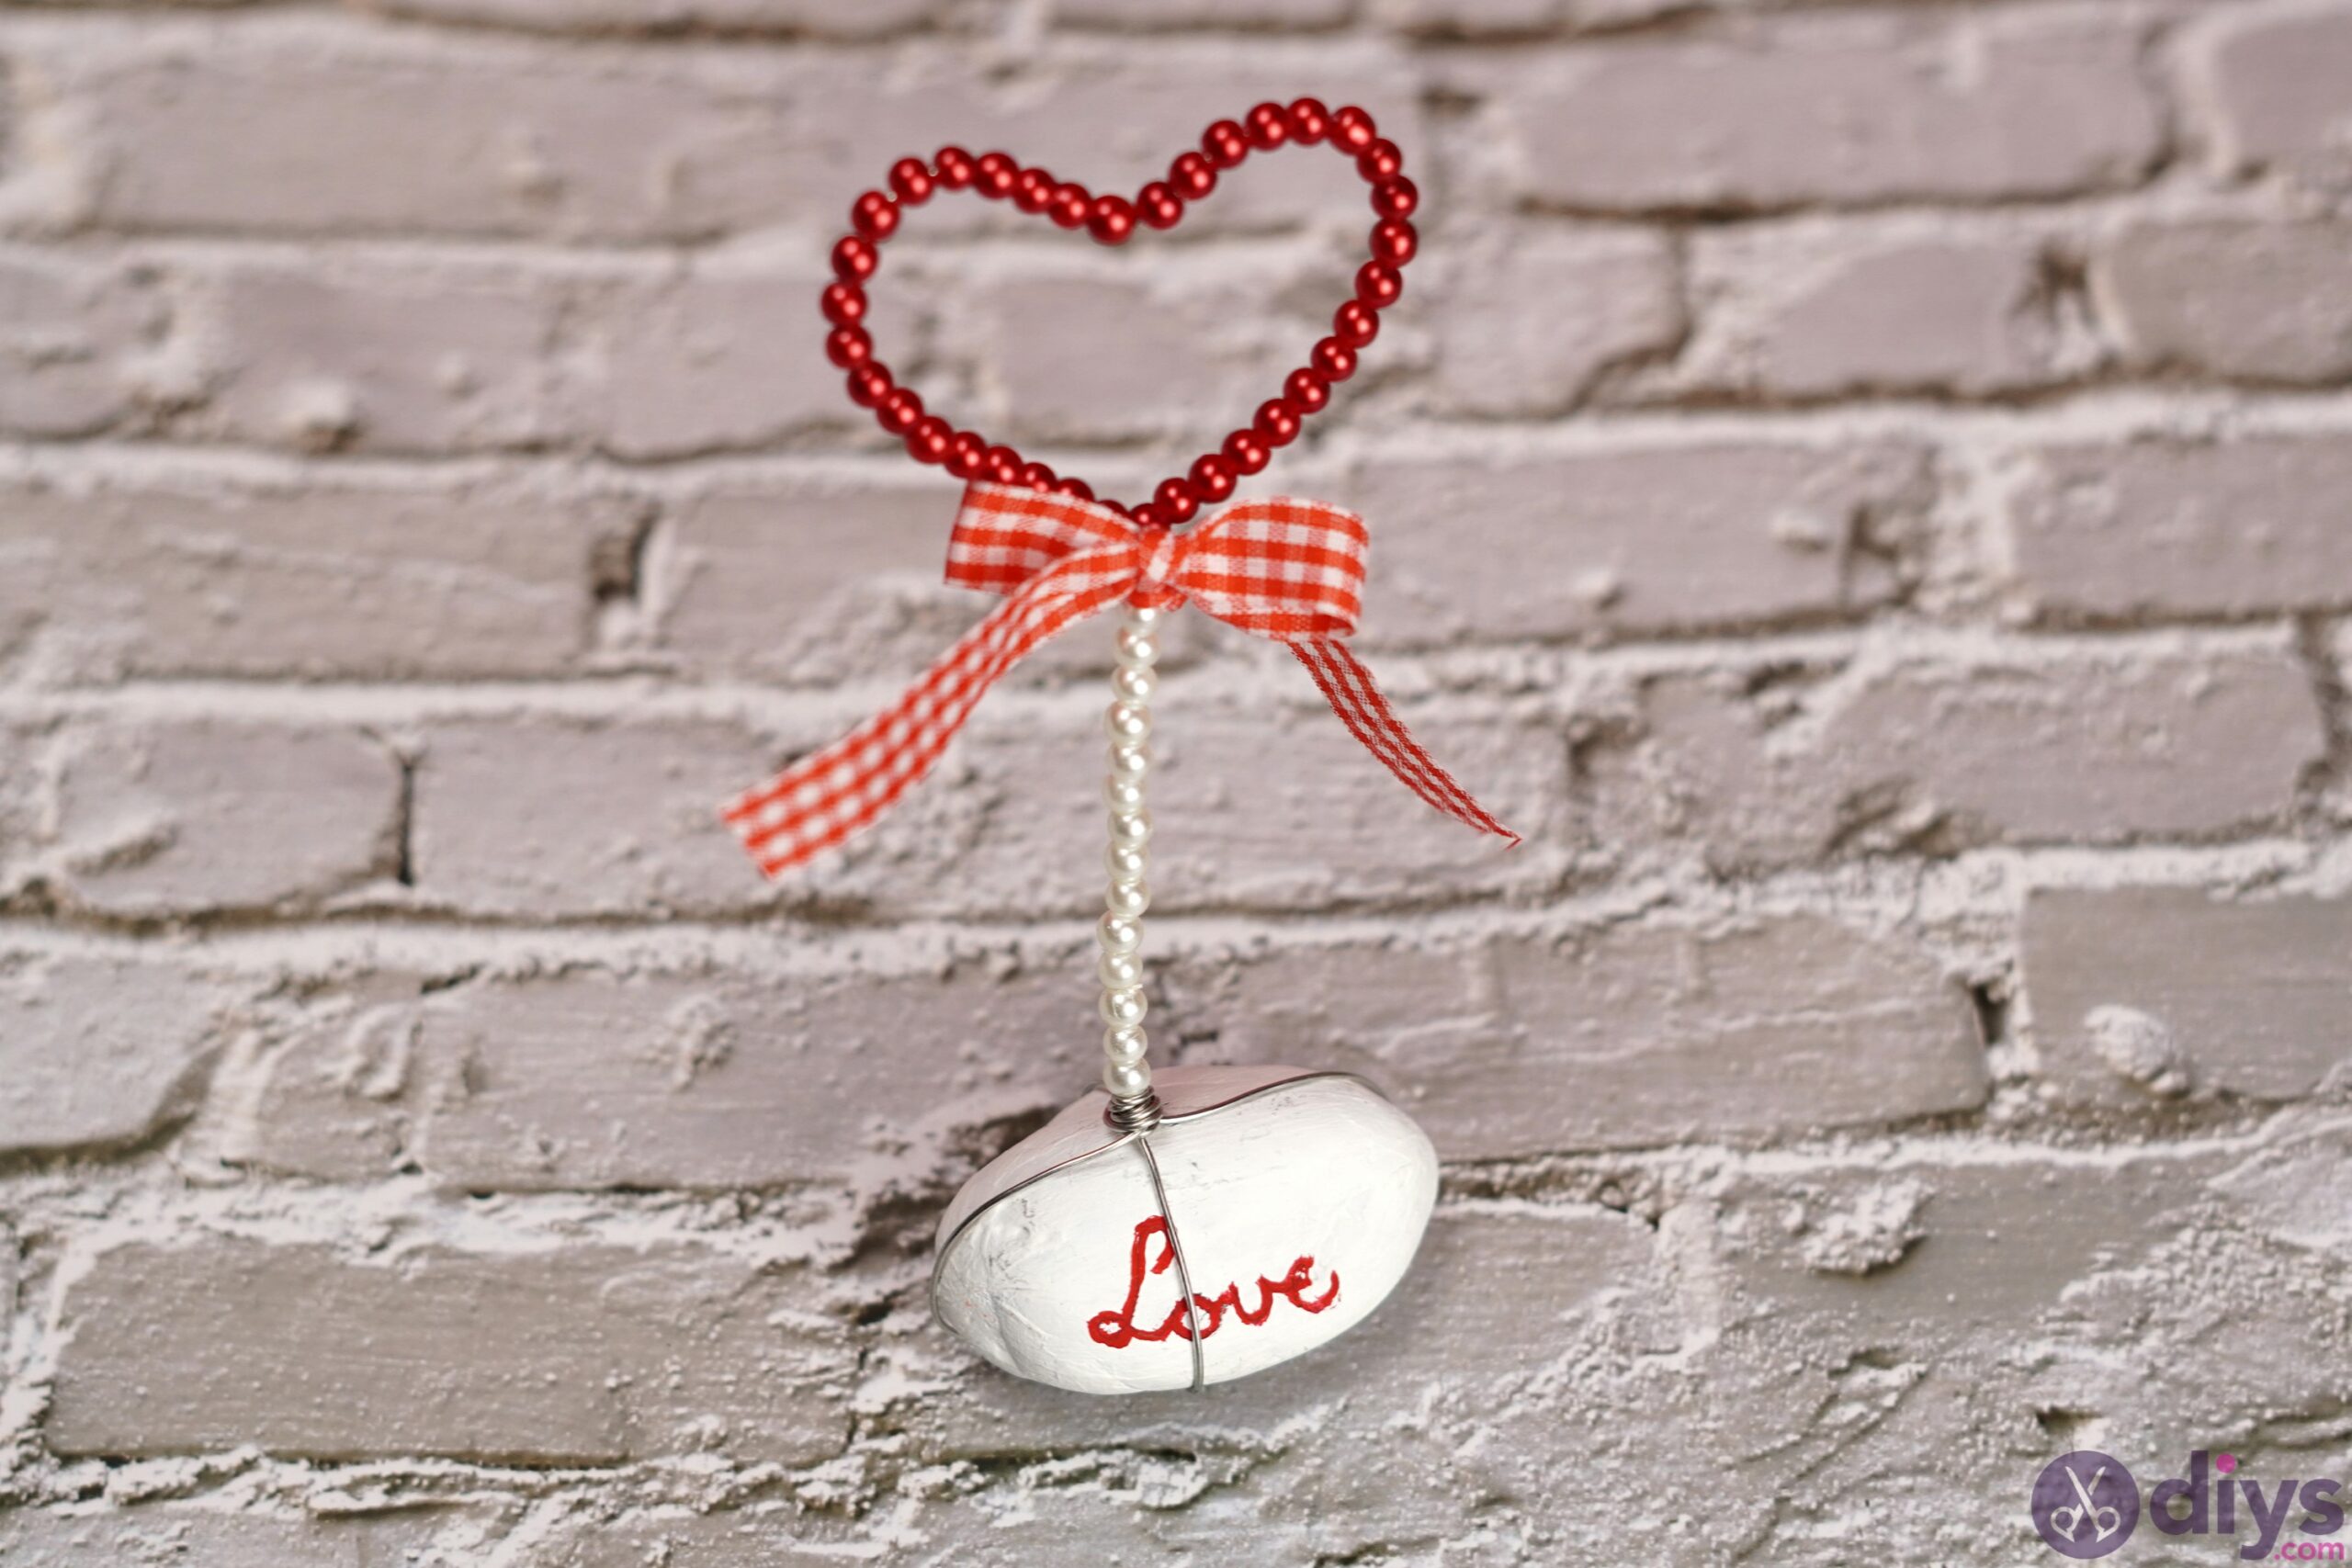
A DIY lovely heart decoration consists of a small rock painted with the word LOVE and attached to a heart-shaped beaded wire. It’s small enough to fit a mantle, shelf, desk, or windowsill. Since the craft uses paint to write the LOVE message, it’s fully customizable since you can write anything. For example, you can easily repurpose the lovely heart decoration into a Mother’s Day gift by painting Love you, mom or into a teacher appreciation gift by saying It takes a big heart to shape little minds.
This guide describes the supplies and step-by-step instructions for making a DIY lovely heart decoration, complete with images and a video guide. Check out tips and tricks for improving or changing this design. The project shouldn’t take more than a 2-3 hours; most of that time is spent waiting for paint to dry.
Supplies
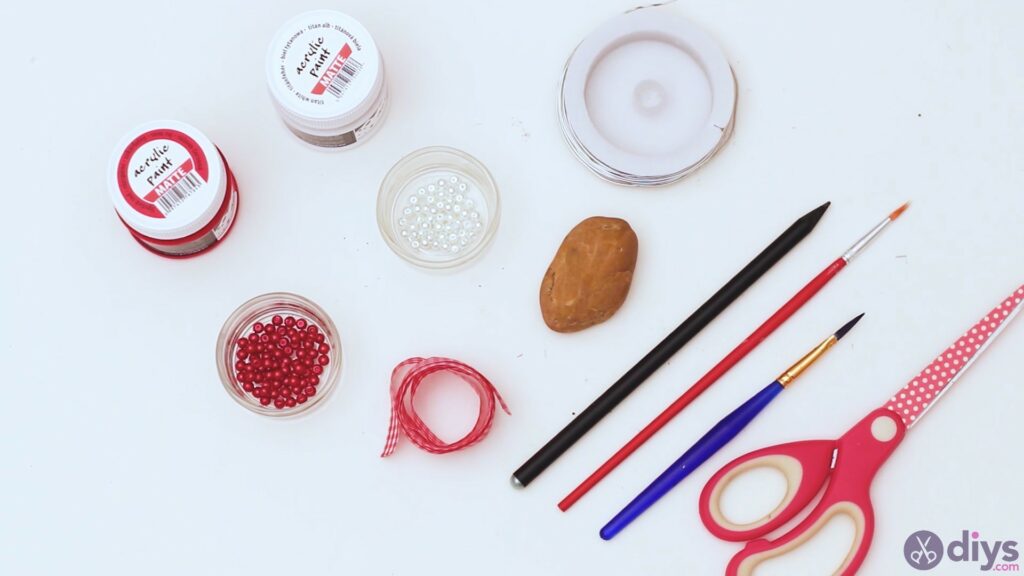
- A rock to act as your decoration’s base. We used an oval stone with a flat side big enough to write LOVE.
- Jewelry wire to create the heart frame.
- Jewelry beads to string onto the wire. We used red beads for the heart frame and white beads for the heart’s hanger. If you use other colors, they should match the acrylic paints.
- Acrylic paint. We used white acrylic paint for the background and red paint for the text. If you use other colors, they should match the bead colors.
- Two paintbrushes
- Pencil
- Ribbon
- Scissors that cut through jewelry wire.
How do I craft a DIY lovely heart decoration?
Follow these step-by-step instructions to make a DIY lovely heart decoration:
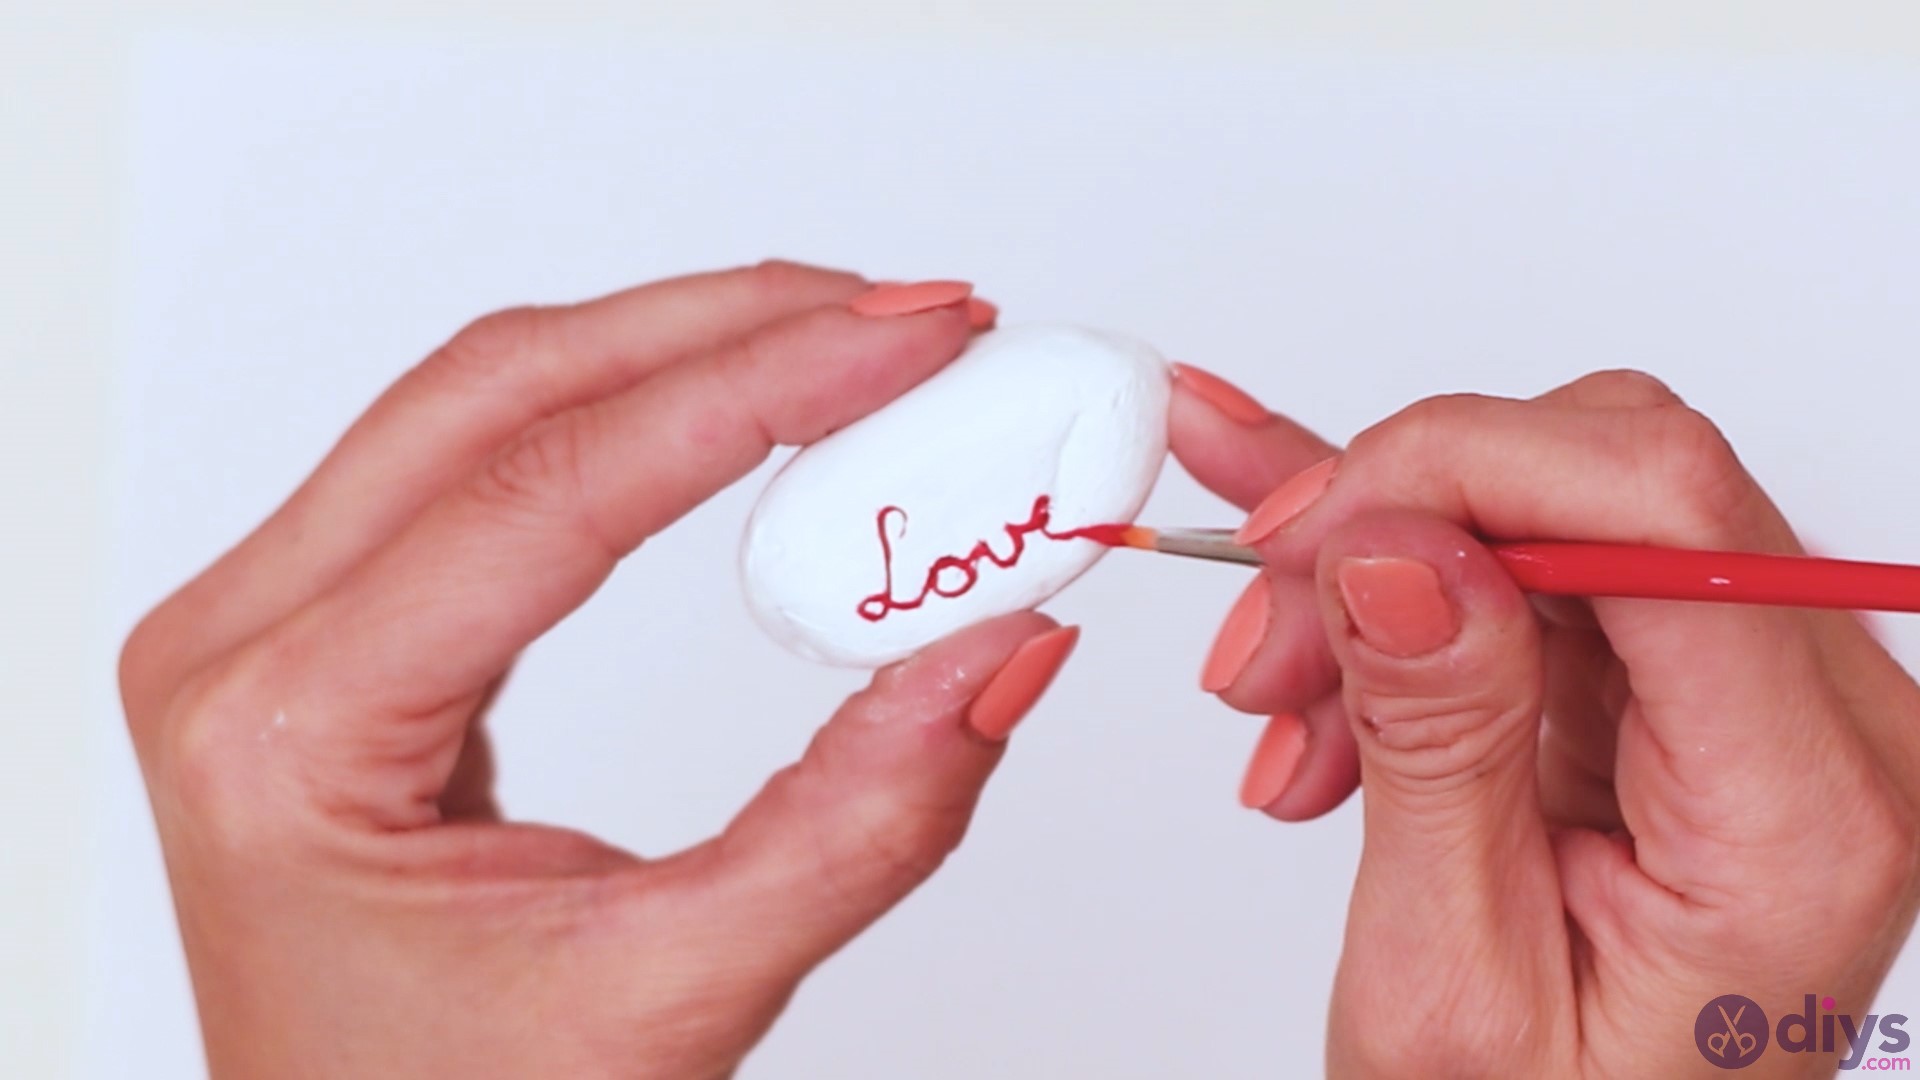
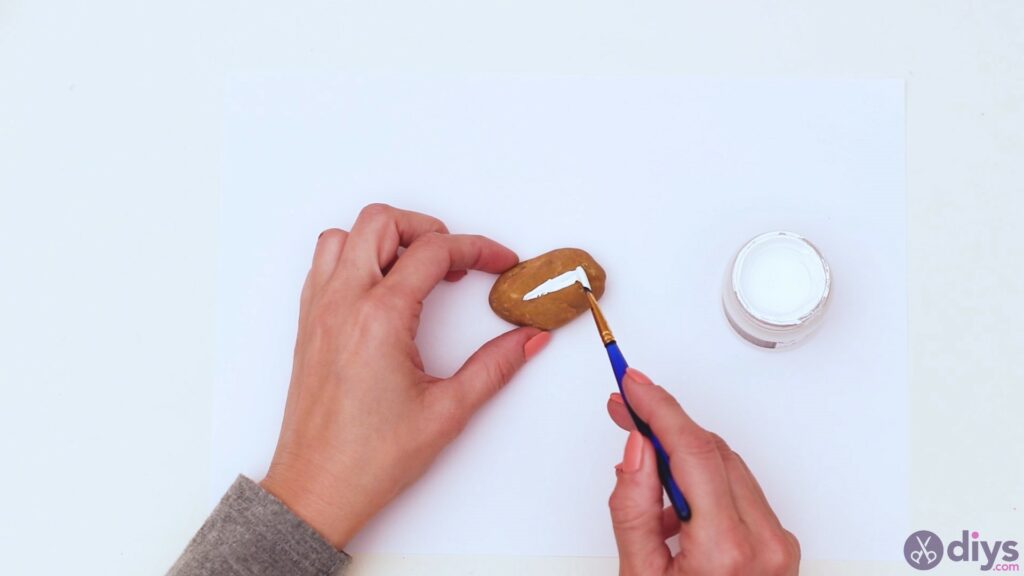
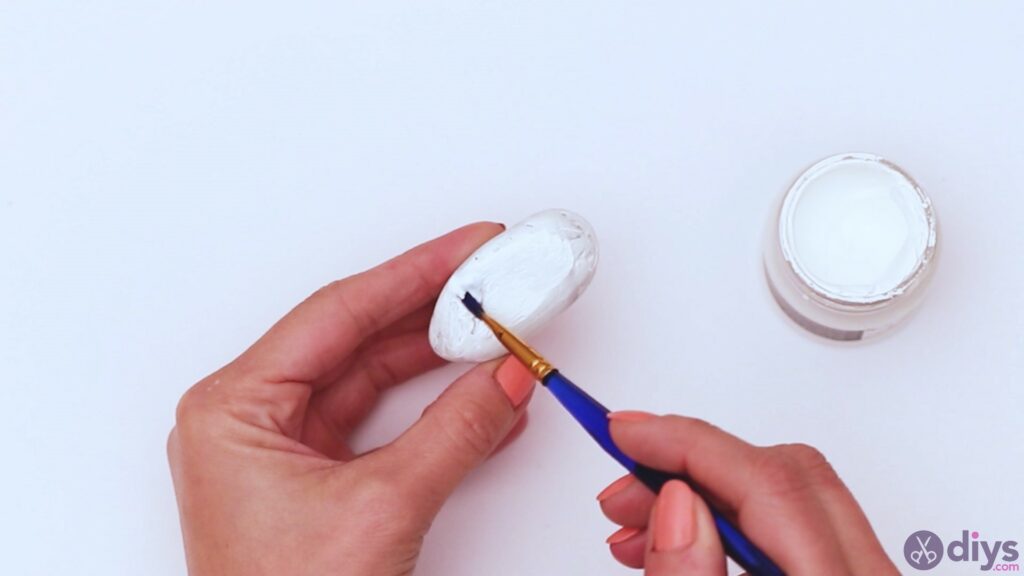
- Paint the rock white: To avoid getting your fingers dirty, paint only part of the rock, let it dry, and then paint the rest. Apply several coats of paint if the color looks uneven and patchy.

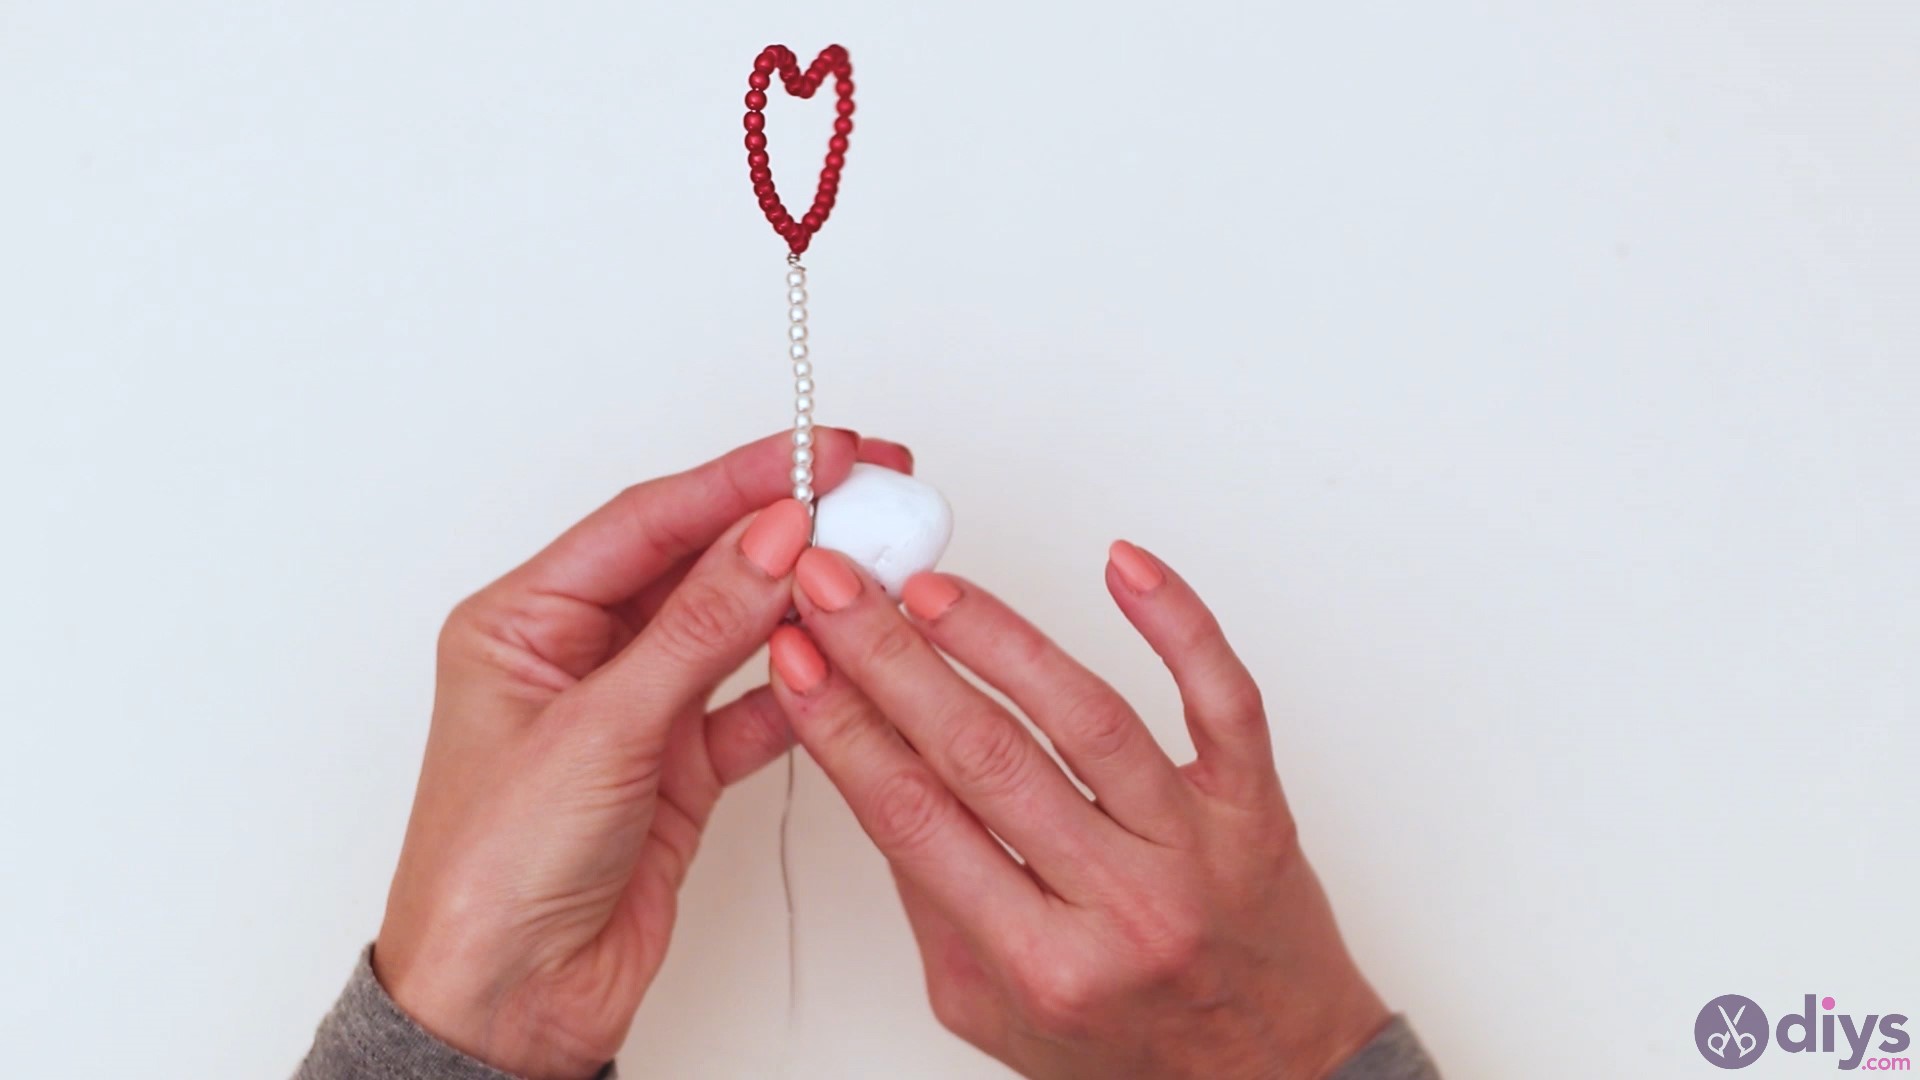
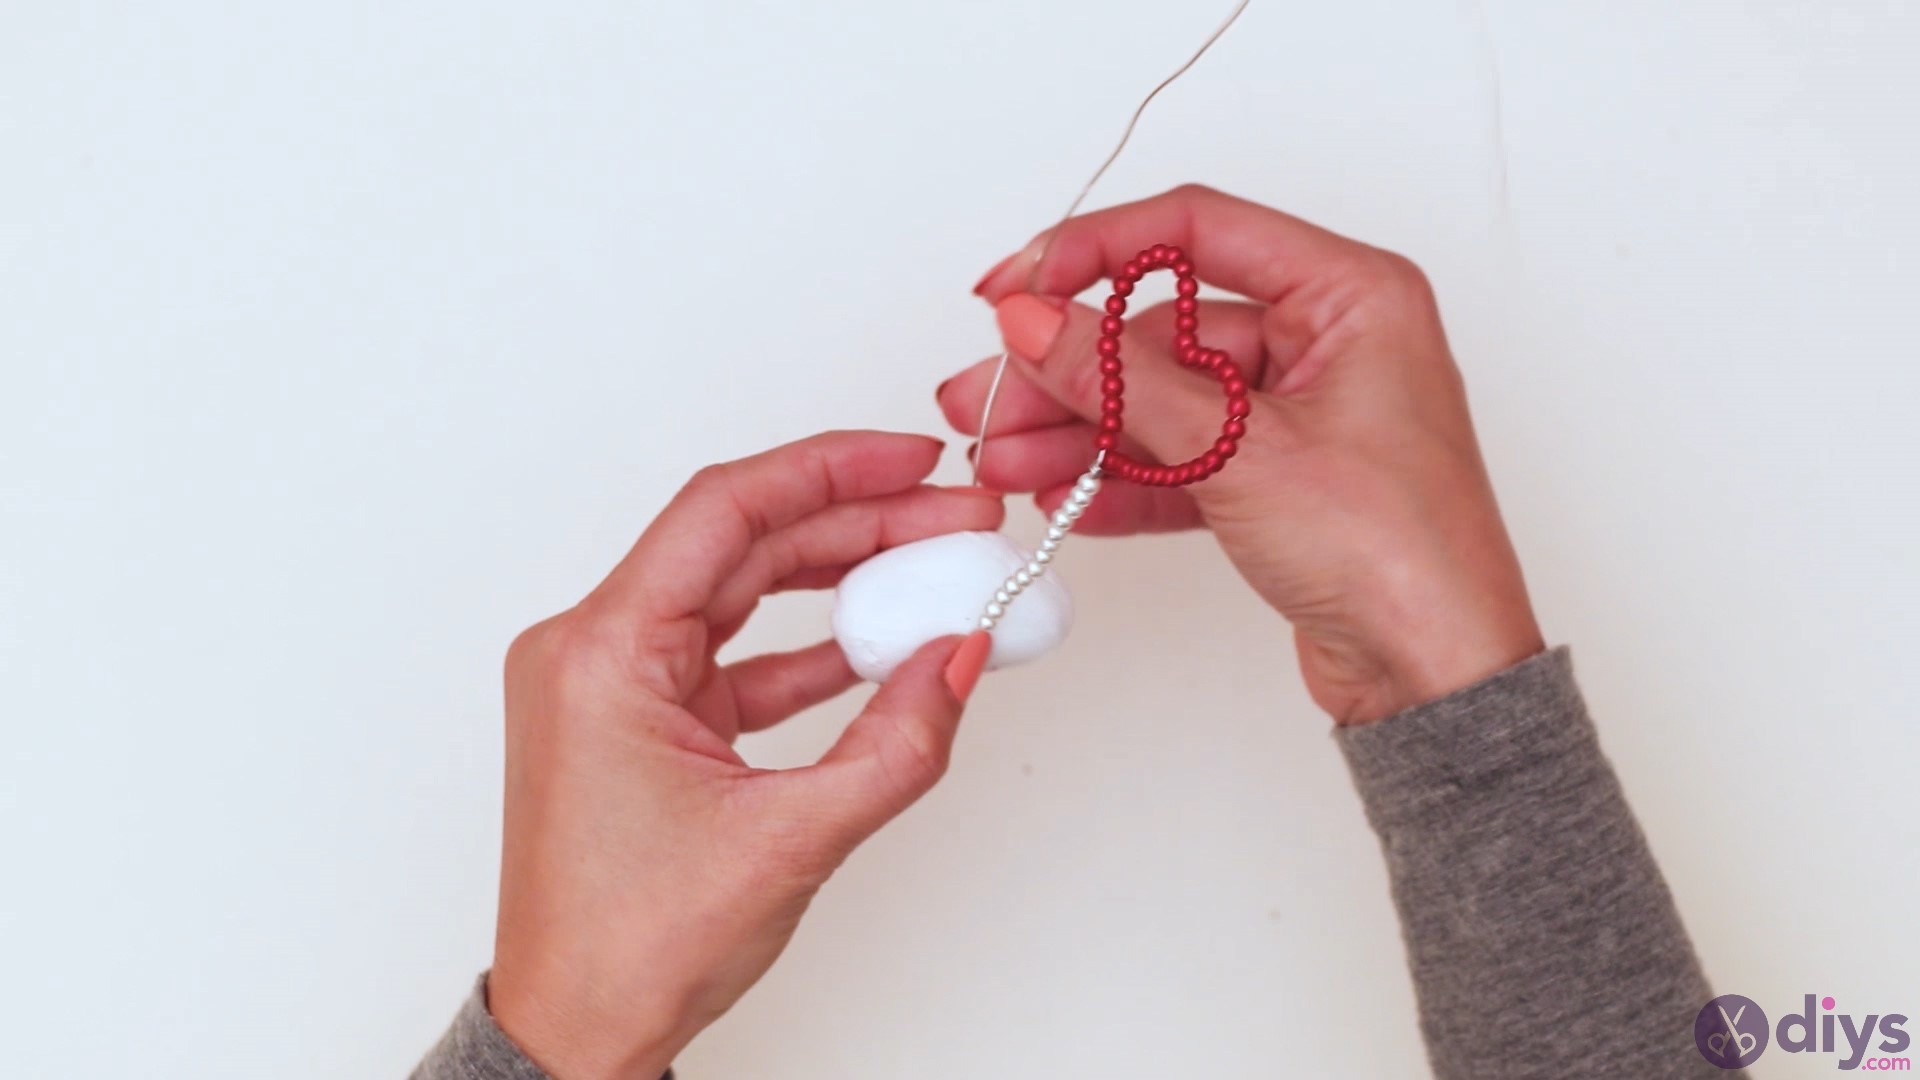
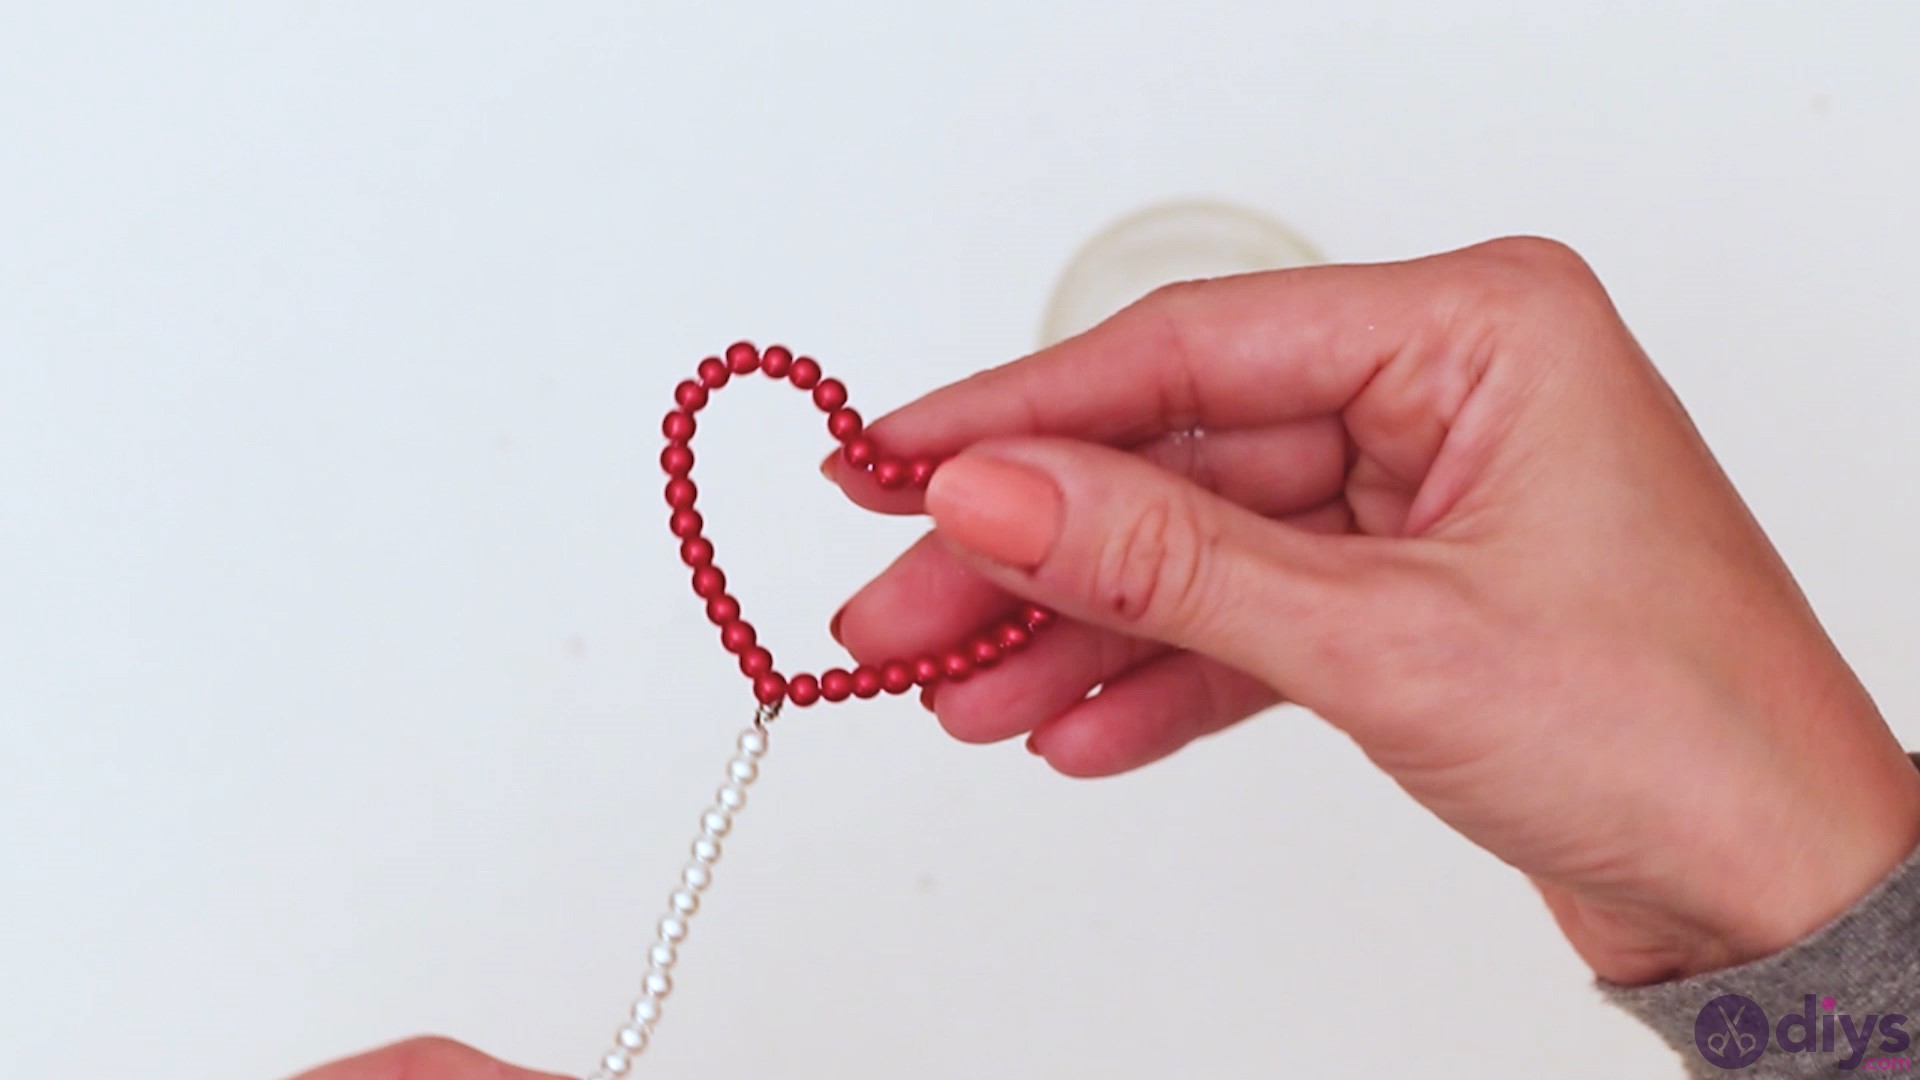
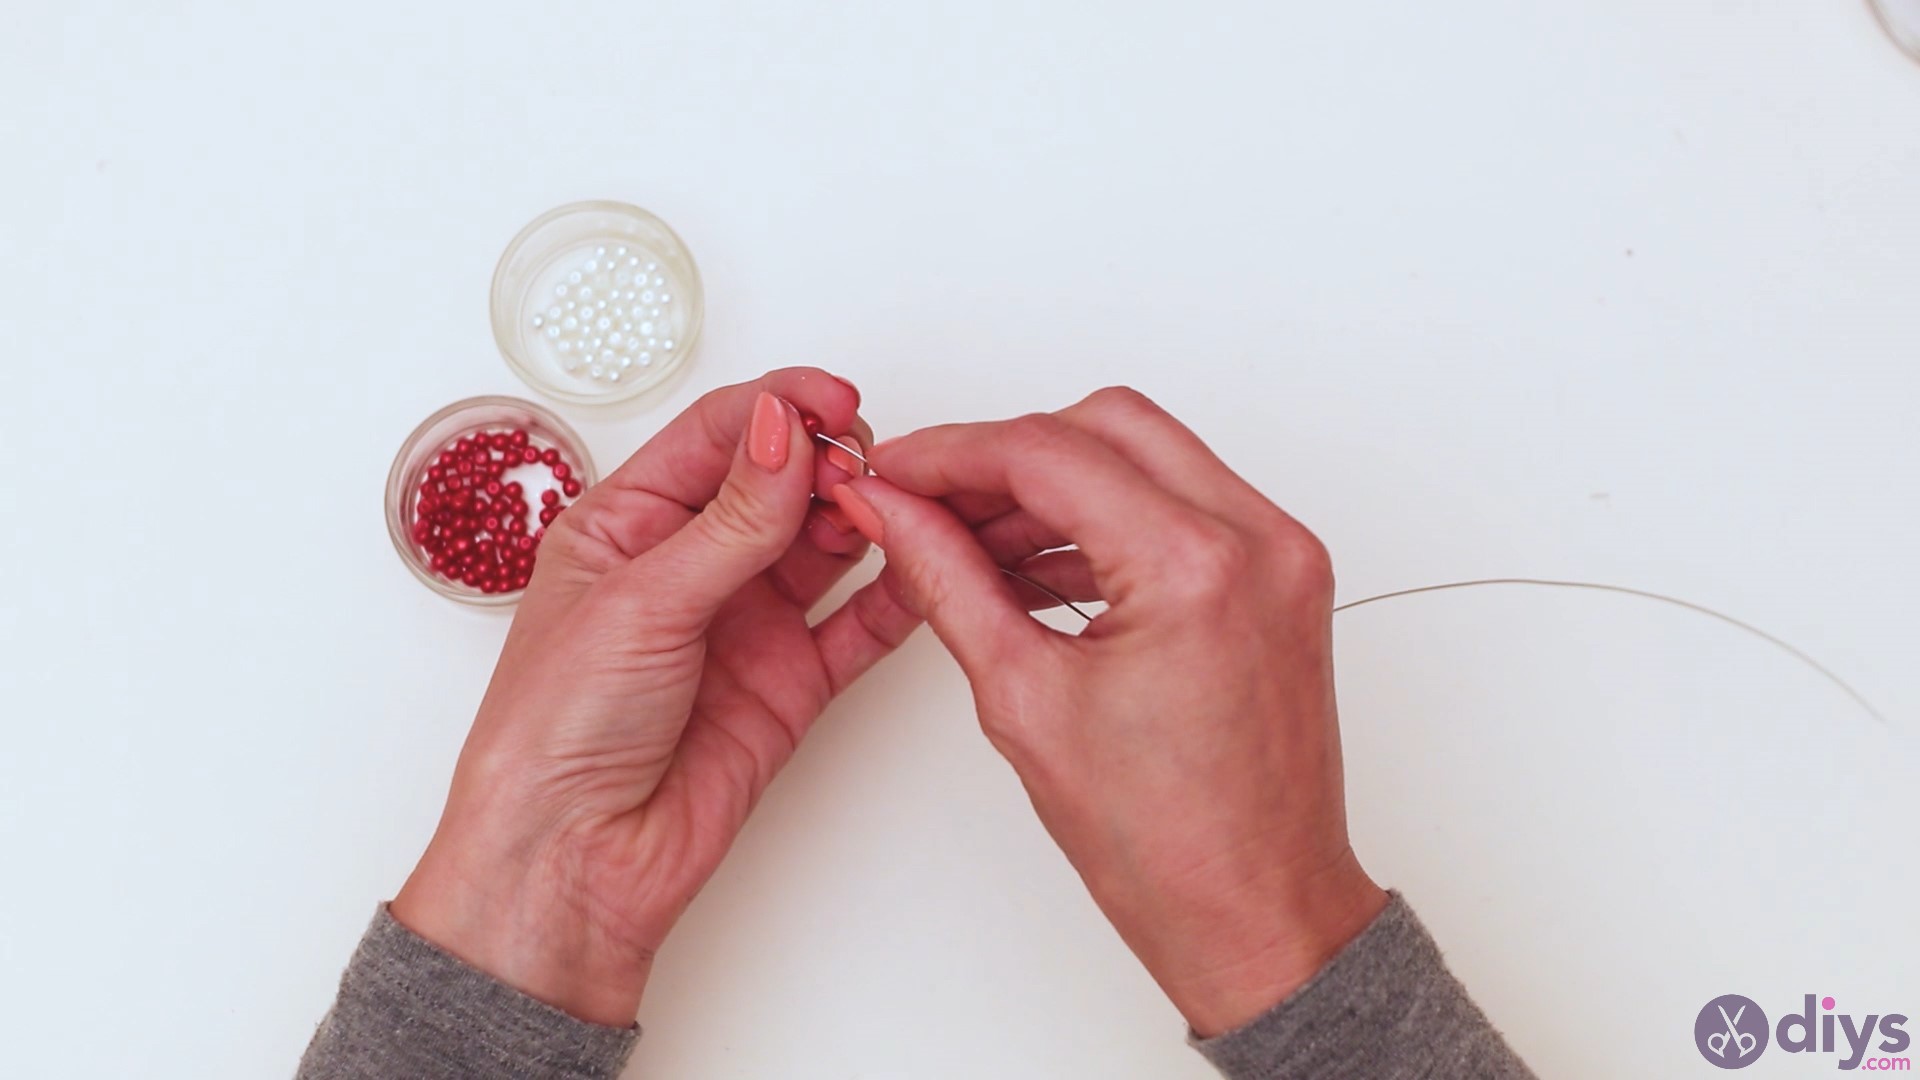
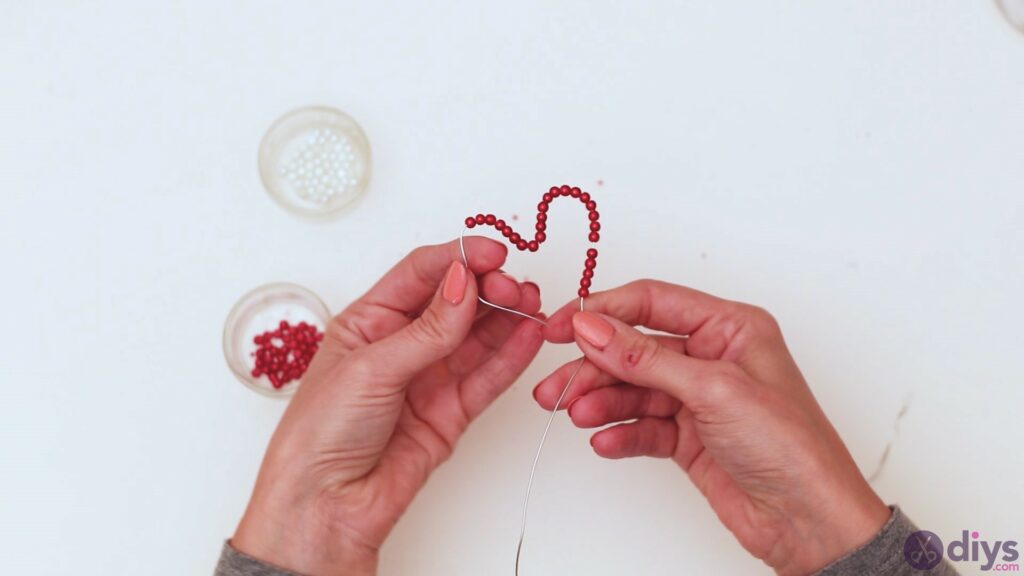
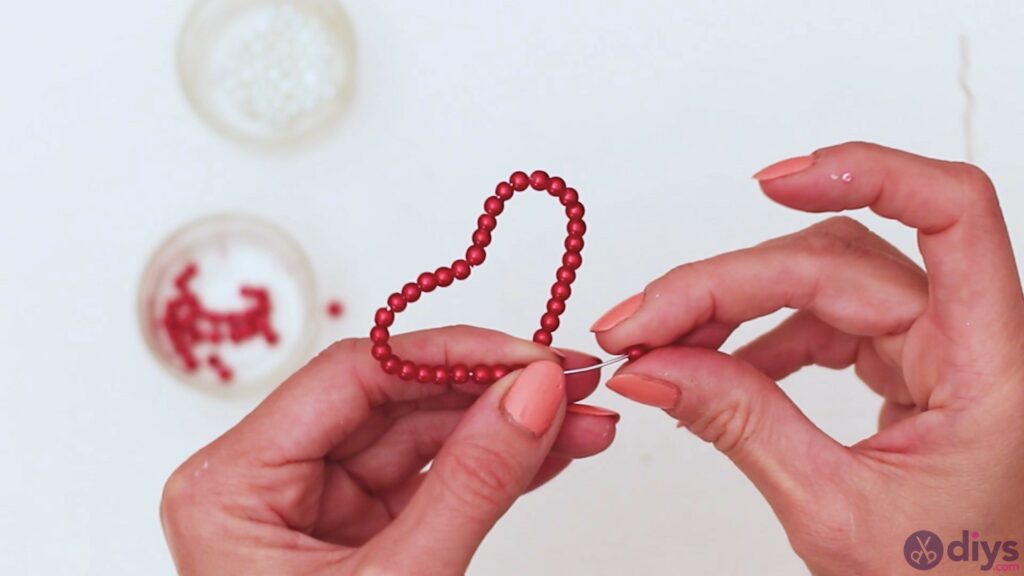
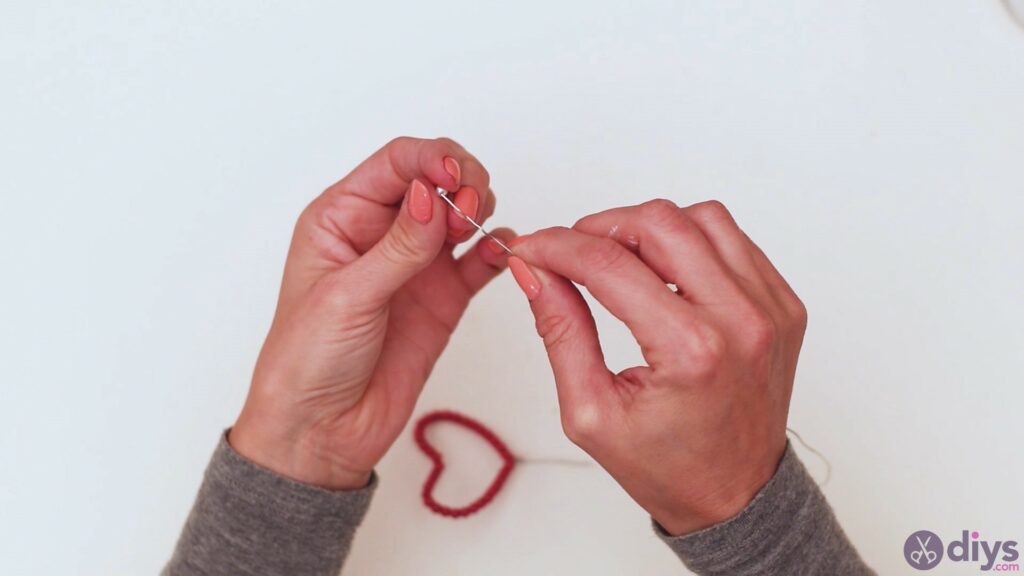
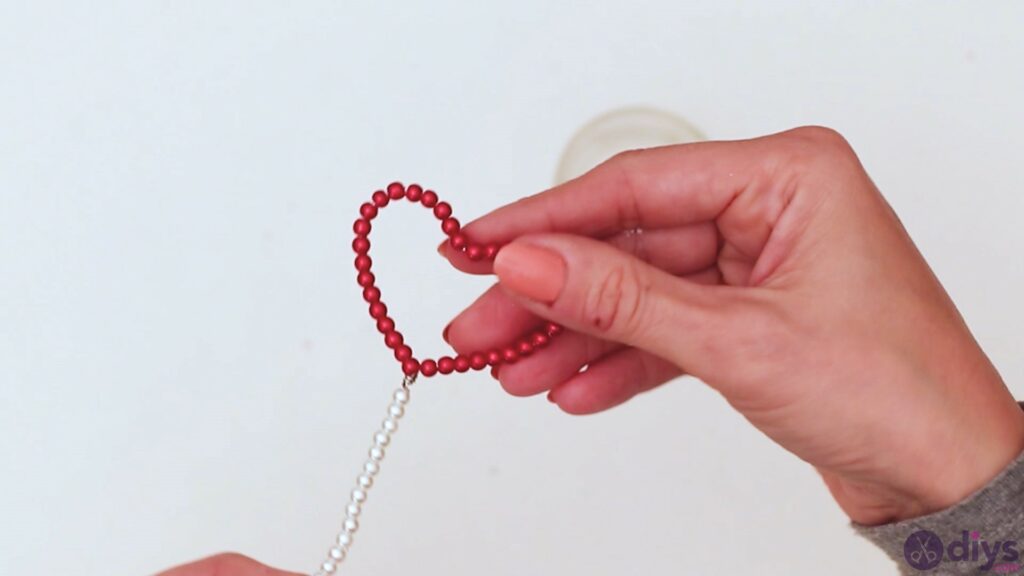
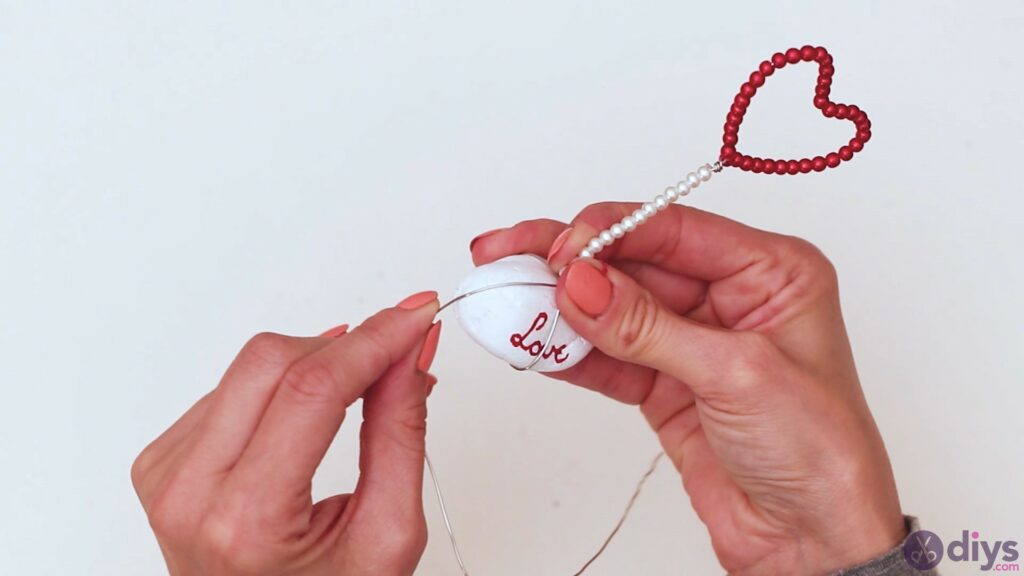
- Make the red wire heart: Cut about 15 in (40 cm) of jewelry wire and bend one end to form a heart. Add red beads to this end of the wire t0 fill the entire heart. Twist the end at the base of the heart to ensure it doesn’t loosen up later.
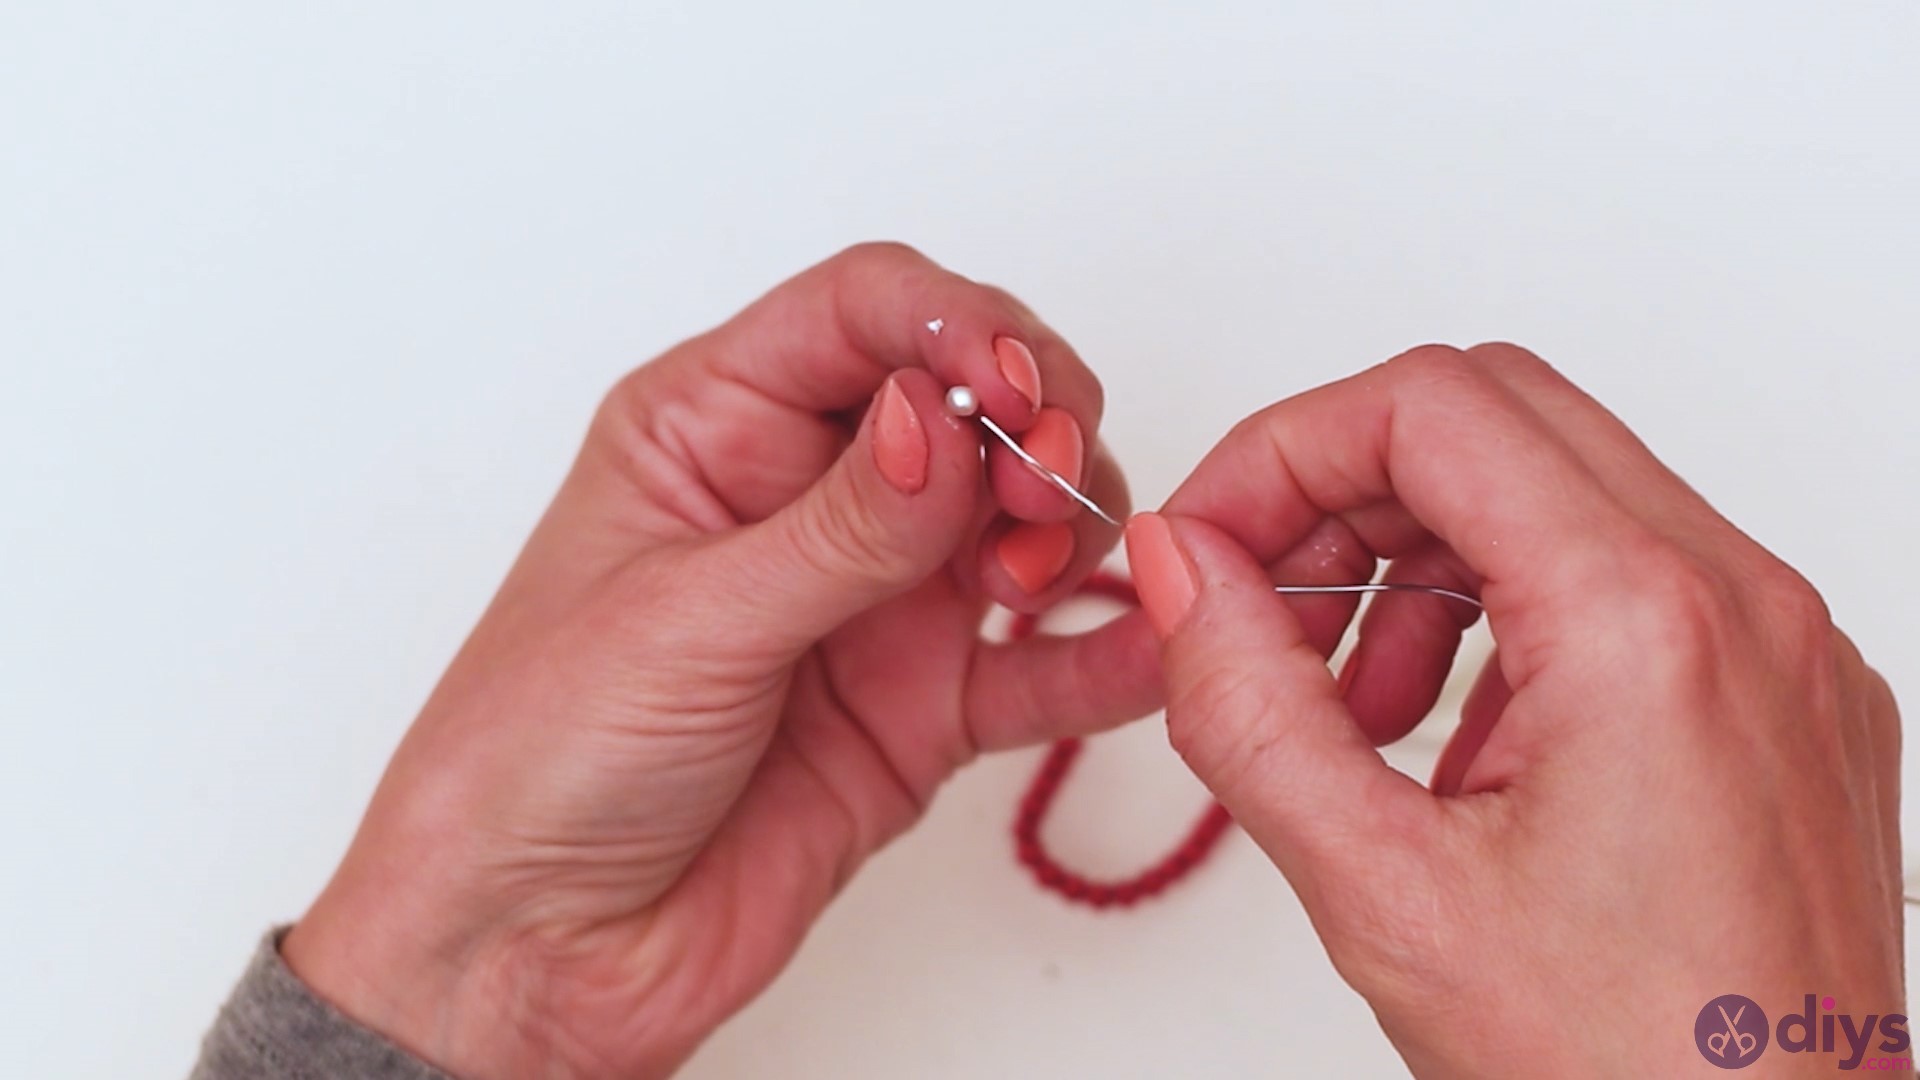
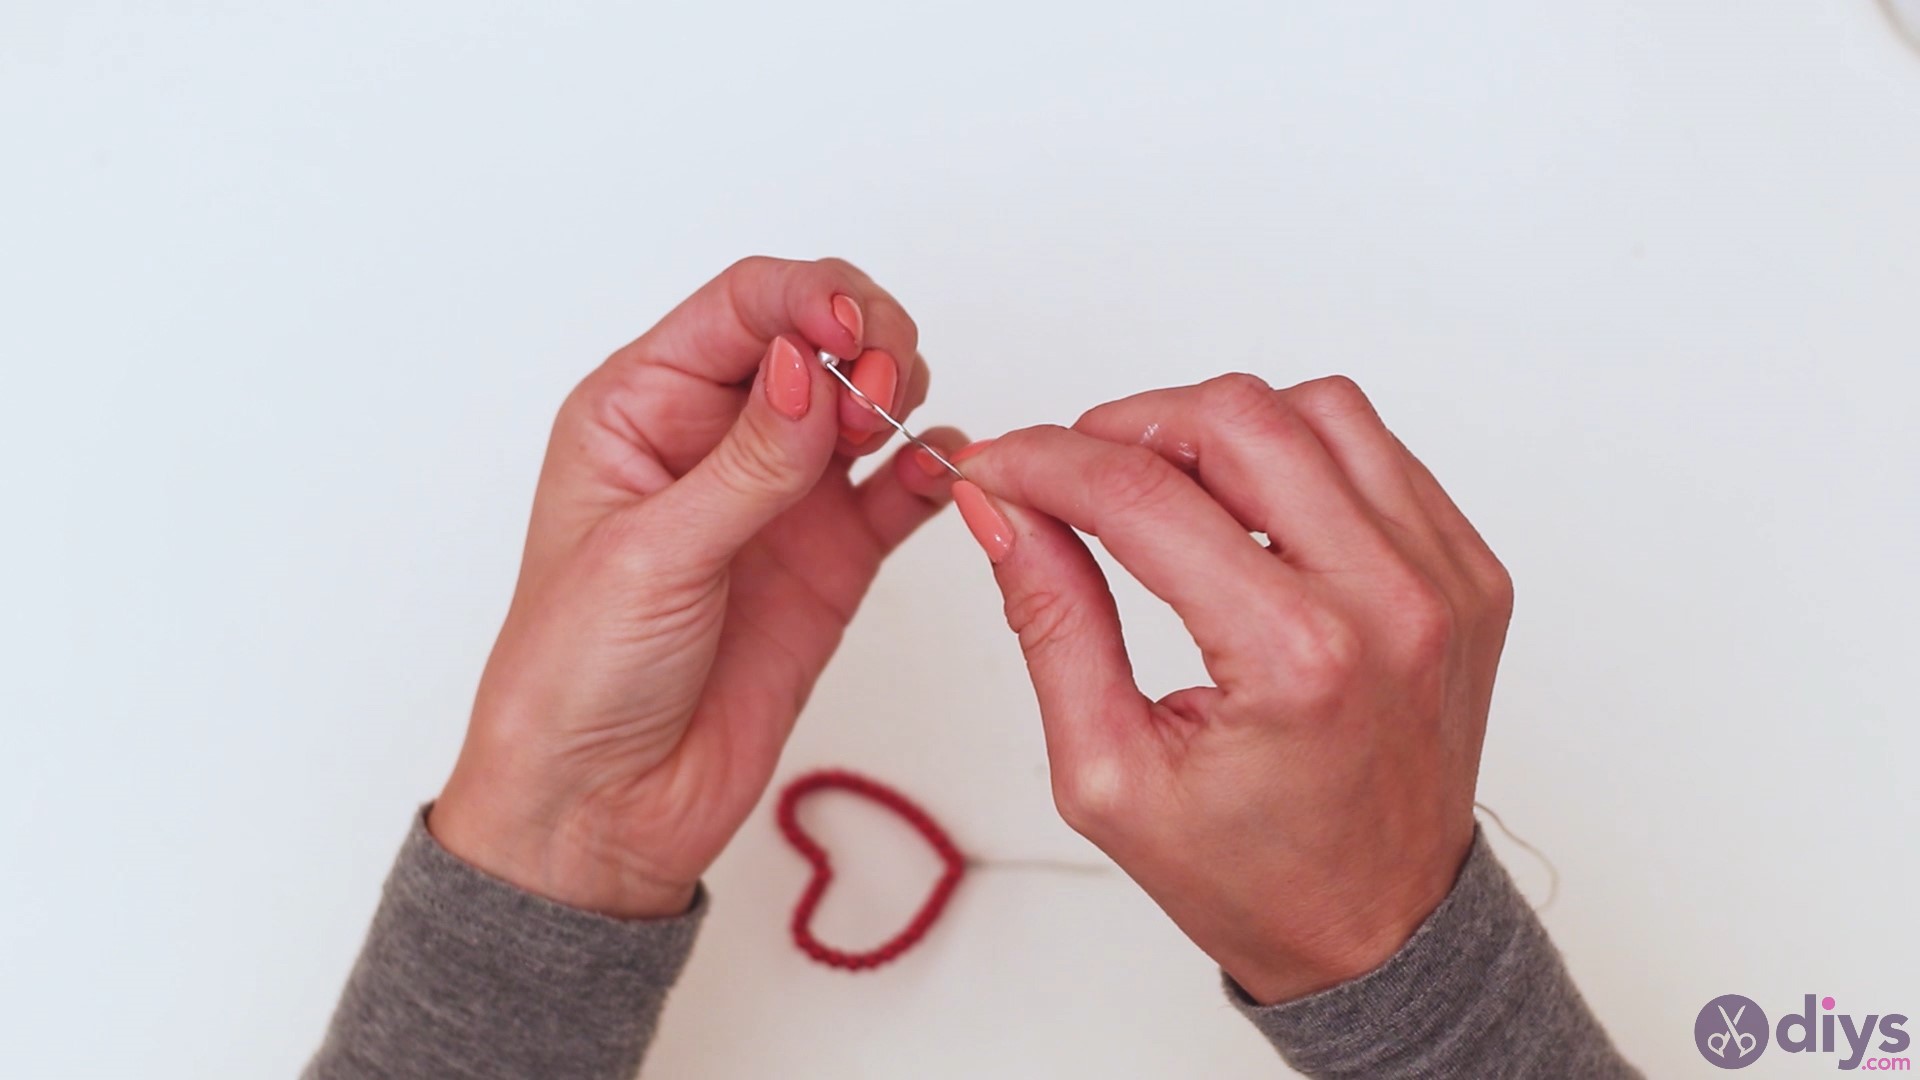
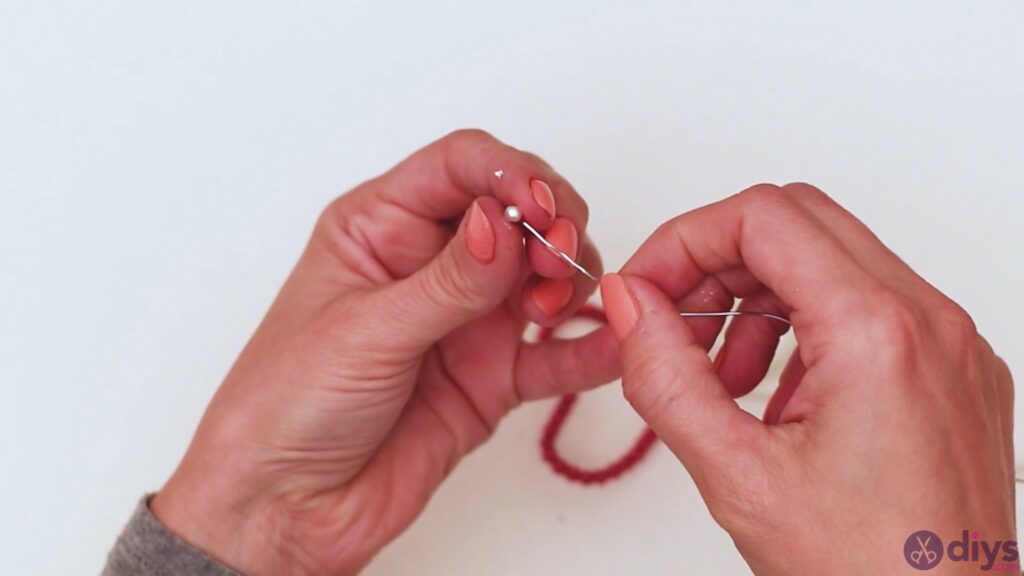
- Make the white wire stem: Add white beads to the jewelry wire to create the heart’s hanger.
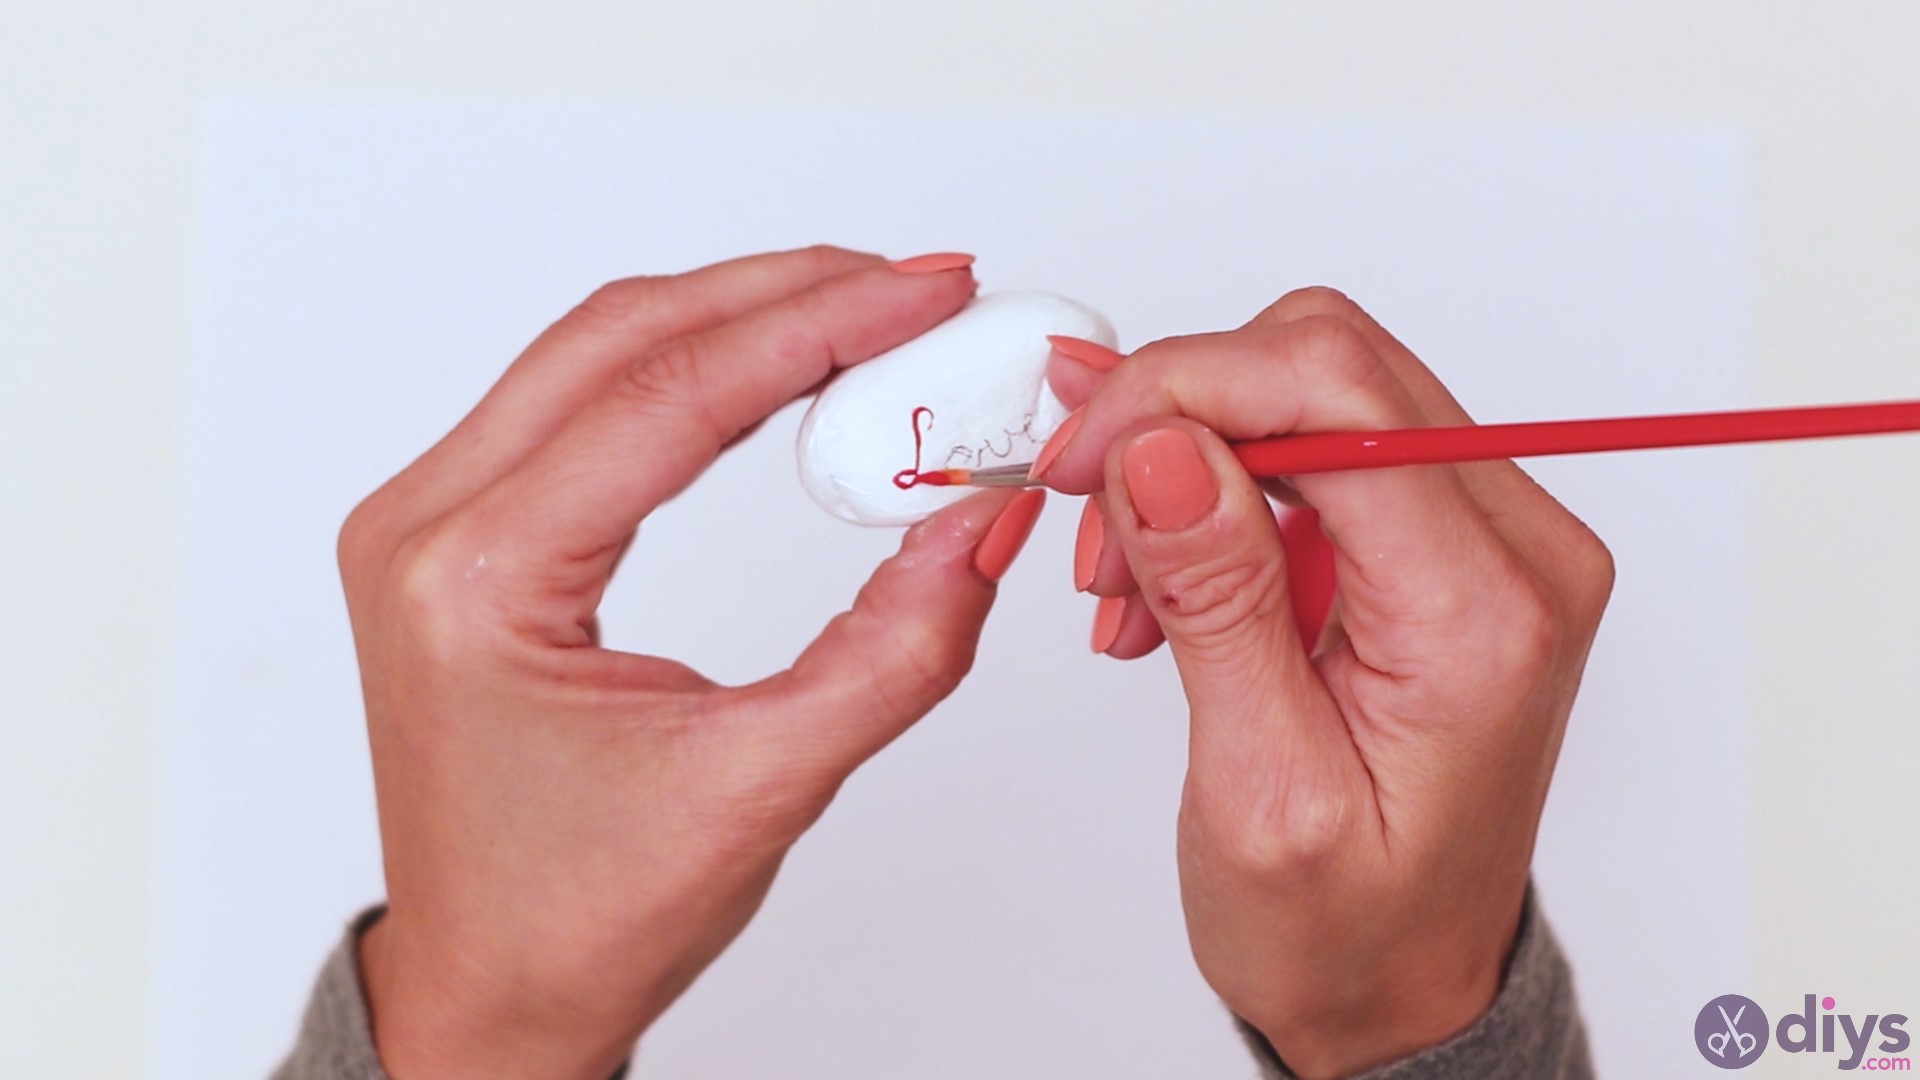
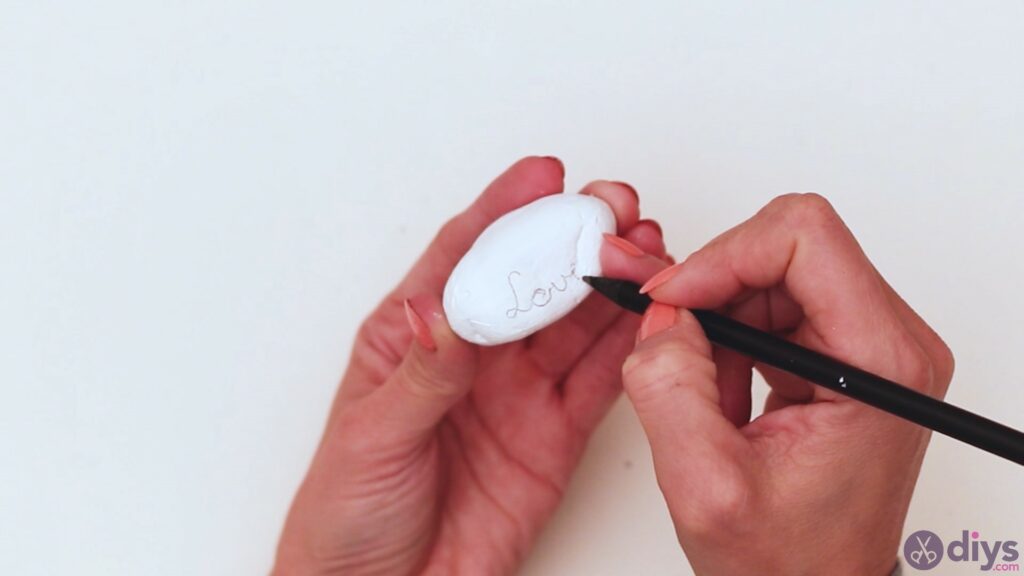
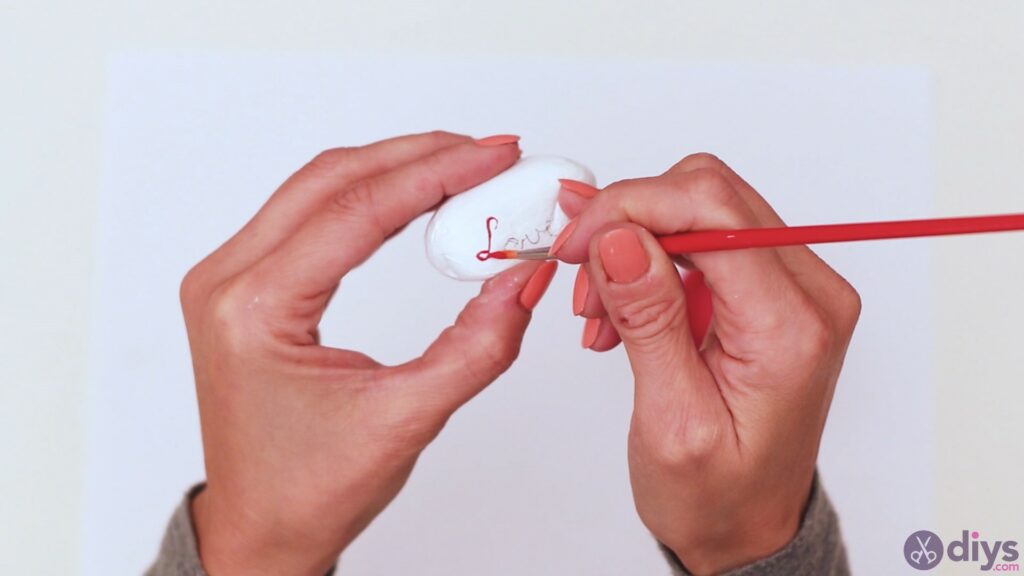
- Write LOVE: Handwrite LOVE in pencil to create a template and paint over the template with red paint.
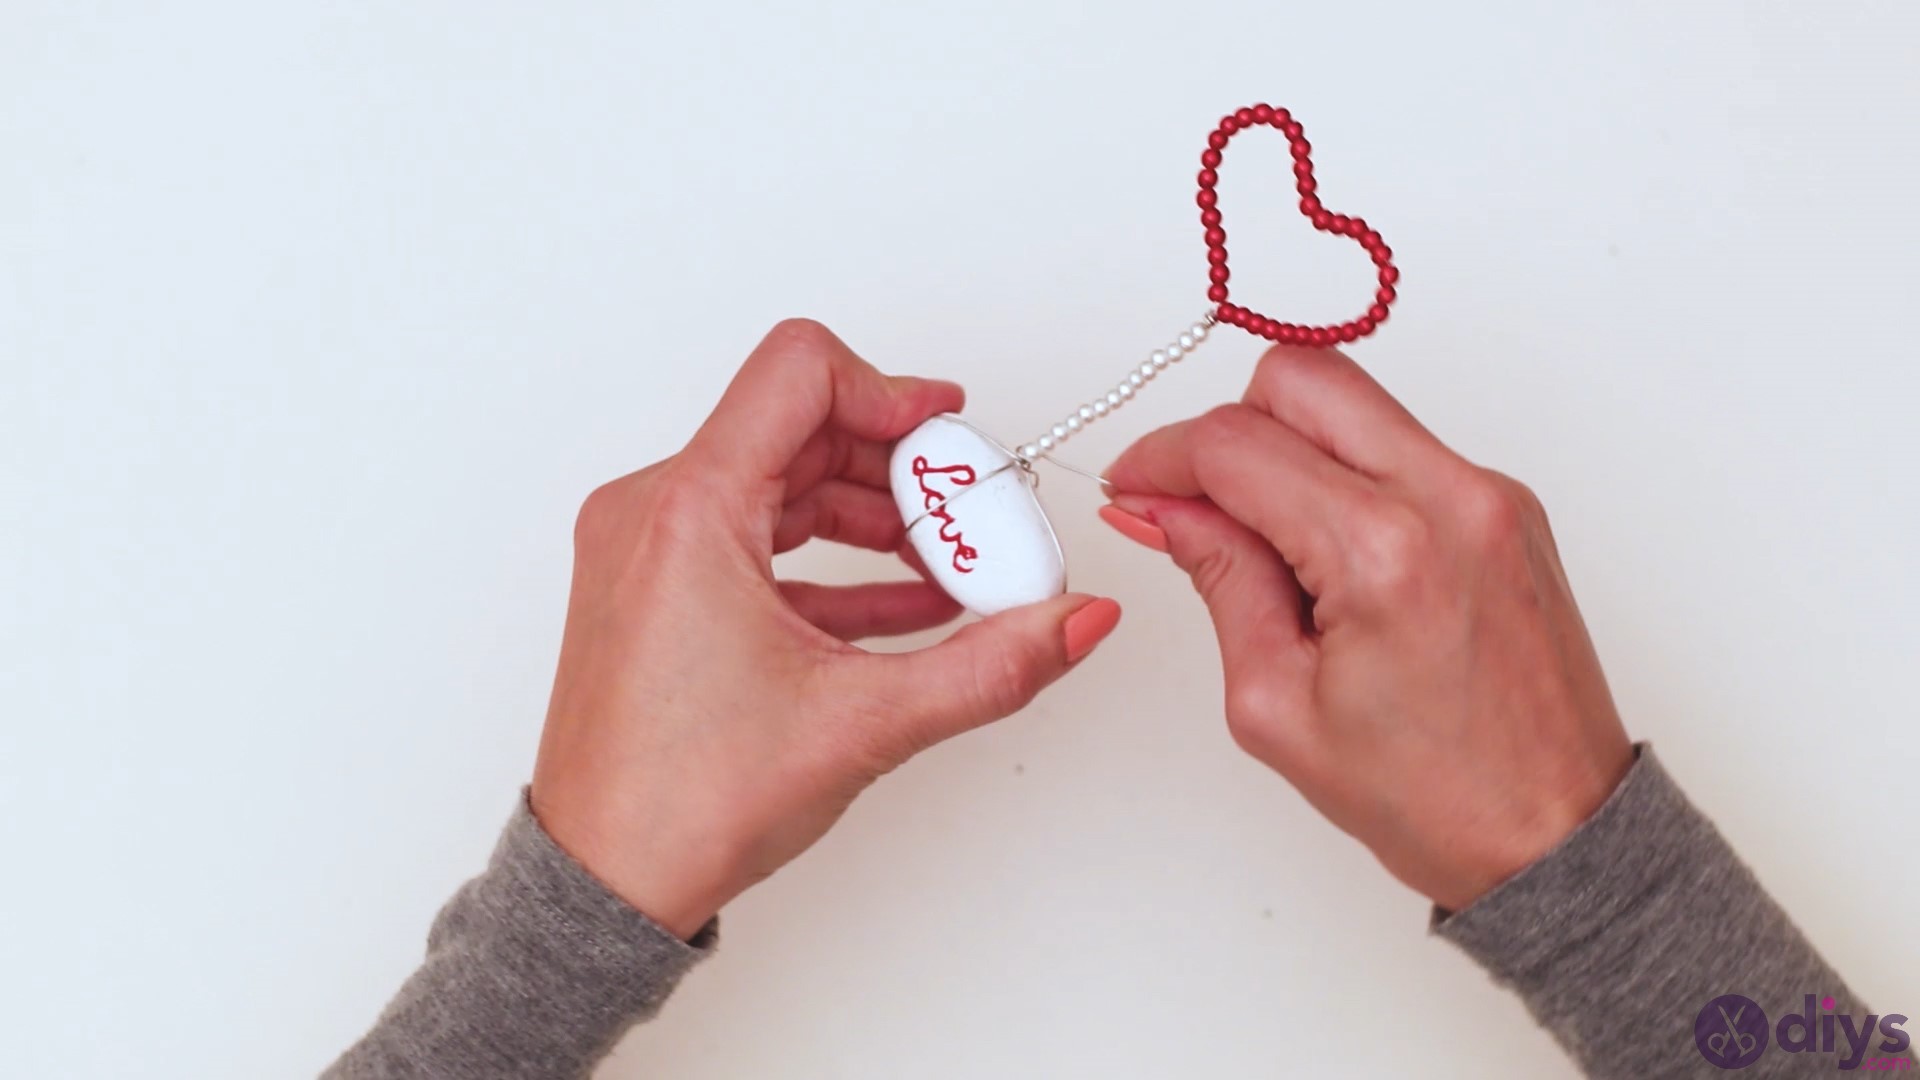
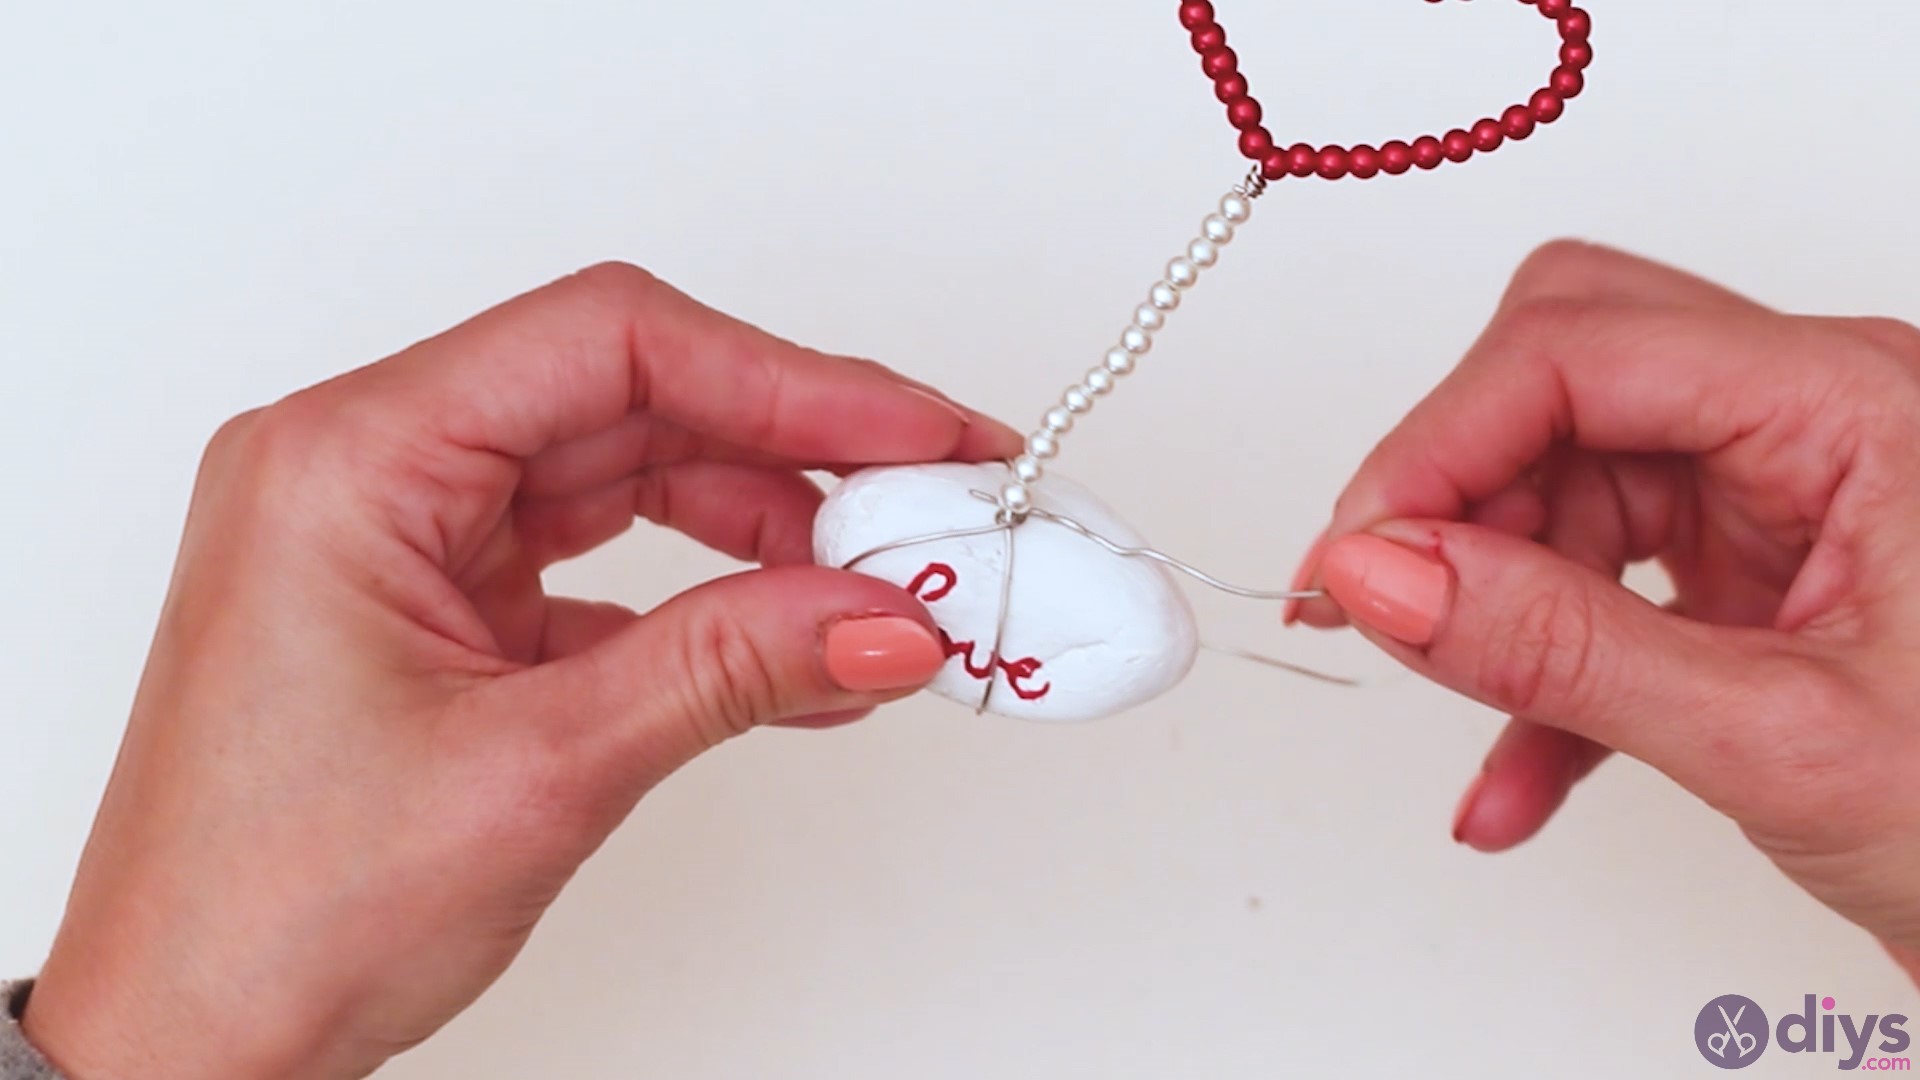
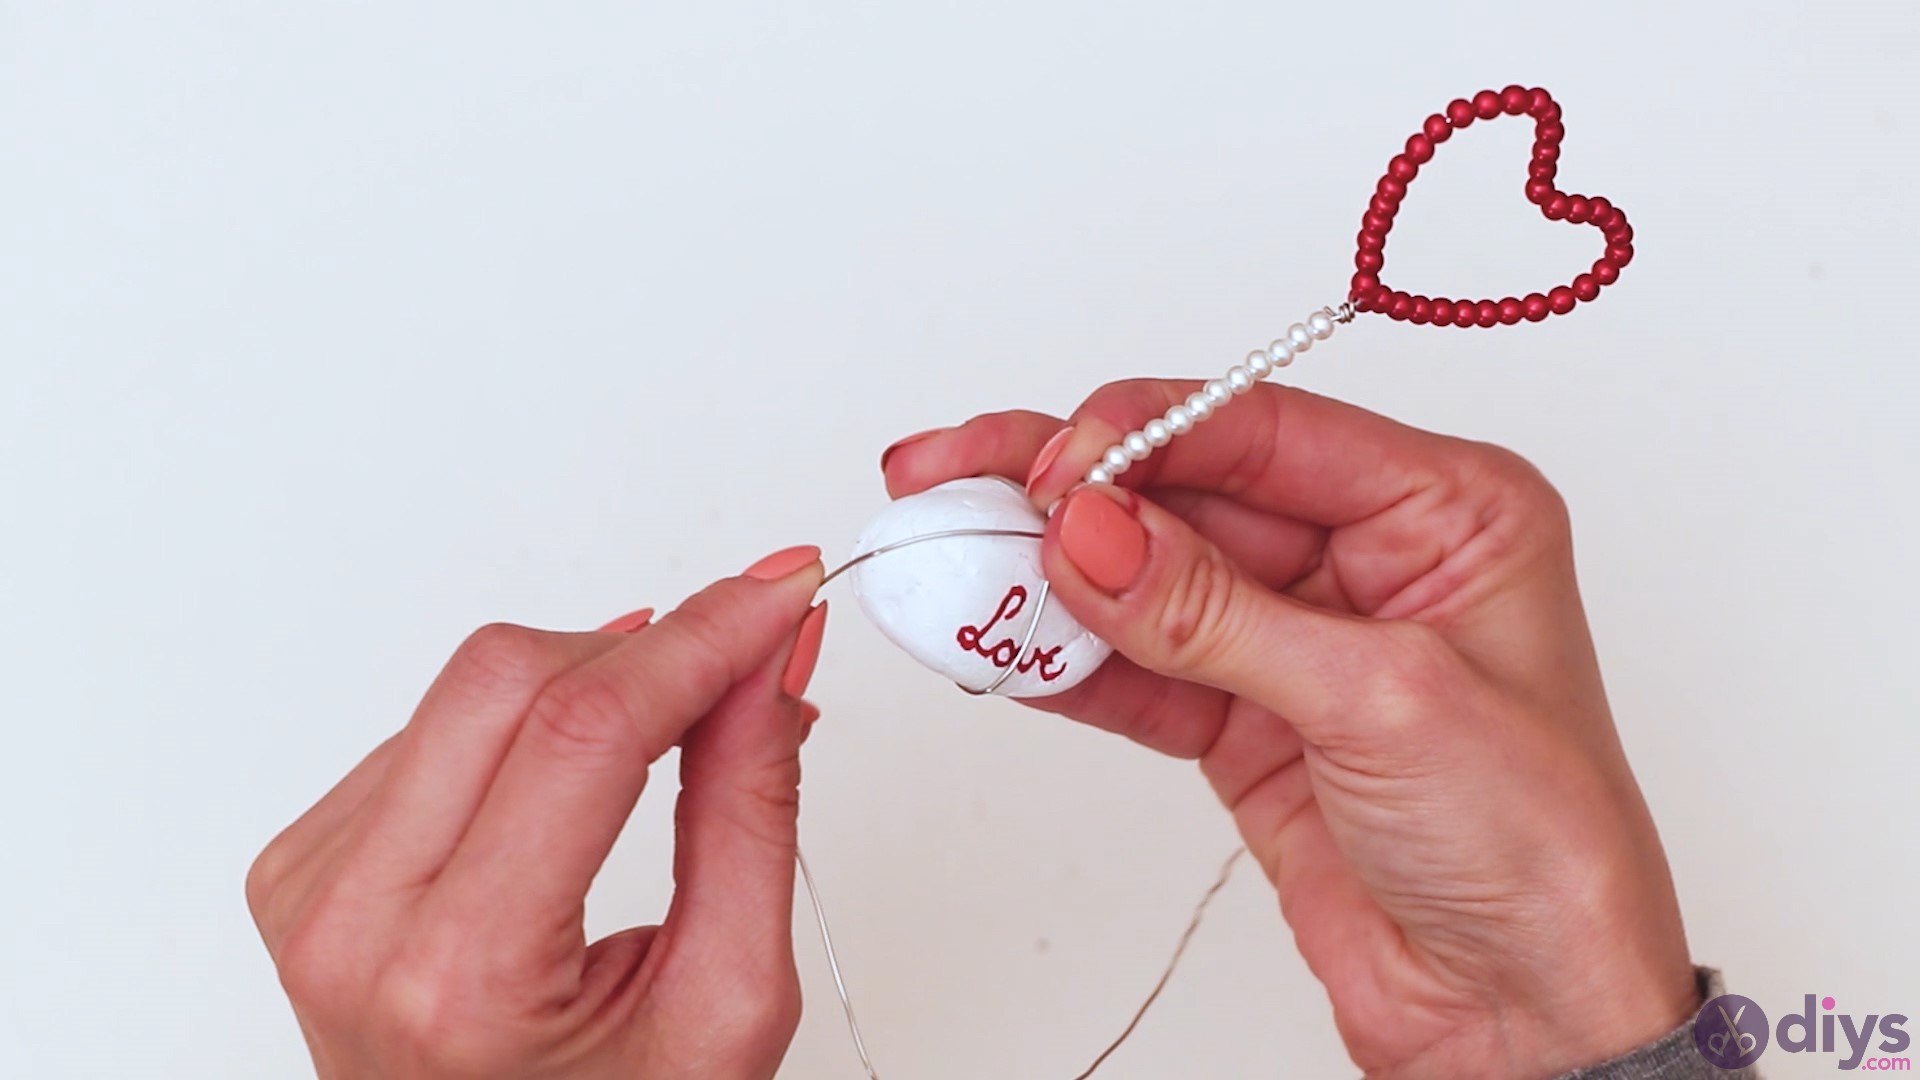
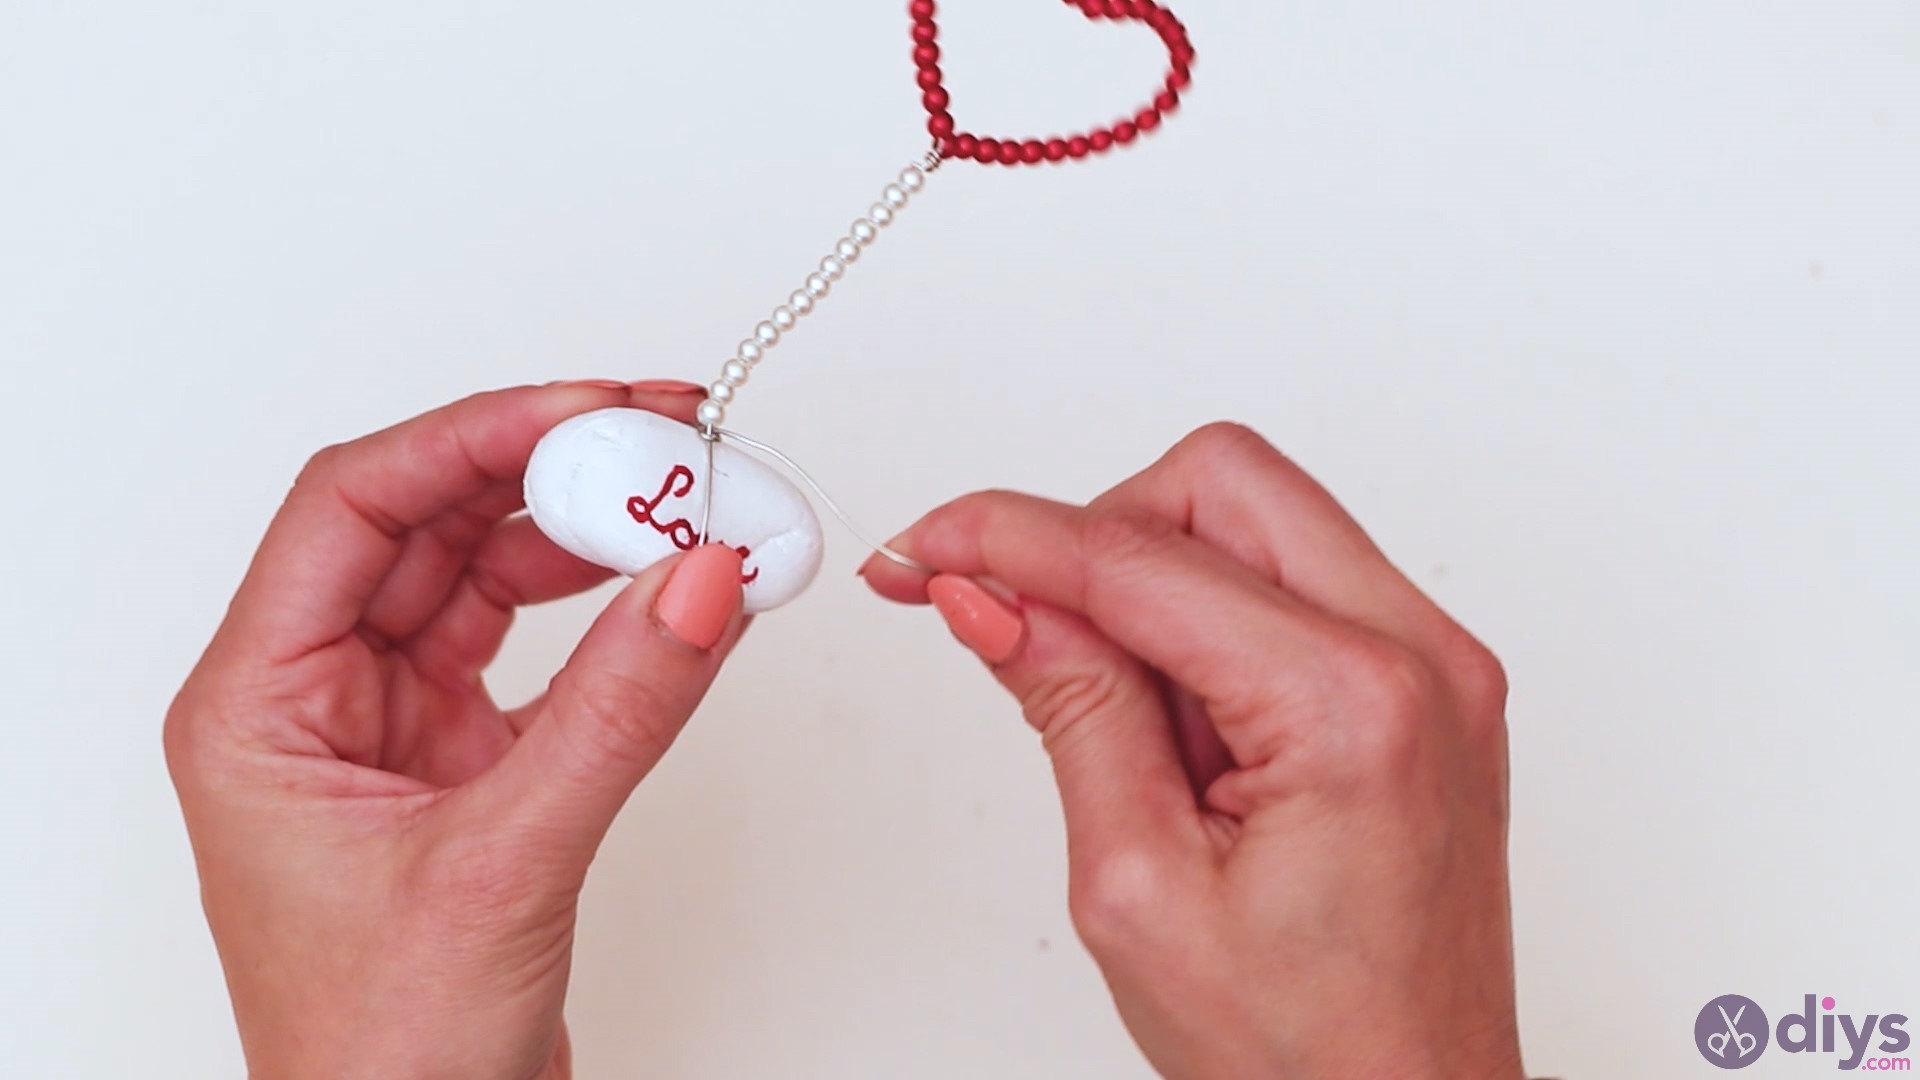
- Attach the heart to the rock: Wrap the unbeaded end of the jewelry wire around the stone. When the longer wire piece reaches back to the 0rnament’s base (where the beads start), twist the wire. Make a couple of loops around the bottom and turn the piece upright so you can read the sign.
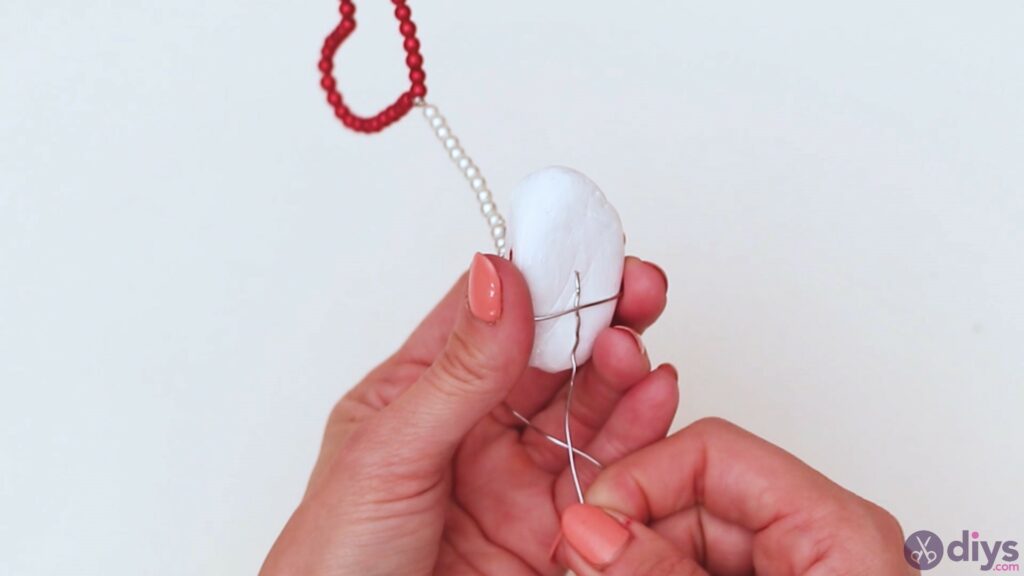
- Secure the decoration: While making the second loop, extend the wire to the right and wrap it around the rock again. Pass the wire’s tip underneath the first loop around the stone, pulling the whole thing through. When you reach back to the top, push the wire underneath the rest of the wires. Pull the entire length of wire through that spot and start looping the wire around the base.
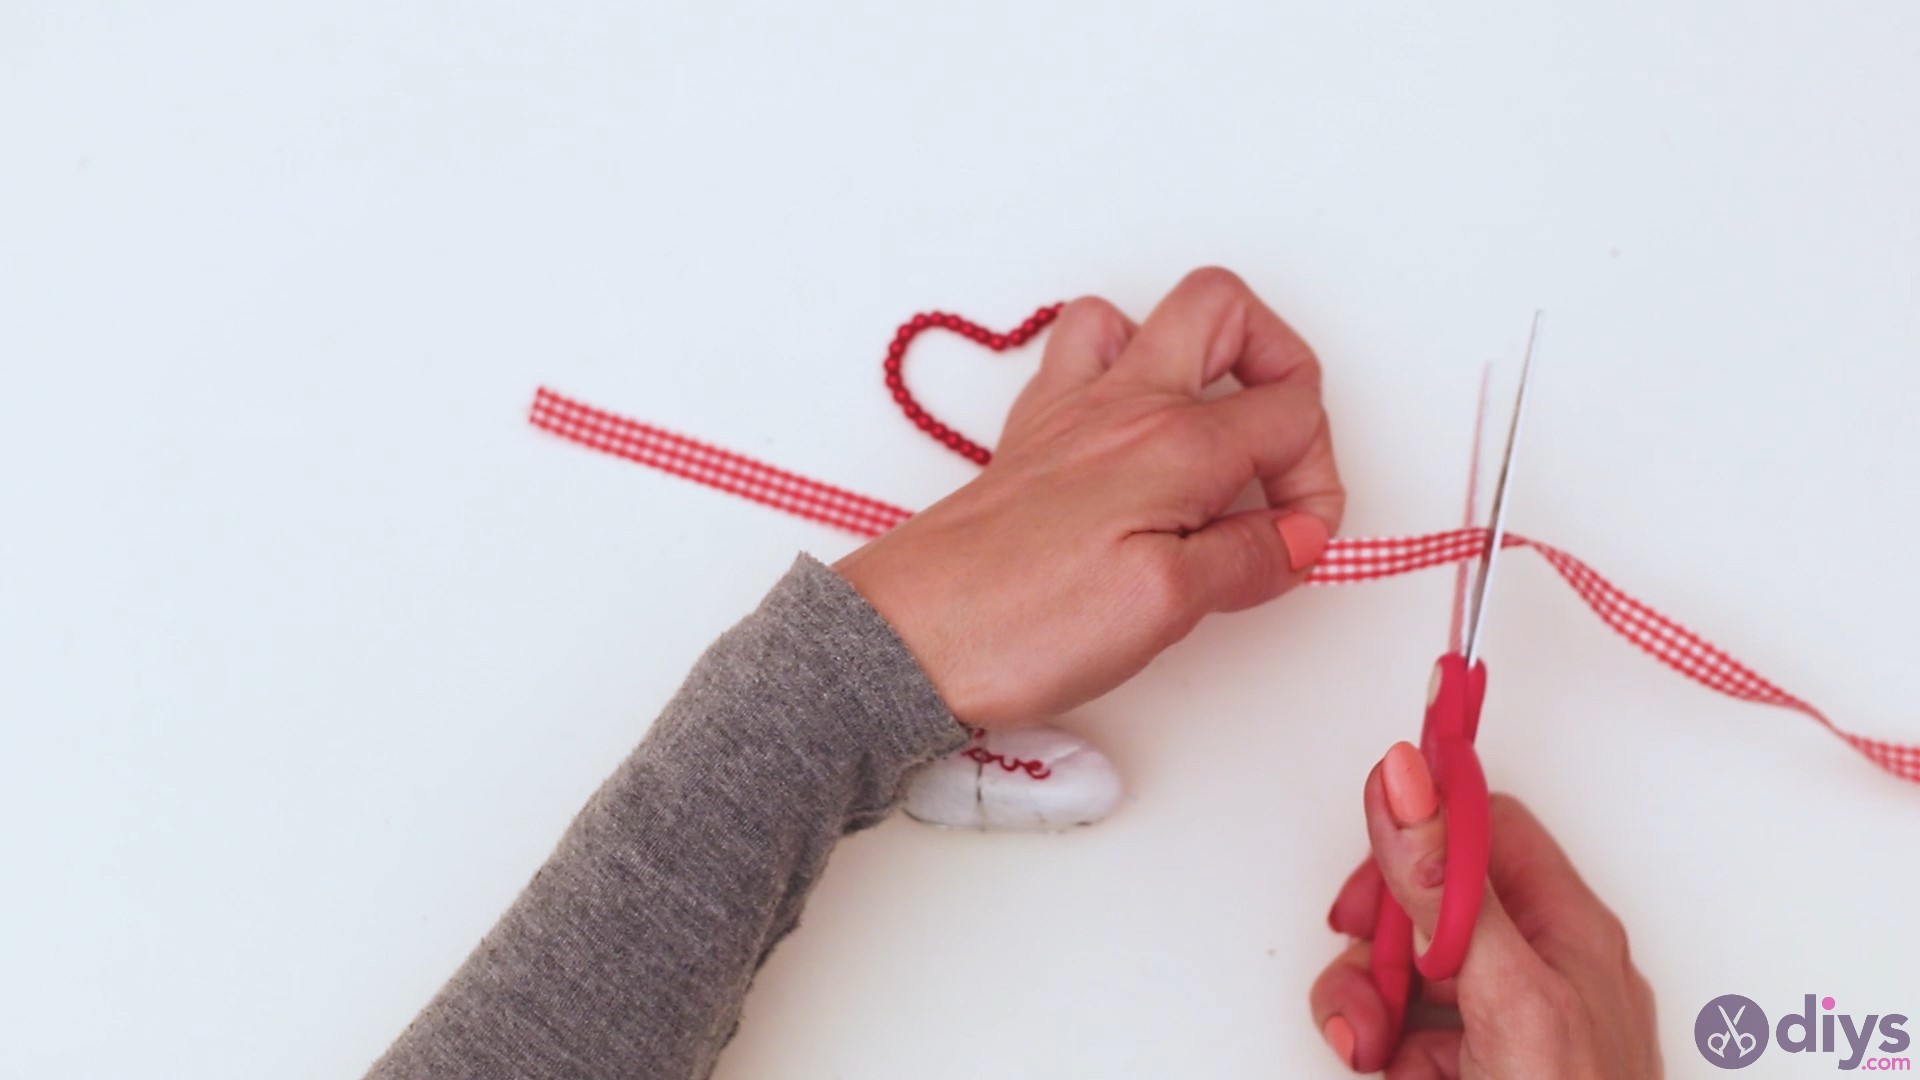
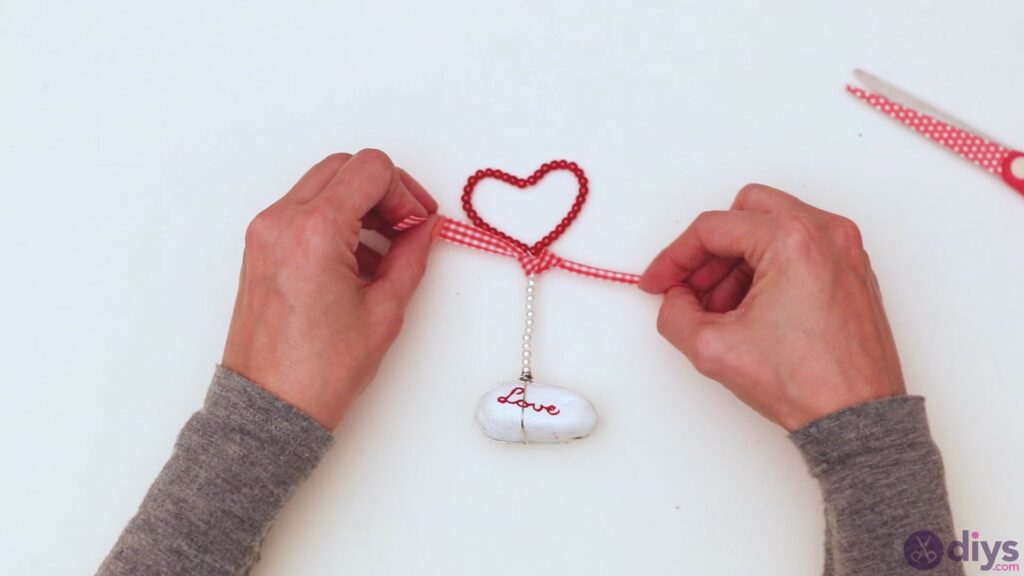
- Add the finishing touches: Cut about 7-8 in (18-20 cm) of ribbon and tie it around the base of the heart to make a bow. Alternatively, wrap the bow around the hanger’s base, where you made a coil near the rock; this will help cover it up and give the decoration a more polished look. Your lovely DIY heart decoration is now complete!


Video guide
Here’s a short video that teaches you how to craft a DIY lovely heart decoration for Valentine’s Day:
More tips and tricks
Check out our tips and tricks for improving or modifying the DIY lovely heart decoration:
- Use naturally white rocks: Skip the rock painting part by using naturally white stones, like the marbled ones found near rivers.
- Make it your own: Personalizing your heart decoration is the best way to make it truly special. Try adding different colors of beads, writing a monogram of your recipient’s initials, or even using glitter paint.
- Create symmetry: When adding red beads to the heart portion of the wire, we suggest counting the ones added to the middle point and adding the same number to the other half of the heart.
- Practice your cursive: Practice writing a few times on paper before transferring your design to a rock.
- Choose a different shape: Instead of a heart, create a different shape using the wire and beads. For example, make a triangle with green beads to craft a modern Christmas tree.
Closing thoughts
Crafting this DIY lovely heart decoration takes little time since it’s a beginner-friendly project. More so, it’s a cutesy gift for Valentine’s Day. Whether the recipient will use it as a paperweight, a tiny centerpiece, or even a keychain charm, it’s a great way to show someone you care. For more similar ideas ideas, check out these Valentine’s Day crafts.