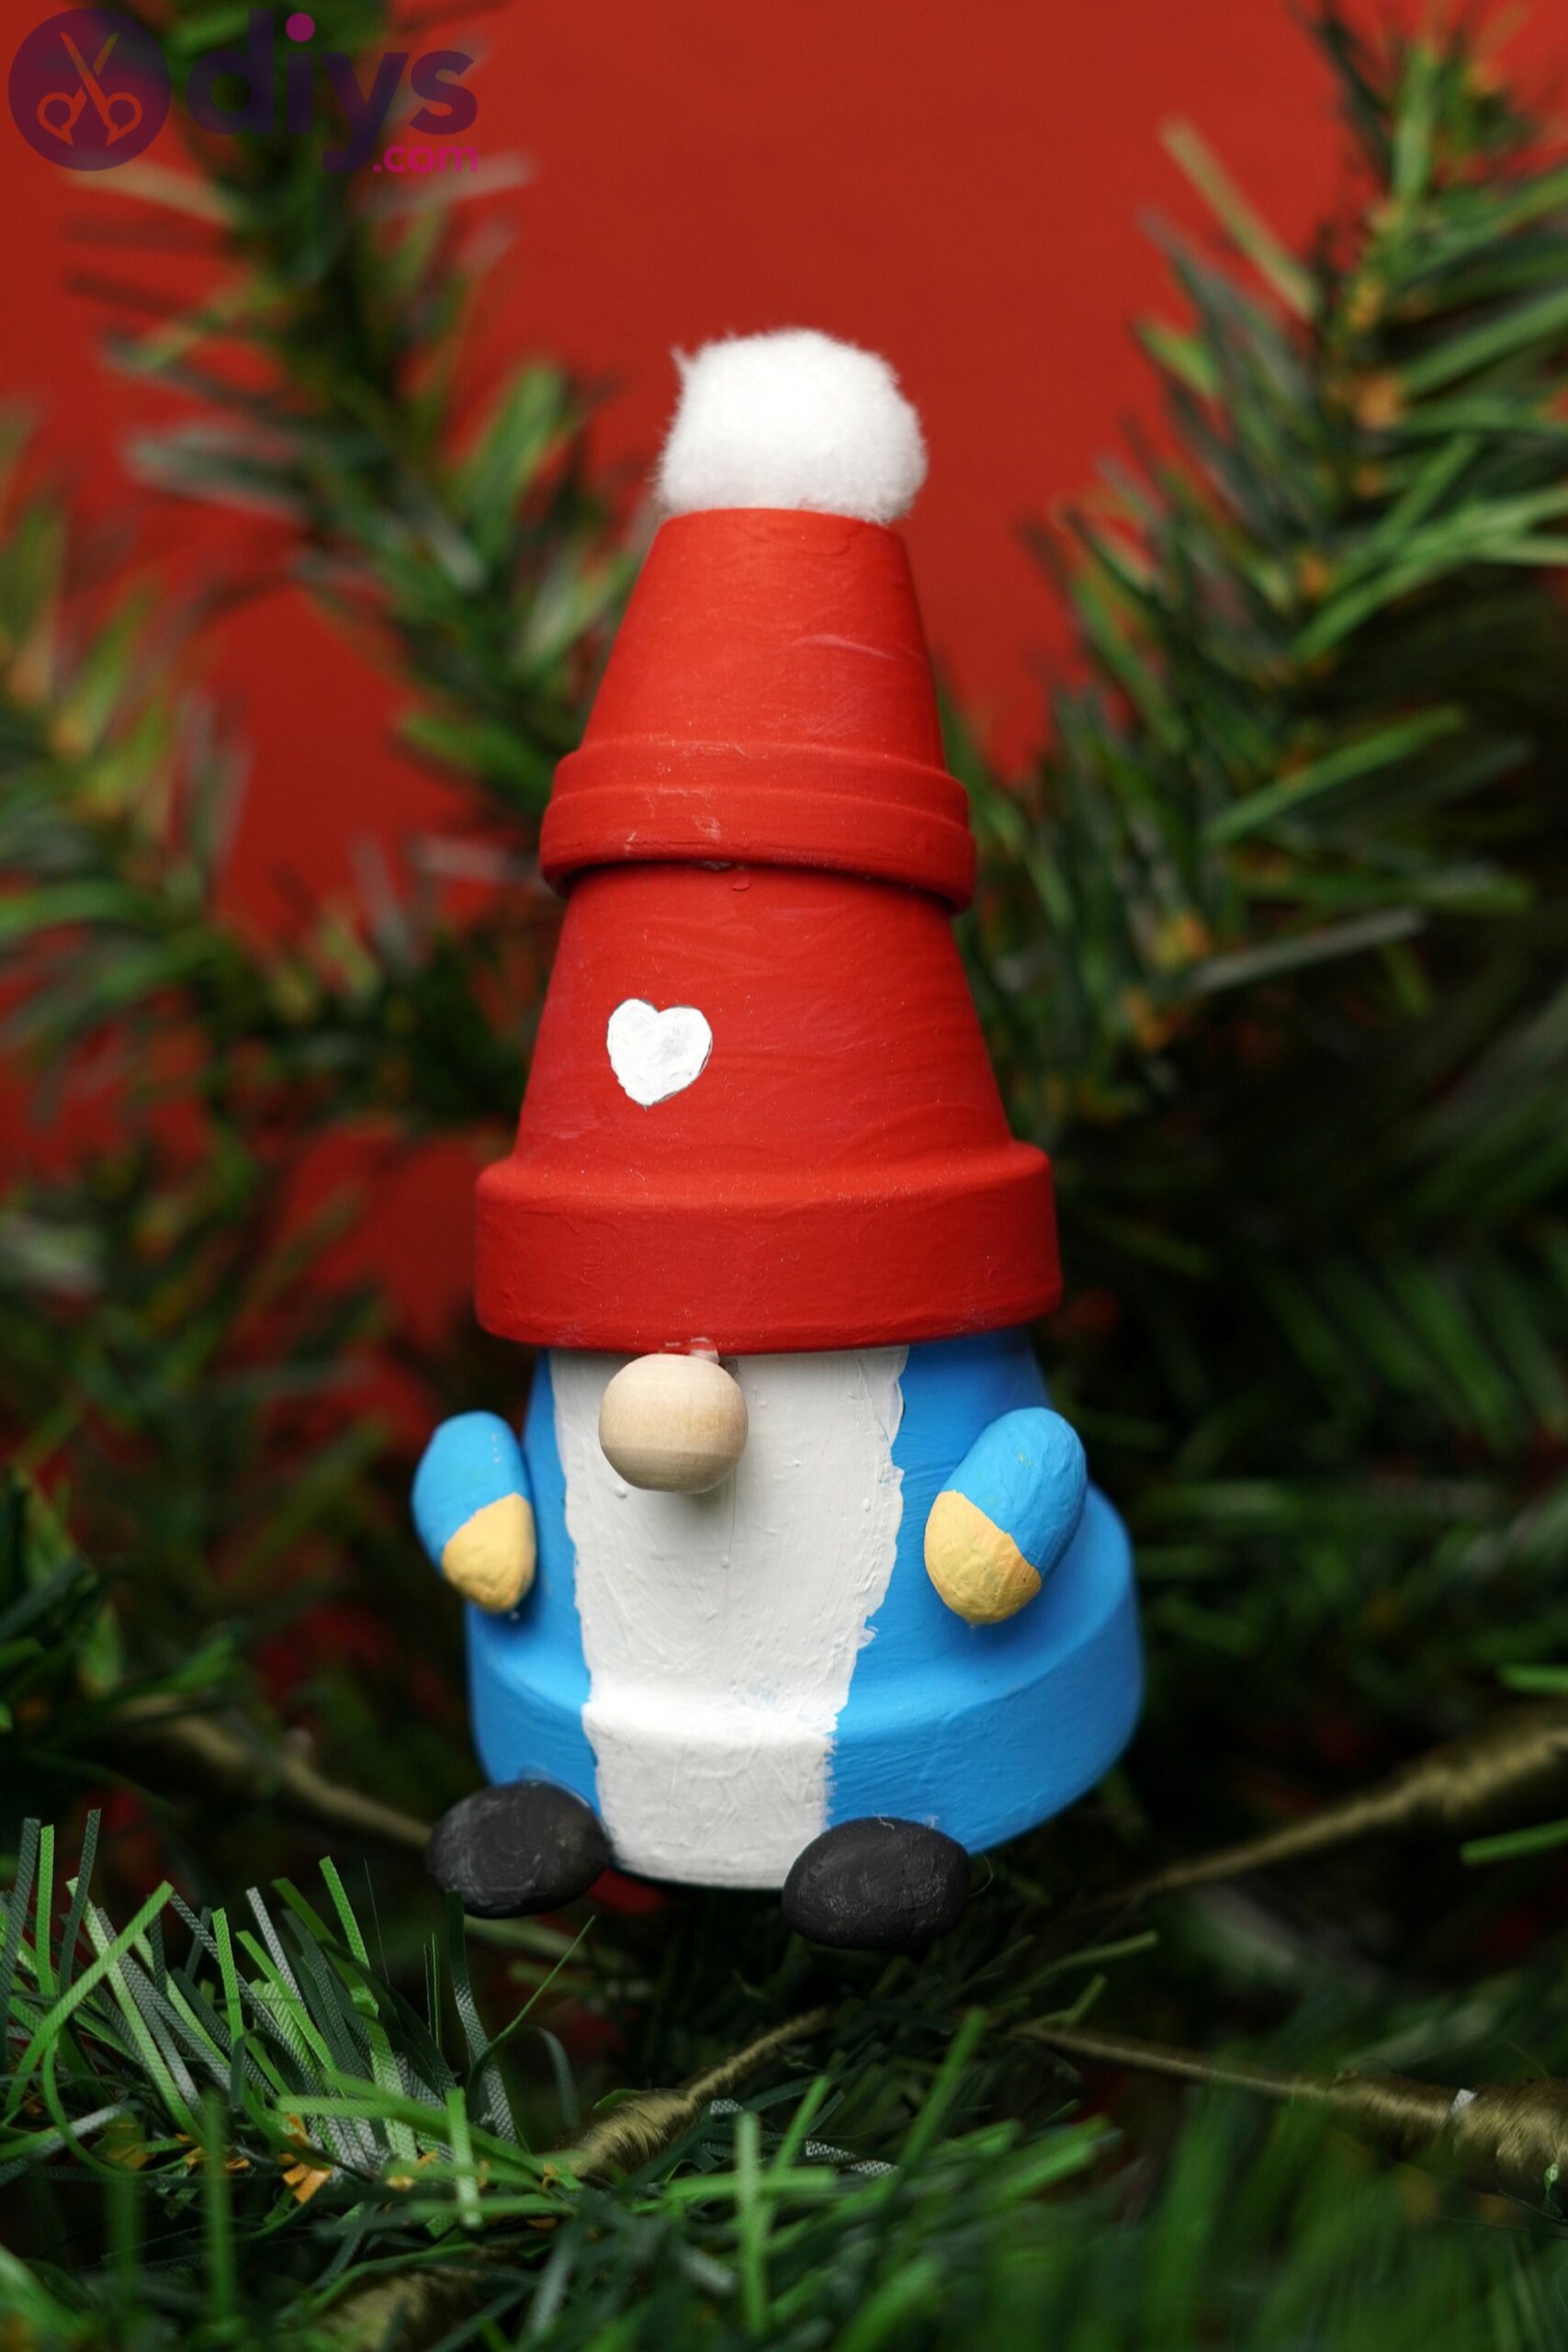
DIY Garden Pot Gnome – How to Make a Cute Companion for Your Flowers
Updated on November 19, 2025


Garden gnomes are absolutely adorable and you can make your own with very little effort and a little bit of creativity. We’re going to help you make one for yourself or to gift to friends and family.

We’re going to help you step by step to create one of these adorable little fellows – a garden pot gnome you can put on your shelf, in the garden or anywhere else you feel like.
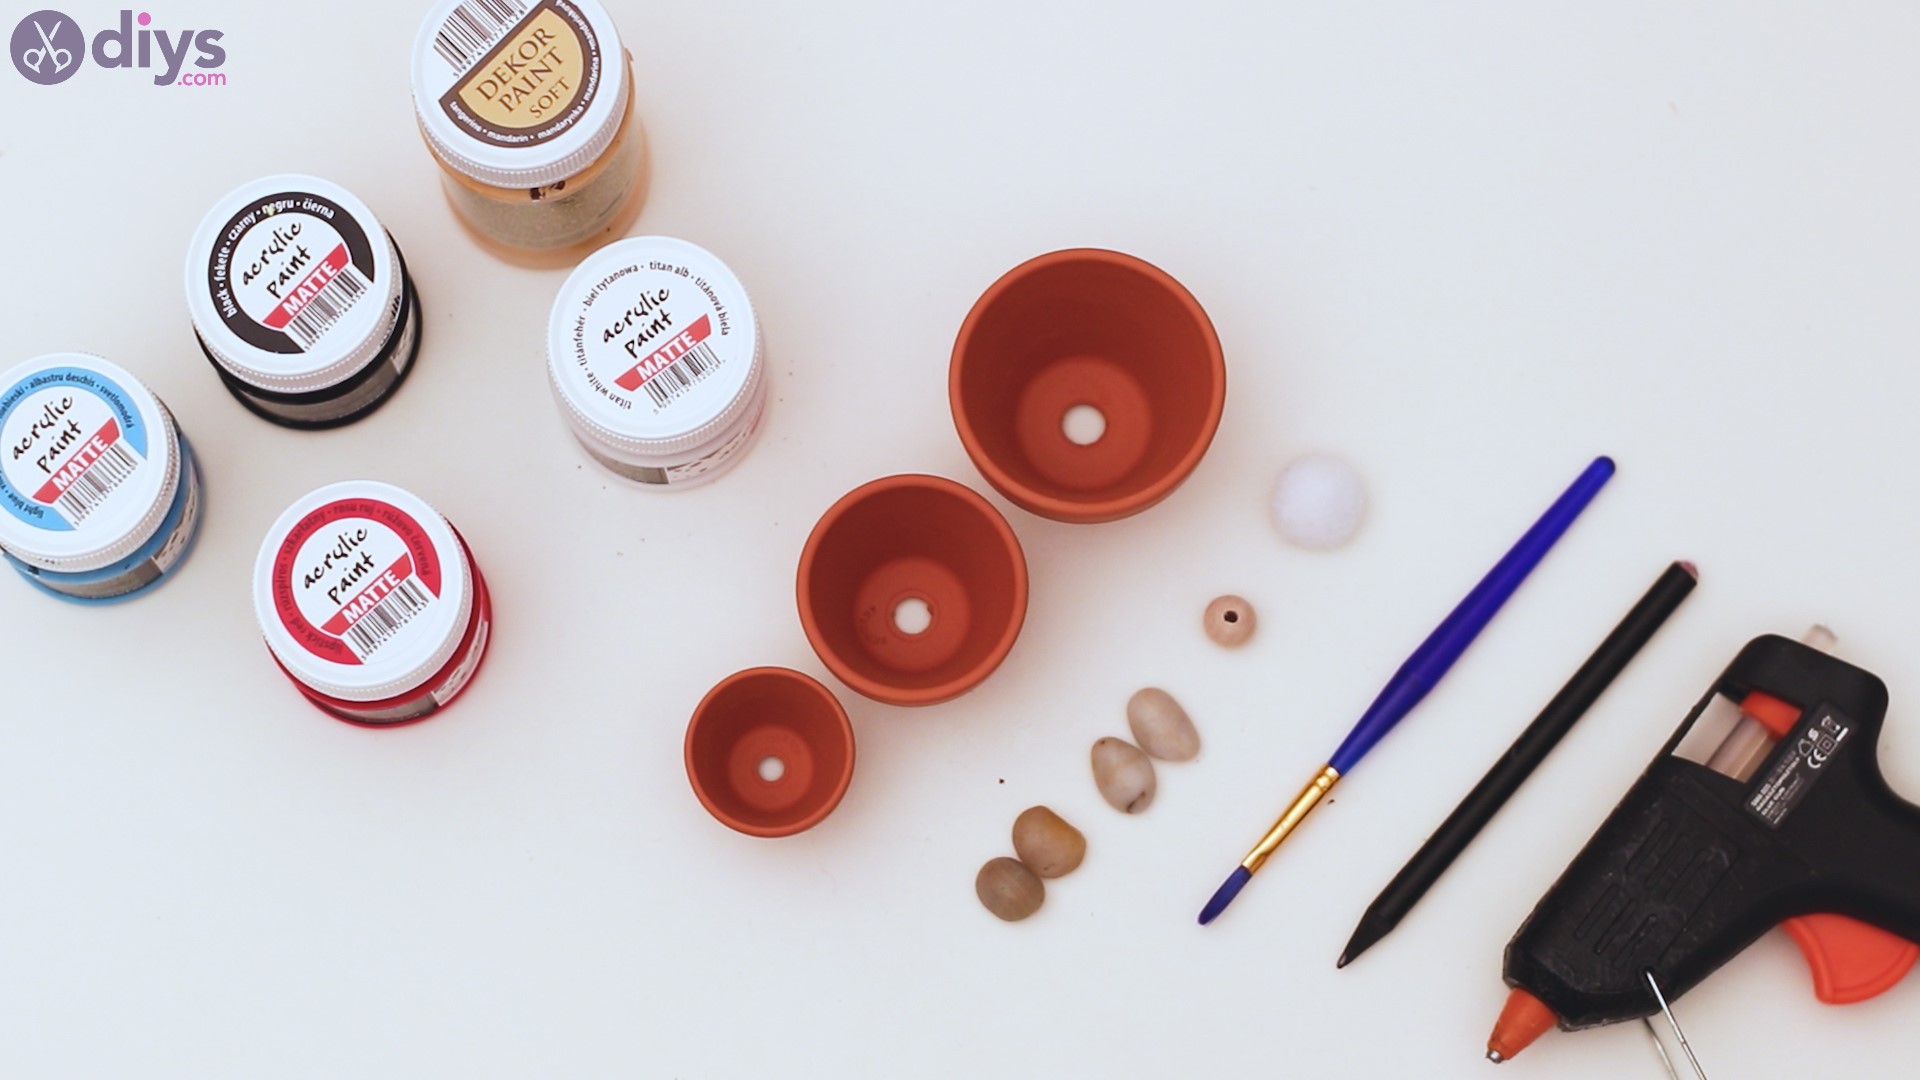
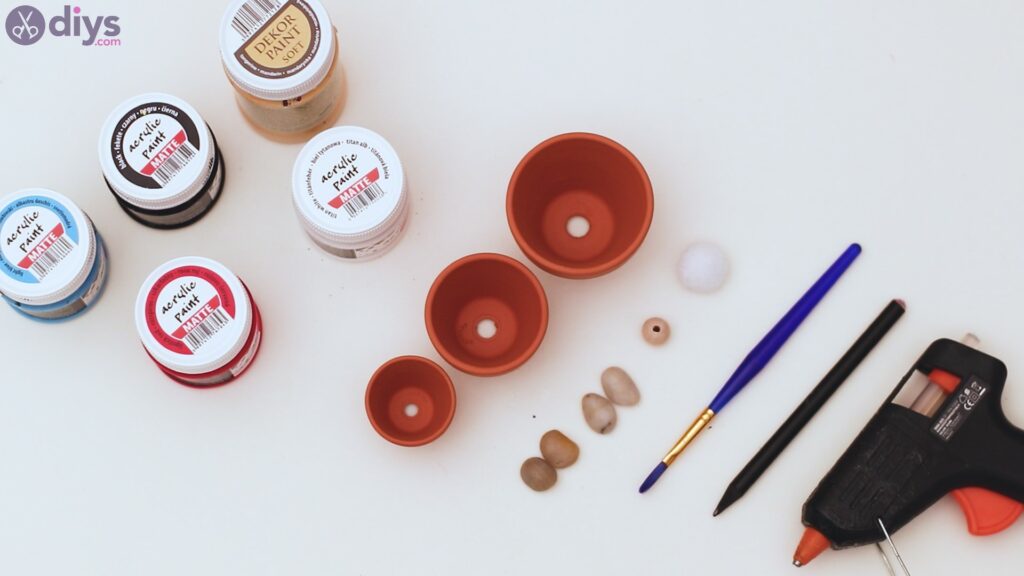
Materials for garden pot gnome
- 3 pots – different sizes
- acrylic paint – red, blue, black, beige, white
- small rocks
- small wooden beads
- white pompon
- paintbrush
- pencil
- glue gun
How to make garden pot gnome
Let’s figure out how to make this garden pot gnome. Did you get all the materials? You don’t want to go running around trying to find various materials you forgot. So just get everything you need from the start and begin your project.
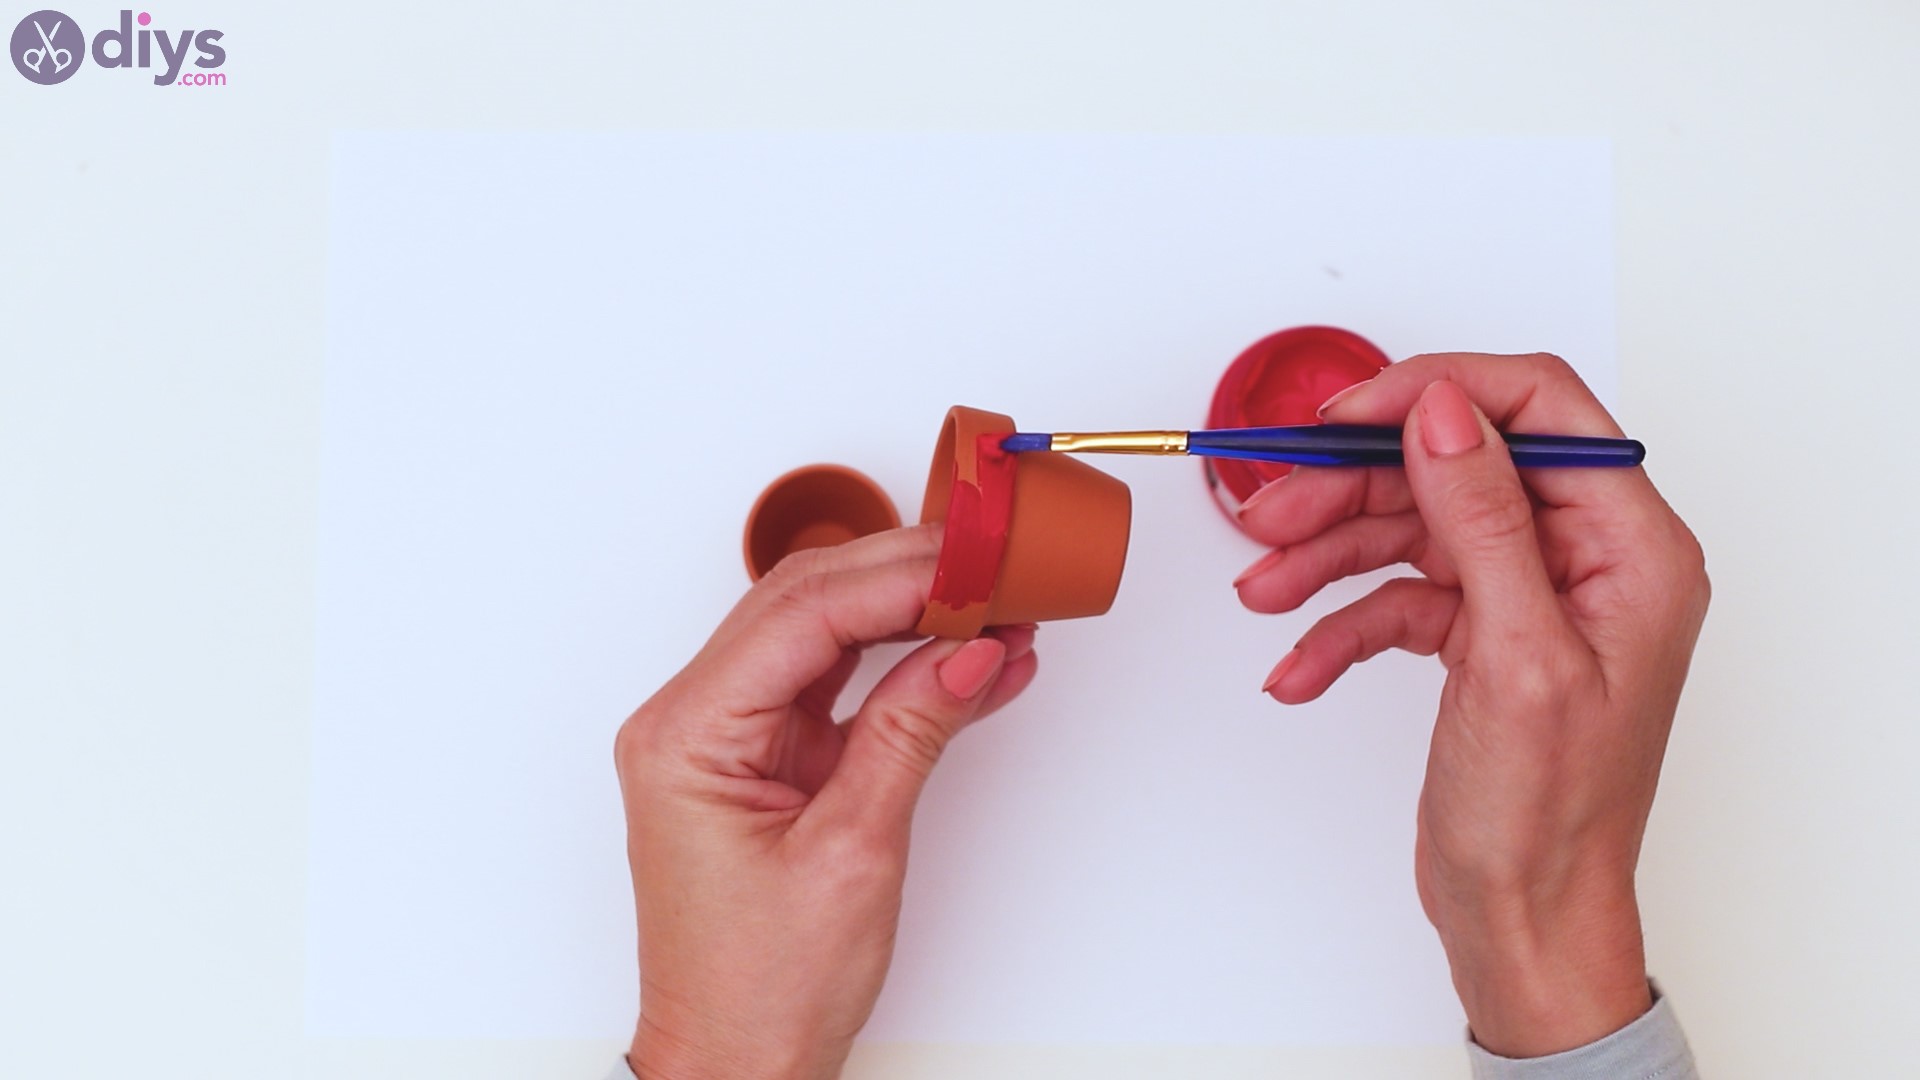
Step 1: Paint the smallest pots
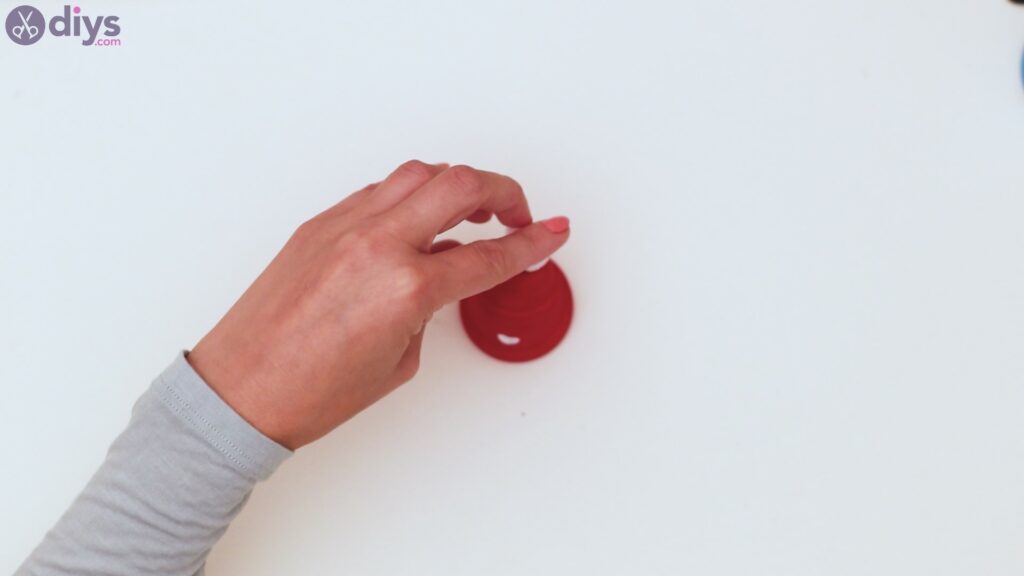
Get the smallest two pots and the red acrylic paint and your paintbrush. Paint the pots with red paint and cover the entire area. The acrylic paint will dry up pretty fast but set it aside to dry on a piece of paper anyway.


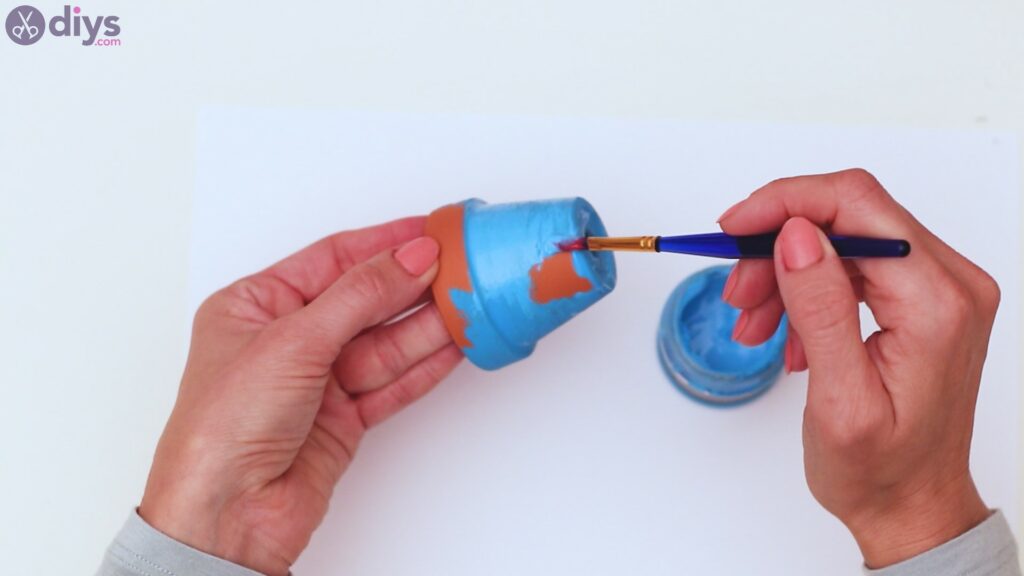
Step 2: Paint the large pot
Get the blue acrylic paint and the paintbrush and start laying down the color over the largest pot. Once you’re done, set the pot aside and allow it to dry.
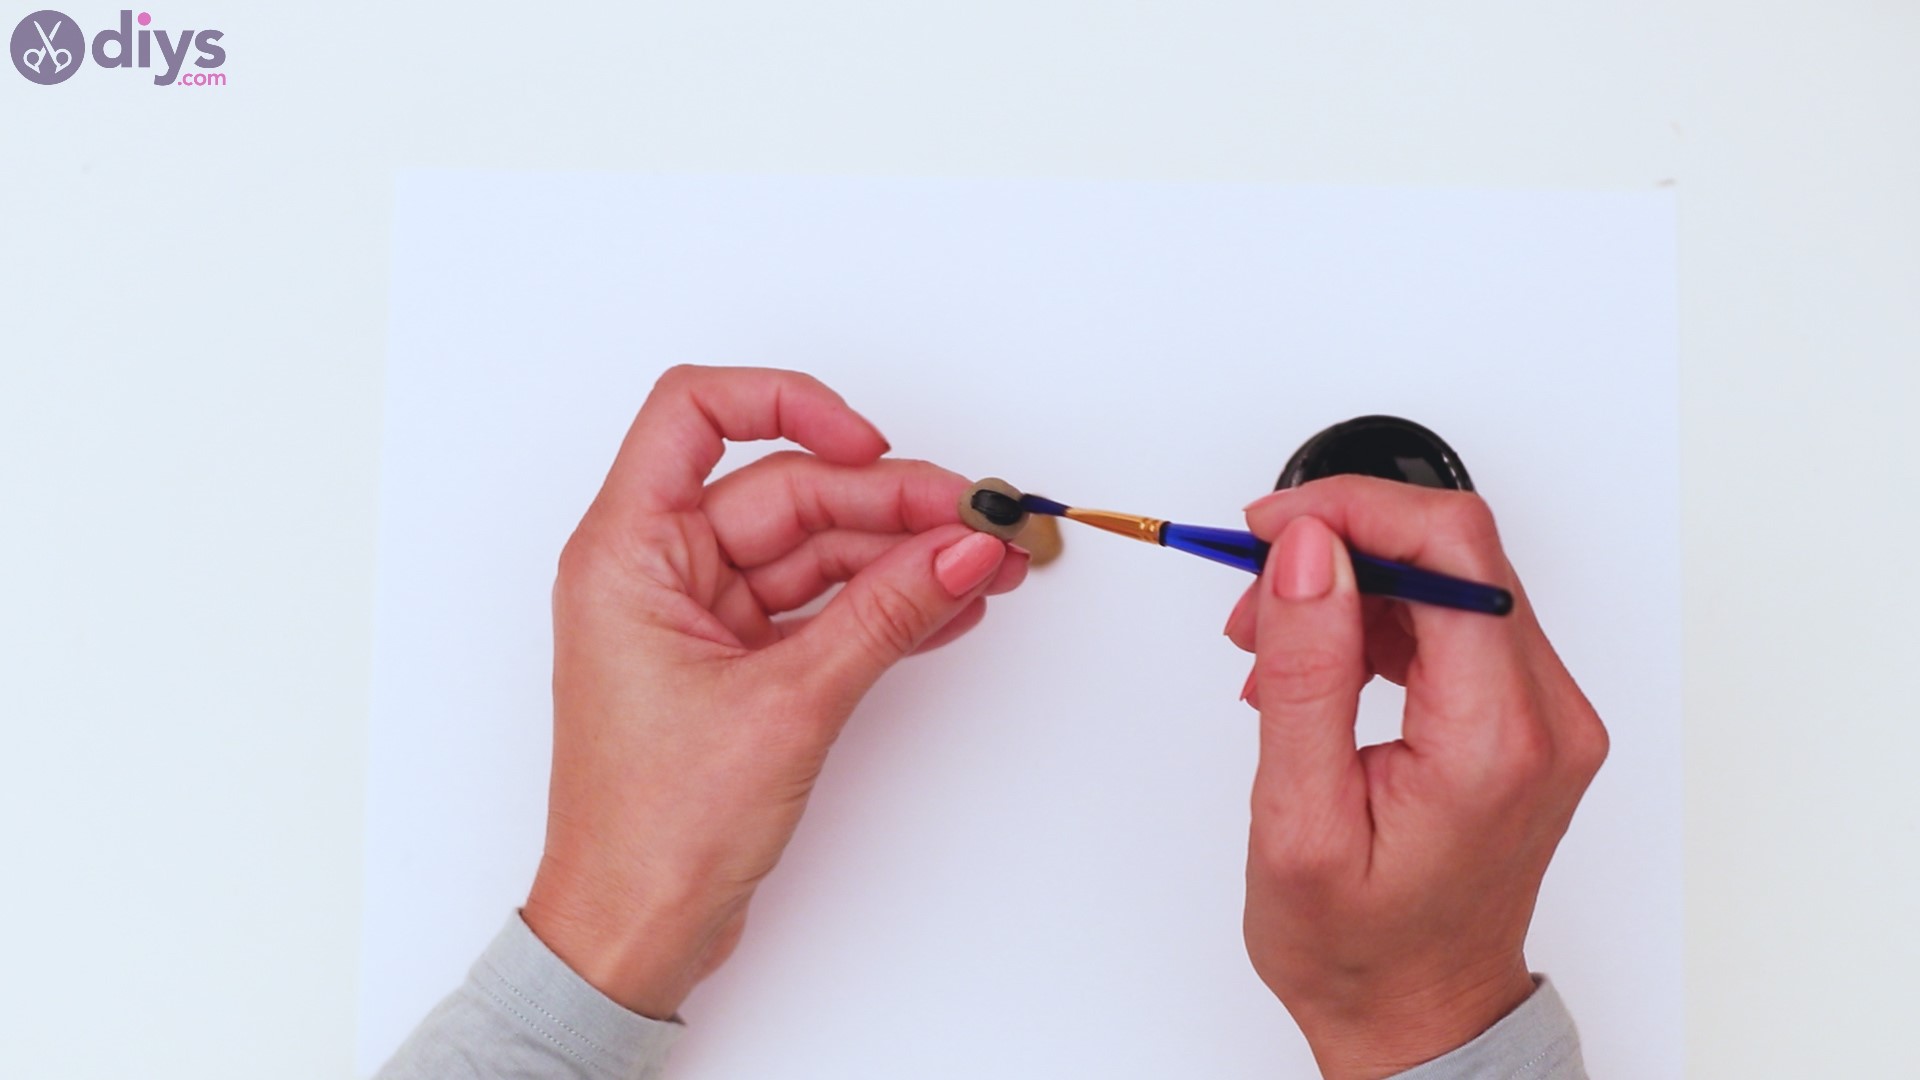
Step 3: Paint the pebbles
Now that all your pots are set aside to dry, it’s time you get those cute pebbles and start painting them. You want to get two of them and color them with black acrylic paint.
Related: DIY Mushroom House – How to Make a Mushroom House for Your Garden
Make sure you cover the pebbles on all sides. Set them aside to dry.
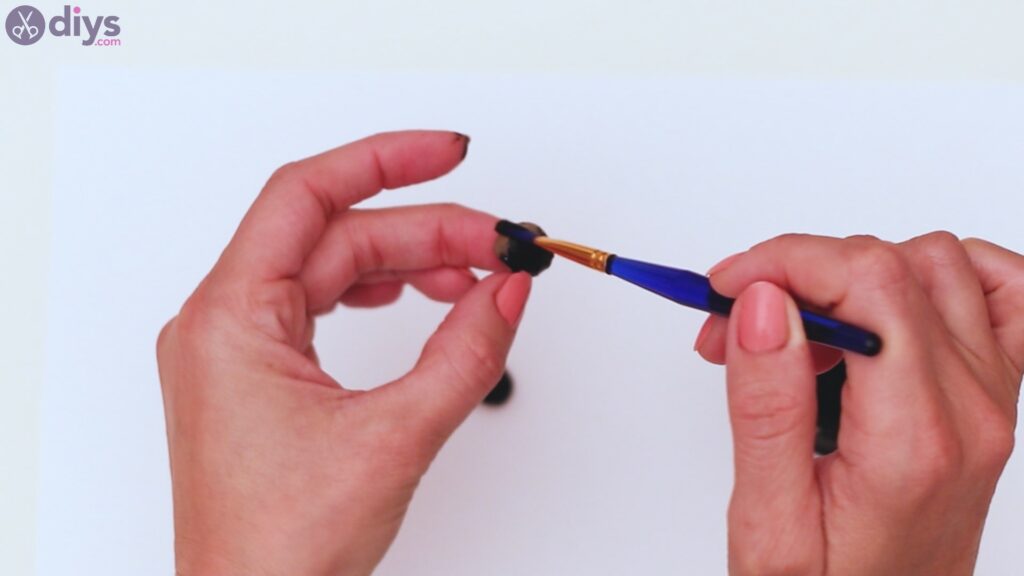
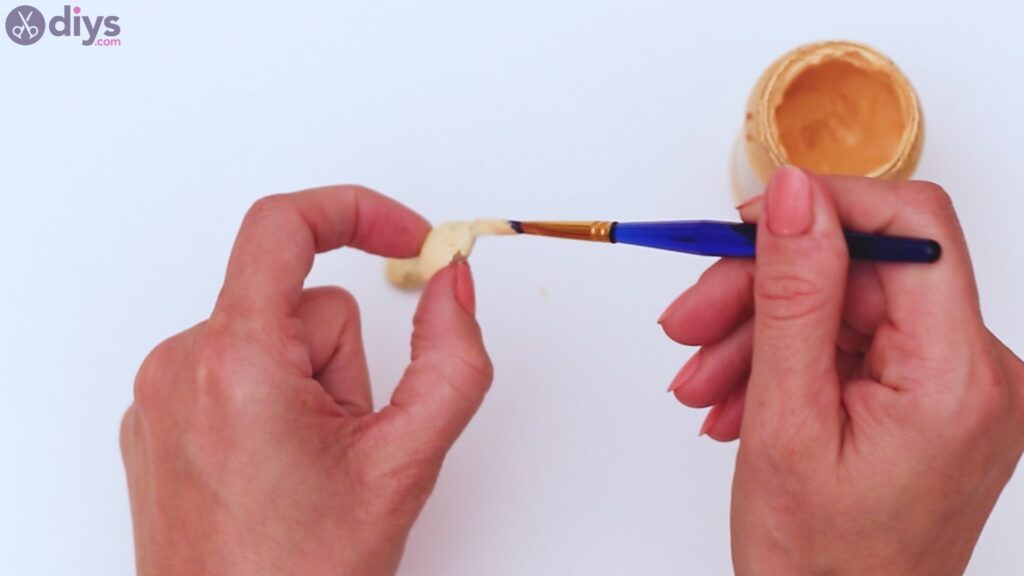
Then, get the beige acrylic paint and cover the two other pebbles. Paint them on all sides and set them aside to dry.
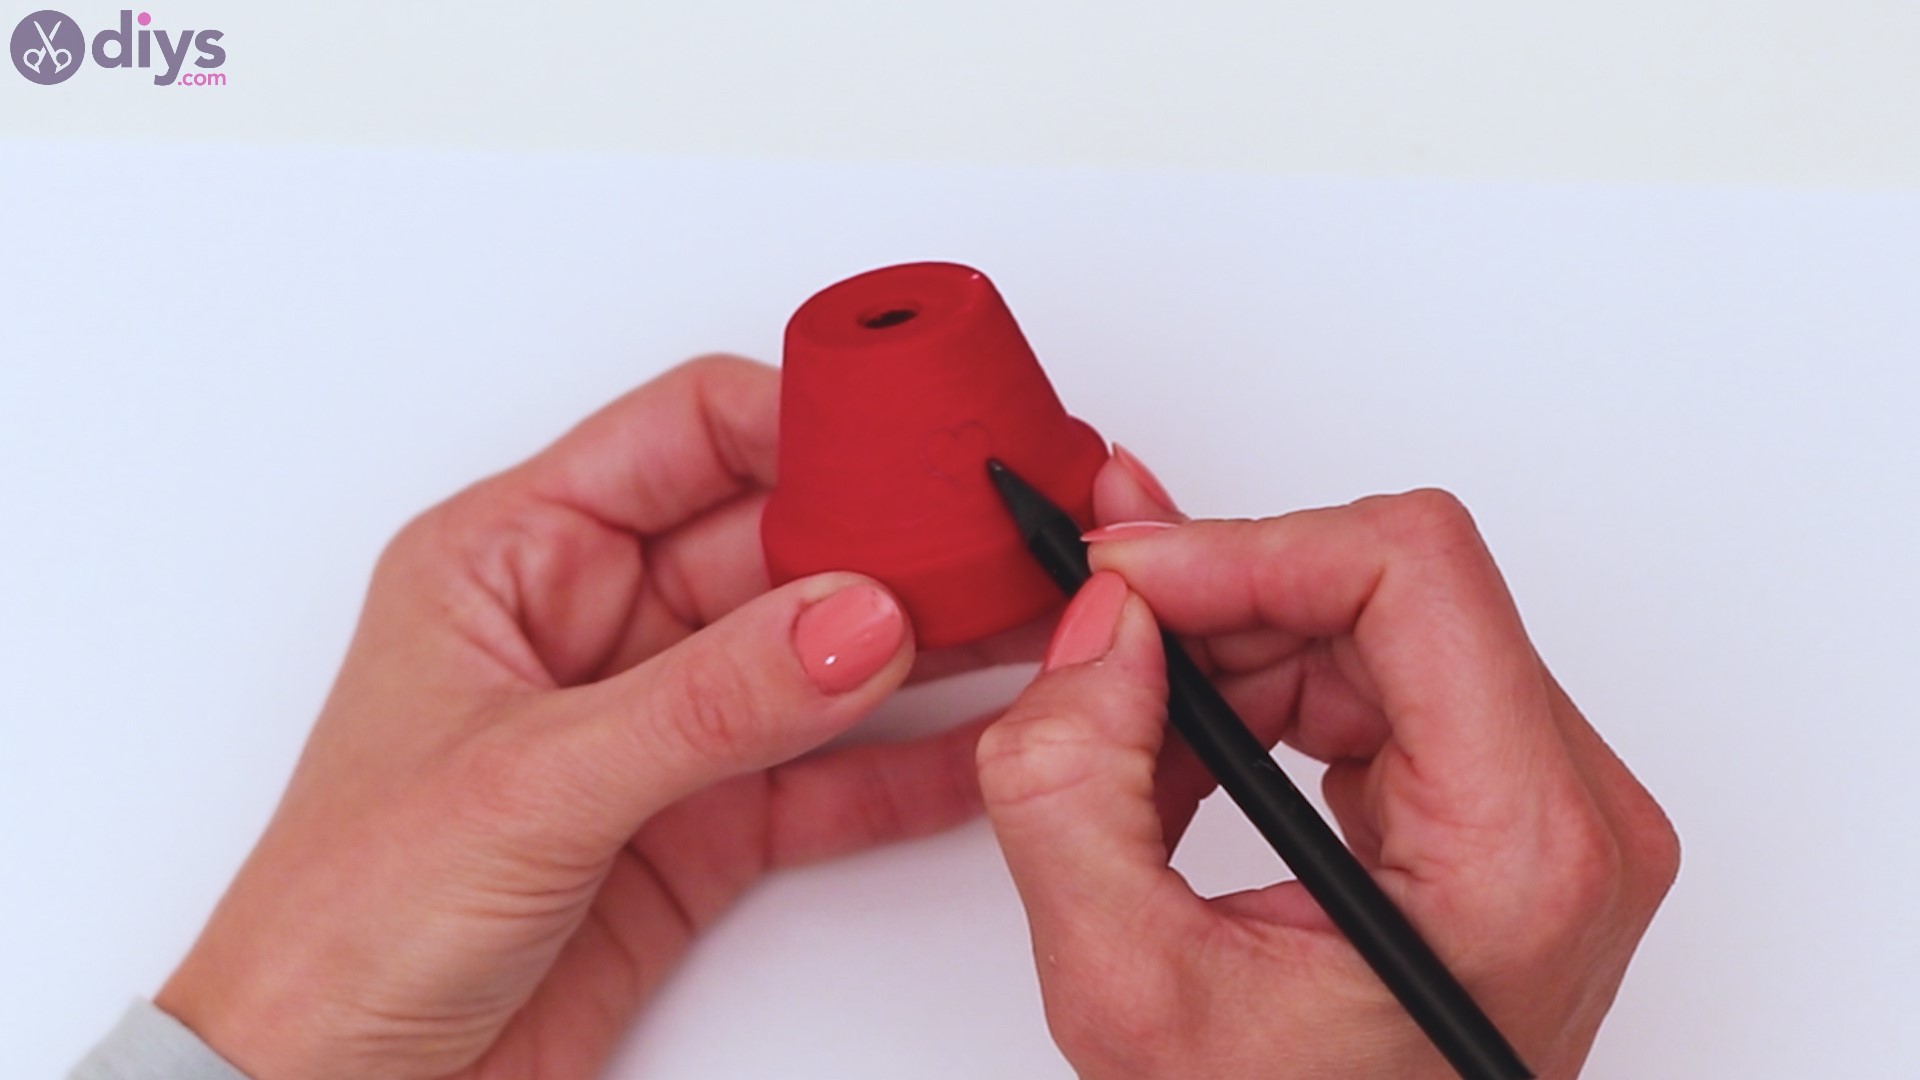
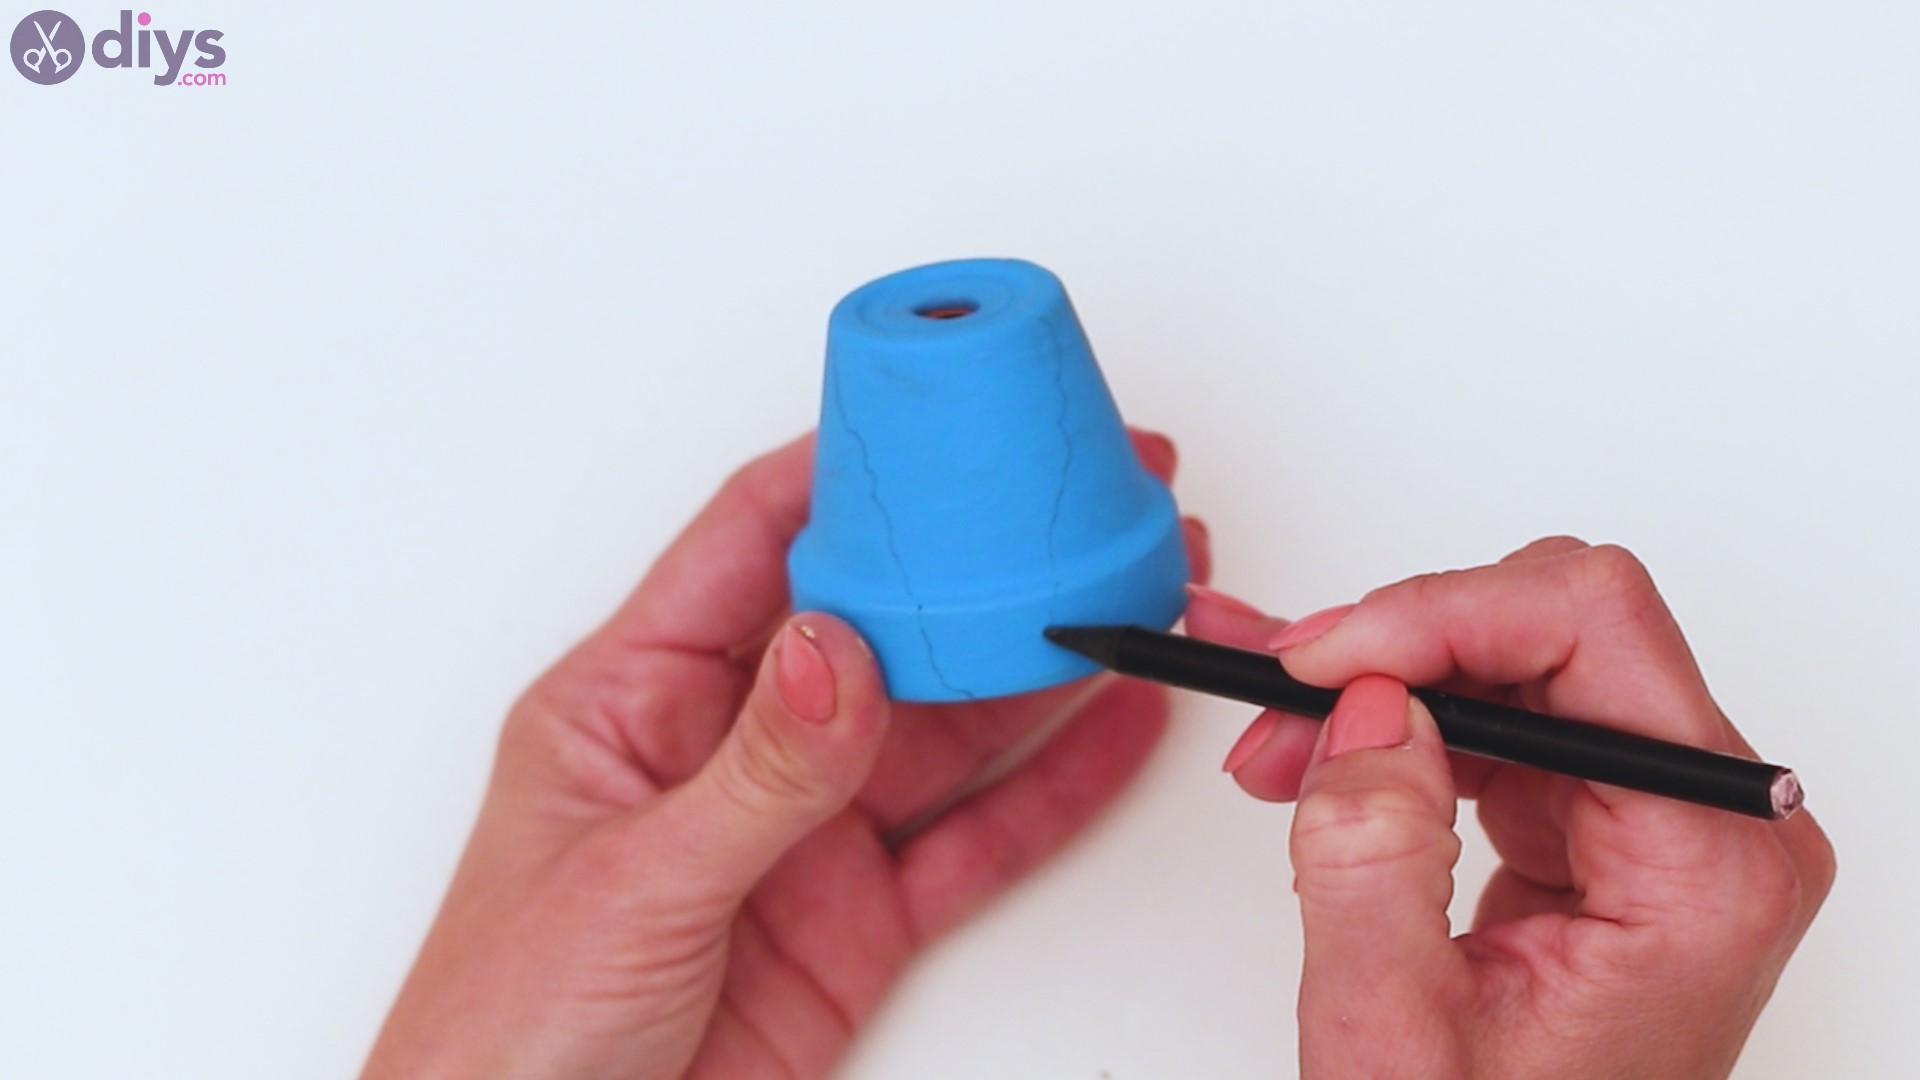
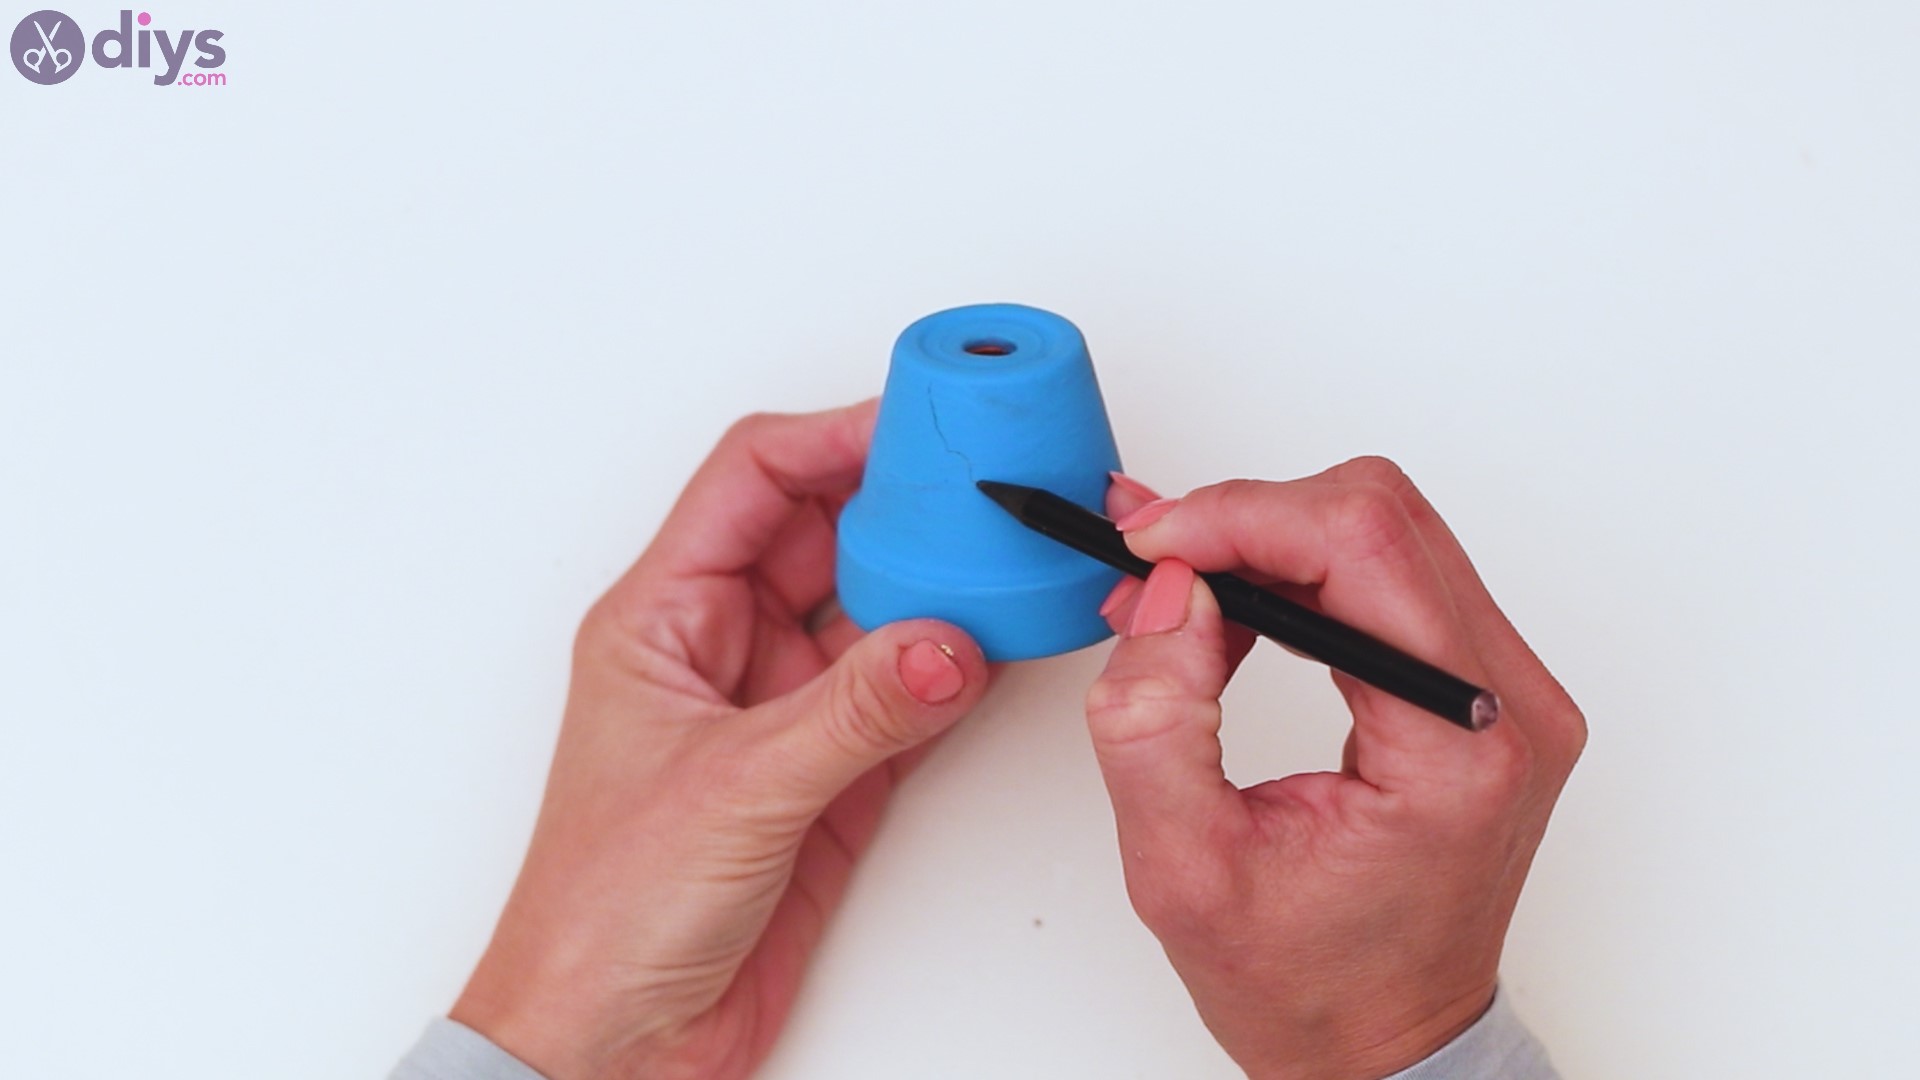
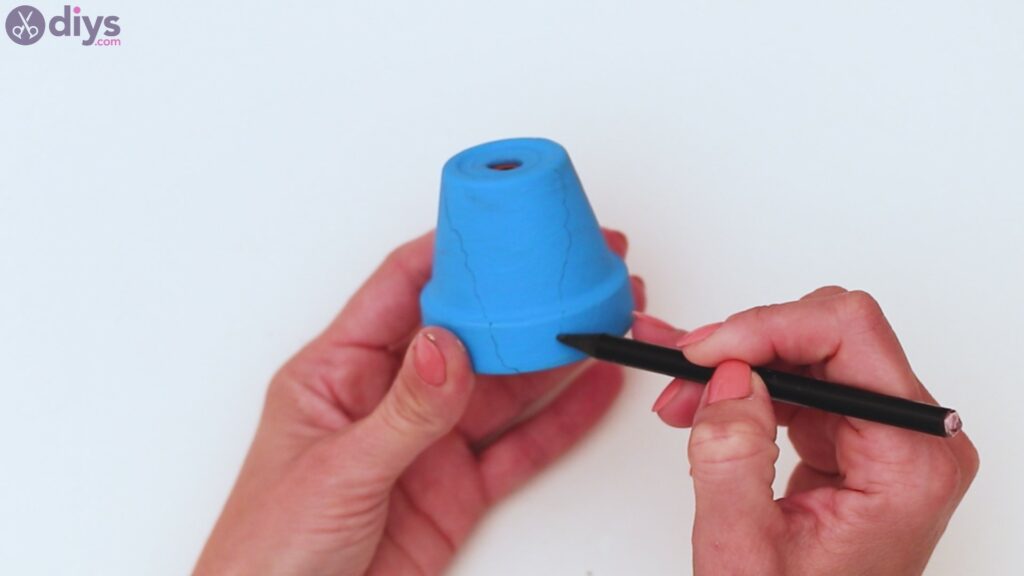
Step 4: Draw a blouse for your gnome
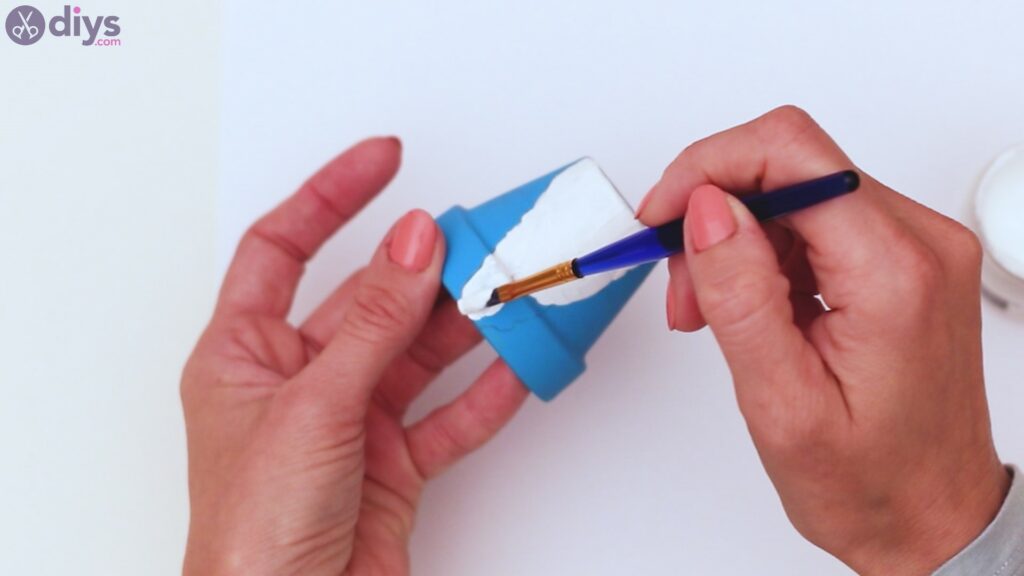
Now that you’ve set the pebbles off to dry, you need to get yourpenciland theblue pot. You want to draw a rough triangle shape on the pot, starting out from the top of the pot, as see in the picture.
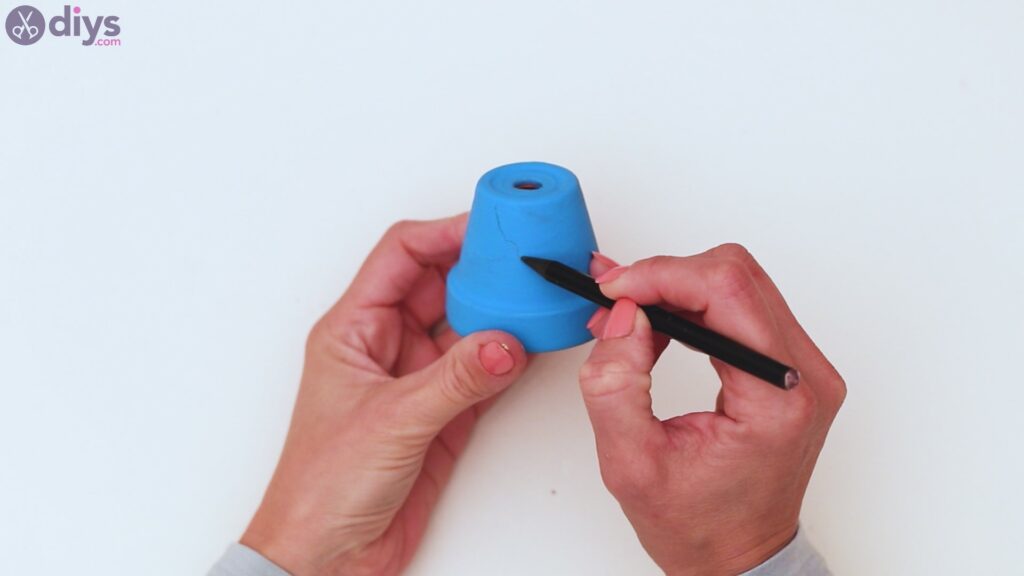
Do the same on the other side. You don’t want the two lines to meet here, giving the impression that the area continues downwards, on the gnome’s body.
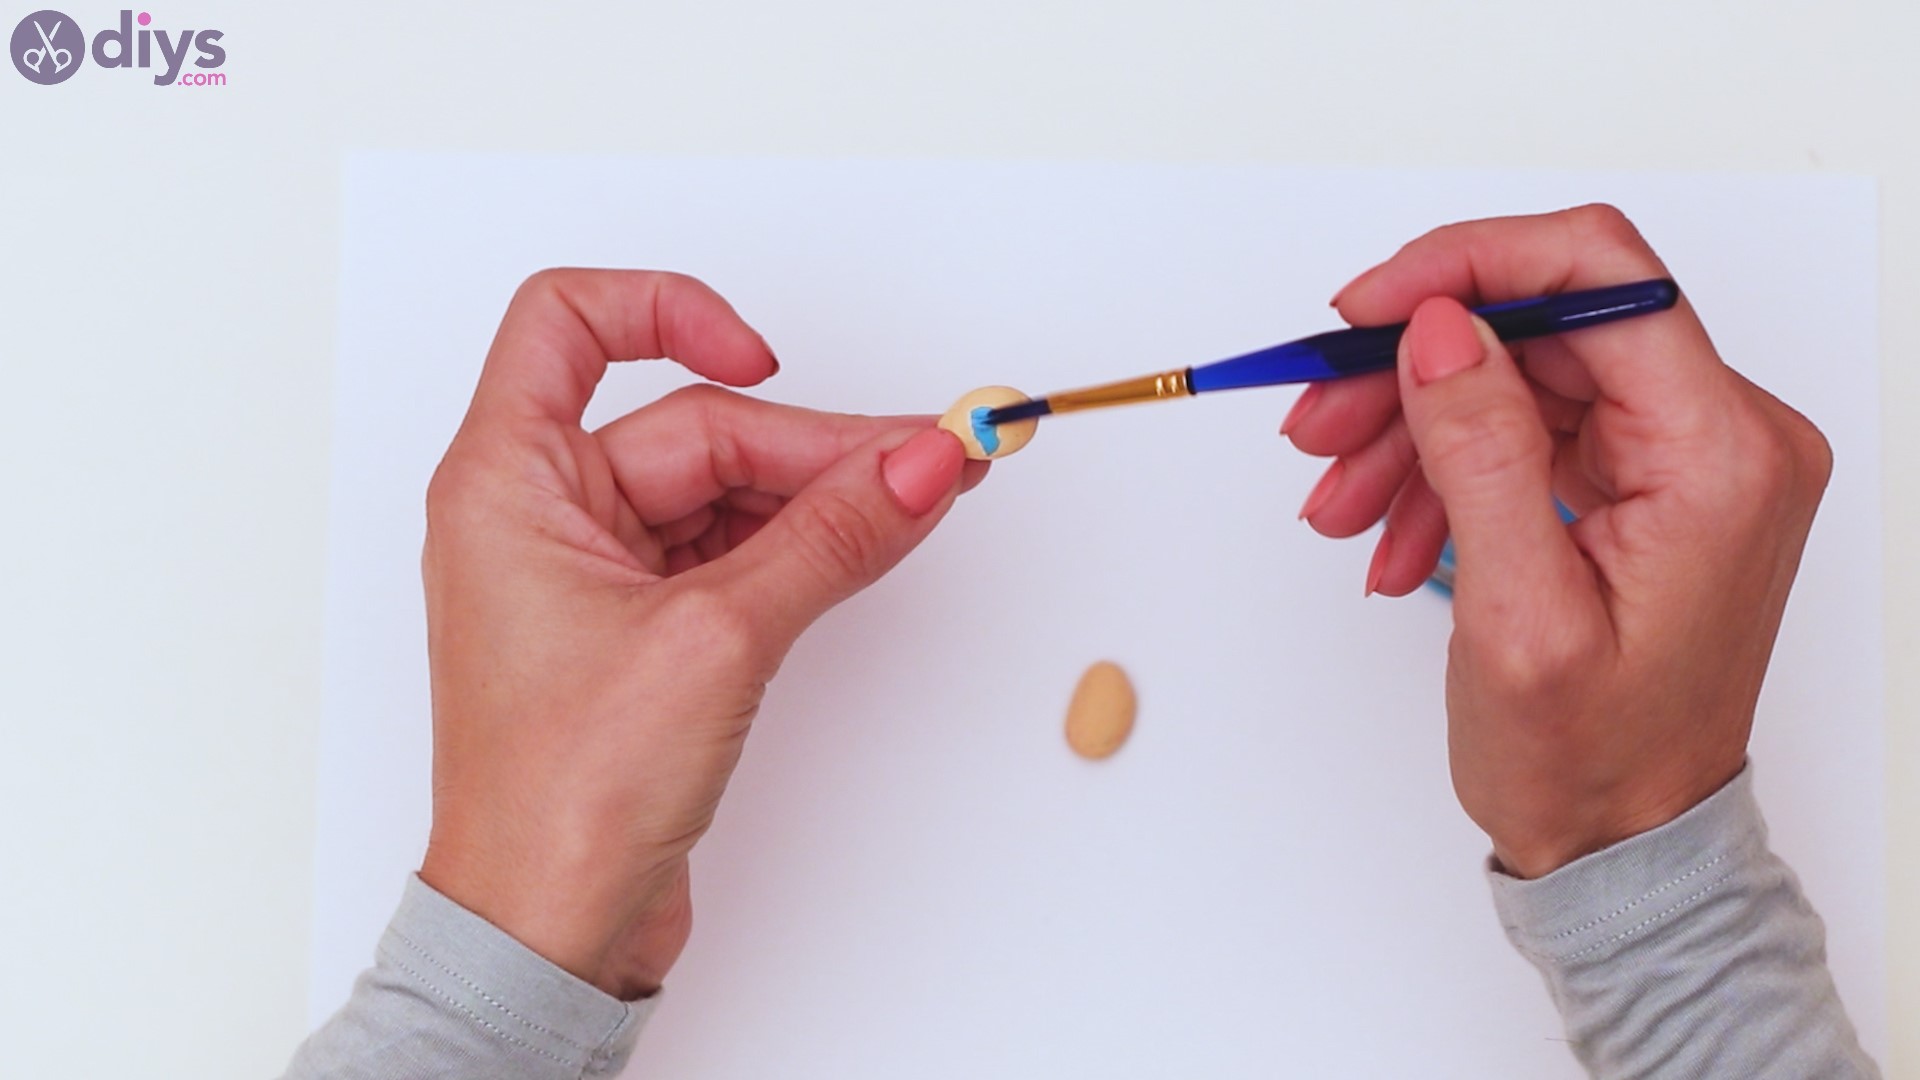
Step 5: Paint the beard
Get your white acrylic paint and your paintbrush and start filling in the area you just drew in. There’s no need for straight lines, but do make sure you cover the lines you drew in. Allow the pot to dry by placing it back on the piece of paper.
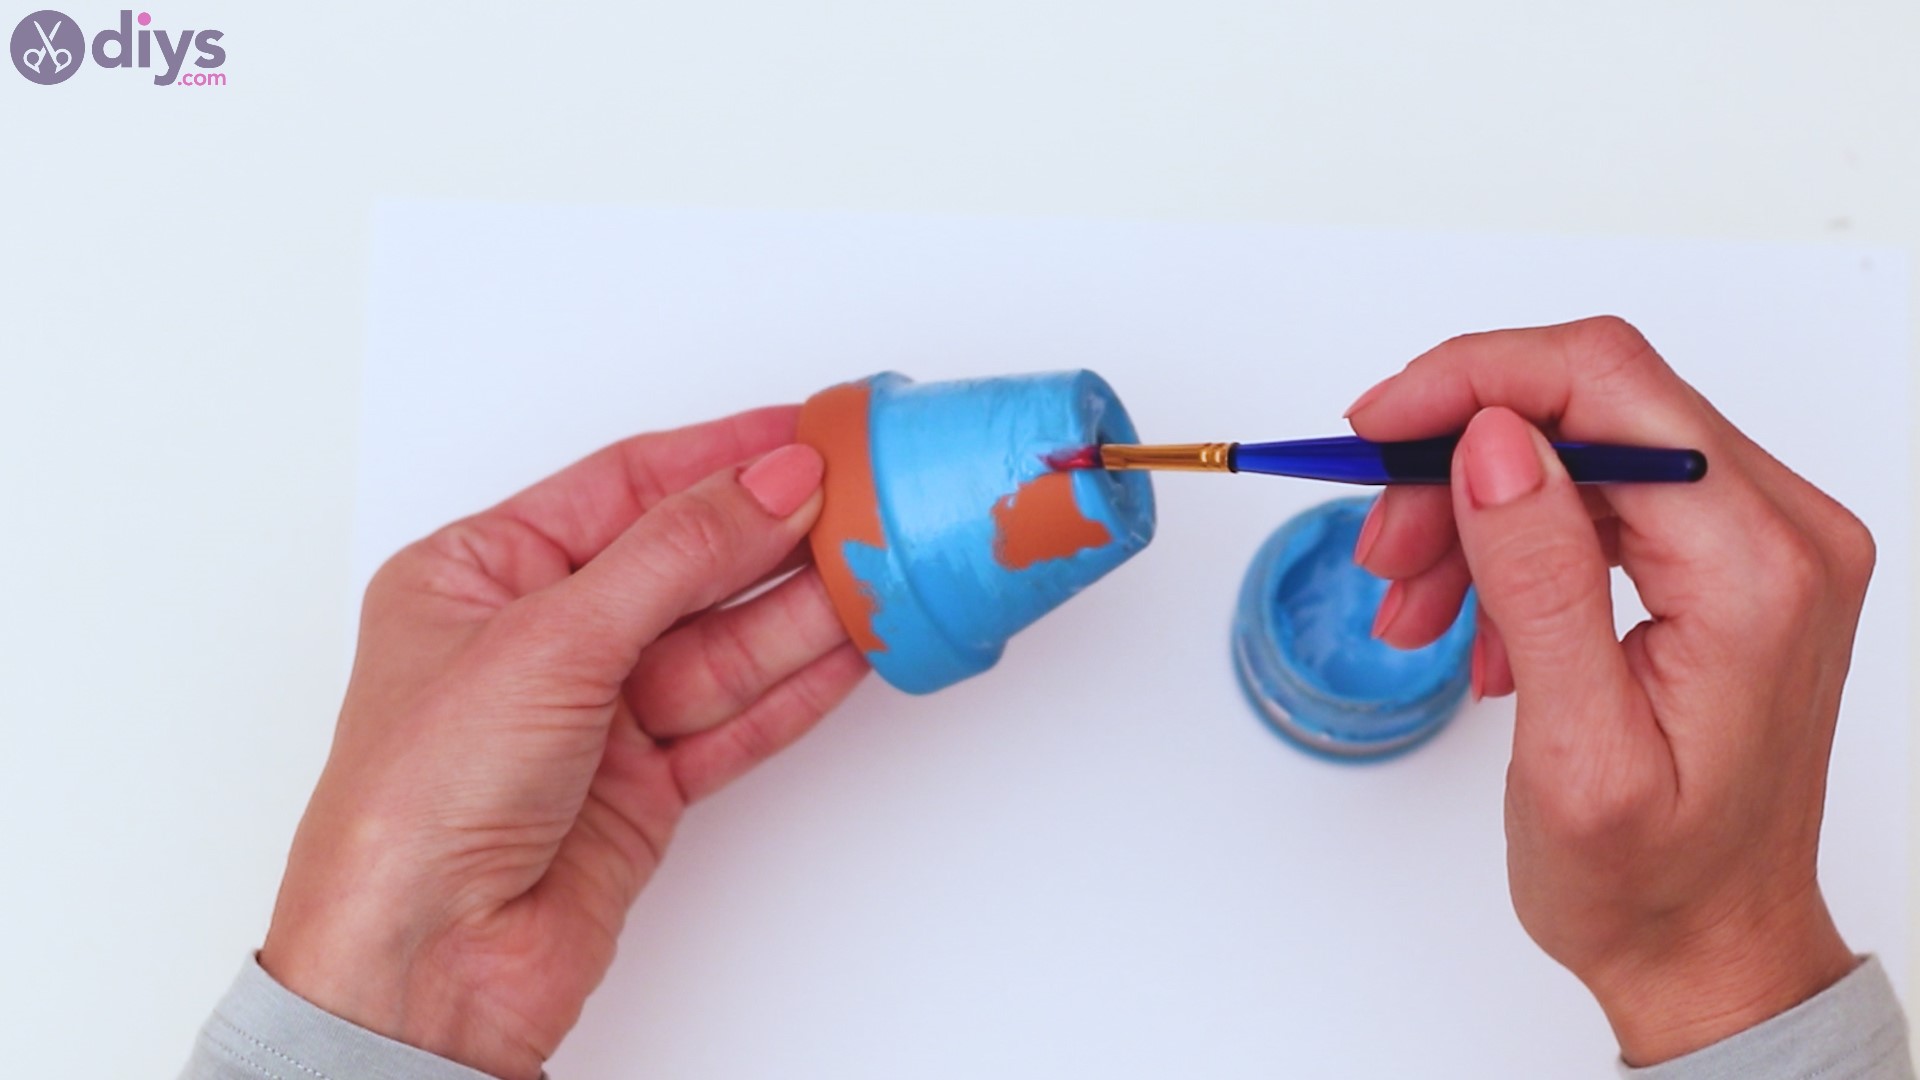
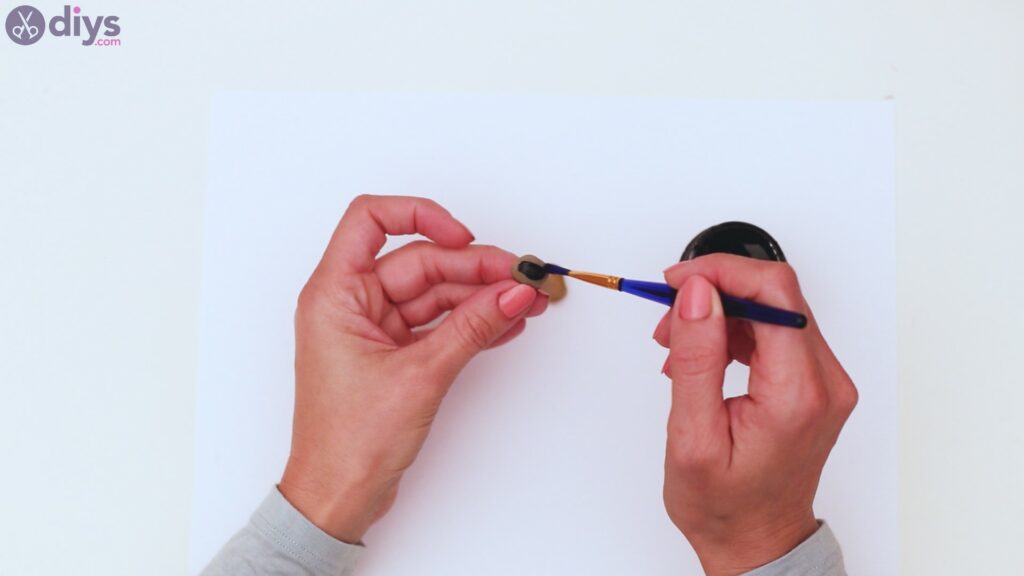
Step 6: Paint some sleeves for the gnome
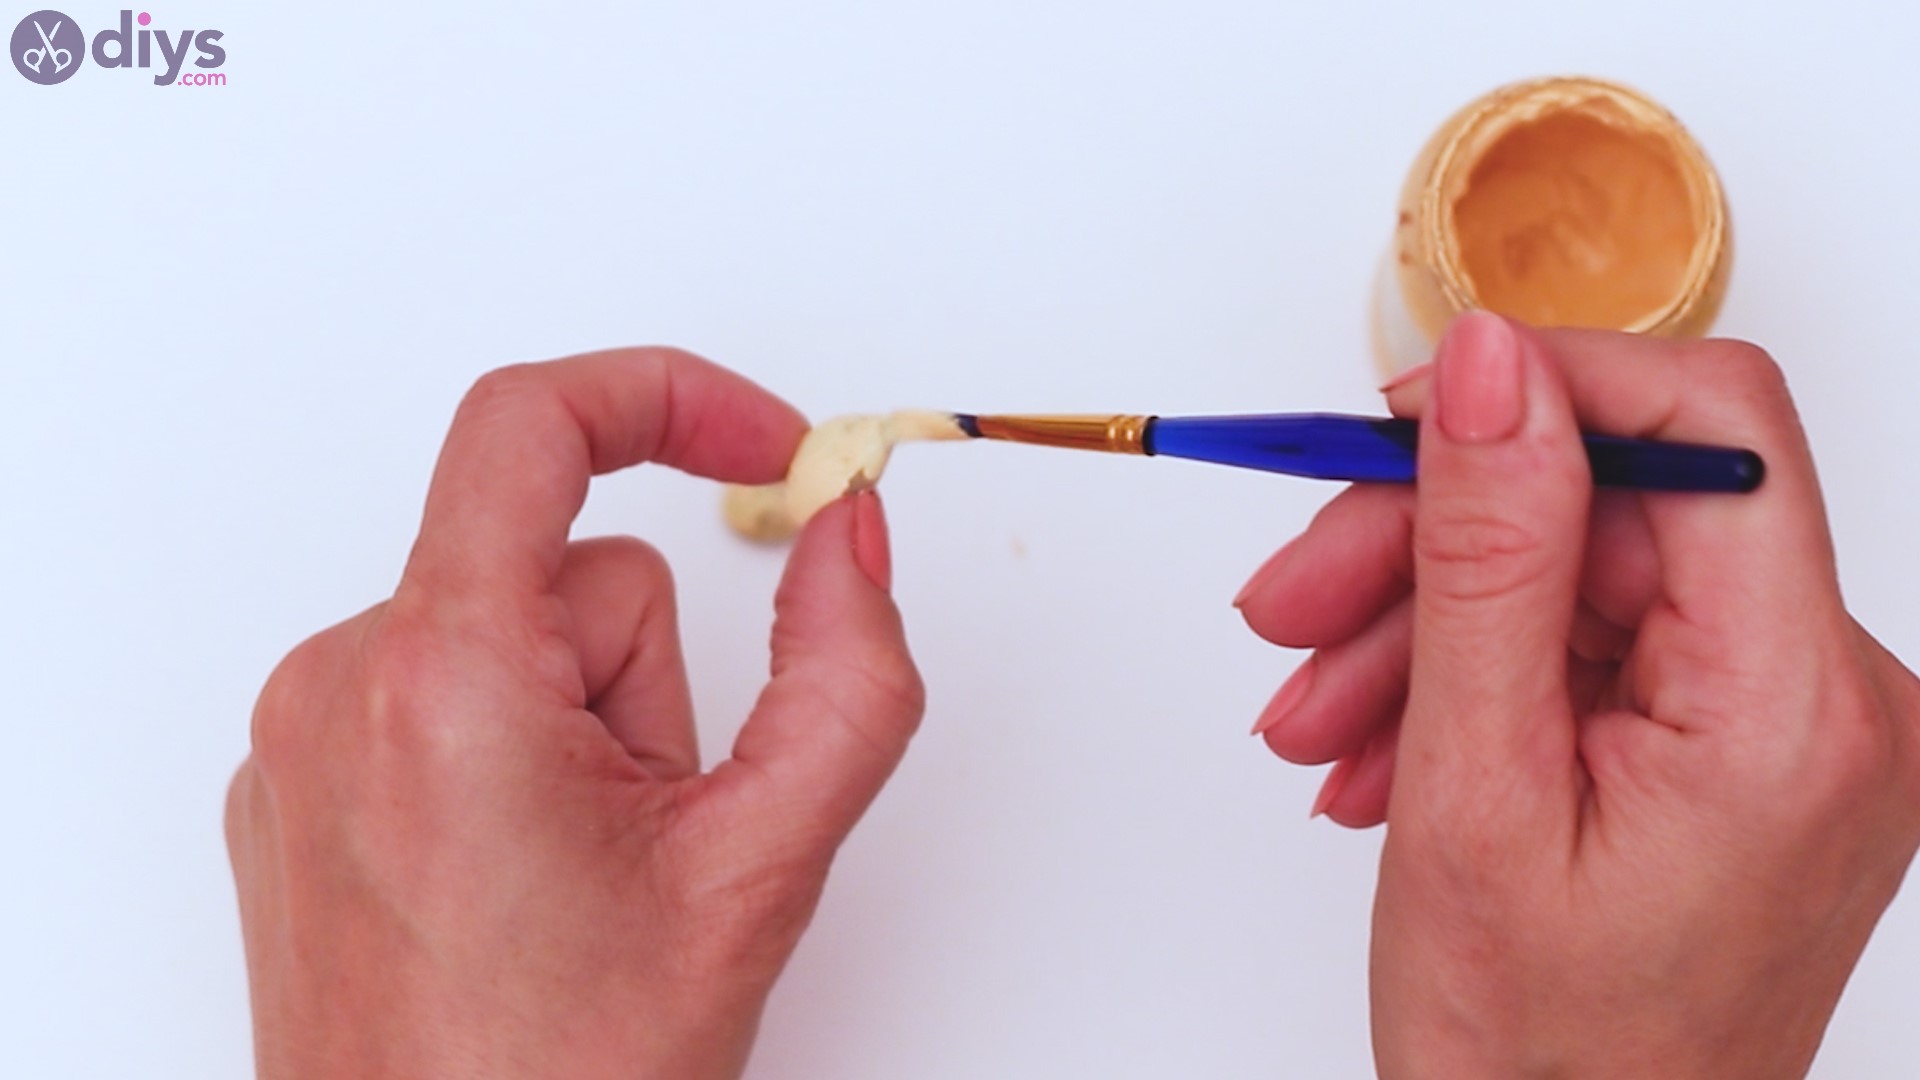
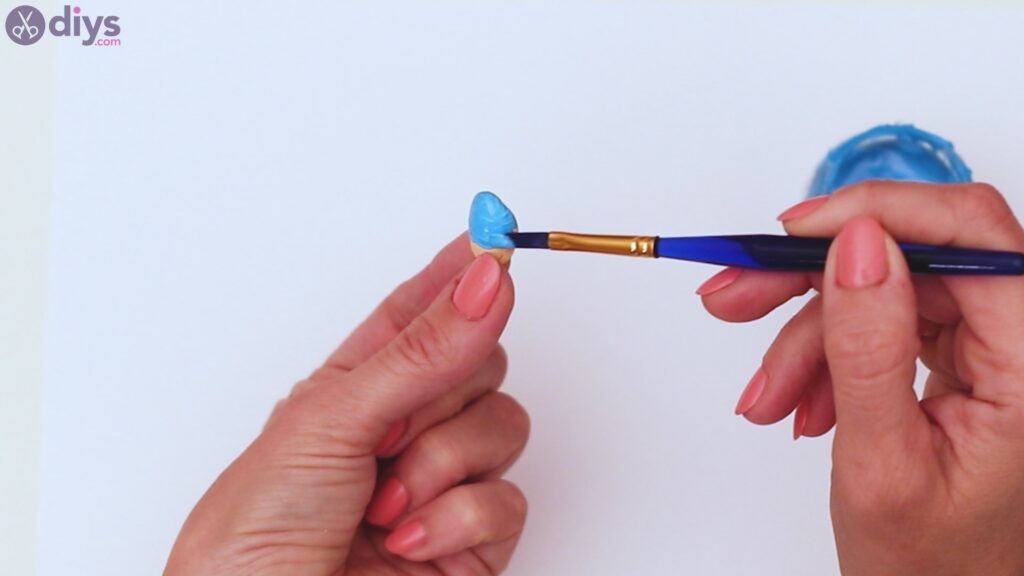
Take those beige pebbles and your paint acrylic paint and paintbrush. Hold the pebbles by one end which you want to be the tip of the hands and paint the other end with the same blue of the gnome’s shirt.

Make sure you cover the entire area on the pebble with blue. Also, it’s a good idea if you try to maintain the edge of the line as best you can.
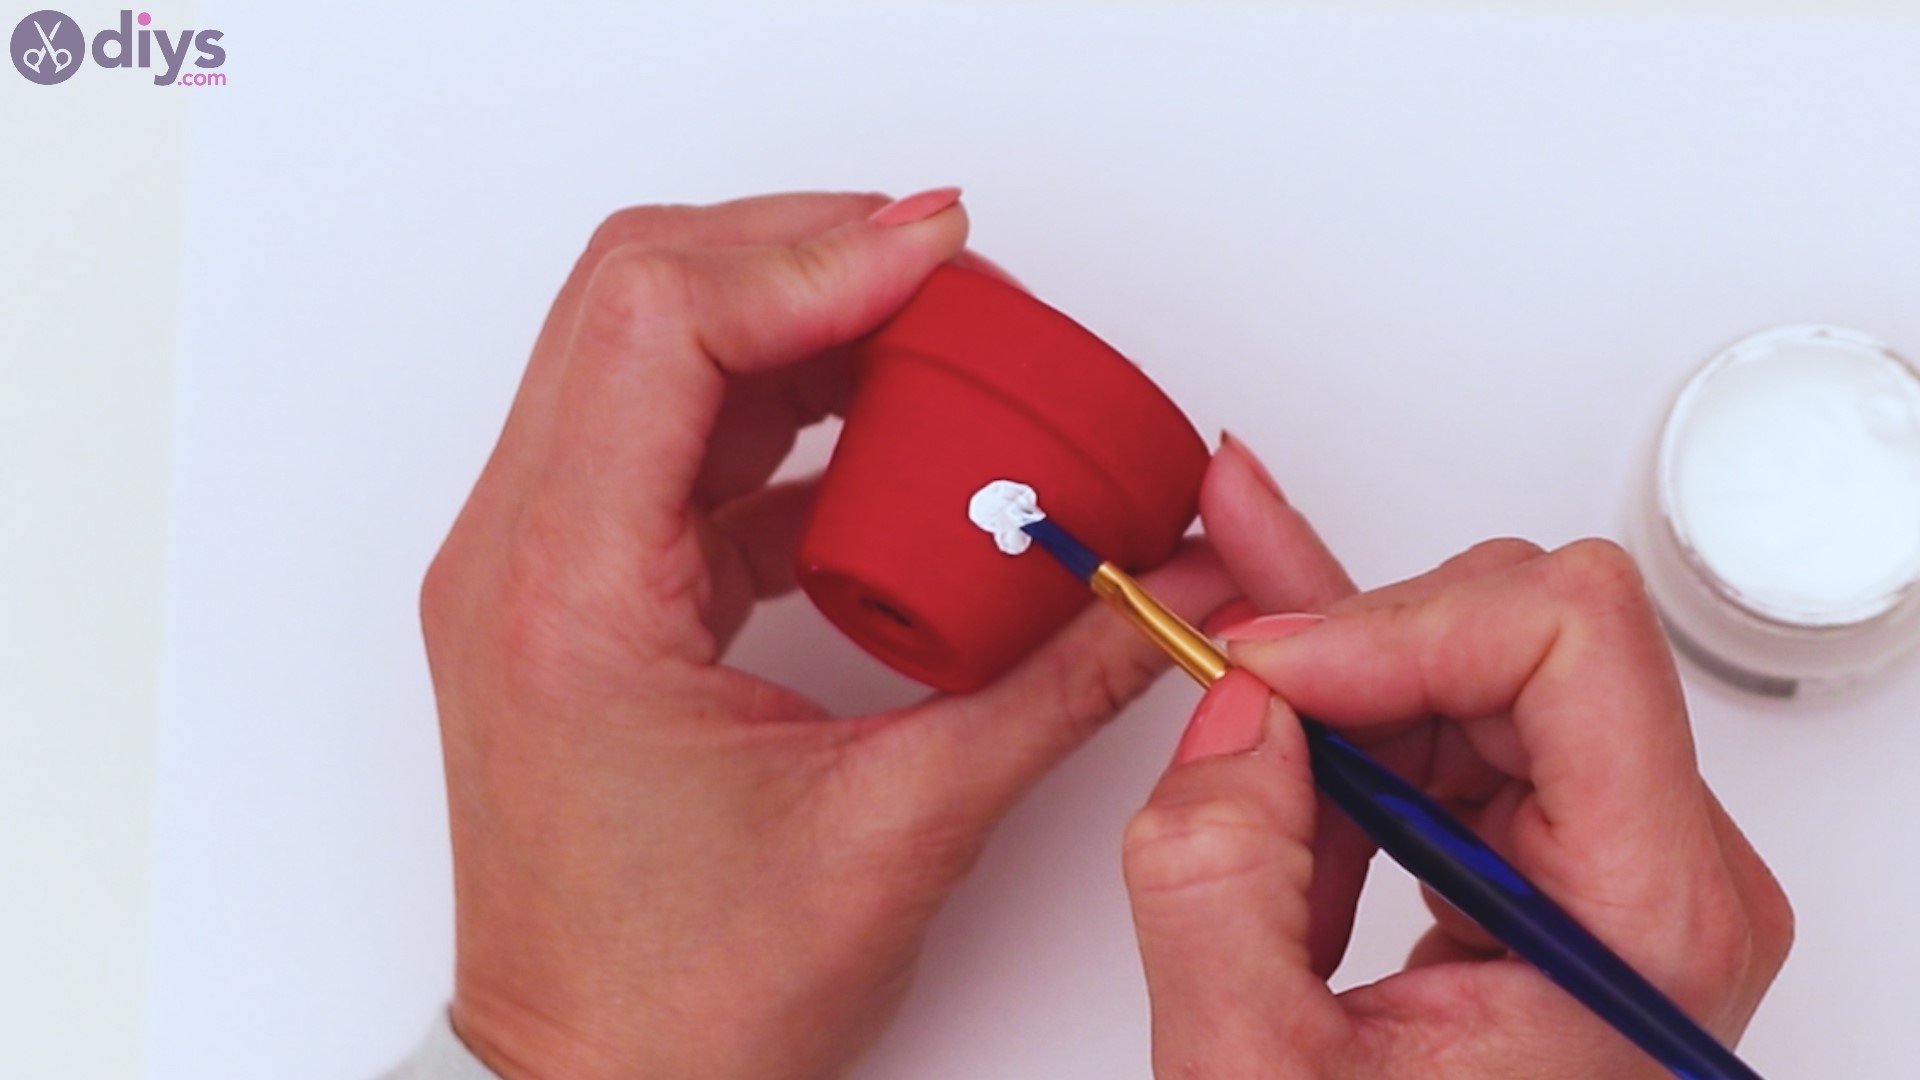
Step 7: Draw and paint a heart
Next, take the middle-sized pot and your pencil. Draw a heart in the middle of the pot. Try to make it as perfect as possible from your first try.
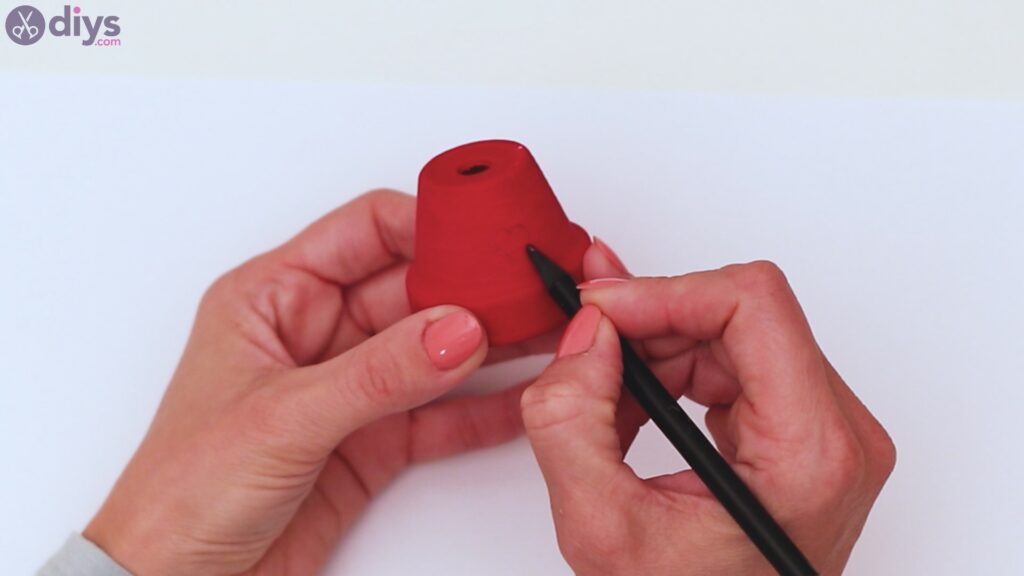
Once you’re satisfied with the shape you drew in, get the white acrylic paint and your paintbrush and start filling it in.

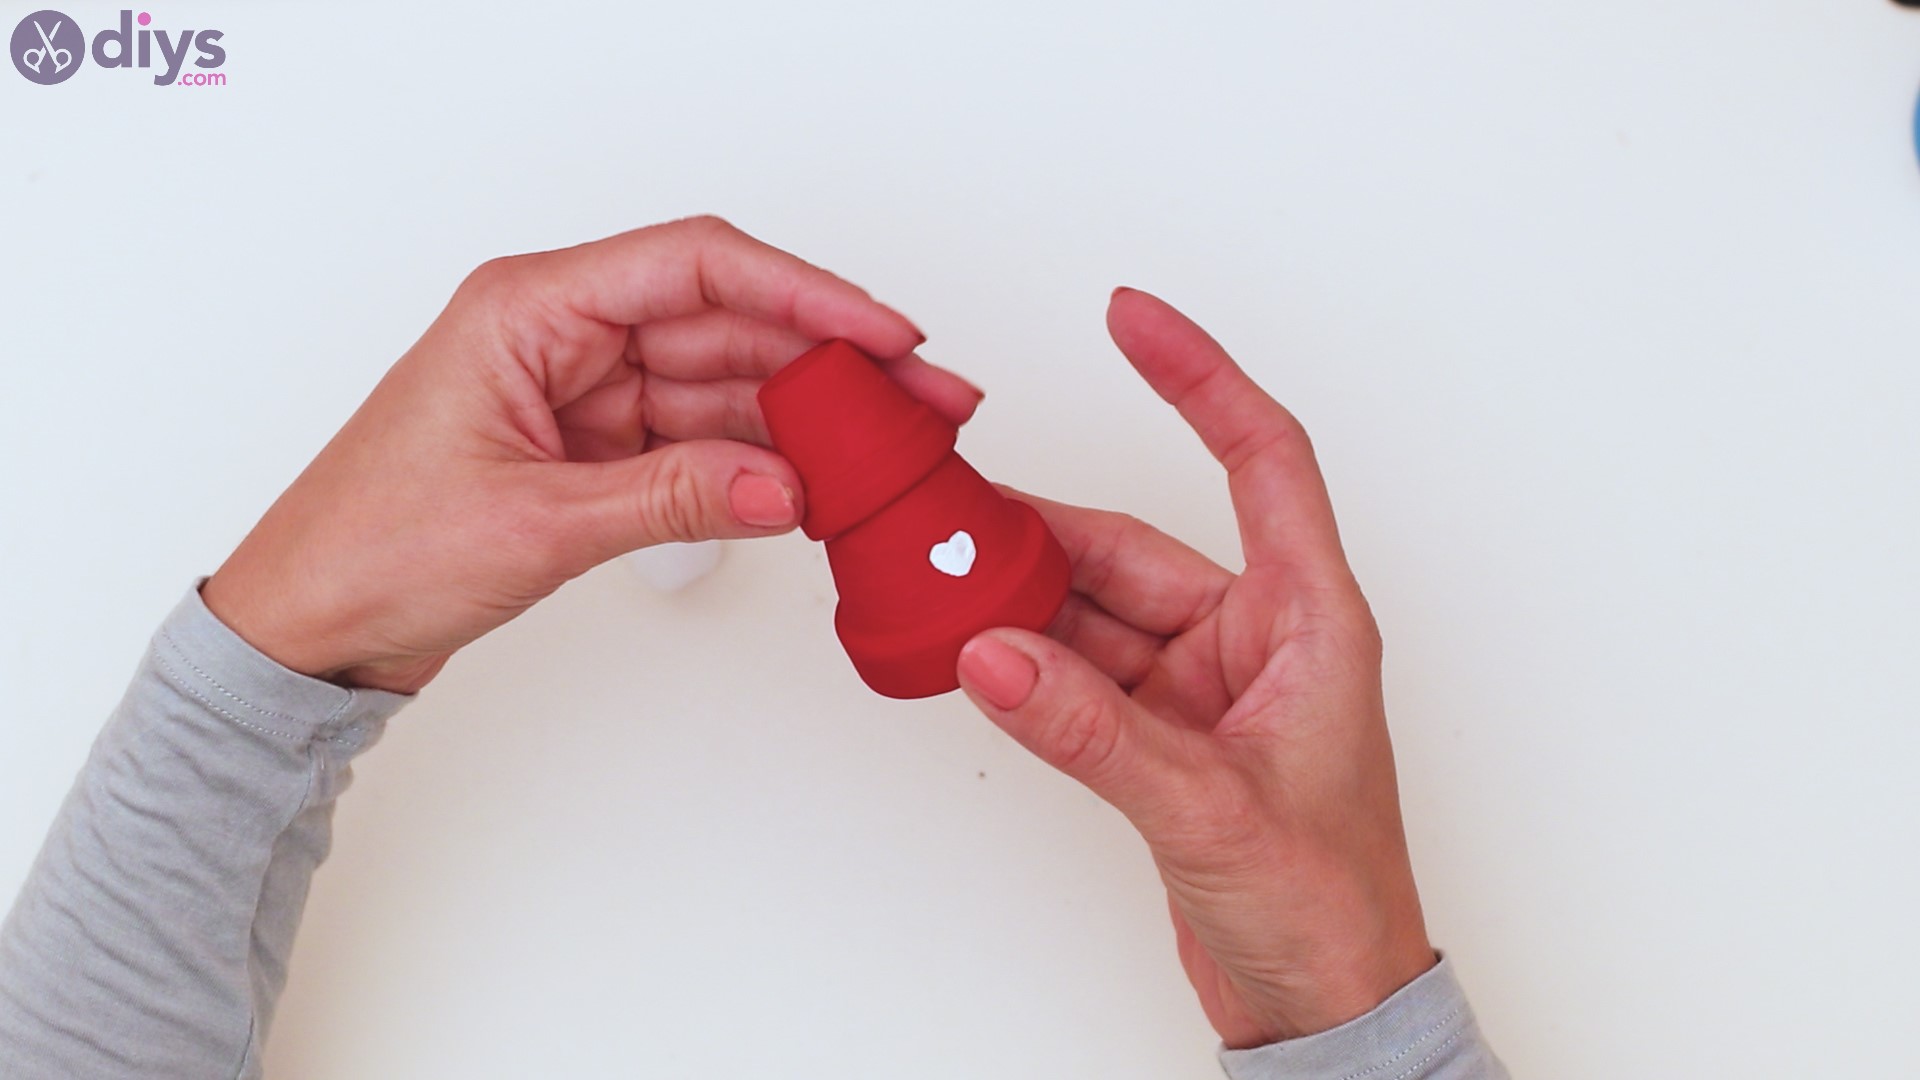
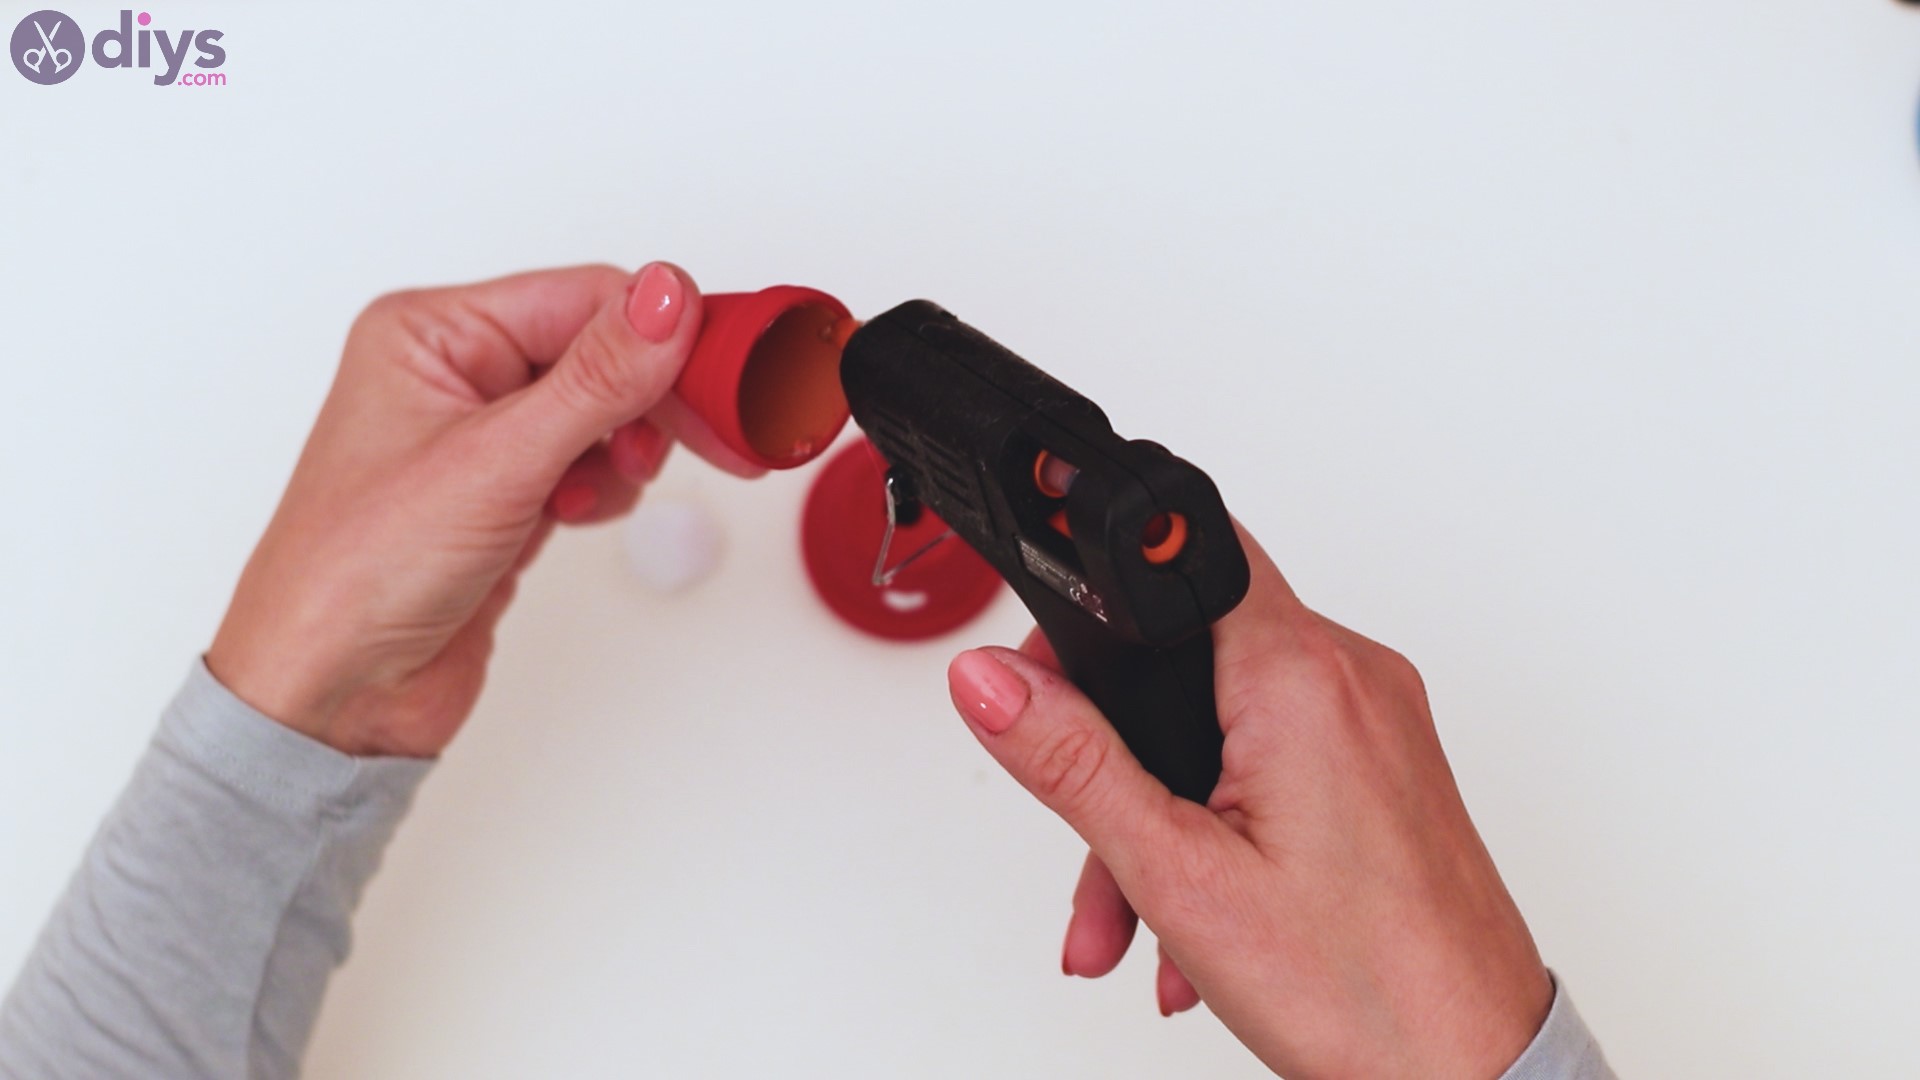
Step 8: Put together the gnome’s hat
Now that the elements are pretty much done, you need to get your glue gun. Take the smallest pots and add some hot glue to the inside rim.

Then, place the small pot on top of the middle-sized one. Press them slightly so the glue sets and you’re sure the two have made proper contact.

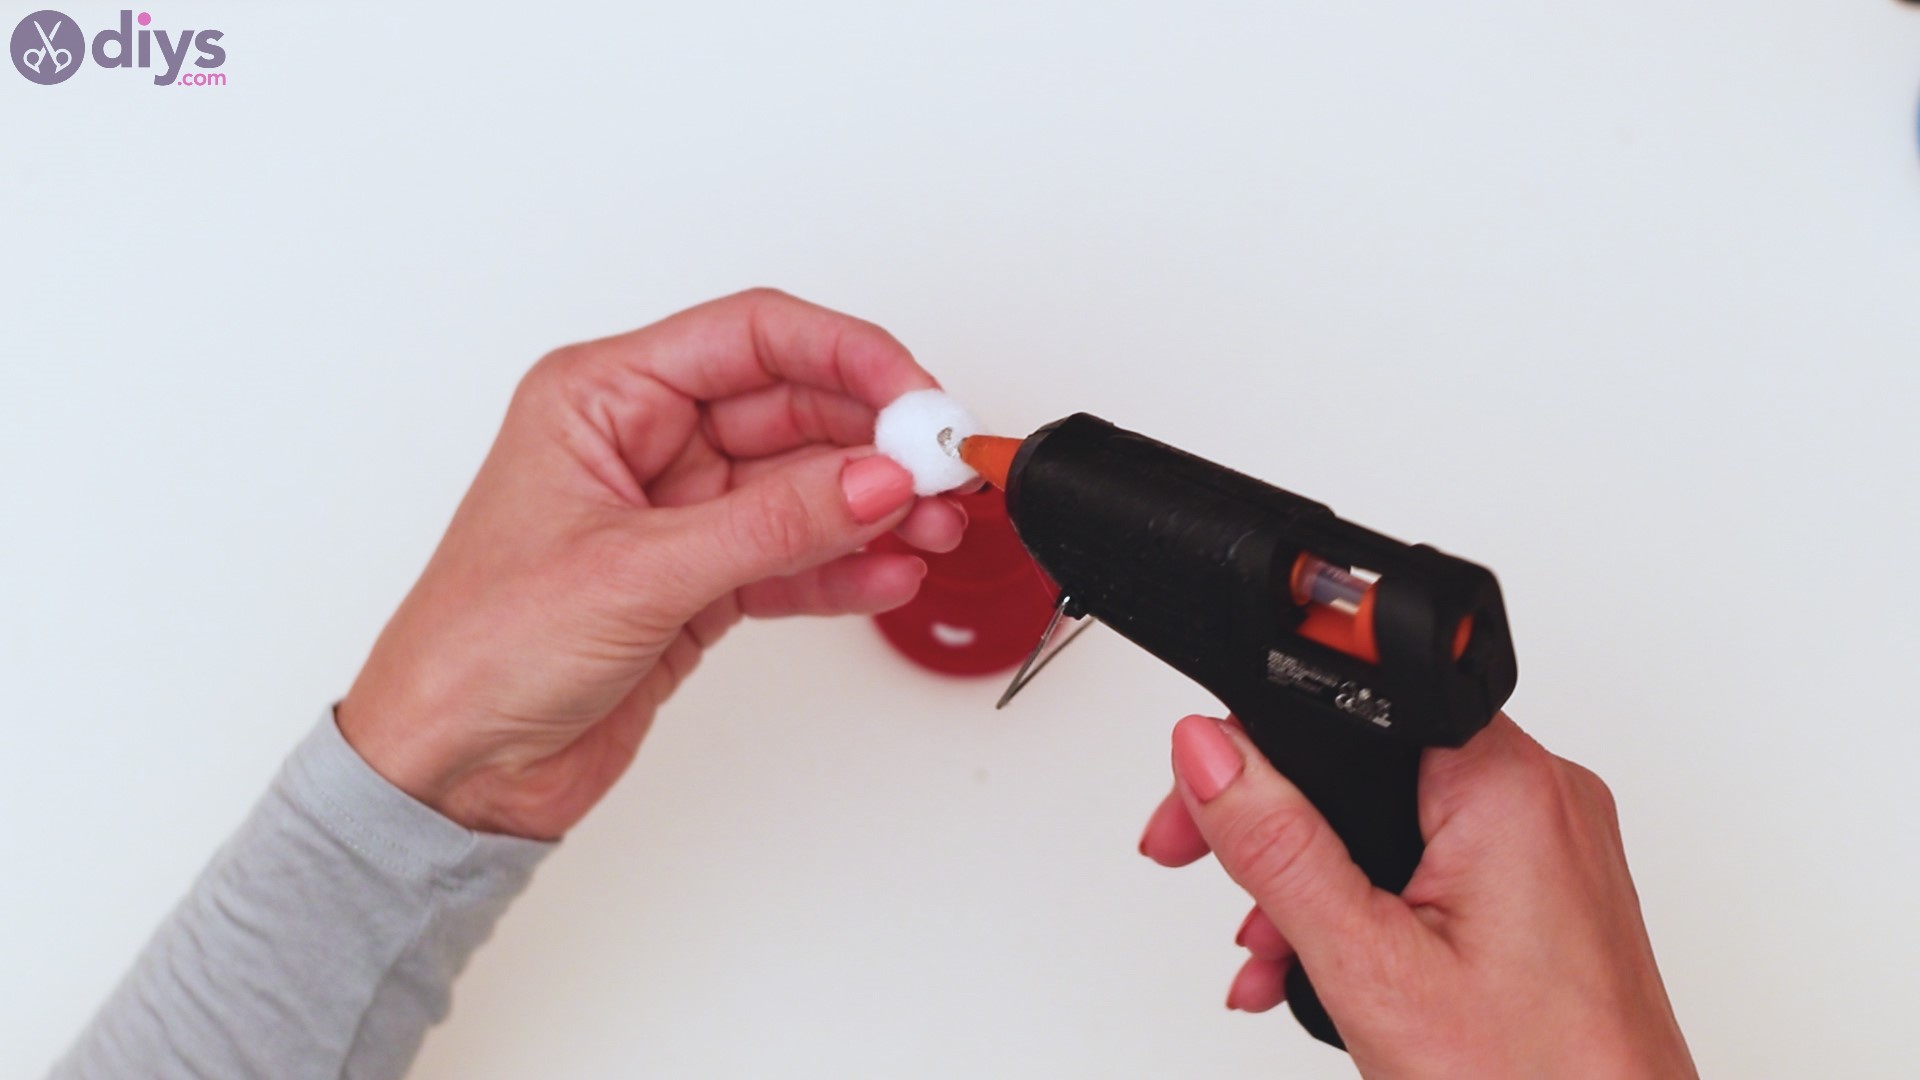
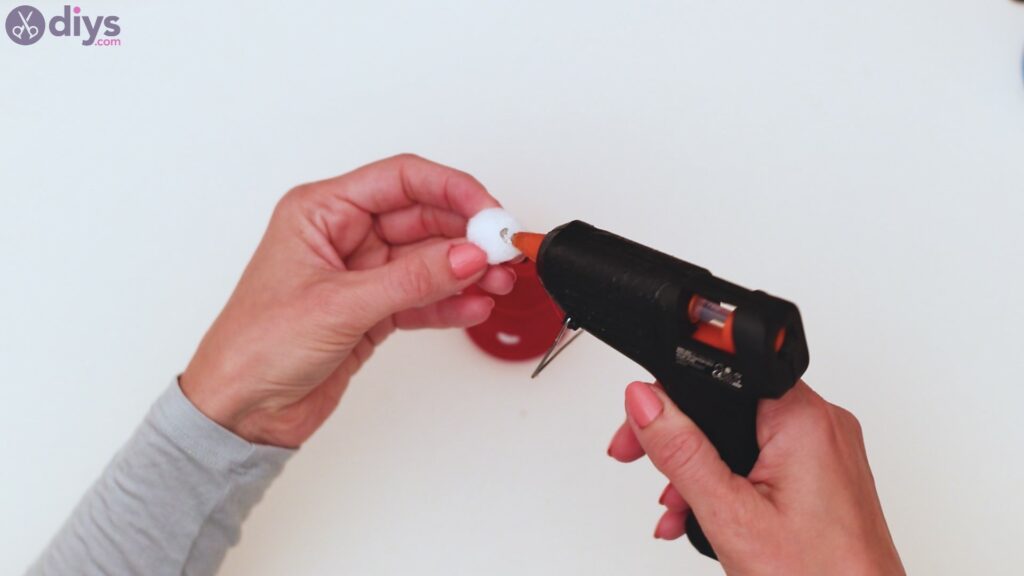
Get the white pompon and add it to the top of the pots. Place some hot glue to an area on the pompon and press it to the top, covering the drainage hole.
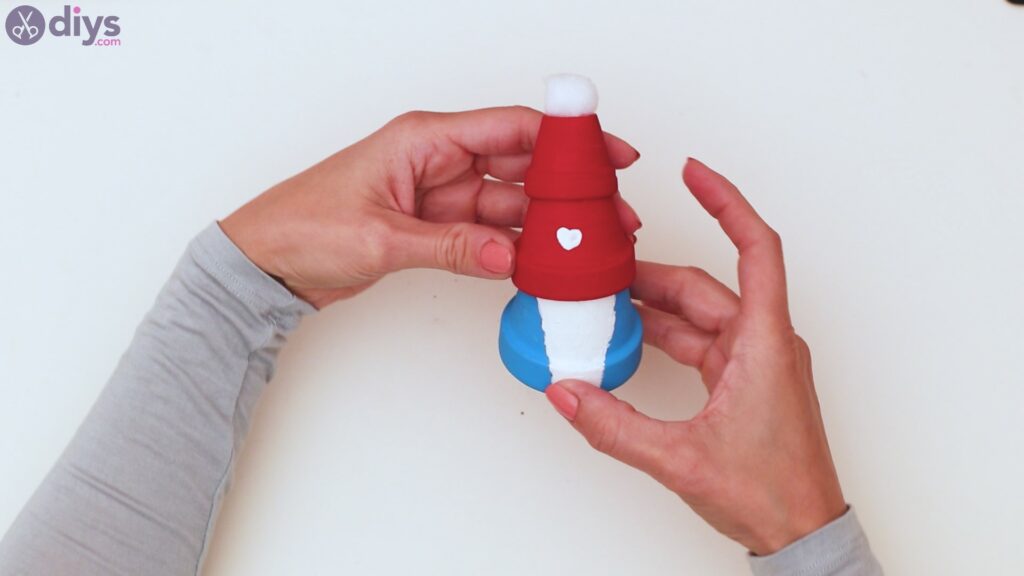
Step 9: Give the gnome its hat
Next, you want to add the hat on top of the gnome. Add some hot glue to the inside of the medium-sized pot and place it on top of the blue pot. Make sure you place it at an angle, much like it would actually wear a hat.
Step 10: Put together the gnome
We’re almost done here, so let’s give this gnome some more shape. Get the wood bead, add some hot glue to it, and apply it in the middle area, right under the edge of the ‘hat’ pots. It will look like the nose is peaking from the beard.
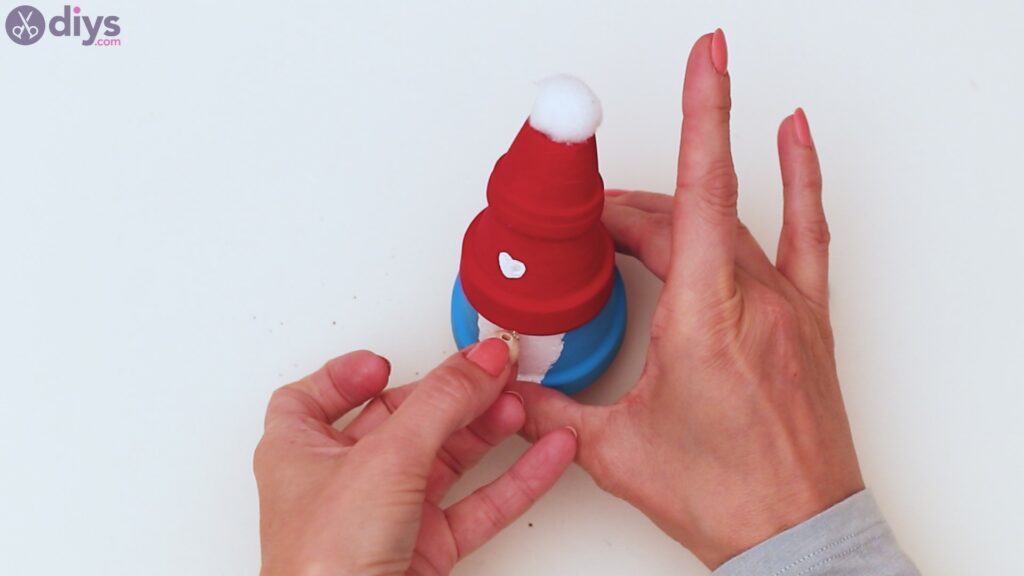
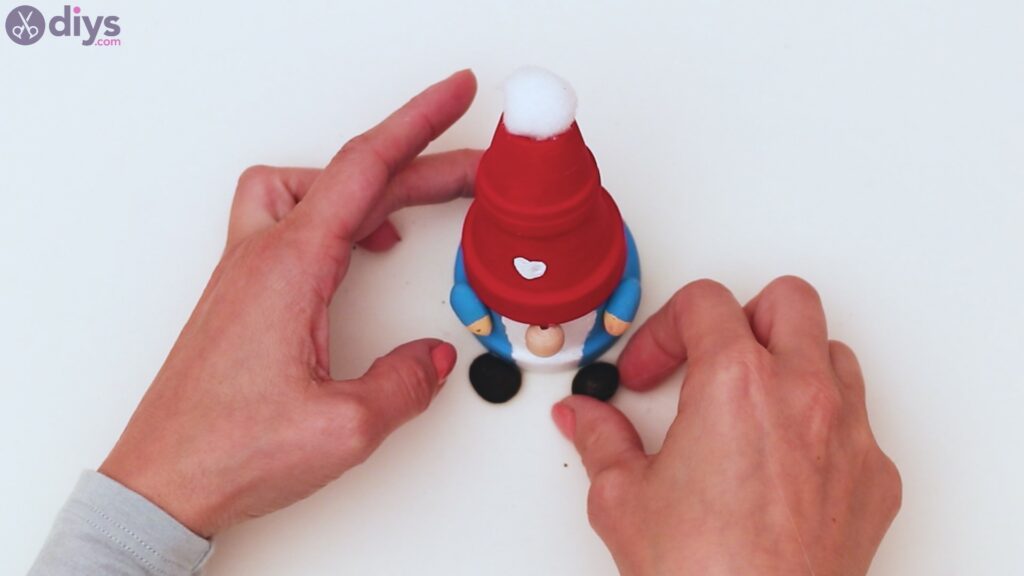
Add some glue to the blue and beige pebbles and glue them to the sides of the pot, as the gnome’s arms.
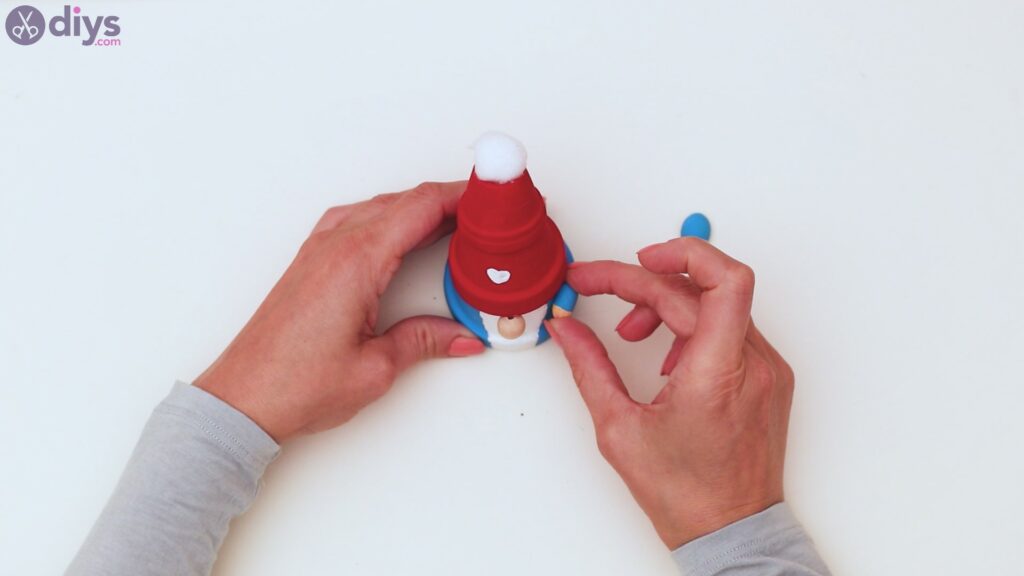
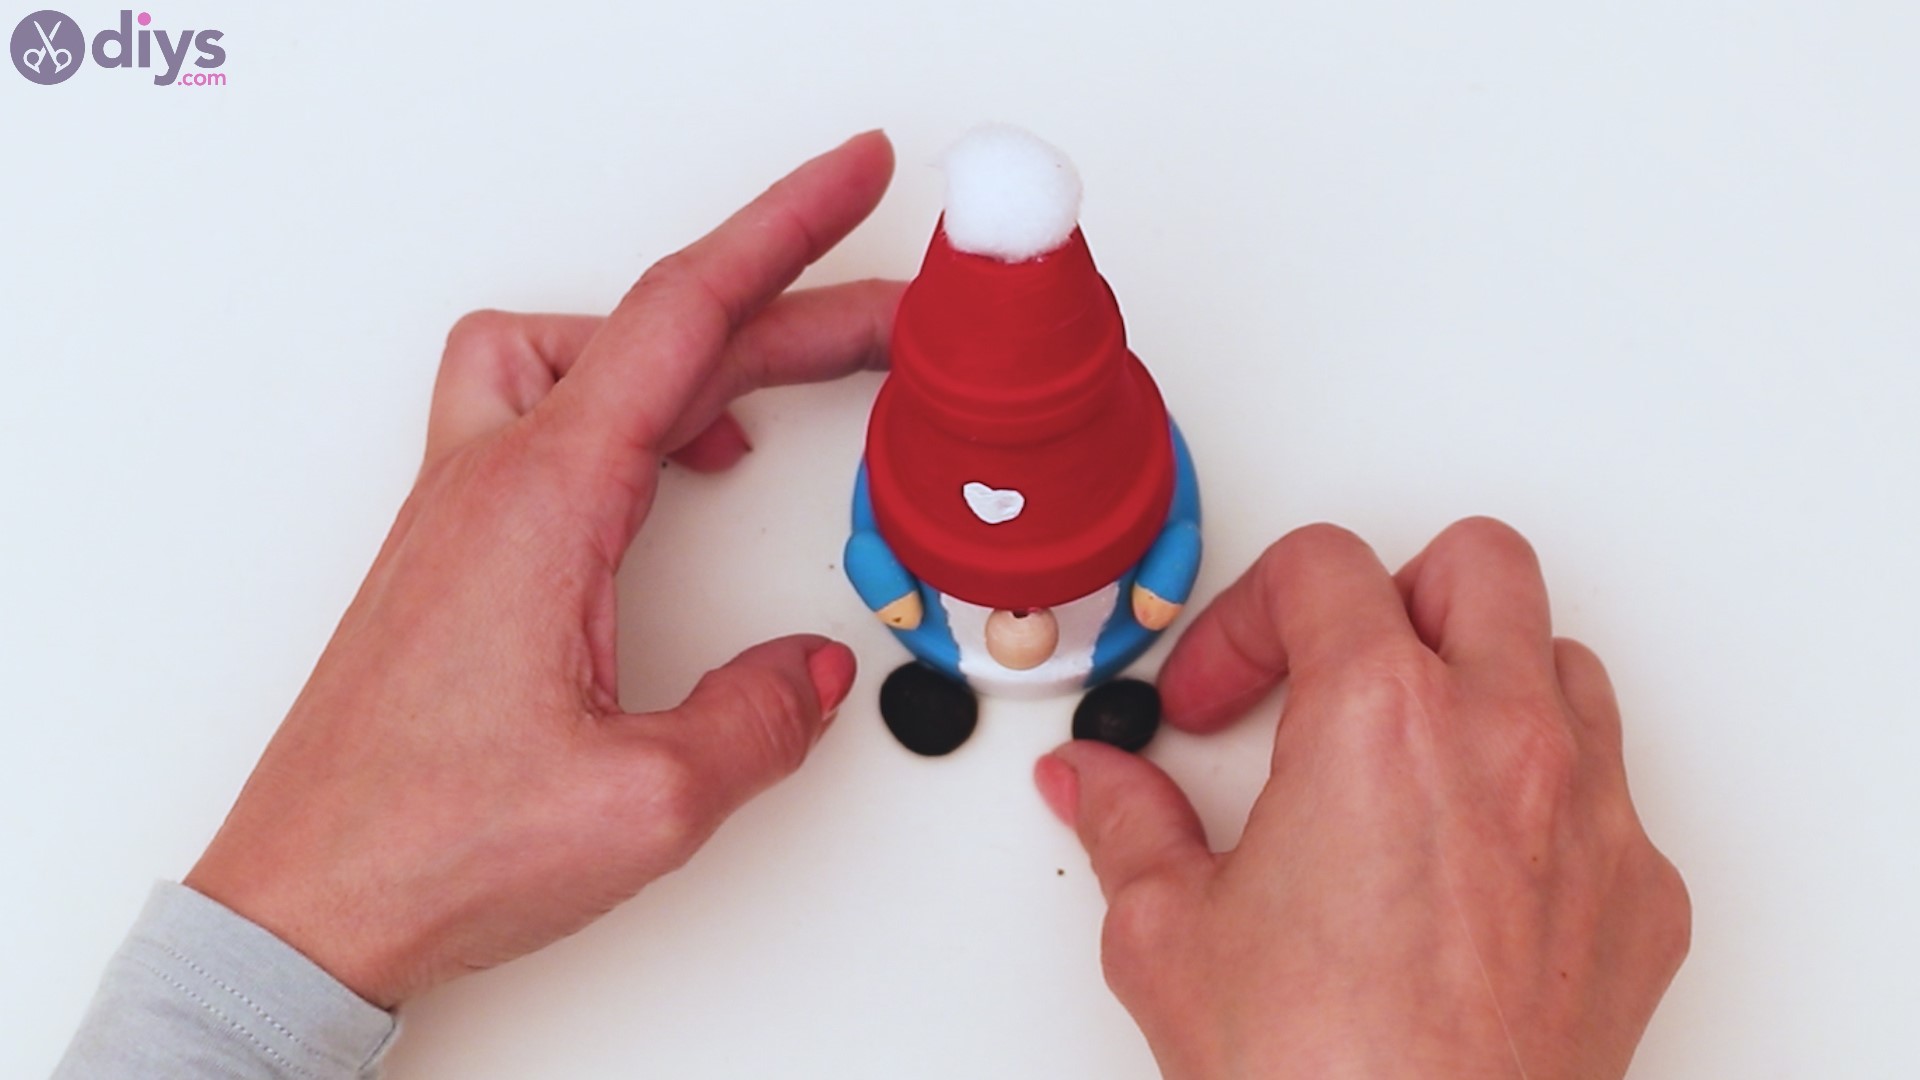
Add the black pebbles to the craft too. You’ll want to add hot glue to one of their sides and place them at the bottom of the pot.
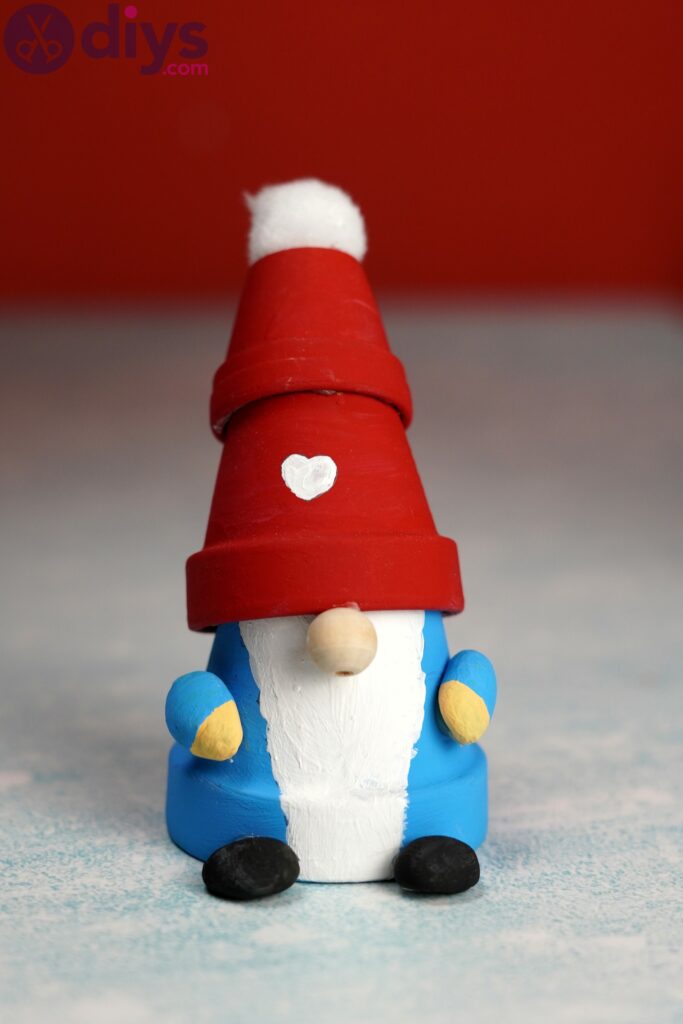
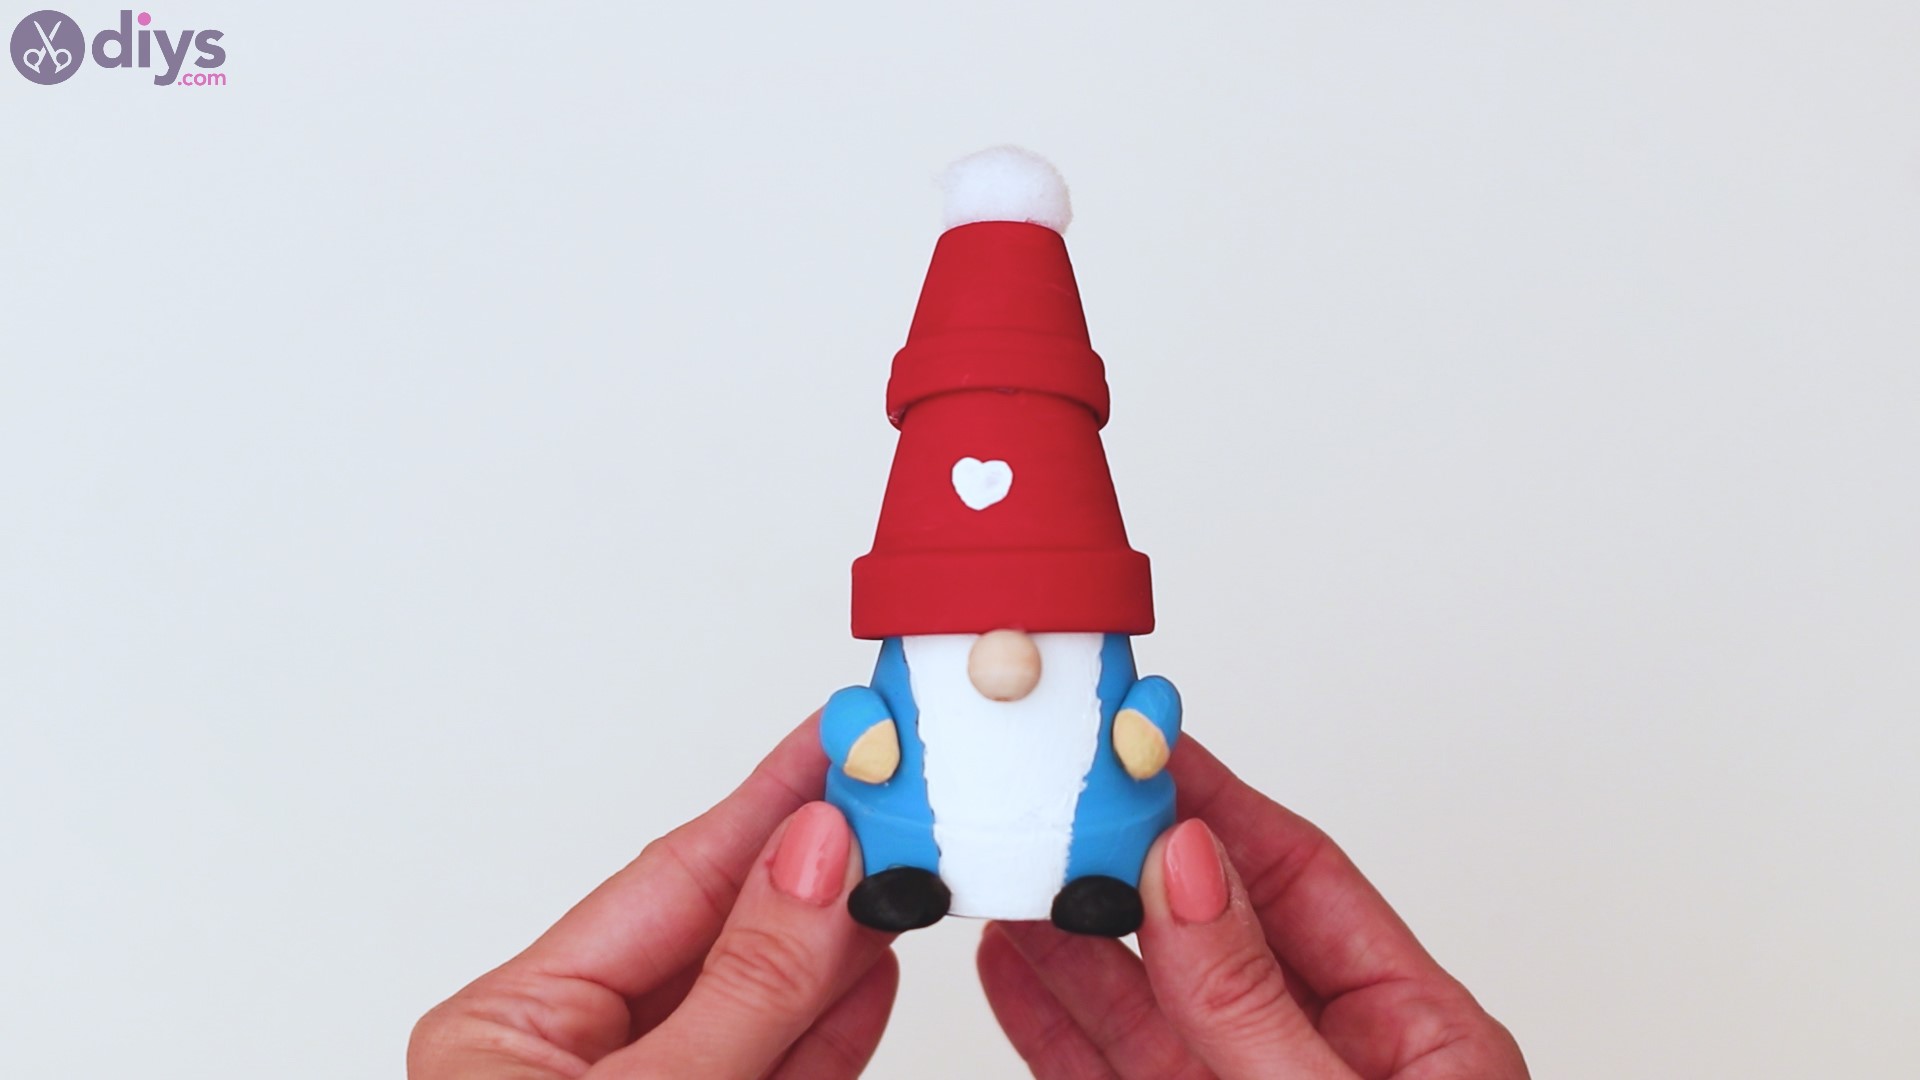
There you go! You’re done! Look how cute this is! It’s an adorable craft that you can do with minimum effort. You can keep it for yourself and make it guard your flower beds or gift it to someone else.
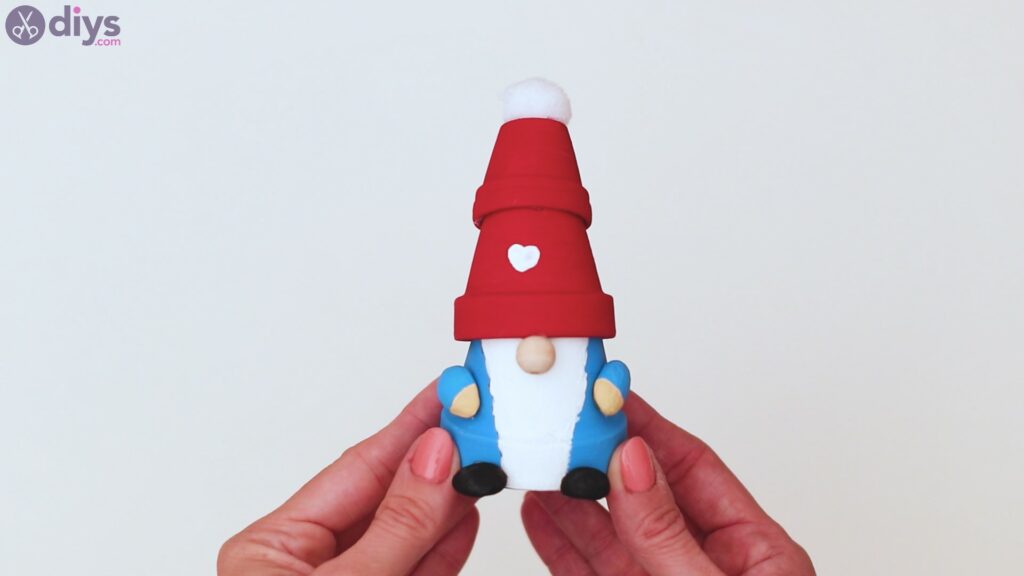
Obviously, you can customize this little gnome by changing the colors of the shirt and hat, and even using different decorative materials. We would love to see how yours turned out, so reach out to us over social media. Drop us a comment in the section below and tell us all about your creations!