DIY Clothespin Memo Board – Remember Everything on Your To-Do List
Updated on November 19, 2025


Remembering everything you need to do in any given day can be difficult, especially as things get extra busy with home chores, work meetings and deadlines, kids’ activities, and so on. So, a memo boardis always handy to have around as it can help you keep track of the more urgent matters, at least. We’re putting our crafting brains to work and creating a clothespin memo board today!

This one will be useful anytime you need to set a reminder for yourself or even for your kids. It’s also going to be fairly easy to make, so let’s get started.
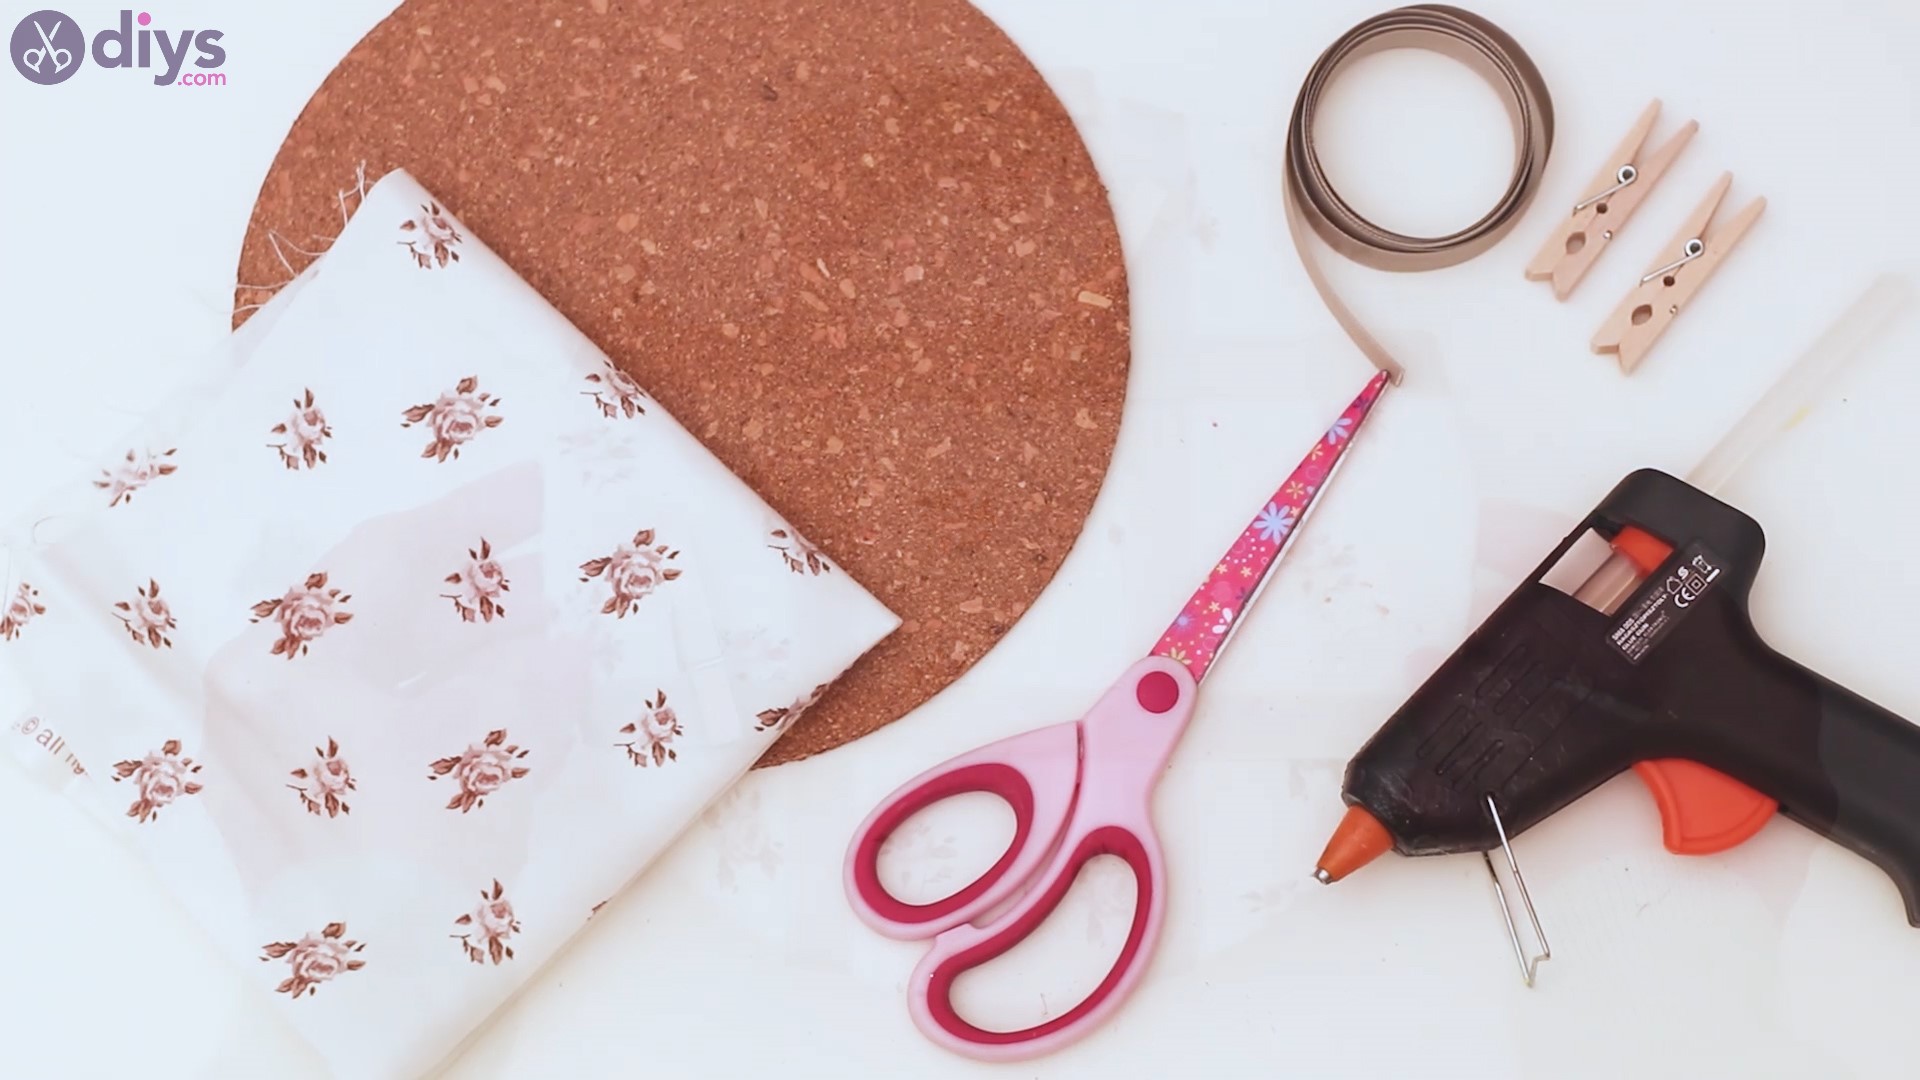
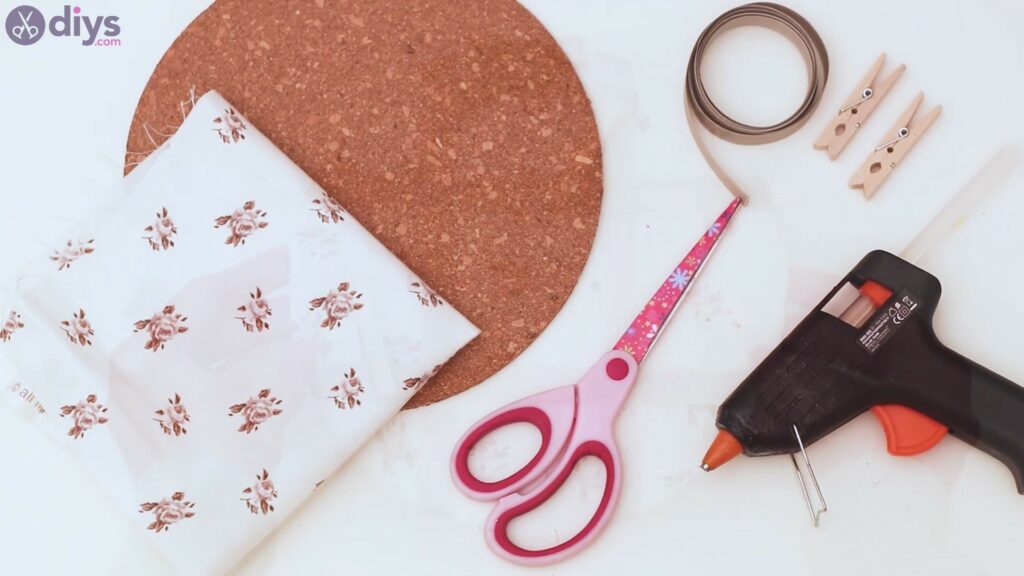
Materials for a clothespin memo board
How to make a clothespin memo board
We’re going to make such a pretty memo board! First, however, make sure you have all your materials on hand so you don’t go looking for one thing or another once you do get started. So? Are you ready? Let’s begin!
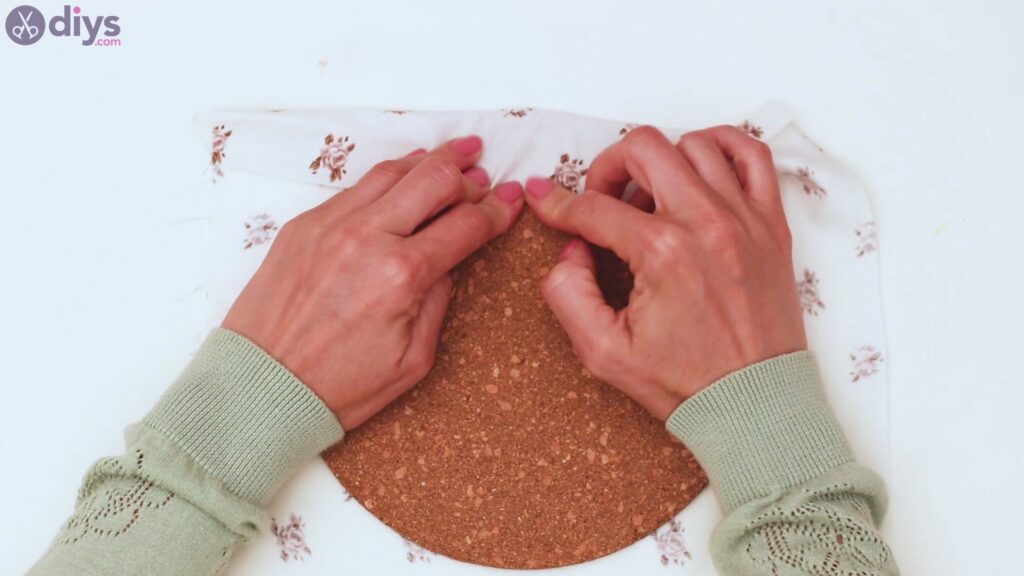
Step 1: “Dress” the corkboard
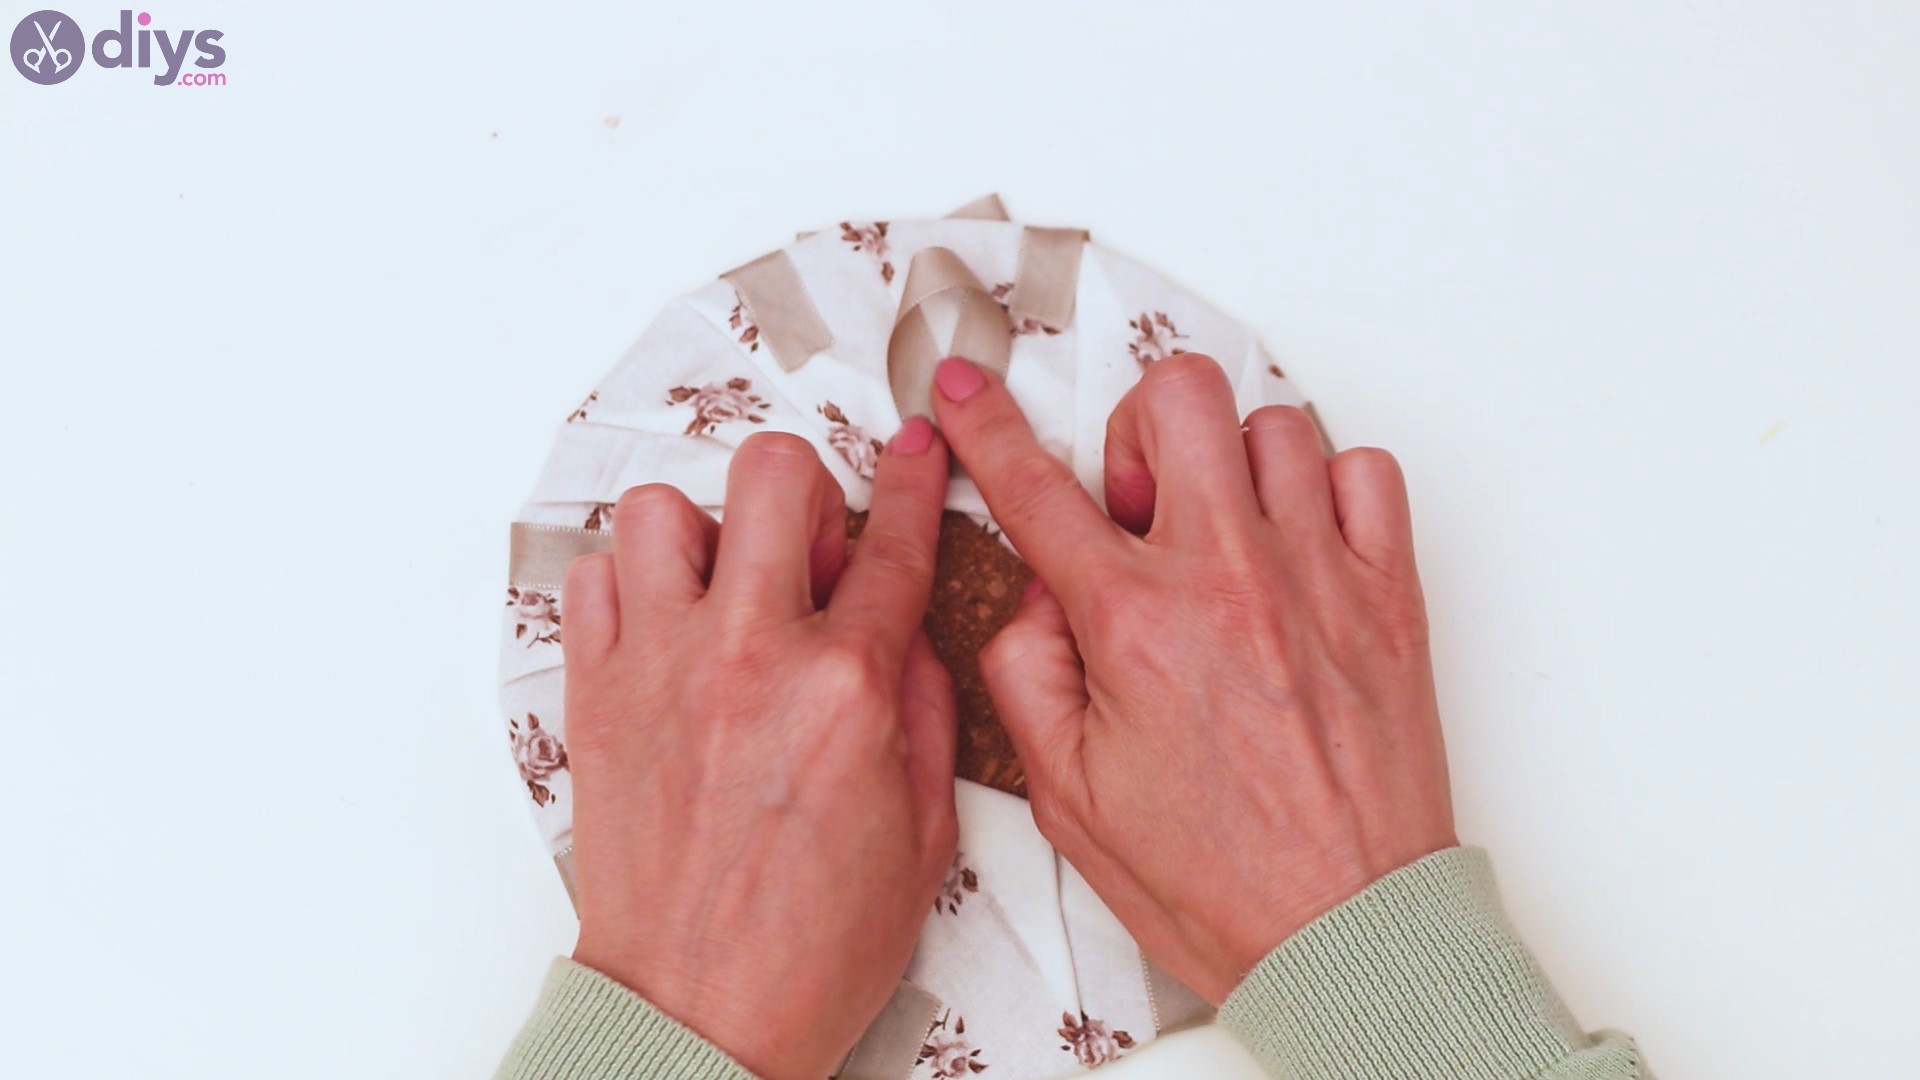
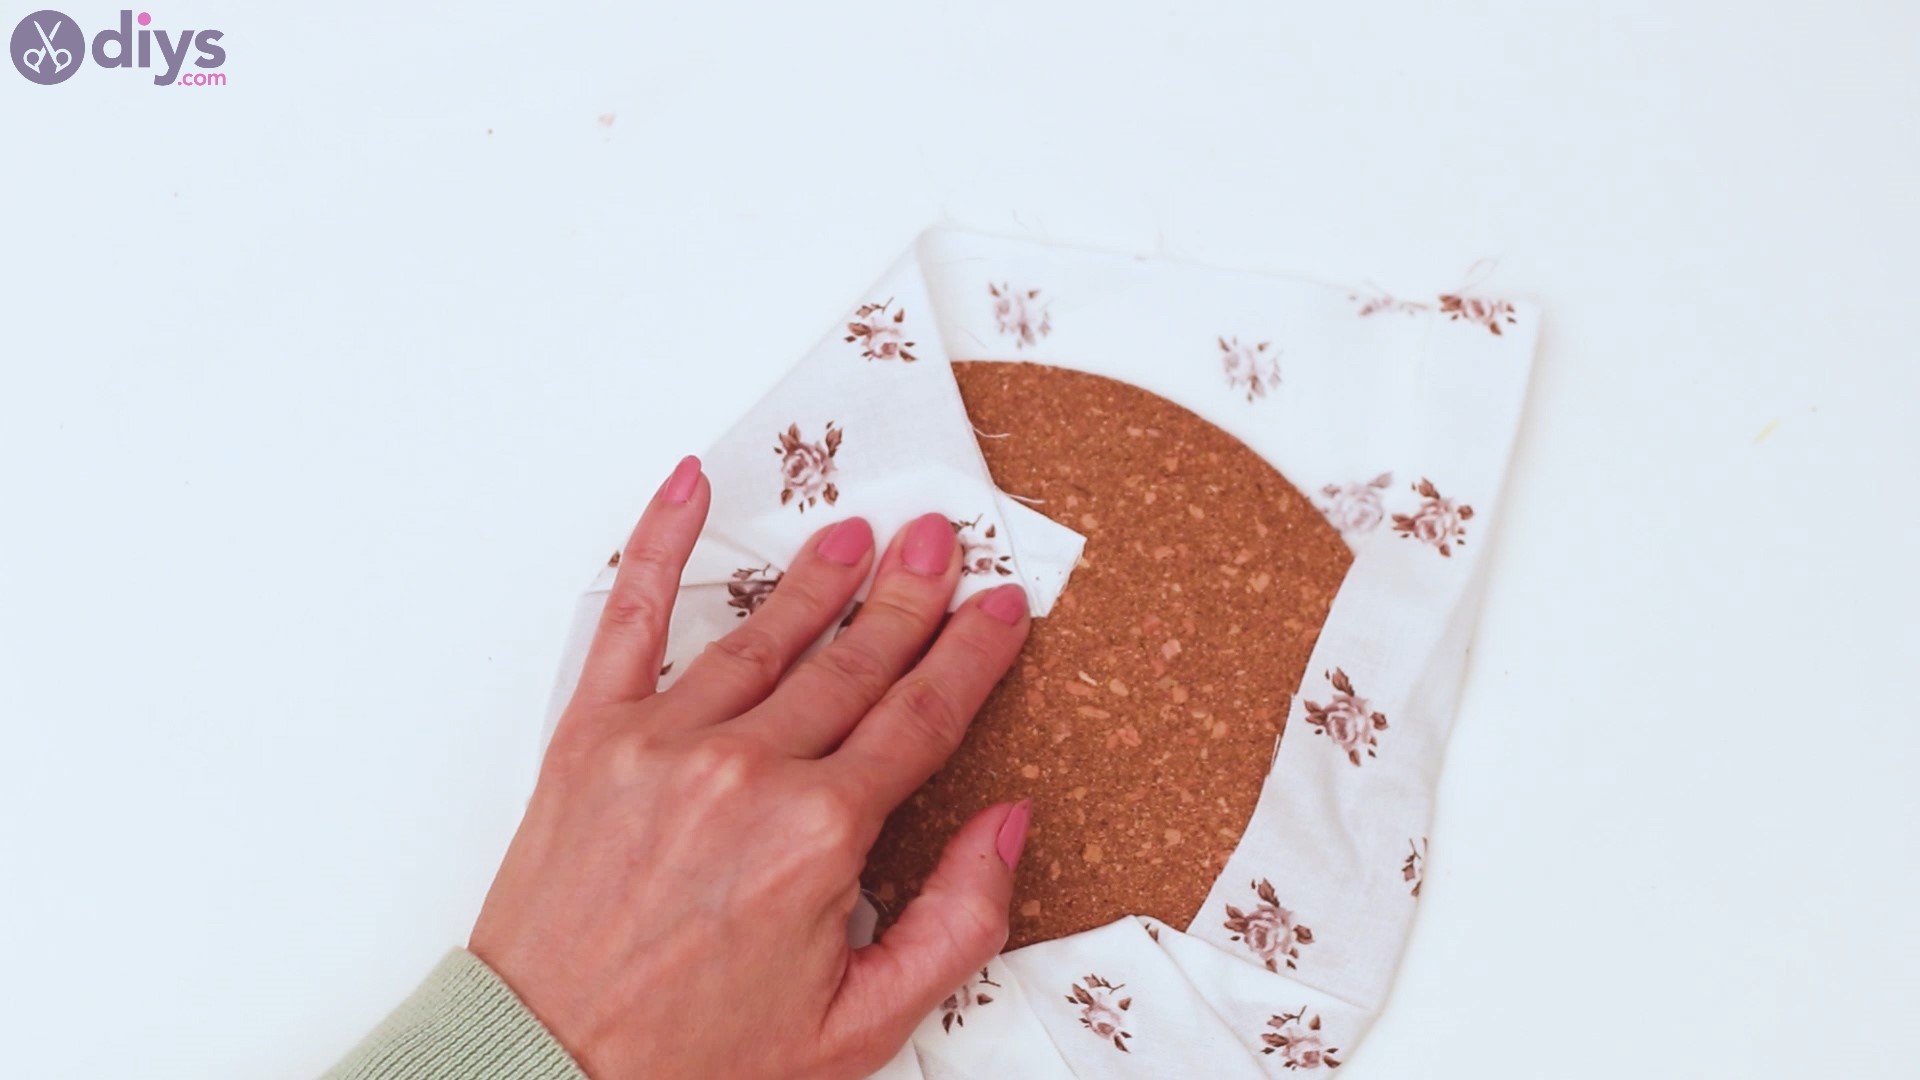
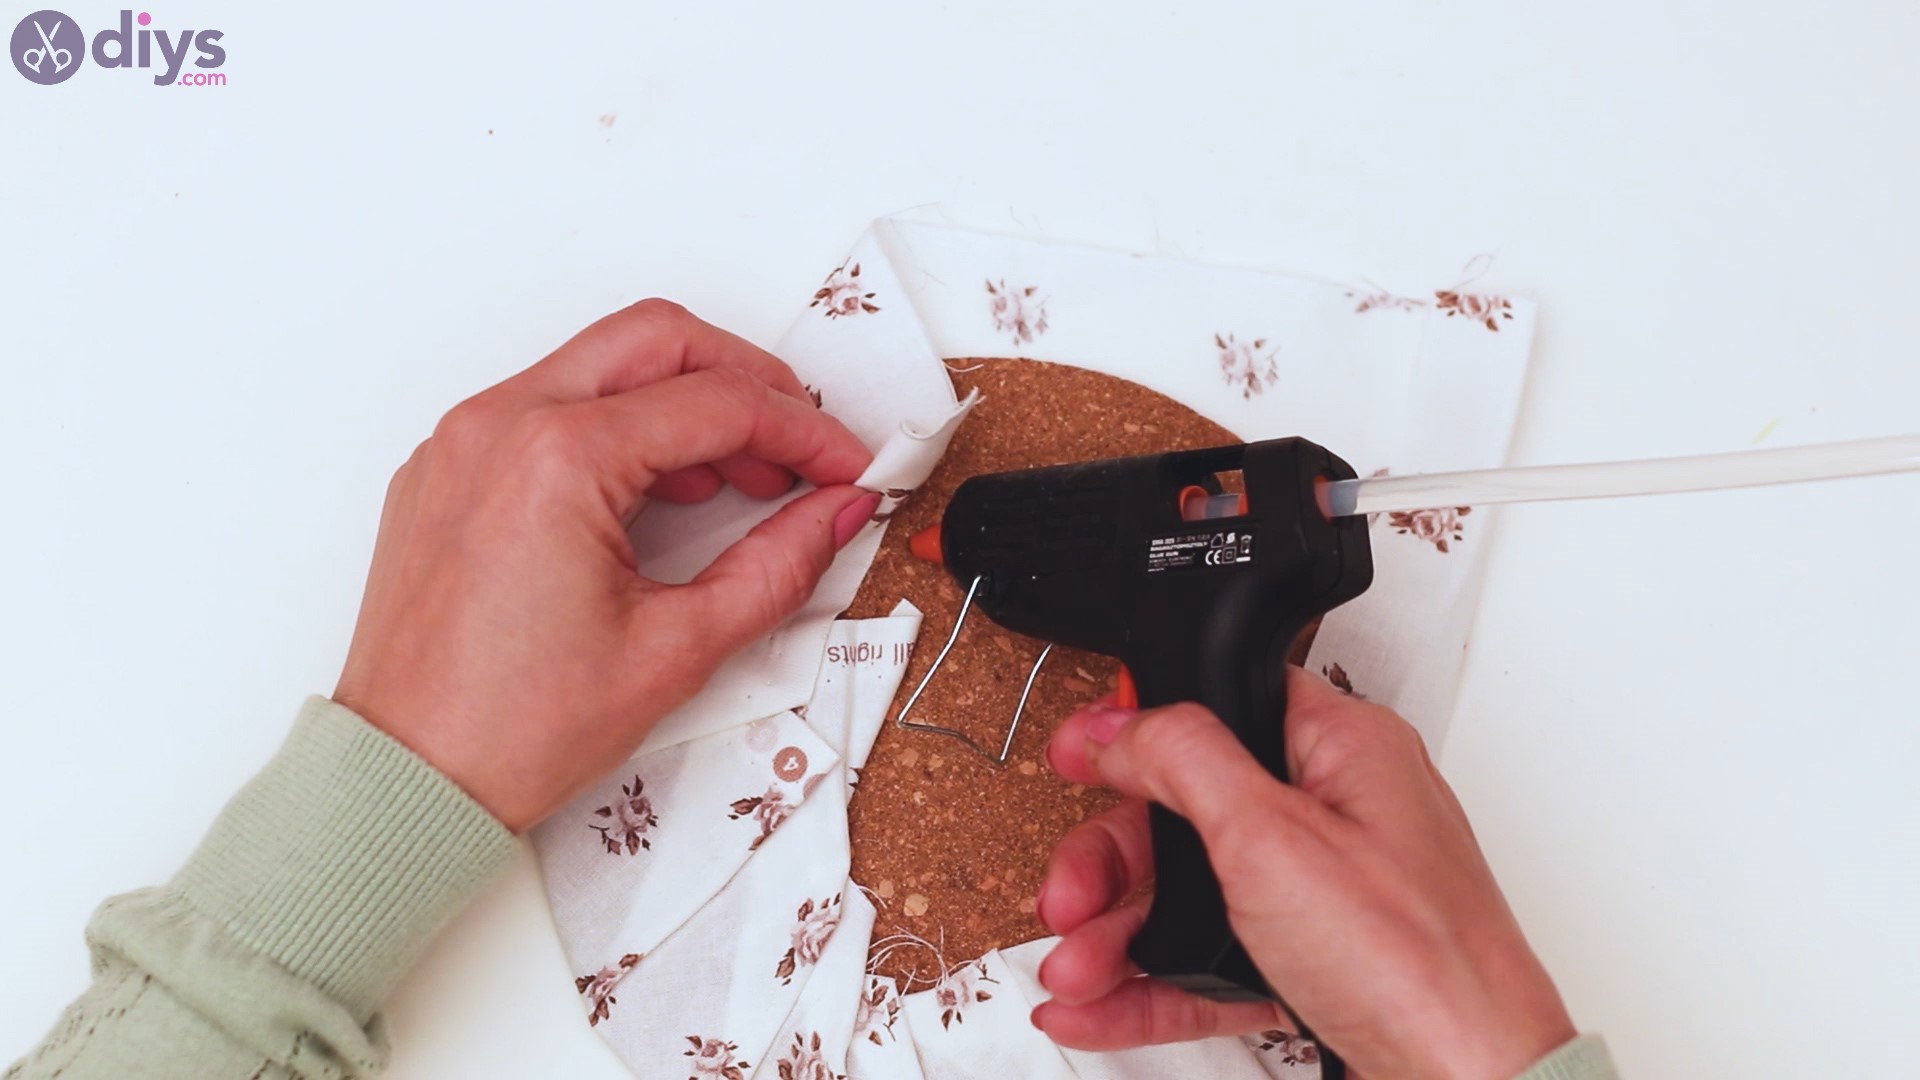
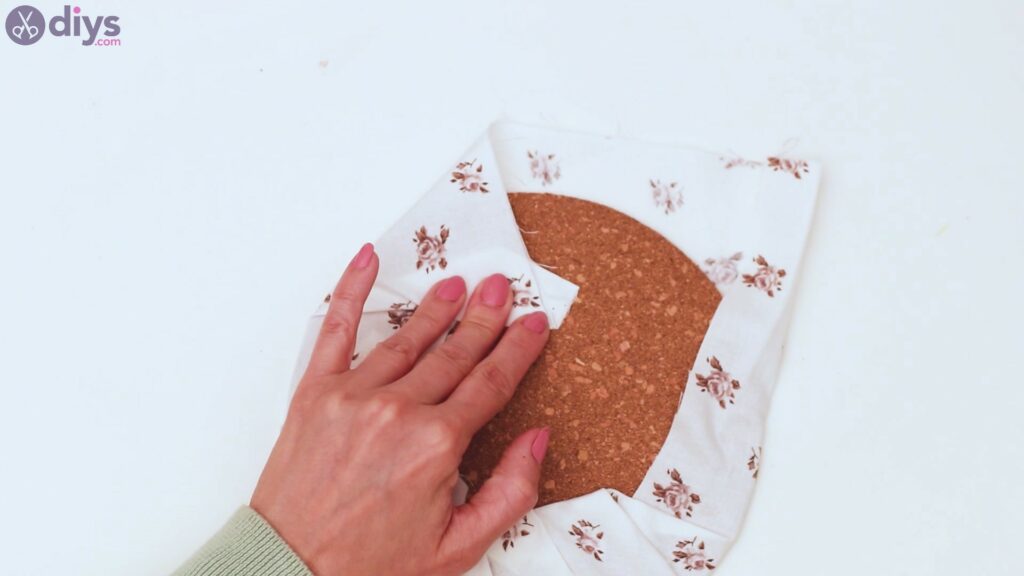
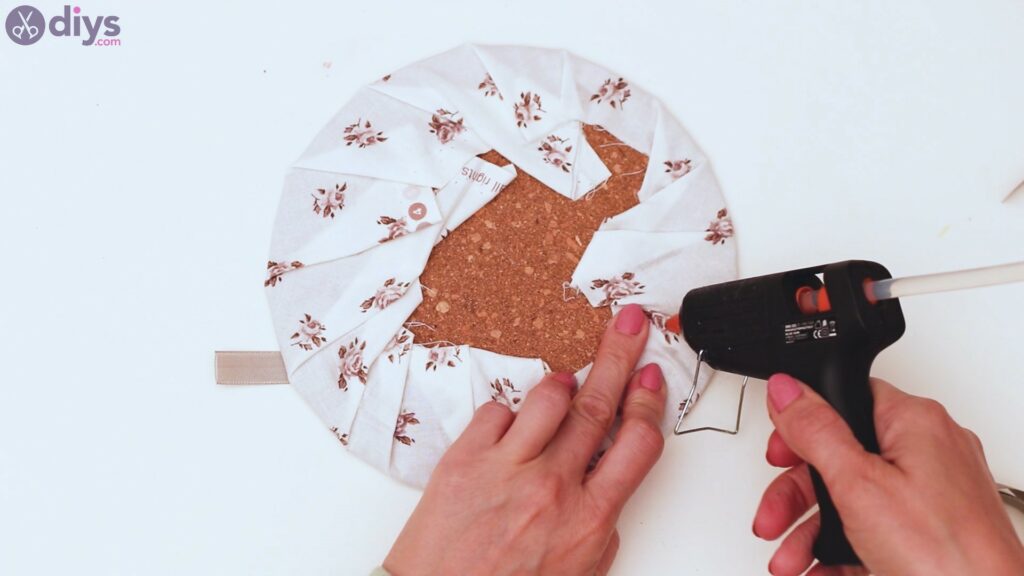
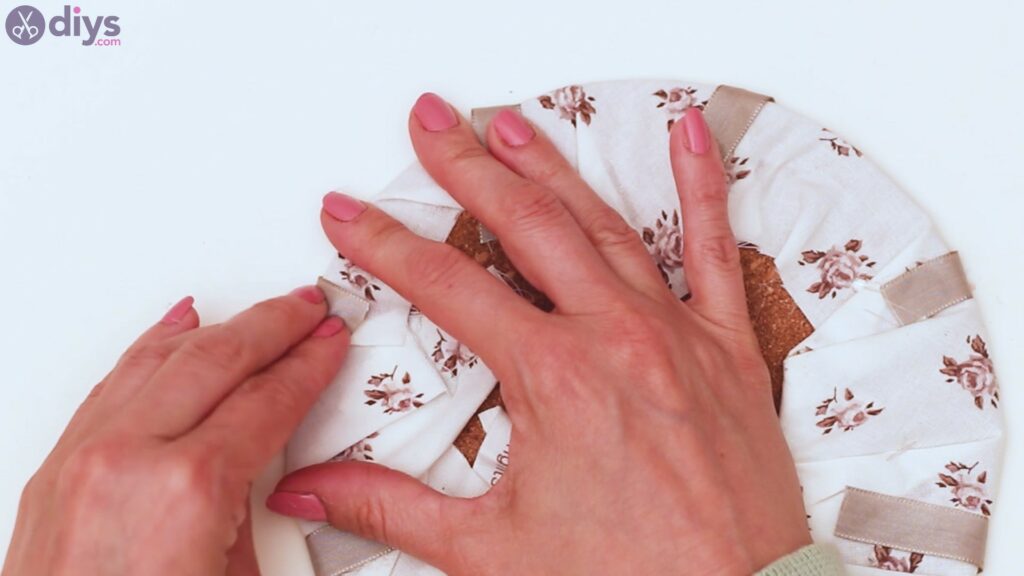
The first thing we’re going to do is to add the fabric to the corkboard. If it’s a patterned fabric like we have here, you’ll want to make sure the pattern is face down. Add the corkboard on top of the fabric and start folding he material on top of it.
Get theglue gunand start adding hot glue to the corkboard and pressing the fabric into the glue, holding it down for a few seconds so the glue sets.
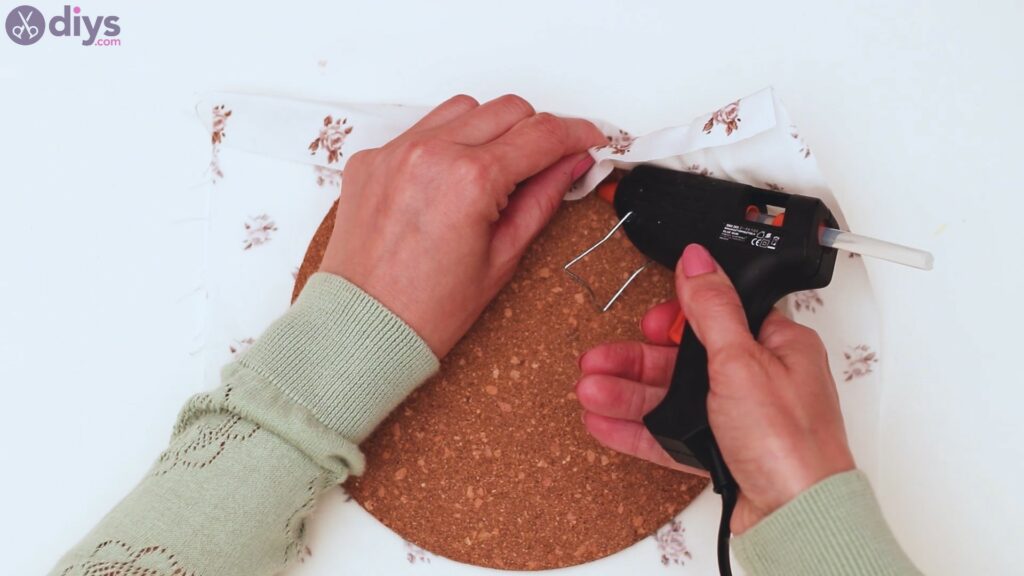
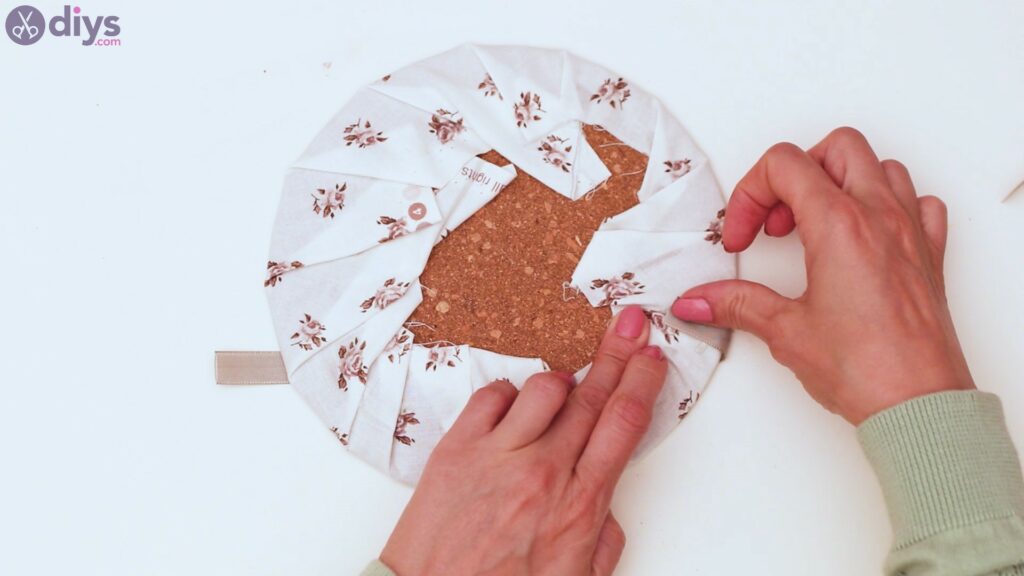
Keep folding the material over the round corkboard. Also, since this corkboard is round, you’ll want to make some folds too, so the fabric remains stretched on the side you’re interested in.

You should add hot glue as you go, in small stretches, so it doesn’t dry out. Plus, in this way, you won’t be hurrying to arrange the fabric which means you’ll do a better job at it.

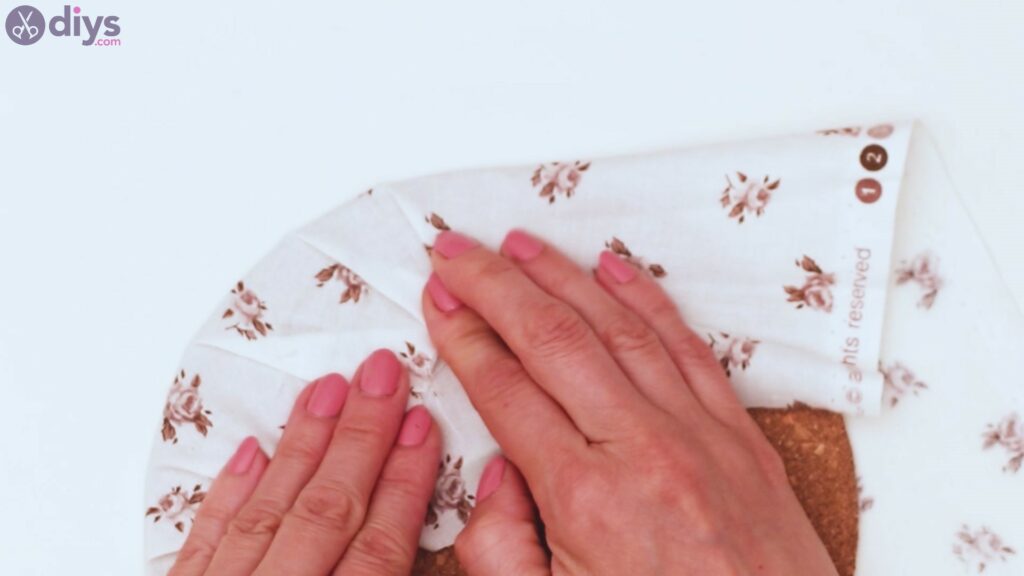
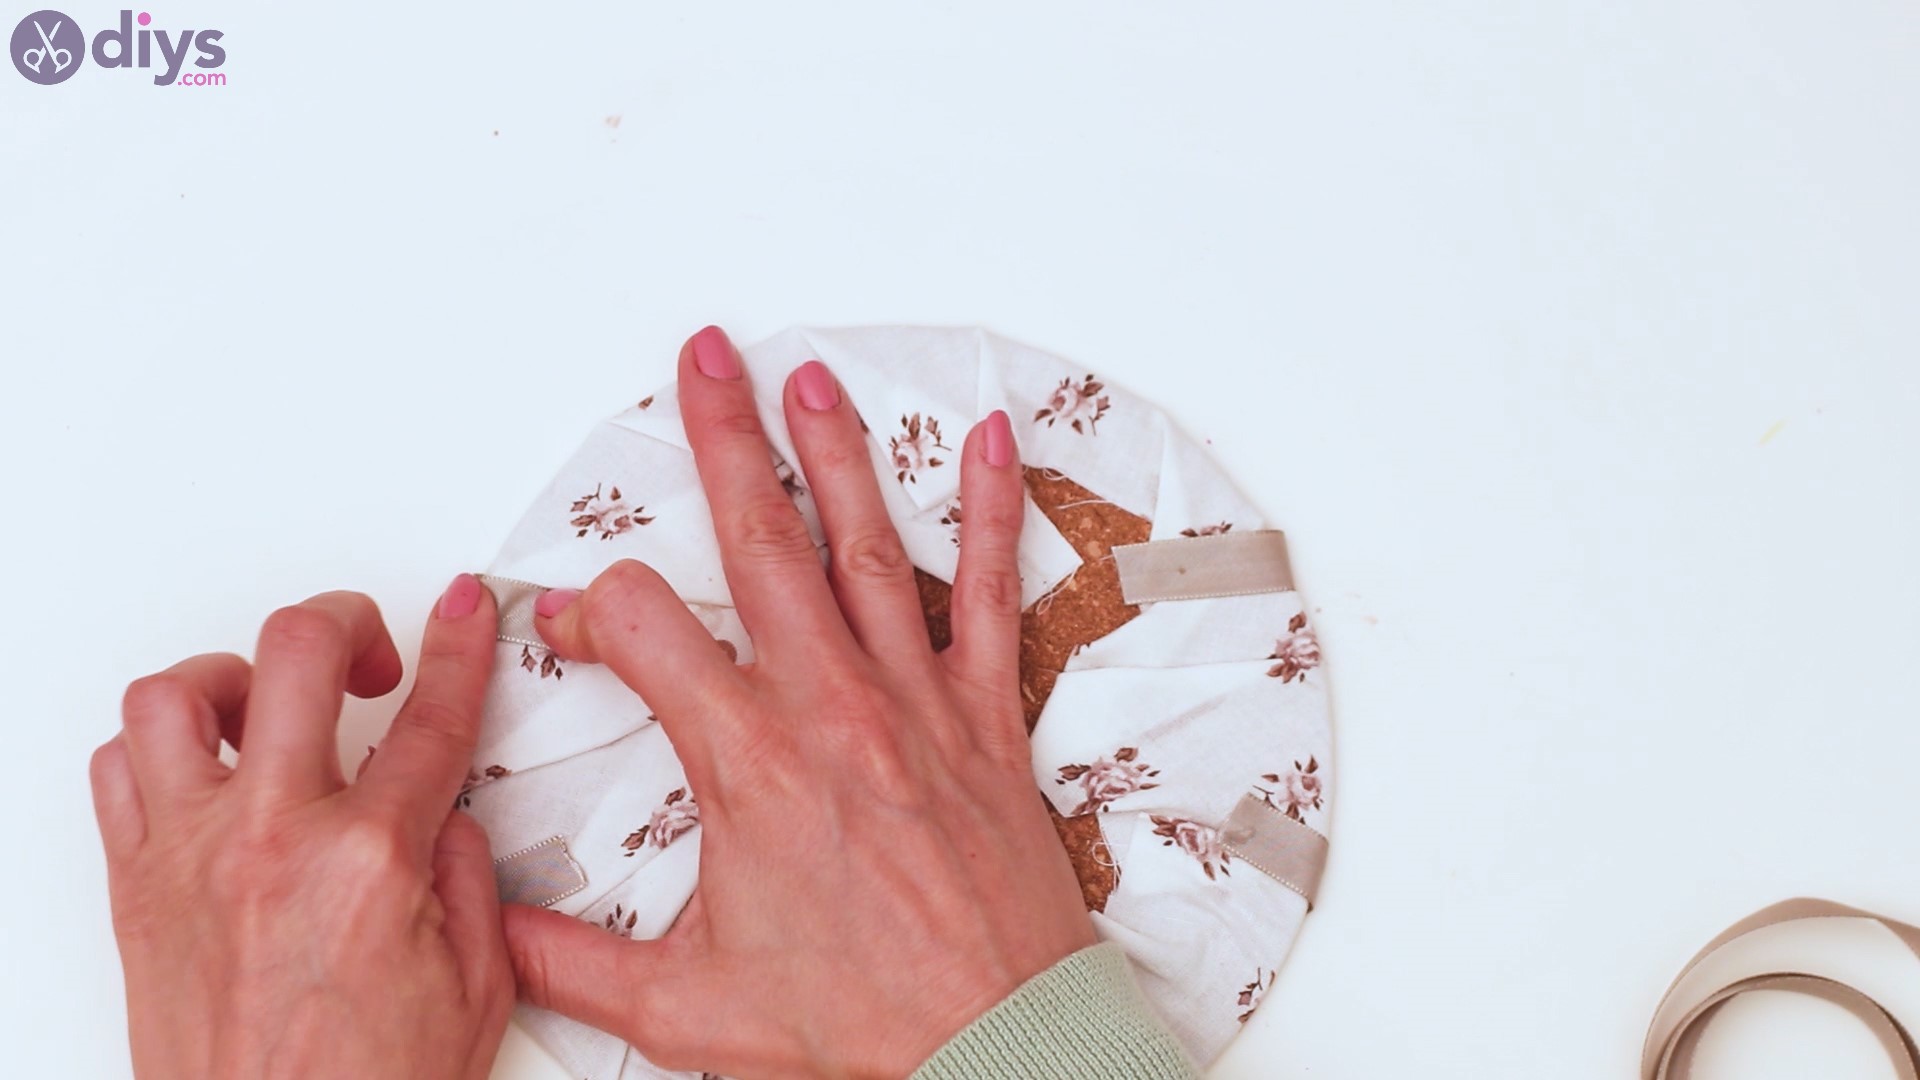
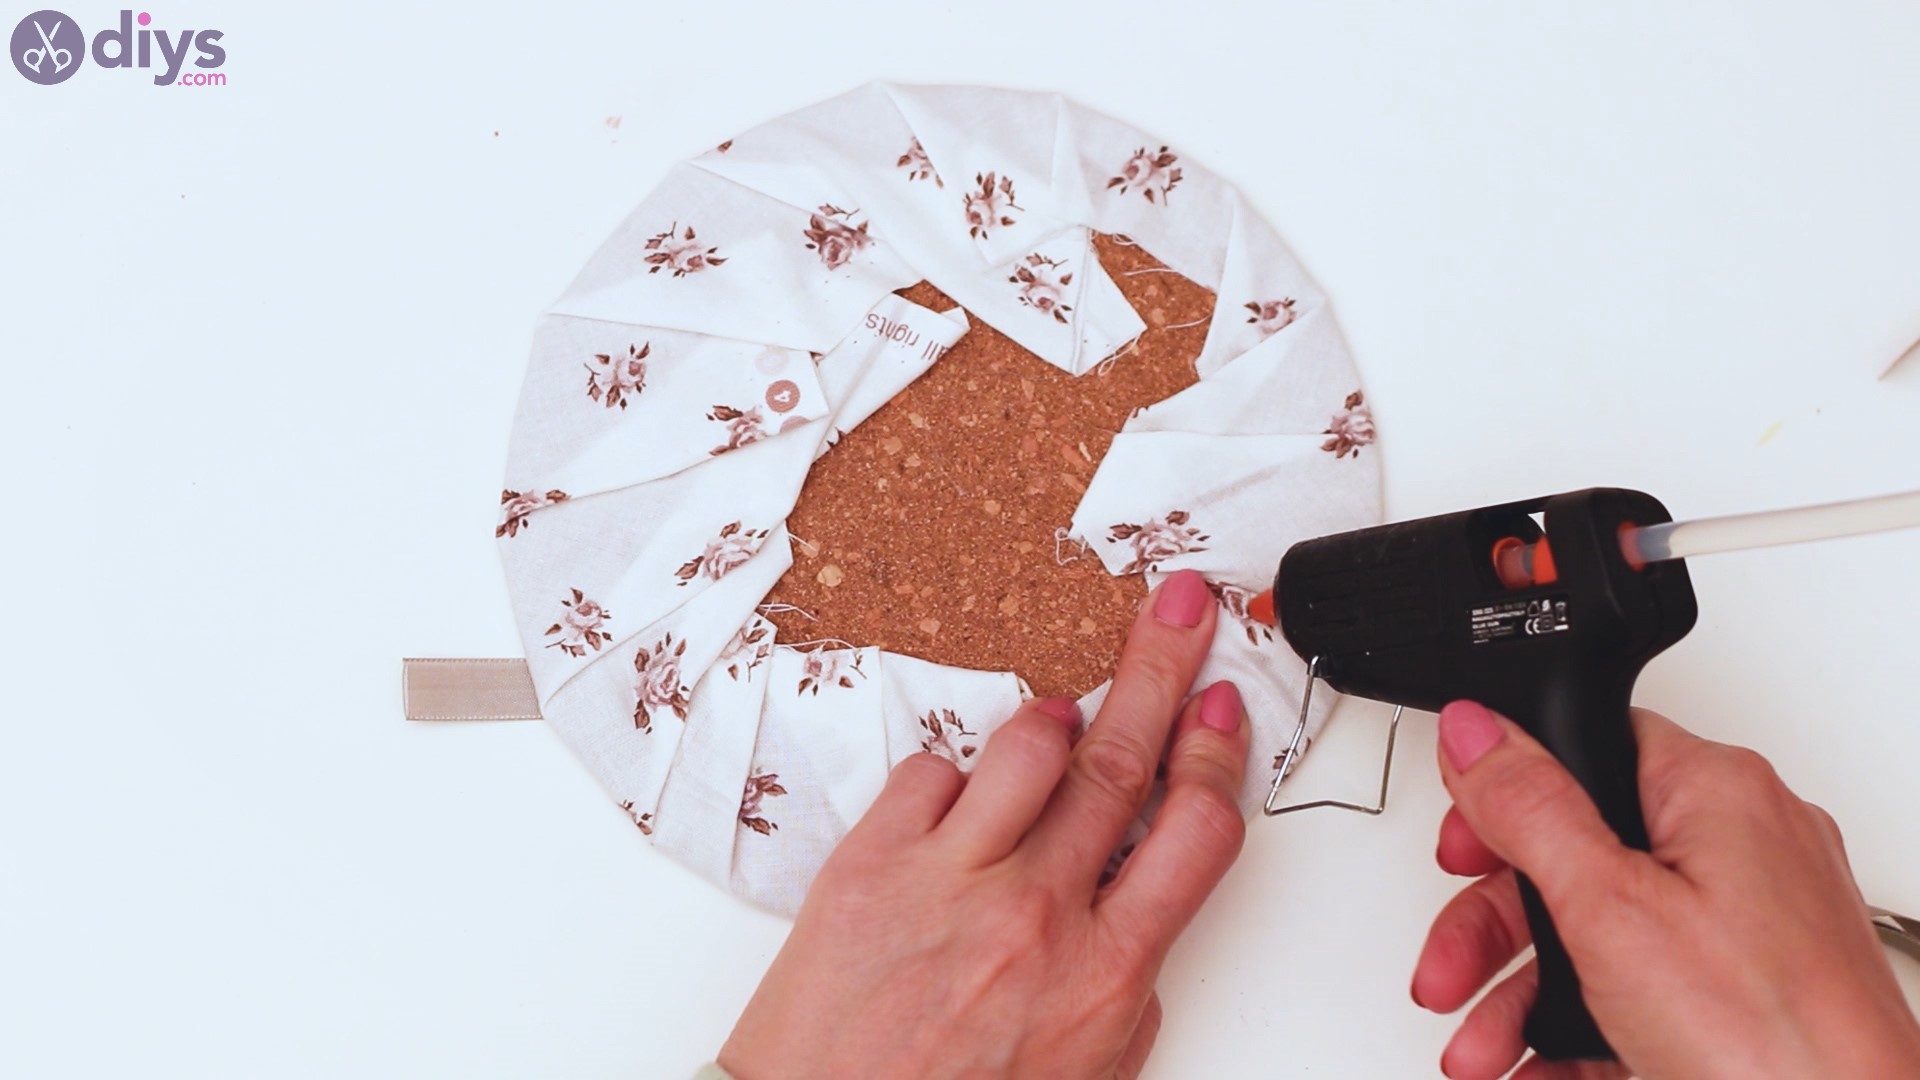
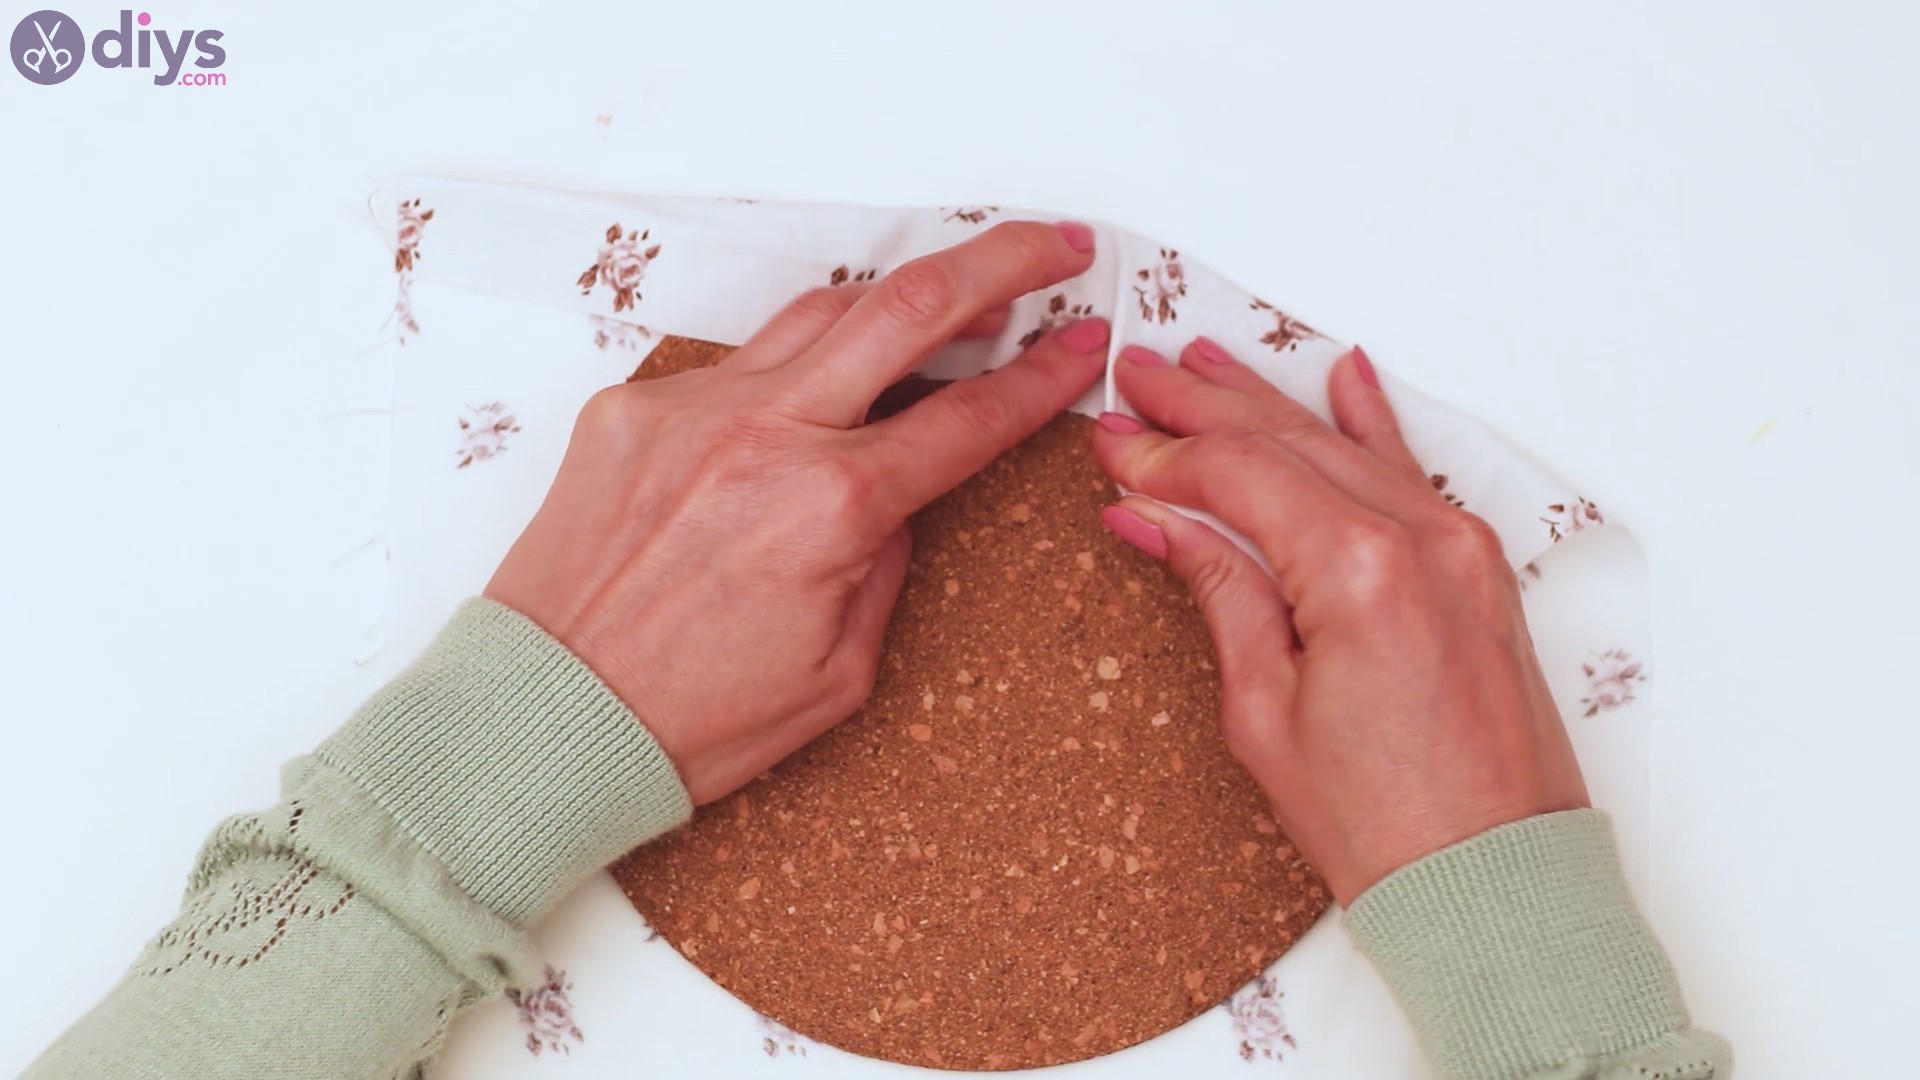
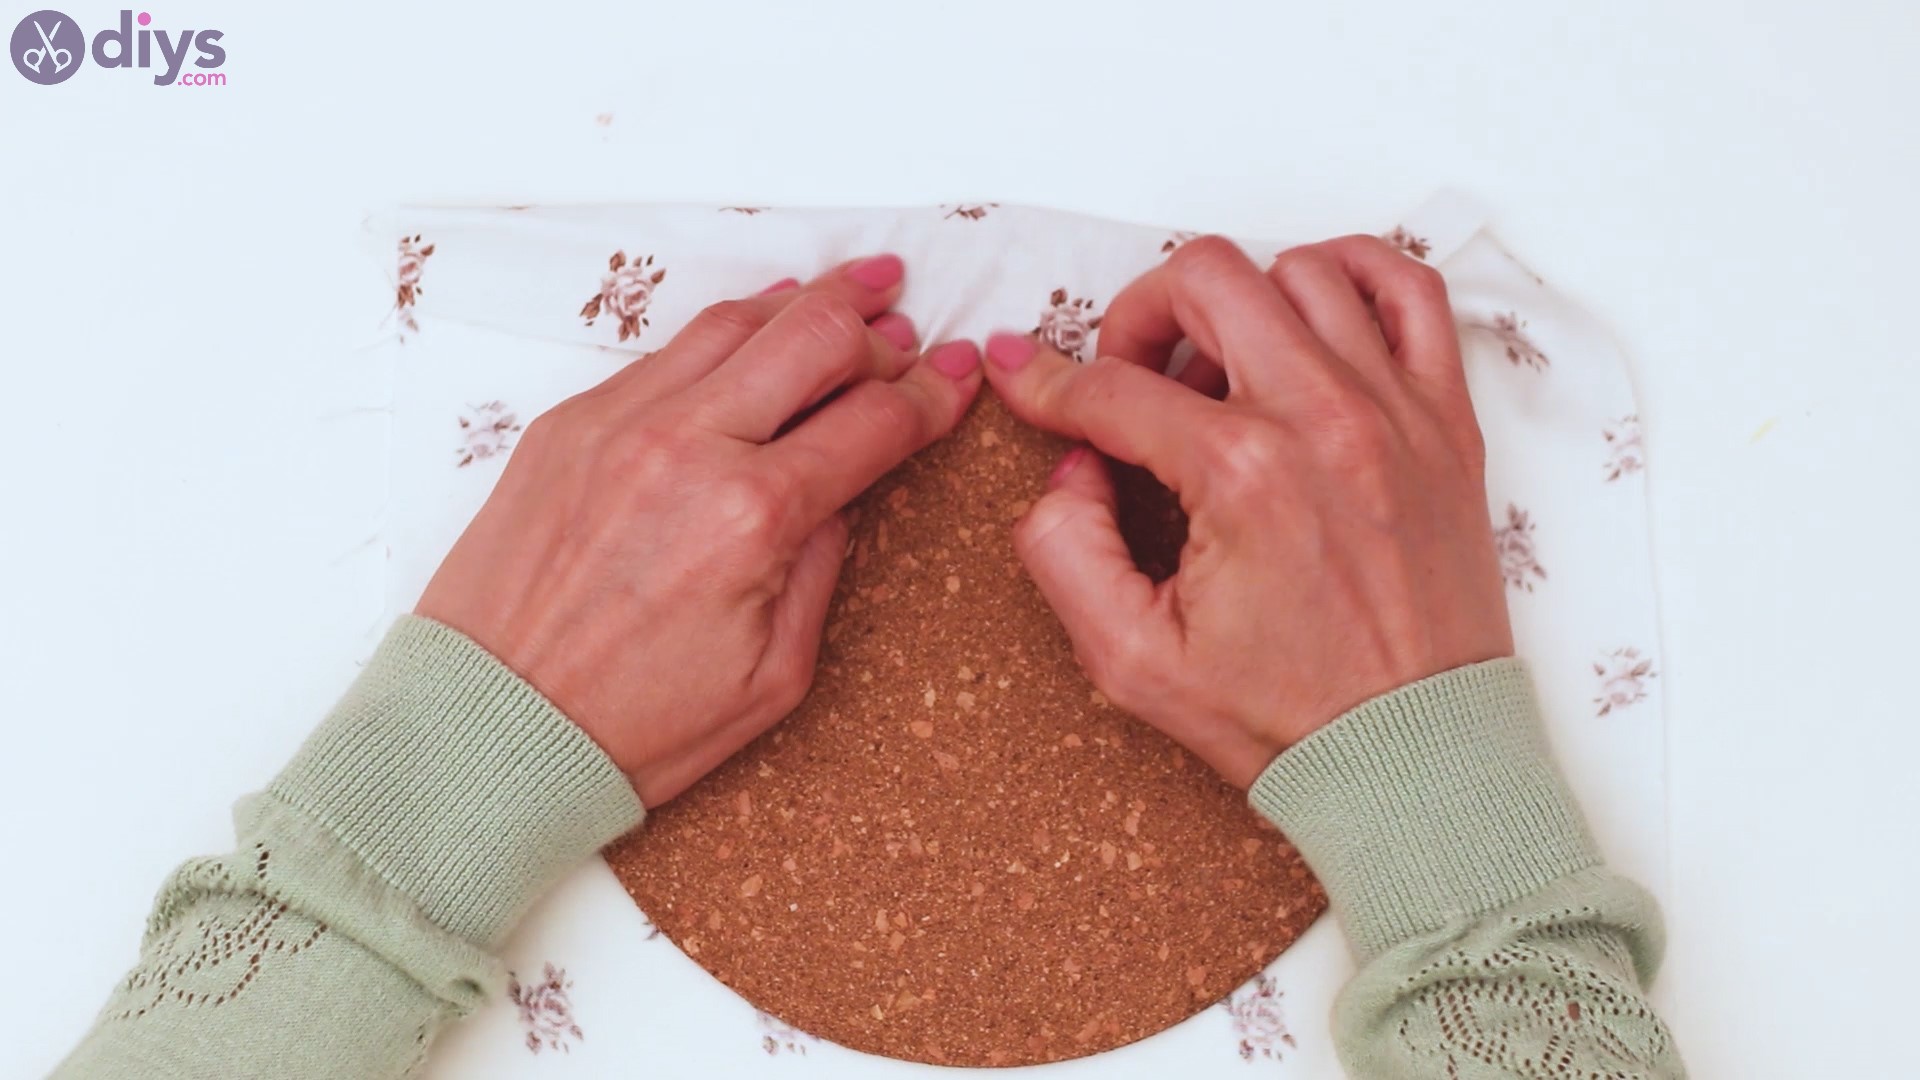
Check out the folds we made in the fabric in the picture below and try to do the same. Also, add loads of hot glue, even between the folds, so the material lays down flat.

Go around the whole corkboard and fold the material as necessary, creating a beautiful and clean design.
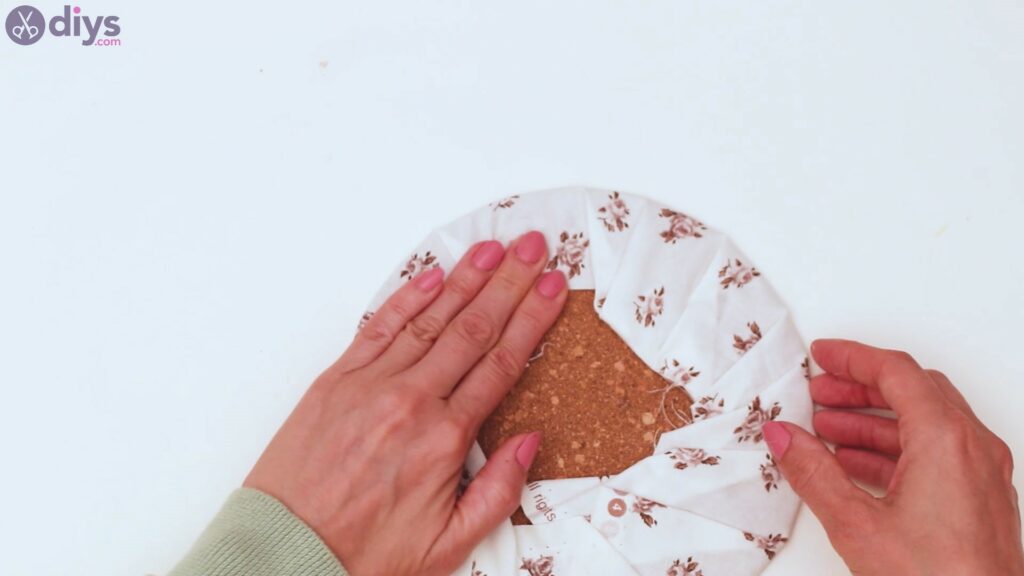
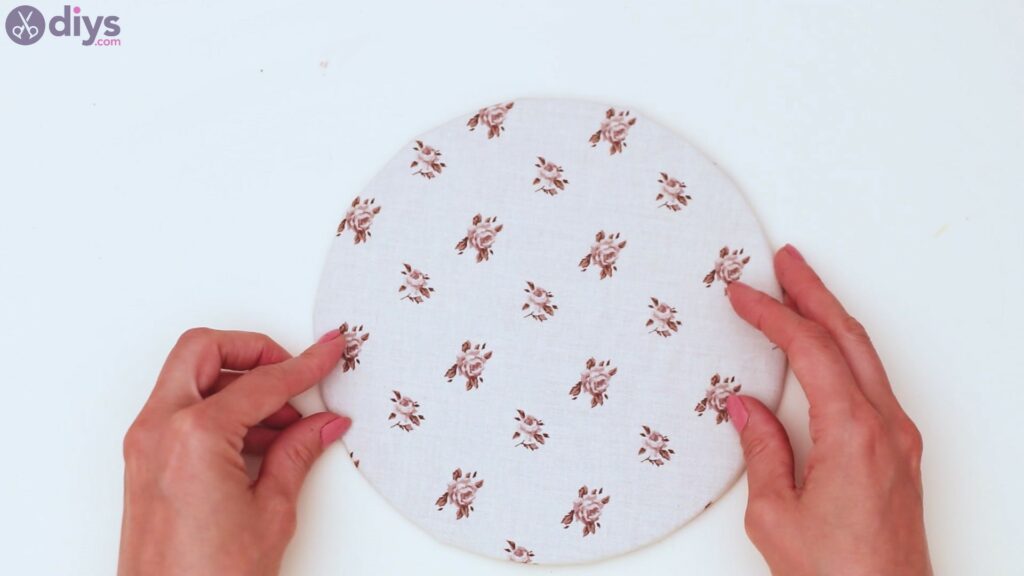
There you go! This is how the front of the corkboard looks now! The material is stretched and nicely placed.
Step 2: Add the ribbon
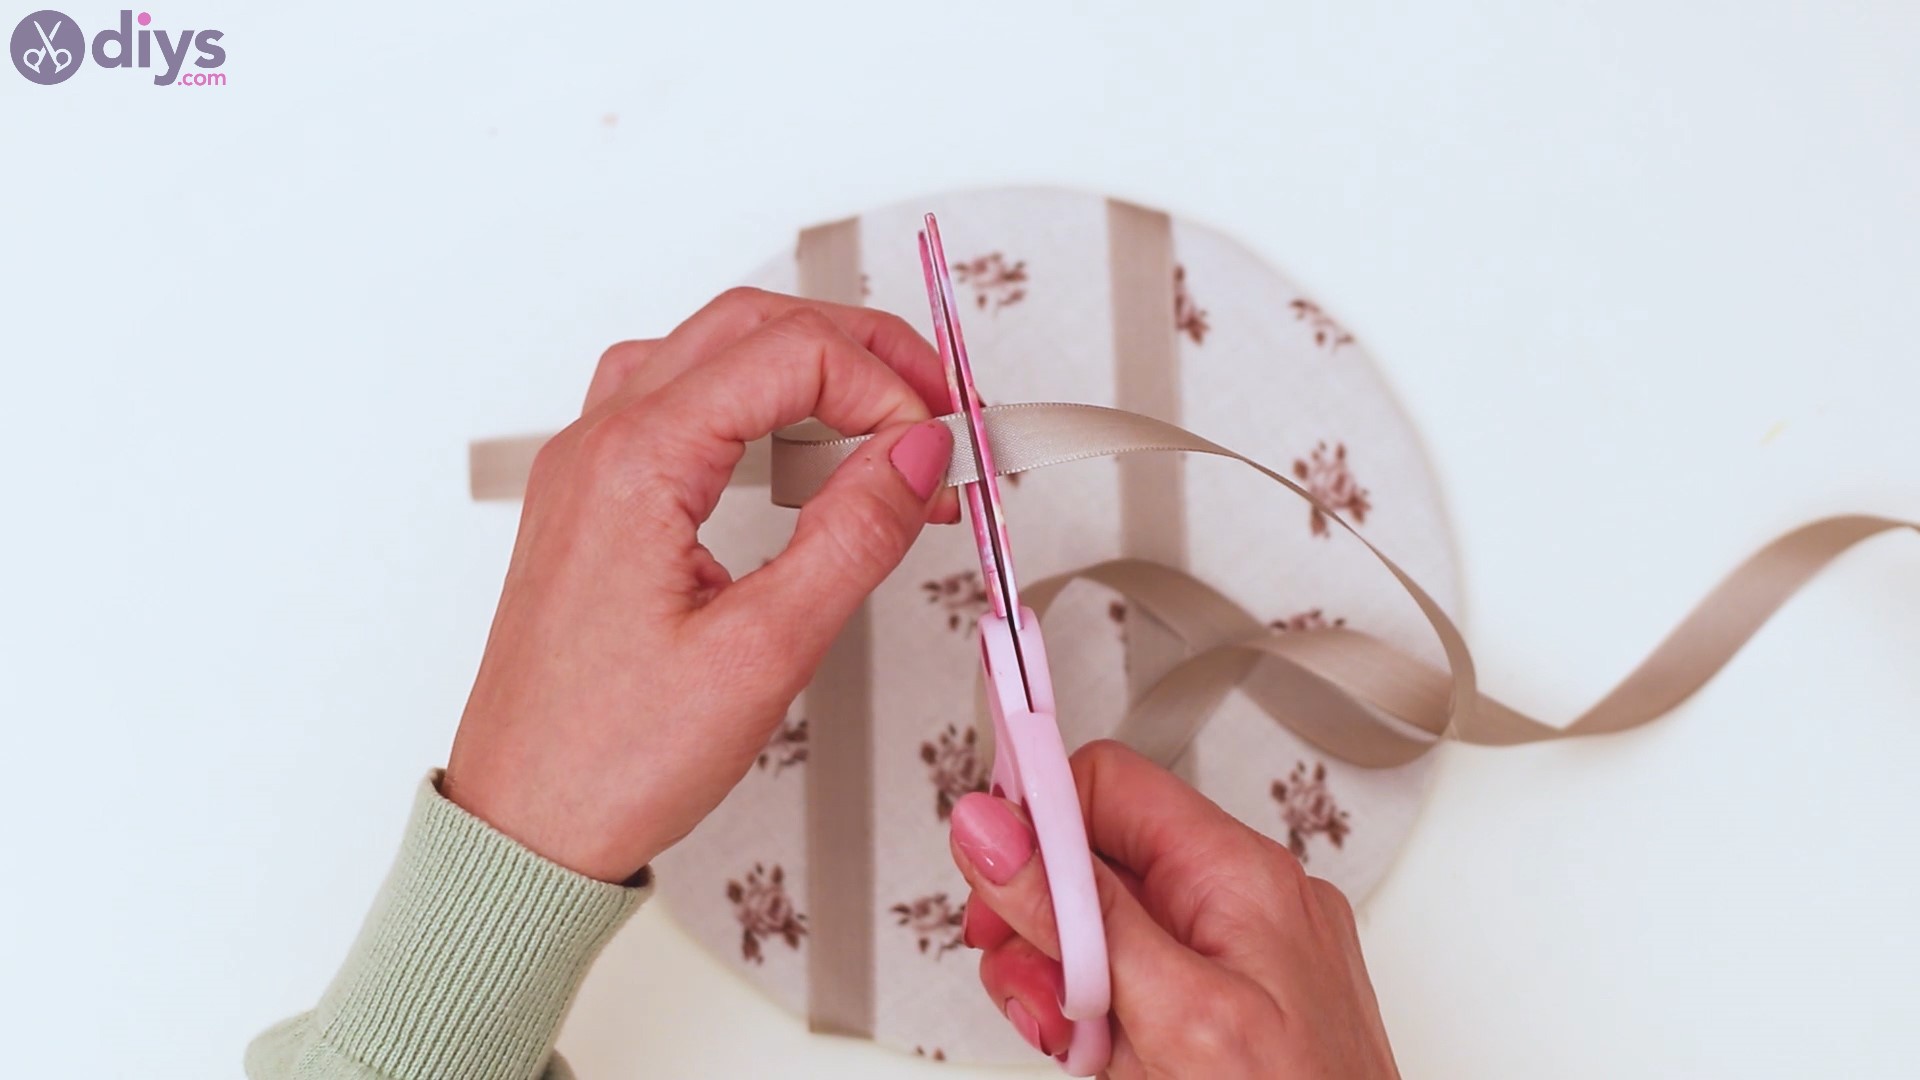
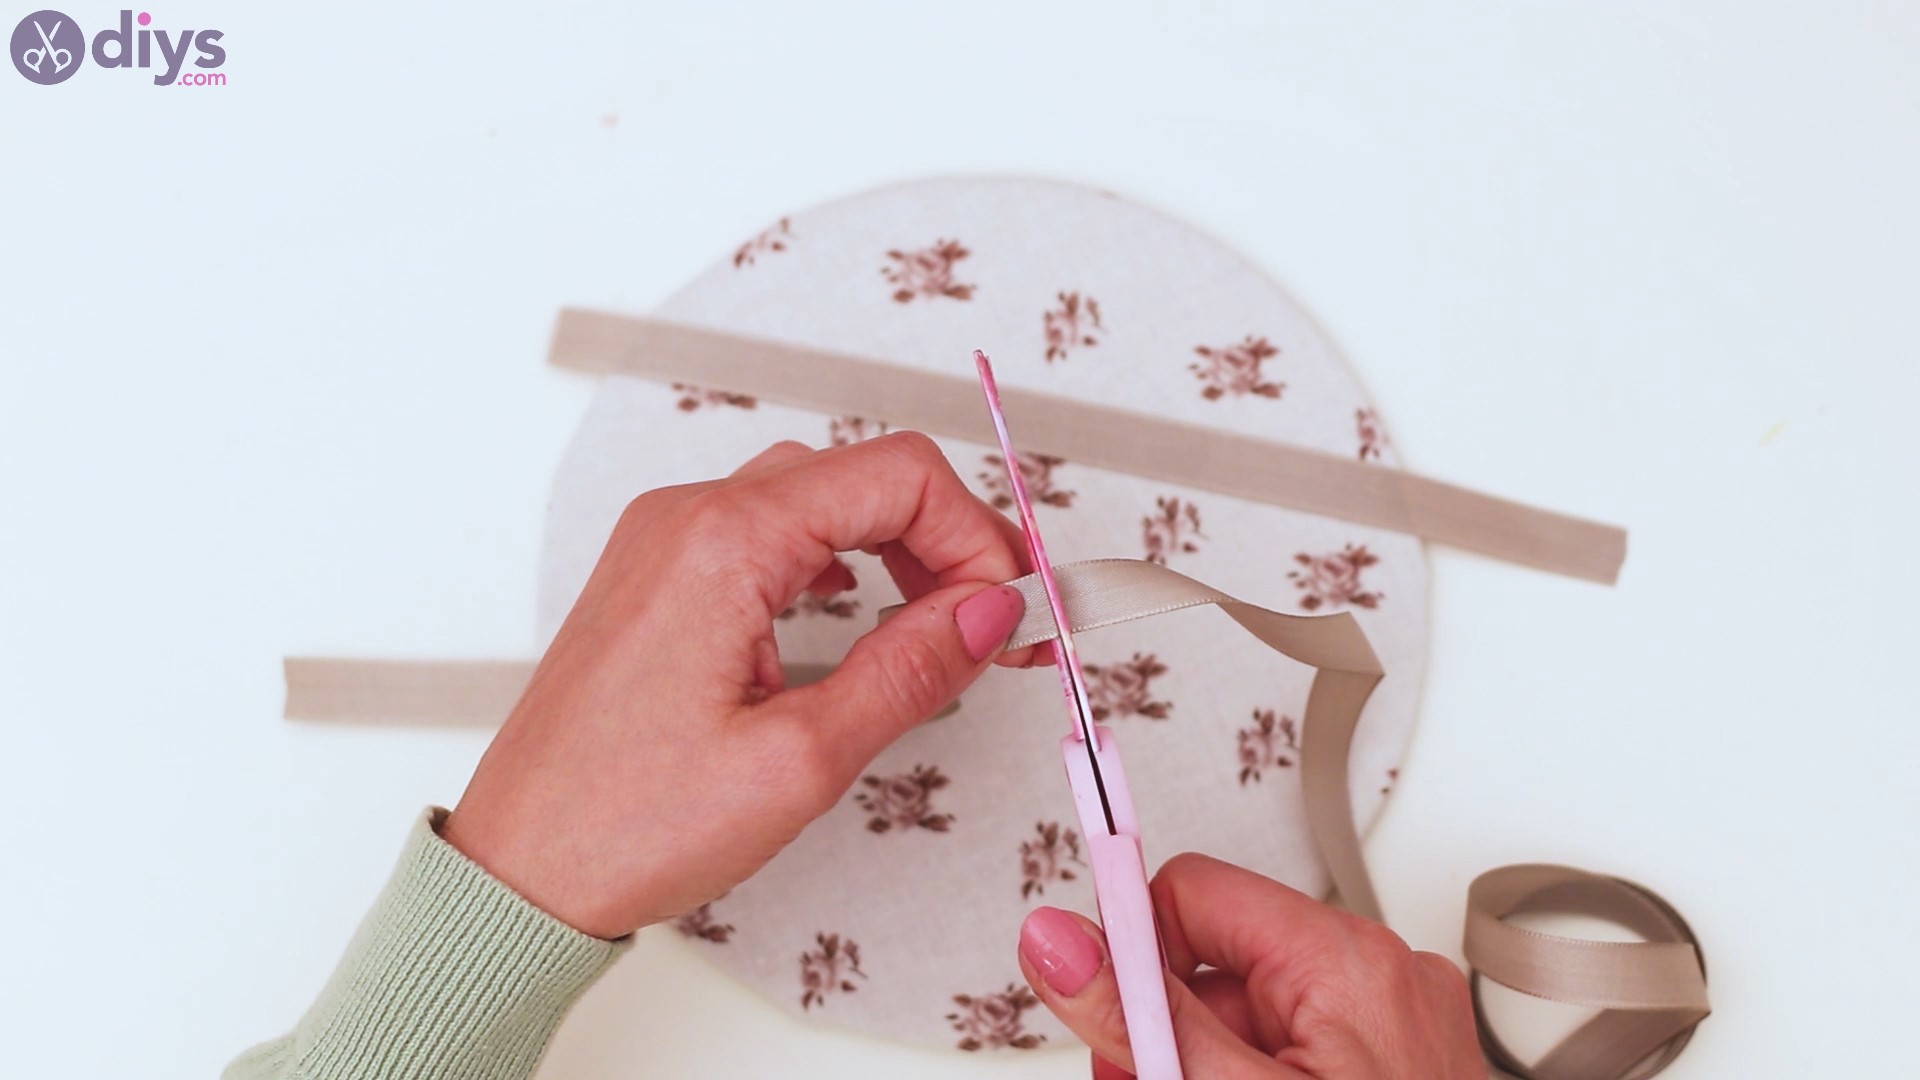
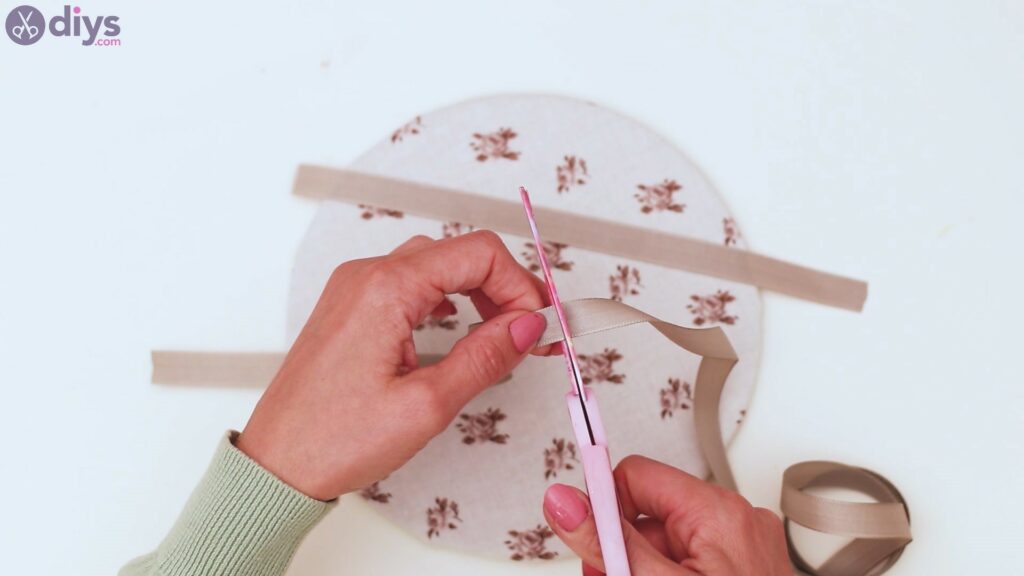
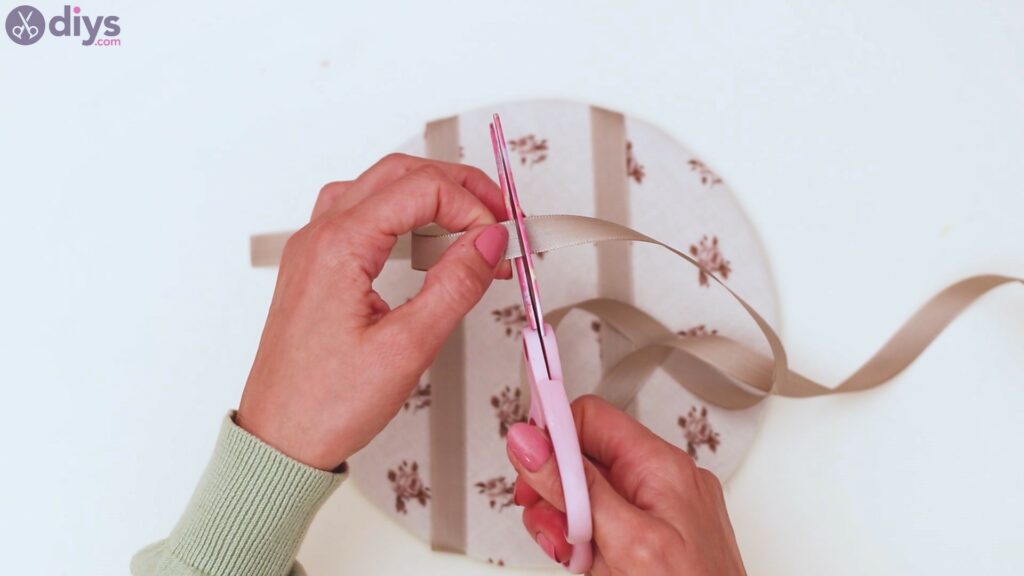
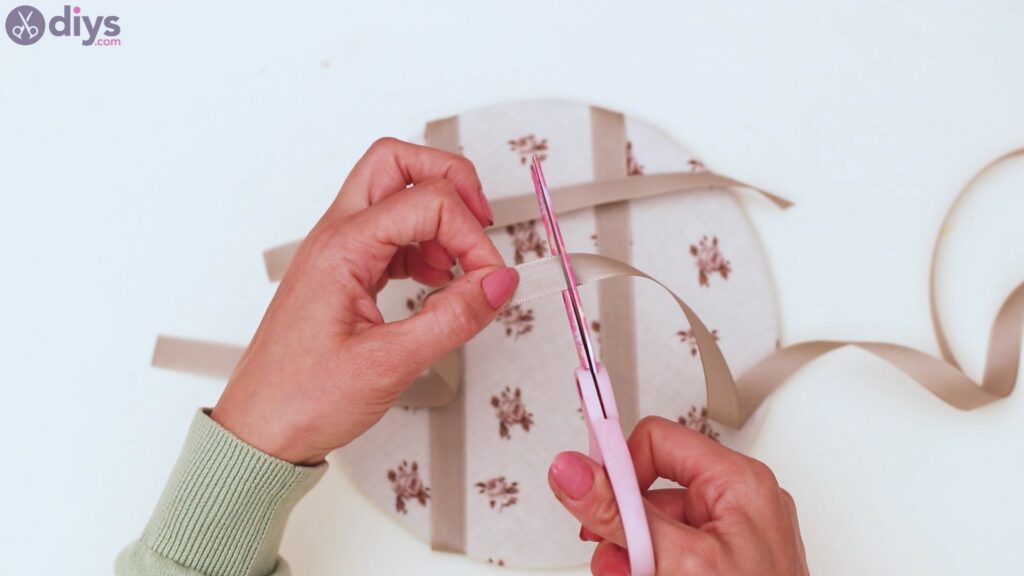
Now that the base for our memo board is done, we can start adding in the silk ribbon. Measure out a length of the ribbon by placing it over the memo board. You’ll want to get thescissorsand cut out the ribbon, but make sure you allow a lot of extra length there, since you’ll be gluing it to the back
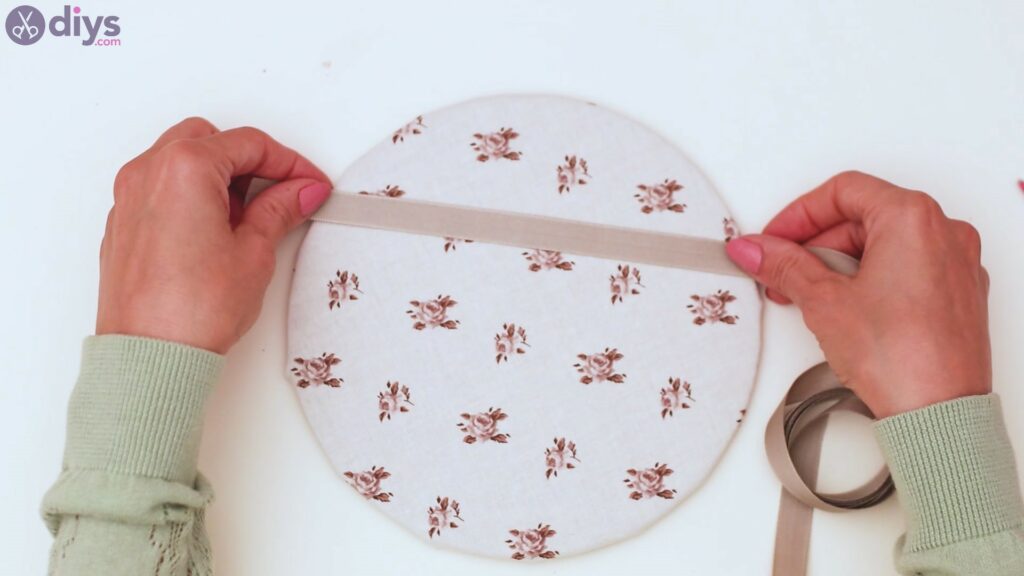

Cut a second piece of silk ribbon. You want both pieces to have similar lengths.
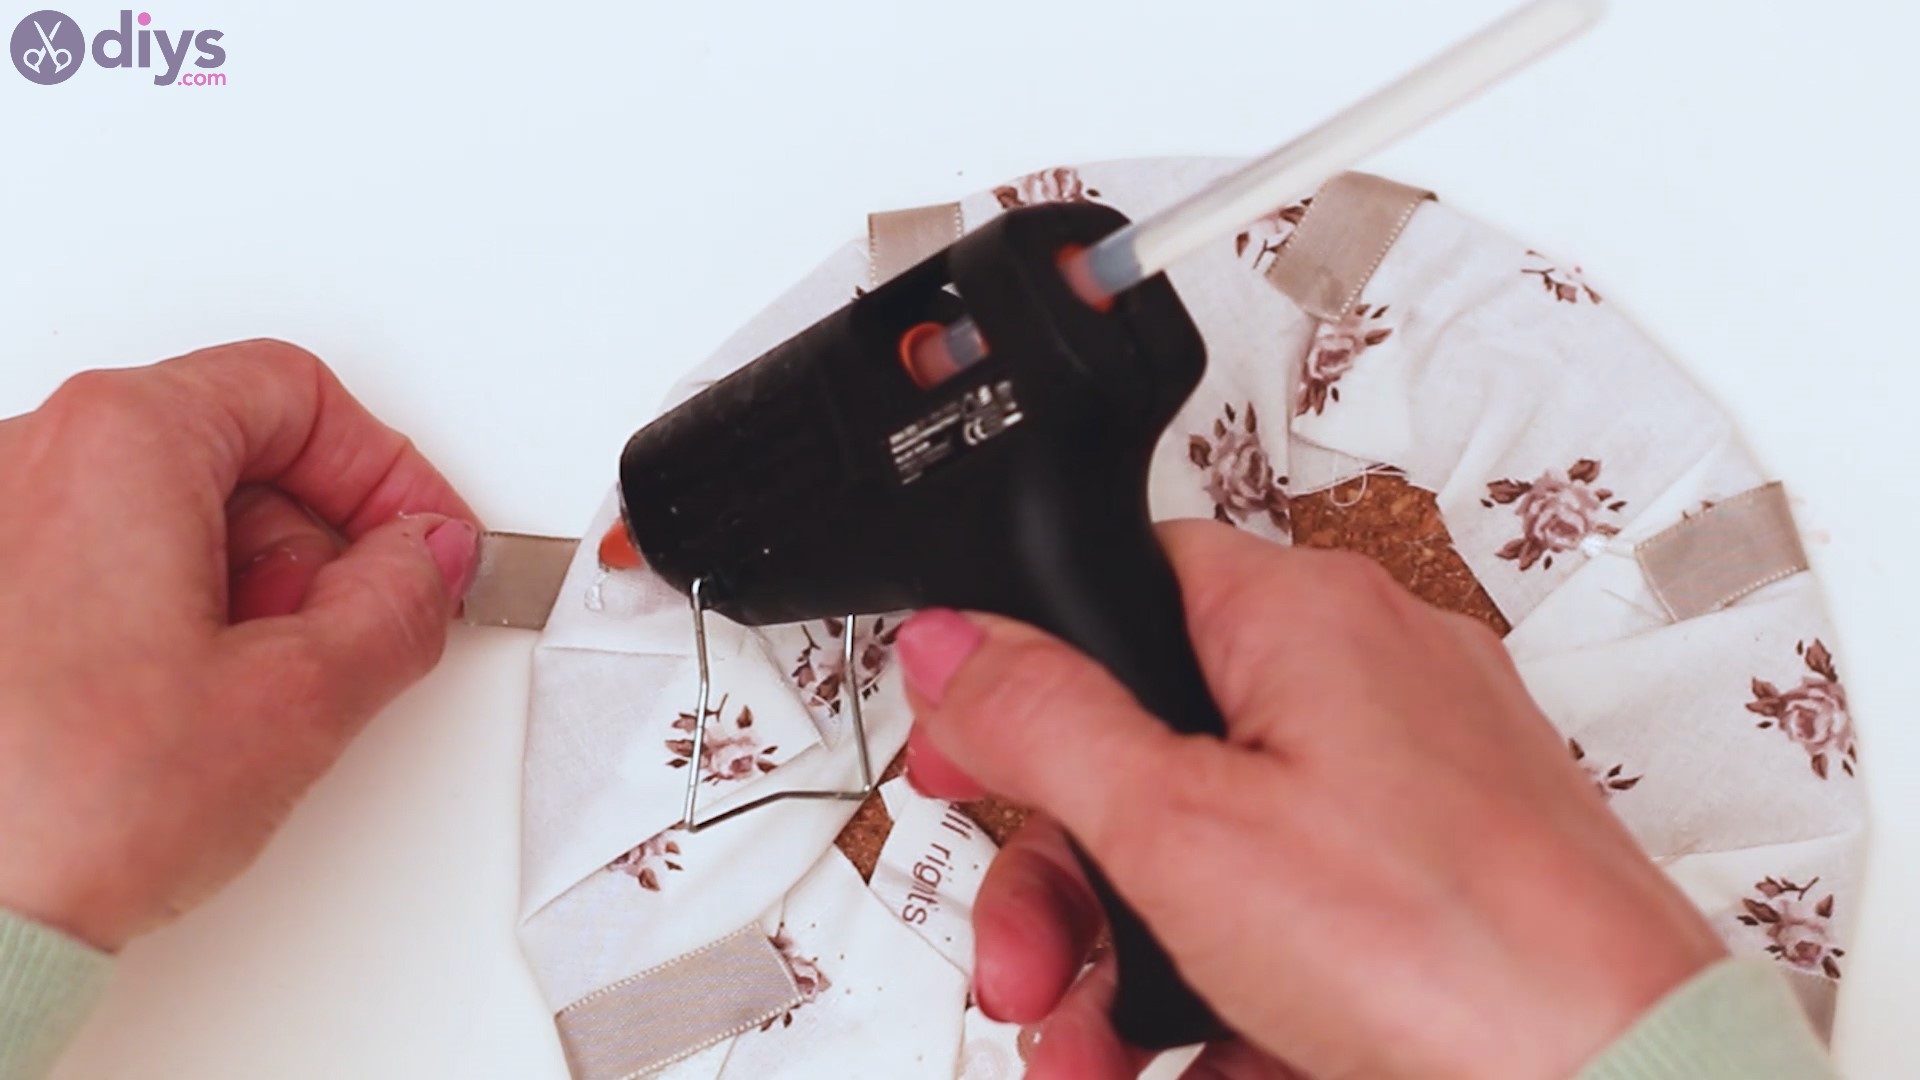
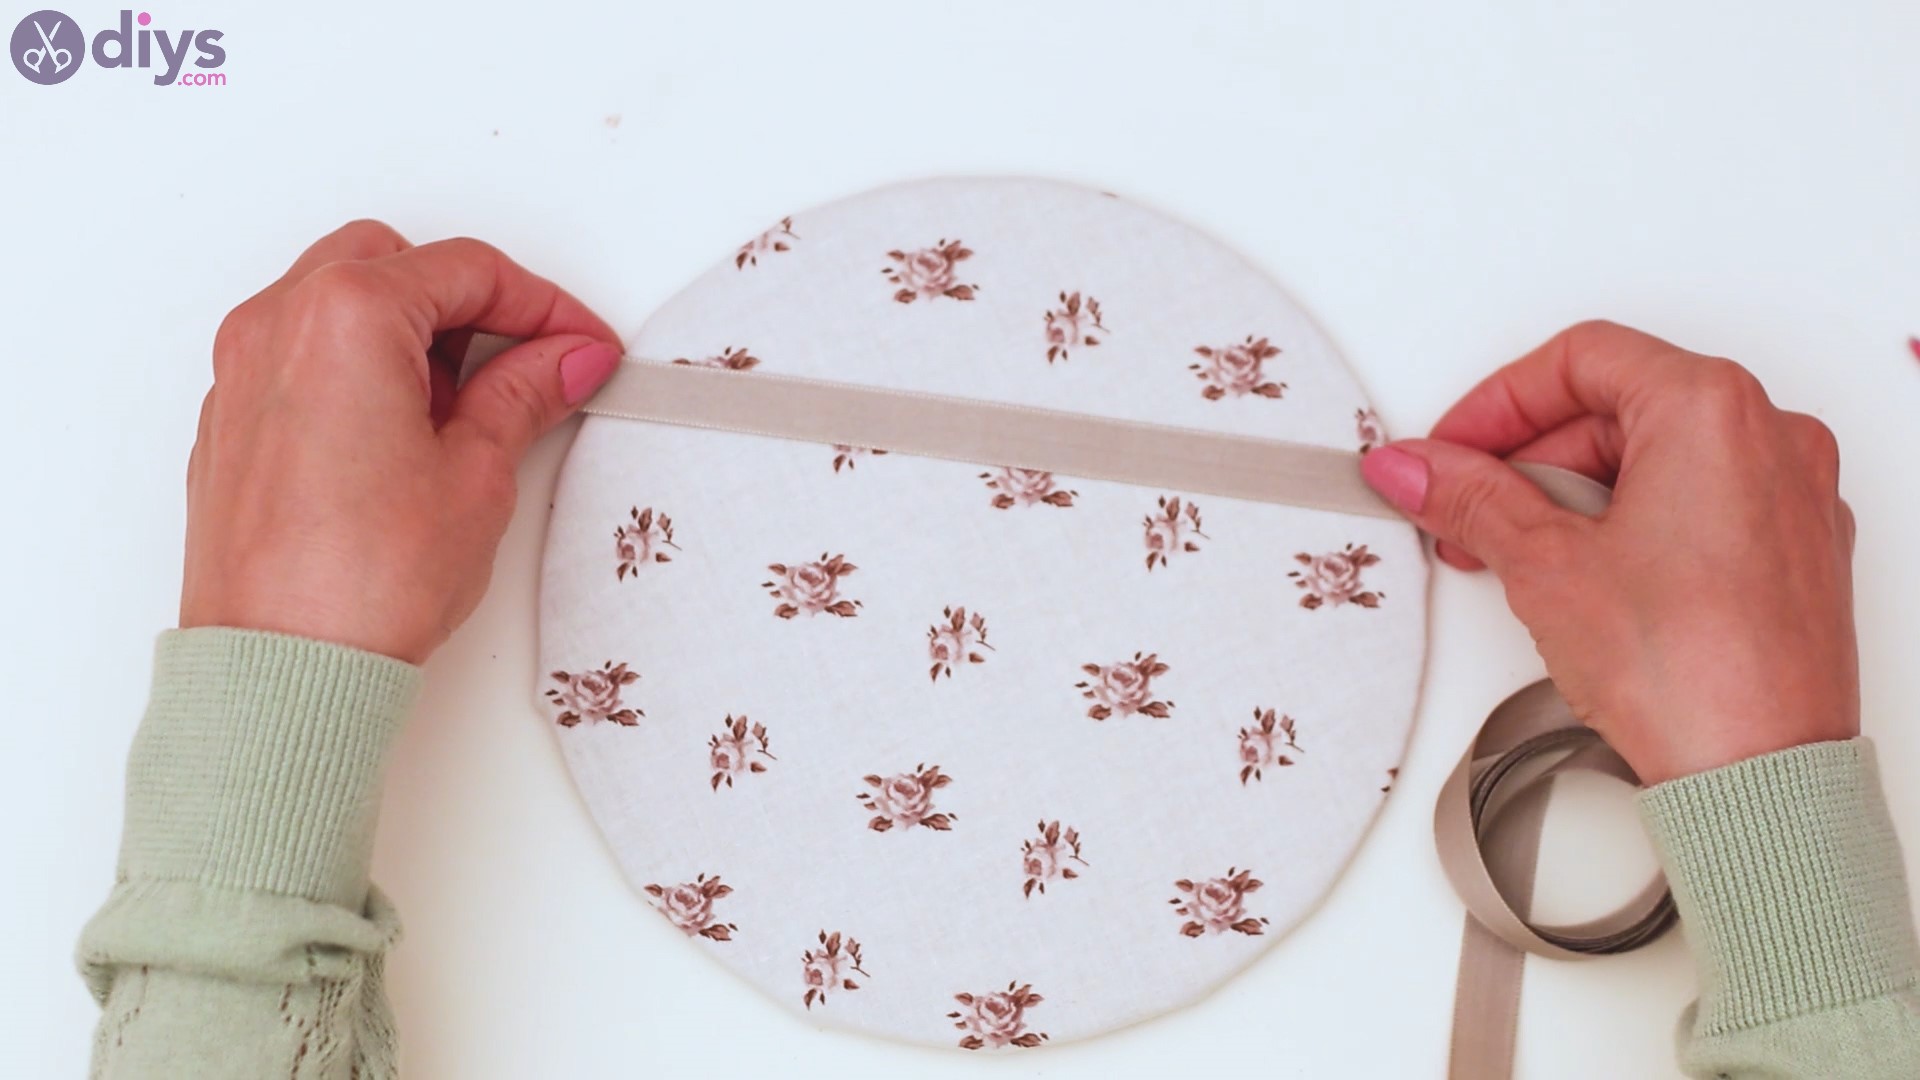
Turn the board over and add some hot glue over the fabric, placing the end of one of the ribbons over it.
You want to place the two pieces of ribbon straight over, horizontally. Make sure the ribbons are as straight as possible here.
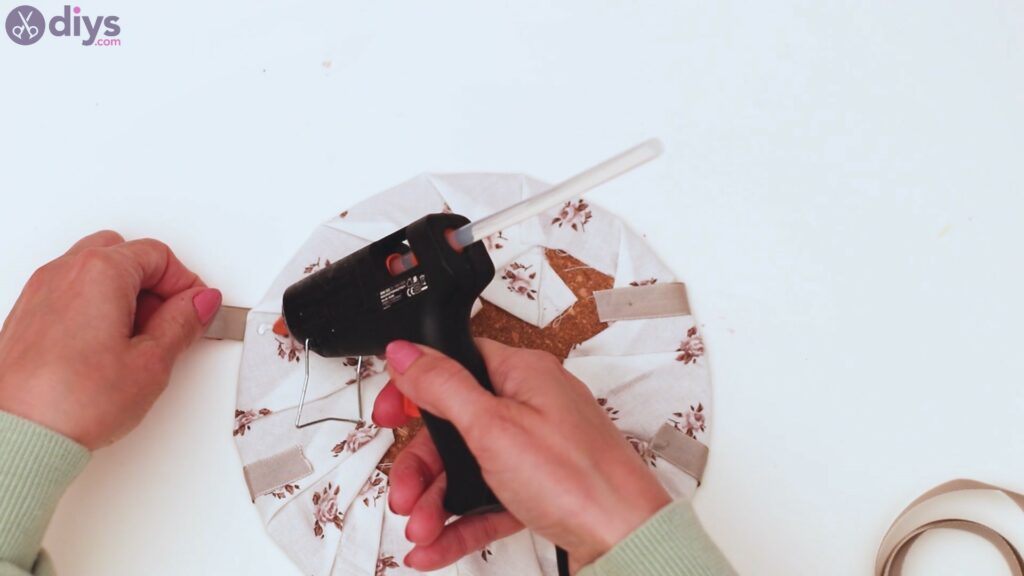

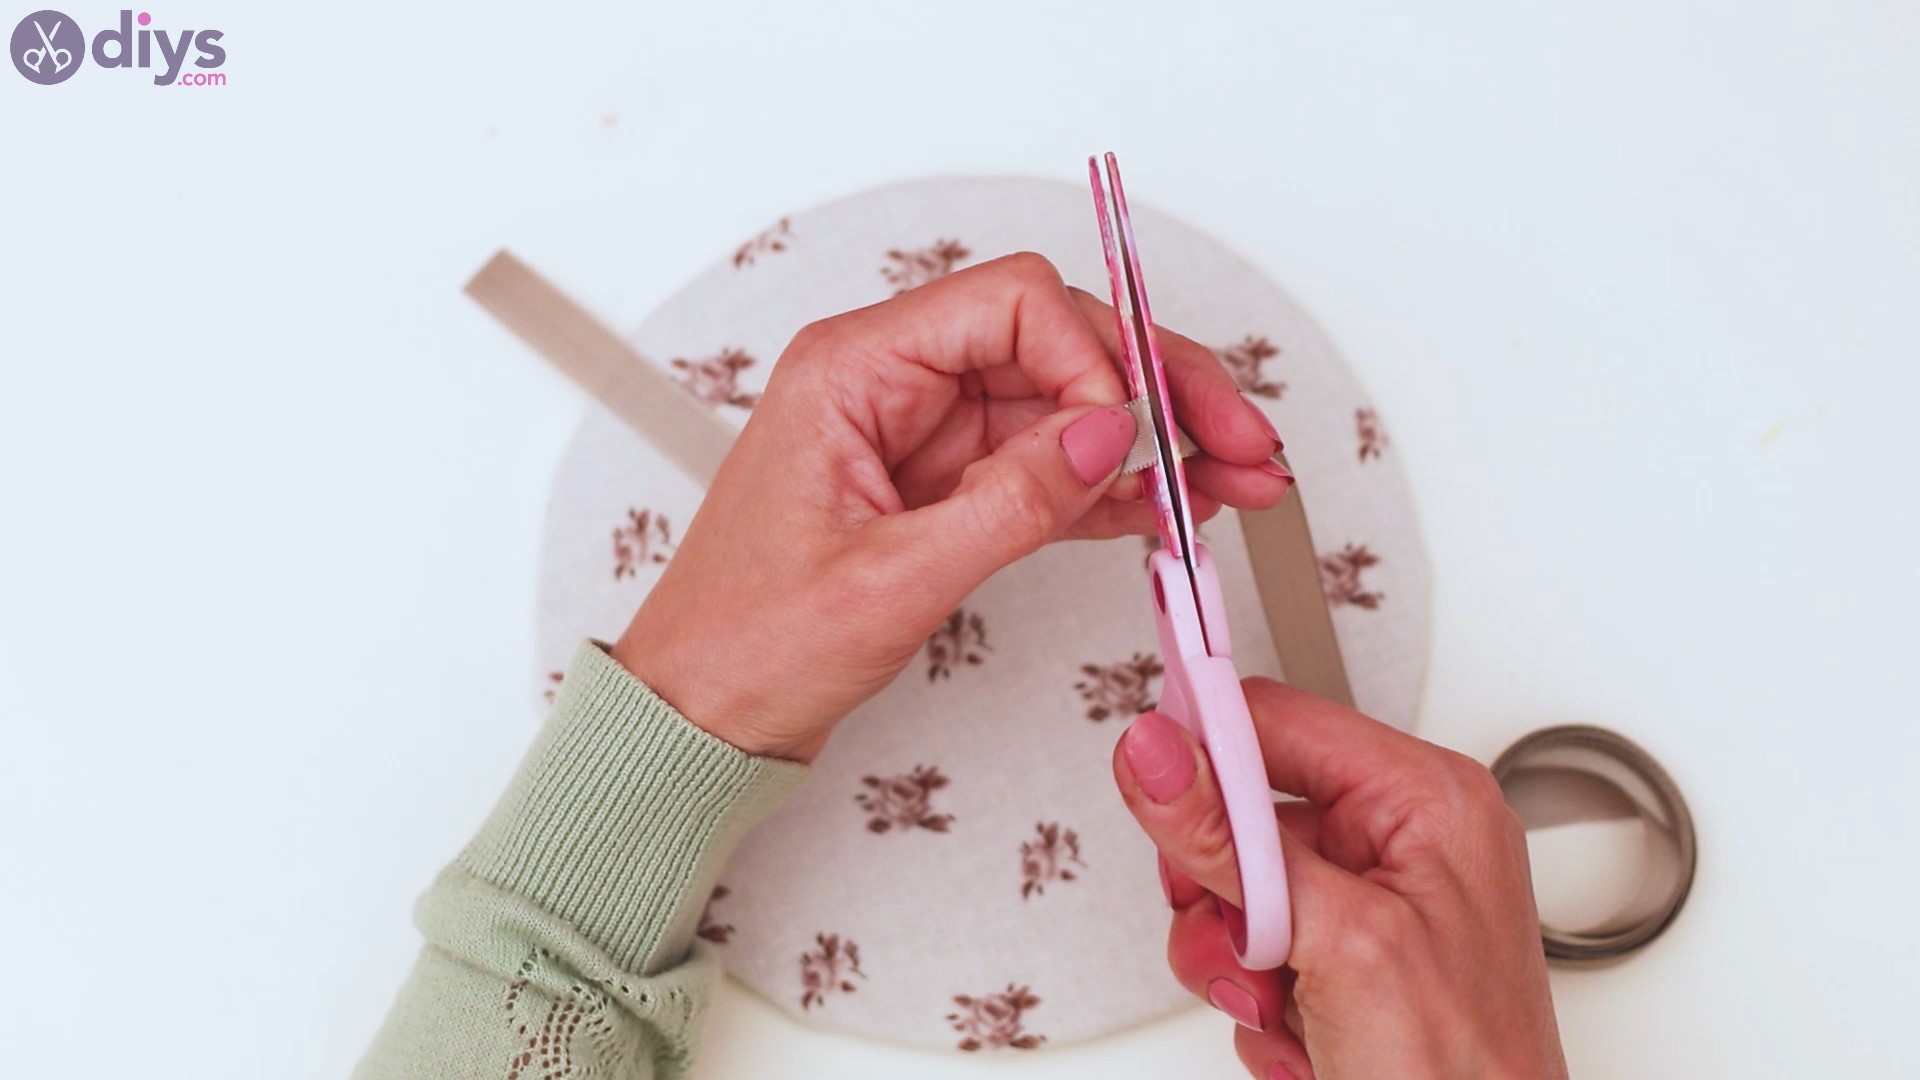
Cut another two pieces of ribbon and turn the board sideways.
Now, start gluing the ribbons to the board. You want the new ribbons you’re adding to be perpendicular to the two you already glued down.
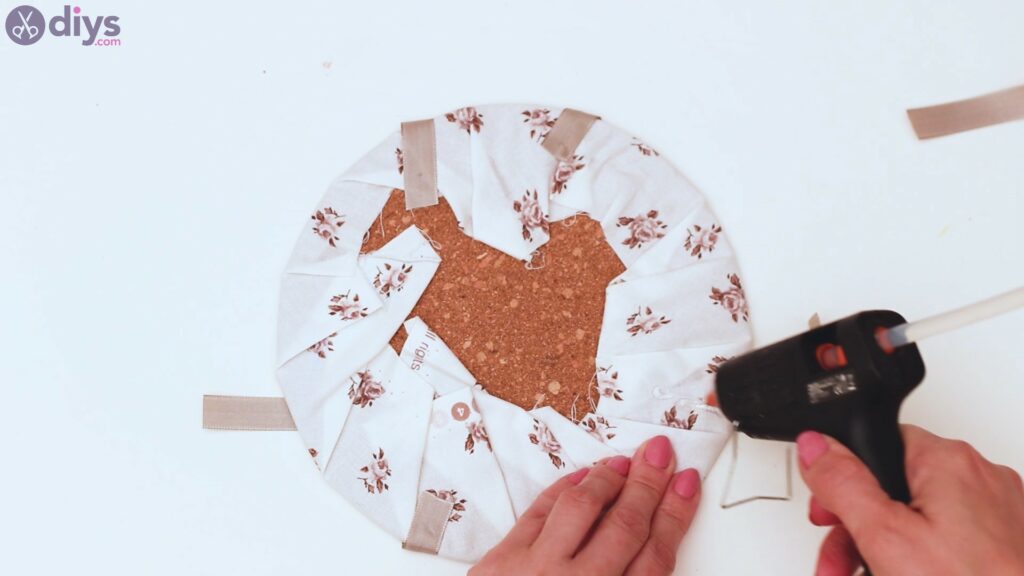
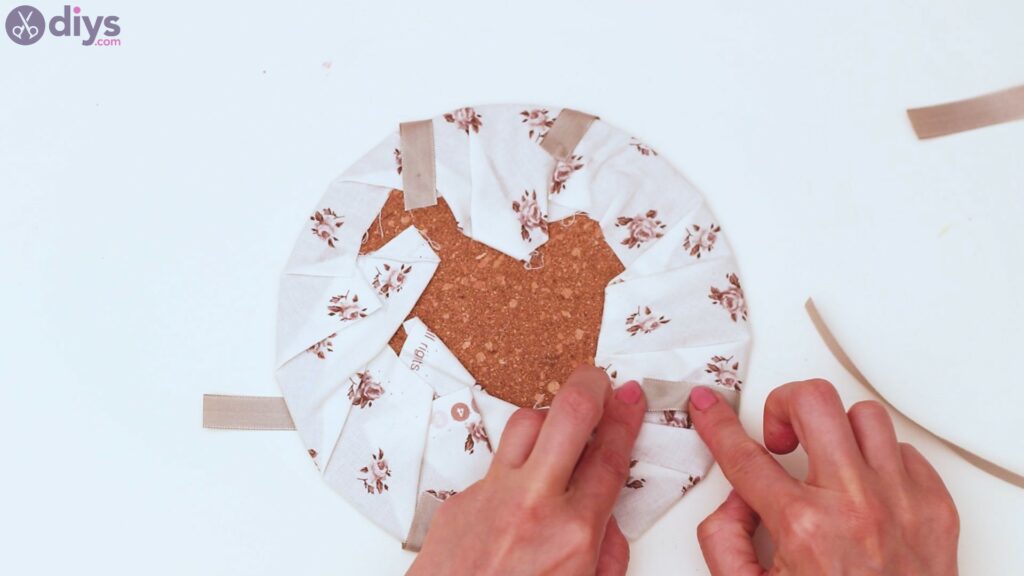
Make sure you use enough hot glue to secure the ribbon. You’ll be hanging various memos off these, so you’ll want them to be sturdy.

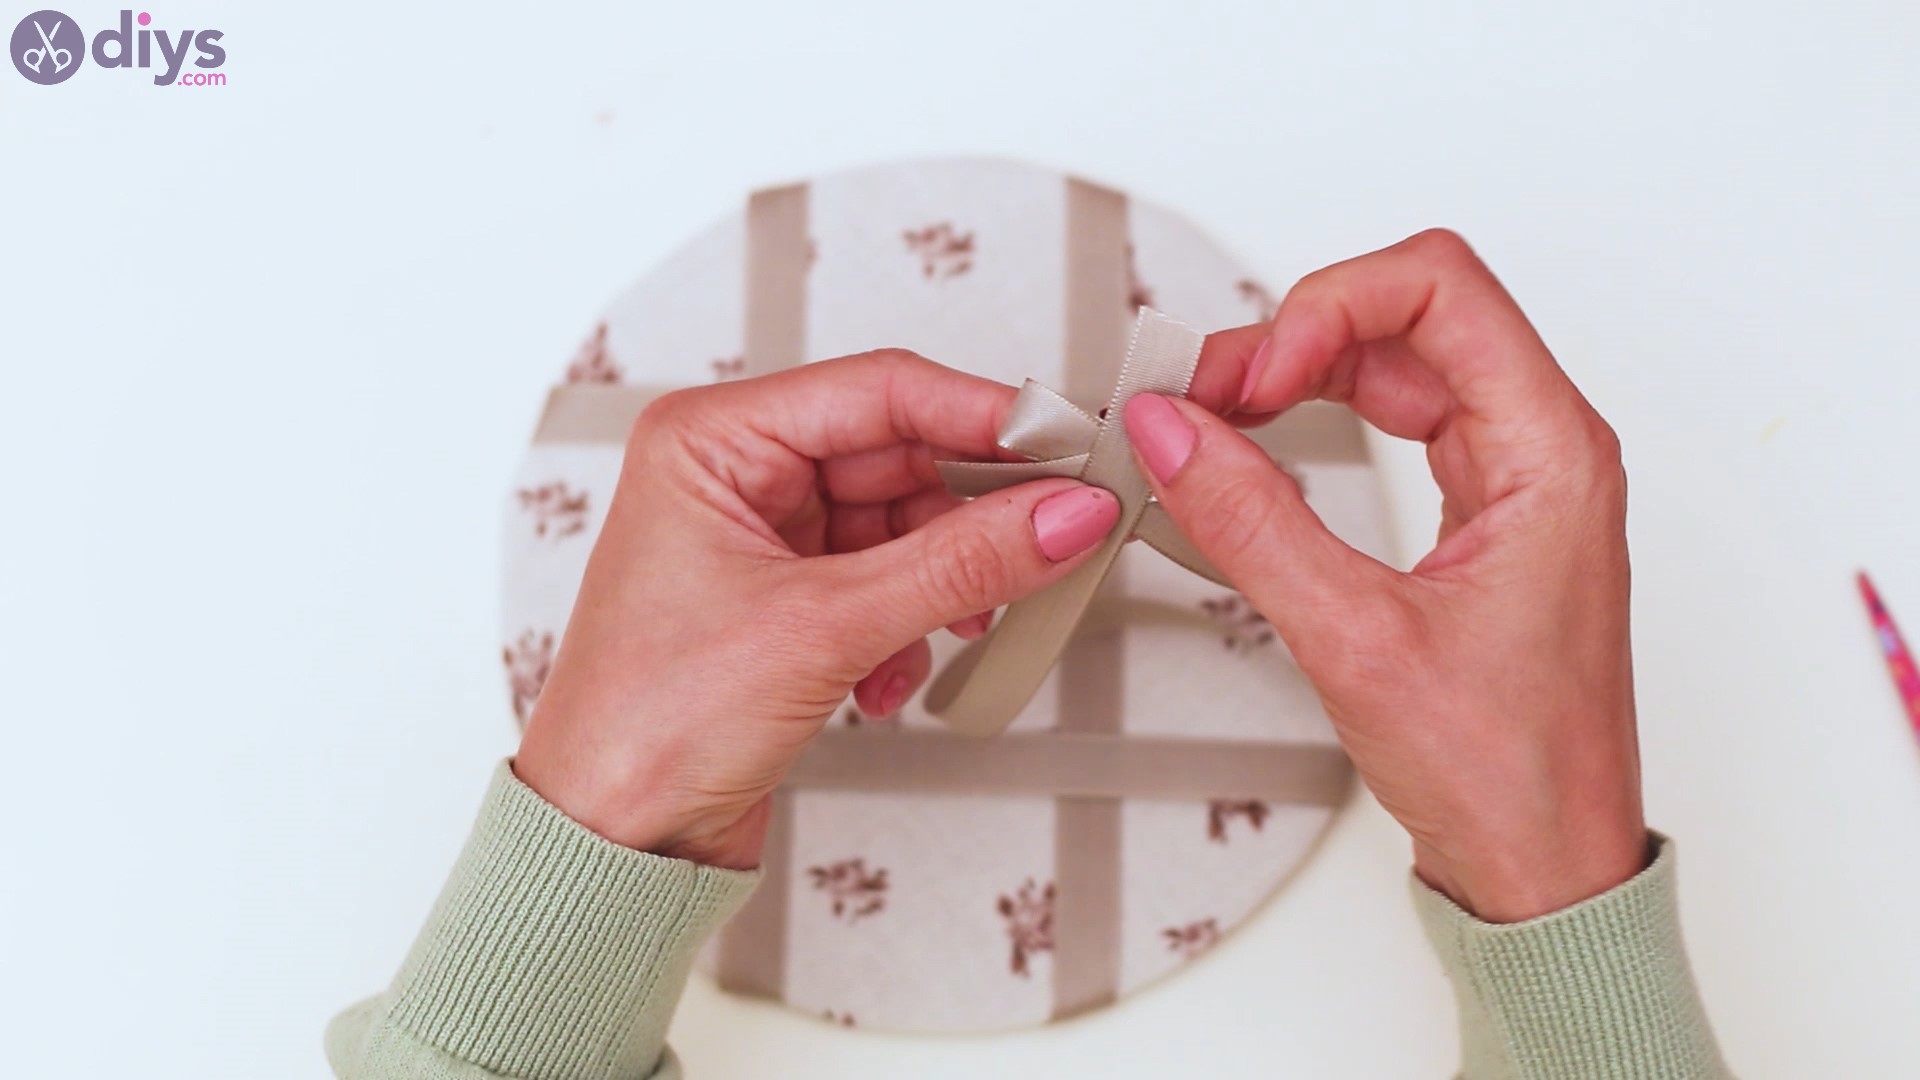
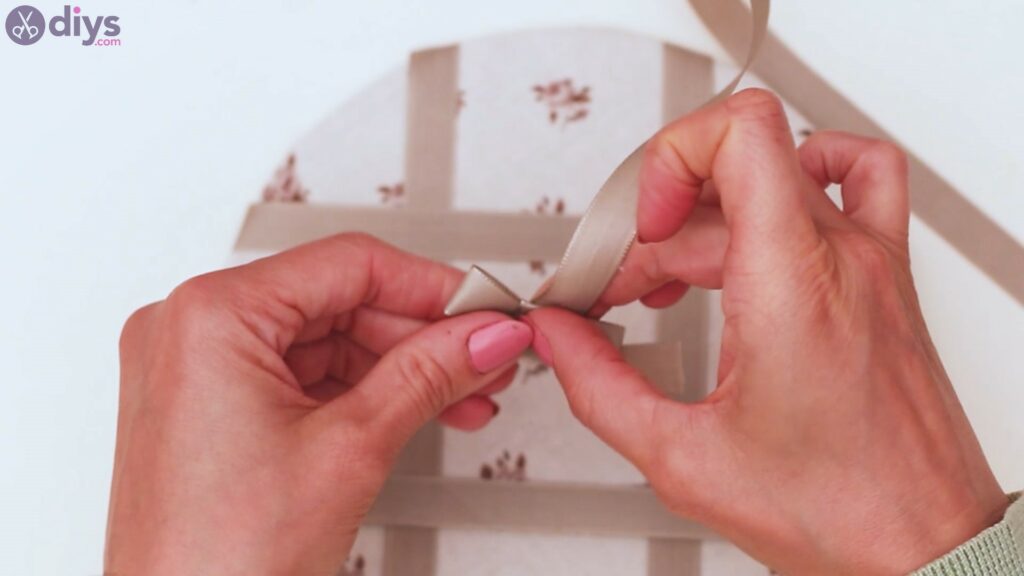
Step 3: Make a bow
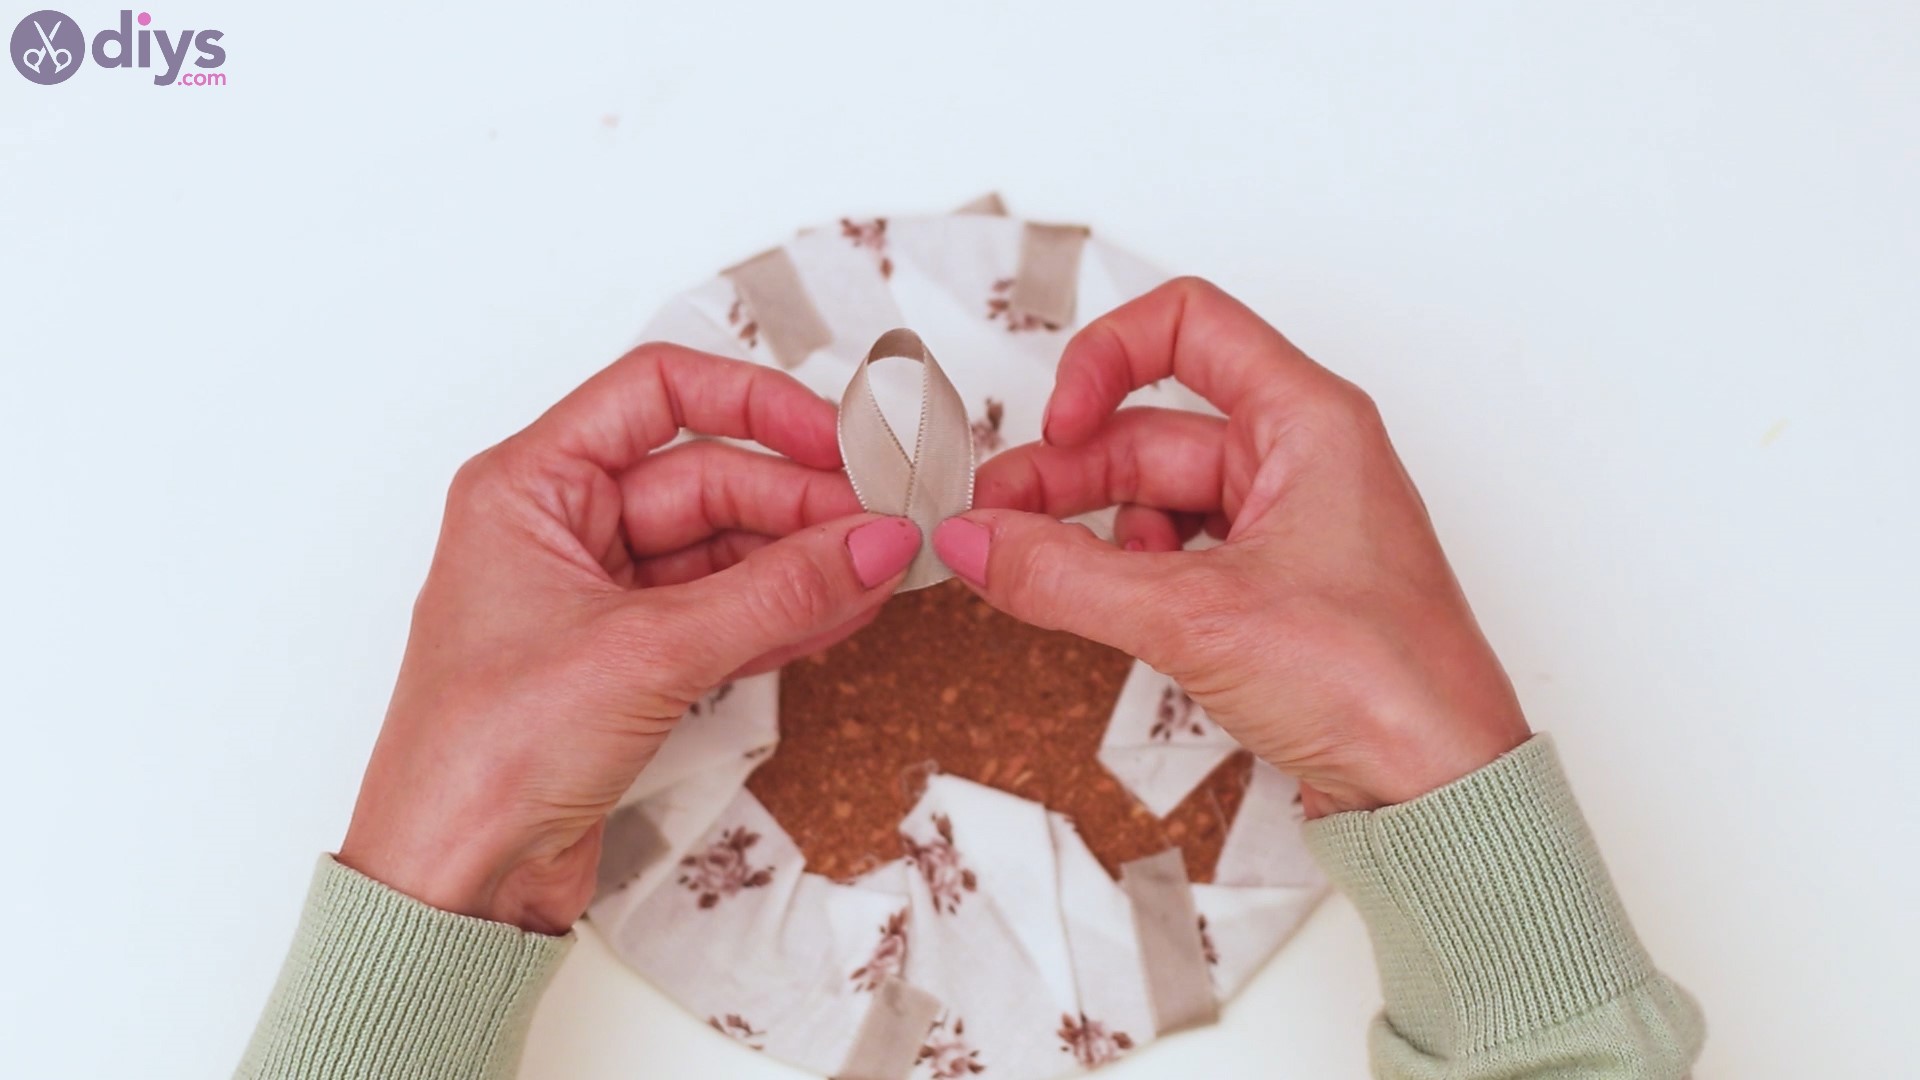
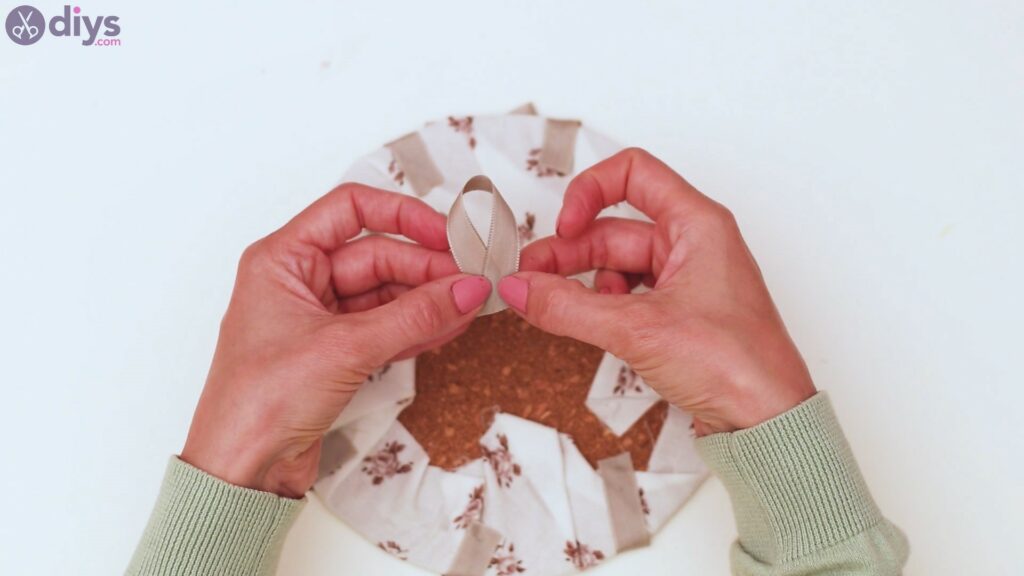
Next, let’s use some more of that pretty silk ribbon to create a bow. Cut a bit of ribbon and set it aside. Then, place a longer piece of ribbon in the shape of a bow, forming the loops.
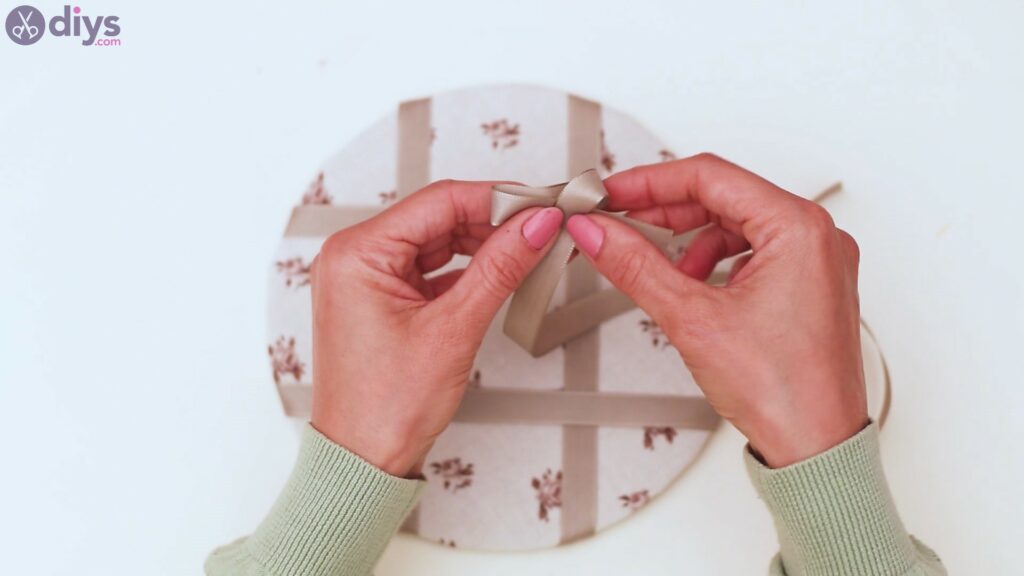

In order to secure the bow, get the glue gun. Add a touch of glue to the middle of the ribbon, and turn the loop of material over that particular spot.

Press the two folds of the bow together, in order for the hot glue to set and to cover a larger area of the bow.
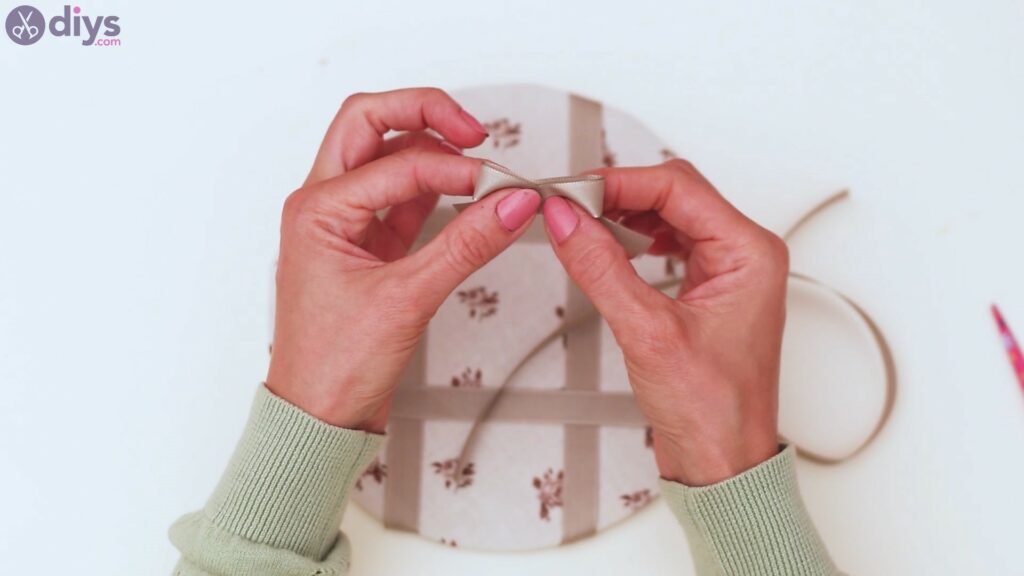
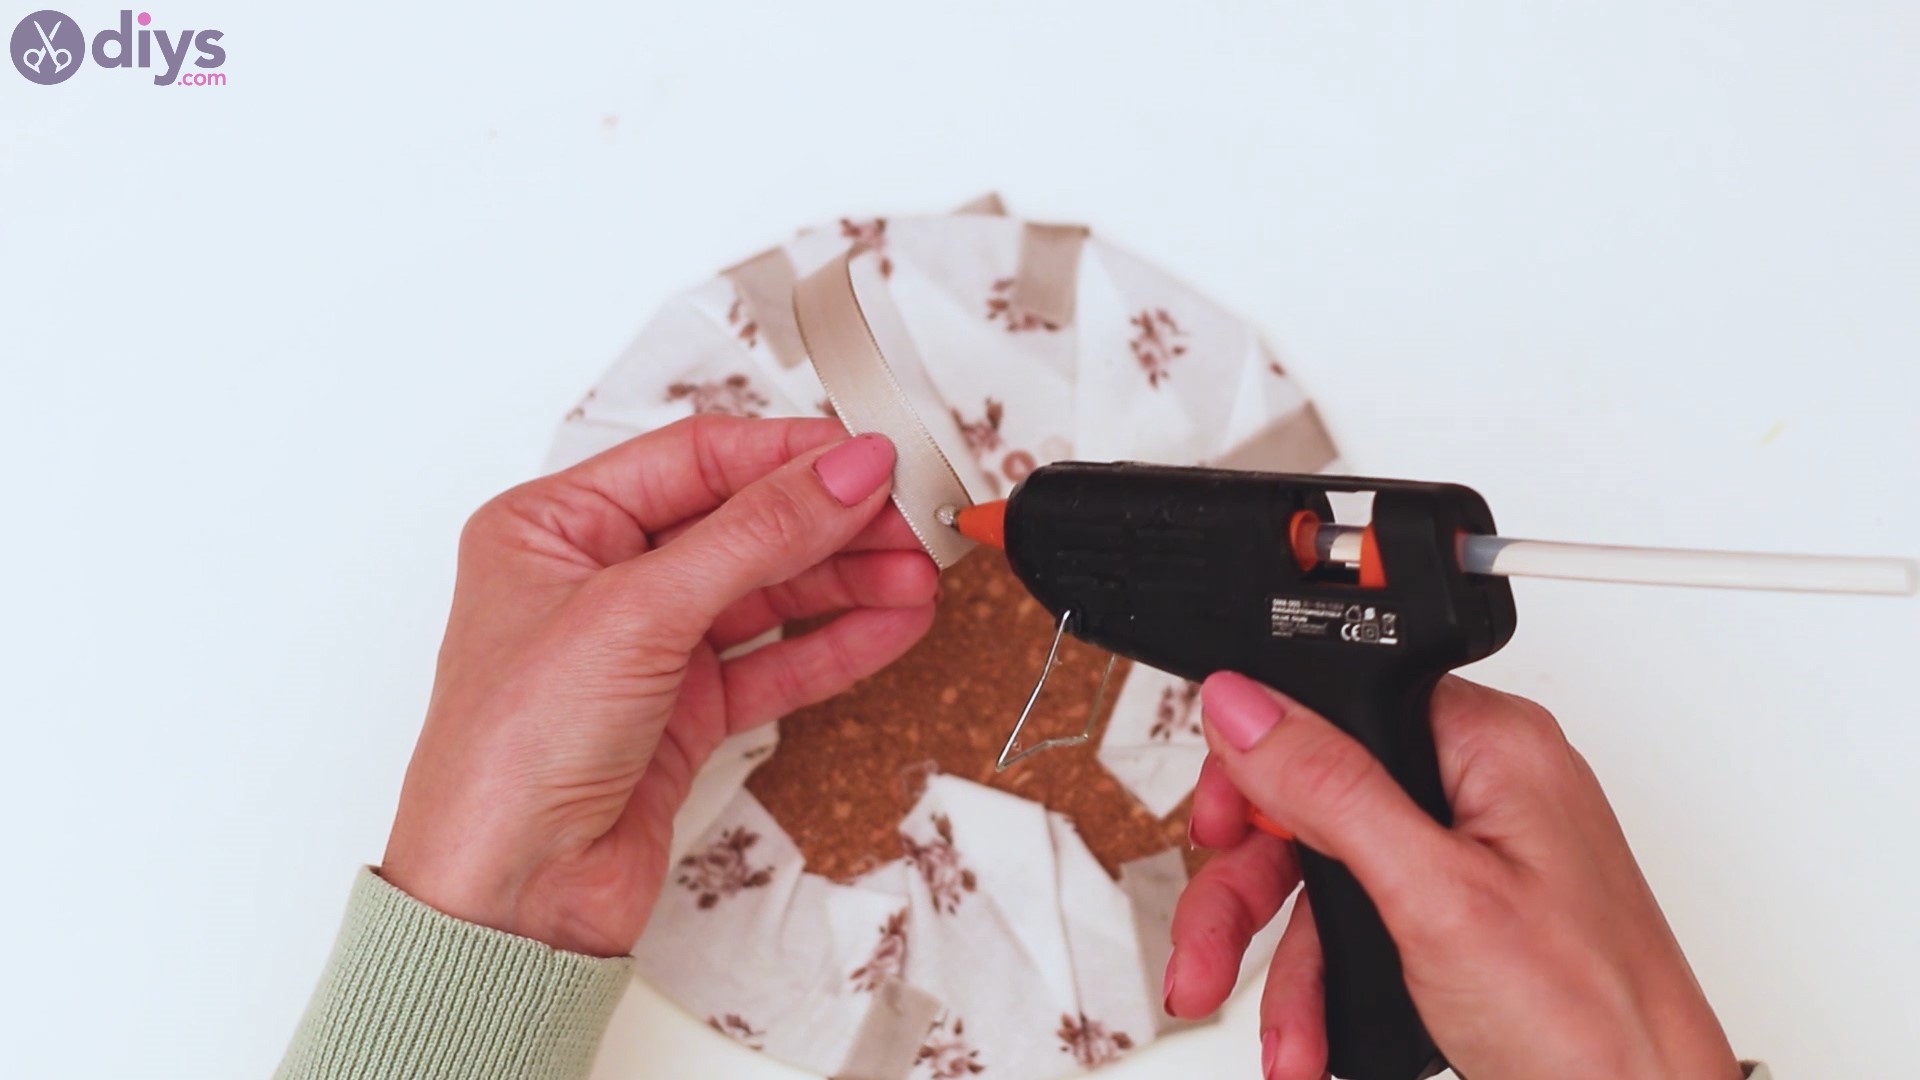
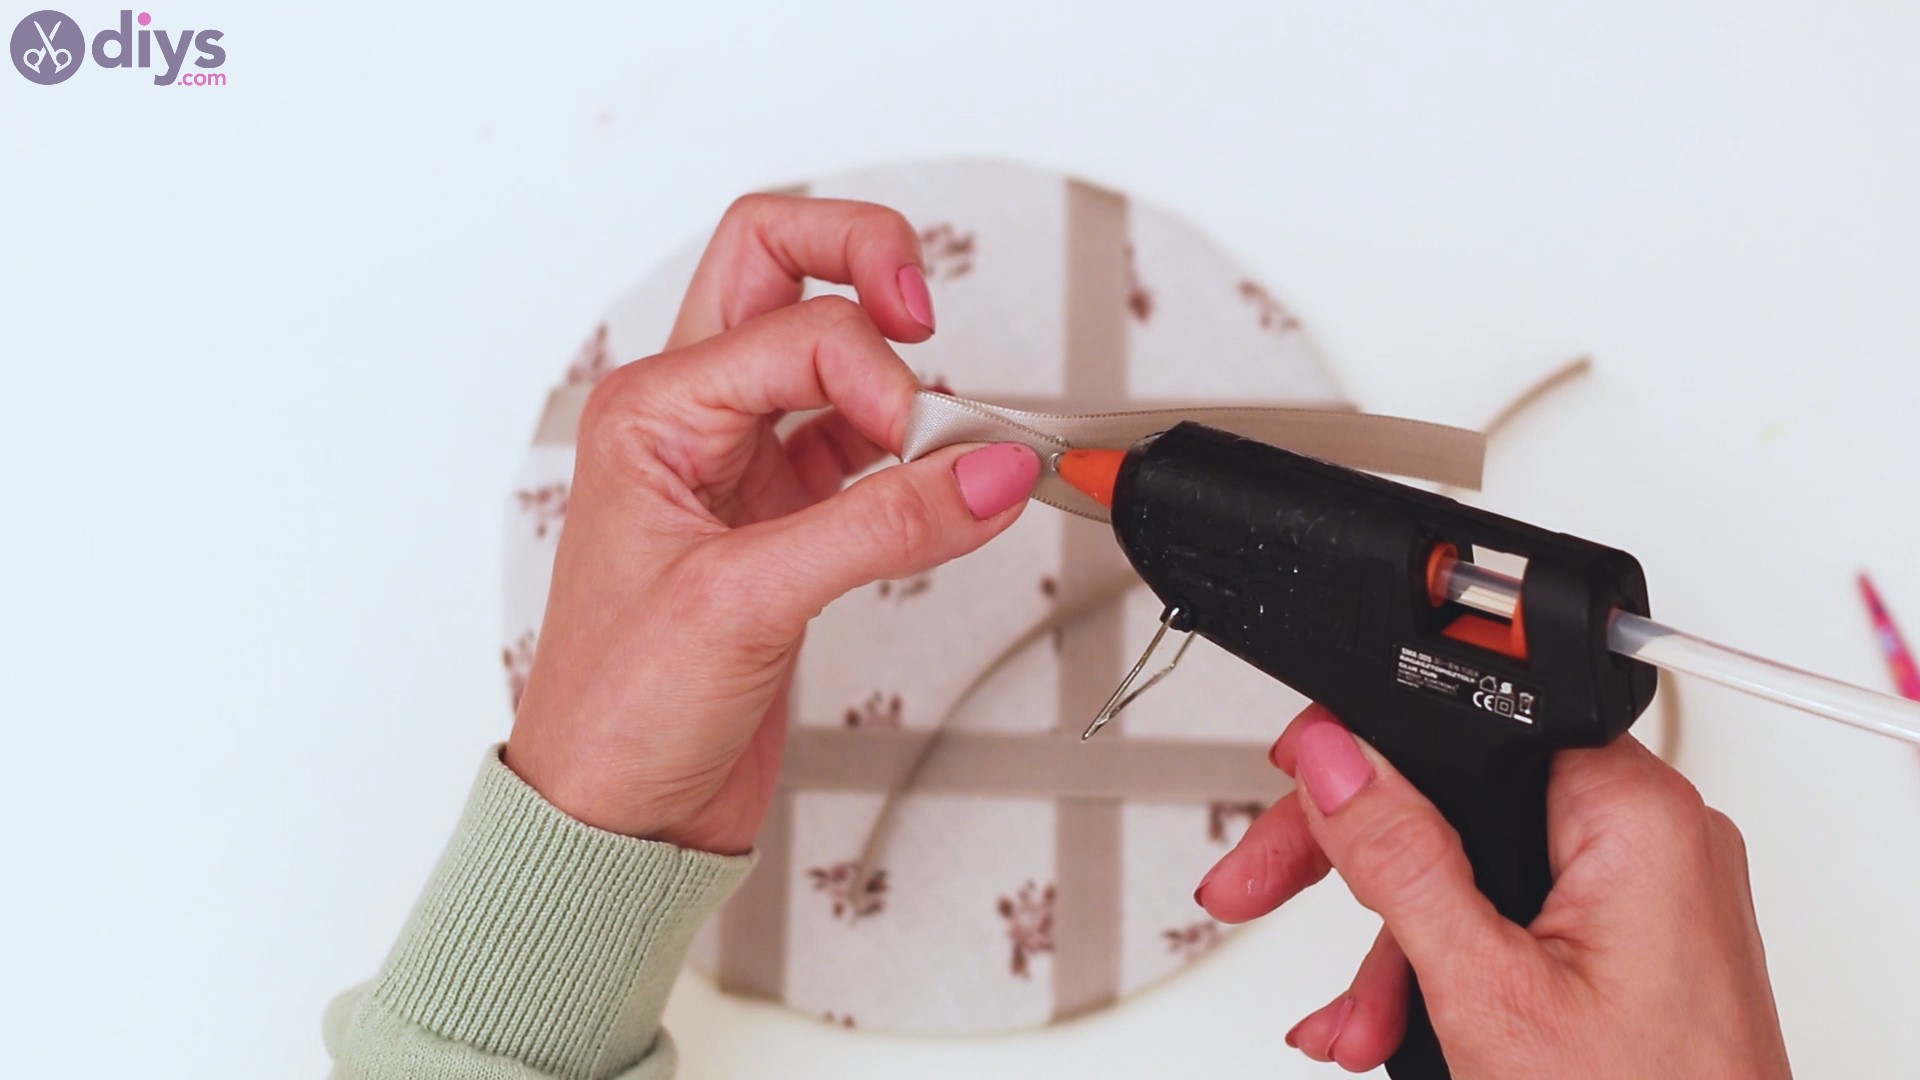
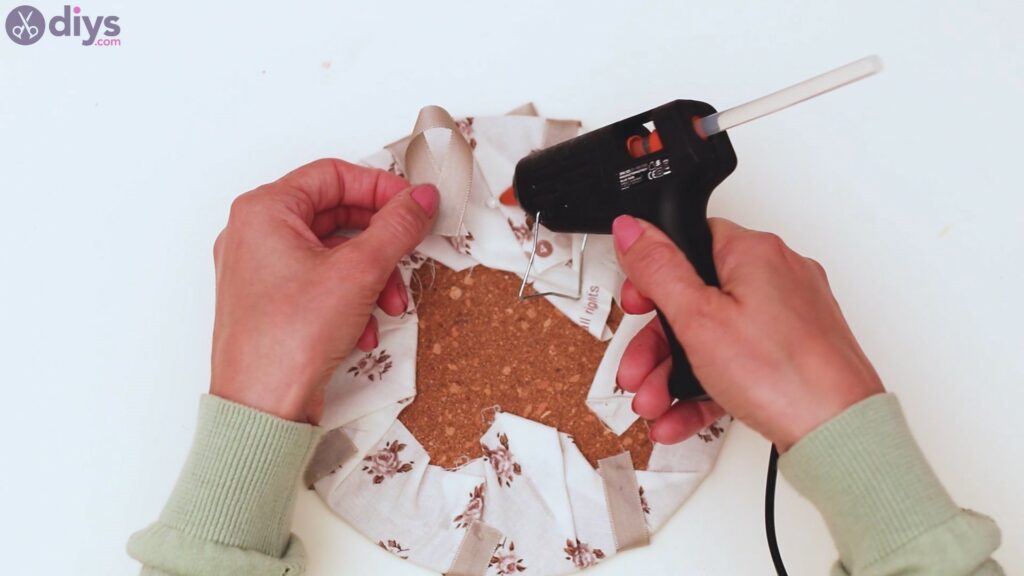
Pick up the shorter ribbon and wrap it around the middle of the bow. Unlike other times we’ve done bows by tying a knot, this time we want a cleaner and flatter design.
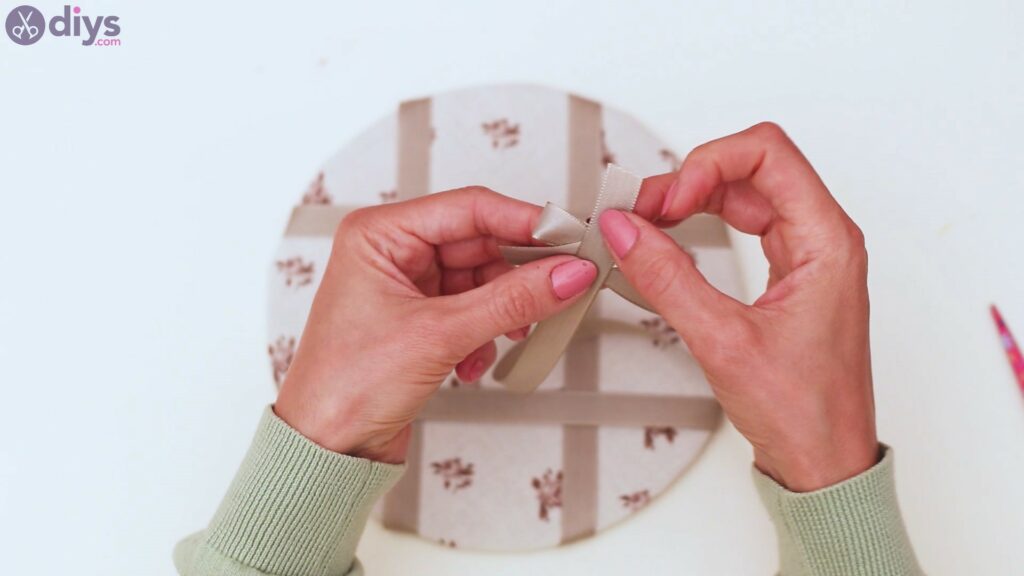
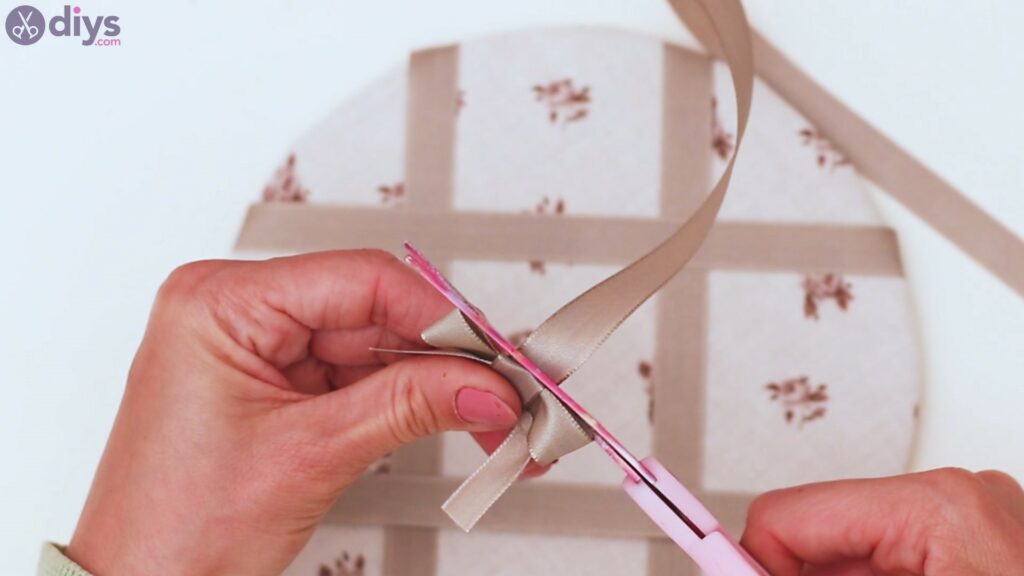
Turn the bow over and add some hot glue to its back, folding the extra piece over it.

Press them together in order to create a flat bow design.
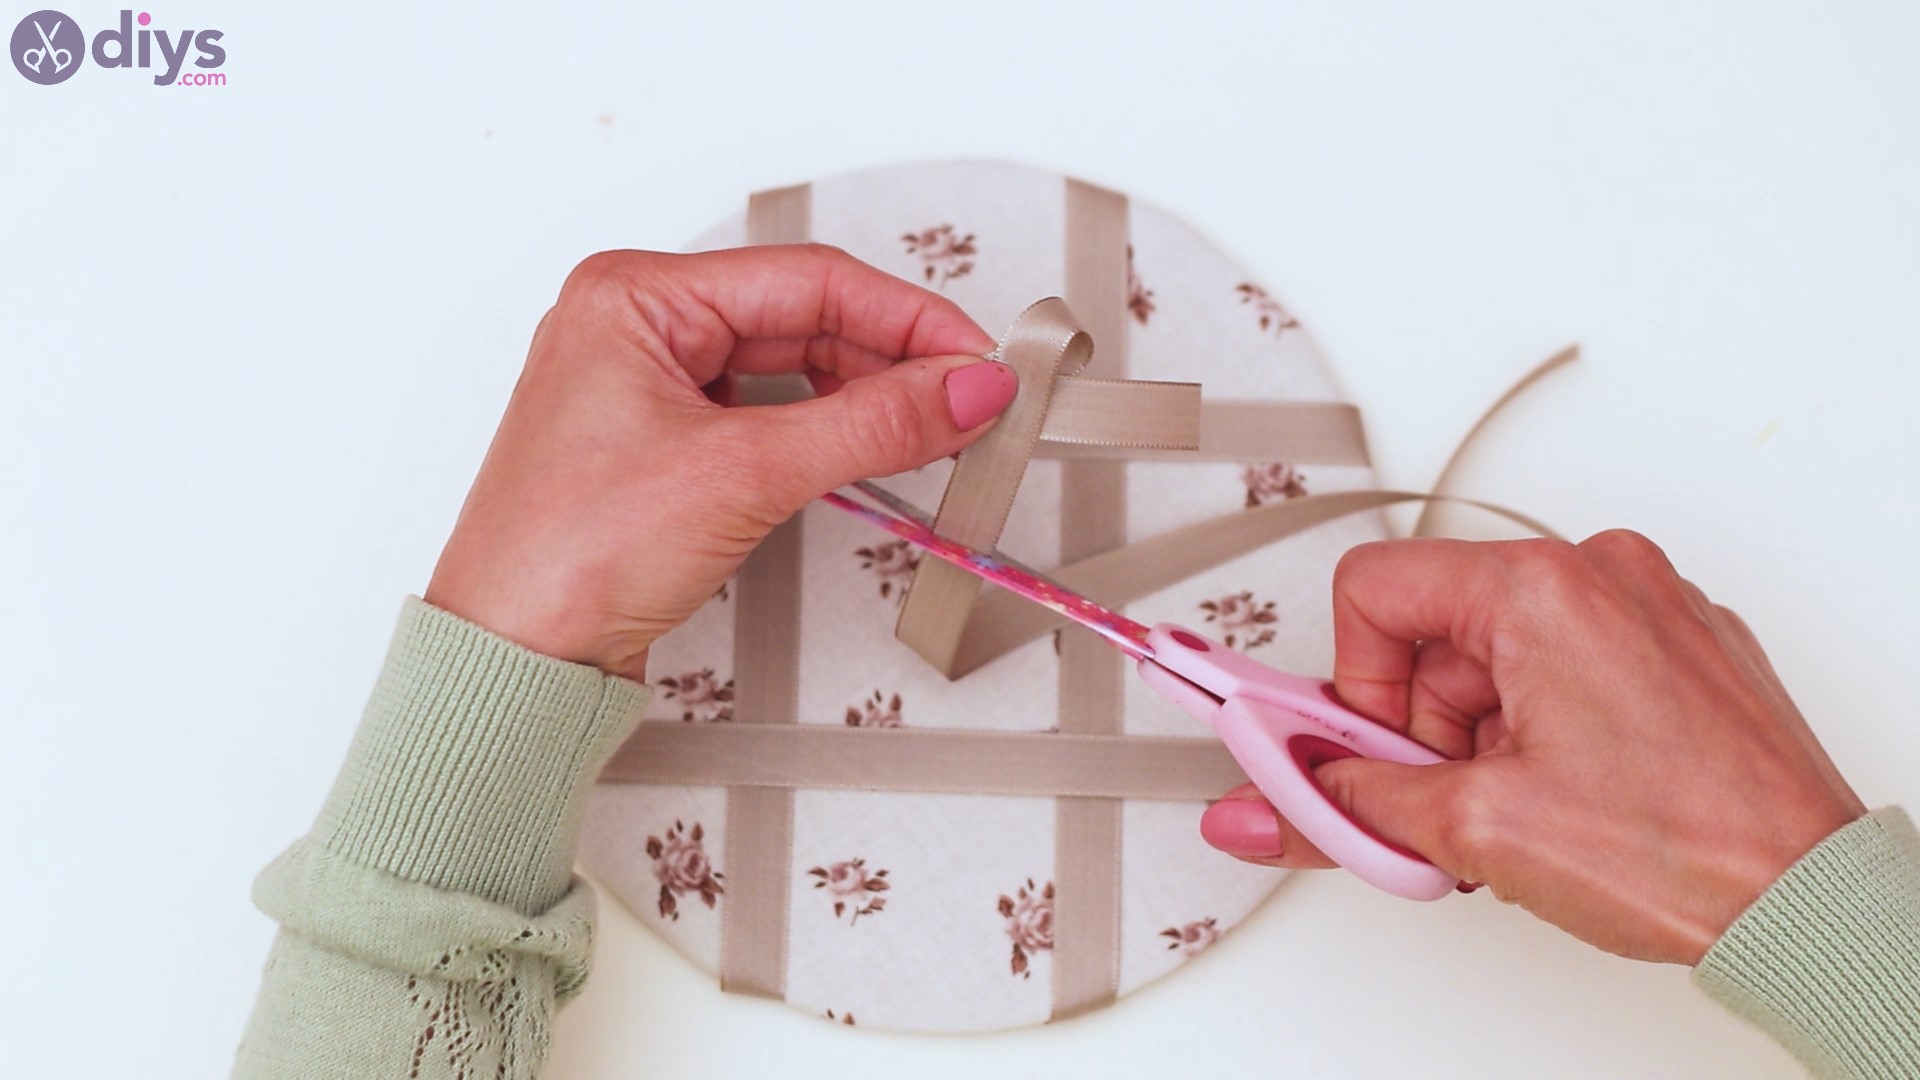
Get yourscissorsand cut off the extra material off the back.
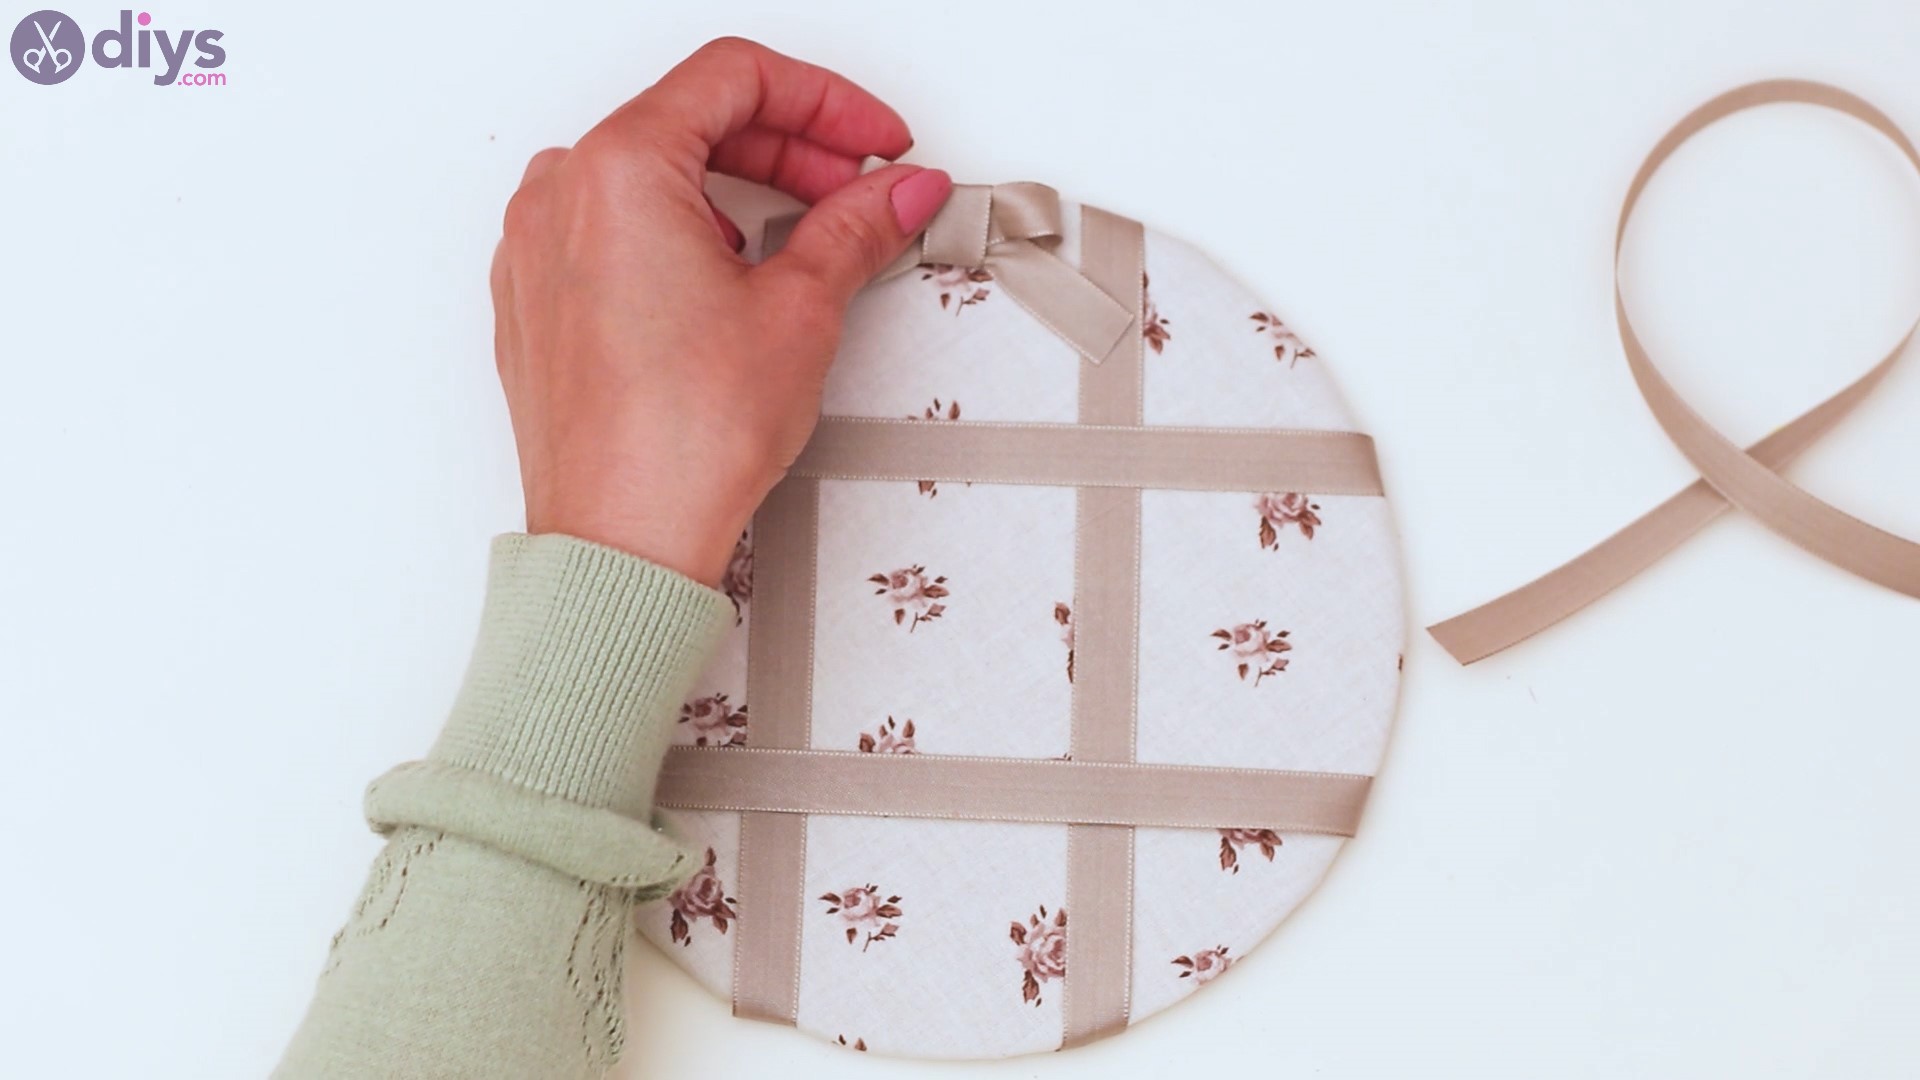
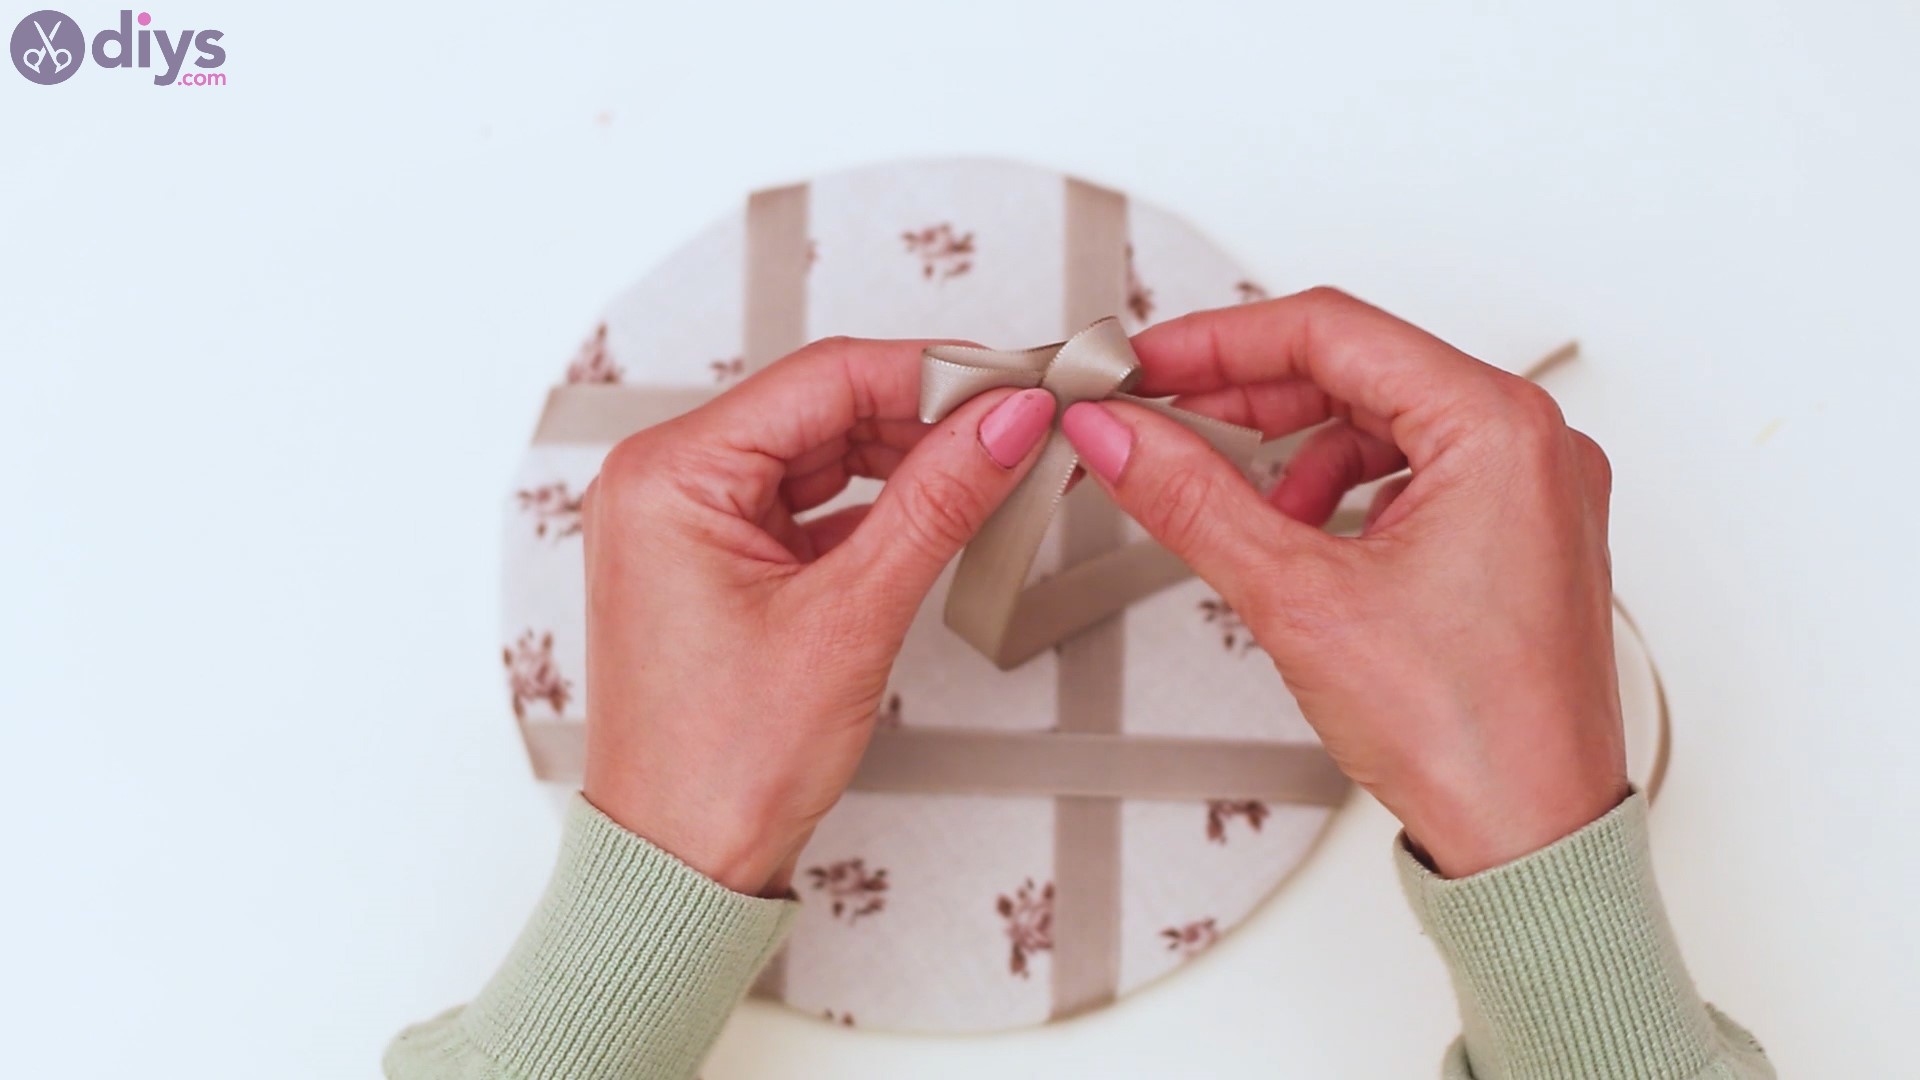
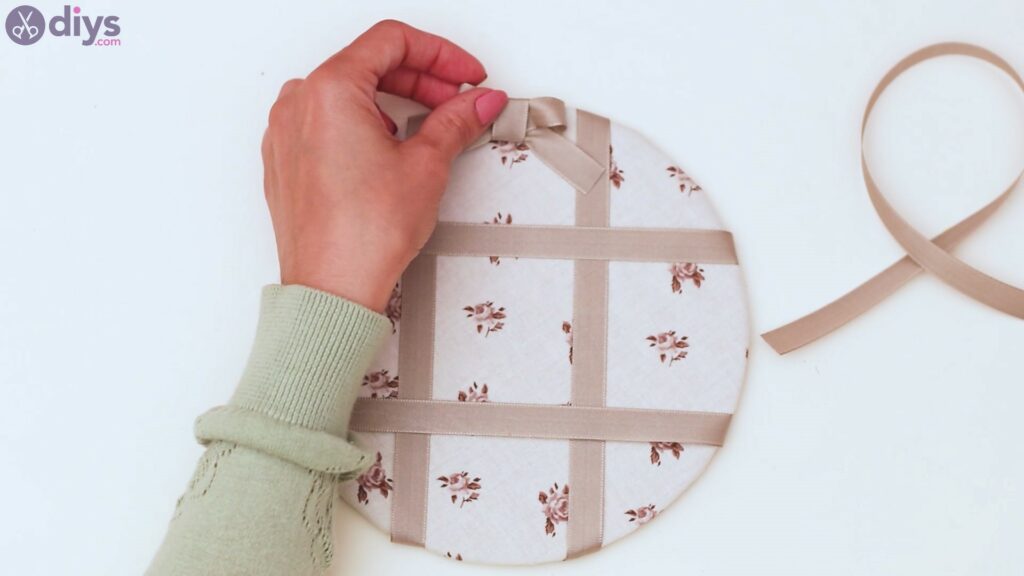
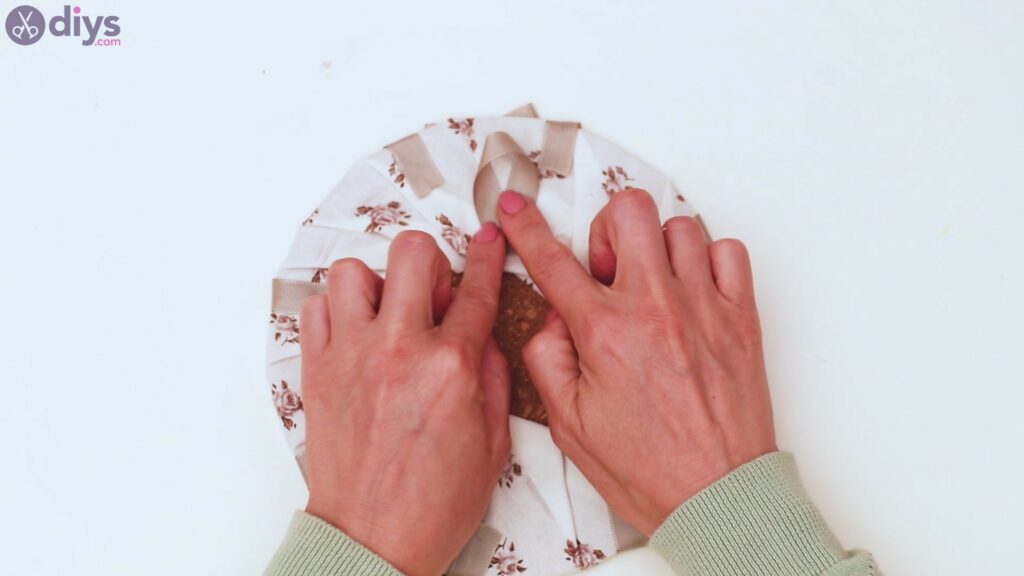
Choose the middle top area of the corkboard and add some hot glue to that spot. Then, place the newly-formed bow over it.

Step 4: Hang the memo board
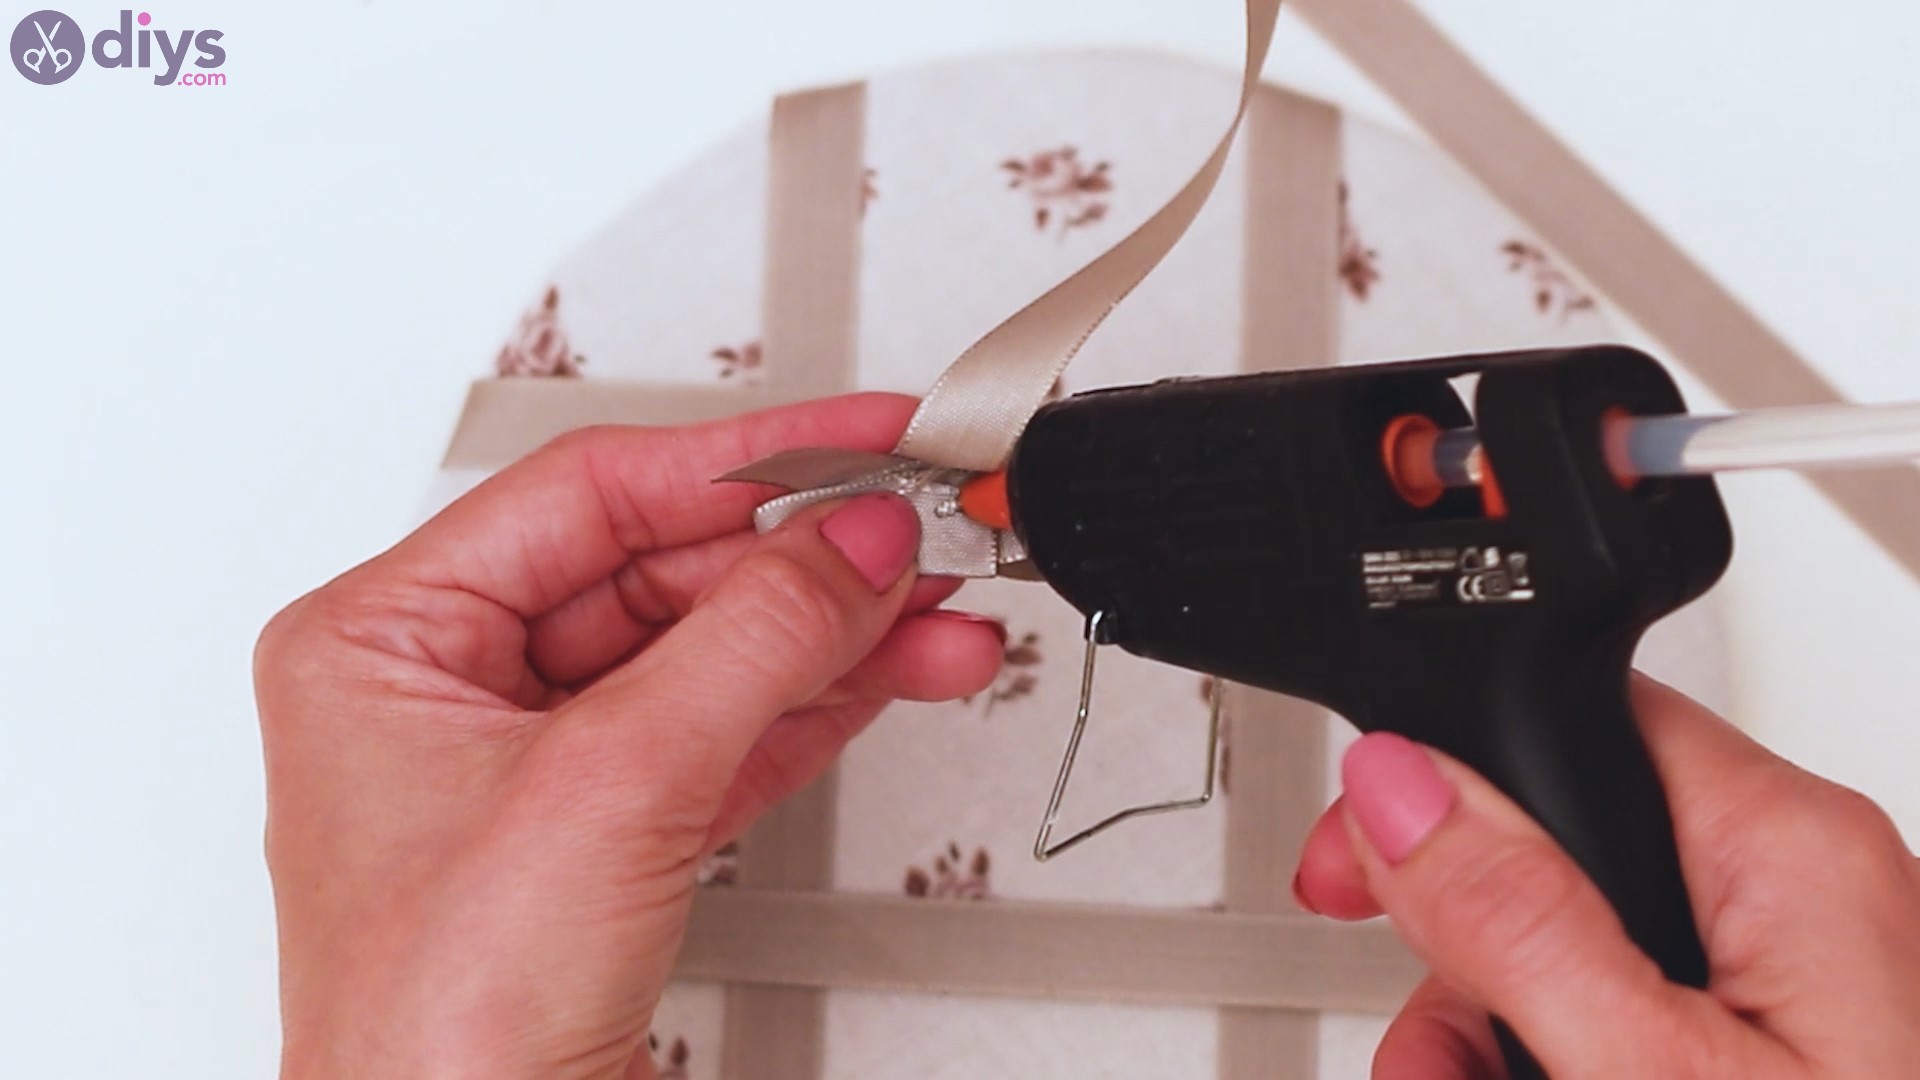
Now that the memo board is pretty much done, we have to make it possible to hang it on a wall. So, get the same silk ribbon we’ve been using and cut a piece. Make sure you fold it to the lenght you want the board to hang on your wall.
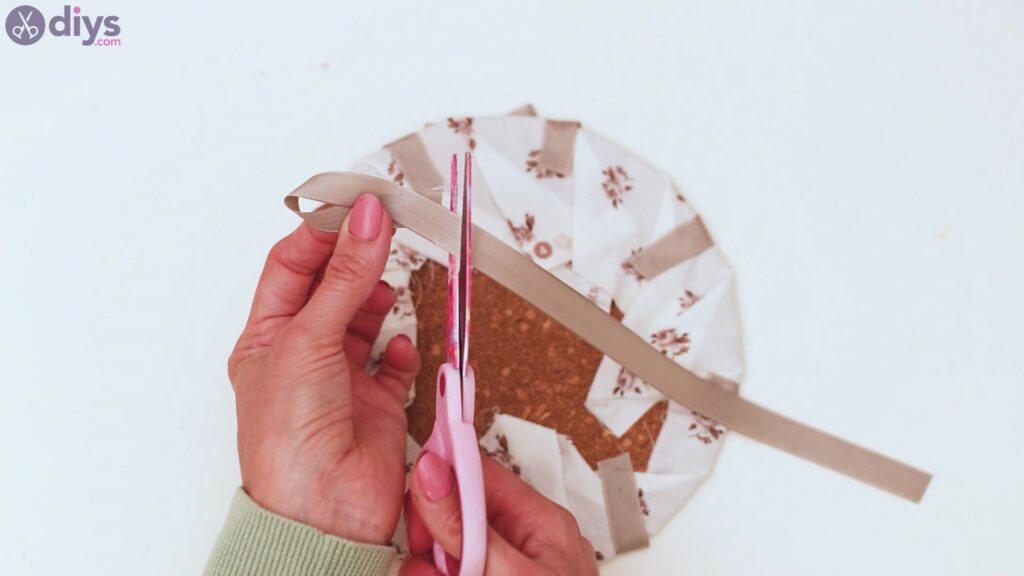
Add some hot glue to the edge of the ribbon and bring back the other end over it, making sure they perfectly overlap.

Then, taking into account the spot where we glued the bow on the other side to mark the middle top area of the memo board, place some more hot glue to the the back of it.
Press the folded ribbon over the hot glue and keep it pressed to ensure the material is not going anywhere. We chose to place this particular ribbon piece well below the edge of the round memo board, for an invisible hanging detail. You can obviously change this andmake the ribbon longer if you want to.
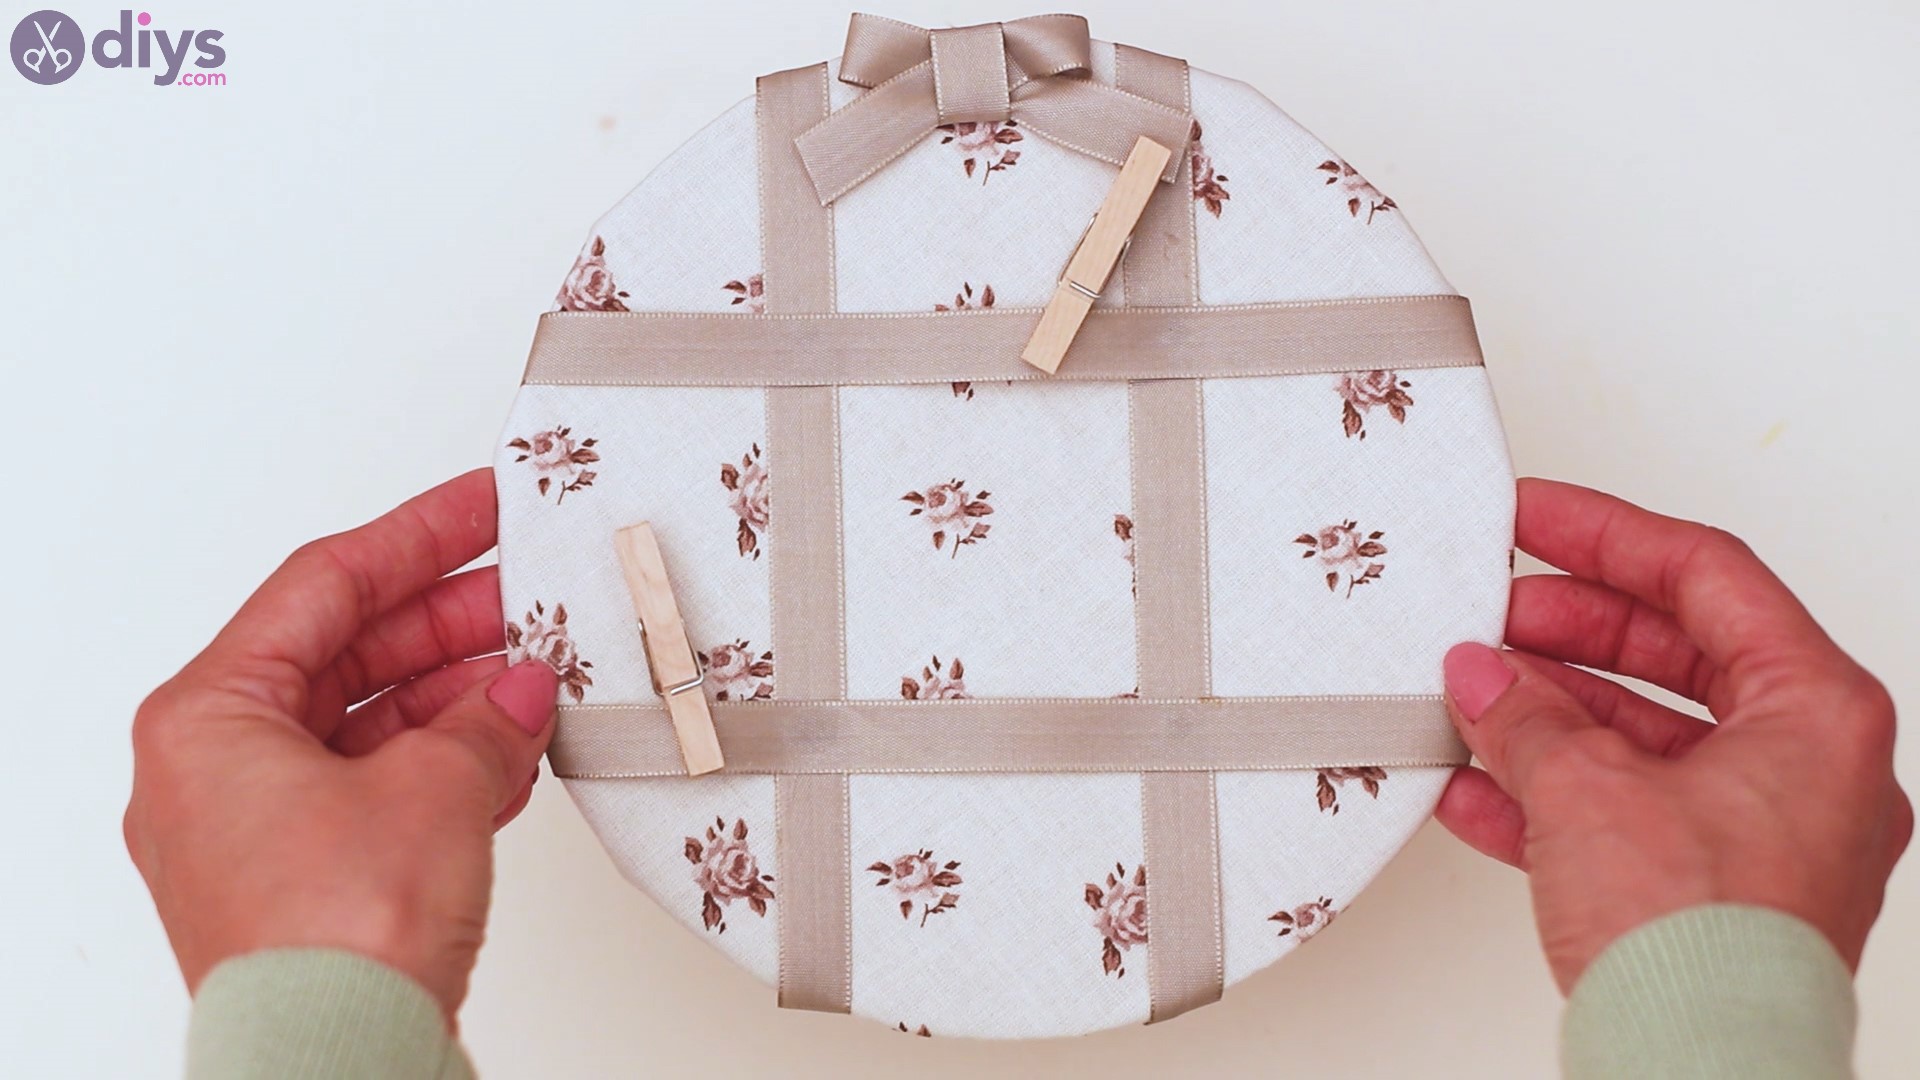
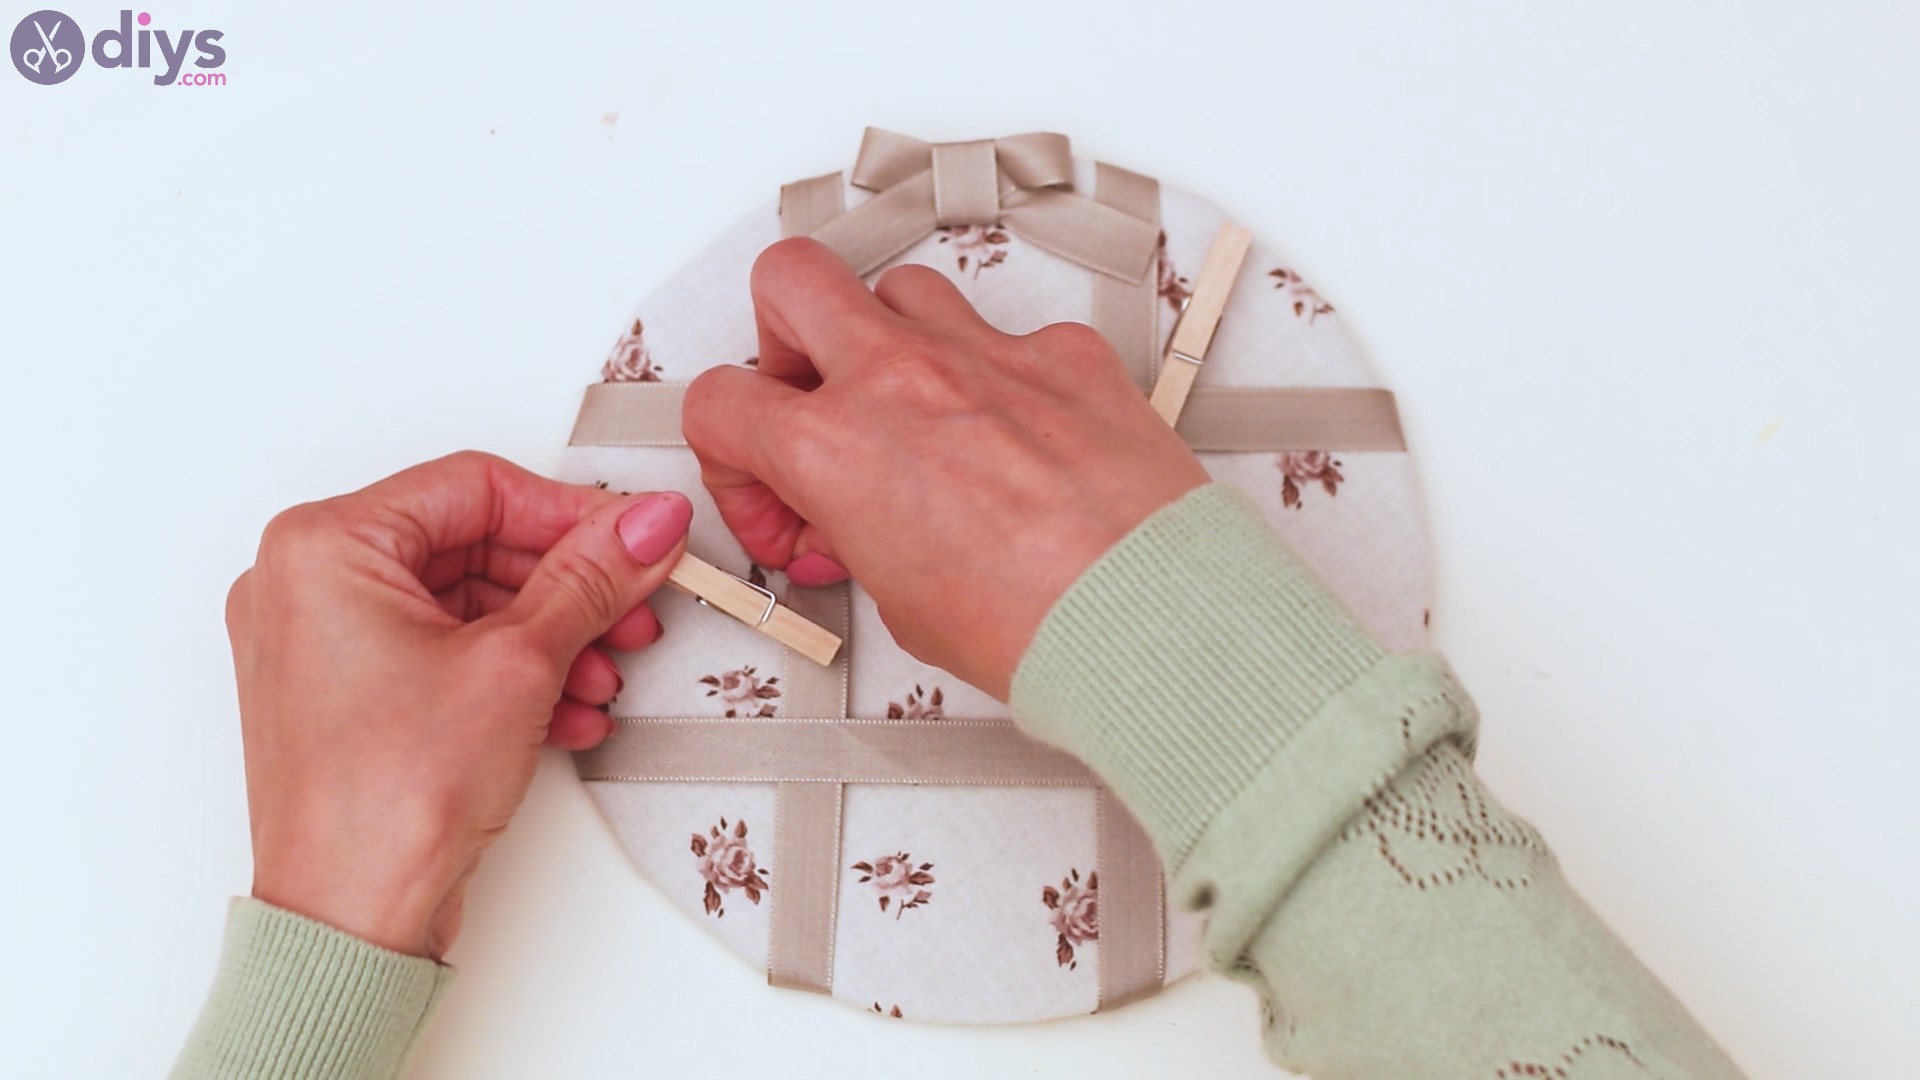
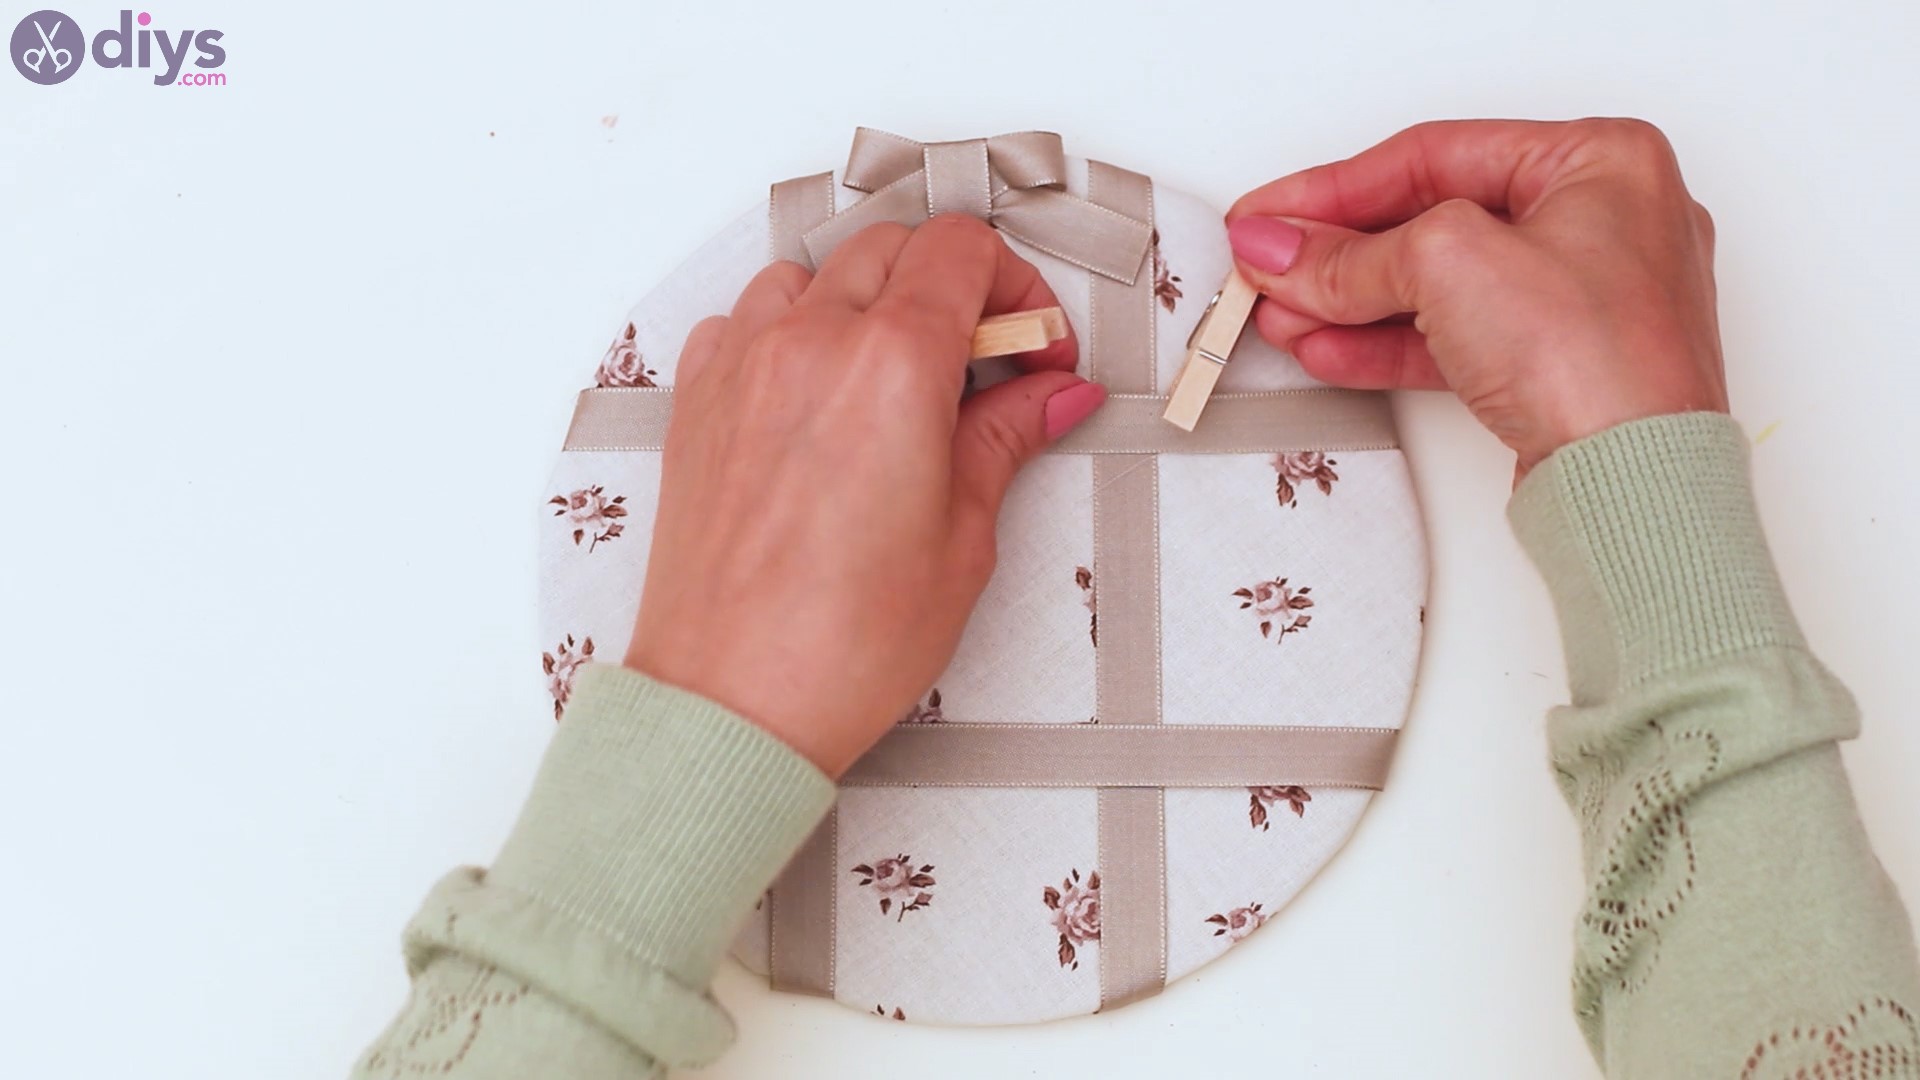
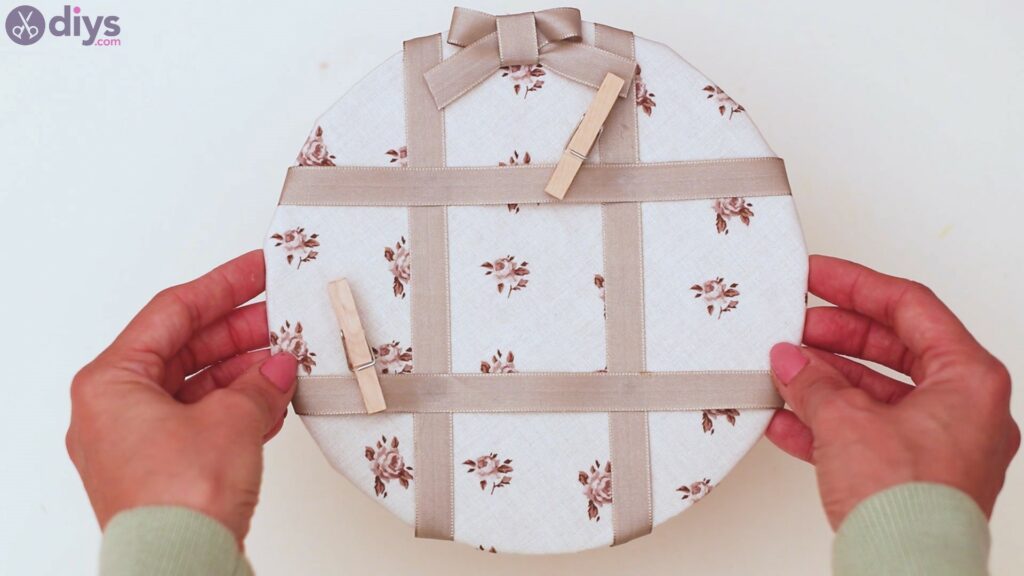
Step 5: Add the clothespins
Finally, we get to add the clothespins. You can attach them to the ribbons we placed on the memo board so you can later add any pieces of paper with the things you need to remember.
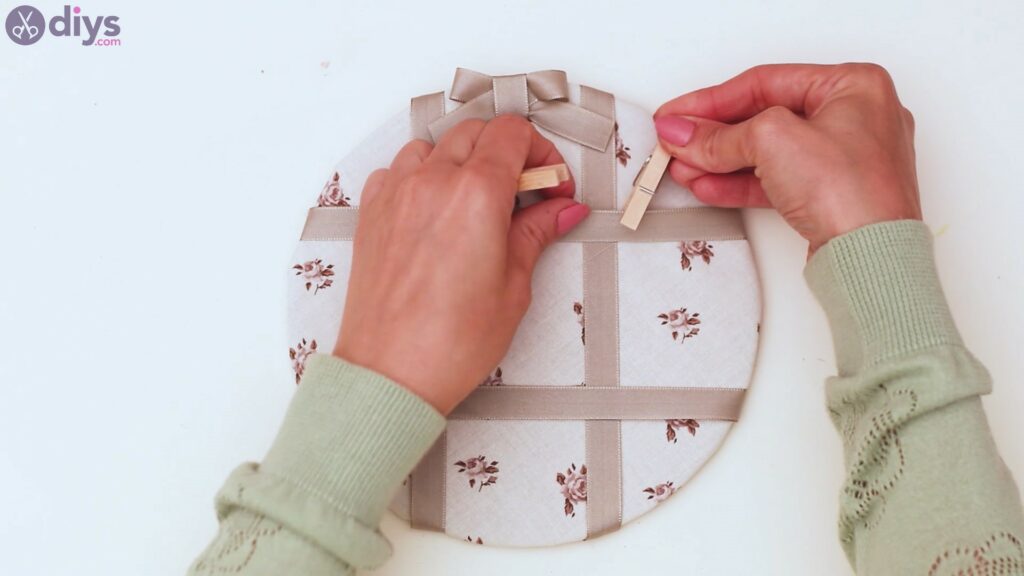
We went with medium sized clothespins, but you can find smaller ones if you feel they’d be enough for your design.

There we go! You now have a beautiful clothespins memo board to remind you of everything you need to do. We love it because it looks so pretty and it’s also so useful. Also, it’s a pretty customizable design, so you can use whatever colors you like most for the fabric and the ribbon, different sized clothespins, and even a different shape for the corkboard. It’s all up to what you have around your home.
You can drop us a comment in the section below and share your photos with us over social media so we can see how your memo board turned out.