How to Grow Bromeliads at Home
Updated on November 19, 2025
If you’ve been hunting for flowering tropical epiphytes that come with lenient caring guidelines, then chances are, you’ve probably thought of Bromeliads as a viable option. They’re not seasonal plants and can grow outdoors or indoors if provided with unwavering warm temperatures.
One thing you’ll love about Bromeliads is their blooming season tends to last a little while, compared to most other flowering houseplants. In this guide, we’ll check out the growing and maintenance tips you want to work with if you’re looking to own a tropical plant.
More About Bromeliad Plants
On the face of it, Bromeliad plants seem like they’re blooming constantly. And that’s because the mother plant drops new offsets that mature and keep the entire container glimmering in a radiant color even when the blooming season is over. Most of the species are epiphytes and they all belong to the Bromeliaceae family. Bromeliads are native to tropical regions of the Americas. These geographic locations are also referred to as neo-tropics. Although not their indigenous place, they also thrive fairly well in West Africa.
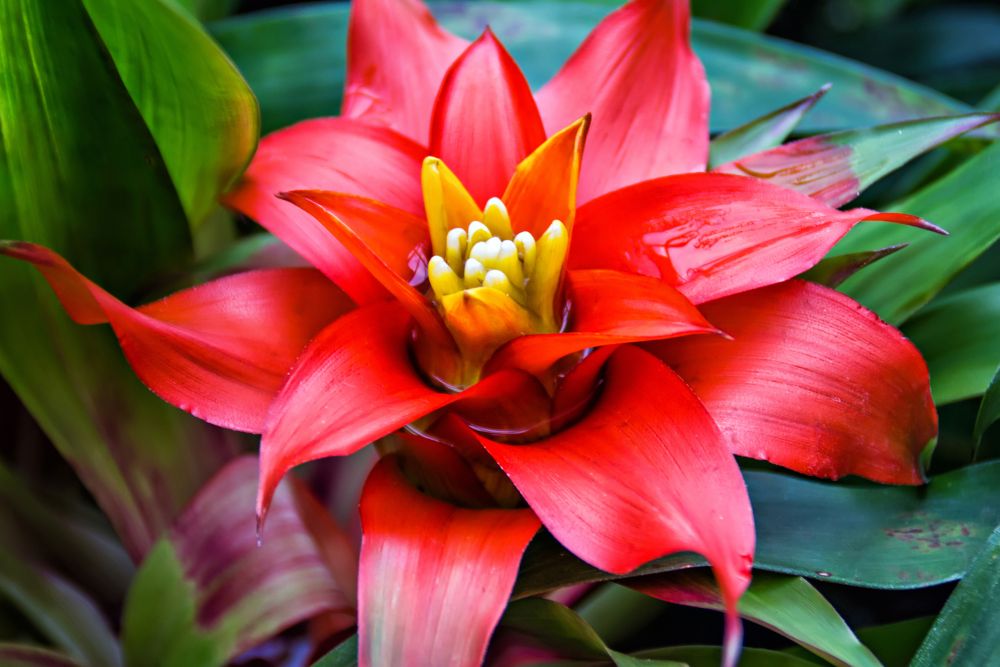
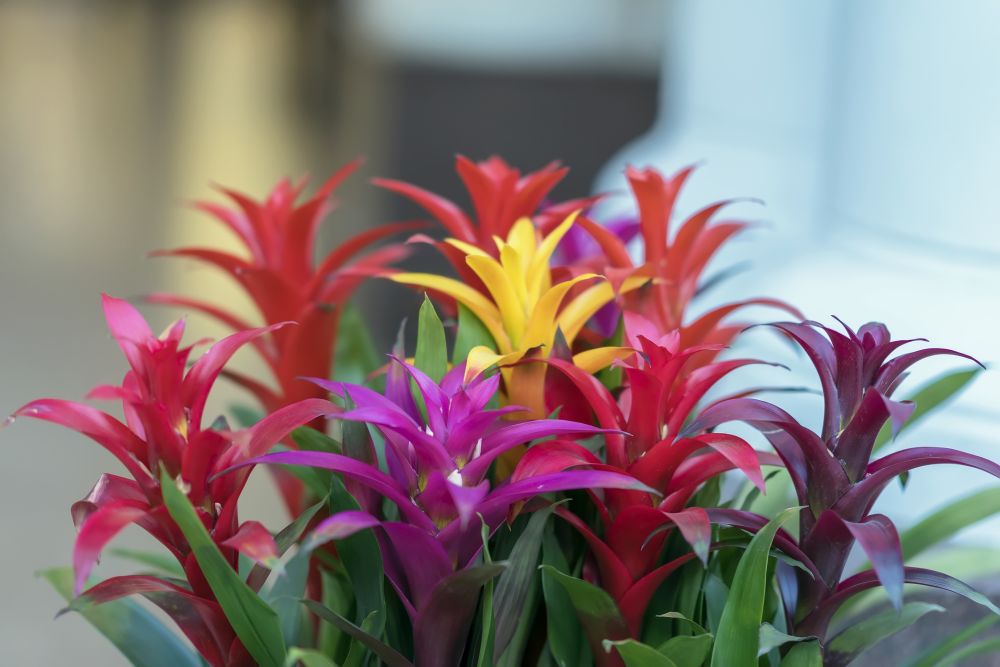
If you’re looking for one with the densest and bright color, then it would be worth giving Guzmania varieties a shot. Since long ago, Bromeliads were categorized as greenhouse or garden plants because of their showy and vibrant appearance. But these days, they seem to have garnered so much traction in the indoor space. Even though Bromeliads share the same growing conditions with Orchids , they’re a bit more tolerant to slightly extreme conditions.
How to Grow Bromeliad Plants
Bromeliads are unfussy plants and most of them—over 3000 species—can either be grown outdoors as terrestrials or as epiphytes which grow on trees and other plants. They can also do well when potted as houseplants. Normally, Bromeliads need a well-structured caring routine to thrive and bloom. Let’s have a look at the general maintenance tips to work with when growing them both outdoors and indoors.
How to Care for Outdoor Bromeliads
While growing your Bromeliads outdoors, it’s worth noting that nearly all of them are accustomed to tropical conditions. Most of these species from the Bromeliaceae family can survive fairly well under USDA hardiness zones 10 & 11. But for others like Tillandsias, zone 9 would suffice if they’re protected from the sun by trees. Since Bromeliads are epiphytic in nature, they’re known to grow on forest floors that have enough shade and have their roots attached to trees.
Apart from shady areas, this is to suggest that this tropical beauty prefers warm and wet environments. If you’re living in a region with slim chances of experiencing frost conditions, then growing your Bromeliad plants outdoors wouldn’t pose any adverse effects. One primary issue with Bromeliads growing outdoors is that they are sensitive to direct sunlight and can burn if exposed for too long. And the optimal tolerance for light or heat exposure will depend on the kind of species you’re looking to grow.
You’ll need to closely track the number of hours which your Bromeliads would potentially get exposed to the sun before growing them. But if natural outdoor fluctuations are not suitable, bromeliad plants will need to be relocated inside your home or office in order to thrive, so growing them inside containers is much preferred if it’s hard to predict the overall temperature patterns. It’s also essential to pick a spot with higher moisture levels since this is a tropical type. It’s inversely crucial to note that some Bromeliad species can get along fairly well with arid climates. I currently have a few bromeliads in my backyard.
I maintain them by spraying water onto them and misting their leaves whenever the humidity level drops below 60%. Only mist on the plant when the leaves are dry but before the foliage gets sun-kissed. You also want to be careful not to overwater your Bromeliad plants. The ultimate goal is to just keep them from looking stressed out or experiencing droop filaments, which makes the leaves look a bit off.
If you live in a colder region, then plant your Bromeliad plants in containers so that you can move them inside when it’s winter. You can dig holes to bury the containers if you’re looking to use this tropical plant for landscaping. Make sure to use growing media with enough drainage holes that let out any excess rainwater, to keep your Bromeliads from the effects of overwatering.
Indoor Bromeliad Caring Tips
Flowering & Fragrance
By far, Bromeliad plants arguably produce the best flowers for an indoor or landscape setting. Whether you’re growing them in your balcony, courtyard, or hanging baskets, the odds for it to bloom would be in your favor especially if you’re conscious of the exact soil, lighting, and temperature conditions it needs. Apart from the striking foliage, you’ll feel revitalized to see its bright flowers that come in various shades of red, yellow, or solid purple. However, the downside is blooming only takes place once throughout this plant’s lifetime. Generally, the average lifespan of the blooms will range anywhere between 3 to 6 months.
Light
Depending on the species, you’ll realize that Bromeliads hold varying tolerance levels to light exposure. While some can keep up with the full tropical sun, others can’t withstand the intense rays. Those with soft and spineless leaves are more vulnerable to the scorching sun, hence they prefer low-light conditions.
It’s no reason why both Guzmania and Vriesea bromeliad varieties are more inclined to wild environments with partial shade. And if you want the blooms to last a little longer, then protecting the entire foliage from the full sun should be a basic step to keep tabs with especially during the warmer months.
The overall foliage appearance will indicate the precise lighting conditions you need to work with. If the leaves are looking dark green, then the rate of chlorophyll production is in excess and that usually happens when your Bromeliad is growing under low-light conditions.
If there’s any significant evidence of leggy growth, it could mean that your plant is desperately in search of light. Those with stiff leaves such as the Guzmania Bromeliad do a lot better under indirect light. On the flip side, scorched or bleached leaves would indicate that’s it’s receiving too much light.
Temperature Requirements

Same as access to light, the temperature requirements for Bromeliad plants can vary depending on the variety, the season, and the range to which it’s typically accustomed. My understanding is that most species in the Bromeliaceae family will survive in a temperature range between 55°F and 80°F.
With such a wide temperature range, it would seem that your Bromeliads are generally happy just about anywhere even when there are slight fluctuations. Other cold-hardy Bromeliads tend to tolerate frosting conditions. However, some do require specific temperatures to thrive in.
In fact, if your Bromeliads are exposed to temperatures that fall below 40 degrees Fahrenheit, the leaves would start to blacken and get distorted due to an intense rupture of the cell walls. If you’ve grown them in containers, you can move them outside when it’s summer, but don’t miss to provide some partial shade.
Otherwise, if they are strictly meant to live indoors, place them in the warmest area of your home. To keep your Bromeliads from experiencing rapid stress, introduce your Bromeliads to new lighting and temperature conditions at a gradual pace.
Soil Structure
One peculiar thing you’ll note about most Bromeliad plants is they have quite out-of-the-ordinary soil requirements, compared to a bunch of other commonly grown houseplants. Most tend to absorb more nutrients and moisture through tiny pores on the leaves, than roots. And it’s no reason why you also have the option to grow them as ‘air plants’ mounted on logs or wall frames.
Even though this is its intrinsic nature, you still want to highly depend on a well-draining potting soil that still has the capacity to retain some moisture since Bromeliads are terrestrial epiphytes with a wide stream of tropical attributes.
As a rule of thumb, avoid using normal soil. Instead, use potting mixes. A suitable potting mixture for this houseplant would be one that’s made of 1/3 sand and 2/3 peat moss. And a pretty solid alternative to peat moss is purchasing a soilless potting mix, then adding charcoal or vermiculite for optimal pH in the soil.
It’s also worth getting acquainted with the basic facts of the Bromeliad type you’re looking to adopt before planting it. Some attack their root systems to tree barks in a sturdier position than when planted in the soil—and vice versa. Besides using a potting mix with good drainage, you still want to make sure that the structure is well-aerated to allow enough air circulation. Most of all, Bromeliads prefer a potting mix with an acidic pH ranging from 5.0 to 6.0.
Potting & Transplanting
If you’re living in arid climates, it’s best to plant your Bromeliads plants in plastic containers. They tend to retain moisture a lot longer compared to those made of clay. Unglazed clay pots let out any excess water much faster since they’re porous. Clay pots are suitable for humid environments since they seep out any extra moisture that would pose a threat to the roots.
When growing indoors, place the pot on top of a wide saucer so it can hold the excess moisture that could damage the floor or any furniture which the growing medium is sitting on.
Bromeliads, especially those growing indoors, are slow growers and typically don’t grow overly tall or wide. So, there won’t be any dire need for transplanting if the original container was a medium-size one.
When it’s at its tender years, you can start off with a 4’ inch container. But in the event where your Bromeliad outgrows its initial container, the best for transplanting would be during the spring season when the growth hormones are getting out of their long-winded dormancy.
How to Water Bromeliads
Even though Bromeliads are tropical in nature and most species prefer humid conditions, they’re a bit more drought-tolerant compared to most other epiphytes. And when growing indoors, don’t be tempted to fill the cups on the leaves with water. Watering your Bromeliad plant at regular intervals is only necessary when both the lighting and temperature conditions are high.
Flush the central cup every once in a while, to get rid of any salt build-ups. During the growing season, watering this houseplant/landscaping masterpiece only once a week would suffice. Reduce the watering intervals drastically during winter since the growth hormones treat this season as a resting period.
If it’s growing as an air plant, your Bromeliad will need to be watered a lot more often. If possible, you want to opt for filtered, rainwater, or distilled water. Using tap water could cause stunted growth or make the plant have brown leaf tips since hard water usually has traceable levels of unfiltered chemicals.
While the roots prefer soil that’s slightly moist, the plant is prone to root rot or crown rot if left in soggy soil for too long. Make sure to work with a growing medium with enough drainage holes that would potentially let out any excess moisture.
Fertilizer
Bromeliads don’t heavily rely on fertilizer to bloom or produce radiant foliage. But if you really want to optimize the results, you want to wait till springtime. Your Bromeliads will only need to be fed once every two to four weeks with a liquid fertilizer that’s diluted at least at ¼ strength.
You want to feed it with low nitrogen fertilizer that’s at the rate of 10-20-20. If the temperatures dip below 20°F, don’t expect new growth, so don’t get tempted to feed your Bromeliads when it’s winter since the hormones are usually dormant around this season.
Grooming & Maintenance
Bromeliads don’t require any intense grooming or maintenance routine. Being a tropical plant, you need to maintain its optimal humidity level. To keep enjoying your Bromeliads, make sure the soil stays moist but not soggy, to prevent them from diseases caused by overwatering.
Over time, some clones called pups will fall off from the mother plant and grow on the edges of the container. If they’re in excess, they would compete with the parent plant for essential nutrients, so it’s best to pluck off some. Get rid of the dead flowers once the blooming phase is over, and dissect leaves that show signs of wilting or are scorched by the intense heat from the sun.
How to Propagate Bromeliad Plants
One handy method for propagating Bromeliad plants is using offsets that usually fall off from the parent plant. They develop in mass numbers during this plant’s lifetime. Removing the Bromeliad pups is pretty easy. Before uprooting them, you want to wait till they are roughly 6’ inches tall. Bigger pups tend to have a sturdier root structure.
Moisten the soil to avoid bruising the pups when uprooting them. You can either pull the pups off or cut them at the base part using a sharp and sterilized knife. Prepare a potting mix that’s generally suitable for epiphytes. When planting, don’t bury them too deep to lower the chances of rotting. It’s worth noting that the pups are planted only after forming roots.
Common Bromeliad Pests & Disease Problems
Some of the common problems your Bromeliad plants are likely to face include root crown and a bunch of fungi-related diseases which most often are a result of overwatering. Most Bromeliads also can’t keep up with excess salt buildups, so using hard water isn’t recommended. And since the roots don’t grow wide and tall, it’s best to plant this tropical epiphyte inside a compact container. Leaving too much room for holding excess water could cause rotting if the soil remains soggy for too long.
If you’re living in a warmer region, you want to keep your Bromeliad plants far from heat stress since it can damage the entire foliage or disrupt the blooming cycle. Whether growing indoors or outdoors, this plant is likely to get affected adversely by pest attacks if you fail to keep a close eye. Some of the common pests to watch out for include aphids, mealybugs, and fungus gnats.