DIY Yarn Wall Hanging – Easy Tutorial Step by Step
Updated on June 28, 2021
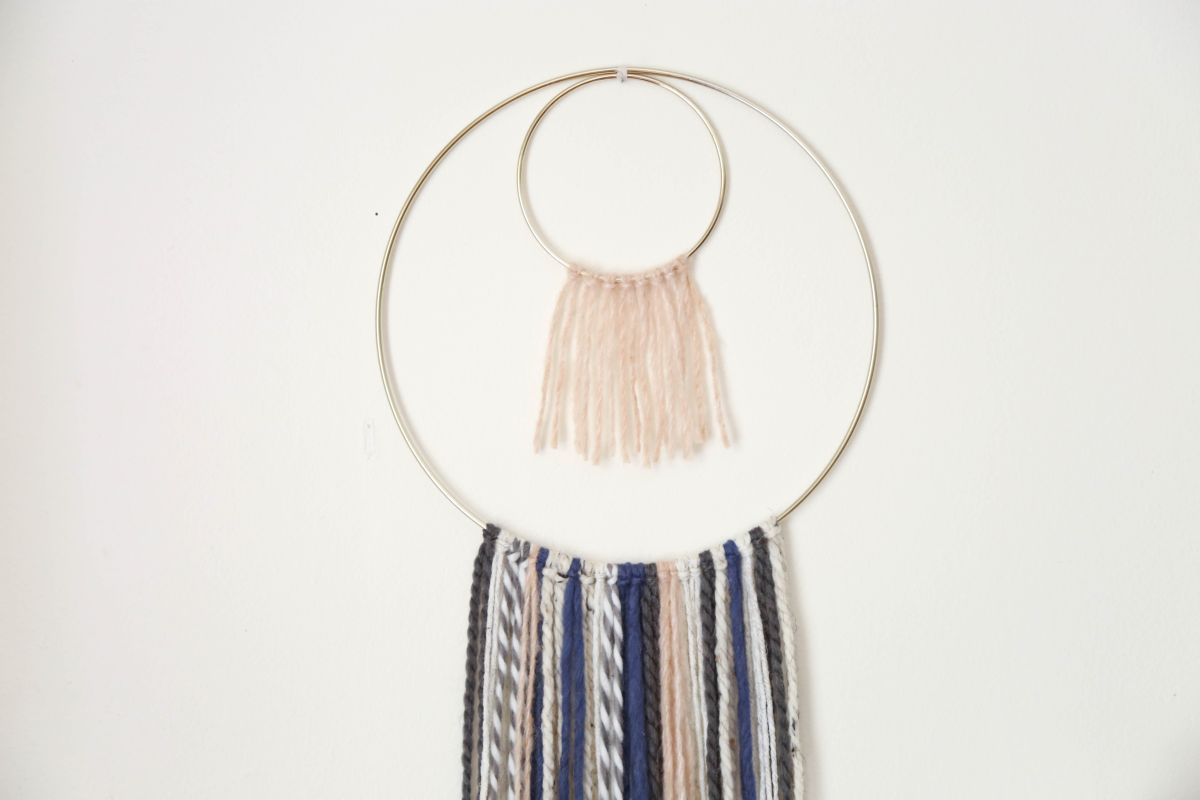
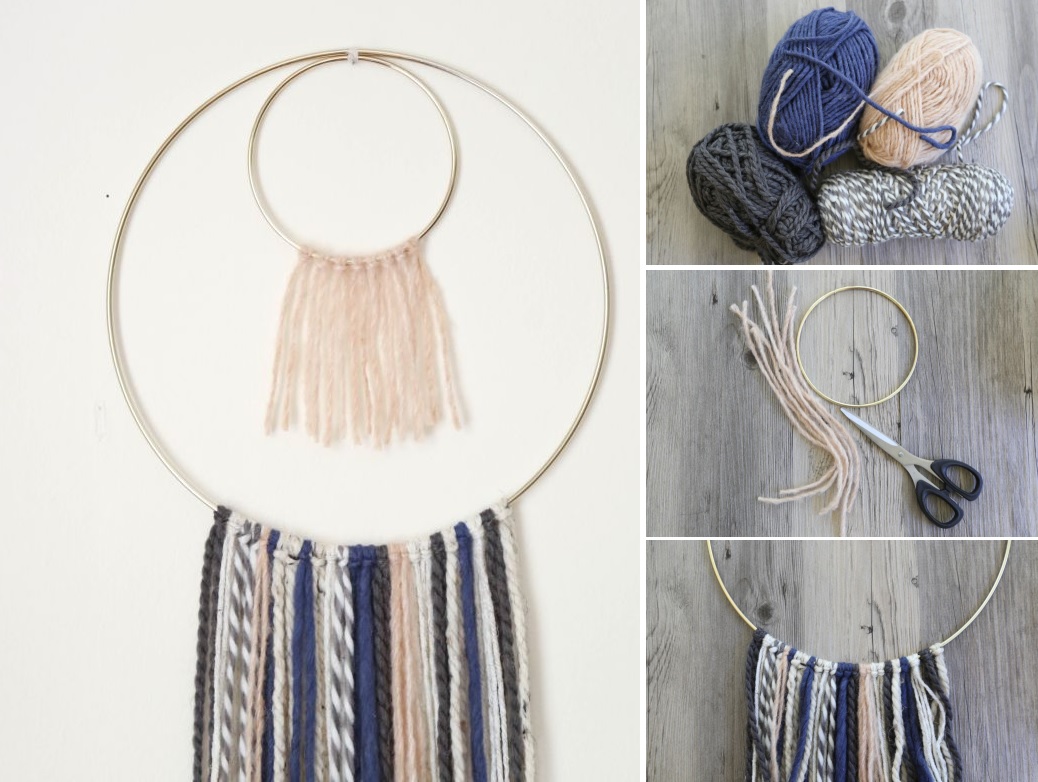
This yarn wall hanging is a quick and easy project if you looking to create some wall décor for your space. This project usually takes about 30 minutes or less. What’s great about this project is that you be super creative and customize this project to your liking. With all the texture and color, this is the perfect wall hanging to add some pizzazz to your room.

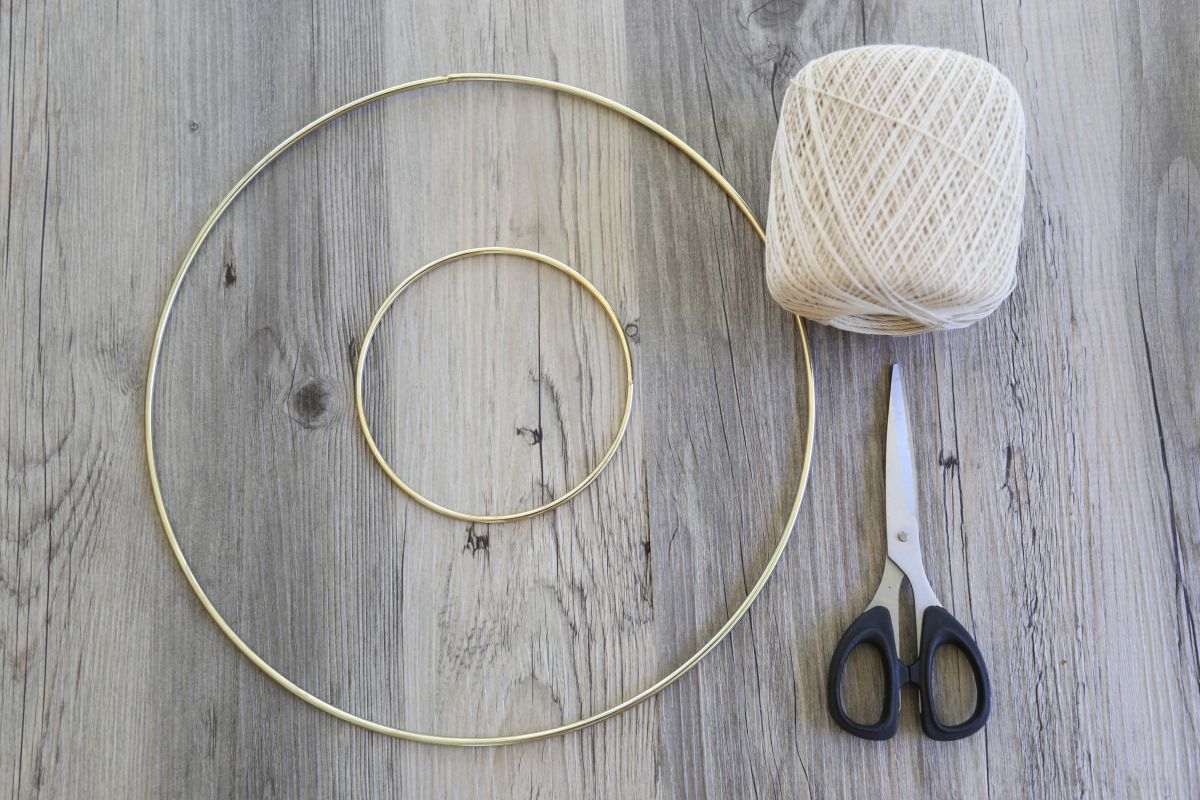
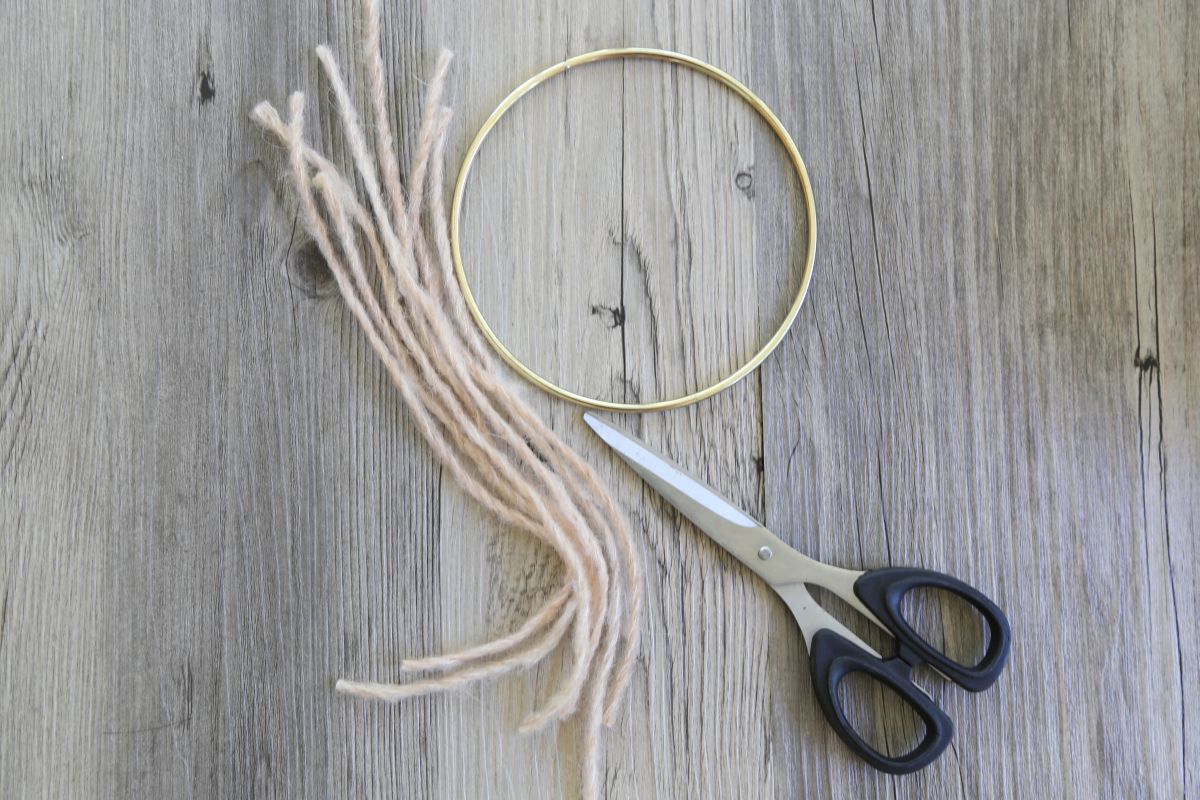
Materials you will need to craft a yarn wall hanging:
- 5” brass hoop
- 12” brass hoop
- string
- different types of yarn
- scissors
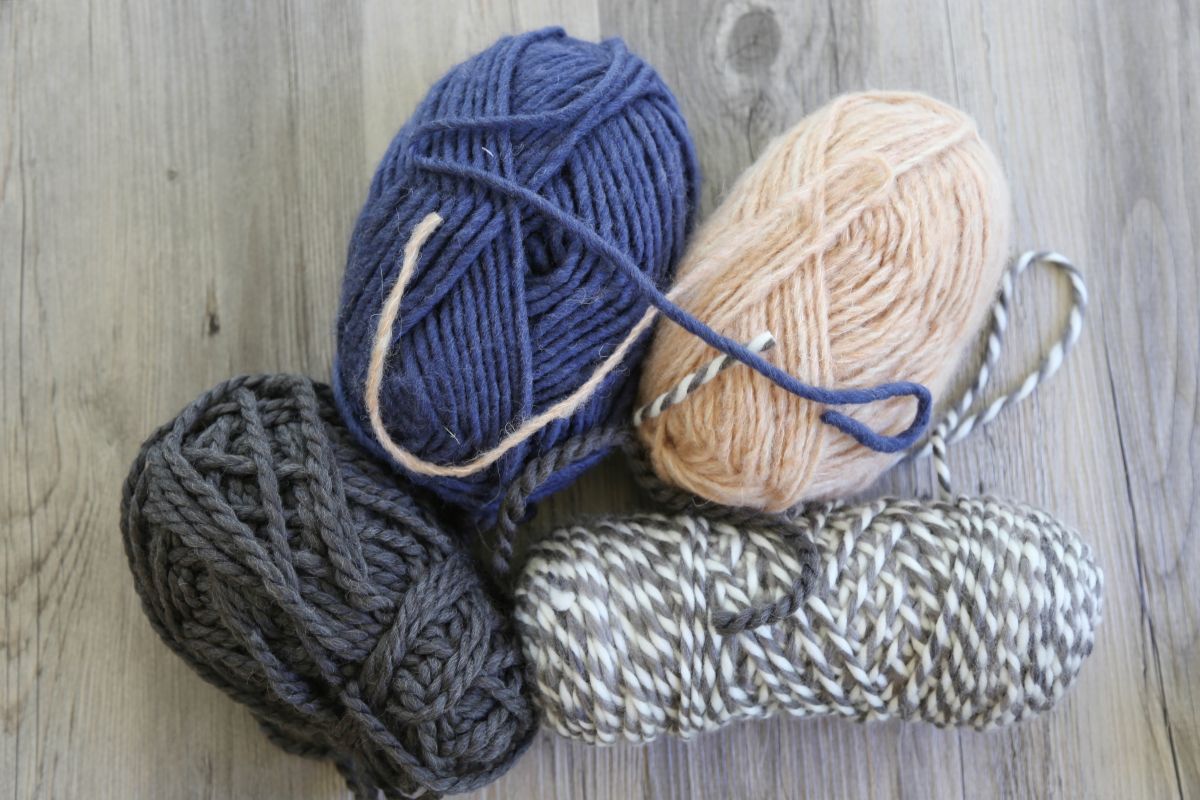
When it comes to the color/type of yarn for this project, it’s up to your liking. You can use one color or 7 different colors, either way, it’s perfectly fine. For this project, I will be using 4 different colors, in which one has a mix of white & gray just to keep this wall hanging aestheticlly interesting.
How to make a yarn wall hanging step by step tutorial:
Step 1: choose the yarn
Choose what type/color of yarn you would want to use for the tiny hoop and cut 10 inches of the yarn. You should have about 8 strands of yarn, but of course you can always add more.
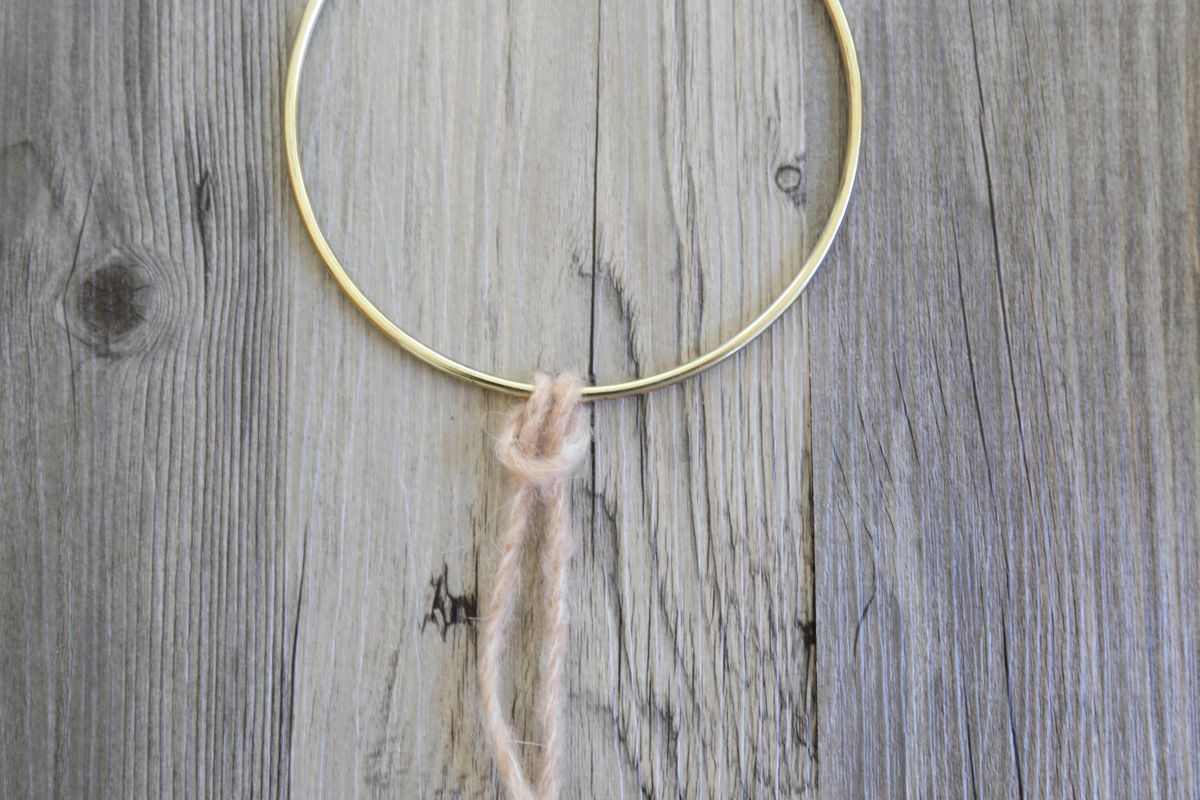
Step 2: attach to brass hop
Attach the pieces of yarn onto the small brass hoop by doing a larks knot. To create this type of knot grab the piece of yarn and fold it so opposite ends meet each other. Place the yarn under the hoop, folded part facing the bottom and the ends of the yarn facing up. Bring the ends over the brass part and pass it under the folded area and pull firm until you create a knot. Continue to do with the rest of the strands of yarn.
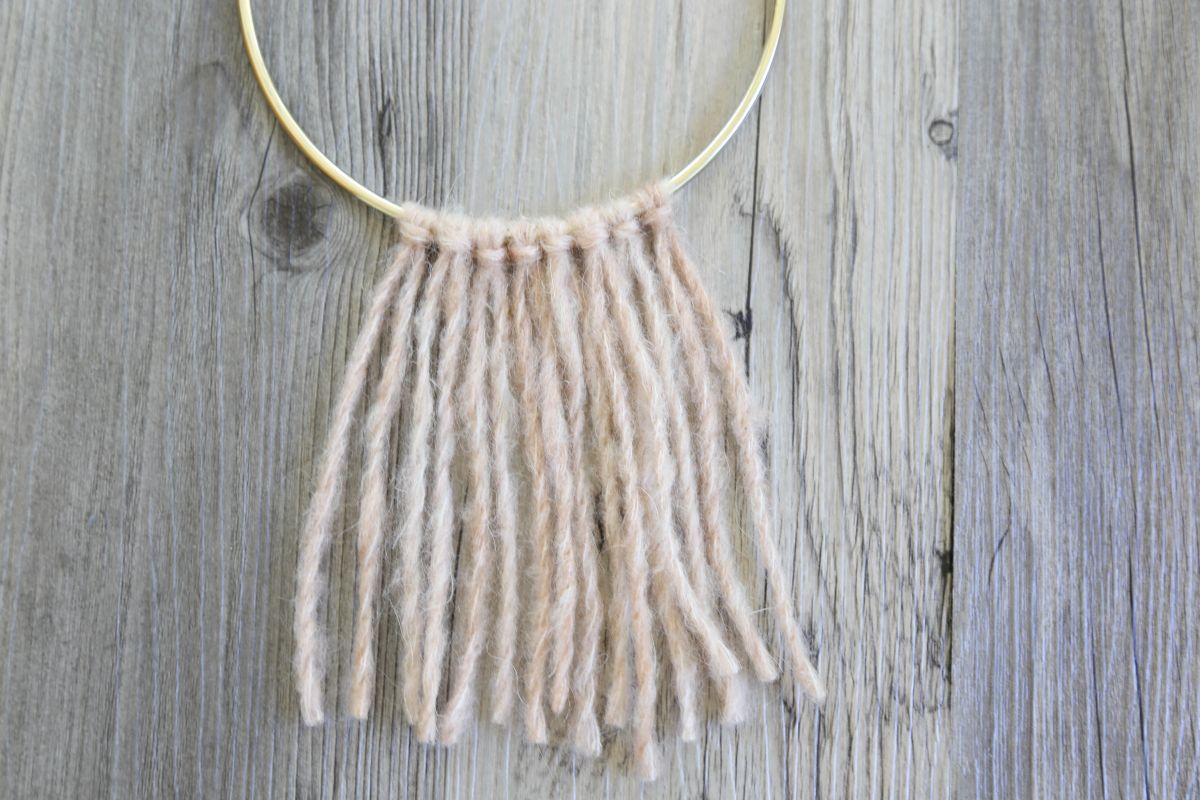
Step 3: trim the bottom
Once you finish attaching the yarn to the small hoop, you can trim the bottom.
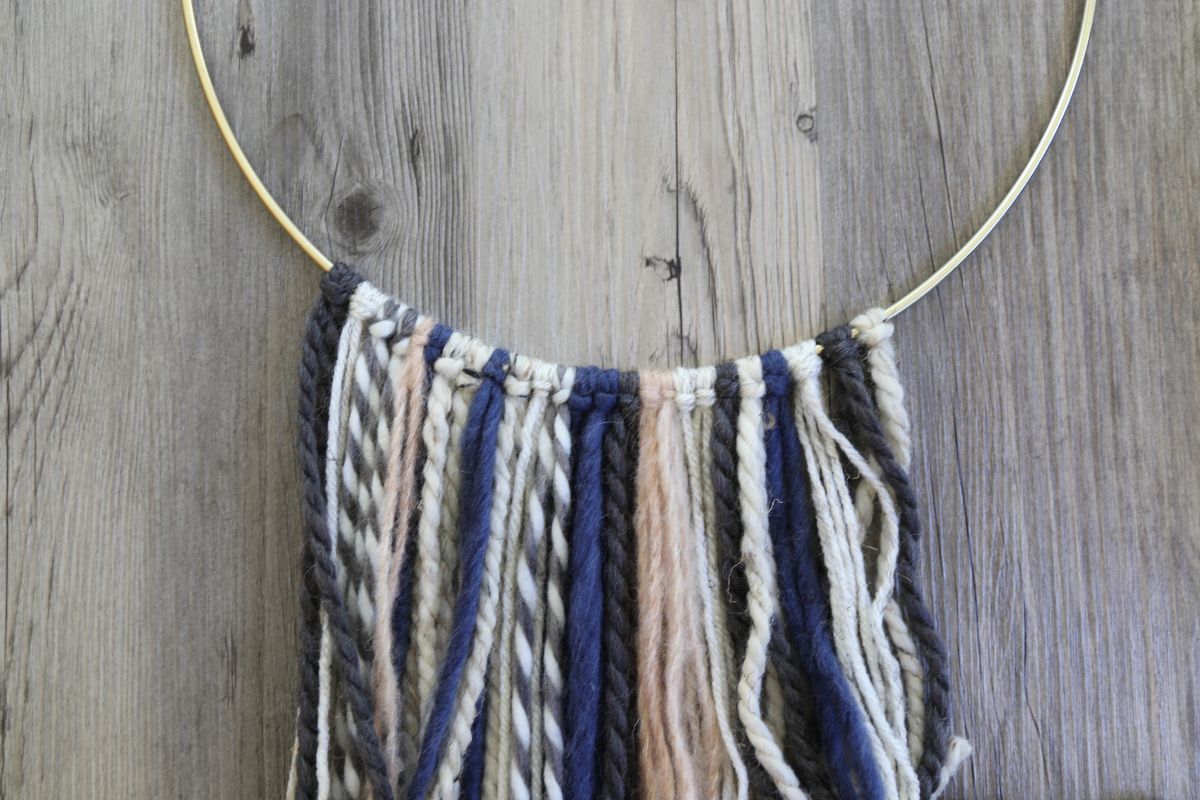
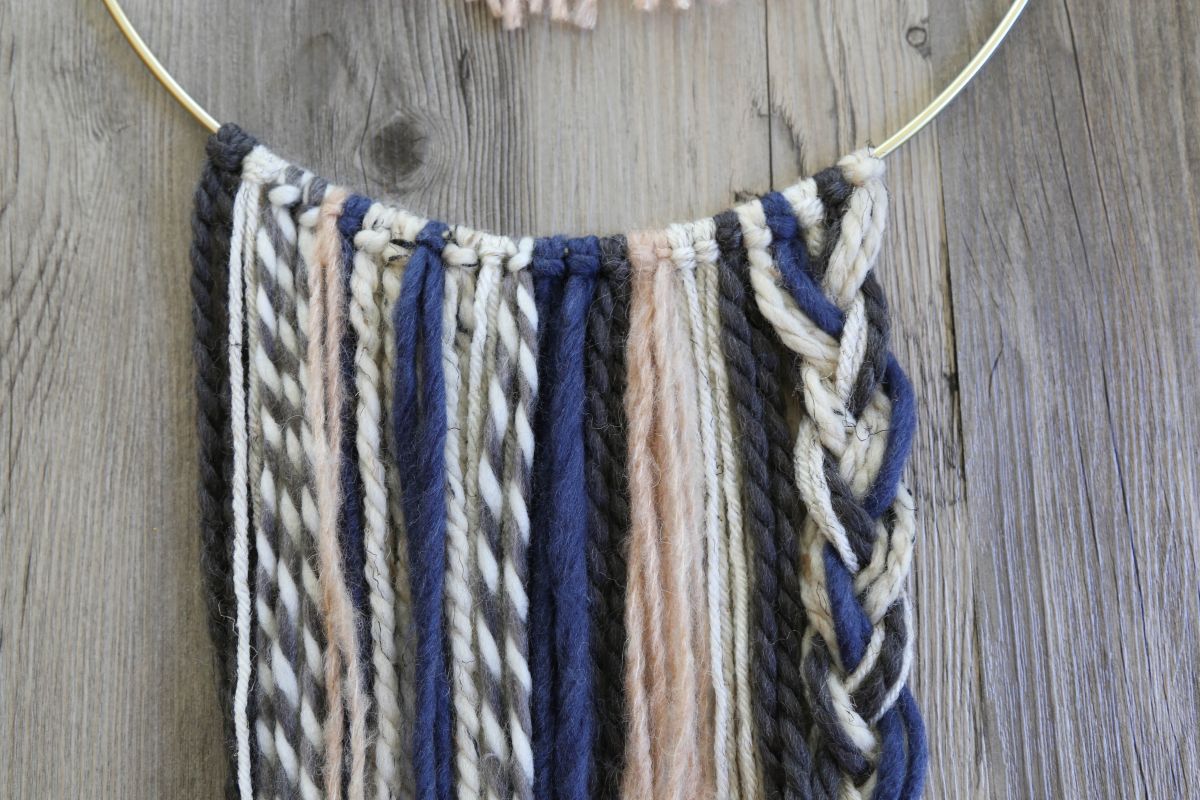
Step 4: add yarn on bigger hop
Moving onto the bigger hoop, take all your yarn and cut about 25-30 strands which should measure 35 inches each. Once you finish cutting all the yarn attach each piece of string to the hoop by creating a larks knot. This part you can decide on the placement of the colors; you can follow a pattern or randomly place them as you go.
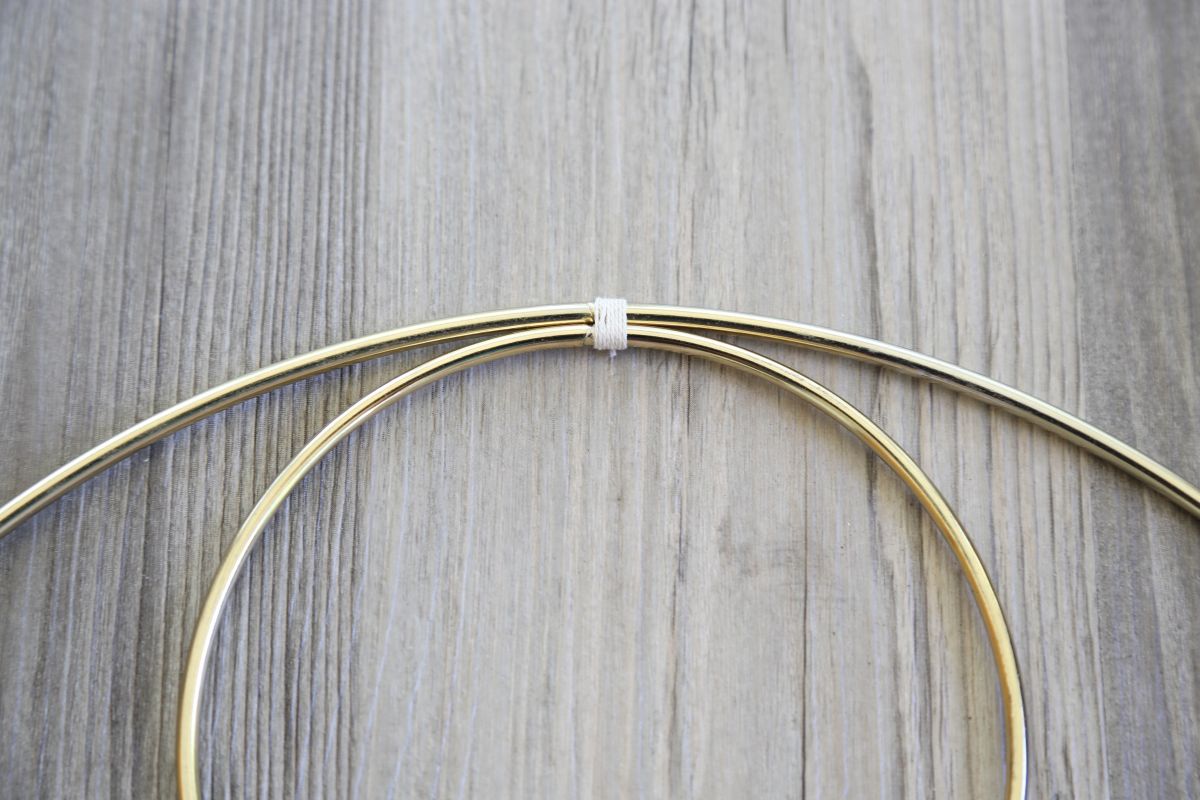
Step 5: fix them
You almost are done! This part you will connect the tiny hoop to the larger brass hoop. Take the smaller hoop and place it inside of the bigger hoop and make sure it’s centered correctly. Then take your string and wrap it around the top of both hoops. To make sure its secure wrap it around about 6-8 times and end it with a double knot—or even a triple knot.
Conclusion
You are all done! If you want to add more texture to your wall hanging you can add a braid or two.
Take your finished project and pick a spot to display your work. Happy crafting folks!