DIY Tin Can Hanging Planter
Updated on November 19, 2025


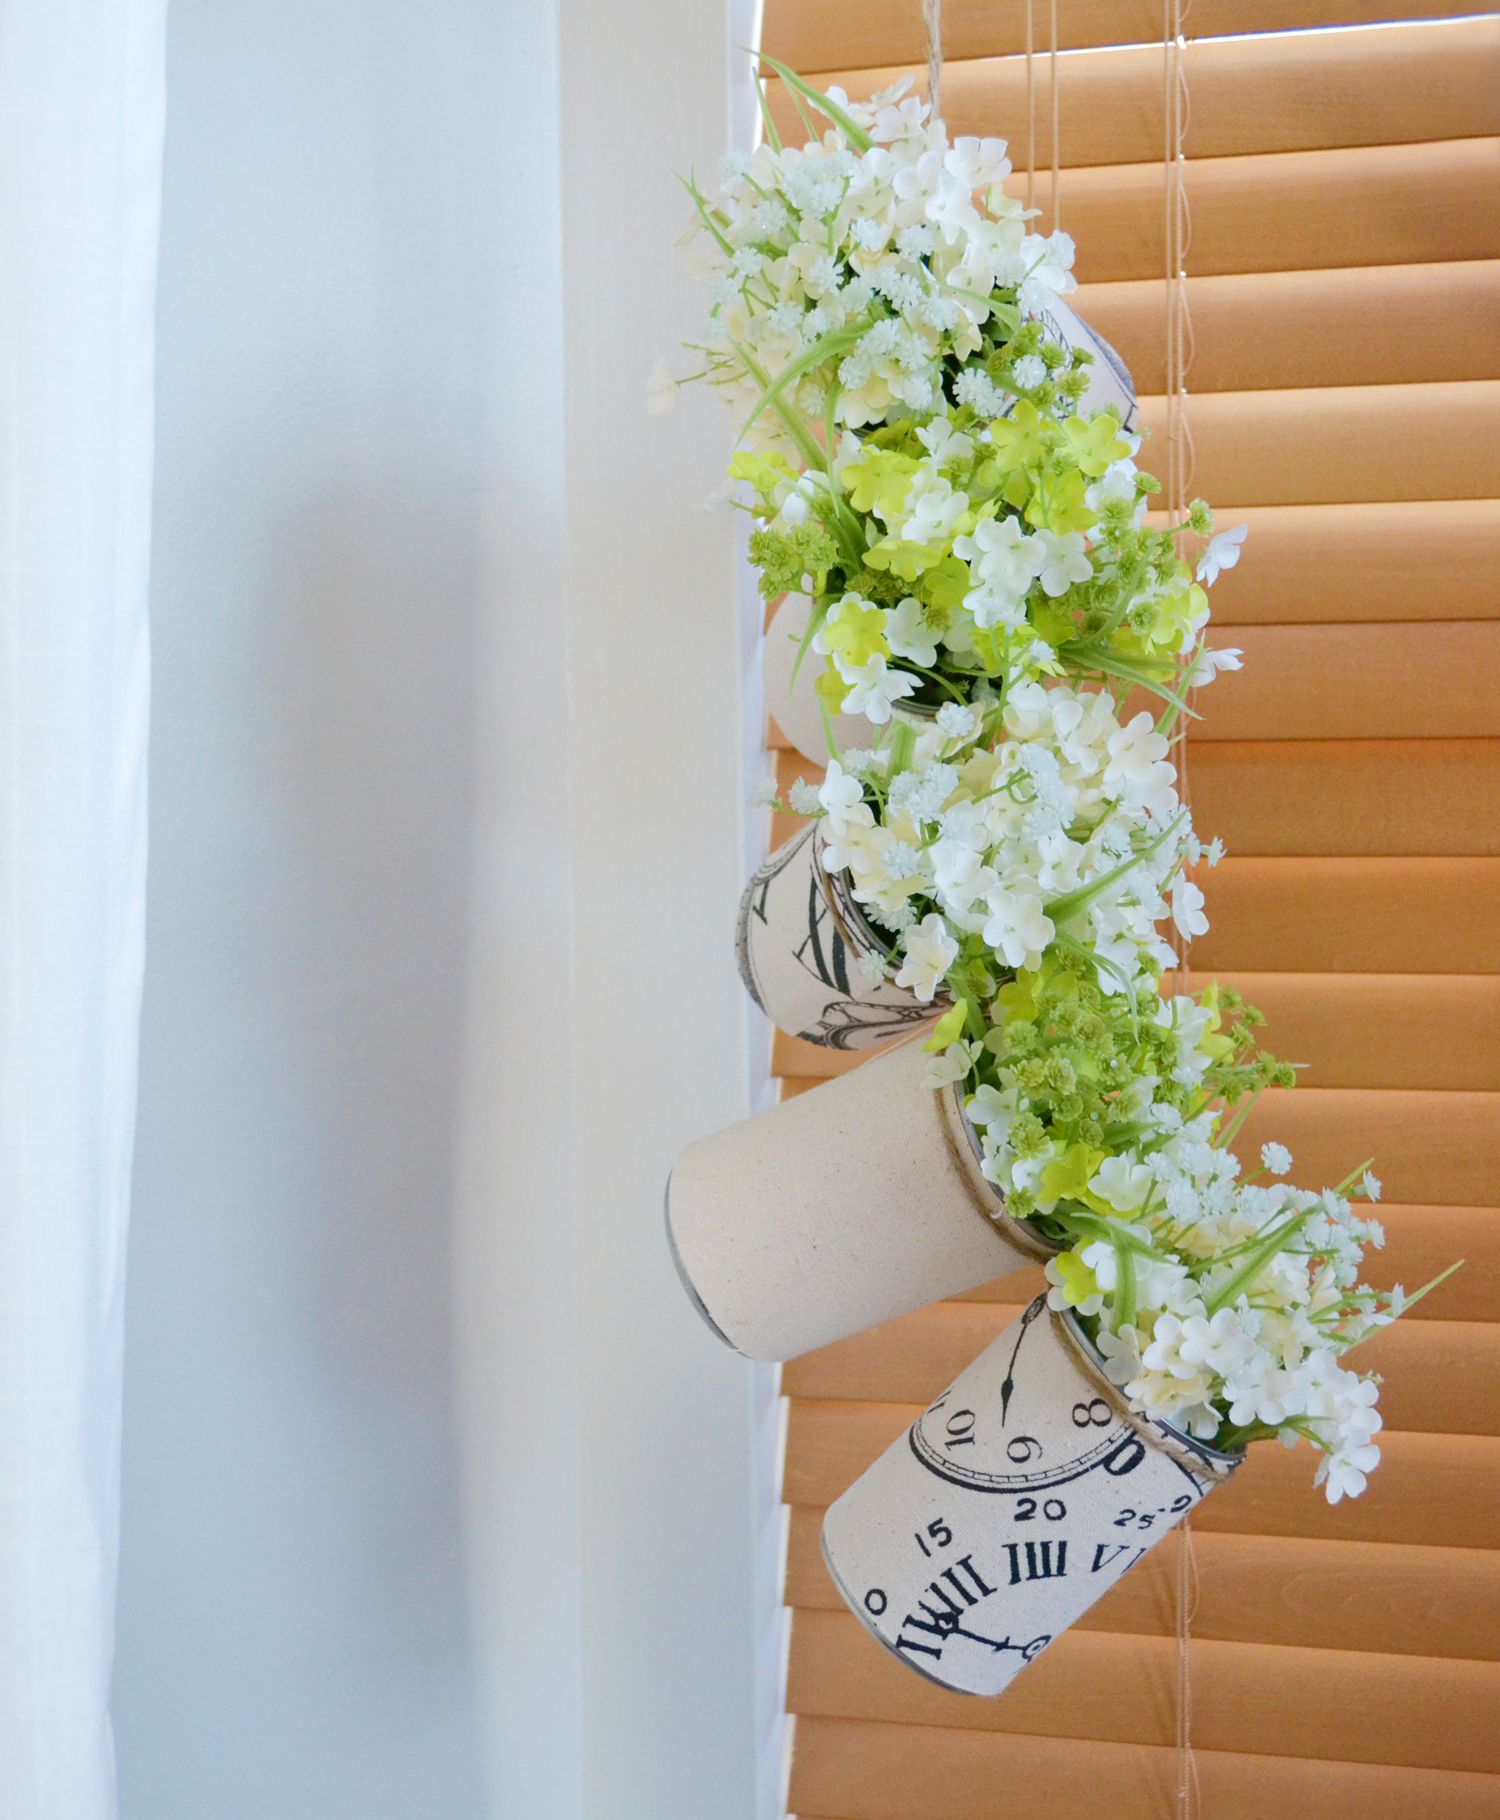
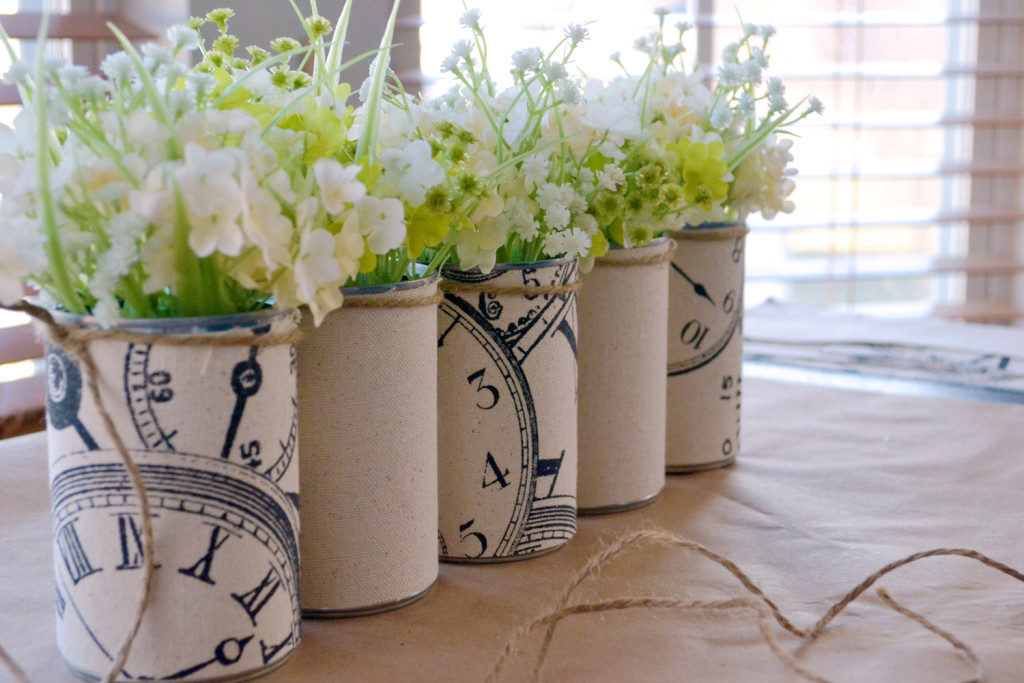
Whenever you have a lot of old tin cans in the recycling bin, stop and think of the many DIY projects that can be done with them. Can you make them in to something fun and practical? My favorite DIYs consist of recycling old projects and using them as elements in my home decor. This hanging planter makes a great statement for Spring.Hanging from the ceiling and with the right floral arrangements, it brings a lot of color to my home.


For this DIY you’ll need:
- Old tin cans
- Scrapbook paper or burlap paper
- Twine
- Hot glue gun and glue
- Flowers
- Pencil
- Scissors
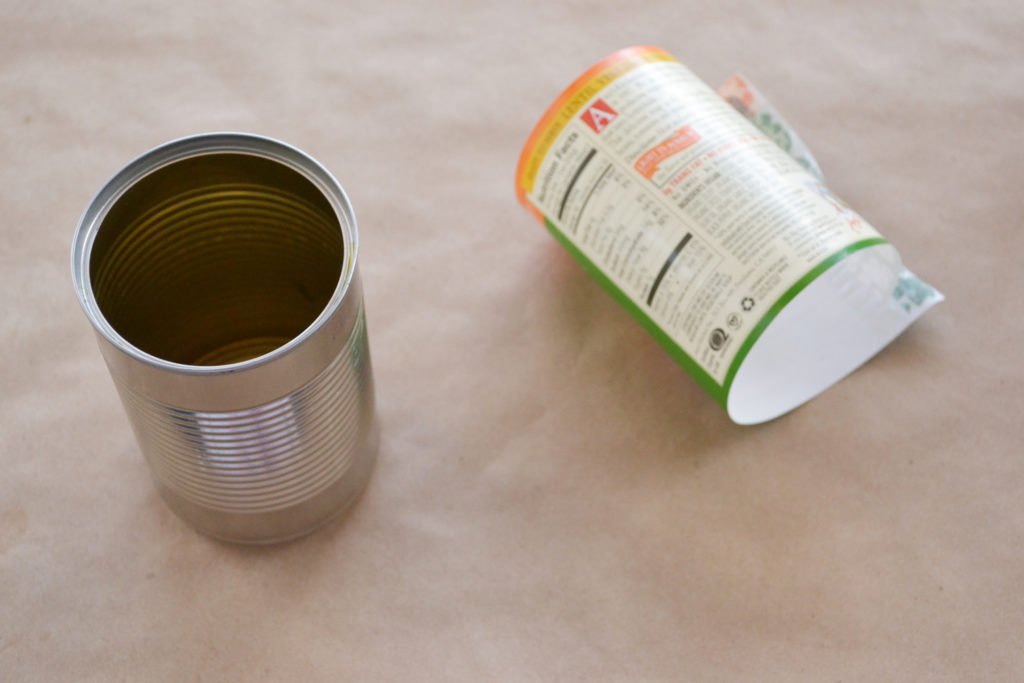
Start by removing the old wrappers from the tin cans. It should remove pretty easily, but don’t hesitate to use Goo Gone or a another adhesive remover to get the label sticker off if needed.

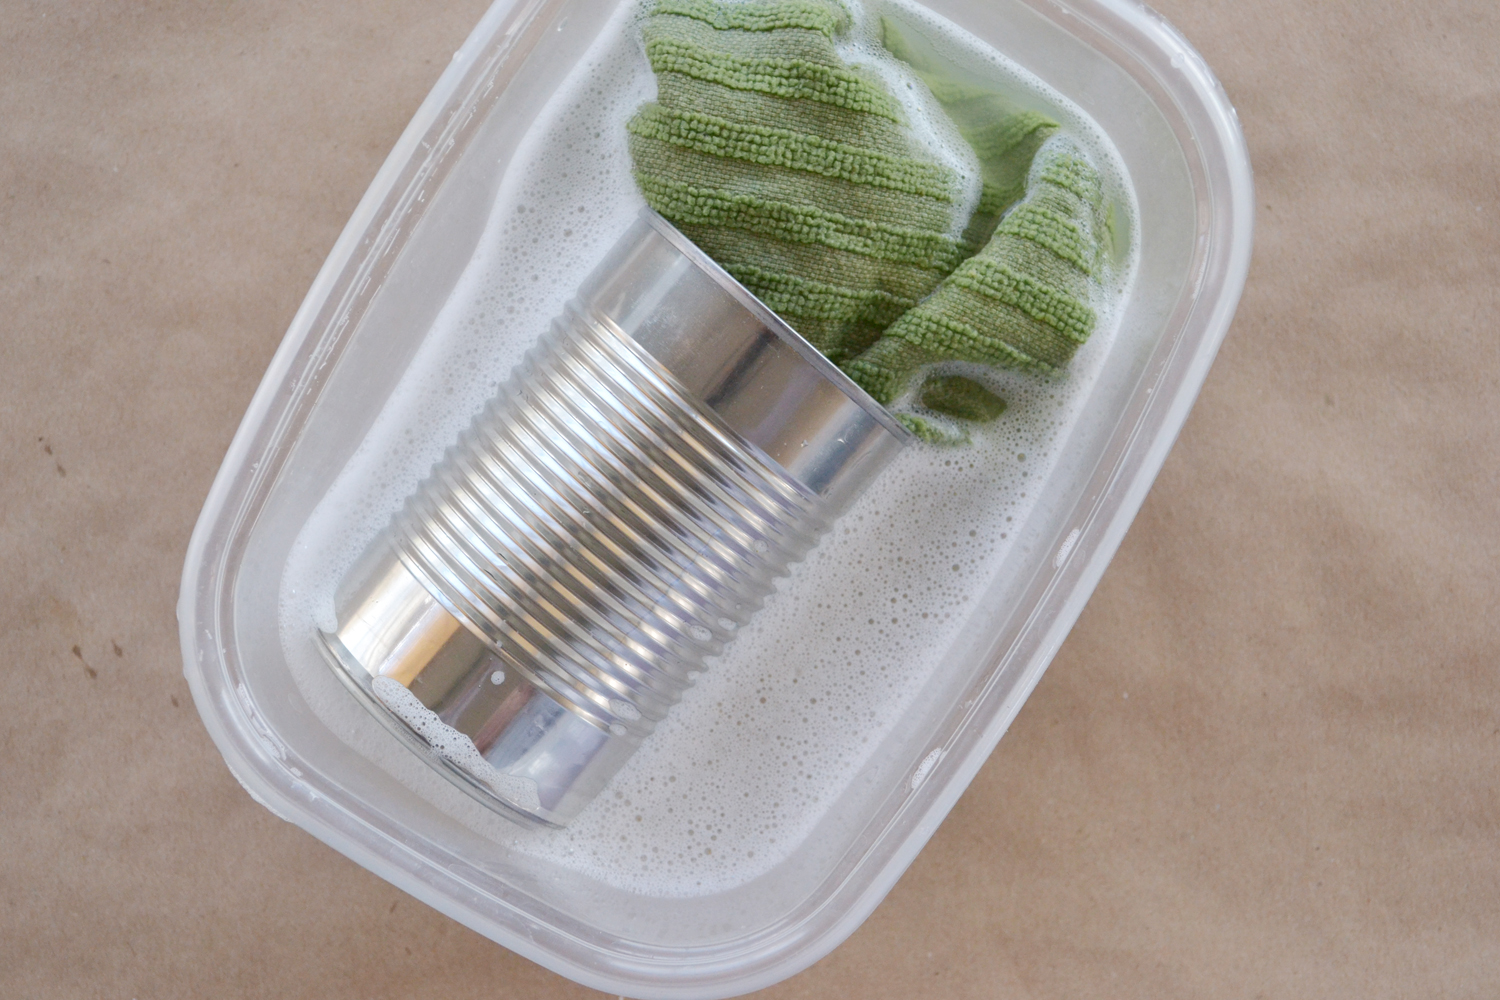
Wash the tin can inside and out with soap and water to remove any food bits or remaining adhesive on the outside. Dry fully with a towel.
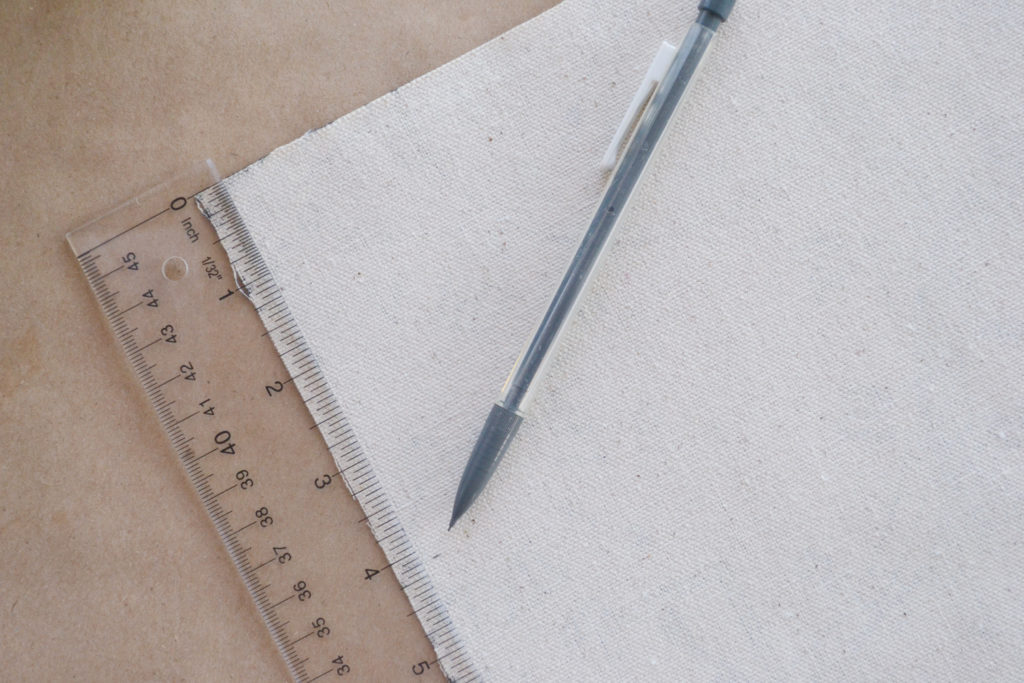
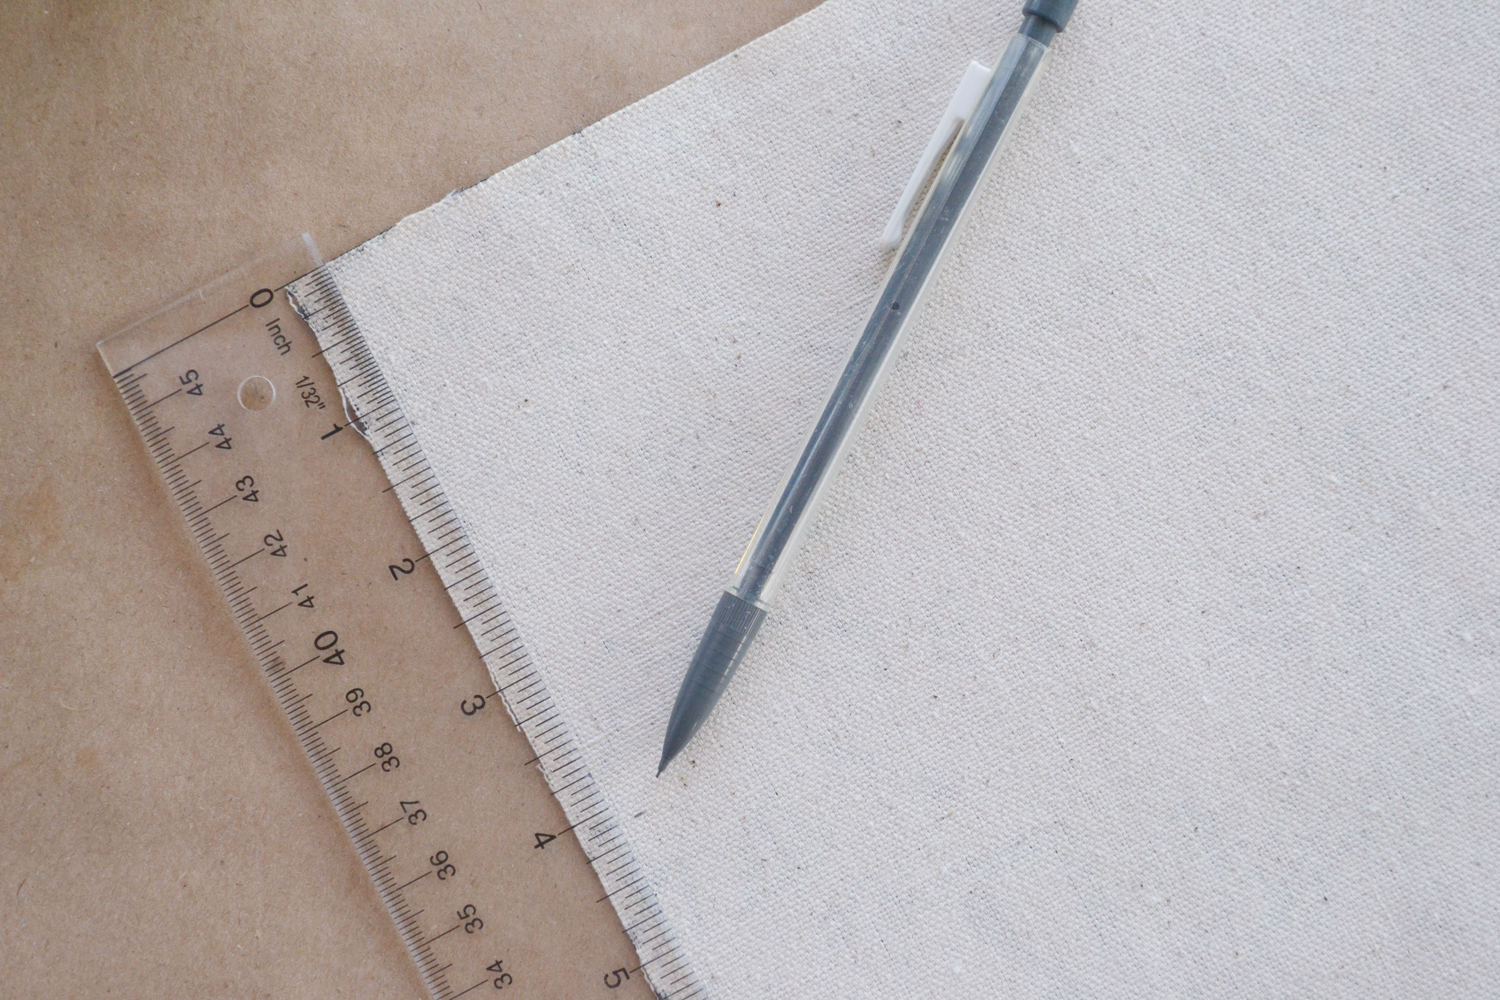
Make sure the tin can is completely dry before you add the scrapbook paper or fabric to the outside of the can, so your paper does not get wet. Measure about 4 inches down on your paper (12 x 12) and draw a line across it on that mark. Cut out that strip of paper. It will be slightly longer than the circumference of the tin can, but you can cut that excess paper off later.

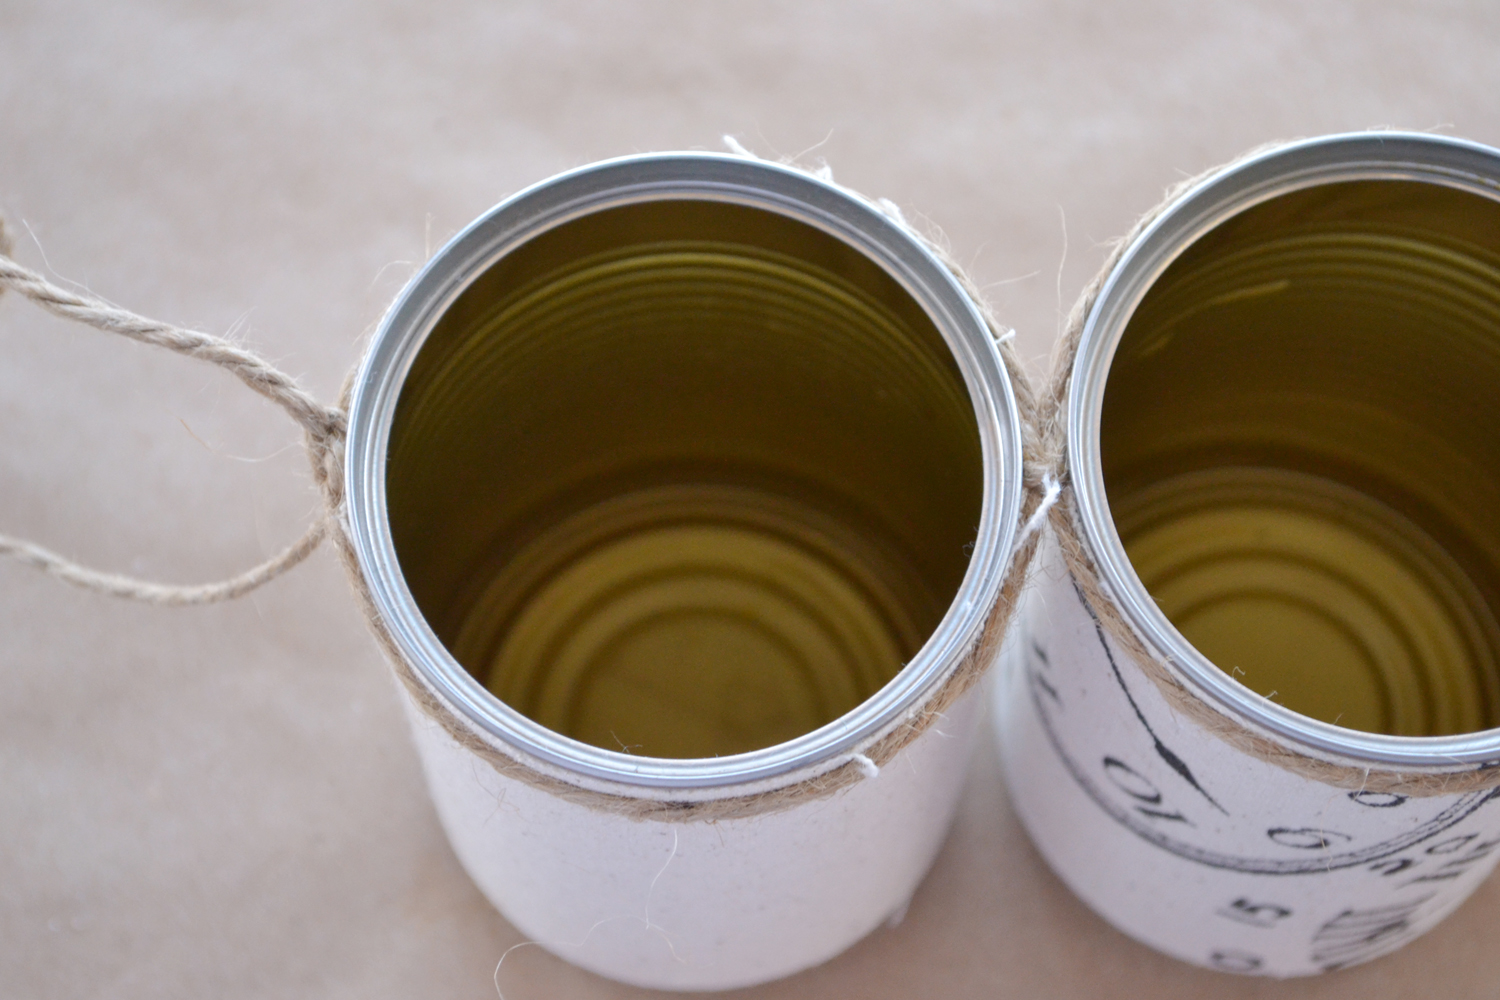
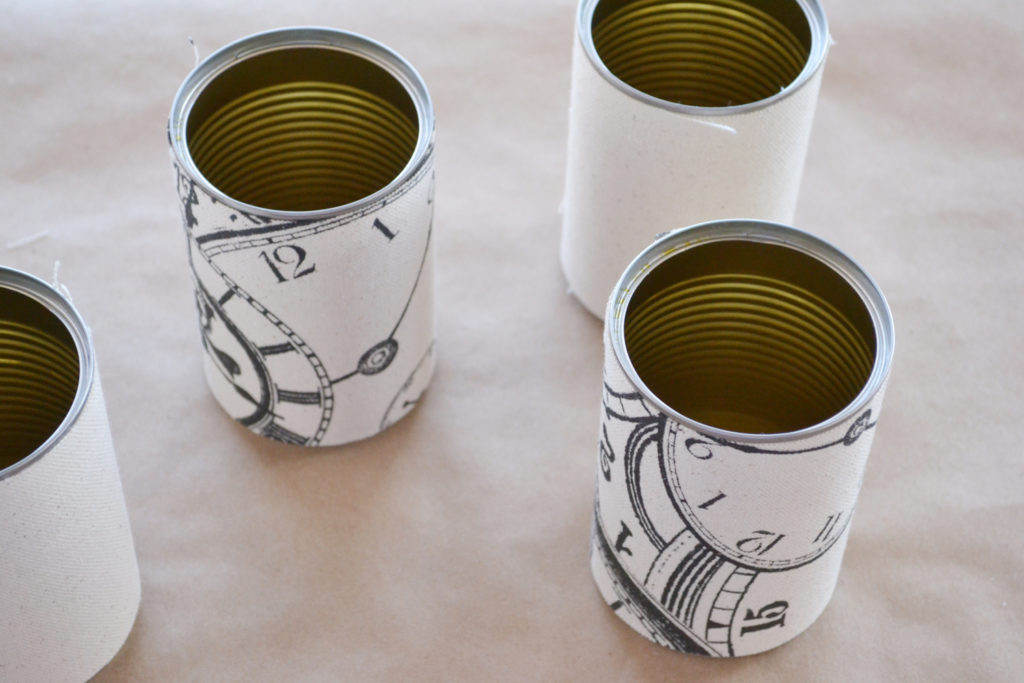
Glue one end of the paper to the tin can and wrap it around to secure it at the other end. Cut off any excess paper if needed. If you are using scrapbook paper, regular white glue would work well. Hot glue can leave an rough surface on the paper, but white glue keeps the paper tight to the tin can with minimal bumps. Though, if you are using a burlap or fabric-type paper as I have in this project, hot glue works well.

Wait for the glue to dry, and cut a long piece of twine for this step. For five cans I cut about two yards of twine to ensure that I had enough. Attach the twine by wrapping around the top of the tin can and tying a small knot to secure it. Add the second tin can right after and tie another knot around that one. Repeat these steps until you have added as many tin cans as you wish.
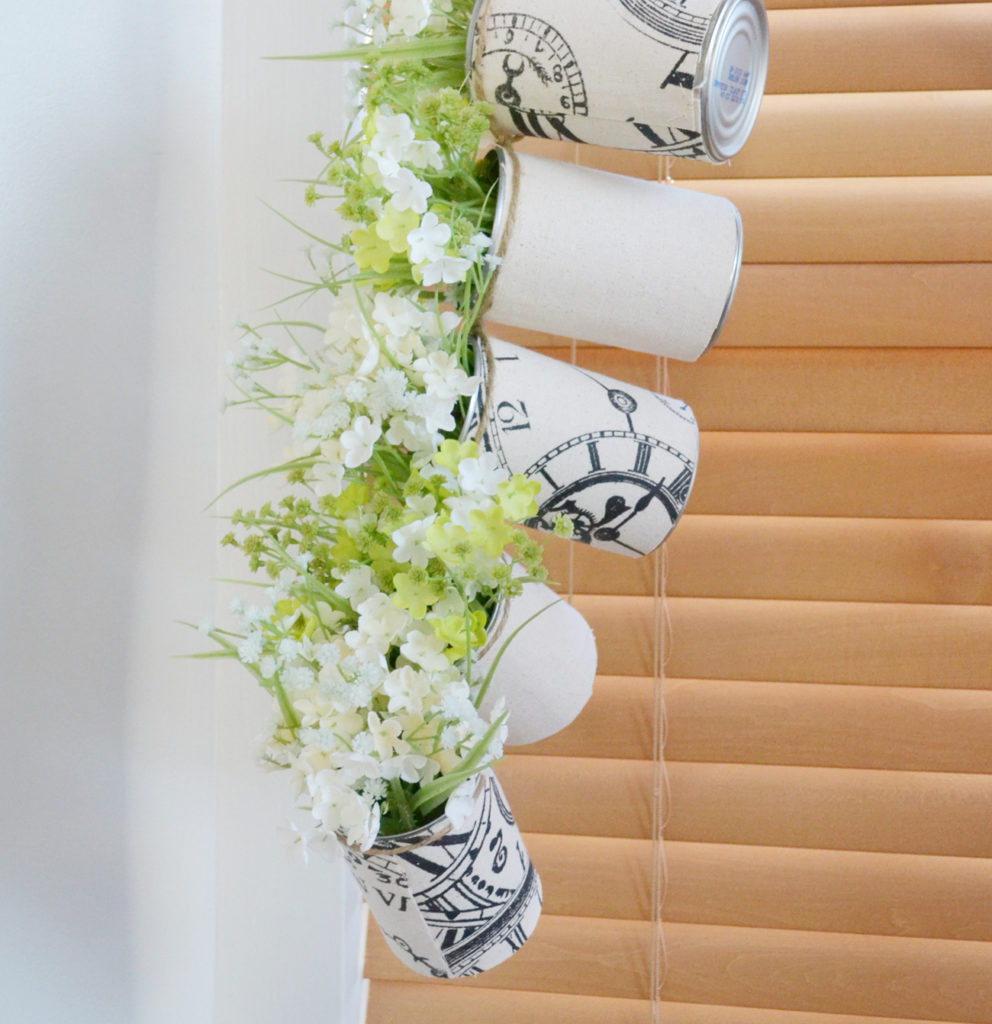
Hang using a Command strip or hook in the ceiling. Hang it by a window to let the plants or flowers catch the sunlight. The tin cans do not hang upright, so be careful when adding soil and water. Pour water in the cans when they are not in the hanging position. This planter is a great DIY that will catch the eye of any guest who comes in your home. It is a great gift idea and the perfect DIY to start the Spring season!