How to Make a Styrofoam Snowman
Updated on November 19, 2025

This adorable DIY styrofoam snowman project was actually such a hit in my house that I couldn’t help making another one so I could lay out the whole process for others to follow along and learn how it’s made as well.

Check out this list of full instructions complete with photos! If you like video tutorials a little bit better than you like following written words, we’ddefinitely suggest scrolling through to the end of this post, where you’ll find just what you’re looking for.
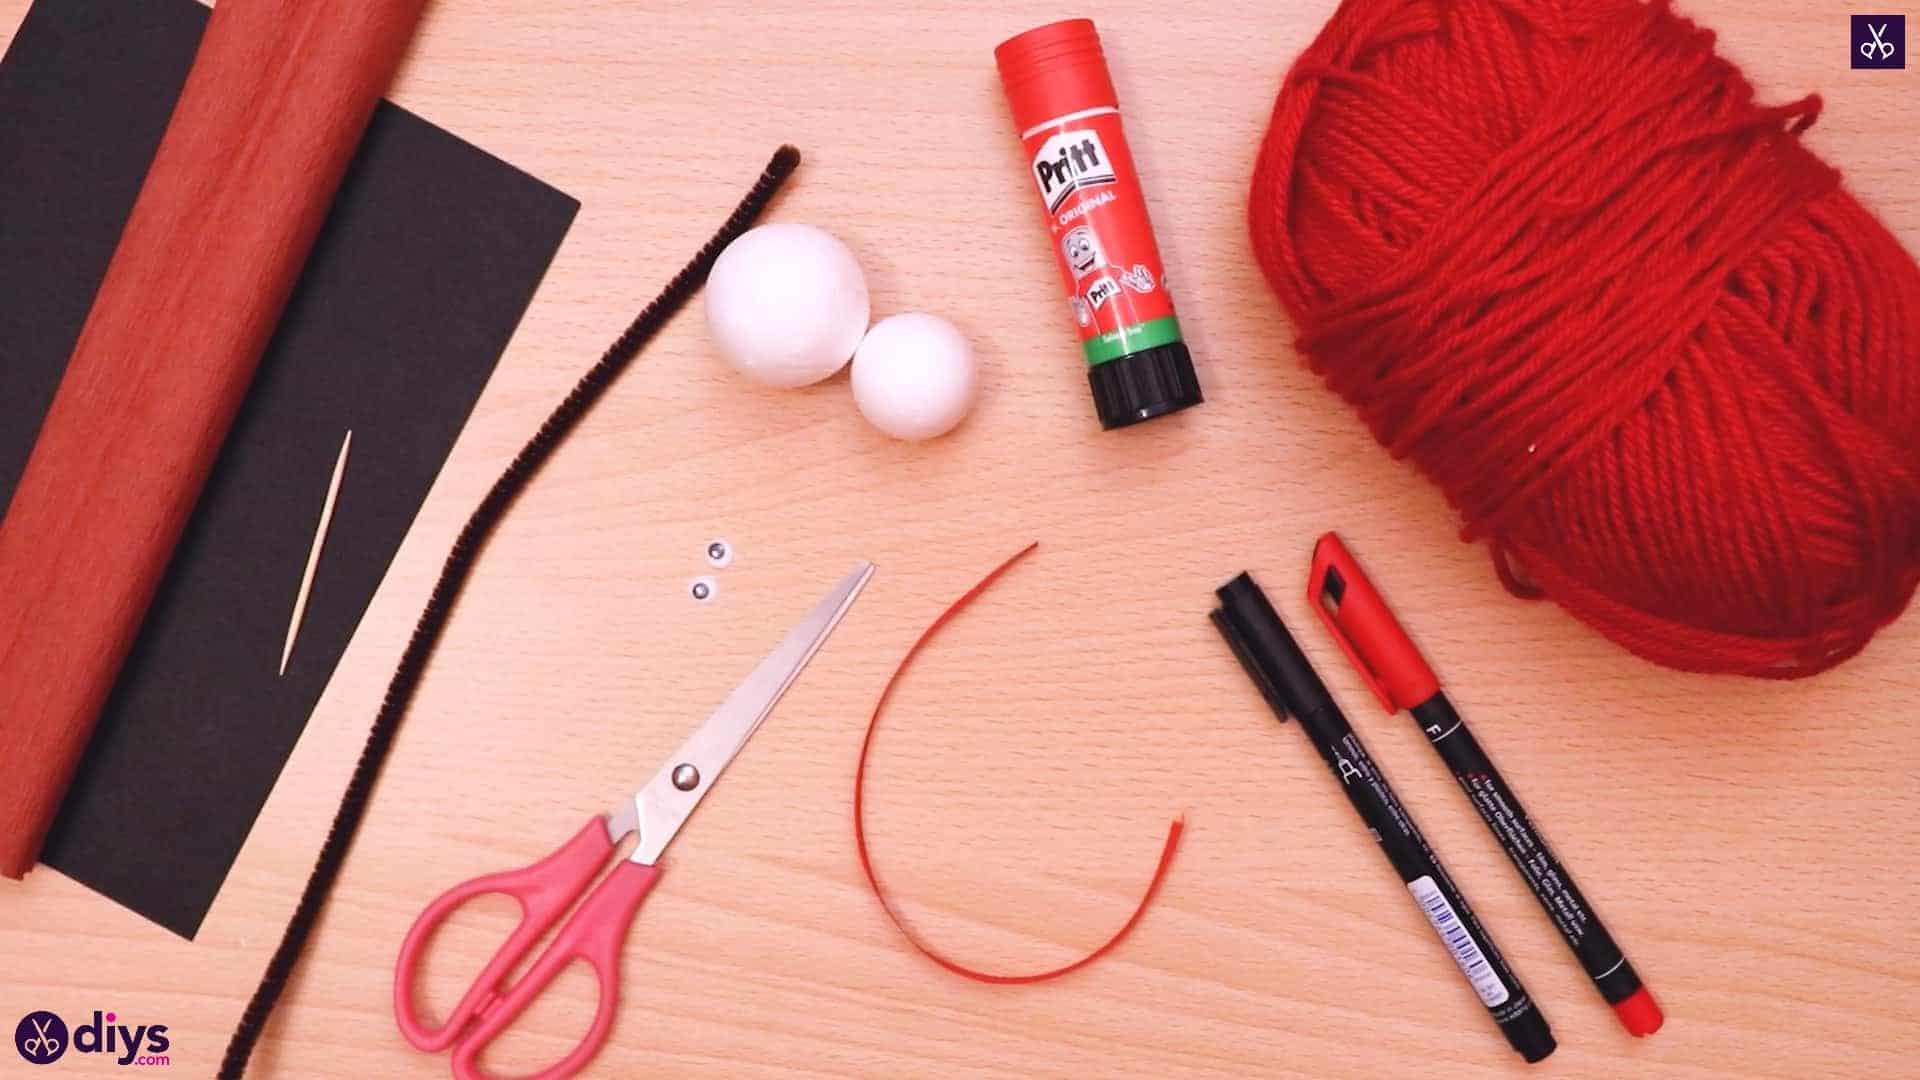
For this project, you’ll need:
- Two white styrofoam crafting balls (one smaller than the other)
- Scissors
- A glue stick
- Markers (red and black)
- Black paper
- Red yarn
- A red ribbon
- Two googly eyes
- A toothpick
- A brown pipe cleaner
- Brown crepe paper
Step 1: get ready
Gather your materials!

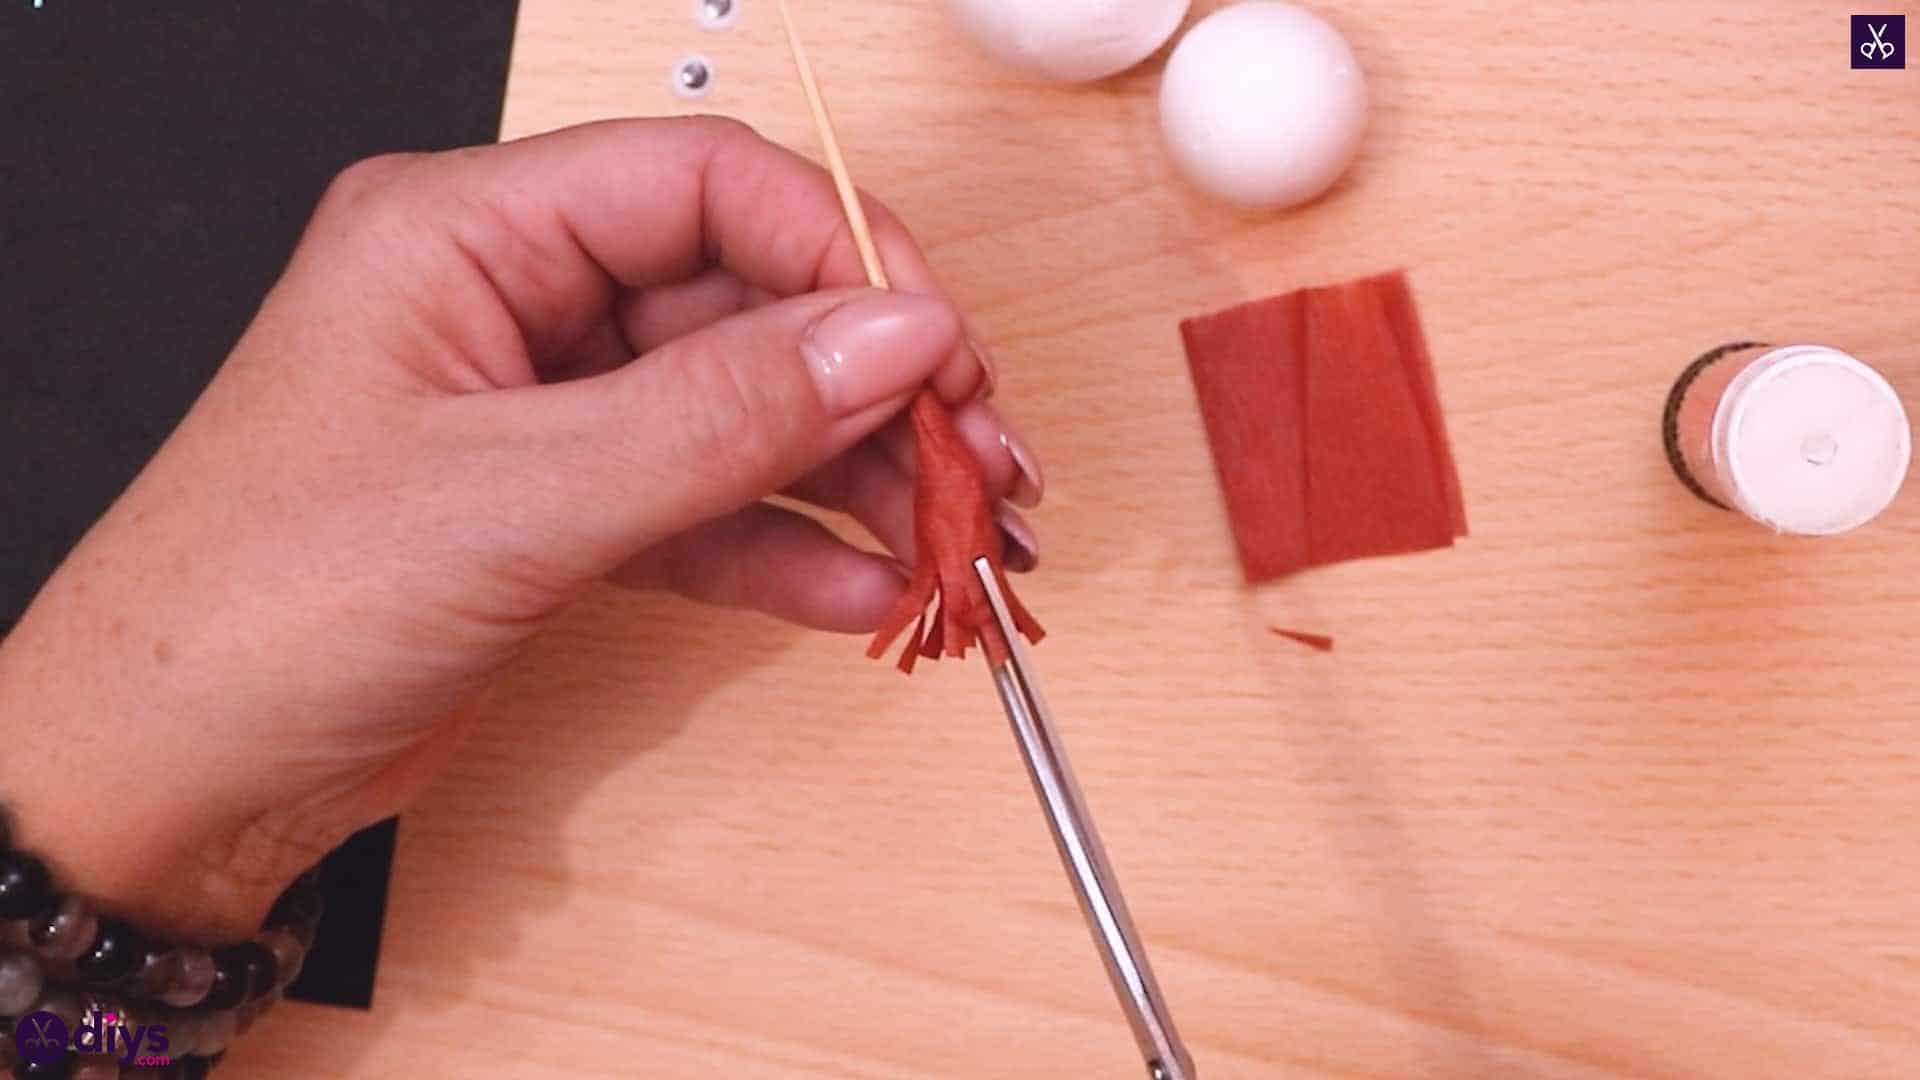
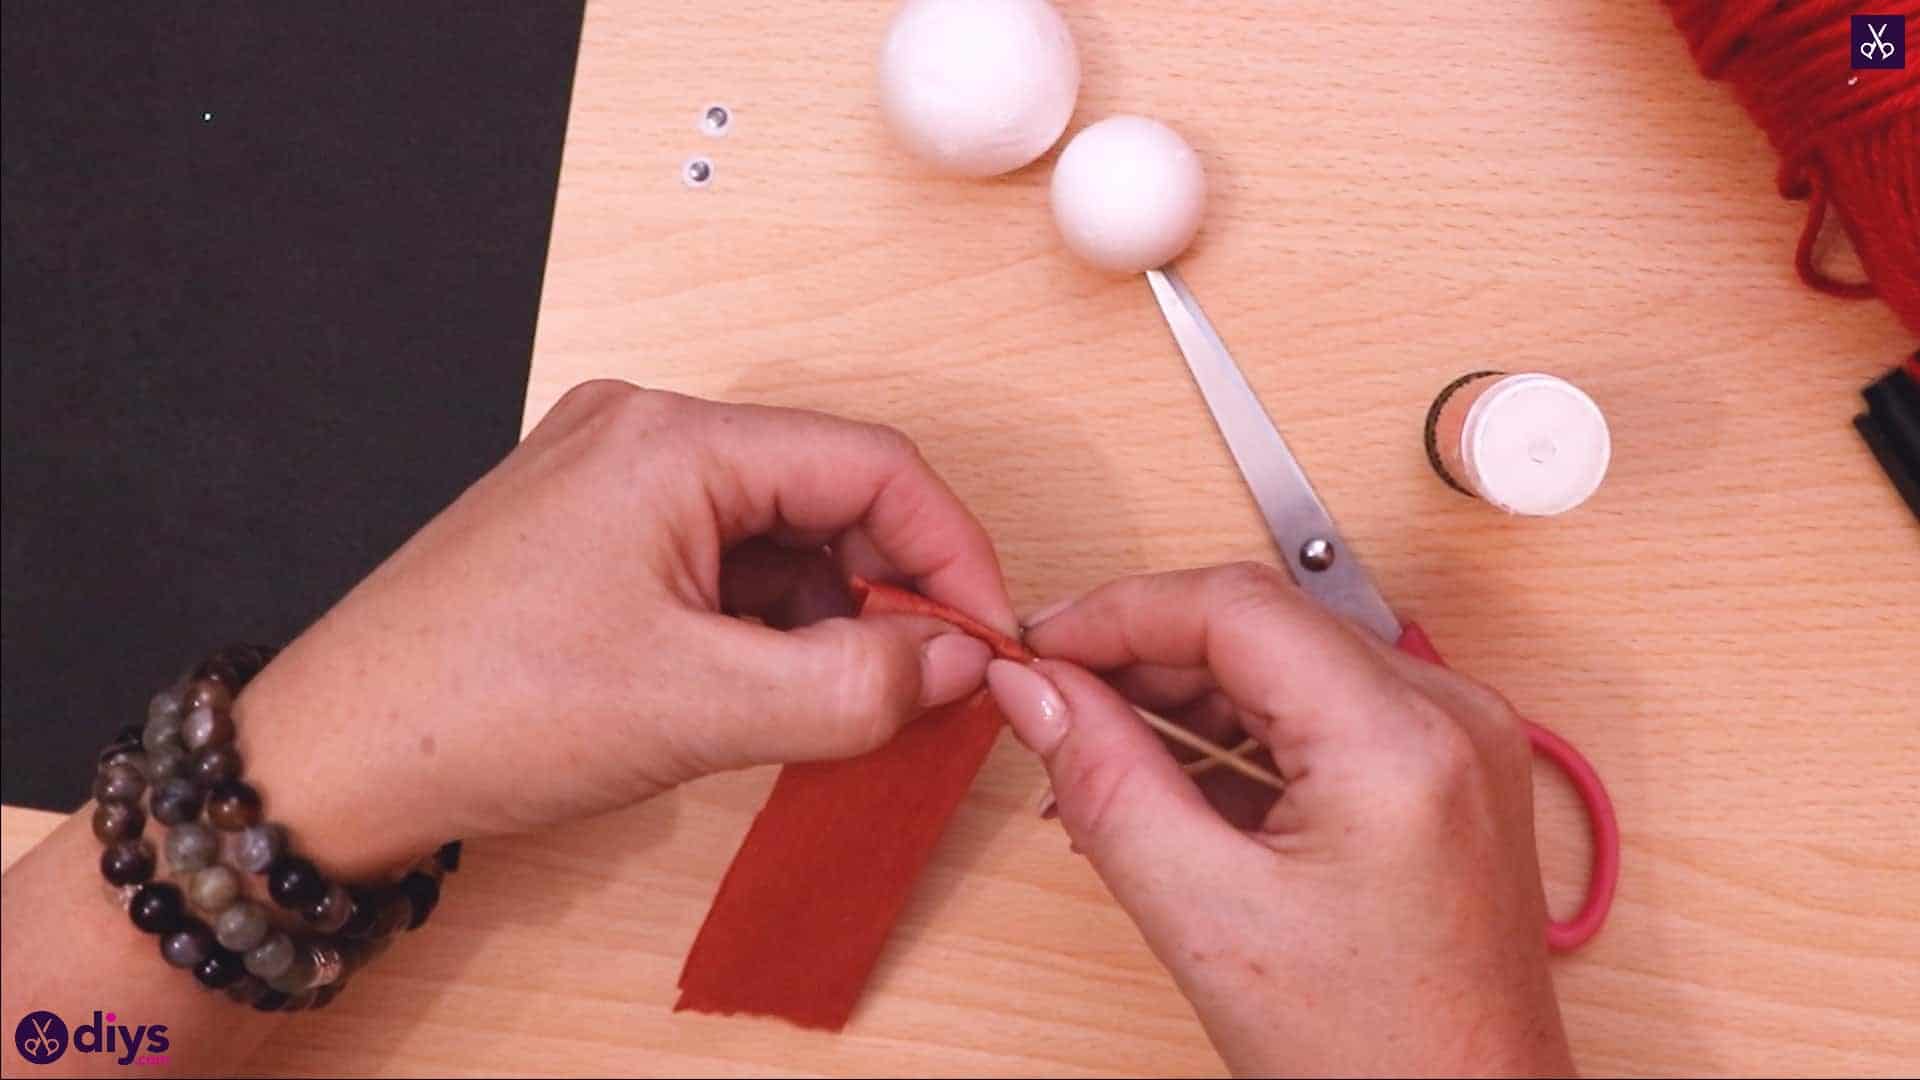
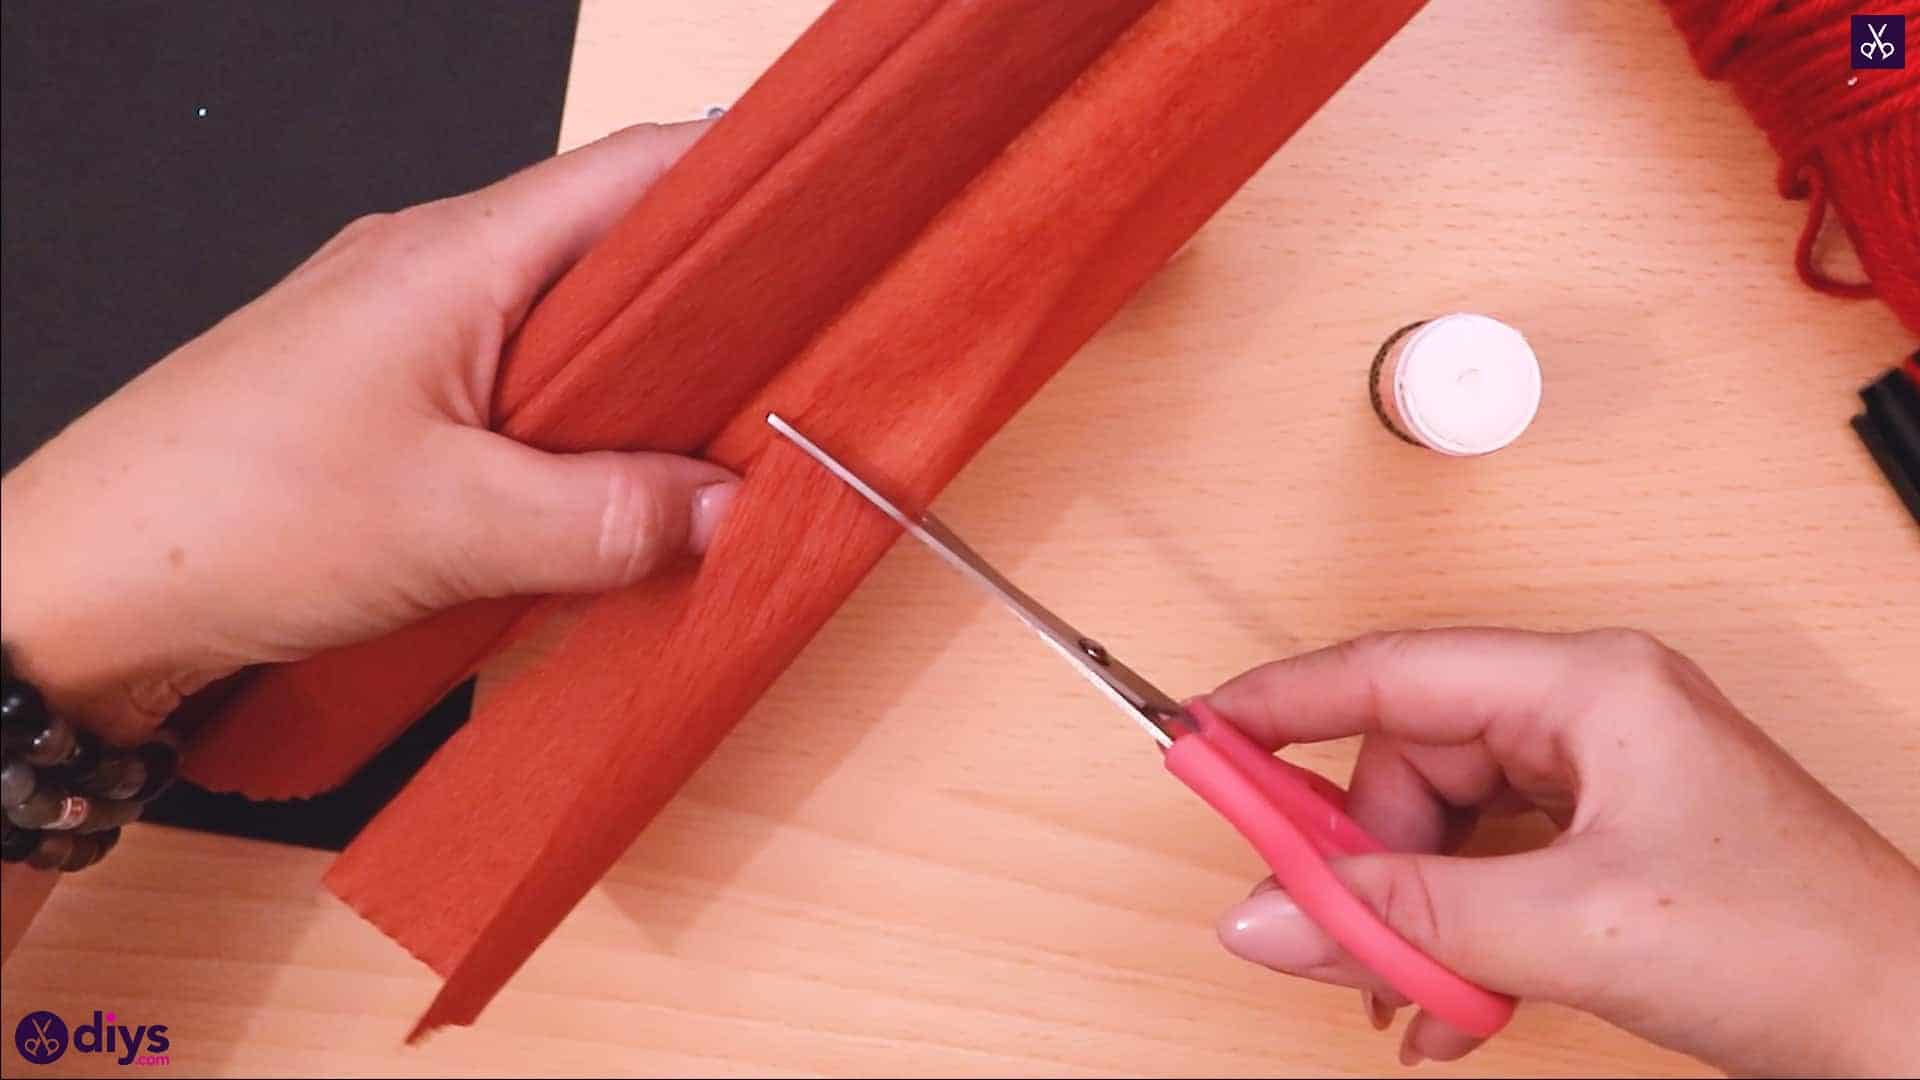
Step 2: cut the crepe paper
Cut a rectangular strip from your crepe paper about an inch wide and two inches long. Apply glue on one side and fold the strip in half width-wise, so it stays the same length but ends up doubled over and half as wide as it was before.

Step 3: wrap the toothpick
Now apply glue across this new surface once more, but this time only along the right side. Place your toothpick across the paper in line with the top edge, so it lies perpendicular to the strip. I made sure the tip of my toothpick only went as far across the trip as the glue did, leaving the otherwise untouched. Wrap the top edge around the toothpick and the roll the toothpick downward, keeping things as even as you can, until you’ve rolled the entire strip around the end of the toothpick.
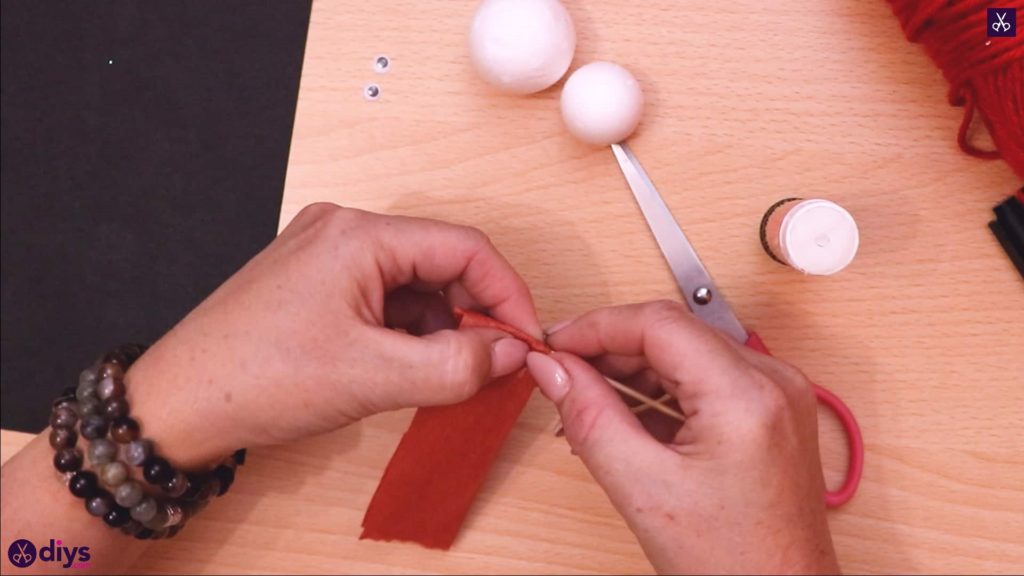
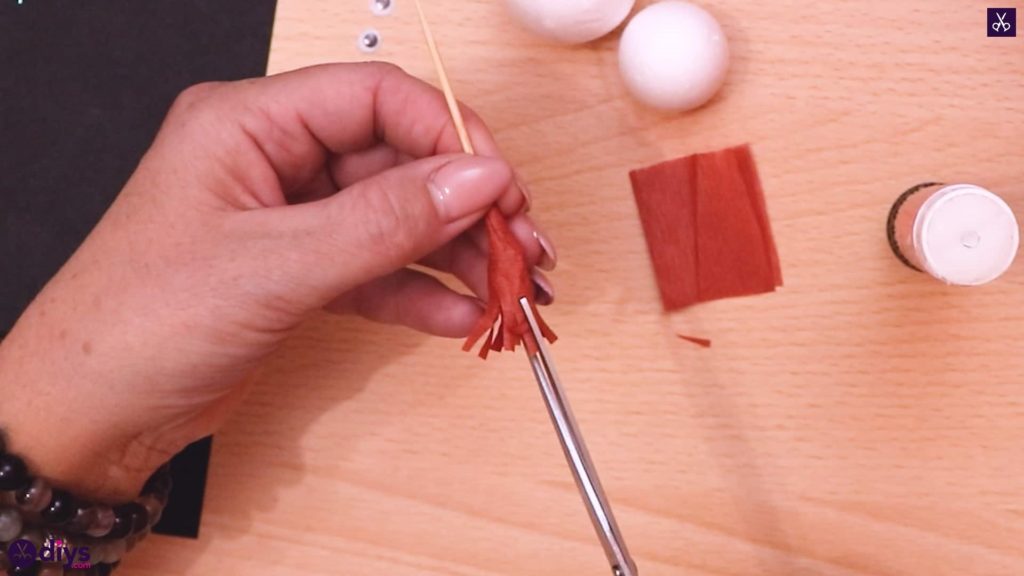
Step 4: make fringe
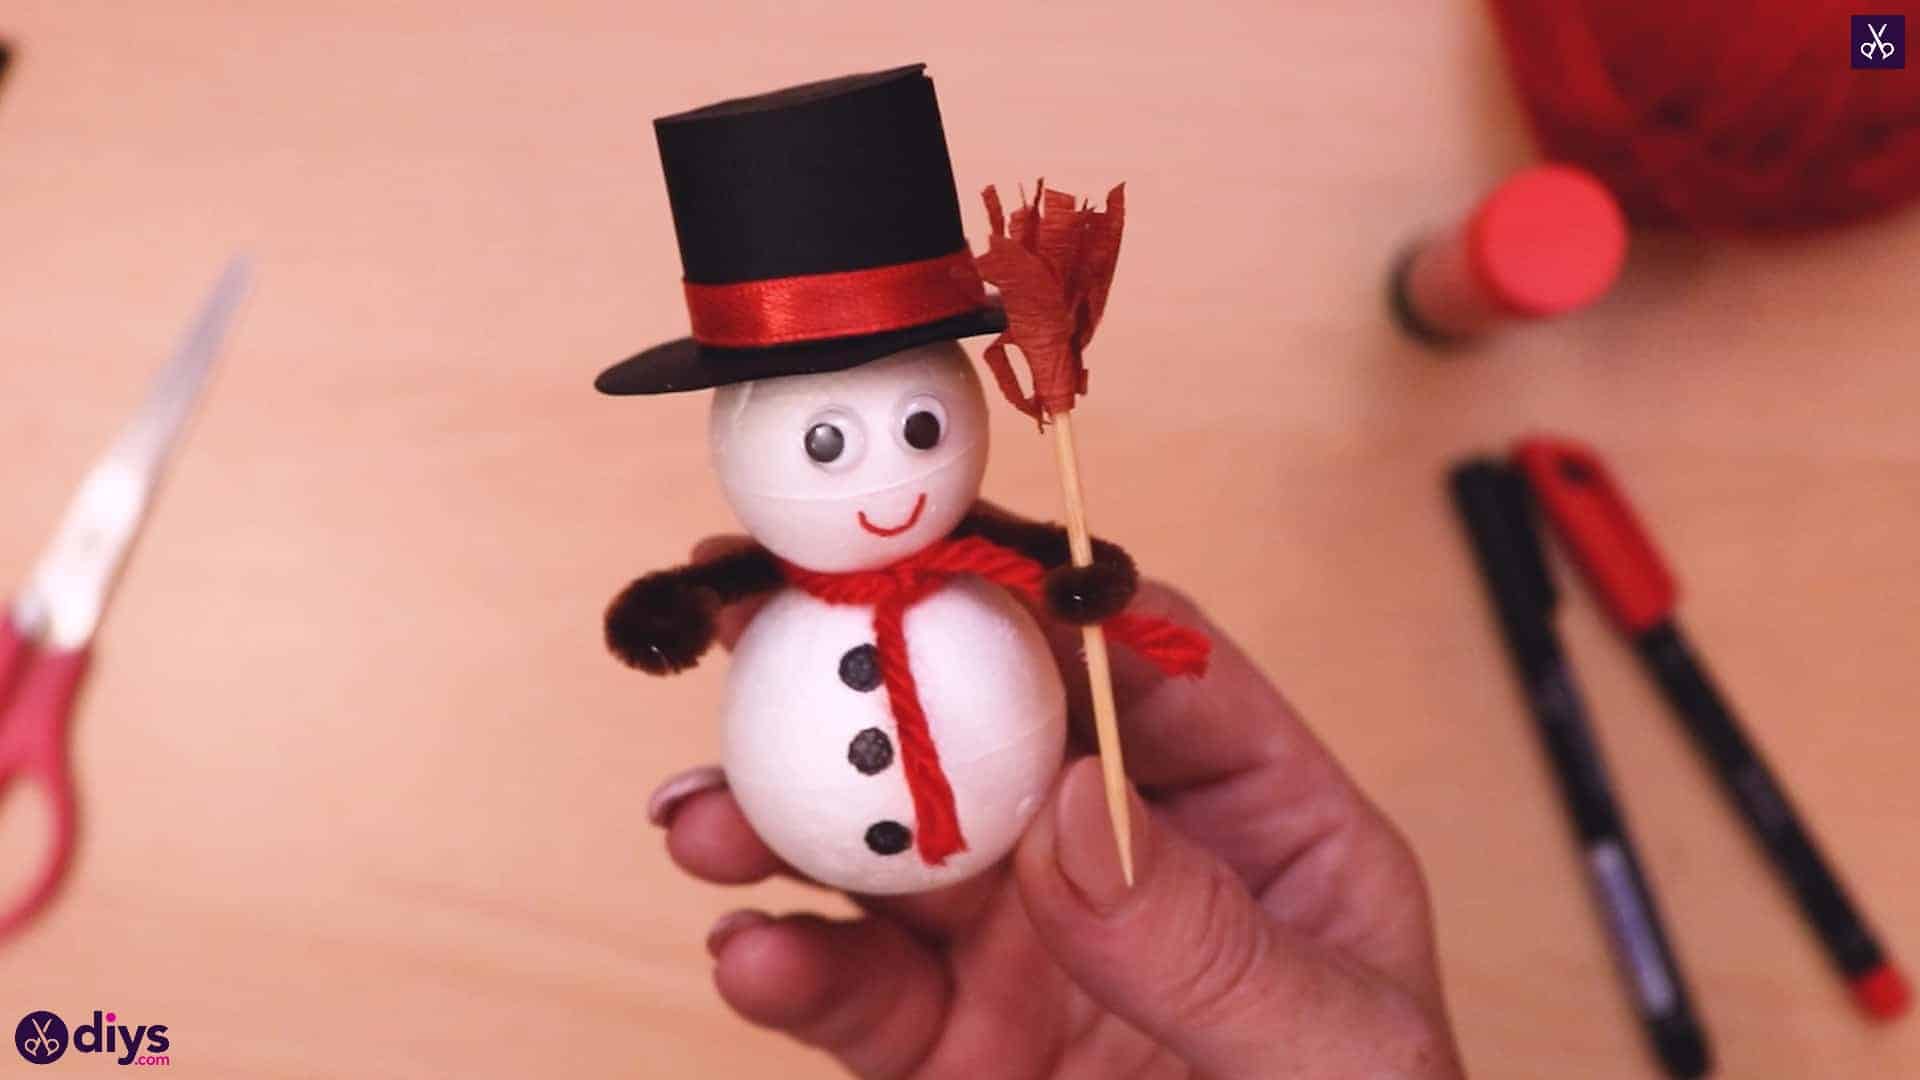
Use your scissors to cut the loose part of the crepe paper roll you just made, which sits just past the tip of the toothpick on the end you just rolled, into little strips, almost like a fringe. You’ve just made your snowman’s broom, complete with bristles!
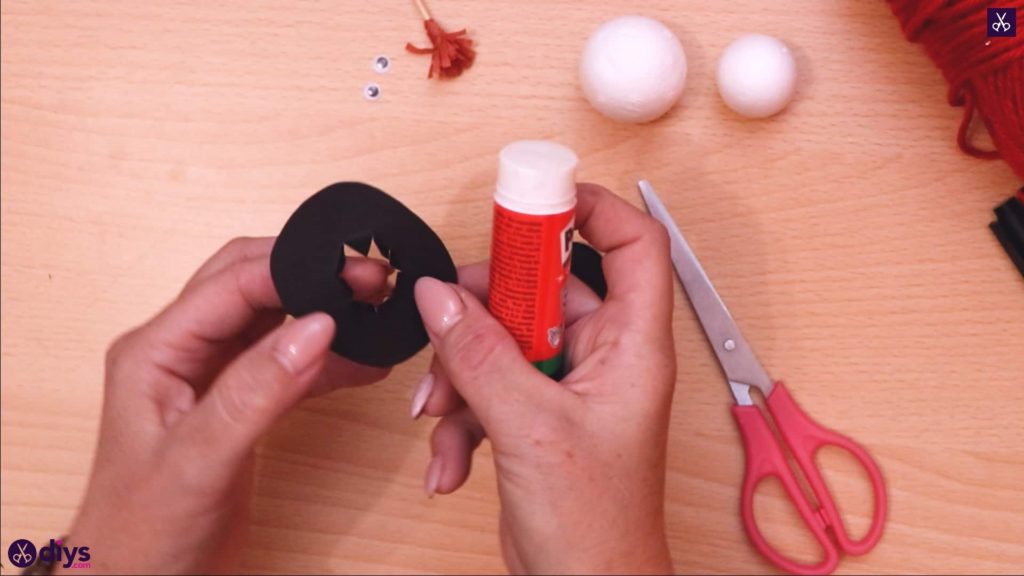
Step 5: start the hat
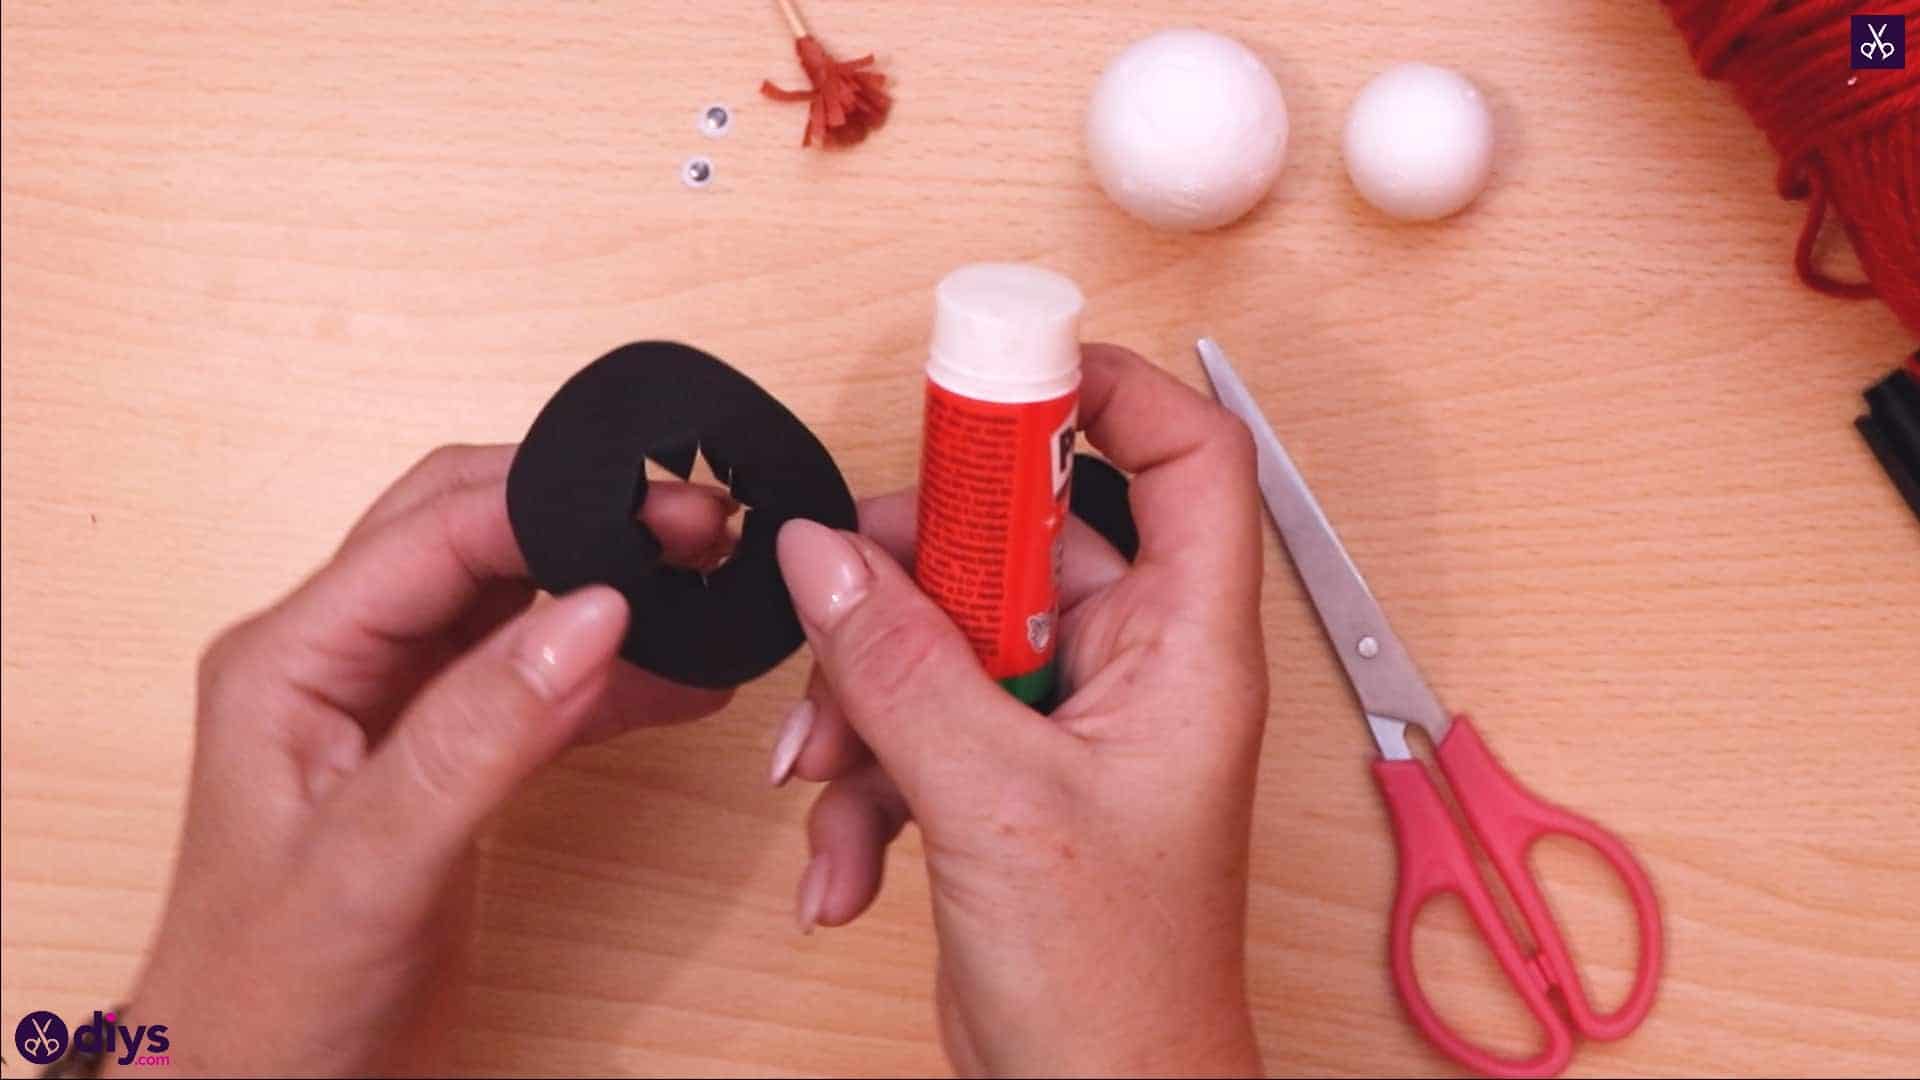
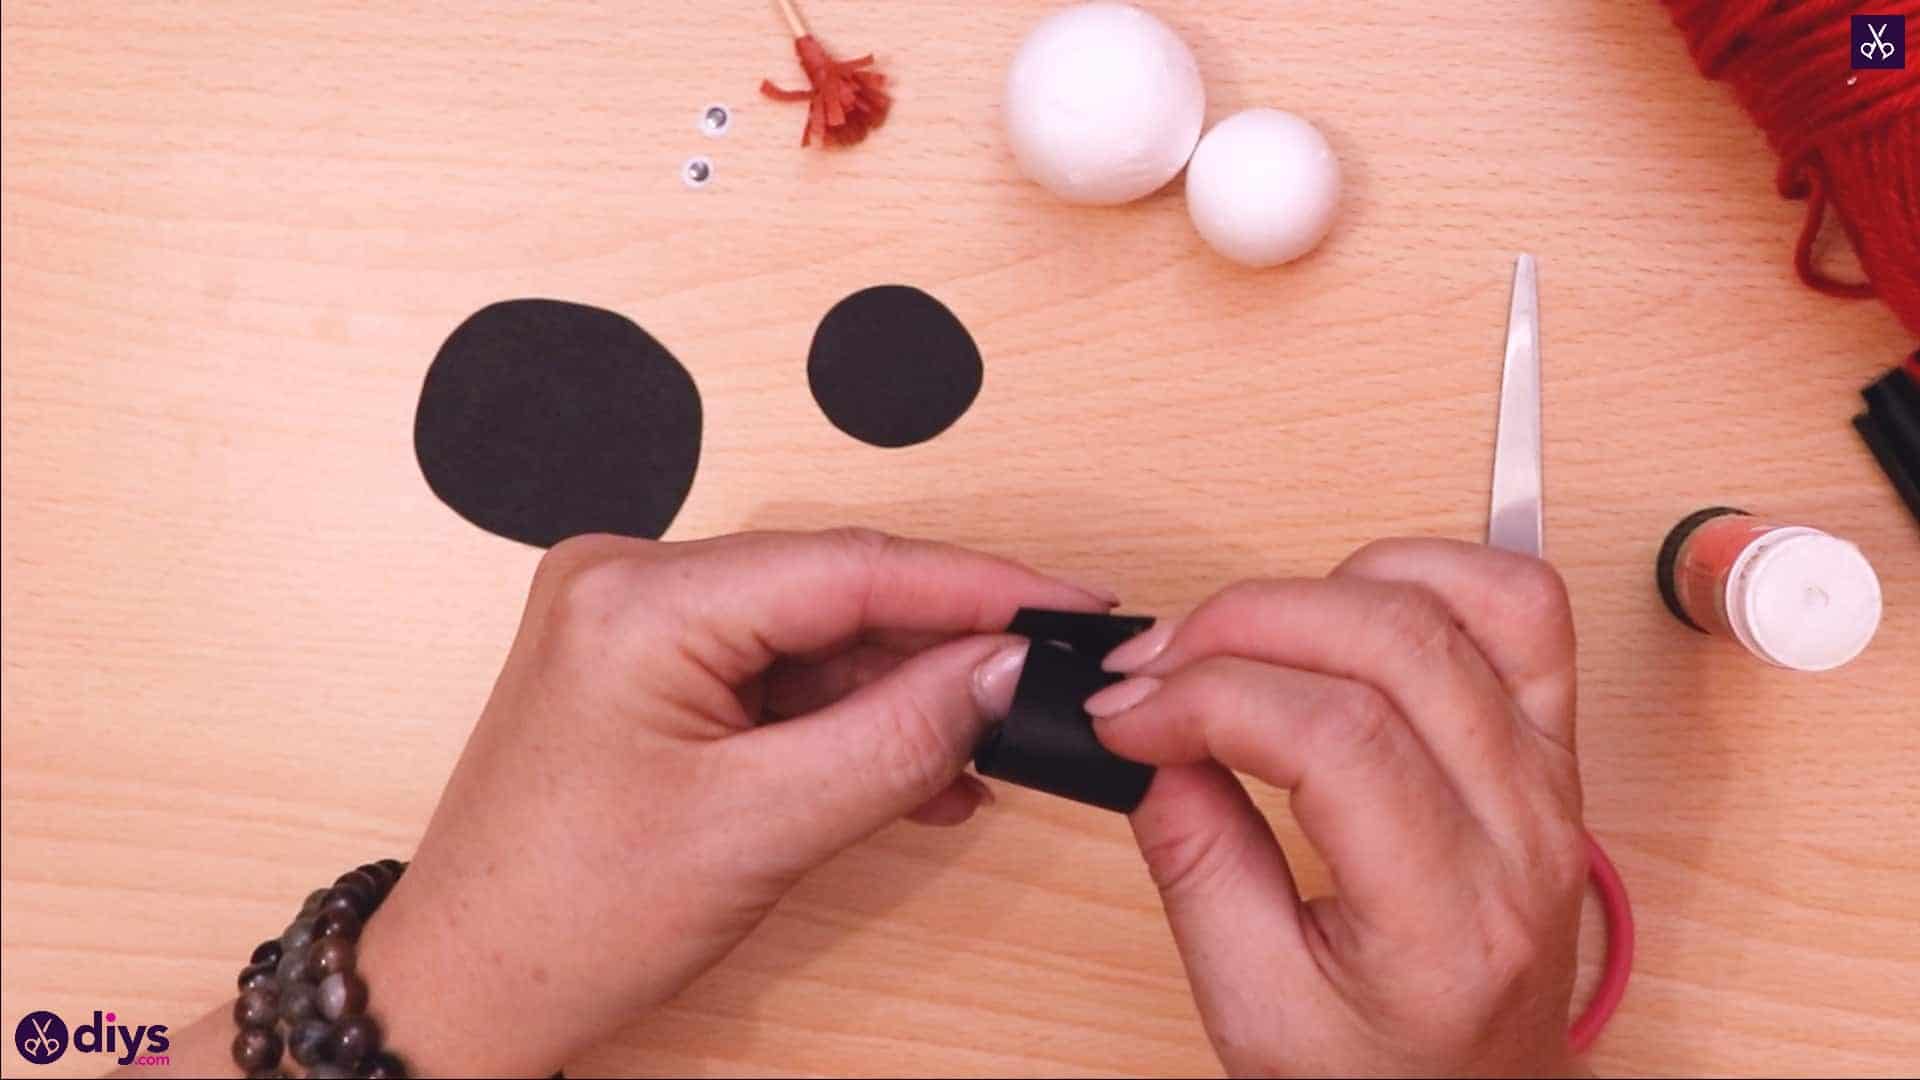
From your black paper, cut a rectangular strip about two inches long and half an inch wide. Then cut two squares, one slightly bigger than the other. For each square, round off the corners and edges until you have two circles instead, still with one slightly bigger than the other. Now apply glue to one end f your black rectangle and curl the other end inwards and up to meet the glue, sticking it down to create a paper cylinder.

Step 6: assemble
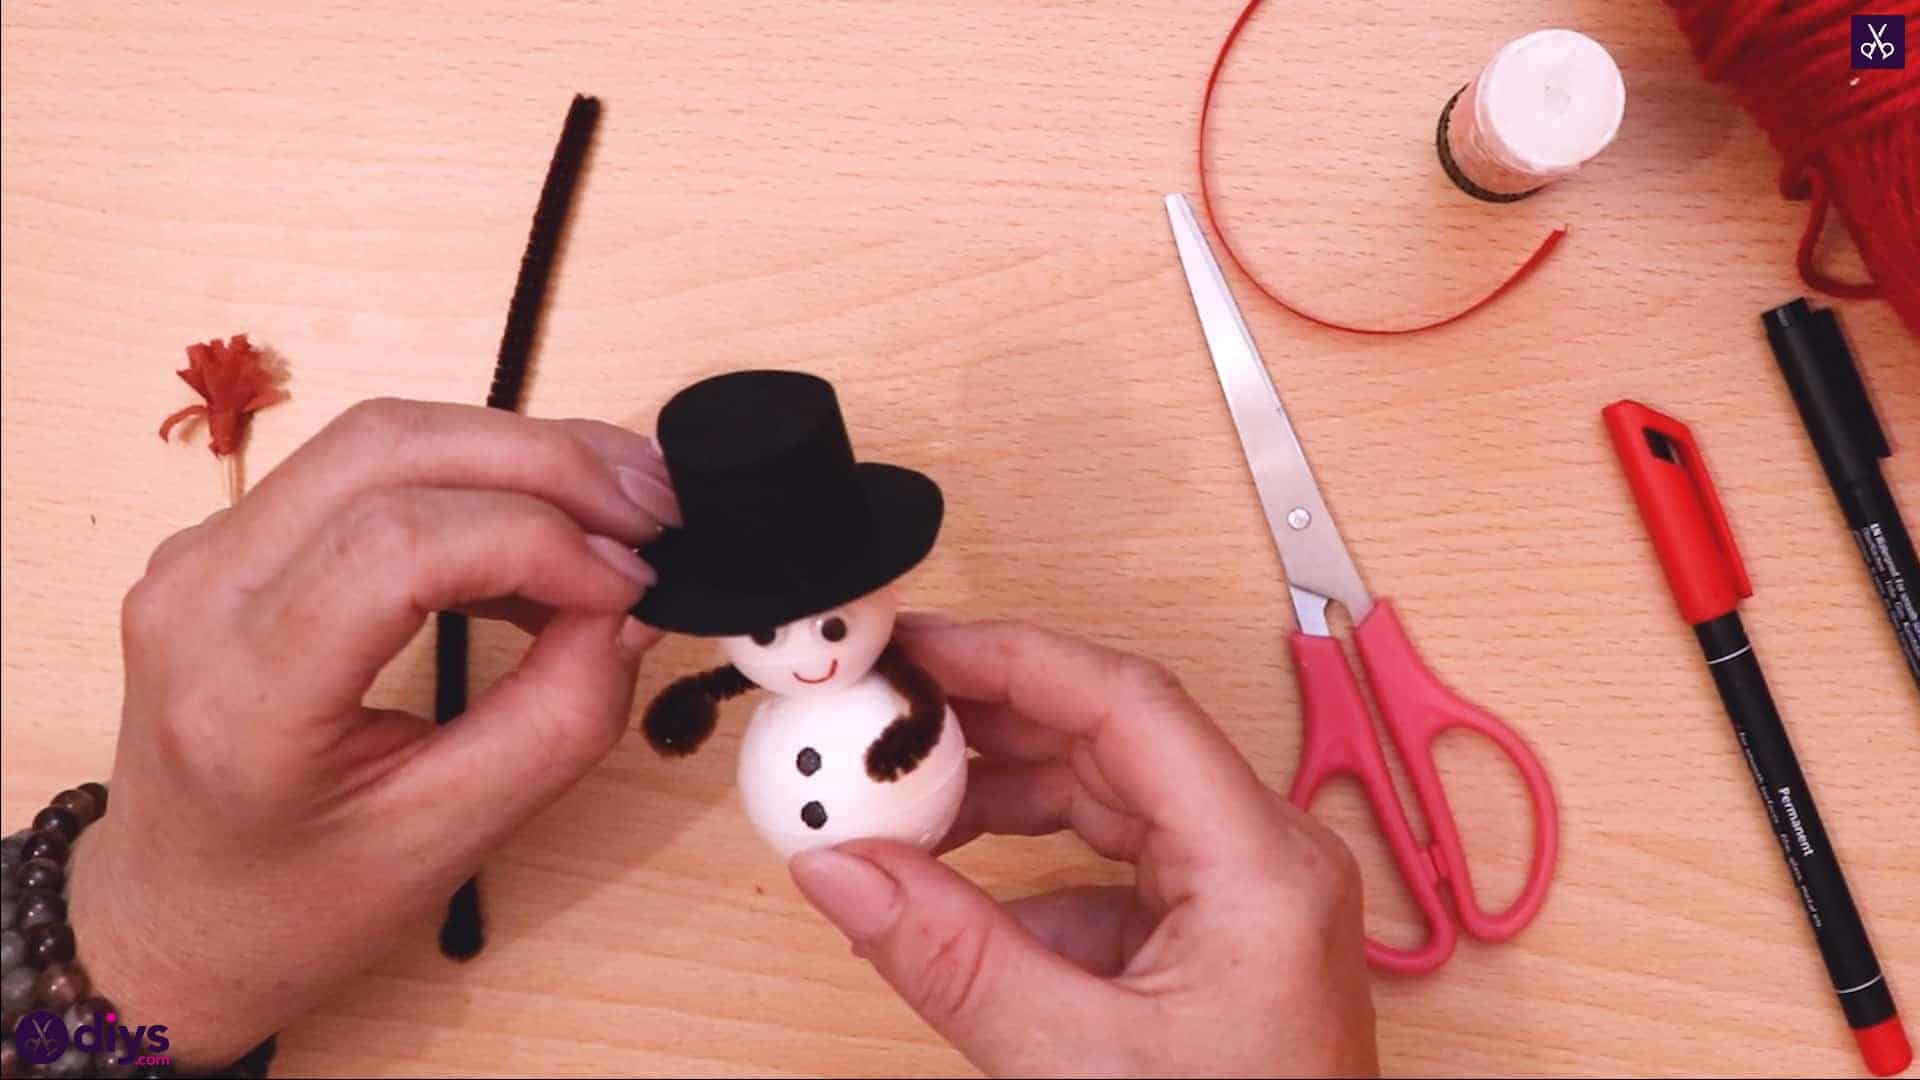
Apply glue to the edges on one end of the black cylinder and stick the smaller circle there. Trim the excess around the outside of the circle until its edges align with the cylinder. That’s the top of your snowman’s hat! Next, use the tip of your scissors to make a hole in the center of the larger circle, then make cuts outward from there all the way around, out towards the circle’s edge but without cutting all the way through. Bend these new spikes you’ve just made upwards and apply glue to their outside surfaces. Then place them inside the top of the hat that you made earlier and use your finger to stick the spikes to the sides. Your top hat now has a brim!
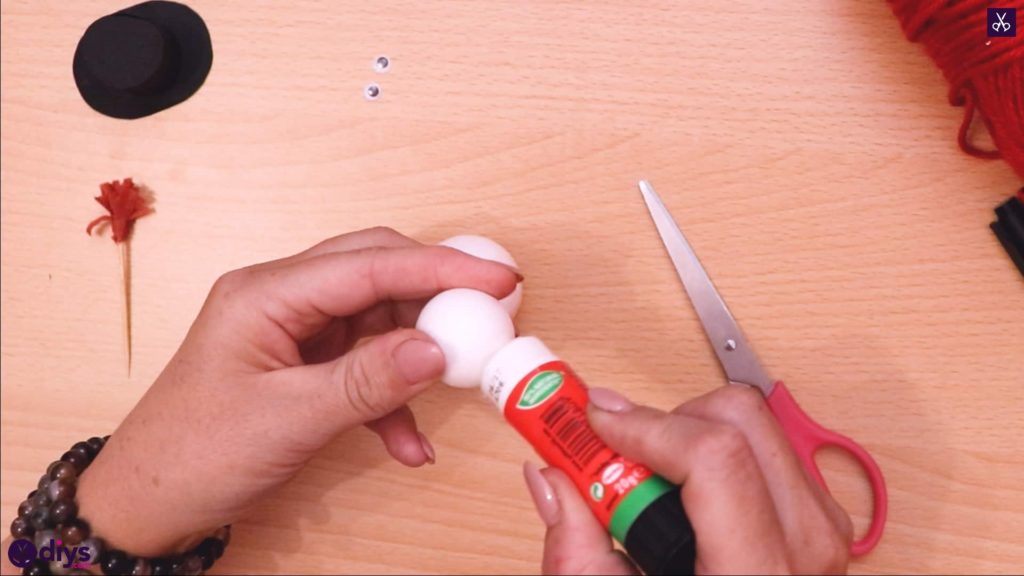
Step 7: glue balls together
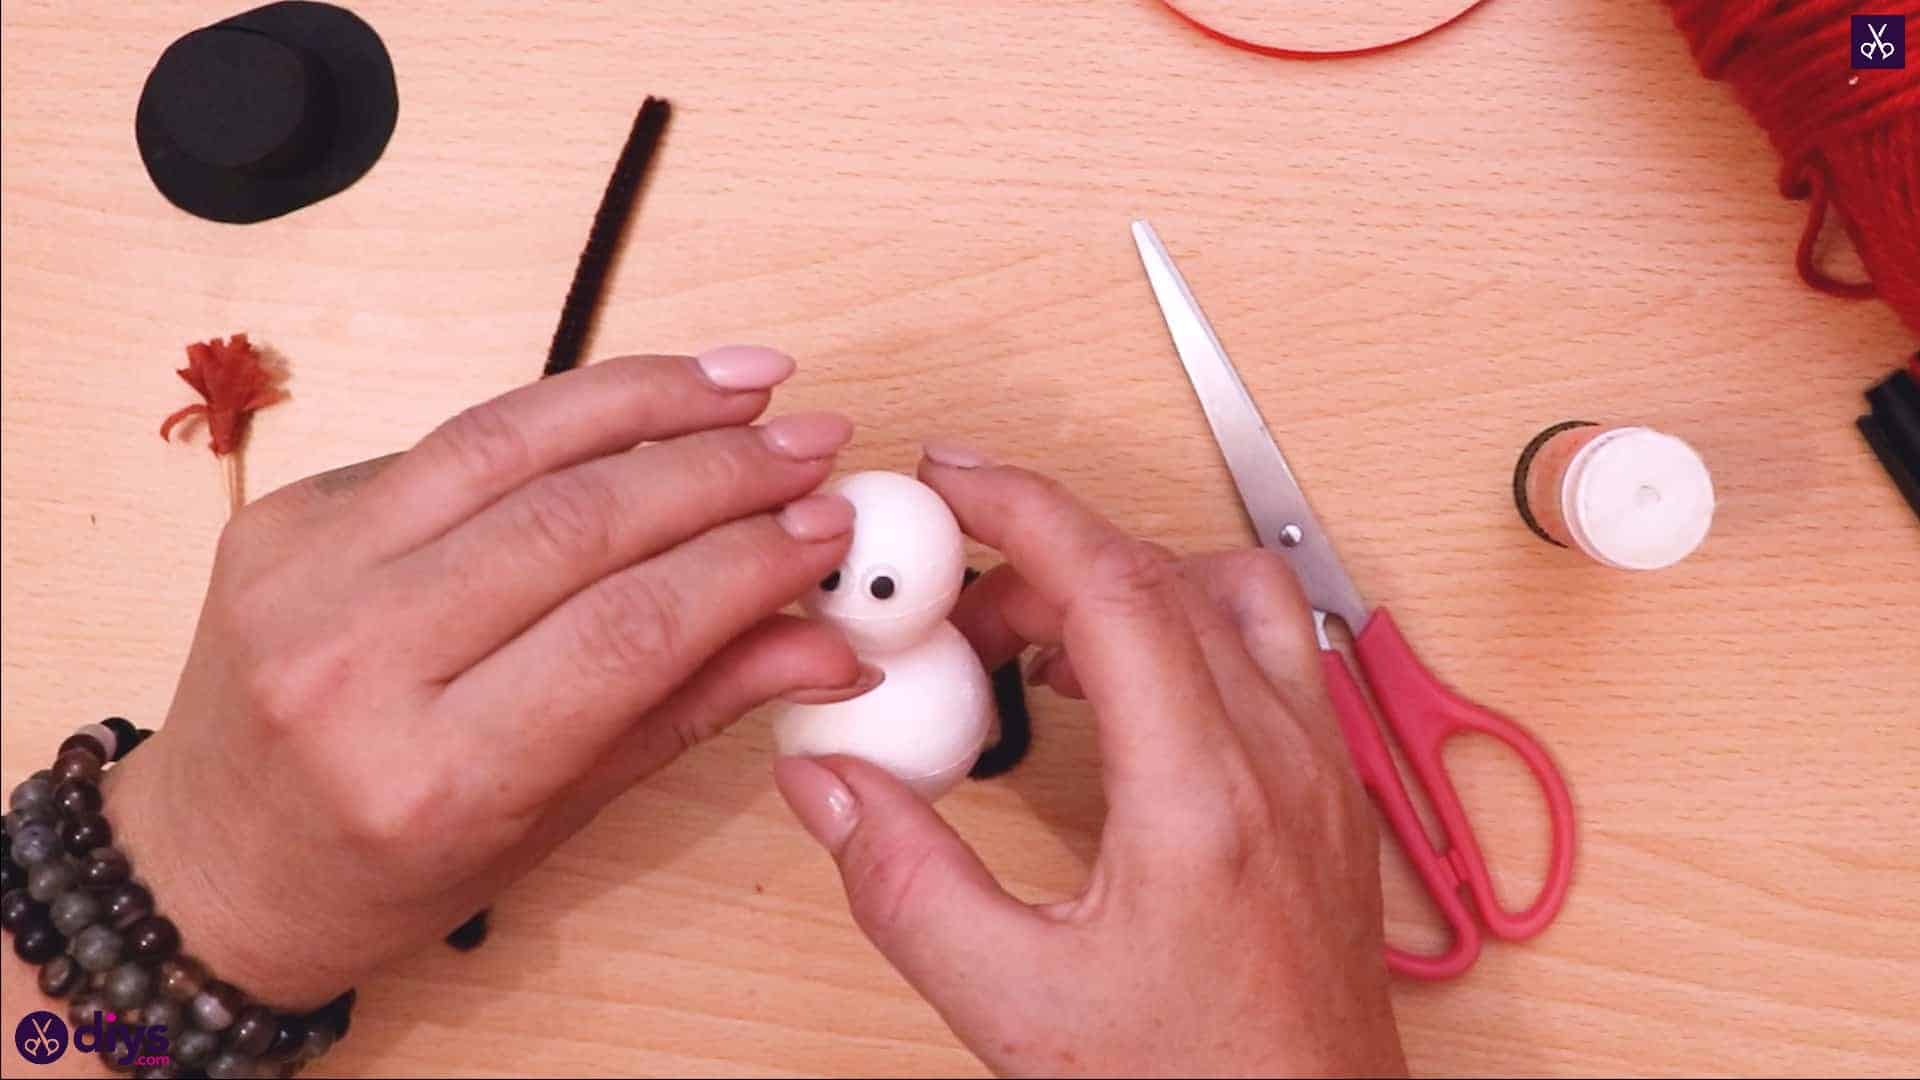
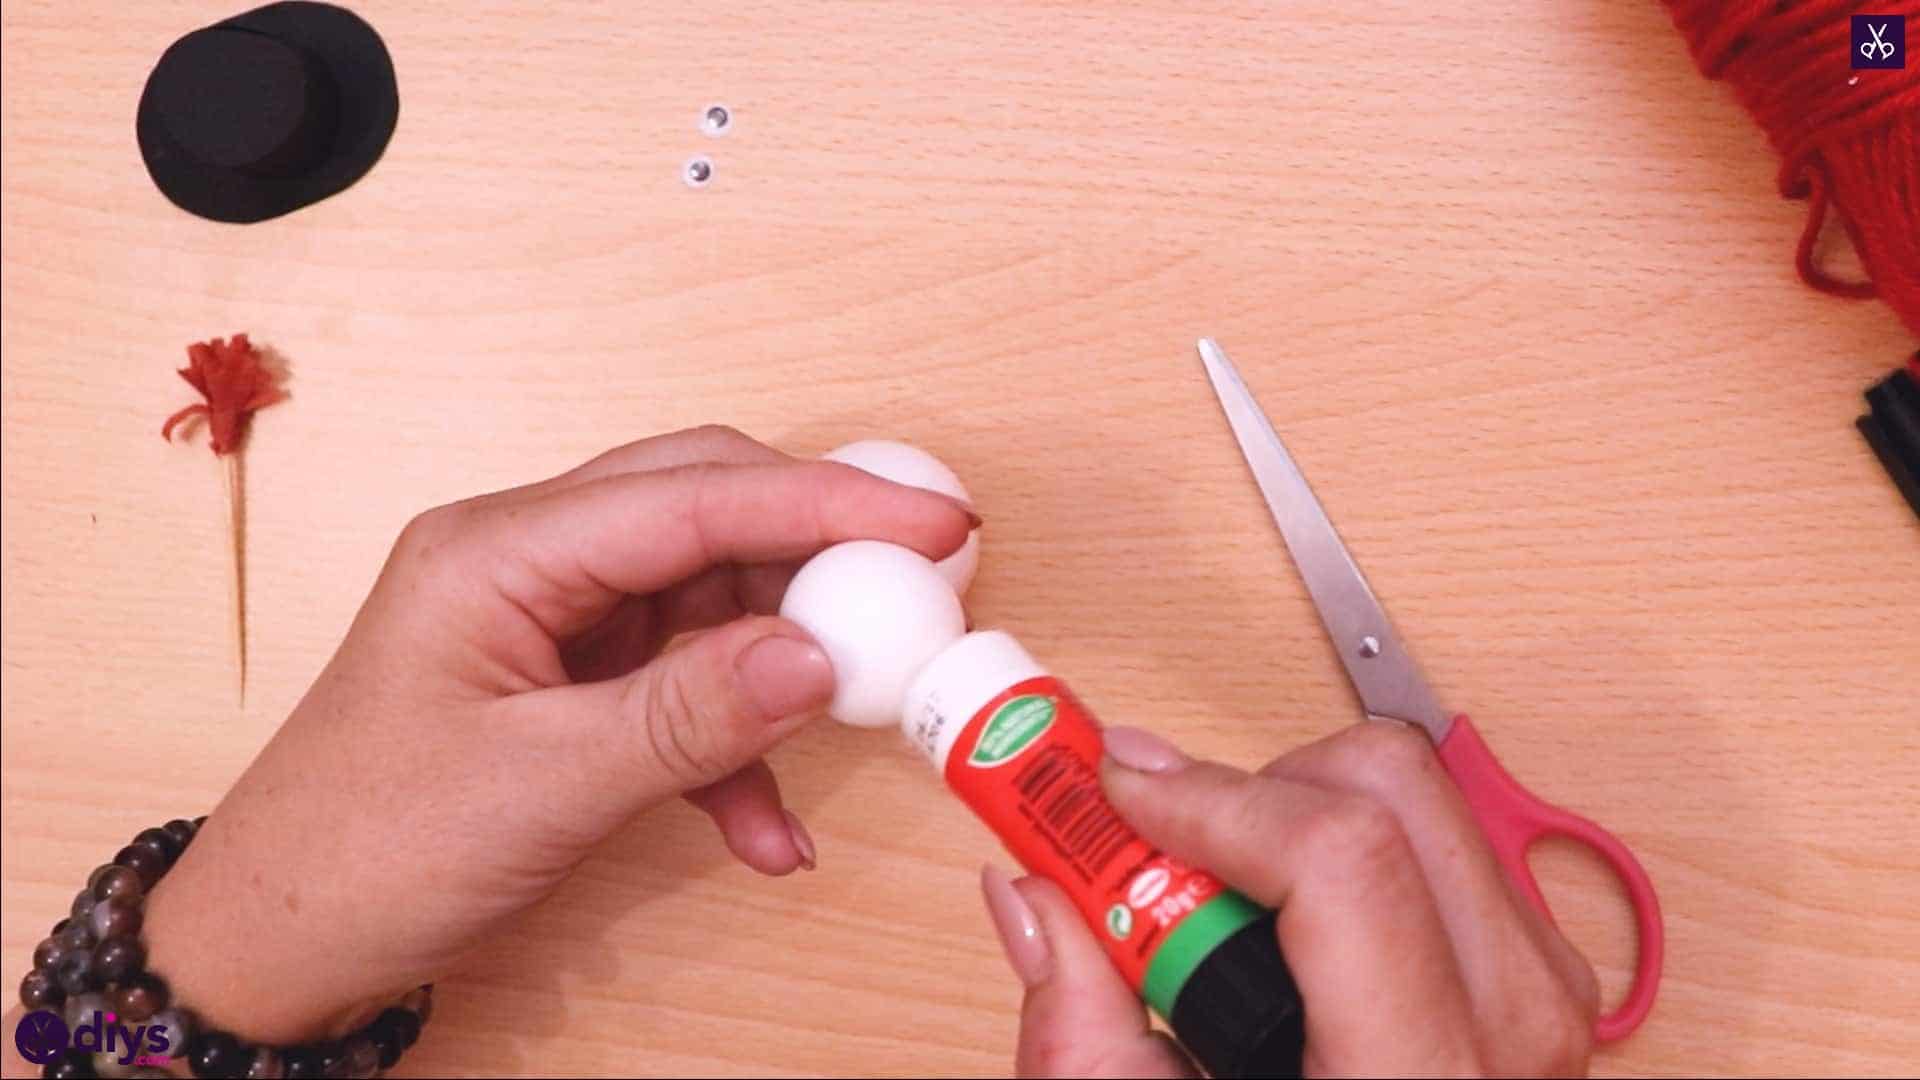
Apply glue to a spot on your smaller white Styrofoam ball and stick it to your larger white ball. These will be your snowman’s head and body.
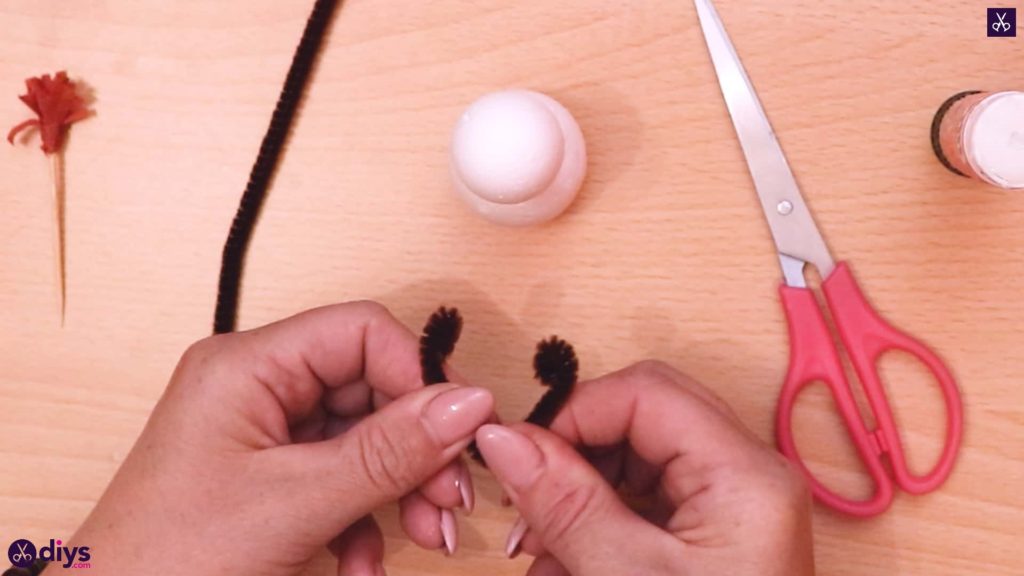
Step 8: make the arms
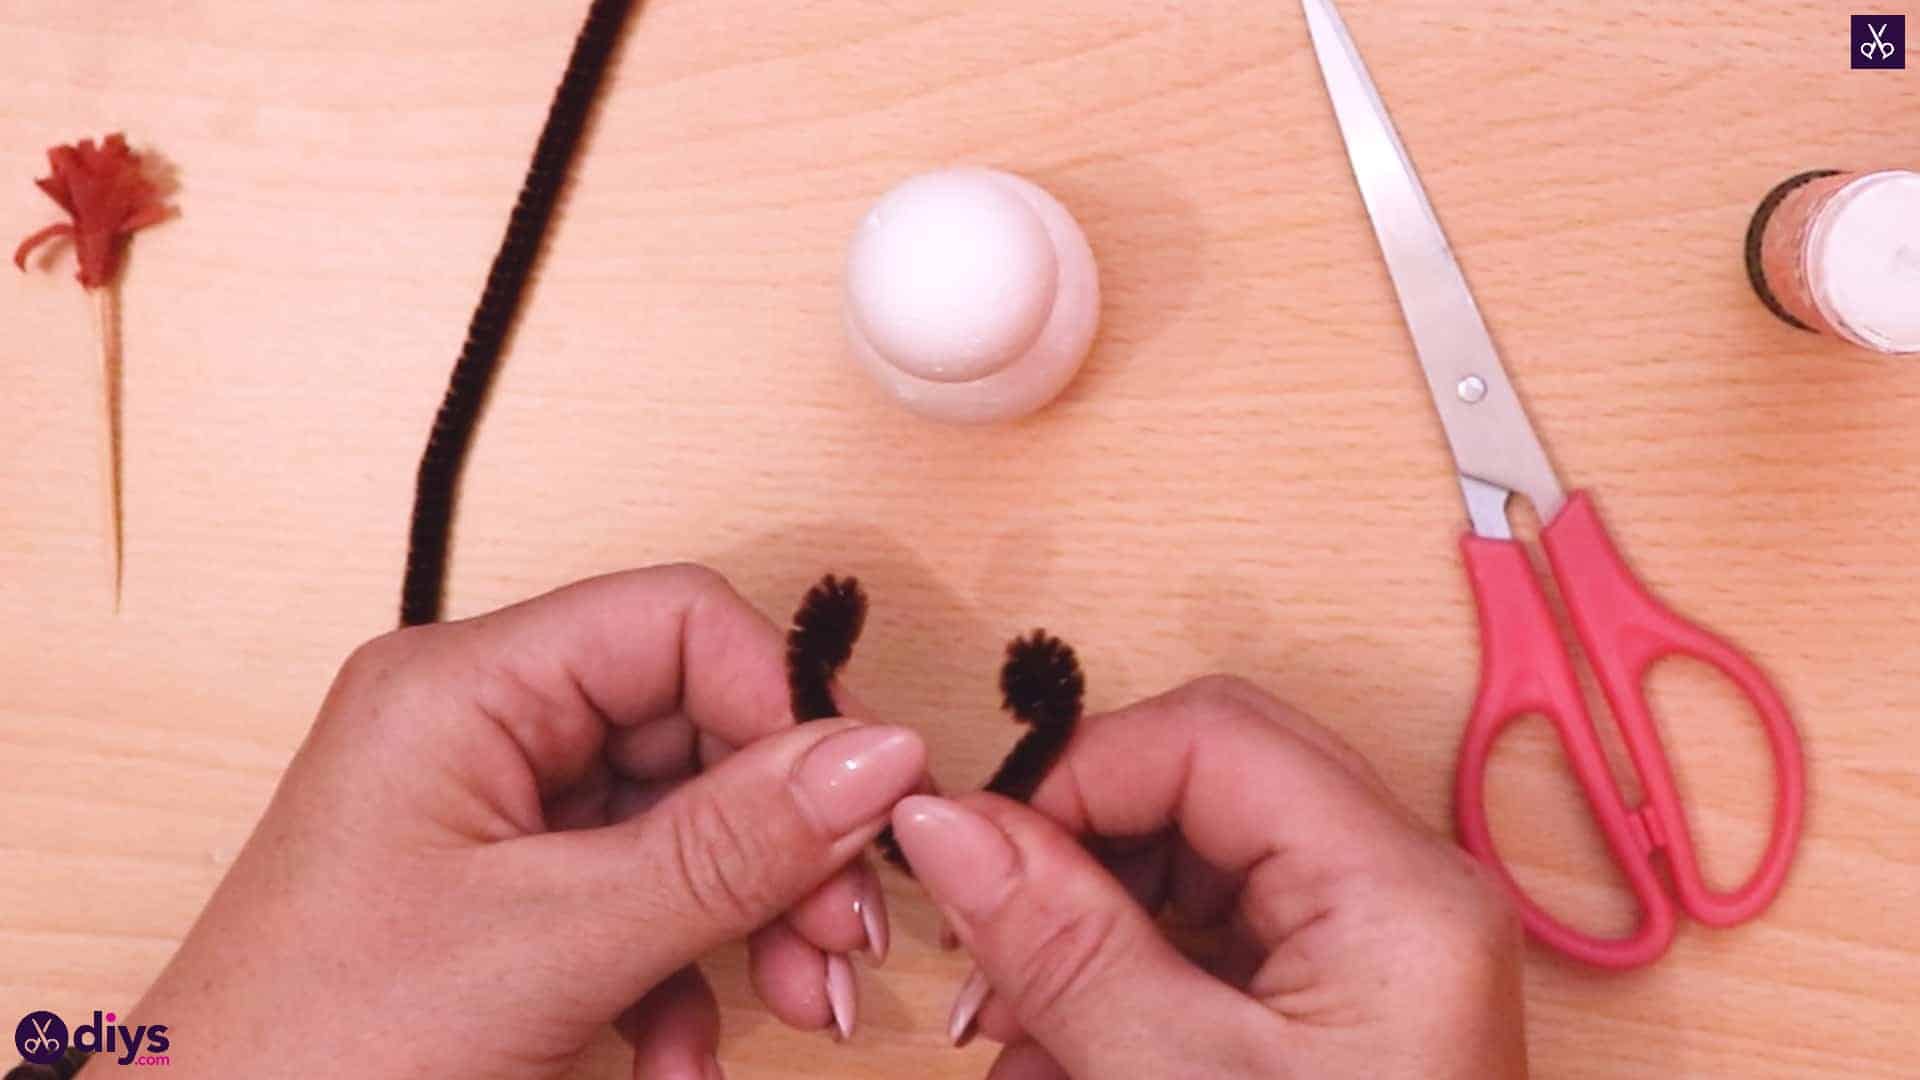
Cut your brown pipe cleaner in half. You’ll only use one side here. Bend this half at its center point as well, but don’t cut it; you’ll just make a V-shape. Curl the ends of the pipe cleaner inward once each to give your snowman little hands, since this shape will be his arms.
Step 9: add the eyes
Apply glue to the backs of your googly eyes and stick them to one side of the smaller Styrofoam ball to make your snowman’s face.

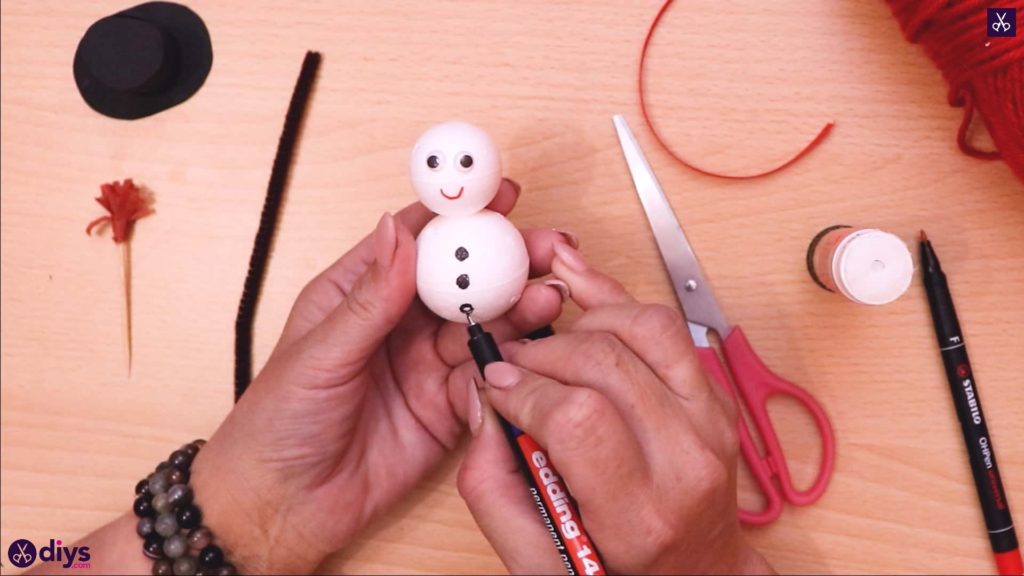
Step 10: draw buttons
Use your red marker to draw a smile under the snowman’s eyes. Then, on the larger Styrofoam ball that makes up your snowman’s body, use your black marker to draw three filled circles that will be his coal buttons.
Step 11: glue the arms
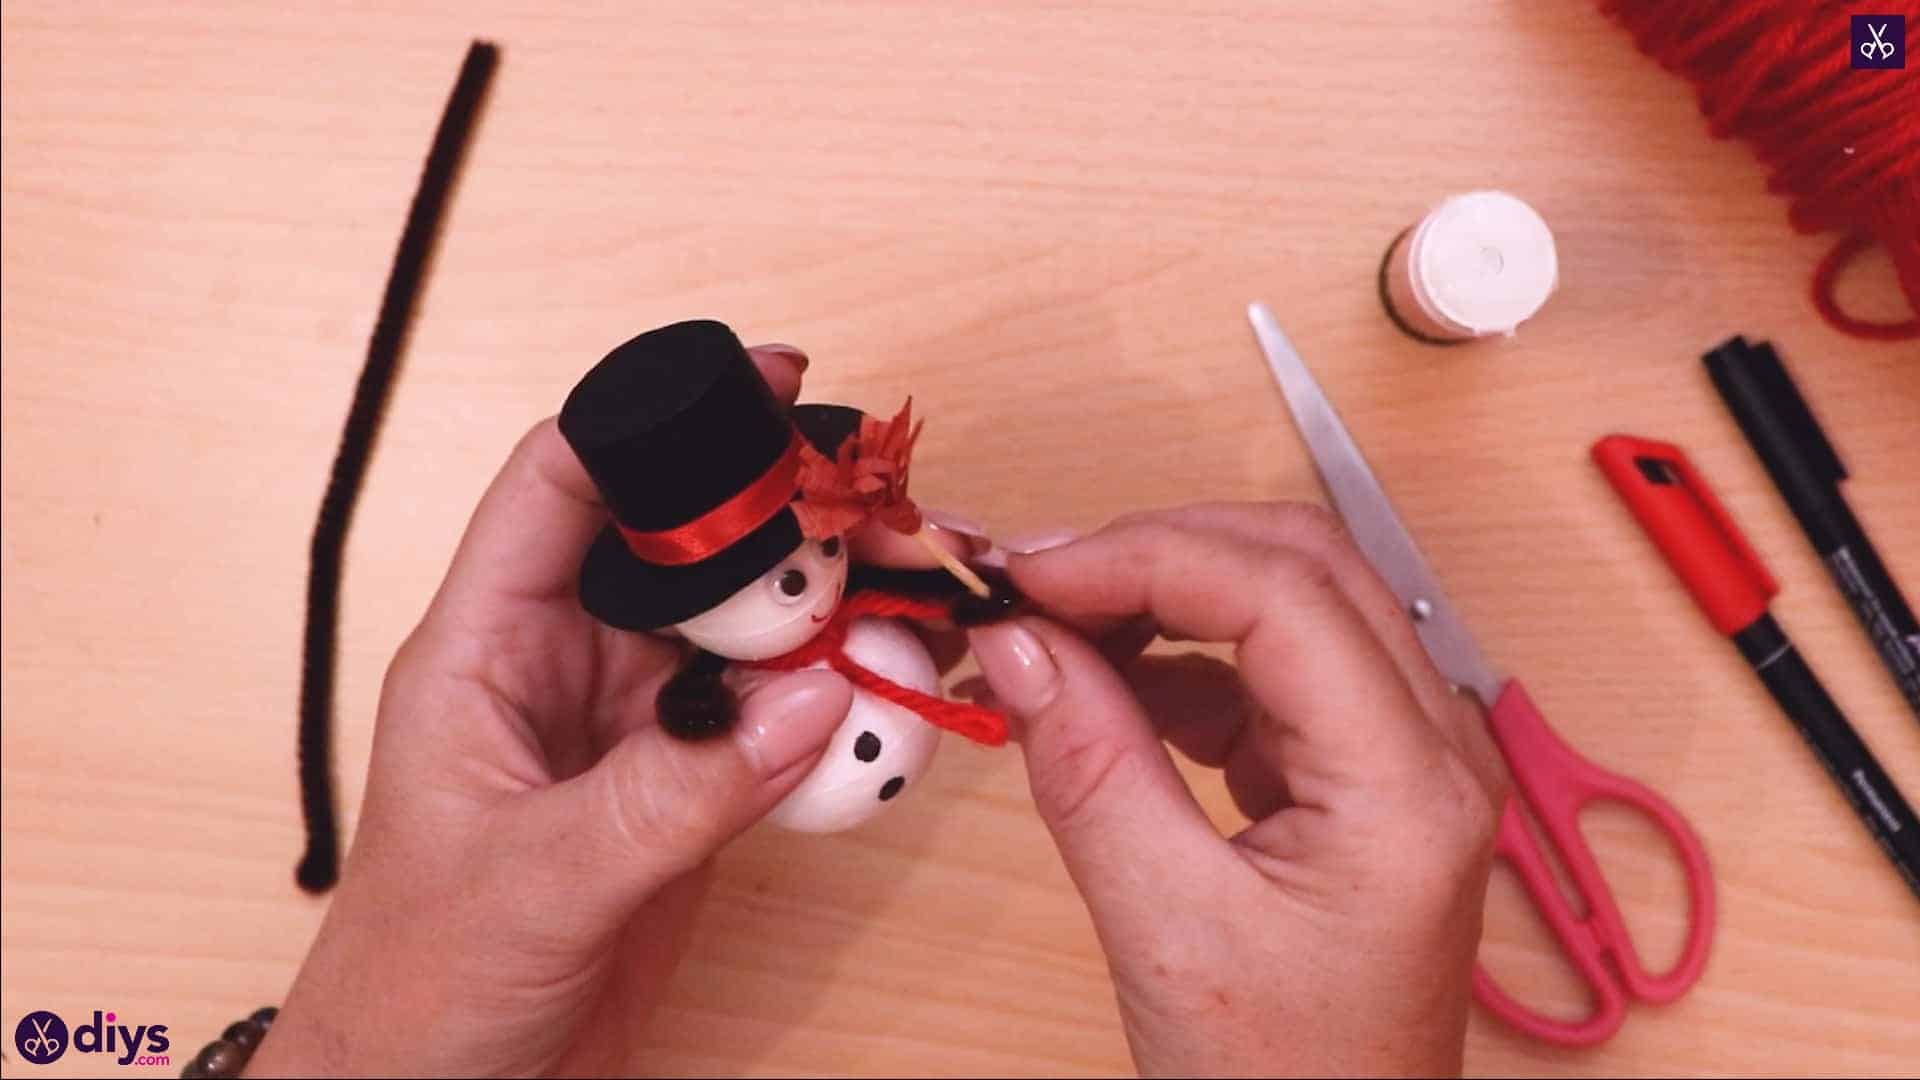
Apply some glue to the bend in your pipe cleaner arms and stick them behind the snowman’s head, at the base of where it meets the body, so that the arms stick out the front. Then, apply some glue on the top of his head and around the edge of the hole in the top hat’s brim and stick the hat on his head.

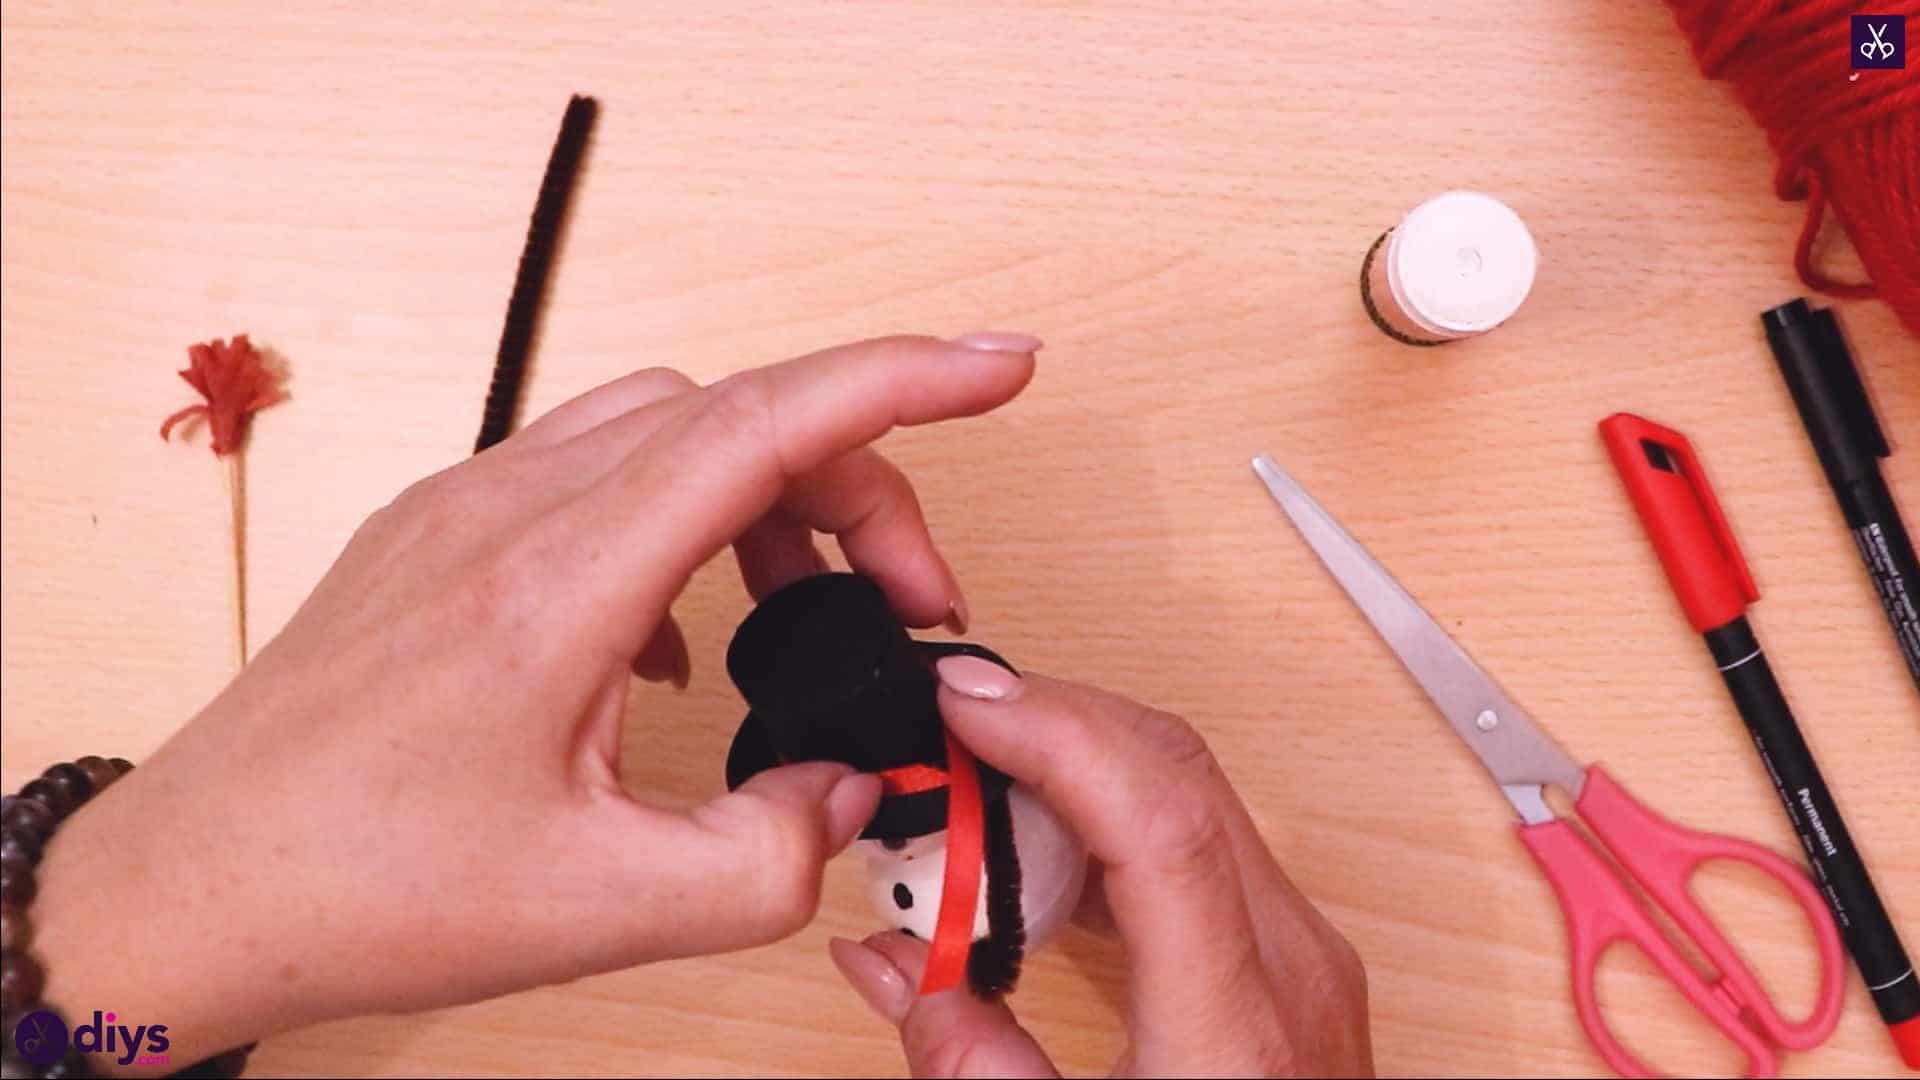
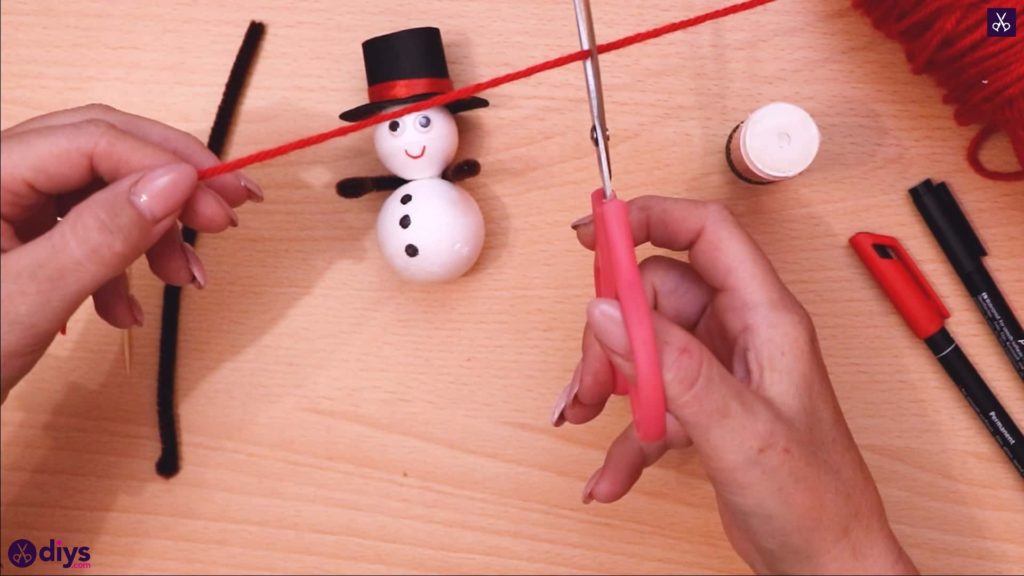
Step 12: add a ribbon
Apply some glue to one end of your red ribbon and stick it at the base of the top hat so you can wrap the ribbon around it where it meets the brim. Wrap the ribbon all the way around like a strap and then trim the excess and glue the other end down too to keep the ribbon in place.

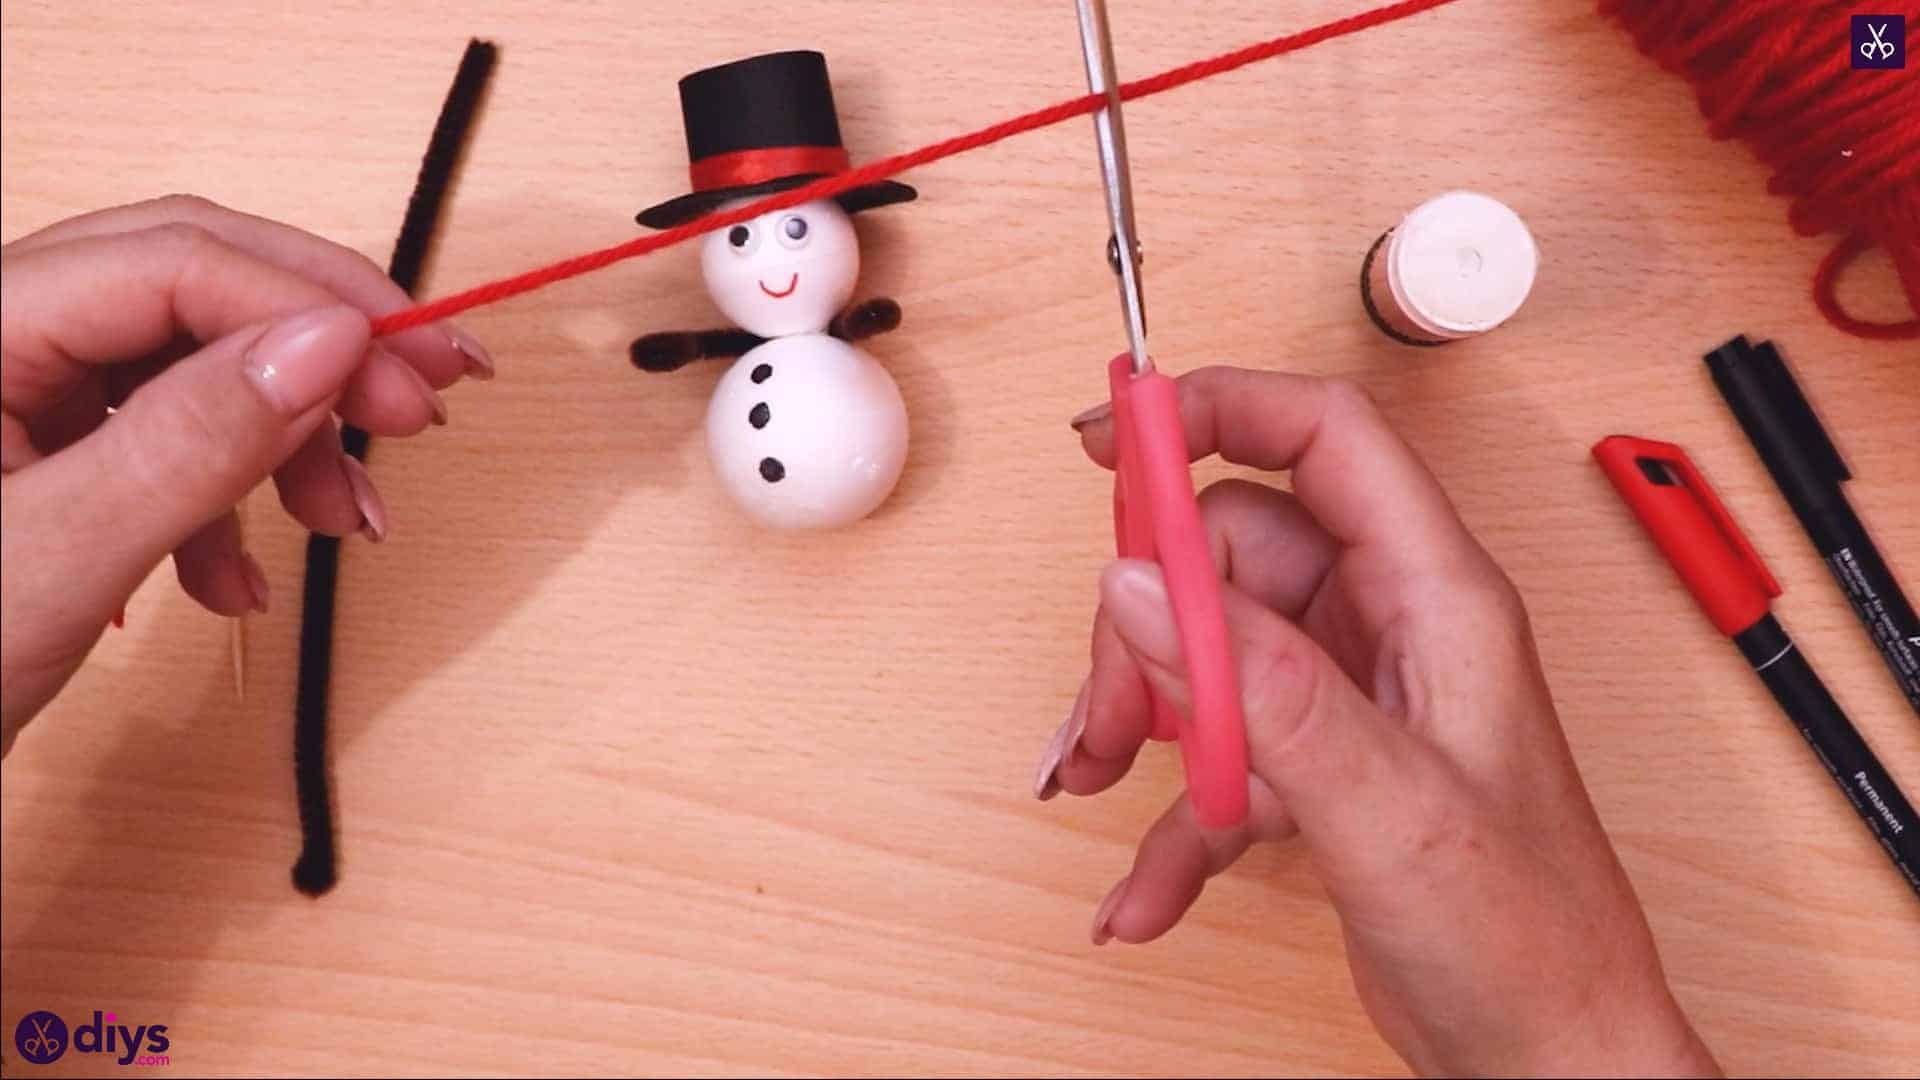
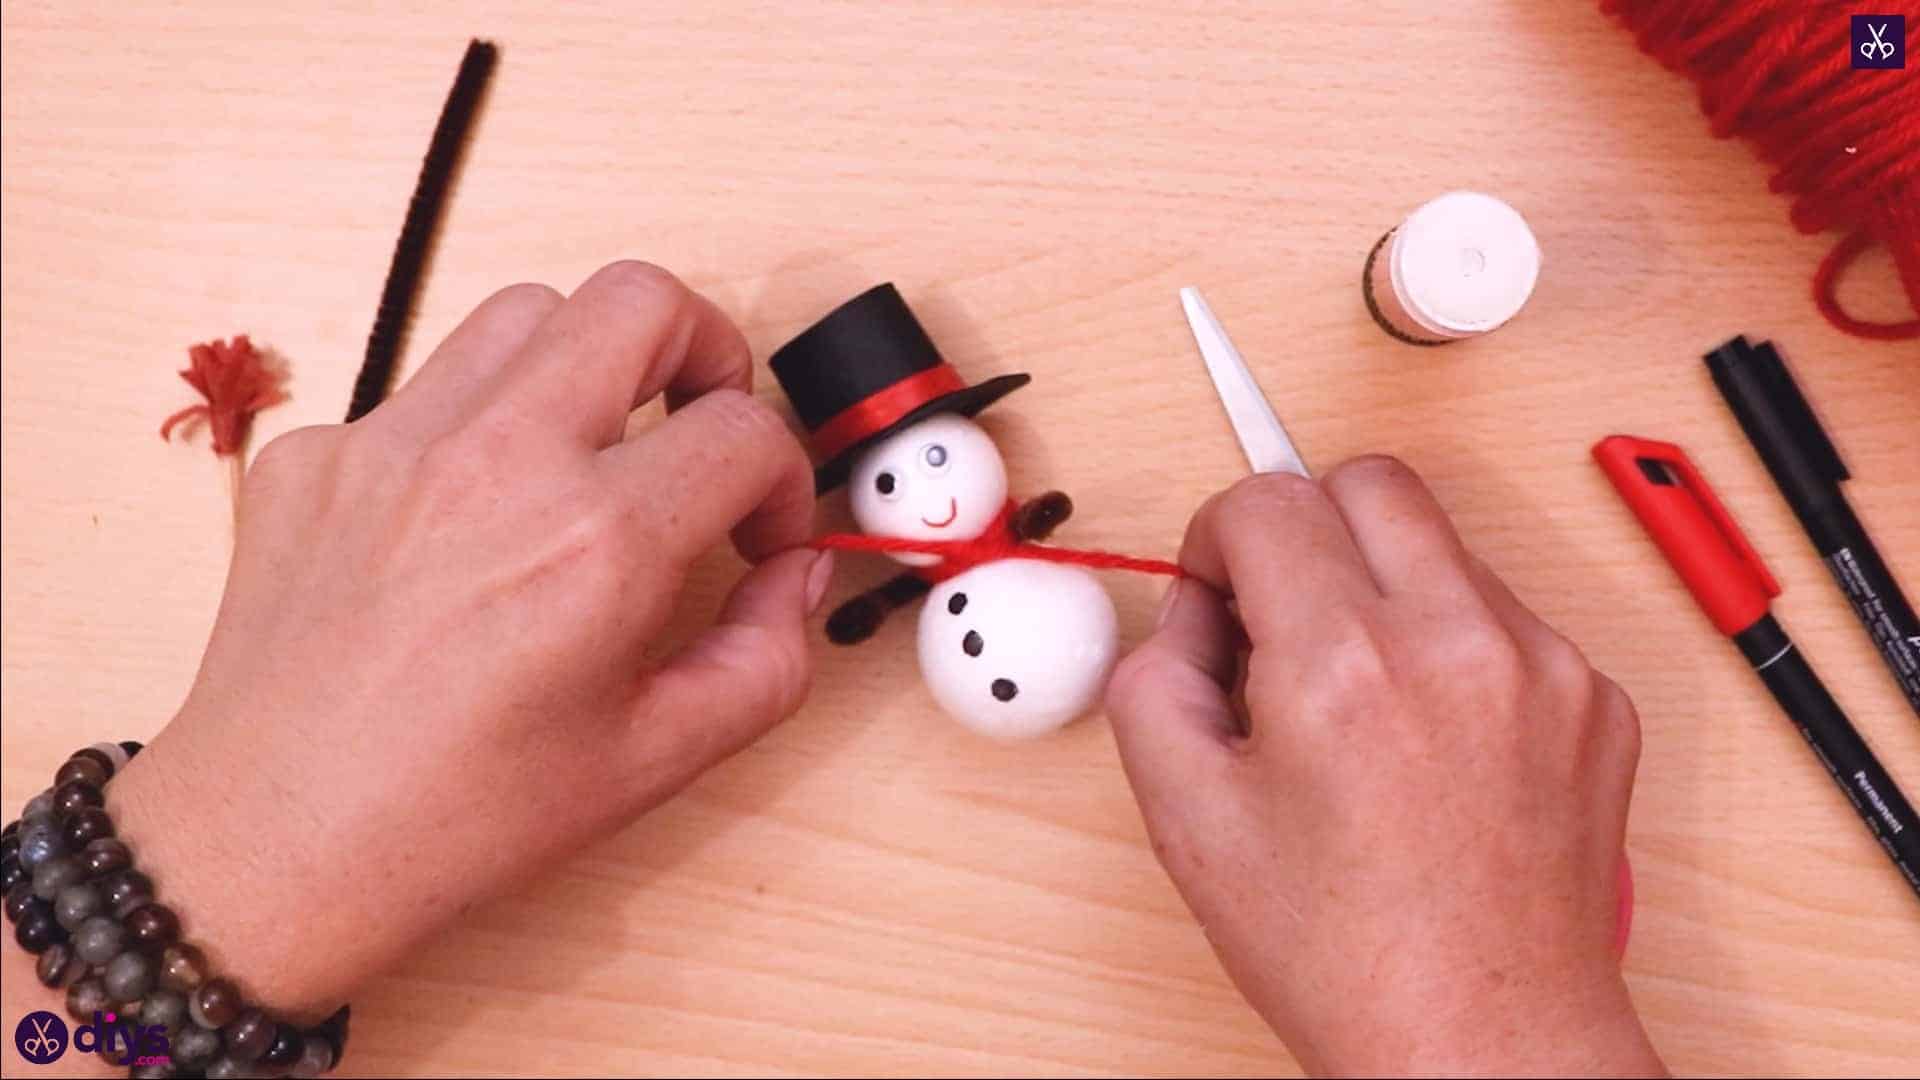
Step 13: make a scarf
Cut a piece of red yarn about three inches long. Wrap it around the snowman’s neck, where his head and body meet, and tie it once. This is now your snowman’s scarf!

Step 14: glue the broom
Apply some glue on the toothpick broom handle about where you want the snowman’s pipe cleaner hand to grip it, then slide it through the curl you made so he’s holding it.

You’re all finished! Just in case you’d like to try this project out for yourself, here’s a fantastic tutorial video to help you!