DIY Rustic Tin Can Container
Updated on June 23, 2021
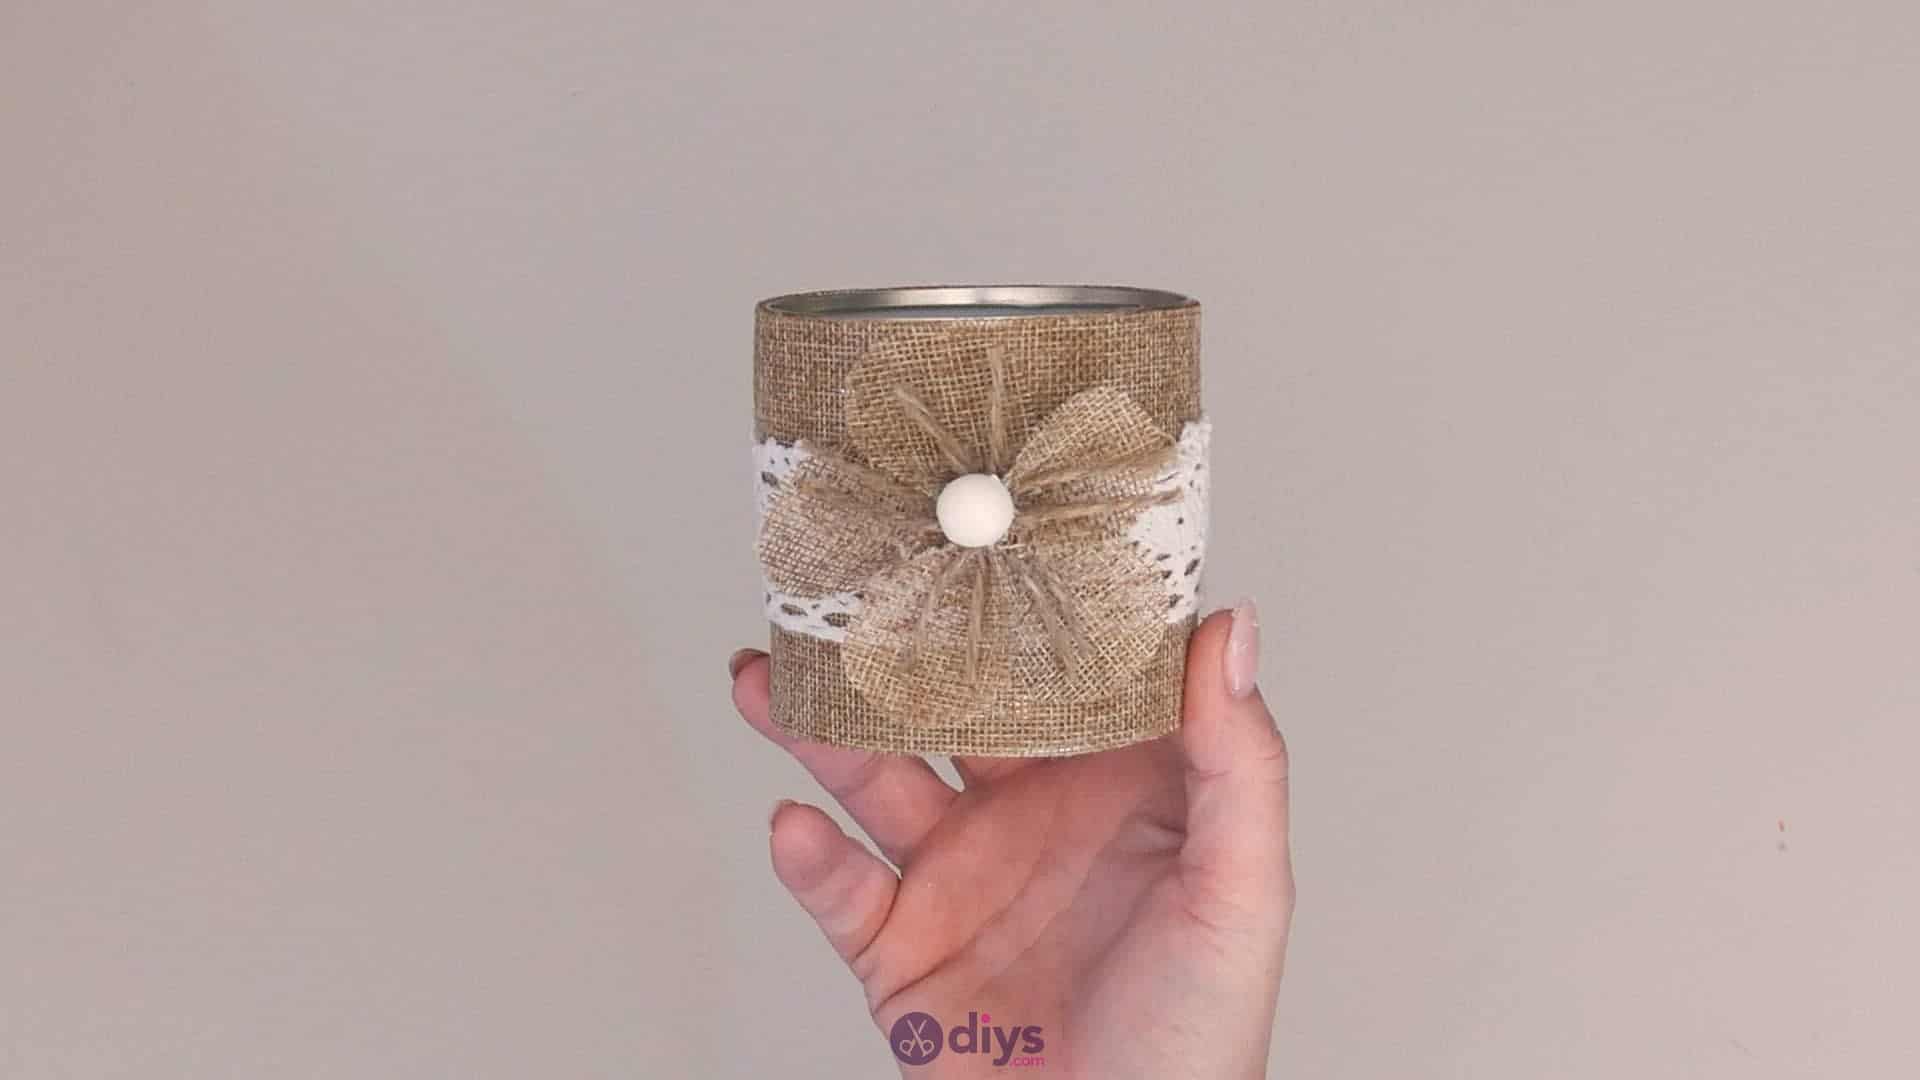


Being the home decor and DIY accessories enthusiast that I am, I’ve been trying to come up with ways to incorporate burlap into my home decor schemes in small DIY ways! That’s how this simple rustic tin can container came to be.

Check out these step by step instructions complete with photos! If you’d rather follow along with a video tutorial instead of written words, scroll to the bottom of this post to find just what you’re looking for.
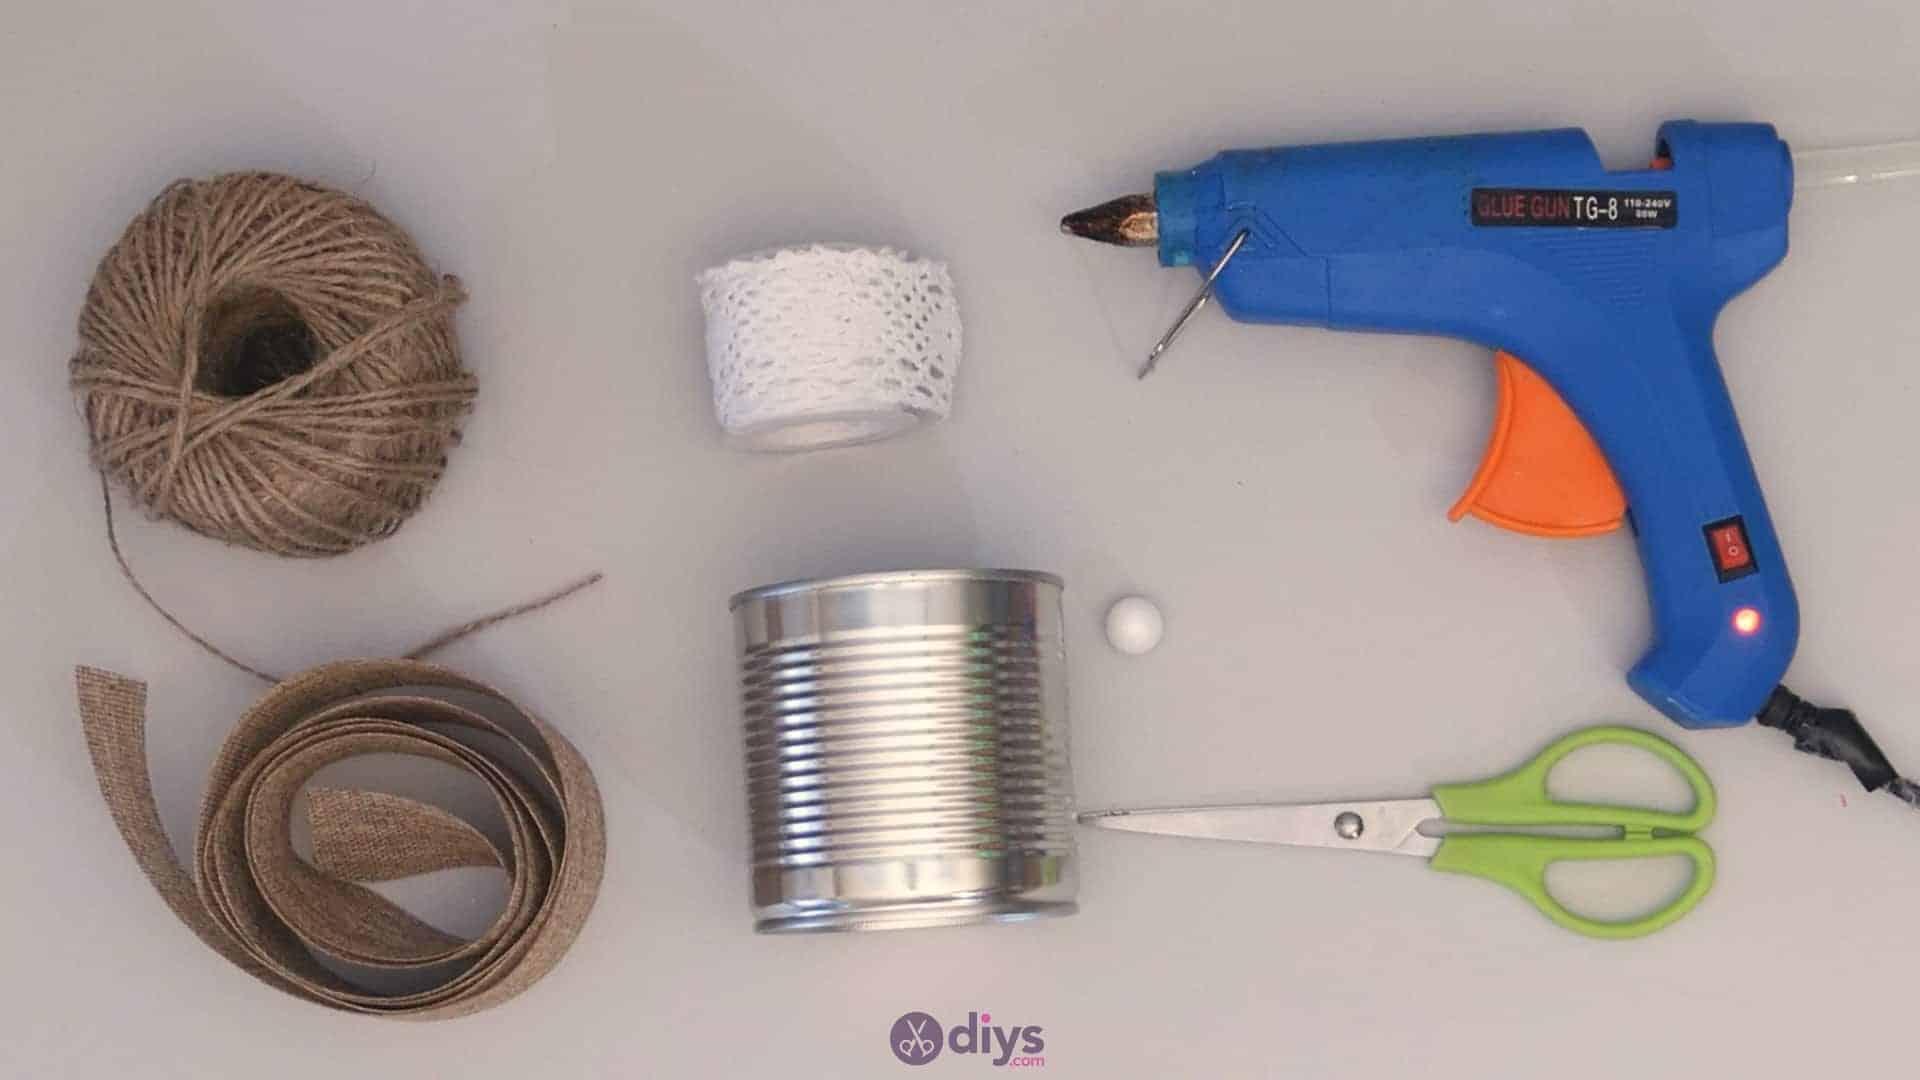
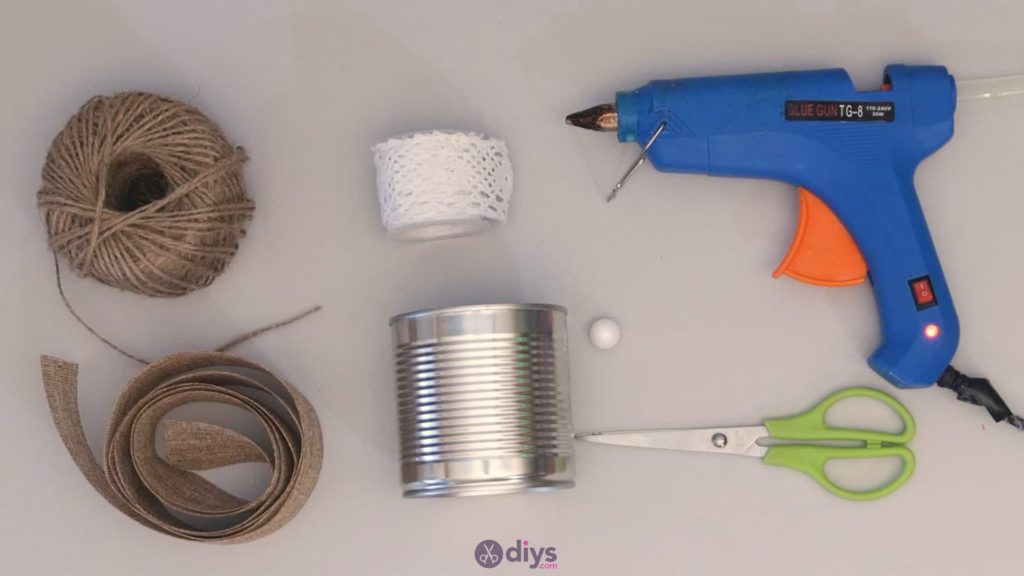
For this project, you’ll need:
- An empty tin can
- Scissors
- Hot glue
- Jute twine
- Lace ribbon
- Burlap trim
- A small styrofoam sphere
Step 1: Gather your materials!
With any DIY project, make sure to have everything you need in front of you before starting.
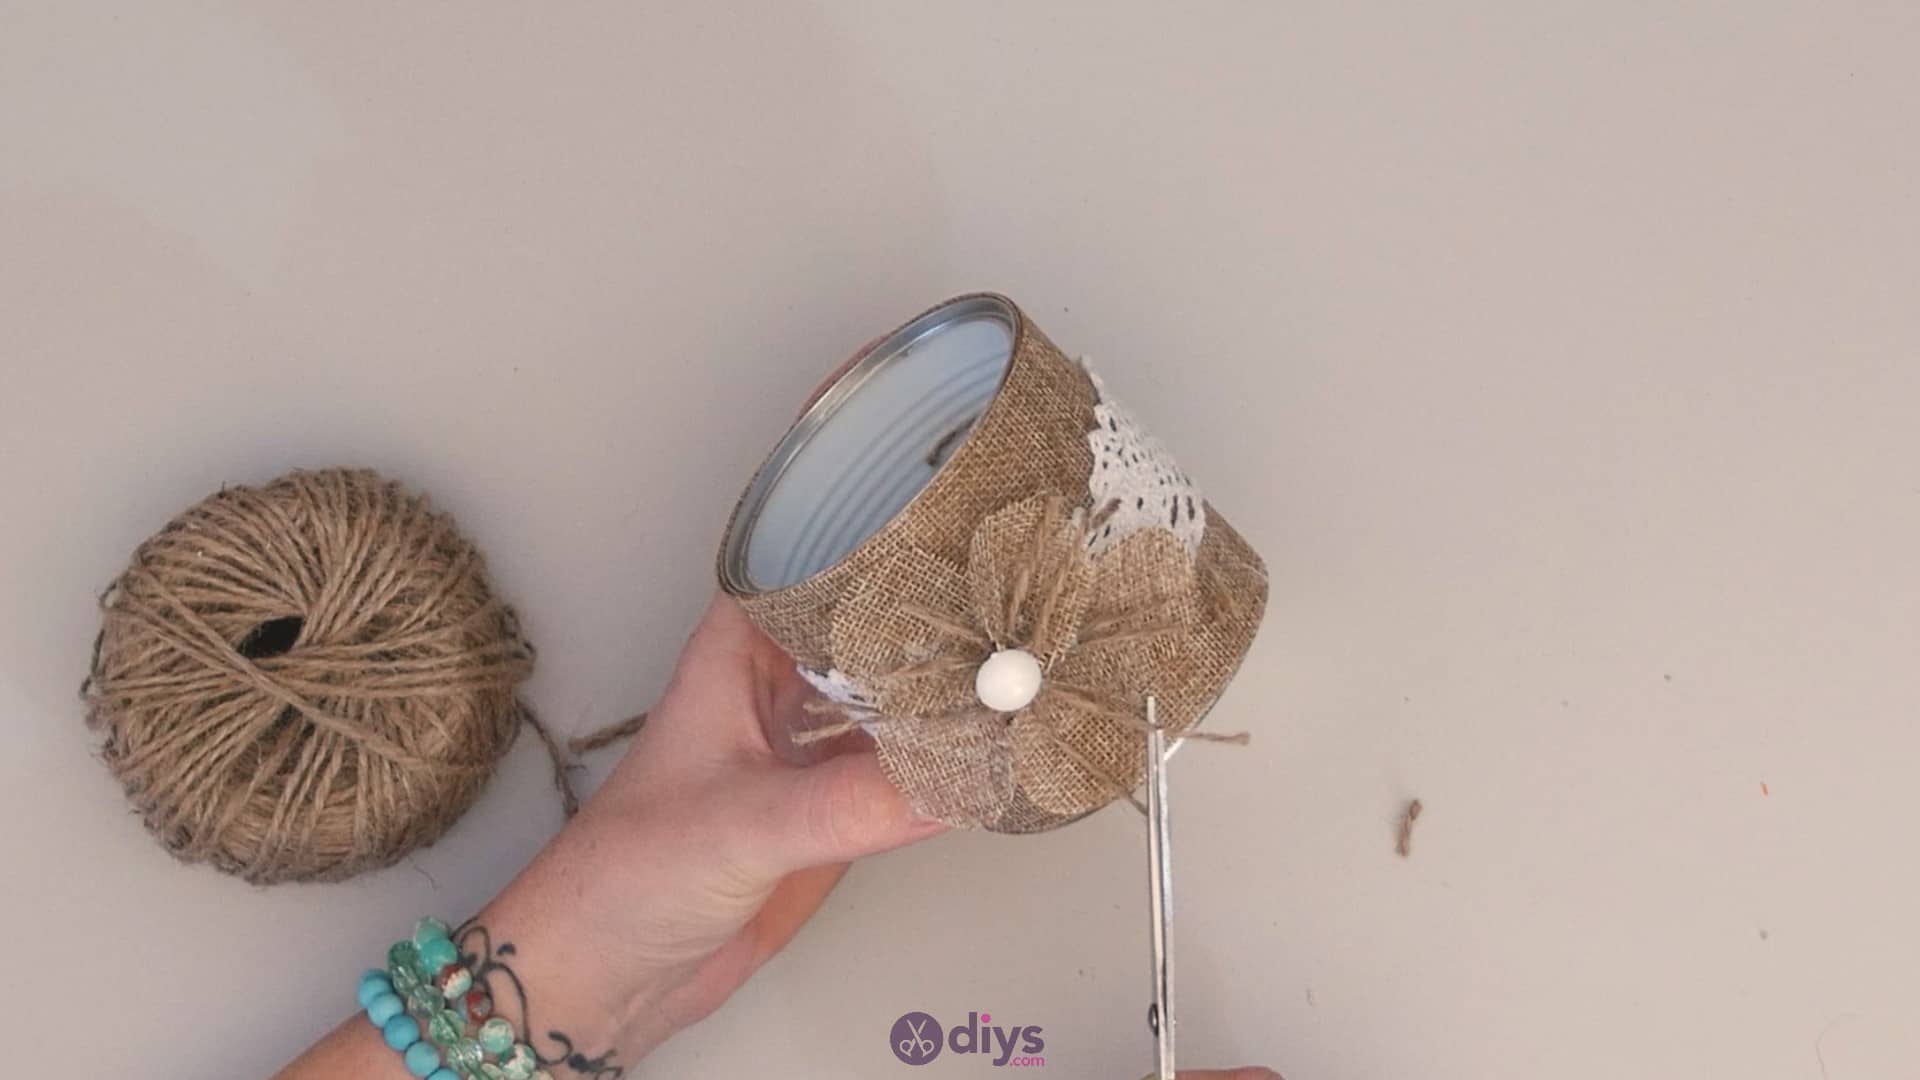
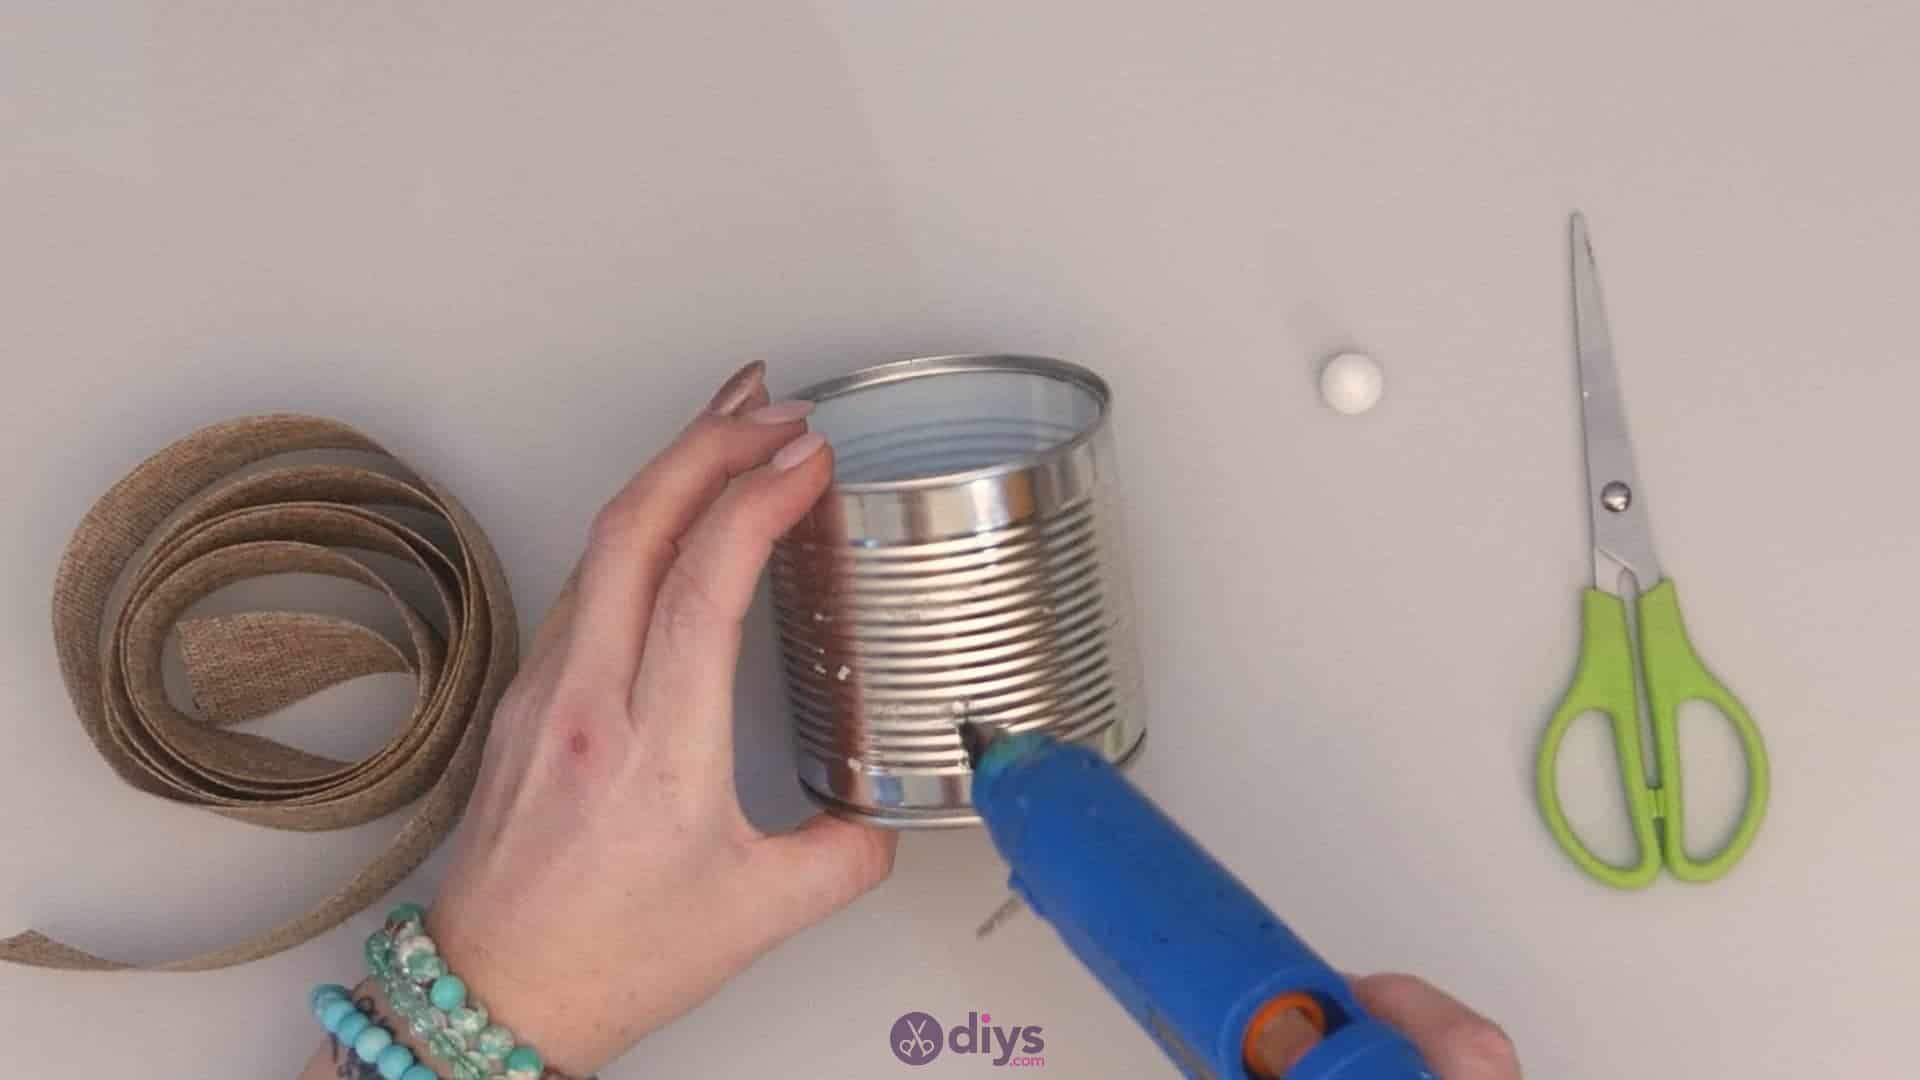
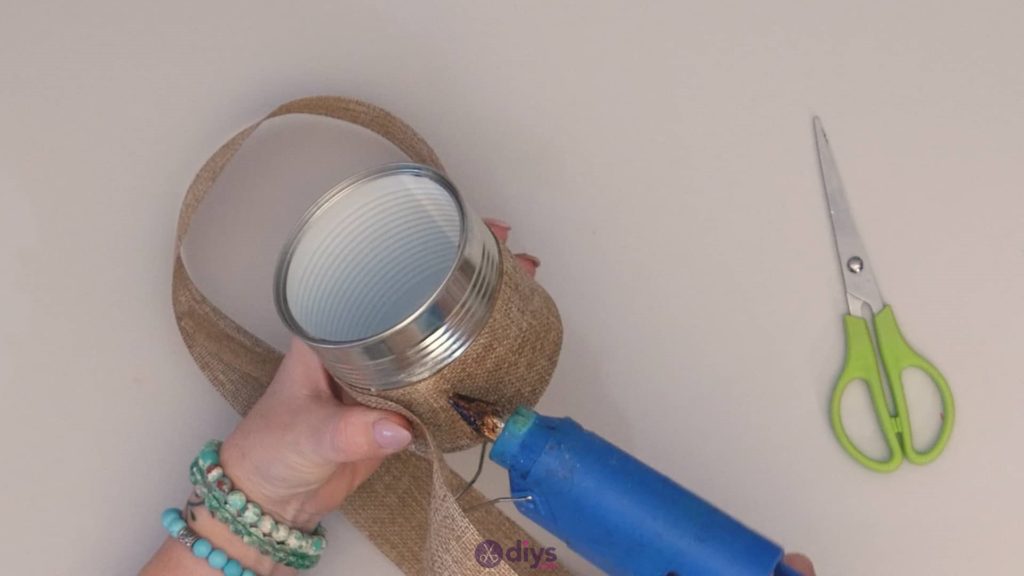
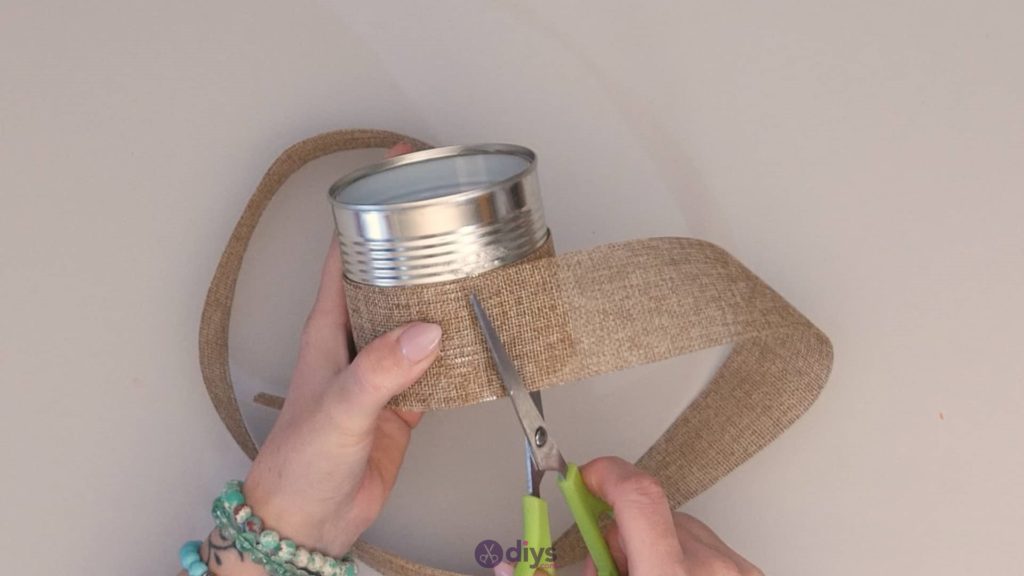
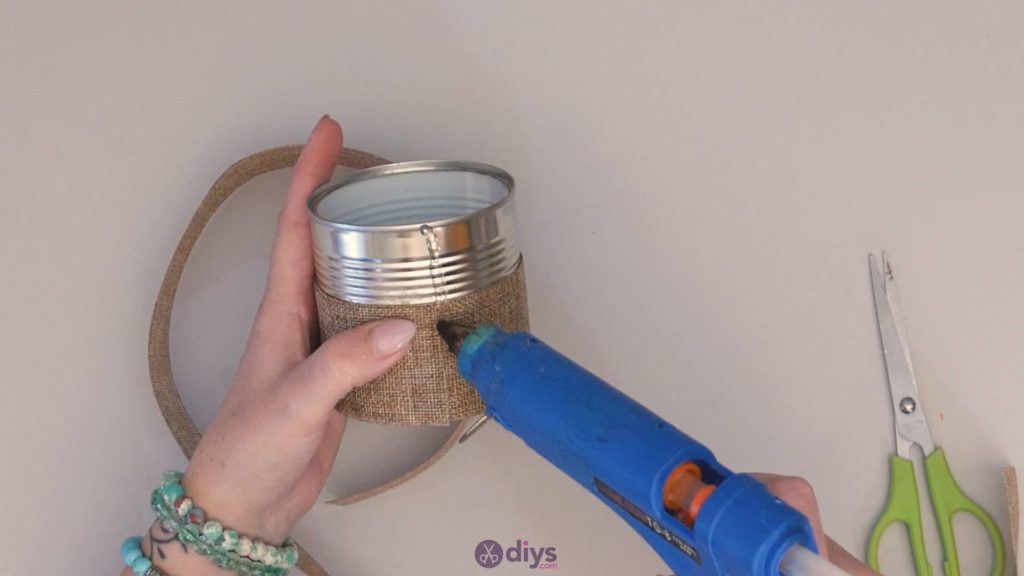
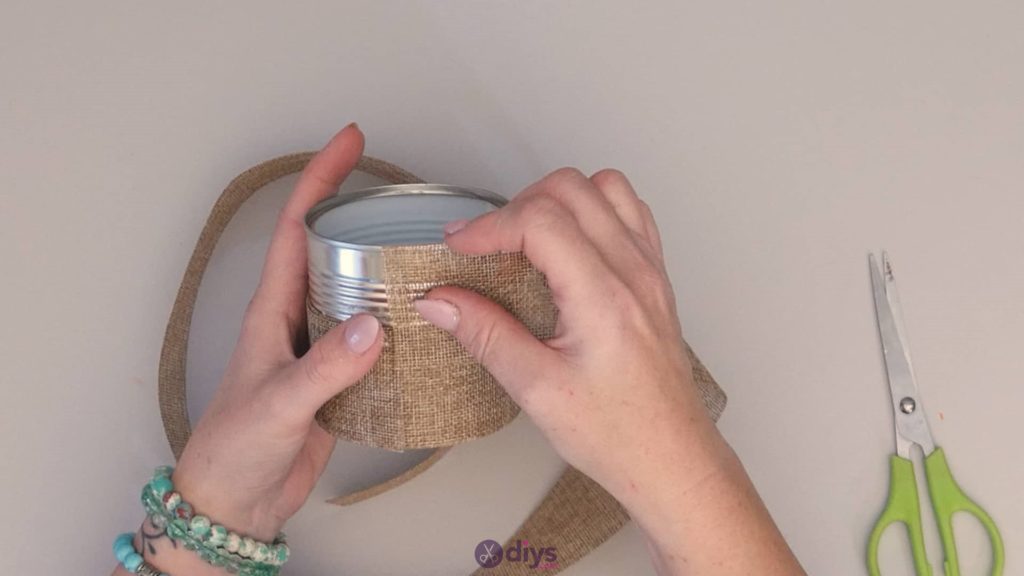
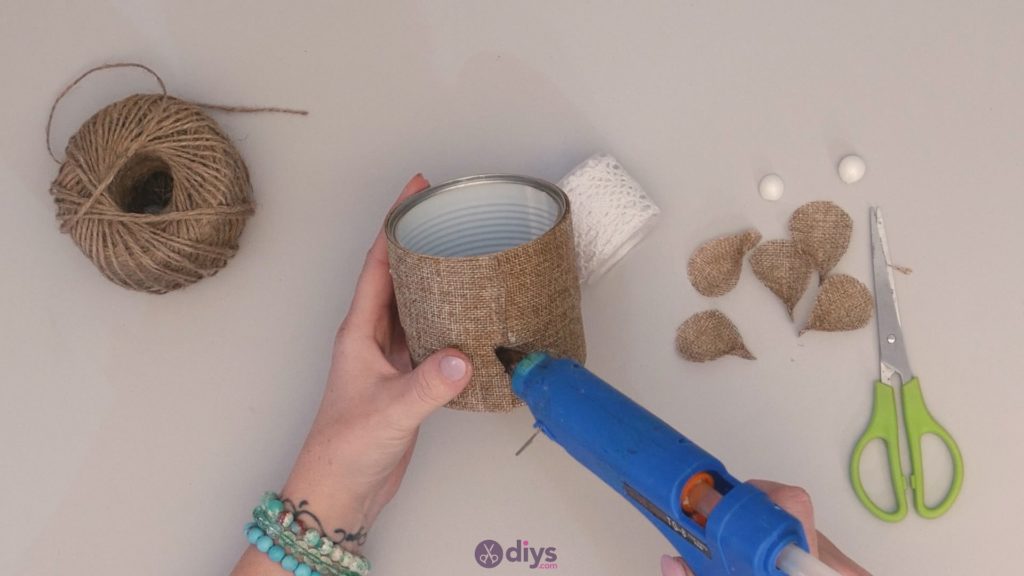
Step 2: wrap and glue jute
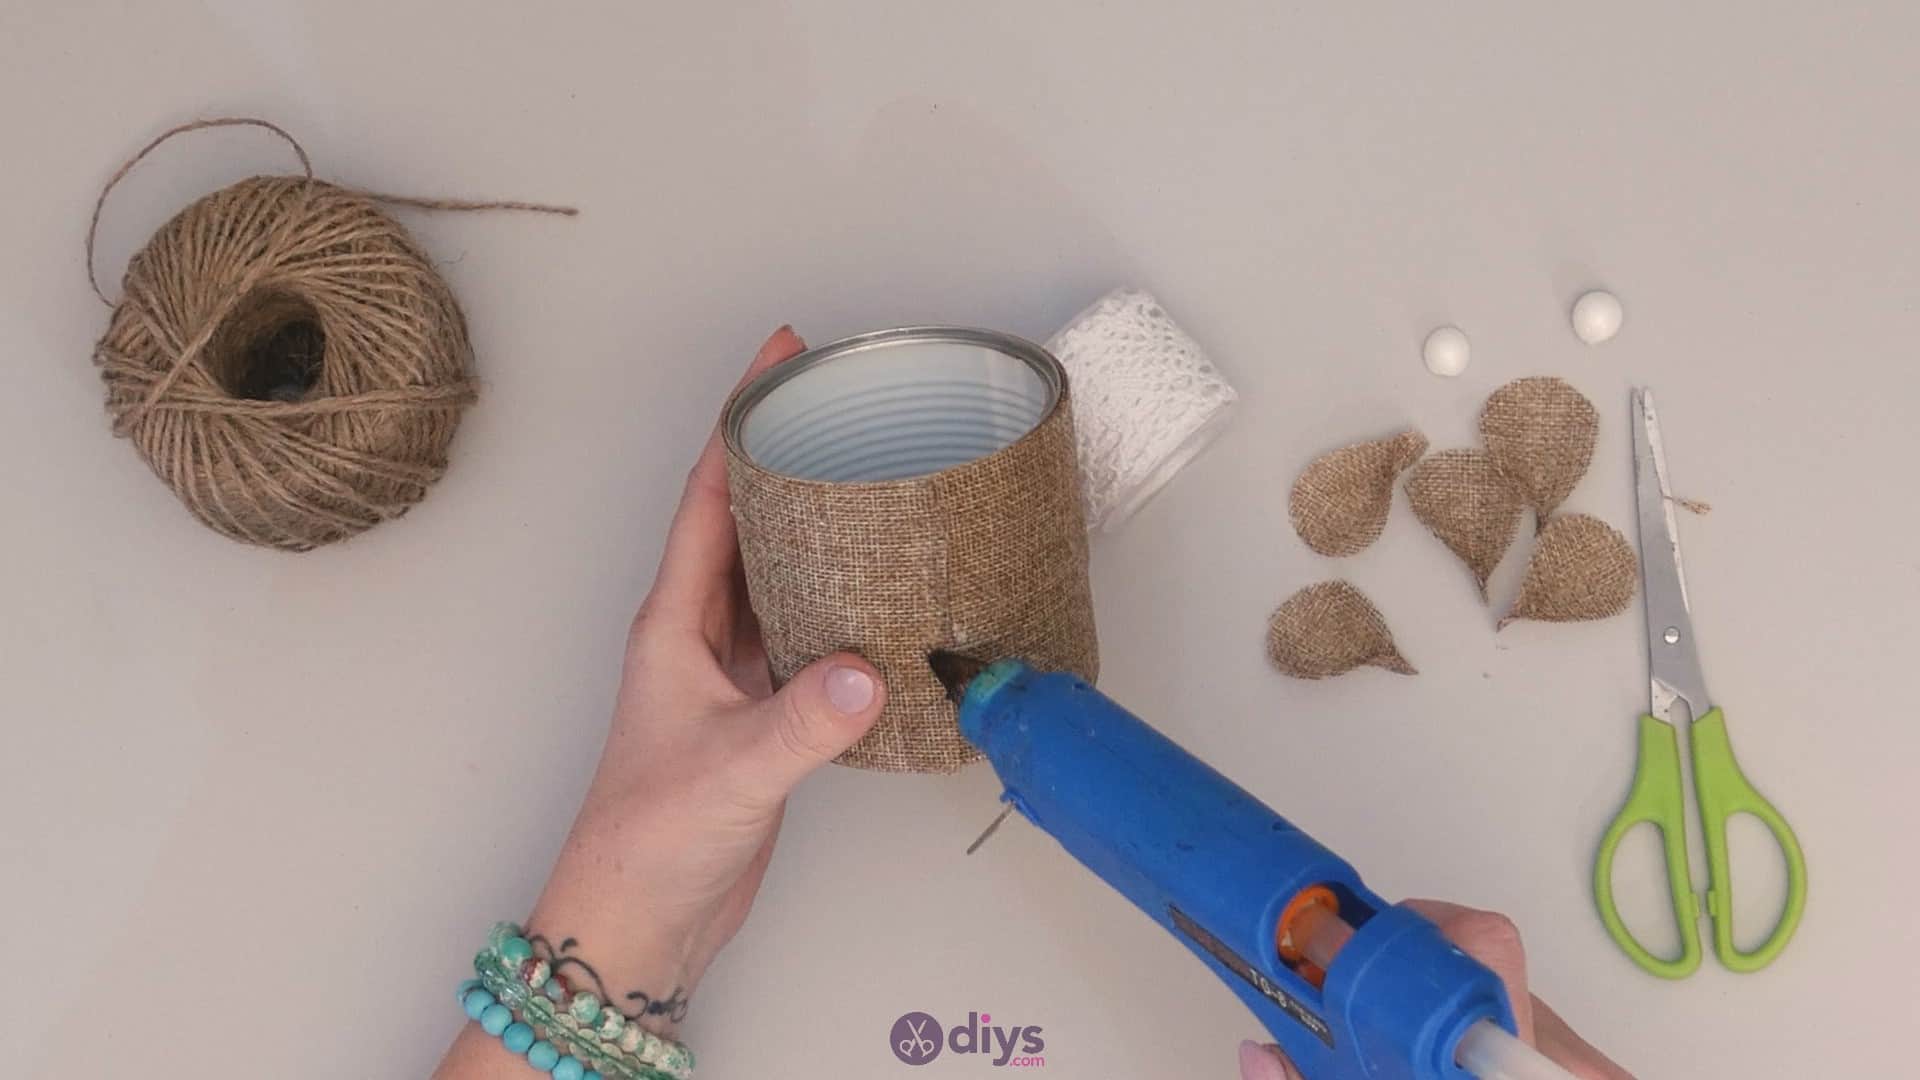
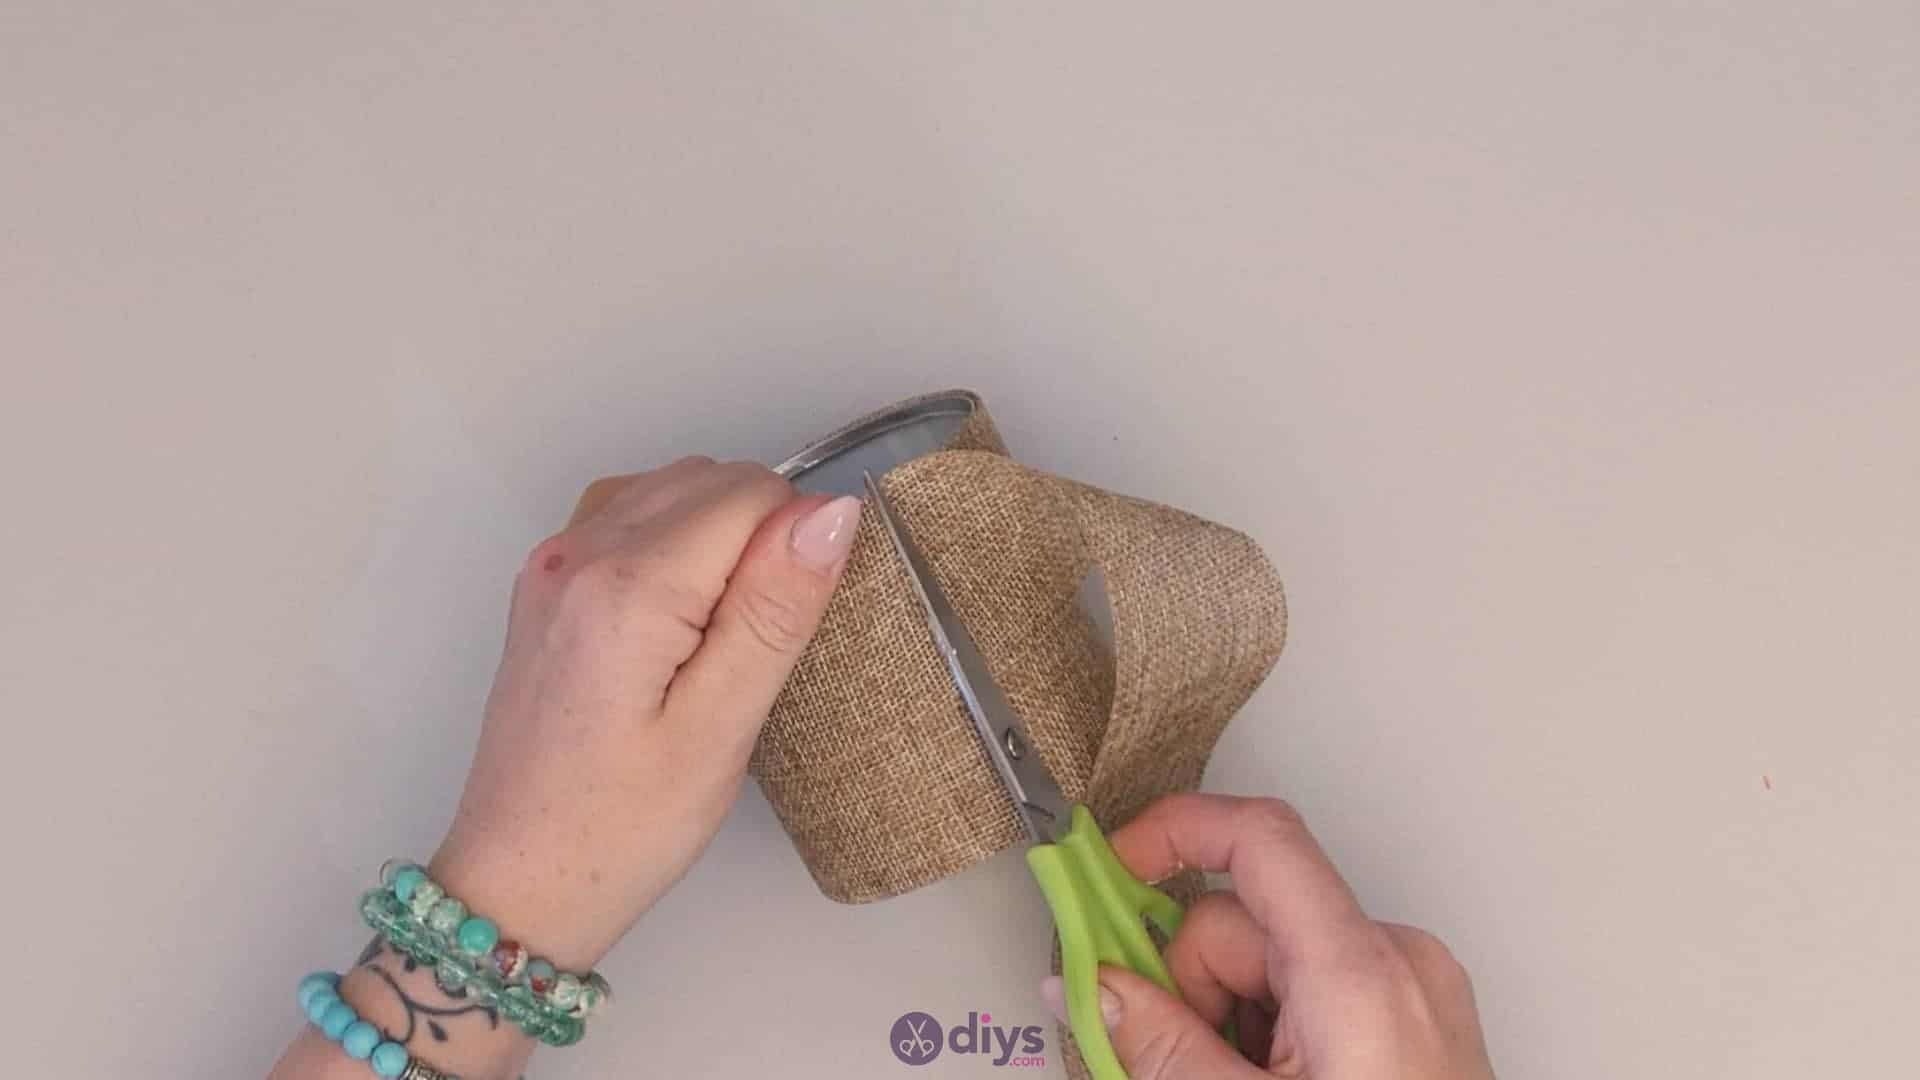
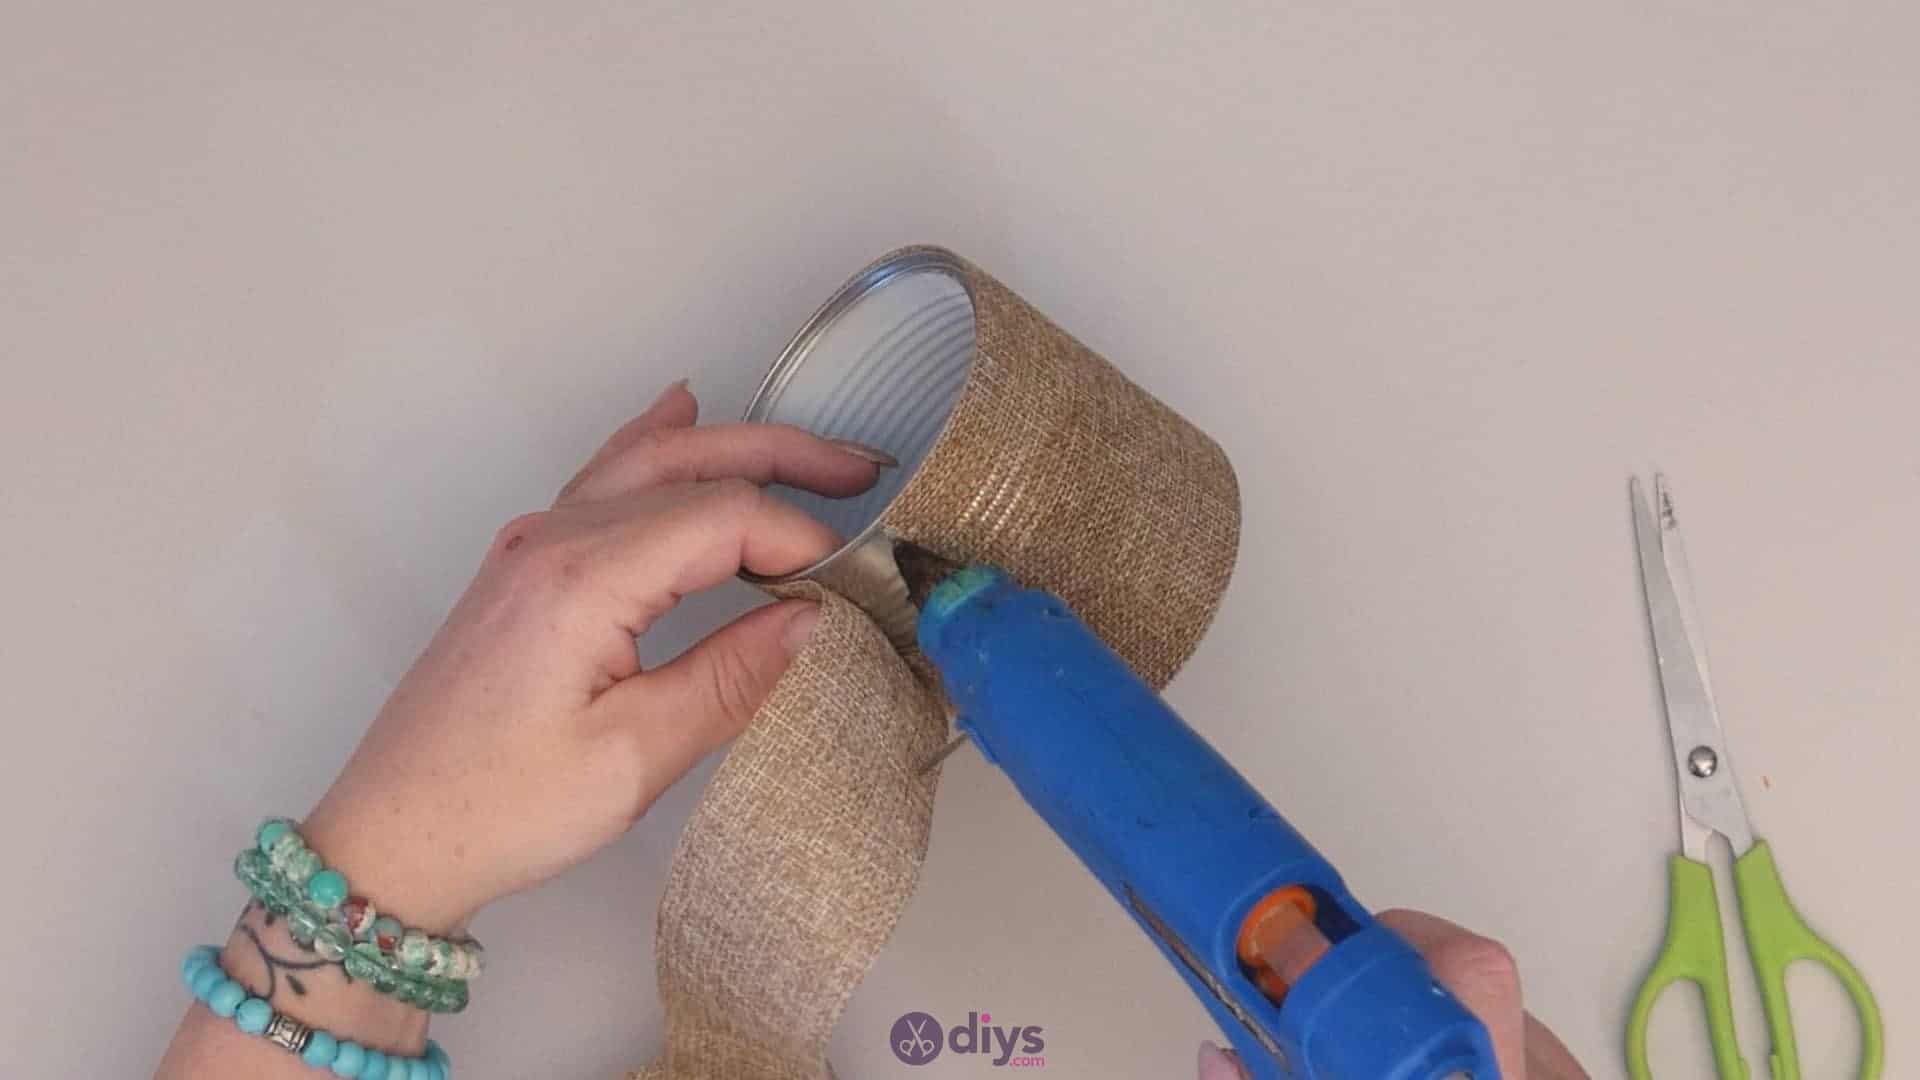
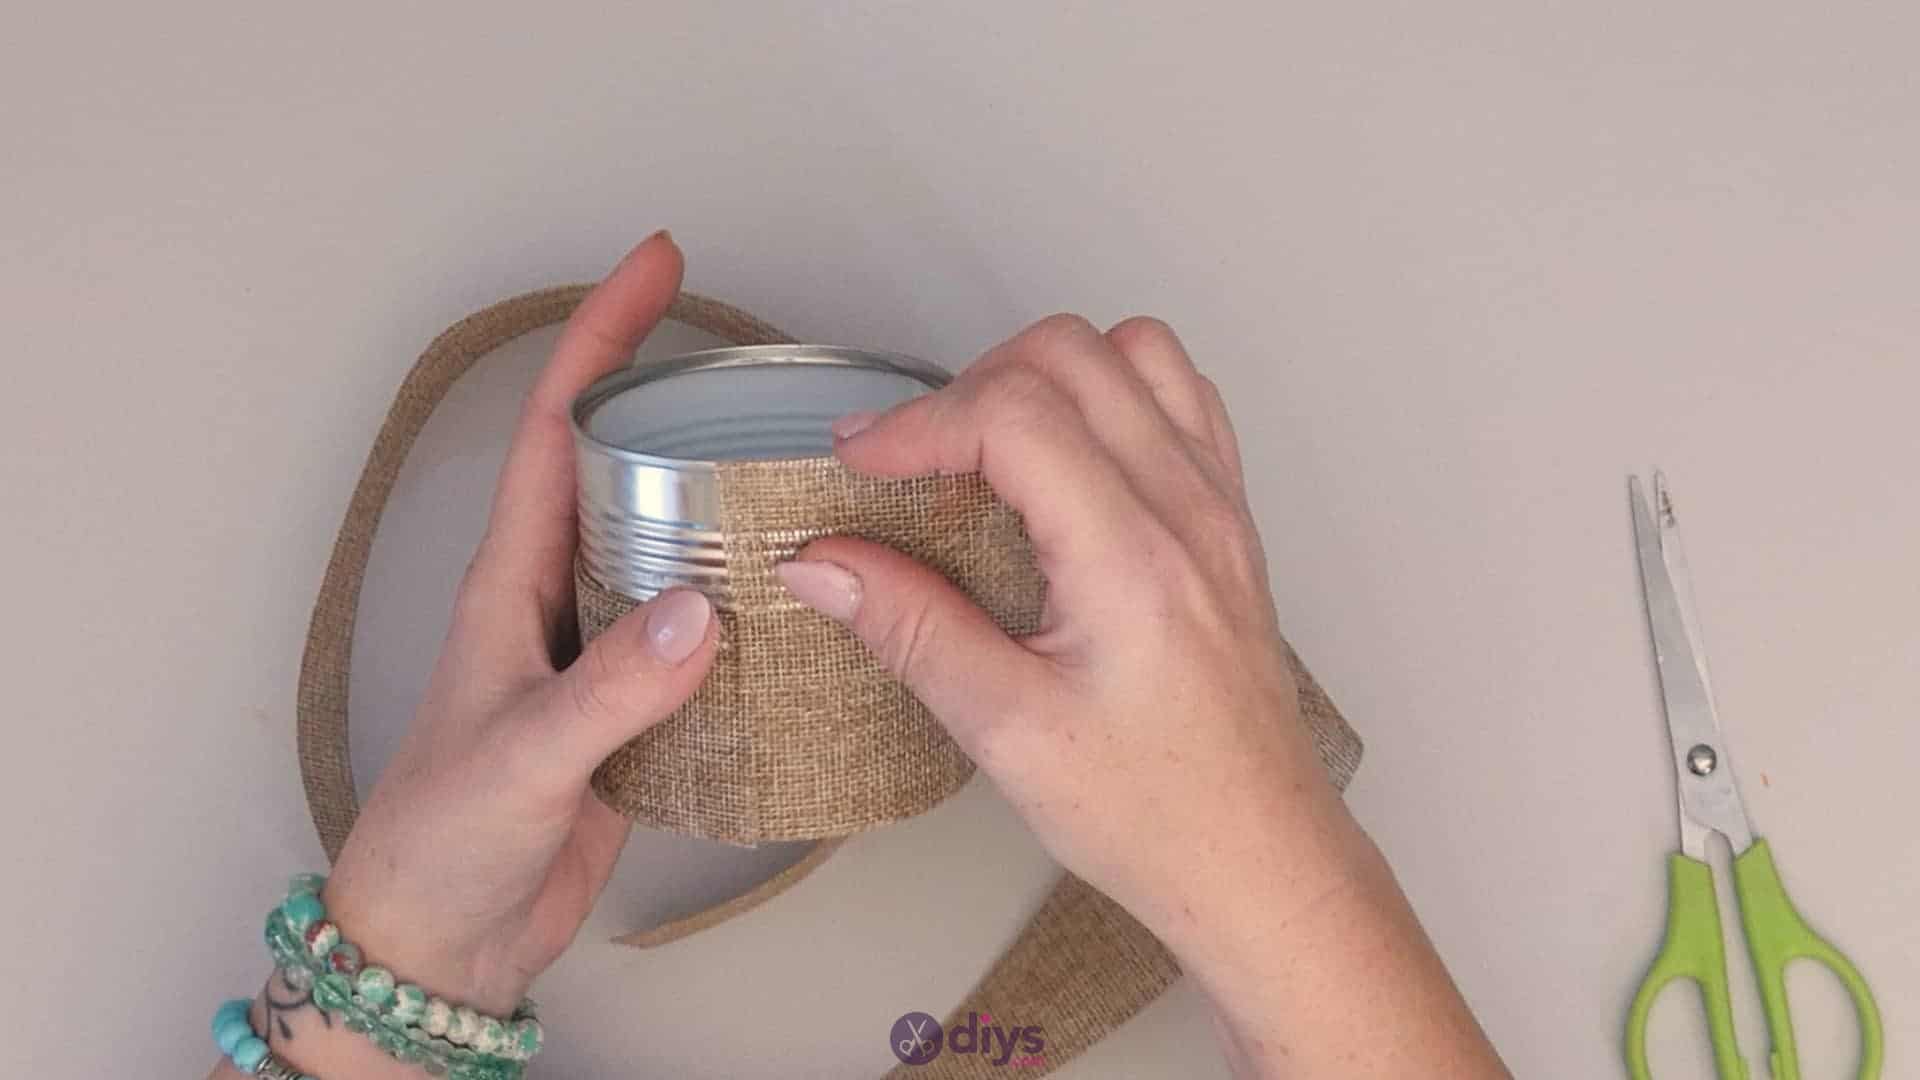
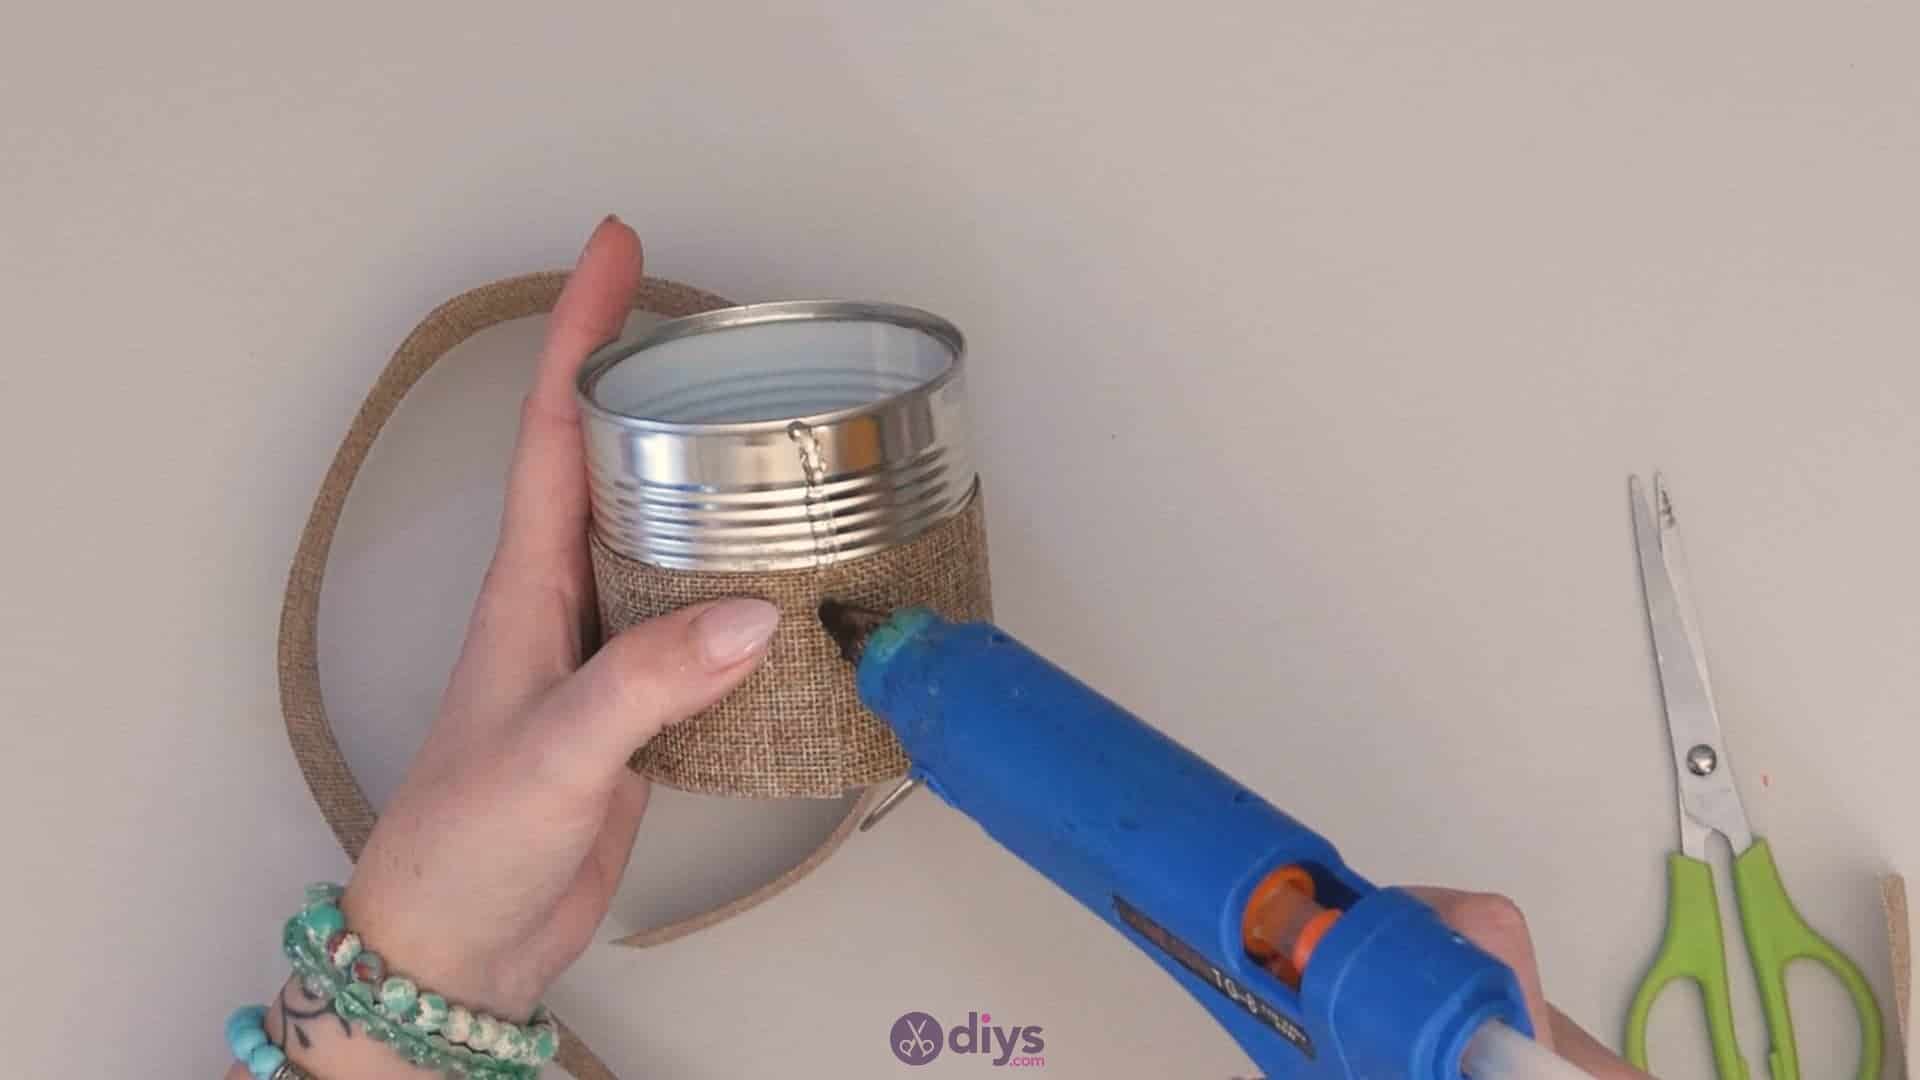
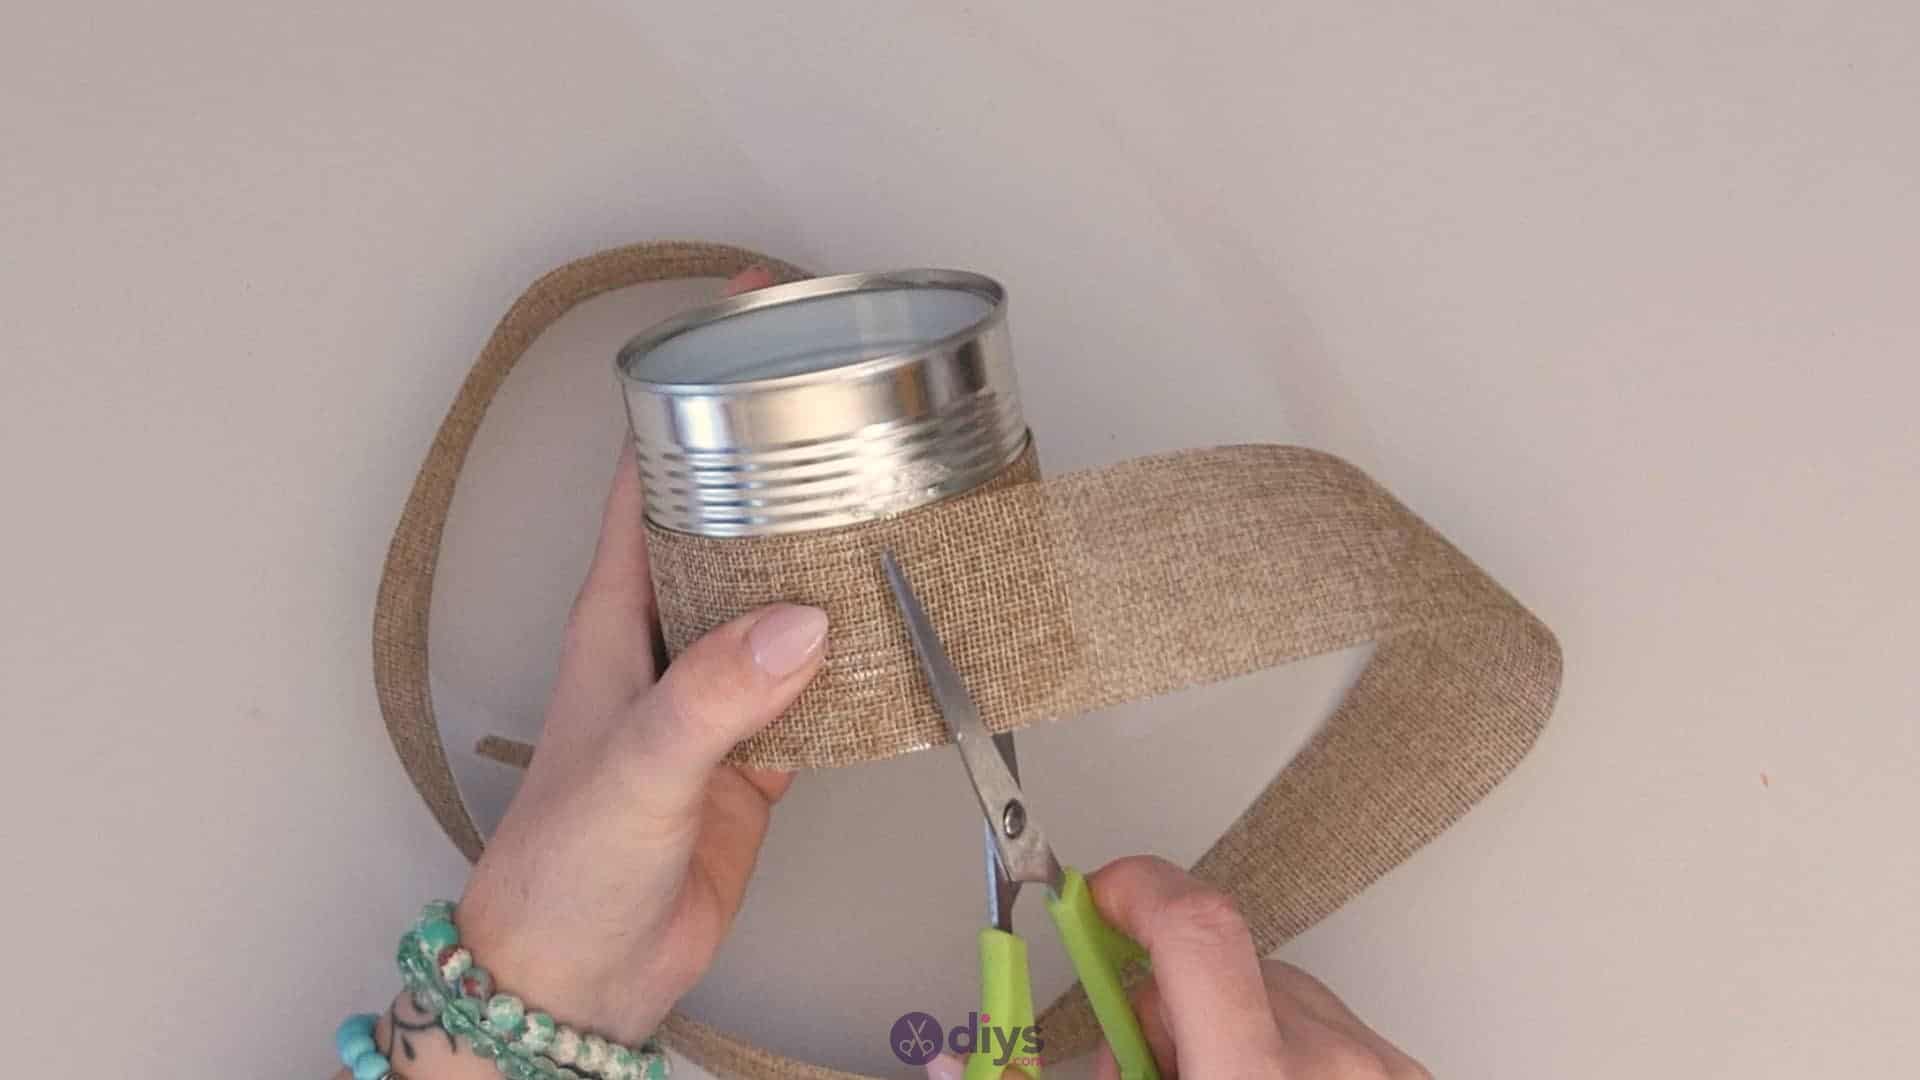
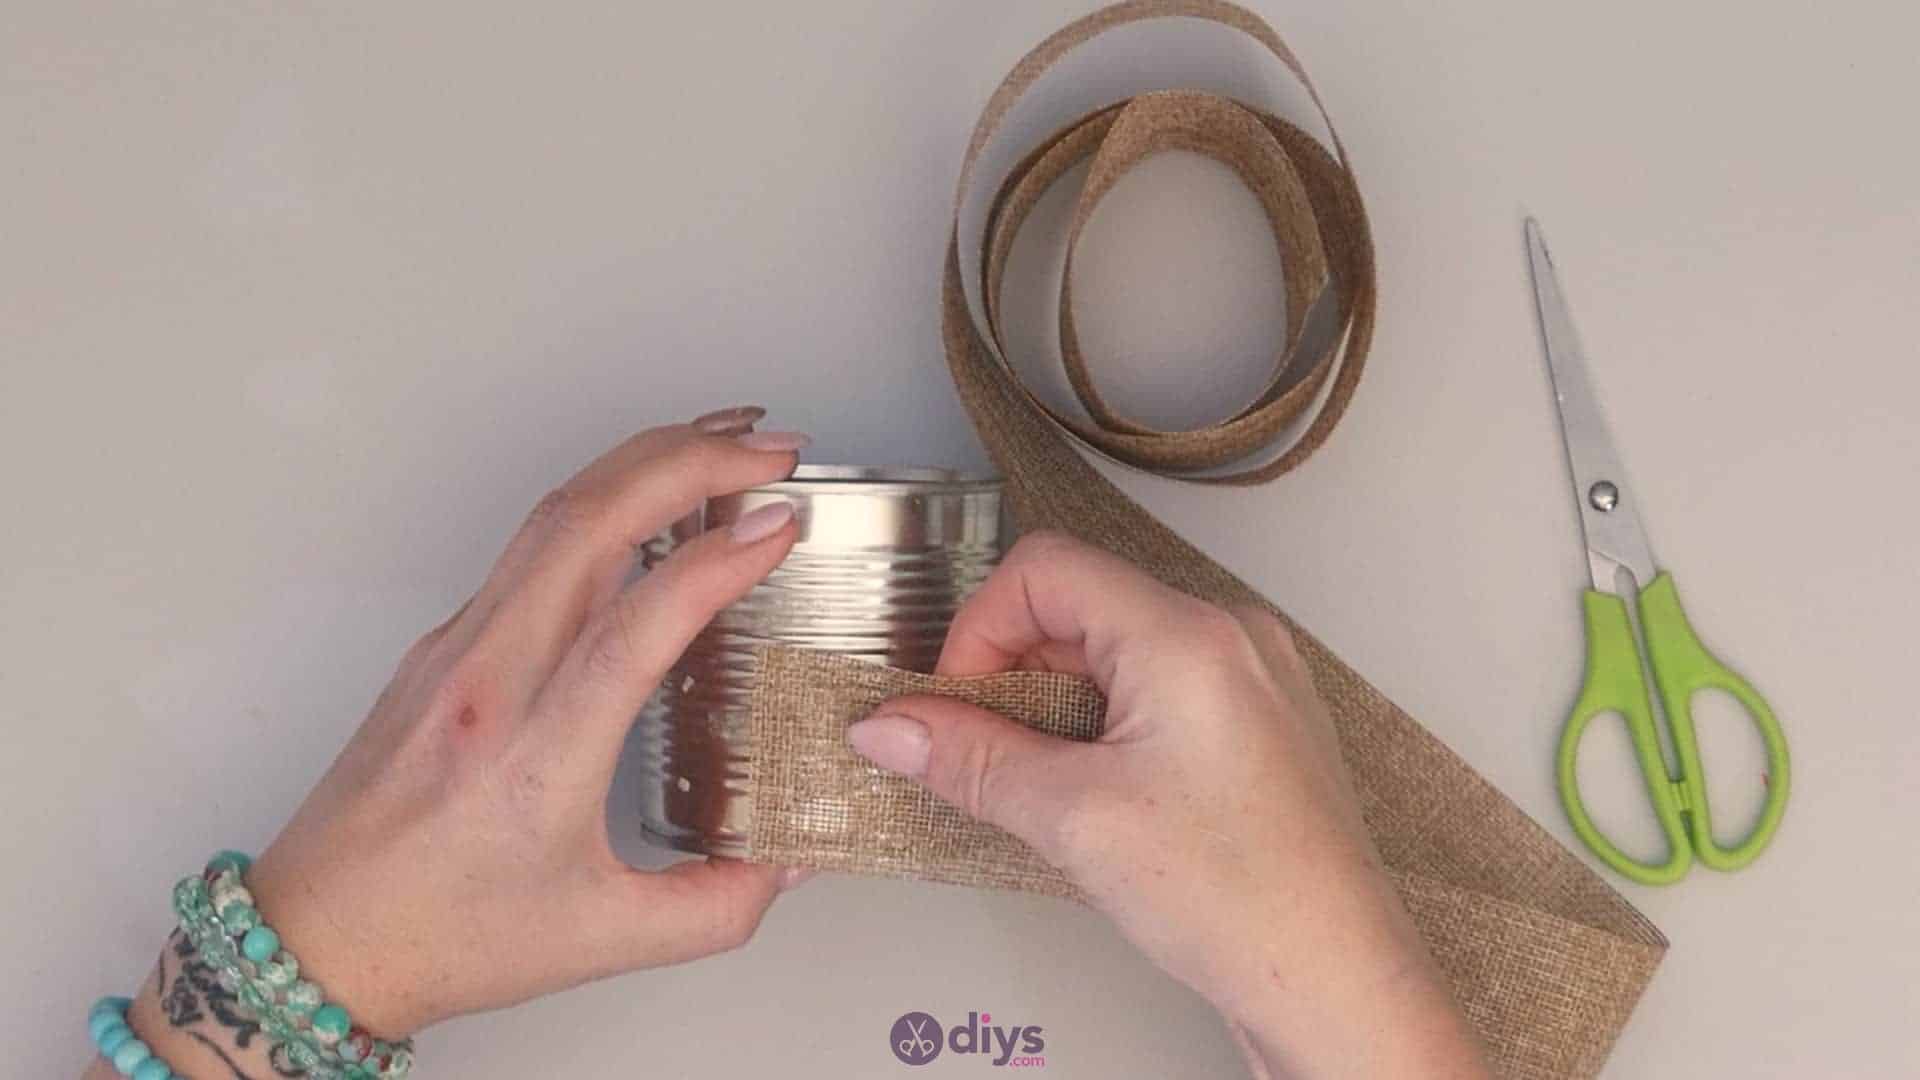
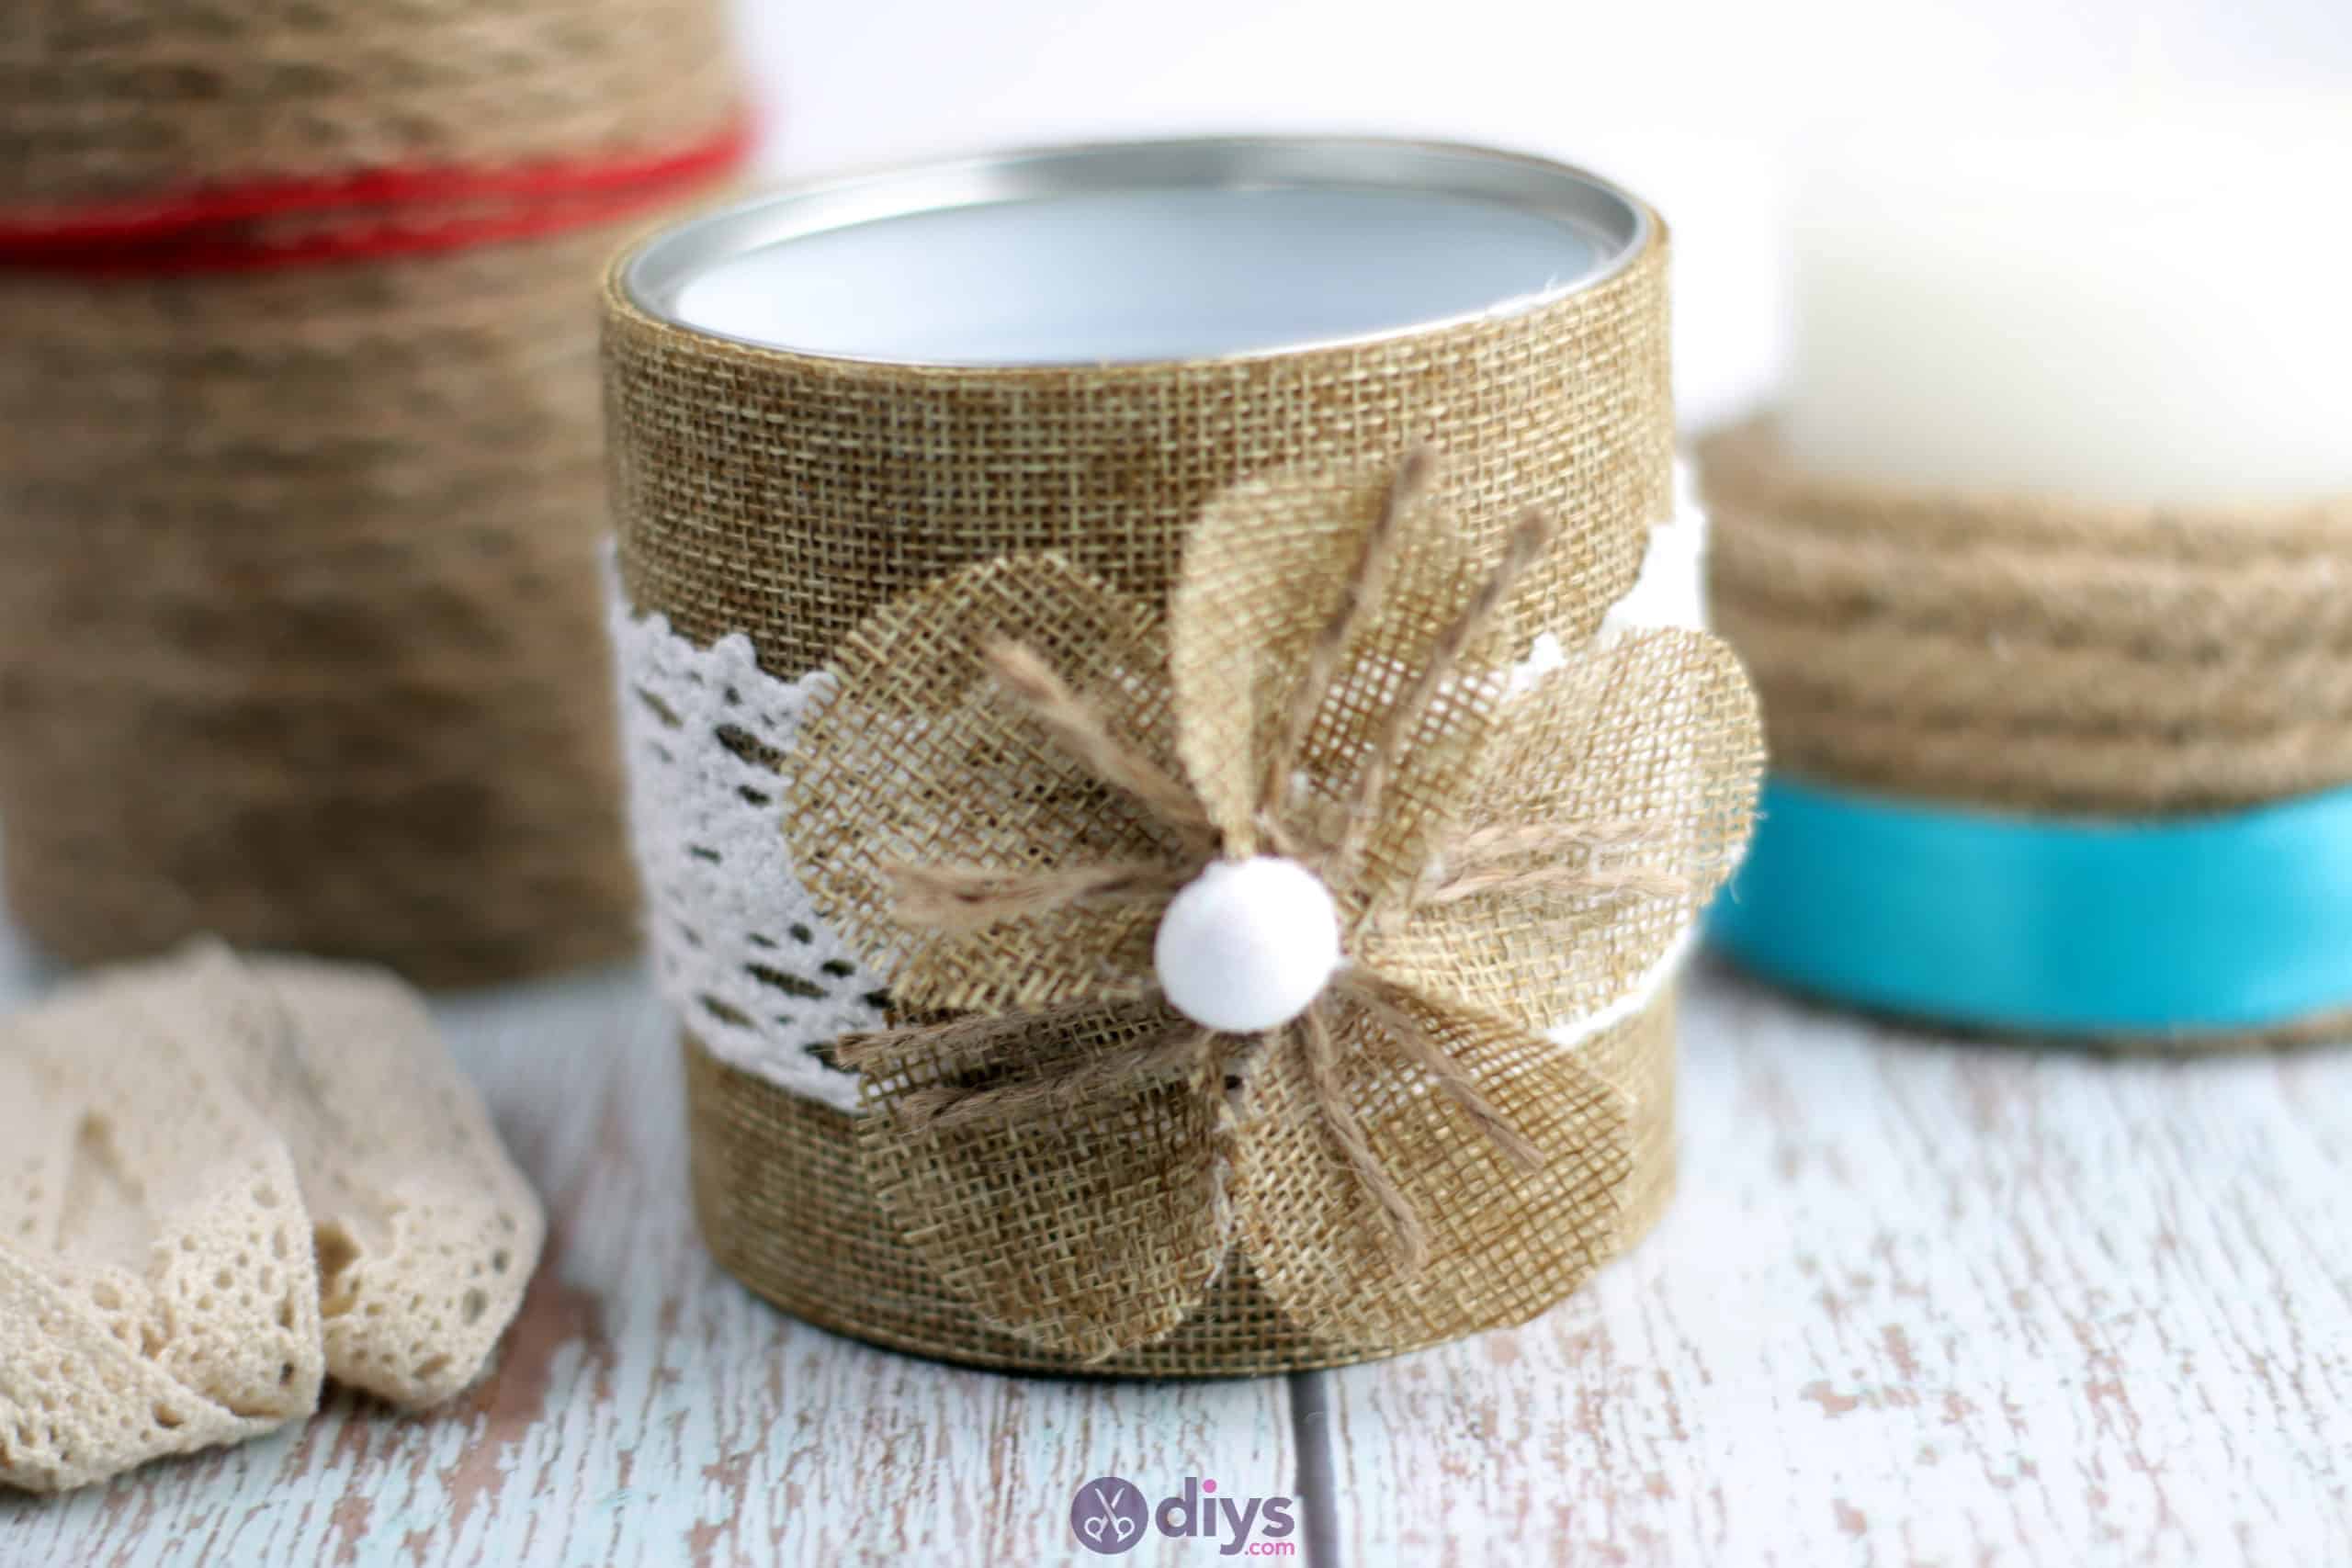
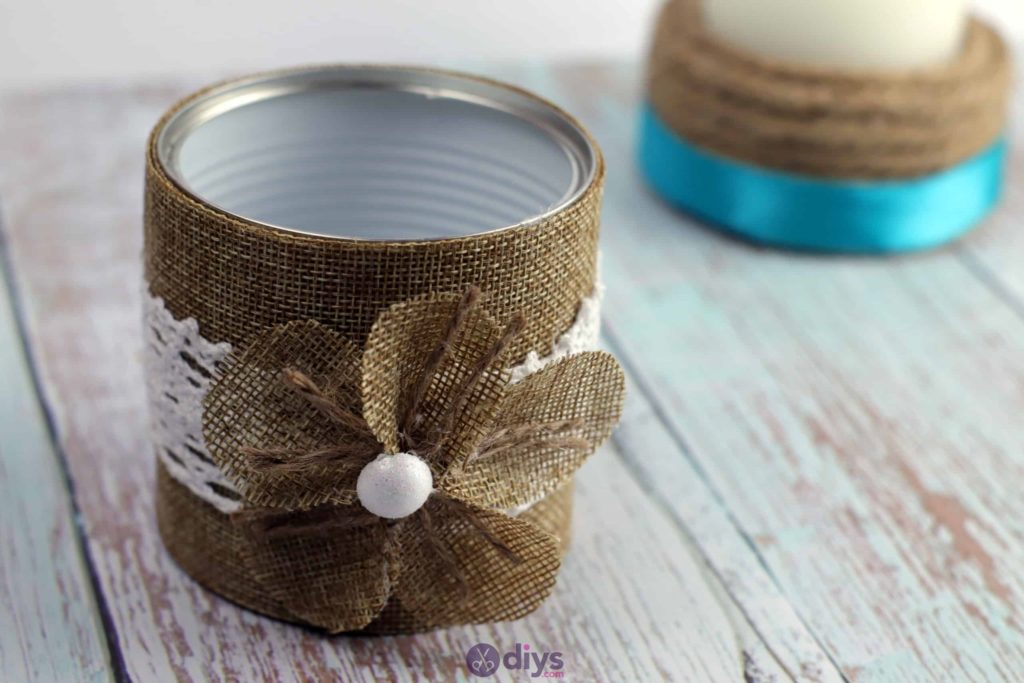
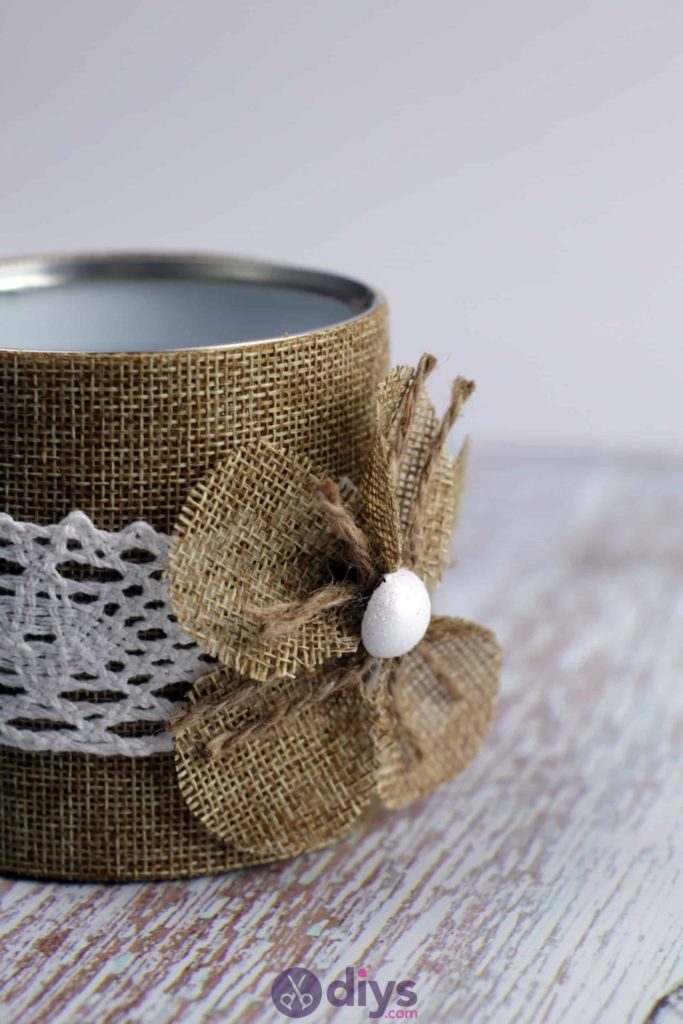
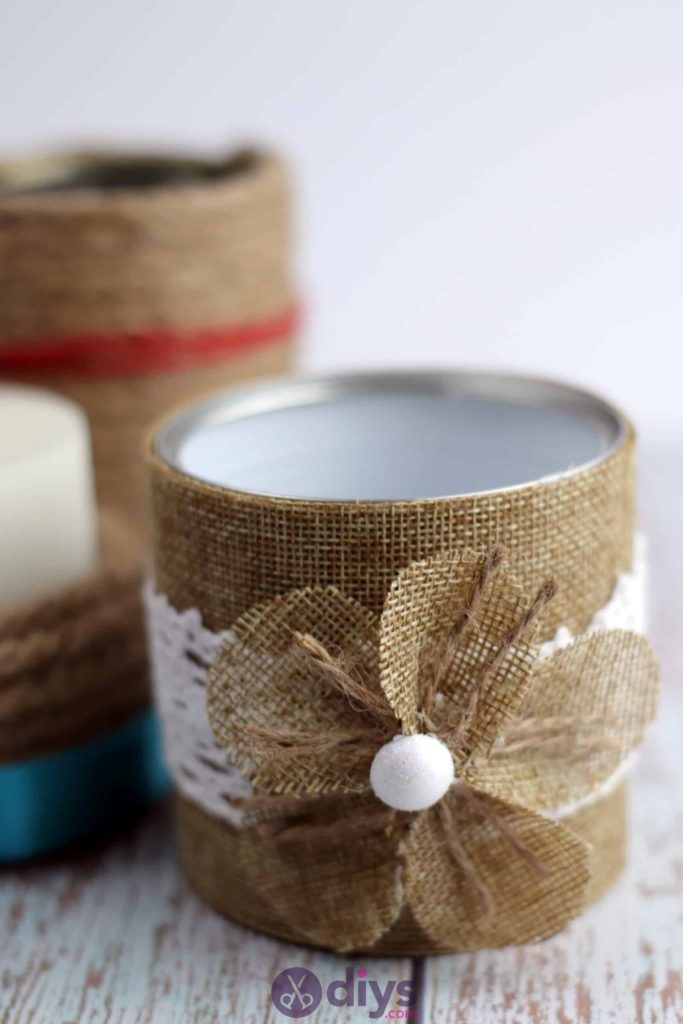
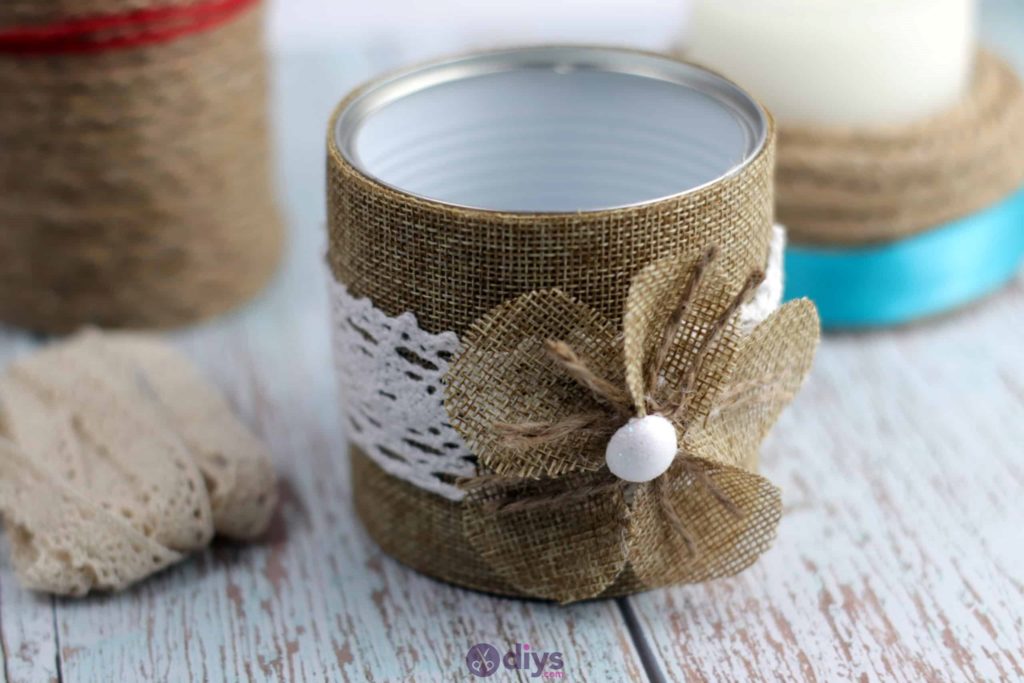
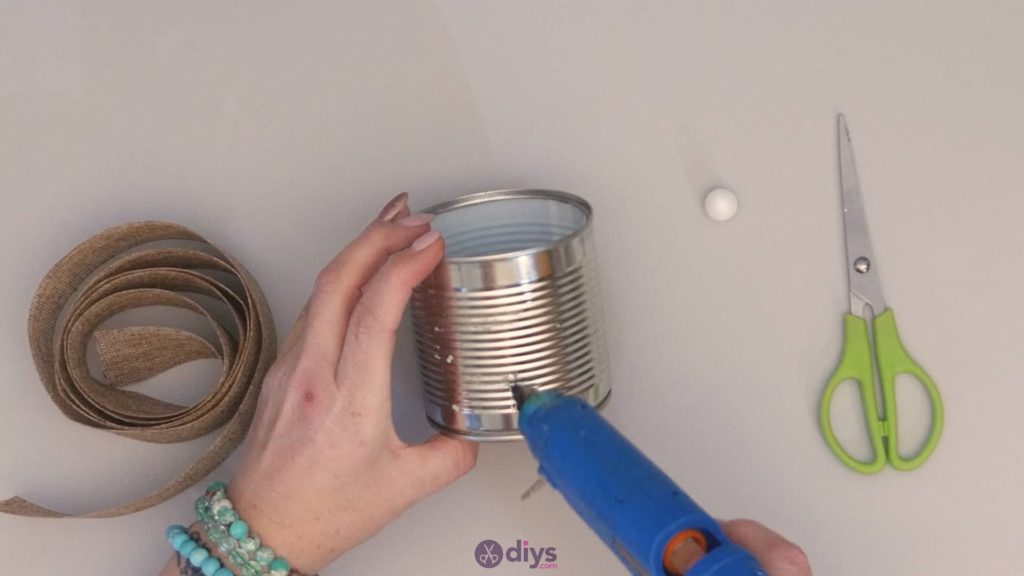
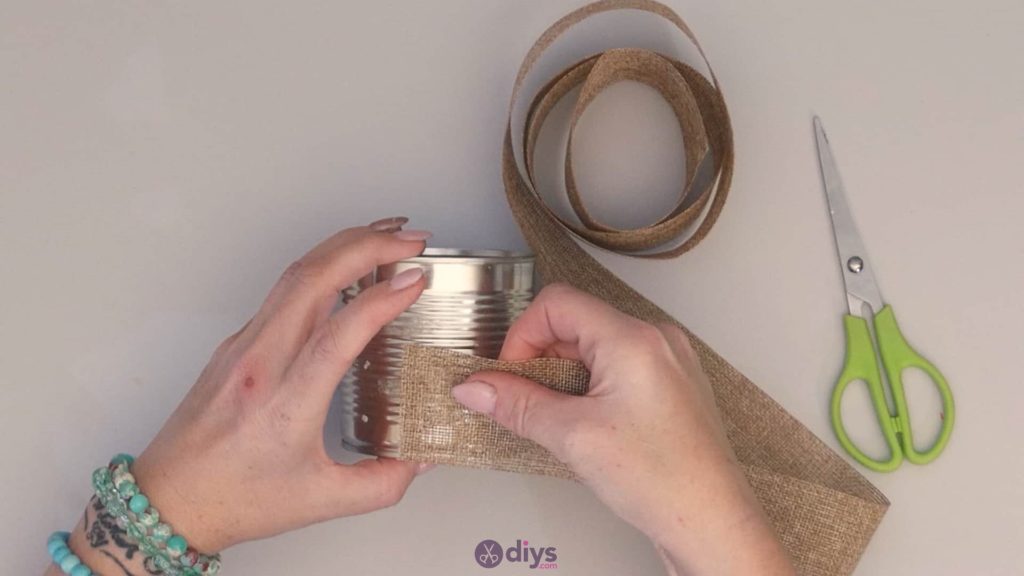
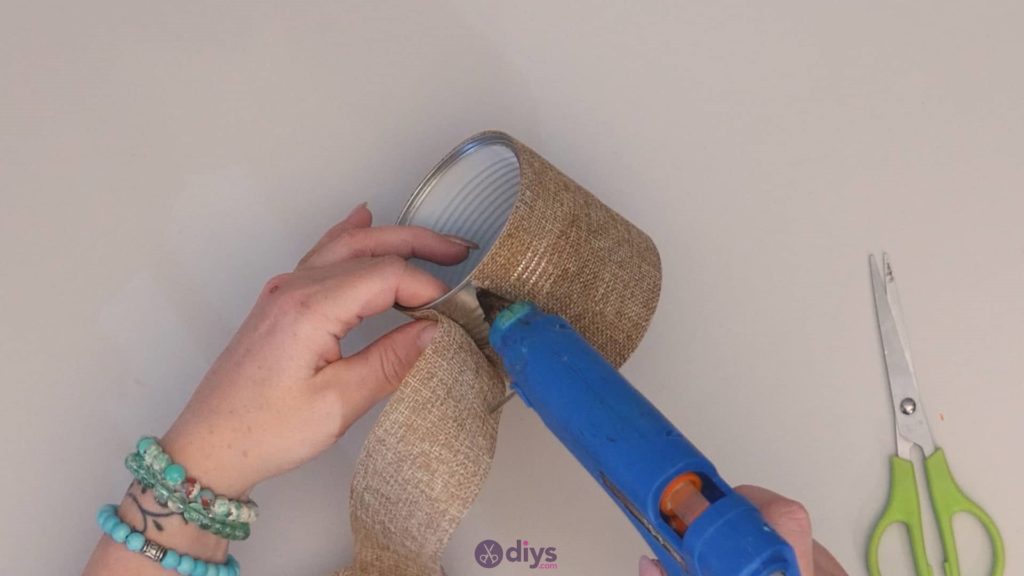
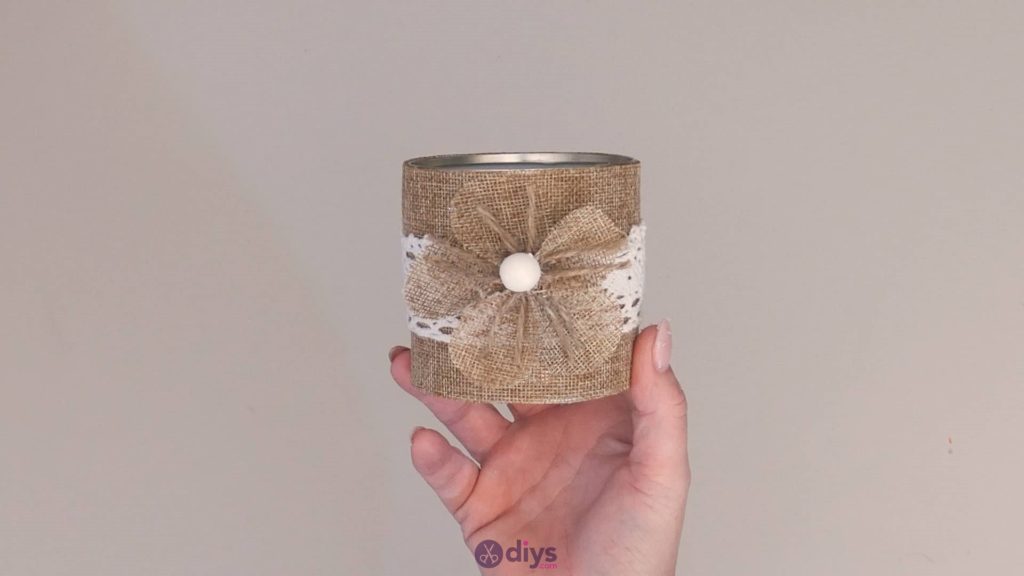
Wrap the outside of your tin can entirely in jute trim. The thickness of my trim was only about half the height of the can, so I wrapped the bottom half first and then the top half. Apply some glue in a vertical line near the bottom edge and glue the short edge of the trim down there so you can wrap the trim horizontally around the can. Keep the long edge perfectly lined up with the bottom edge of the can as you wrap. When you get back to your starting point, apply a bit of glue along the edge of that first end and stick your trim down there, trimming off the excess. Repeat the process on the top half of the can, starting and ending in the same place as before so you have a distinct back side to your can for when you embellish it and set it on display. If your trim is very thin, you can wrap it around twice for opacity.
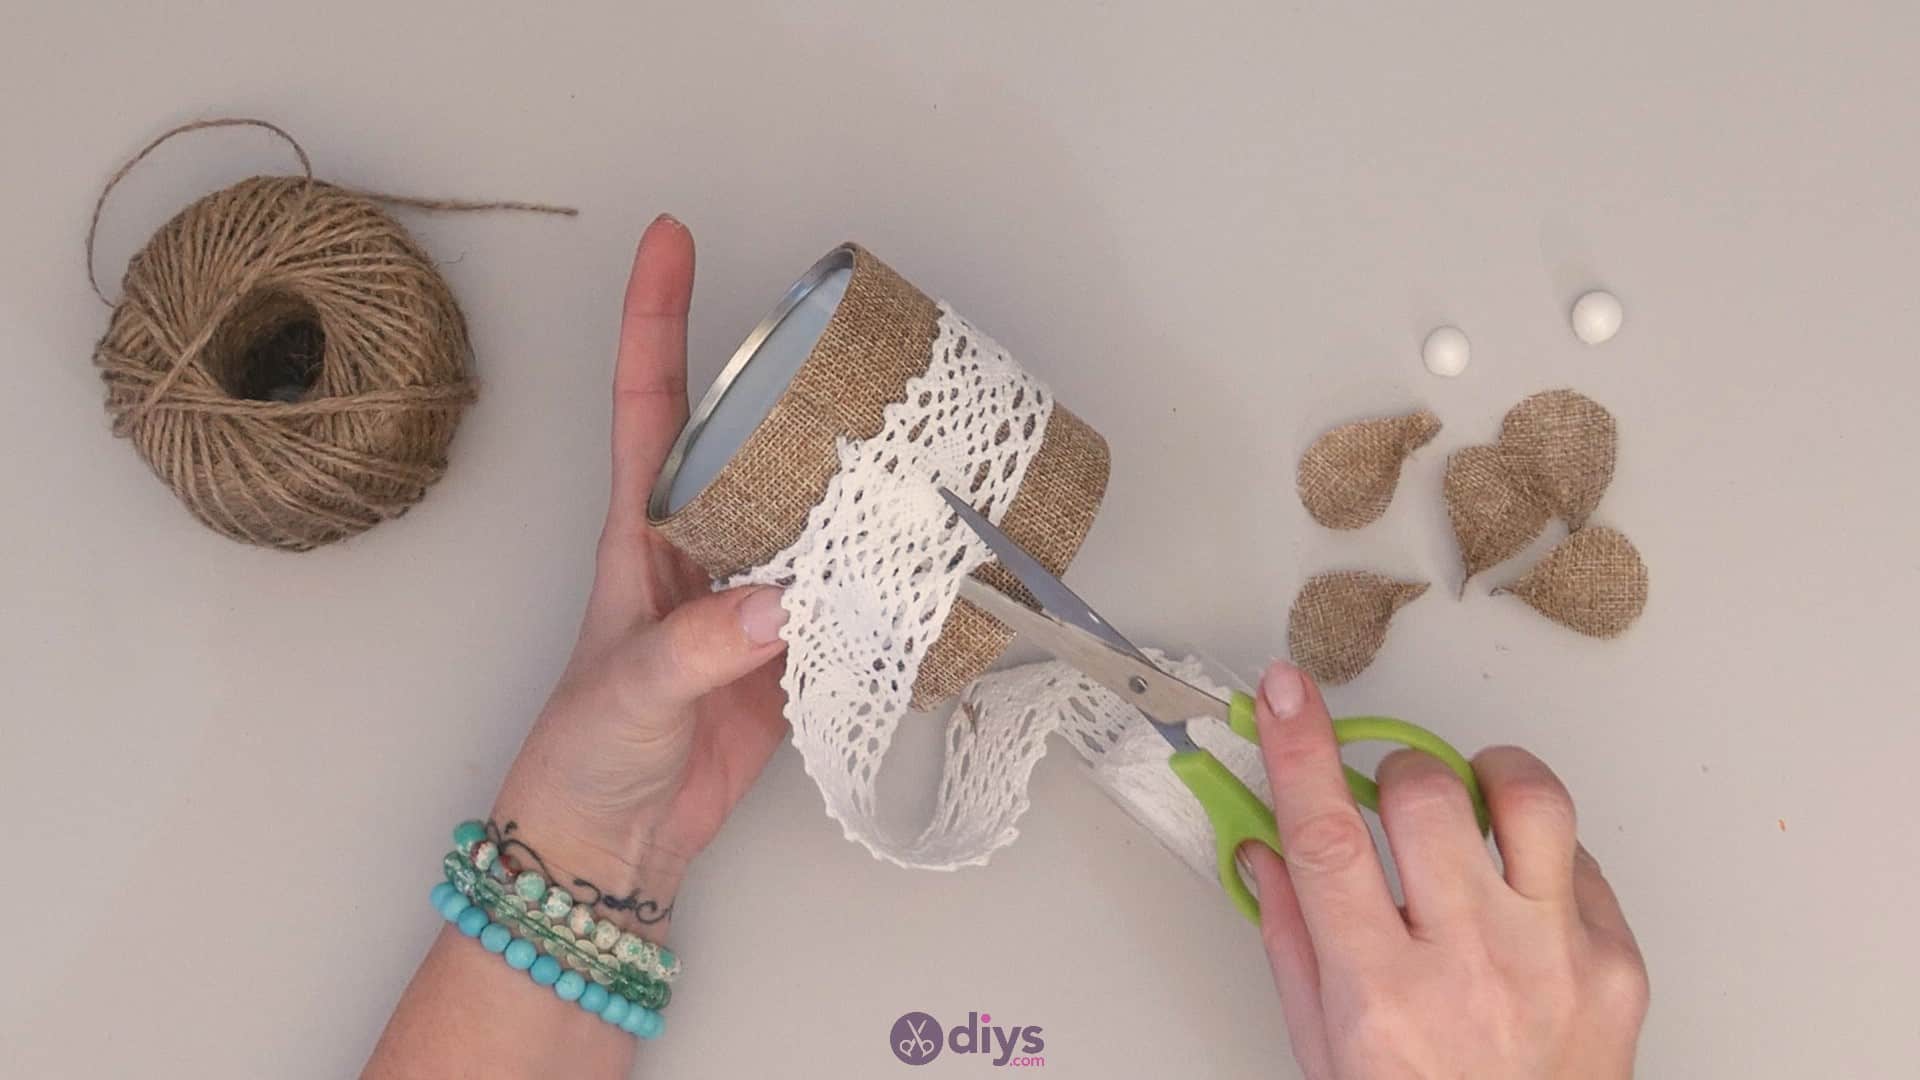
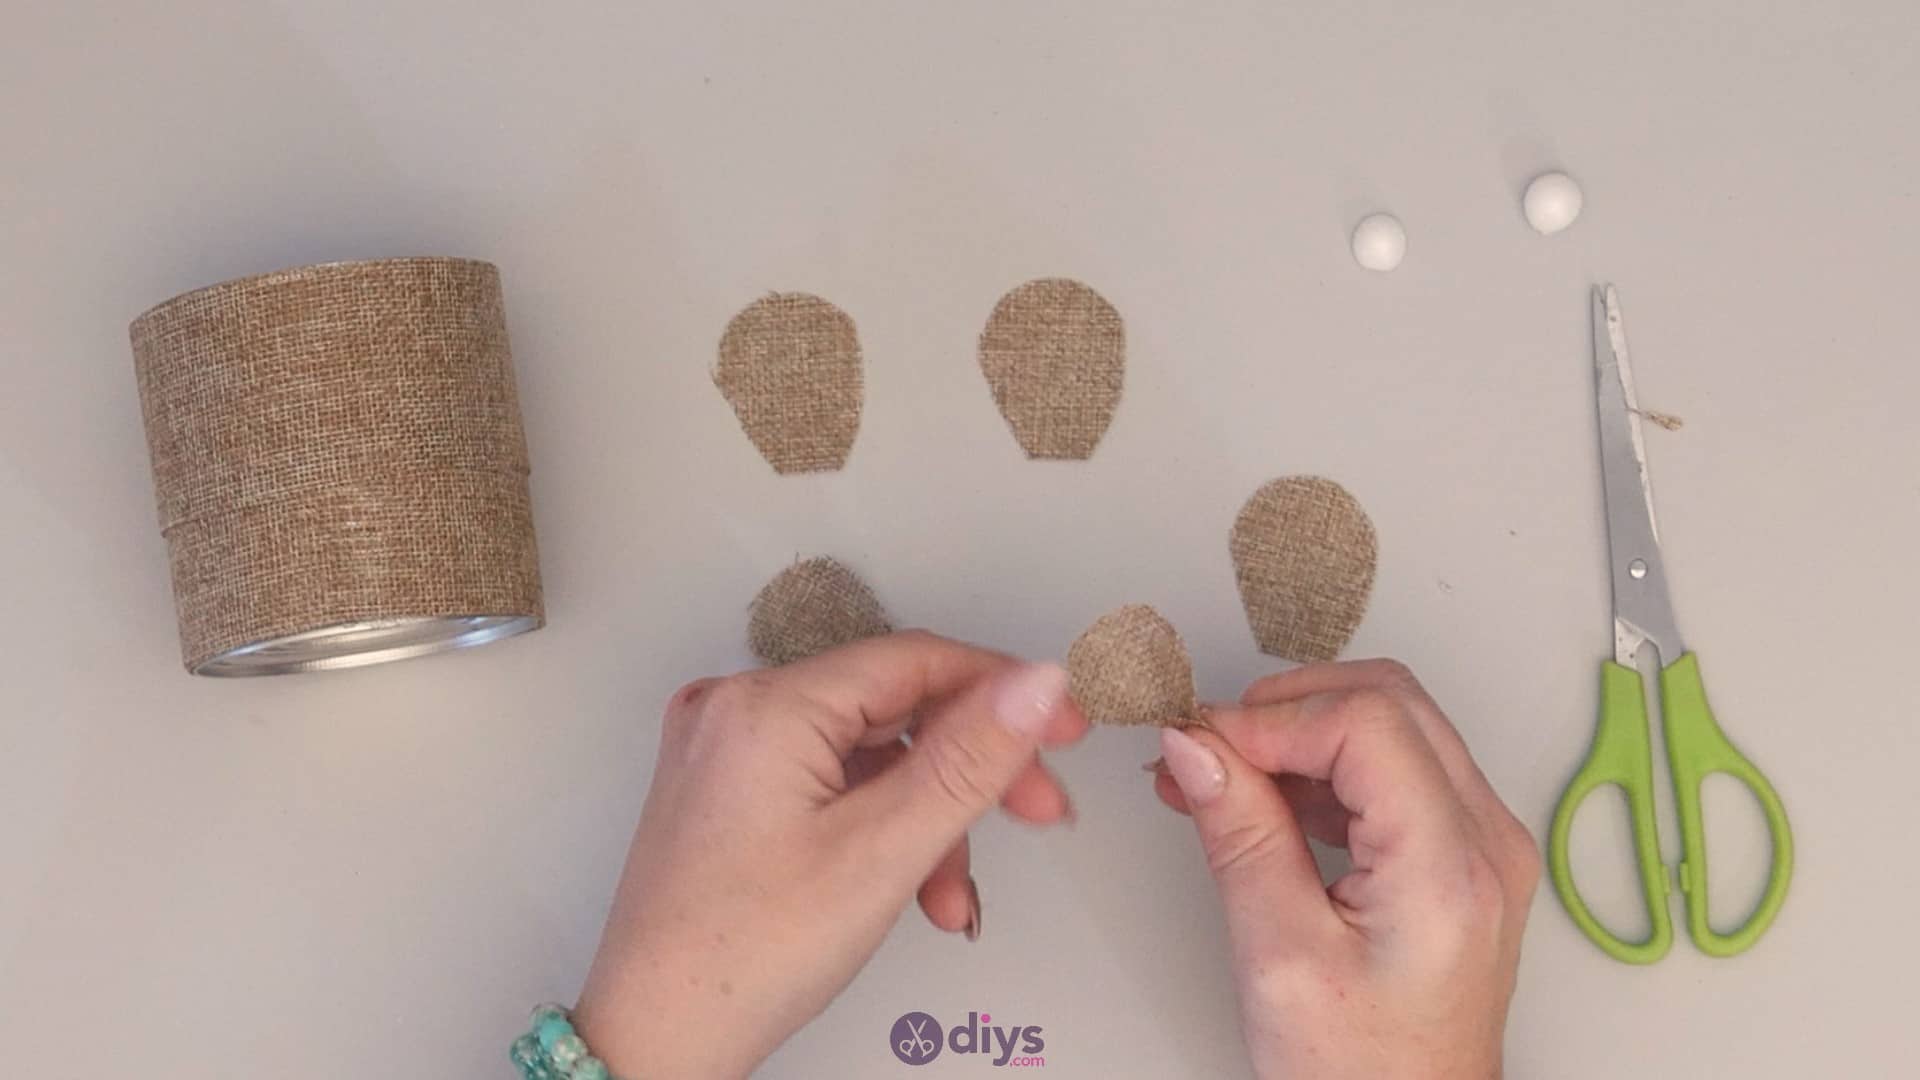
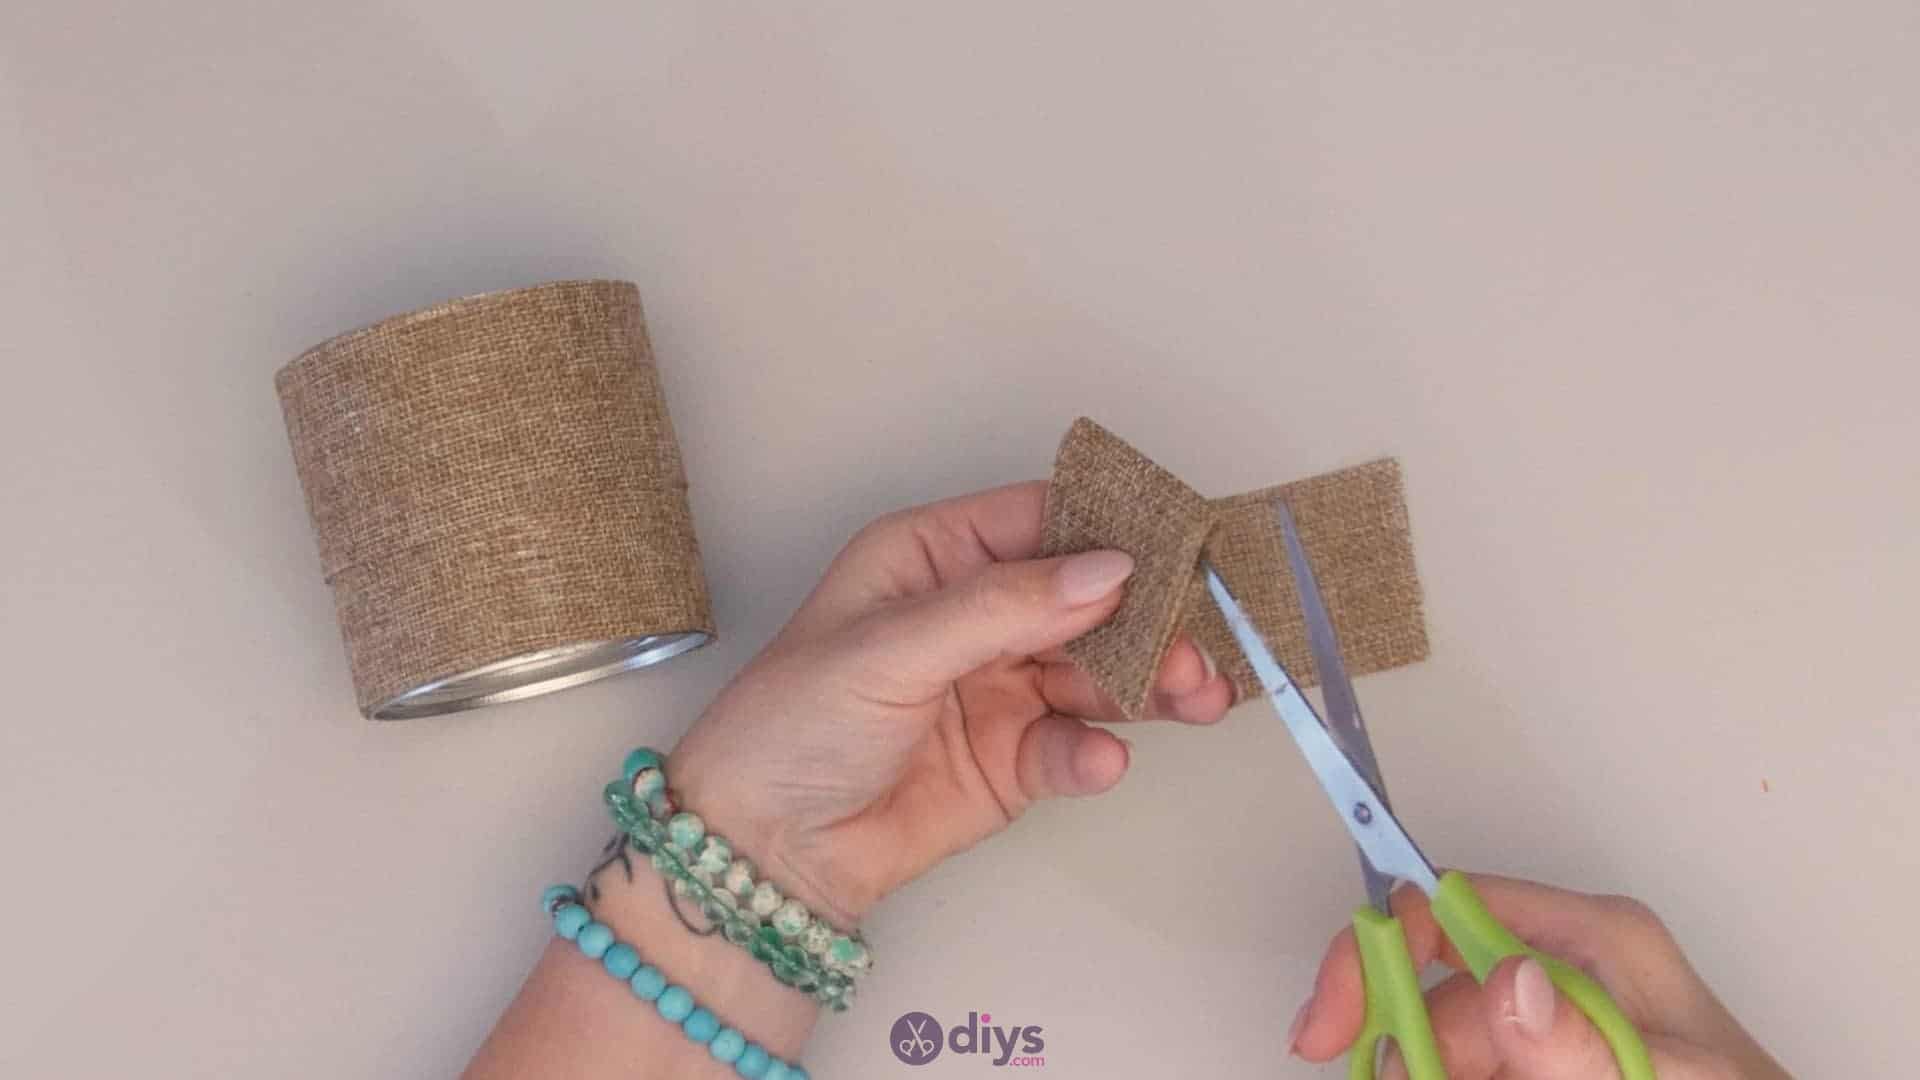
Step 3: make petals
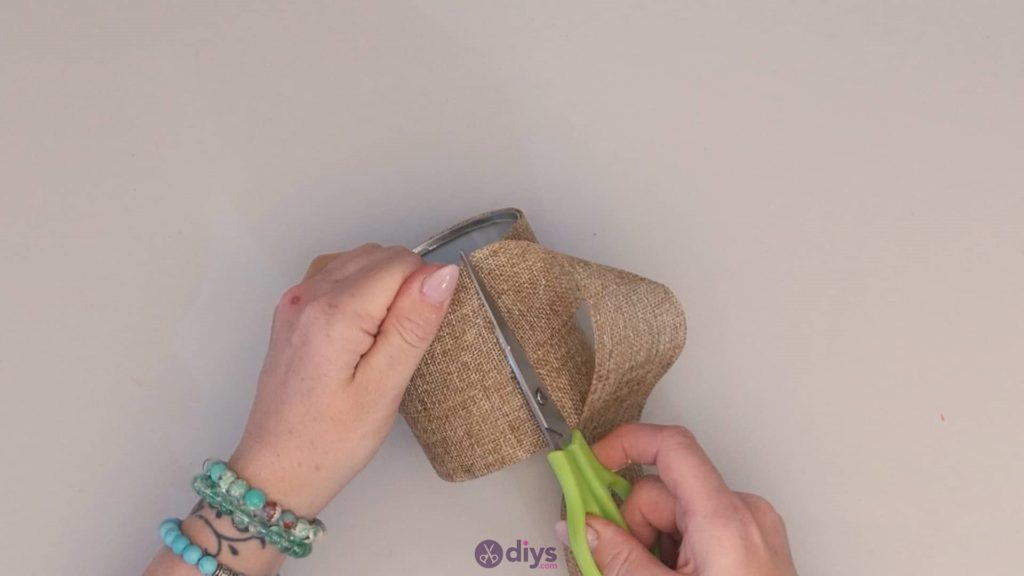
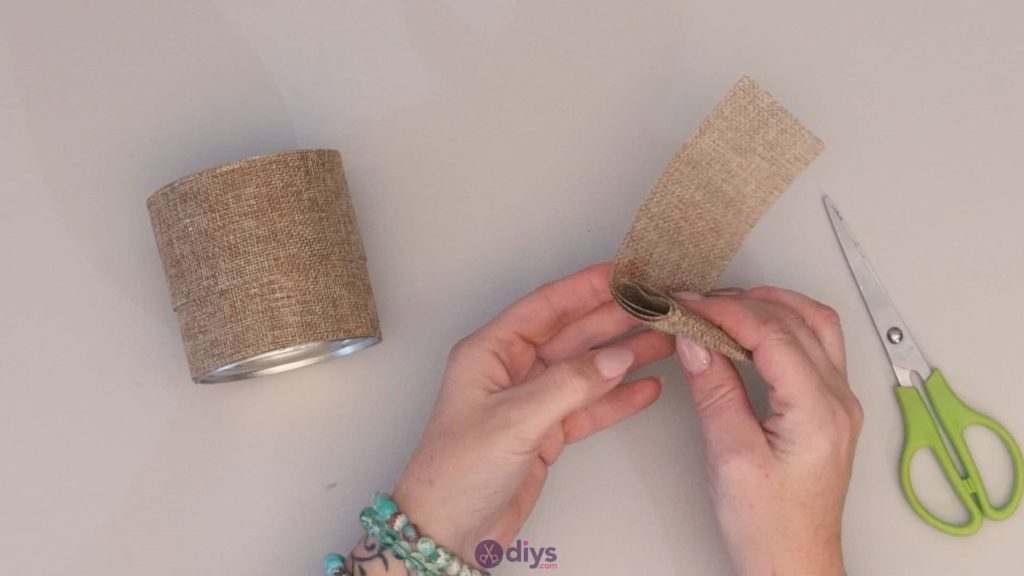
Make a fold from the end of your trim that’s the same length as the width of the trim, so you have a square. Fold it over two more times, all in the same size, and trim the excess off. Pinch the folds together in the centre to hold them in place and use your scissors to cut the edges that have creases free so you now have a small stack of individual squares. Remove one- you only need five squares- and then use your scissors to cut out the shape of a petal. Make sure you cut throughall of the squares at once so you get five of the same shape in the same size. My petals were rounded at the top and then tapered down towards a straight edge. When you pull them apart, you’ll have five flower petals.
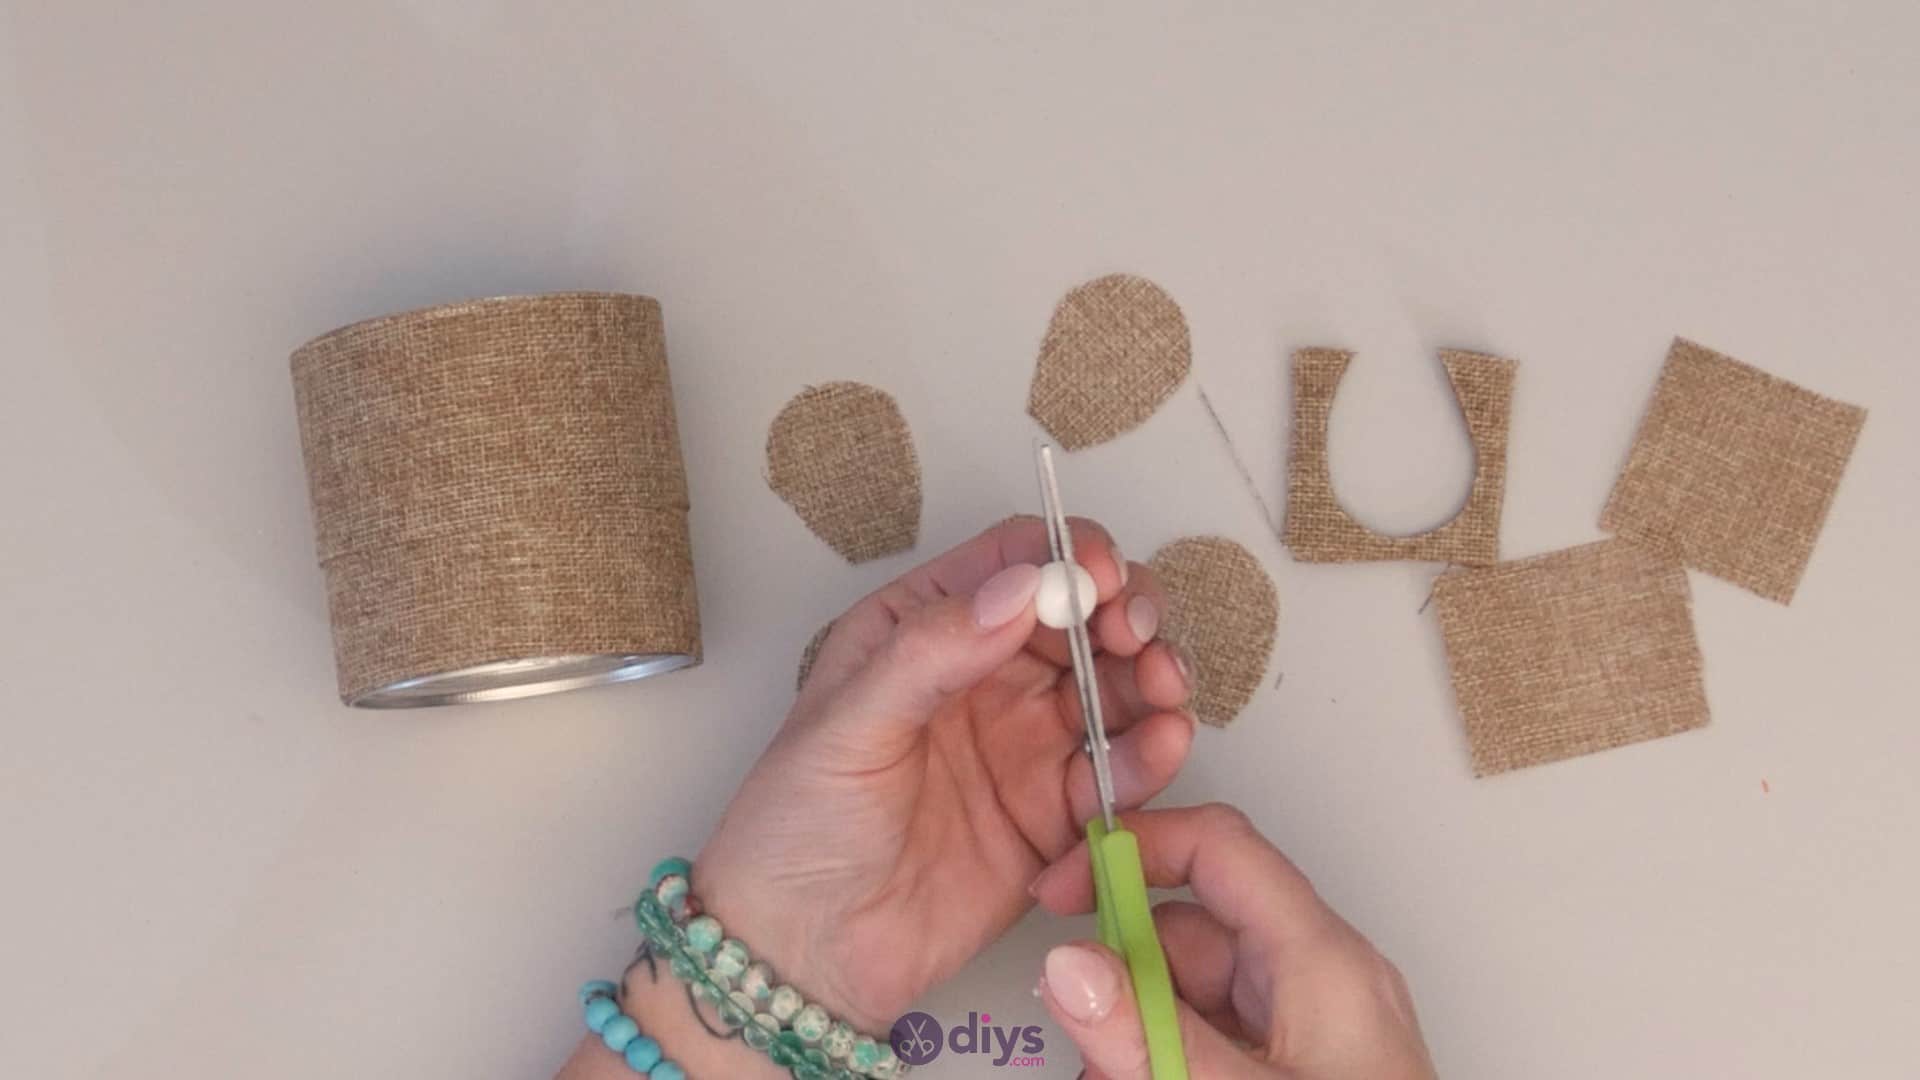
Step 4: cut styrofoam ball
Use your scissors to cut your little styrofoam sphere in half so that you have two circular shapes with flat backs. You’ll use one of these as the centre of your flower in a moment. Set them aside for now.

Step 5:
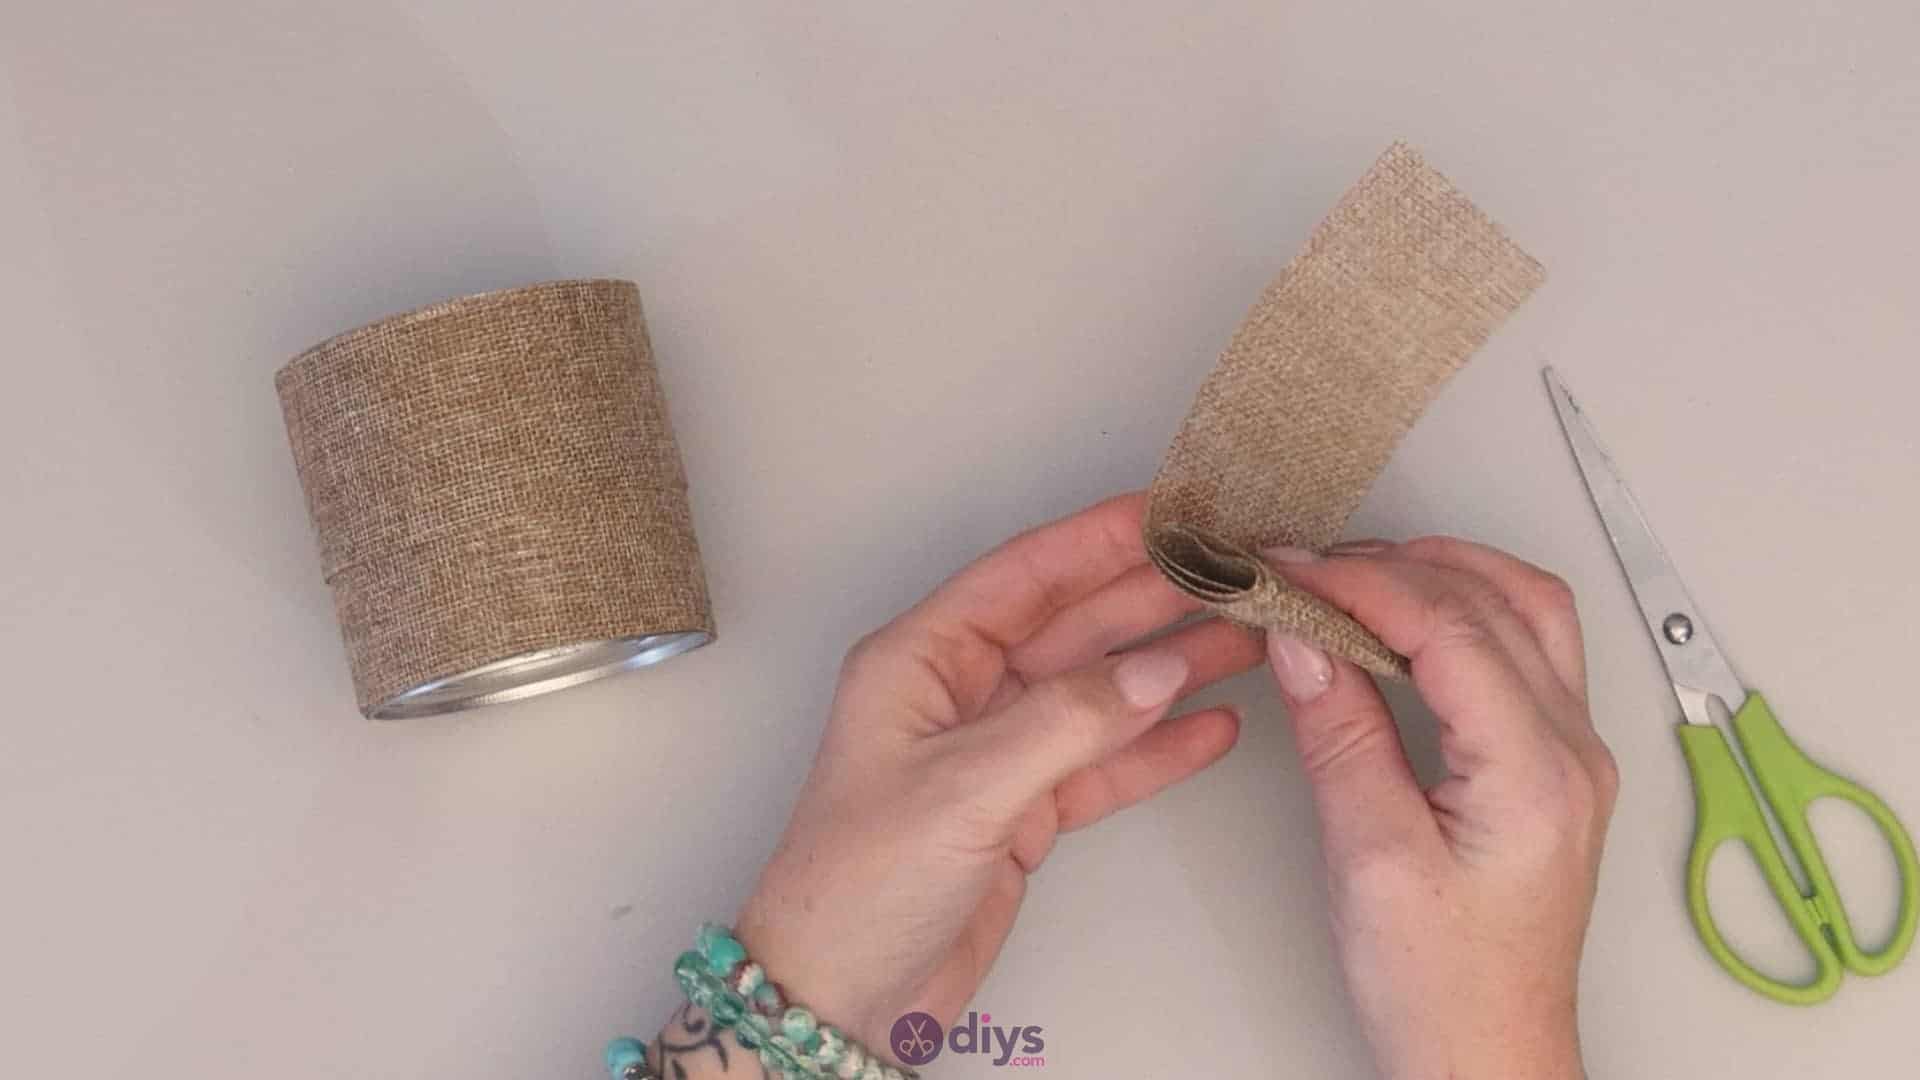
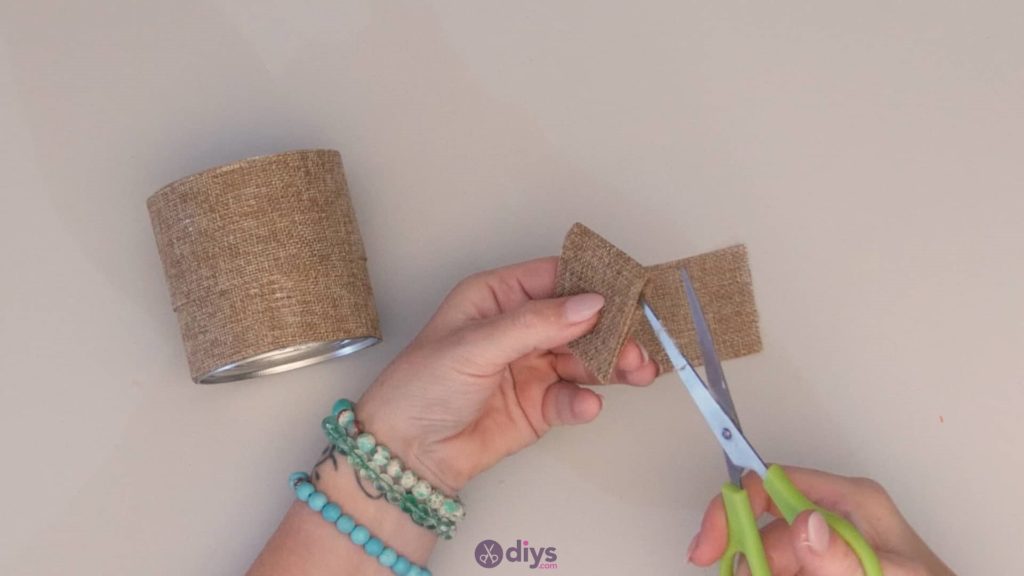
On each of your burlap trim petals, apply a dot of hot glue in the middle of the bottom flat edge and bring the two corners of that edge together to close the bottom of the petal, pinching them together. This gives the petal a scooped shape like an actual flower. You’ll repeat this process for all five of your flowers.

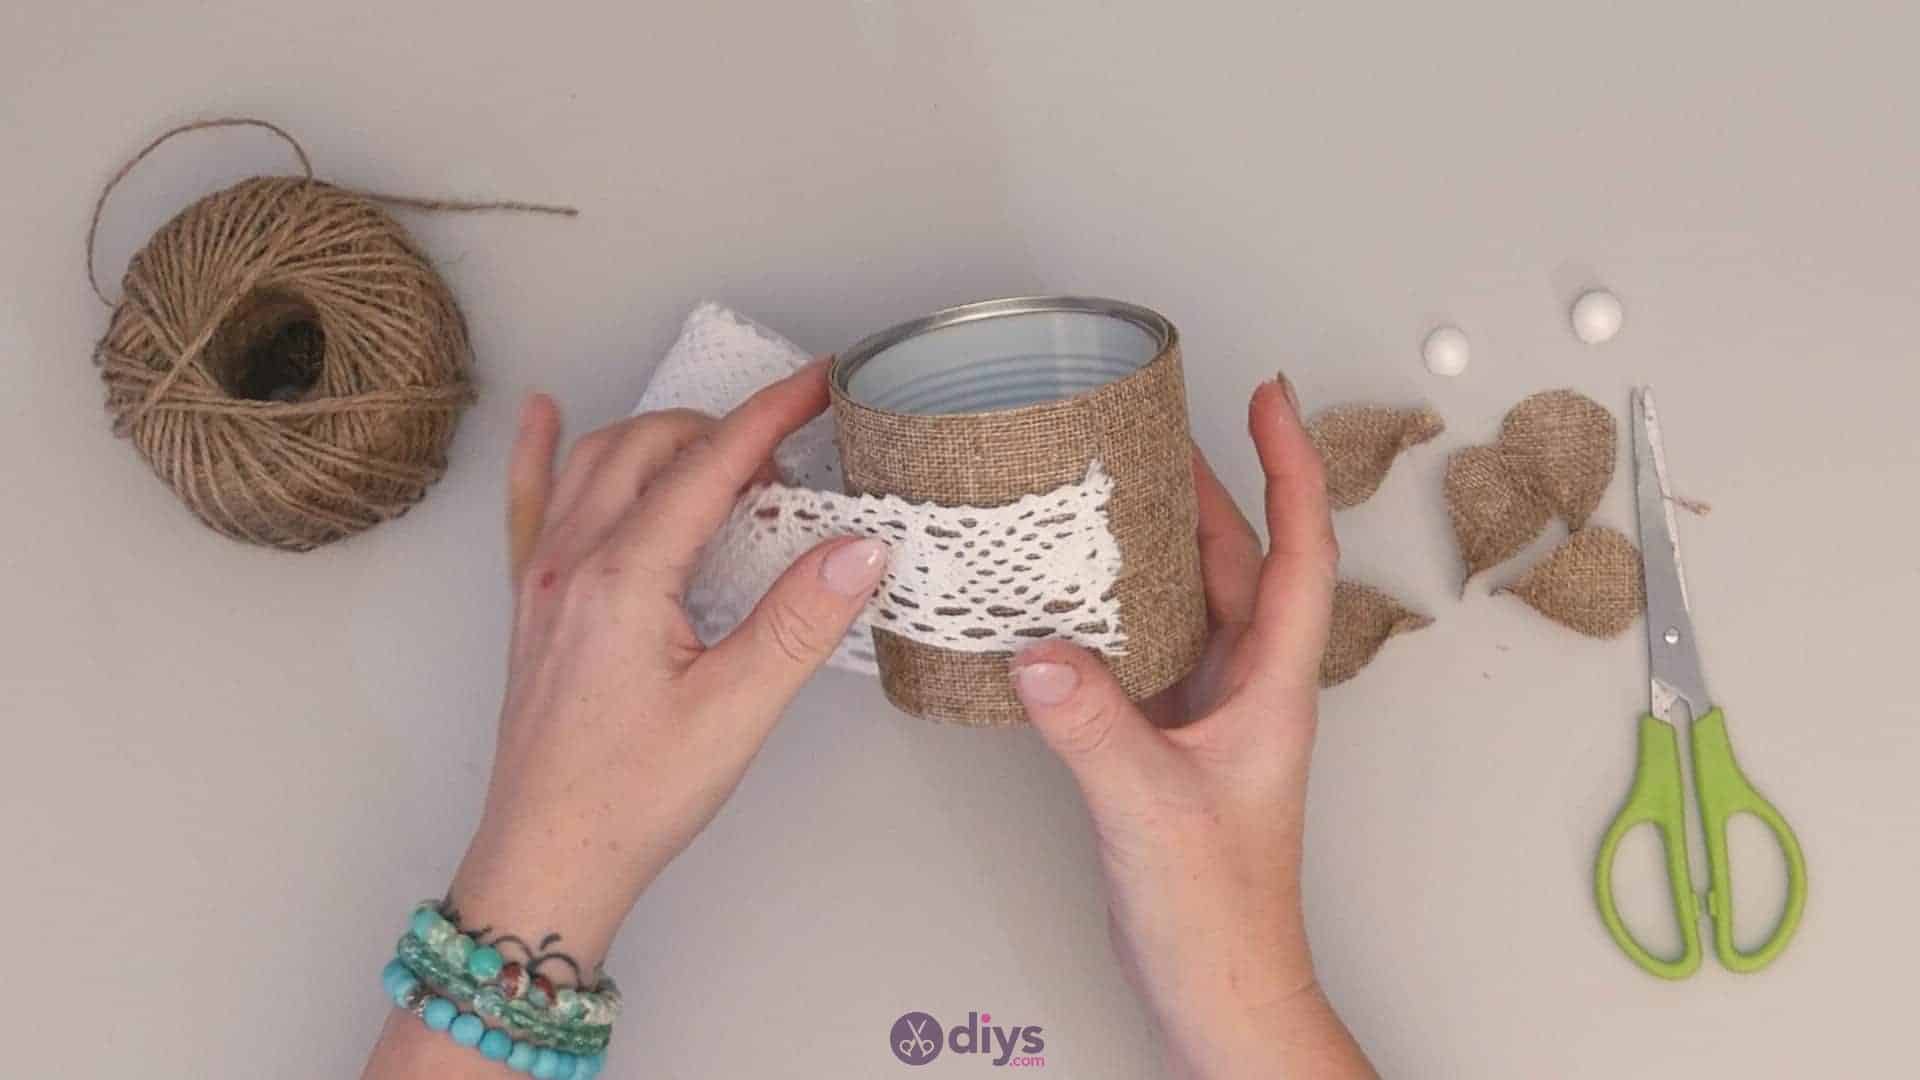
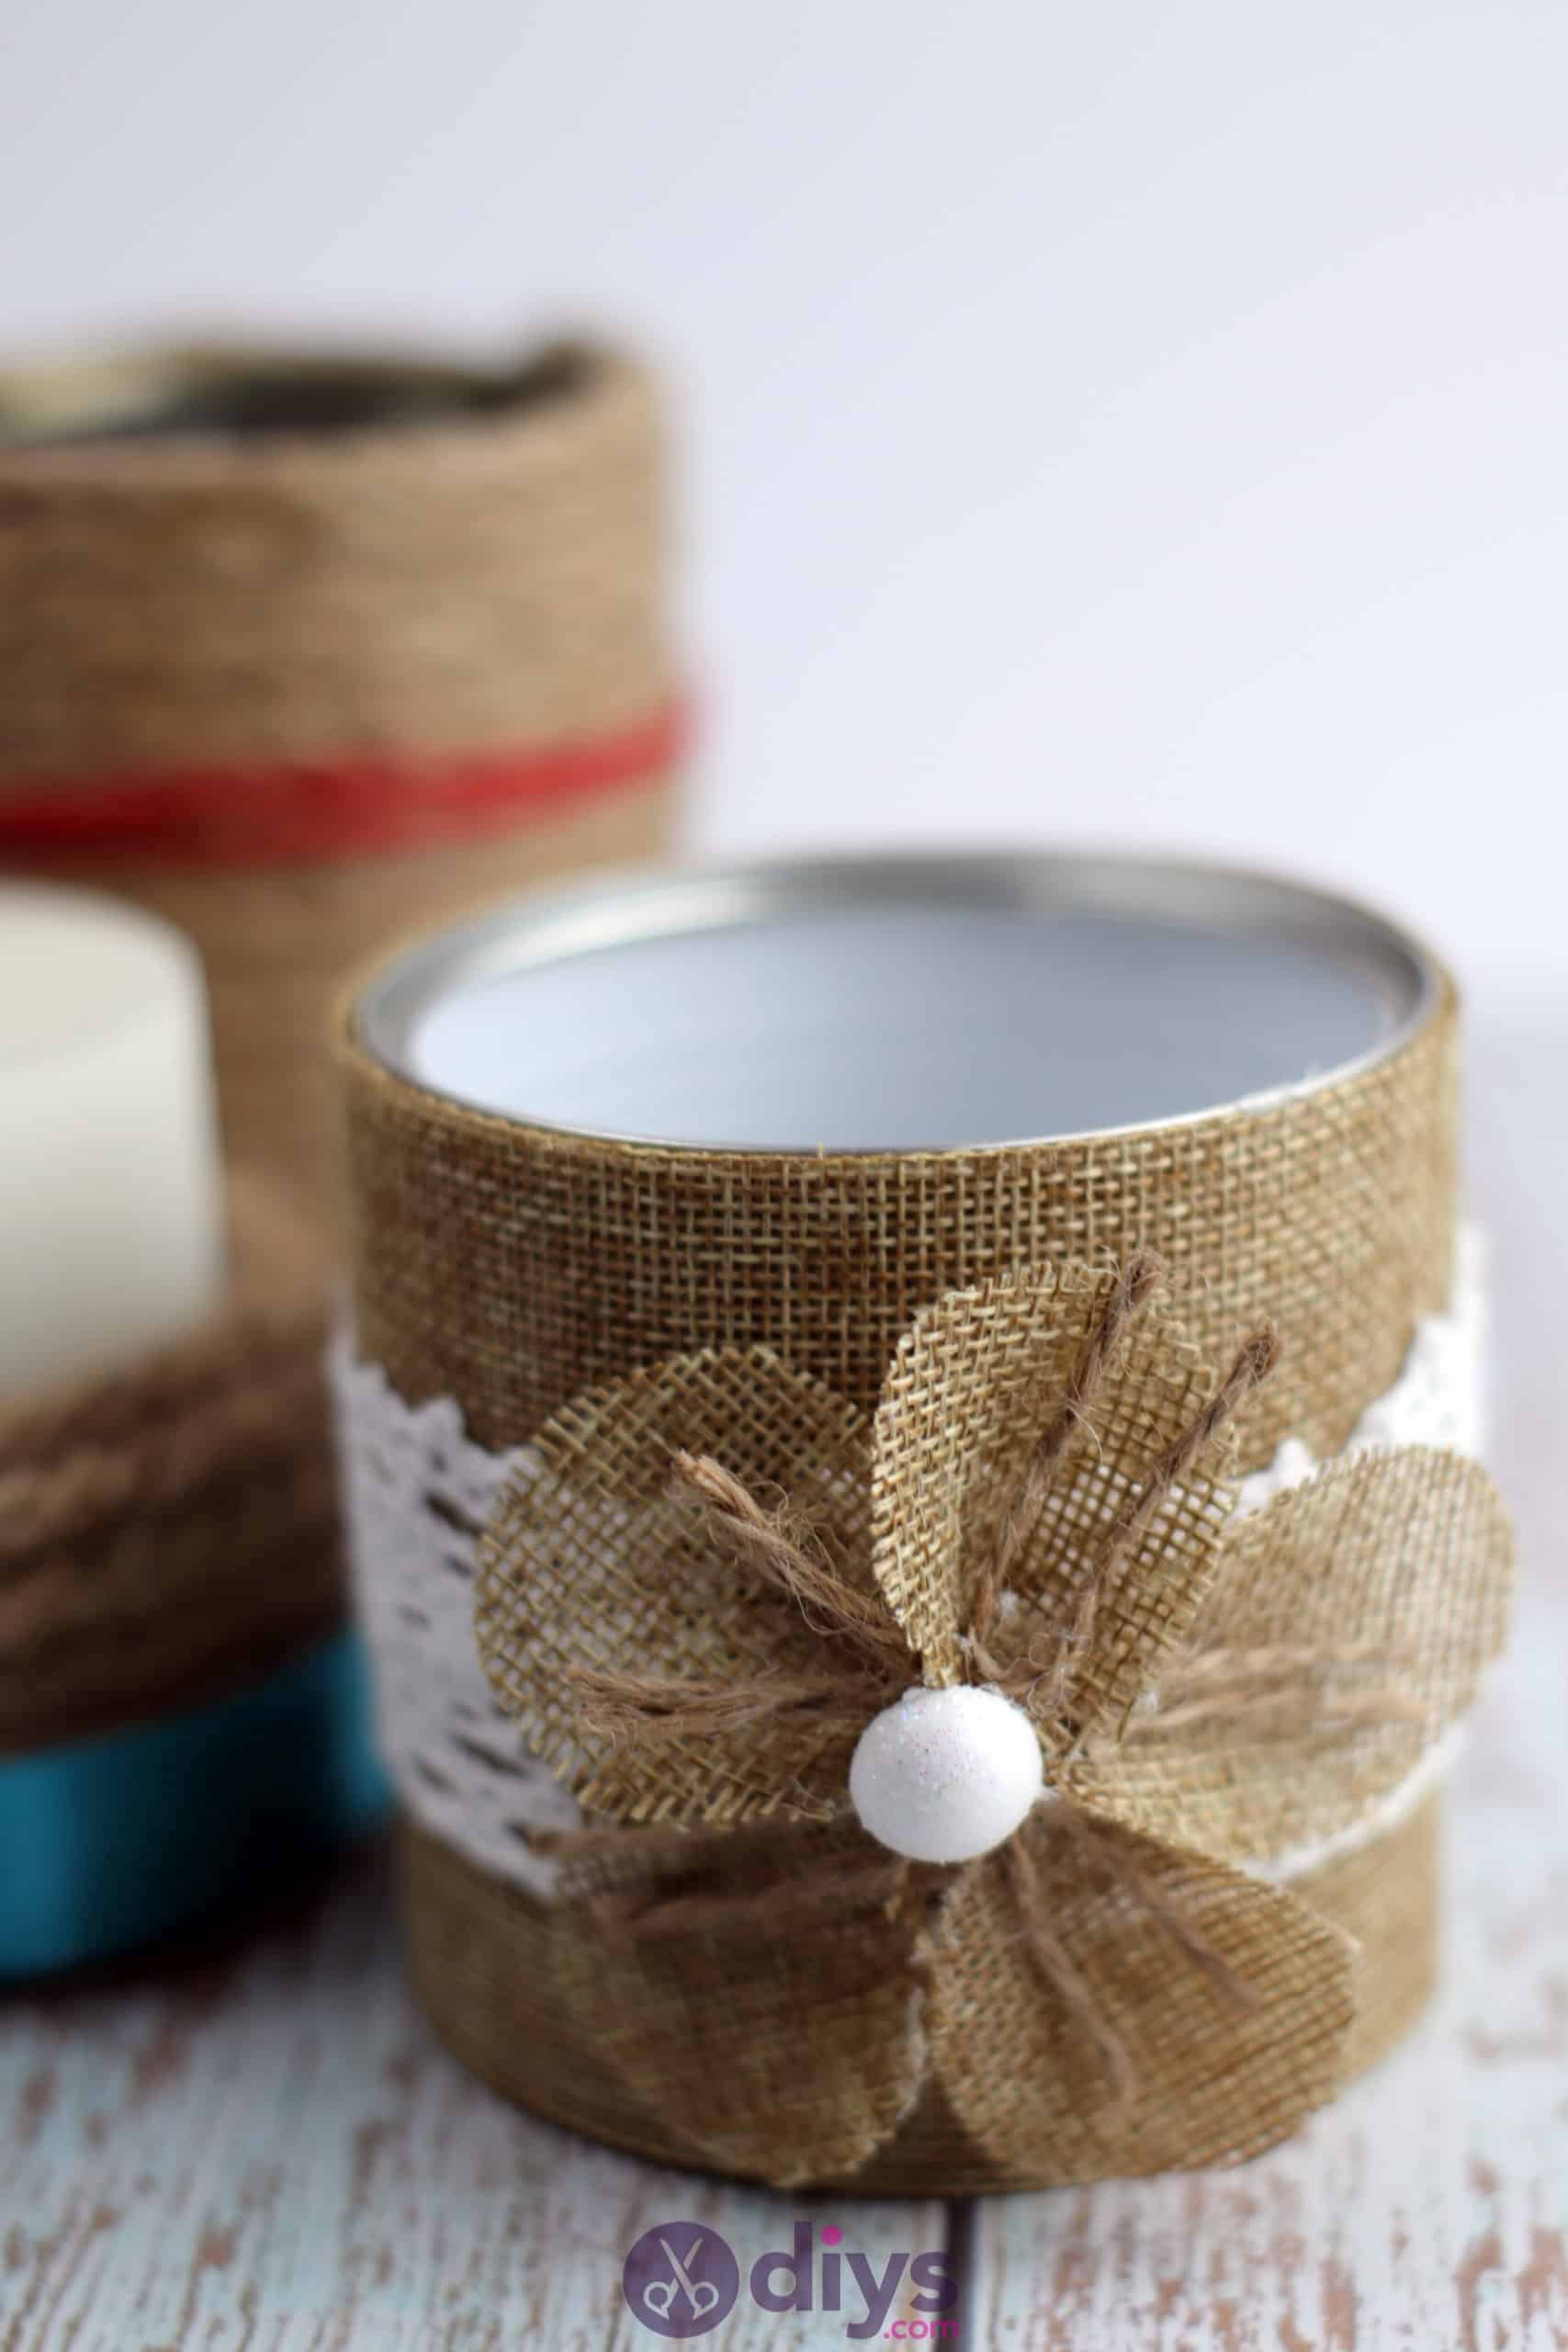
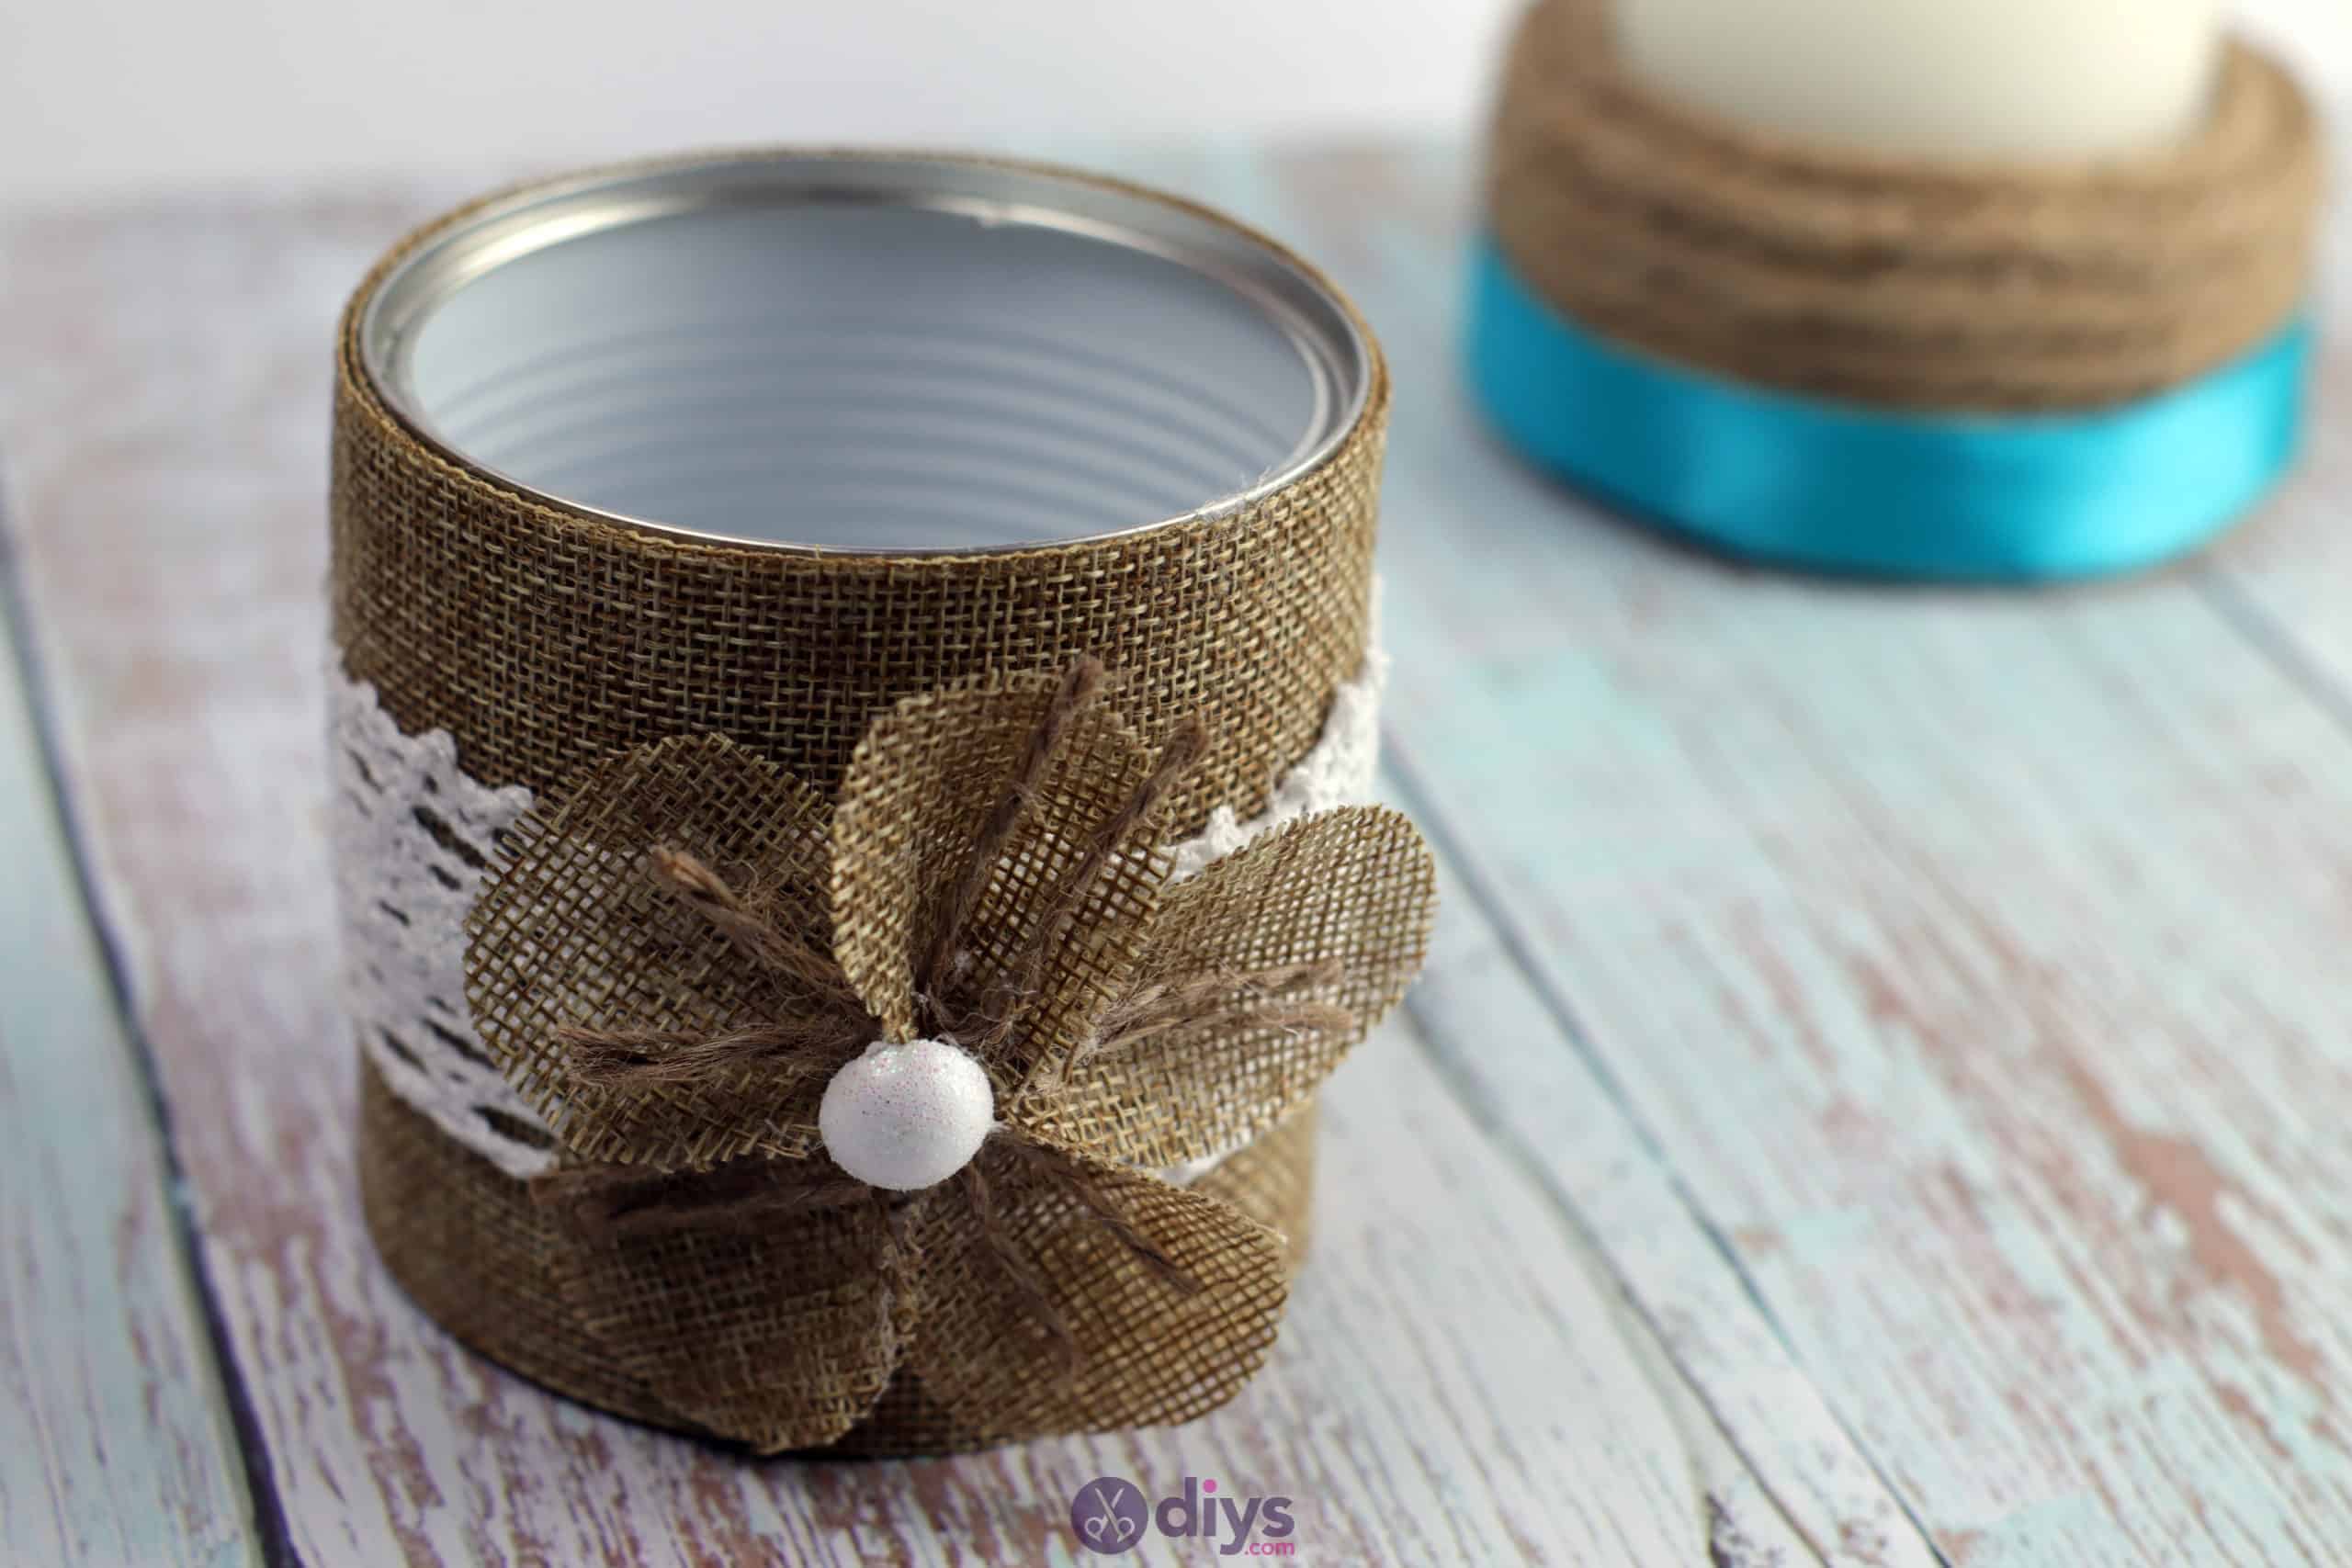
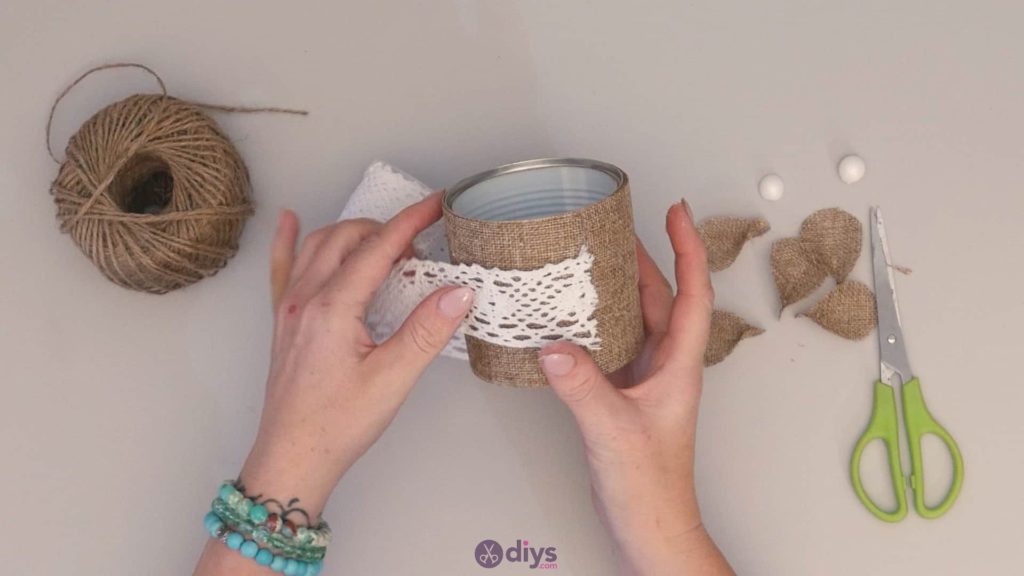
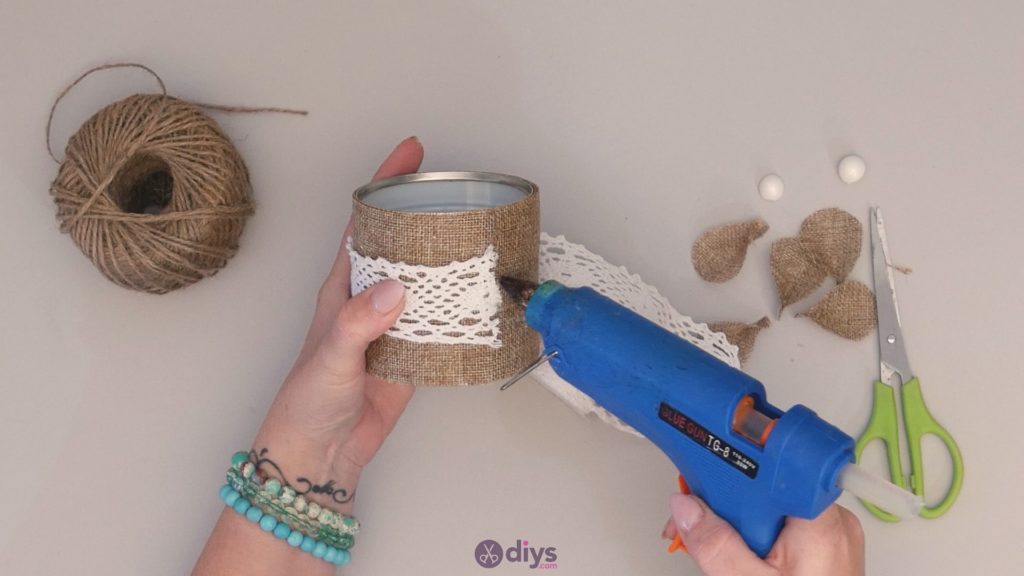
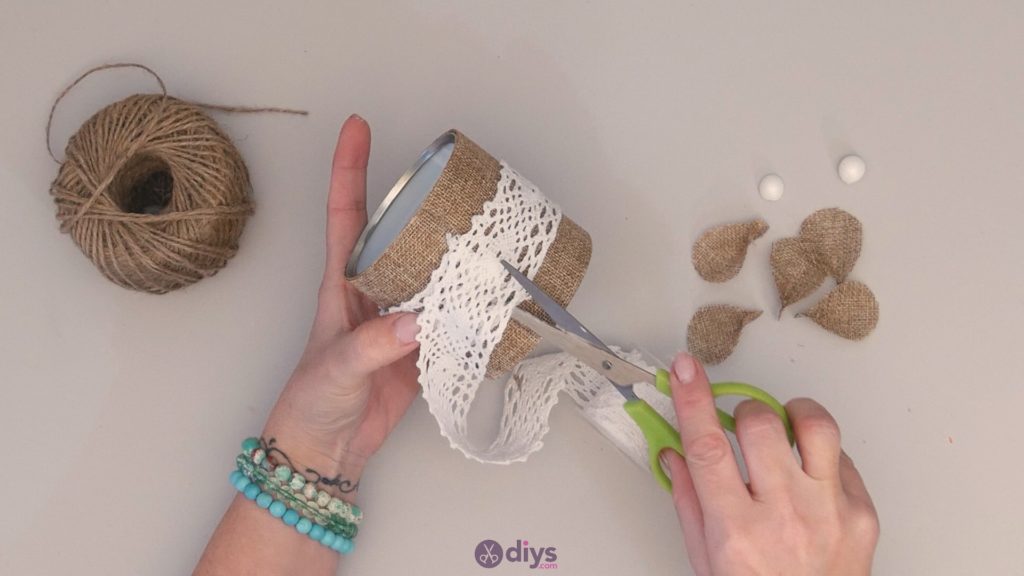
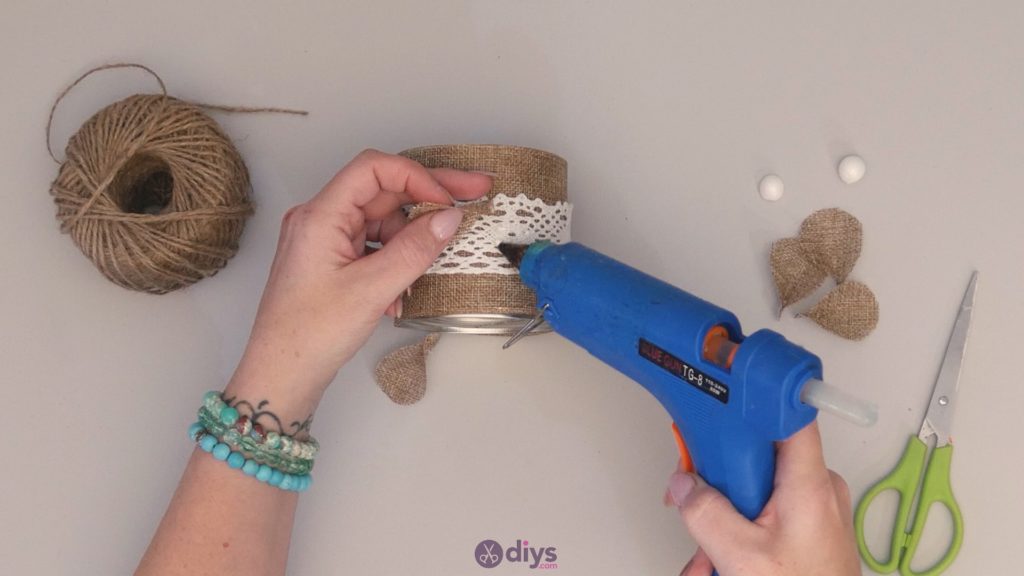
Step 6: add lace
Add a lace trim around the centre of the can for detail! You’ll use the same wrapping technique as you used with the burlap earlier to cover the can, but this time higher up the can around the middle. Glue down the short edge at one end (start and end in the same spot you did it with the burlap for the sake of neatness), wrap the ribbon all the way around the can until you meet back up with your starting point, apply glue again, stick the ribbon down where it meets the glue, and them trim the excess.
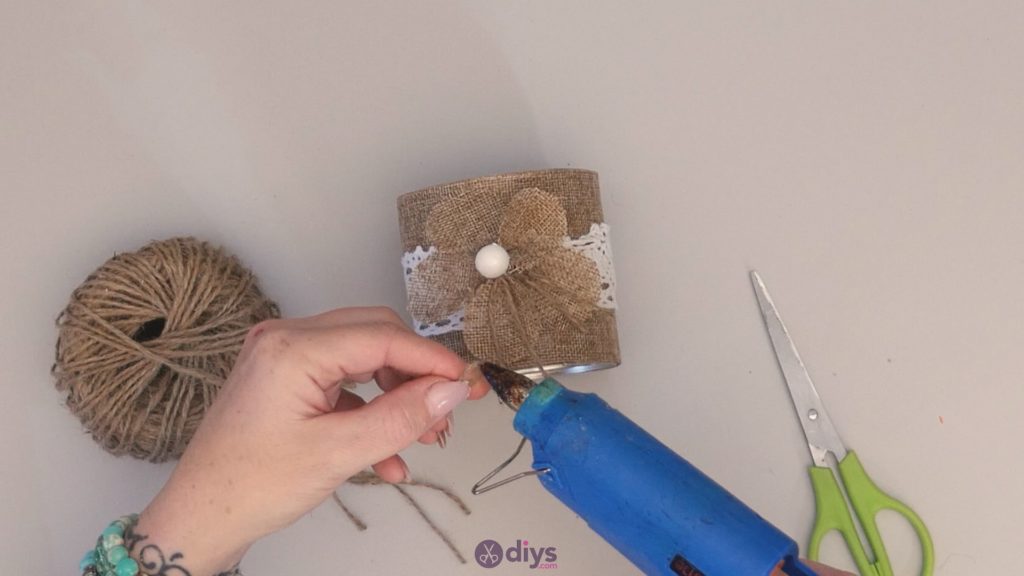
Step 7: add petals
Turn your can around to the side that you want to display as the front; I used the side opposite to where my burlap and lace ribbon seams were. Apply a generous dot of glue in the centre of the lace ribbon on the front and use this as the spot where you’ll anchor down the middle of your burlap flower. Stick the pinched ends of each petal there, positioned so the rounded tops of the petals splay round in a circle while the ends gather together in the glue, where the pollen of the flower would be.
Step 8: add center of flower
Apply glue to the back of one of your little styrofoam circle halves, on the flat side, and press it into the centre of the flower. This is your flower’s pollen!

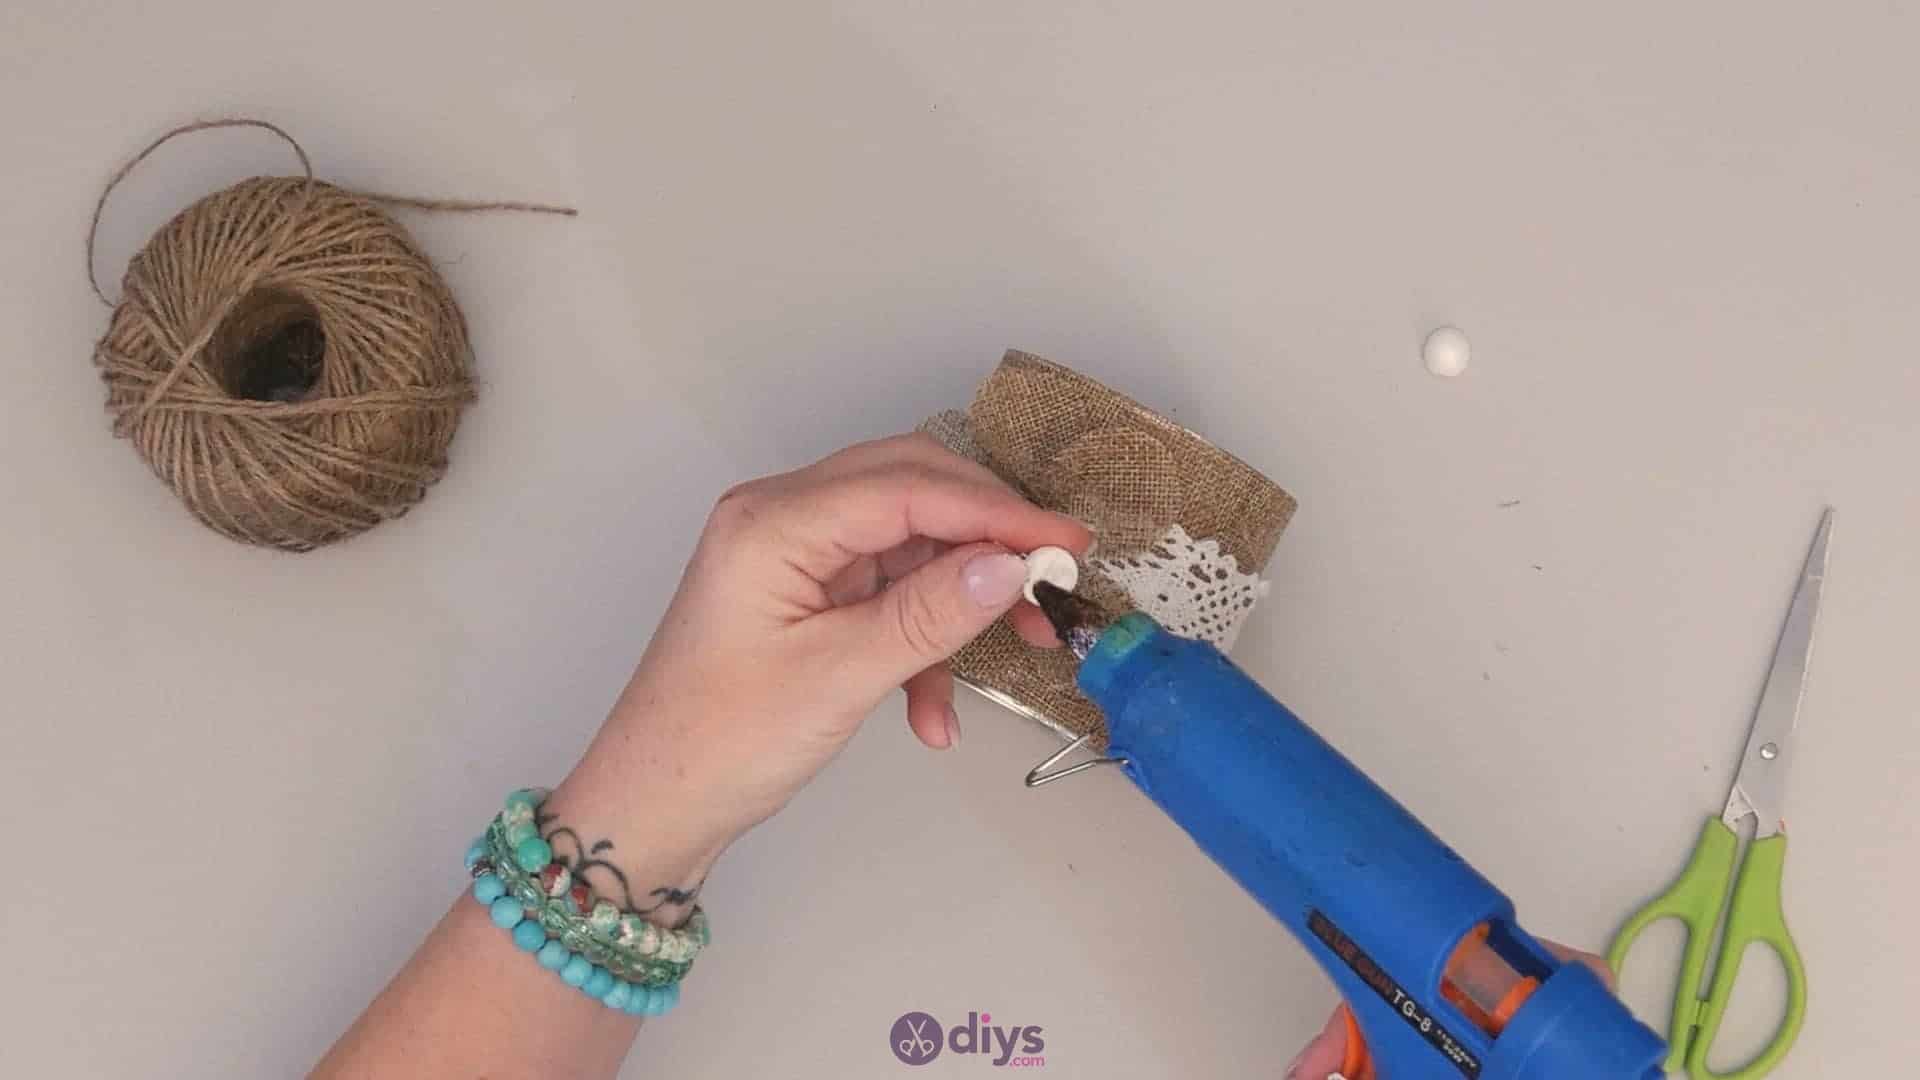
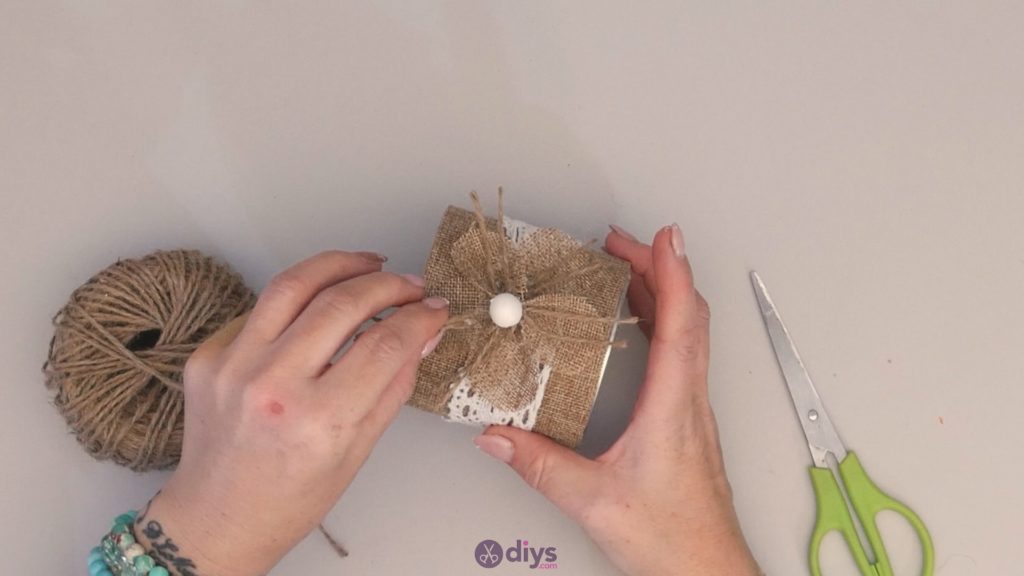
Step 9: add details
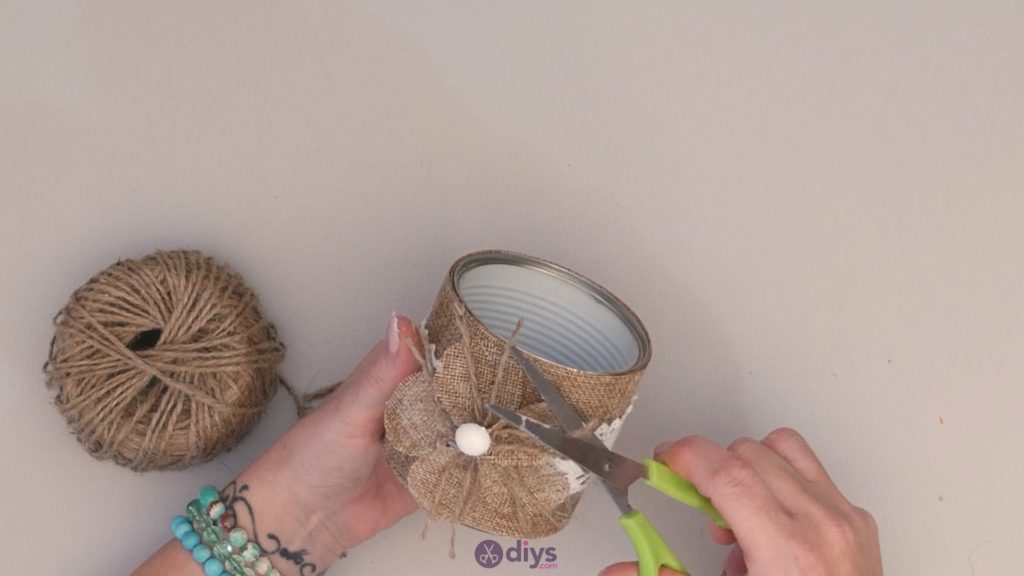
Cut several little one-inch long pieces of hep string or jute twine and pinch them together at one end in bundles of two and three. Apply glue to those pinched ends and nestle them under and between the flower petals so they splay out from underneath. Repeat this process all the way around the flower for detail and then use your scissors to trim them to be even or look however you please, if necessary.

That’s really all there is to it! Of course, you can use this same basic idea but change up your materials, colour scheme, and materials to get a different look or theme. Just in case you’d like to try this project out for yourself, here’s a fantastic tutorial video to help you!