DIY Knit Sweater For Cold Days
Updated on June 25, 2021
If you’re on the hunt for a stylish wrap that will keep you warm on that chilly winter nights, look no further. Today we are sharing an incredibly easy tutorial for a super chic wrap made from light sweater knit material and buttons. So let’s get started.

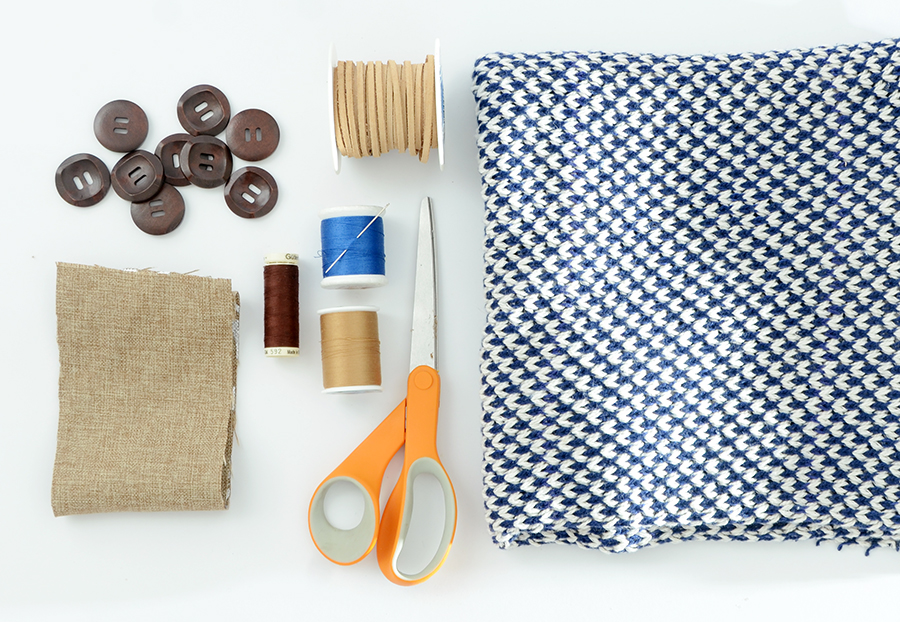
Here’s what you’ll need for your knit wrap:
- 1 yard of sweater knit material
- Scrap of light brown burlap style fabric
- 5-7wooden buttons
- 2 feet of suede cord
- Coordinating thread
- Needle
- Scissors
- Sewing machine
Step by step tutorial to craft the knit sweater:
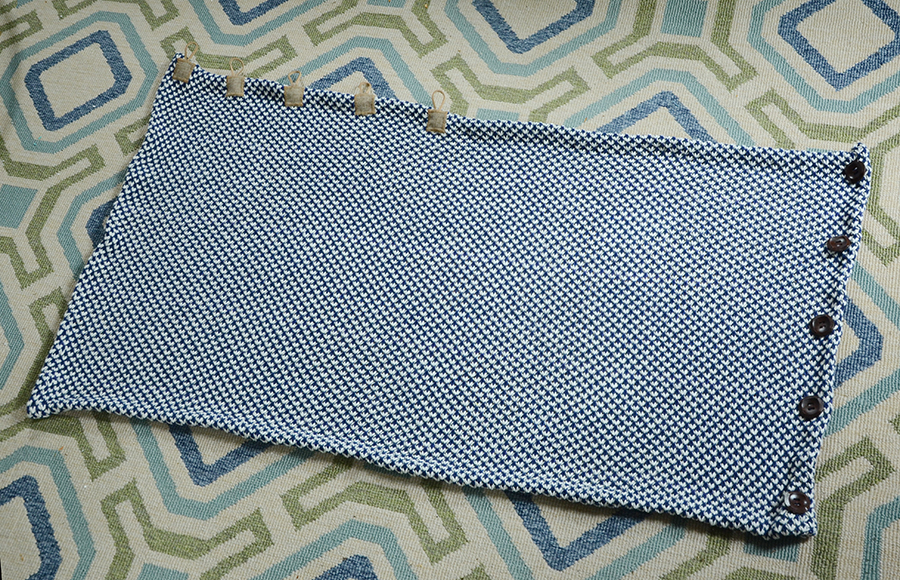
Here is what the completed wrap will look like laid out flat. It will be easier to visualize the steps going forward if you know what the piece should look like at the end.
First, cut and hem your sweater knit fabric. Cut it to 45×27″ for a size small and then hem the whole perimeter by hand, folding it twice to hide the raw edges. If you’d like to make a size medium, cut it to 50×32″ and hem the same way. A large should be about 55×37.” Be sure to drape the fabric over yourself to make sure it fits correctly before hemming.
Note: you’ll want to add six buttons and button loops for a size medium, and seven for a large.
Next, you’ll sew your buttons to the shorter end on the right side. Lay them out evenly along that edge and use safety pins to keep them in place. Use brown thread to attach each one to the fabric. See the third image for layout reference.
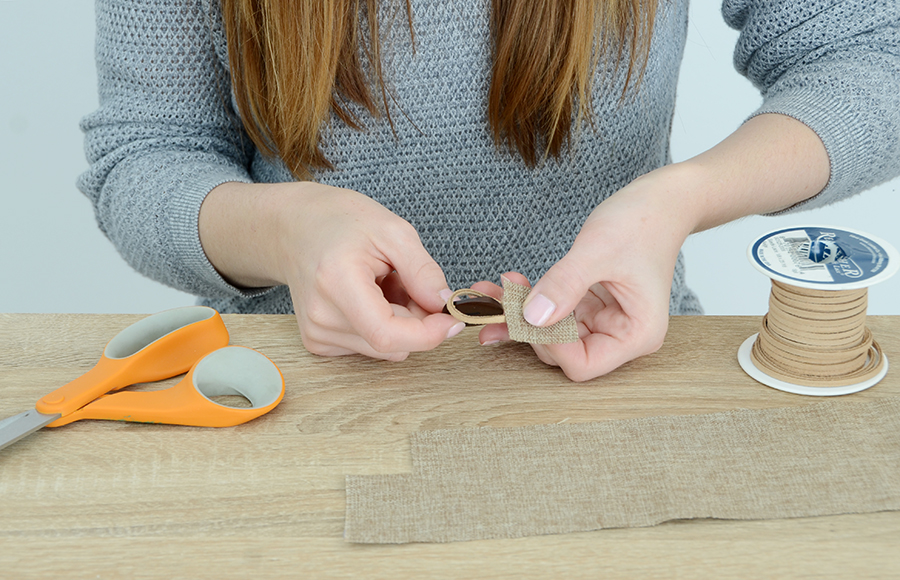
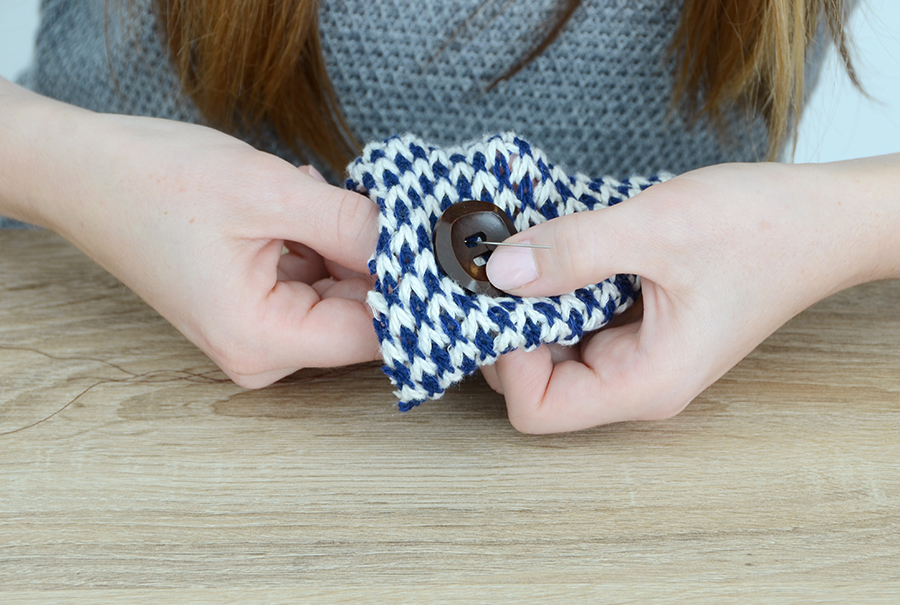
Next,you’ll create your button loops. Cut a one inch square piece of burlap fabric, and a piece of suede that is about three inches long. Loop it and hold with the fabric as shown above to make sure that one of your buttons can easily slide through it.
Pin it to the opposite corner as the buttons, in the top left, with the loop facing upward. Refer to the third image above for this step. Measure the distance between your buttons and pinfour more loops to the right with the same spacing as the buttons.

Sew around the perimeter of each square using a wide zig zag stitch. Sew slowly when you go over the suede cord so you don’t break your needle.
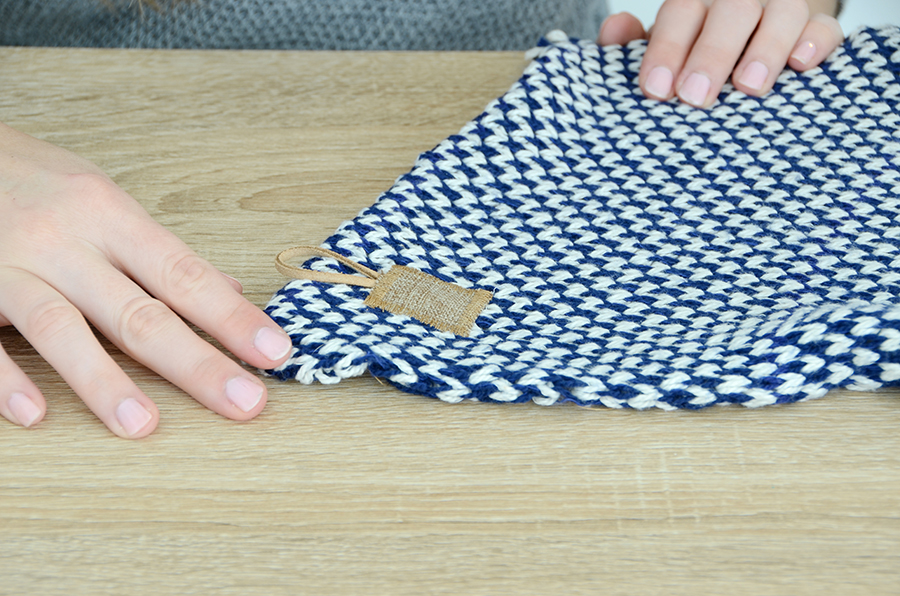
It should look like the image above. Sew the remaining loops to the right of this one, and trim all of your excess threads. And you’re finished!
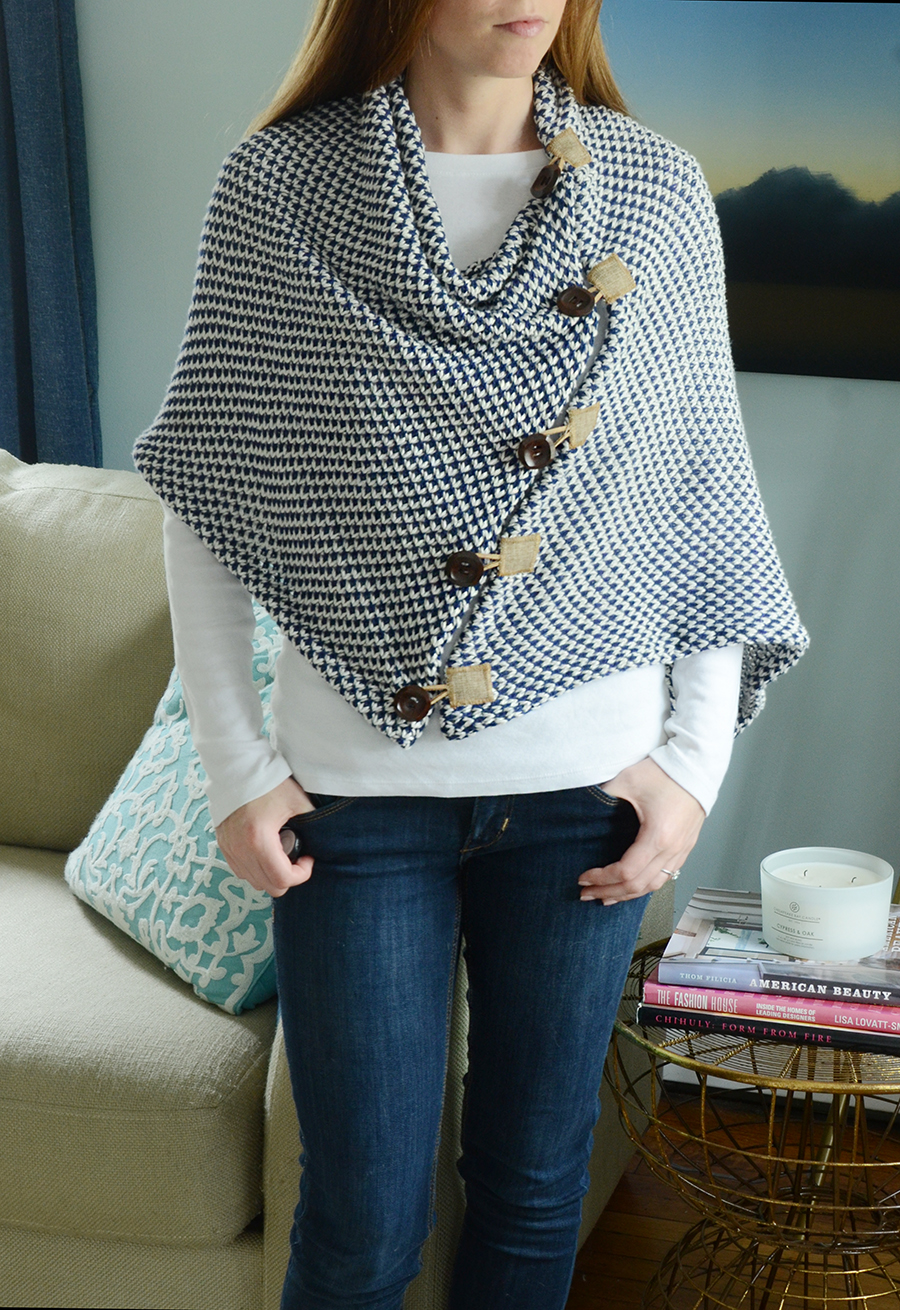
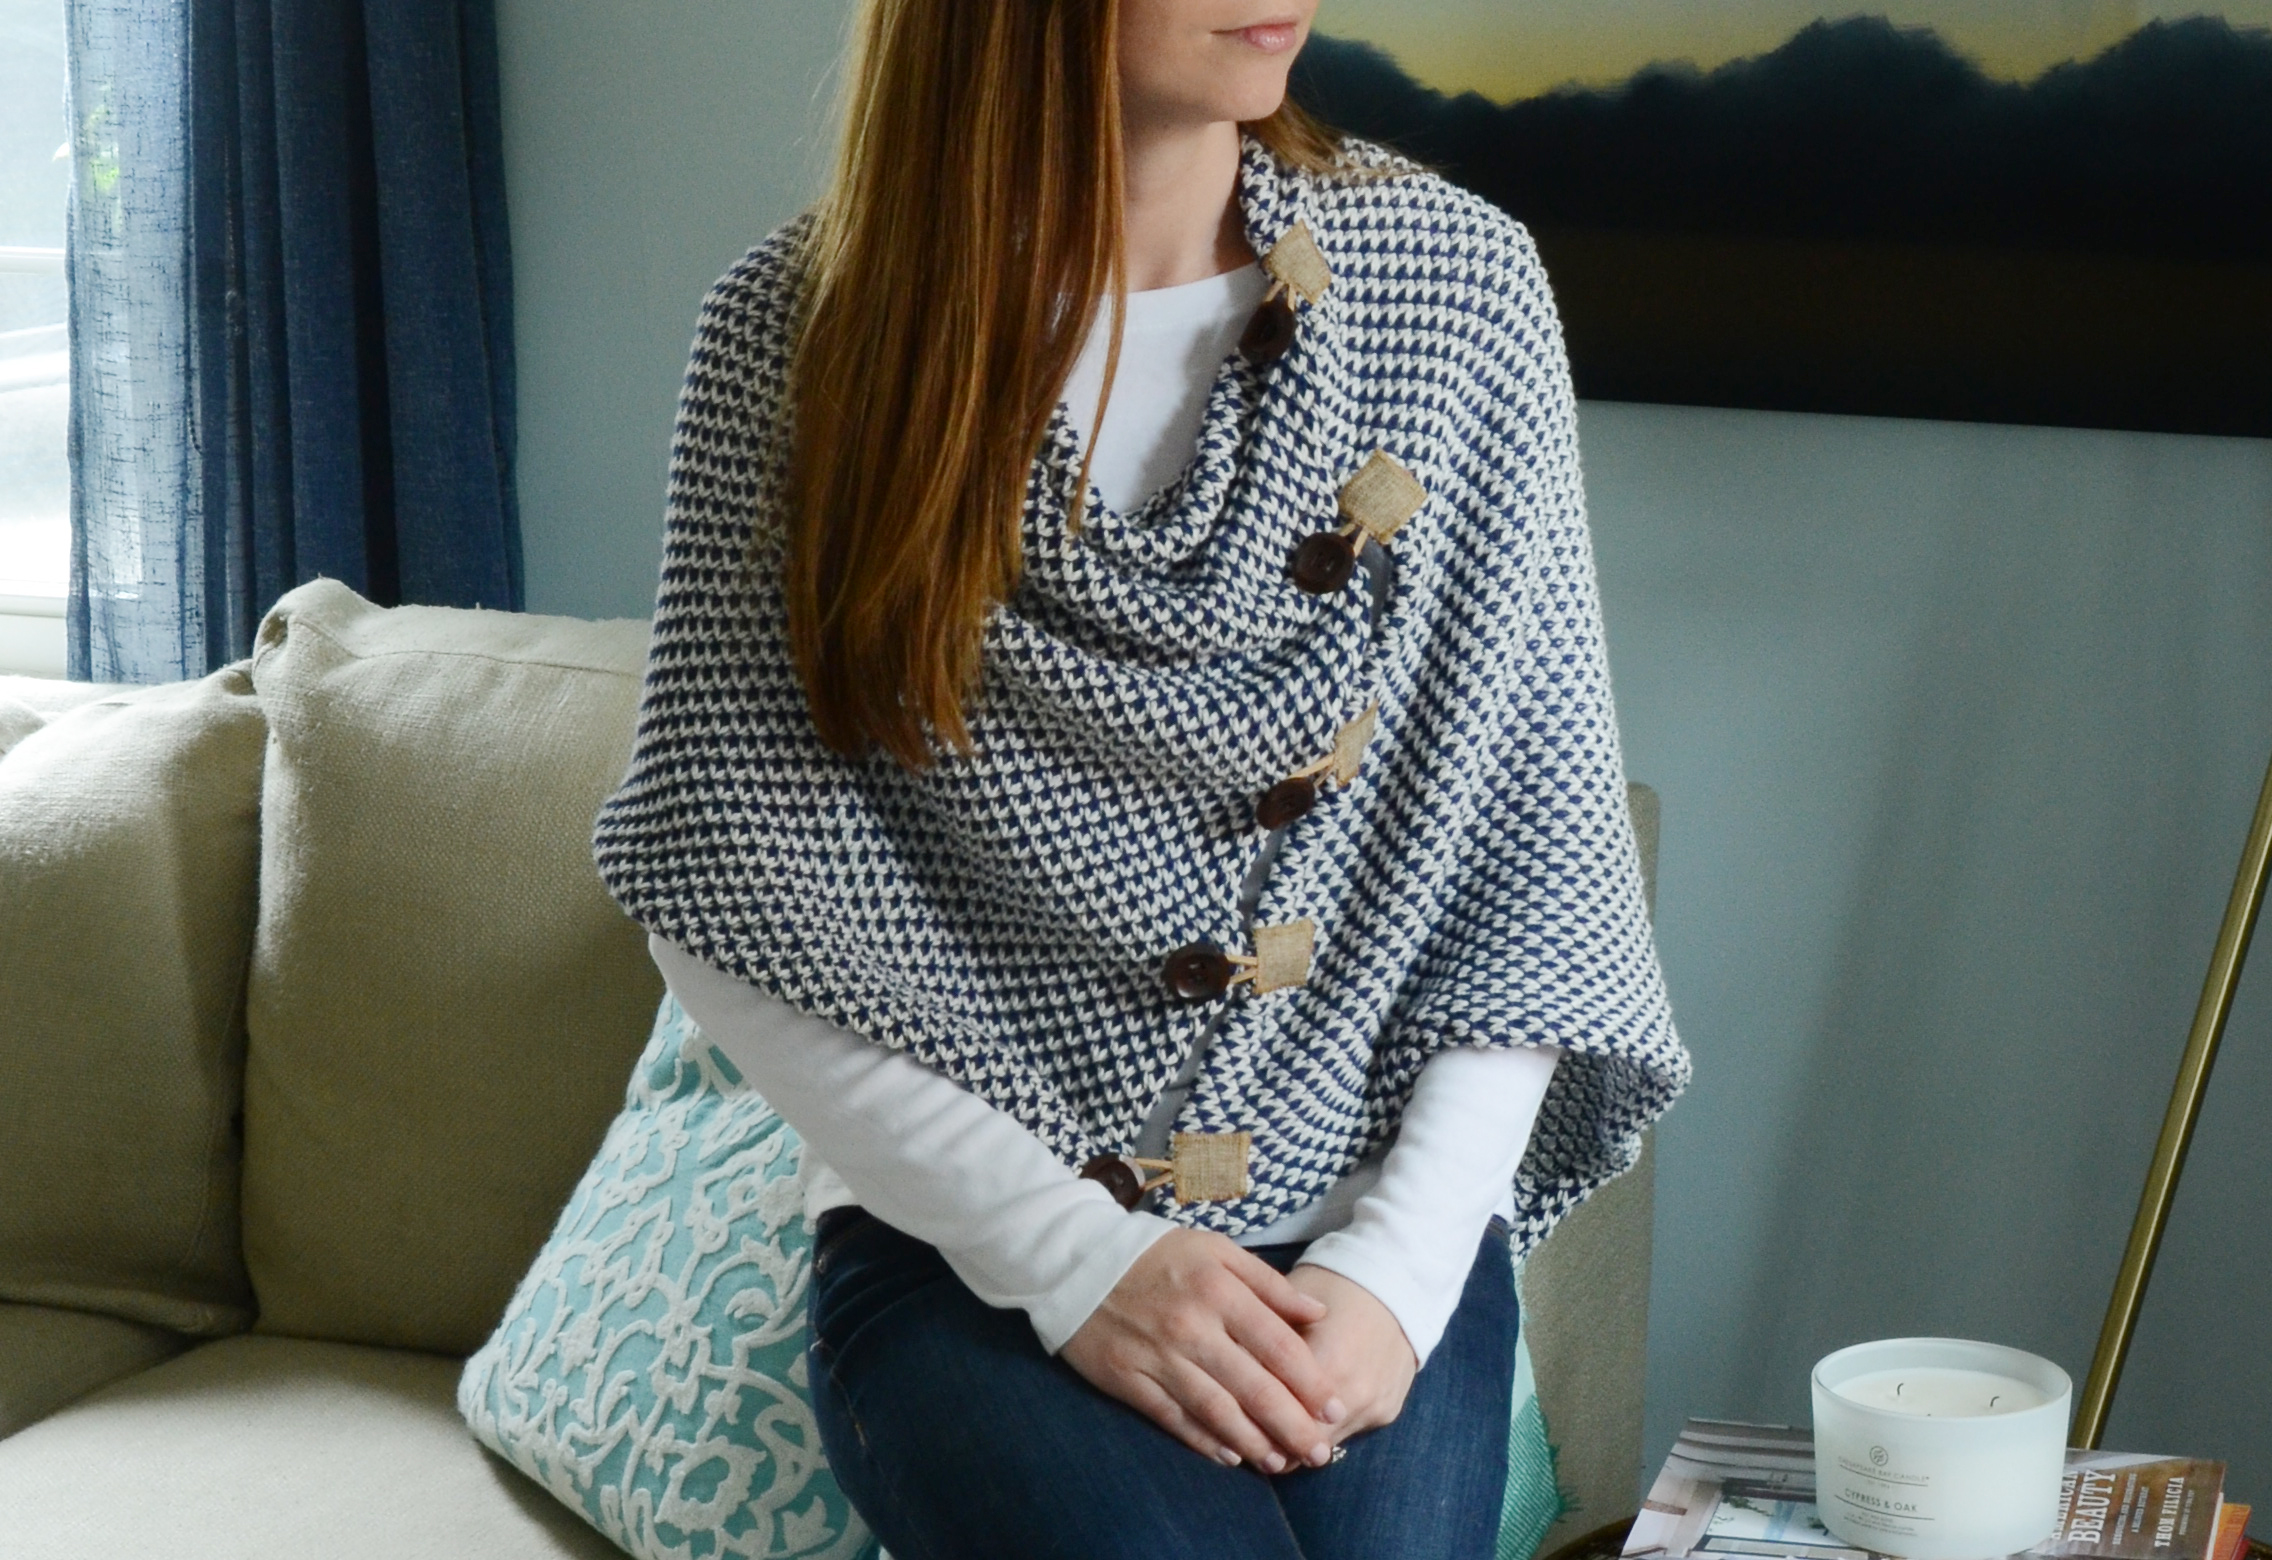
This wrap looks store-bought, thanks to the cool button loops and sweater knit fabric. Someone actually asked me if it was from J. Crew!
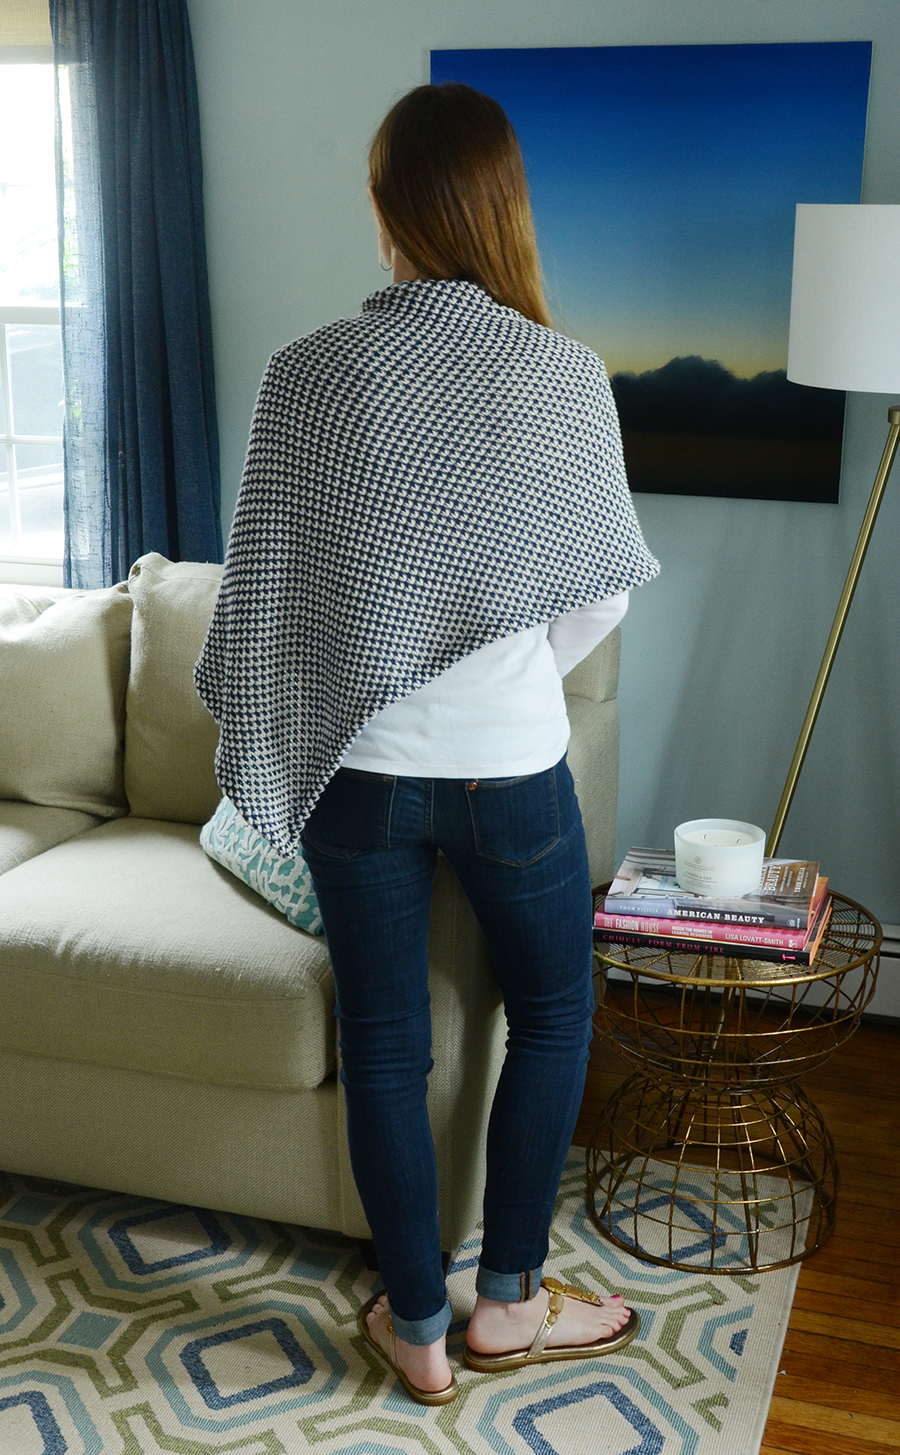
The back has a unique asymmetrical shape just like the front, so it is the perfectway to dress up a basic white shirt and jeans. It would also be beautiful over a summer dress to keep your shoulders warm once the sun goes down. Versatile, easy and affordable… what could be better?!