How To Recycle Plastic Bottle – DIY Pom Pom Ornament
Updated on November 19, 2025


Christmas might be over for the year, but that doesn’t mean atall that I’m over the idea of making winter themed crafts, decor pieces, and ornaments! Where I live, there are stillseveral months of winter left, so I’ve got quite a bit of winter crafting left in me yet. Recently, I taught my kids how to make homemade yarn pom poms for the first time, so it’s been a huge theme in our house to incorporate that technique in essentially anything we’re making lately. That’s how these cute plastic bottle and pom pom ornaments came about!
When my kids realized that the finished product looked awesome hanging in the window, they actually made several of them in all different colours. I decided to play along and I even documented the steps for how I created my favourite one so far. Check out these step by step instructions complete with photos! If you’d rather follow along with a video tutorial instead of written words, scroll to the bottom of this post to find just what you’re looking for.
For this project, you’ll need:
- A small plastic bottle with a plastic top (like a travel sized liqueur bottle or a novelty holiday pop bottle)
- White and gold yarn
- A glue stick
- Regular scissors
- Curved nail scissors
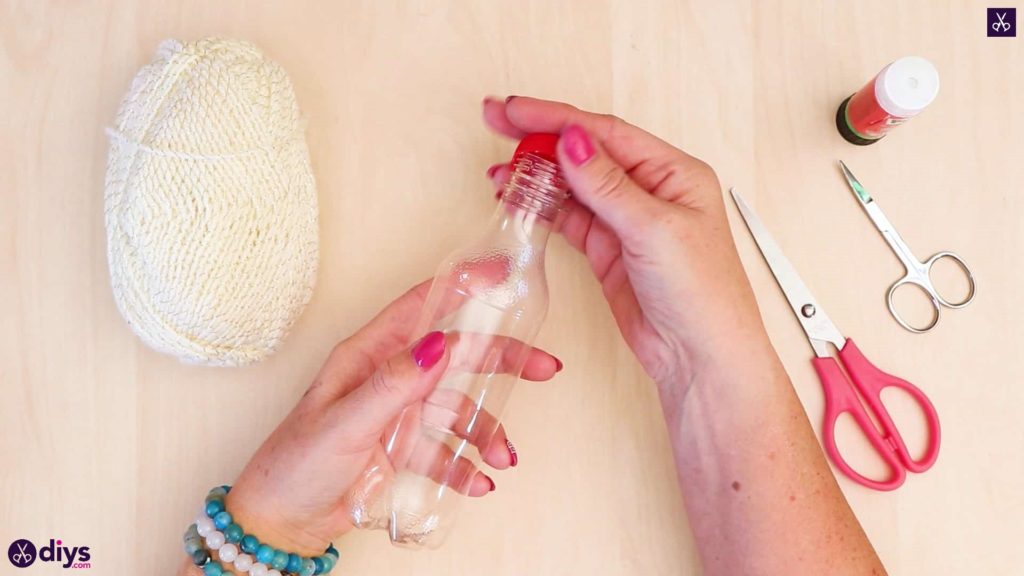
Step 1: Gather your materials!
Check your list and make sure you have everything in front of you before you begin.
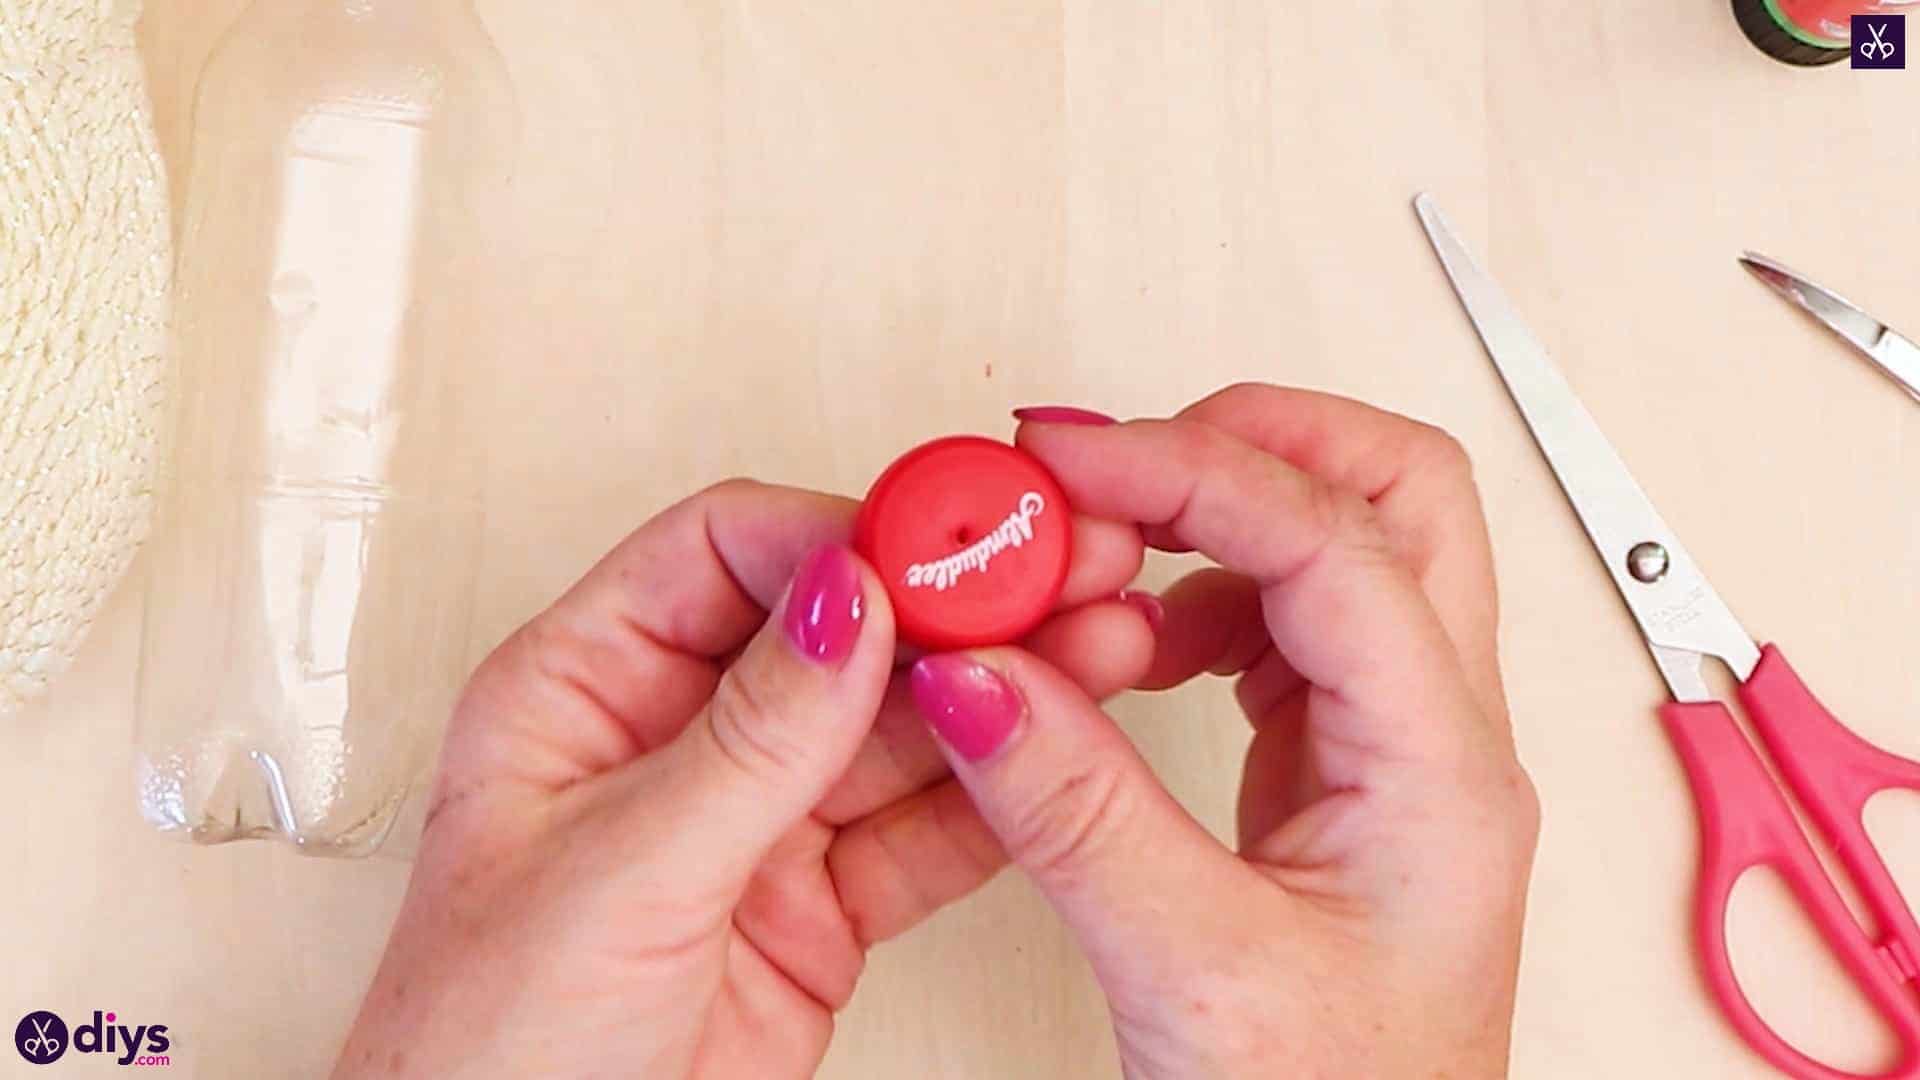
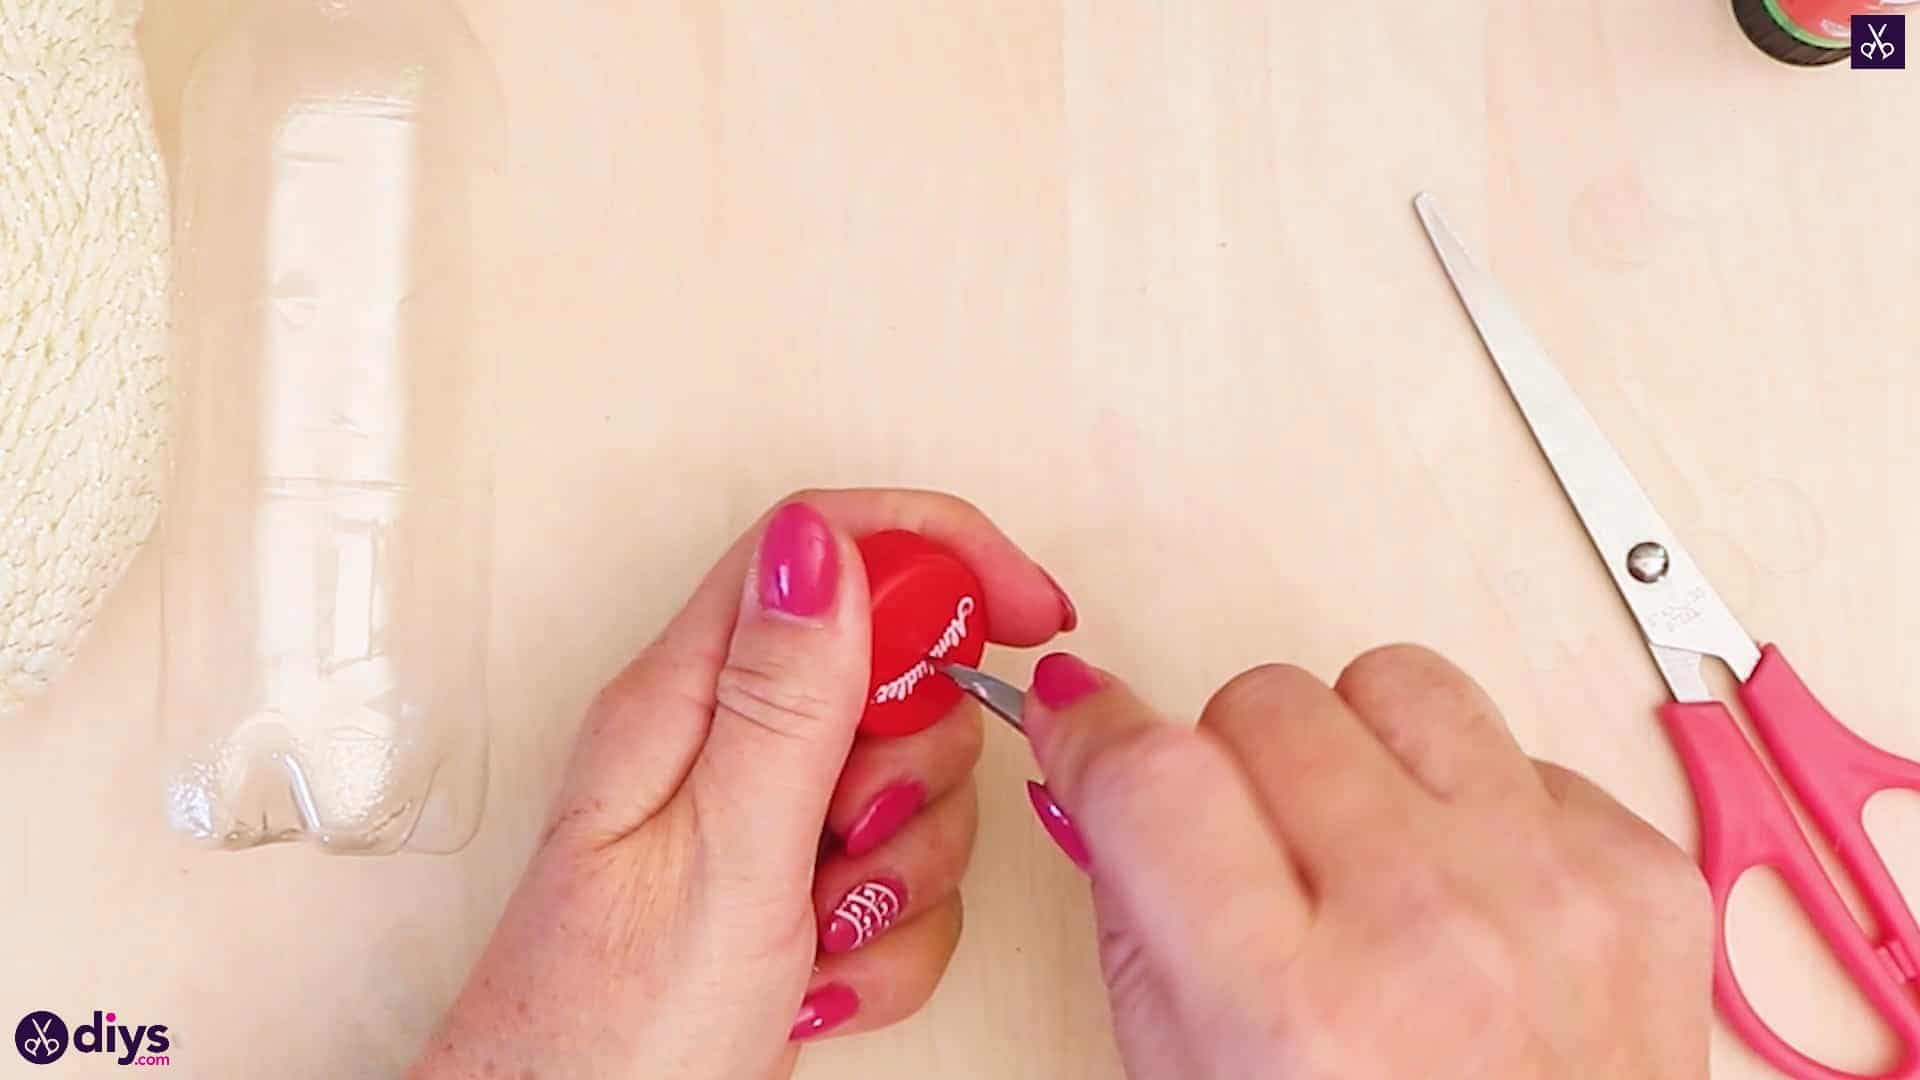
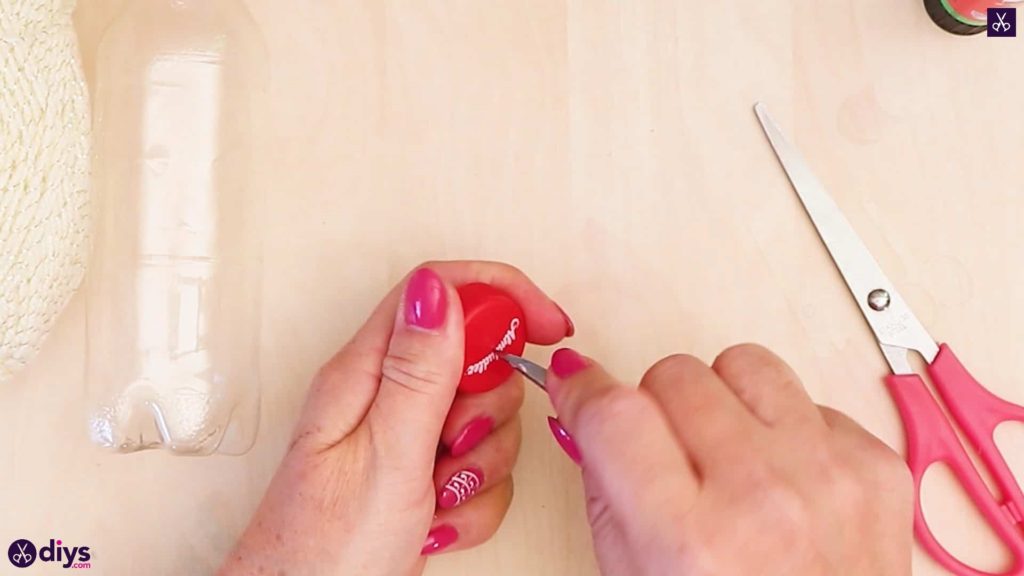
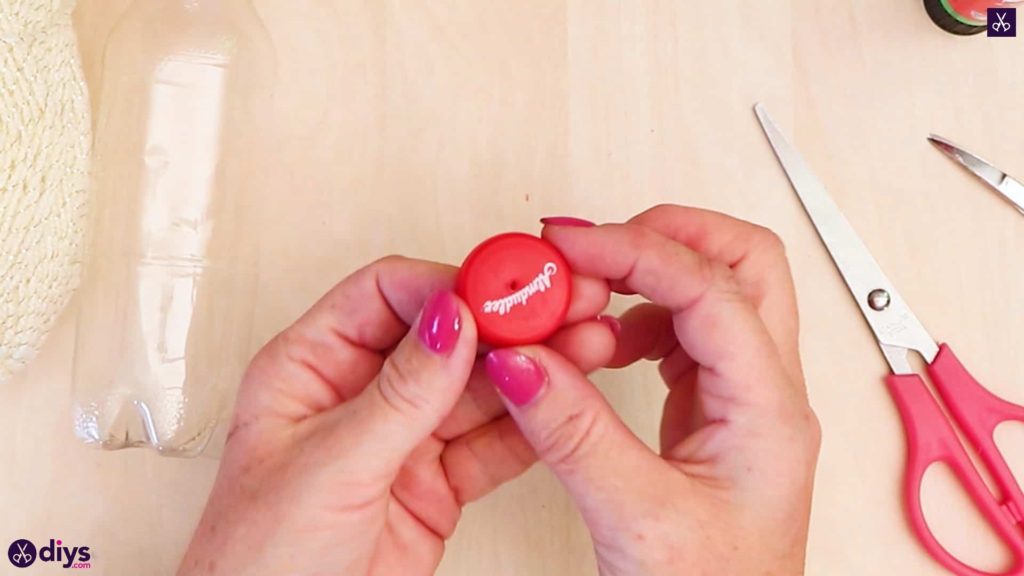
Step 2: poke holes in the lid
Unscrew the lid from your bottle and set the bottle itself aside for the moment. Then use the pointed tips of your curved nail scissors to very carefully pierce a hole in the center of the bottle’s plastic lid. Later on, you’ll add a loop here so that you can hang your ornament.
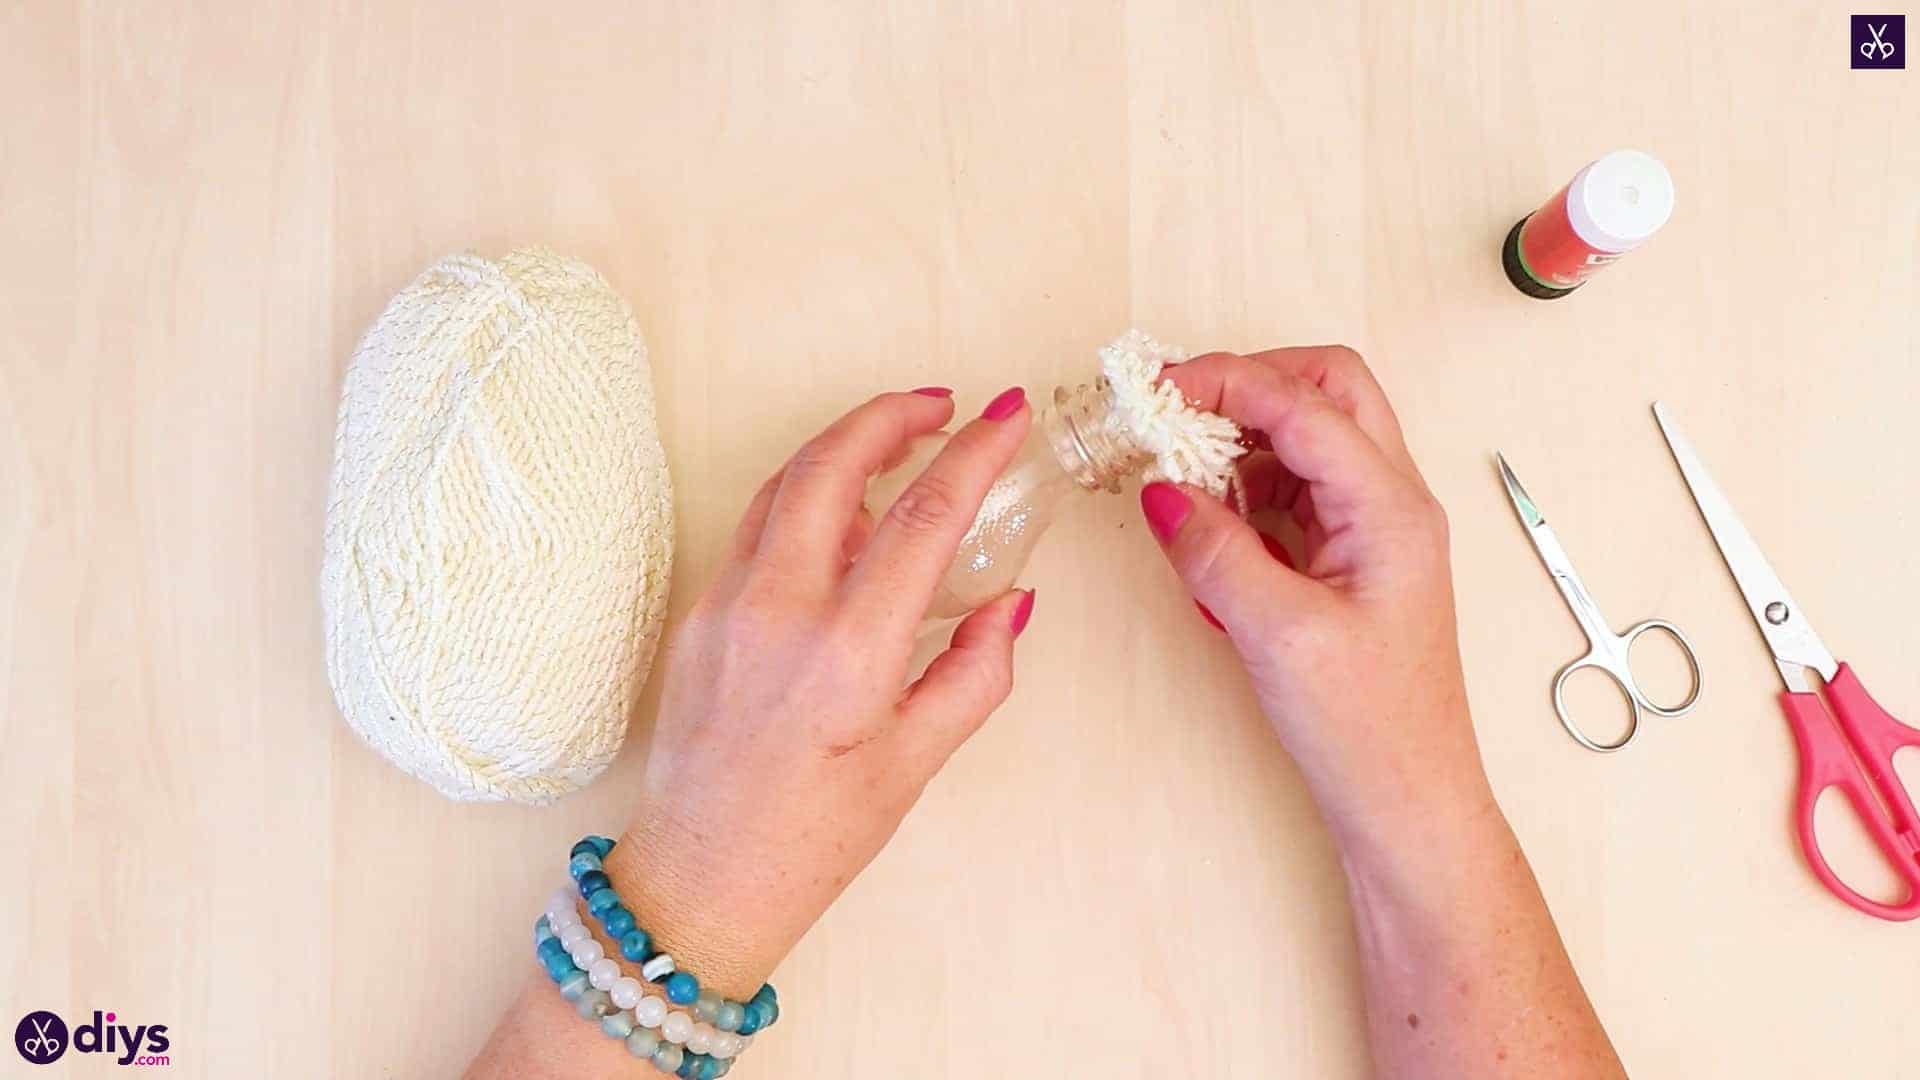
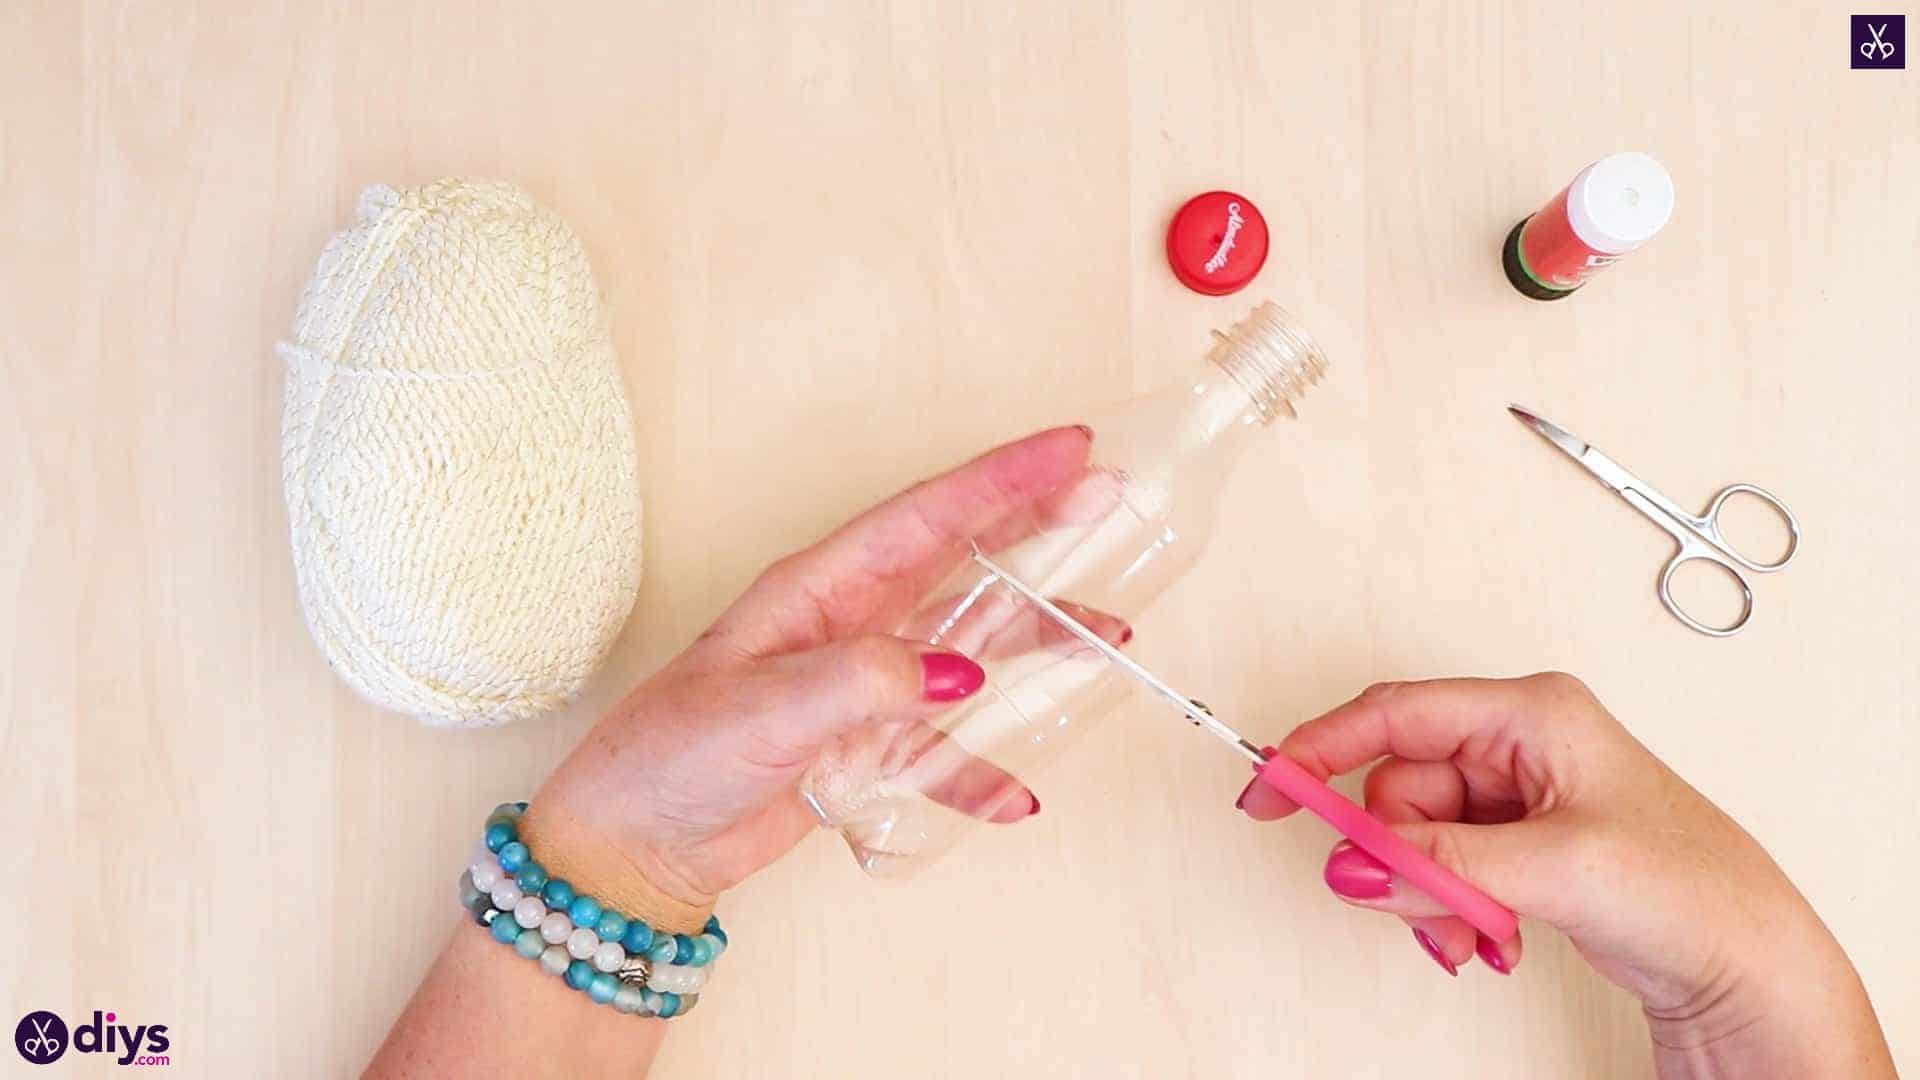
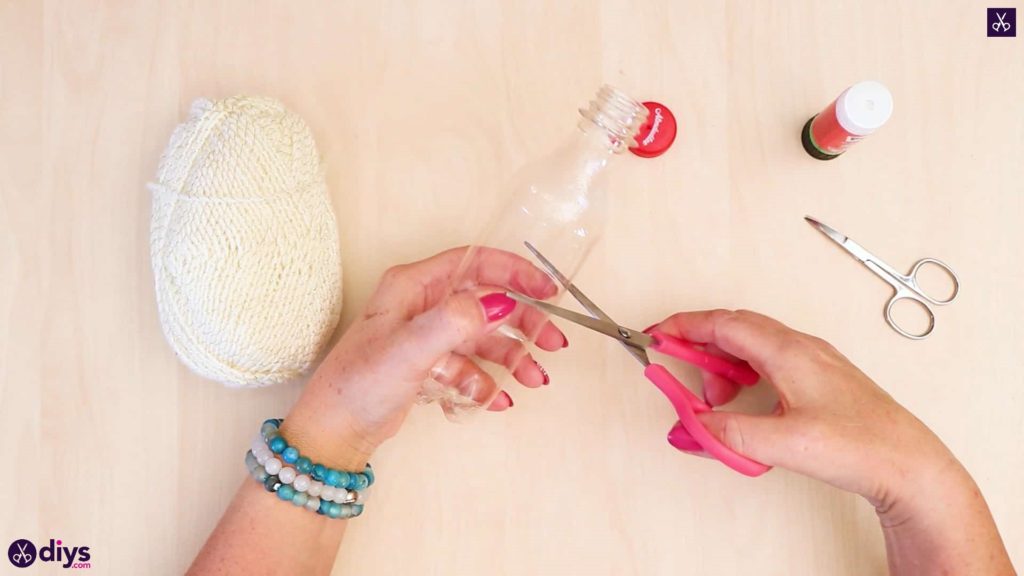
Step 3: cut off the top
Use your larger scissors to cut off the top of your bottle, about an inch below the bottom of the neck. You’ll use this top piece for your ornament; you can recycle the bottom half.

Step 4: start making the pom pom
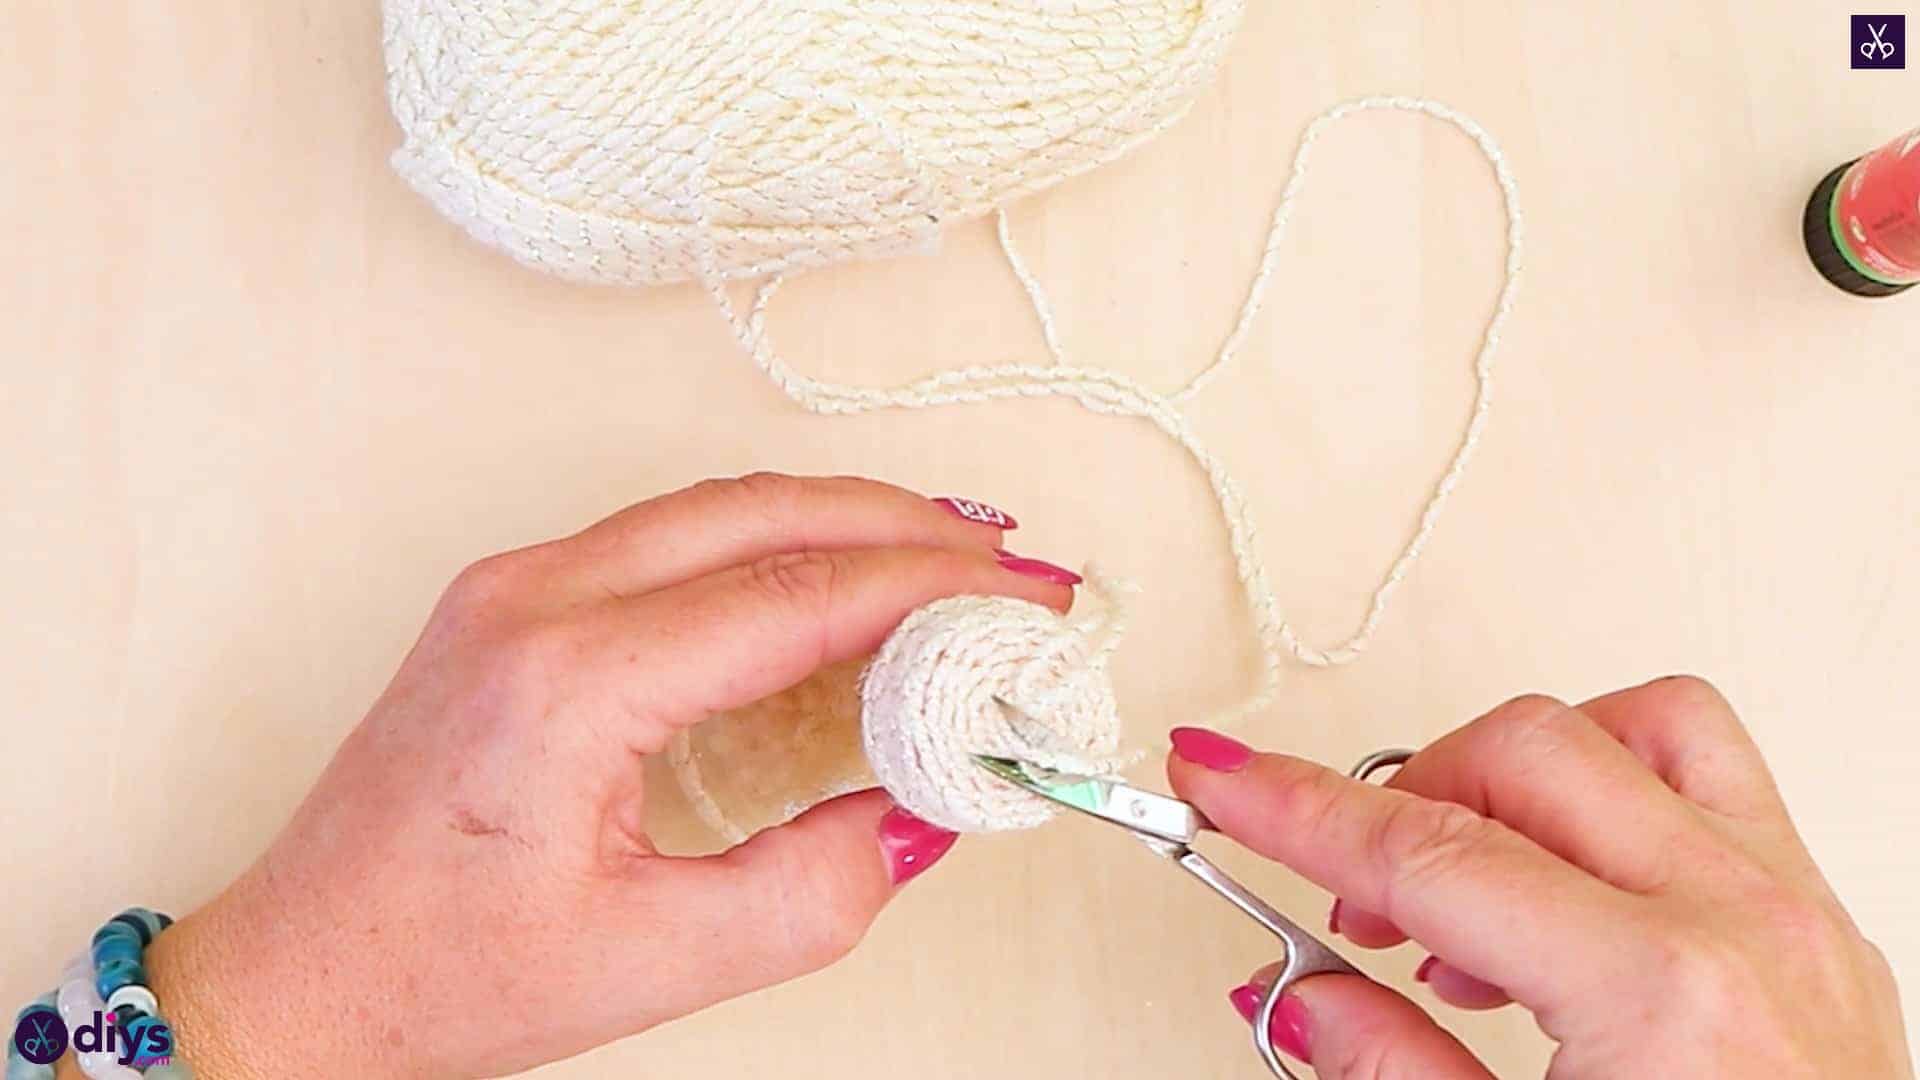
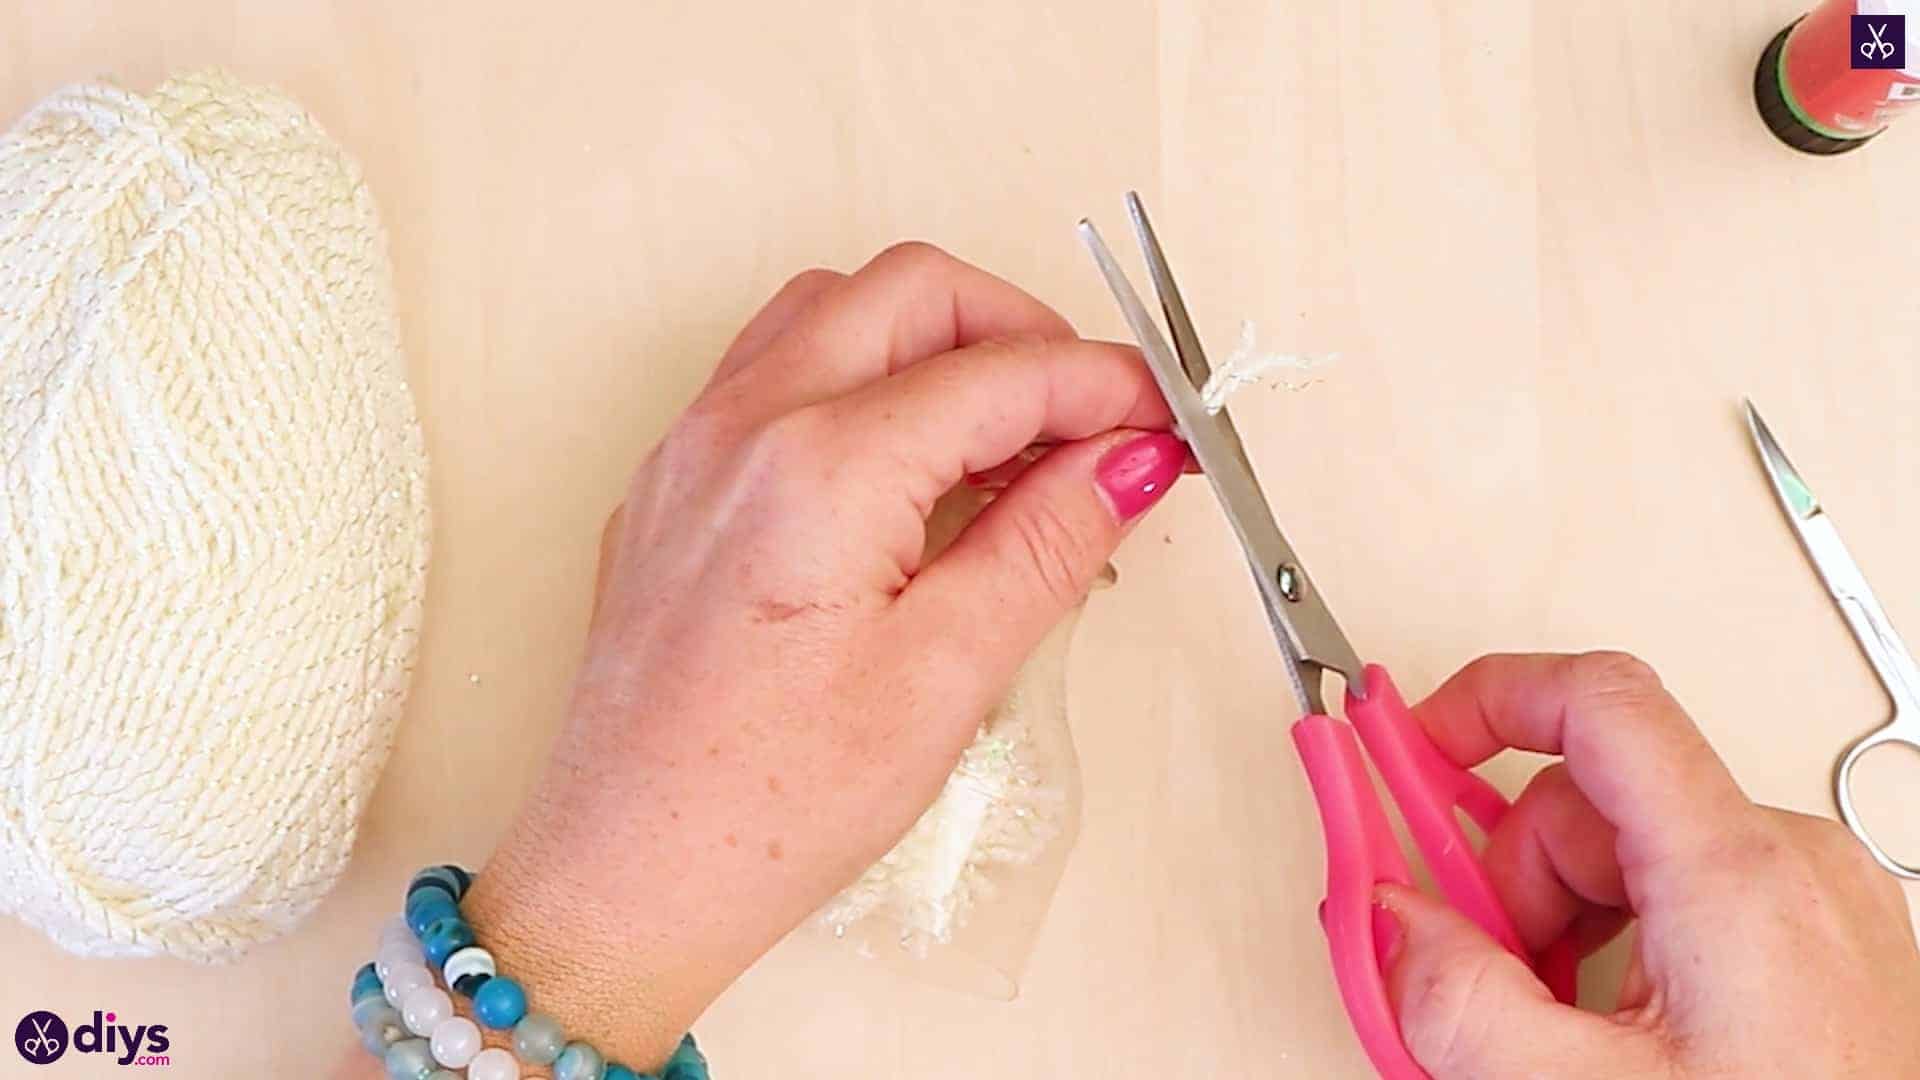
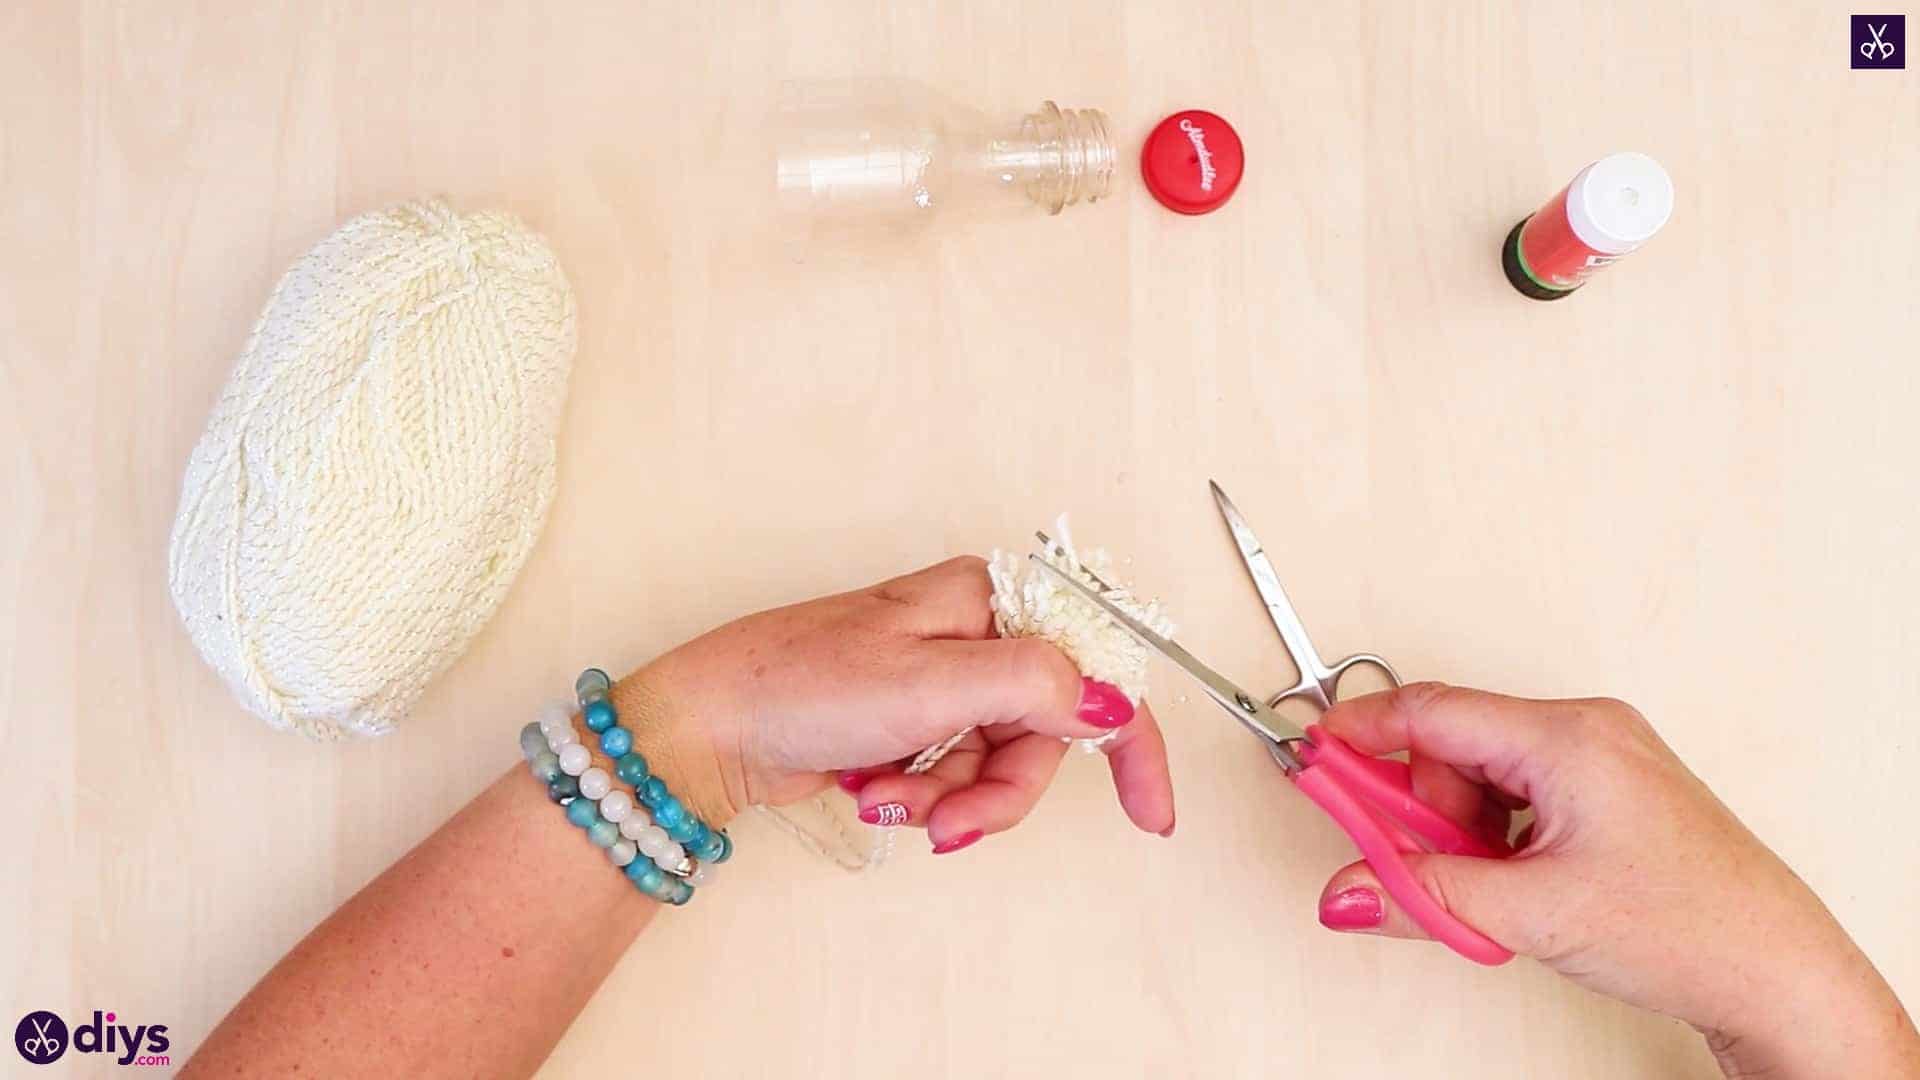
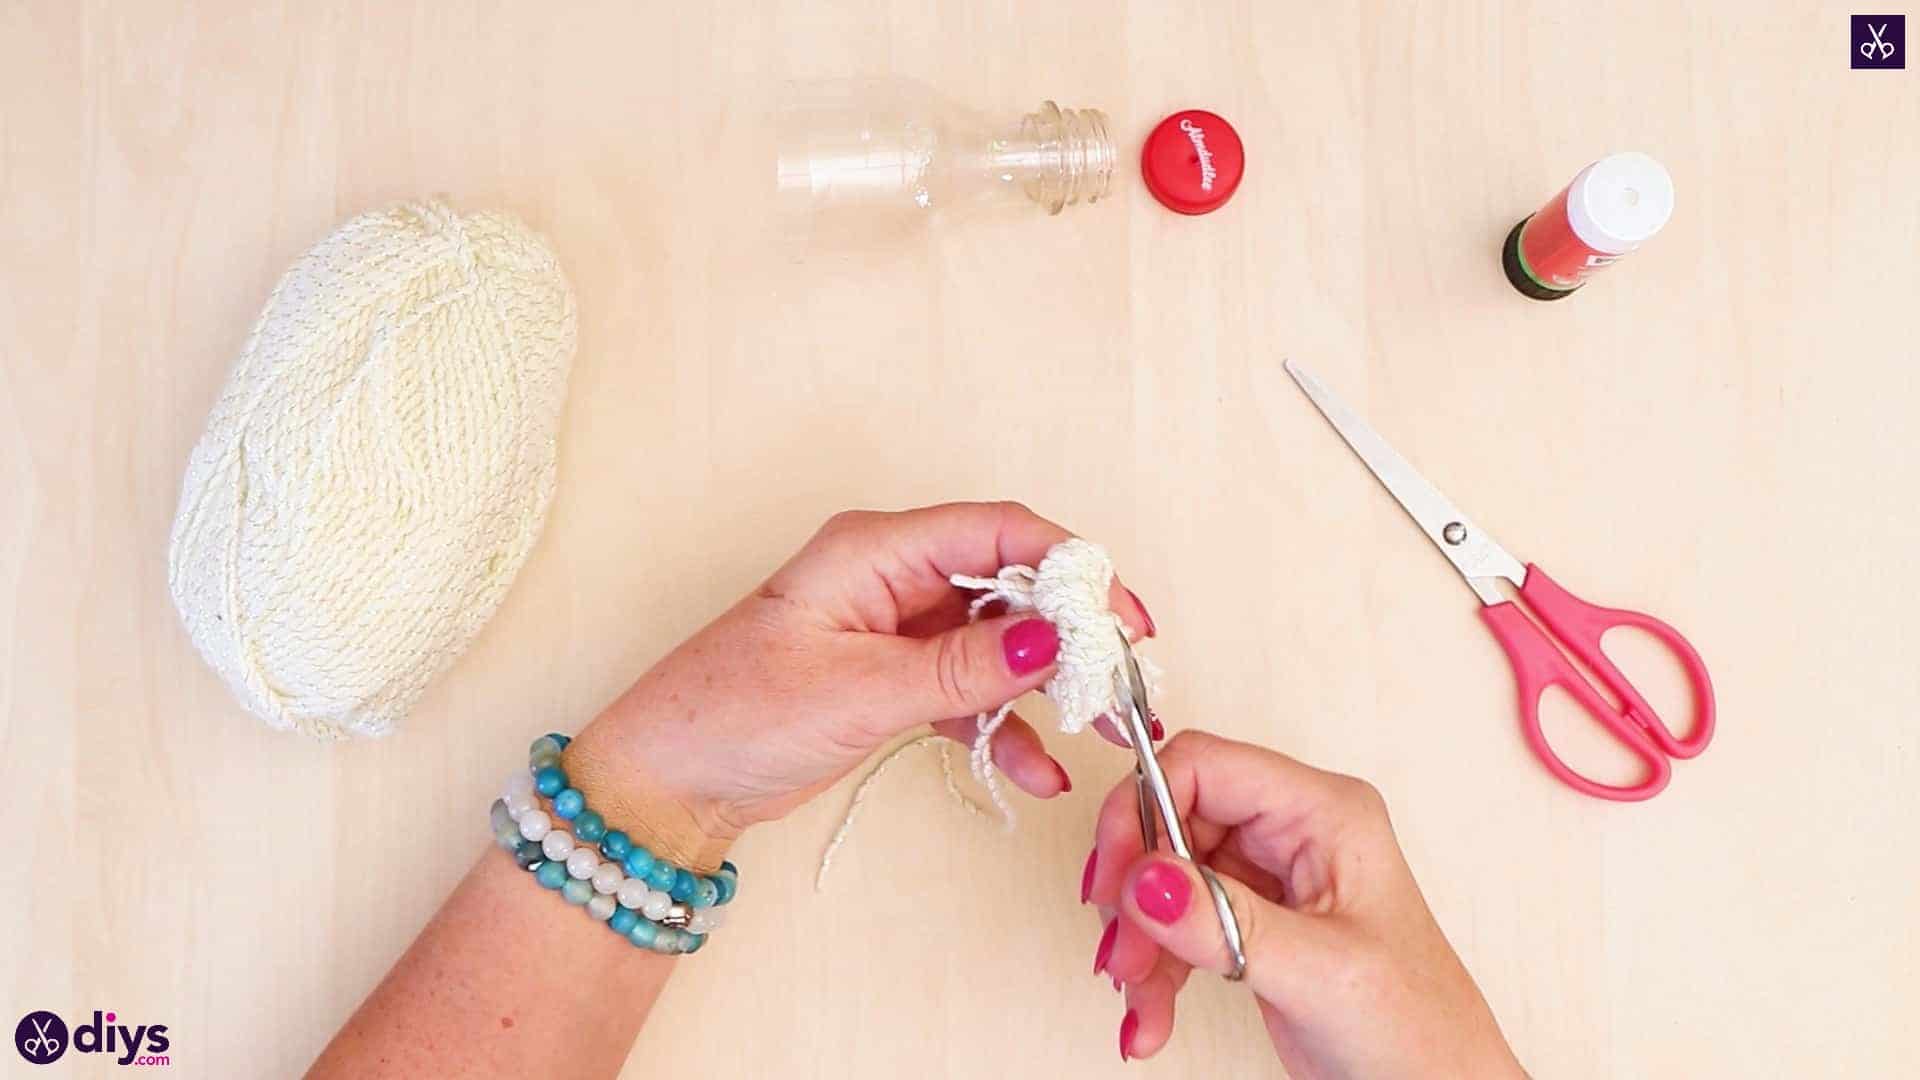
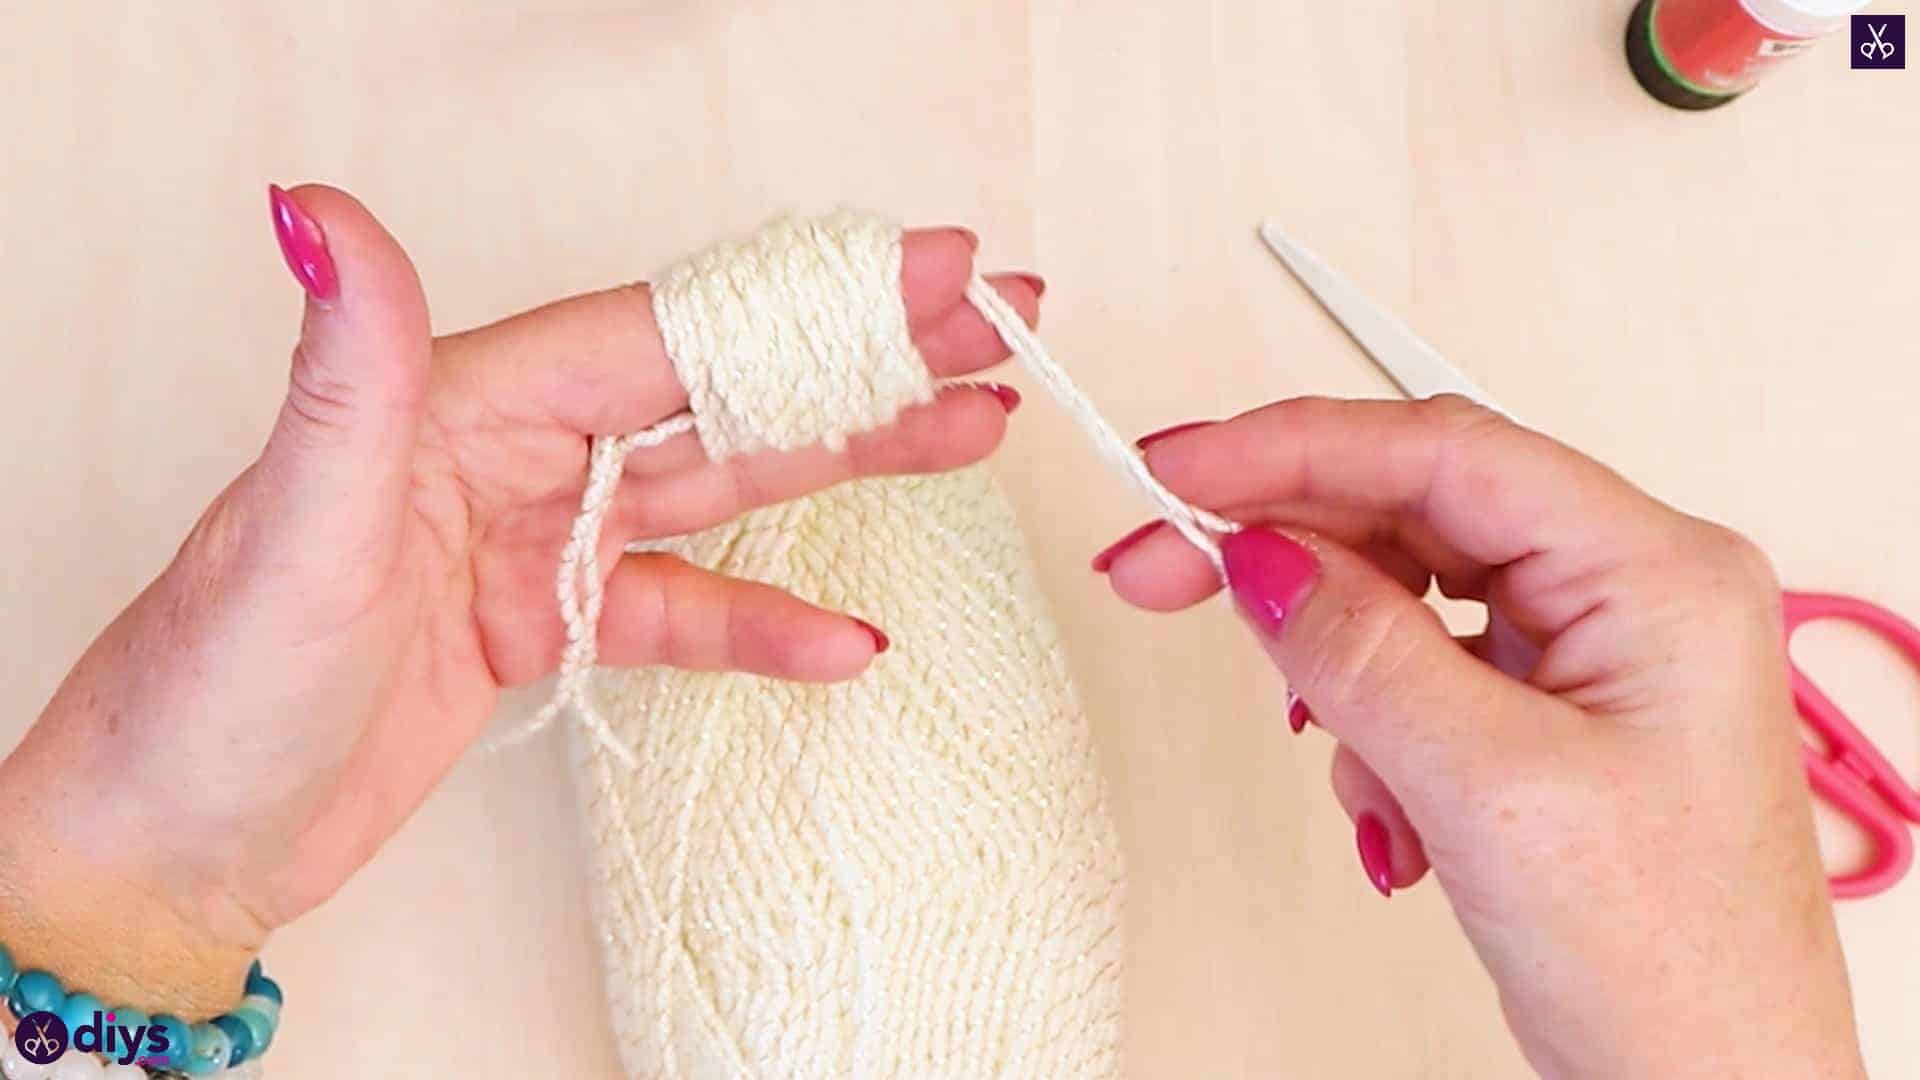
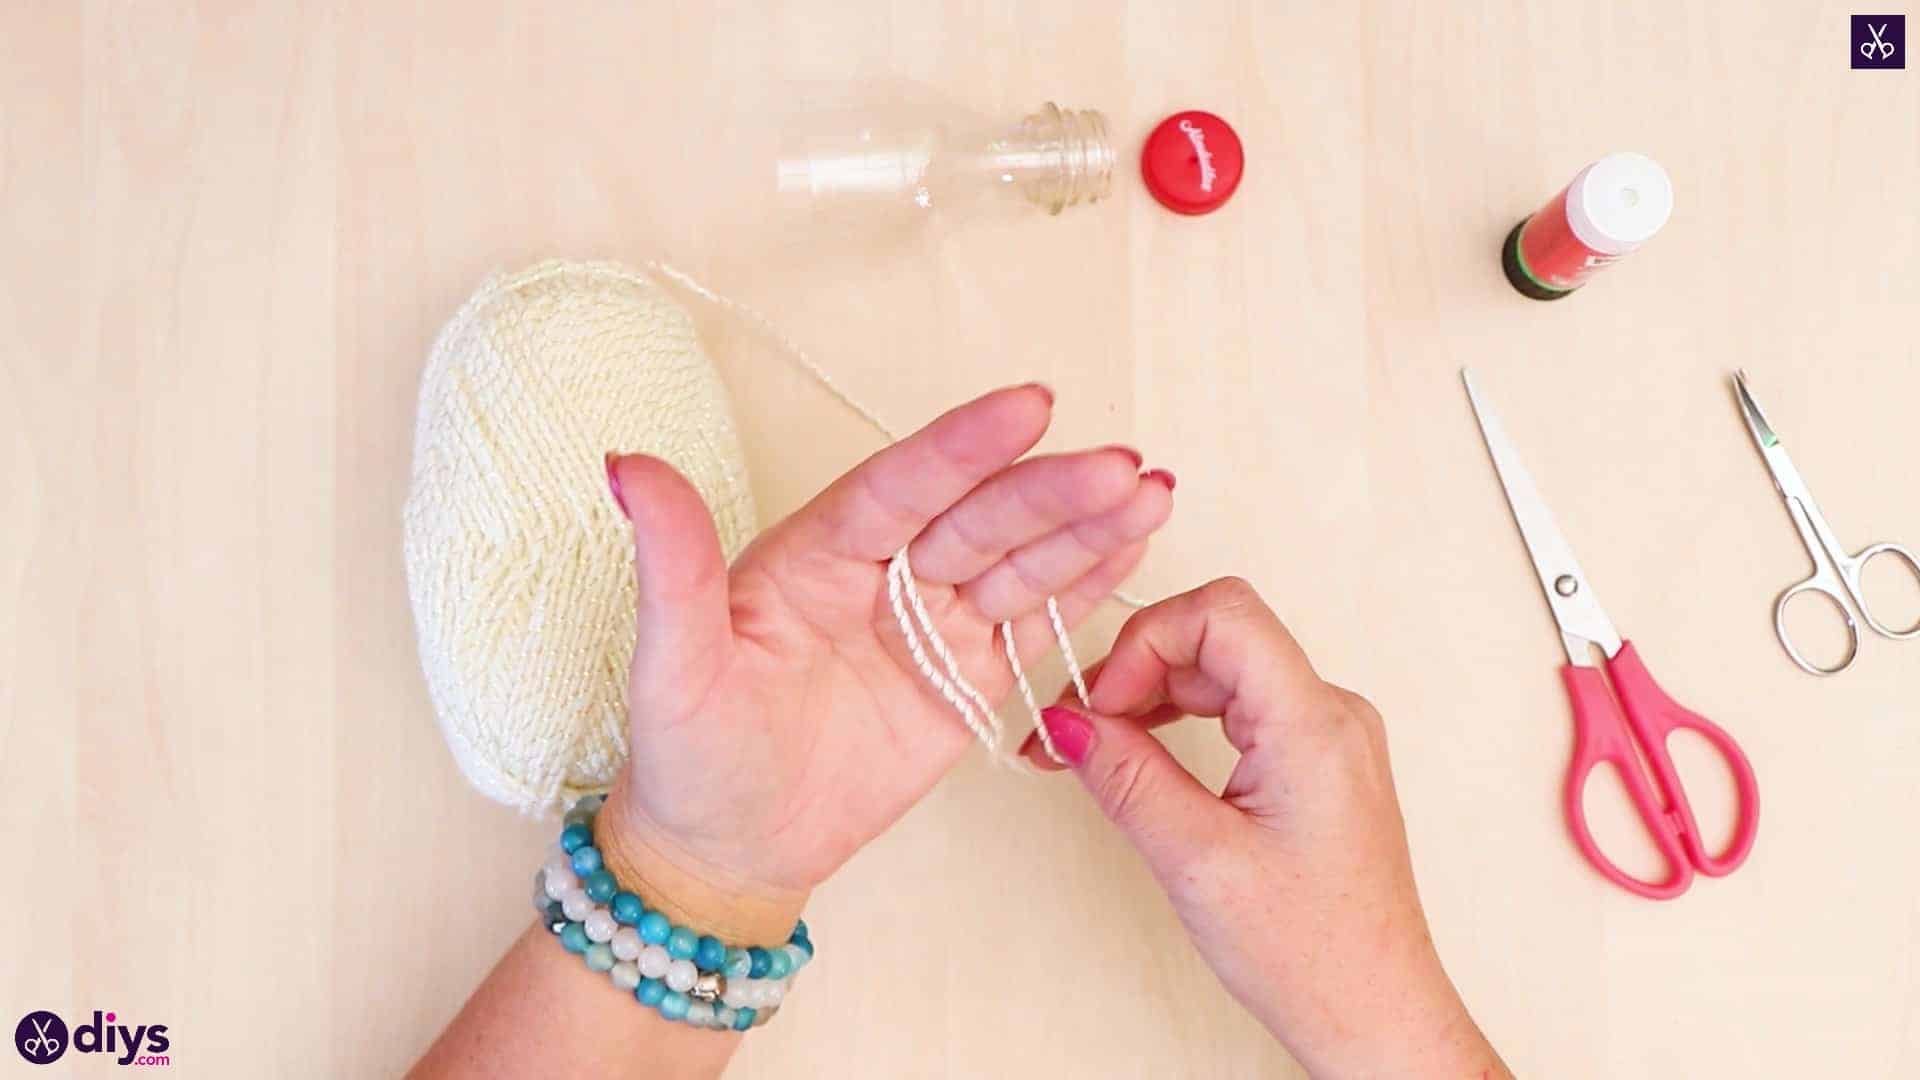
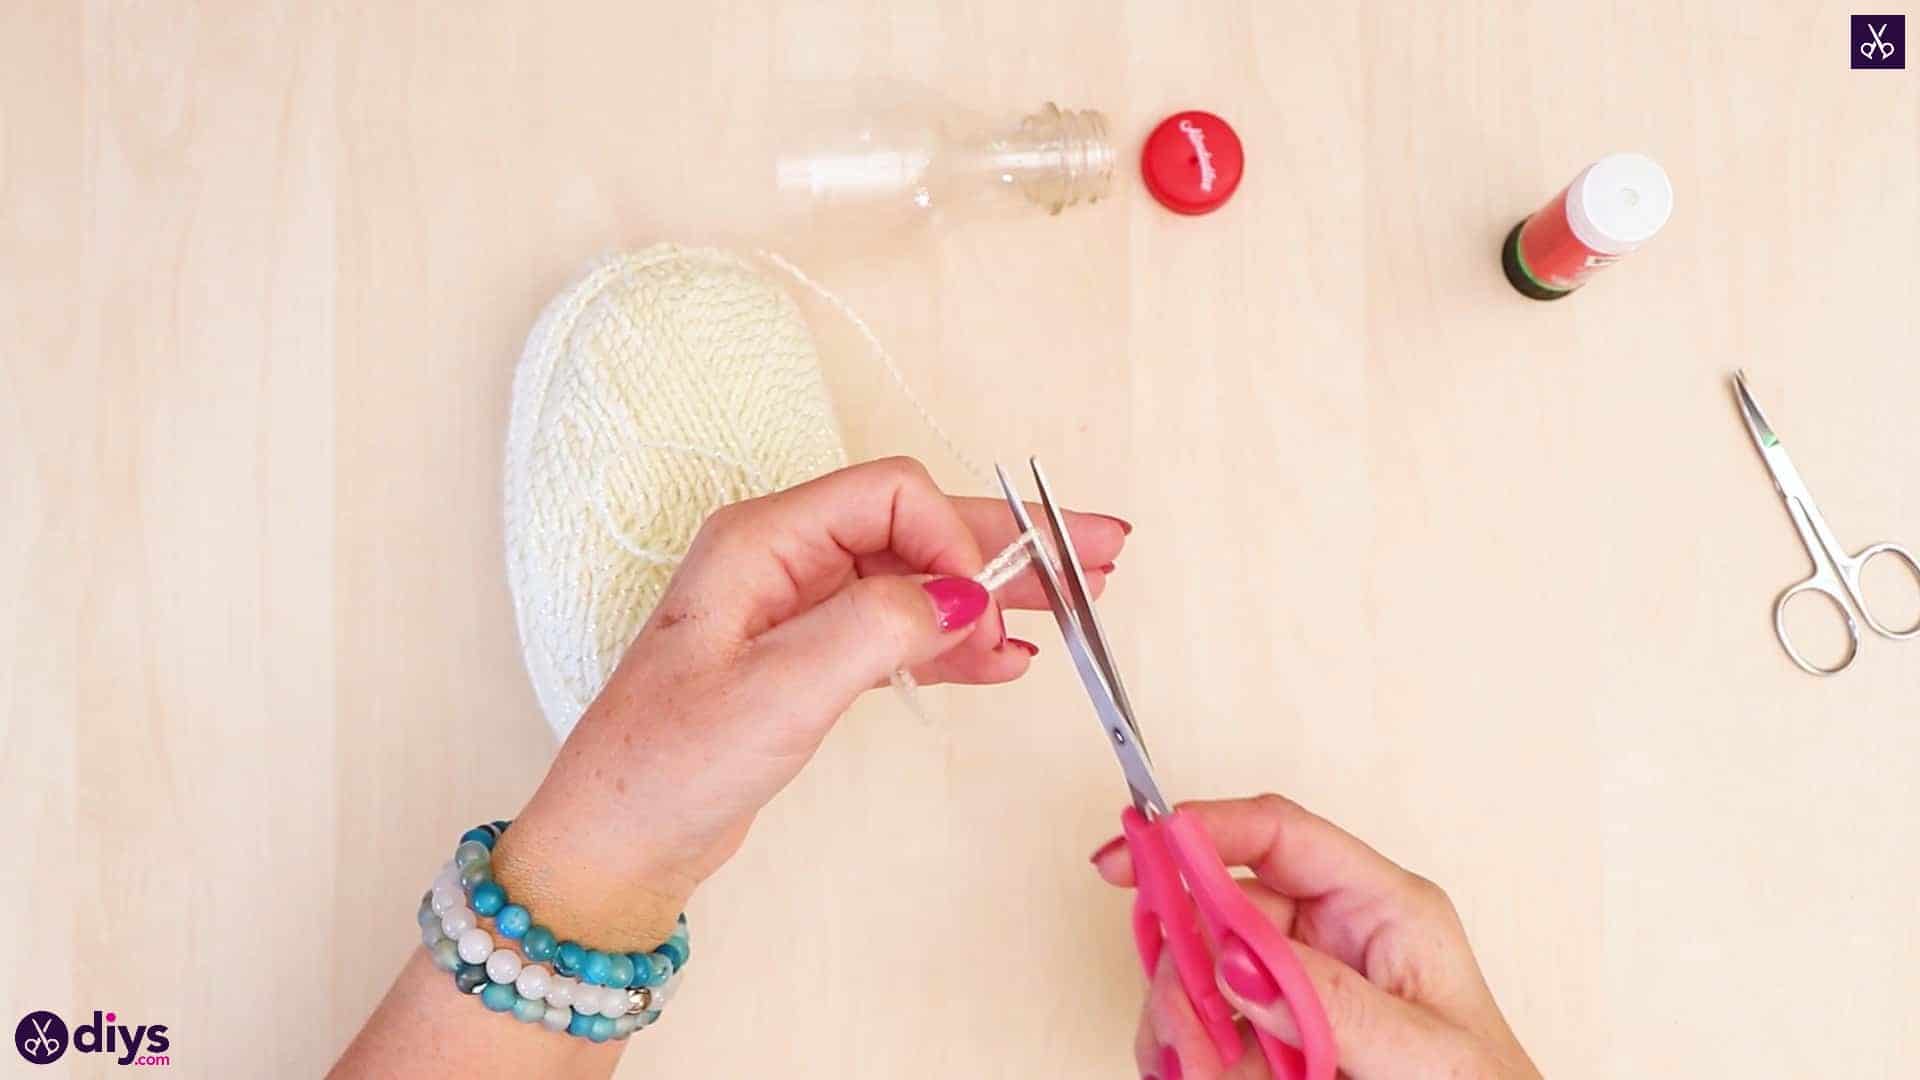
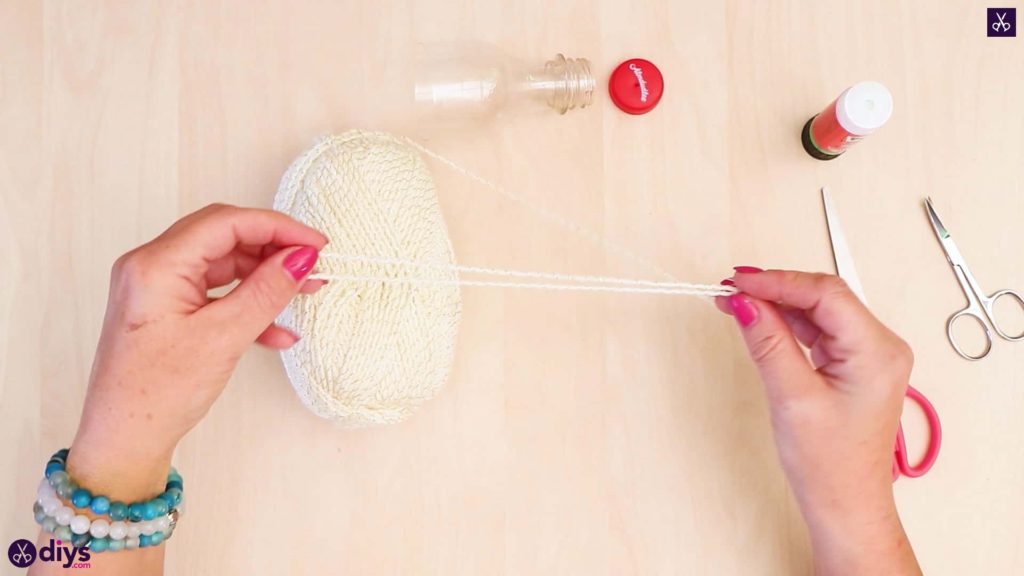
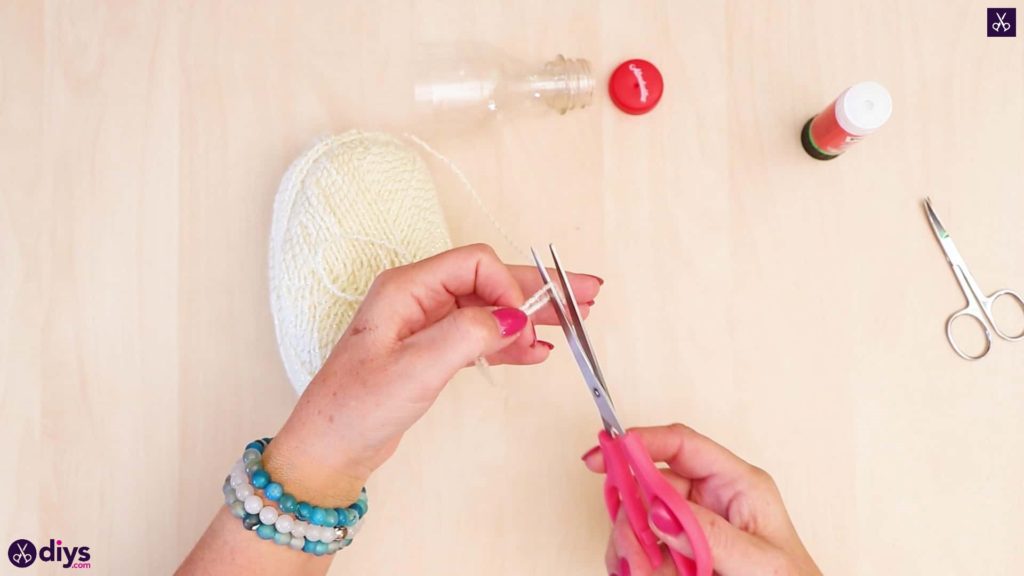
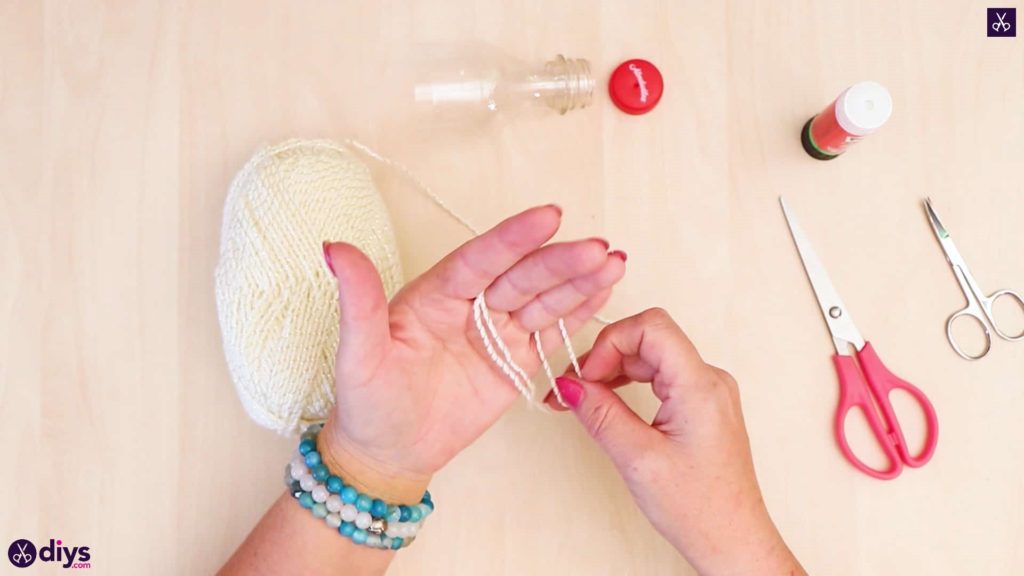
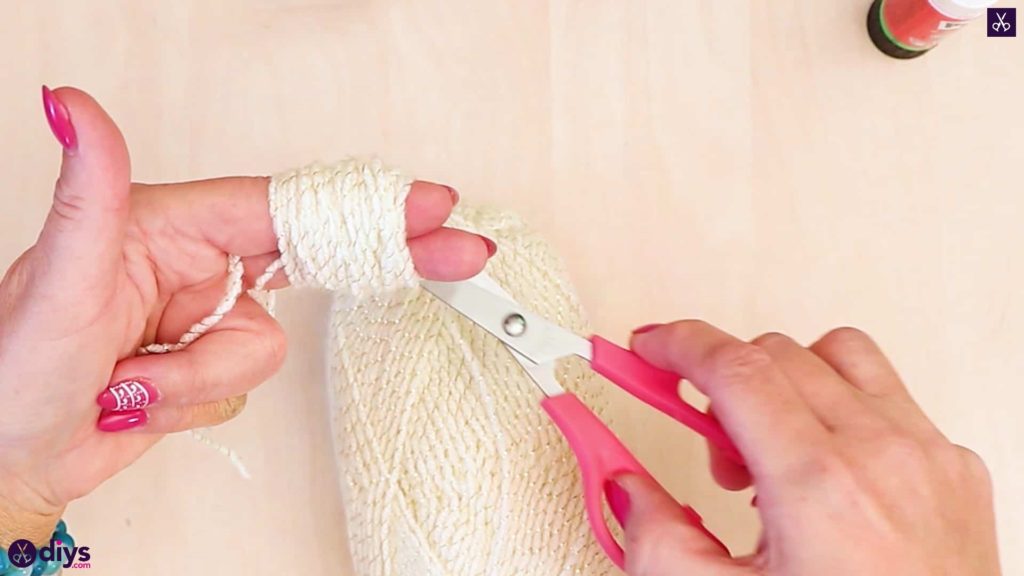
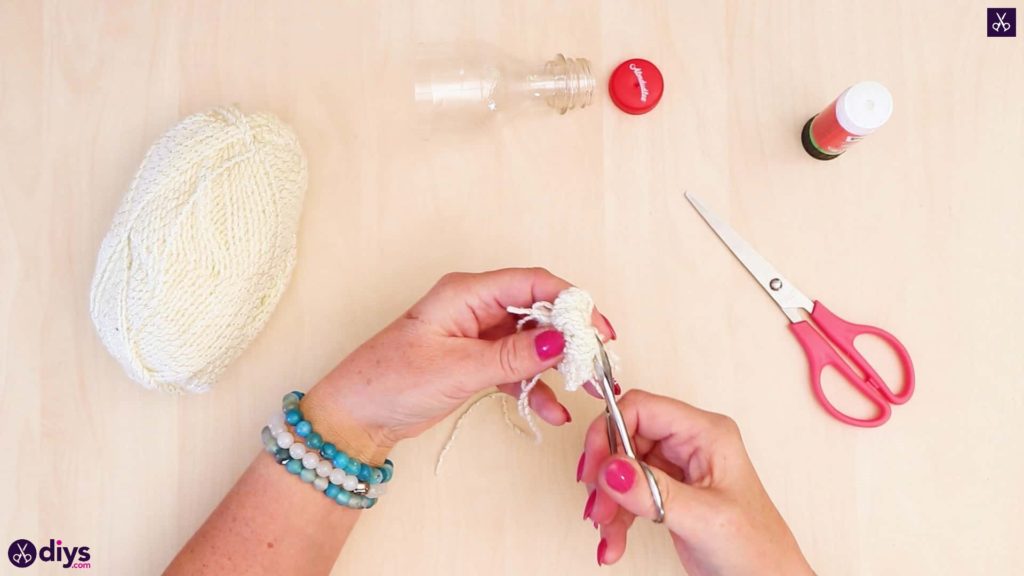
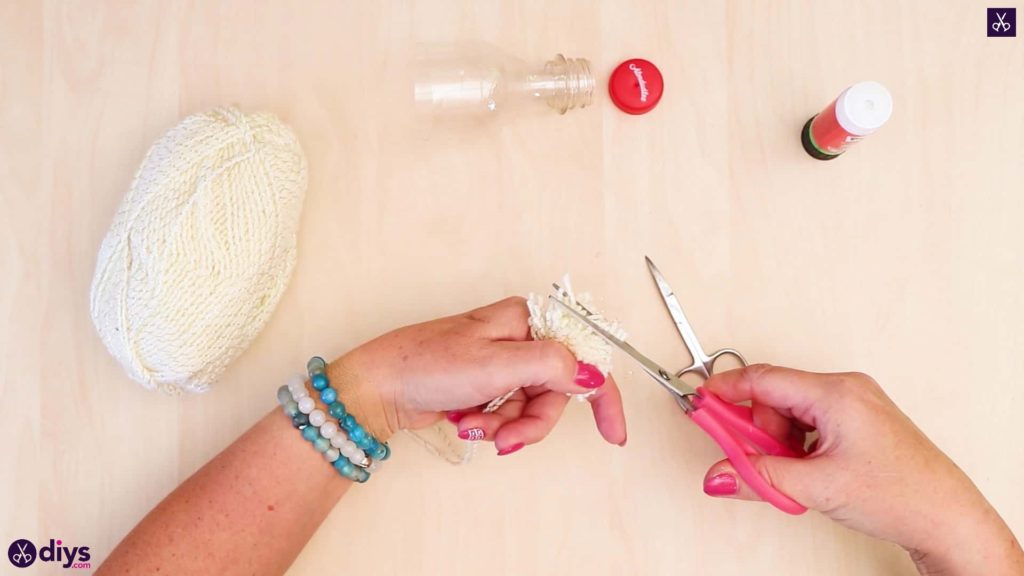
Make your small pom pom! This will go inside your ornament. Cut a piece of yarn about eight inches long and fold it in half, with a loop at one end and even ends at the other. Place this looped piece between your middle and pointer fingers, at its center, so the loop sticks out behind your hand and the ends rest across your palm. pull the piece all the way down to the best of your fingers. Next, take the end of your ball of yarn and use your thumb to press it against the inside of your two fingers, then start wrapping the yarn around and around both of them. Wrap until you’ve got a bundle about half an inch thick and cut the yarn free from the ball. Pull your very first looped piece towards your bundle, bringing the loop forward carefully without letting the bundle come loose. Put the ends of the first piece through the loop and pull to keep your bundle together. Slide the bundle off your fingers and pull the ends tighter to cinch the bundle in the center, wrapping them around and knotting them several times to keep the center of the pom pom tight and together. Do not trim those ends. Now, take your scissors and cut the looped yarn on each end of your bundle free so they spring open with a fringe effect. Use your scissors to trim those ends neatly, fluffing the pom pom into that classic rounded shape (but make sure you still don’t trim off those longer original ends; you need them later).


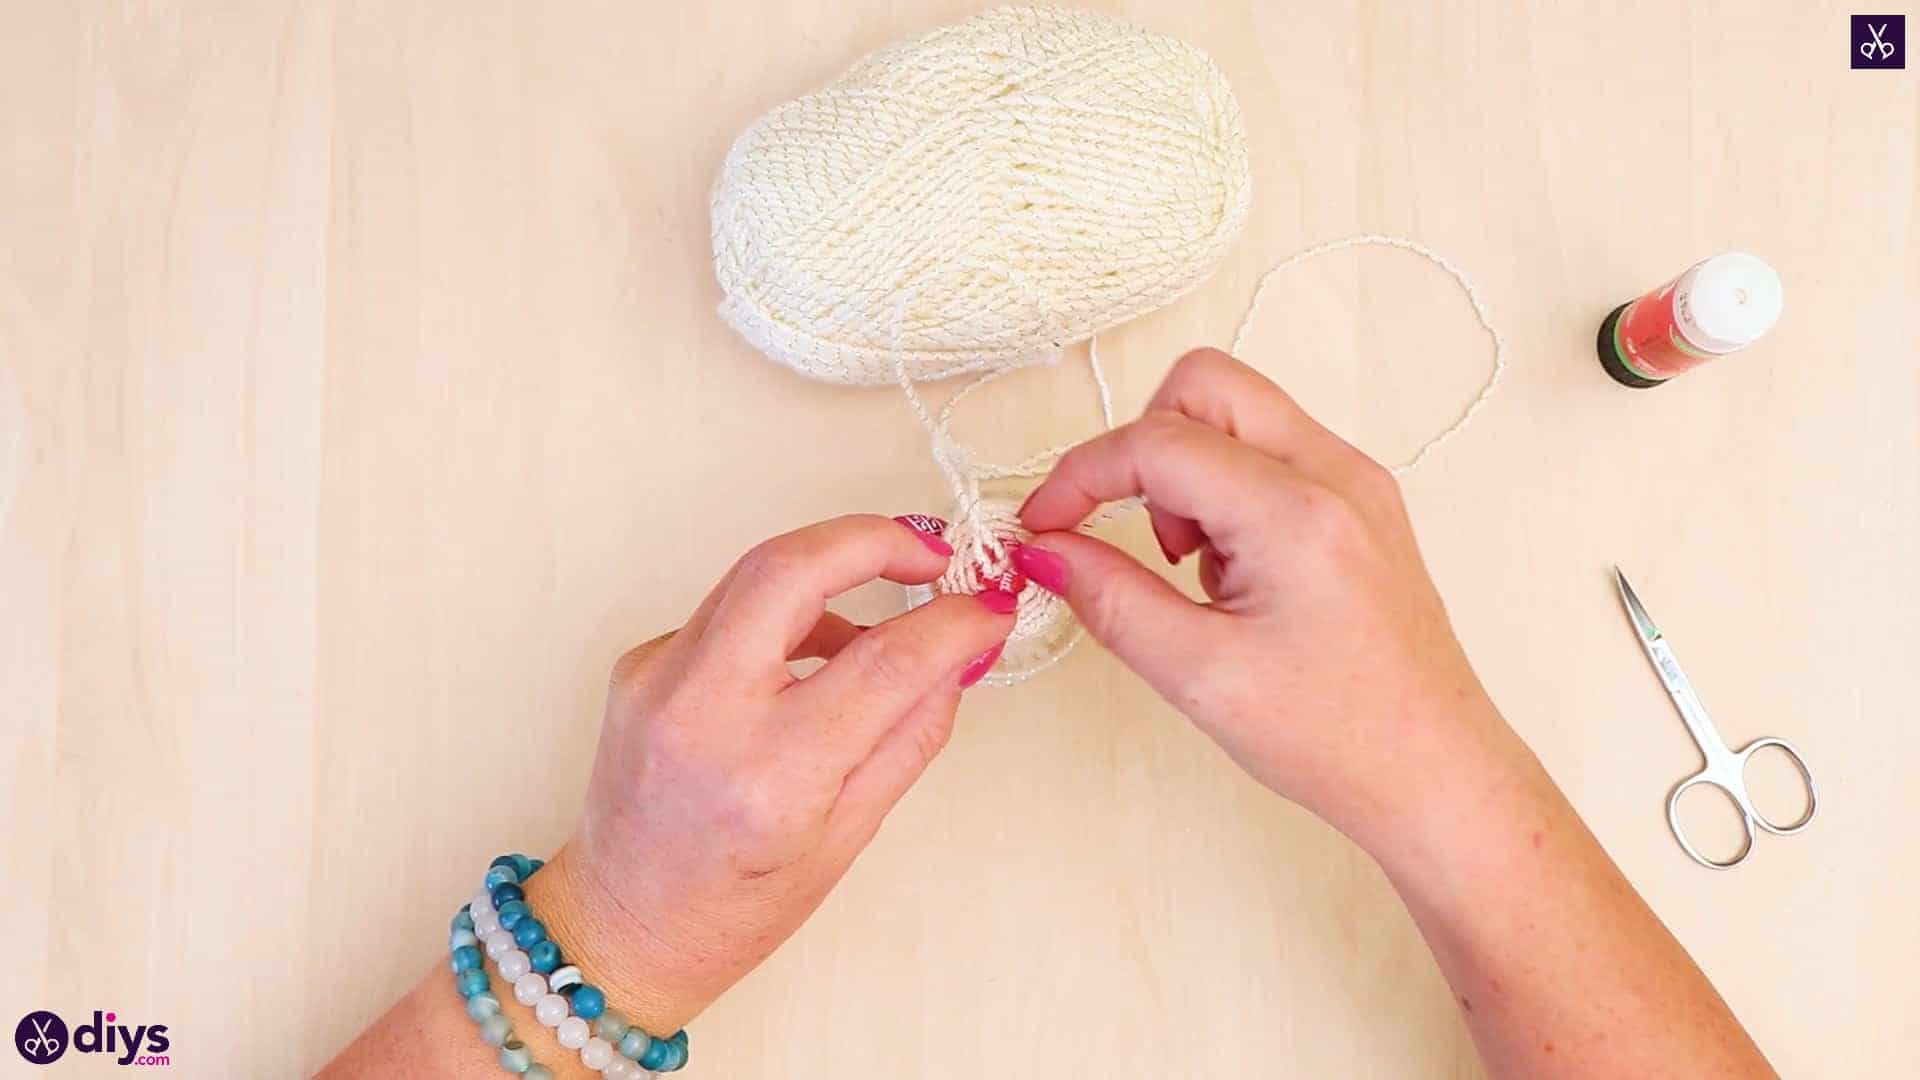
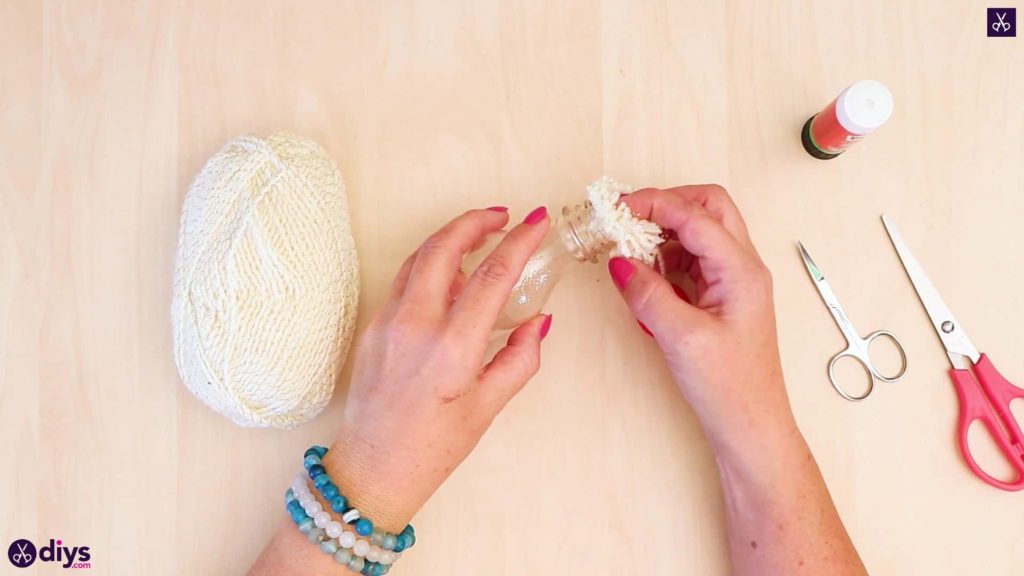
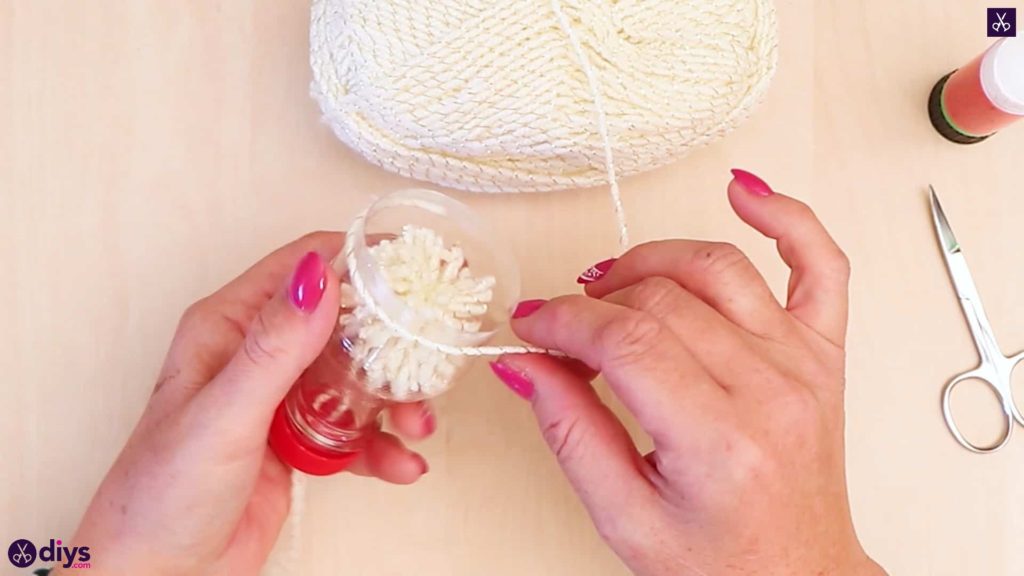
Step 5: put the pom pom inside
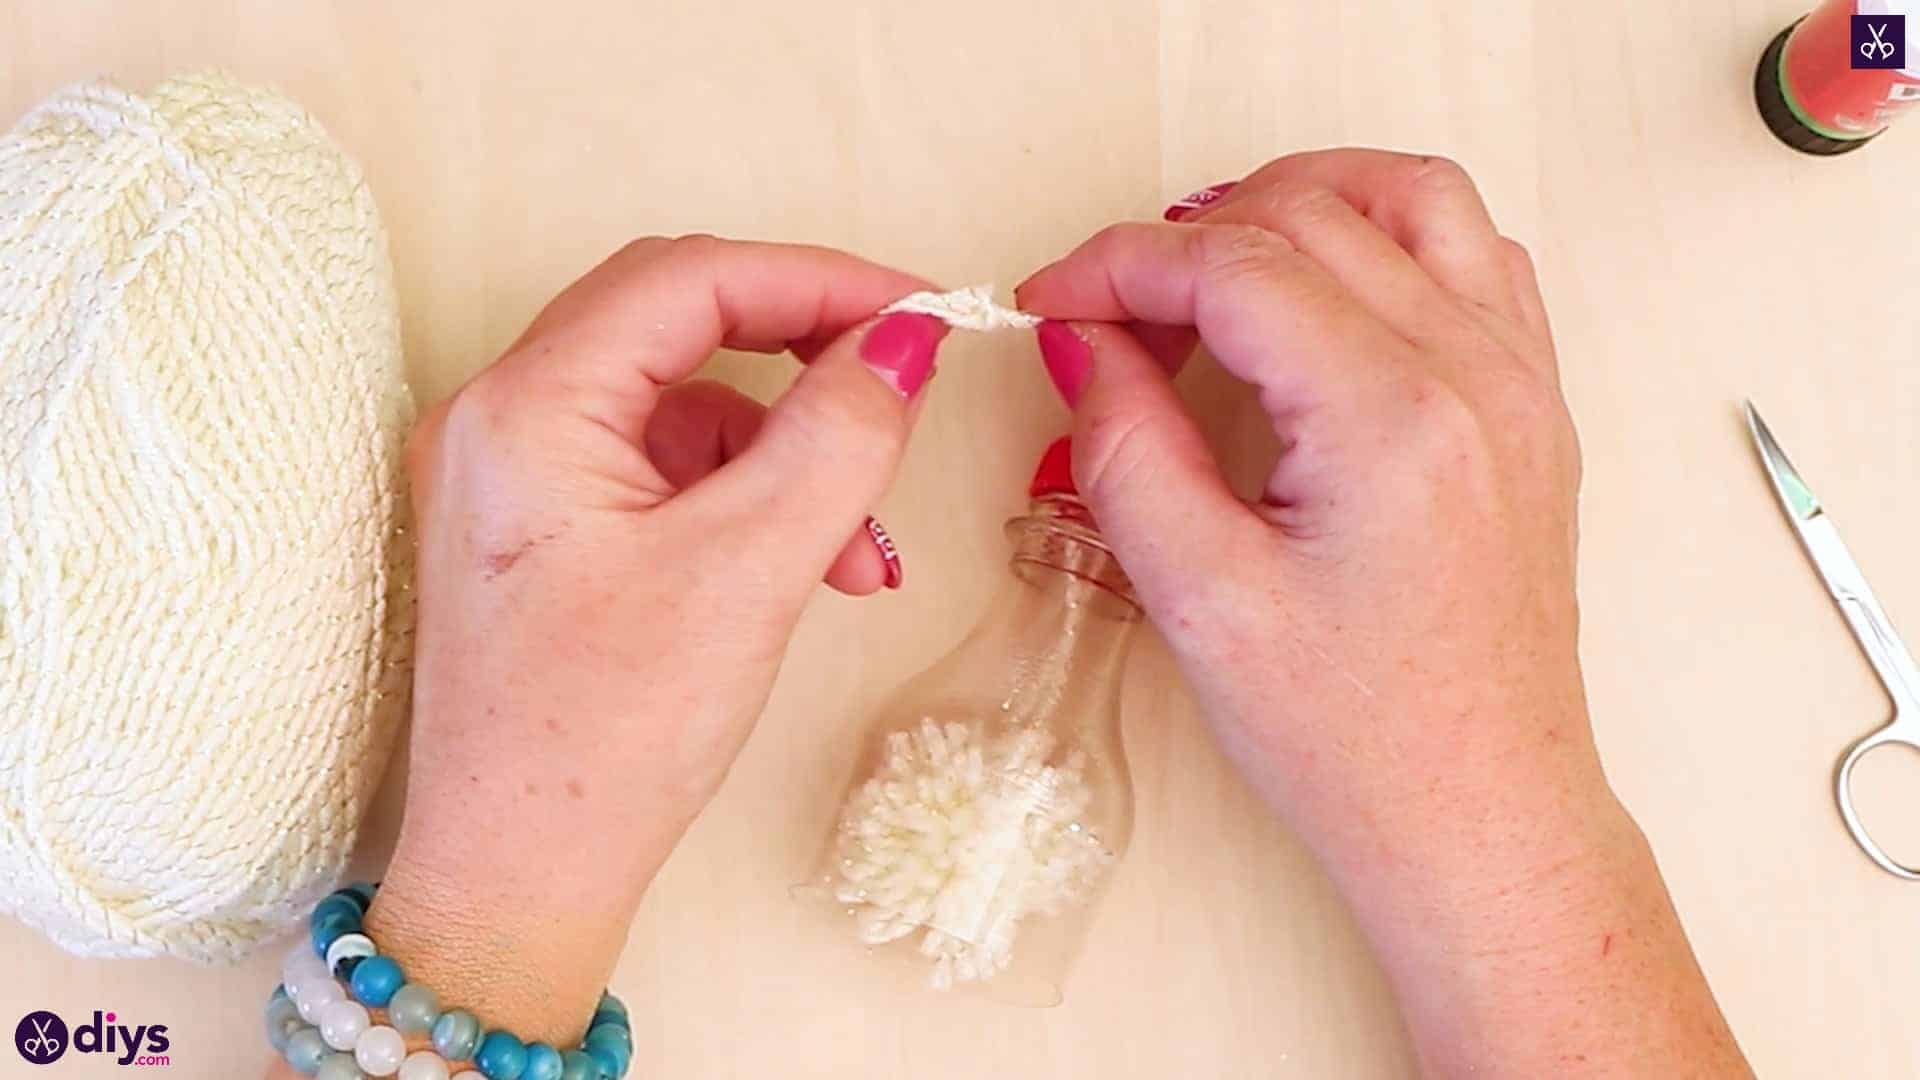
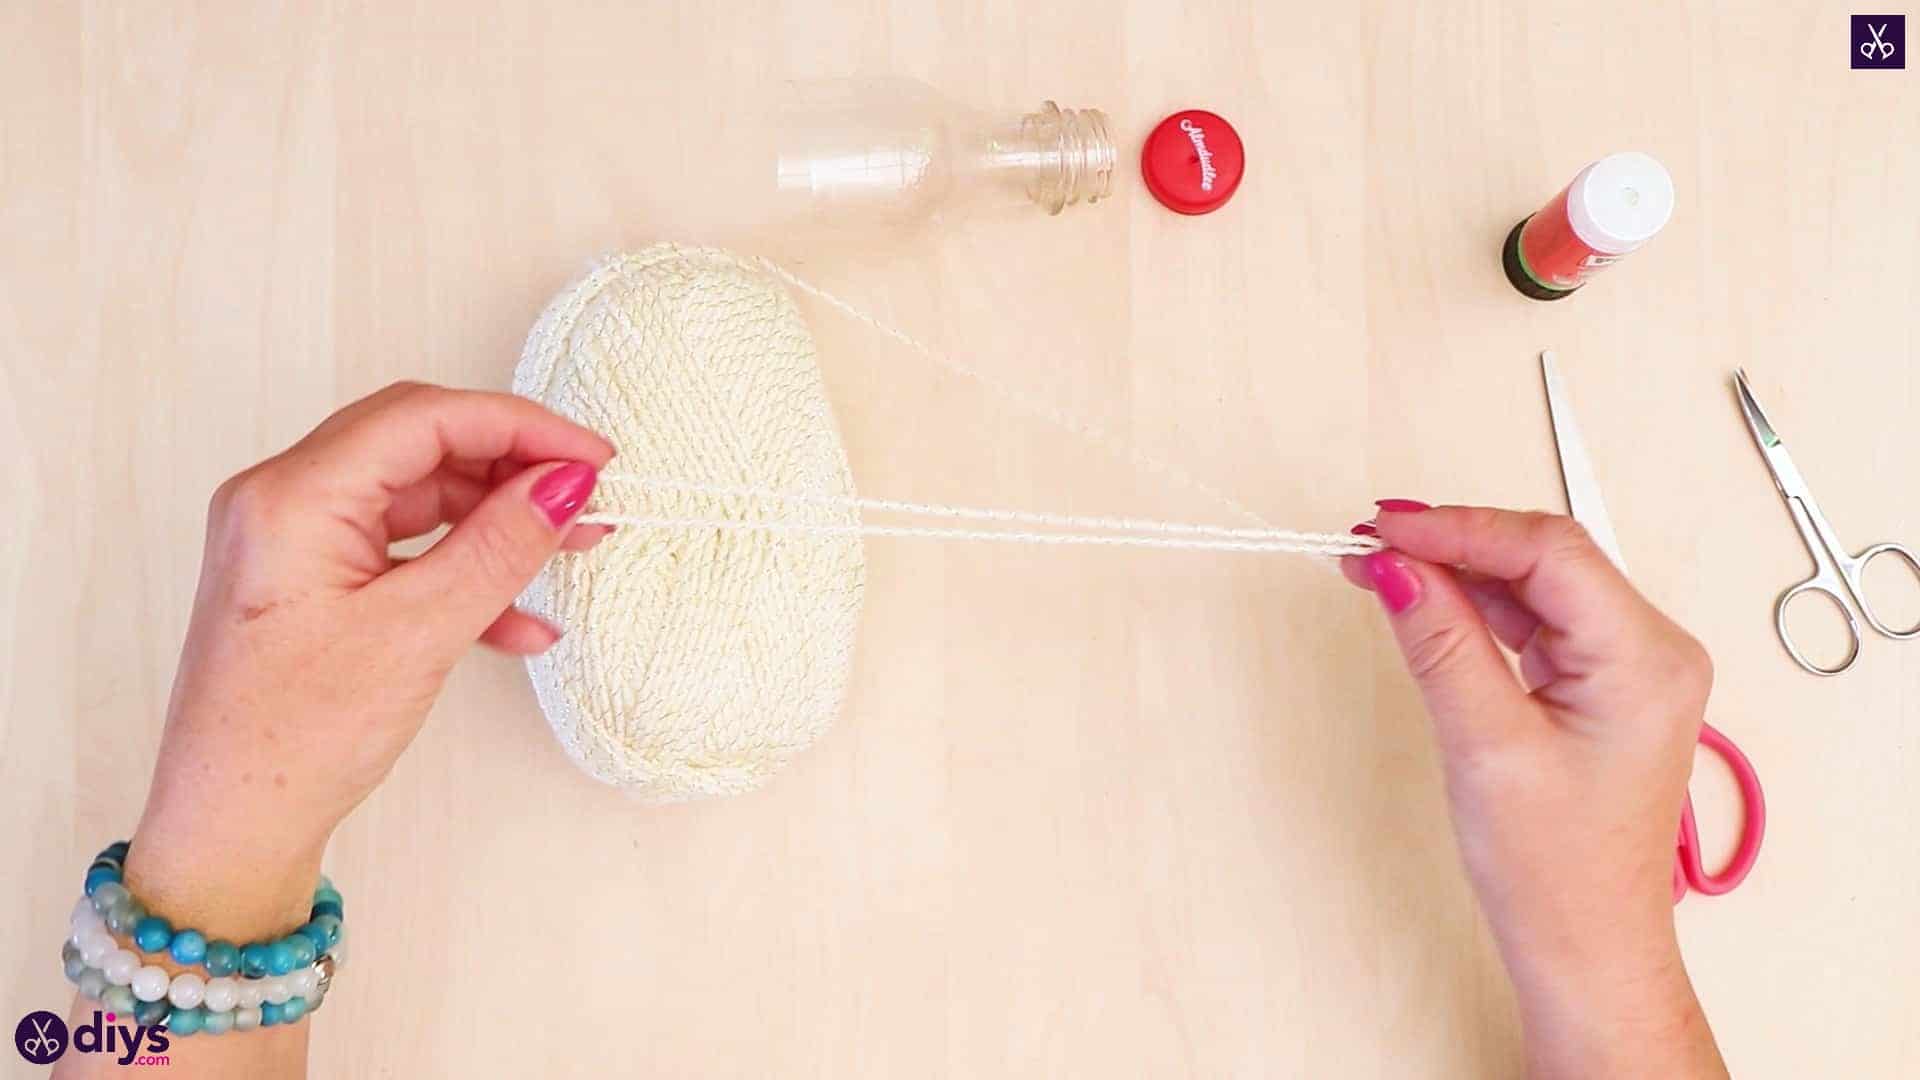
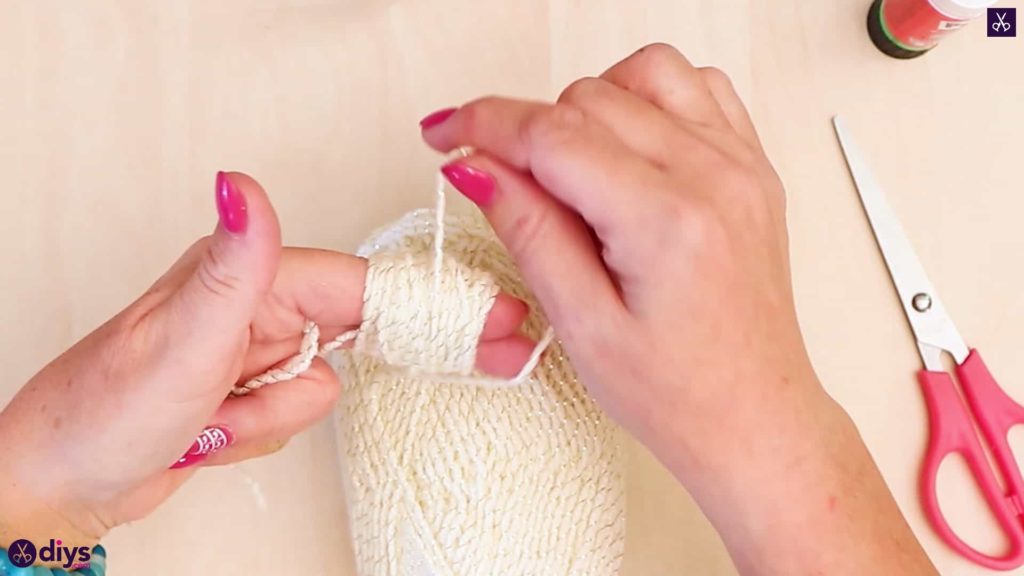
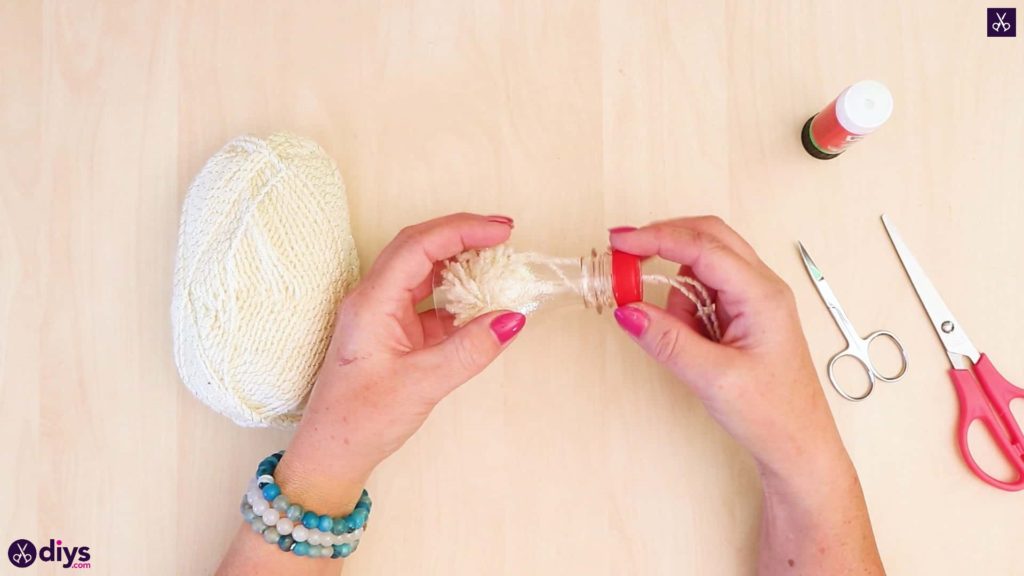
Hold the long ends of your pom pom together and pass them both through the hole in the middle of your bottle top. I used the tip of my nail scissors to poke them through at first so I could pull them to the other side. Don’t pull the stringstoo far through just yet; you’ll need a bit of slack for the next step.
Step 6: add the top
Push your pom pom through the open bottle top so it hangs just below the neck of the bottle on the inside and then screw your lid back onto the bottle. Now you can pull on either the end strings or the pom pom to adjust things and position the pom pom where you want it to sit inside.
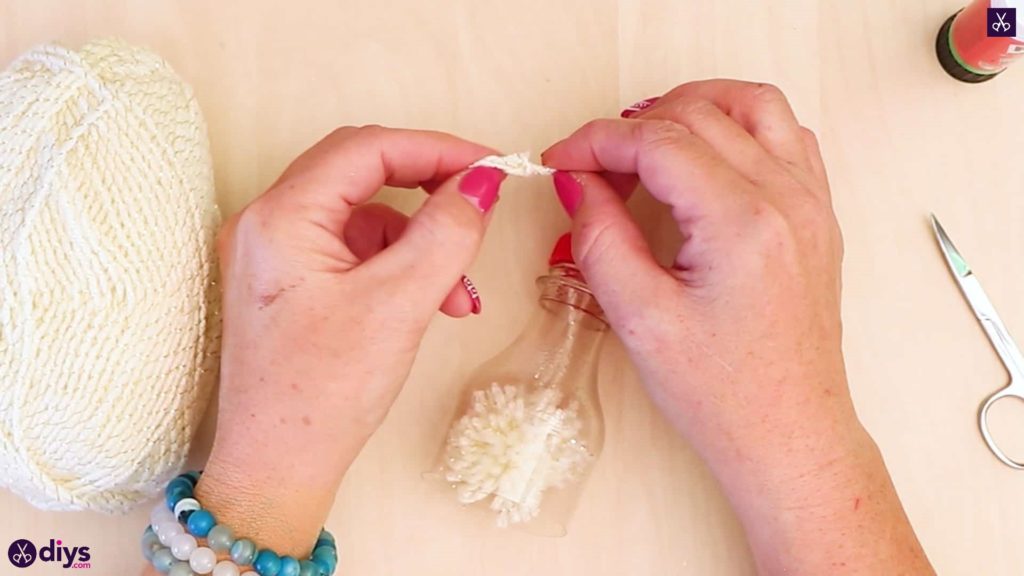
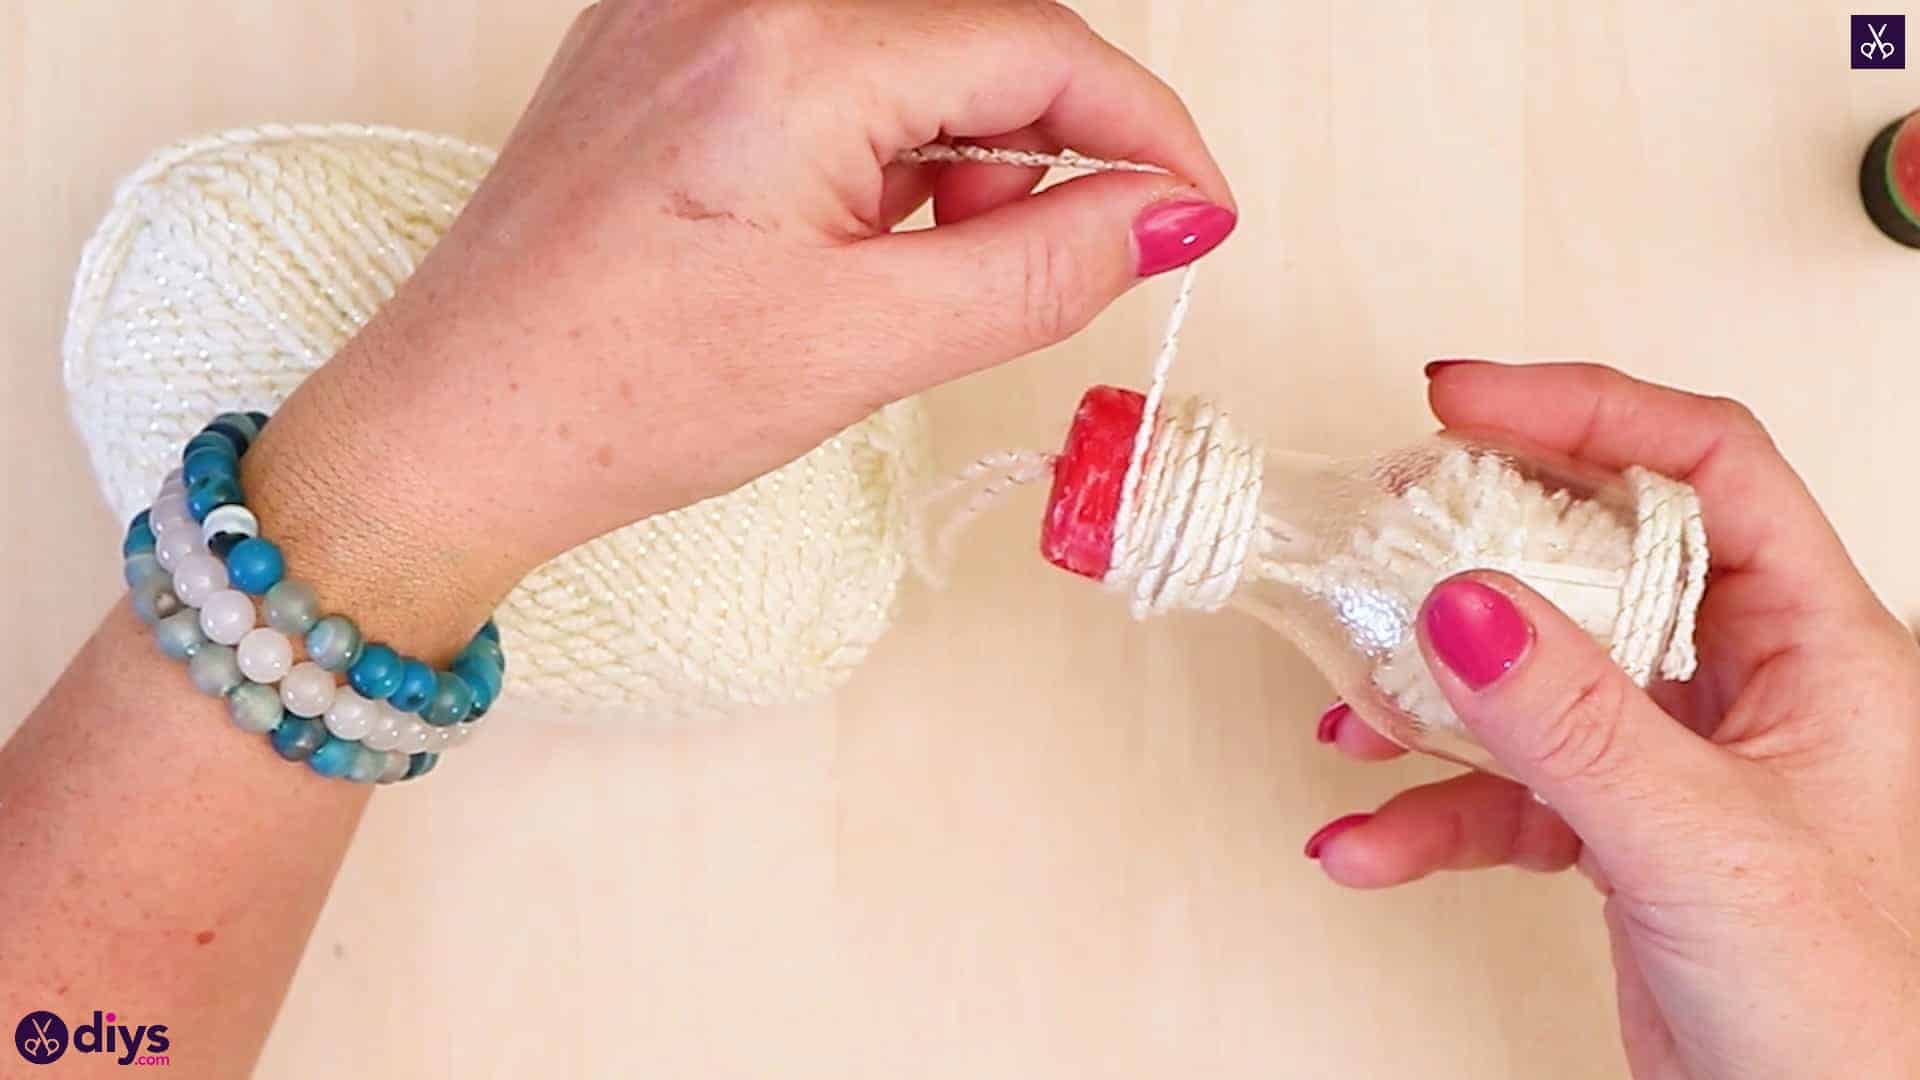
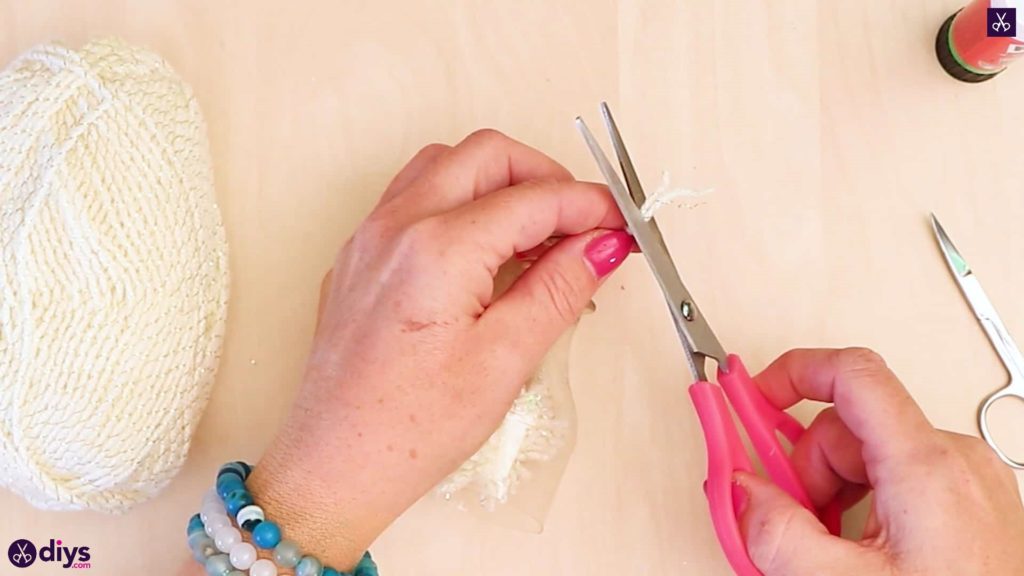
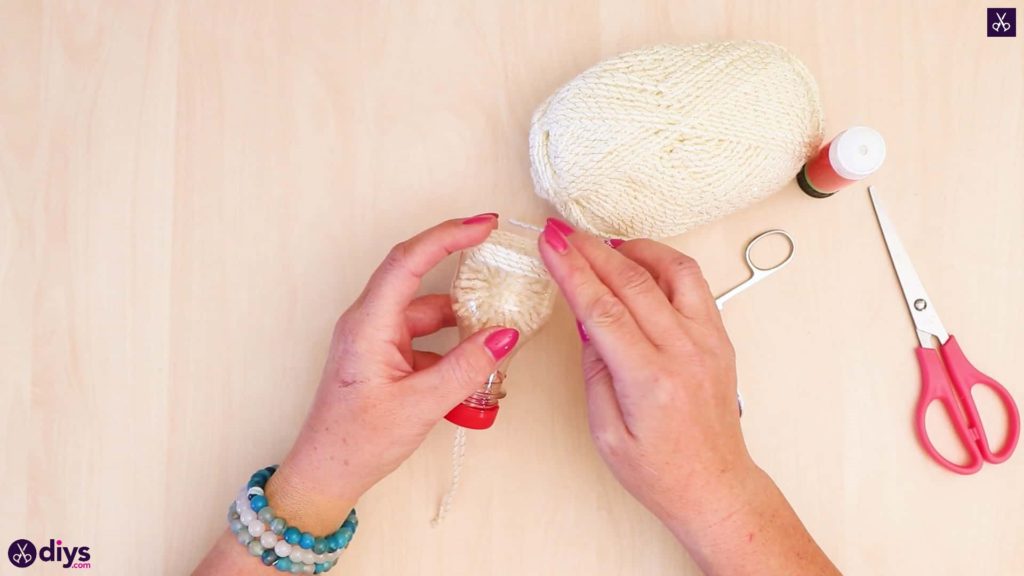
Step 7: tie and trim
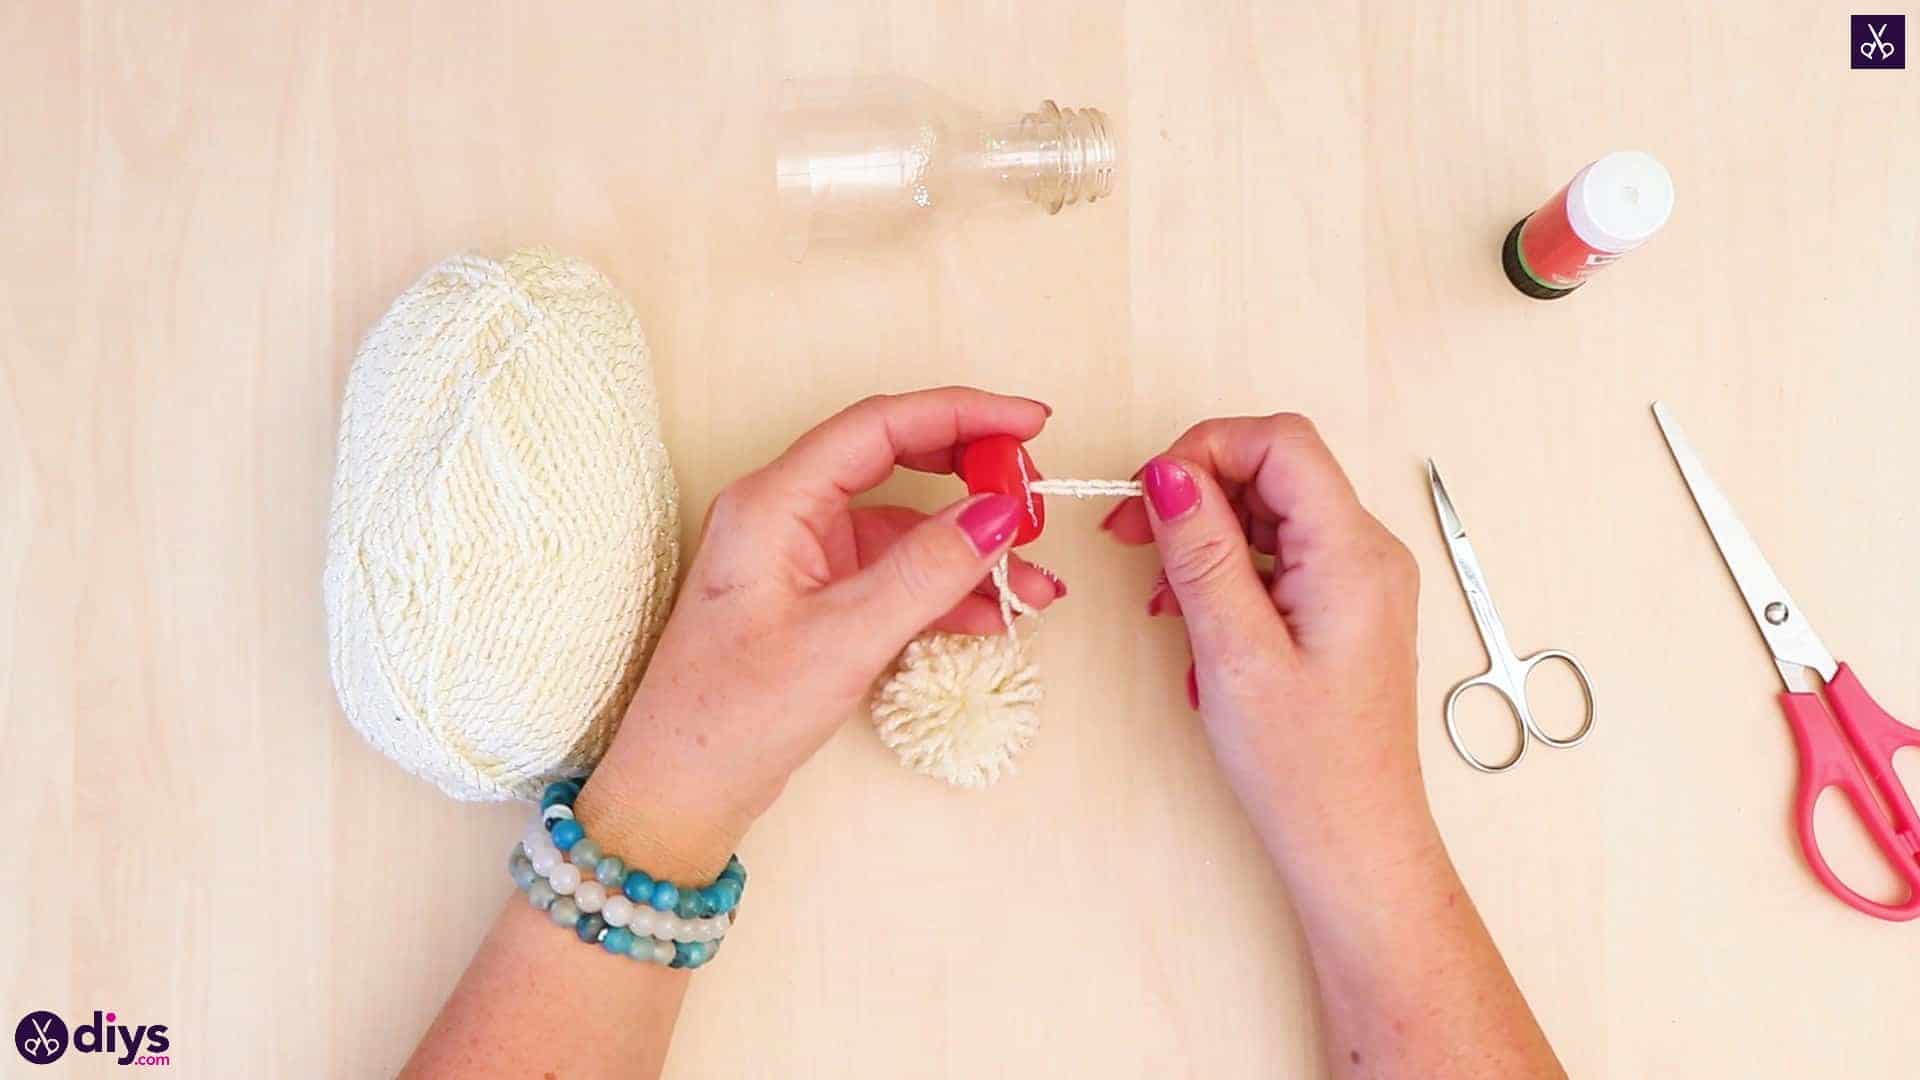
Hold the ends of your original yarn piece together and tie them in a knot so you have a complete loop to hang your ornament from when it’s finished. Trim the tips of the knot if necessary.
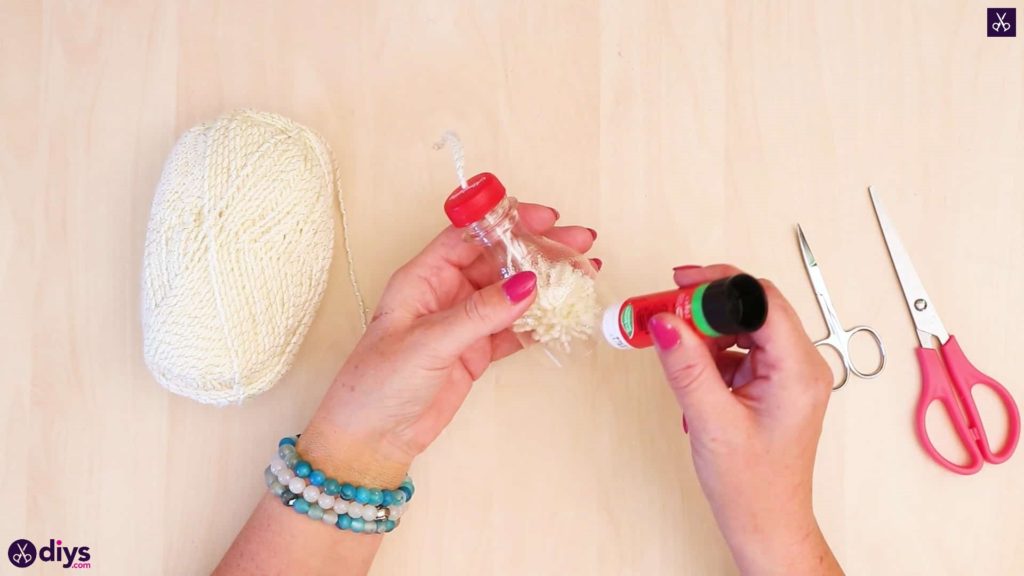
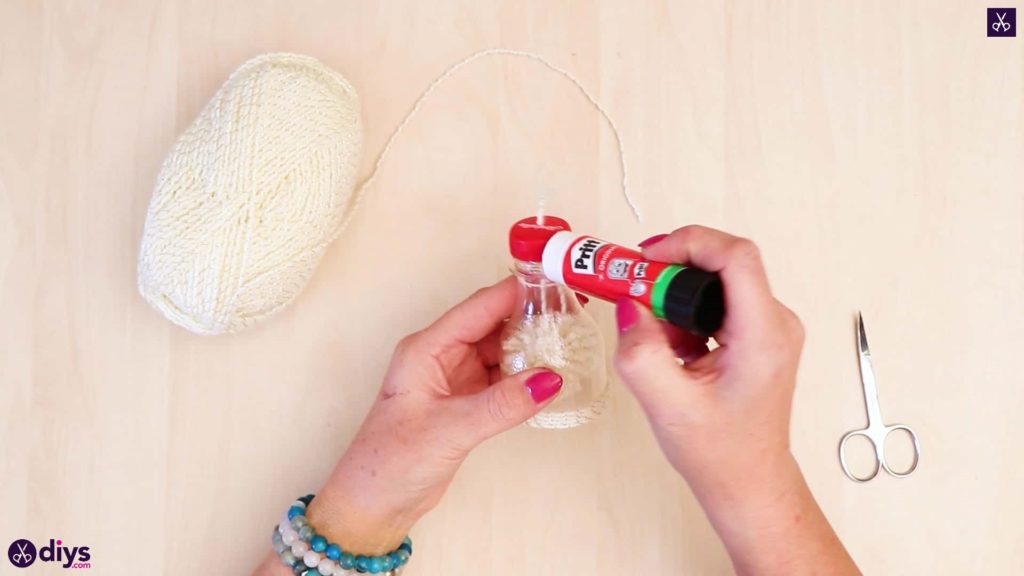
Step 8: start wrapping
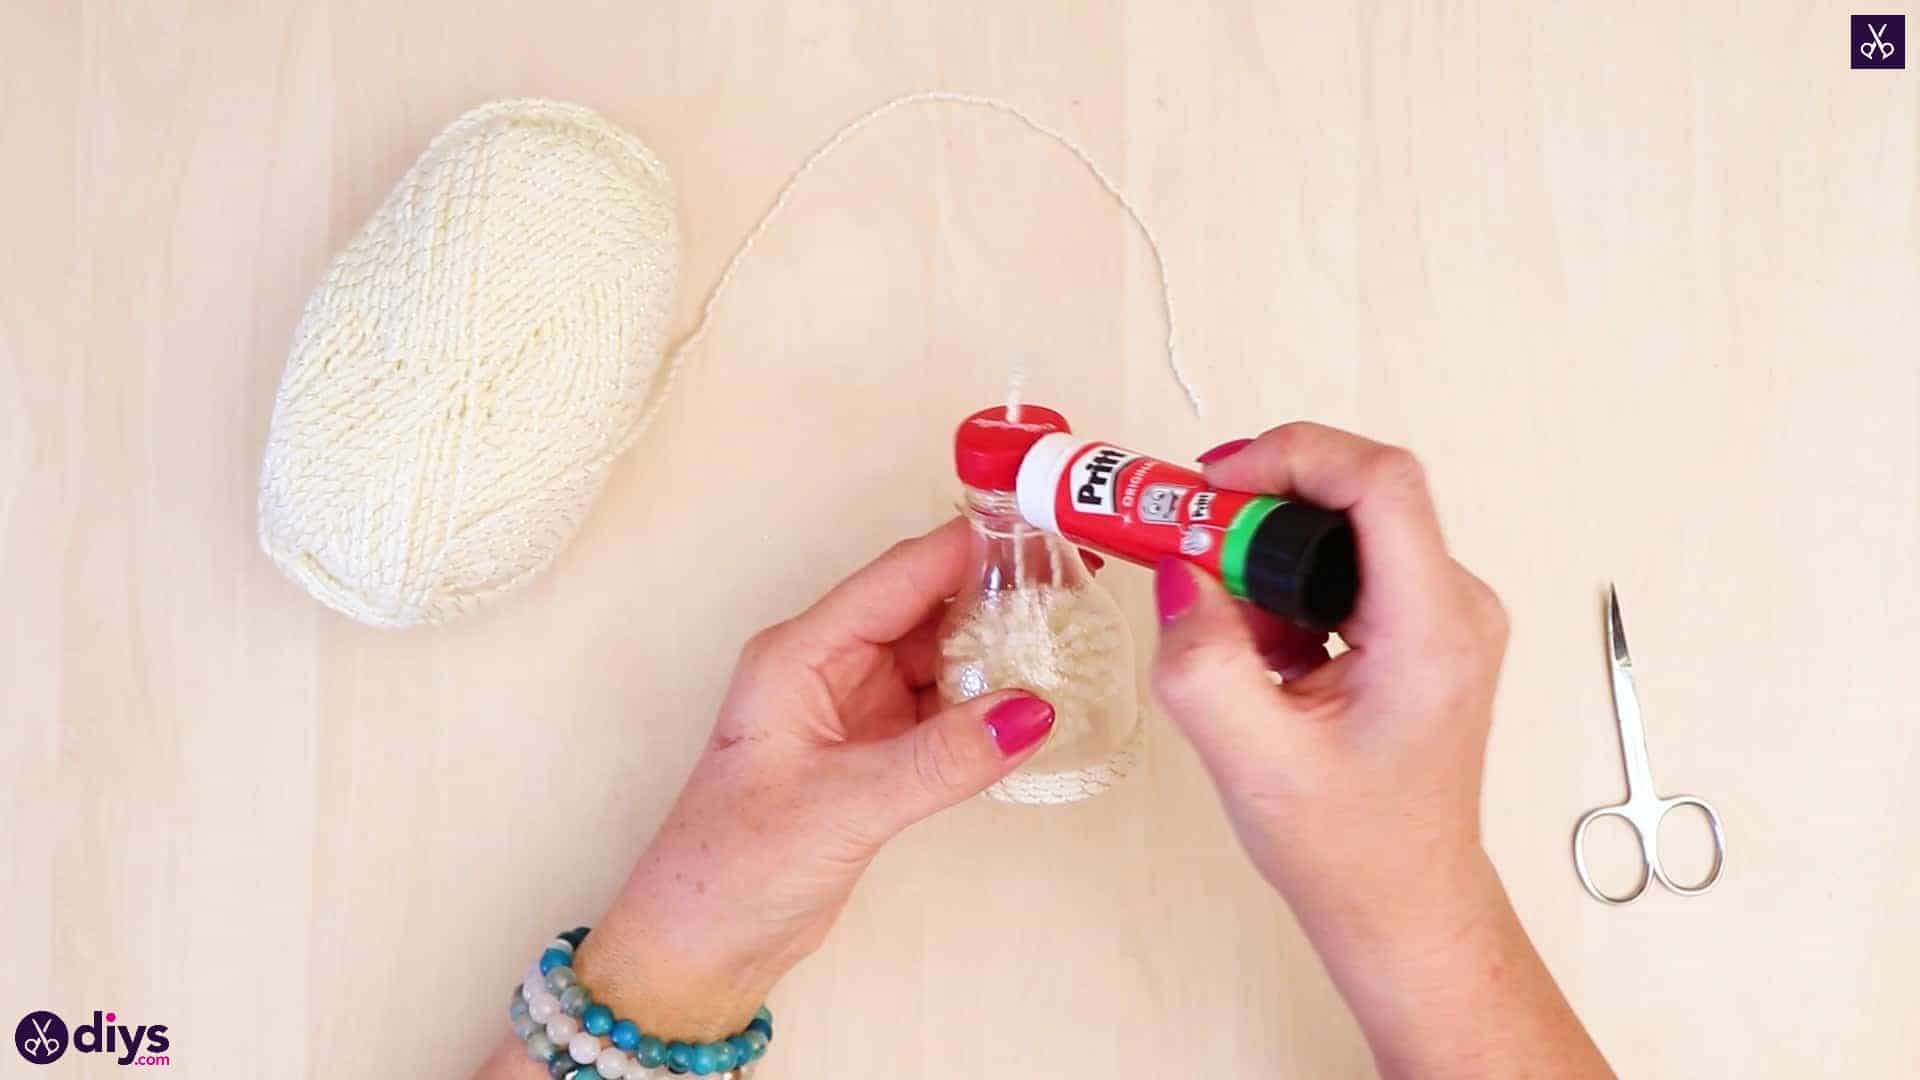
Use your glue stick to apply glue all along the bottom cut edge of your bottle. Stick the end of your yarn down along the very edge horizontally and begin wrapping the yarn around the bottom, keeping it as even with that very edge as you can. Keep wrapping the yarn round the bottle, lining your strings so they pass next to and against each other and start spiralling upwards. Continue wrapping until you have a bottom trim around the bottle’s edge that’s about half an inch thick. Trim the yarn and carefully stick your new end down (I carefully tucked mine under the wrapped yarn to hide it).
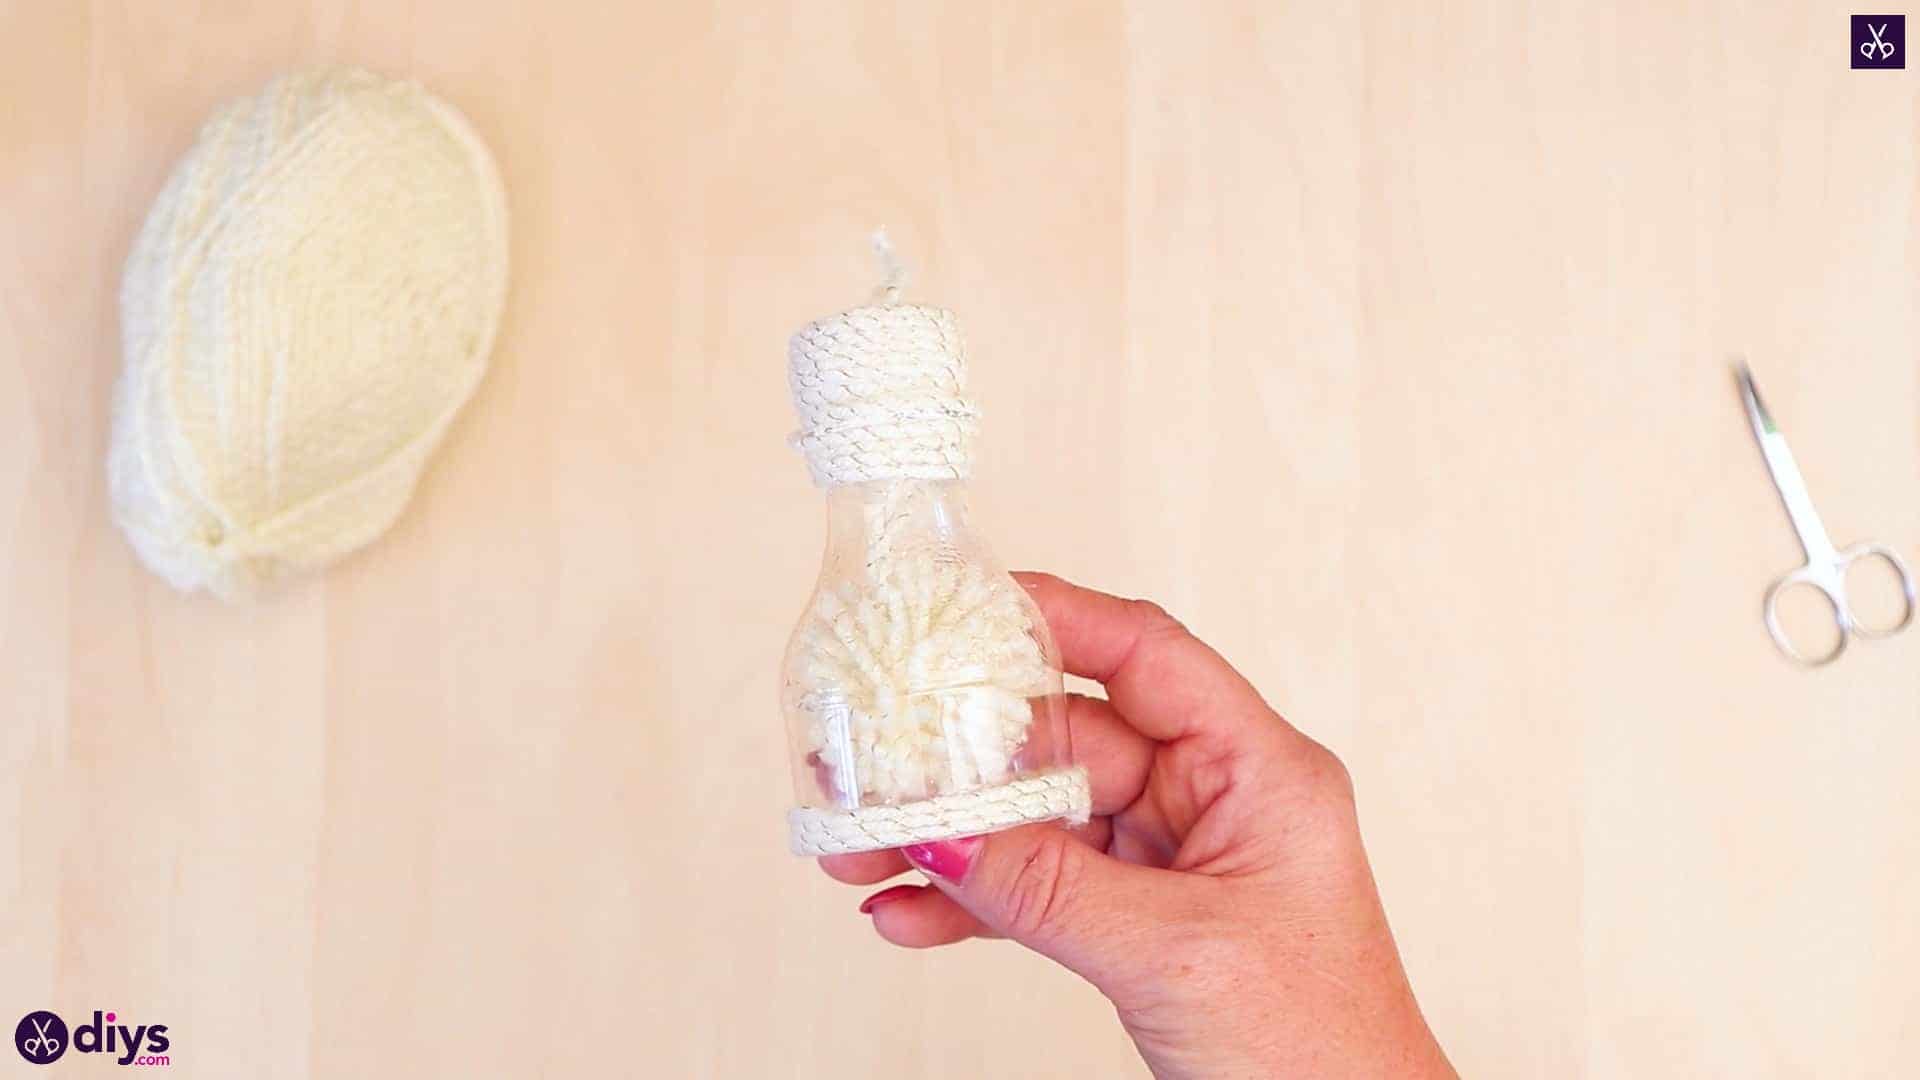
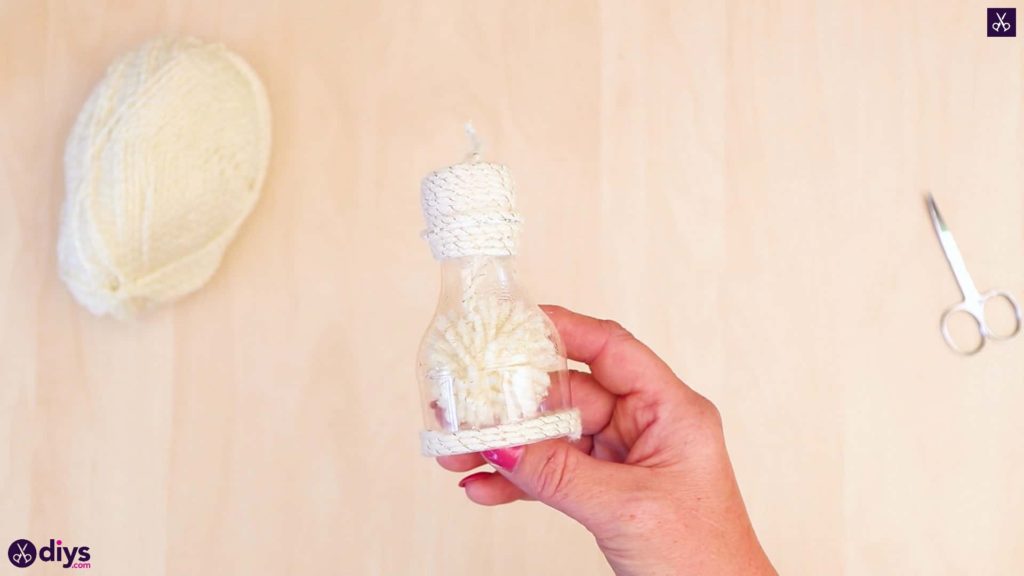
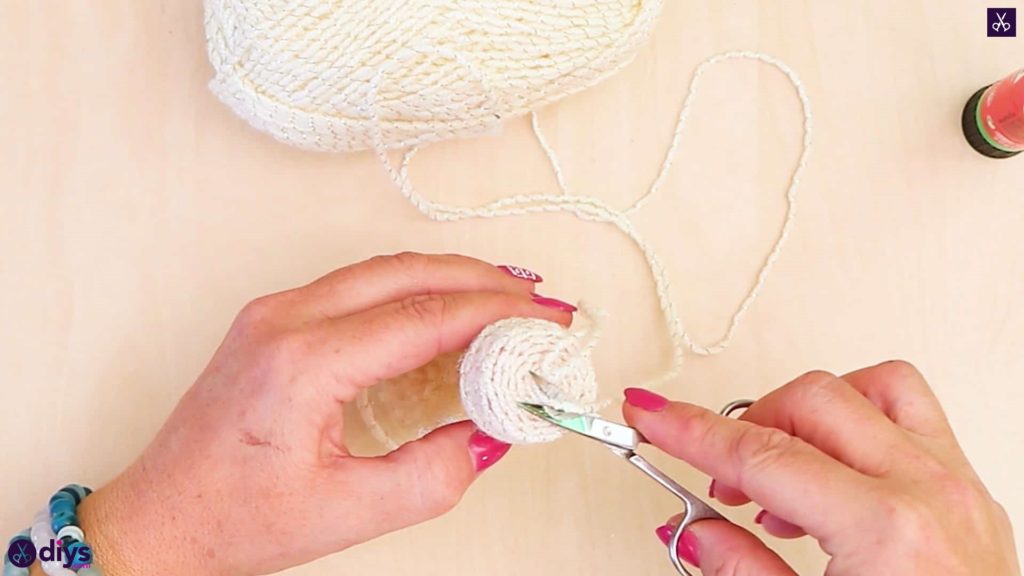
Step 9: cover the lid
Repeat this entire gluing and wrapping process around the top of the bottle, starting at the top of the neck underneath where the cap screws on and continuing all the way up. This time, when you get to the top of the bottle where it plateaus, apply glue to the whole surface and spiral the yarn inward, lining it up with itself in the same way until you get to your loop at the center. Trim the end and stick it down,


Voila! A little window ornament that looks a bit like a winter hat, with a peekaboo pom pom in the clear center. Just in case you’d like to try this project out for yourself, here’s a fantastic tutorial video to help you!