DIY Felt Pansy Wall Decor
Updated on June 23, 2021


You can use several DIY projects to beautify your walls. If you are in search of something aesthetically pleasing and unique to give your space a sweet touch, you should try a felt pansy wall decor. This project is excellent for people who like to create sentimental pieces and enjoy the feel of nature. The steps are straightforward, and even if you are new to art projects, you can try it out.
All you need is a few art supplies that you most likely already have lying around the house, and you are good to go! Let’s get started.
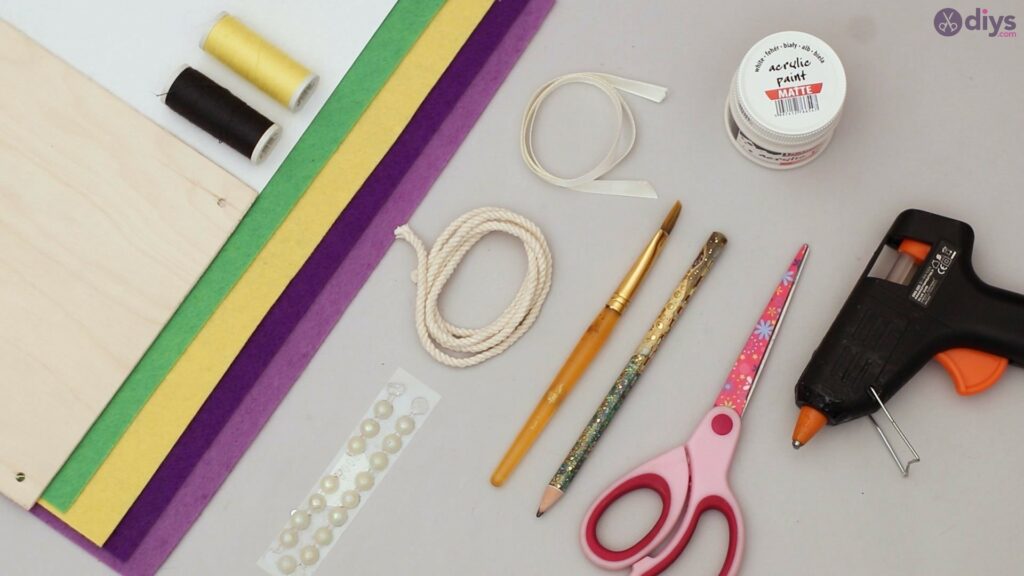
Materials you’ll need for this wall decor:
- wood table
- glue gun
- scissors
- paintbrush
- white acrylic paint
- decor bead
- rope
- silk ribbon
- yellow and black twisted yarn
- pin
- pencil
- 2 shades of purple, yellow, and green felt material
- paper
Step by step tutorial to craft a wall decor:
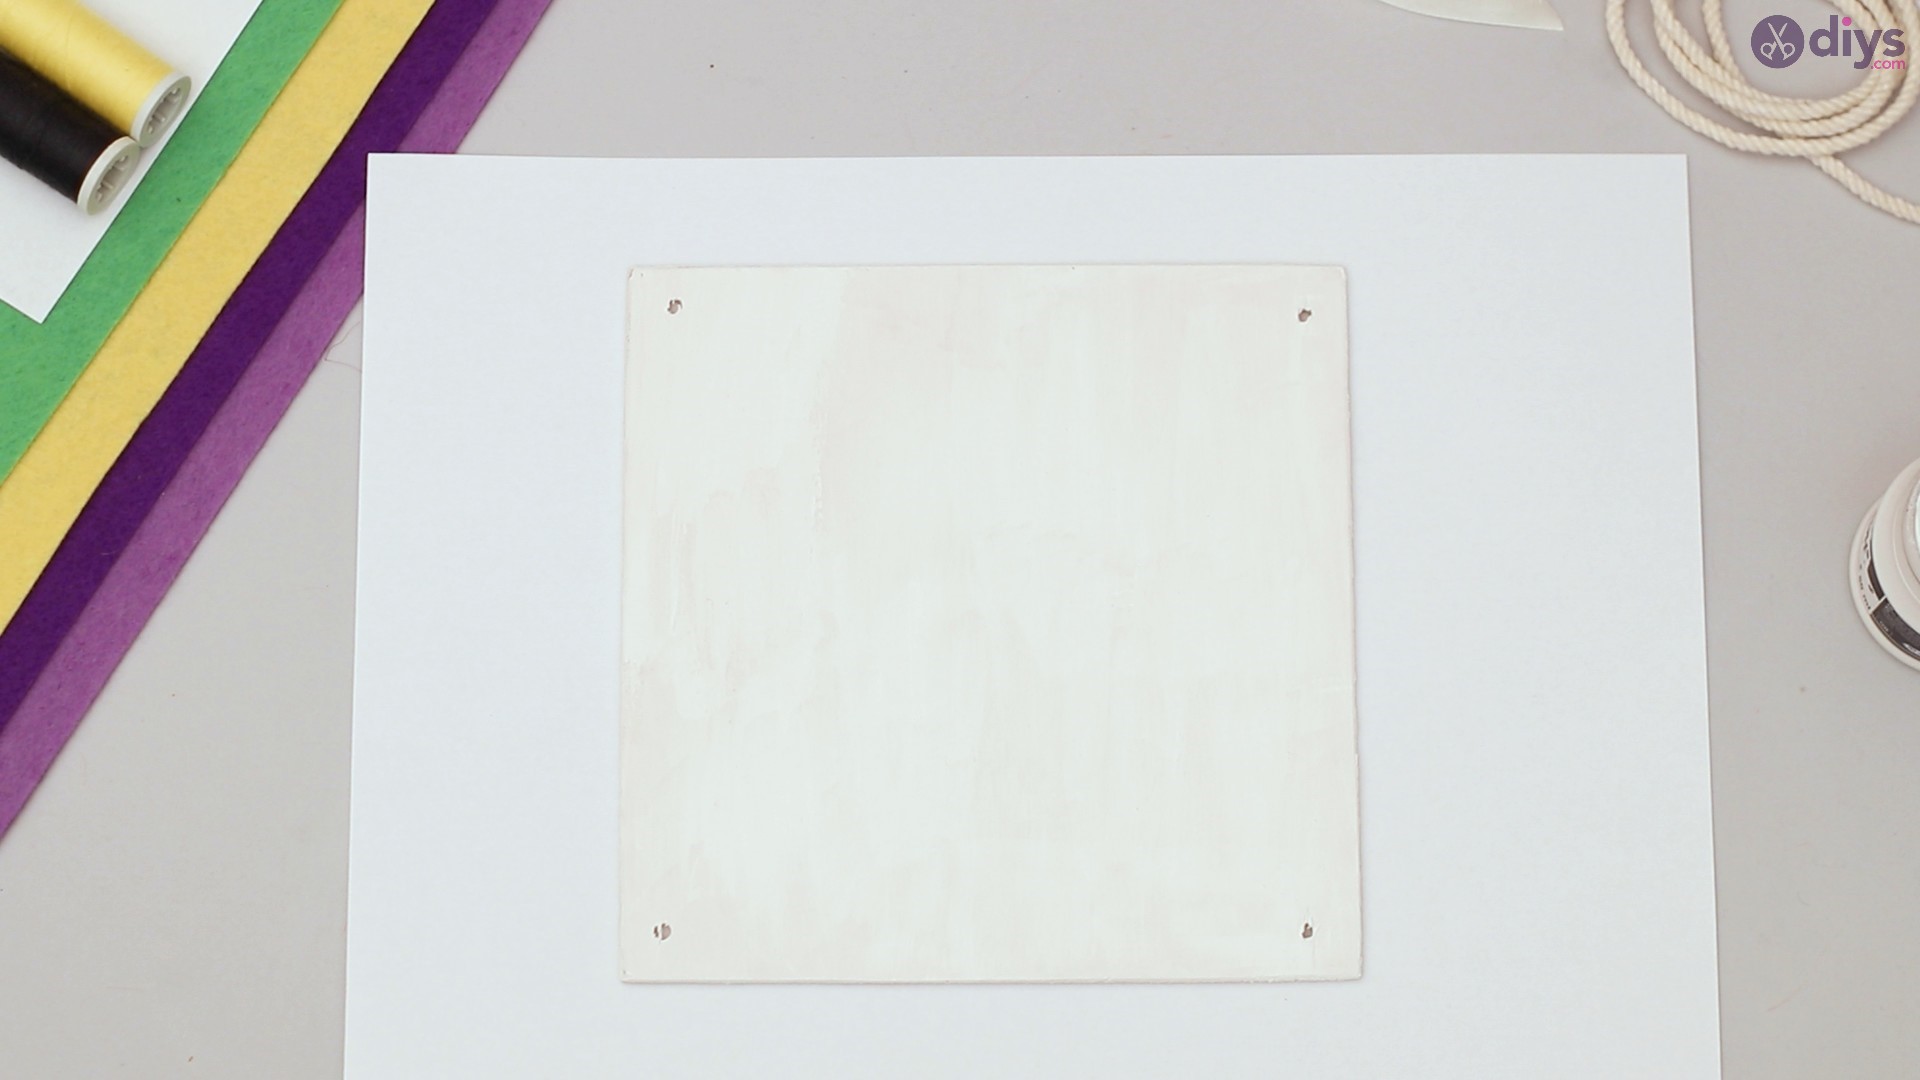
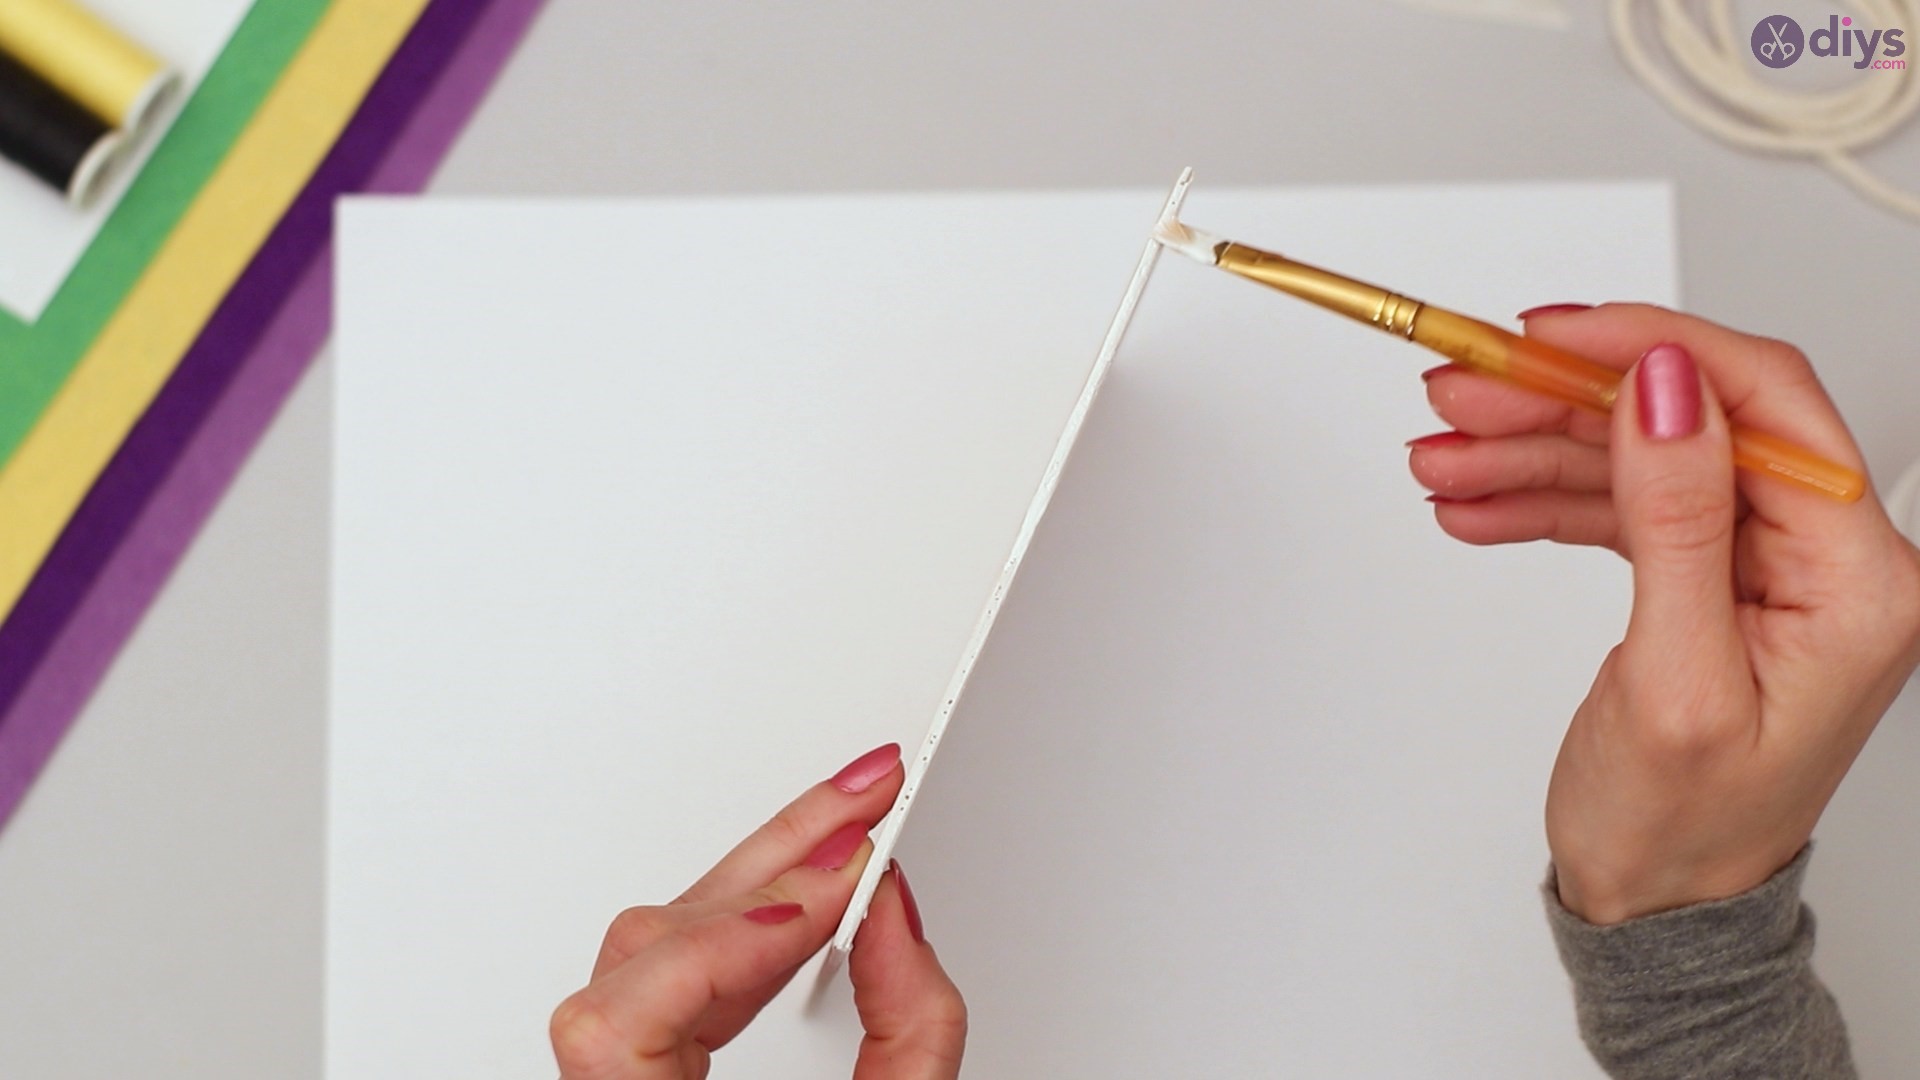
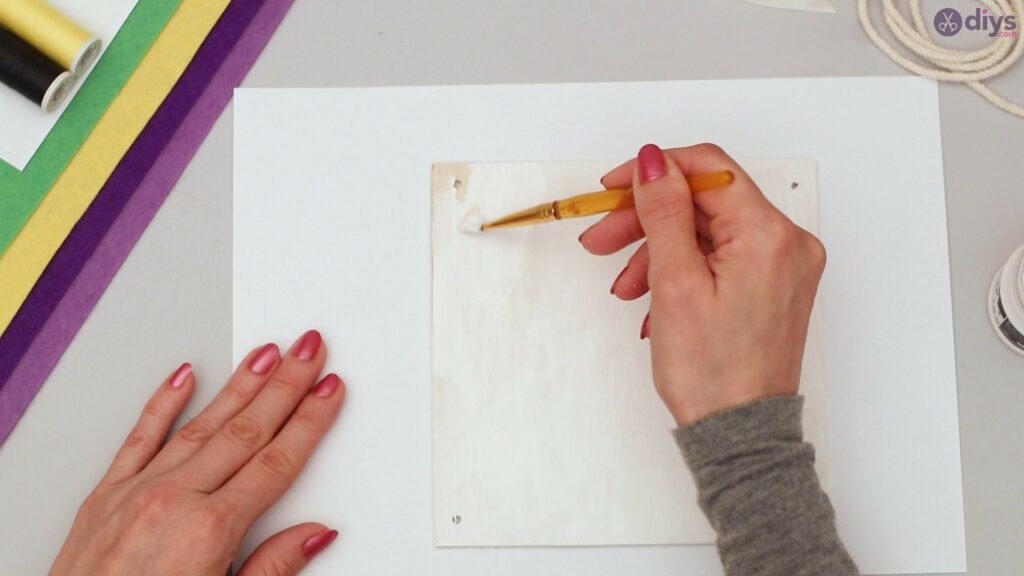
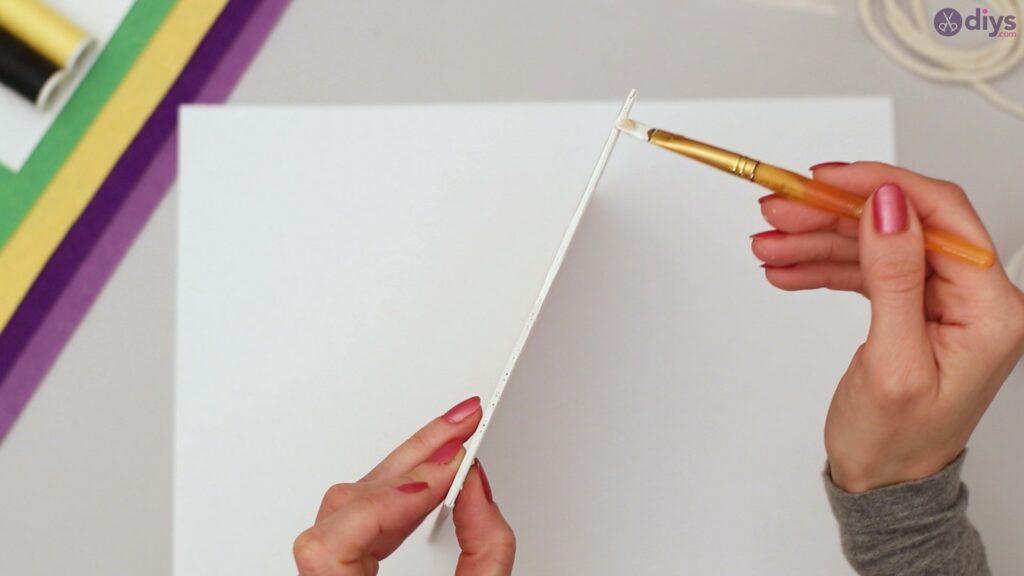
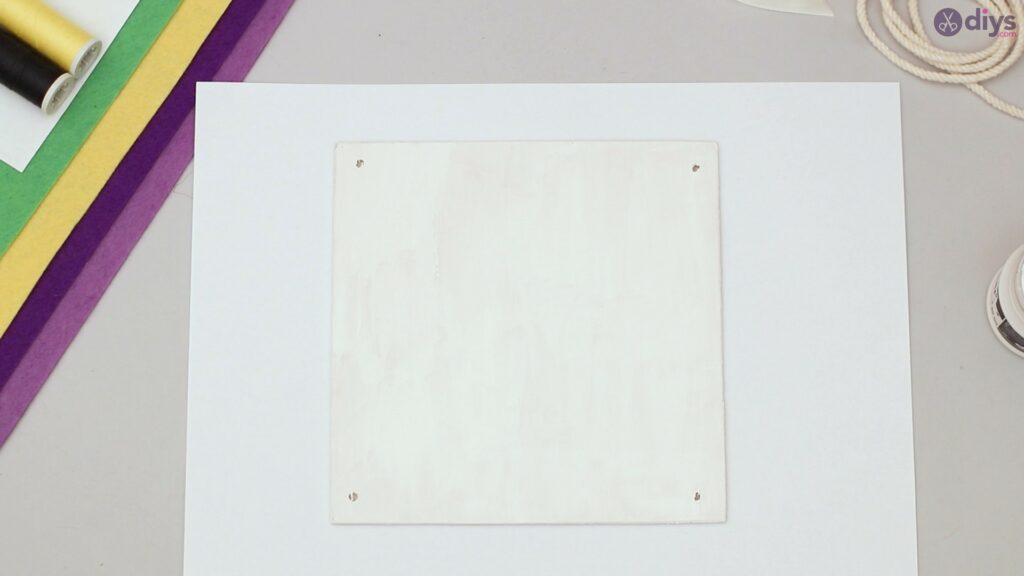
Step 1: Painting your wood table
To get started, you will need your wood table, paintbrush, and white acrylic paint. Take your white acrylic paint and begin painting the entire wood table, including the edges.

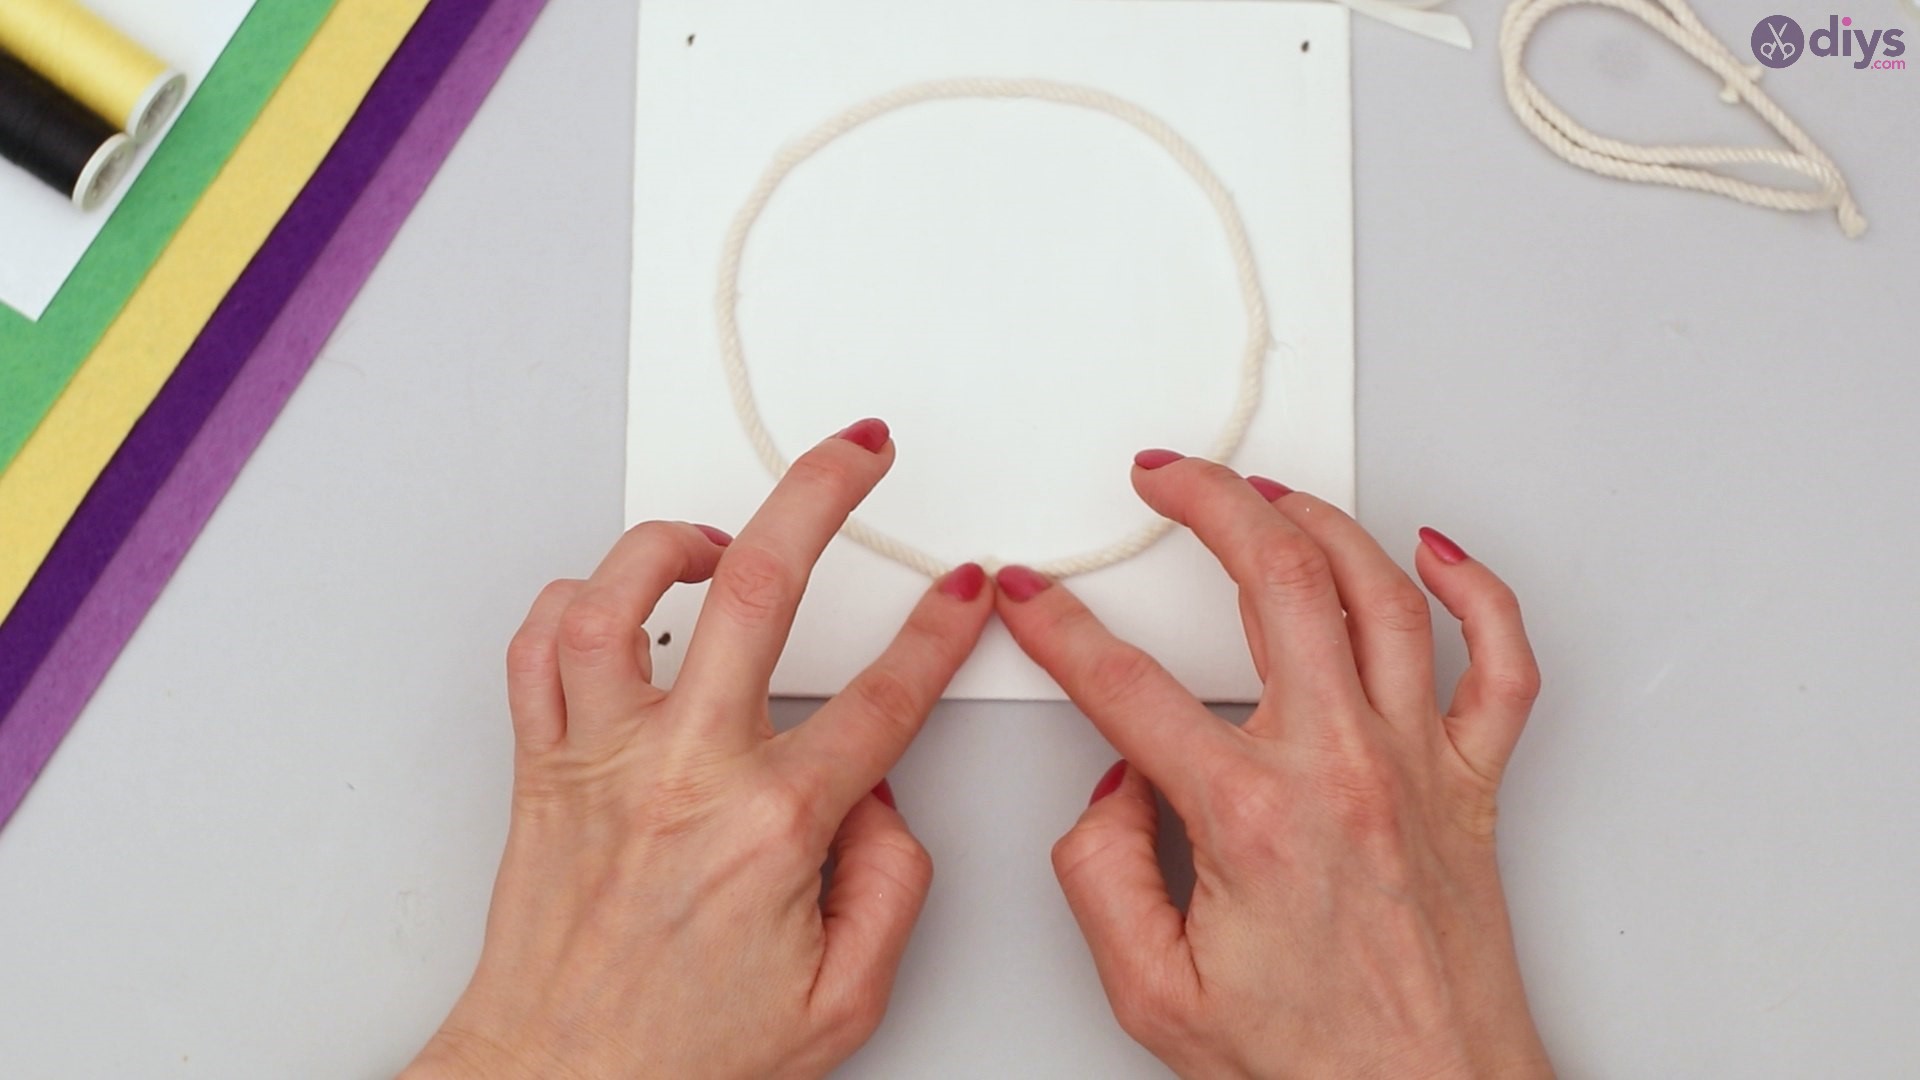
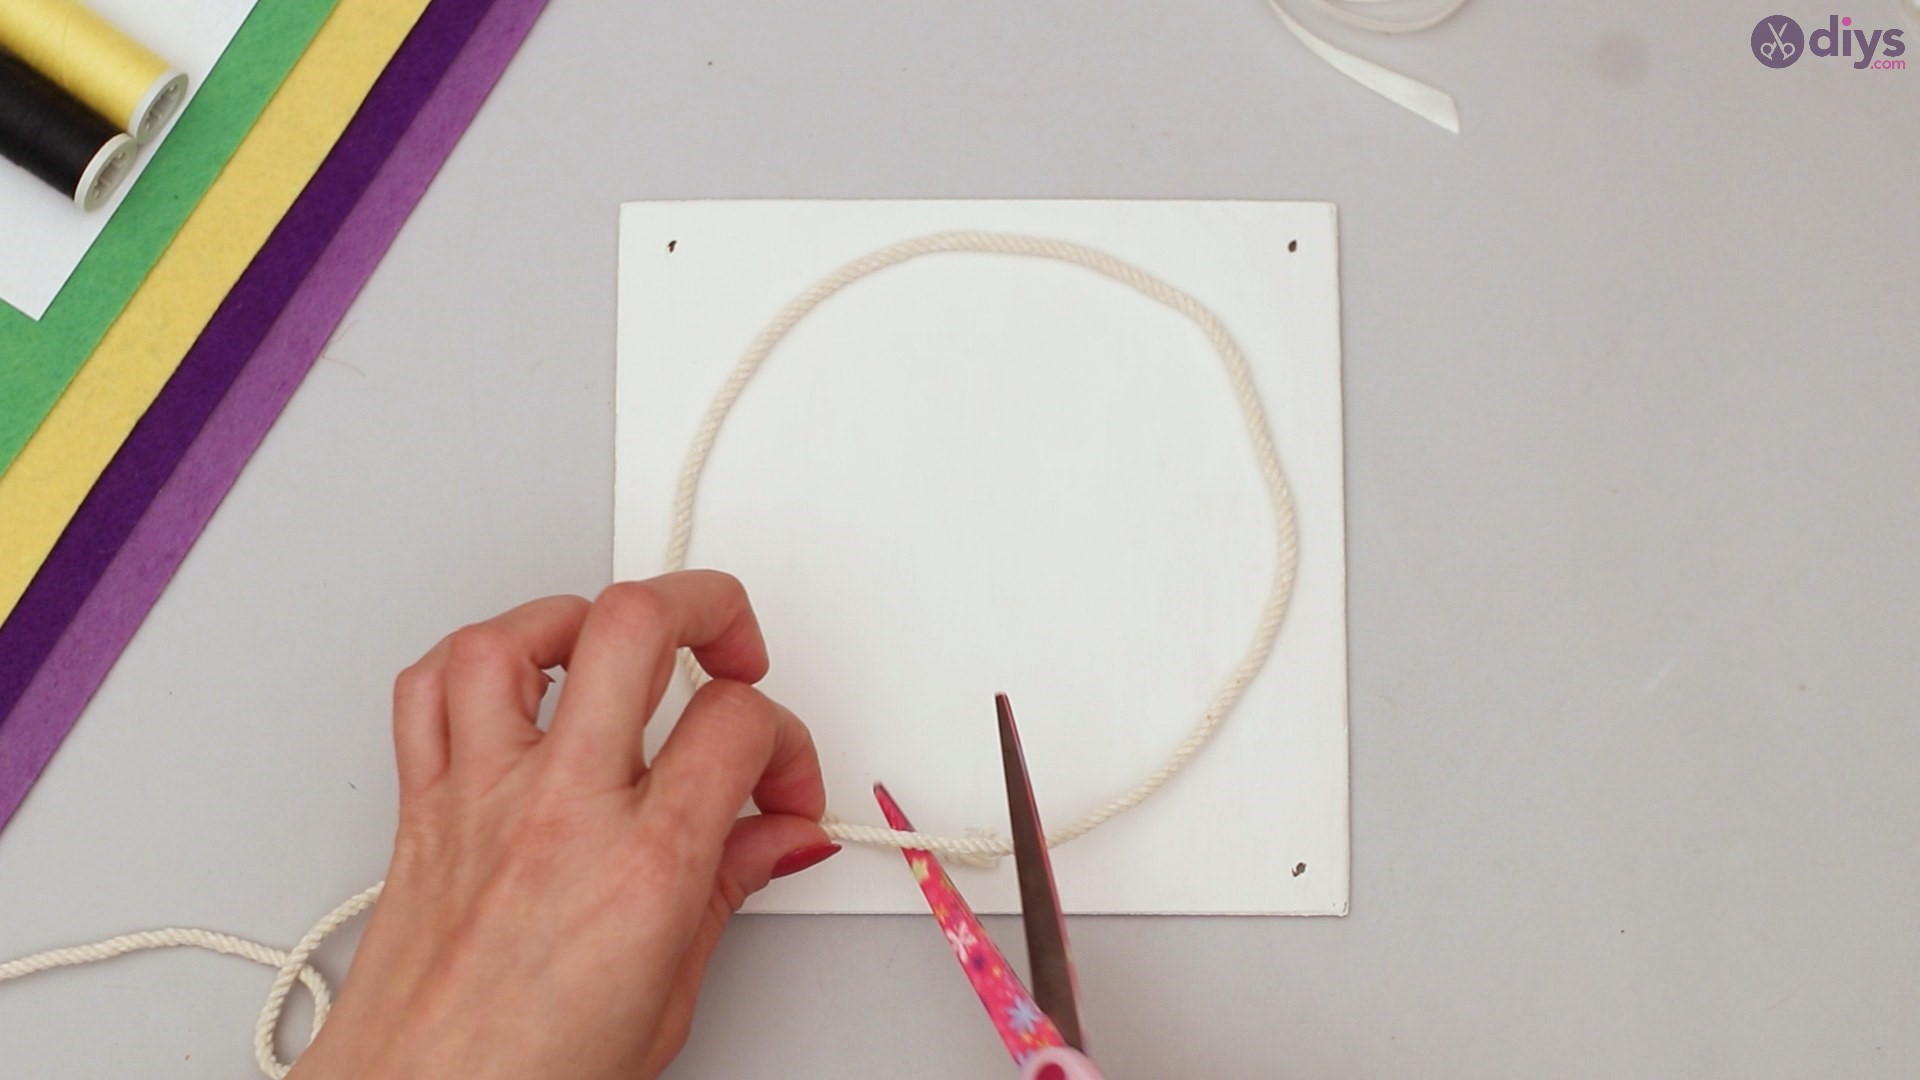
Step 2: Hot glue the rope
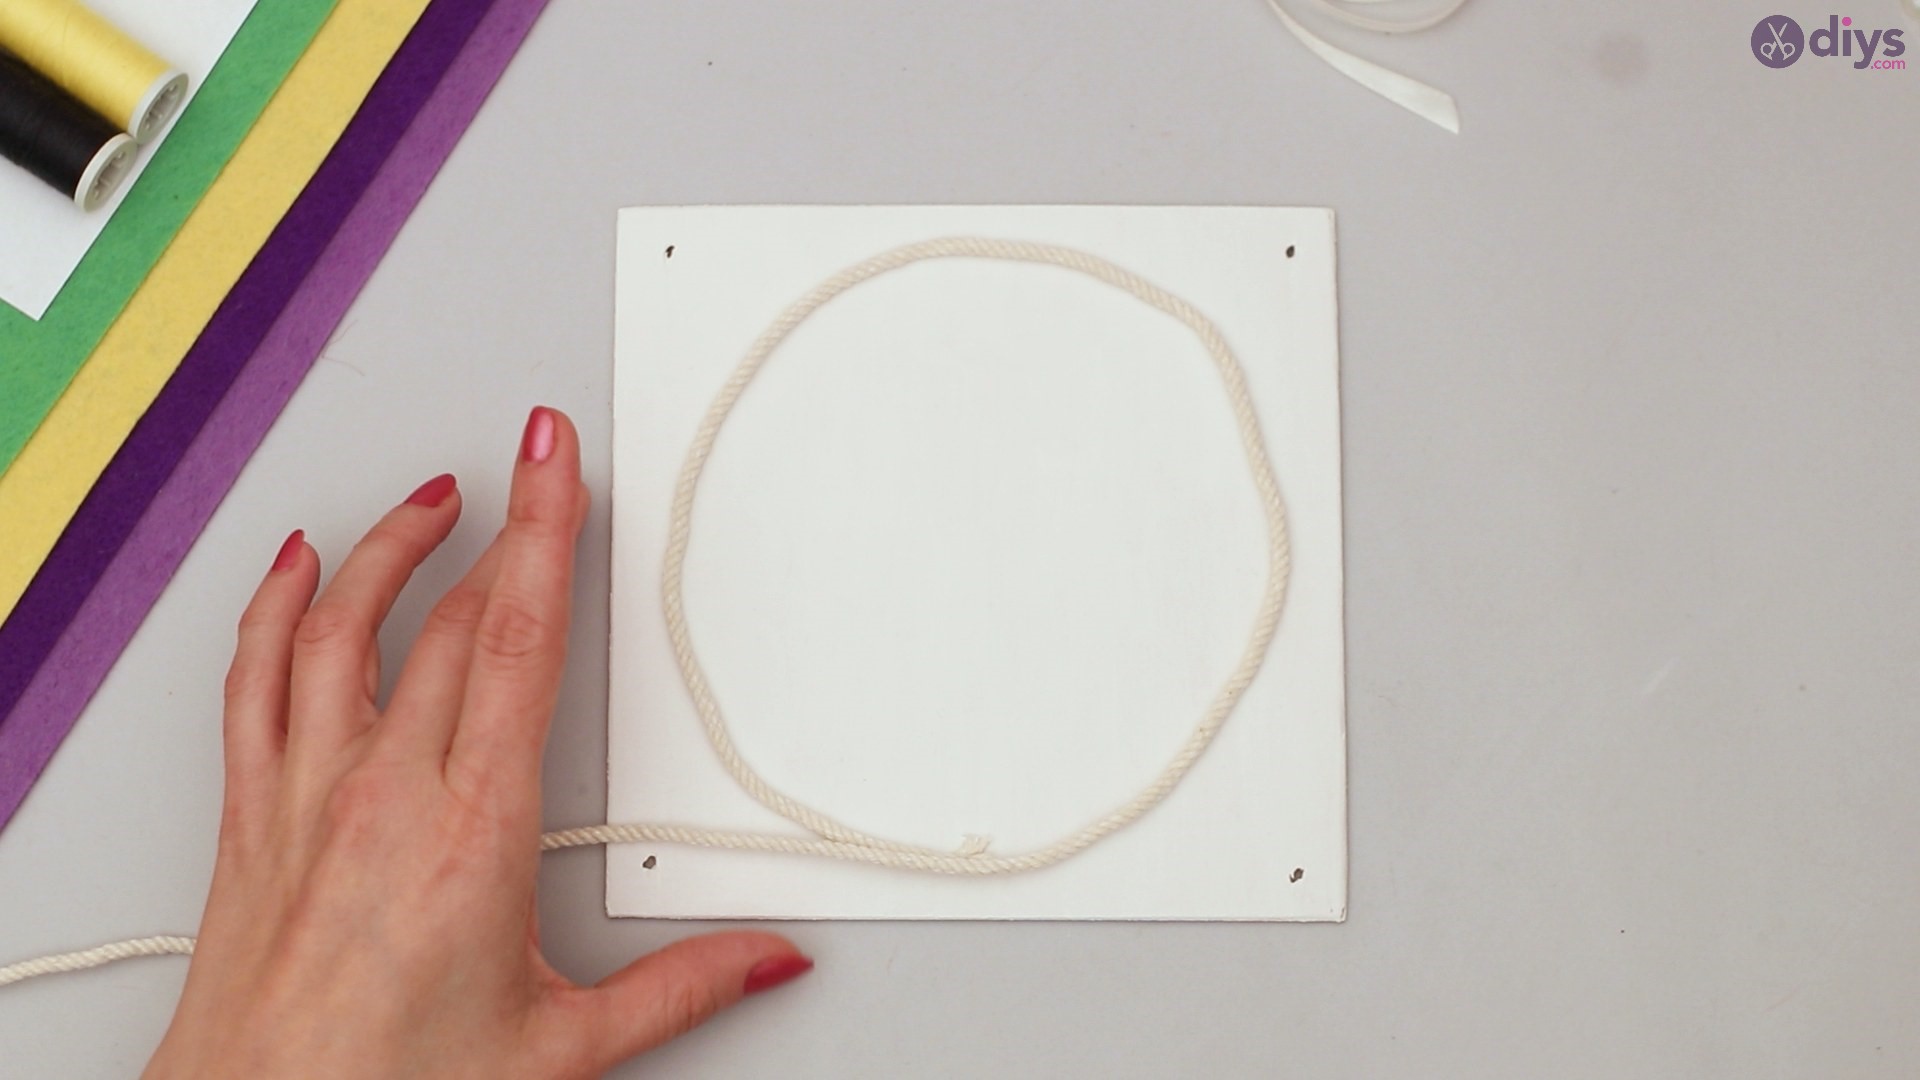
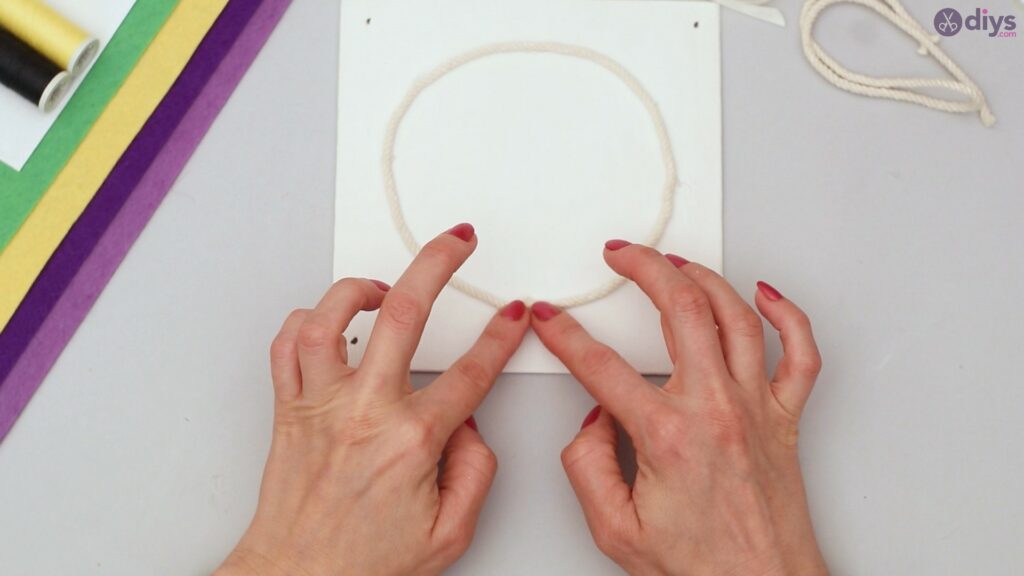
Lay the painted wood table flat down and allow it to dry for a minute or two.
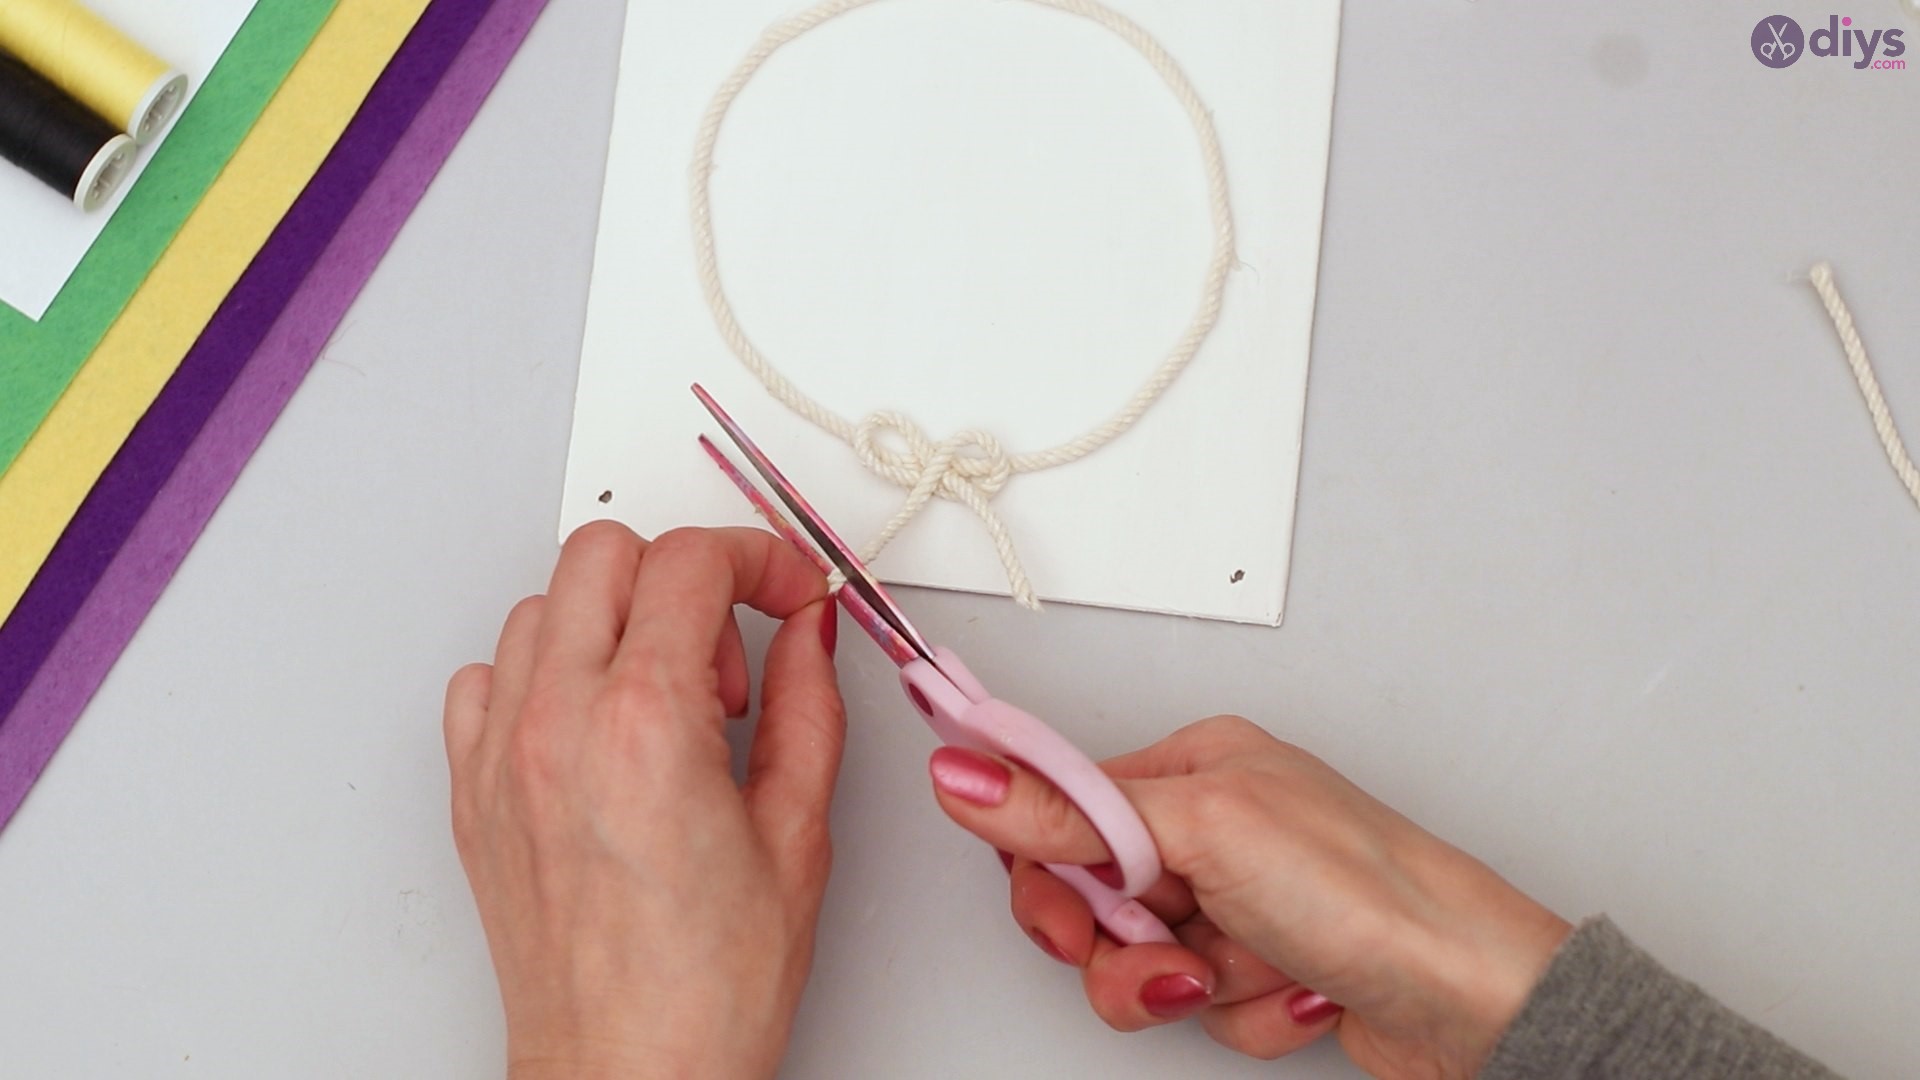
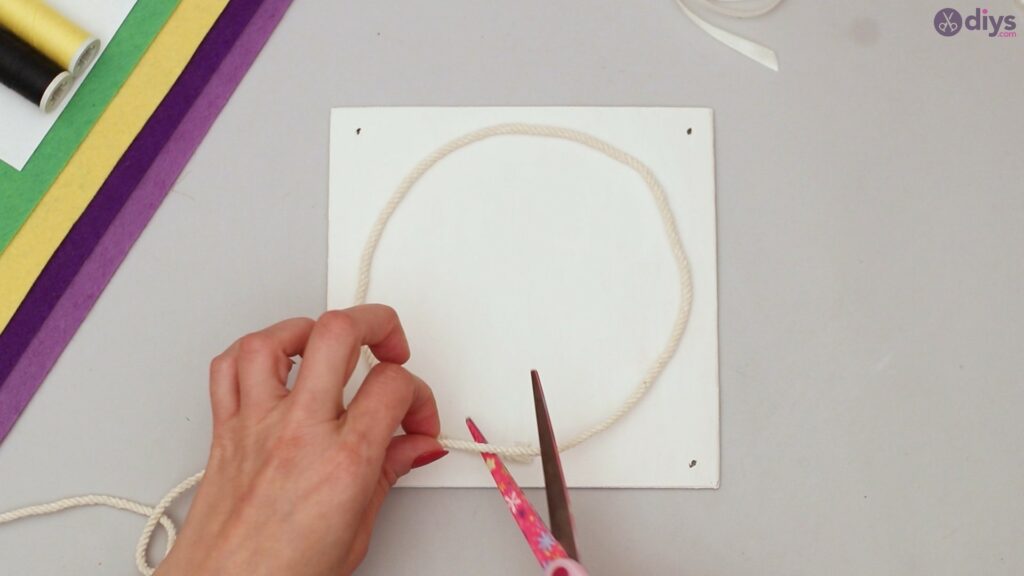
Take the rope and place it on the board in a circle.

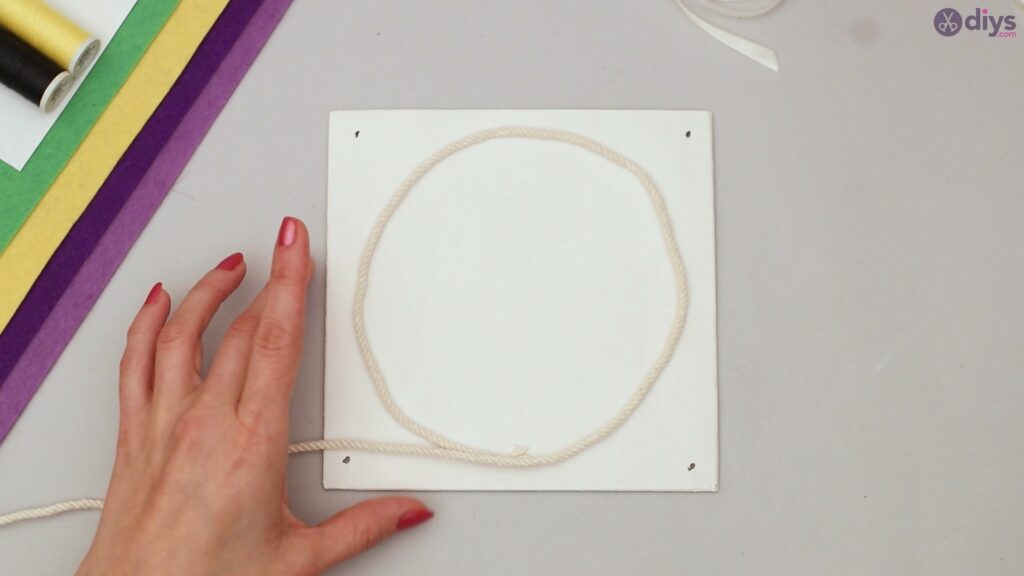
Take your scissors and cut off any excess rope.
Using your glue gun, firmly secure the rope to the wood table.
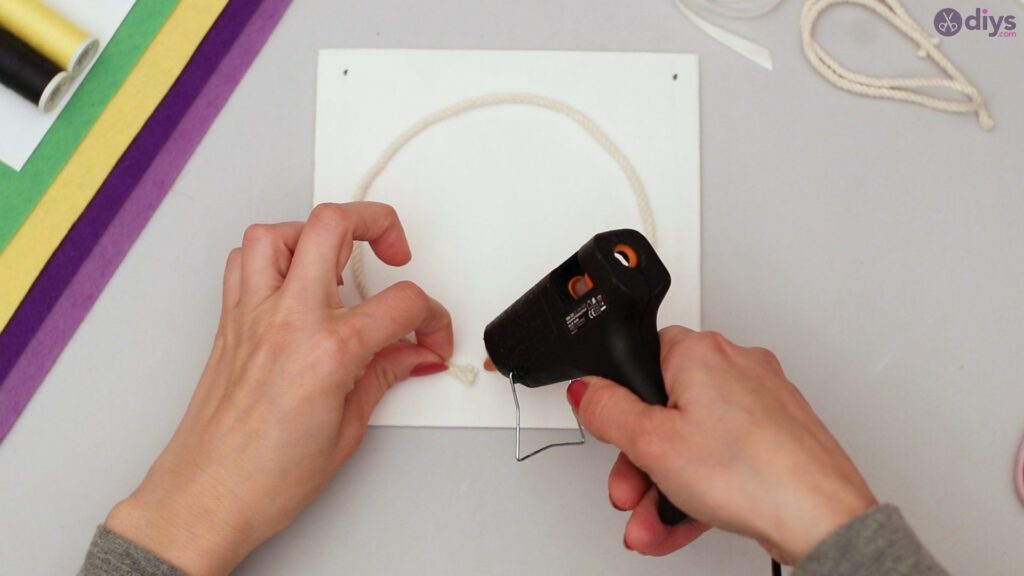
Apply the glue around the entire length of the rope to prevent it from falling off or getting loose.
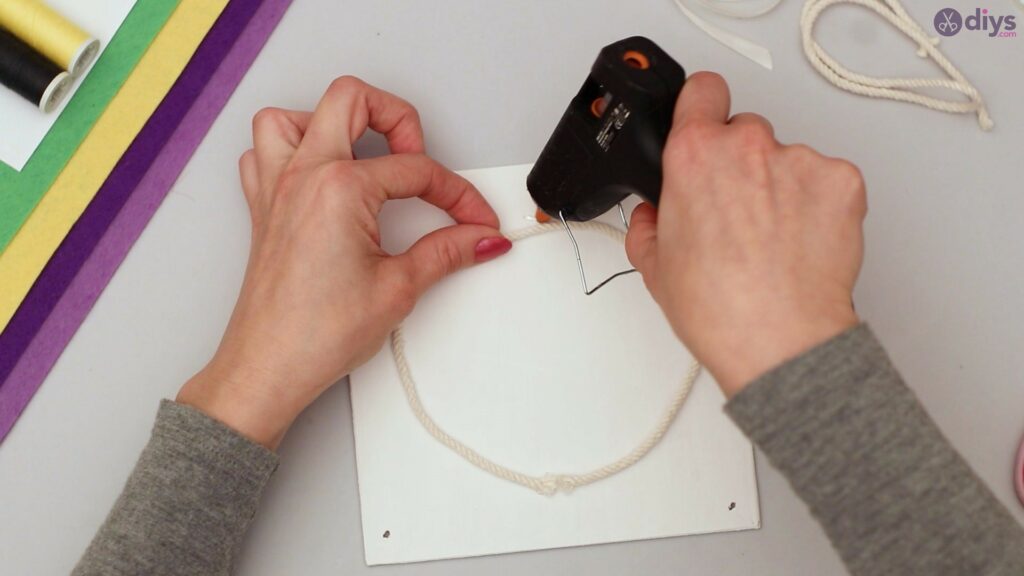
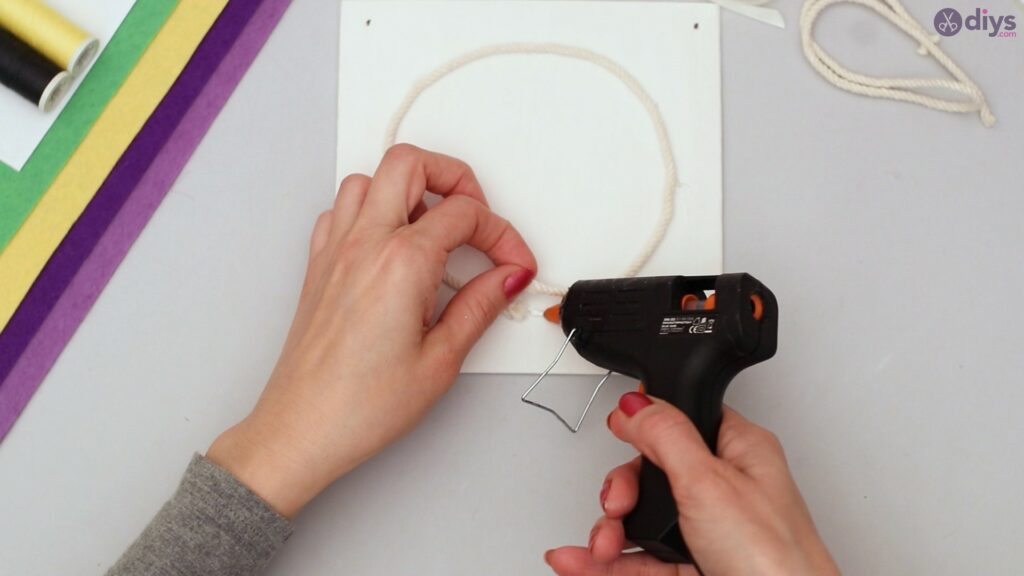
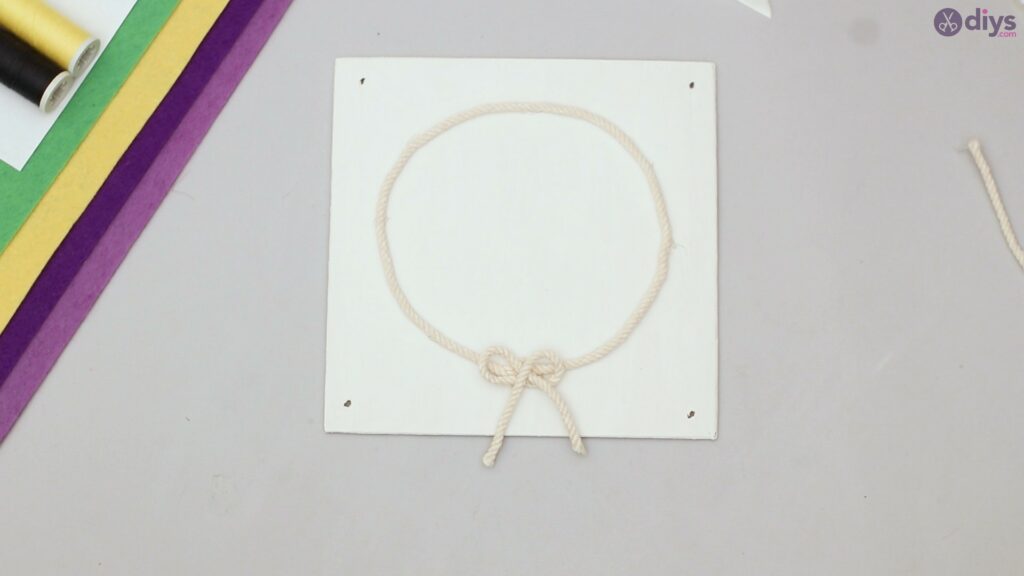
Make sure you smoothen the edges and make the circle look neat.
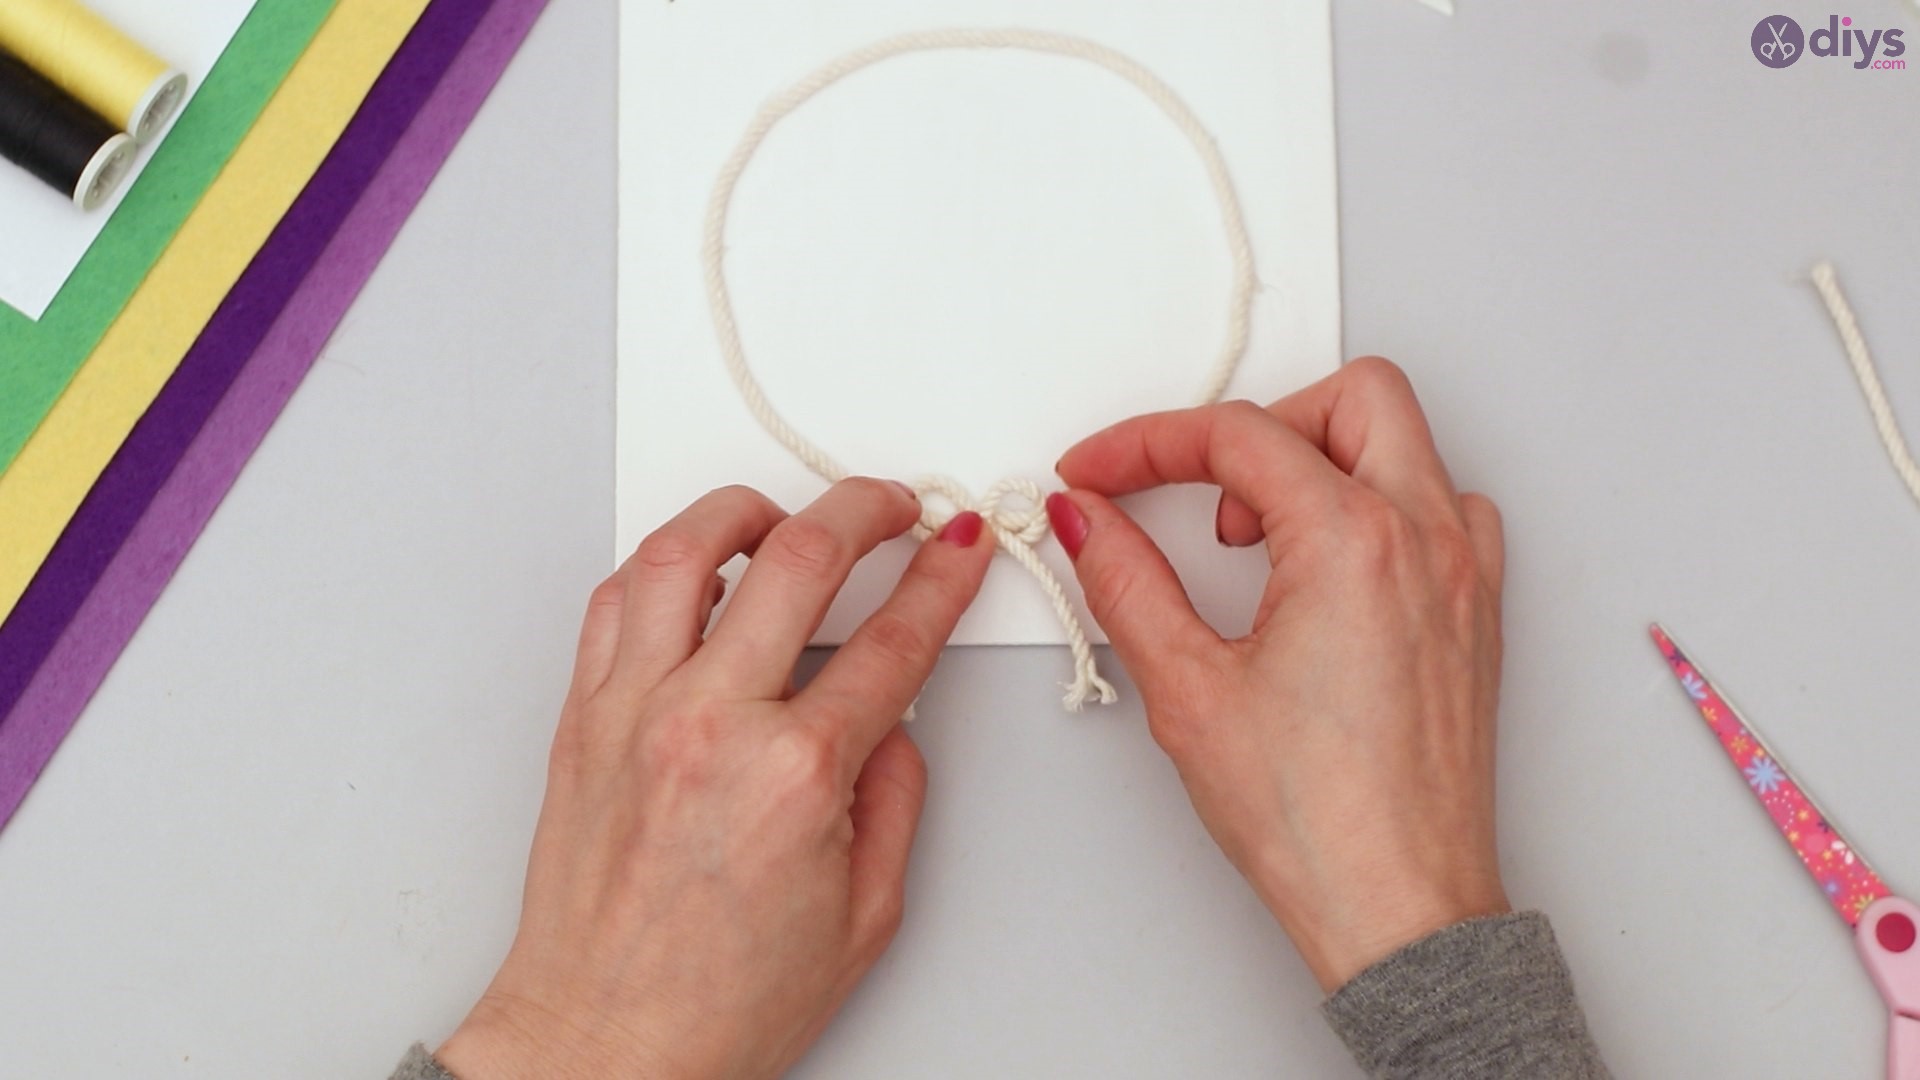
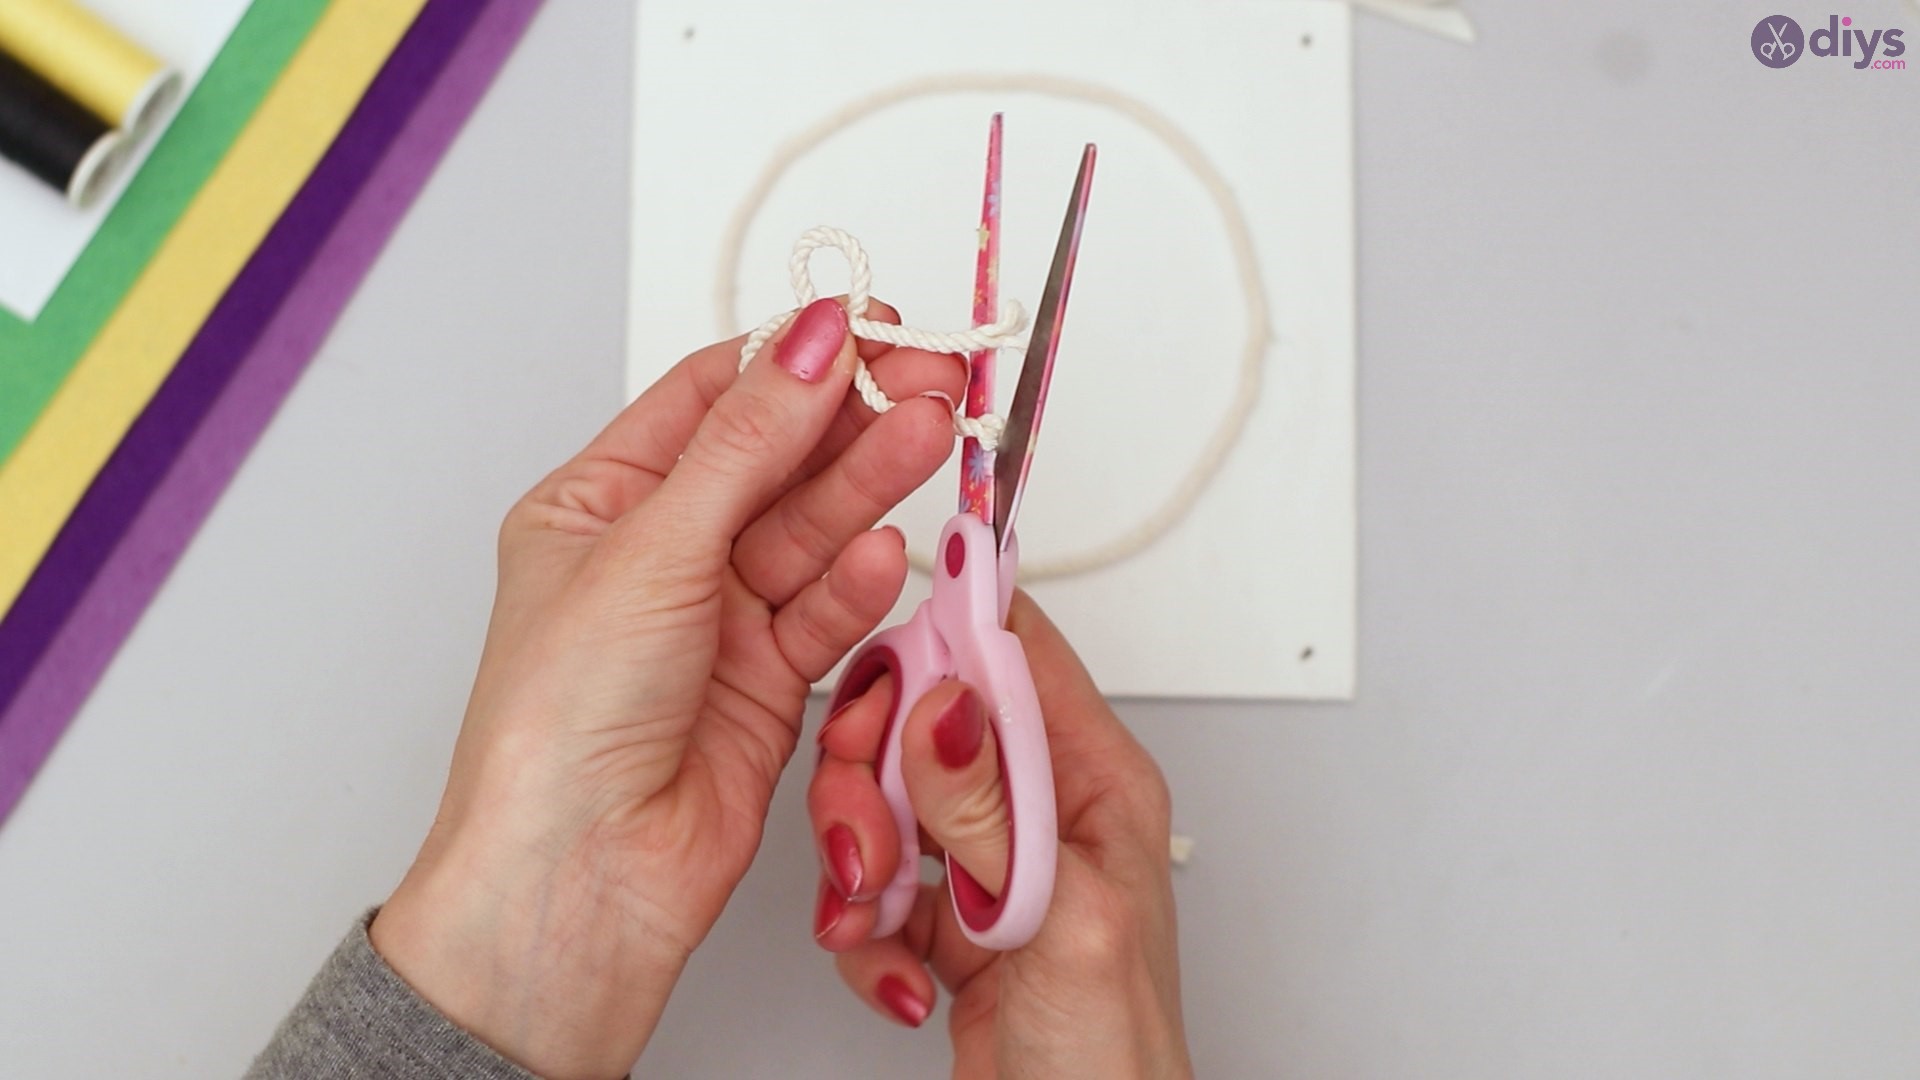
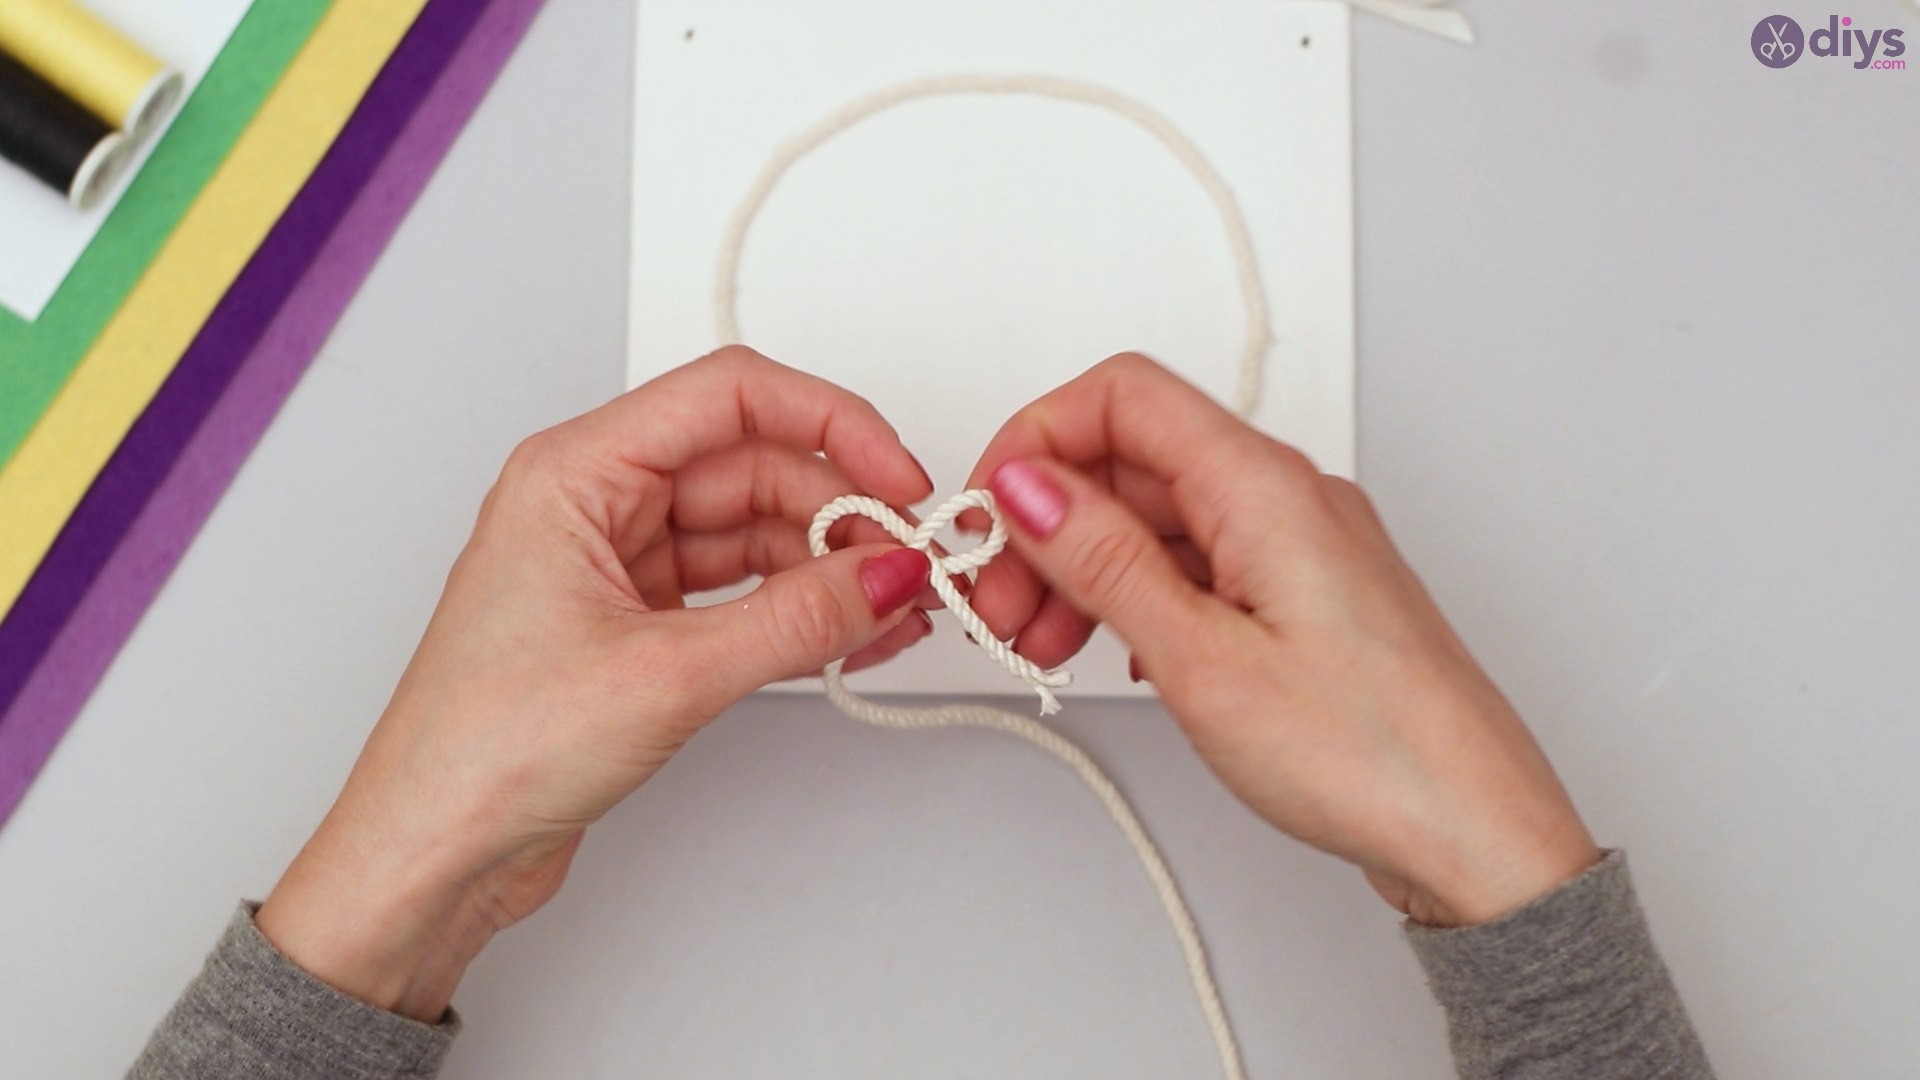
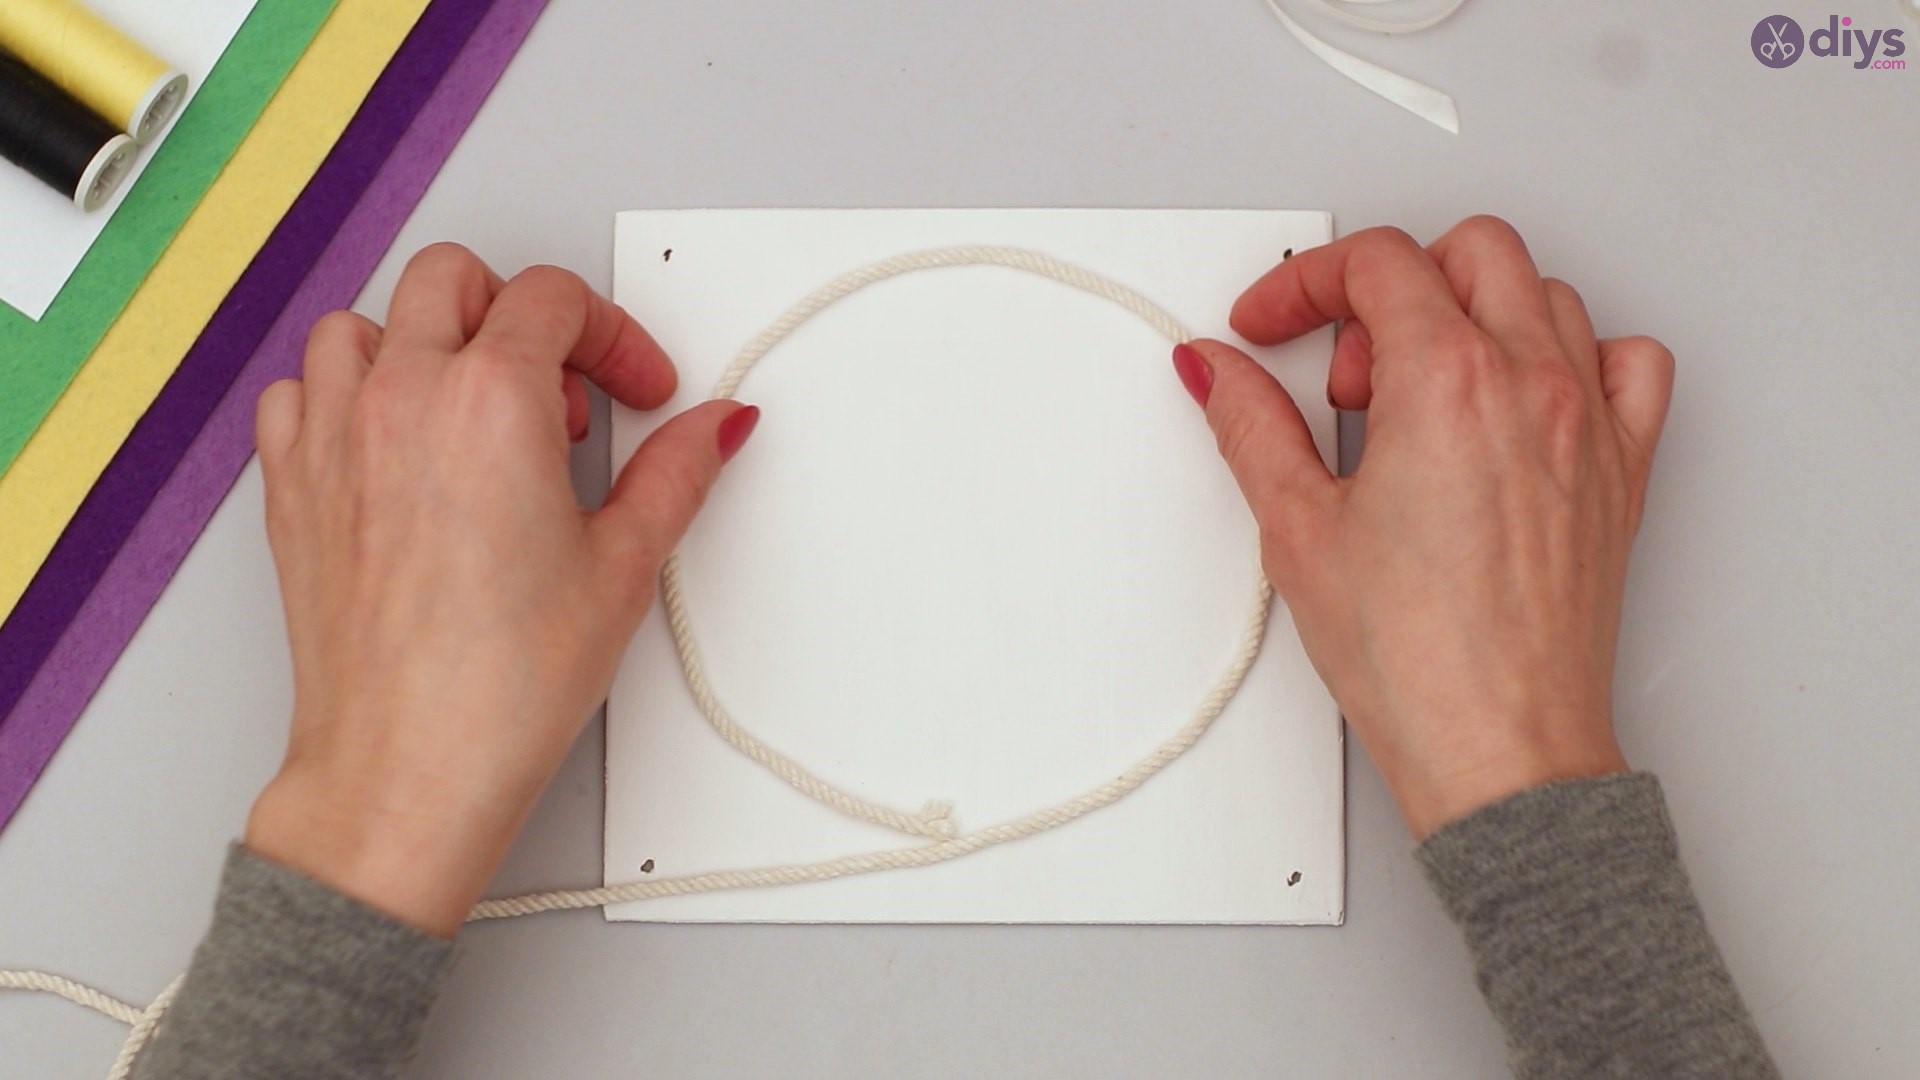
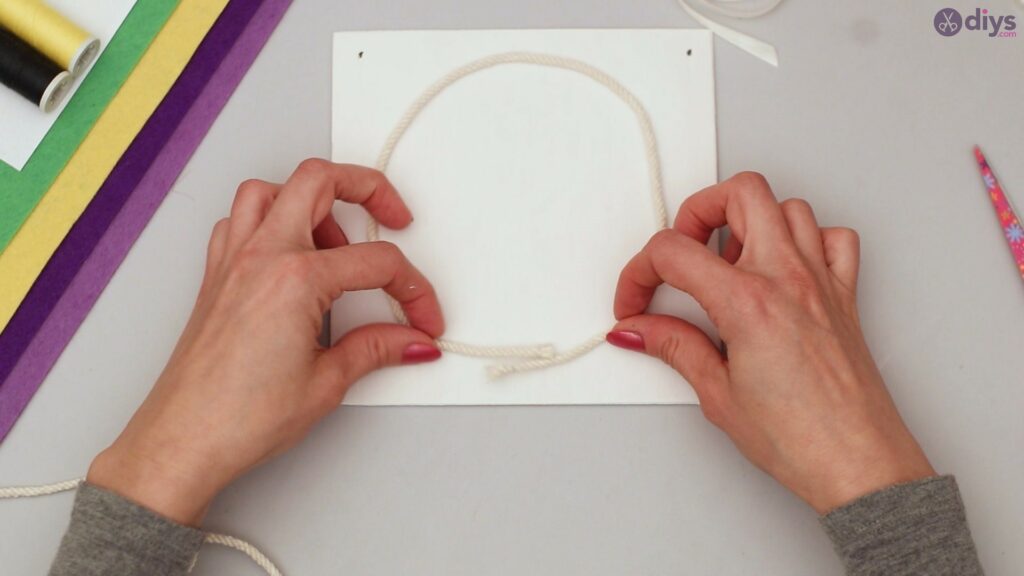
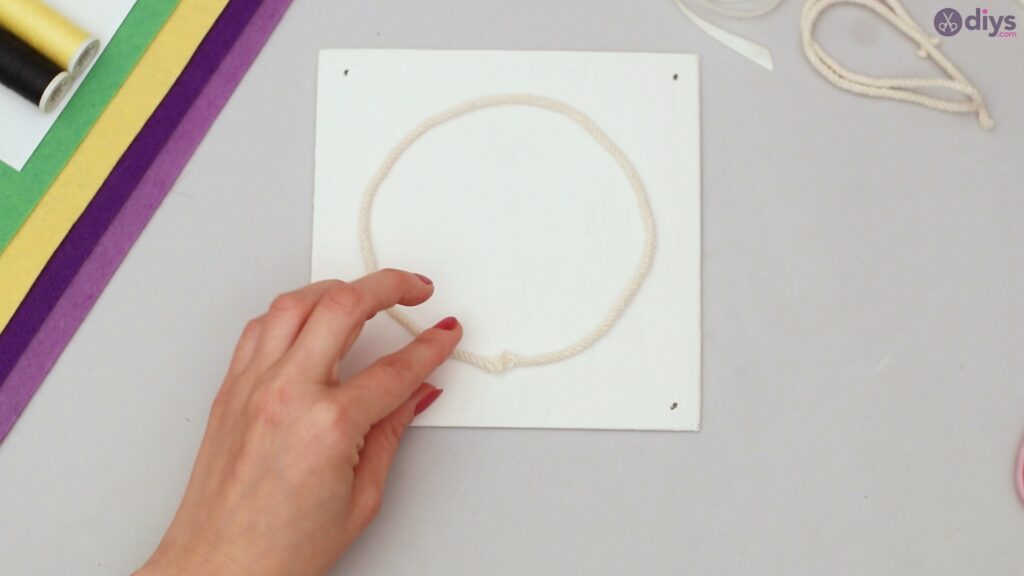
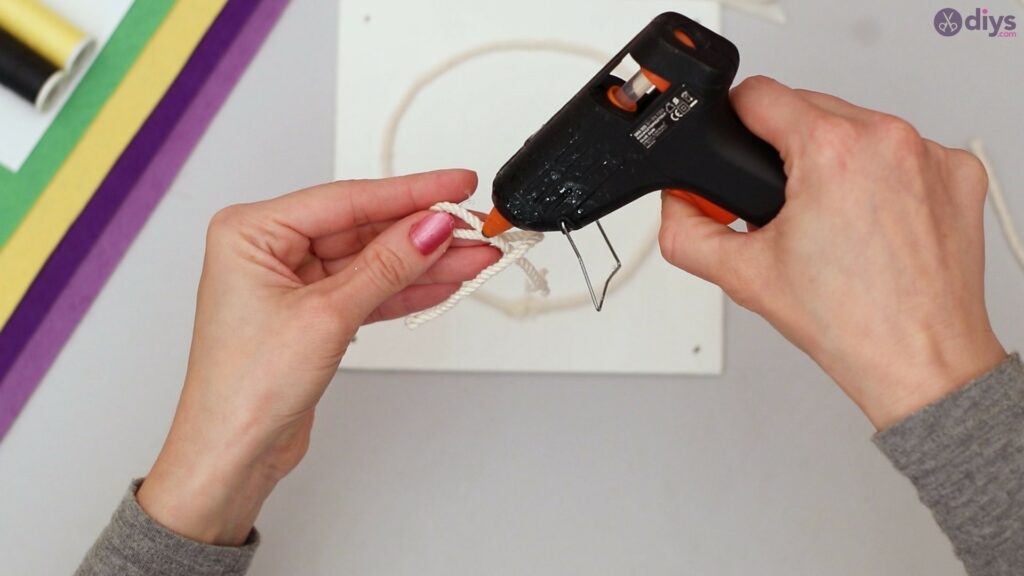
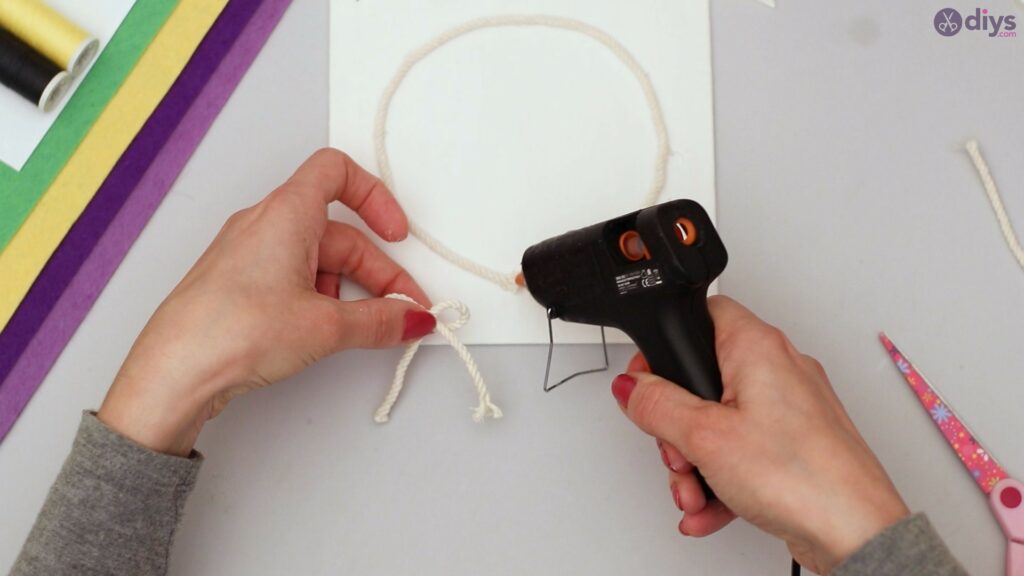
Step 3: Making the Bow
Take some more rope and make a small bow.

Using your scissors, cut off any excess rope while holding the bow in the middle.

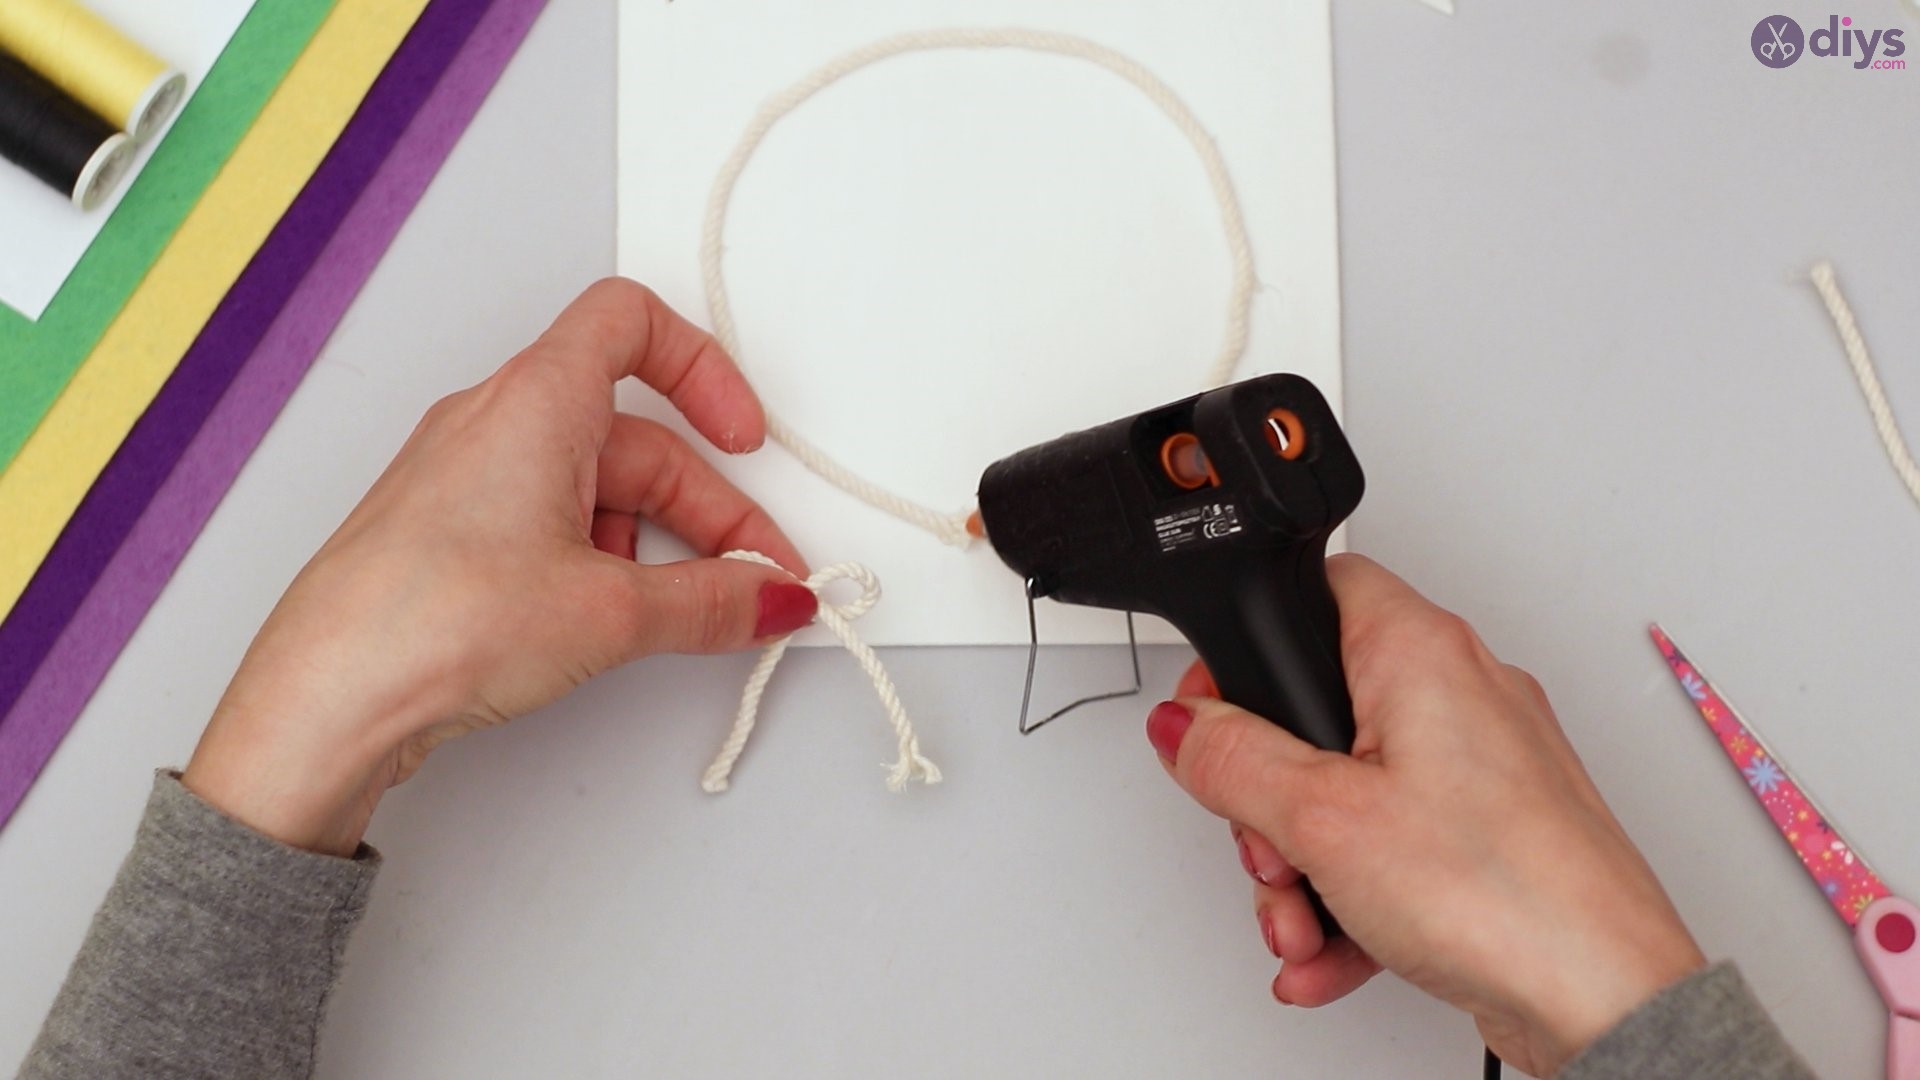
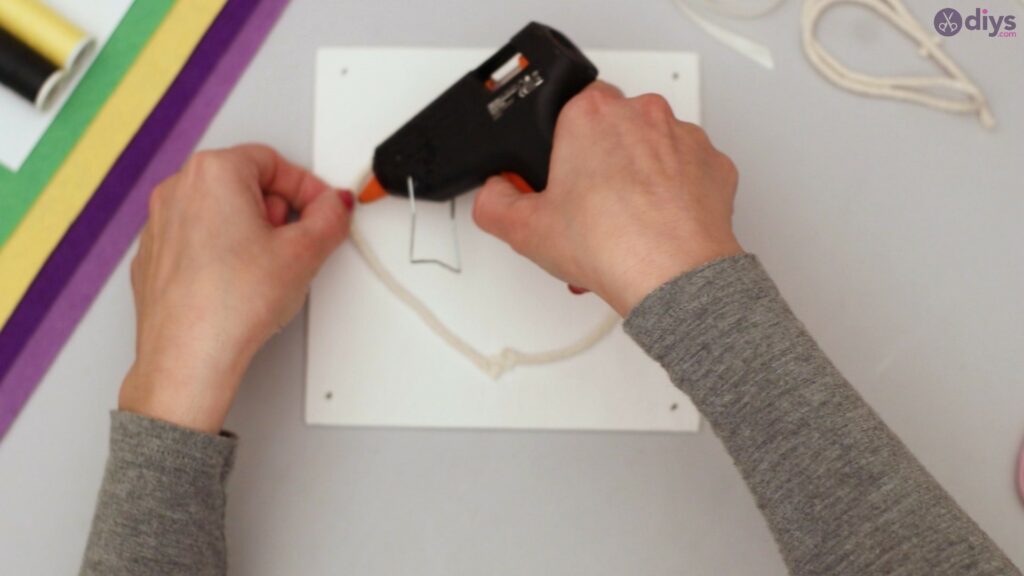
Take your glue gun and apply some glue to the center of the bow.
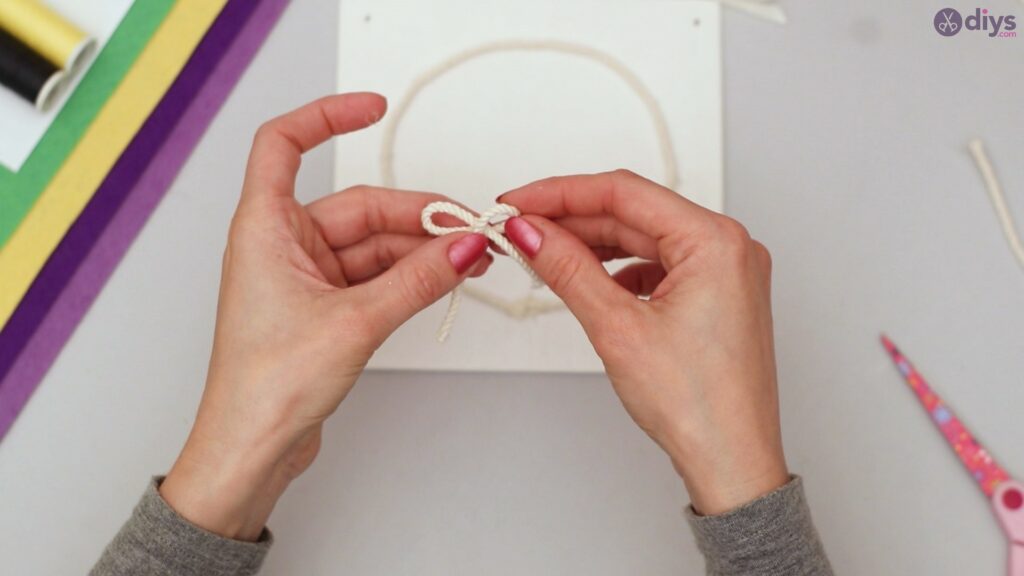
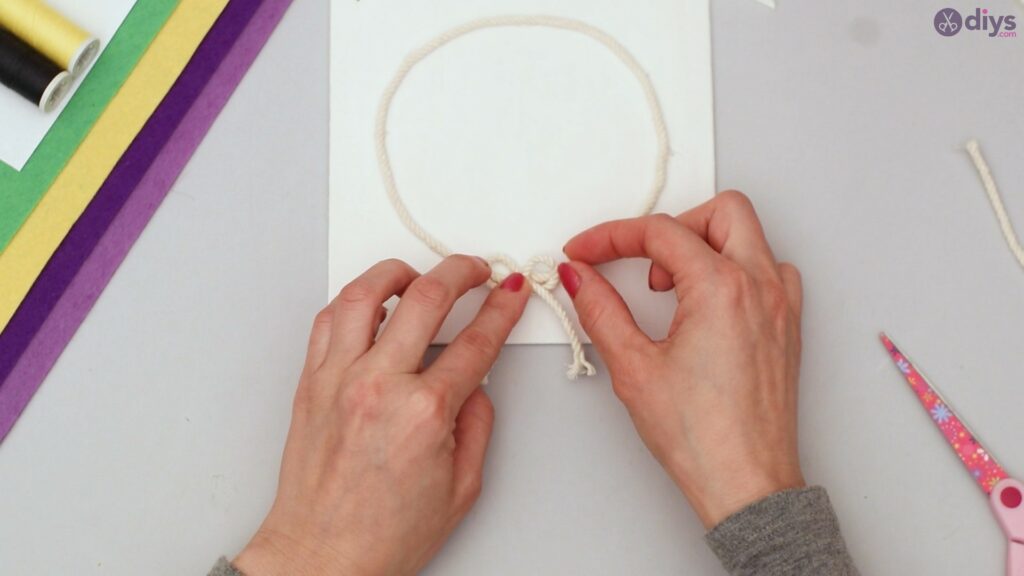
At the point where your circle connects, apply some glue.
Press the bow against the circle to secure it.
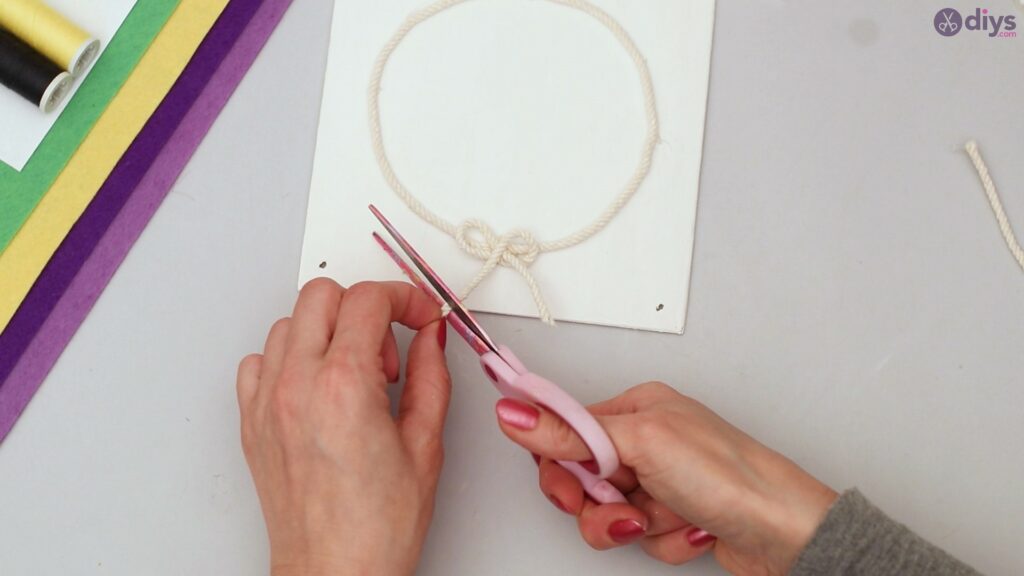
With your scissors, trim off any excess rope left on the bow.

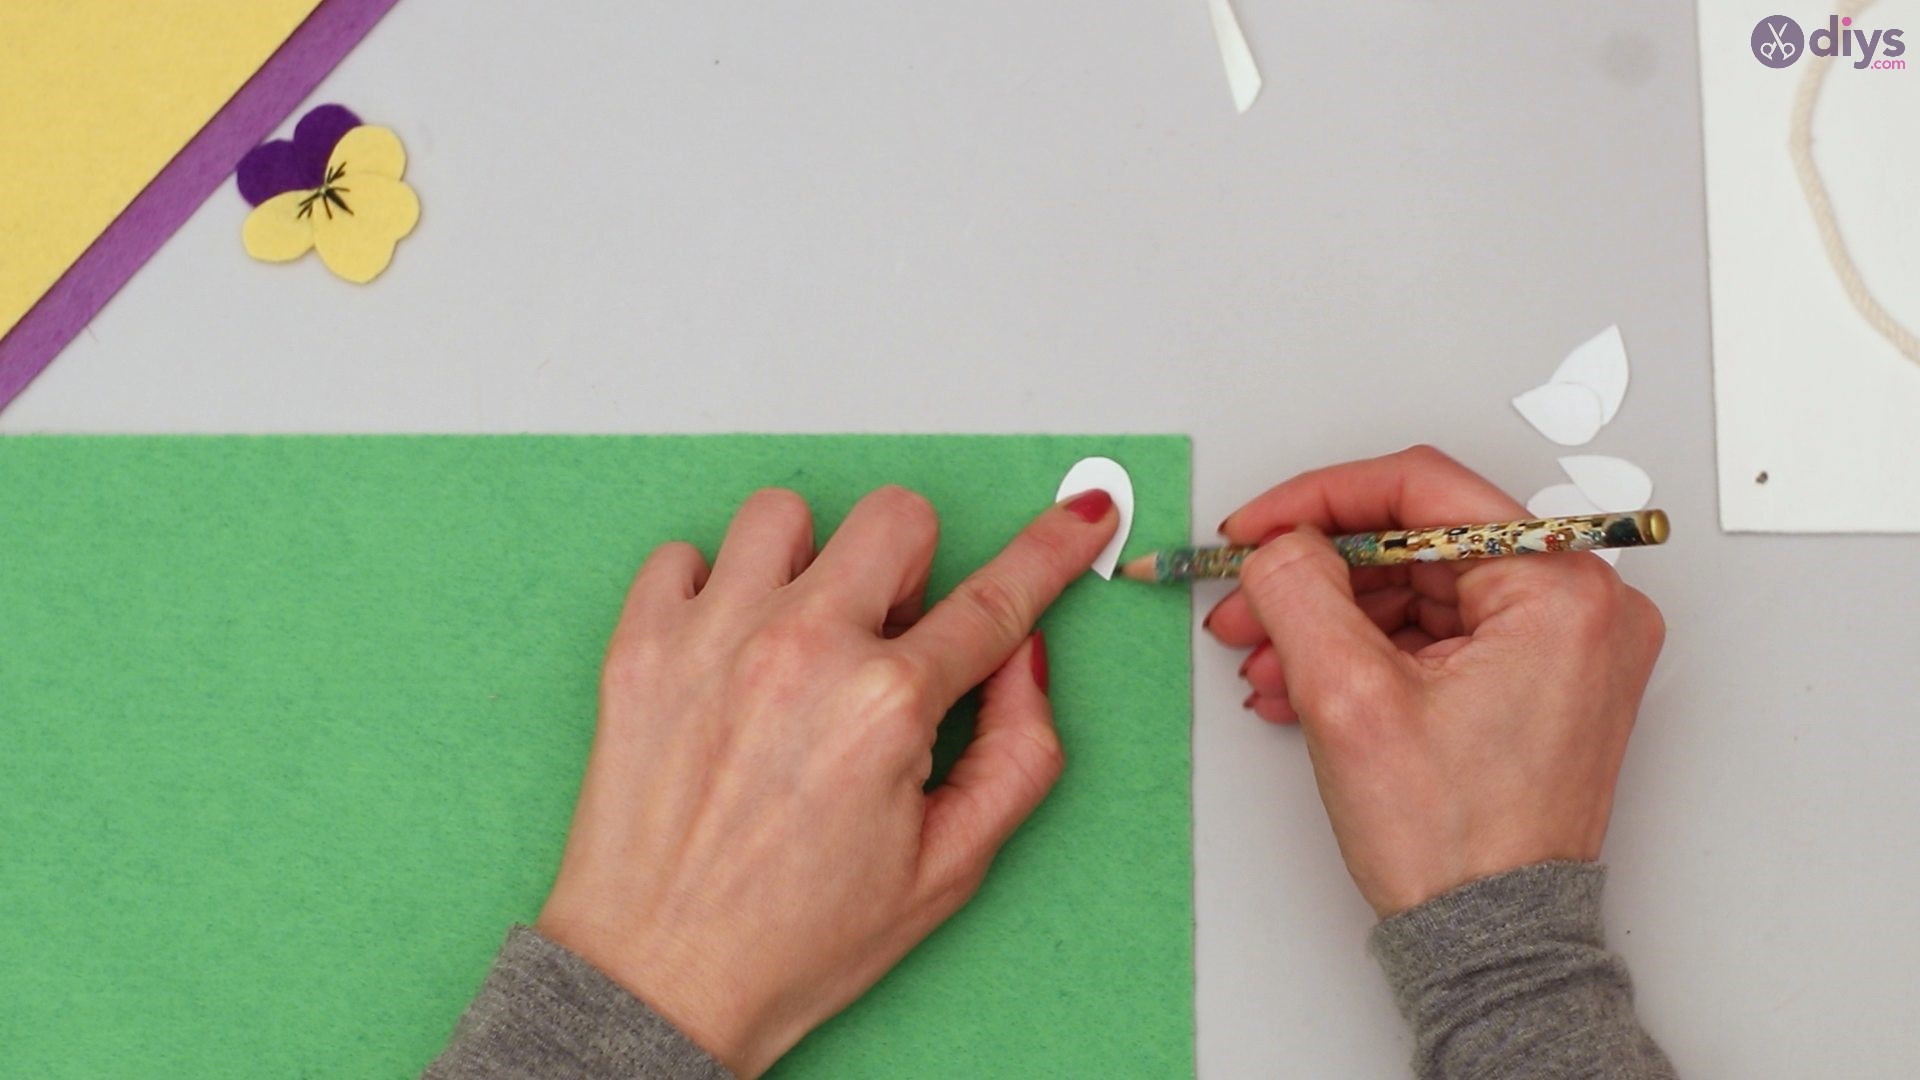
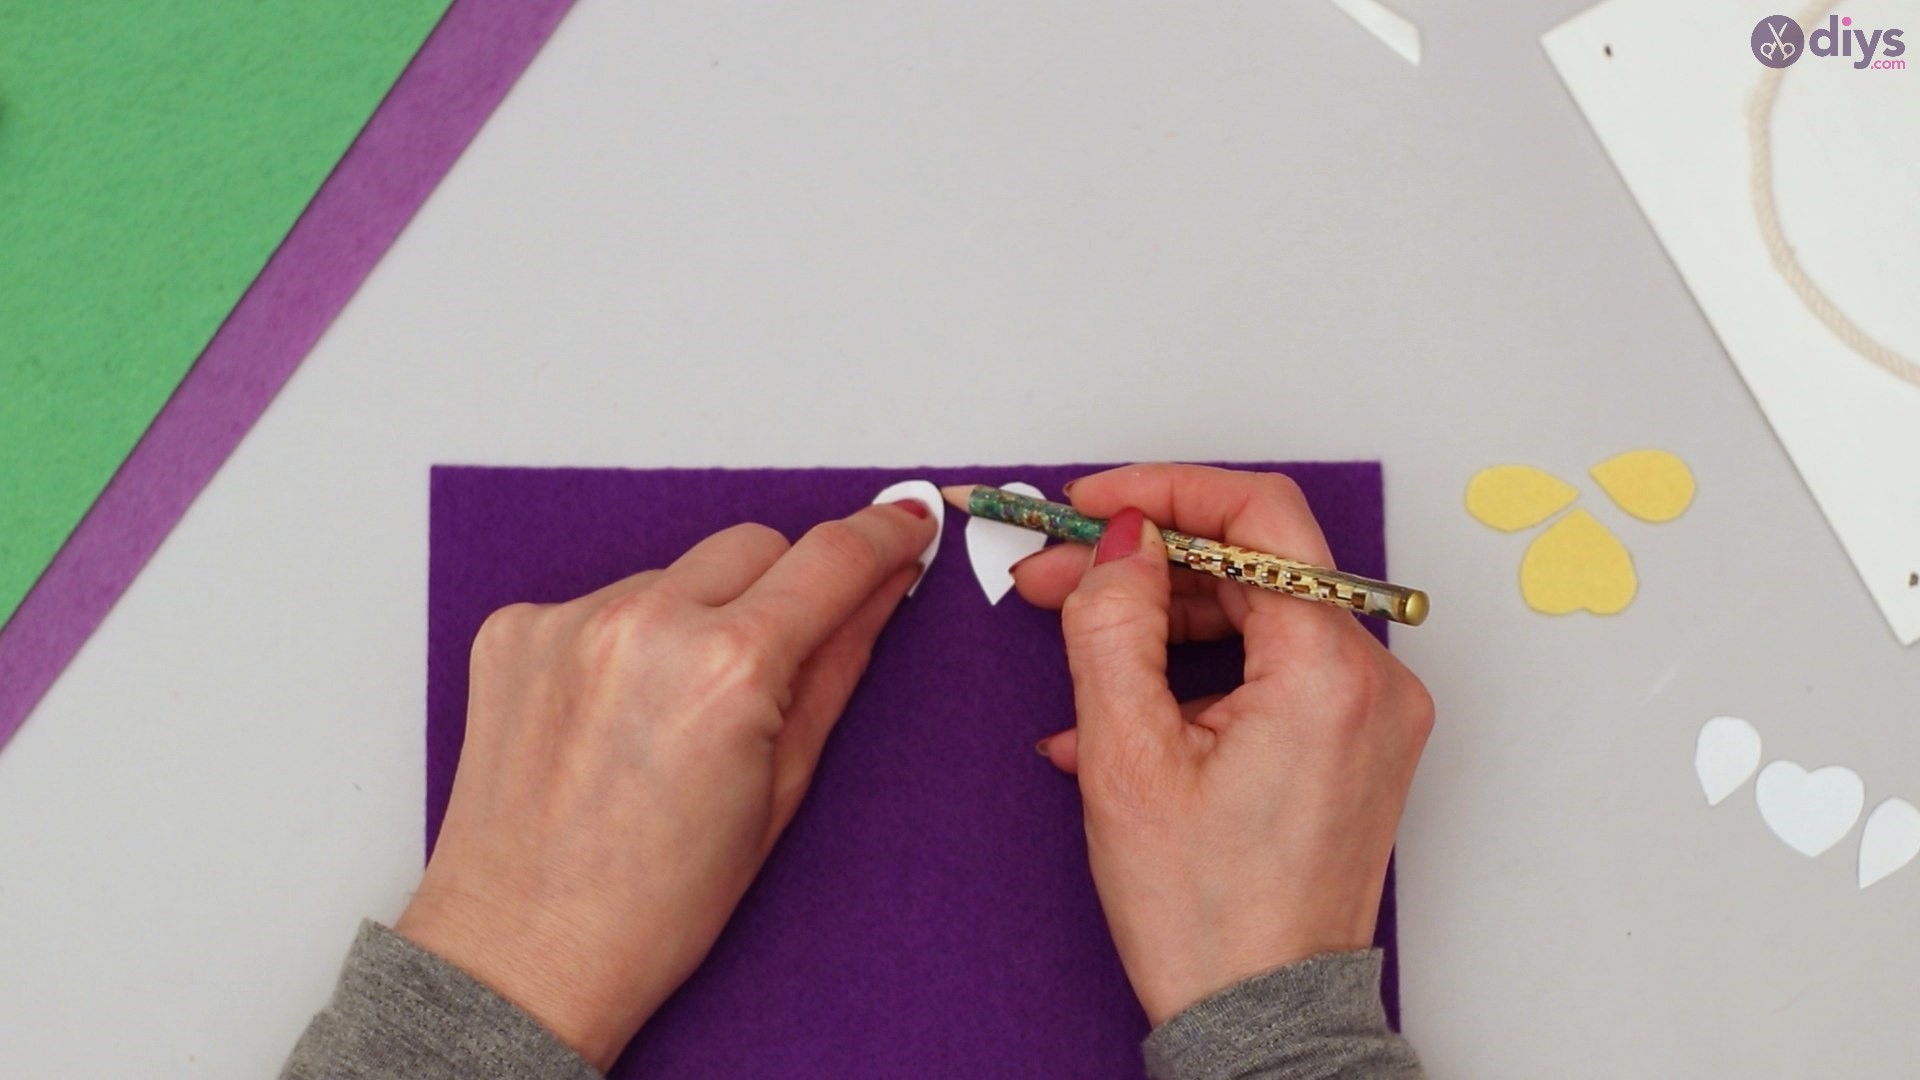
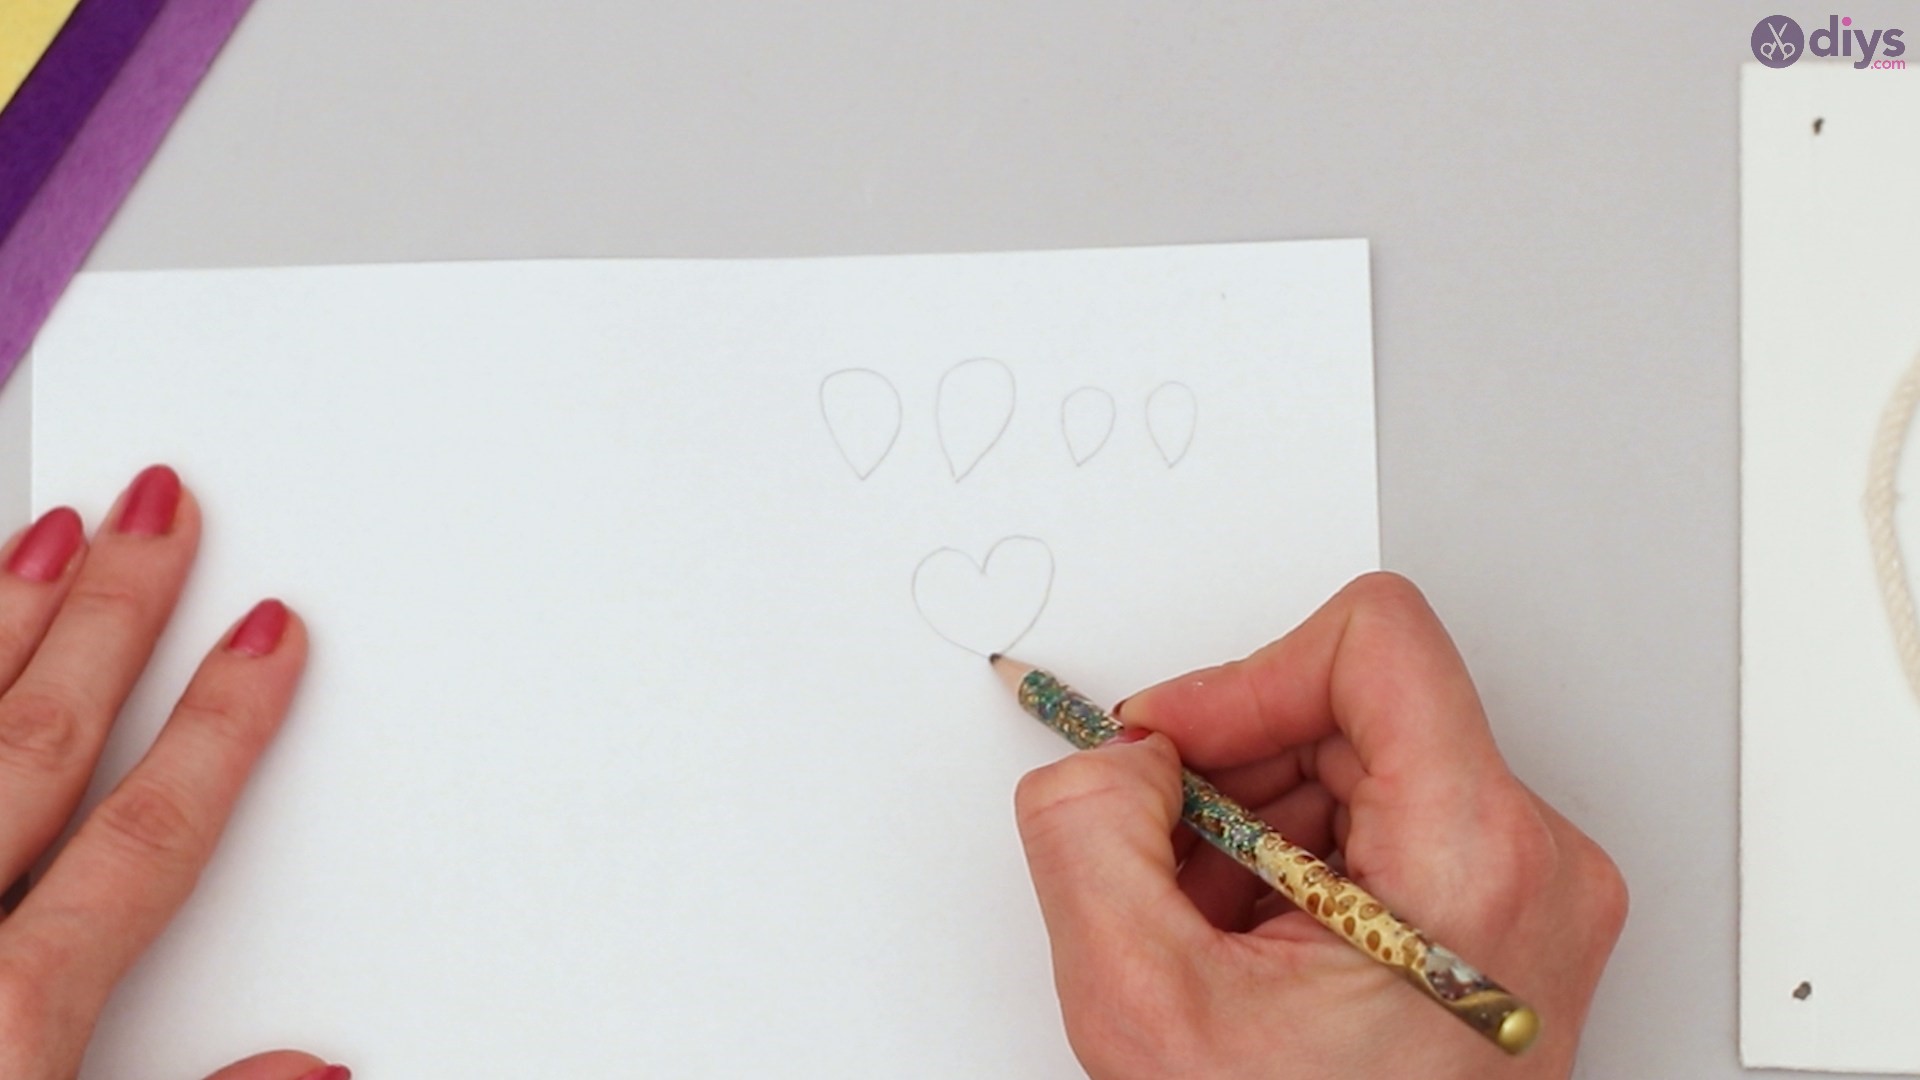
Step 4: Tracing out the Pansies
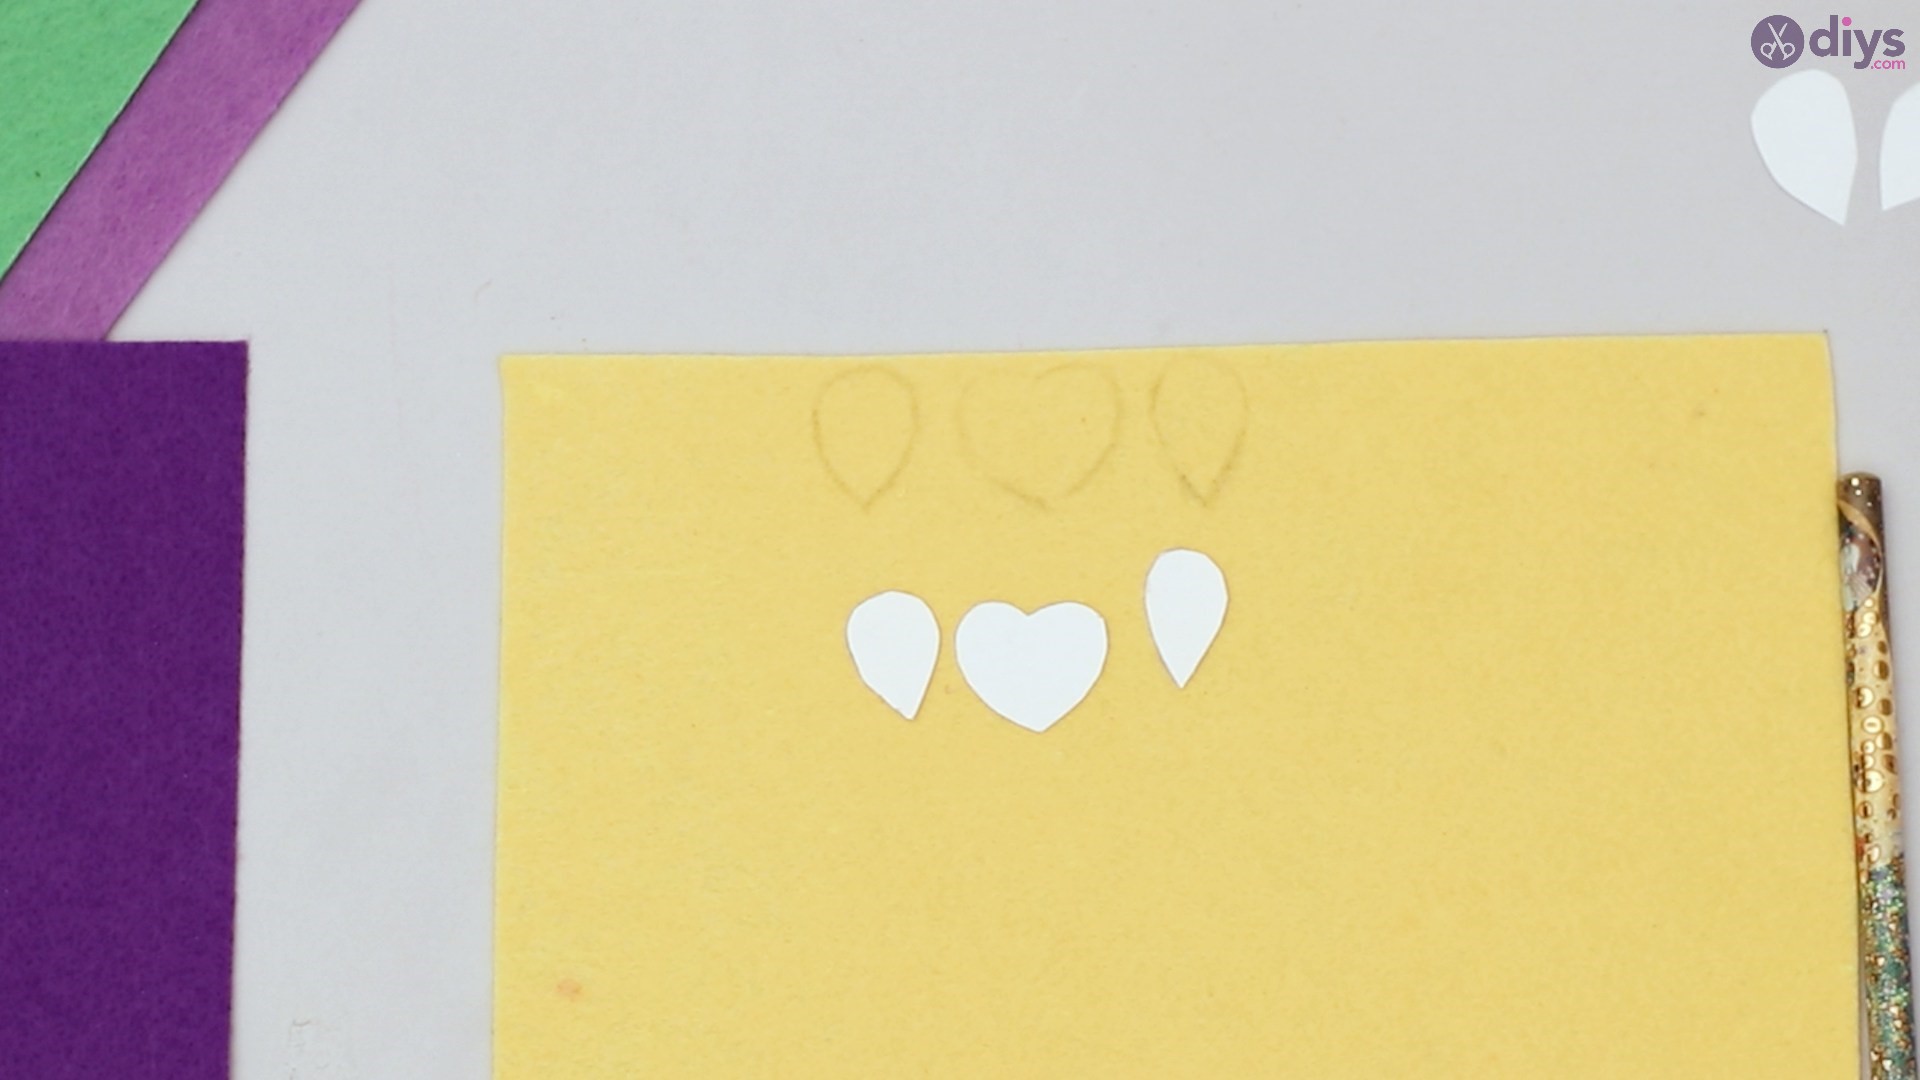
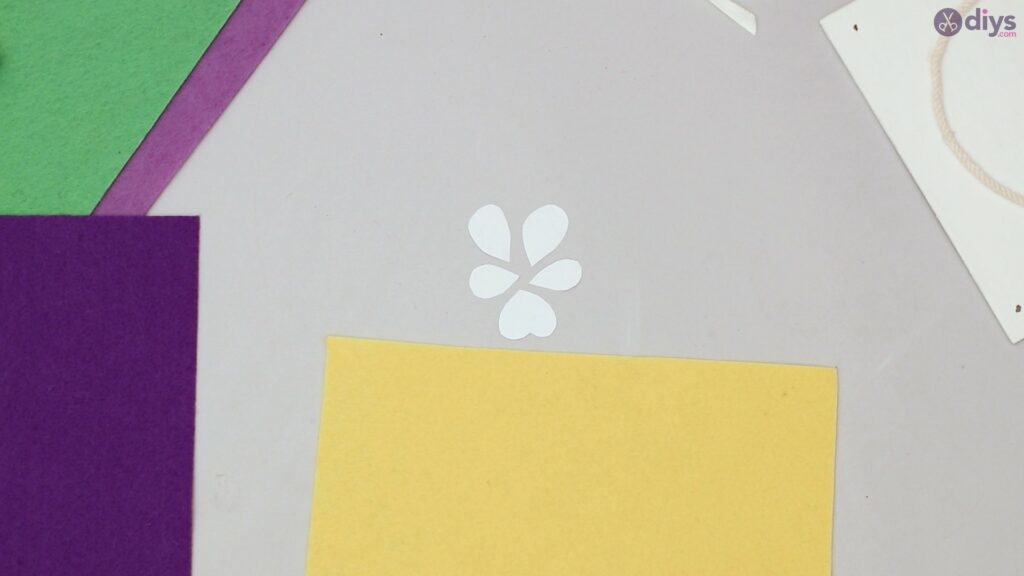
For this step, you will need a pencil and paper. On your piece of paper, draw out a heart and a few teardrops.

Cut out the heart and teardrops and arrange them, placing the heart upside down at the bottom.
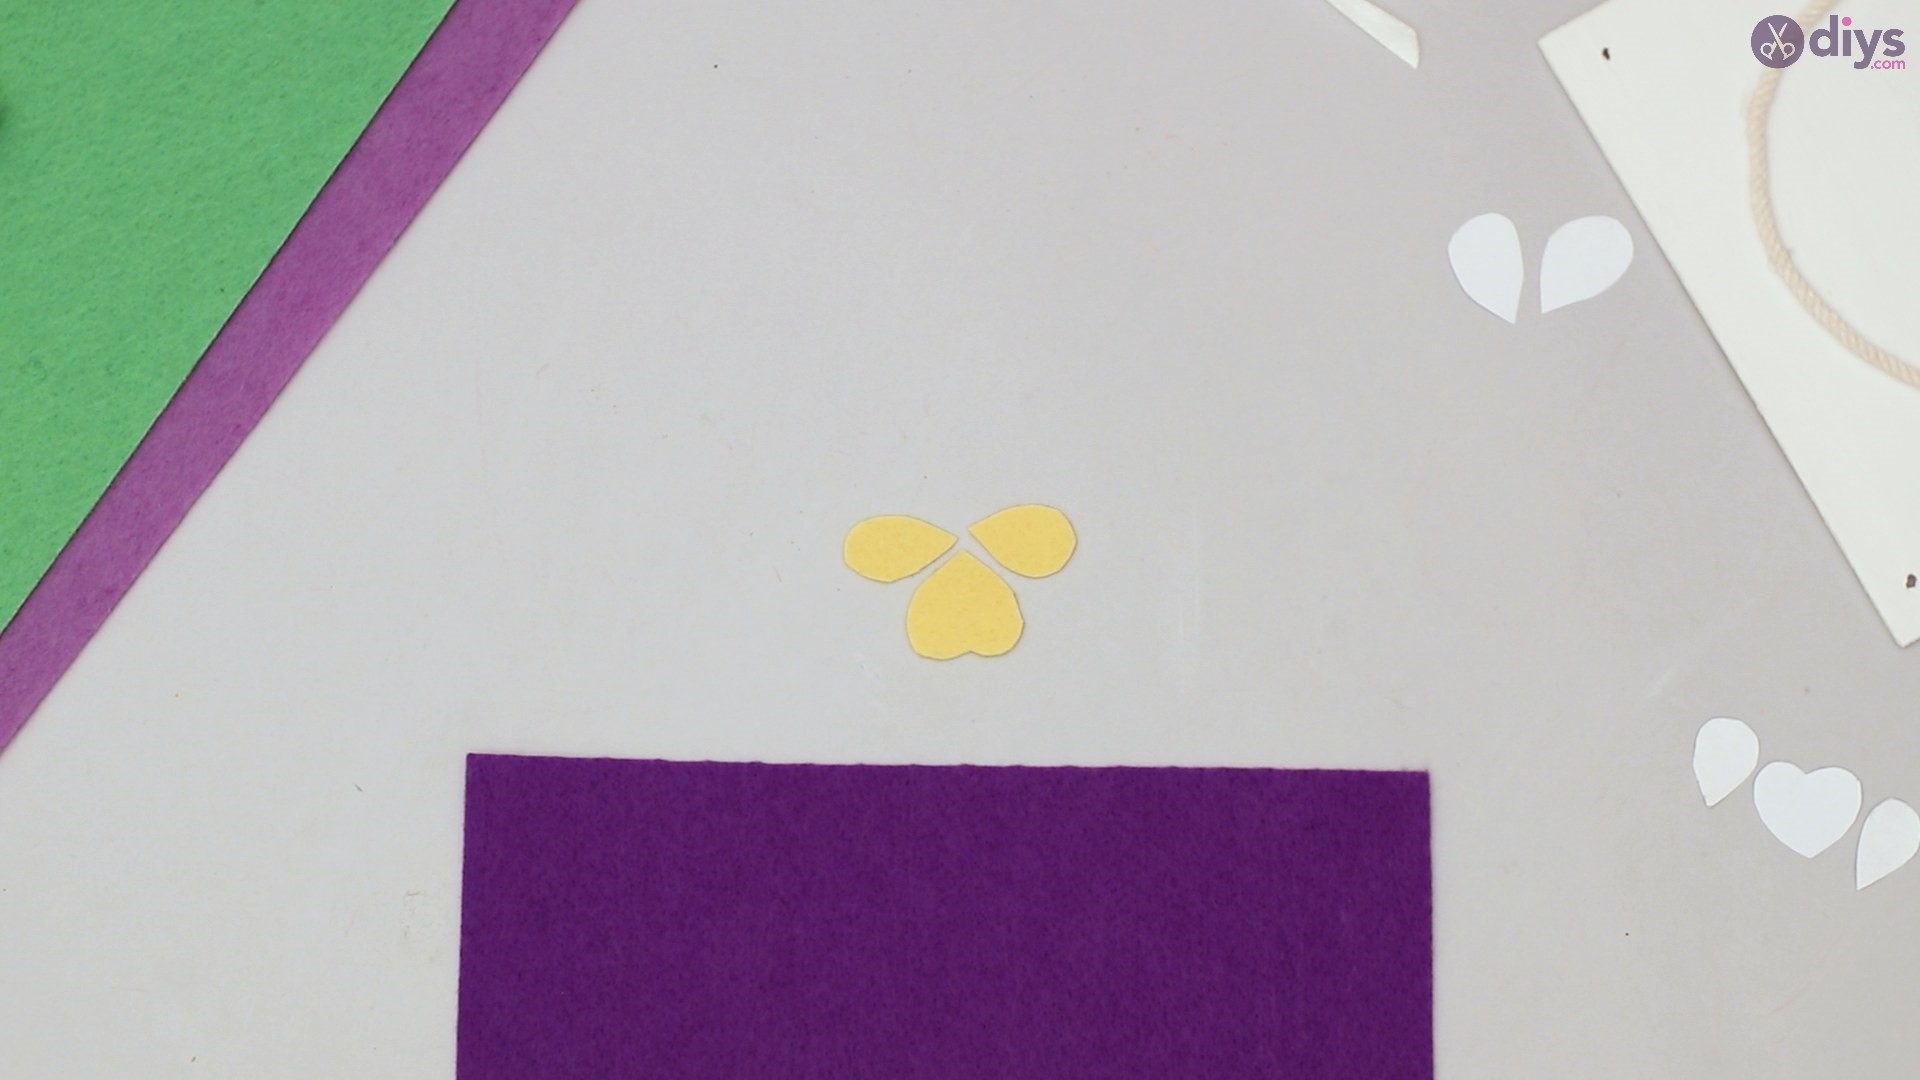
Take the yellow felt material, place the cutouts on it, and trace around the yellow material’s cutouts using your pencil.
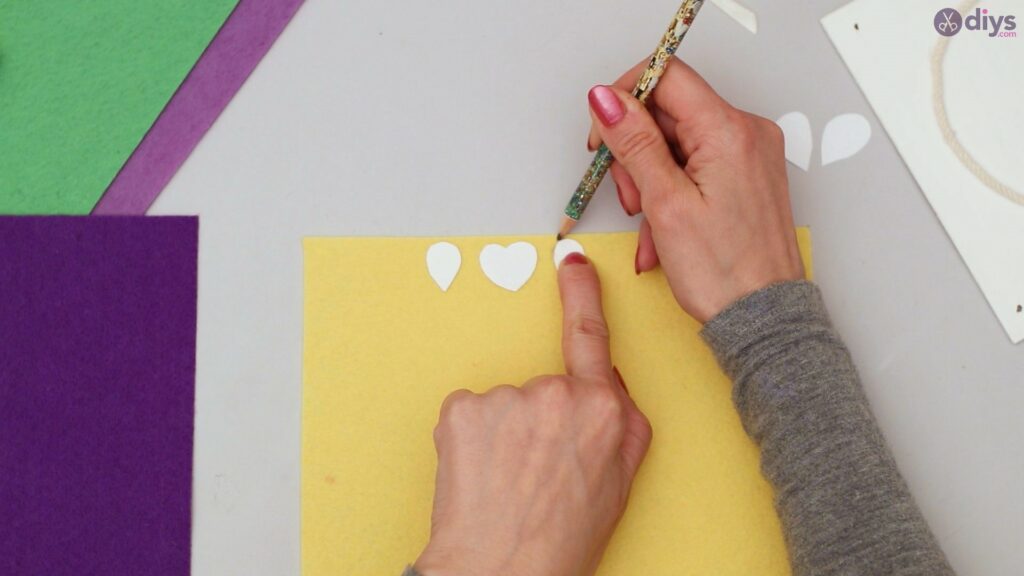

Using your scissors, cut out the shapes from the yellow felt material.
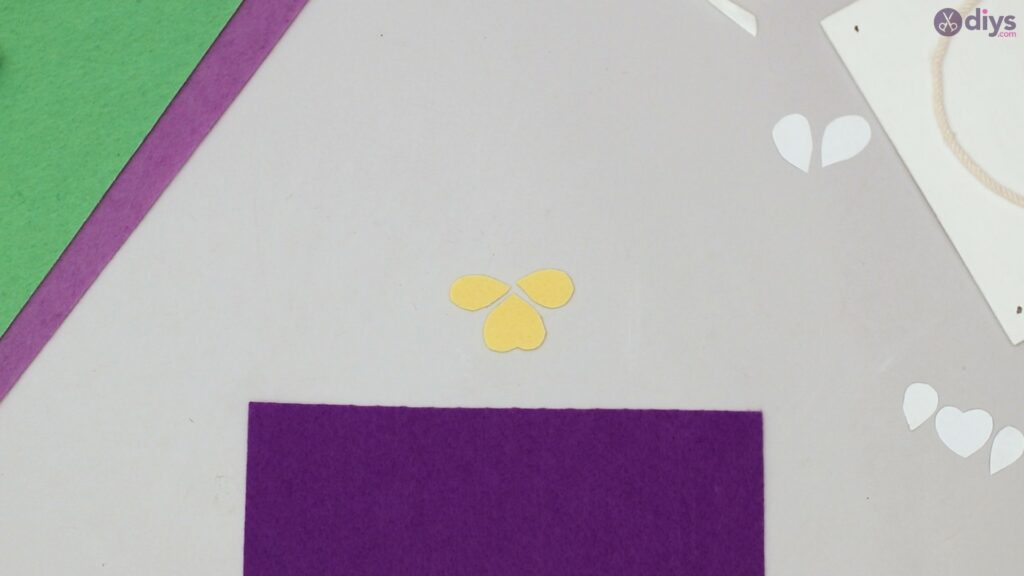
Take your purple material and with your pencil, trace around the cutouts on the material.

Cut out what you have traced from the purple felt material using your scissors.

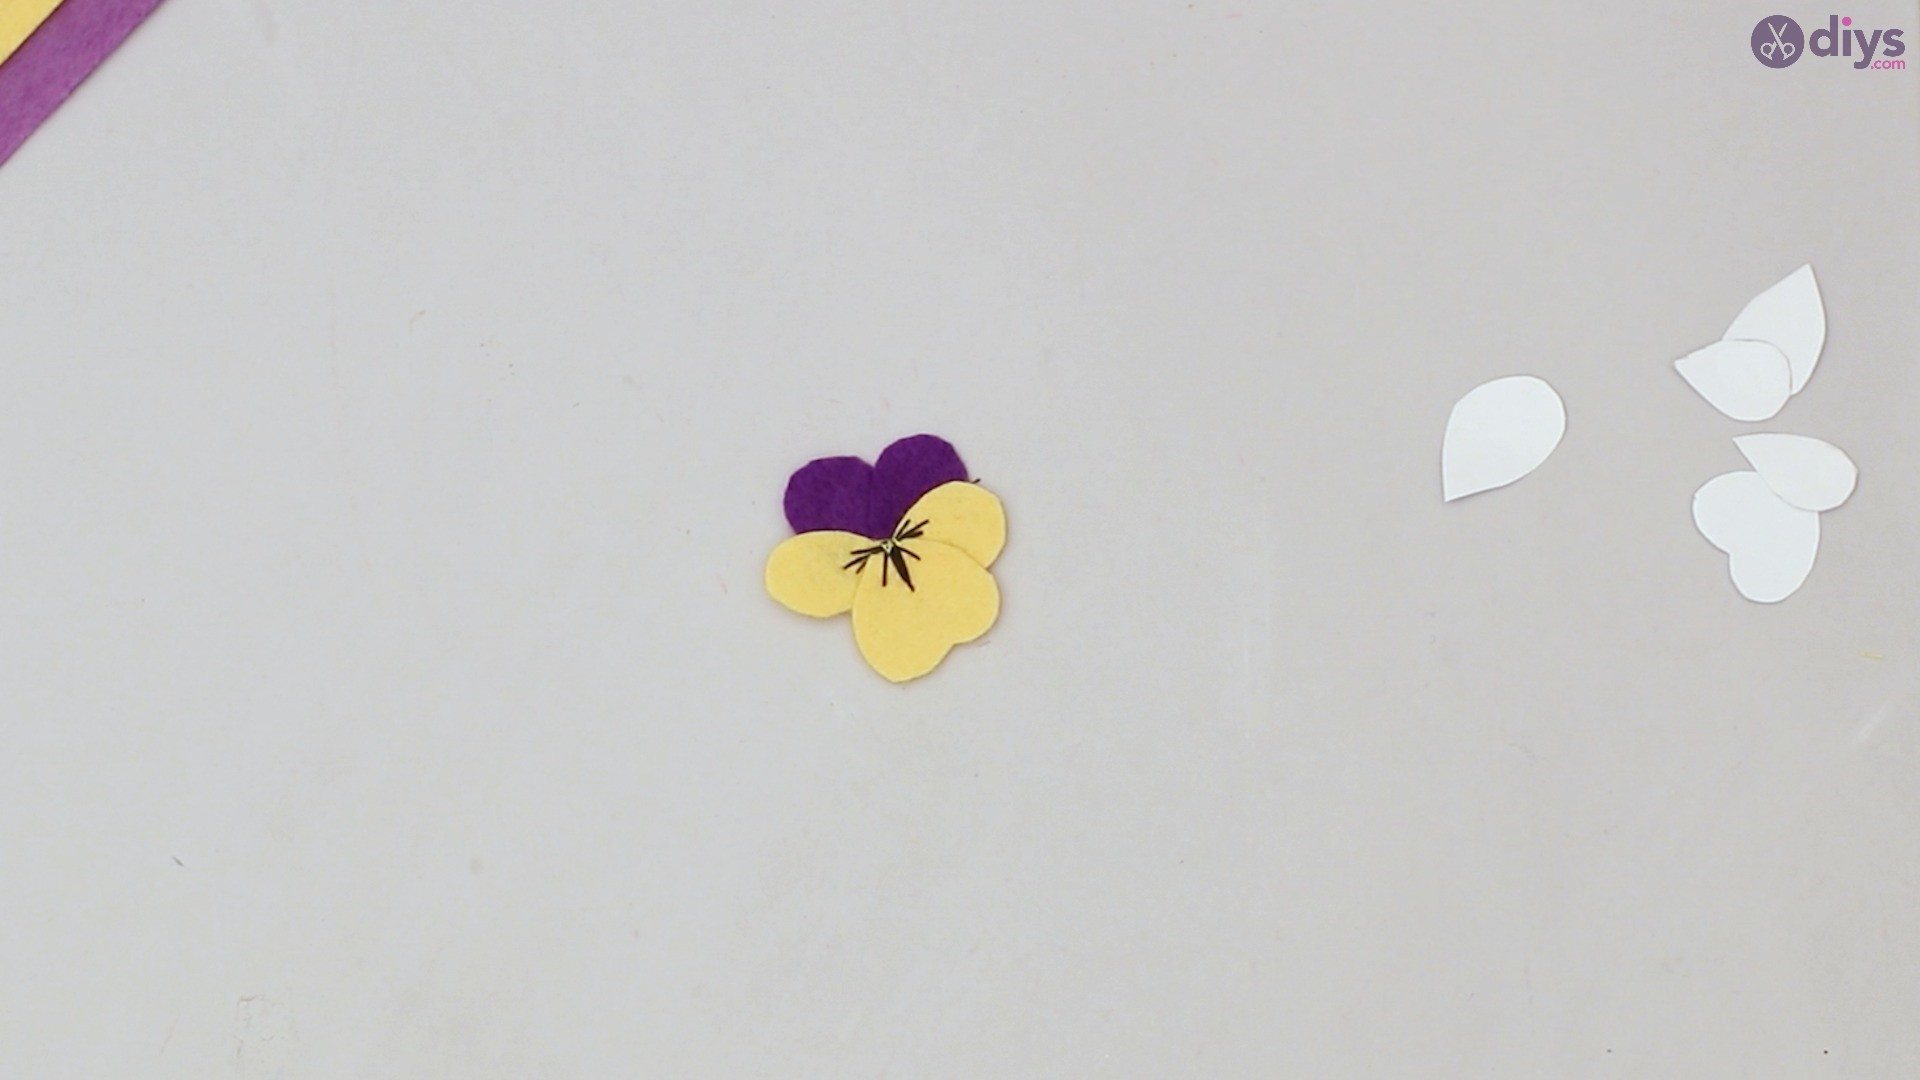
Step 5: Making the Pansies
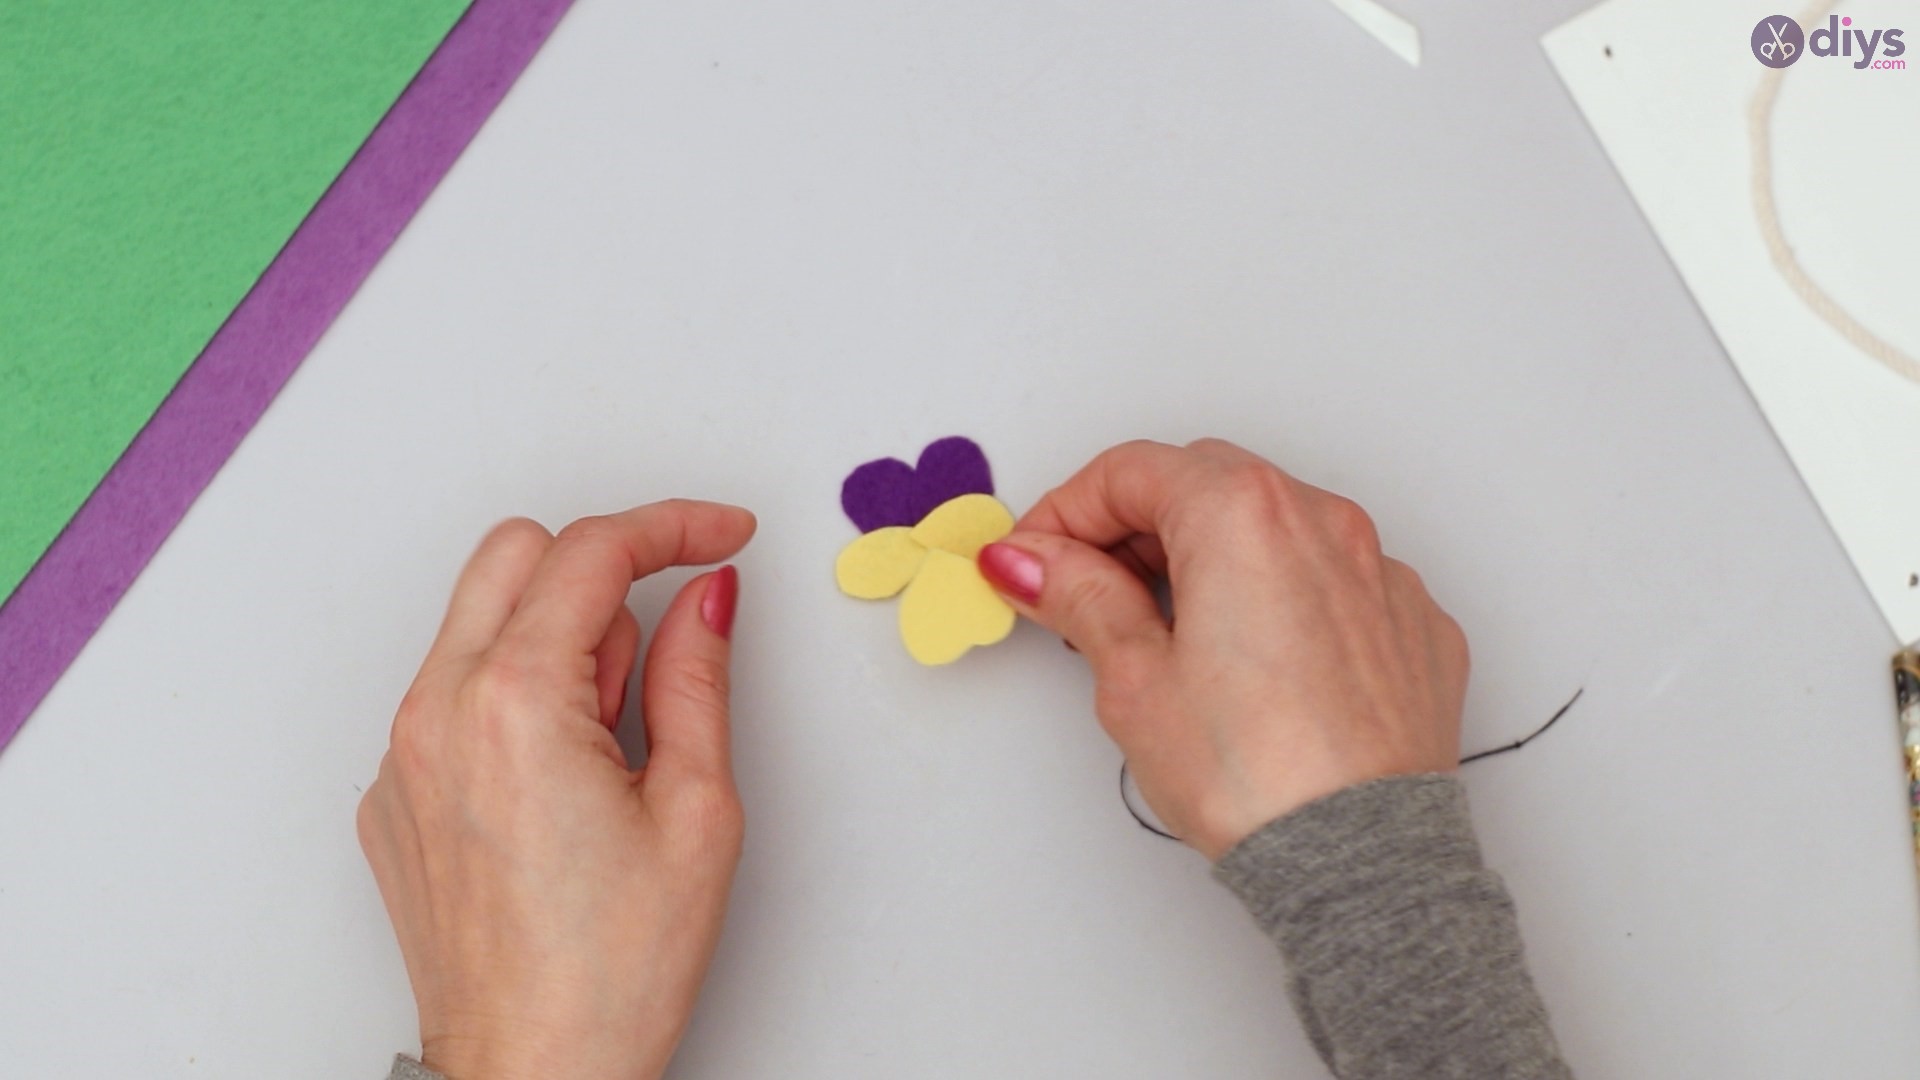
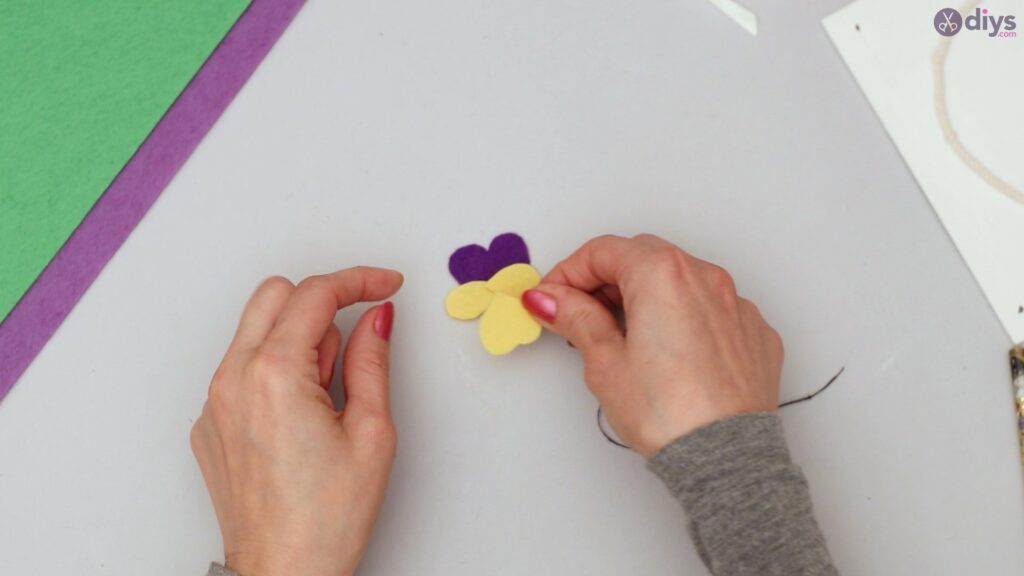
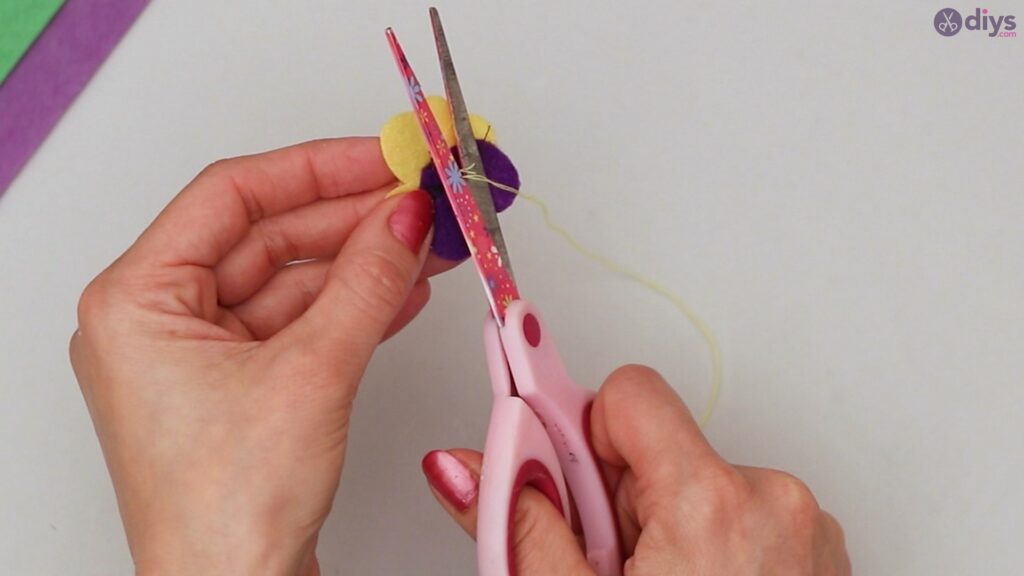
For this step, you will need your pin, yellow and black twisted yarn. Place your yellow cutouts on the purple cutouts. Using your pin and make a hole through the middle of the pansy cutouts.
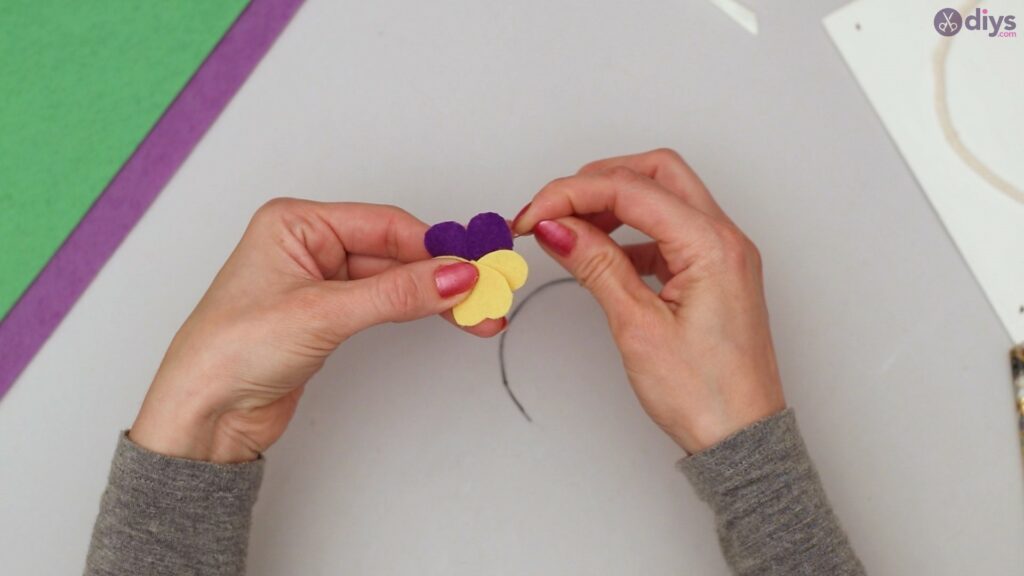
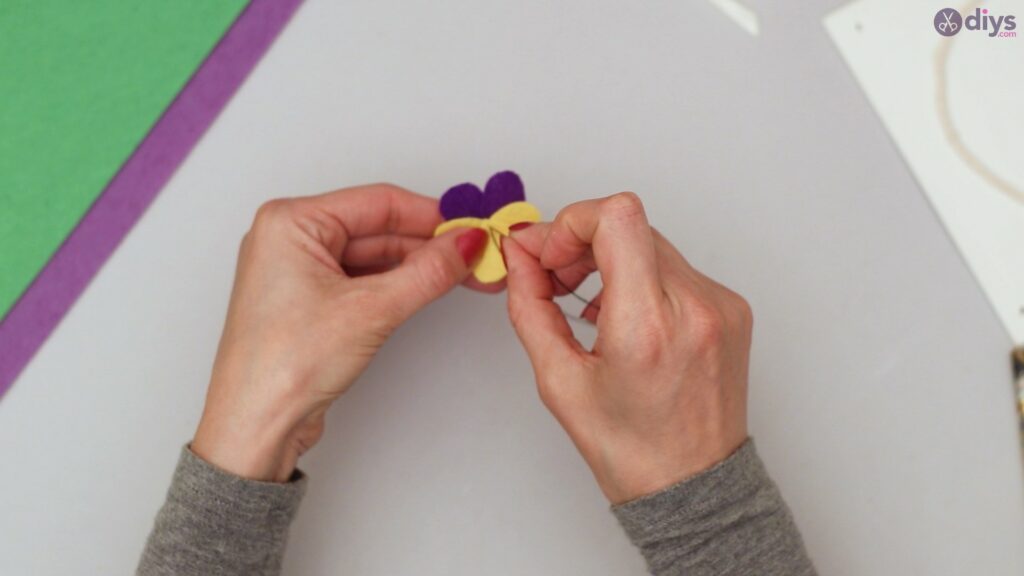
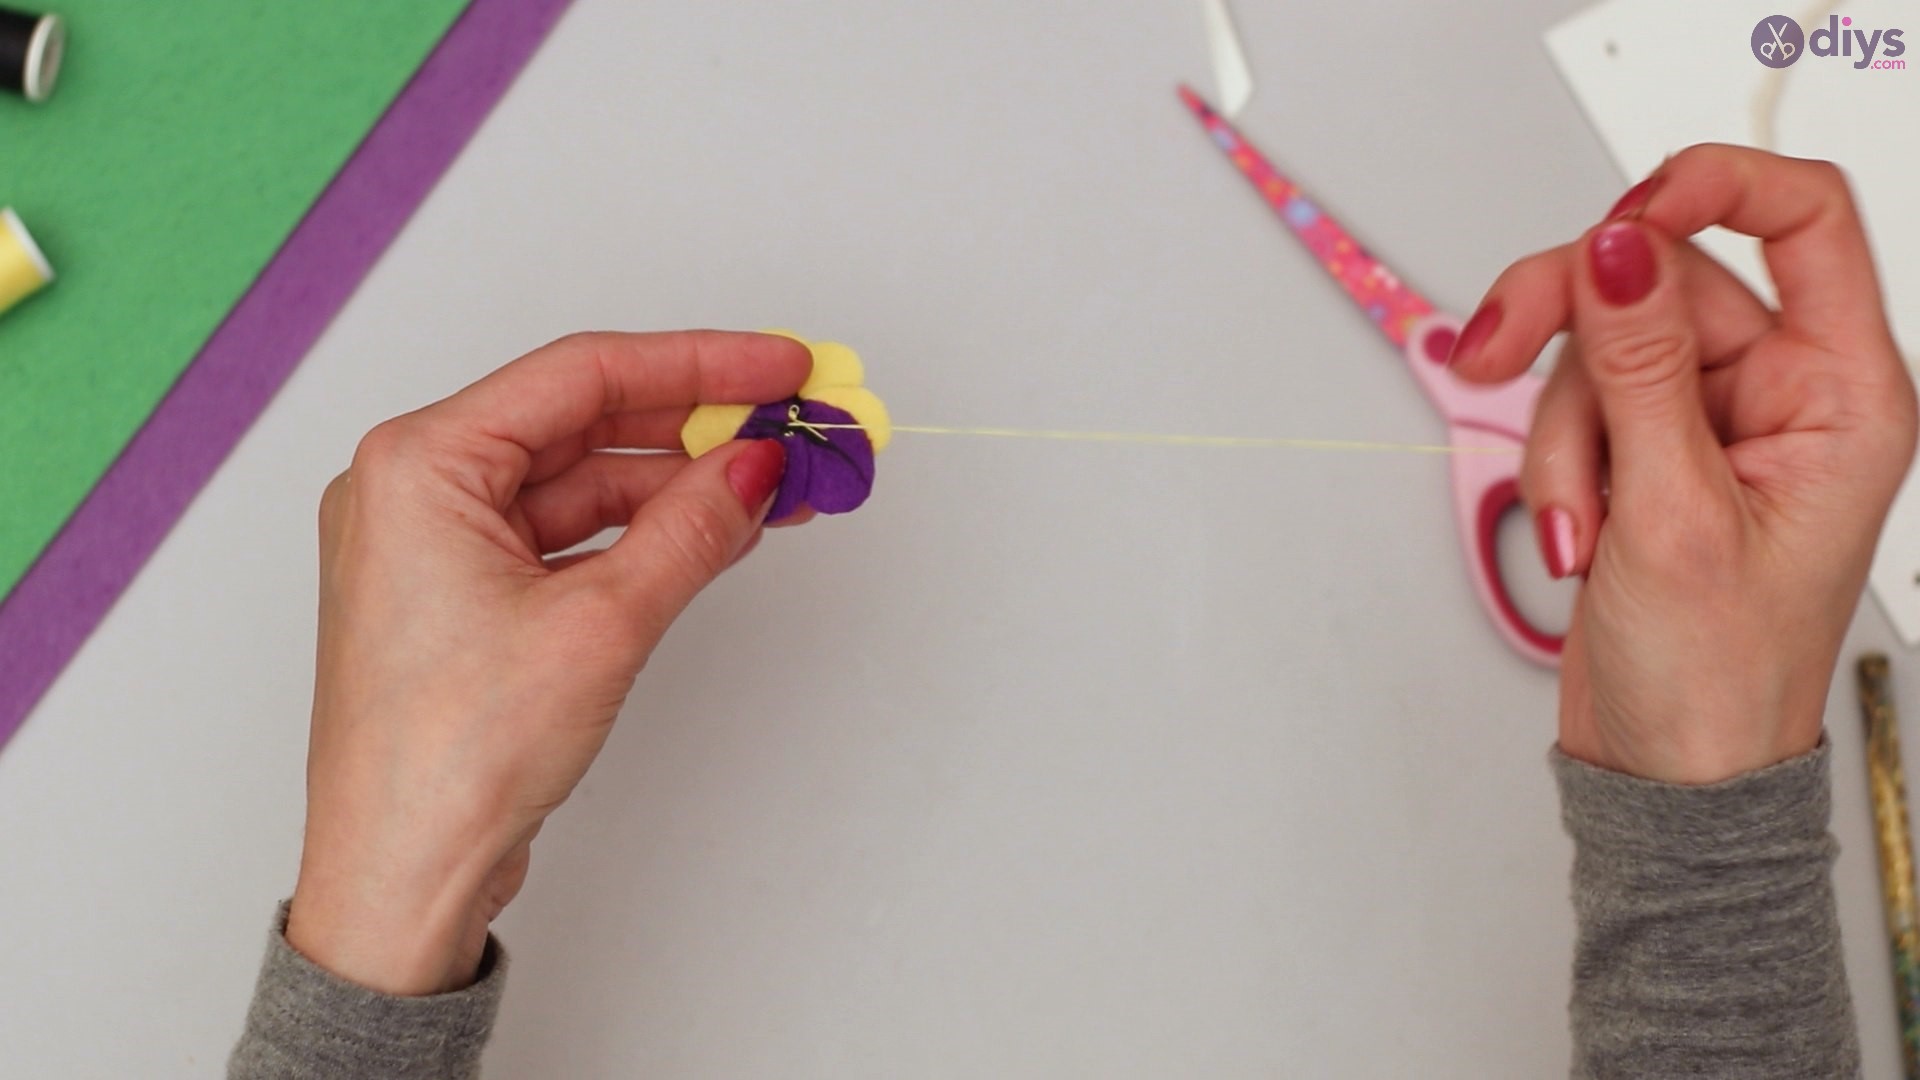
Take the black twisted yarn and pass it through the hole you have made in the middle of your cutouts, going in one direction repeatedly and looping the yarn around the pansy.
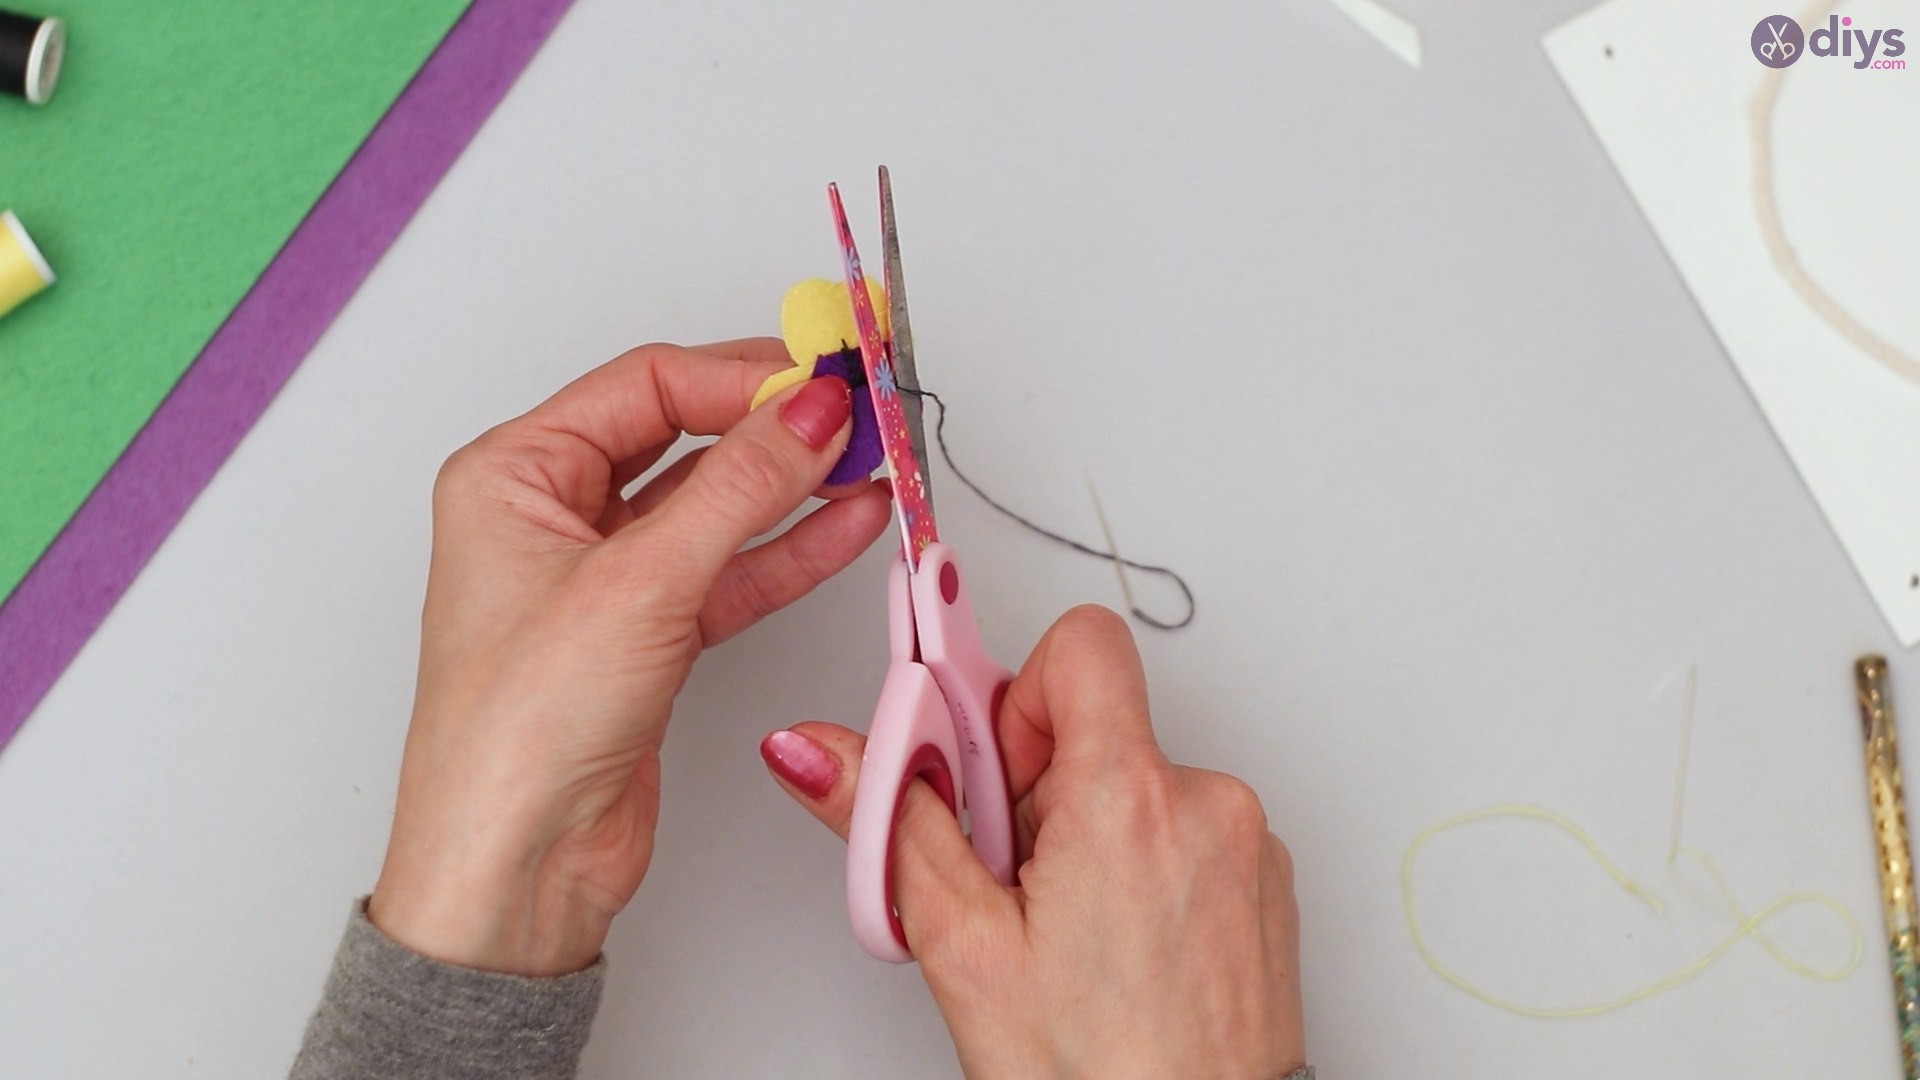
When you are done, tie the black yarn behind the cutouts.
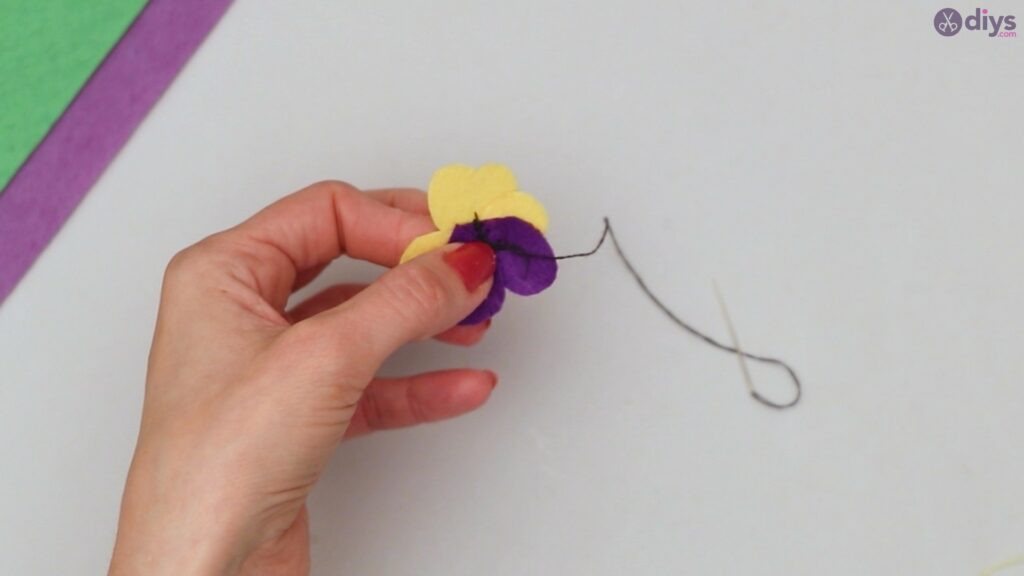
With your scissors, cut off the excess black yarn.
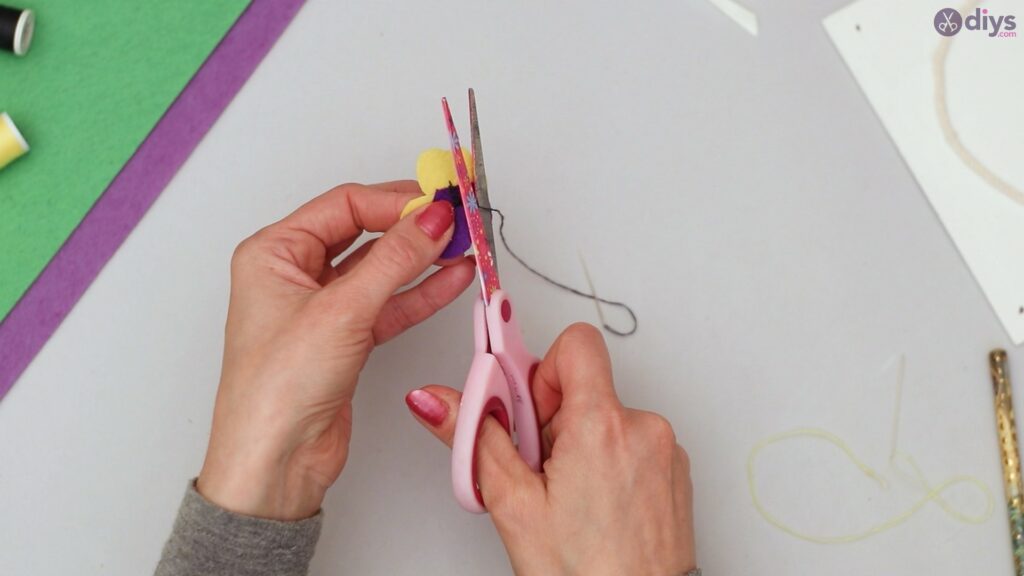
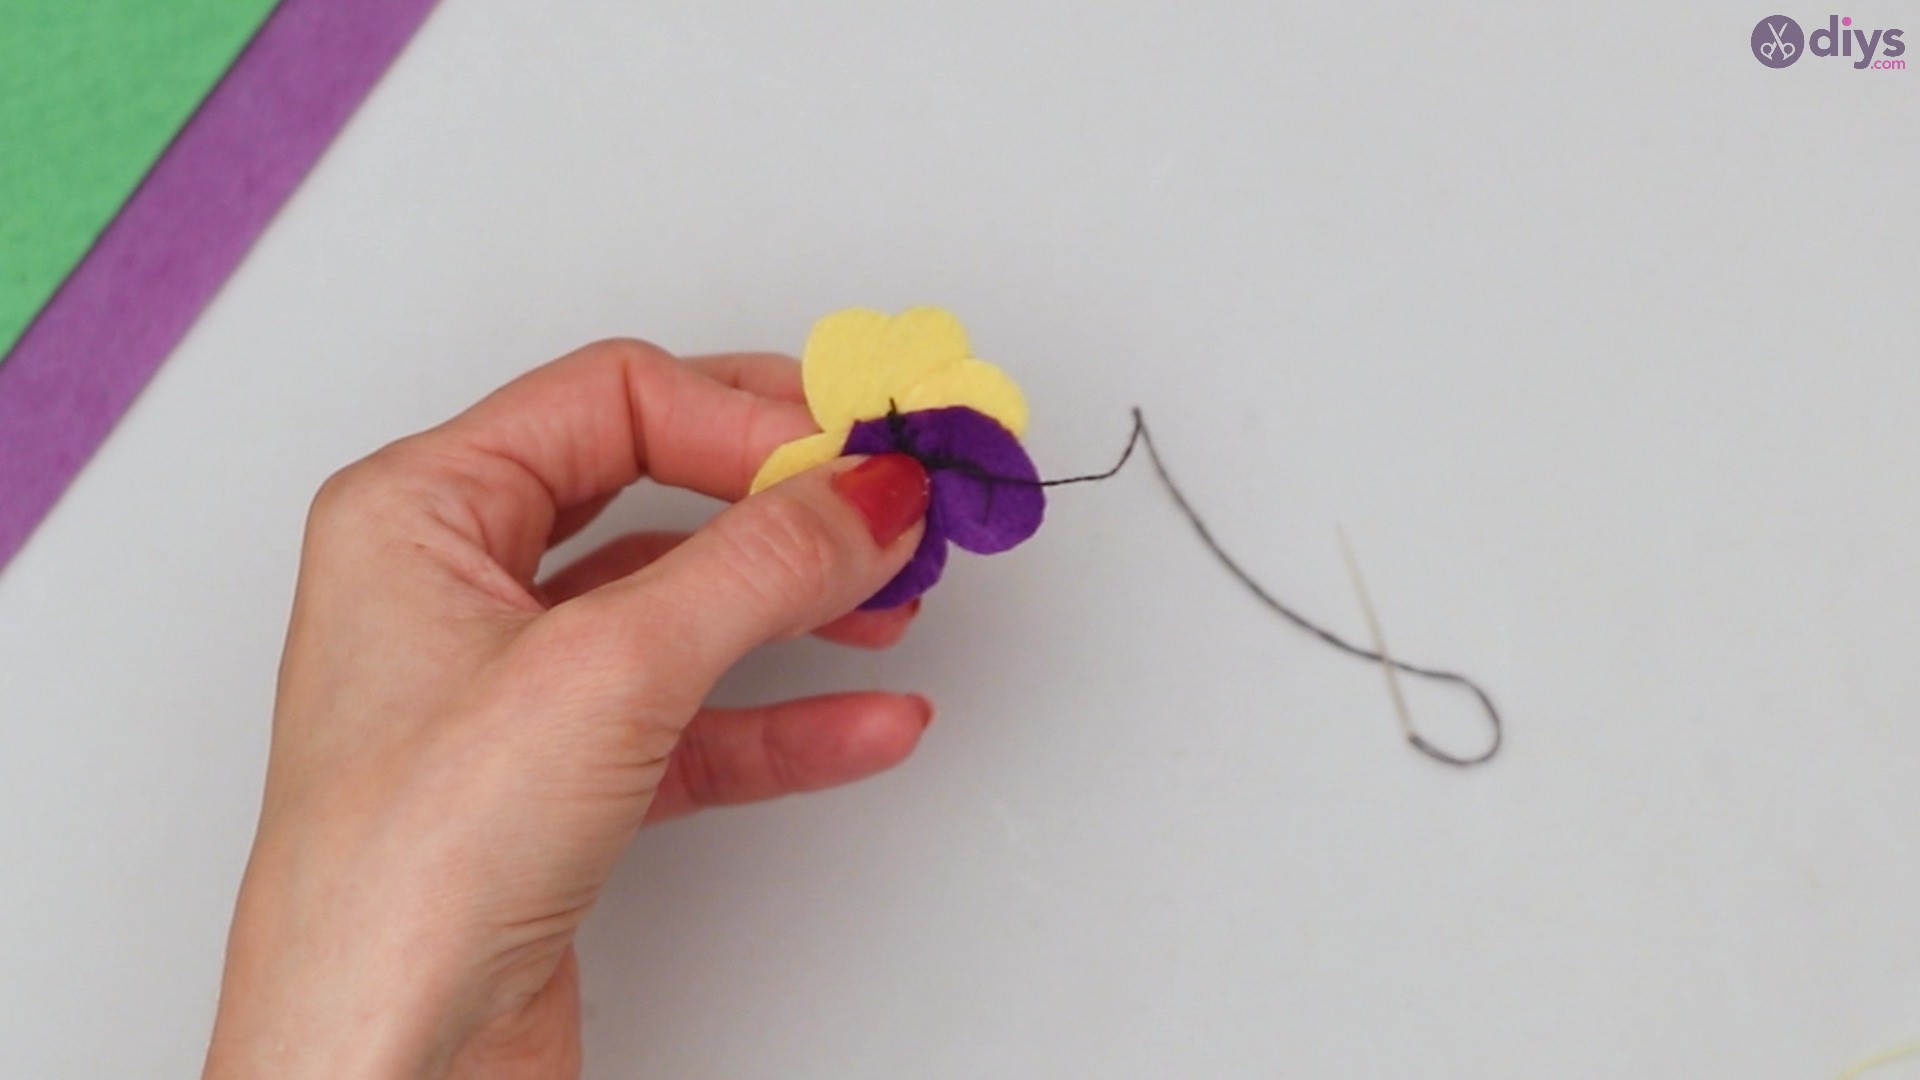
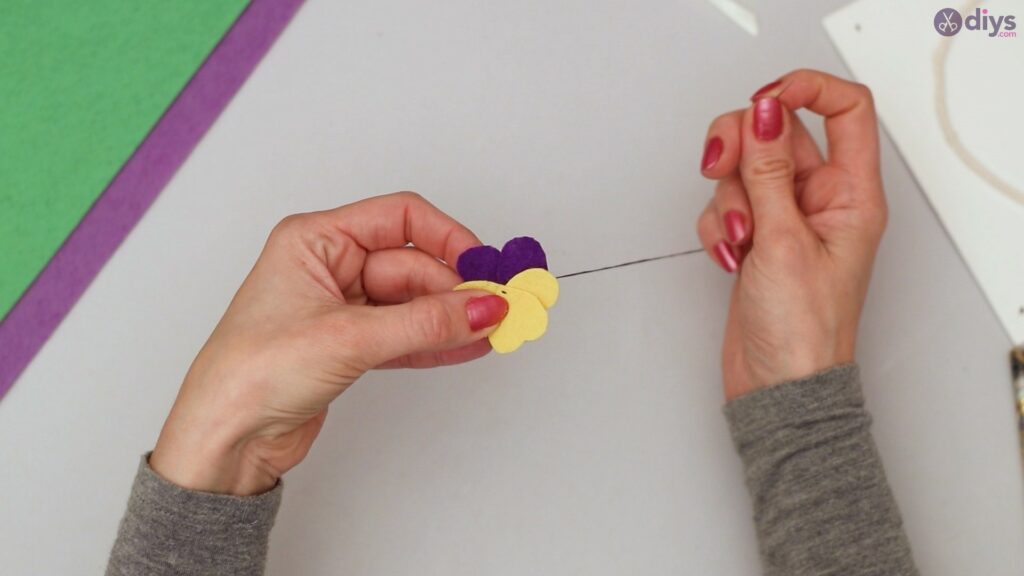
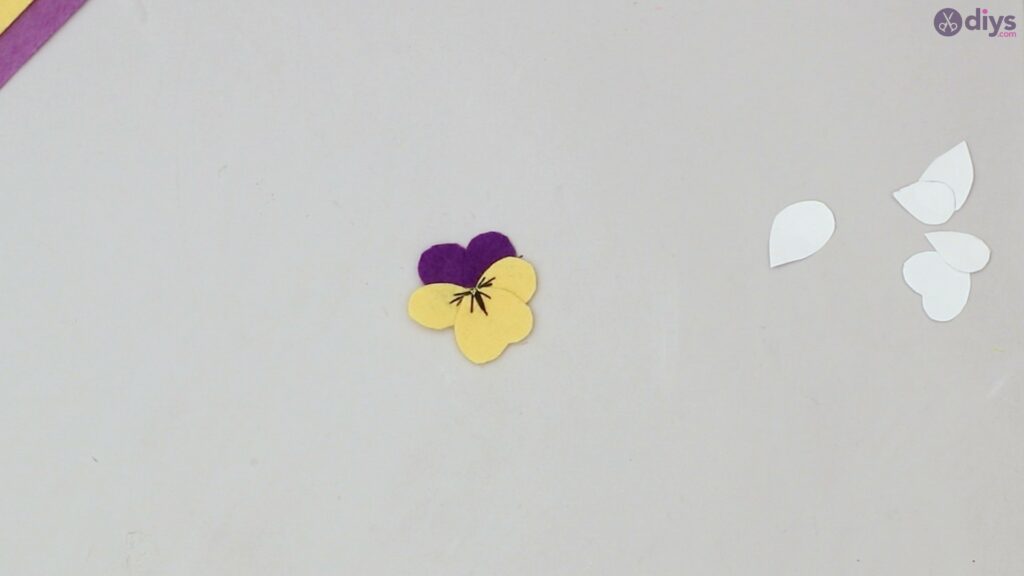
Now, take the yellow twisted yarn and pass it through the hole you have made in the middle of your cutouts in one direction repeatedly, looping the yarn around the pansy.
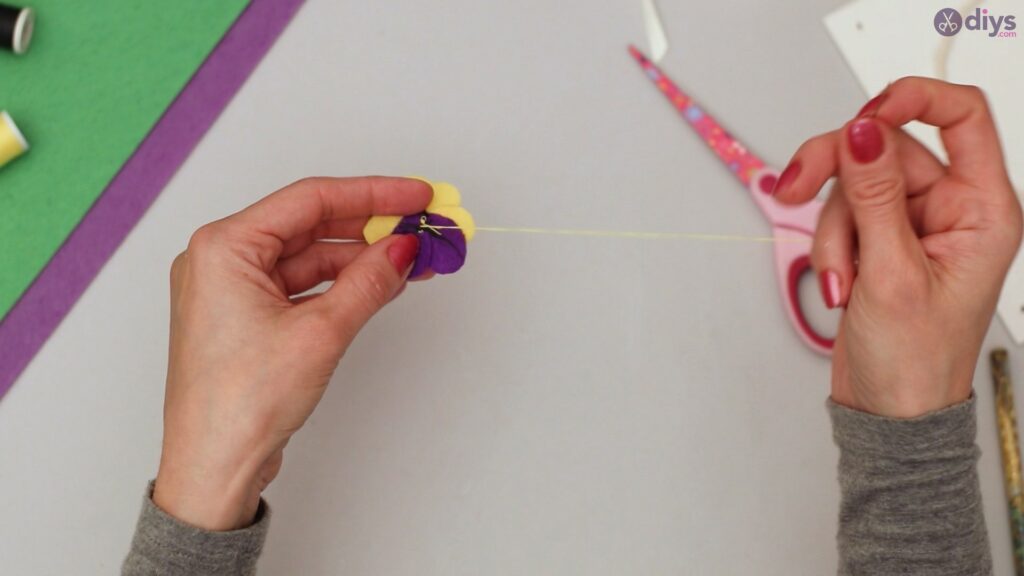
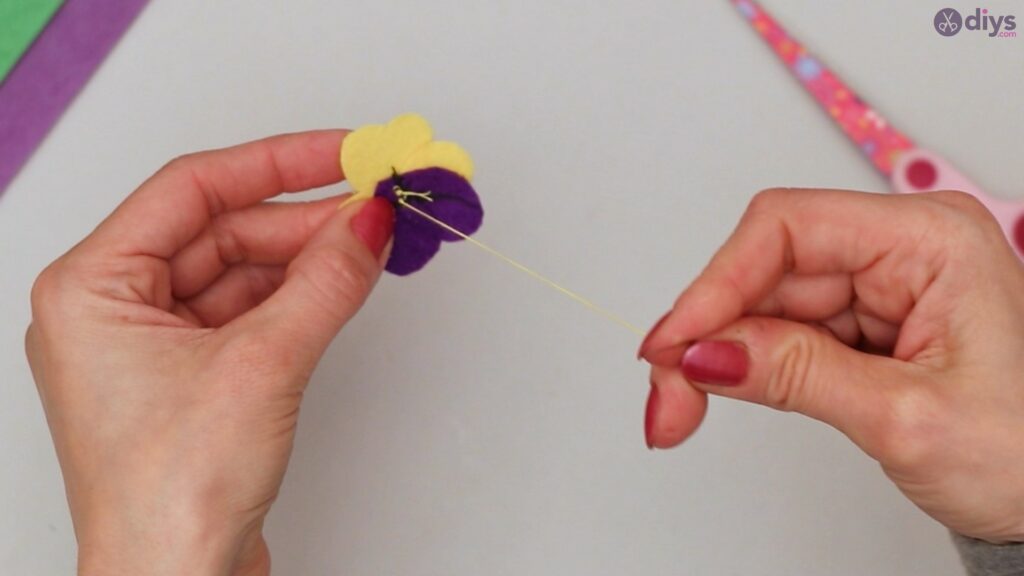
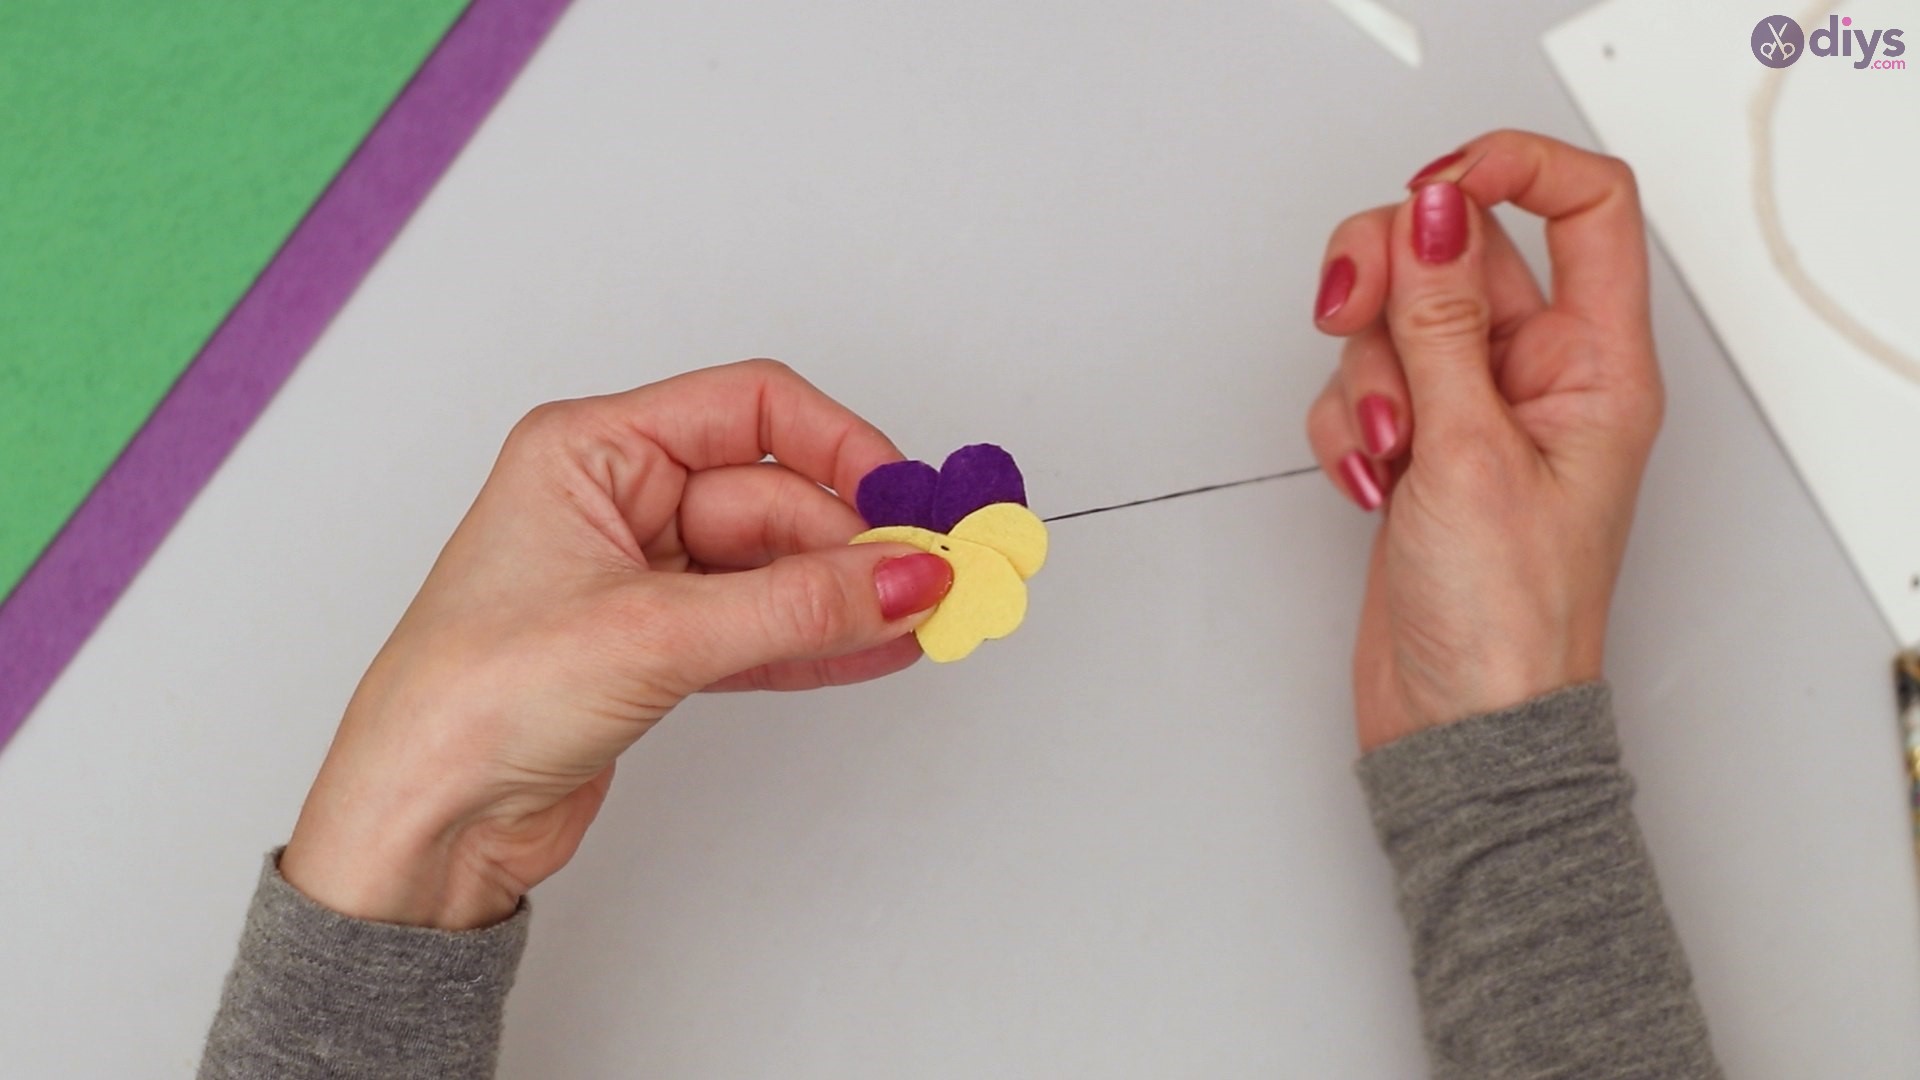
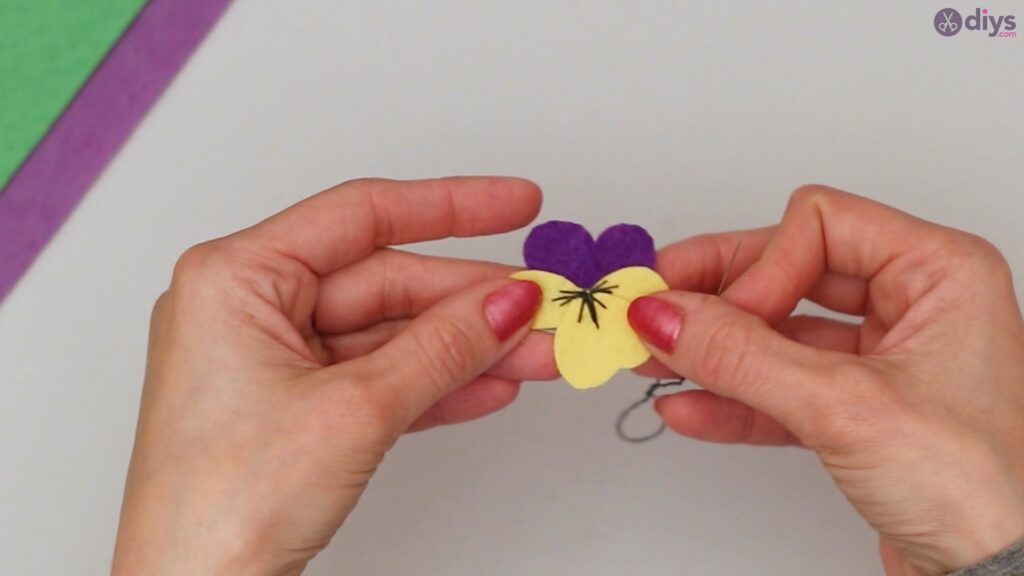
When you are done, tie the yellow yarn behind the cutouts and trim off any excess.
It should look like this. Now you have your first pansy. Repeat the process for as many more pansies as you would like to have. You must pass the yarn around to form a loop so that the outcome mimics the petals of a real flower.
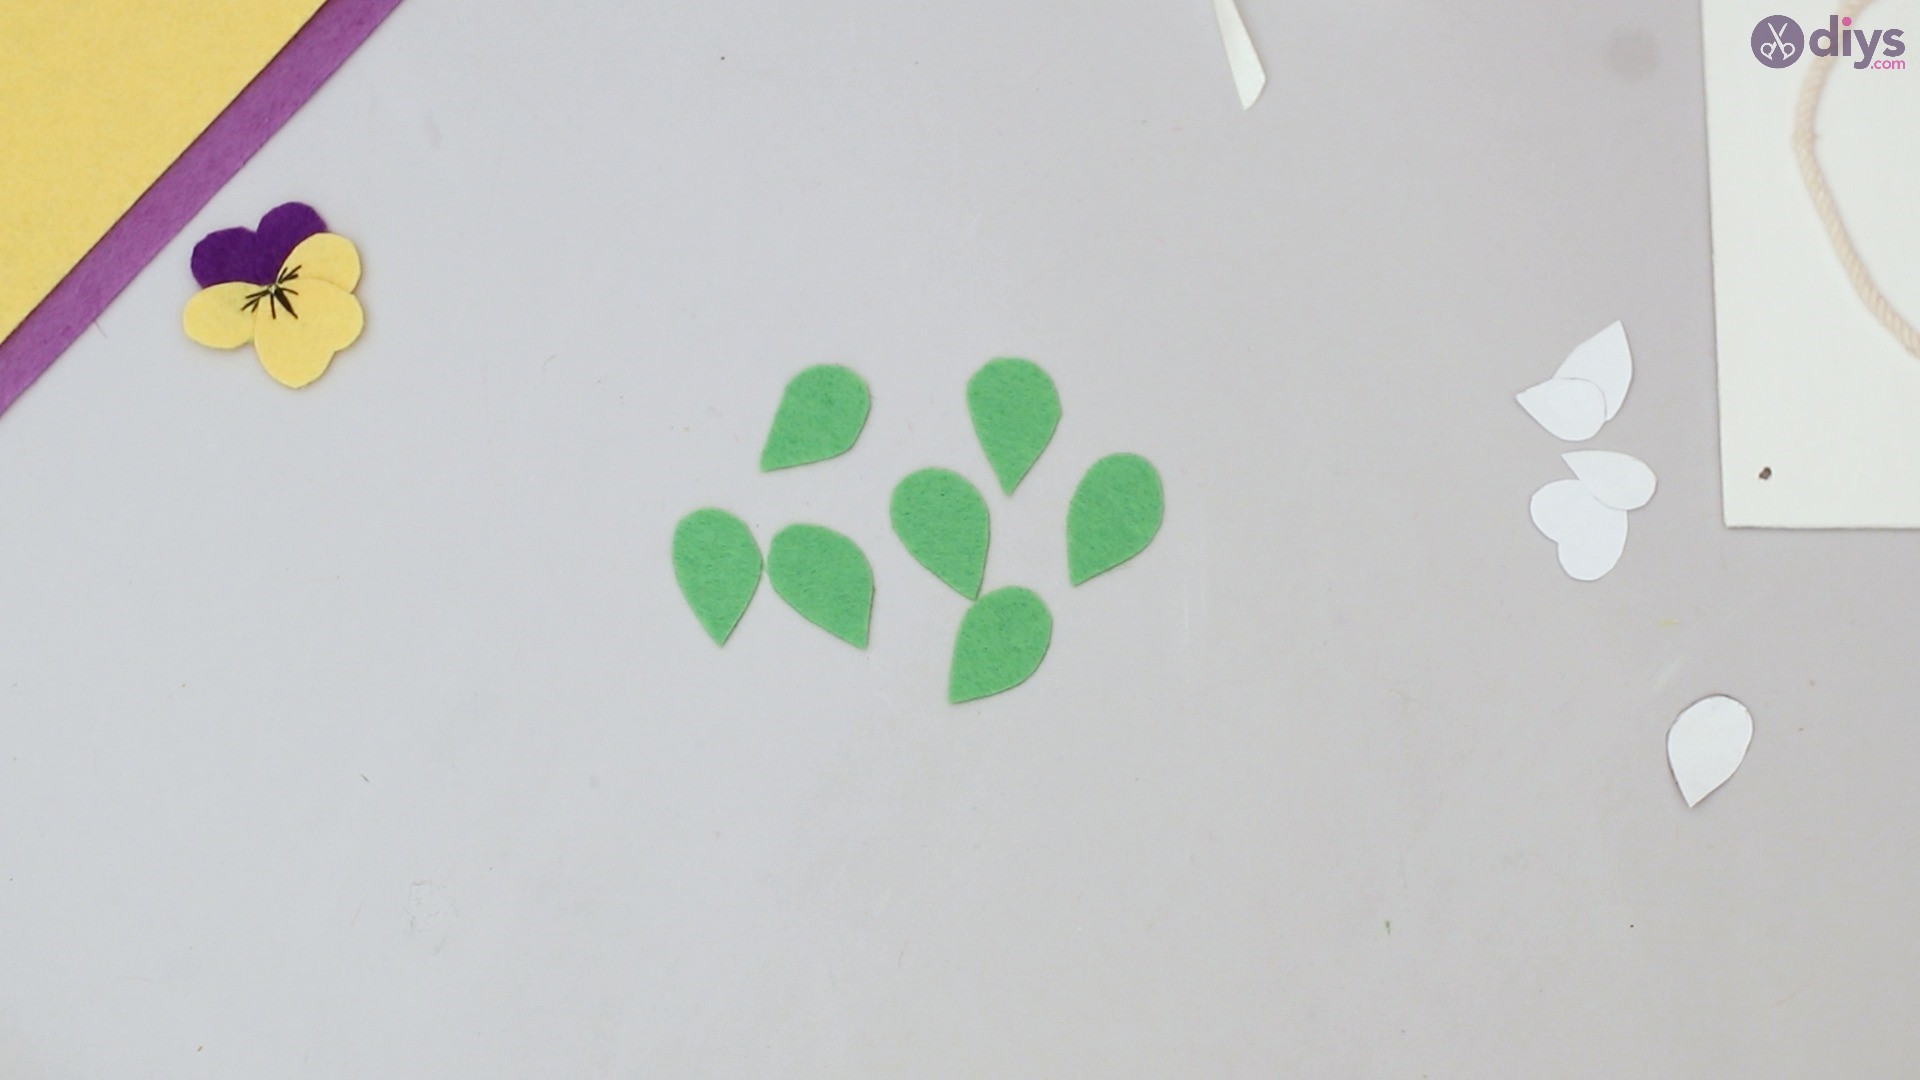
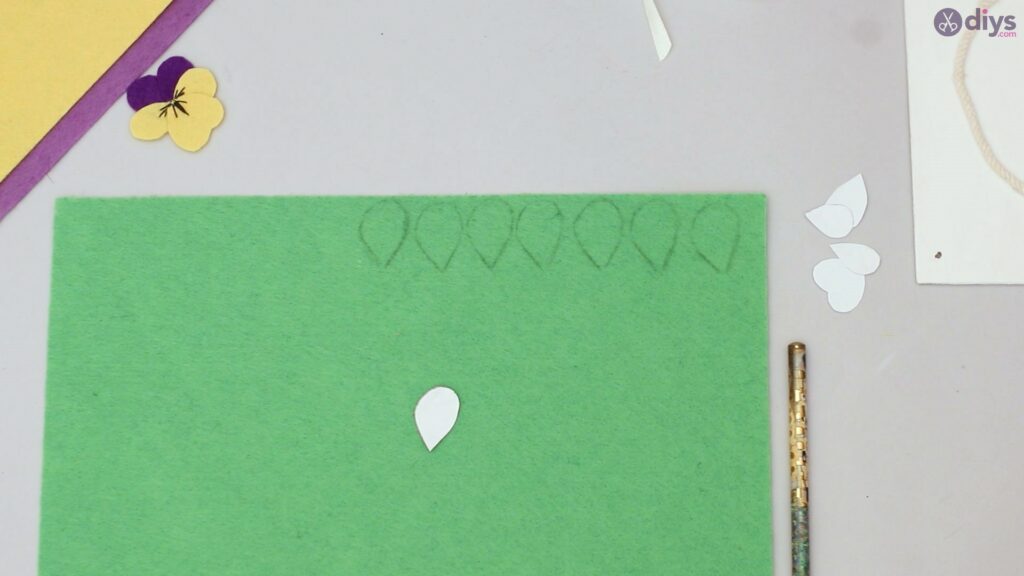
Step 6: Making the Leaves
Take the teardrop cutouts, place them on your green felt material, and using a pencil, trace the felt material around the paper.

Once you are done, cut out what you have traced. These will form the leaves for the pansies.

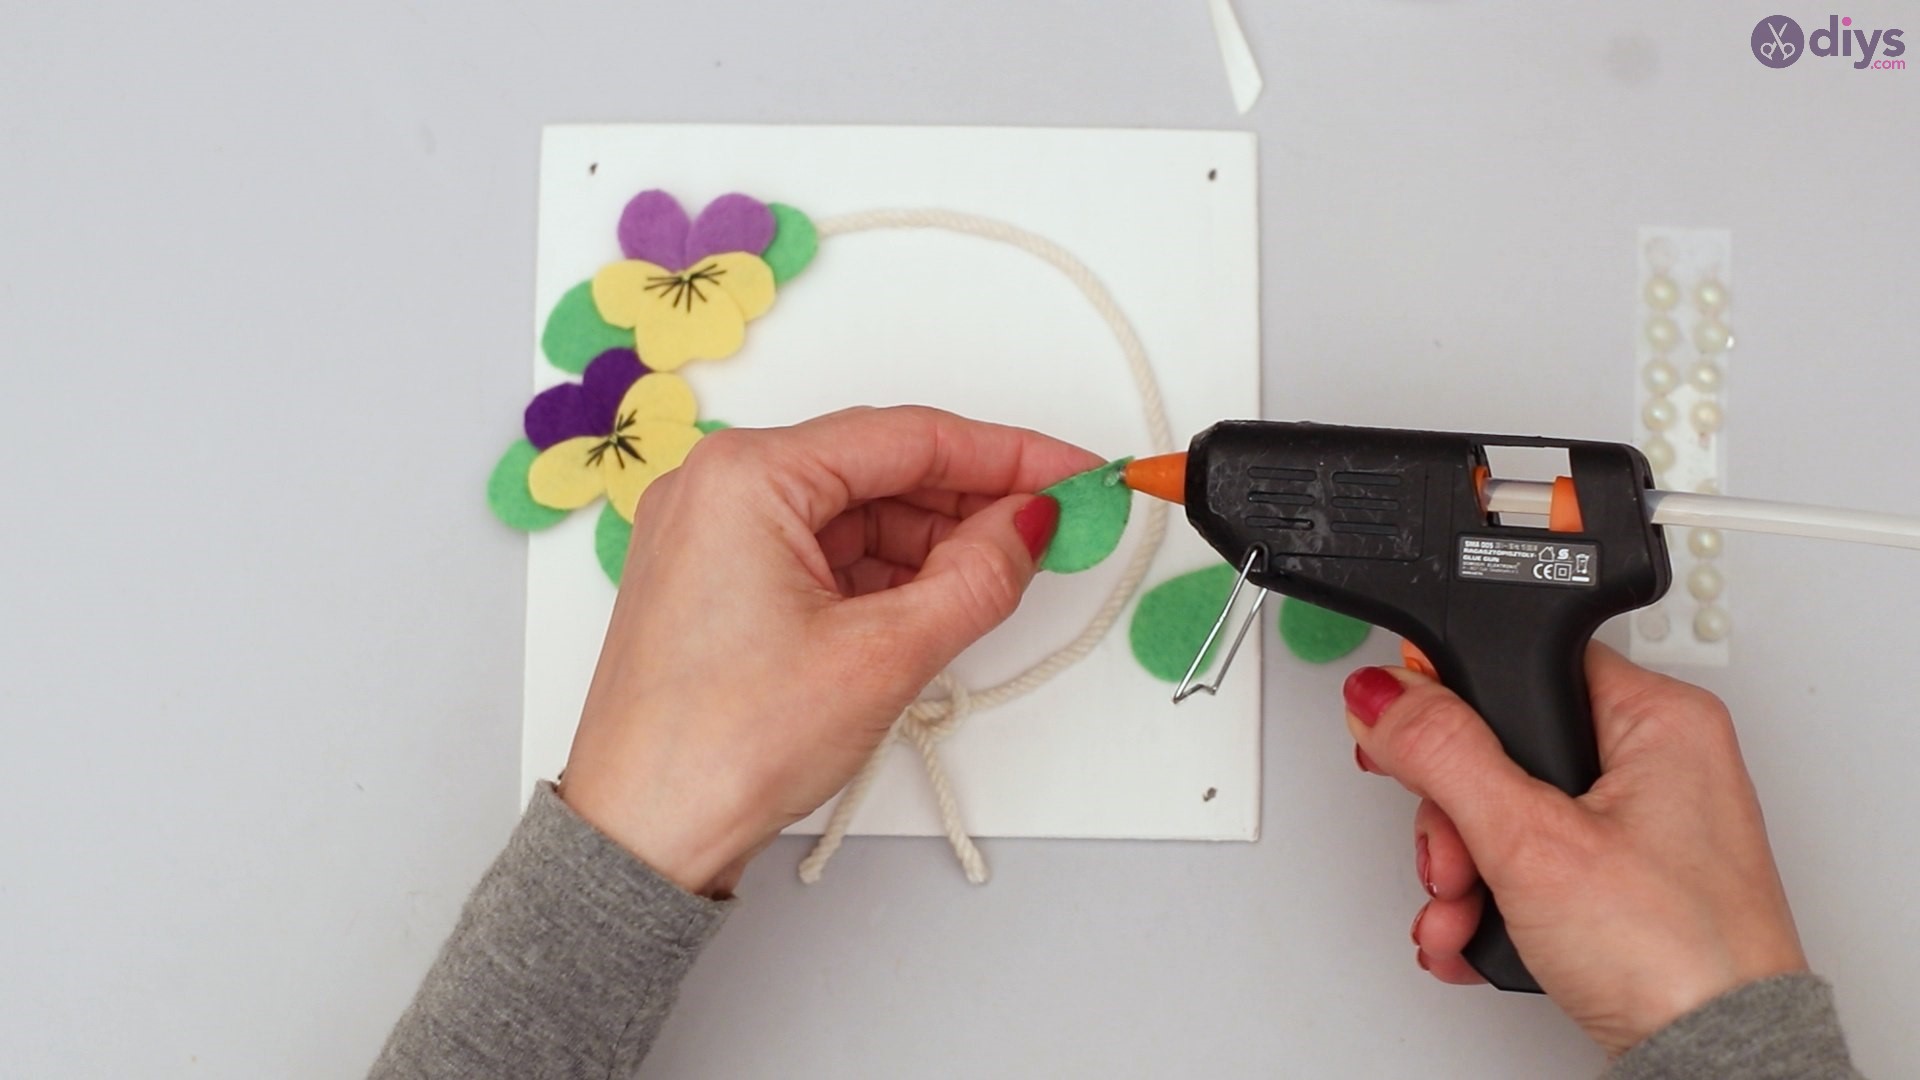
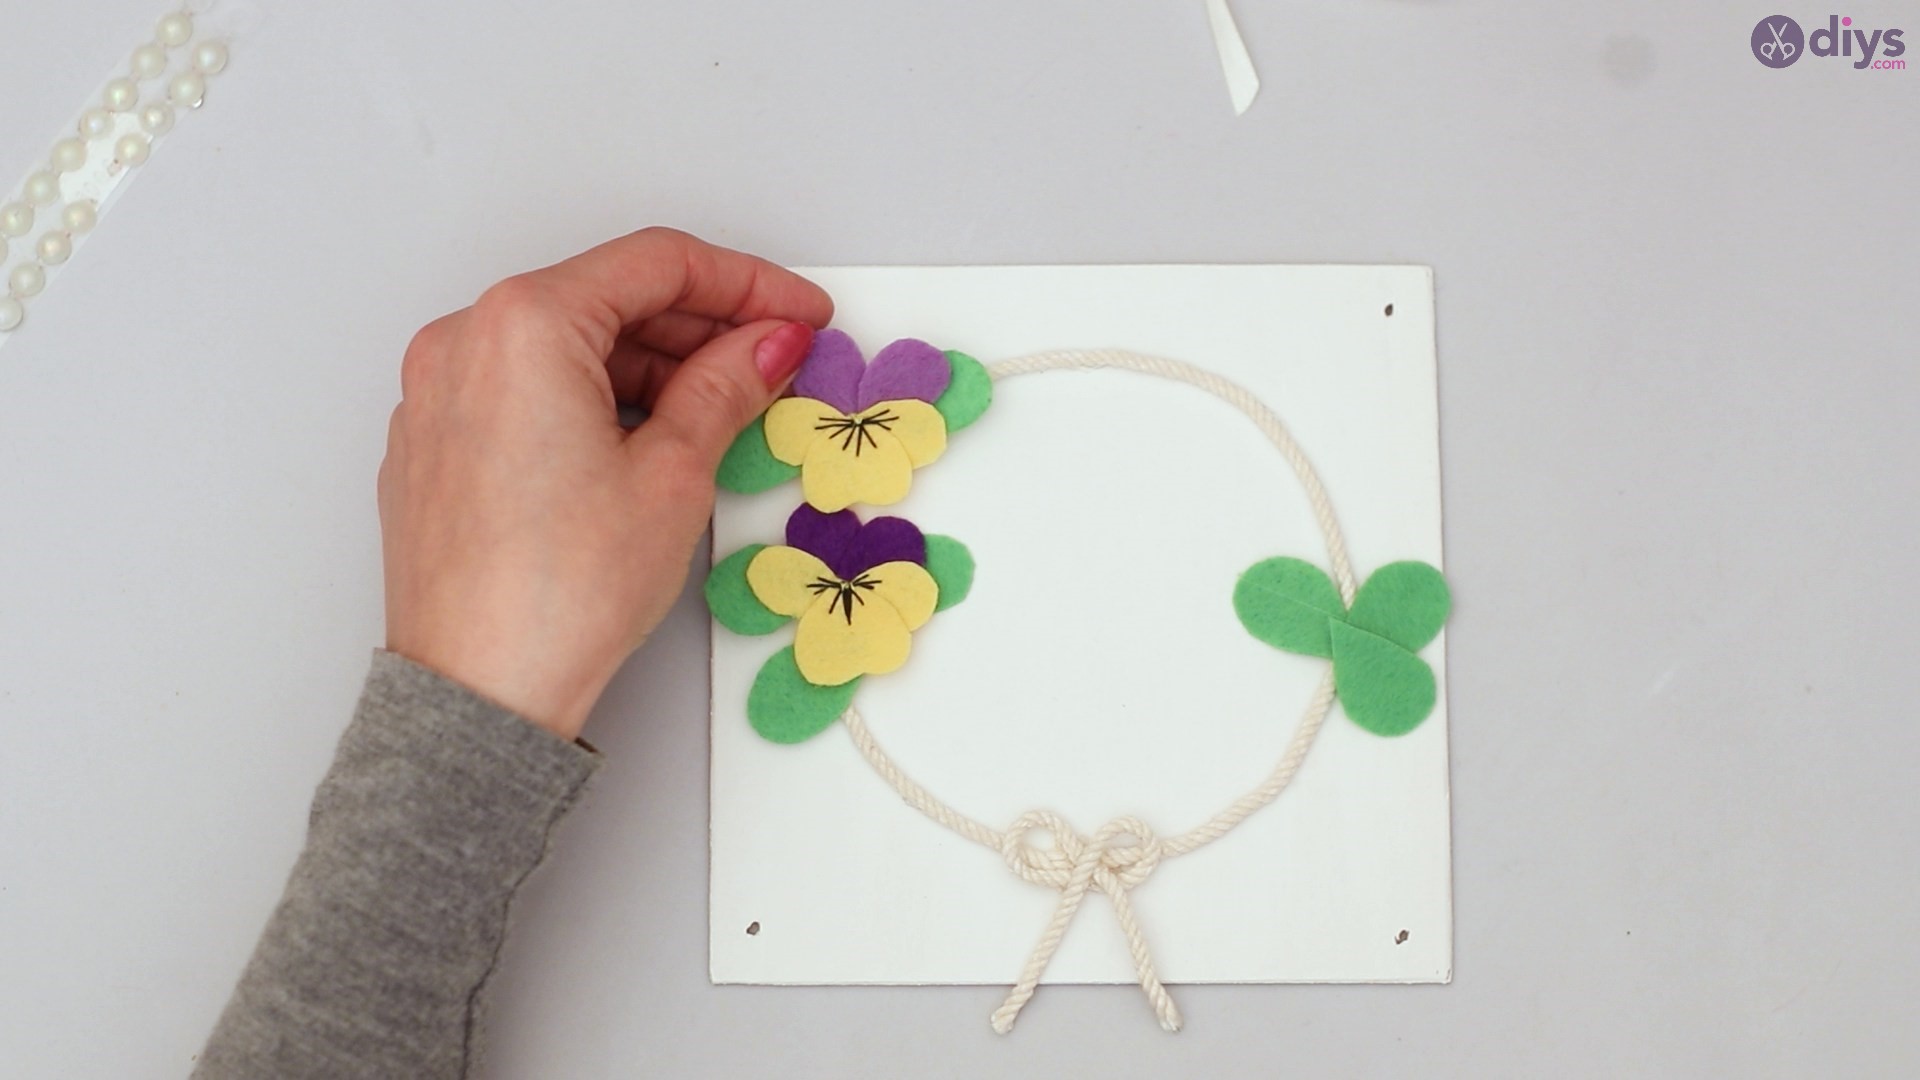
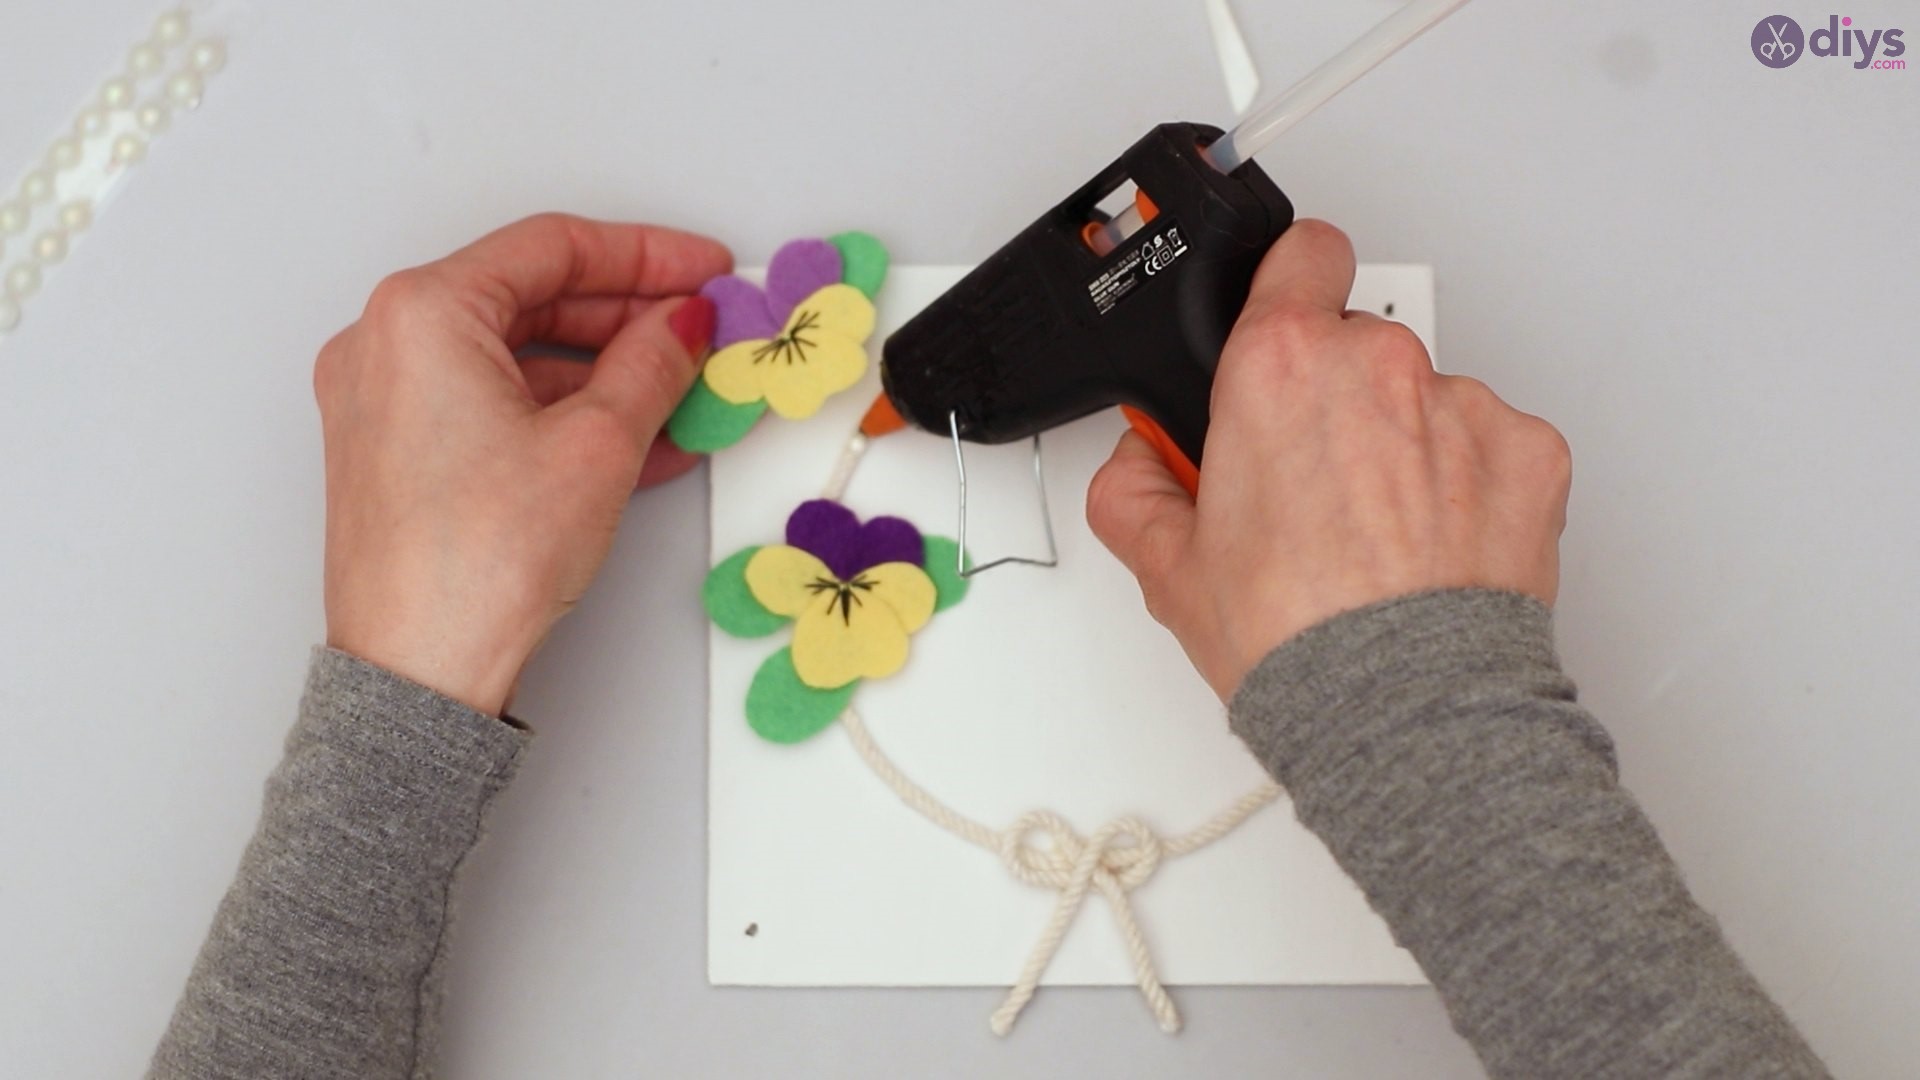
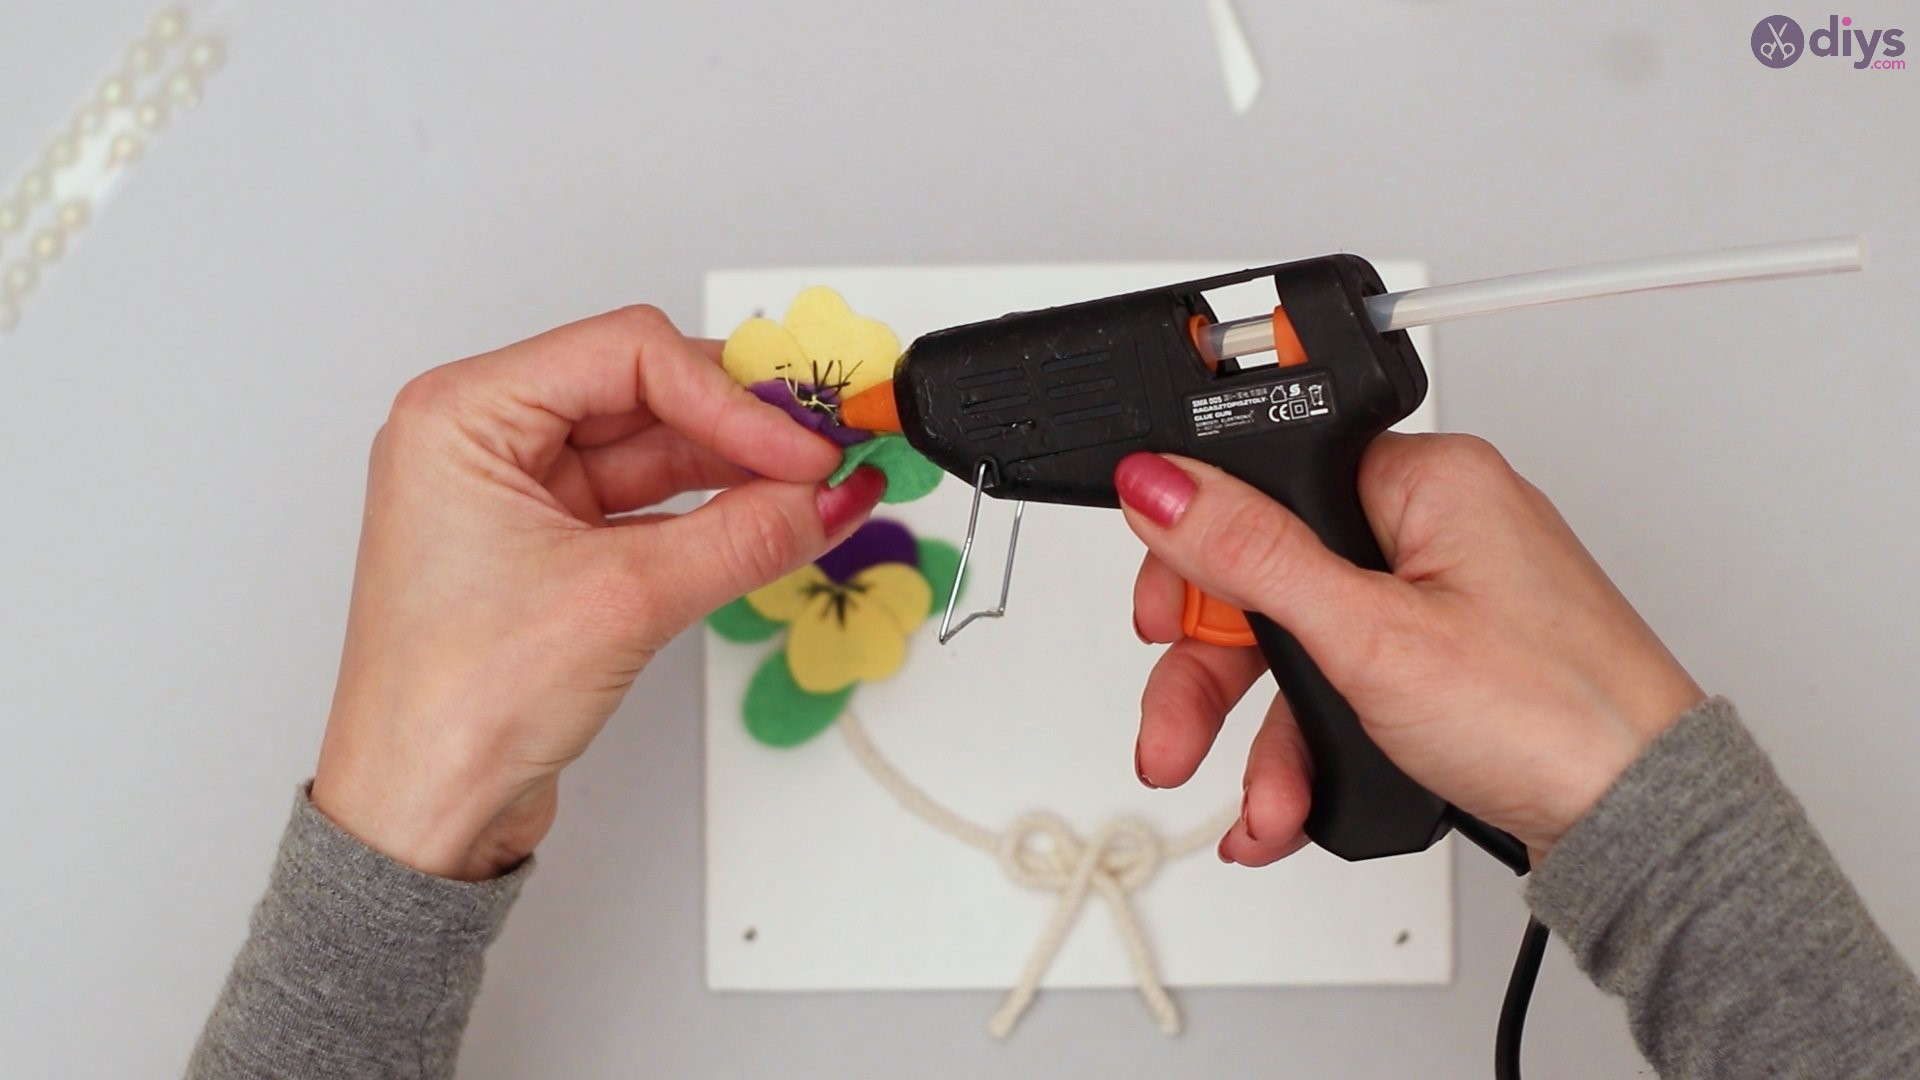
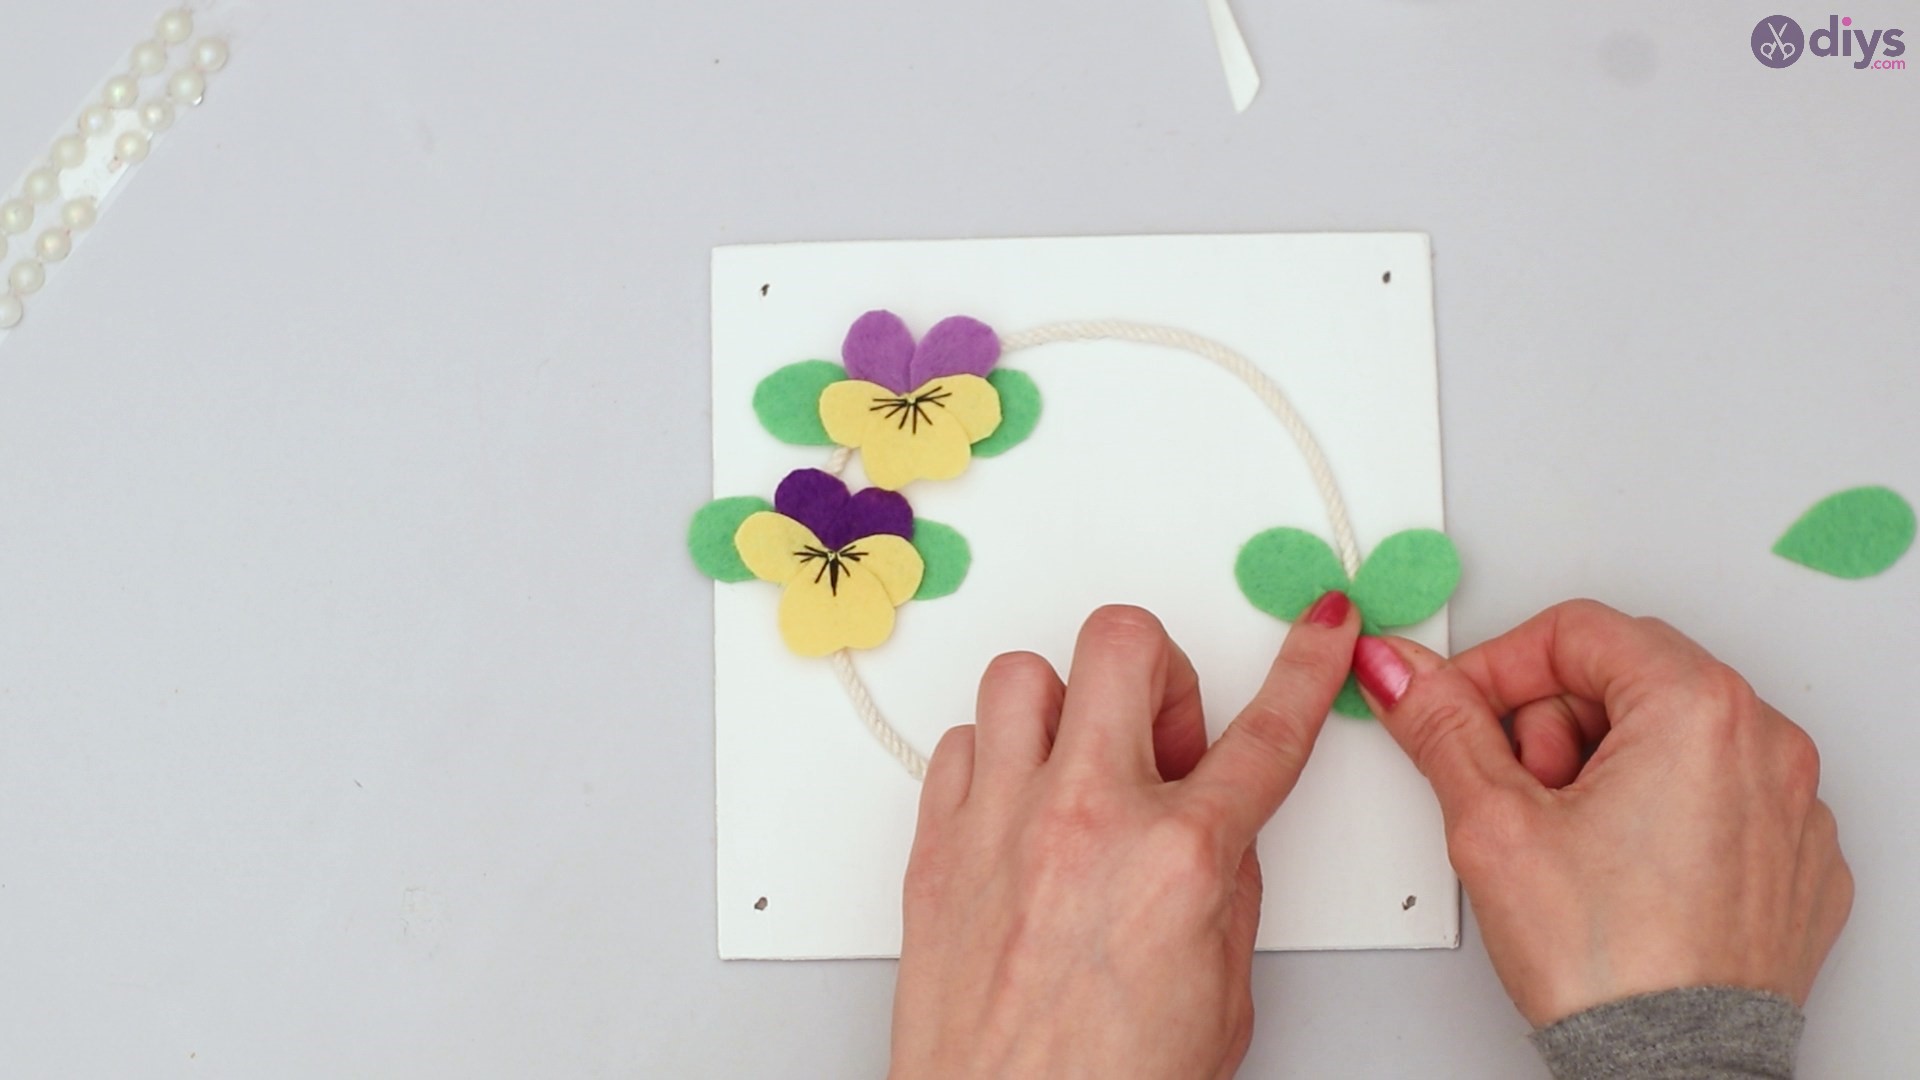
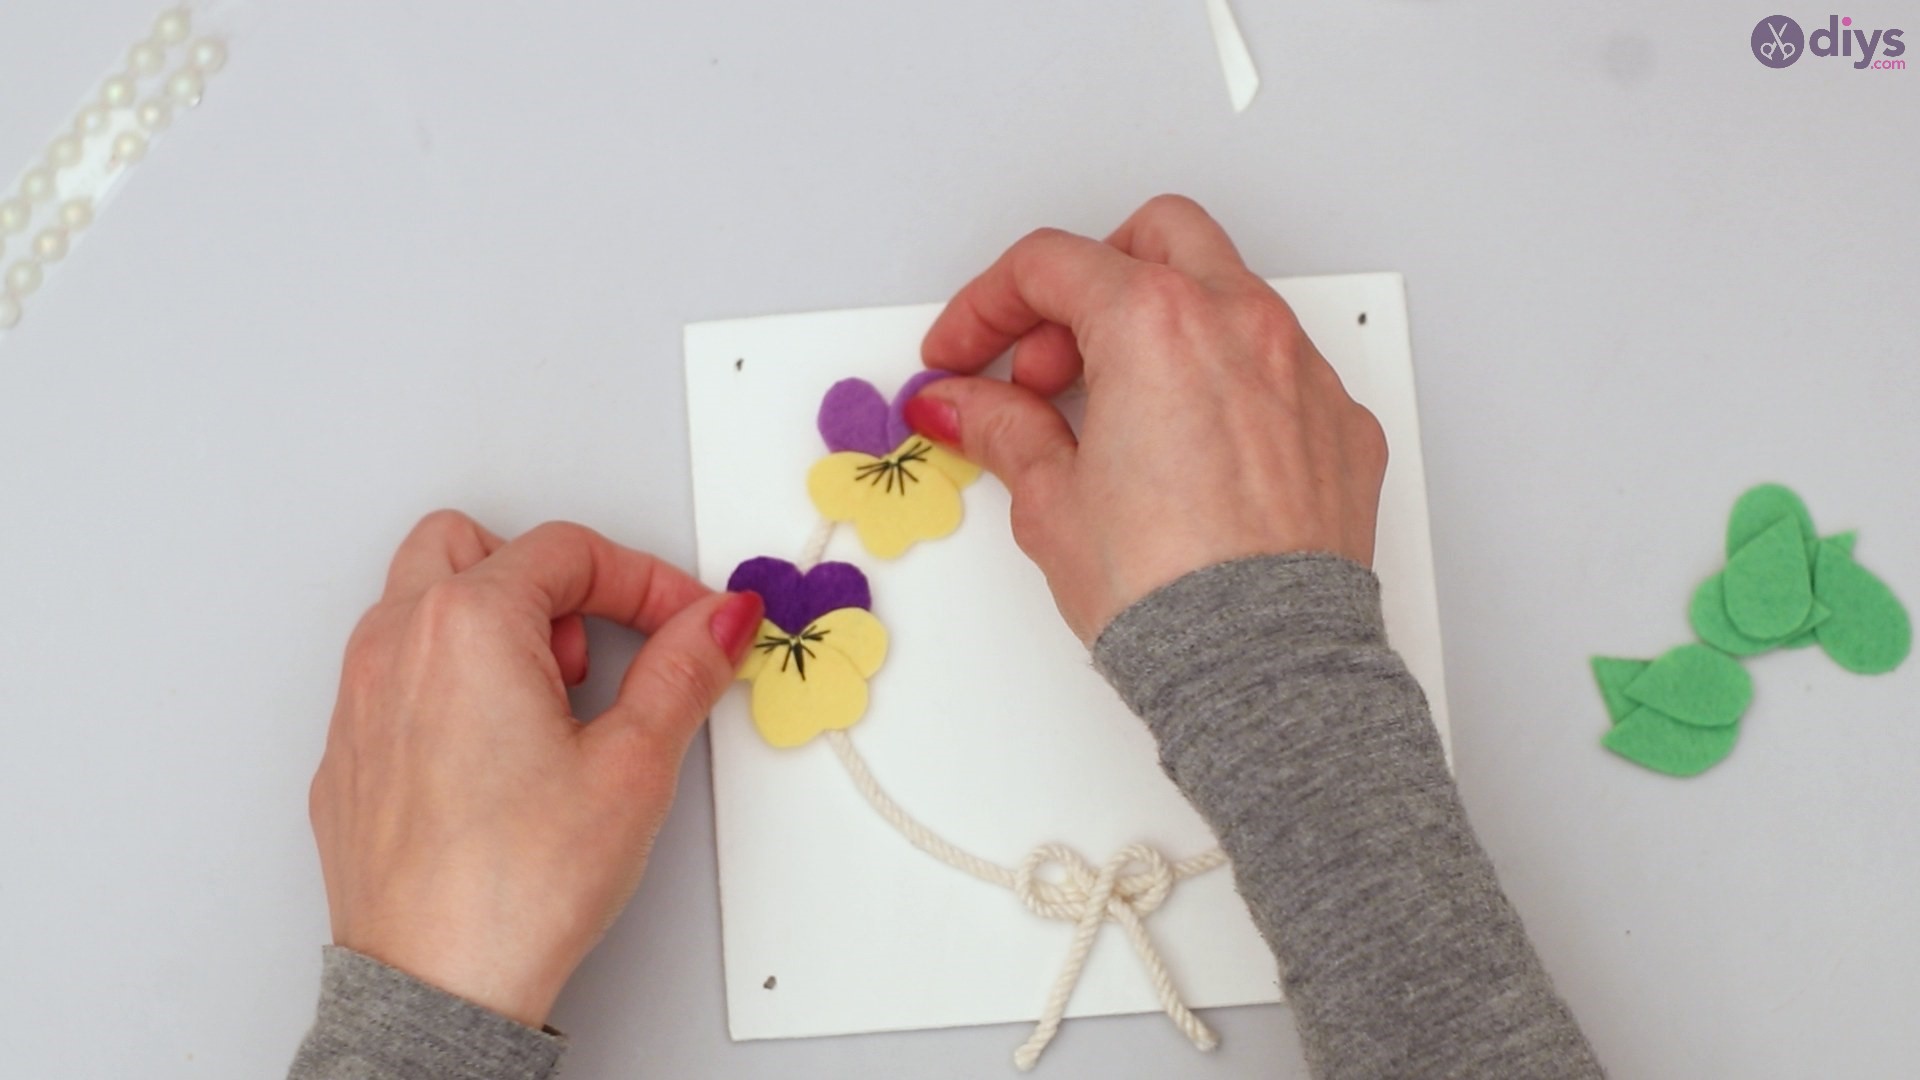
Step 7: Sticking on the Pansies
Take the pansies and place them where ever you like on the rope that you have glued to the wood table.
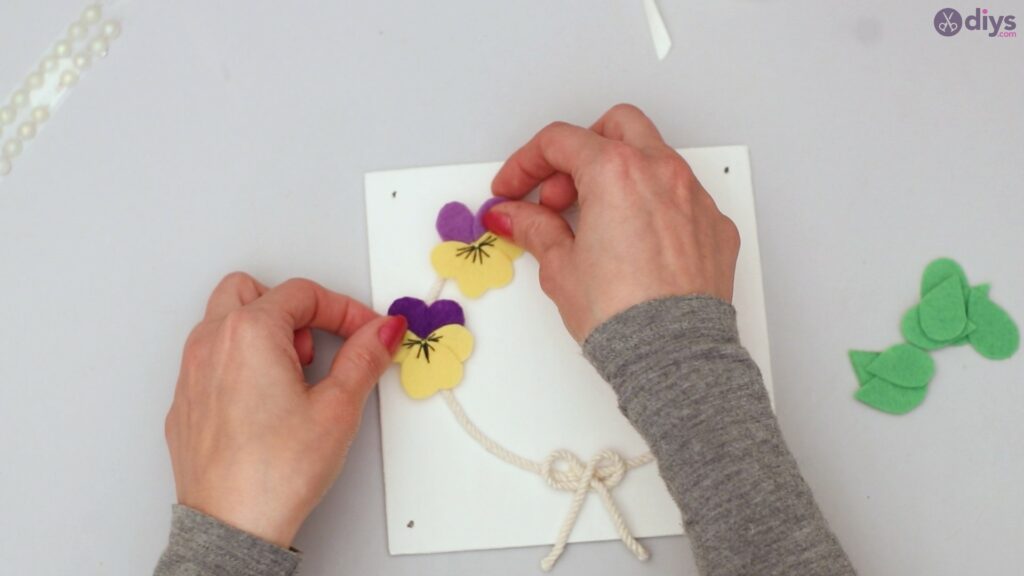
Now, place some of the leaves beneath the pansies and some others just opposite the pansies. Do not set any pansies on the leaves opposite to the ones you have already placed.
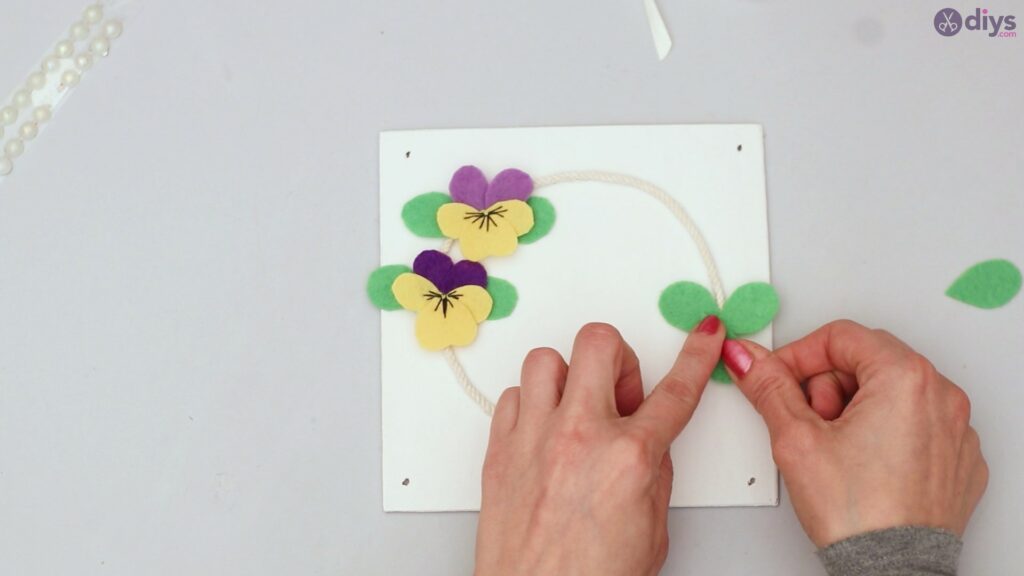
Using your glue gun, apply a dot of glue to the center of the pansies.

Apply some glue where you would like to place the pansies on the rope.
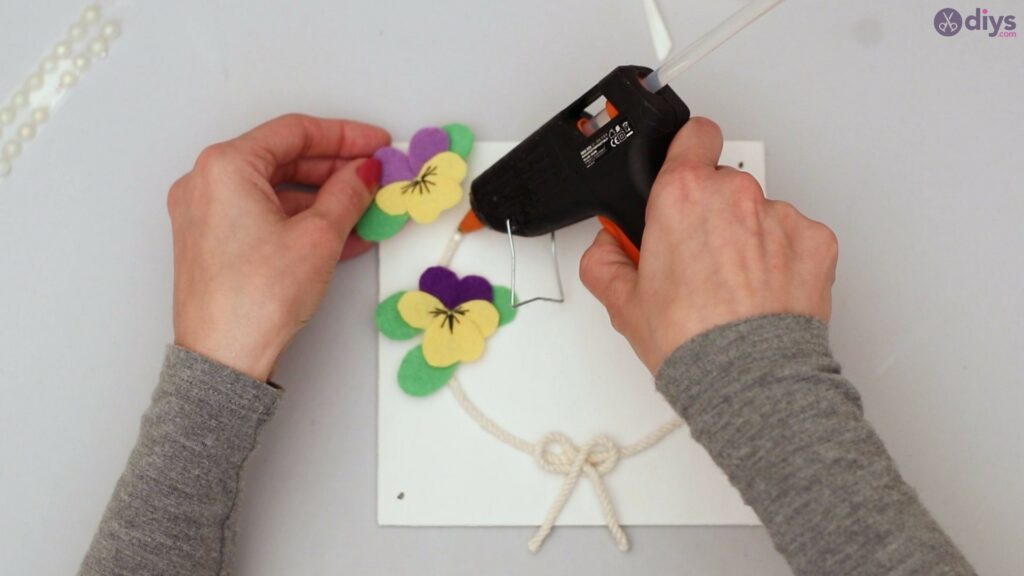
Secure the pansies against the rope on the wood table.

On the rope where you have just leaves, apply glue, and secure it against the table.

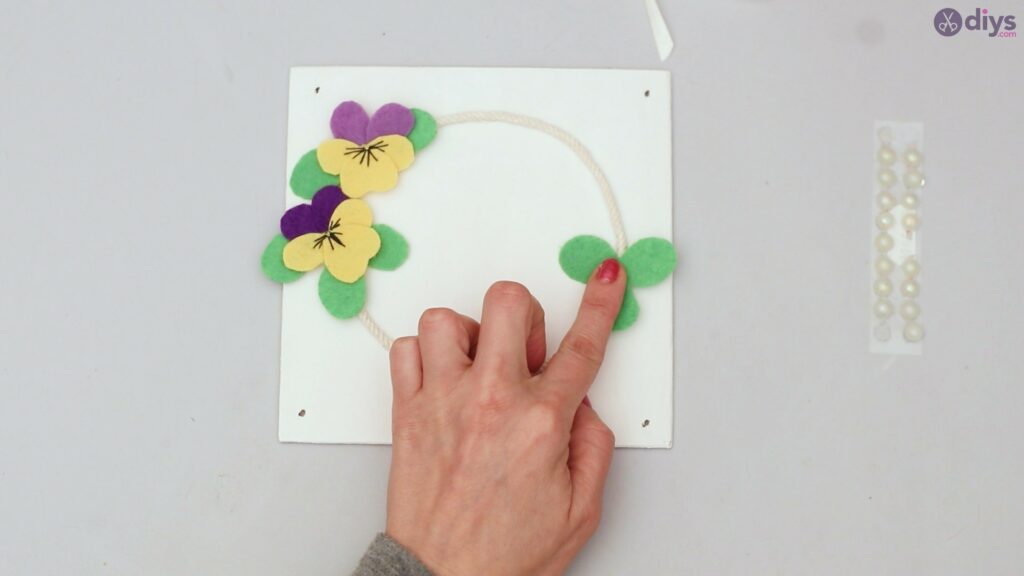
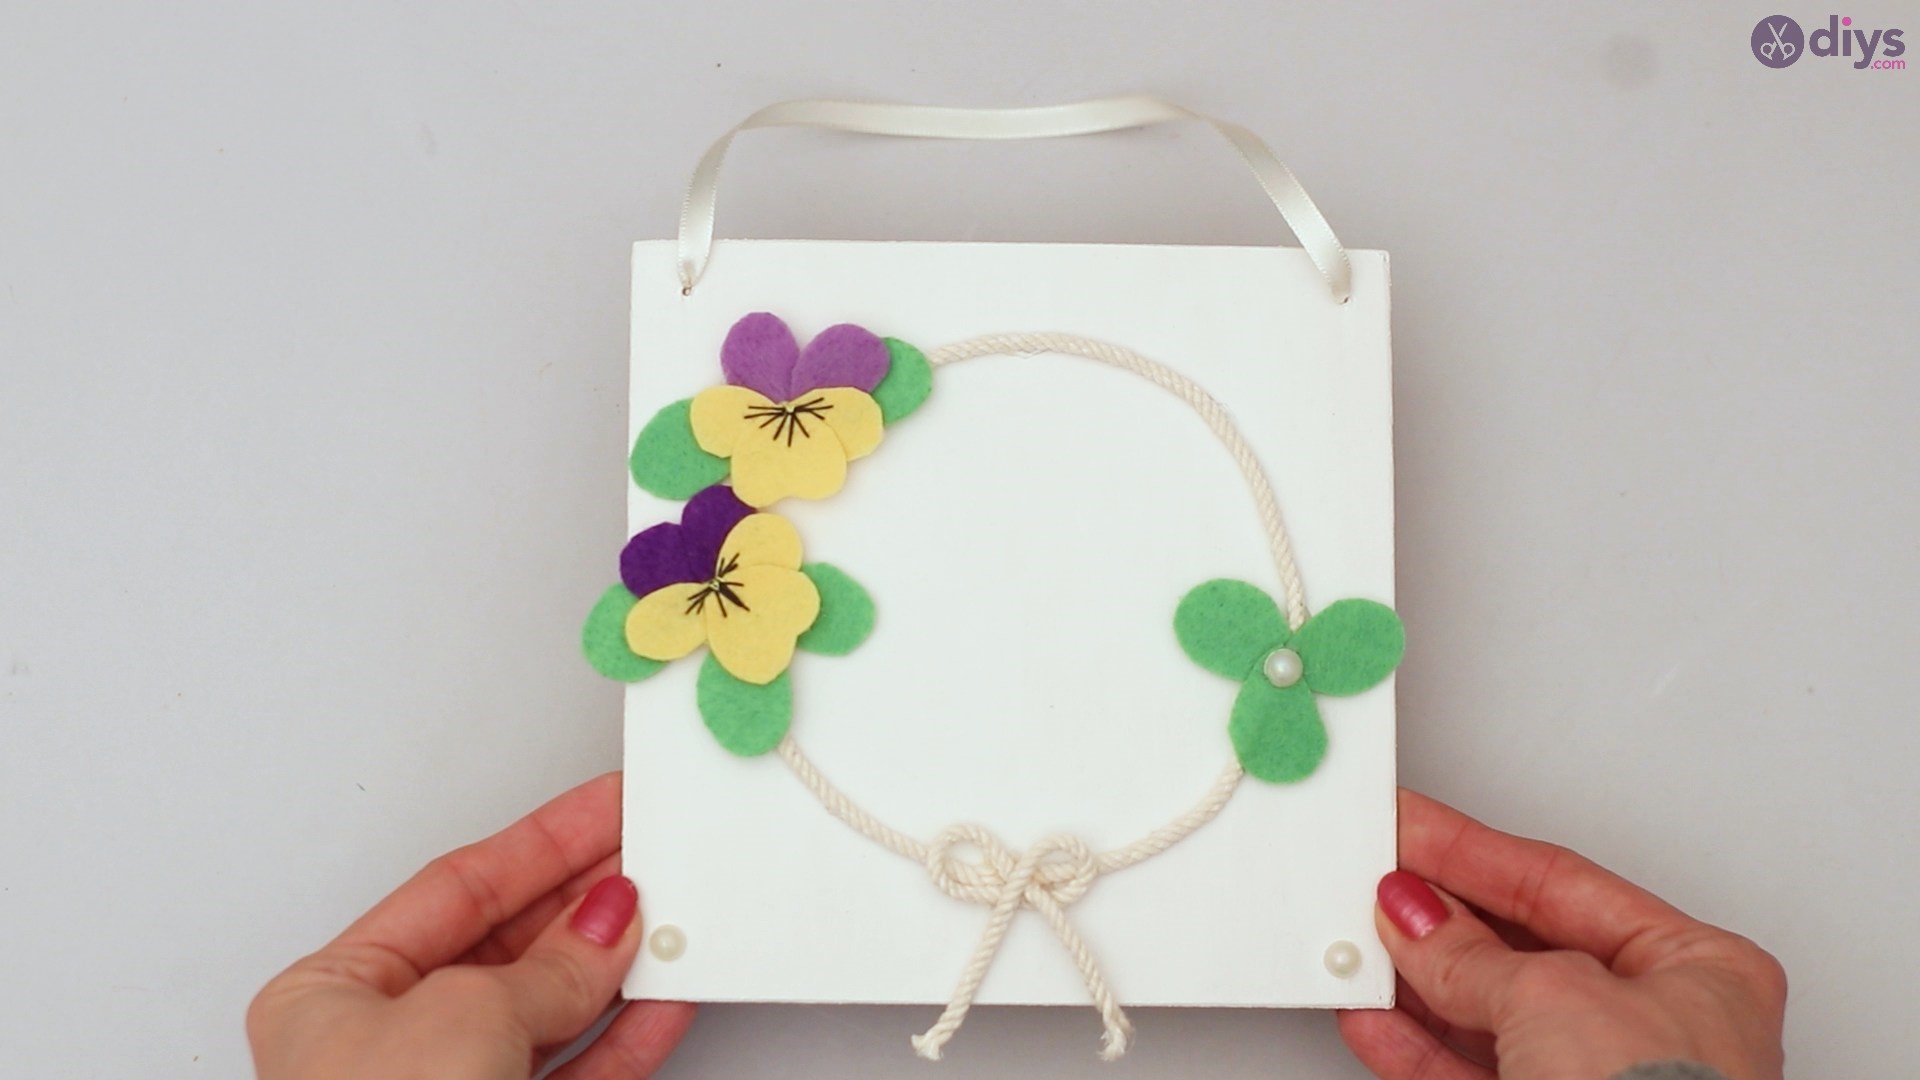
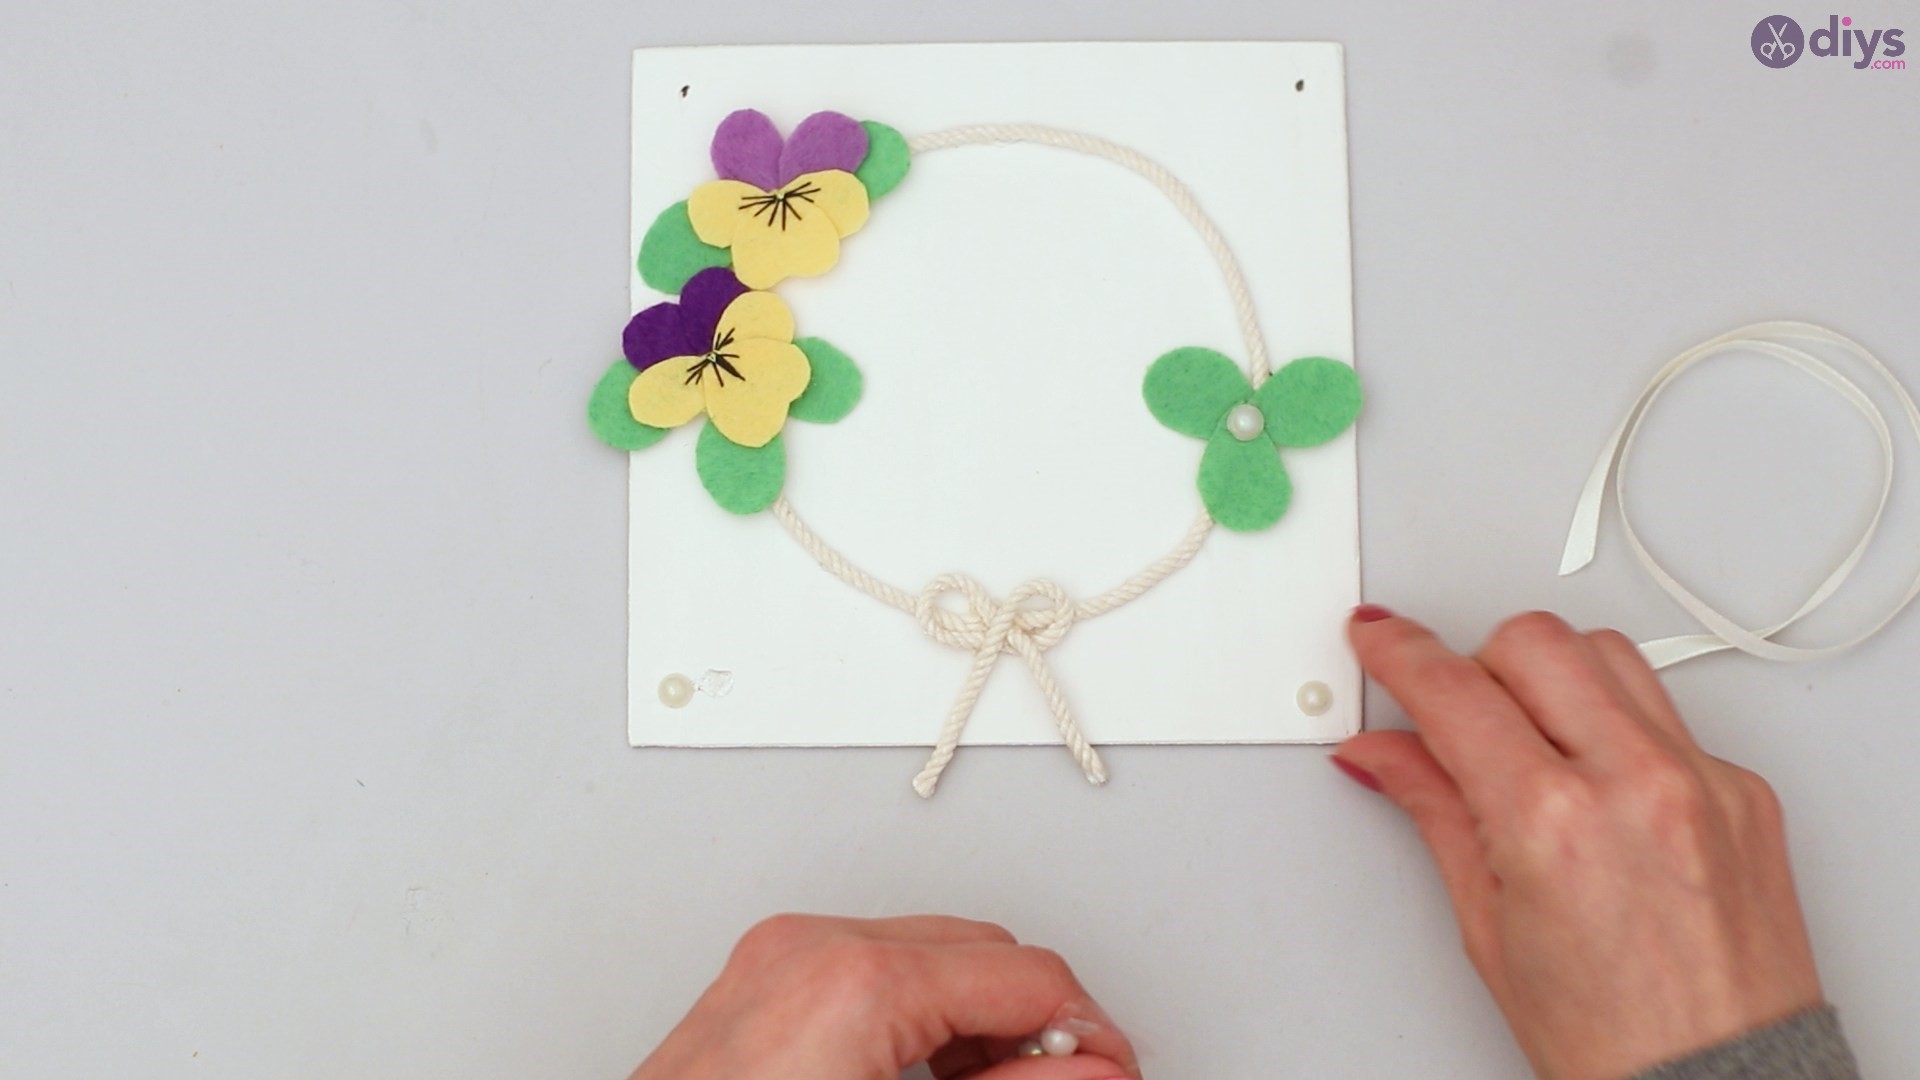
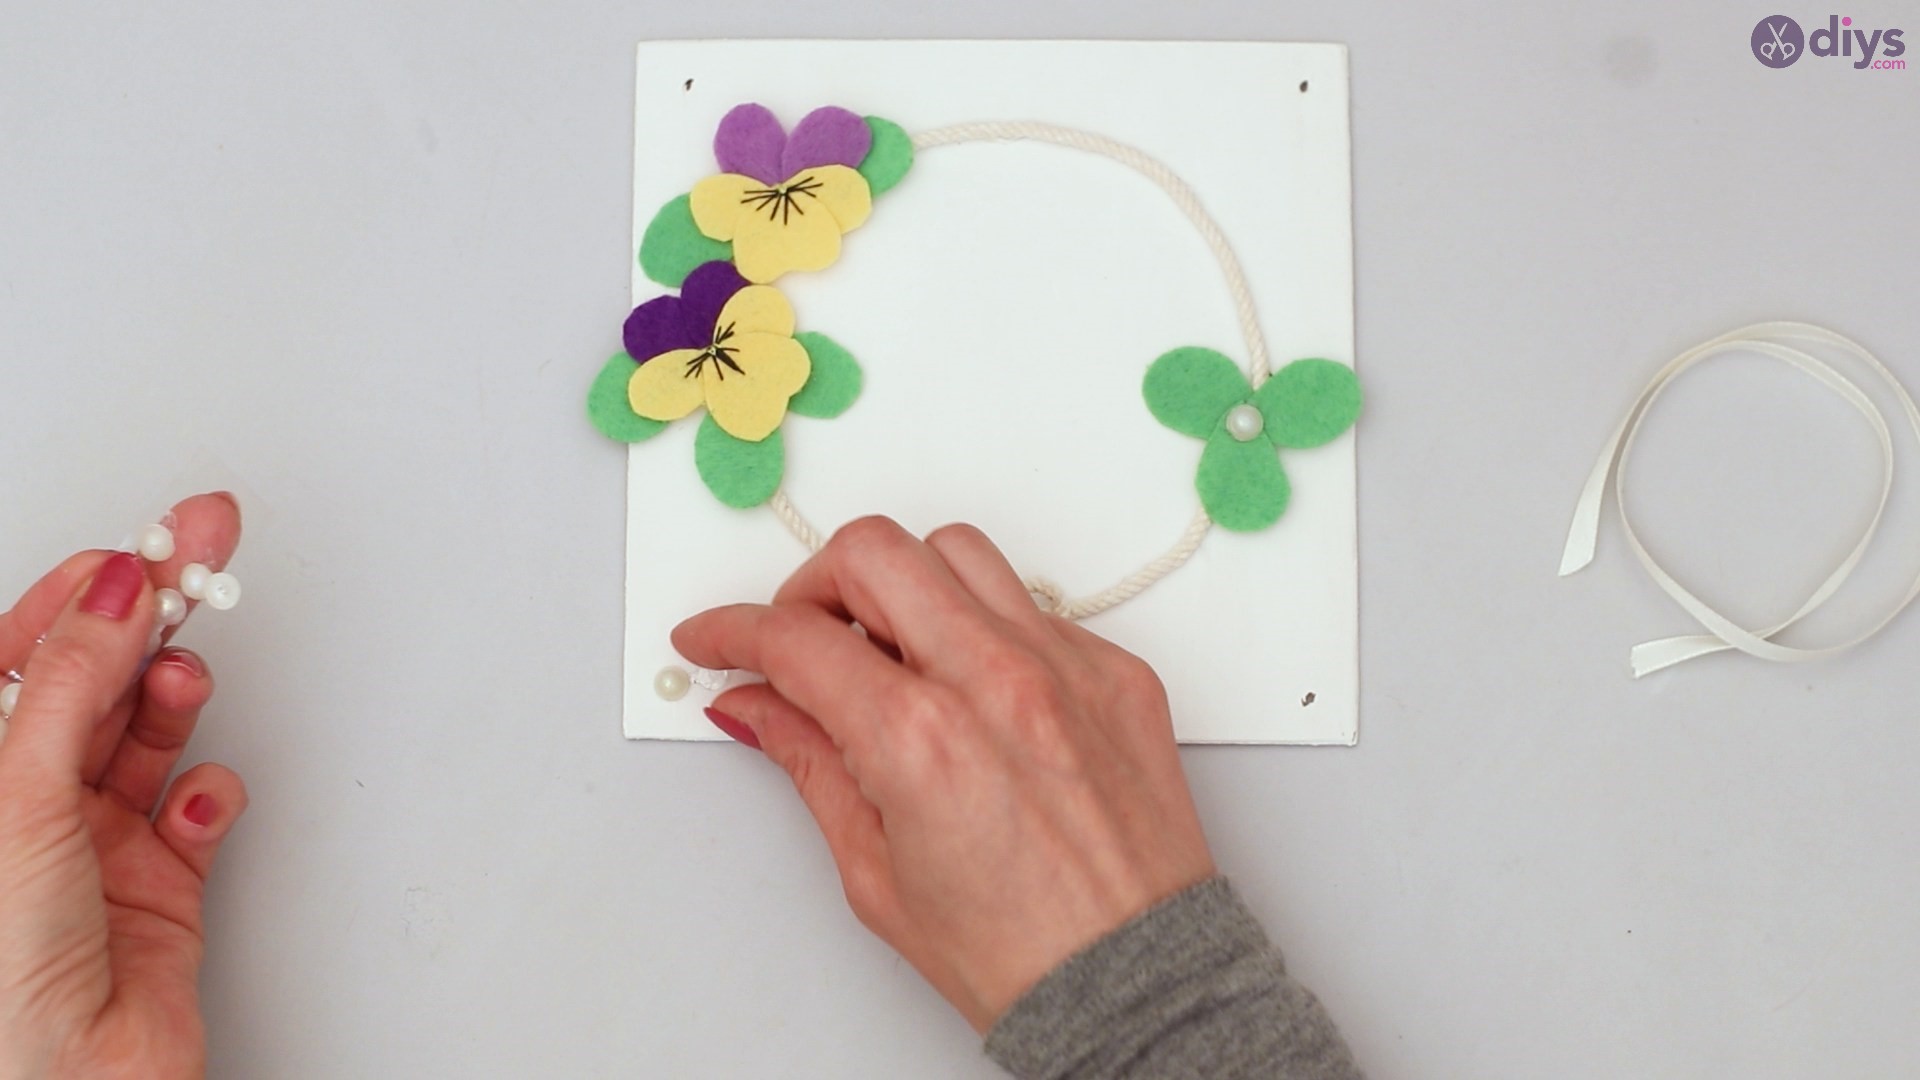
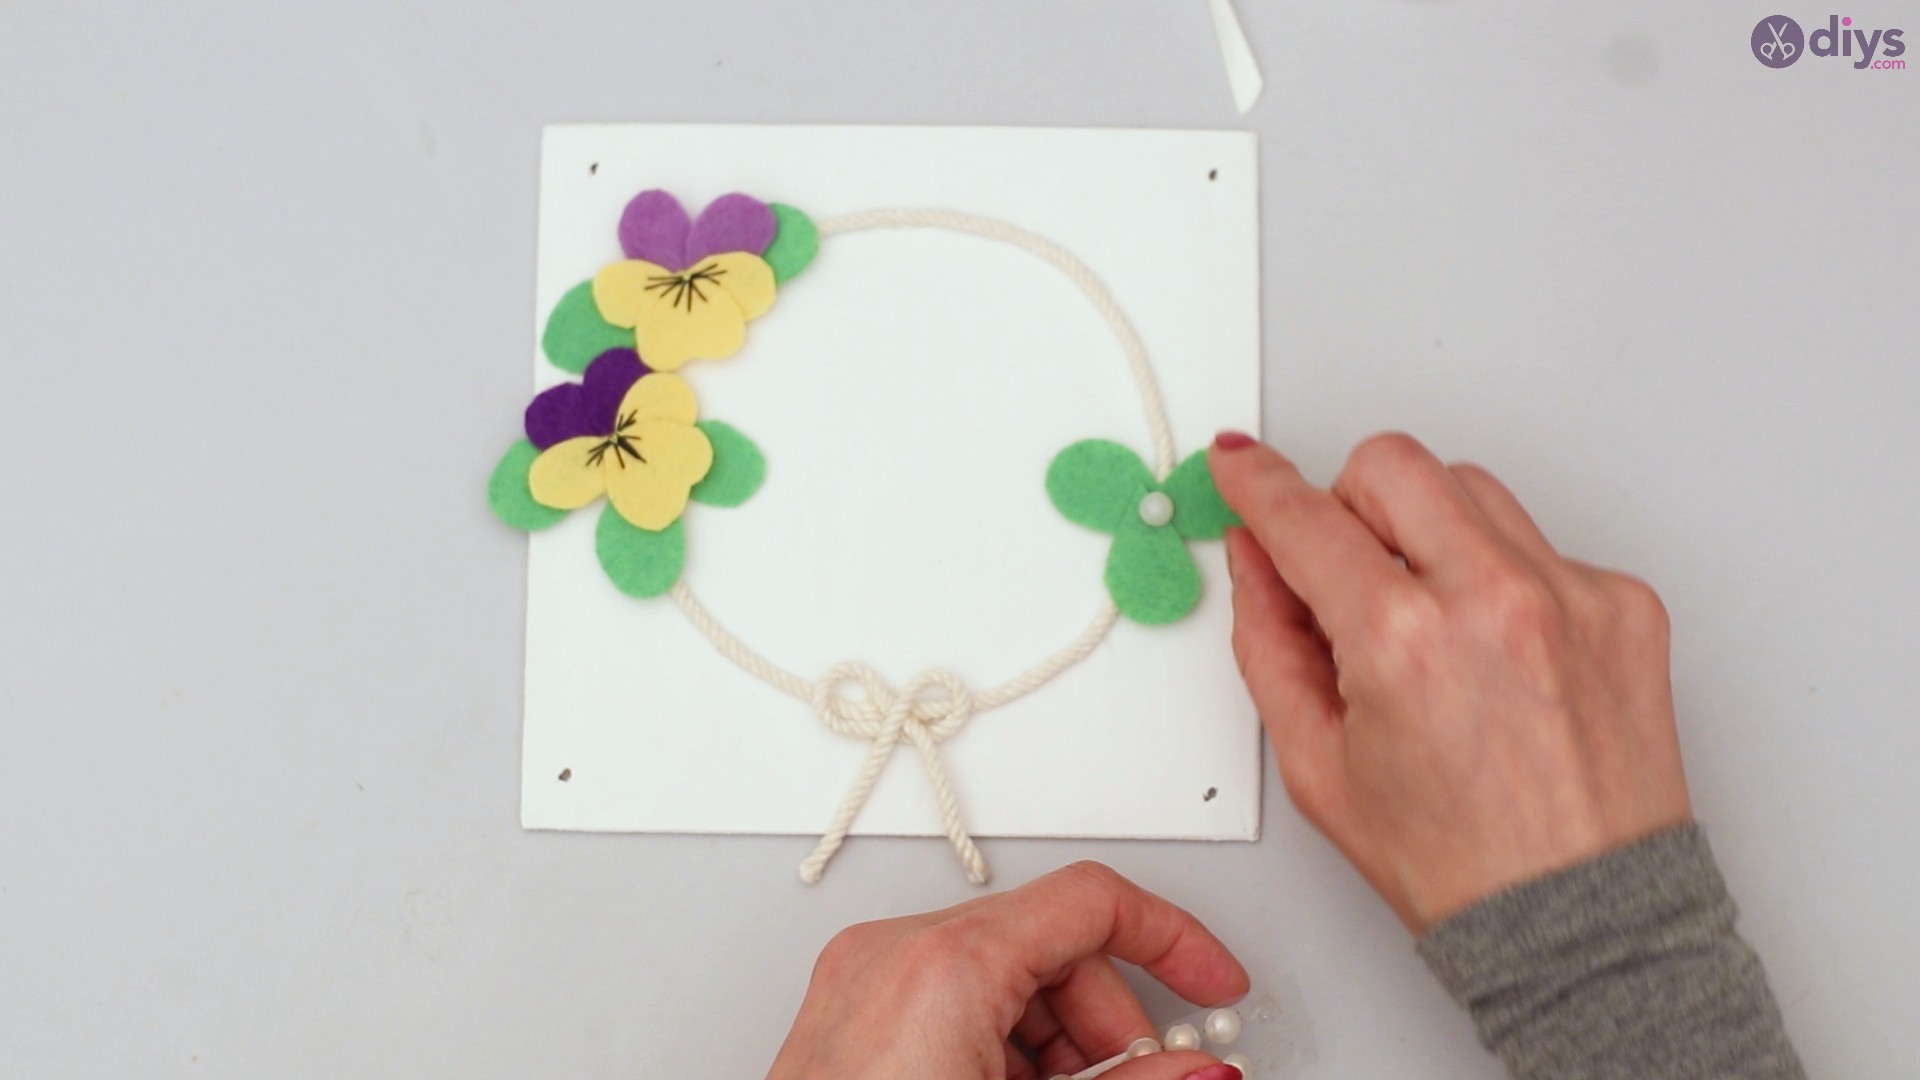
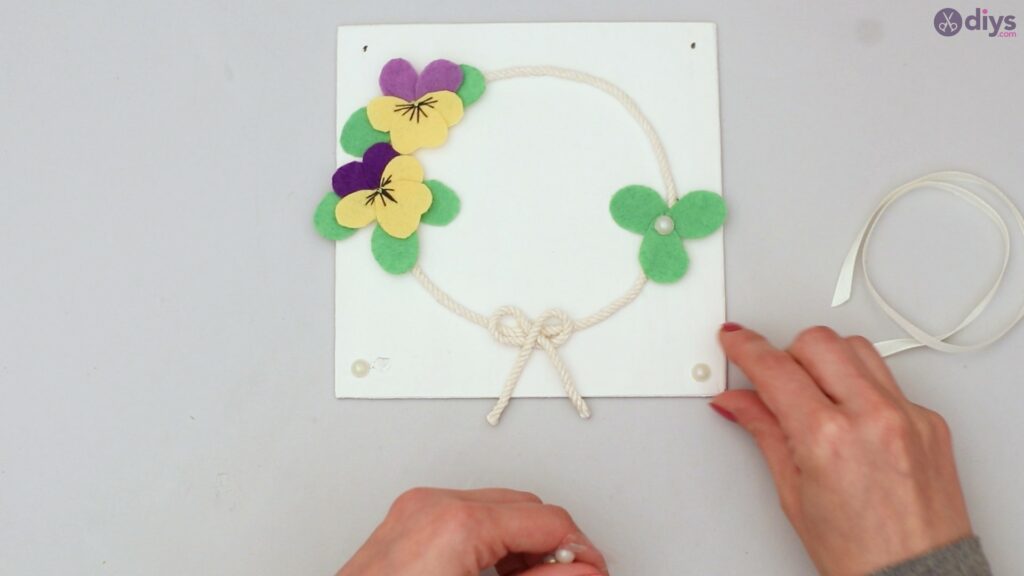
Step 7: Beading
For this step, you’ll need your glue gun and decor beads. Begin by placing one bead in the middle of the leaves.
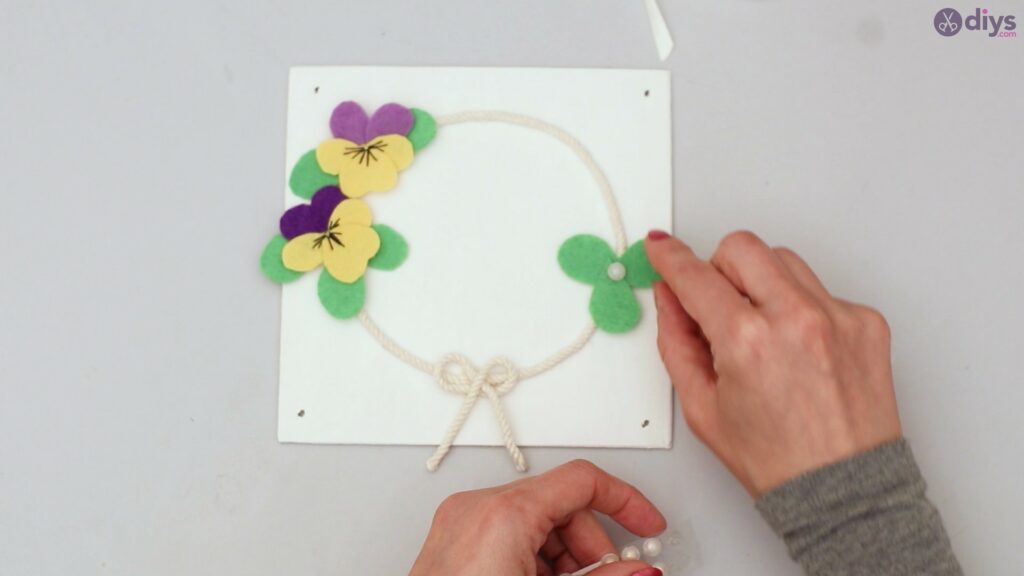
Next, place one of the beads at each of the bottom corners of your wood table.

Make sure you firmly secure the beads; you can use your glue gun to do so.
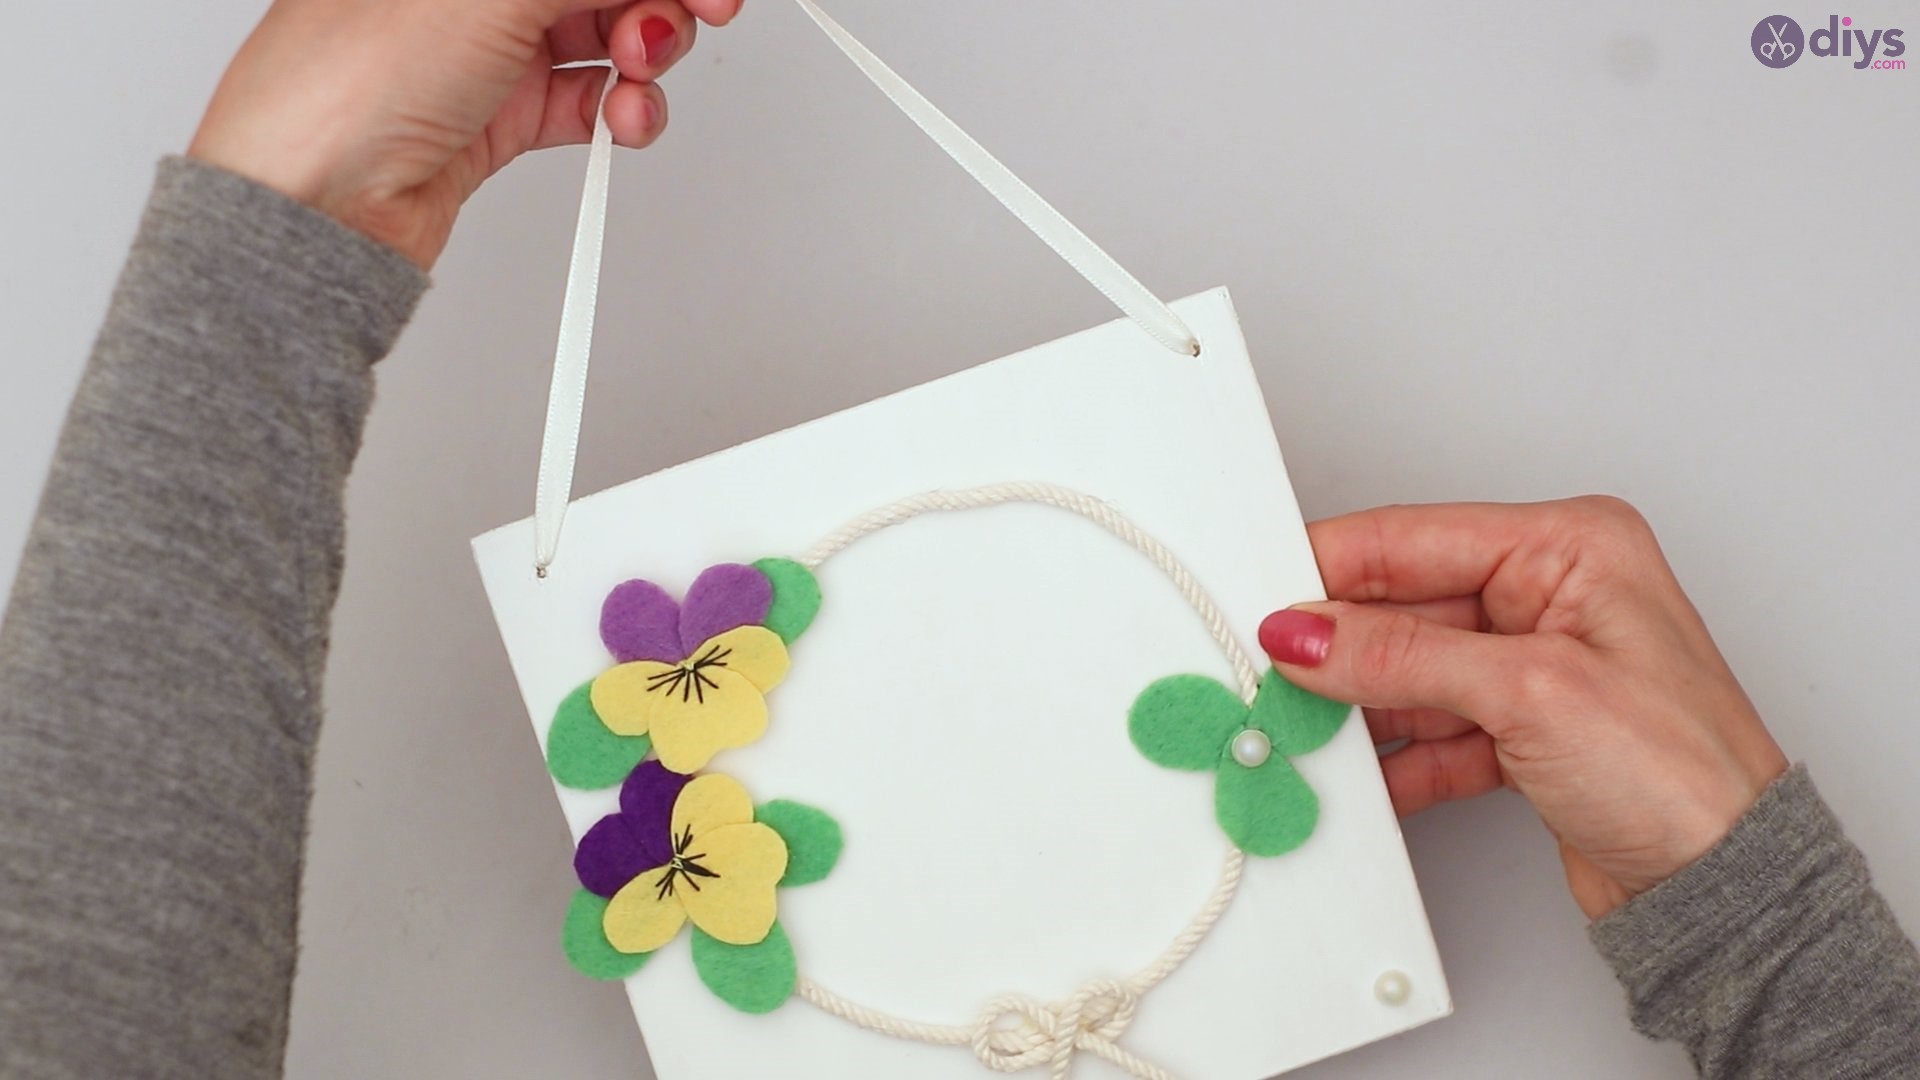
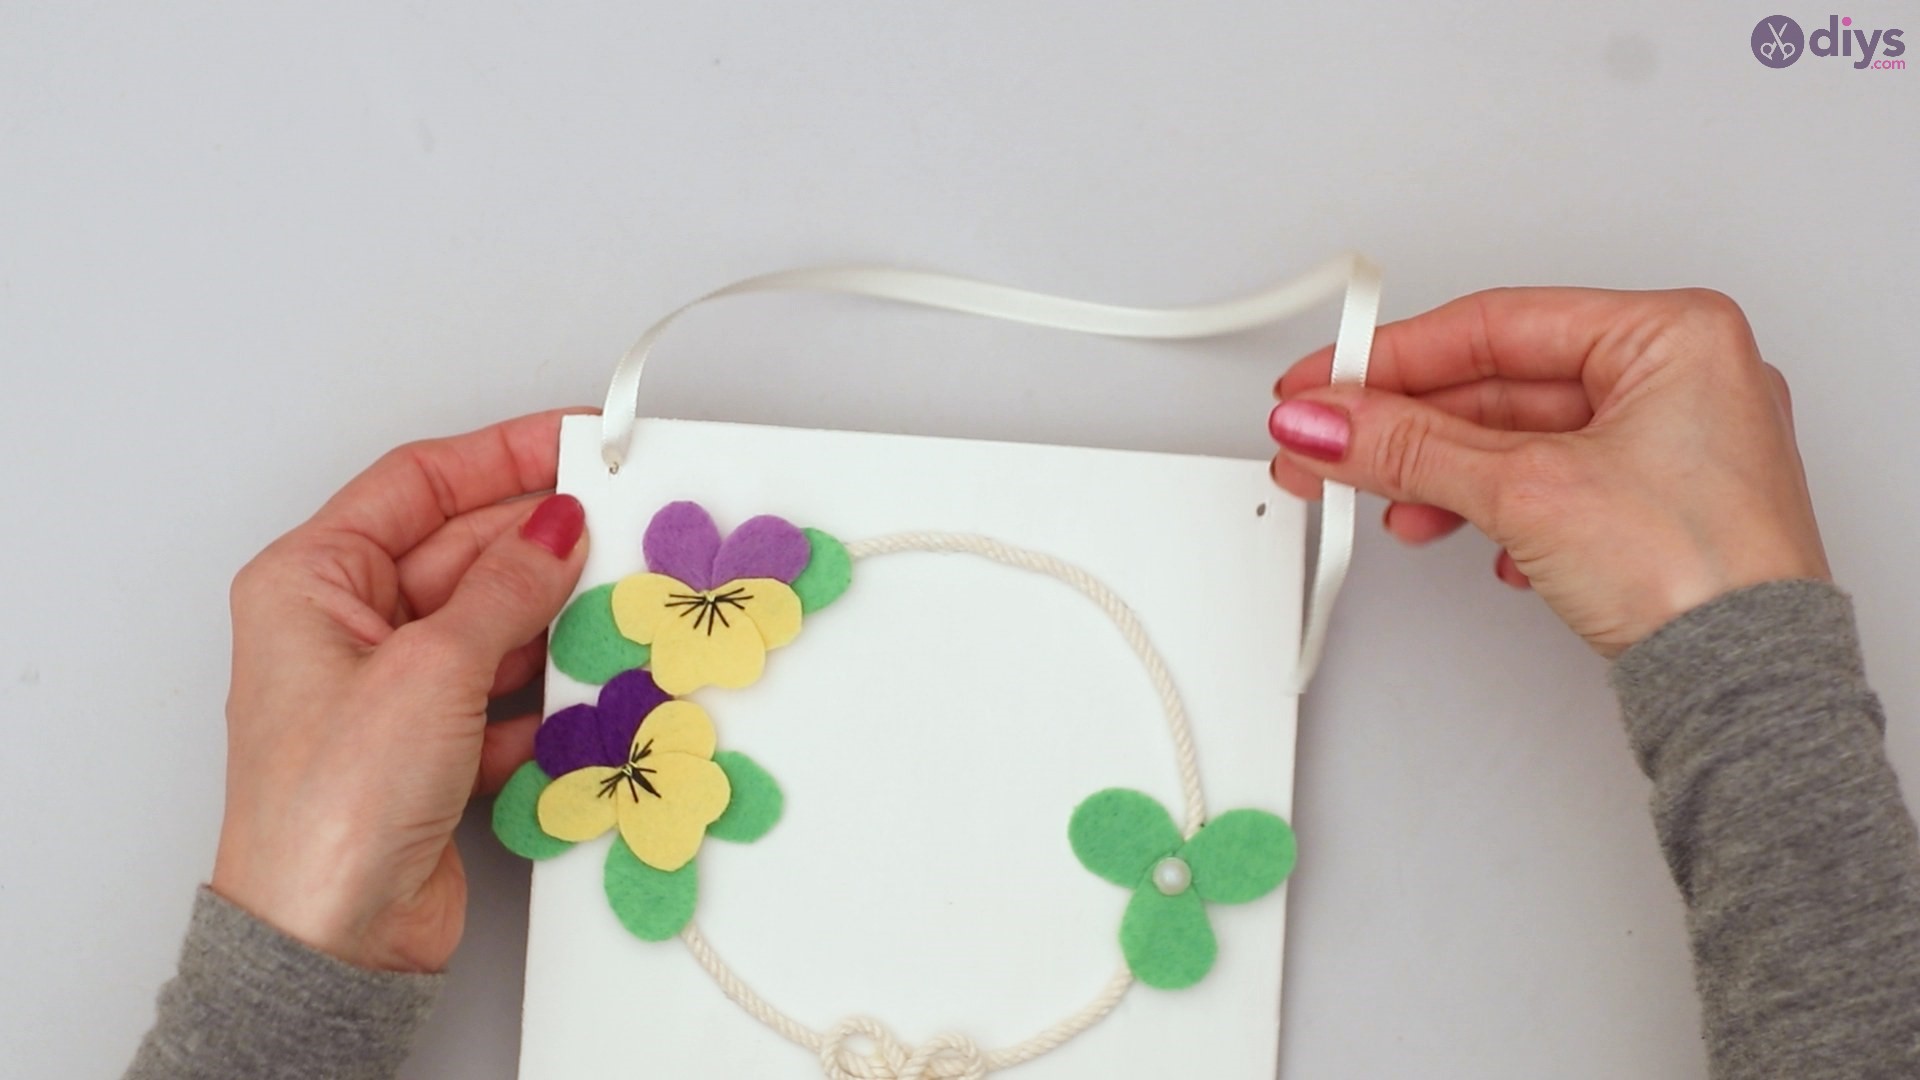
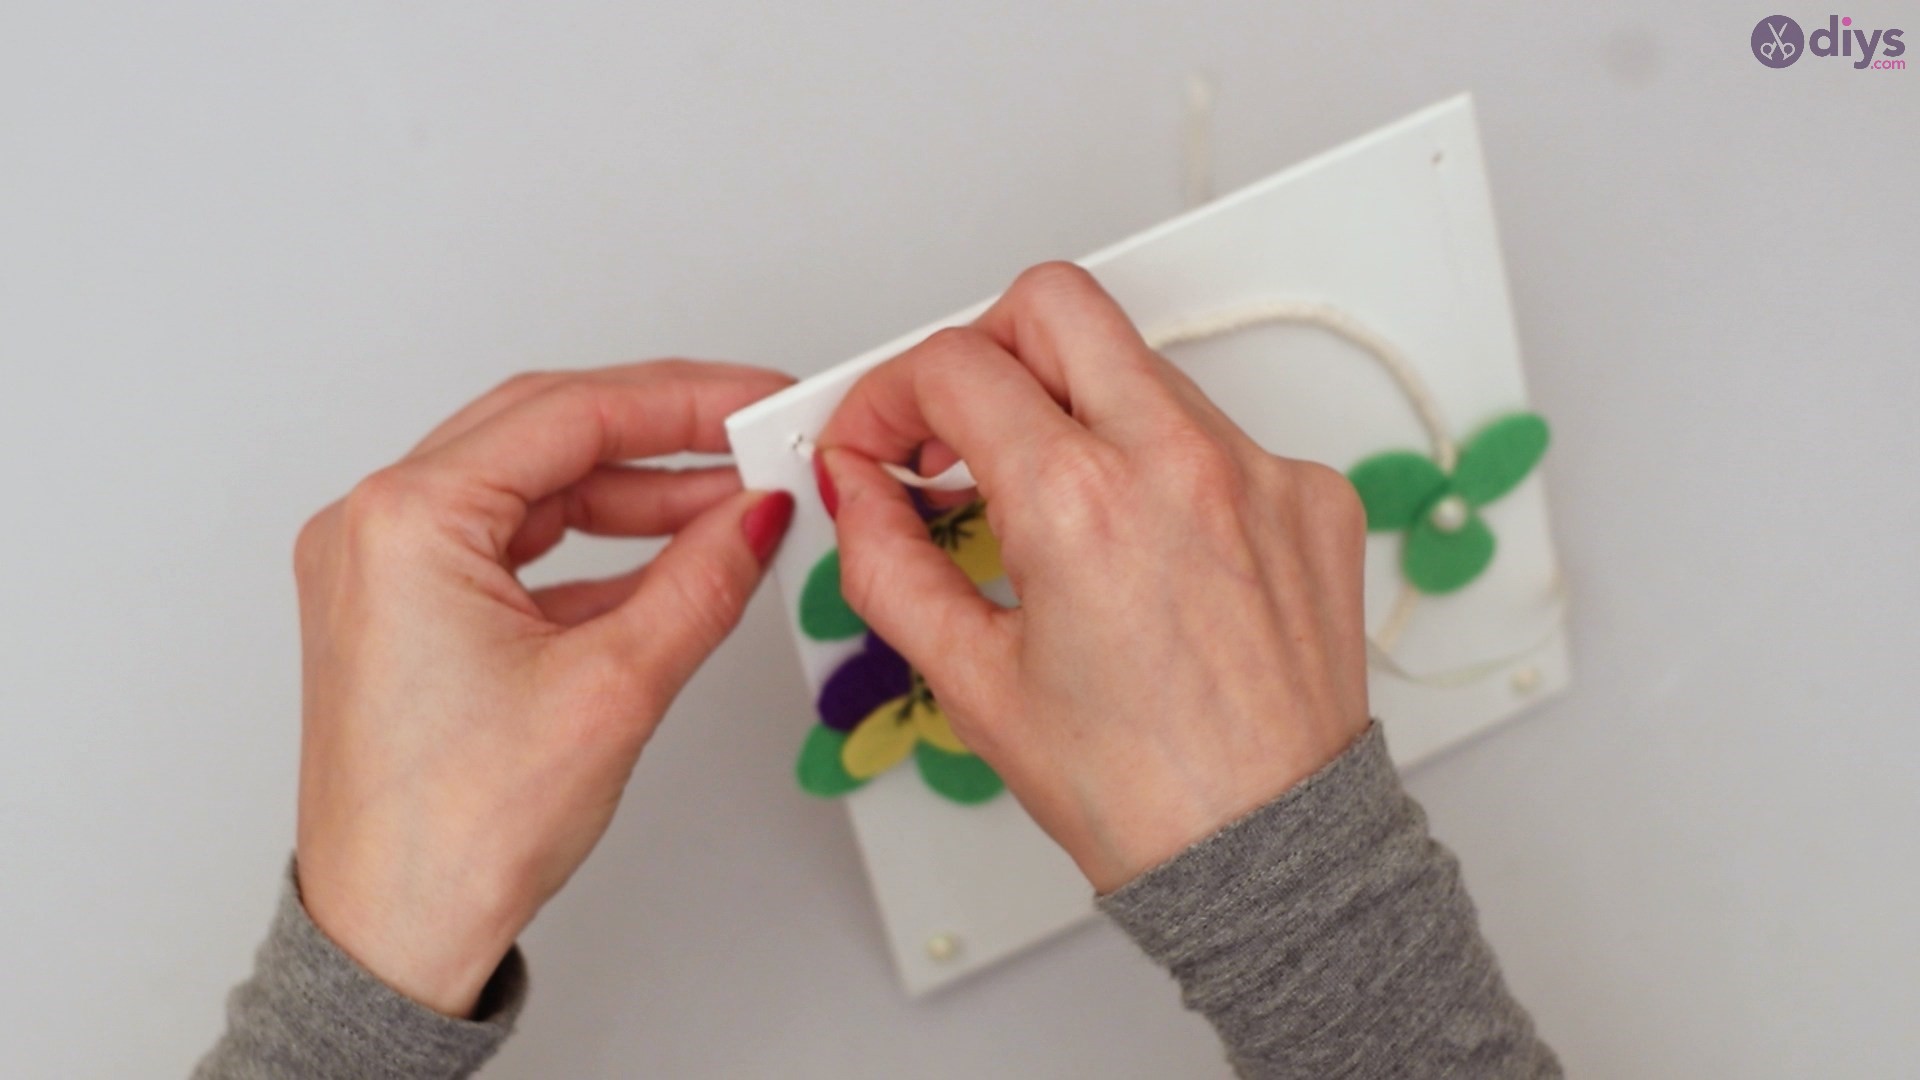
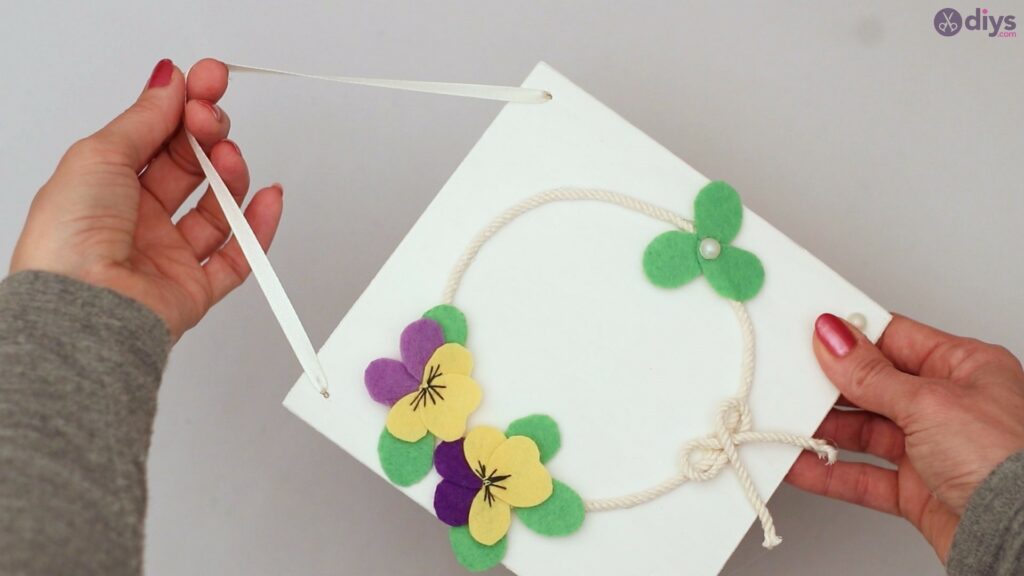
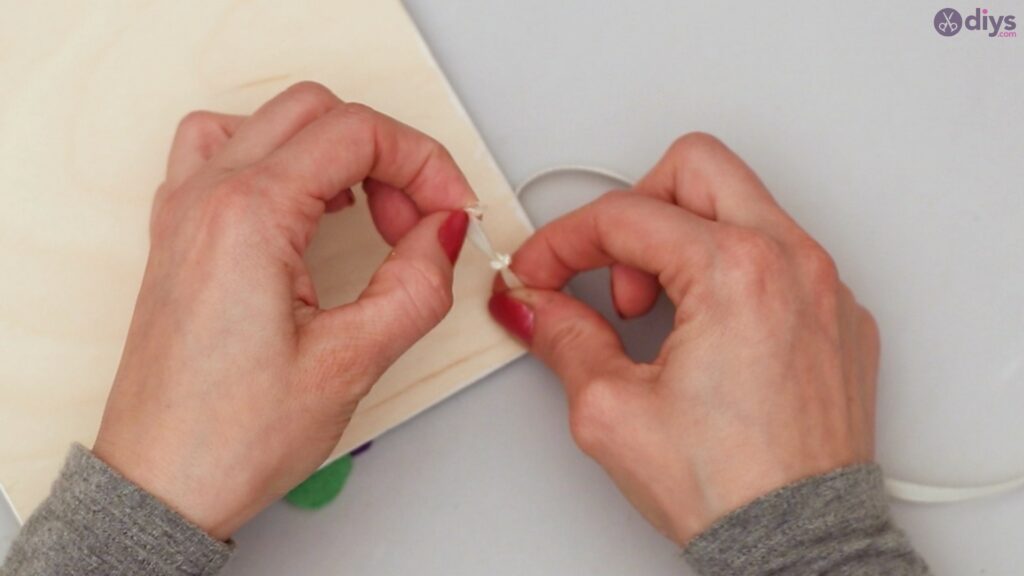
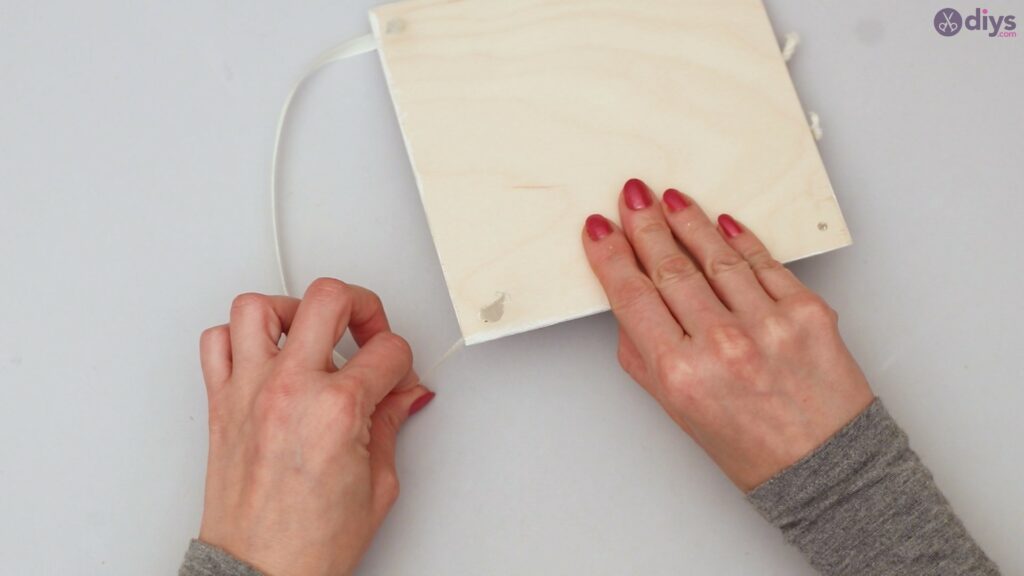
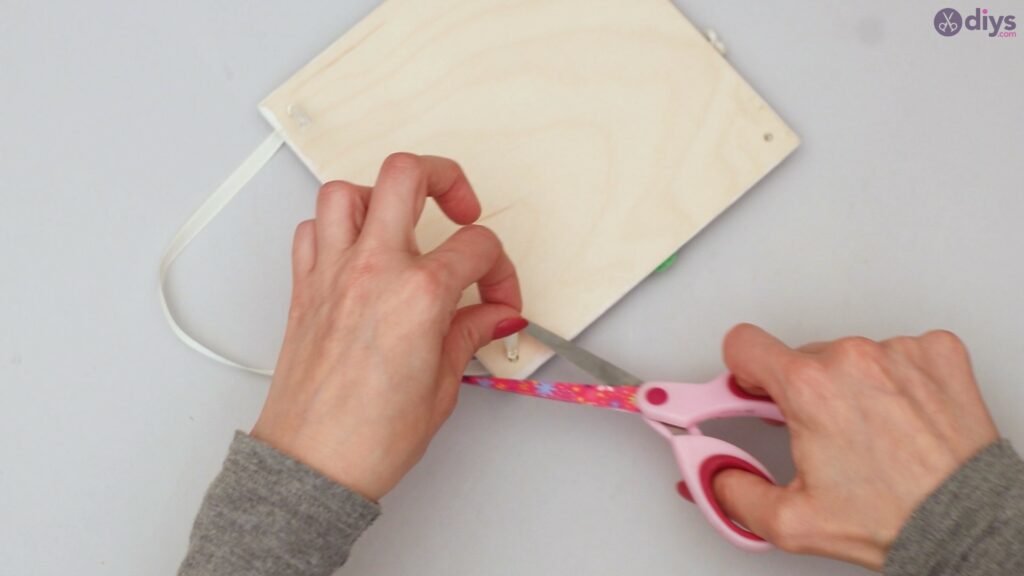
Step 8: Hanging Ribbon
Through one of the holes at the top of your wood table, pass the silk ribbon, and make a knot behind it to prevent your wood table from falling off.

Now repeat the process.

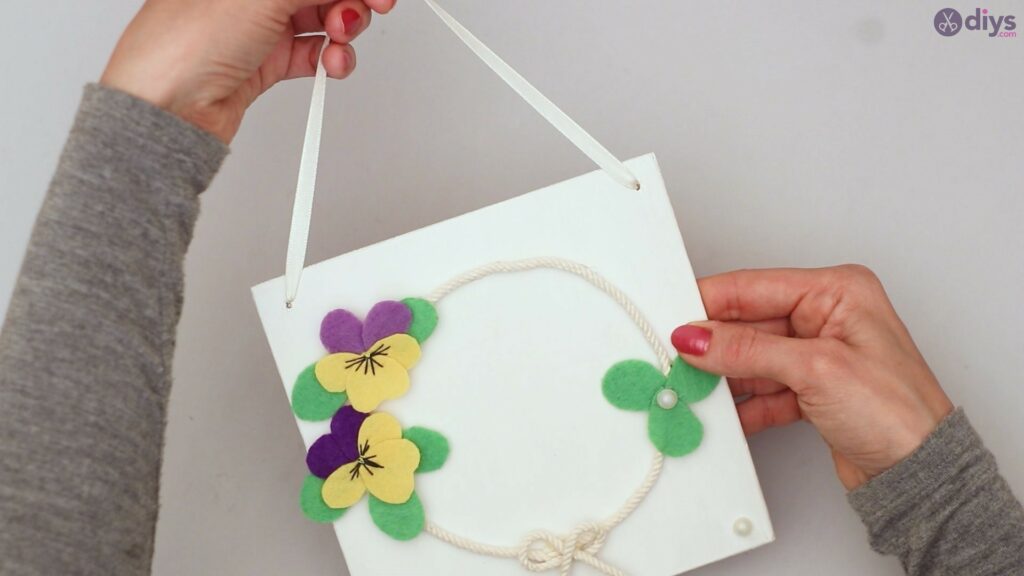
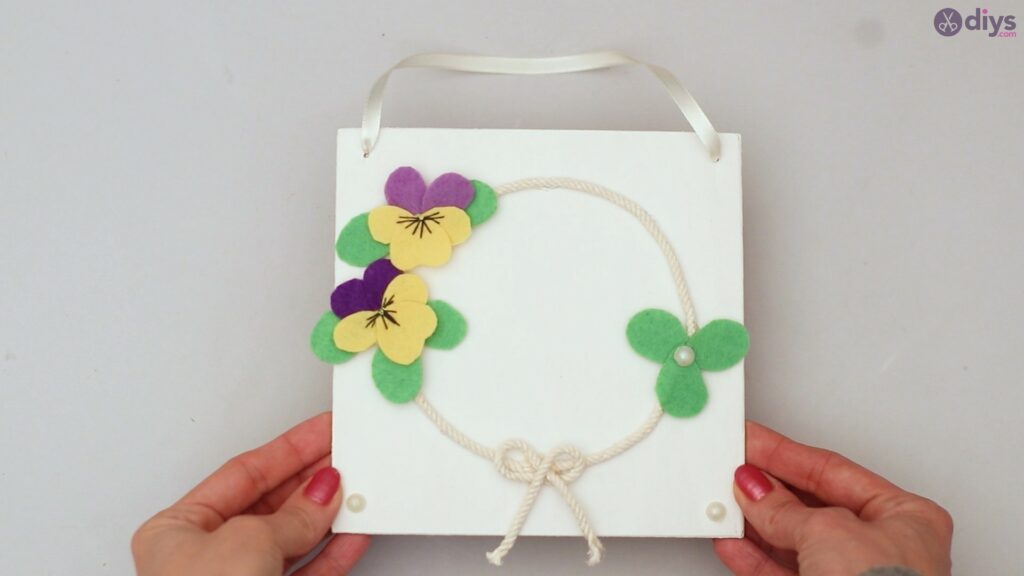

Congratulations! you have made your very own felt pansy wall decor. This will create a perfect gift for kids and even adults. Feel free to modify this project as you like.
You can create so many different colors and designs of this felt pansy wall decor so let your imagination run wild. This is a fun project to engage in with your friends and family.
This decor can be hung on your wall, just above your bed, behind your door, on your bookshelf, and so many other fun places around the house, or even at your workplace.