How to Make an Easy Paper Craft Tree
Updated on November 19, 2025


If you’ve never tried paper quilling before then I’m very sorry indeed to tell you that you’ve been missing out on something fantastic, creative, and a whole lot of fun! It’s easy to do and makes beautiful decor or gifts. Check out how we made this one and try it yourself!
Check out these step by step instructions complete with photos! If you’re the kind of person who prefers video tutorials, scroll to the bottom of this post to find just what you’re looking for.
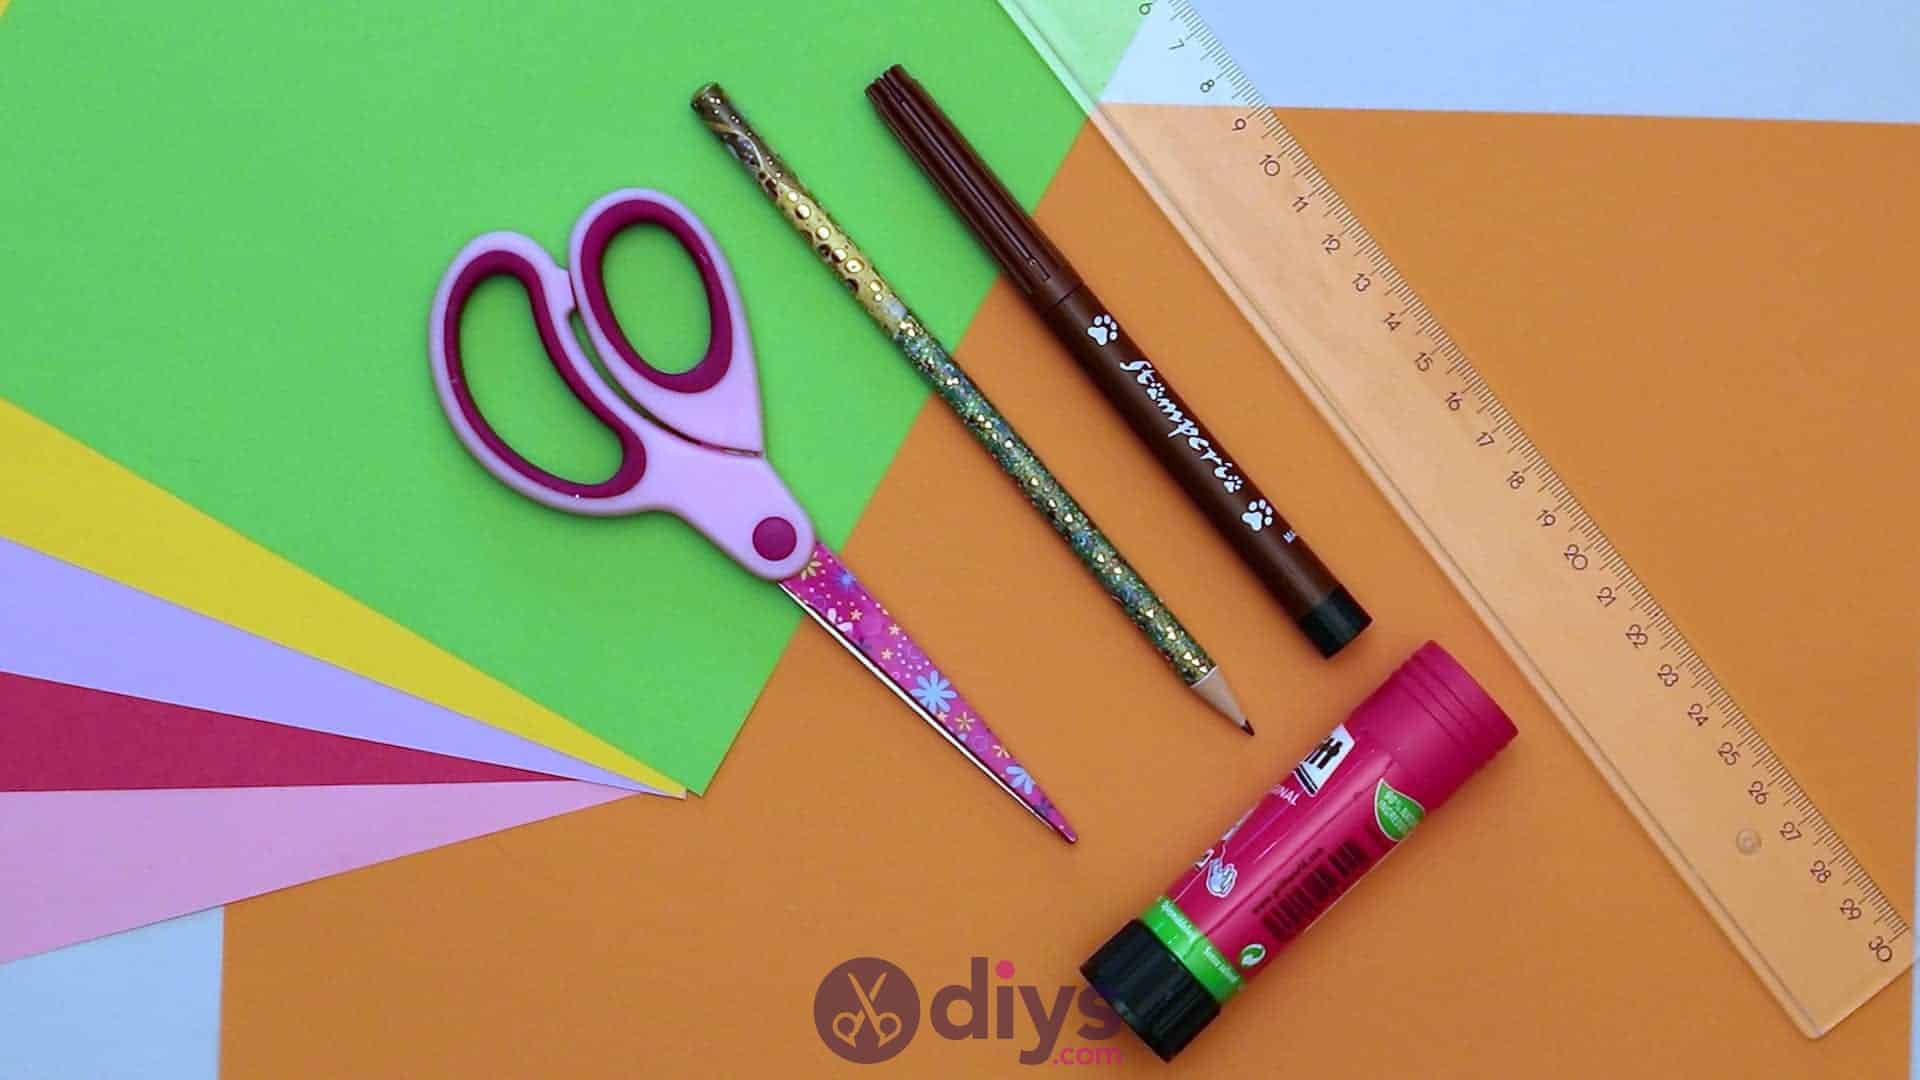
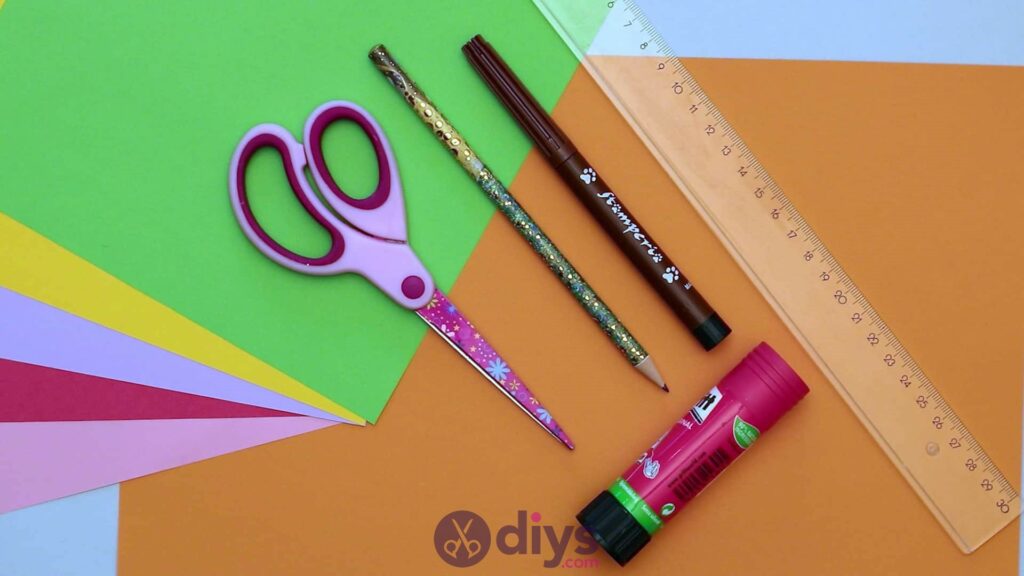
For this project, you’ll need:
- Scissors
- Glue stick
- Pencil
- Brown marker
- Orange cardstock
- Coloured paper (pink, purple, yellow, red, green)
Step 1: Get your materials
Before you begin any DIY project, always gather all your materials first.
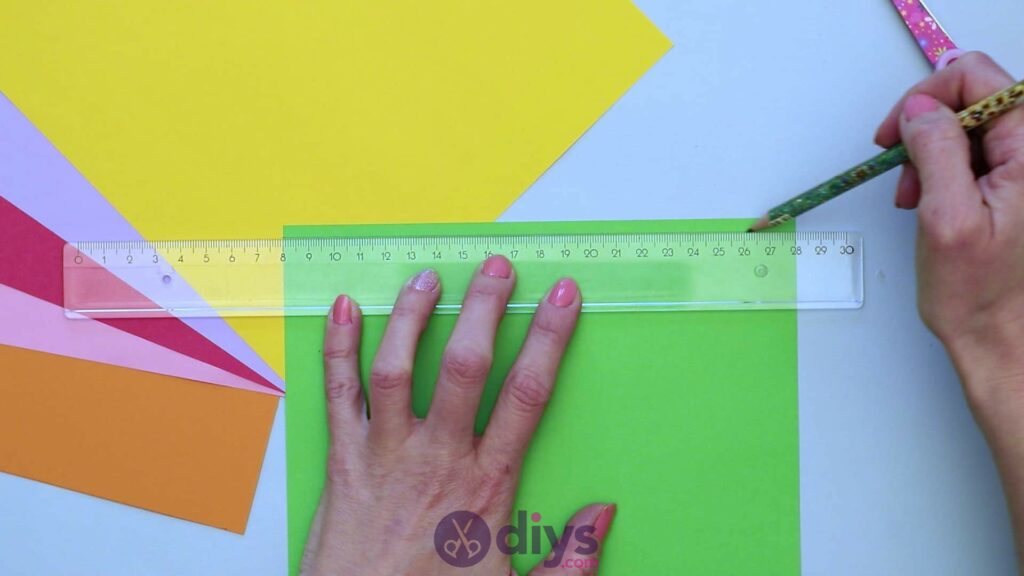
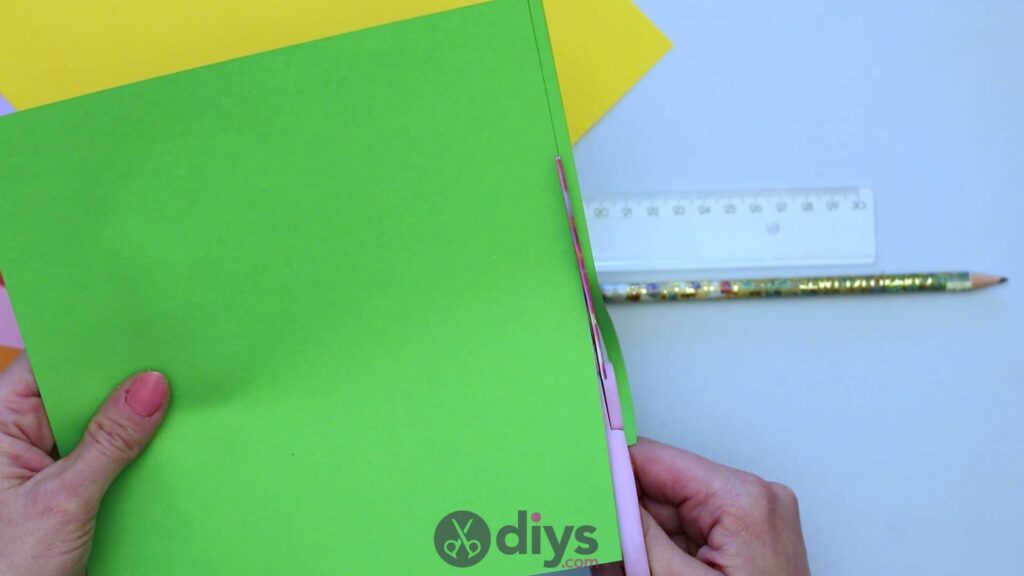
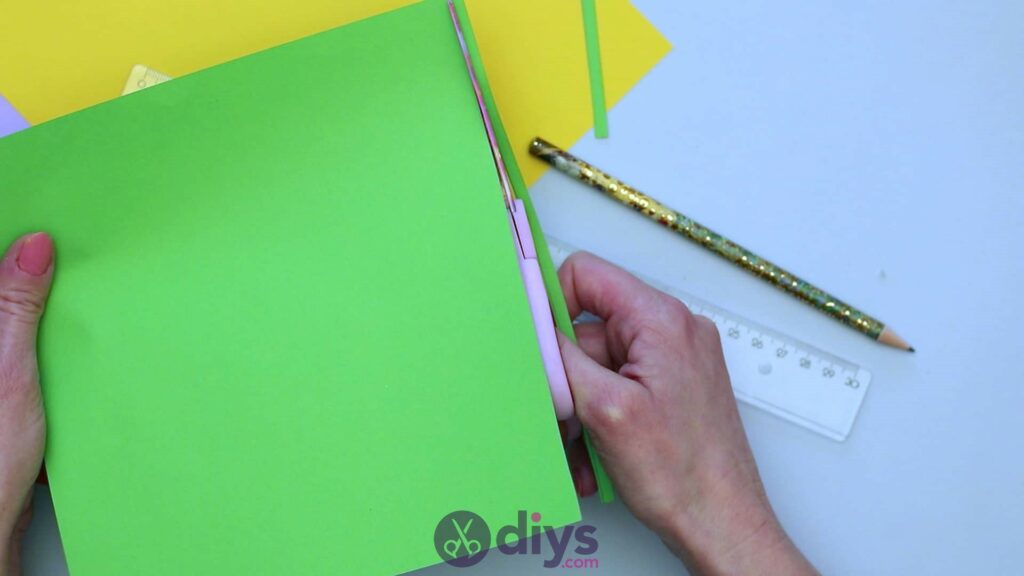
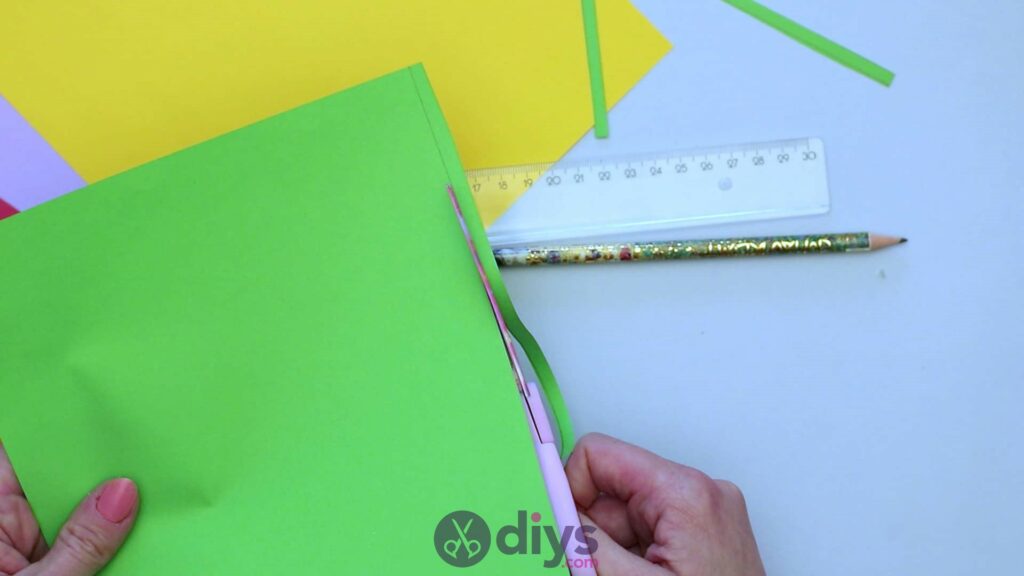
Step 2: measure and cut
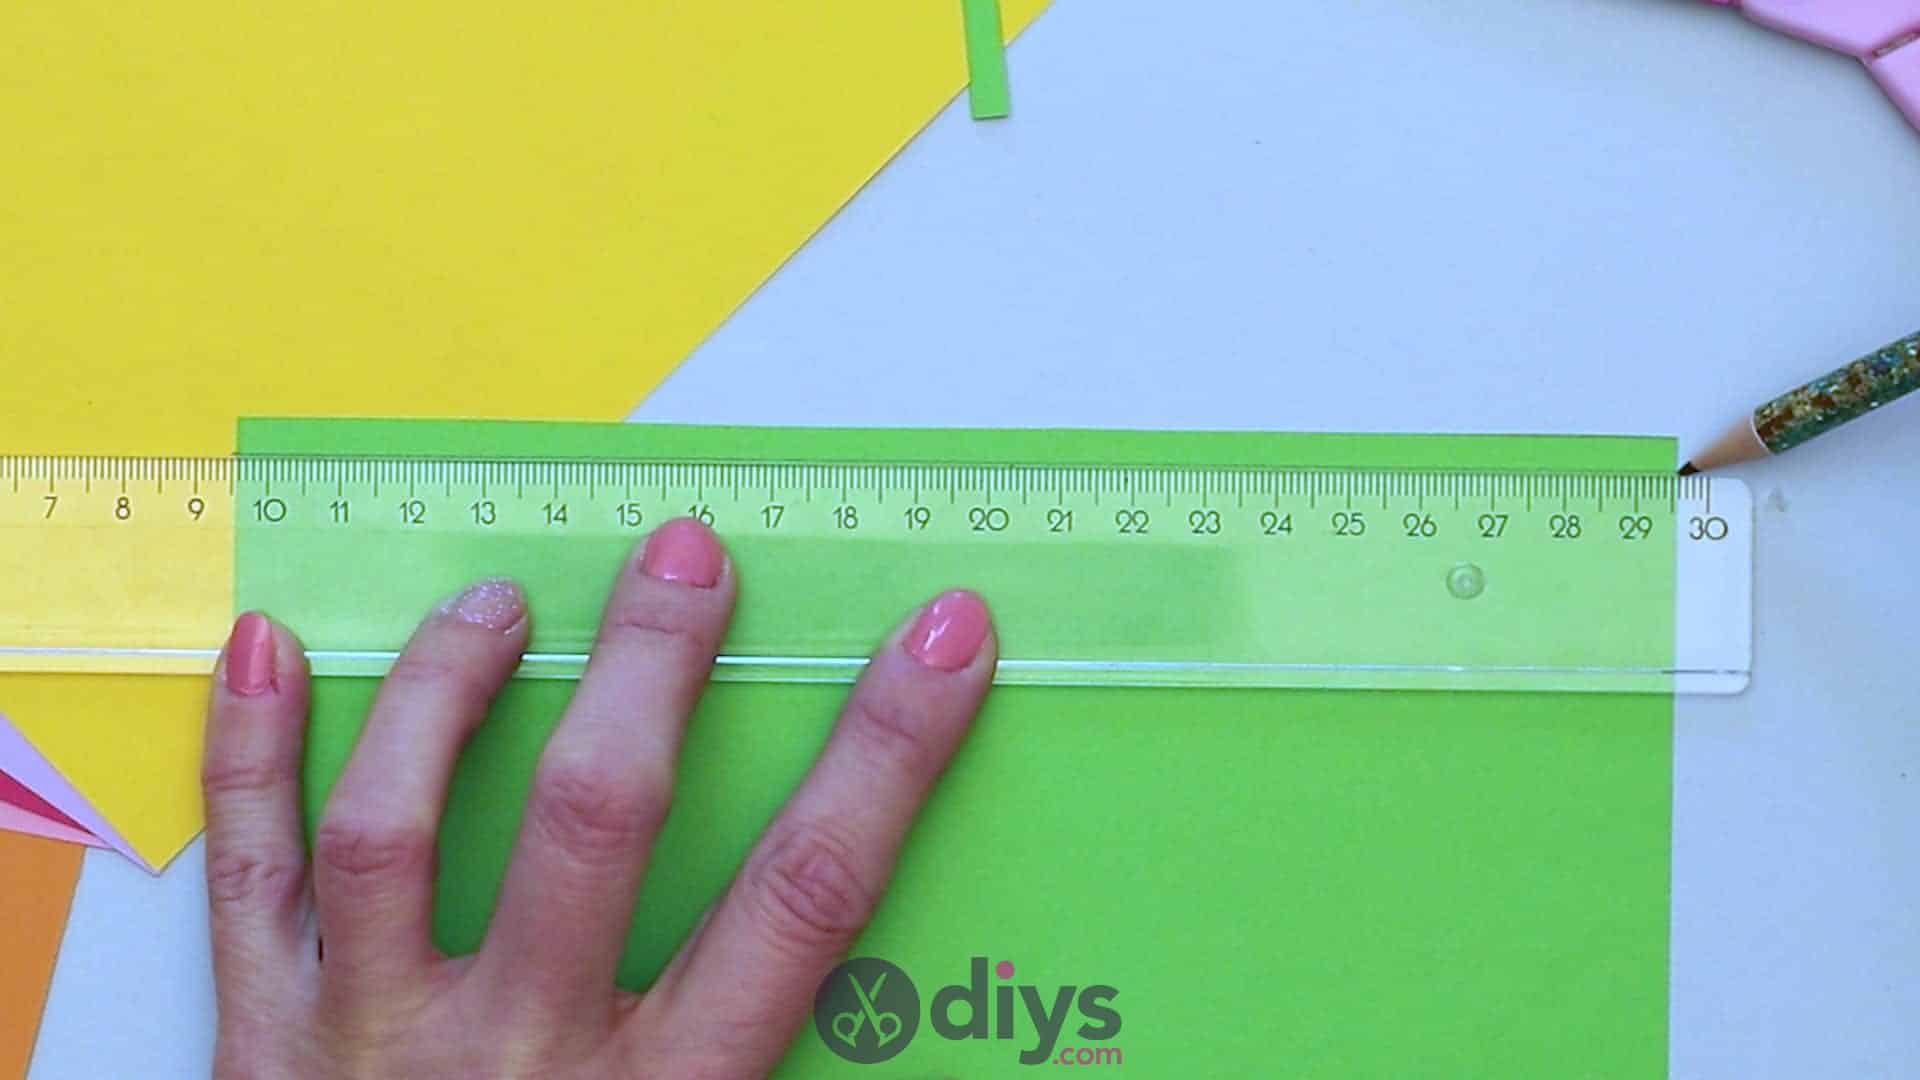
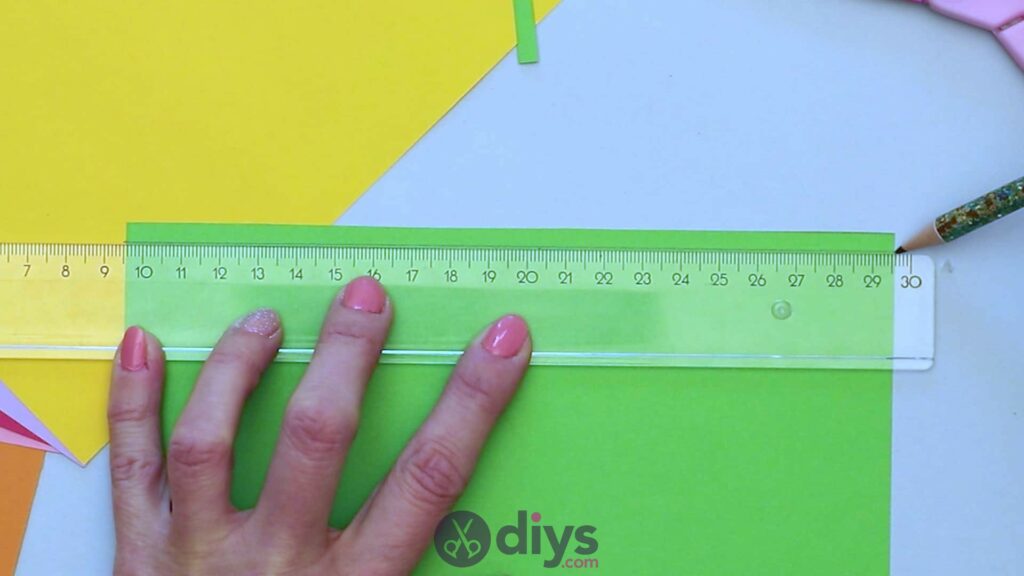
Turn your first piece of coloured paper portrait-wise on your tabletop so its short edges become the top and bottom and its long edges become the right and left sides. On the right side, along the bottom edge, make a mark 1cm away from the bottom right corner. Then make a mark 1cm away from the top left corner, along the top edge. Turn your paper counter-clockwise landscape, so the long edges are not the top and bottom, with the marks you just made at the top. Use your ruler to join the two marks and draw a line between them with your pencil. You’ve officially mapped out how long and wide your quilling strips will be.
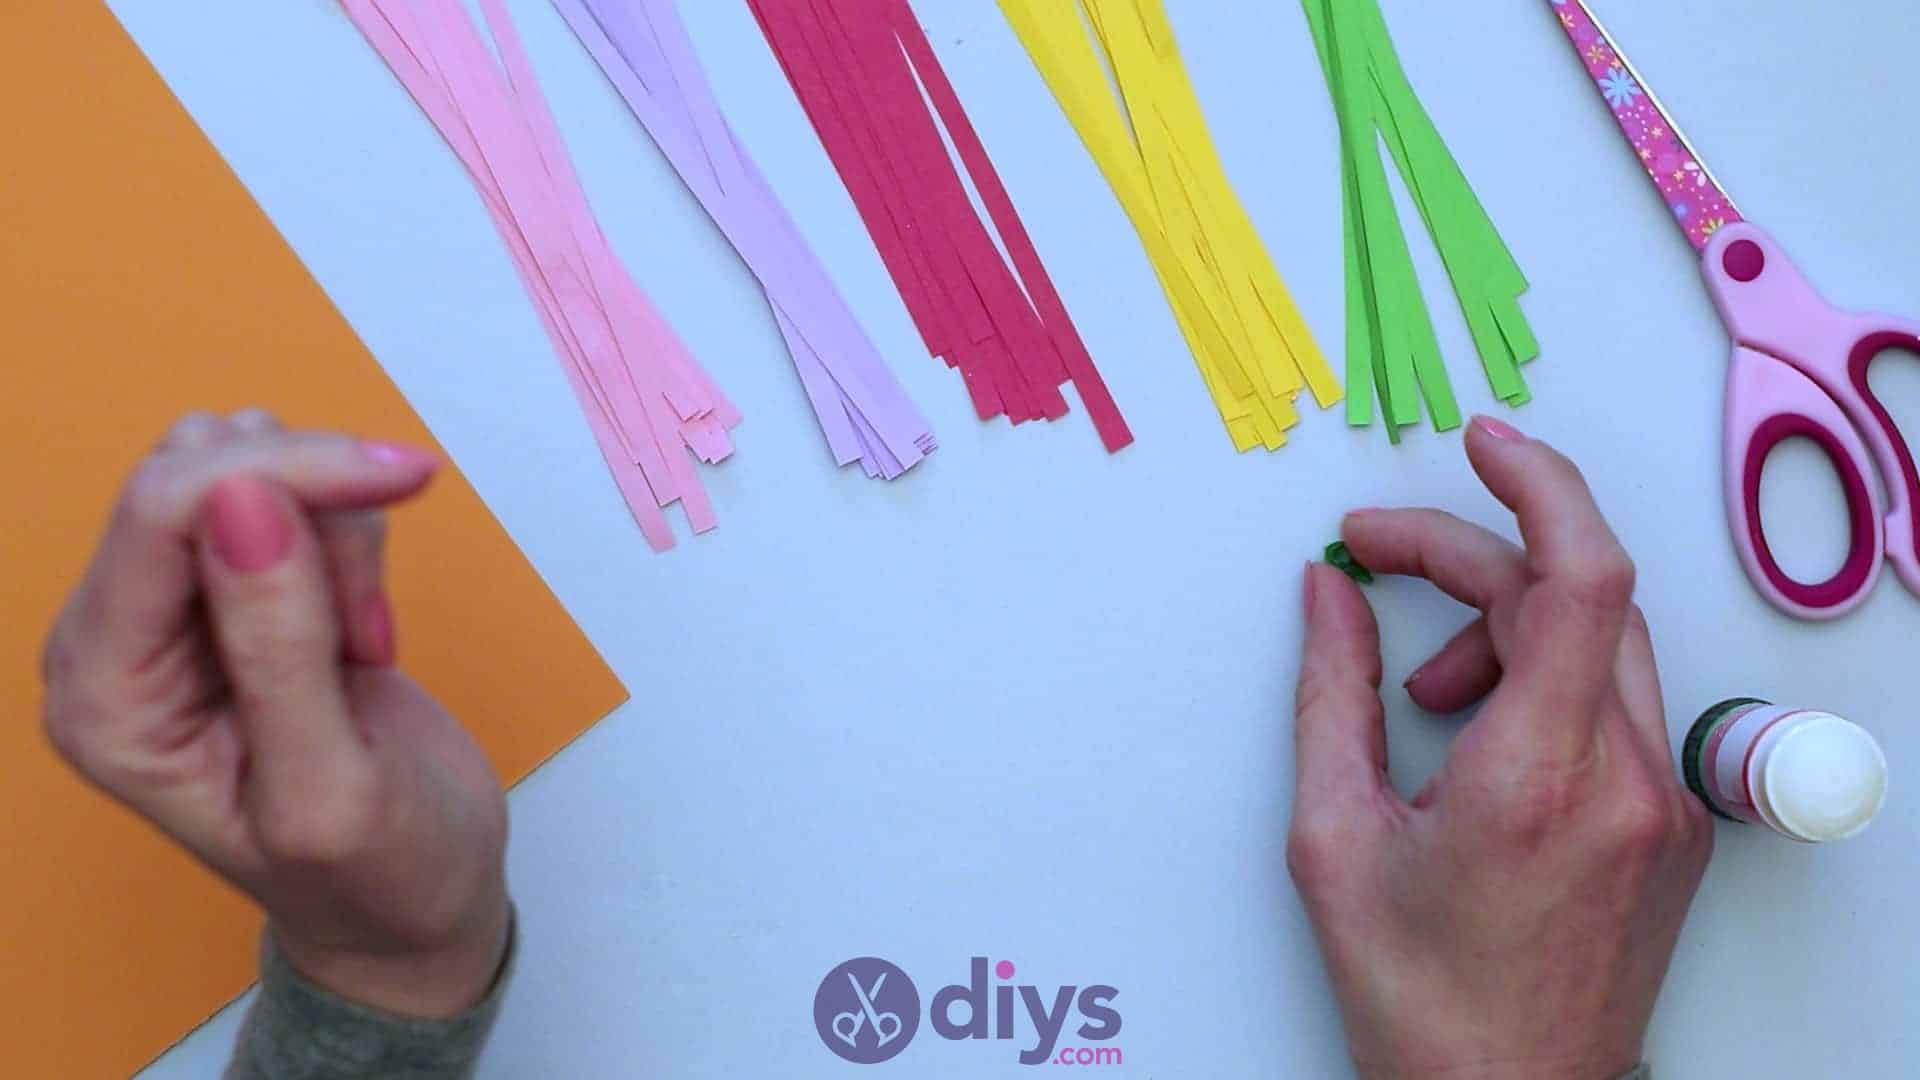
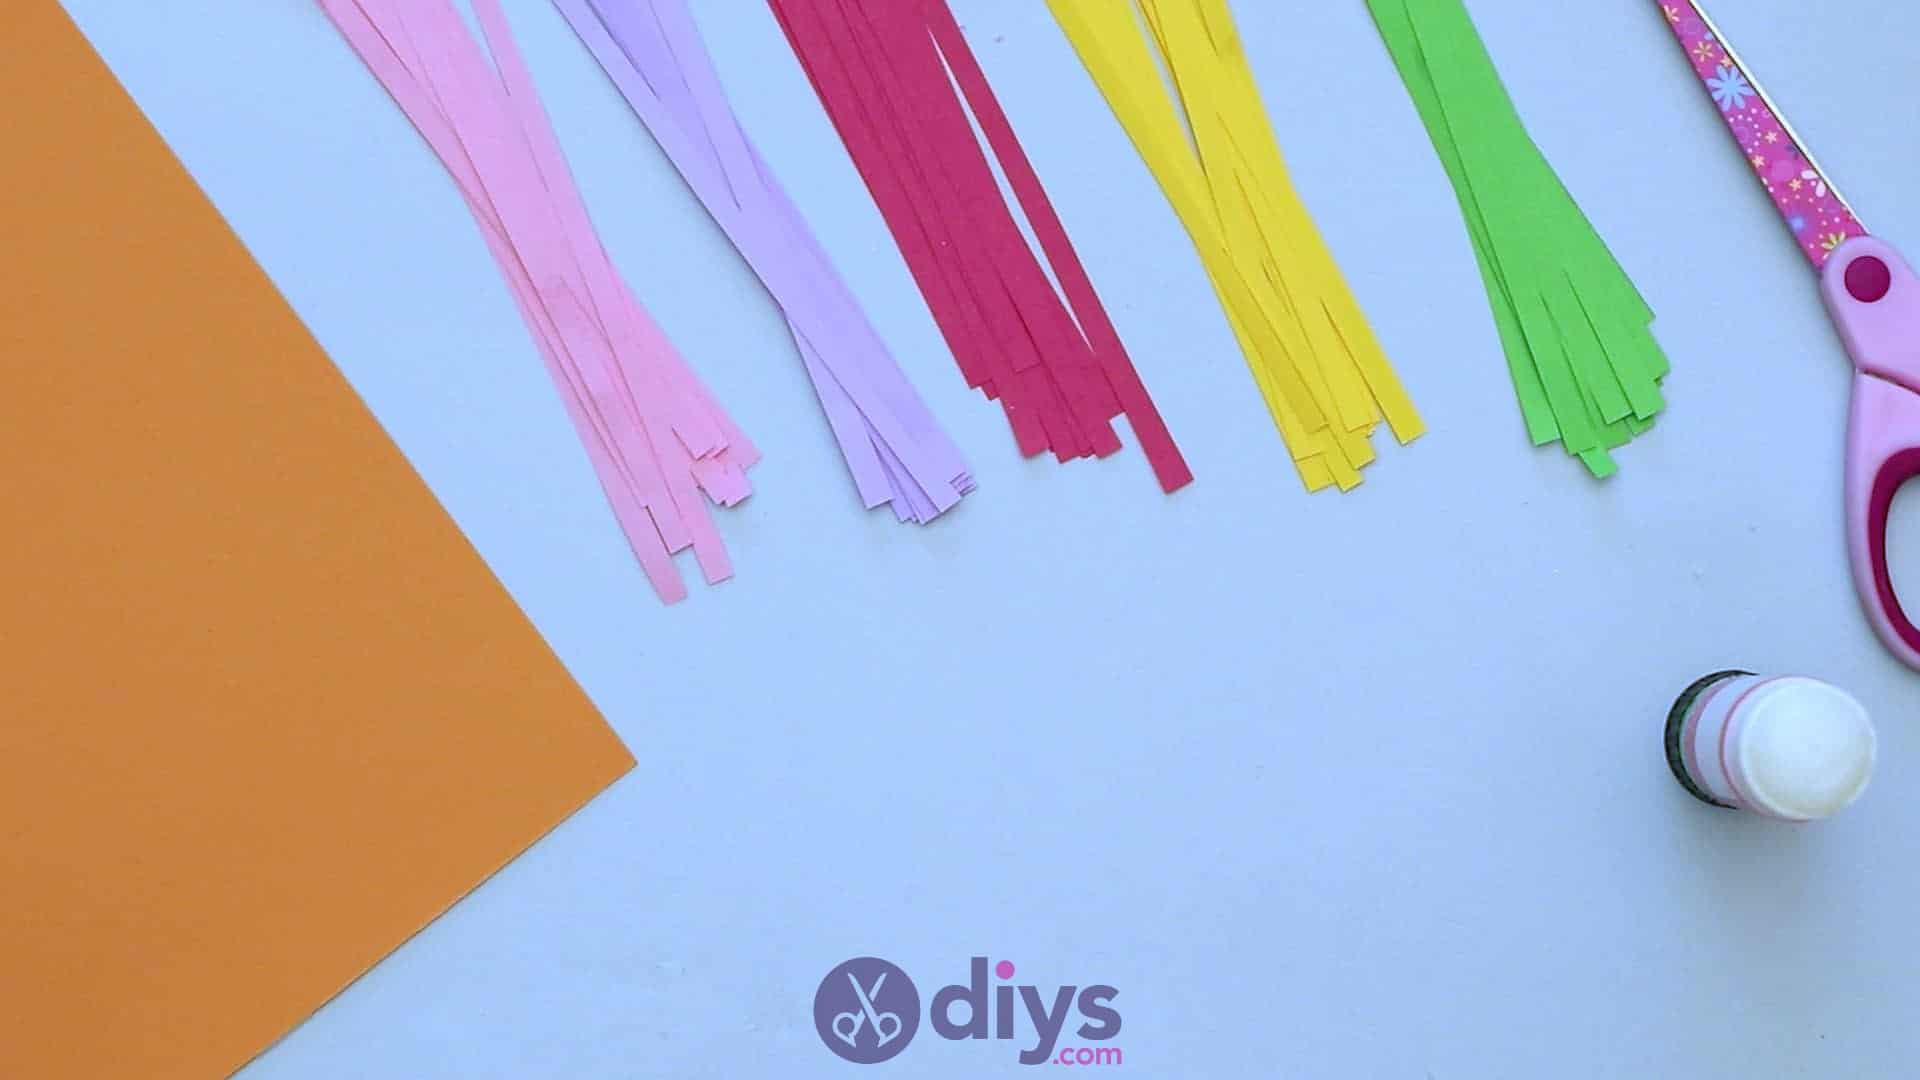
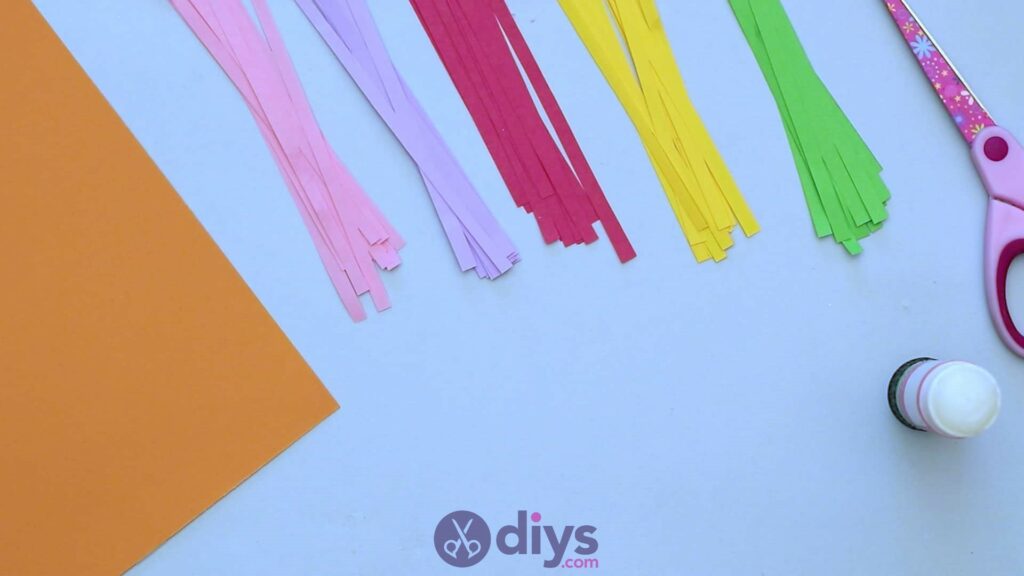
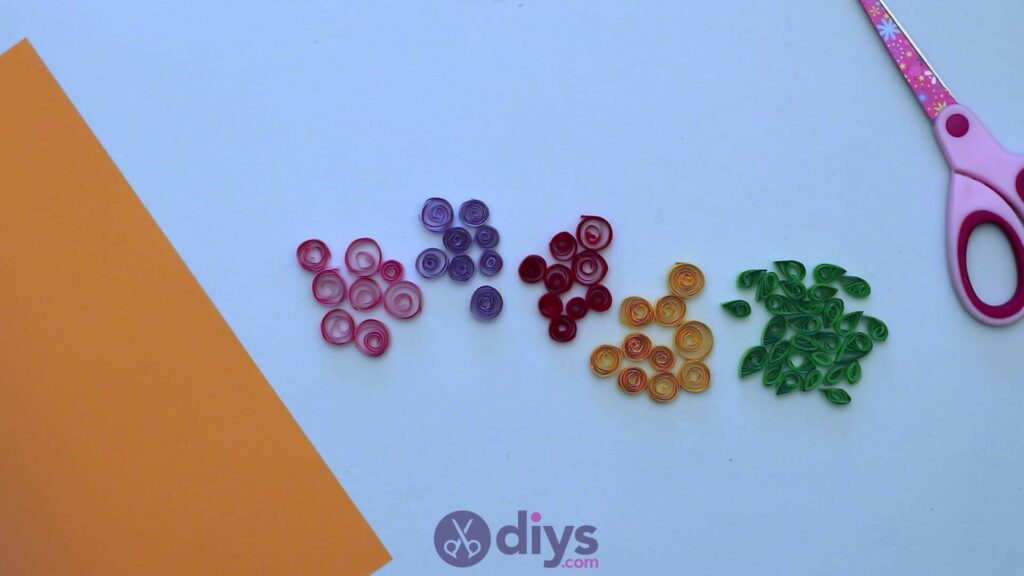
Use your scissors to cut along the line you just drew to get your first strip. Repeat thisentire process to make more strips, not just in the colour of paper you started with but also in all of your paper colours (except, of course, the piece of cardstock you’ll use as your background). I cut as many strips as I could get out of each page because I wanted to havelots of strips to work with when it came time for quilling, or spiralling my strips. I used my green strips to make pinched leaf shapes and the rest of my colours to make rounded spirals that looked like flower blossoms.
Step 3: make your leaves
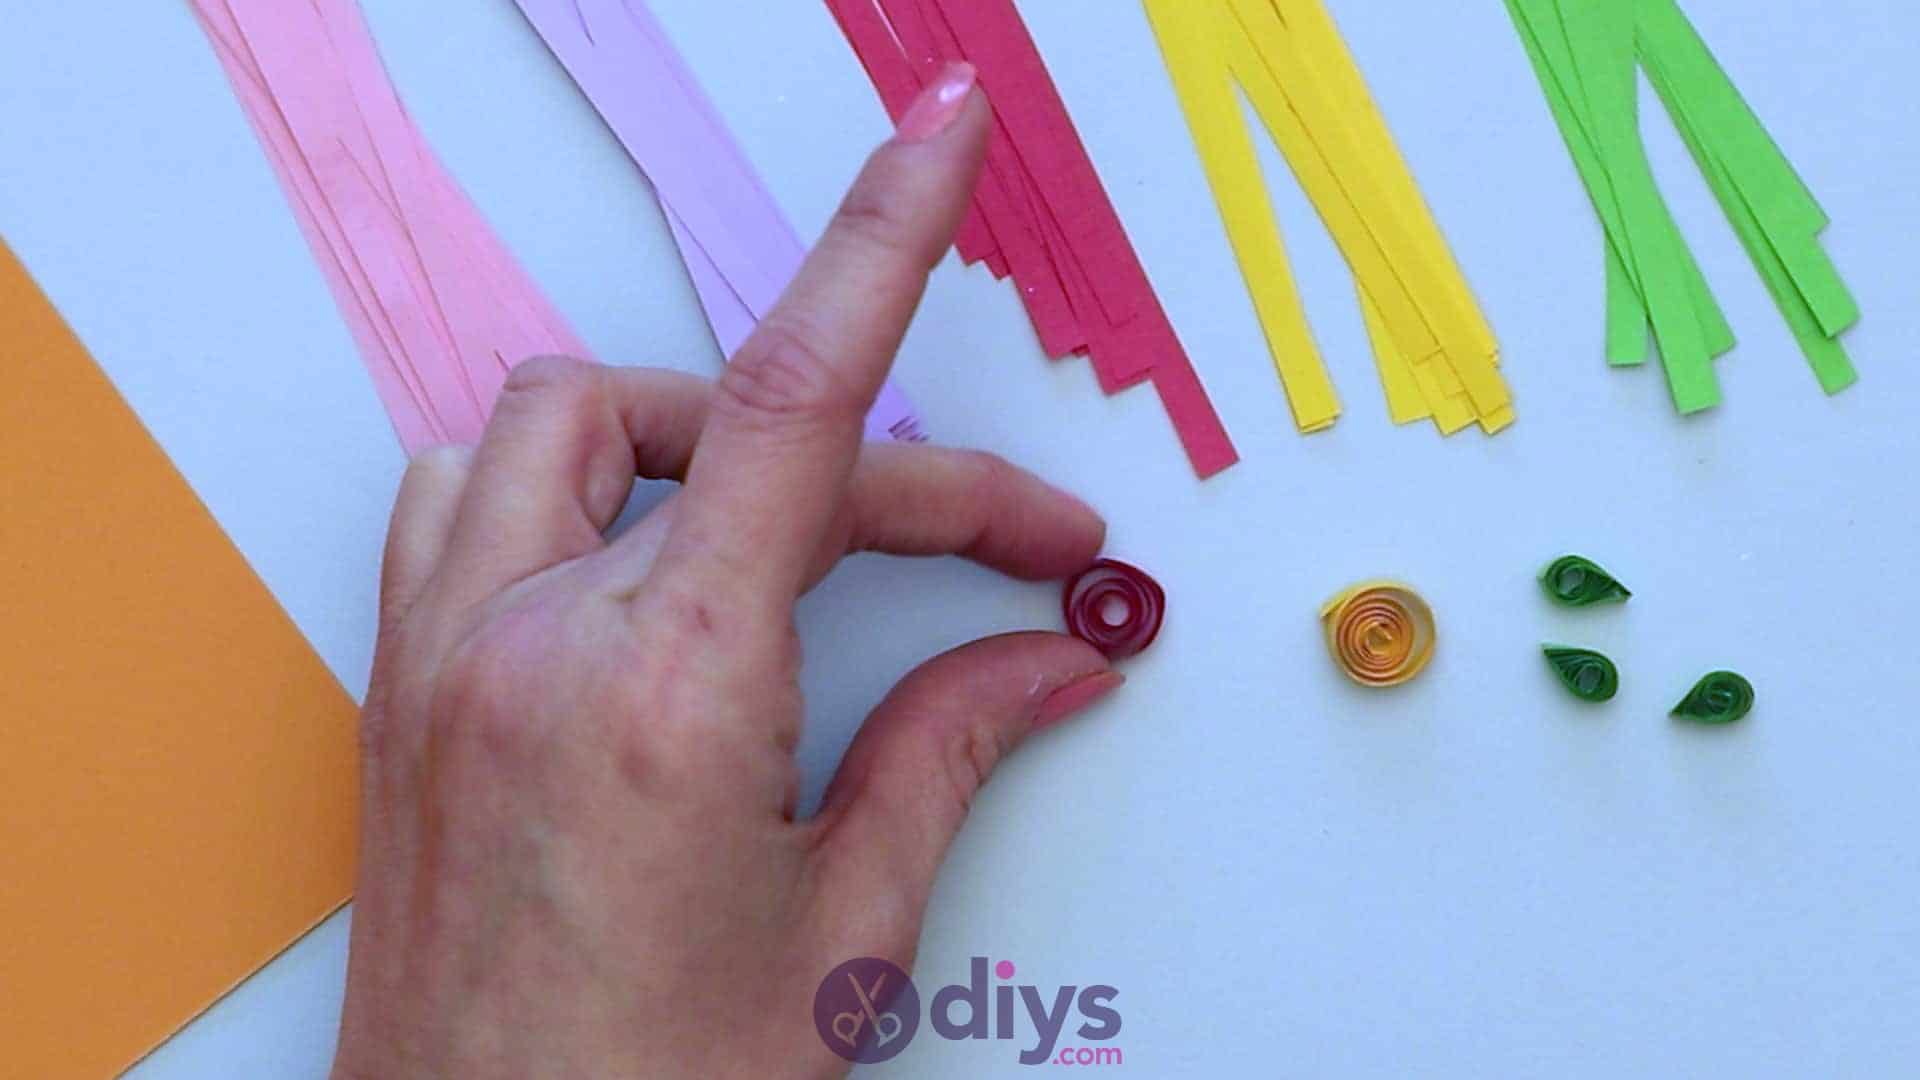
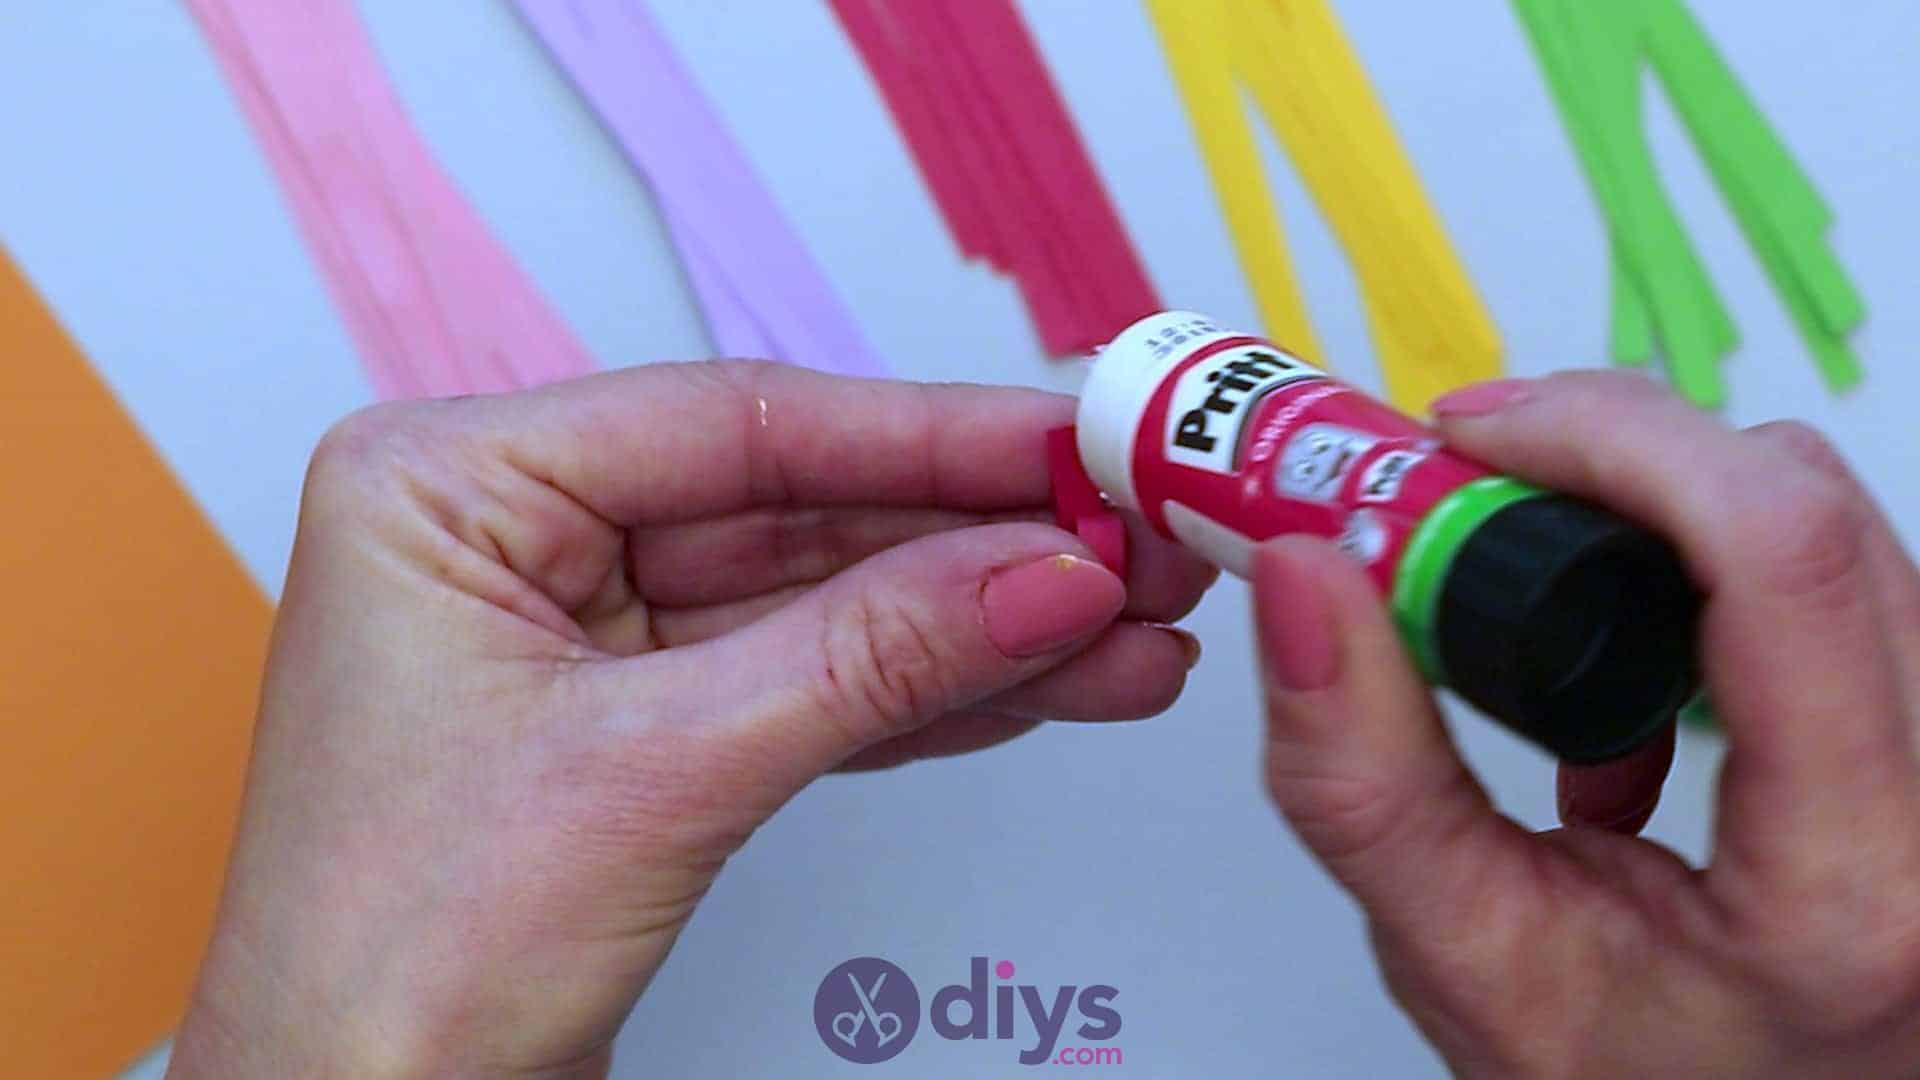
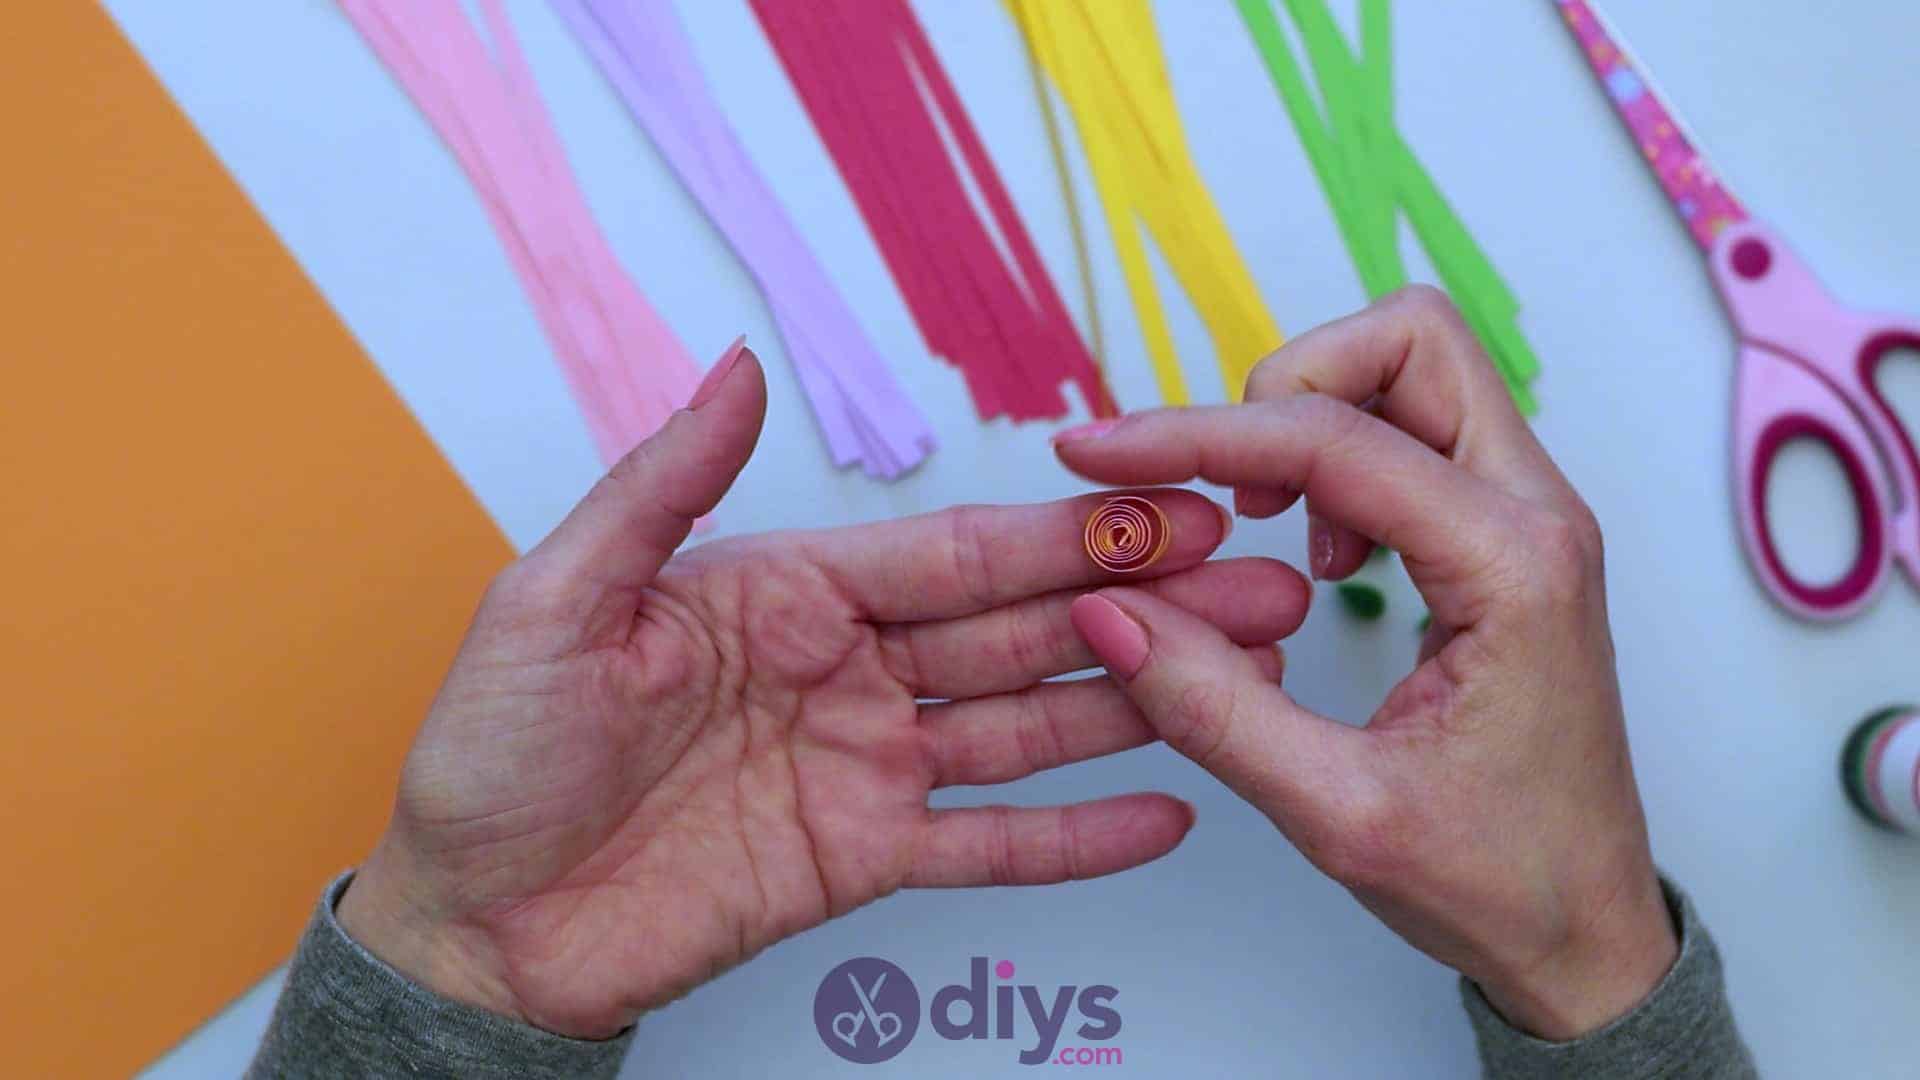
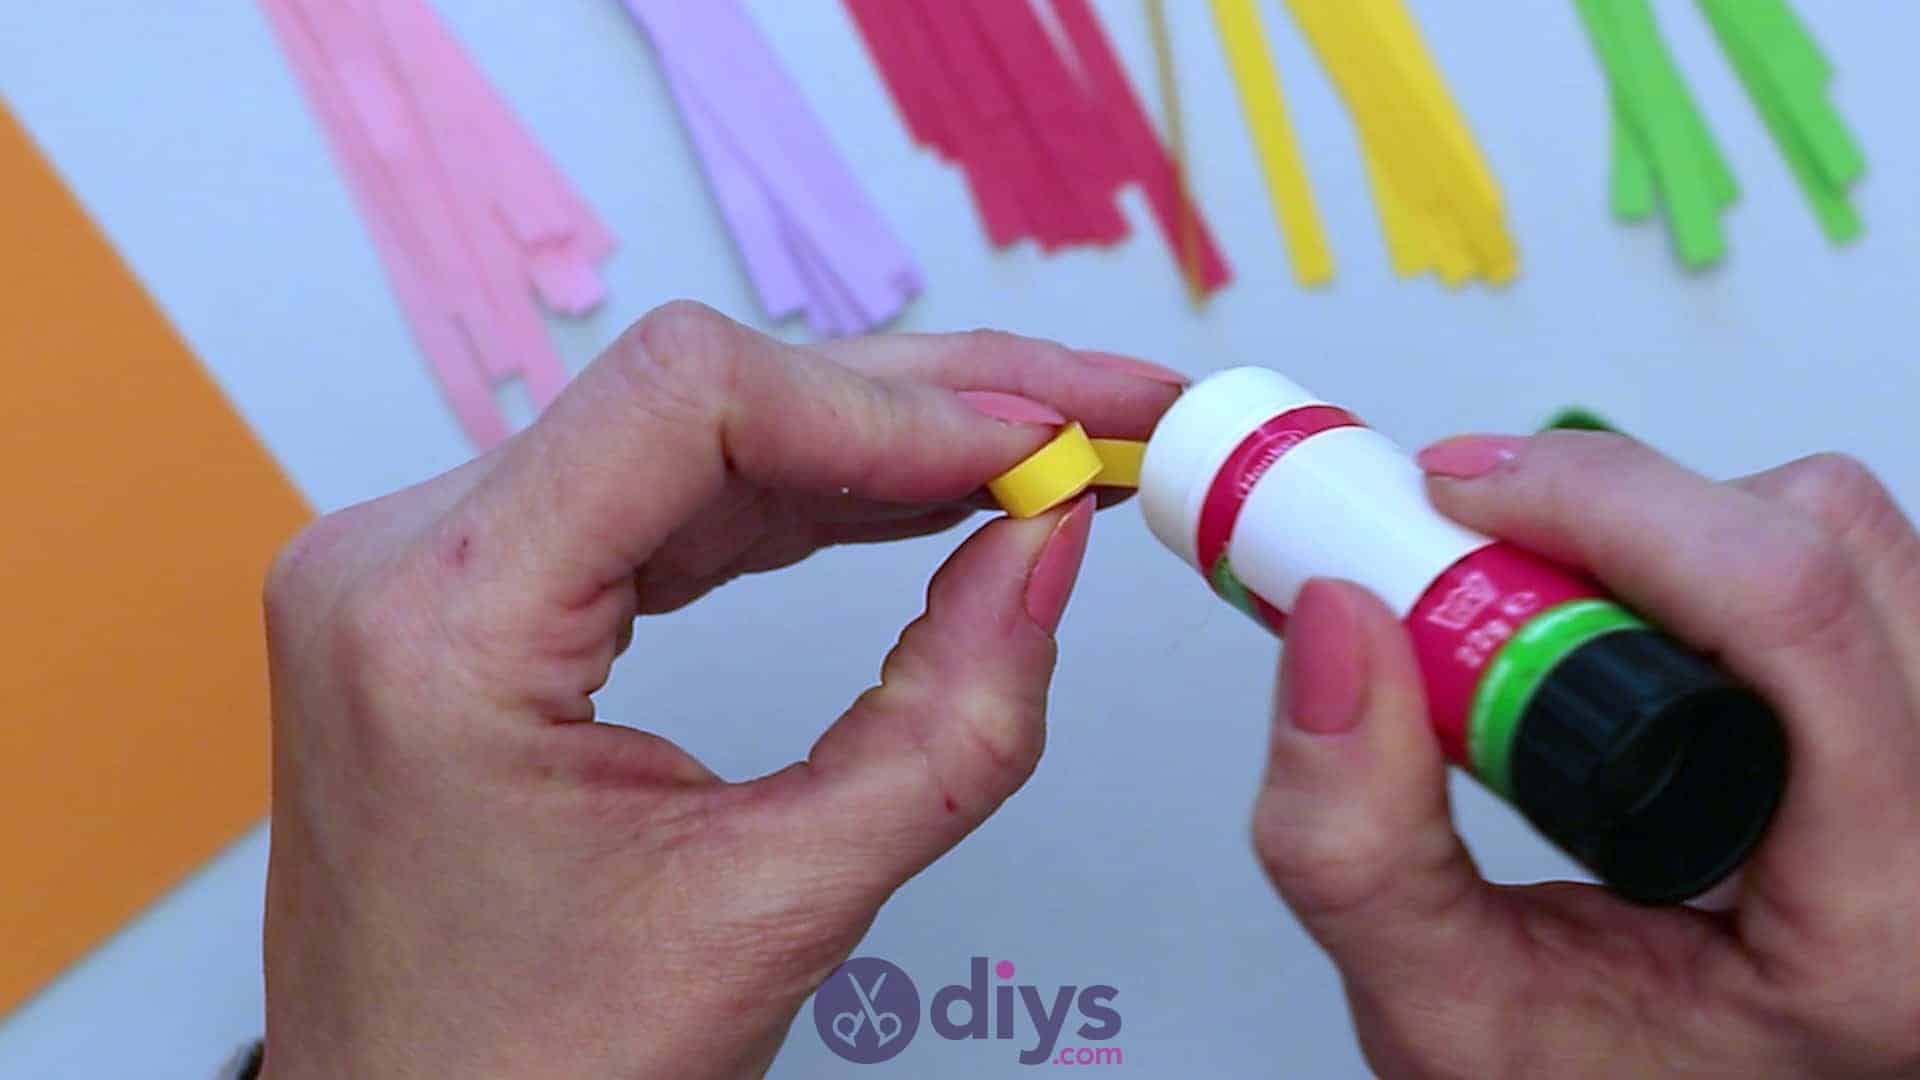
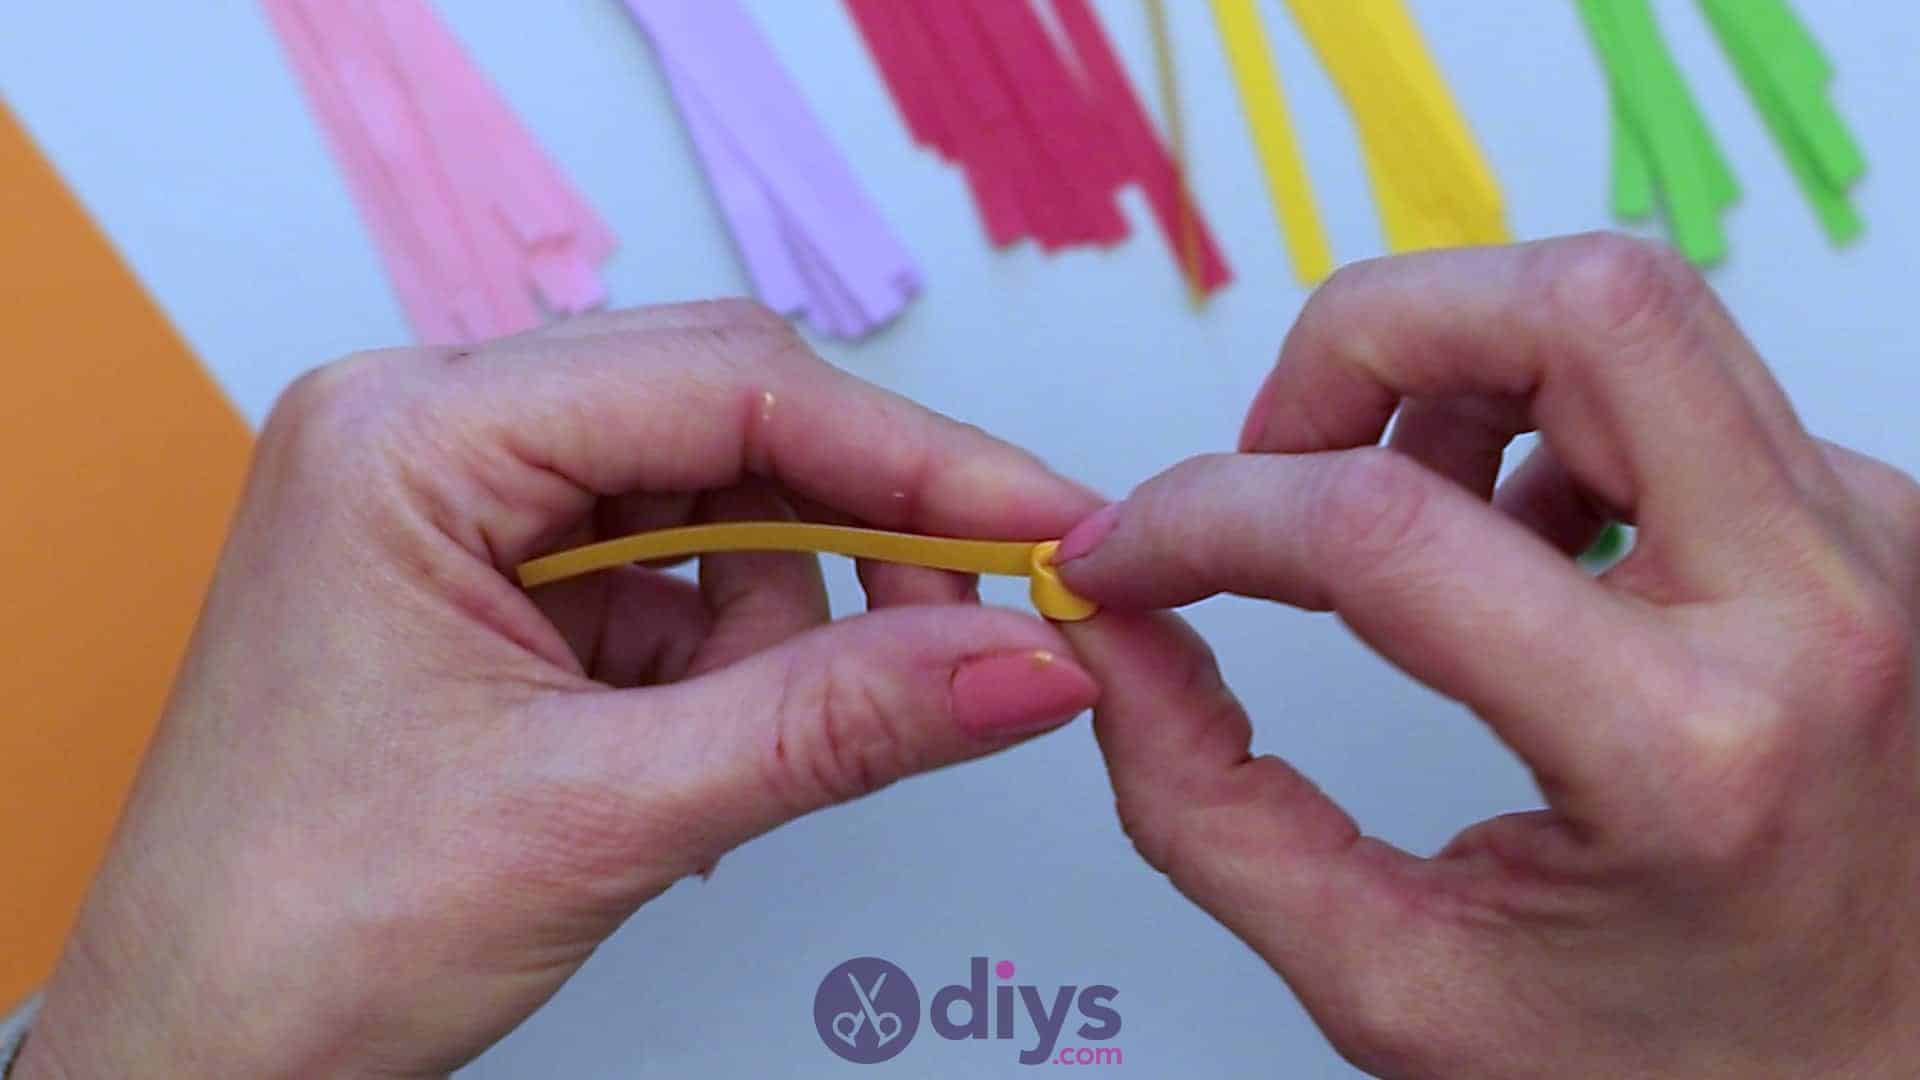
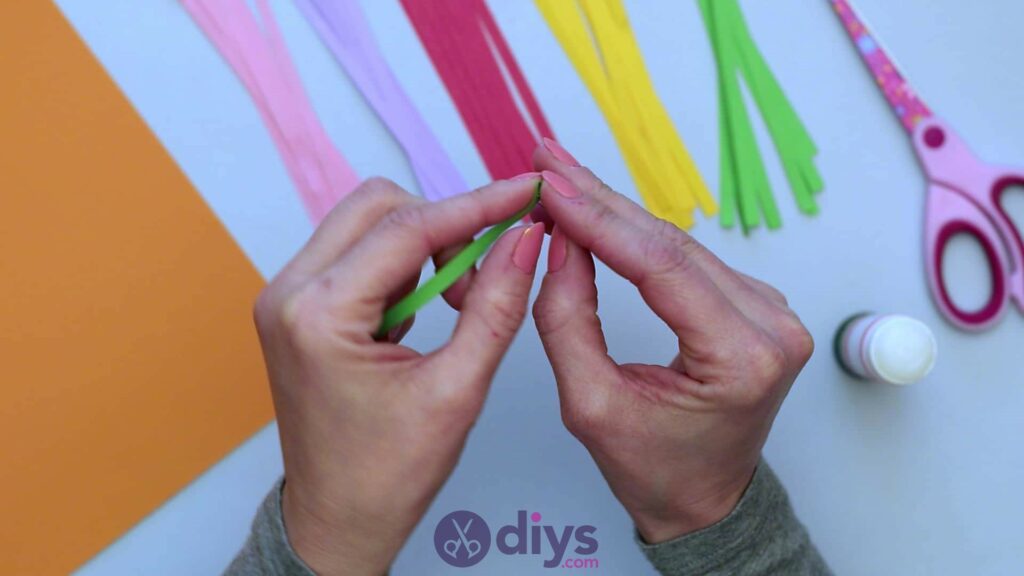
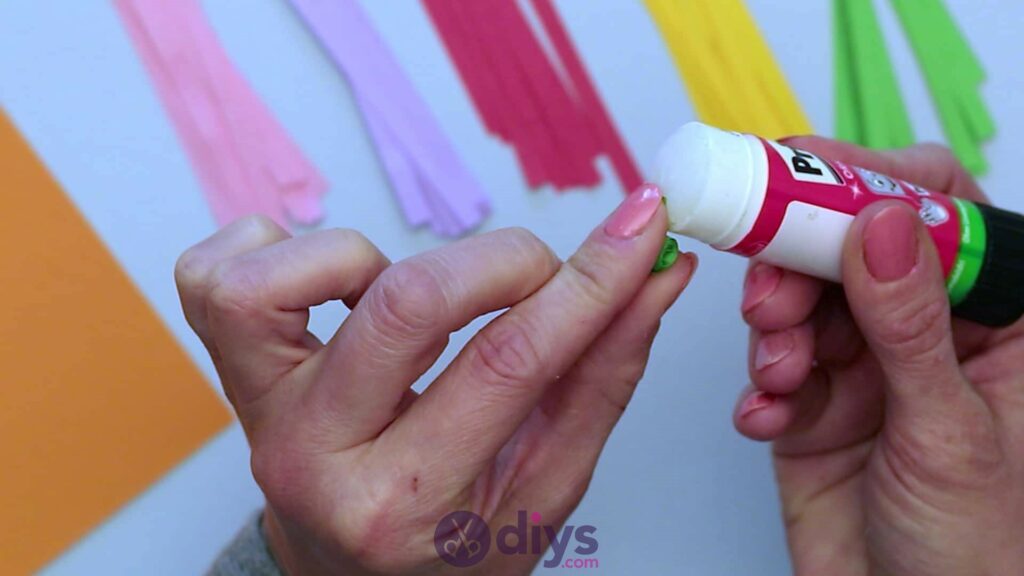
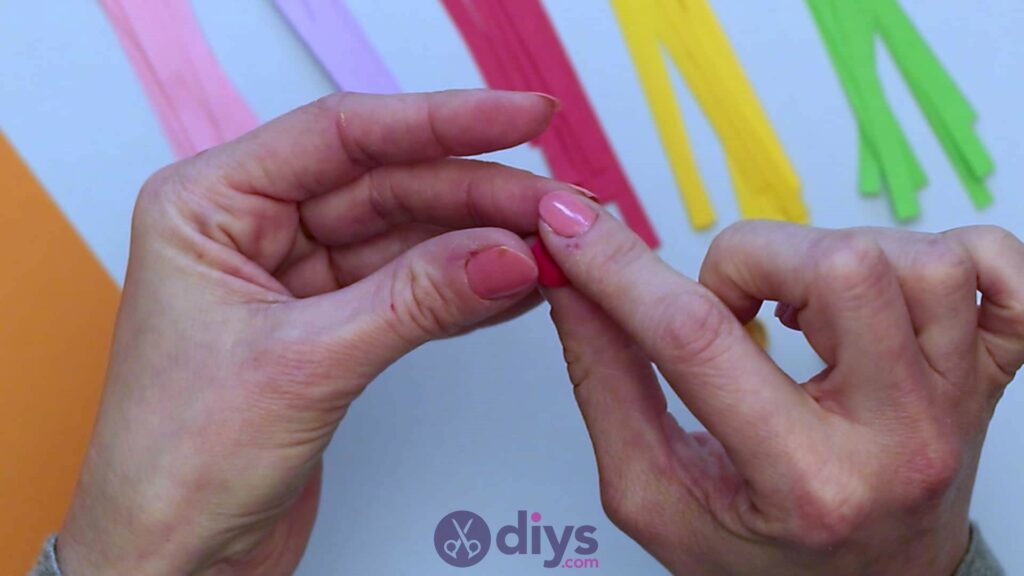
Make your paper quilled leaves! Start with your basic quilling technique. Pick up your first strip, curl one of its ends over onto itself further down the strip, and start rolling it so the rest of the strip warps around your original curl and is gathered into a tight spiral as you roll. You’ll keep your roll right tight until the end, where you’ll want to leave yourself 2cm or so excess so that your spiral can loosen a little and leave you room to pinch the paper in order to make your leaf shape. Apply glue to the very end of your newly rolled strip with your 2cm excess save and curl that over to meet the outer side of the roll, letting the excess create a slightly loop.
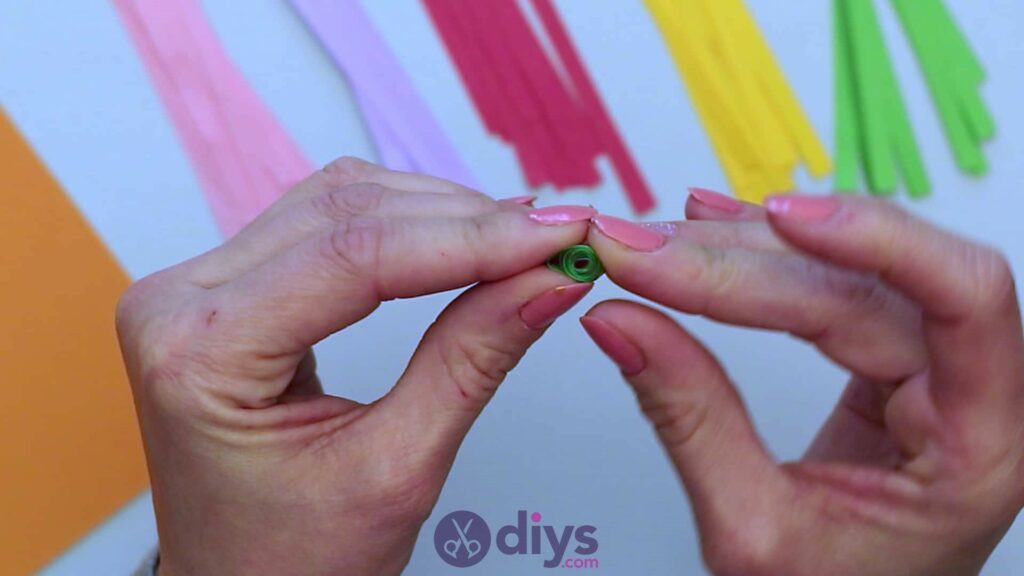
Stick the glued end down on that outer side. You’ll see that your tight roll loosens a little bit in that excess space you left, creating a slightly more visible spiral. You’ll see how one side of your now rounded shape is a little looser, with your layers starting to release up into the spot where you left your excess, while the other side stays a little more densely spiralled. This looser side is where you’ll created a little creased pinch in order to make the shape look like a leaf, peaked at that end in a sort of teardrop shape. Repeat this entire process to create as many leaves as you please, or as you think you’ll need.


Step 4: rinse and repeat
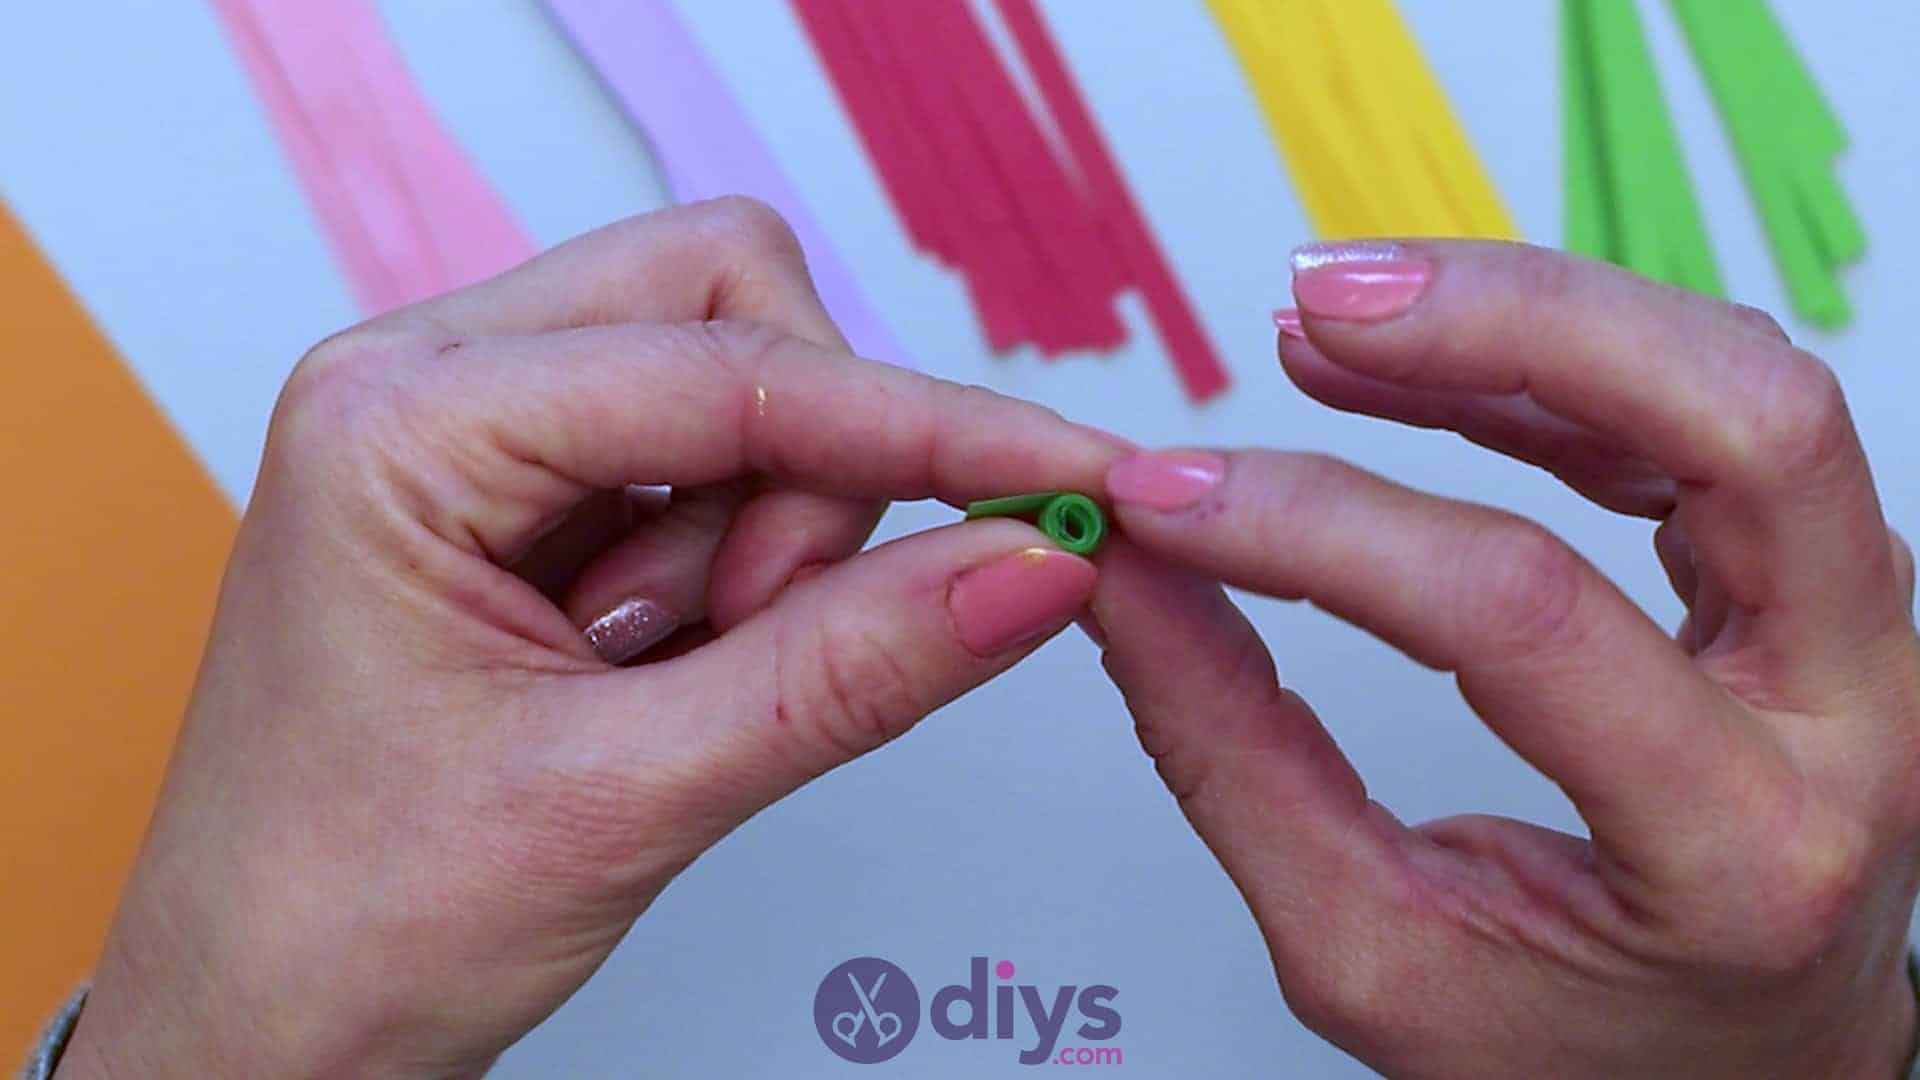
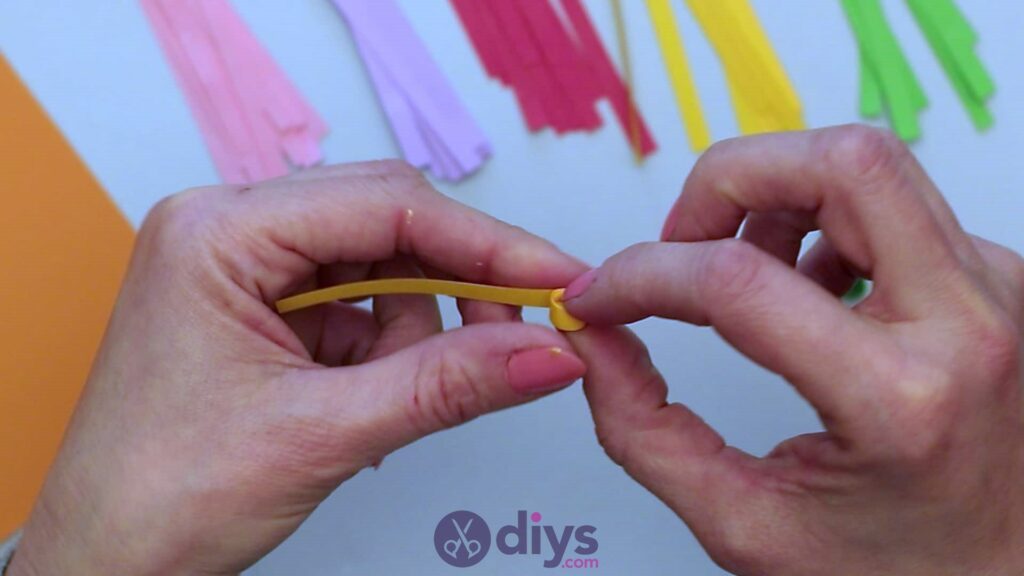
Now you’ll repeat the rolling process you did abovealmost identically, but with a slightly different finishing step. You’ll still leave a little bit of excess after rolling and glue it down loosely to let some unrolling and spiraling happen, but this time you’ll leave your shape rounded instead of pinching it. This will give you cute circular blossoms to make flowers with, rather than teardrop leaves.
You can control the size of your blossoms by rolling more tightly and leaving less excess for spiraling in order to get denser and therefore smaller flowers, or rolling more loosely and leaving a little more excess in order to get wider, slightly larger flowers. This spiraling action is the basic technique involved in the foundations of paper quilling; how you pinch, vary, and arrange the finished circles is what gives you different looks and effects. Quill all of your strips in all of your different colours until you think you have enough flowers to match up with your leaves and make a treetop out of in a moment.


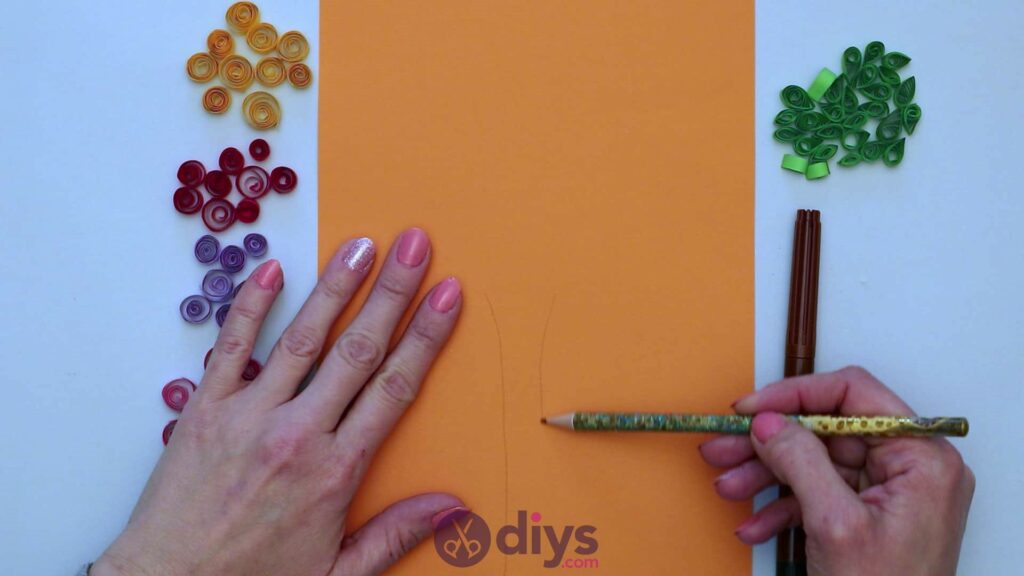
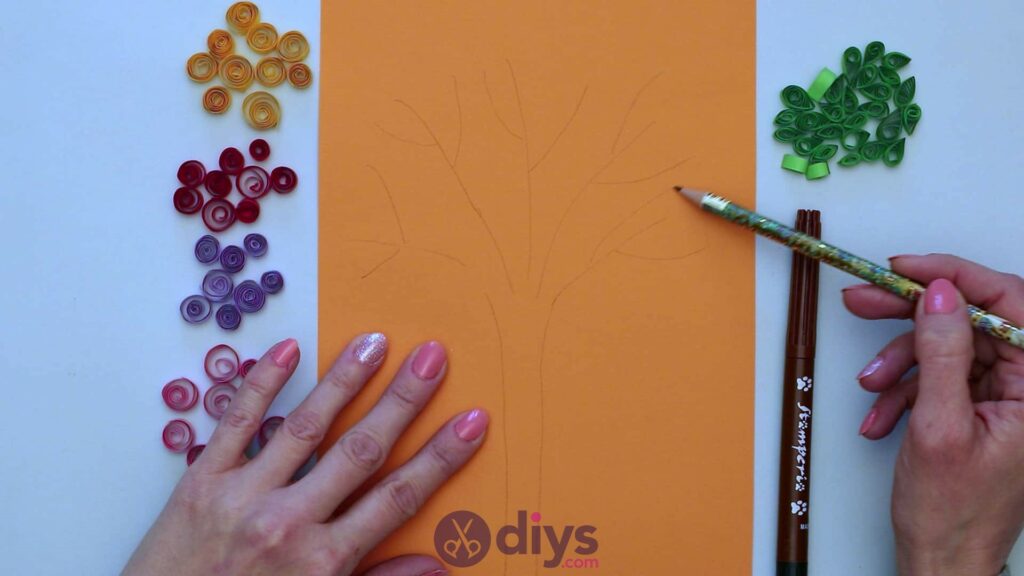
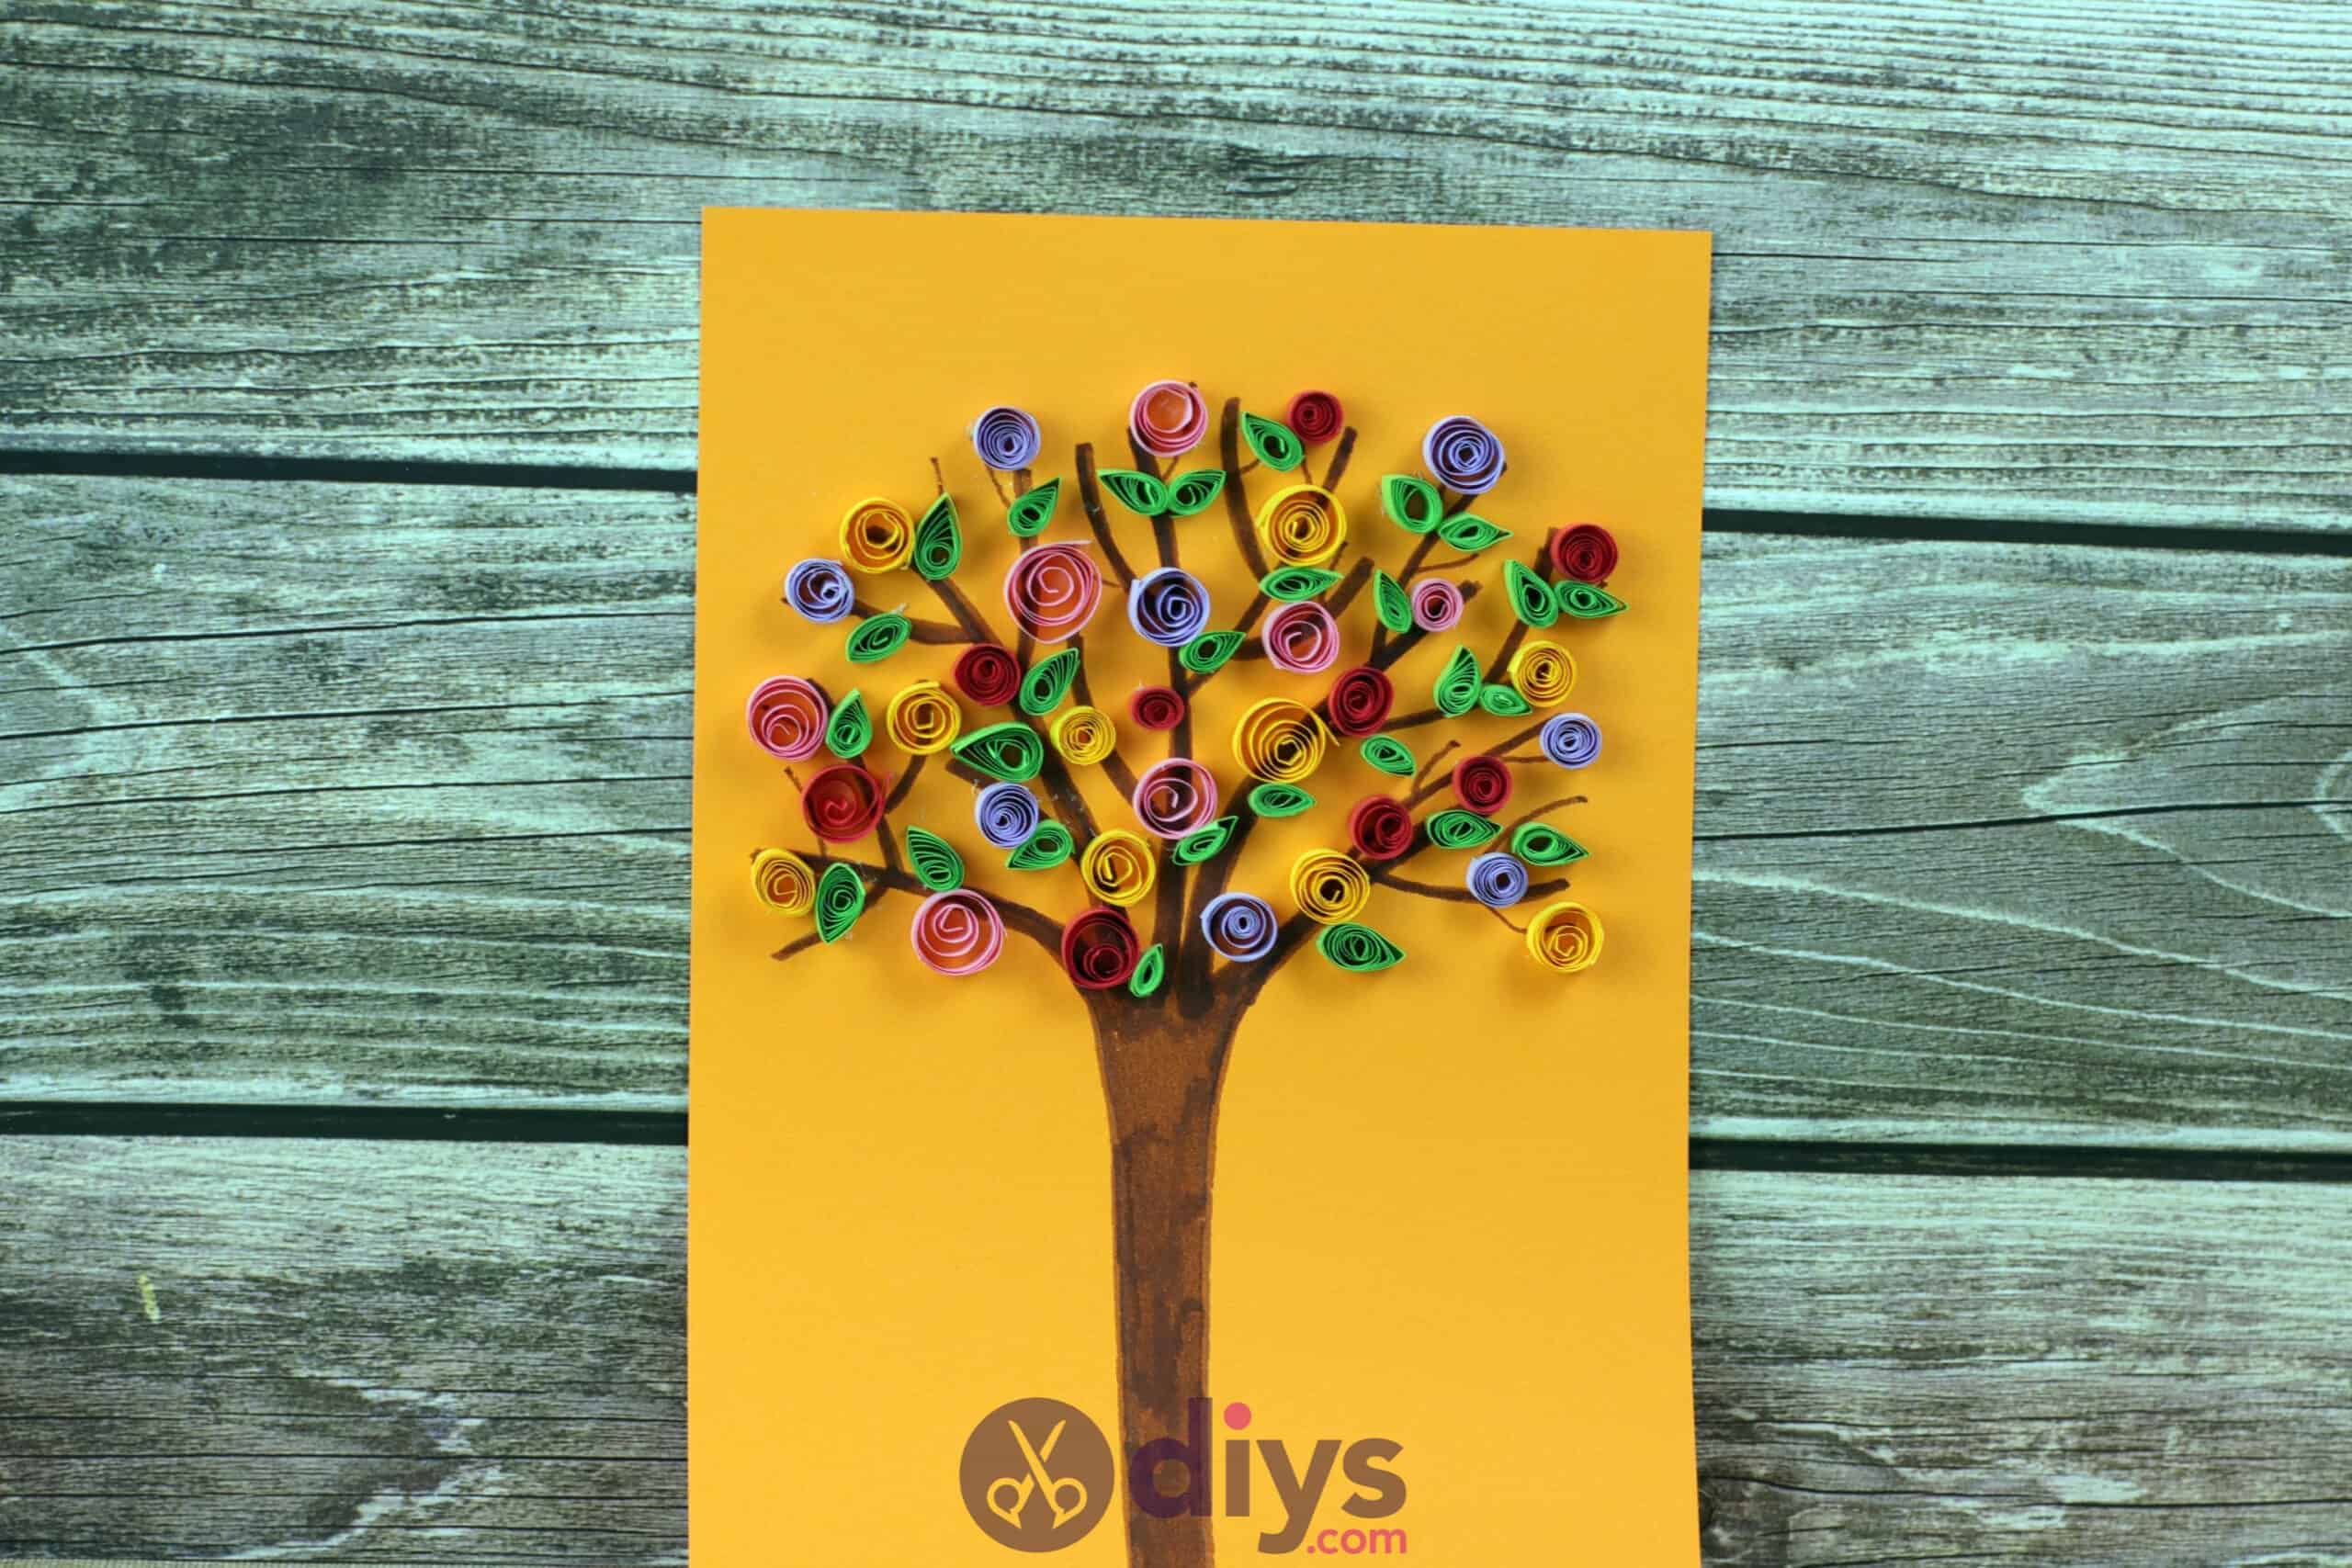
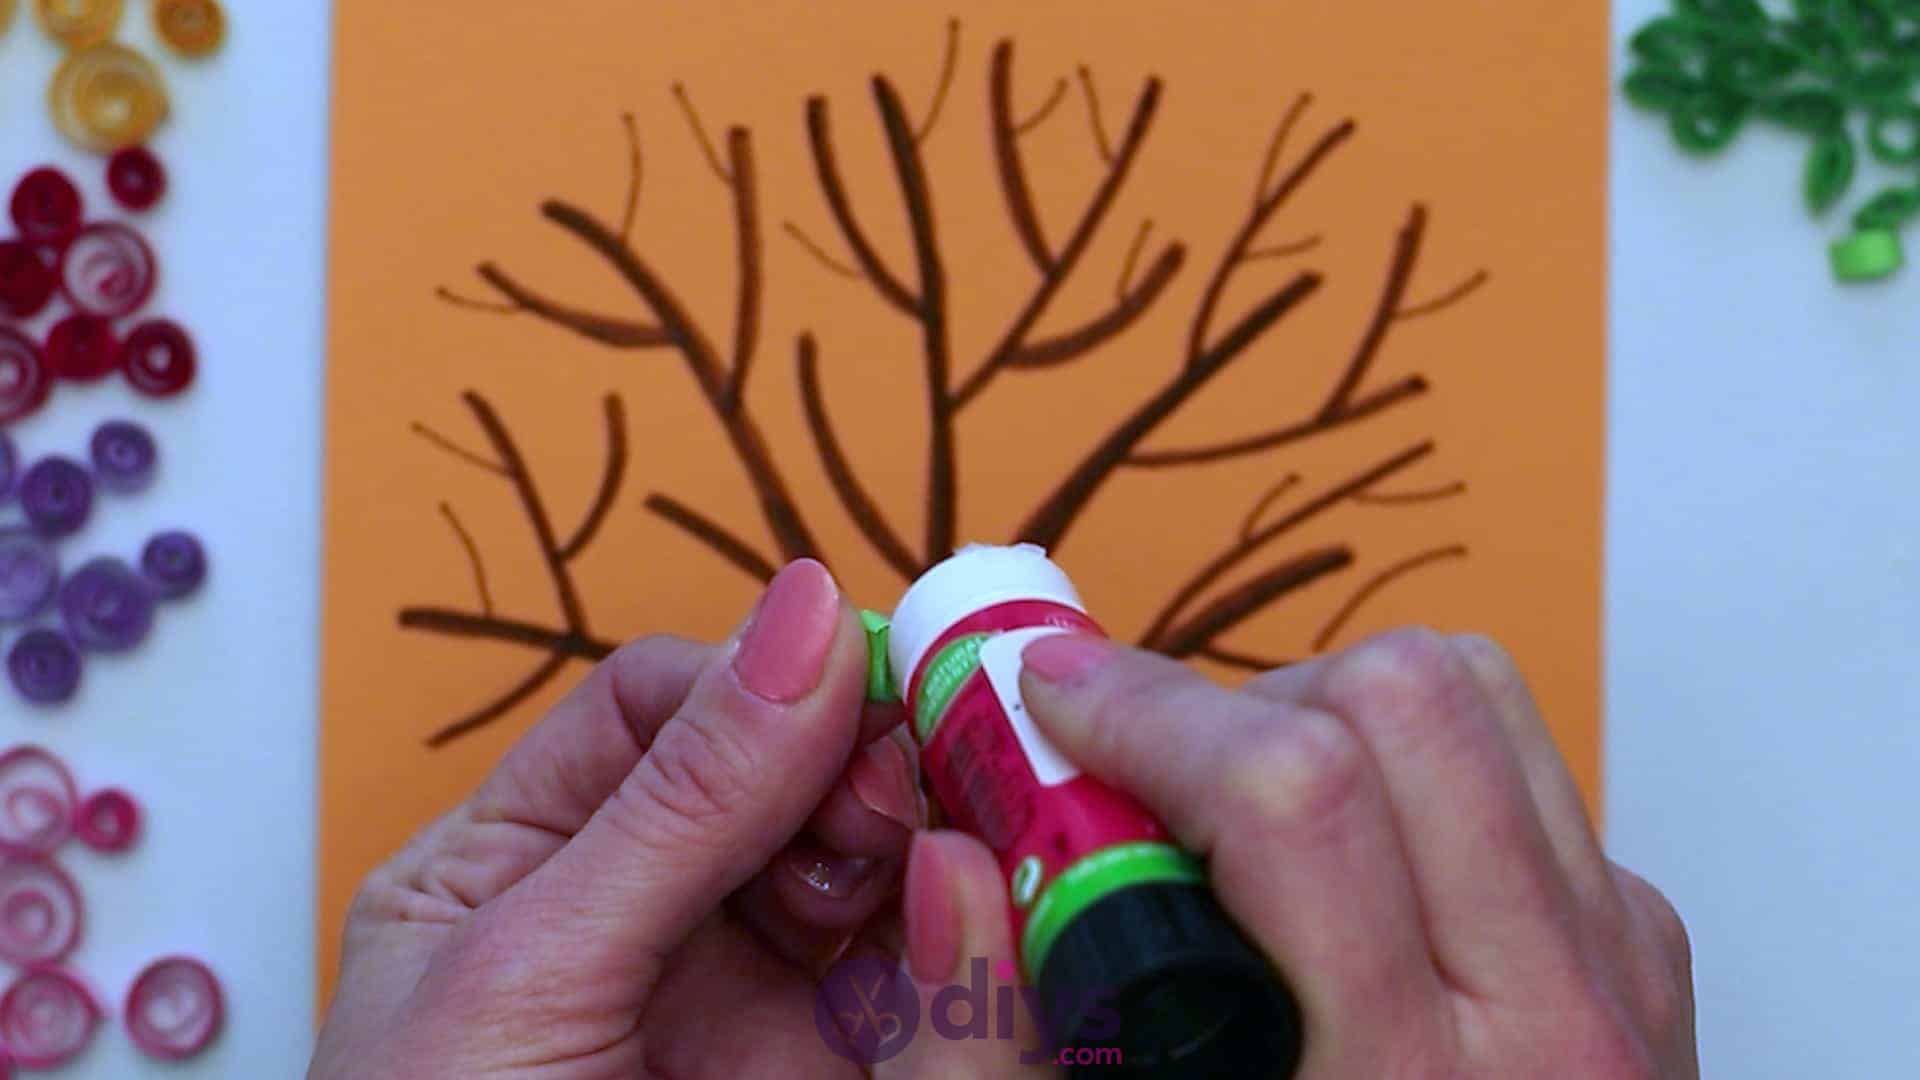
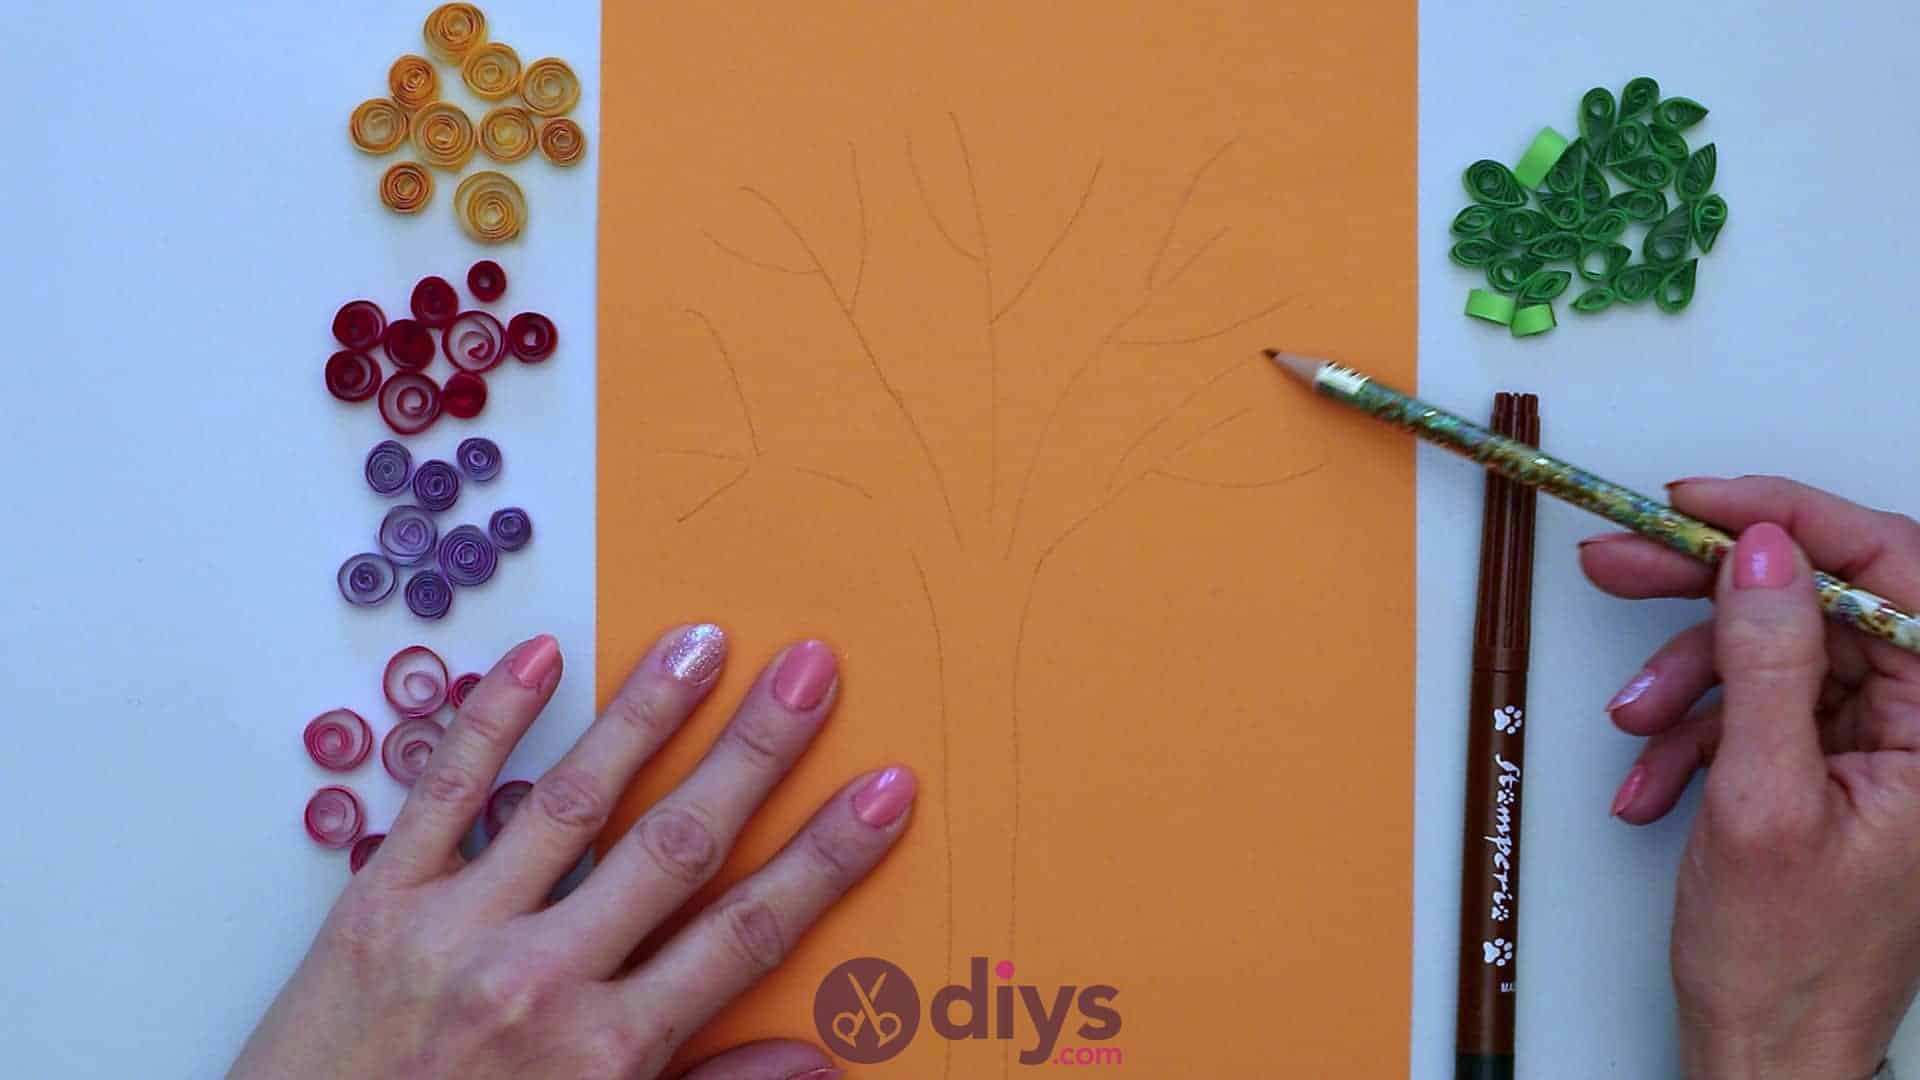
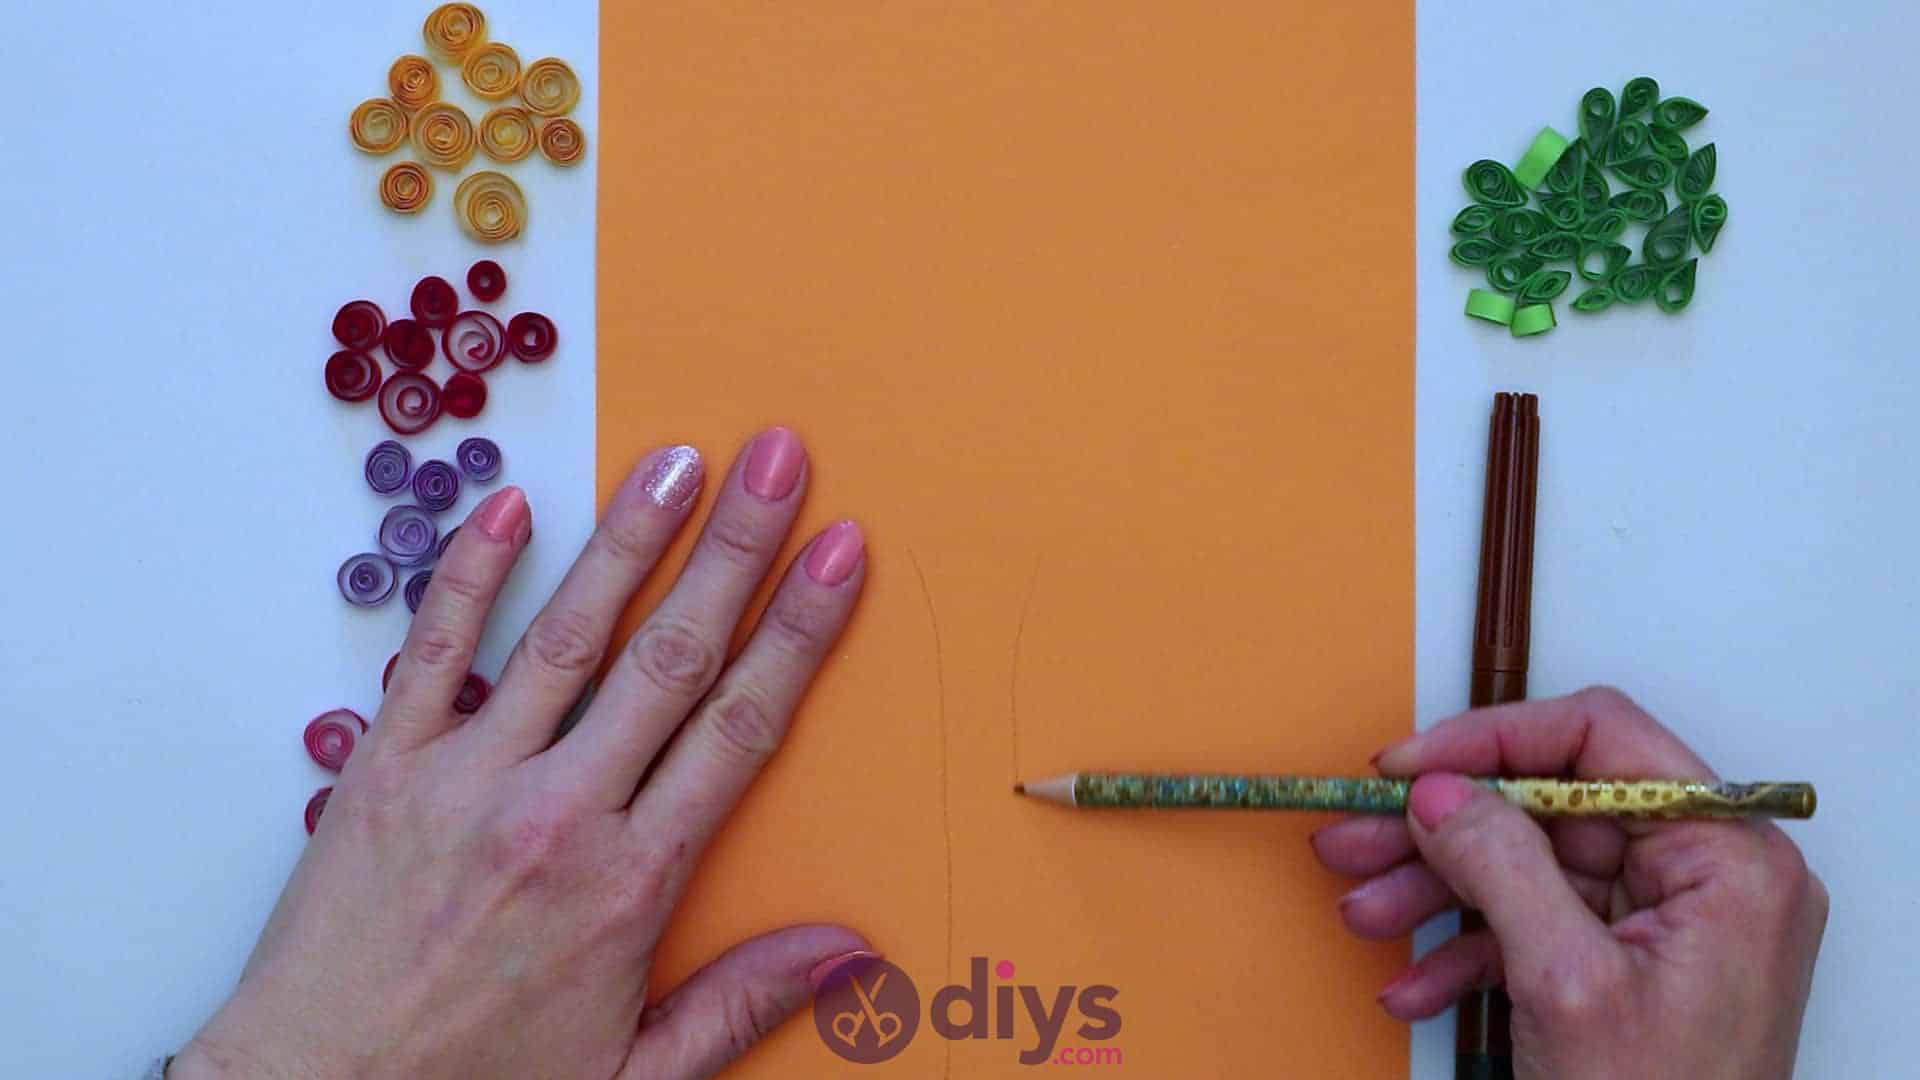
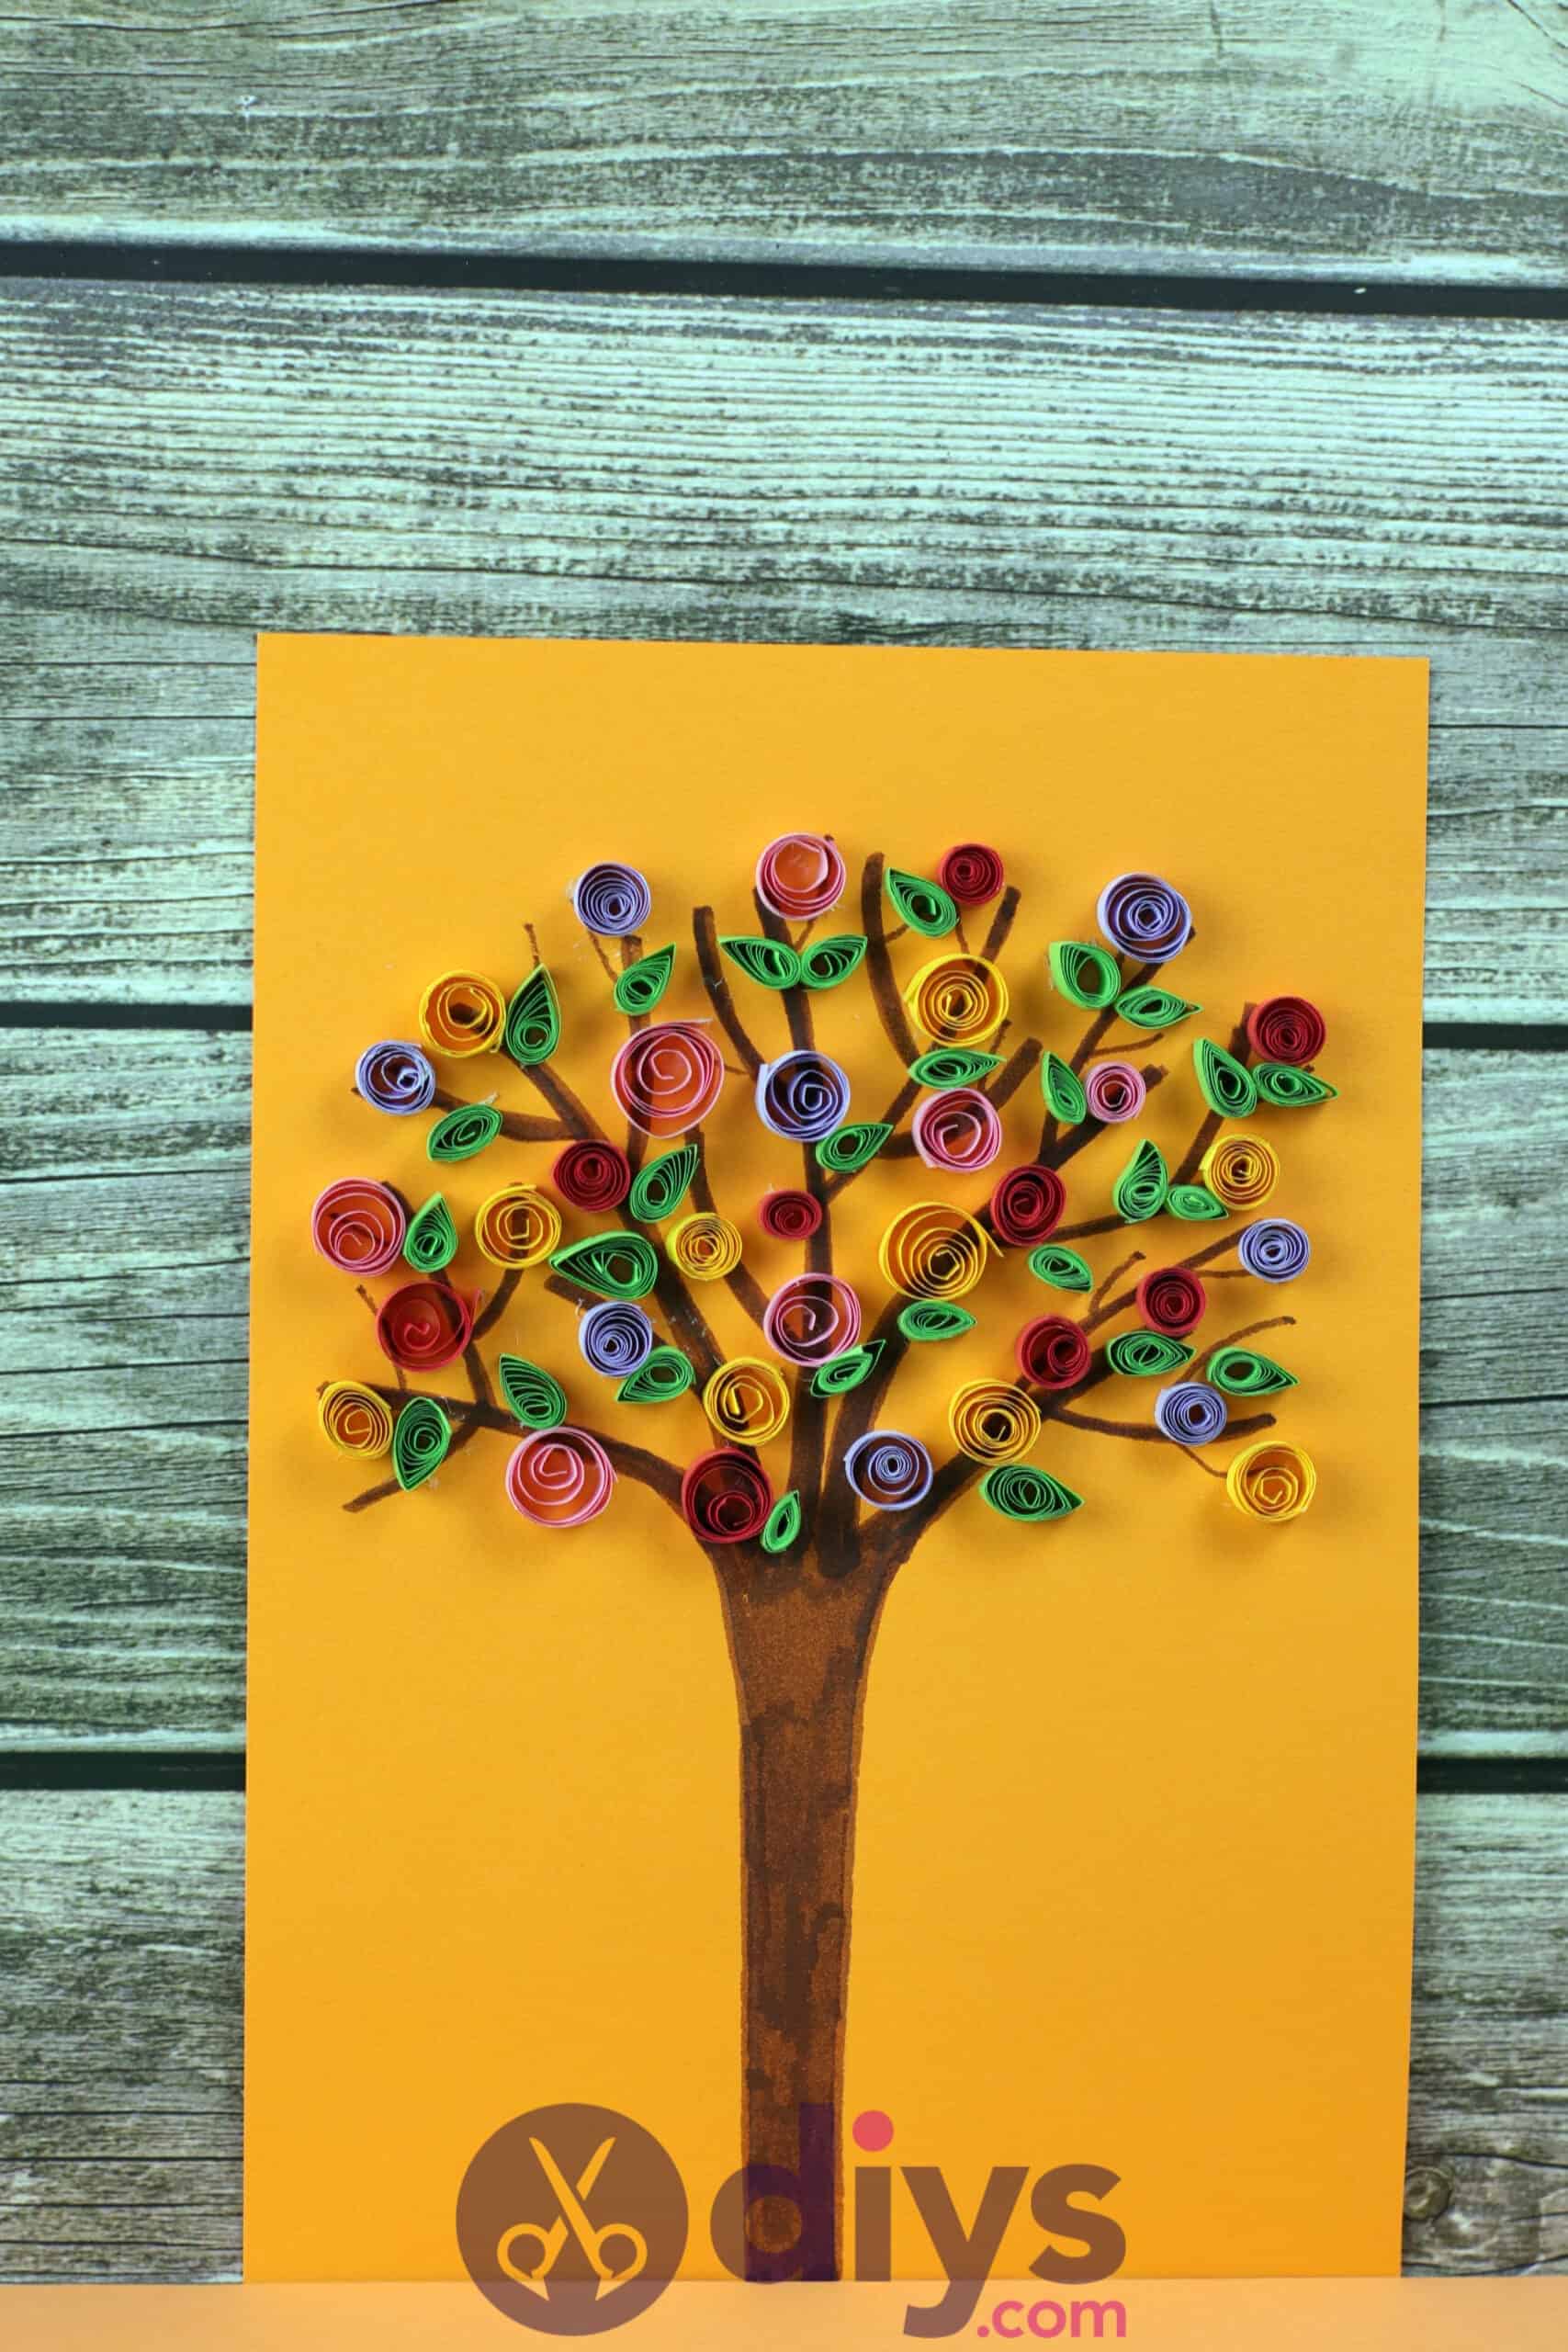
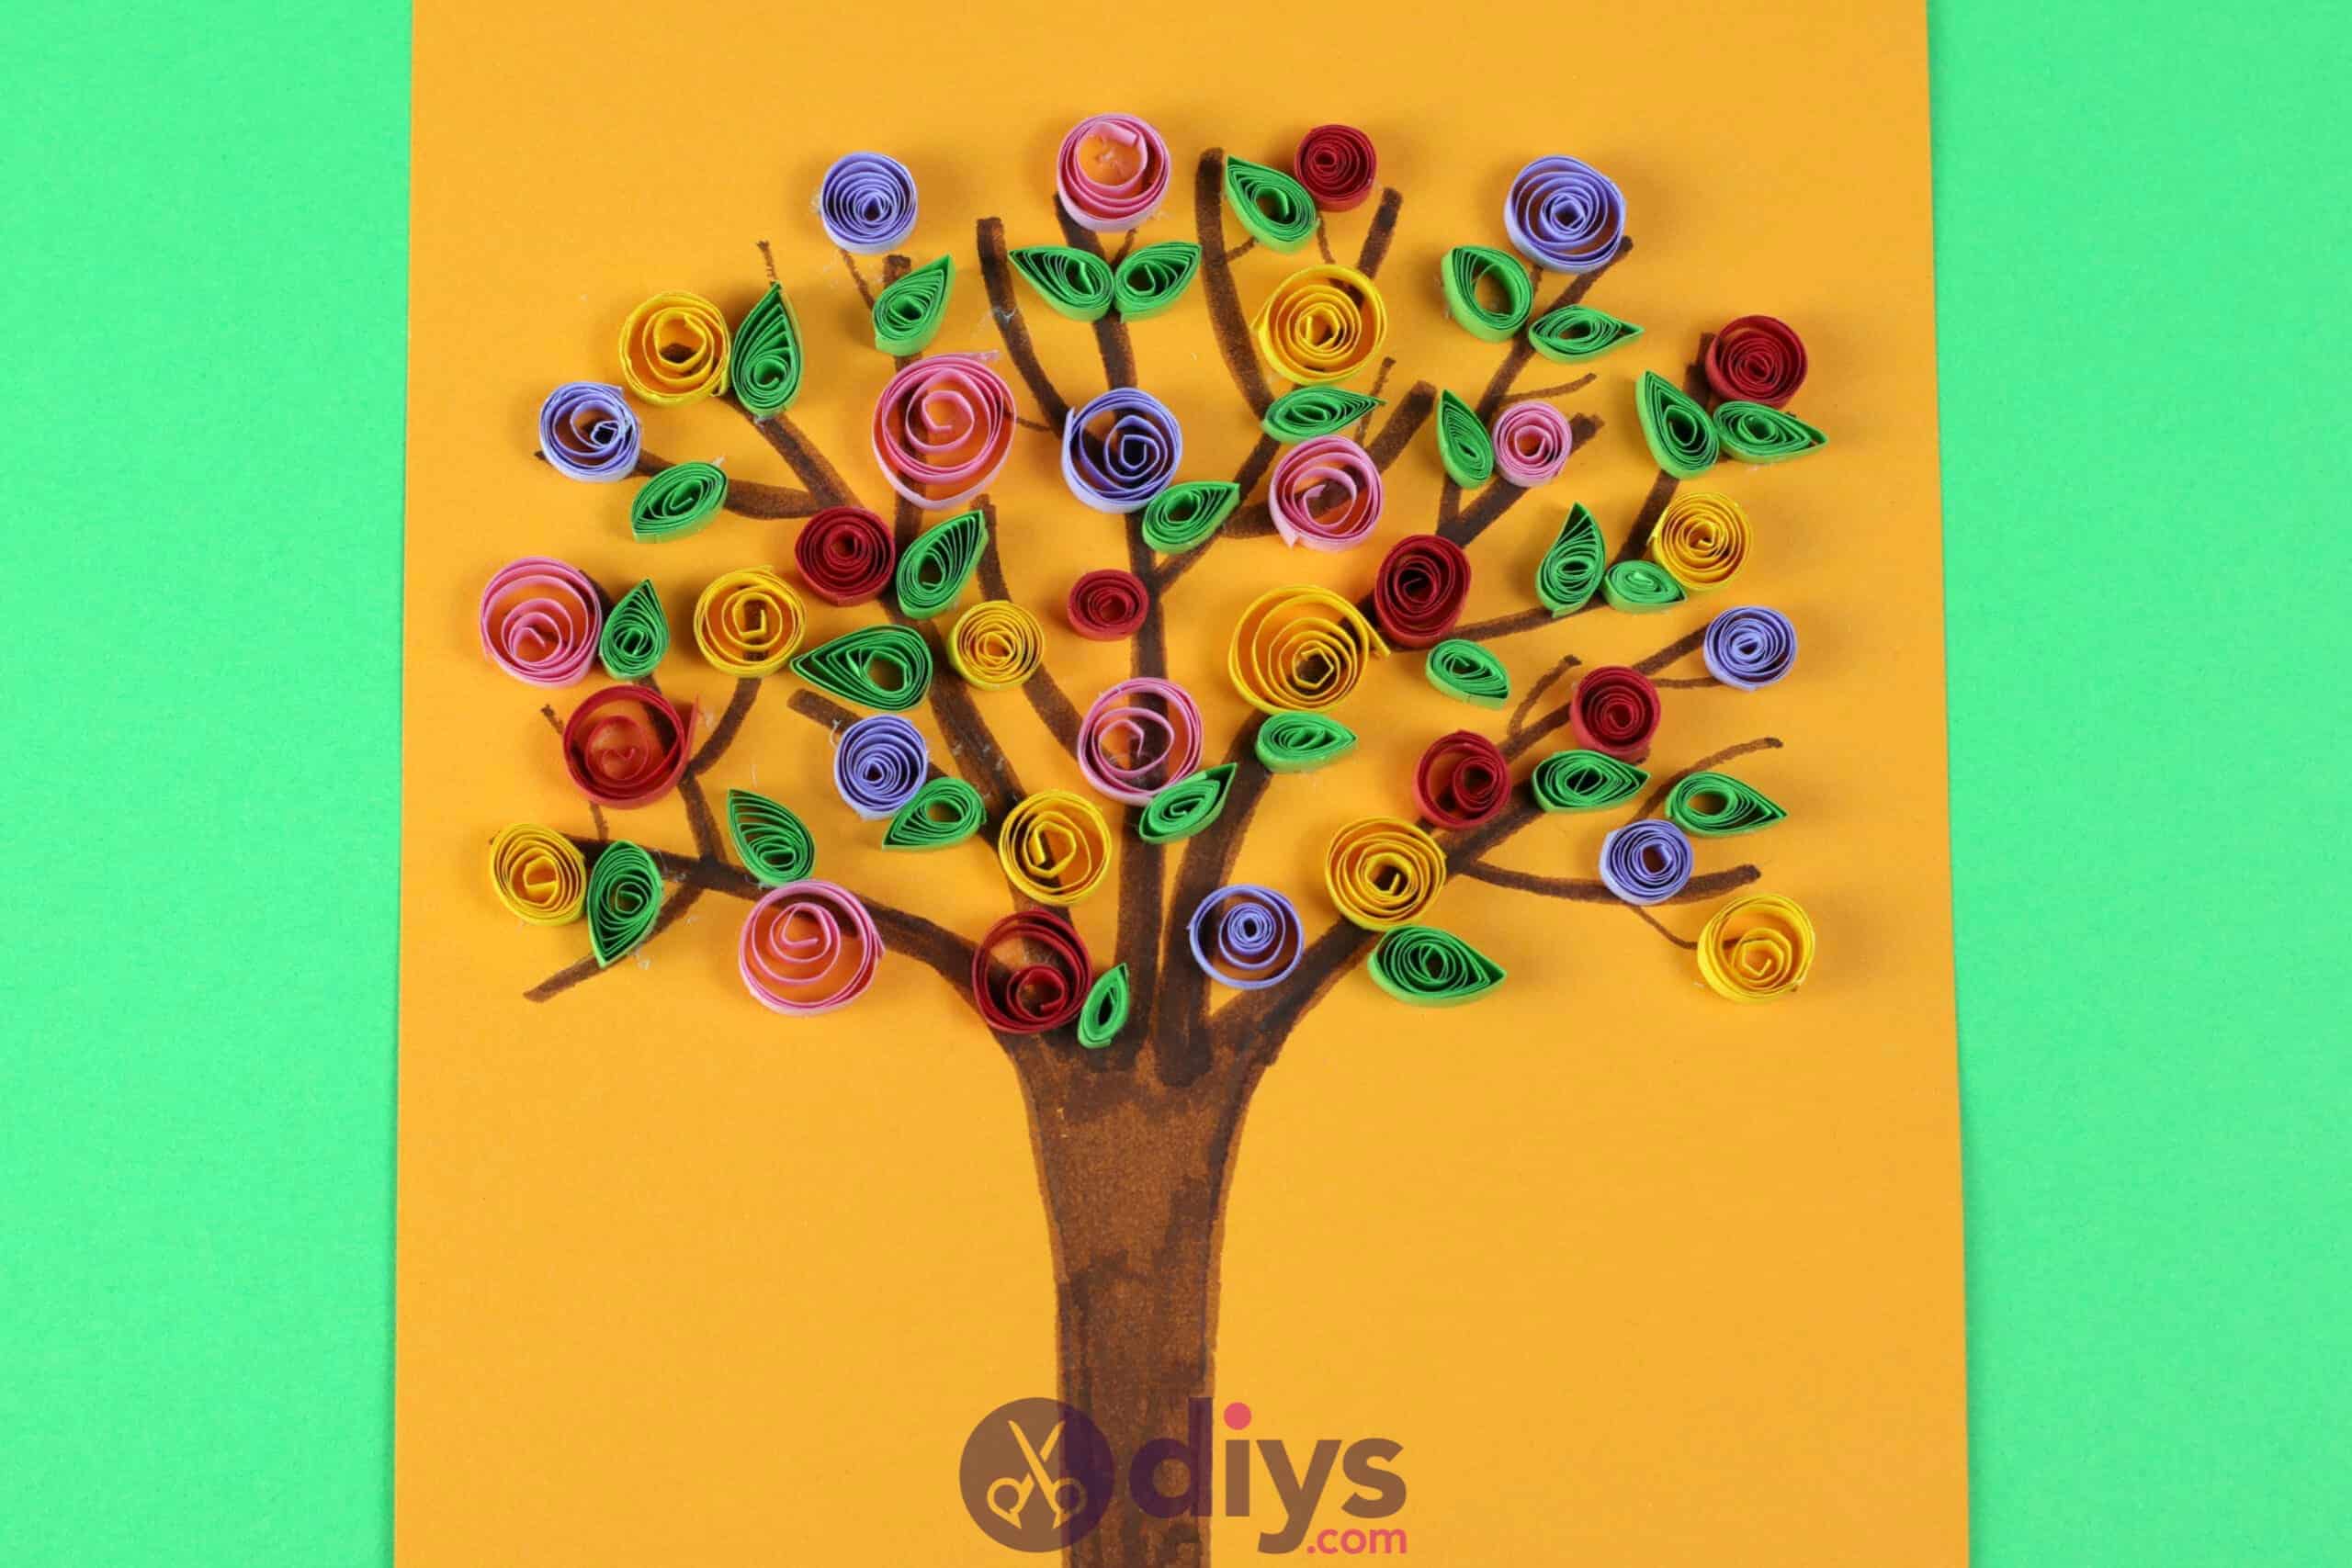
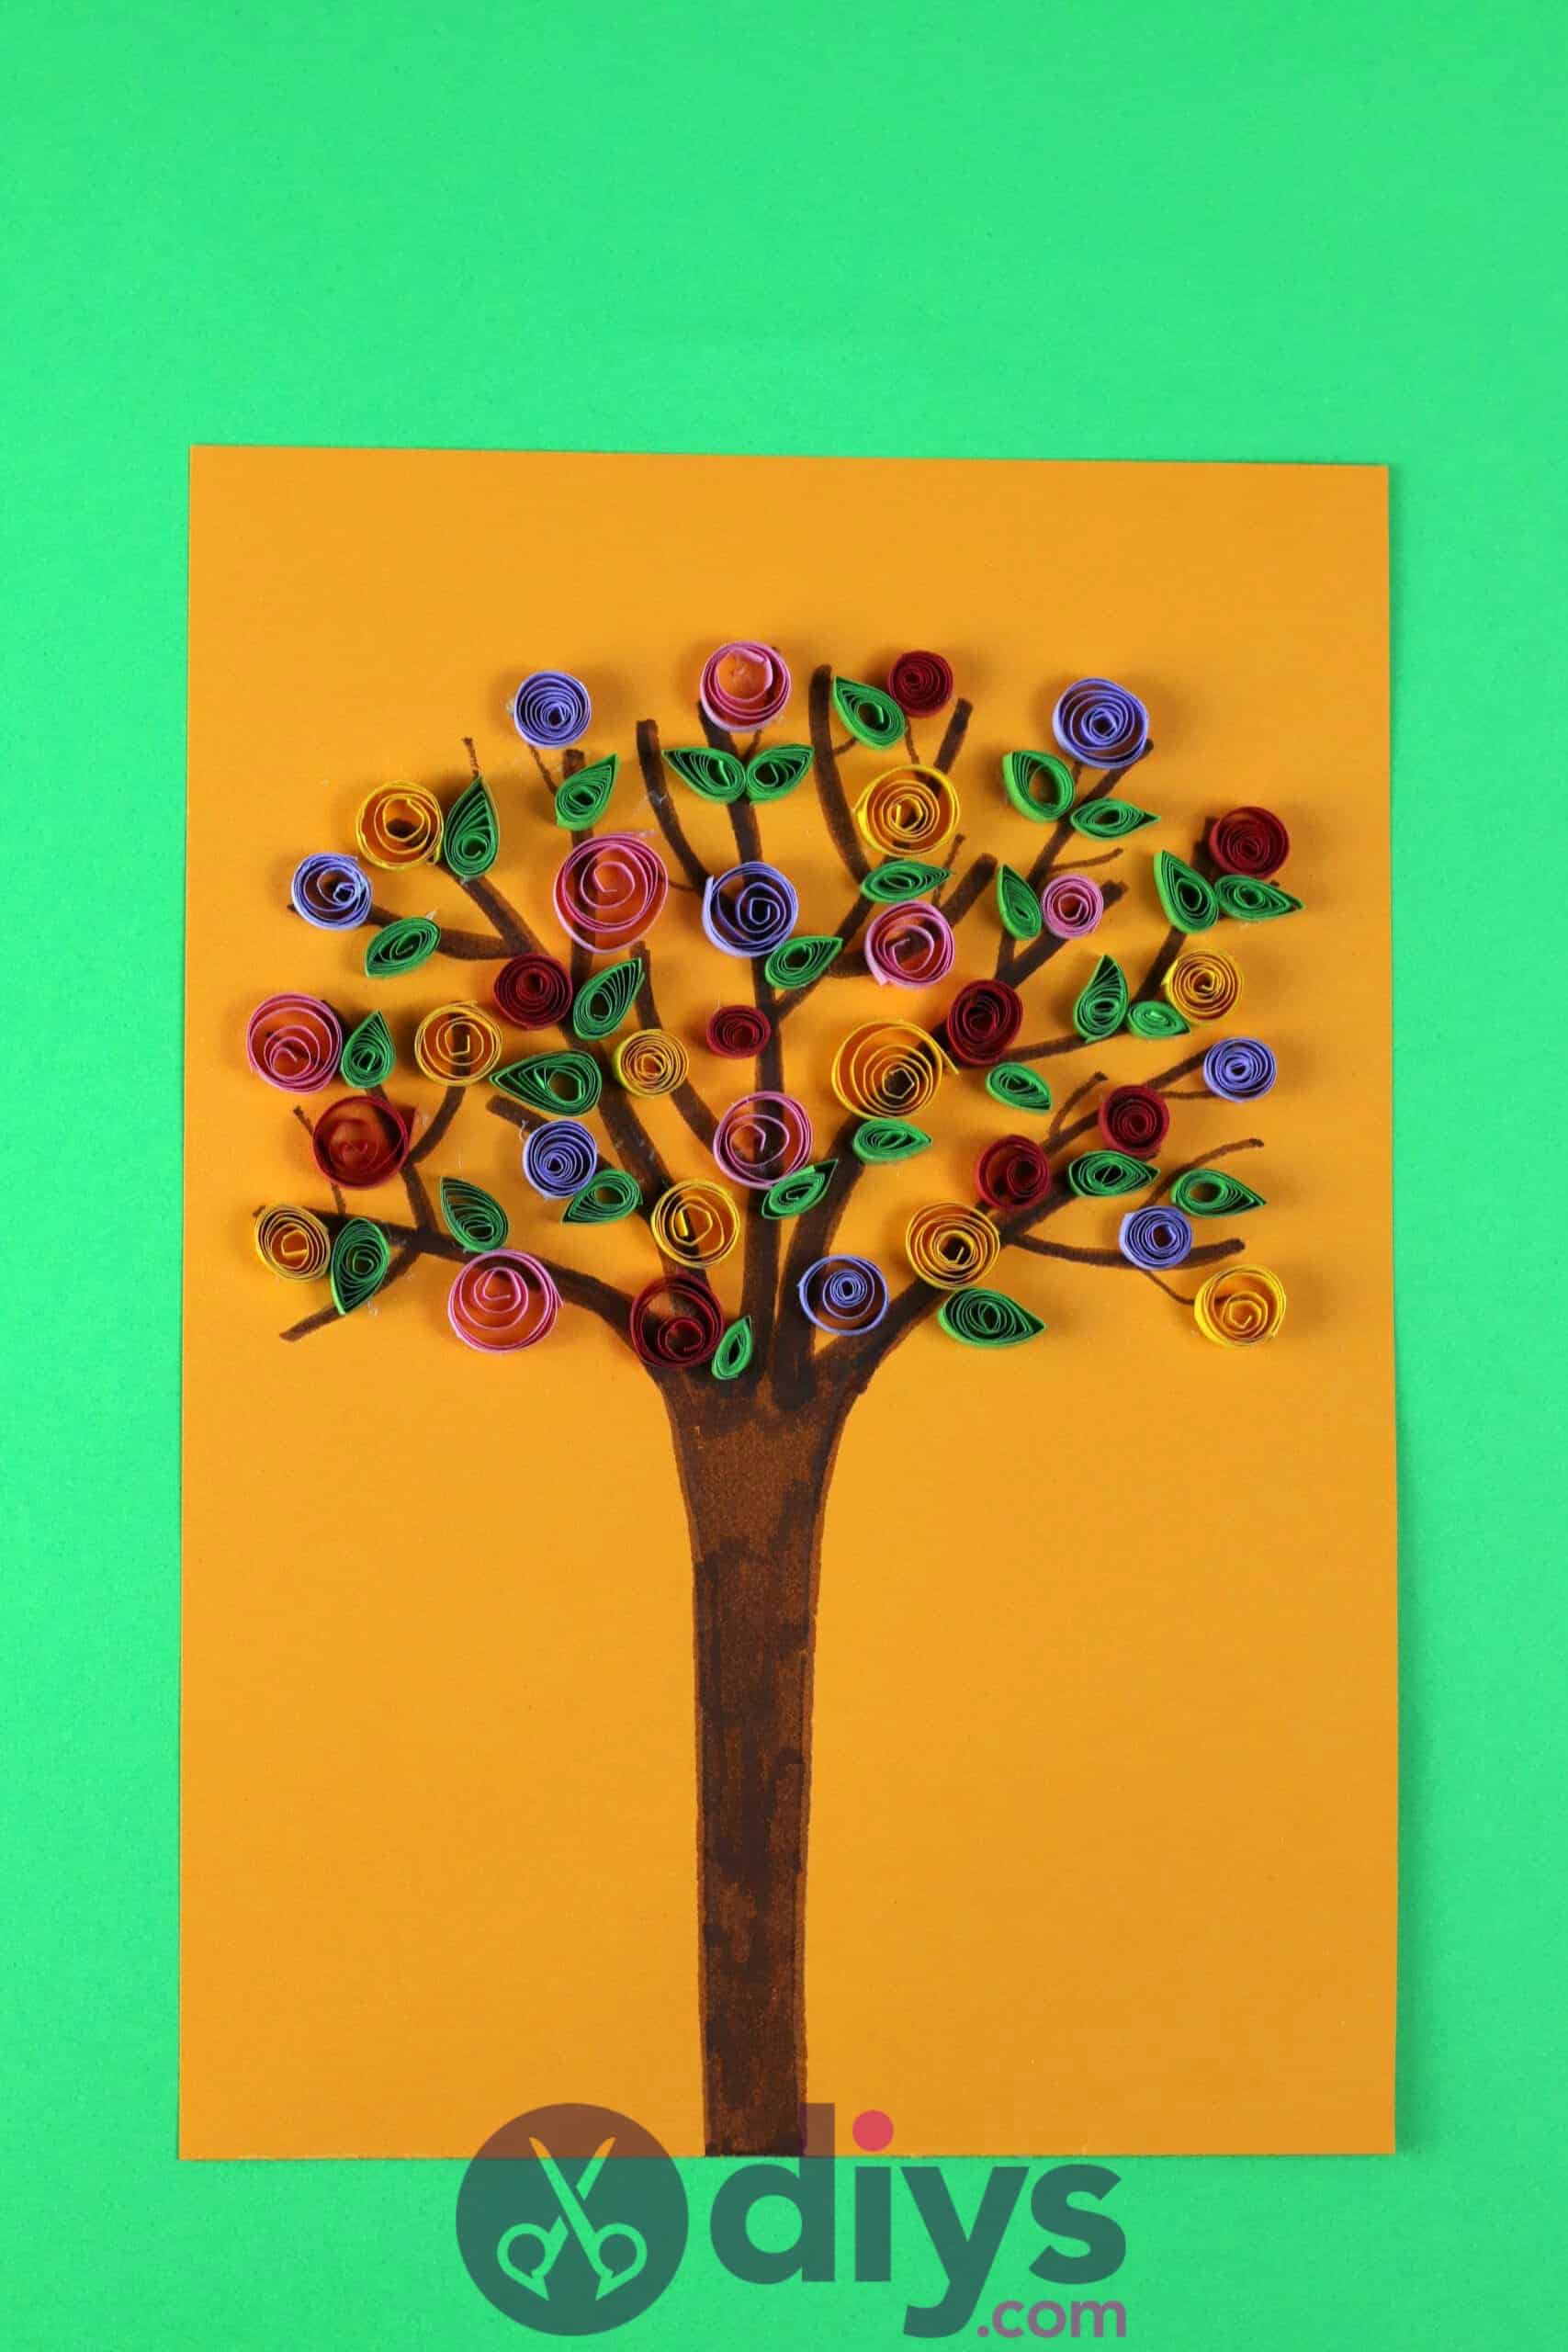
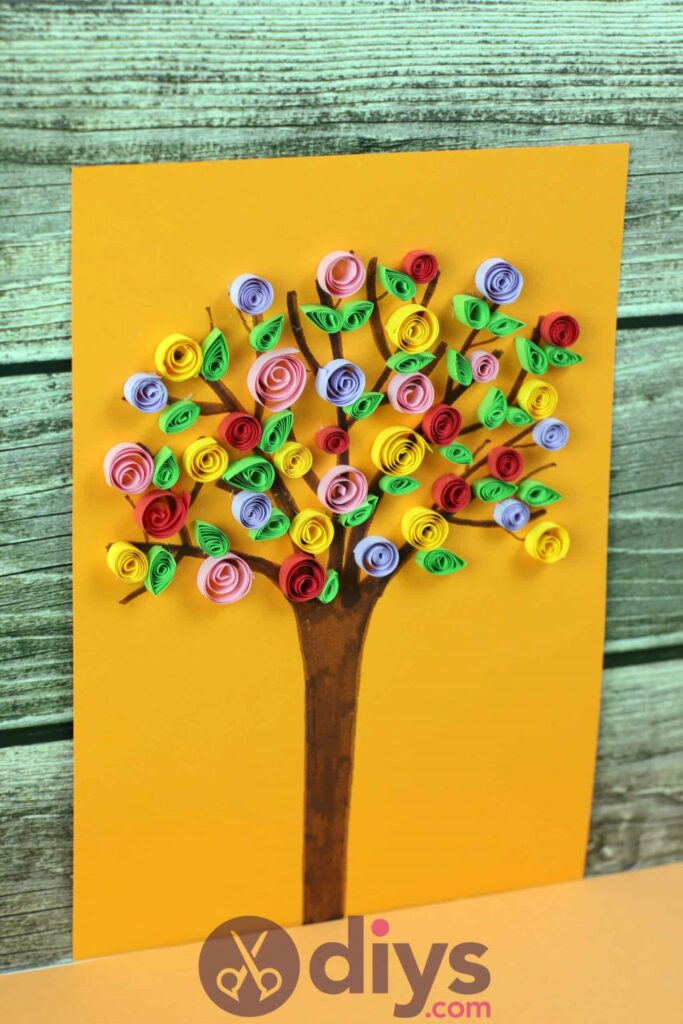
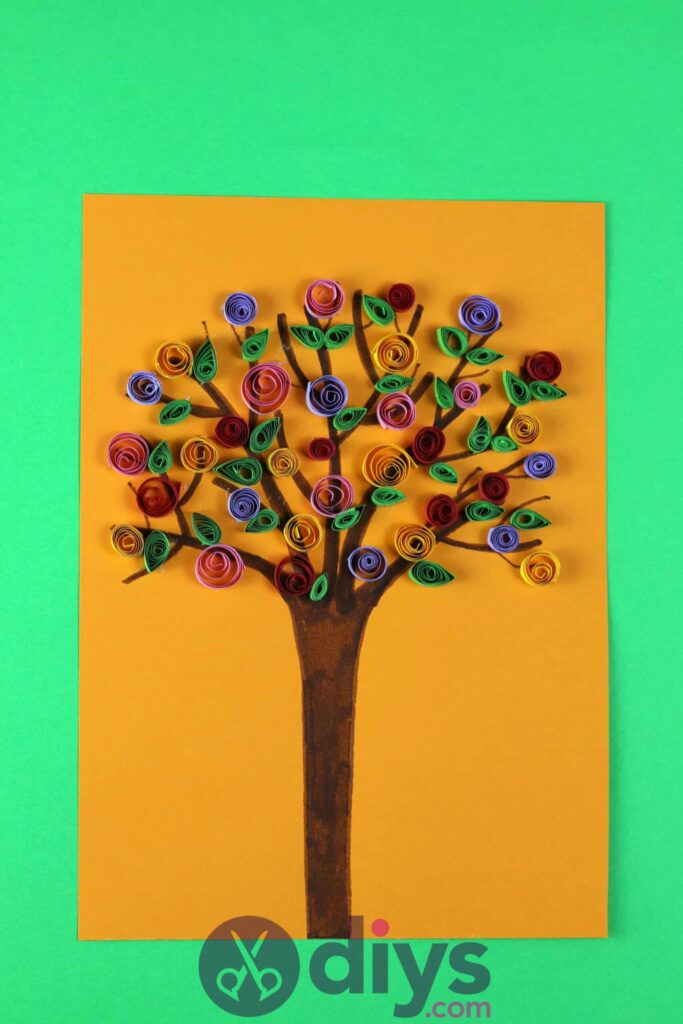
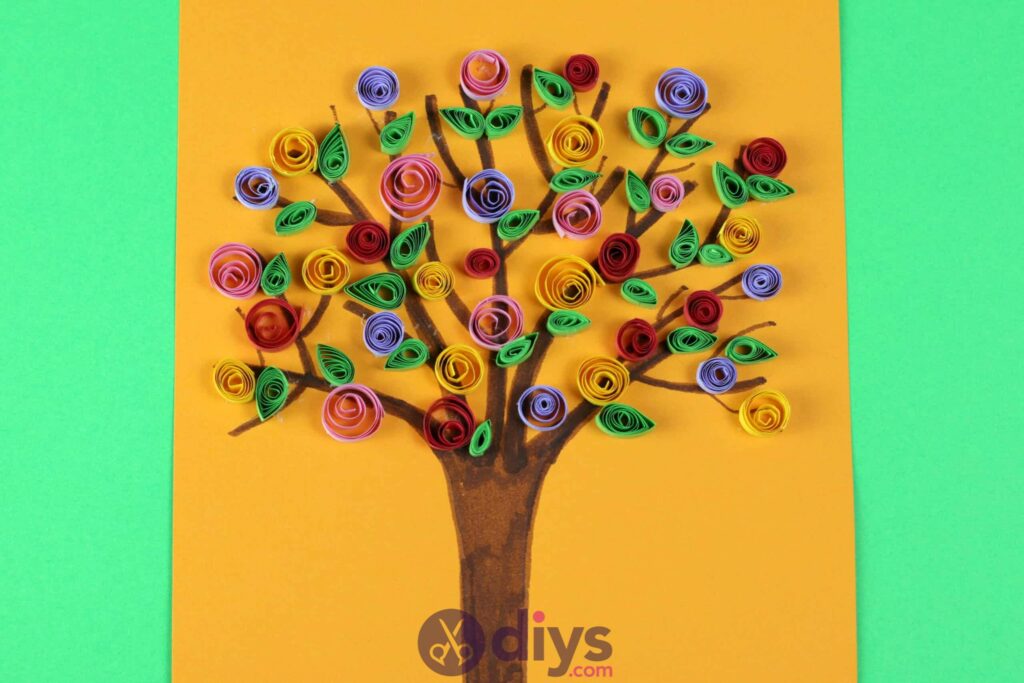
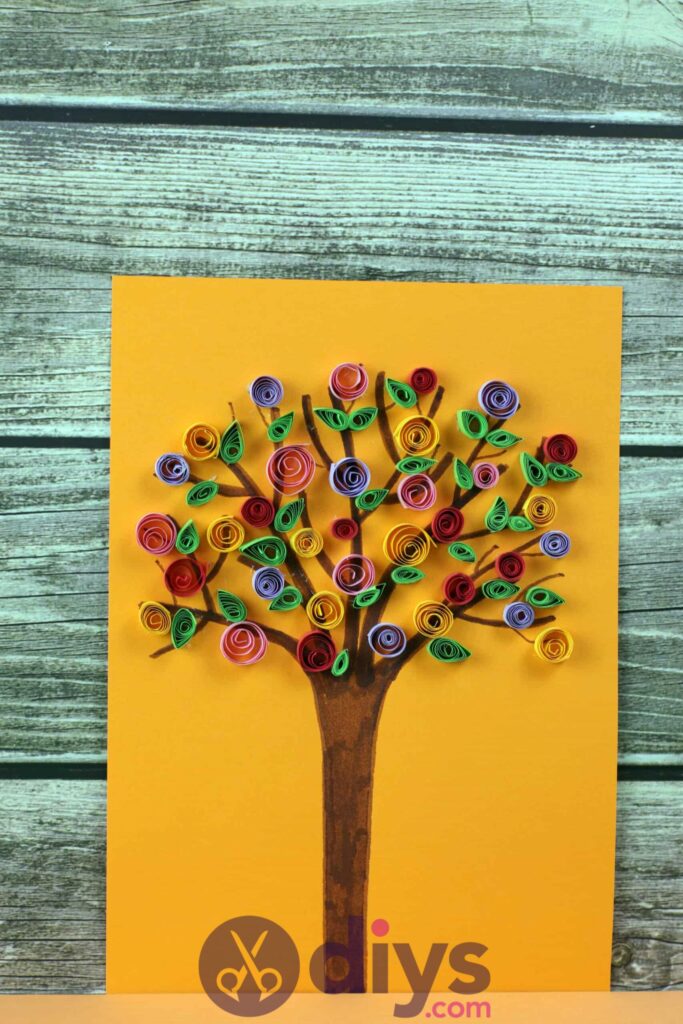
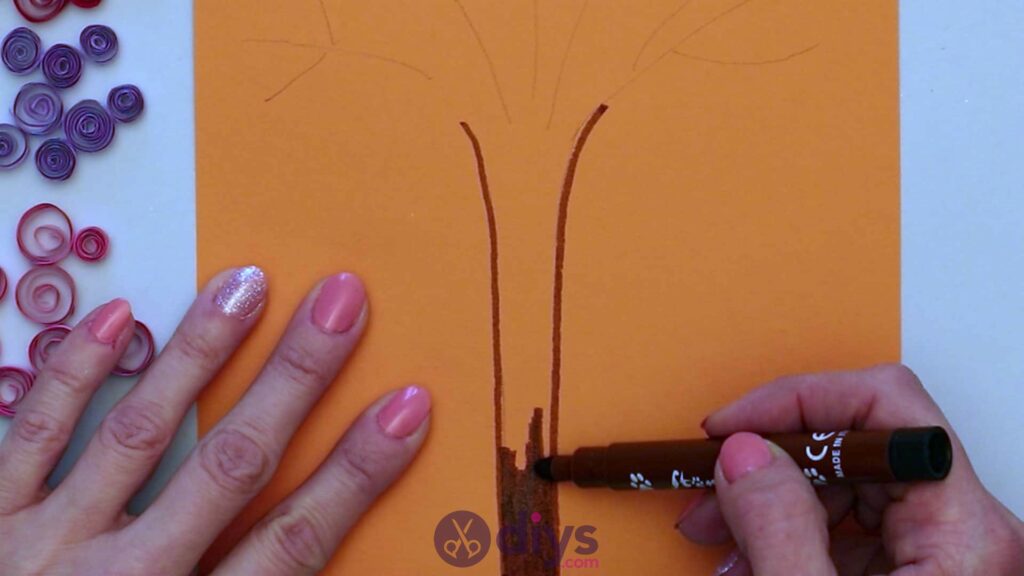
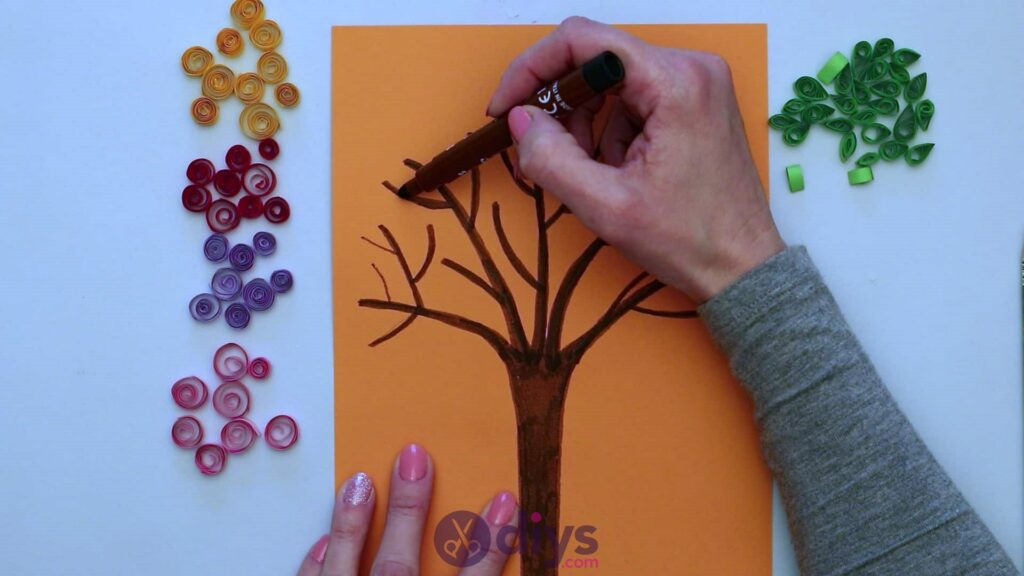
Step 5: draw the tree
Use your pencil to sketch out the shape of your tree on the cardstock you choose as your background. Draw a trunk and branches with twigs. It doesn’t have to be detailed; you’re going to add the details later using your quilled paper shapes. Once you’re happy with your sketch, flesh the drawing out with your brown marker. Fill in the trunk and trace over the lines for your branches. You can honestly be as basic or detailed, artistic or simplistic as you want here; it all depends on the finished look you’re going for and your skill level. I kept things pretty easy because my kids were following along with my work to make their own and I wanted the project to stay beginner friendly.


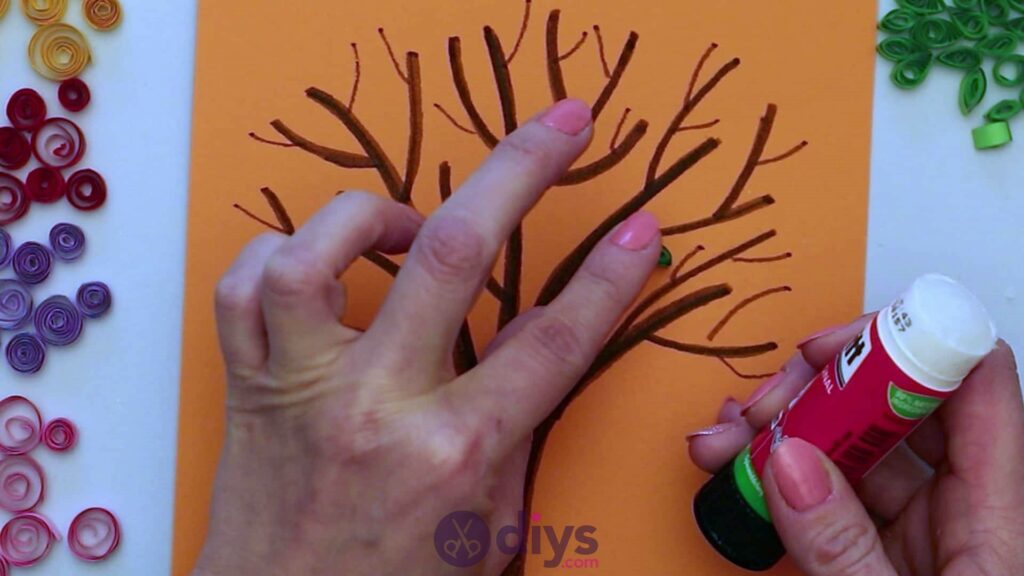
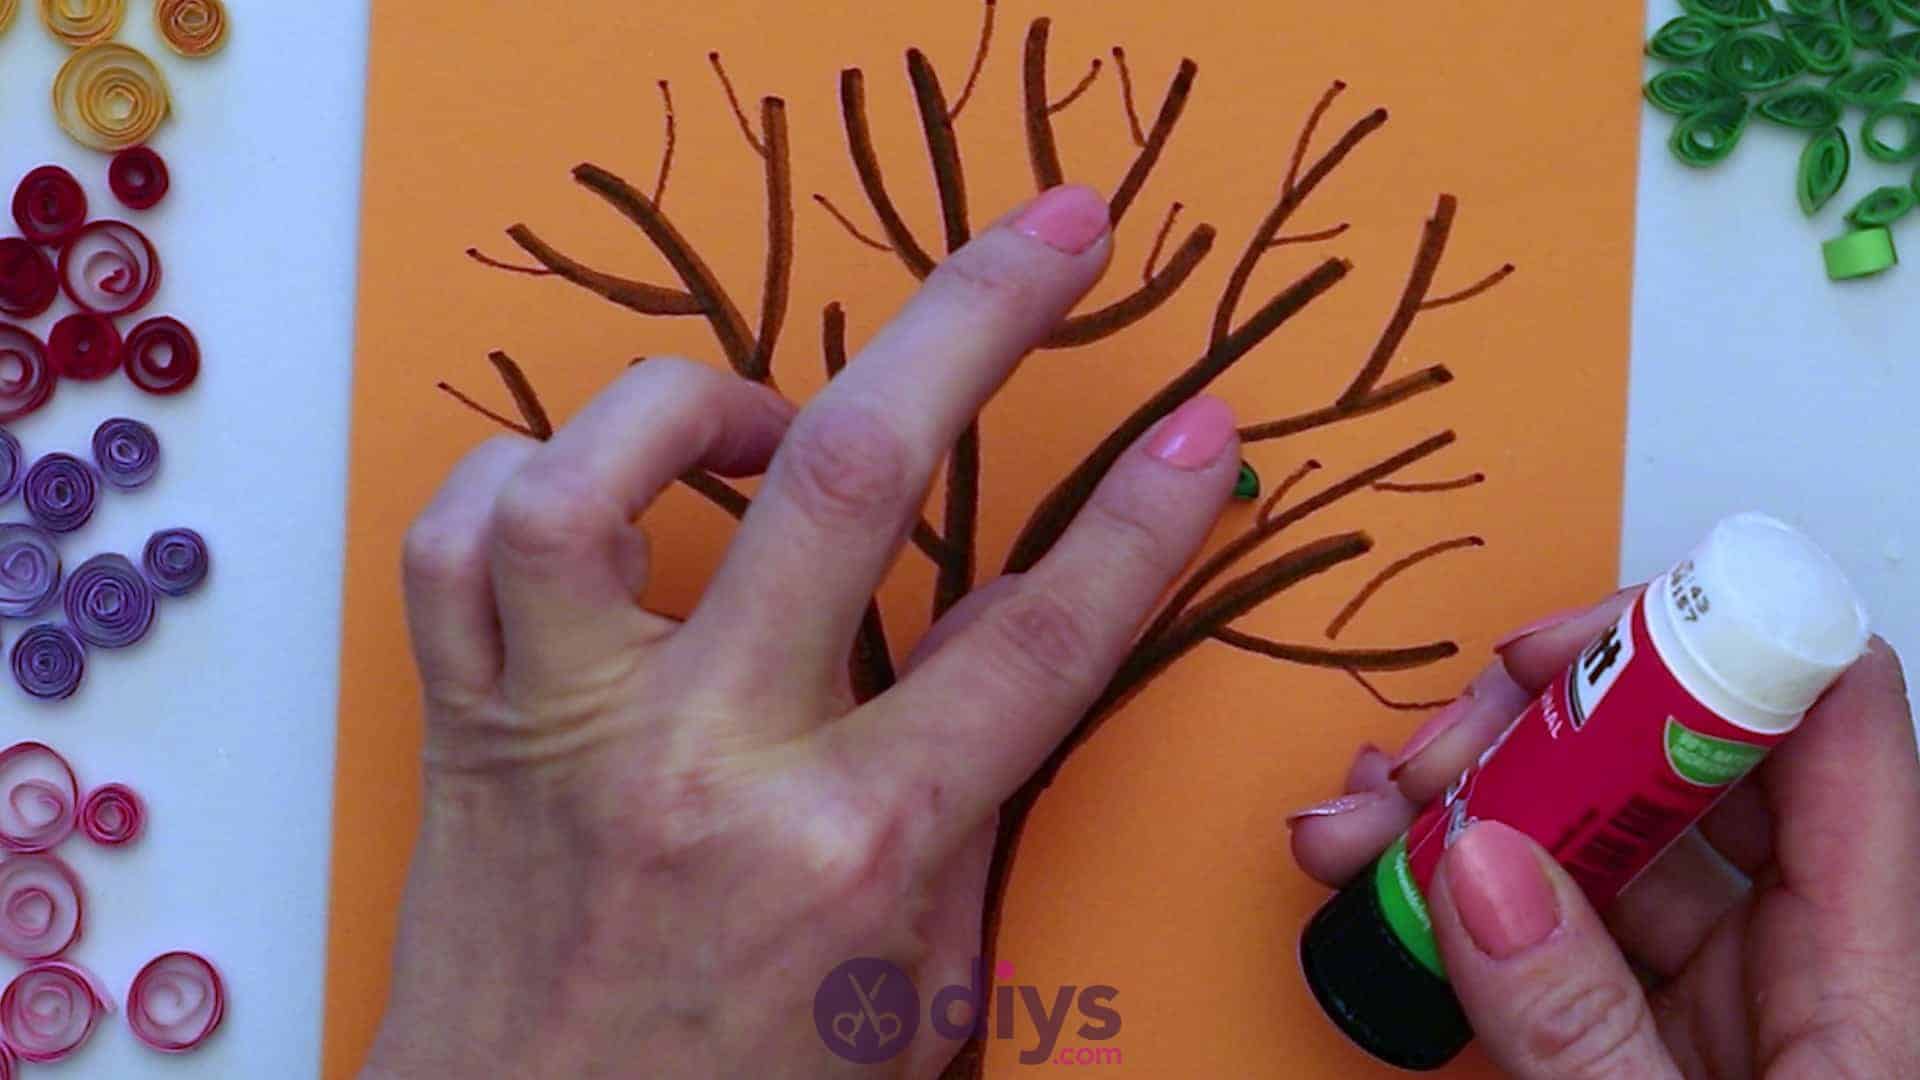
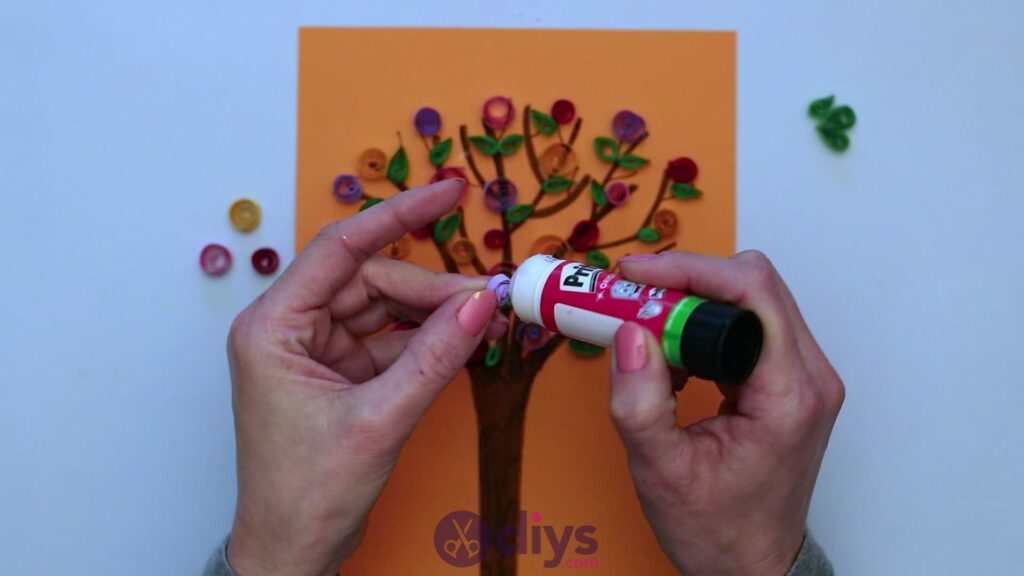
Step 6: start filling the branches
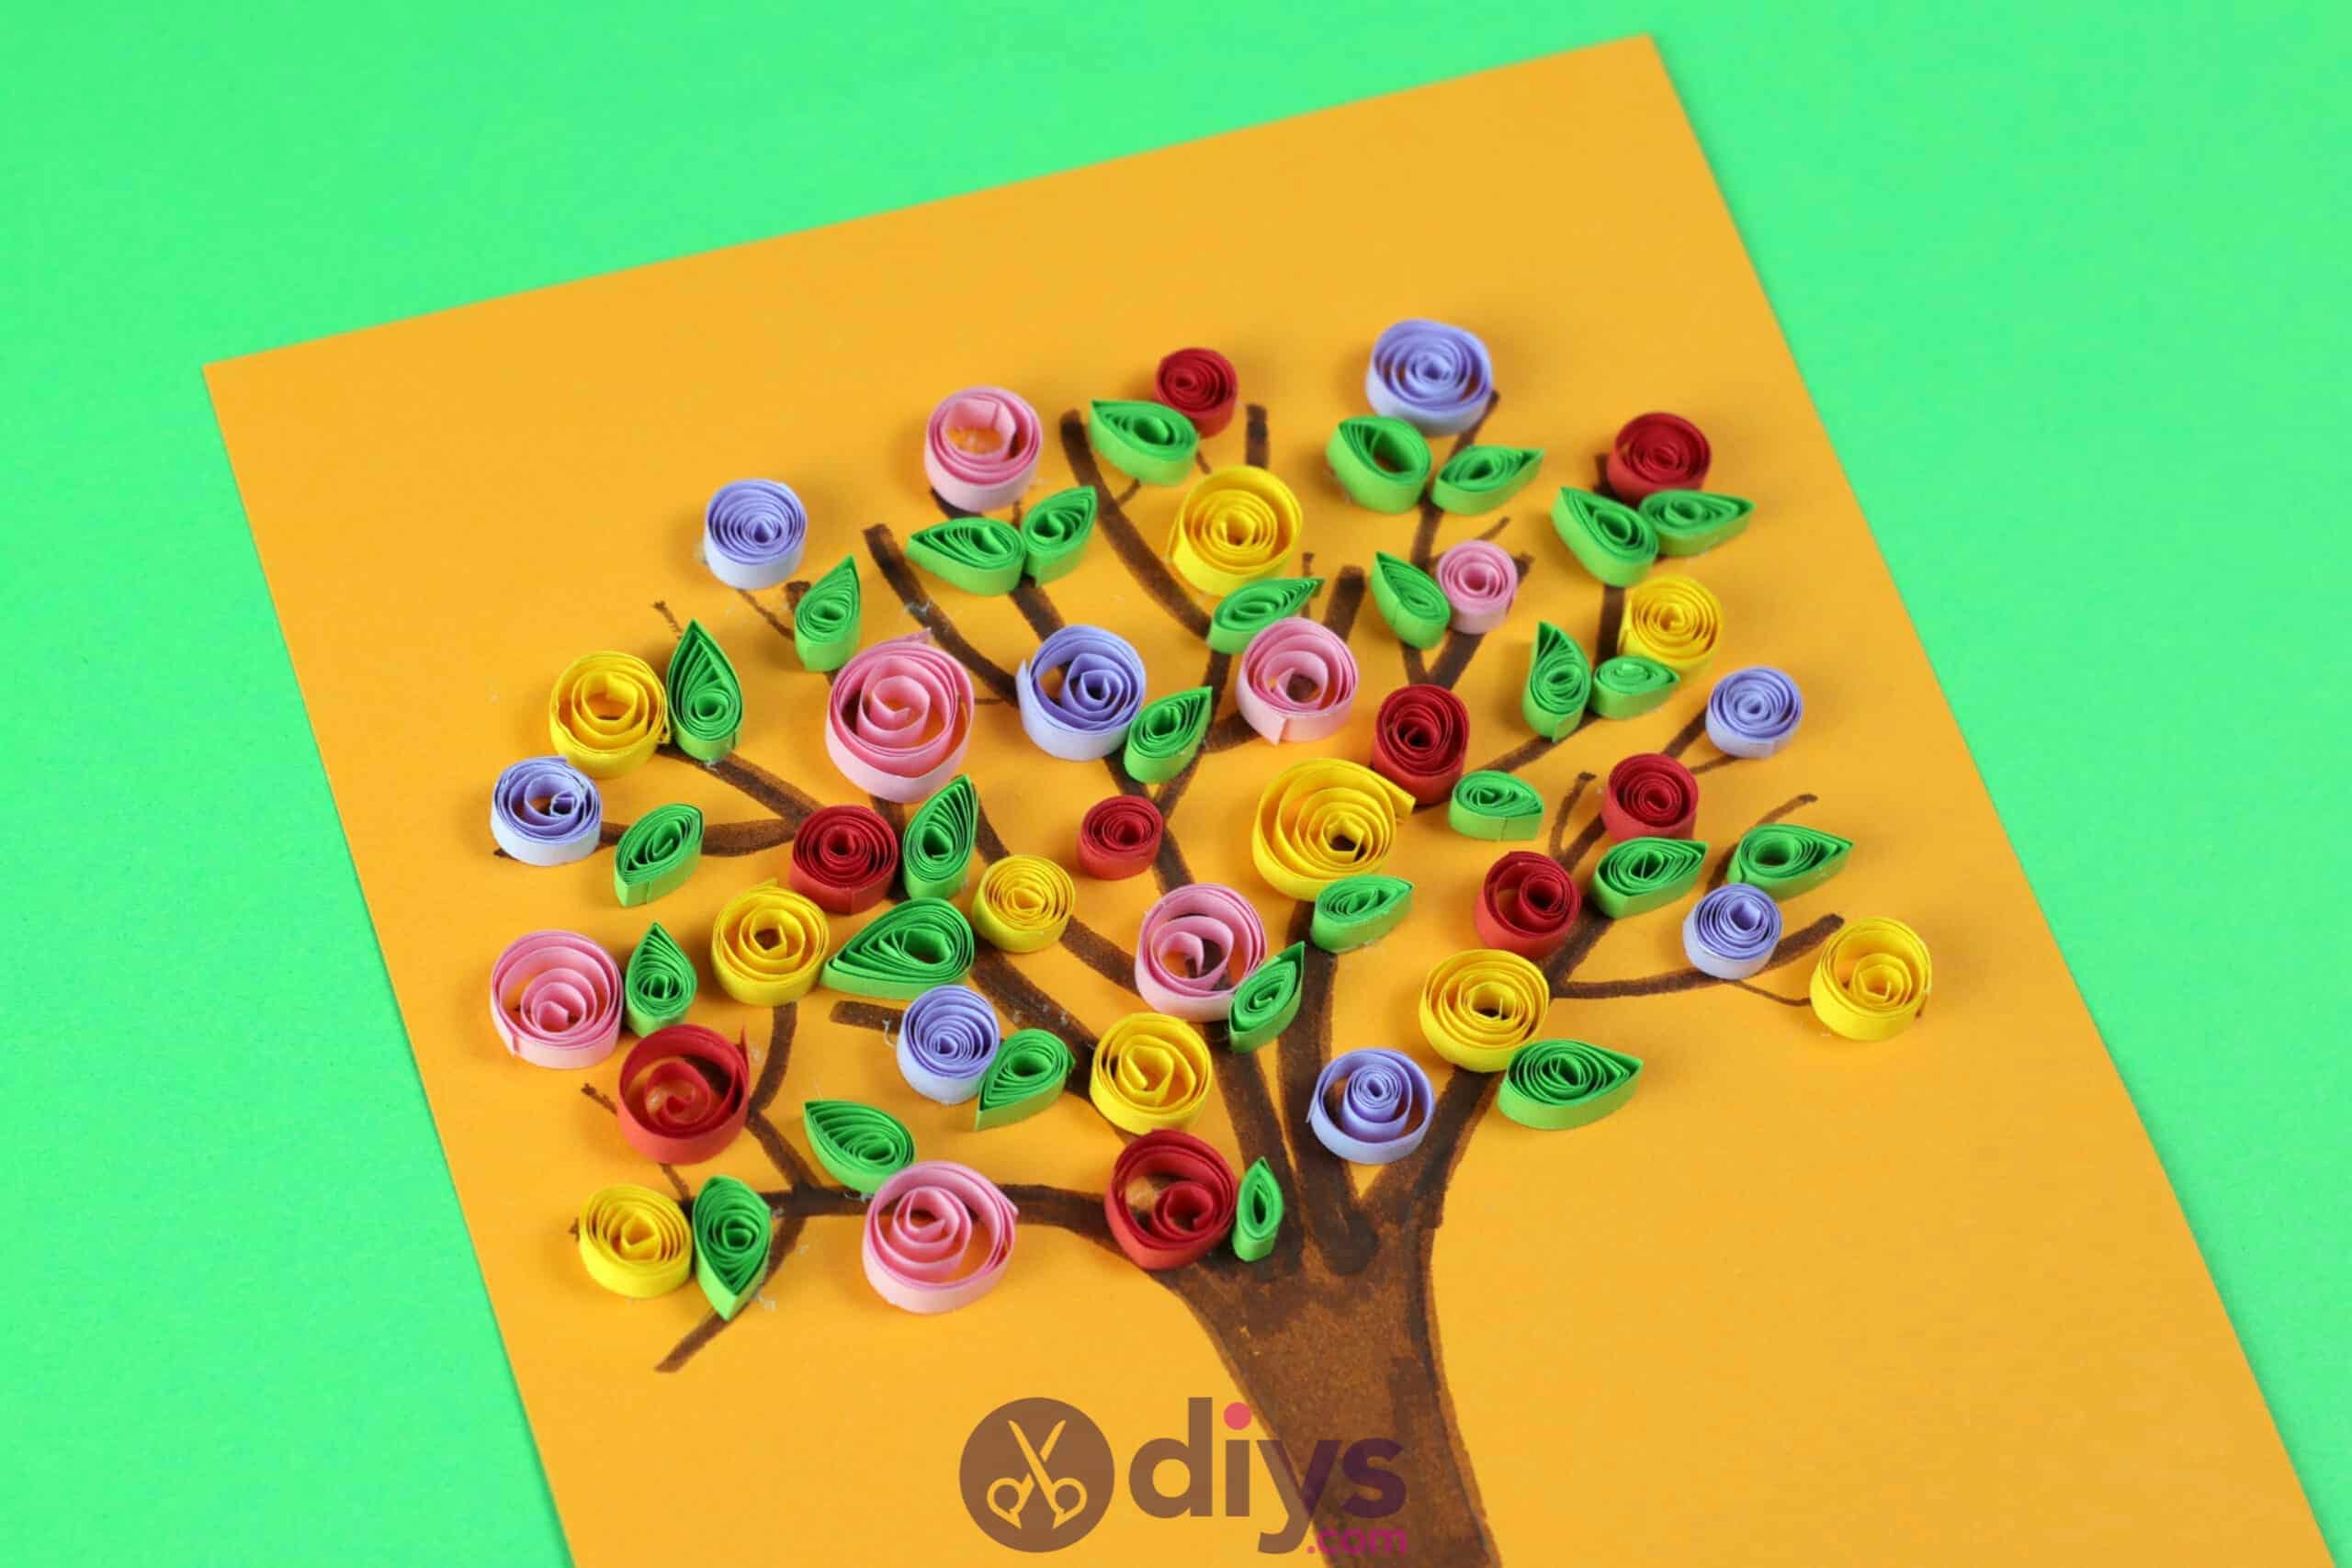
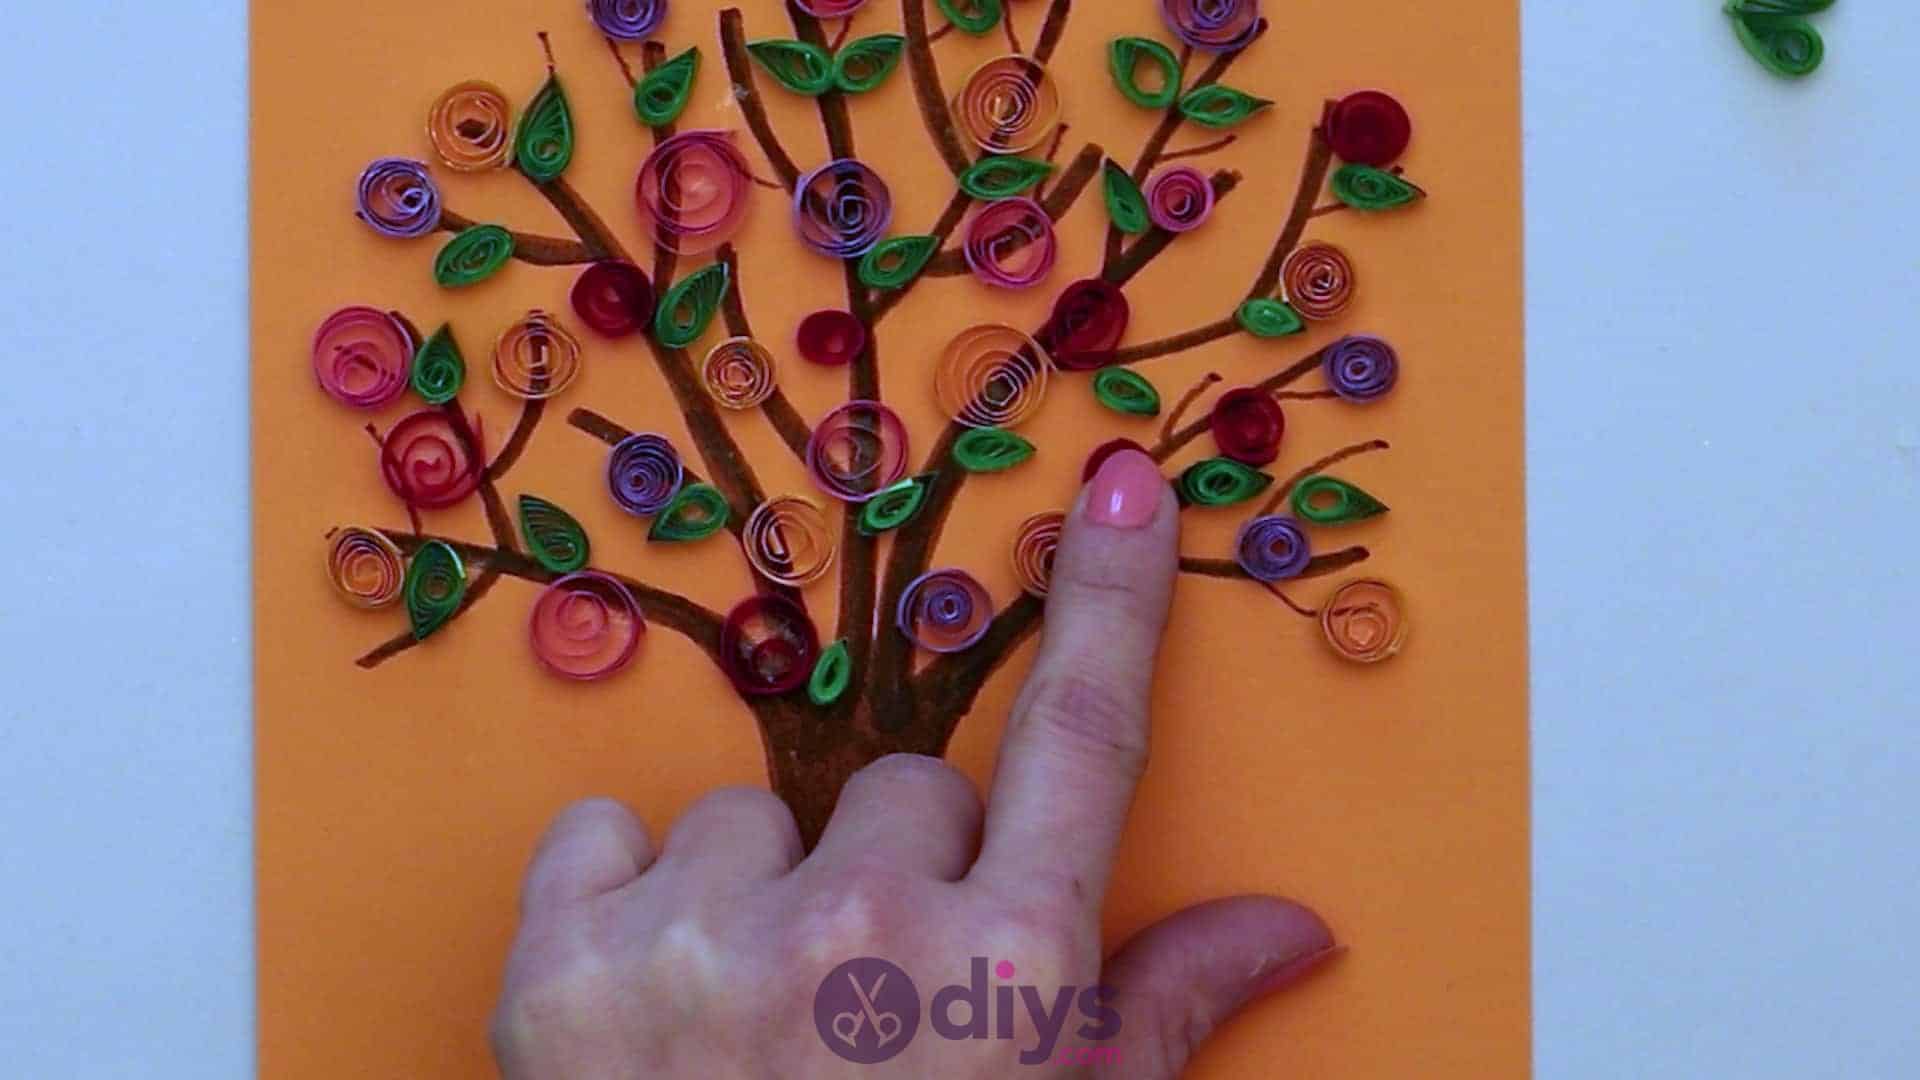
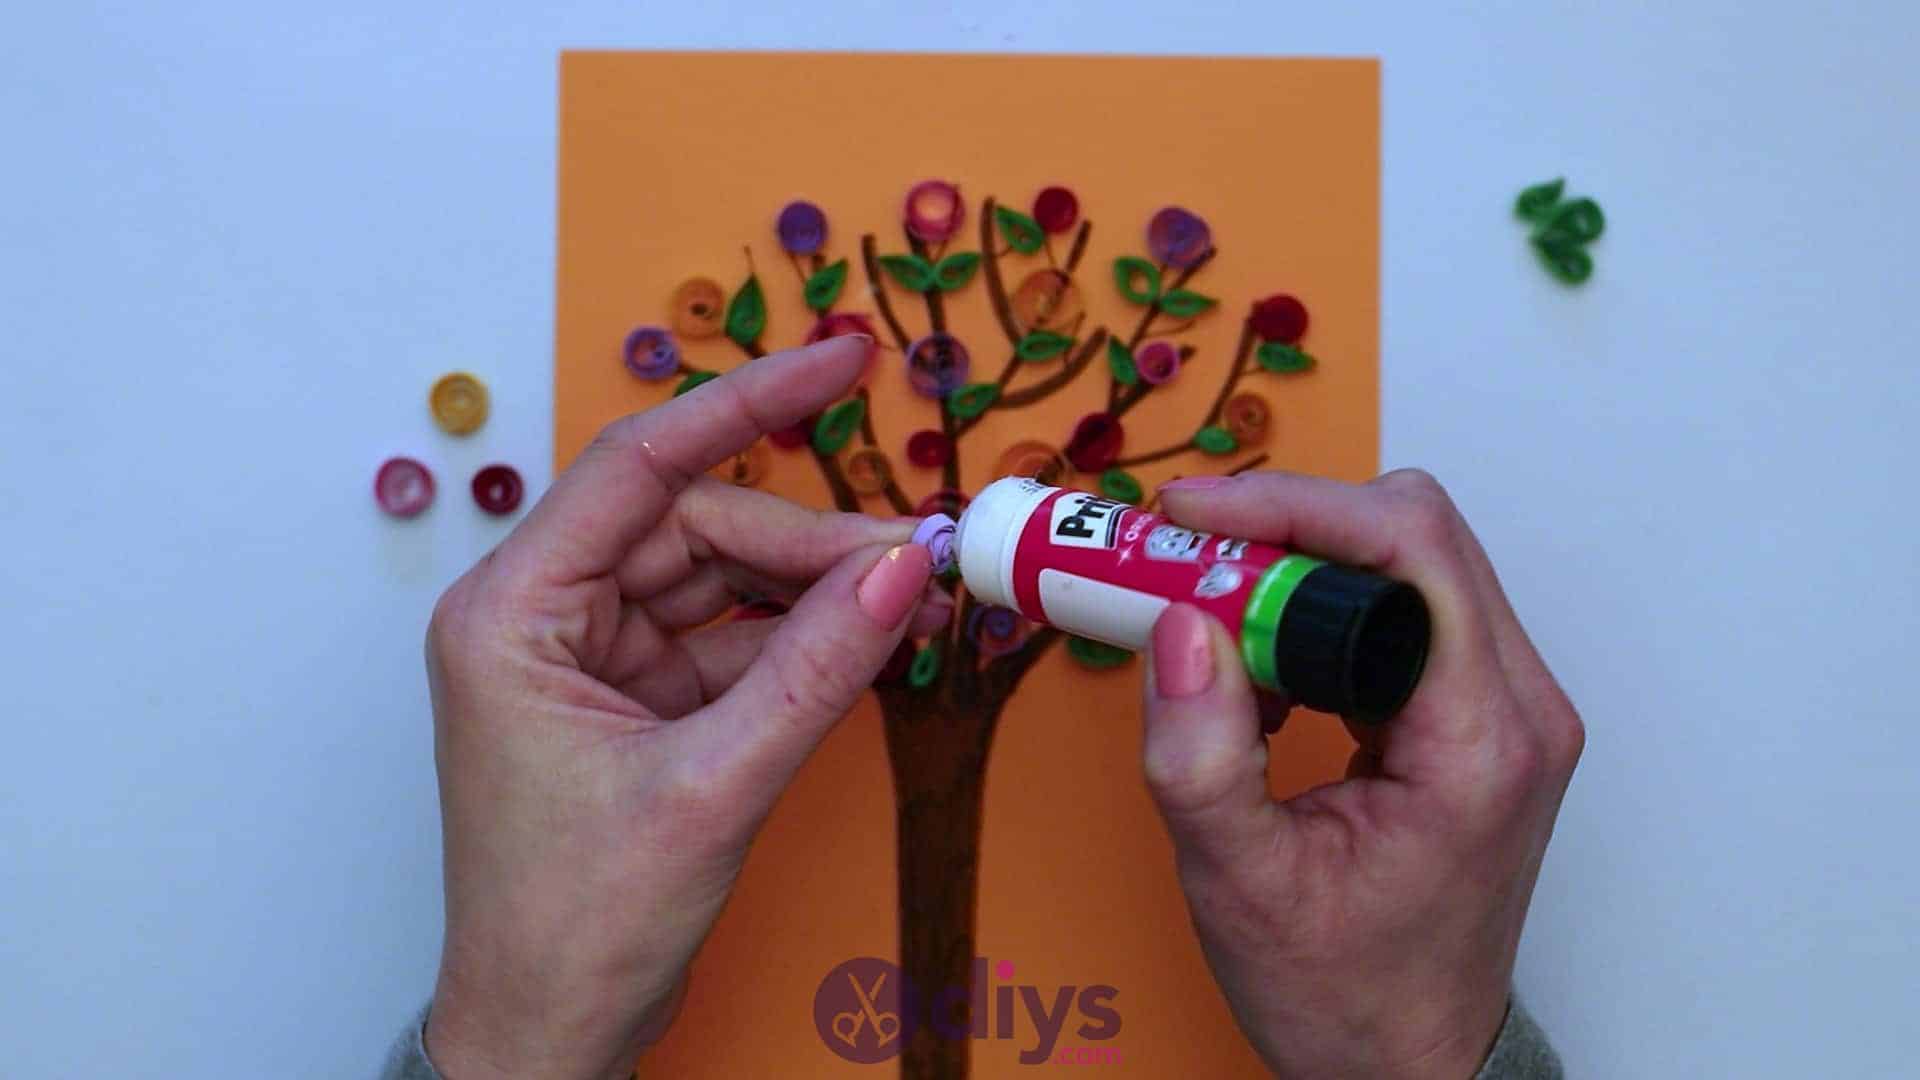
Use your quilled shapes to fill in your treetop! Affix each piece into place where you want it by applying glue to whichever side of the paper piece looks like the back to you and sticking it down on the cardstock where your branches are. Scatter your flowers and leaves to create whatever look you please; I chose to fill mine in quite a bit but not so much that you couldn’t see the branches, and to scatter the colours for an eclectic look rather than grouping them by kind.
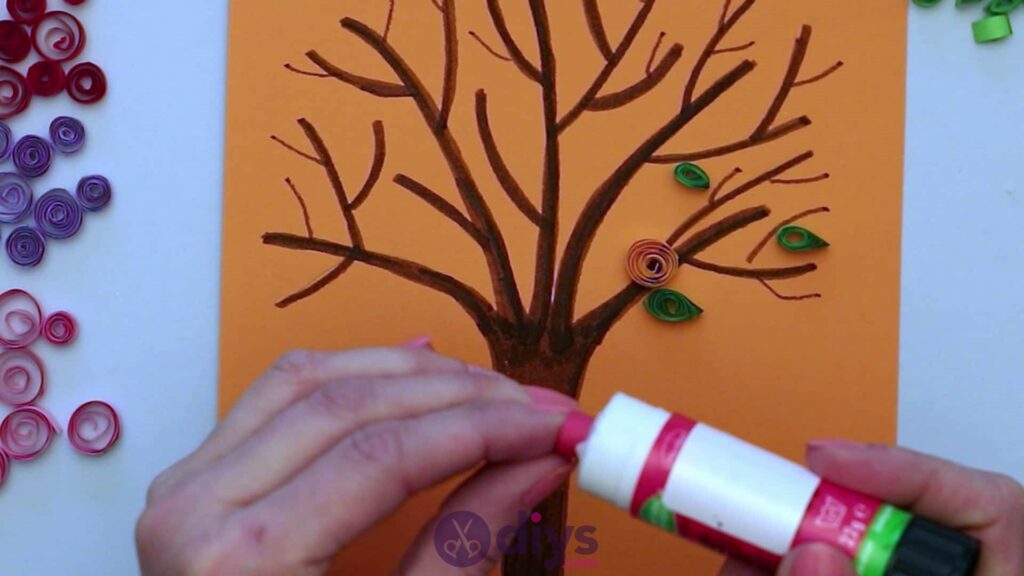
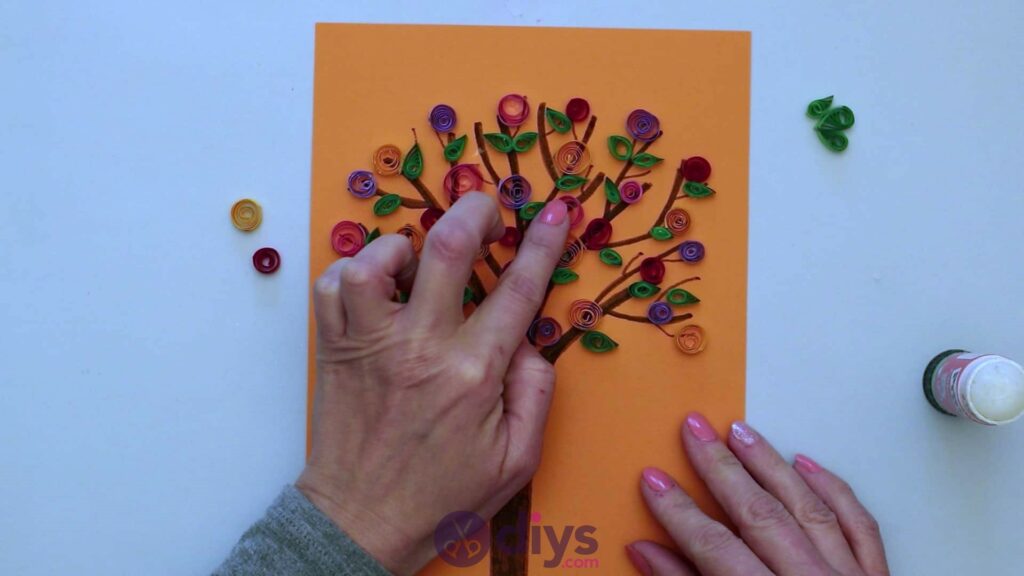

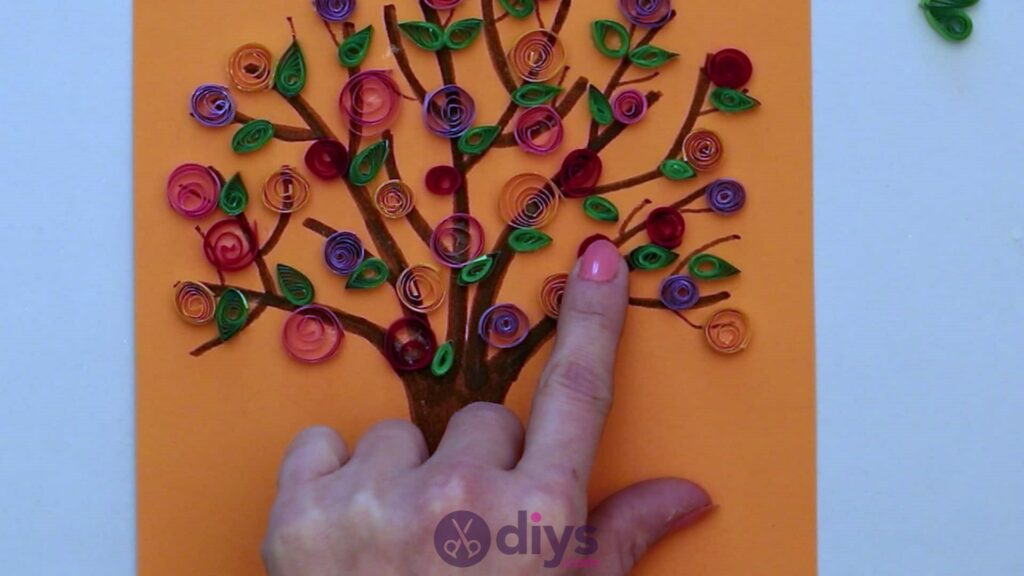
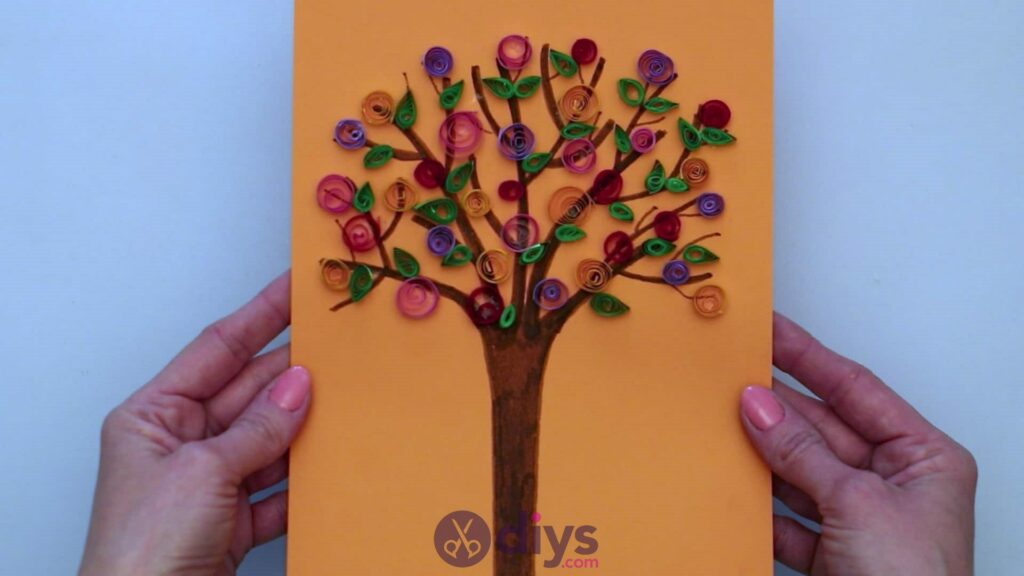
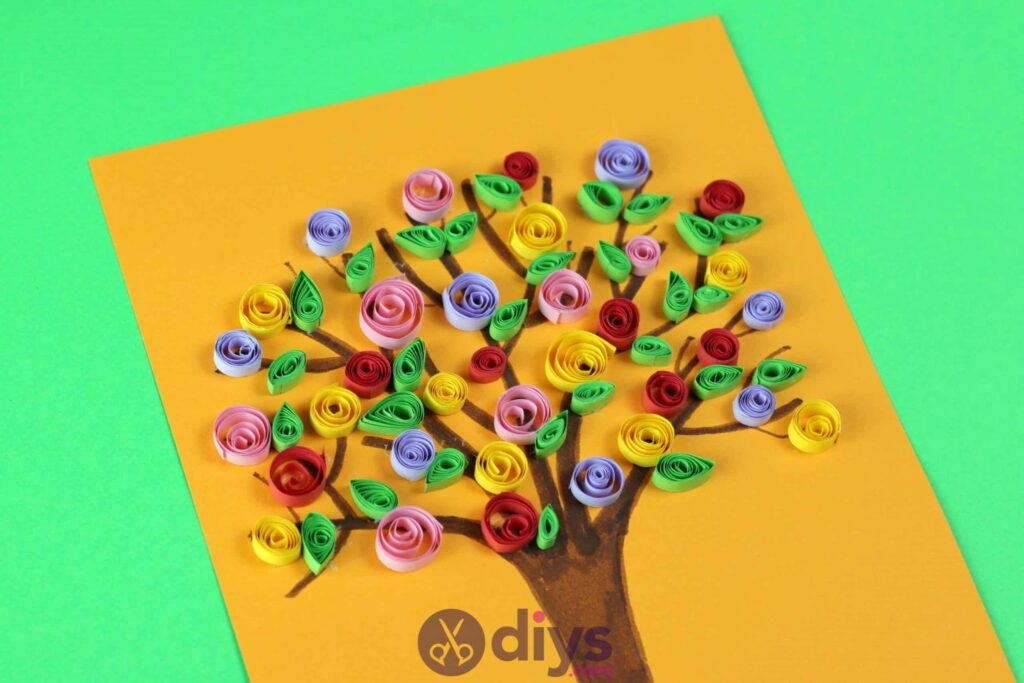

Your tree is finished whenever you’re pleased with how it looks! You could also try making this project with all one colour of flower, to make something like a light pink cherry blossom tree. Just in case you’d like to try this project out for yourself, here’s a fantastic tutorial video to help you!
I am 11 years old andI tried it and it turn out really good,but I was also having some problem with rolling but when I saw the video carefully then I understand. thank you dear I really appreciate your work please make some more cards tutorial.