DIY Tin Bee Hotel – Make a Bug Hotel for Your Garden
Updated on June 23, 2021


Insect hotels are super cute things you can do in your free time to help out the bugs in your garden. Whether they’ll set up their homes there, will use it to hibernate, or will just stop for a little while, it doesn’t matter in the end – it’s a cute project you can make.
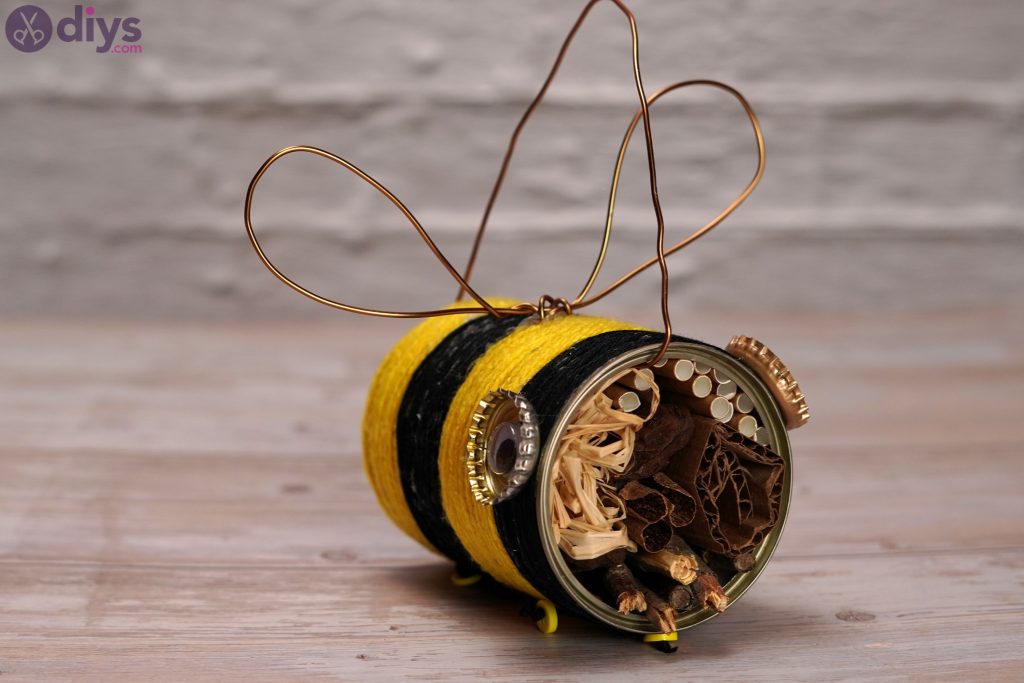
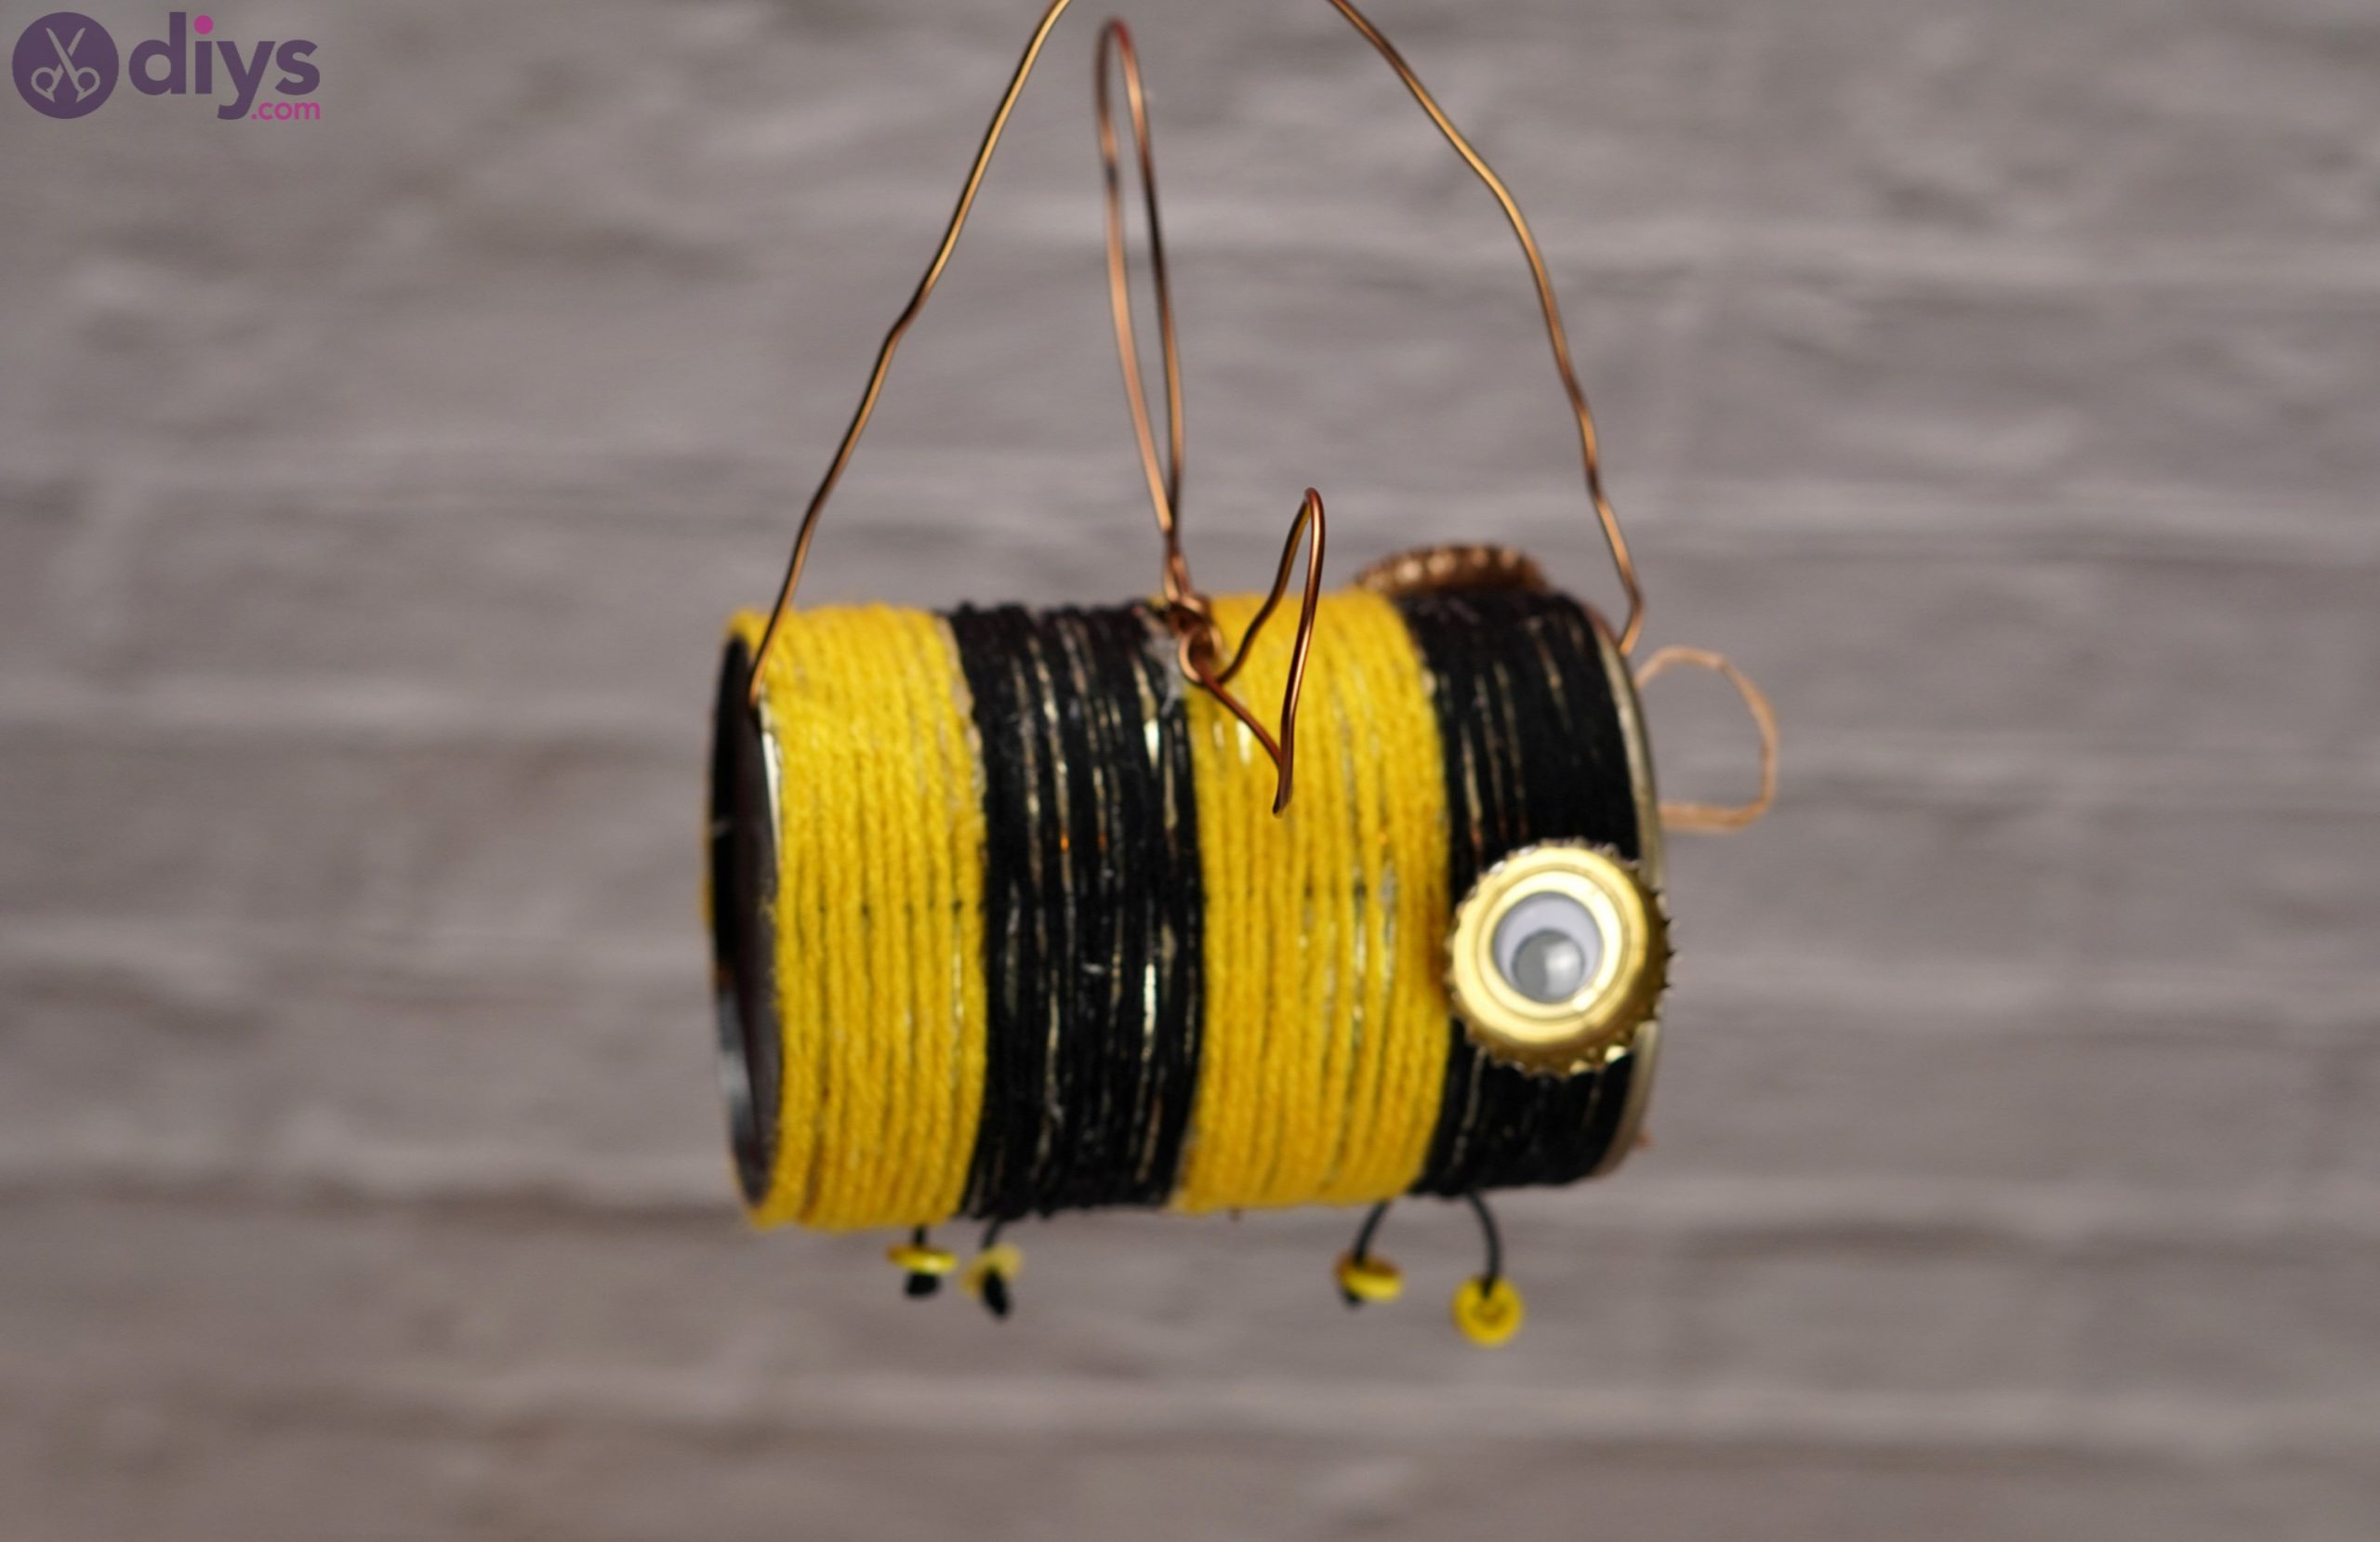
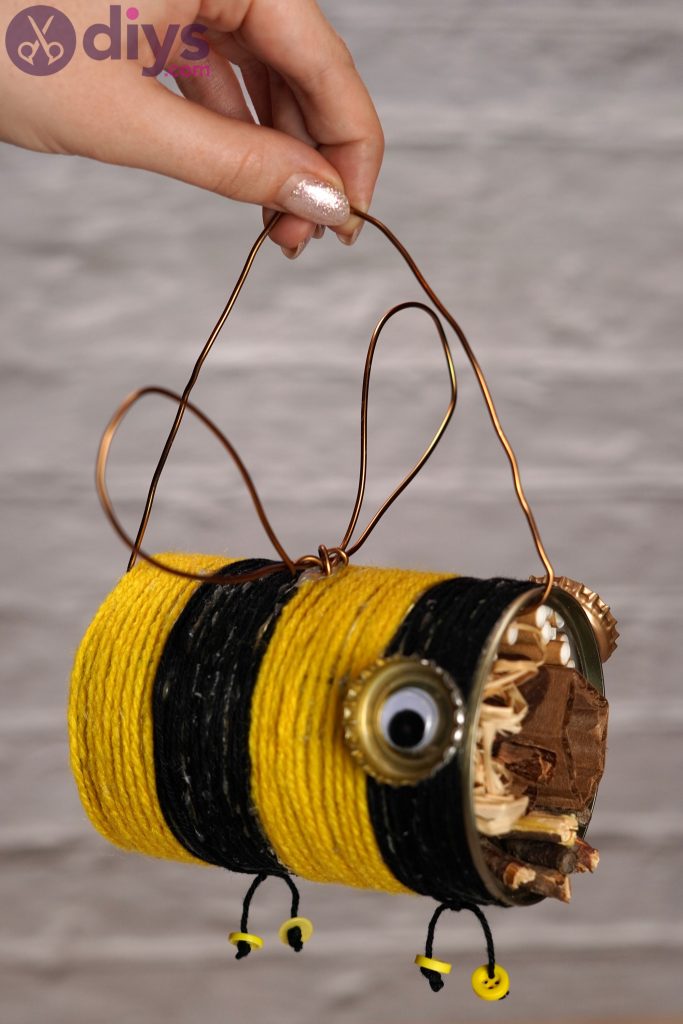
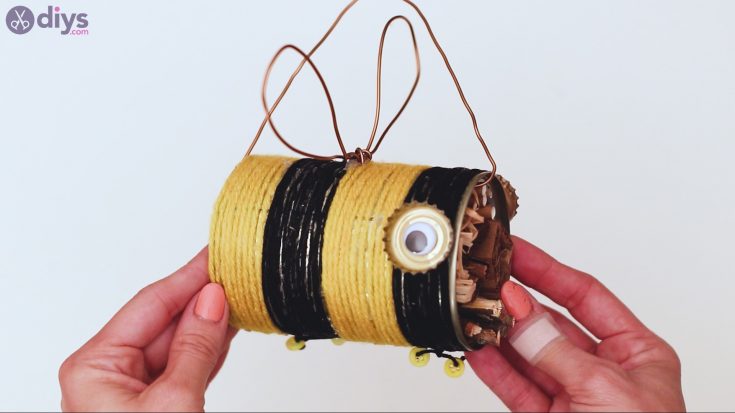
Tin Bee Hotel is a cute project we’re setting up, featuring the regular things you’re used to seeing in bug hotels, but with a pretty look that resembles a colorful bee. Not only will this make it easier to spot for bugs, but it’s also cuter to have in the garden.
Materials for This DIY Tin Bee Hotel
- tin
- yellow and black yarn
- branches
- paper straw
- tree bark
- raffia
- metal caps
- buttons
- googly eyes
- cardboard
- wire
- black acrylic paint
- paintbrush
- scissors
- hammer
- nail
- glue gun
How to Make a Tin Bee Hotel
If you want to start making your tin bee hotel, it’s always best to make sure you have all the right tools at your disposal. This will allow you to concentrate on making your bug hotel rather than running around to get this or that you may have forgotten. So, are you ready? Let’s get started!
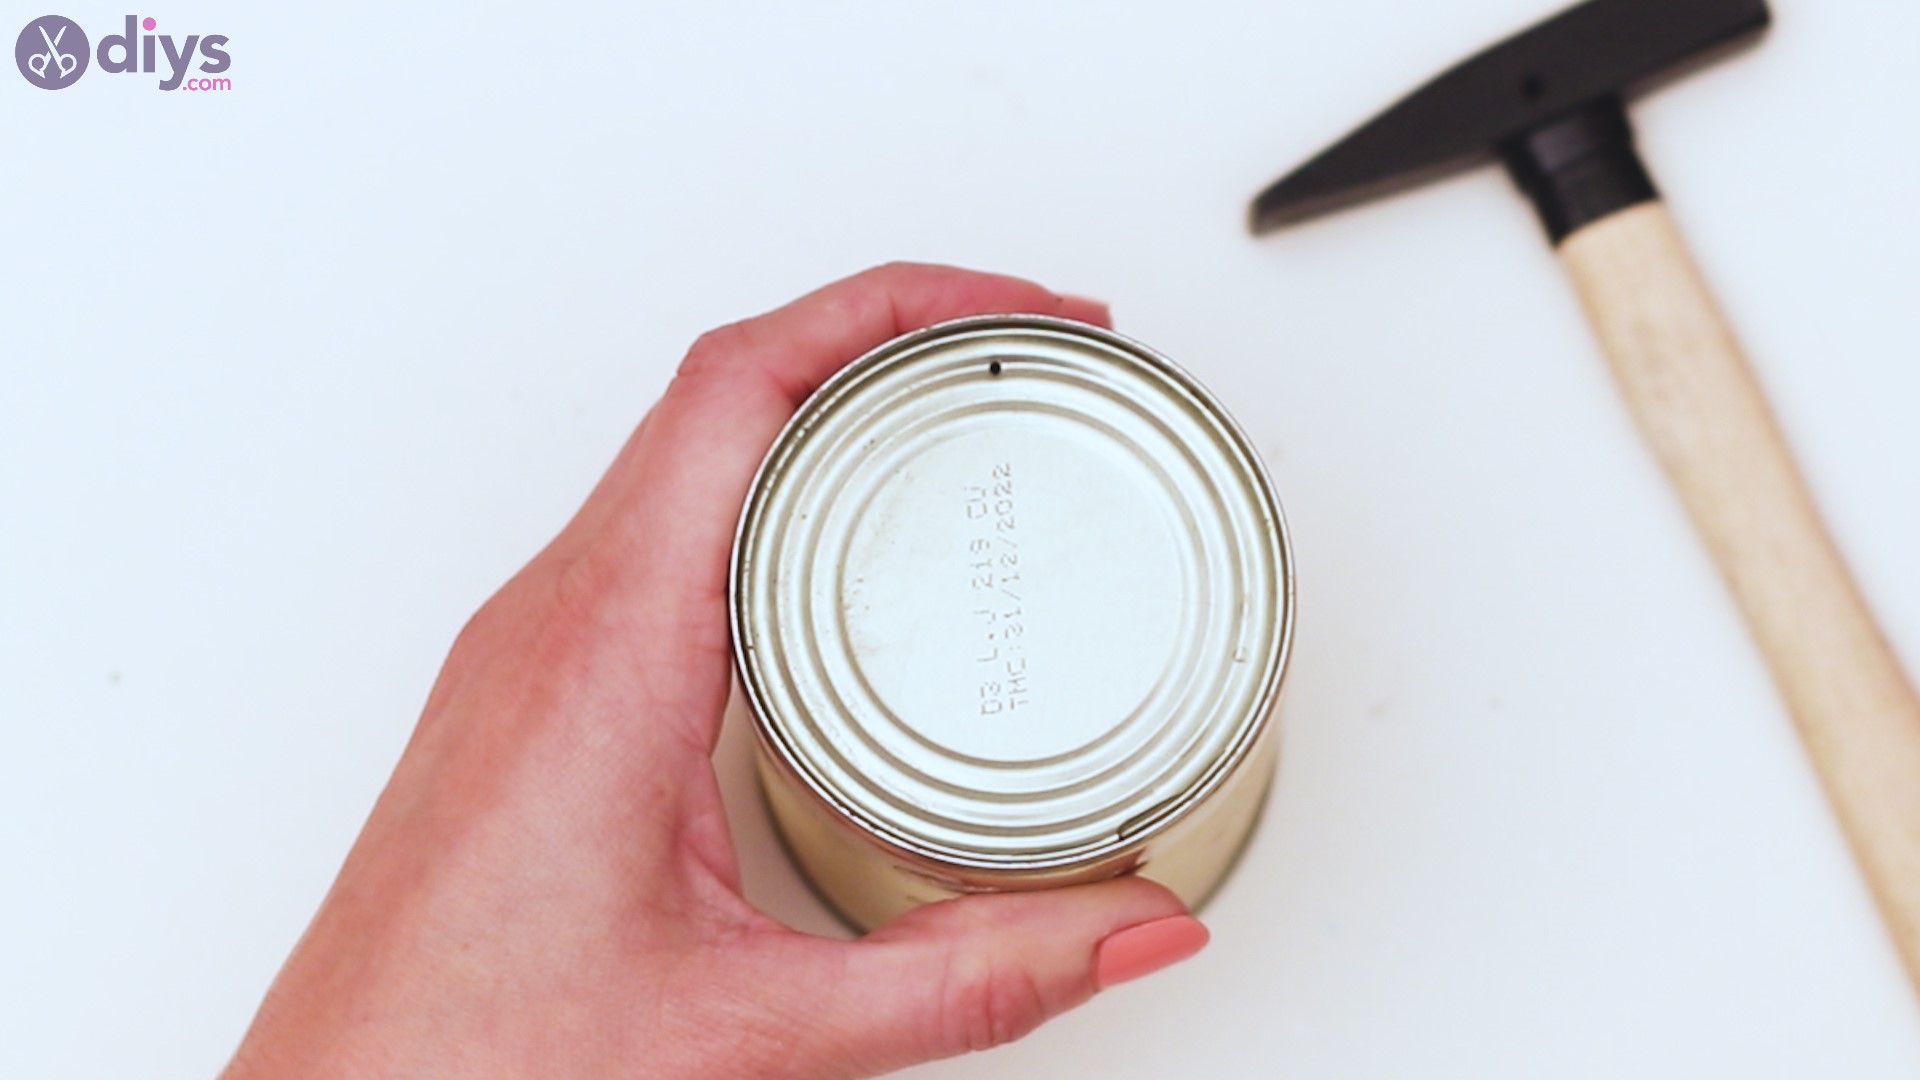
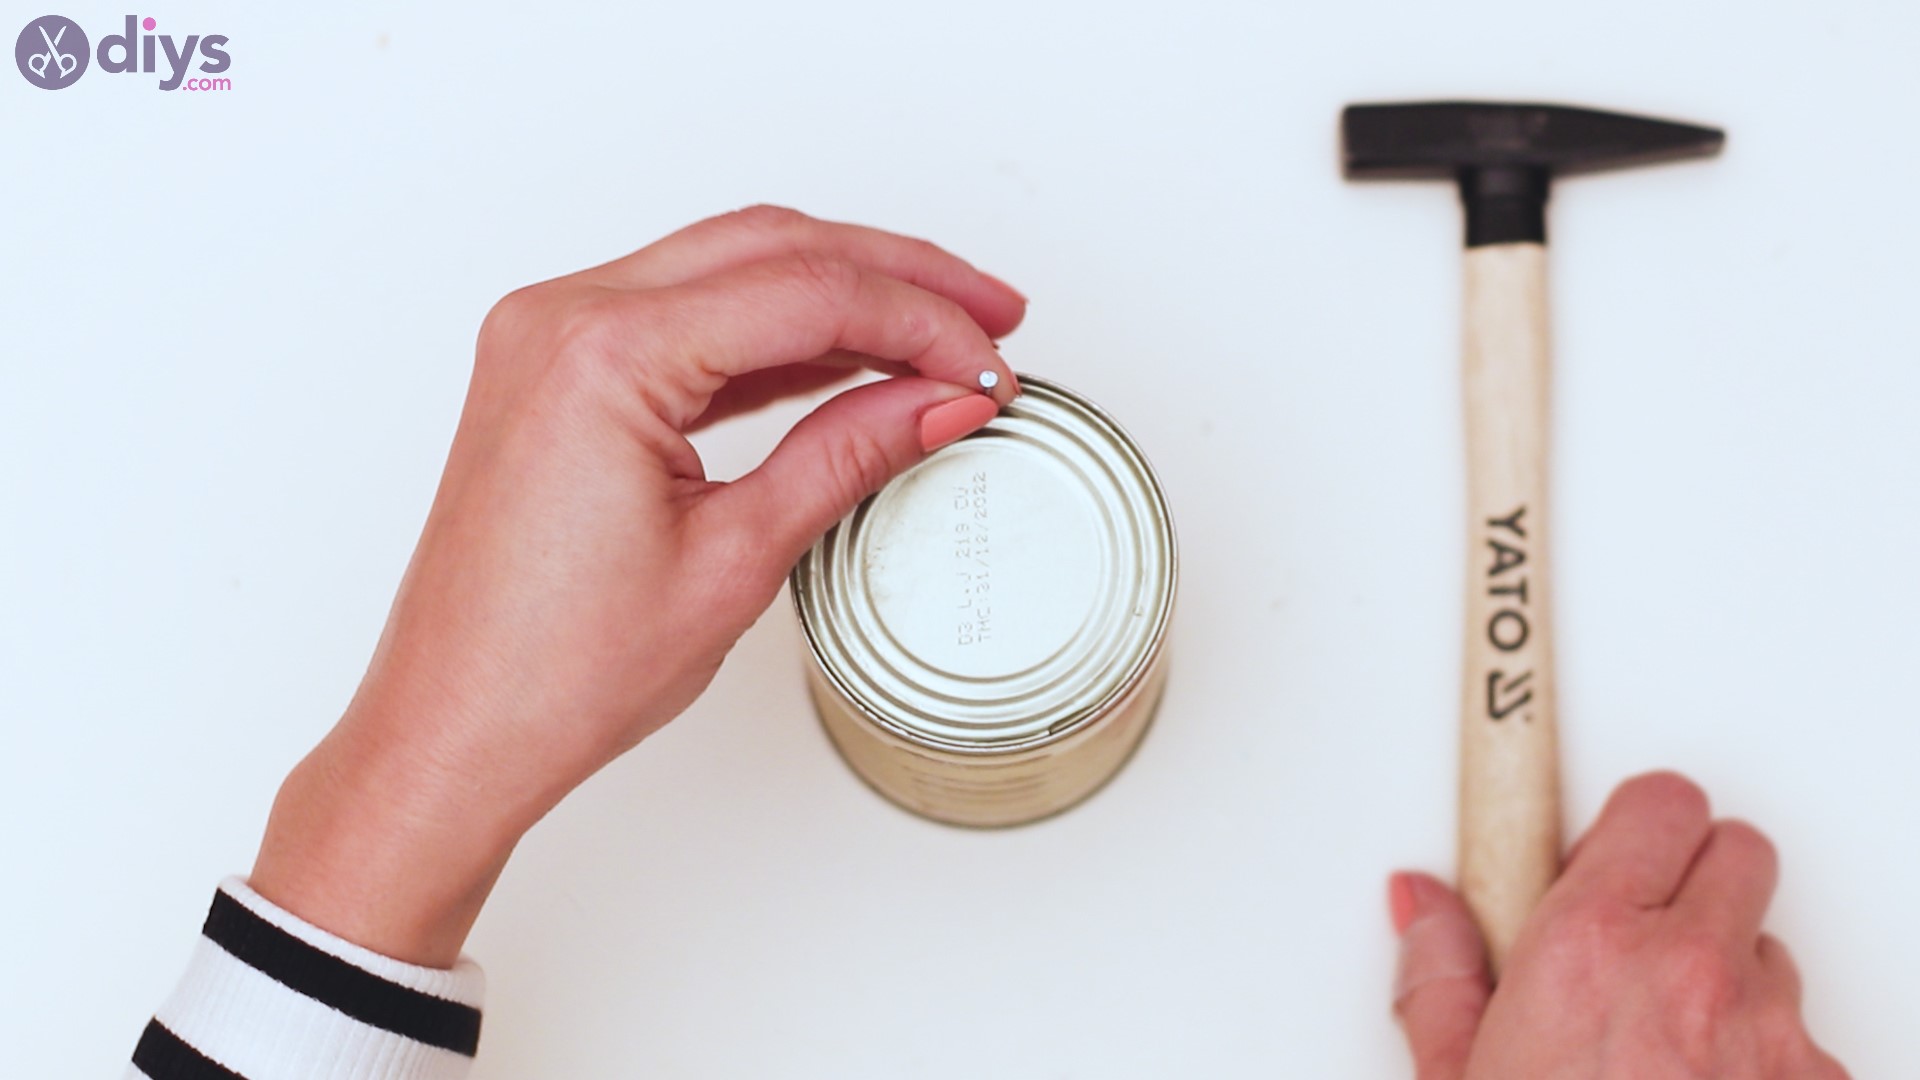
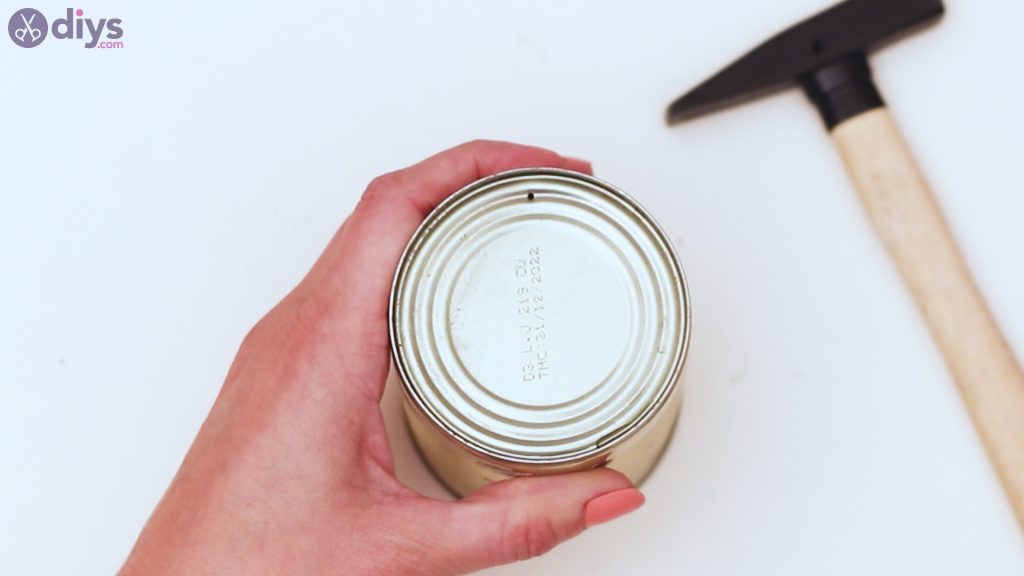
Step 1: Make a hole in the lid
You want to start by making a hole in one of the lids of the tin can. Since you probably already removed one of the tin lids, you want to take a nailand yourhammer and drive a hole at the end of the can. This is an important step since you’ll be using the hole to pass through the wire to hang the bug hotel.


There you go, it’s easy to do, but you do have to be careful not to apply too much pressure.
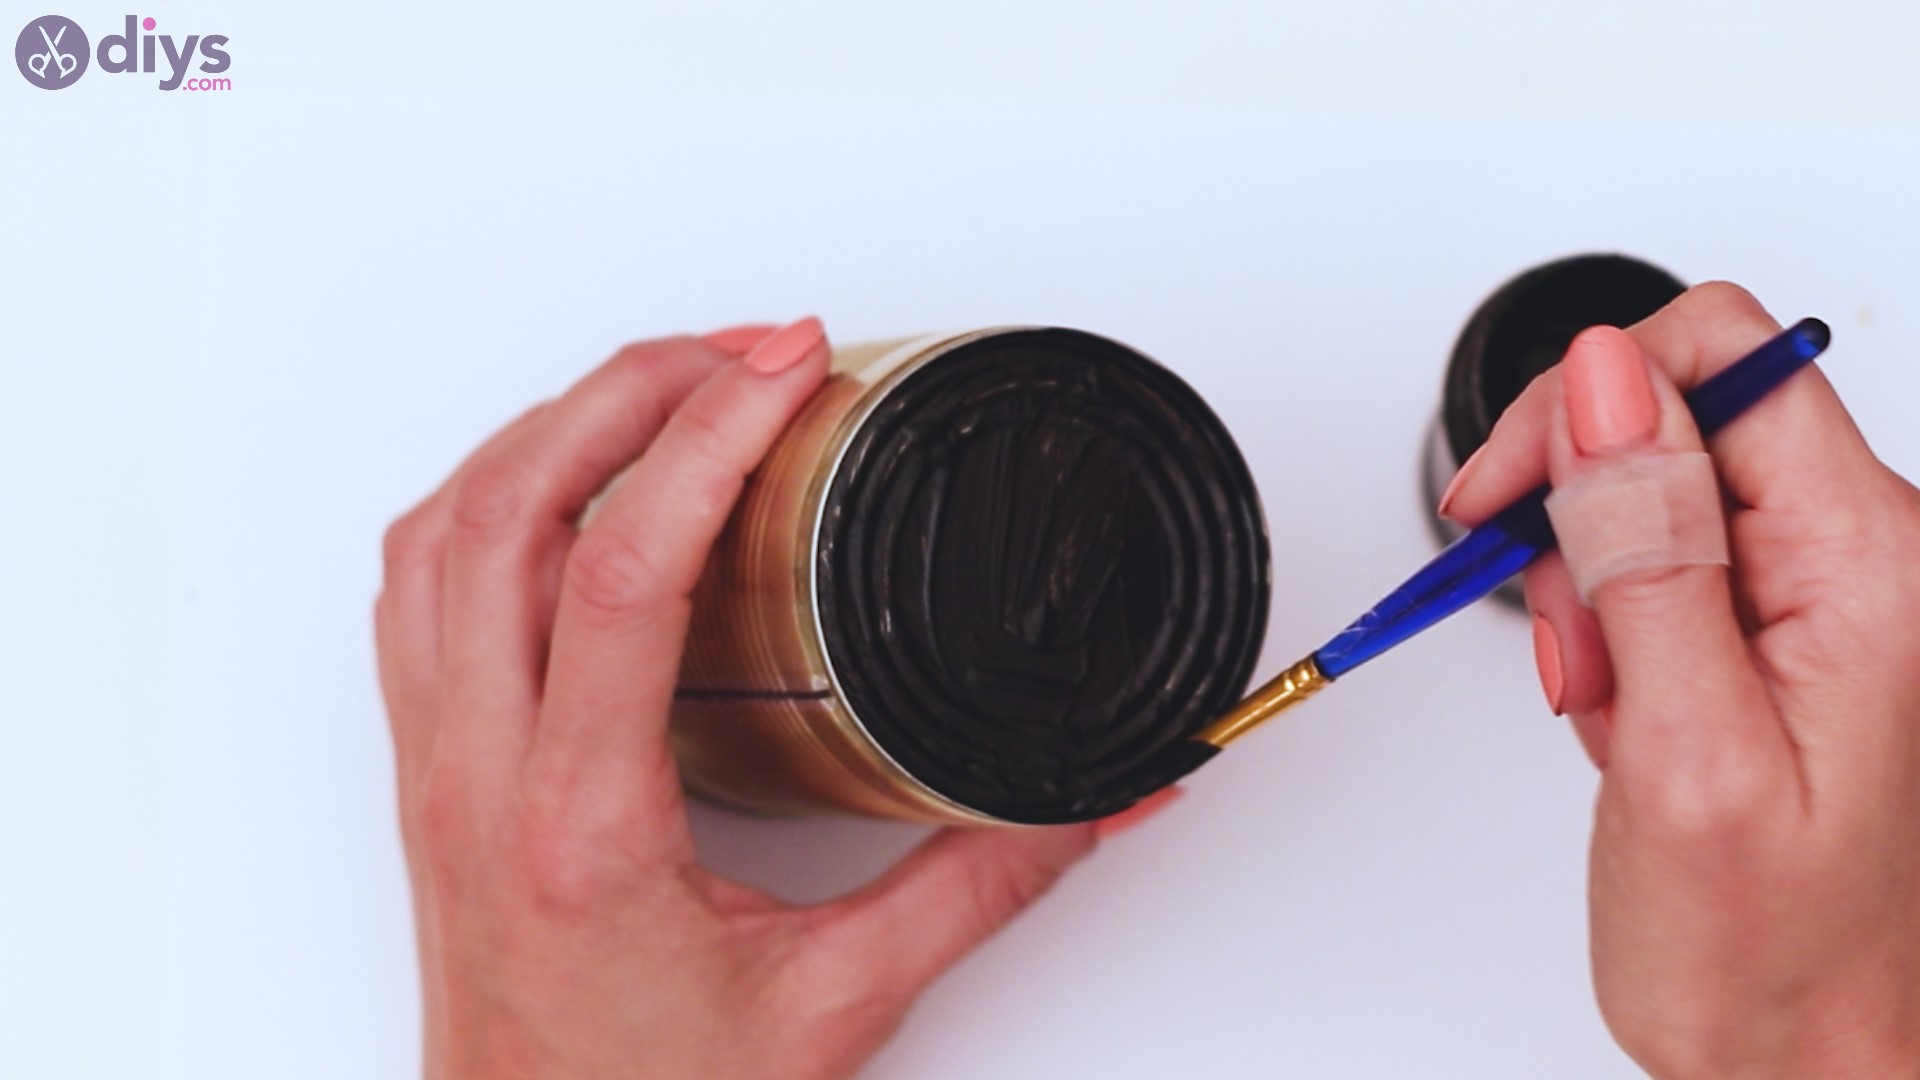
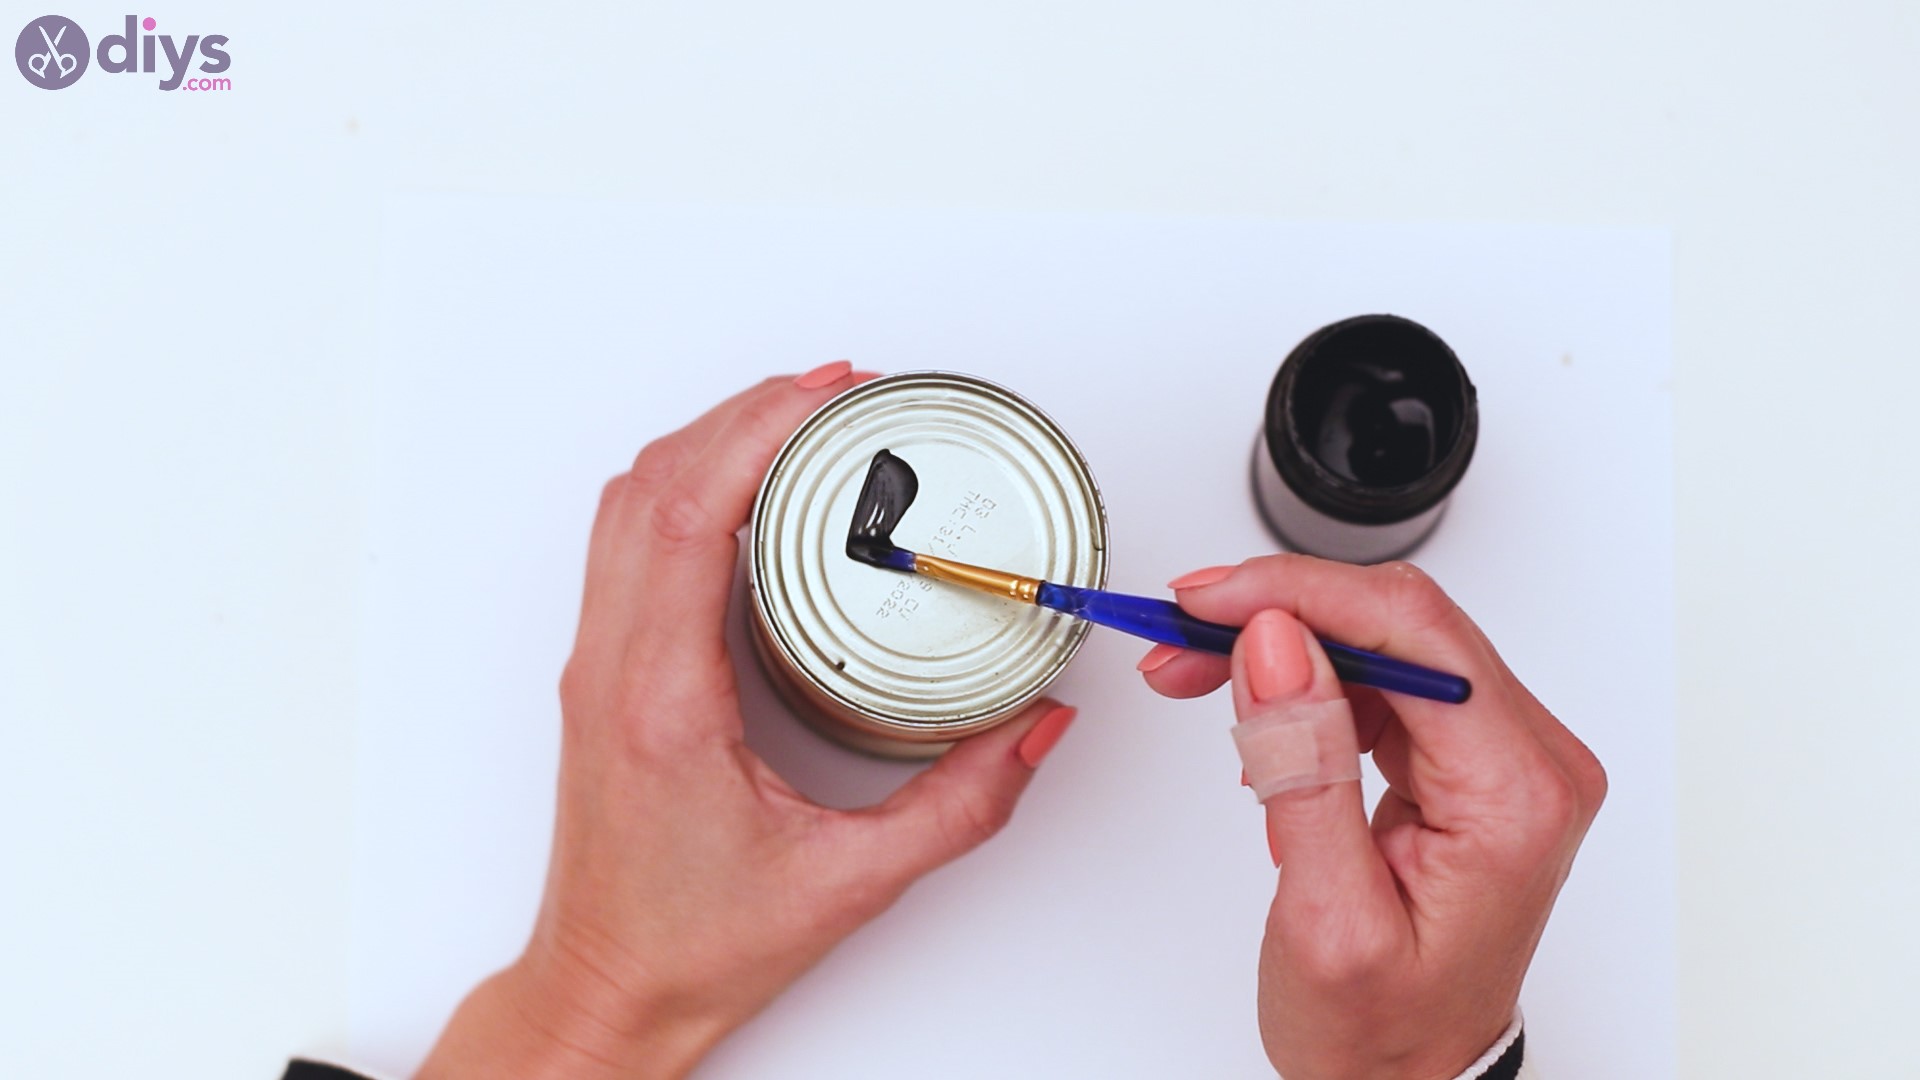
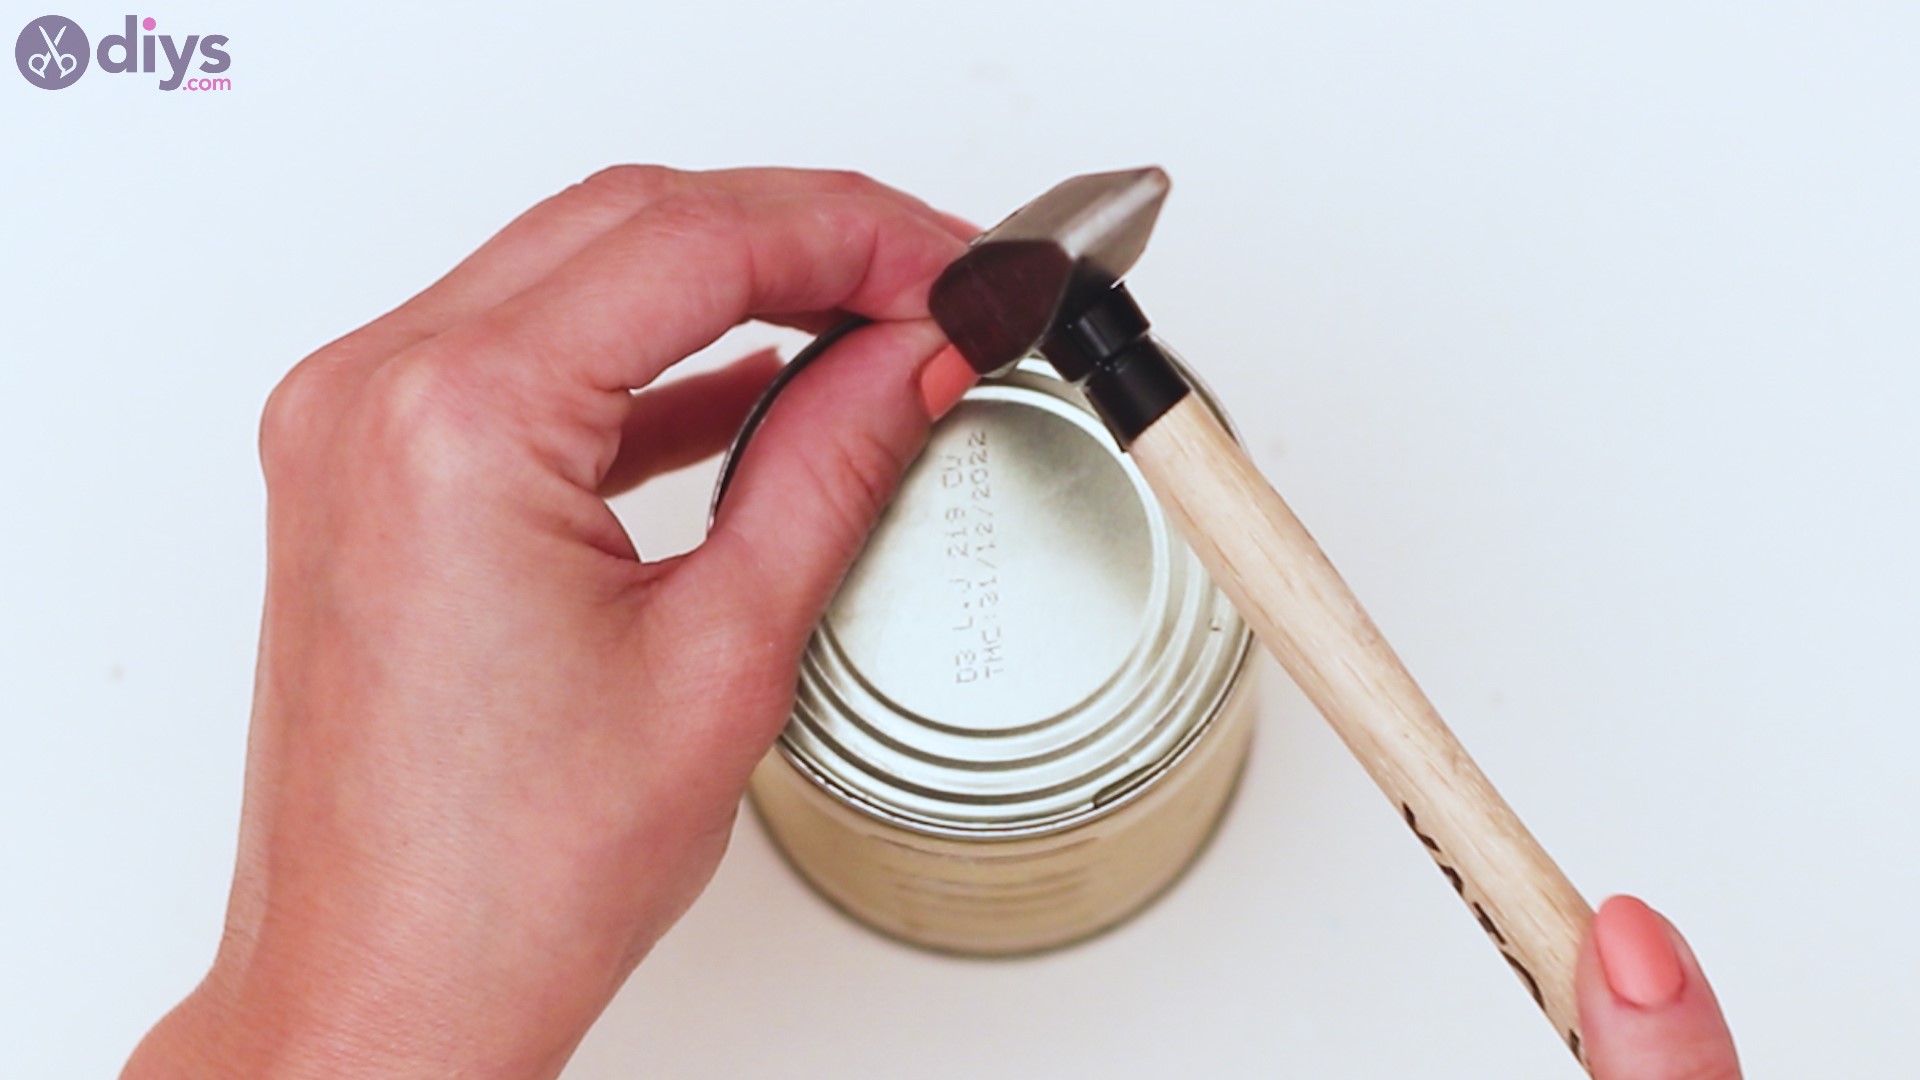
Step 2: Paint the tin can lid
Get theblack acrylic paint and yourpaintbrush and start applying color to the lid you just perforated.

Make sure you apply the color to the entire surface, including right near the joining spot between the lid and the can.

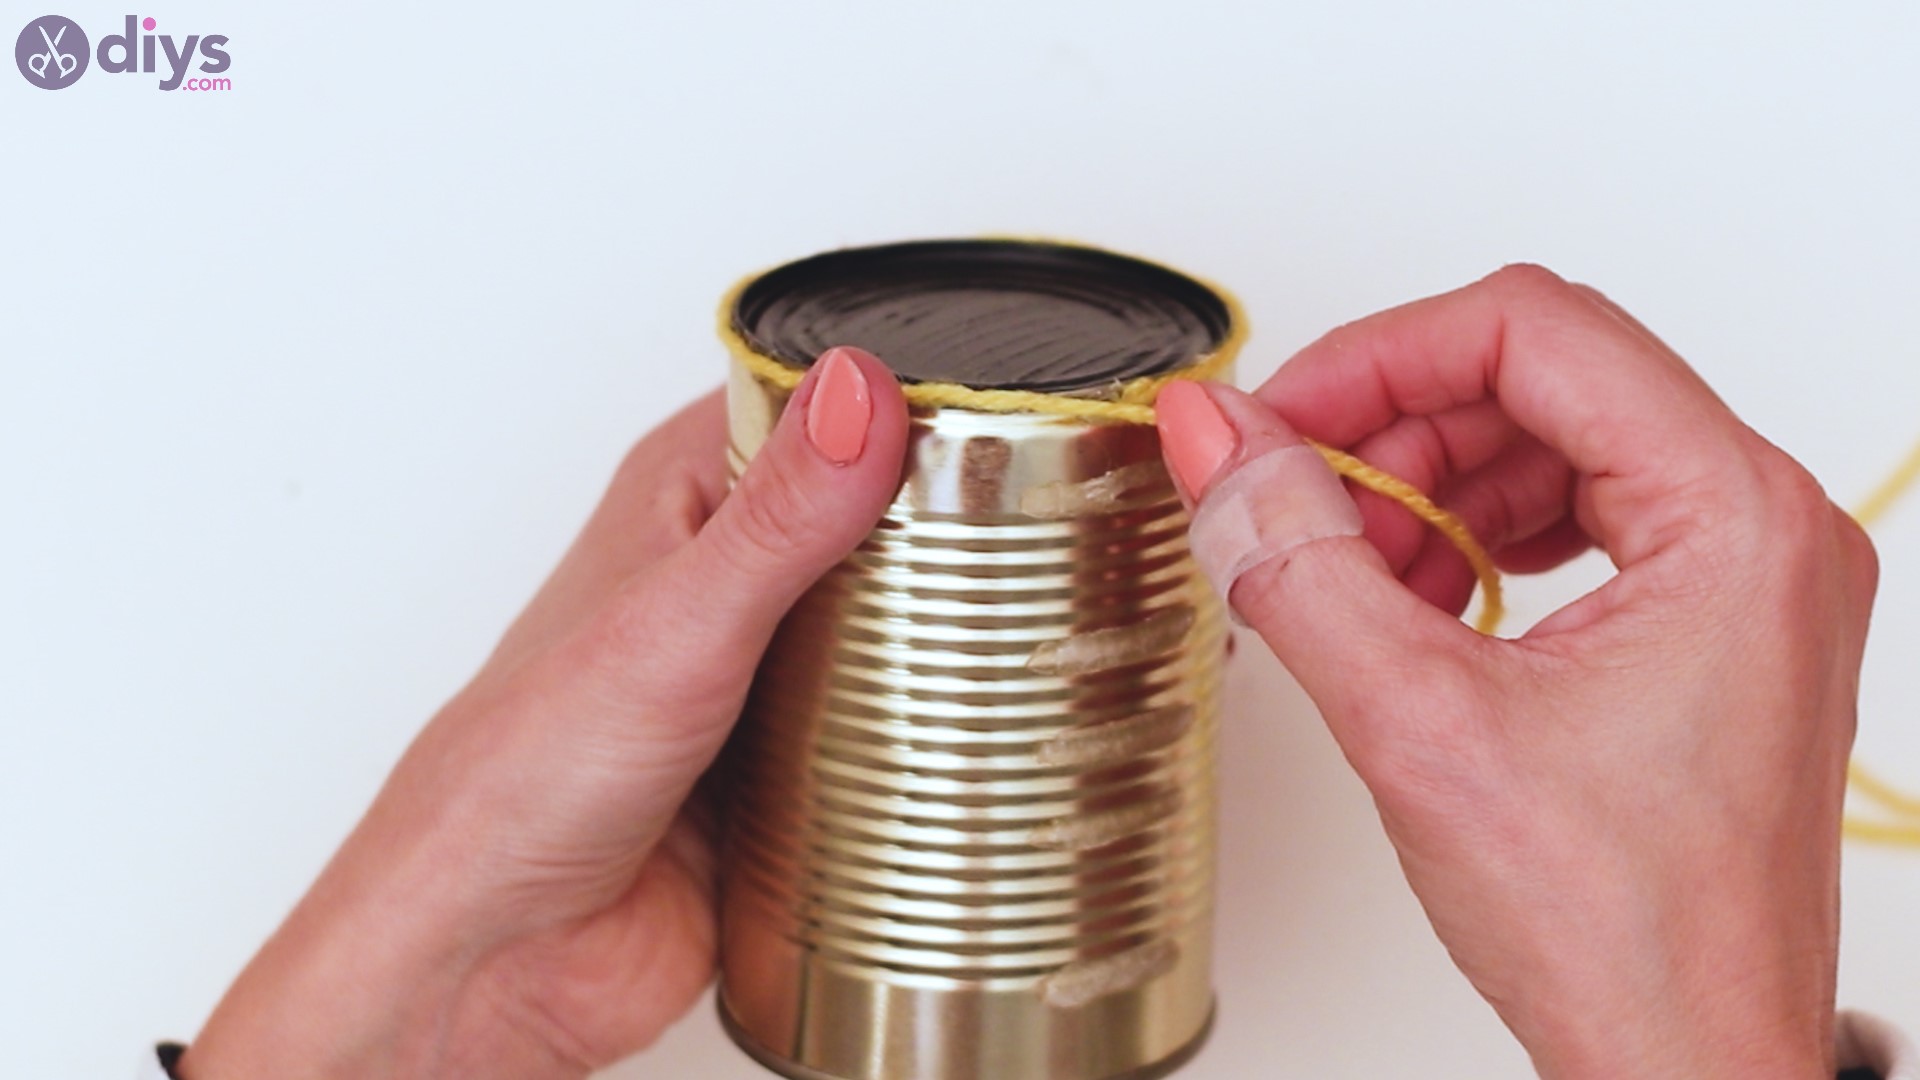
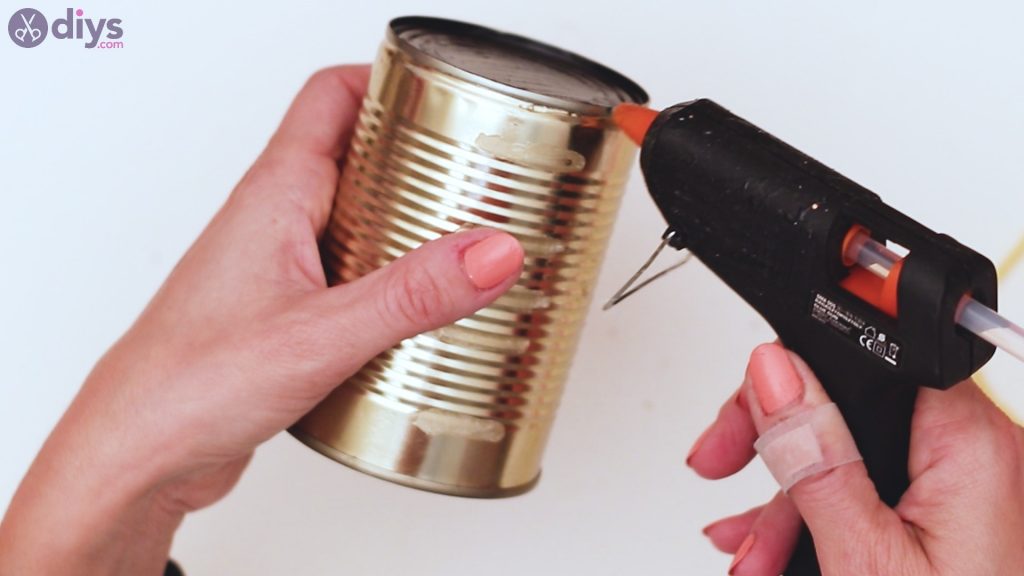
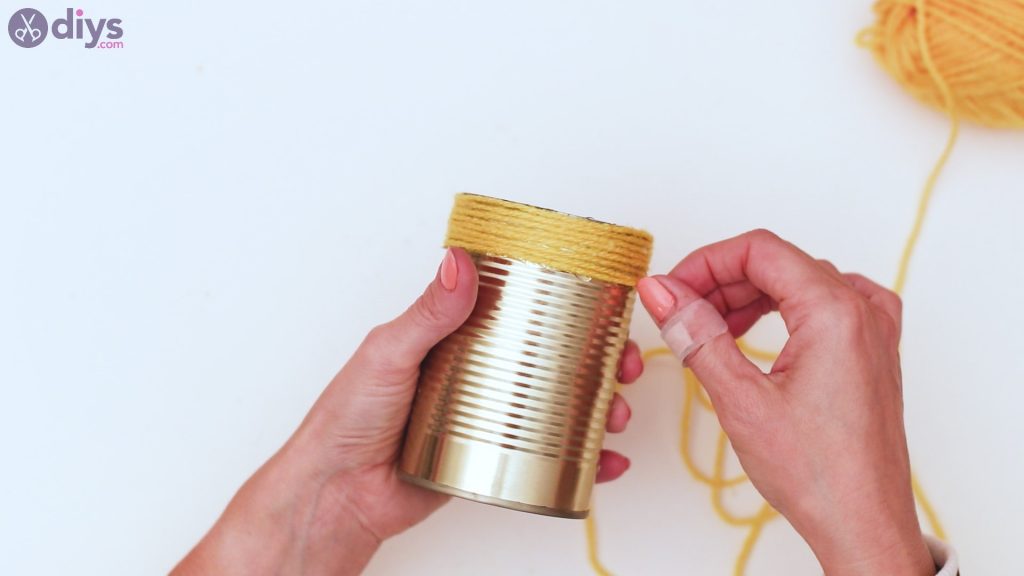
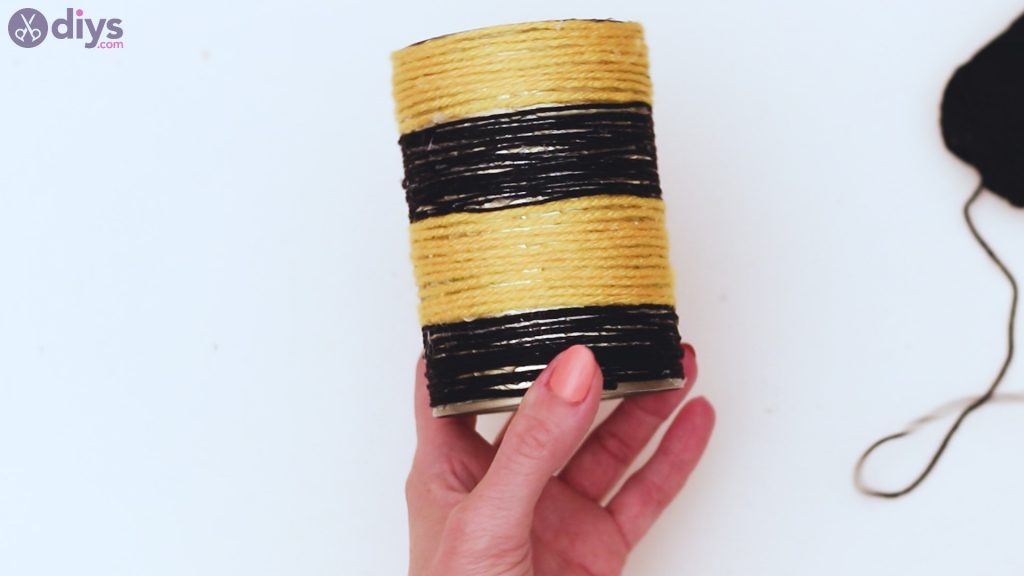
Step 3: Add in the yarn
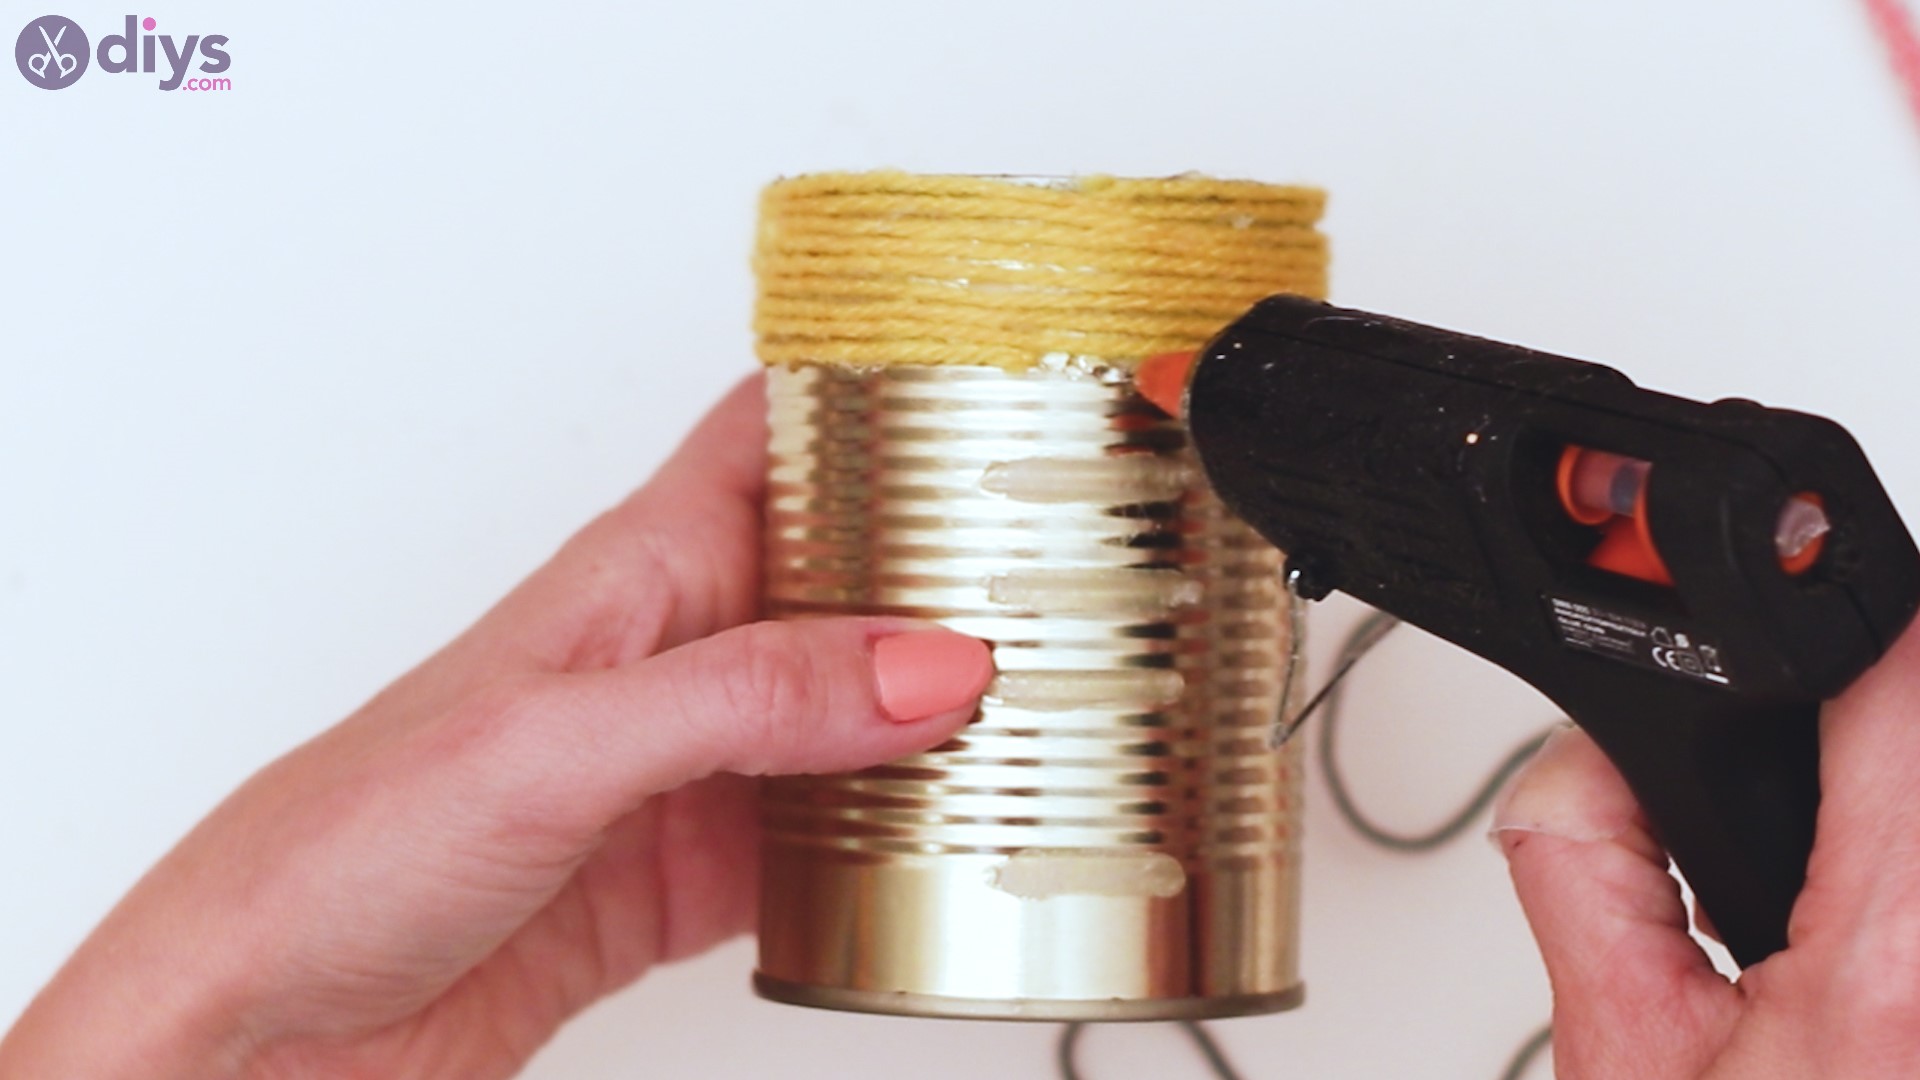
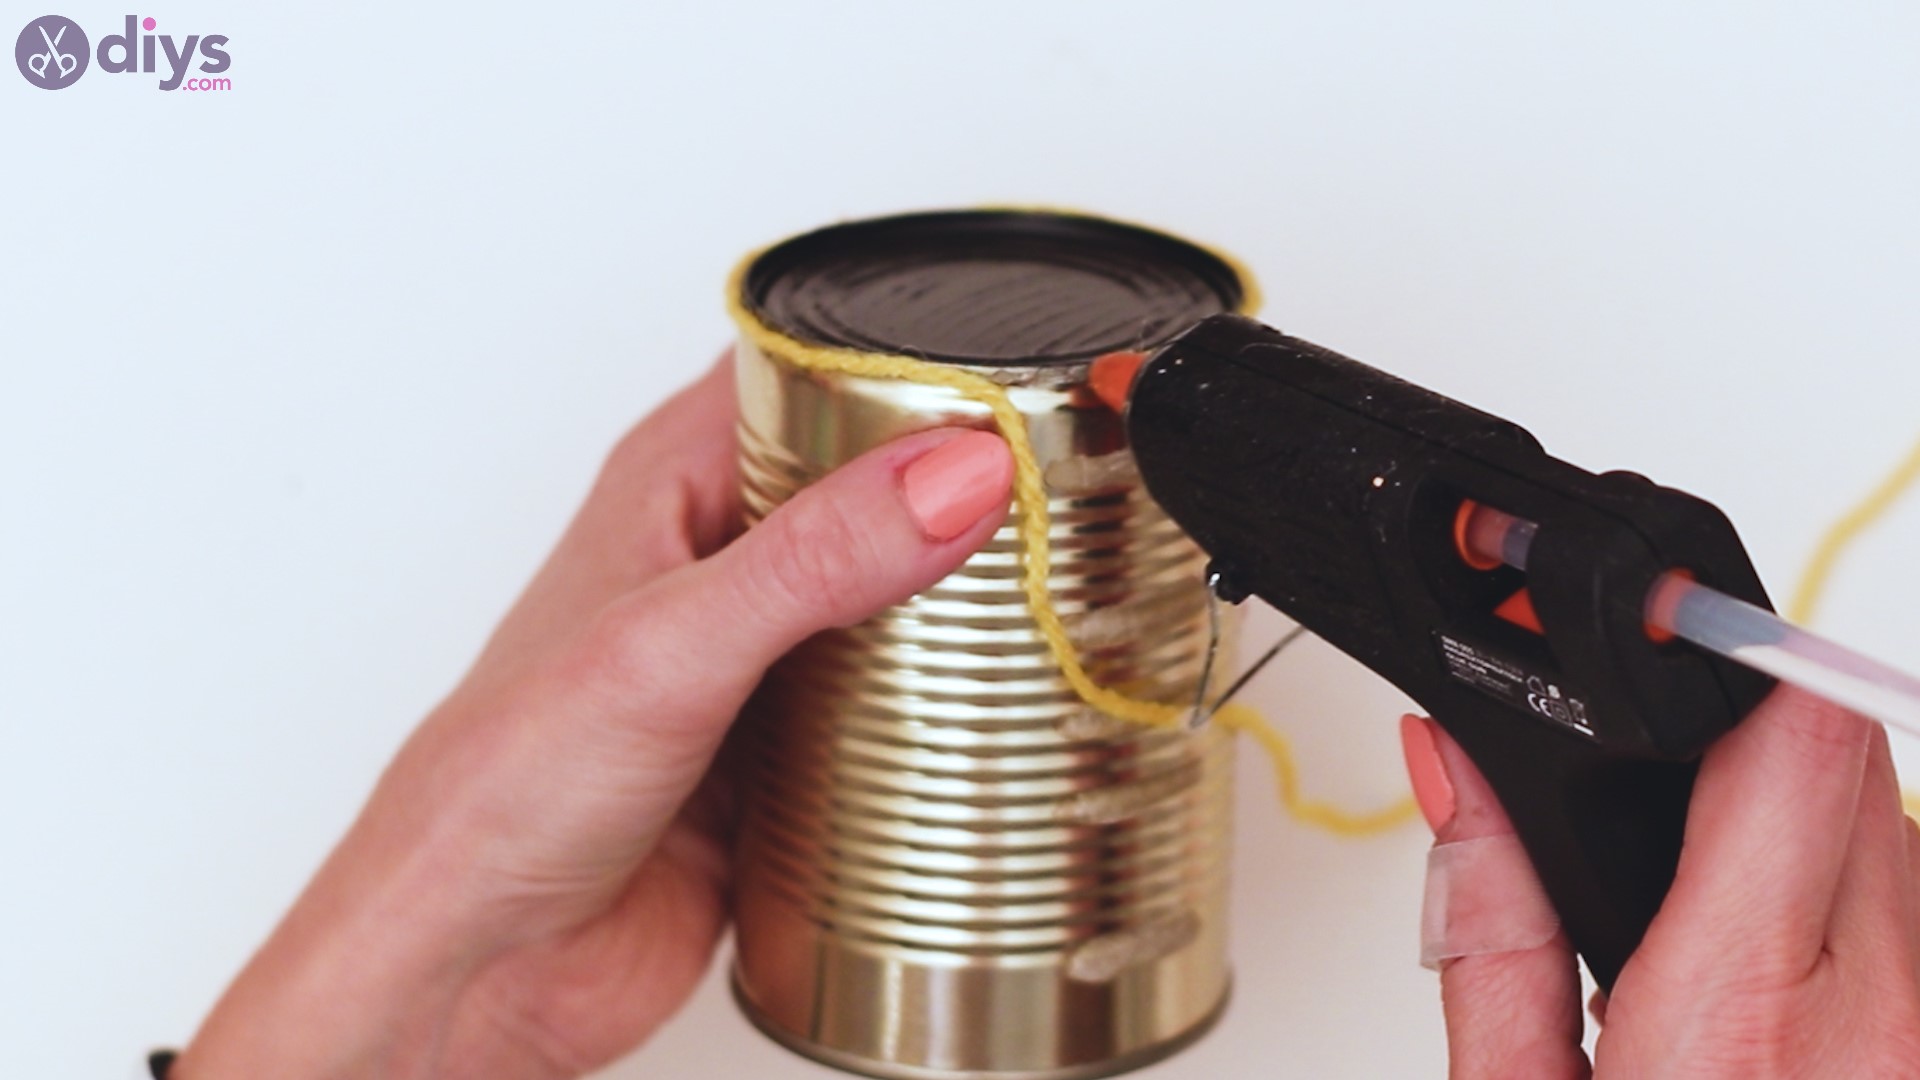
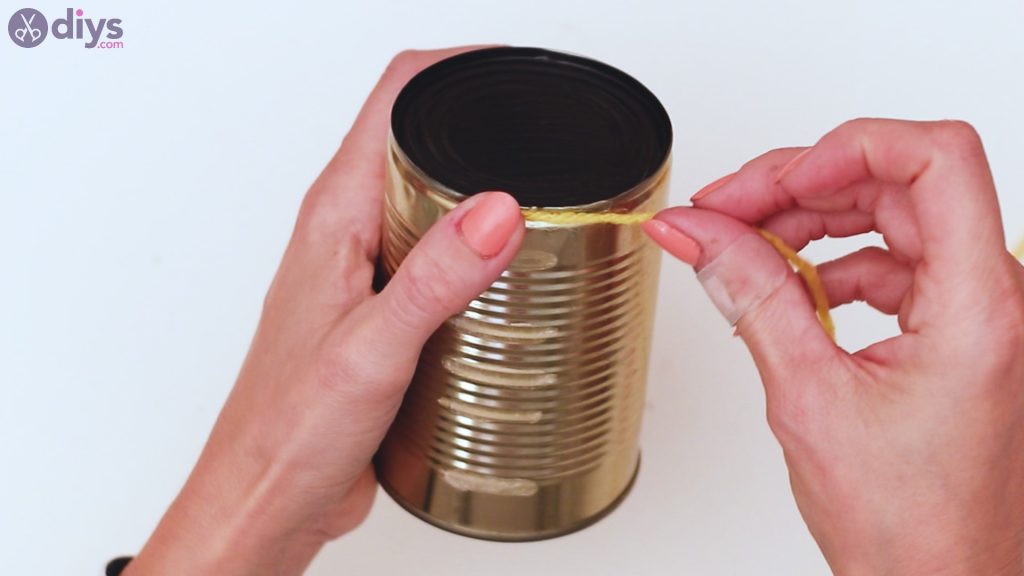
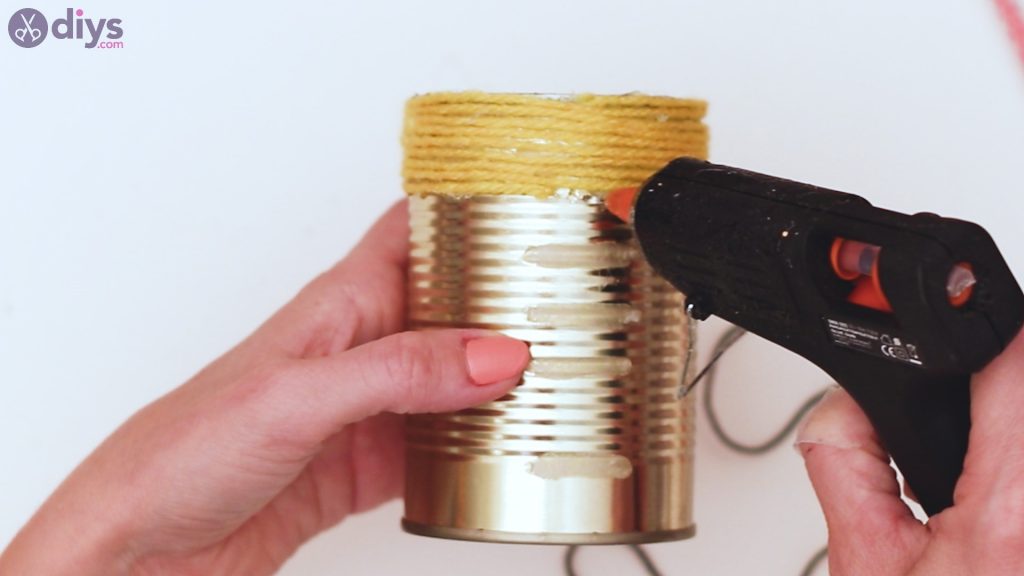
We’re trying to make this can look like a bee, so you’ll be using yellow and black yarn. Get your trustyglue gunand the colored yarn, and let’s start adding it in. Plug in your glue gun and add some hot glue at the very top of the can.
Pick up the yellow yarn and start wrapping it on the very edge of the tin. Make sure to follow the edge as close as you can so you set the tone of the whole piece. You’ll need to add hot glue constantly, so keep it on hand.


Build up the layers of yarn as you go, wrapping the material close together.
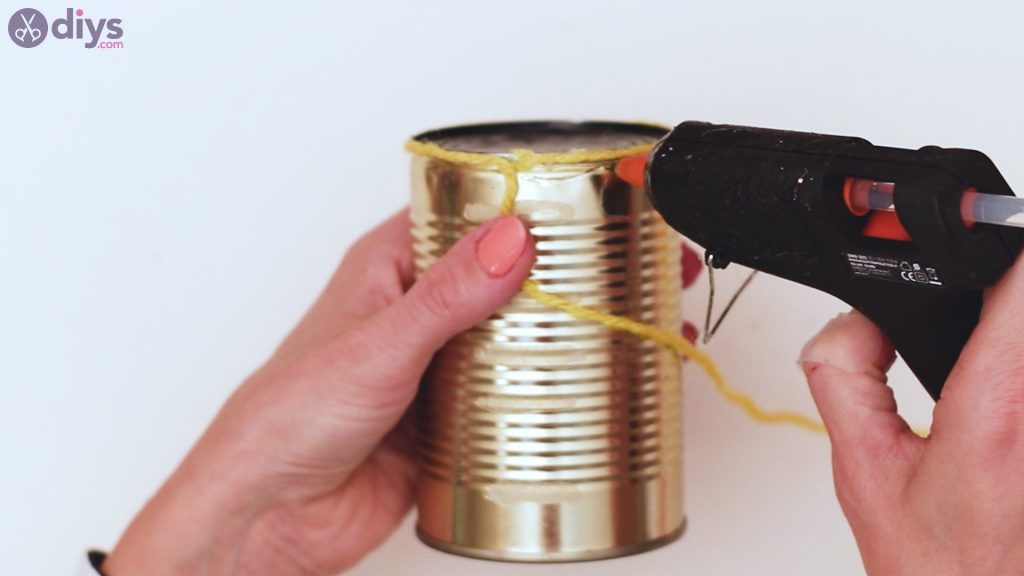
You want the layers to loop closely together, so make sure you arrange the yarn nicely.

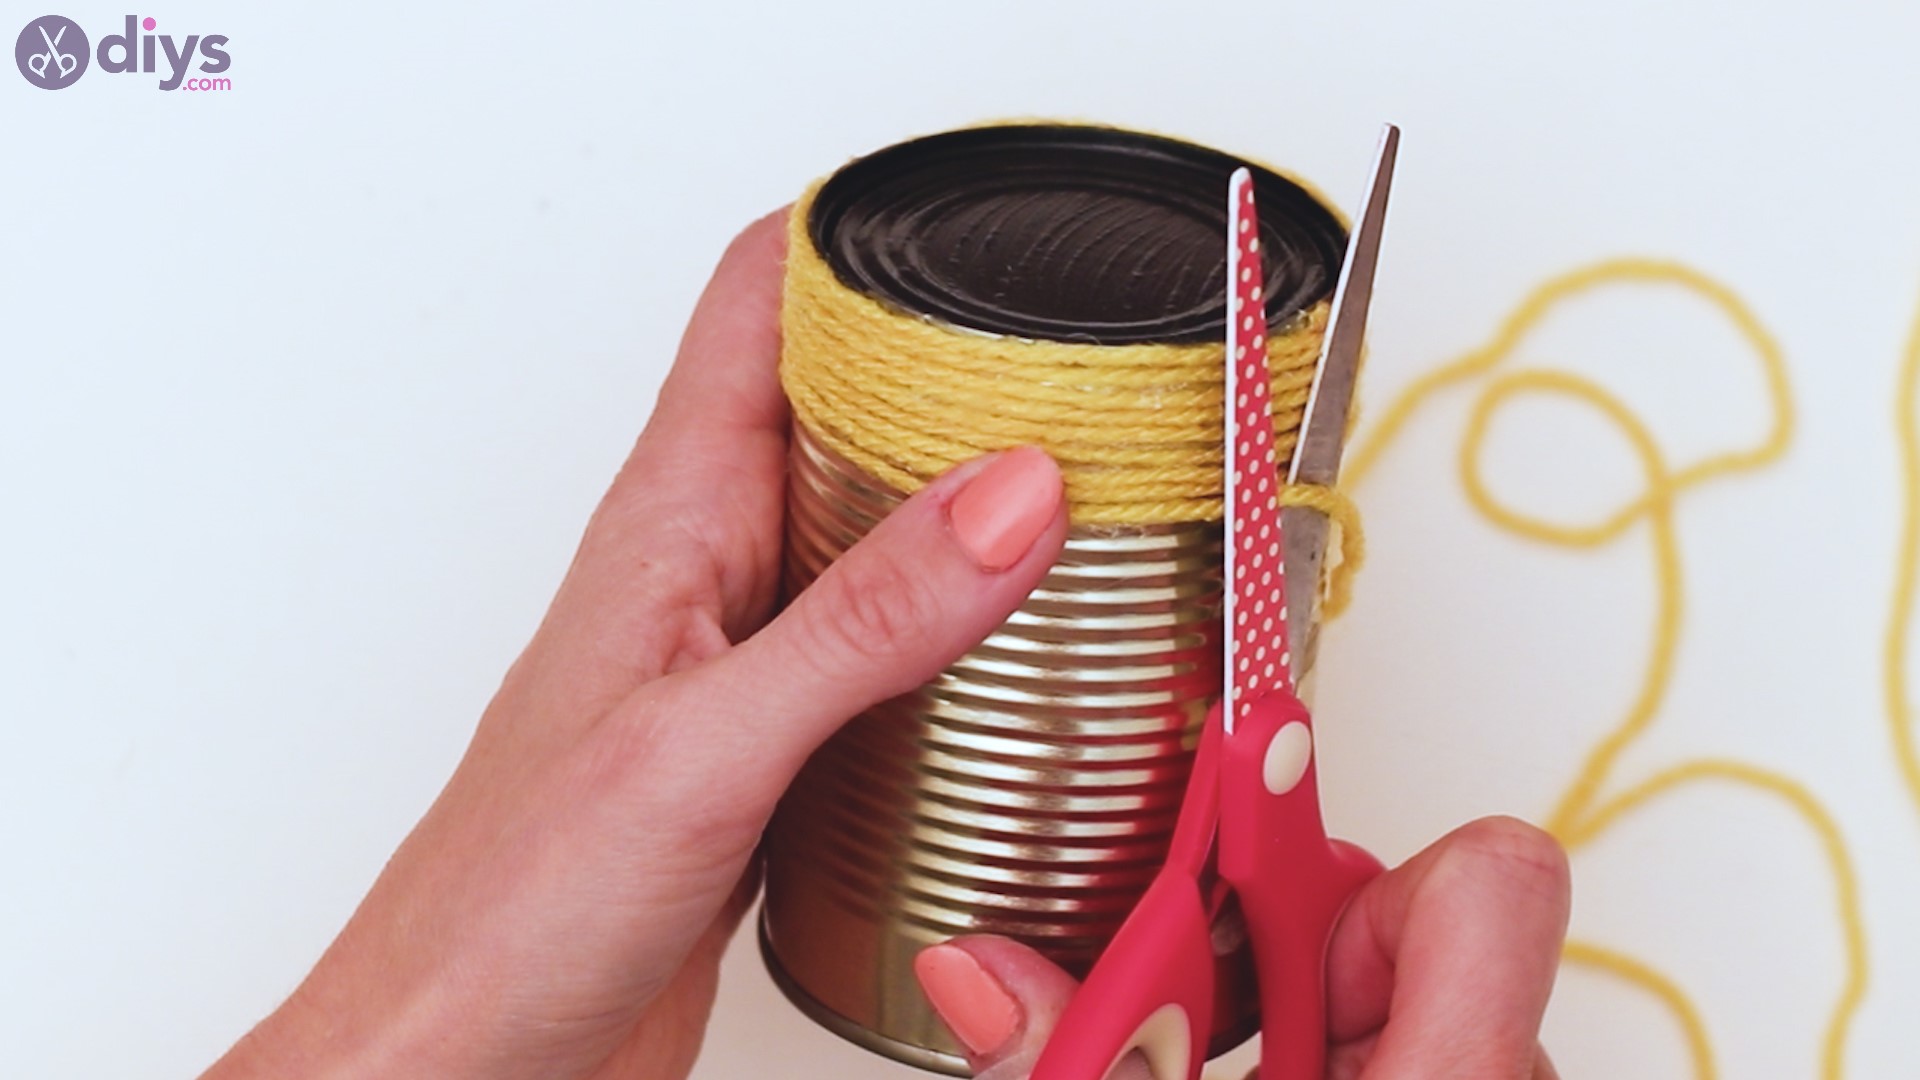
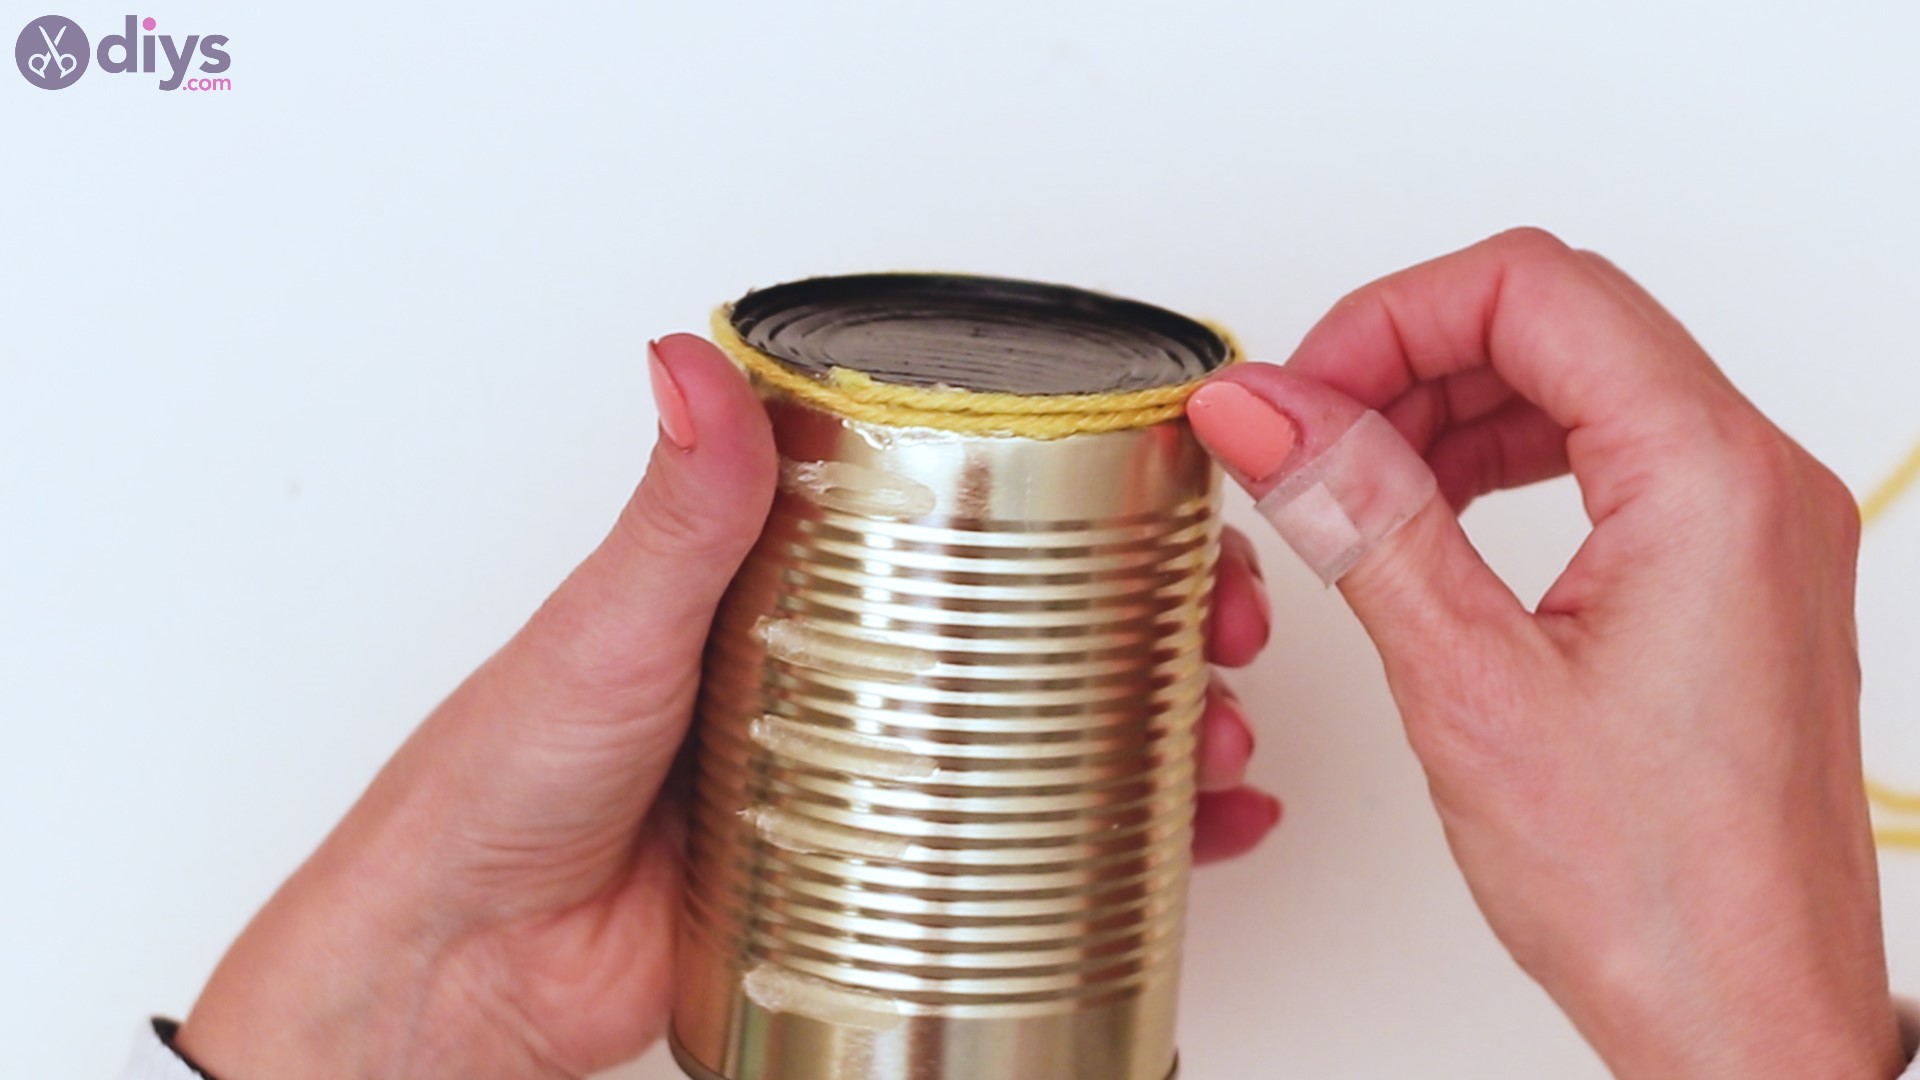
The tin will have 4 colorful layers, so measure out where the quarter spot of the tin’s length is and stop adding in yellow when you hit that spot.

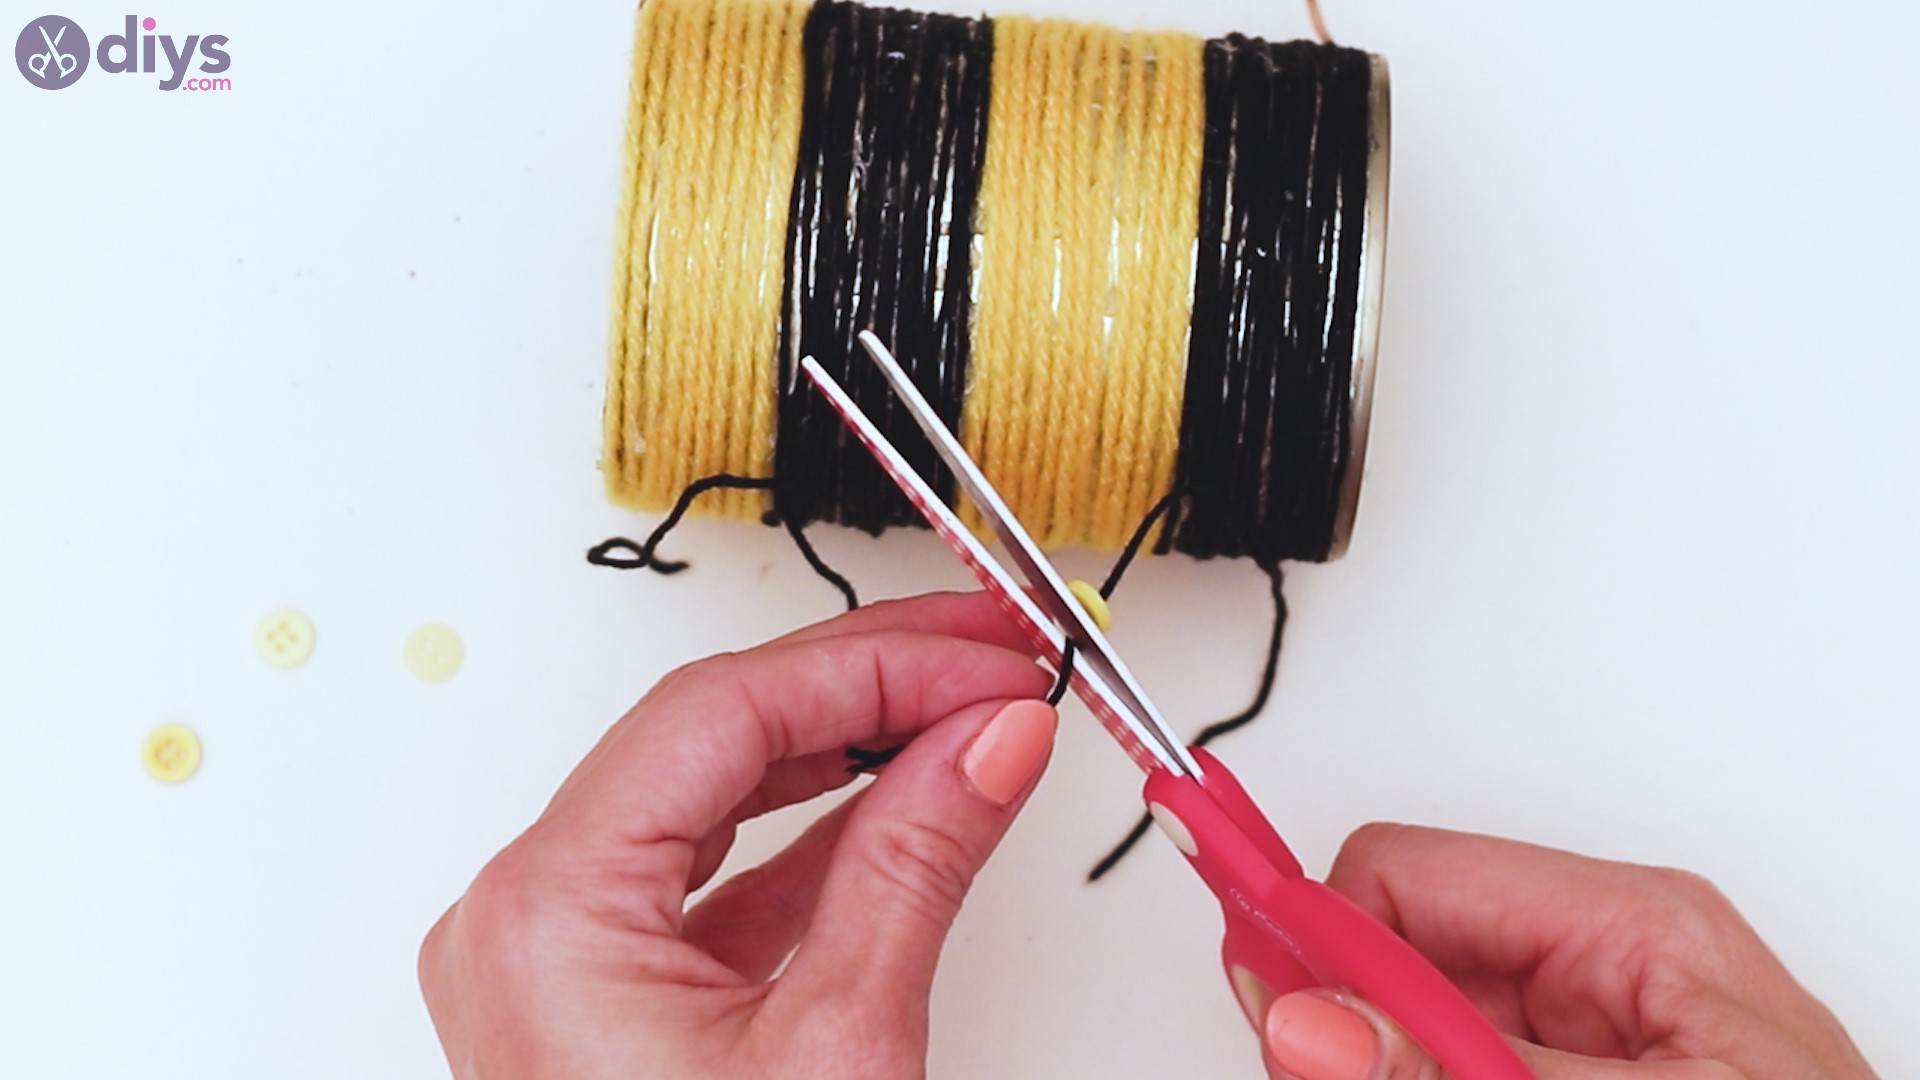
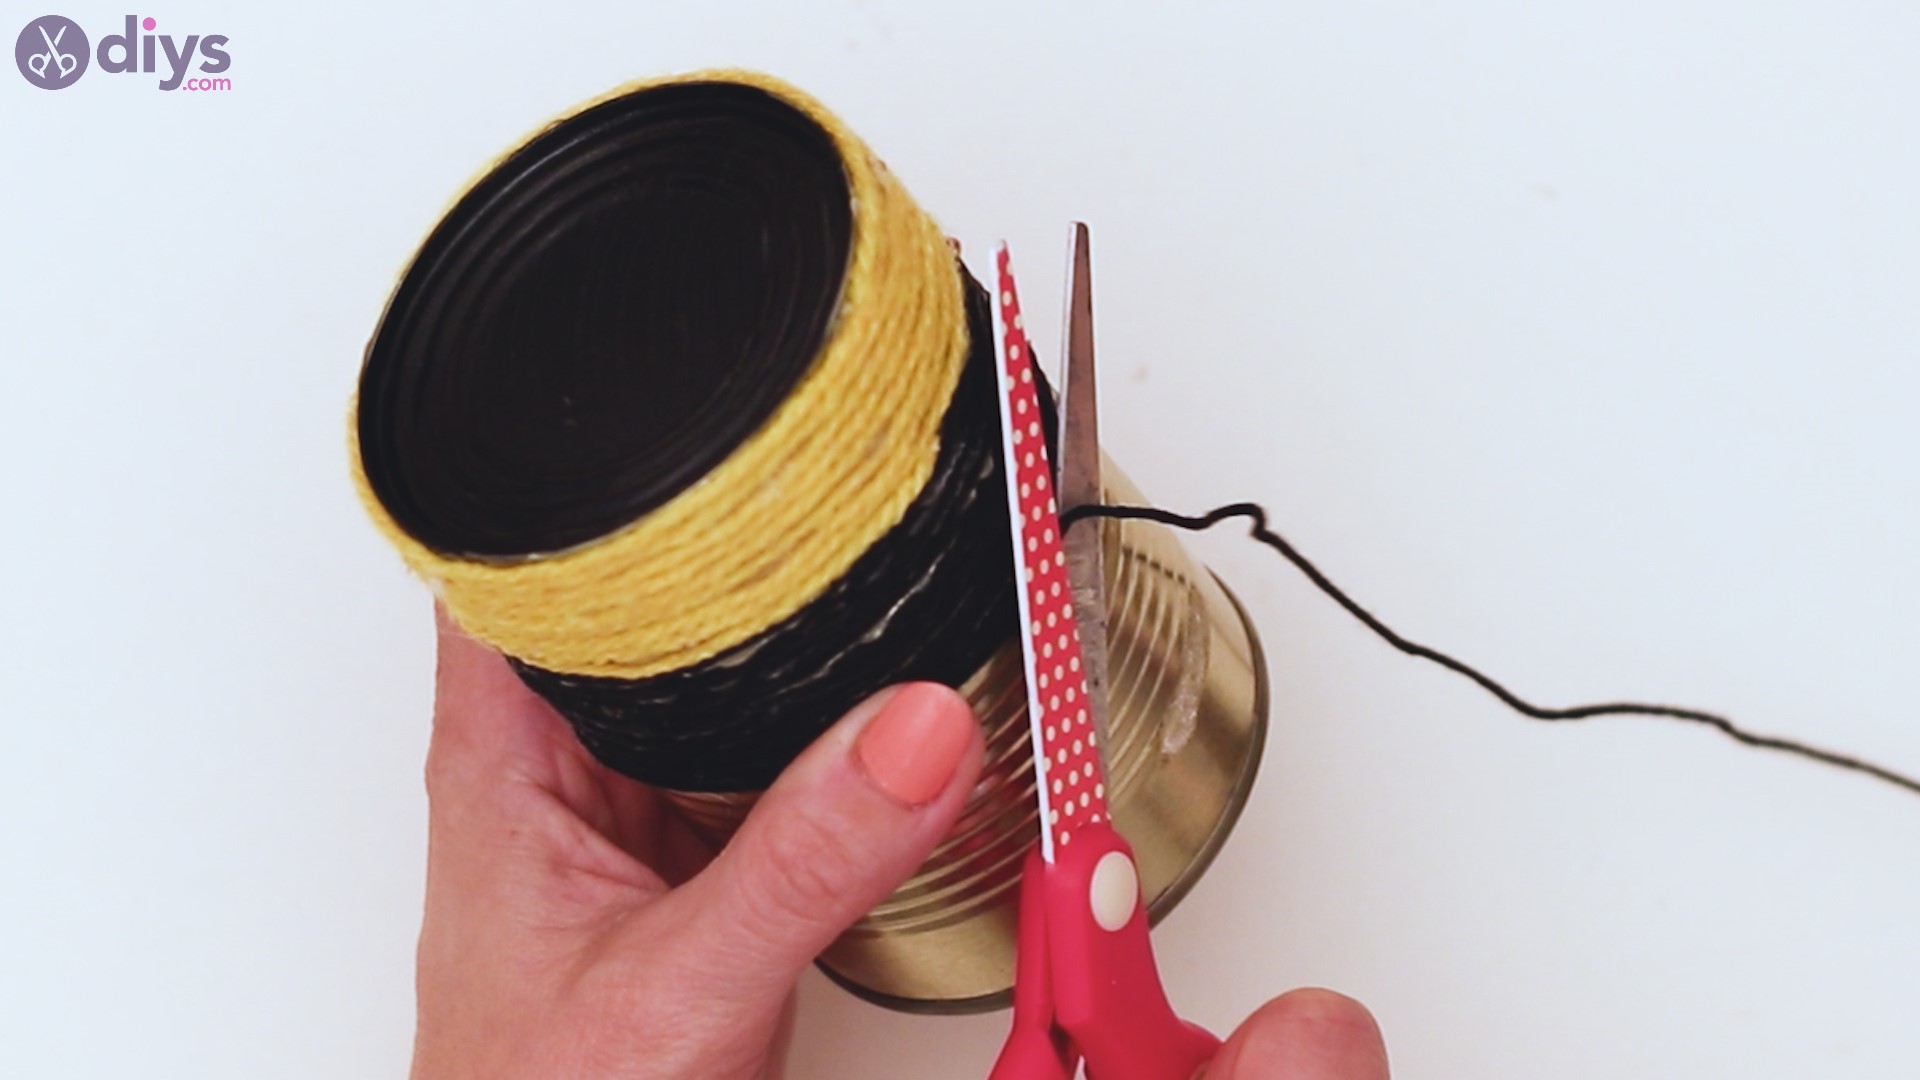
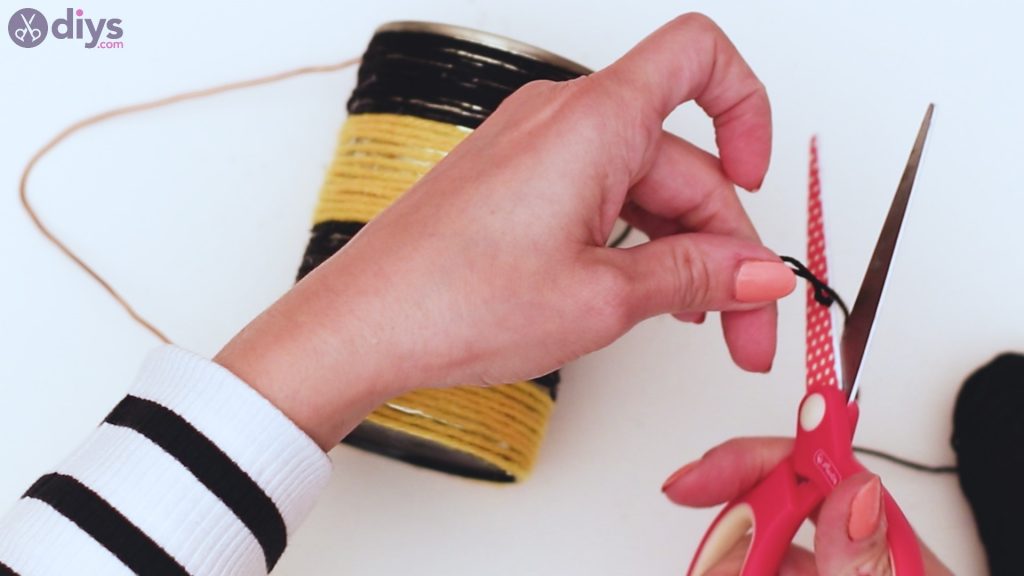
Step 4: Add in the black yarn
Now you have to start adding some black yarn to the tin. Add in the hot glue, and then lay down the yarn thread.
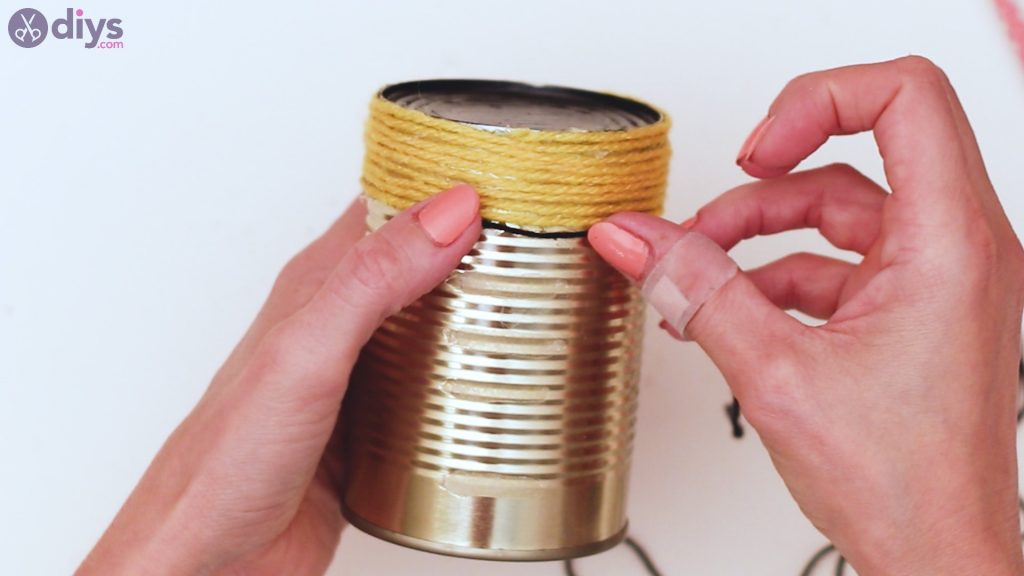
Much like you did with the yellow, measure out, so you know when to stop wrapping in the yarn.
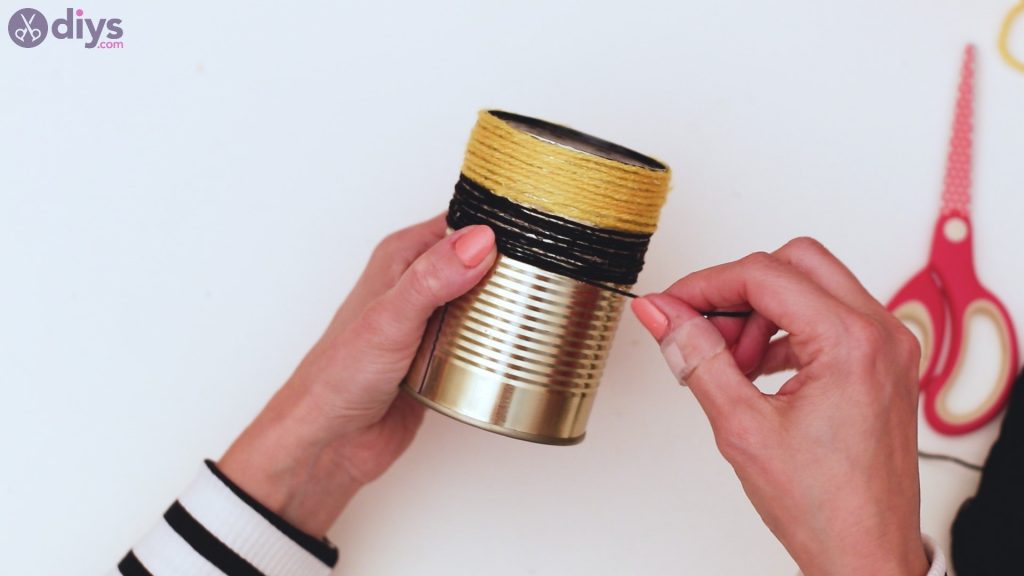
Use yourscissorsto cut the thread when you’ve reached the spot.

Once you’re done with the first black spot, add in some yellow yarn again, and then finish it up with some black yarn once more. In the end, your tin should look like this.
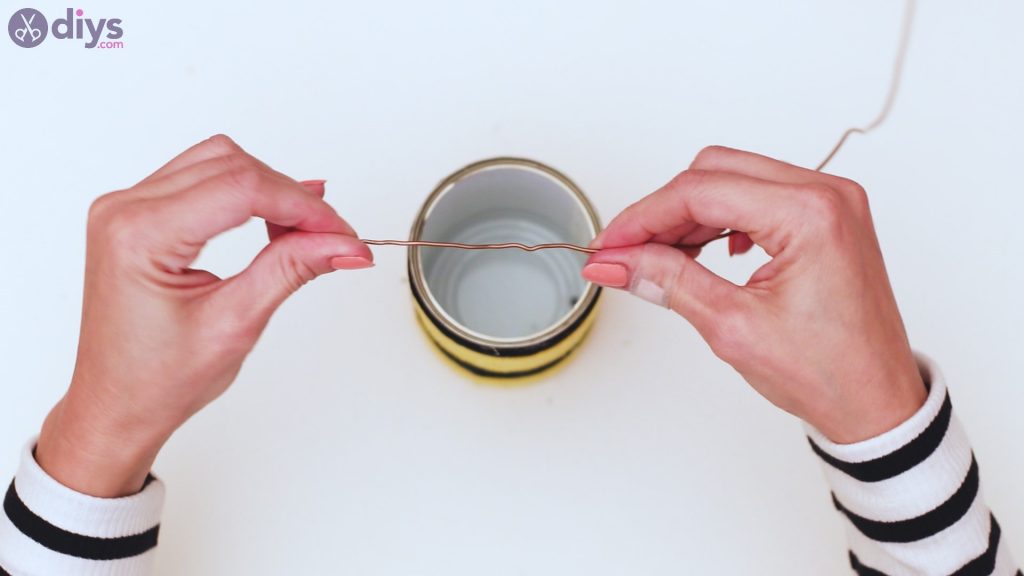
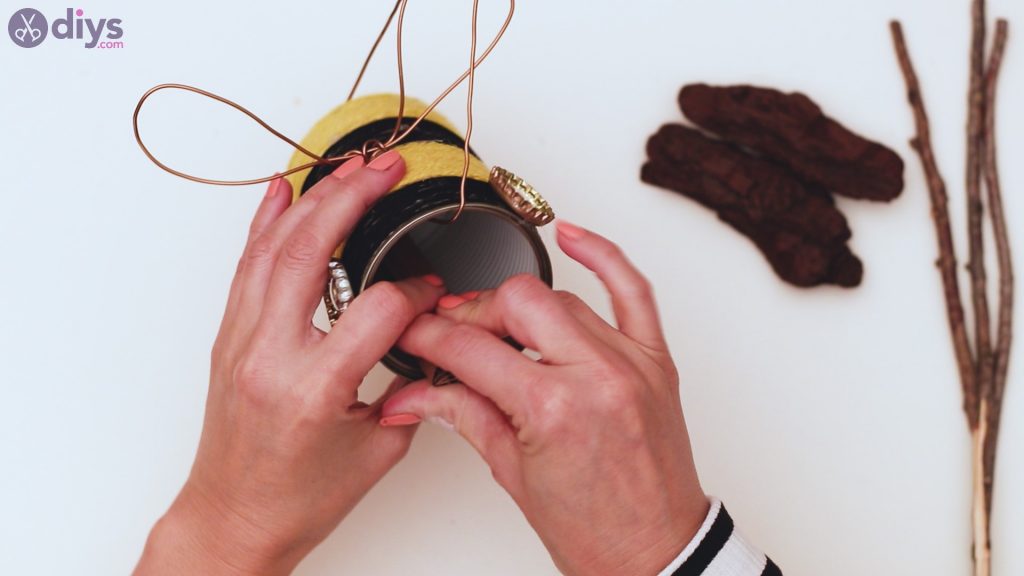
Step 5: Make your hotel hang
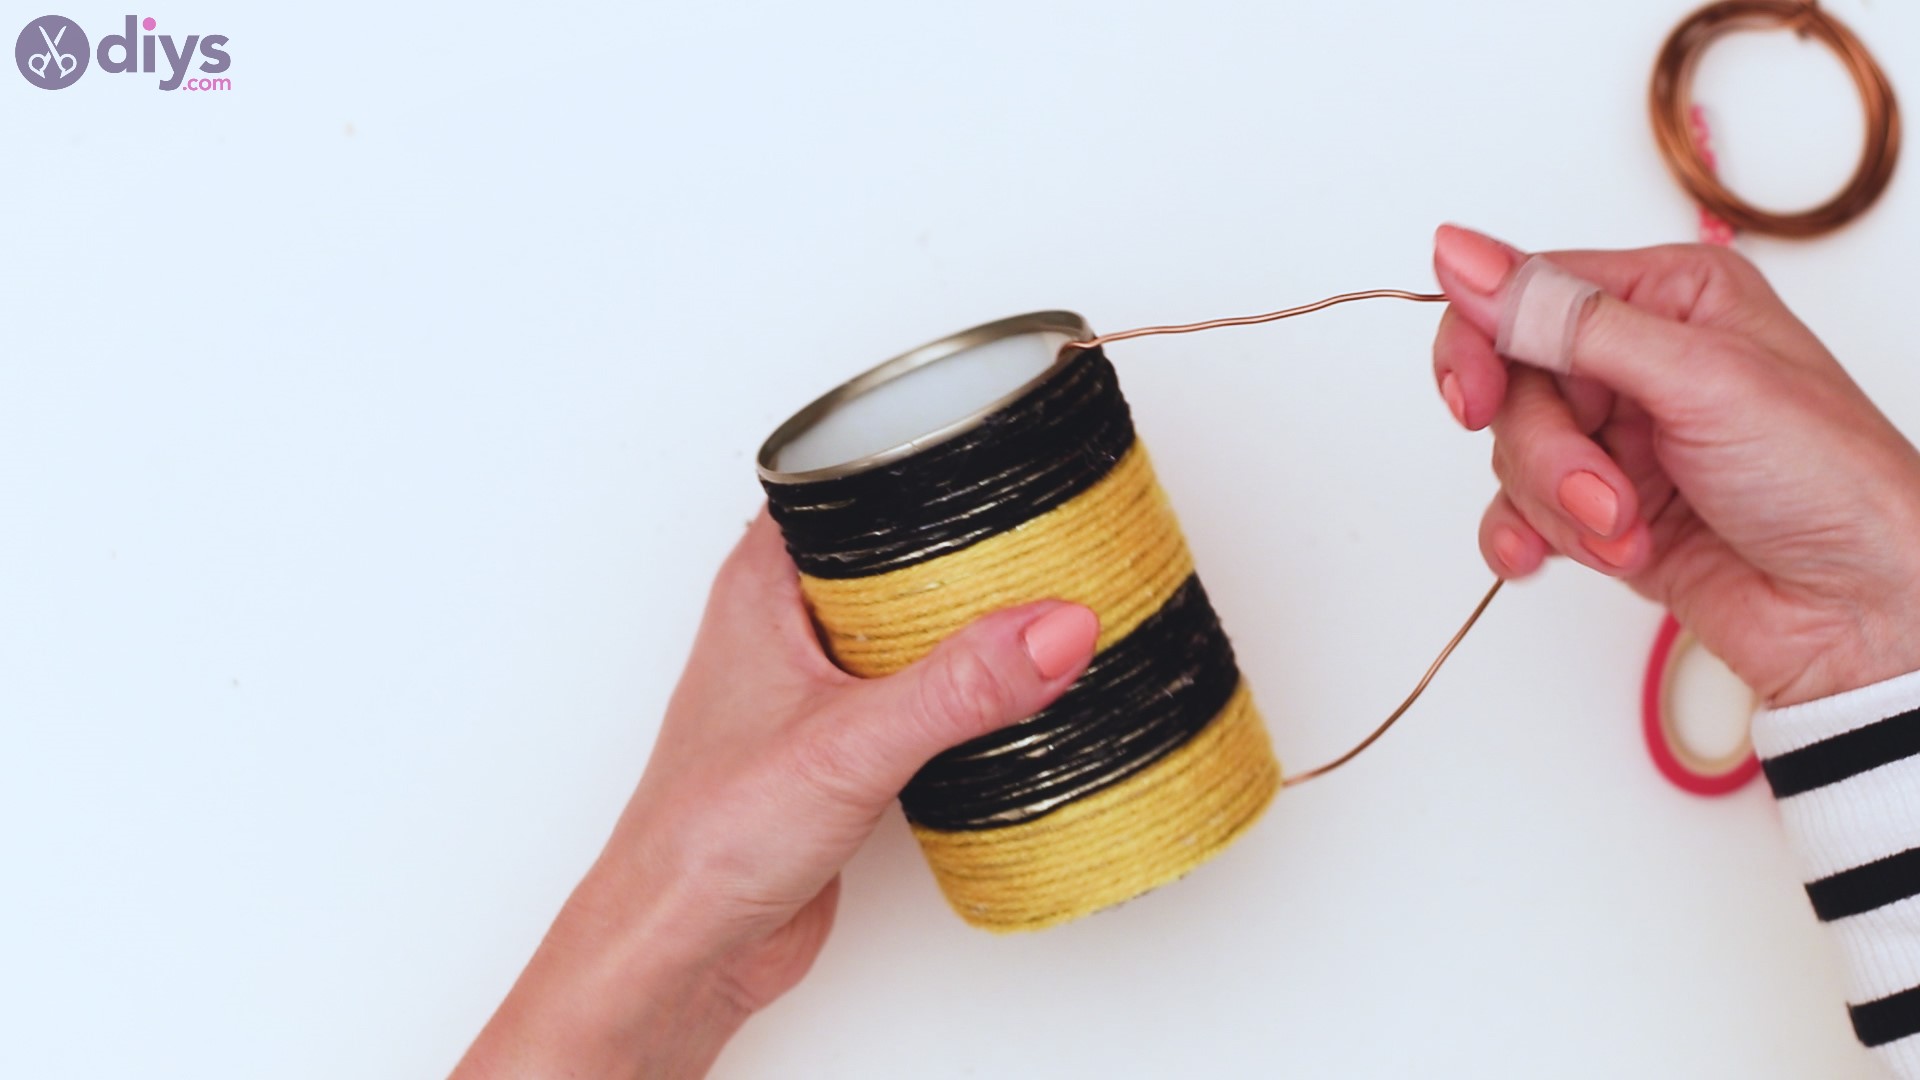
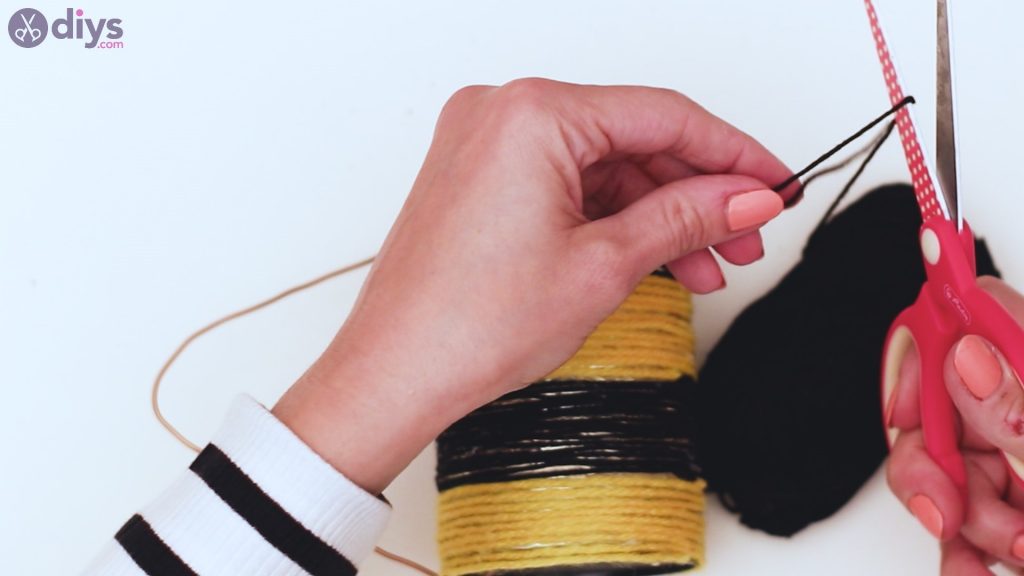
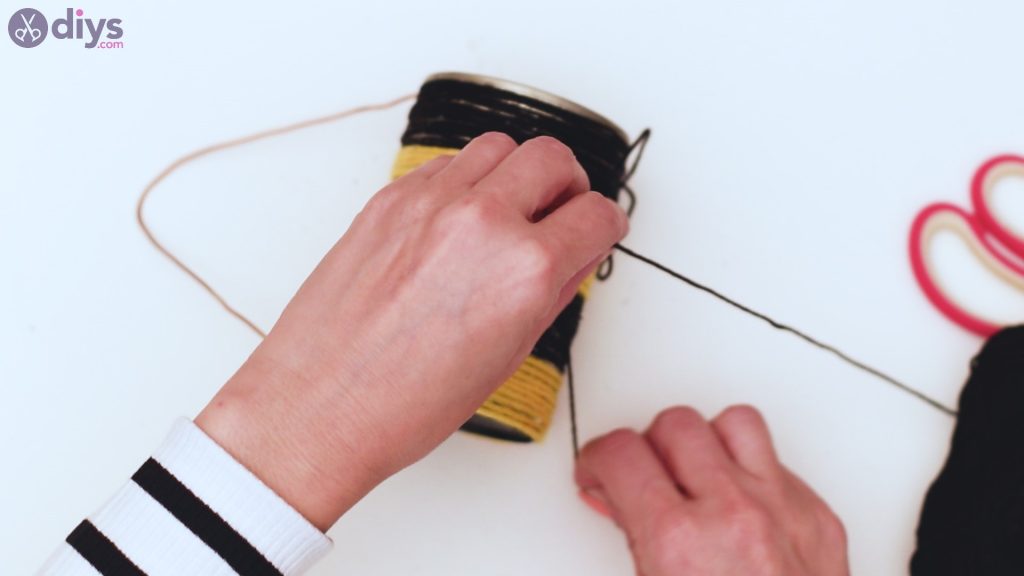
Now that your yarn is in place, it’s time you get the metal wire and make it so the tin can hang on a tree branch or wherever you feel like. So, grab the wire and push an end through the hole you made in Step 1.

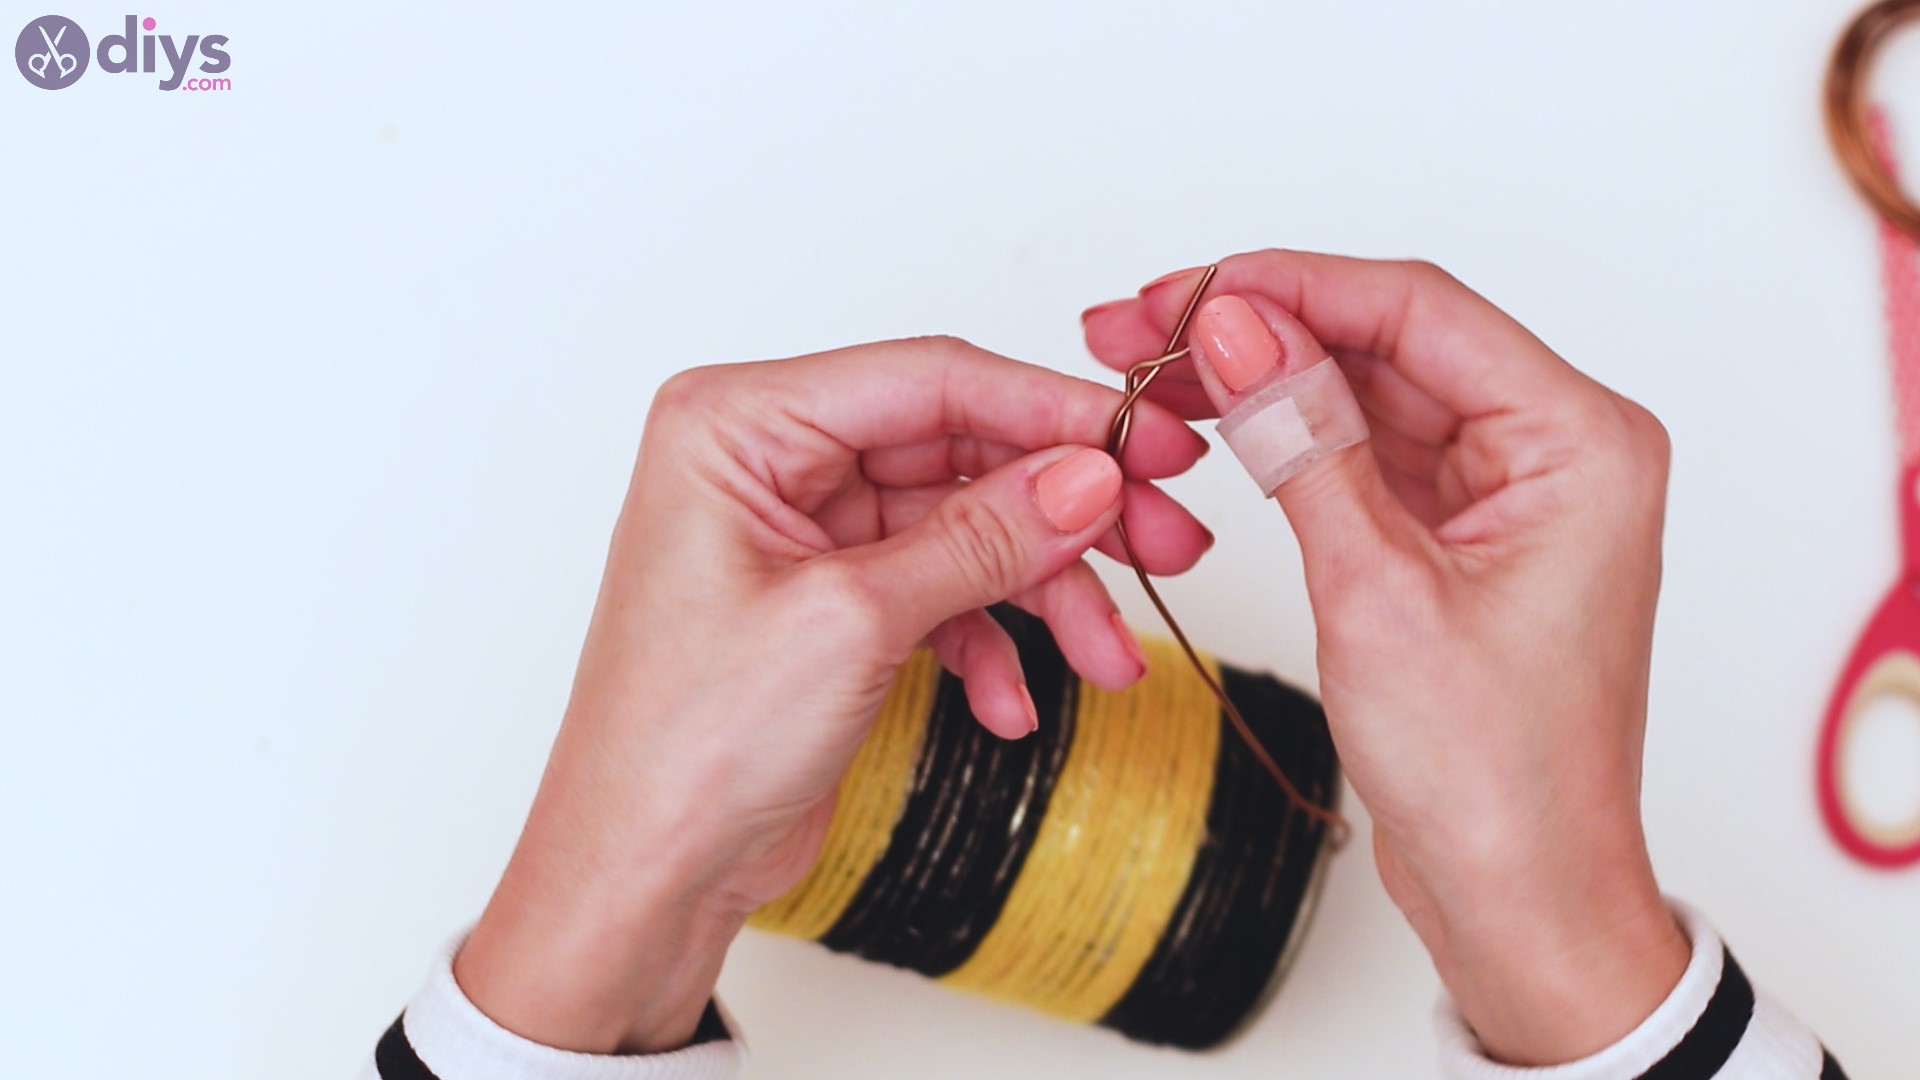
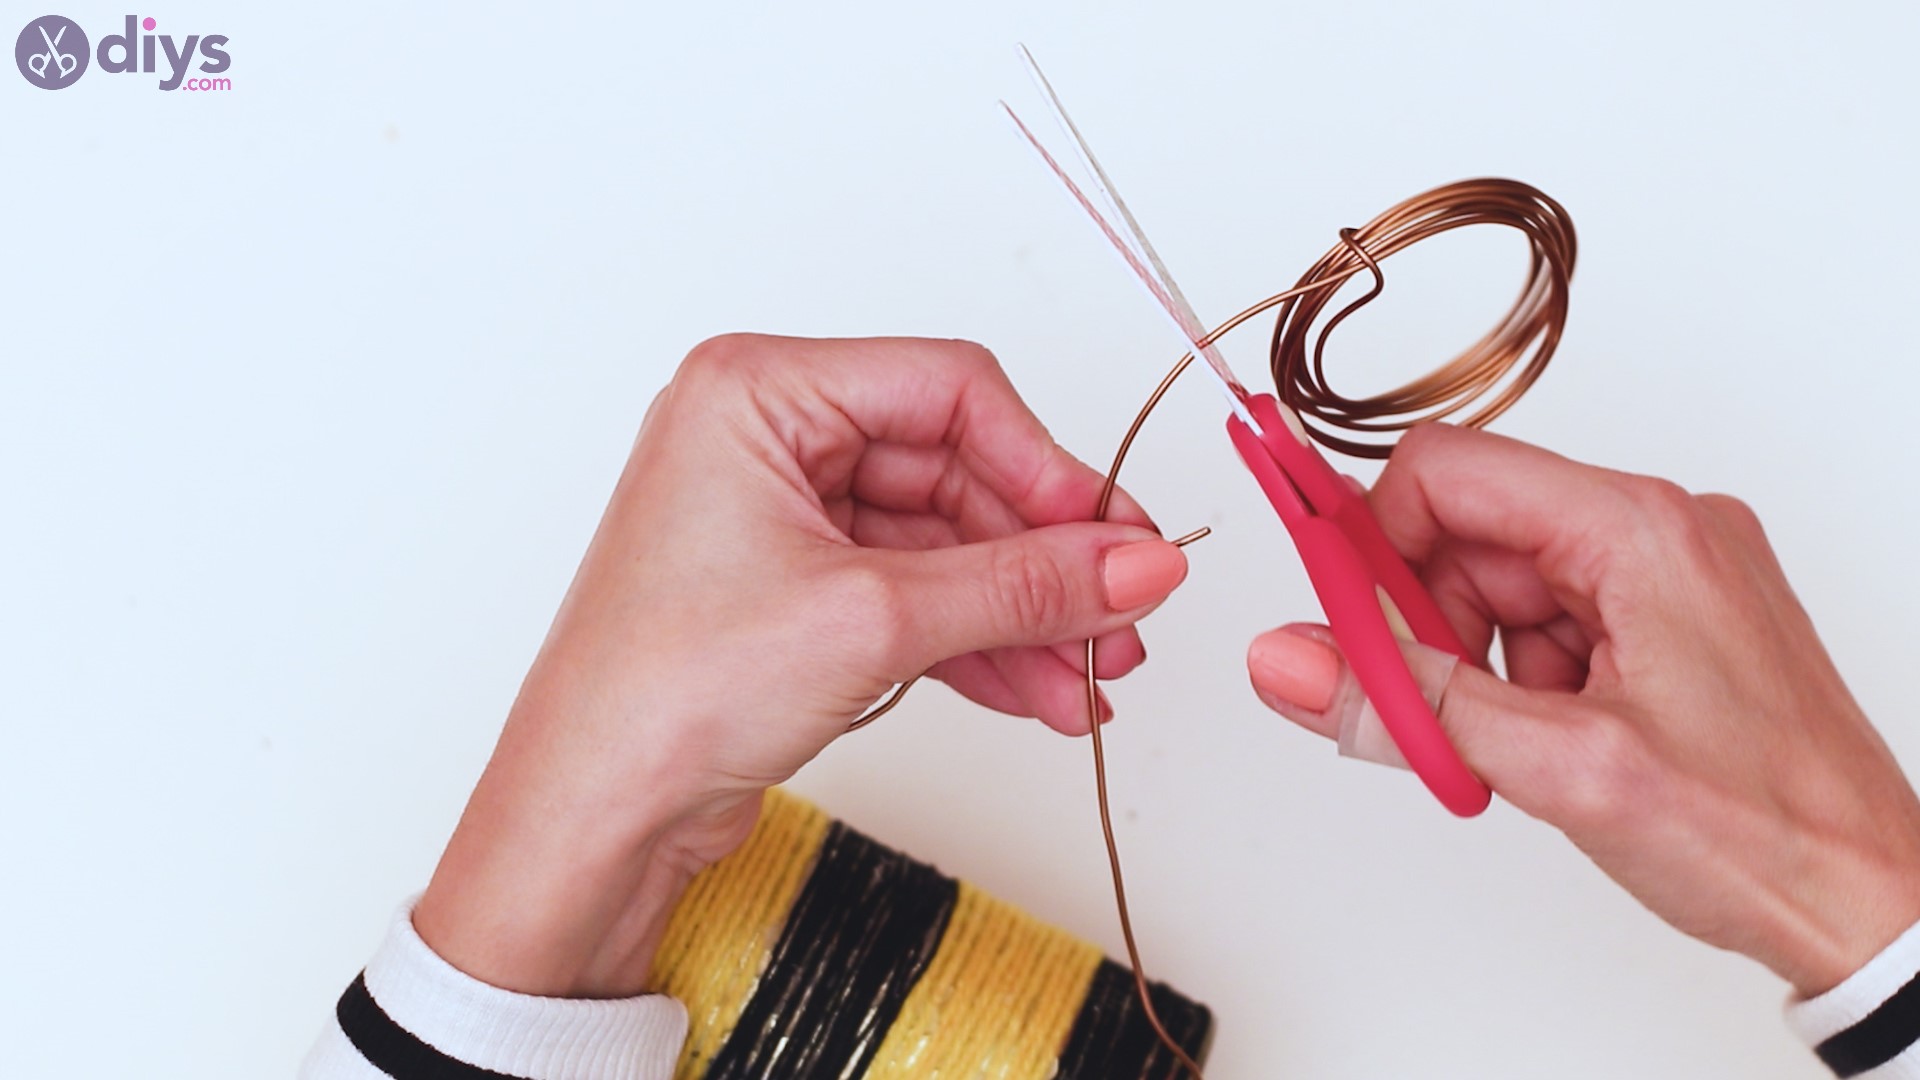
Push enough wire length, so the end wraps over the tin and joins the spool. Cut the extra wire and intertwine the ends.


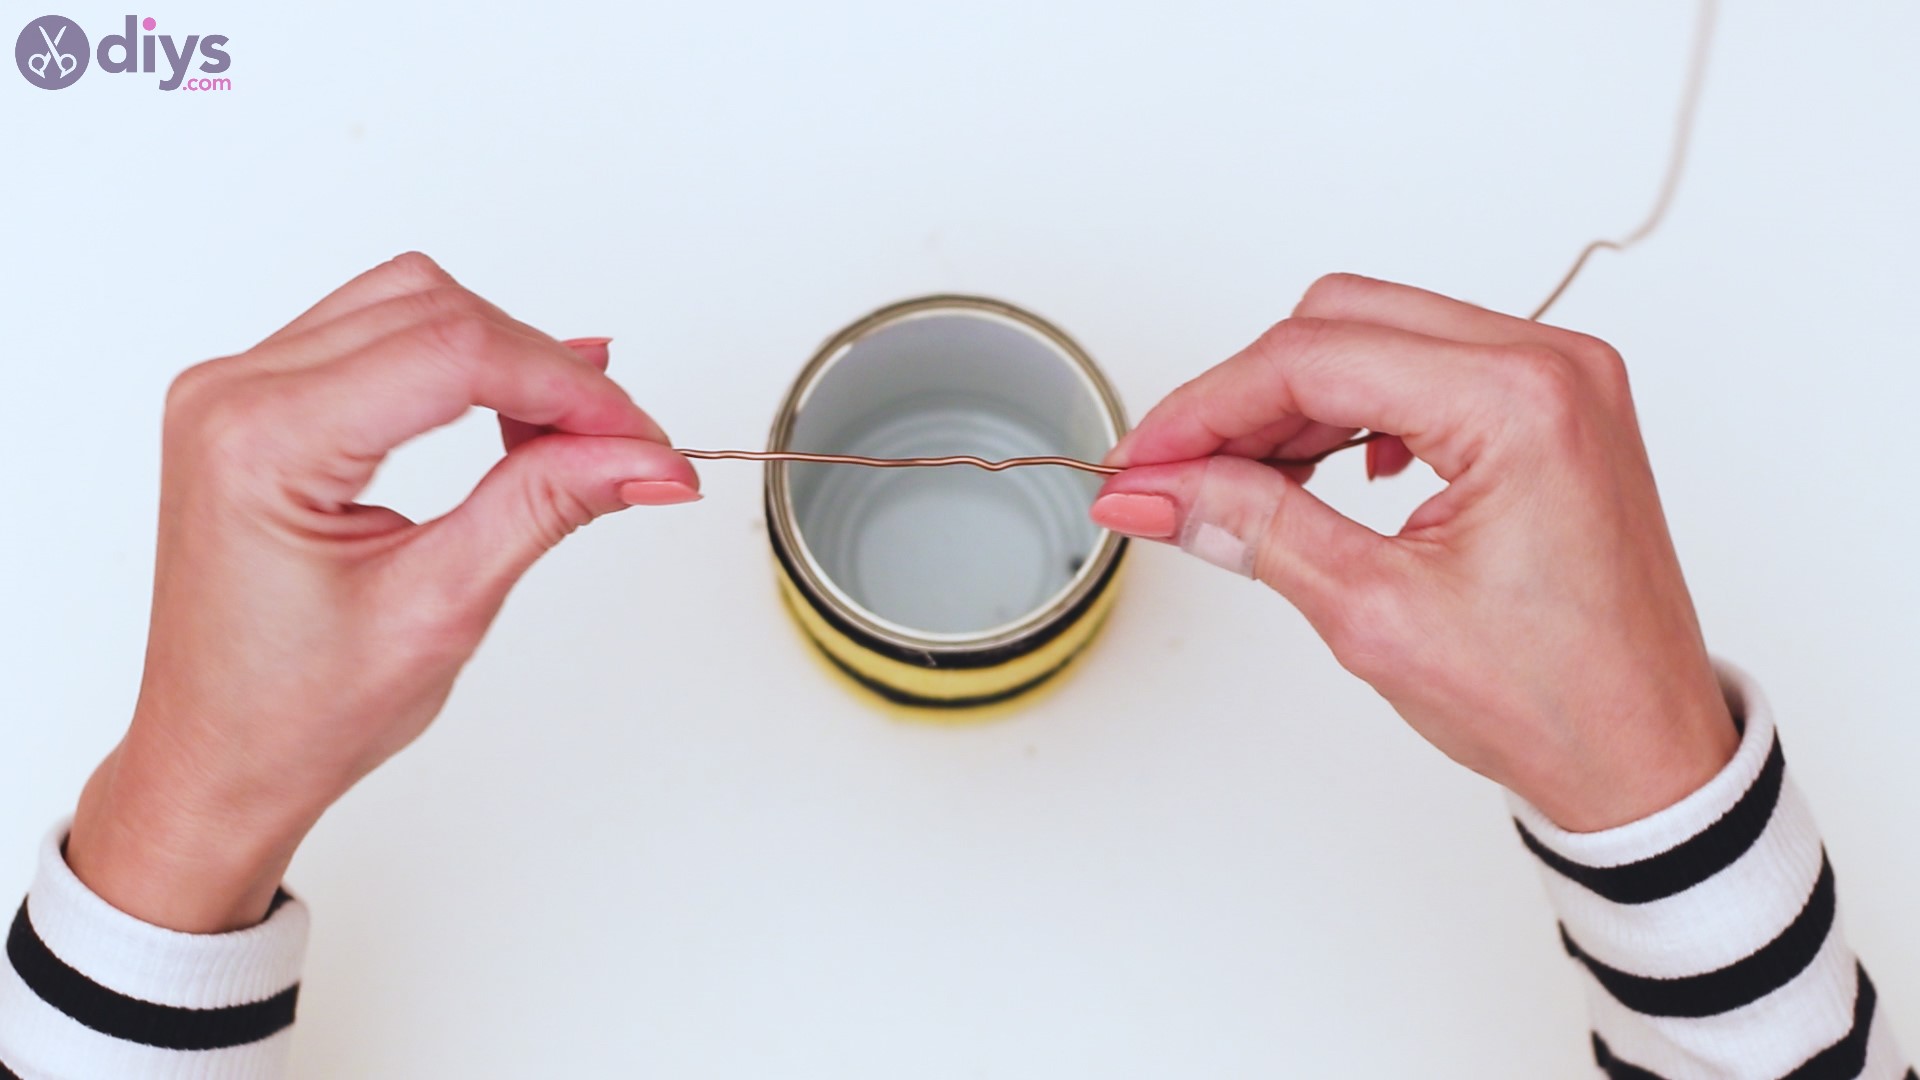
Once the wire ends are joined together, you can push that inside the tin by pulling on the wire. You want to hide the spots that are not necessarily the most aesthetically pleasing.

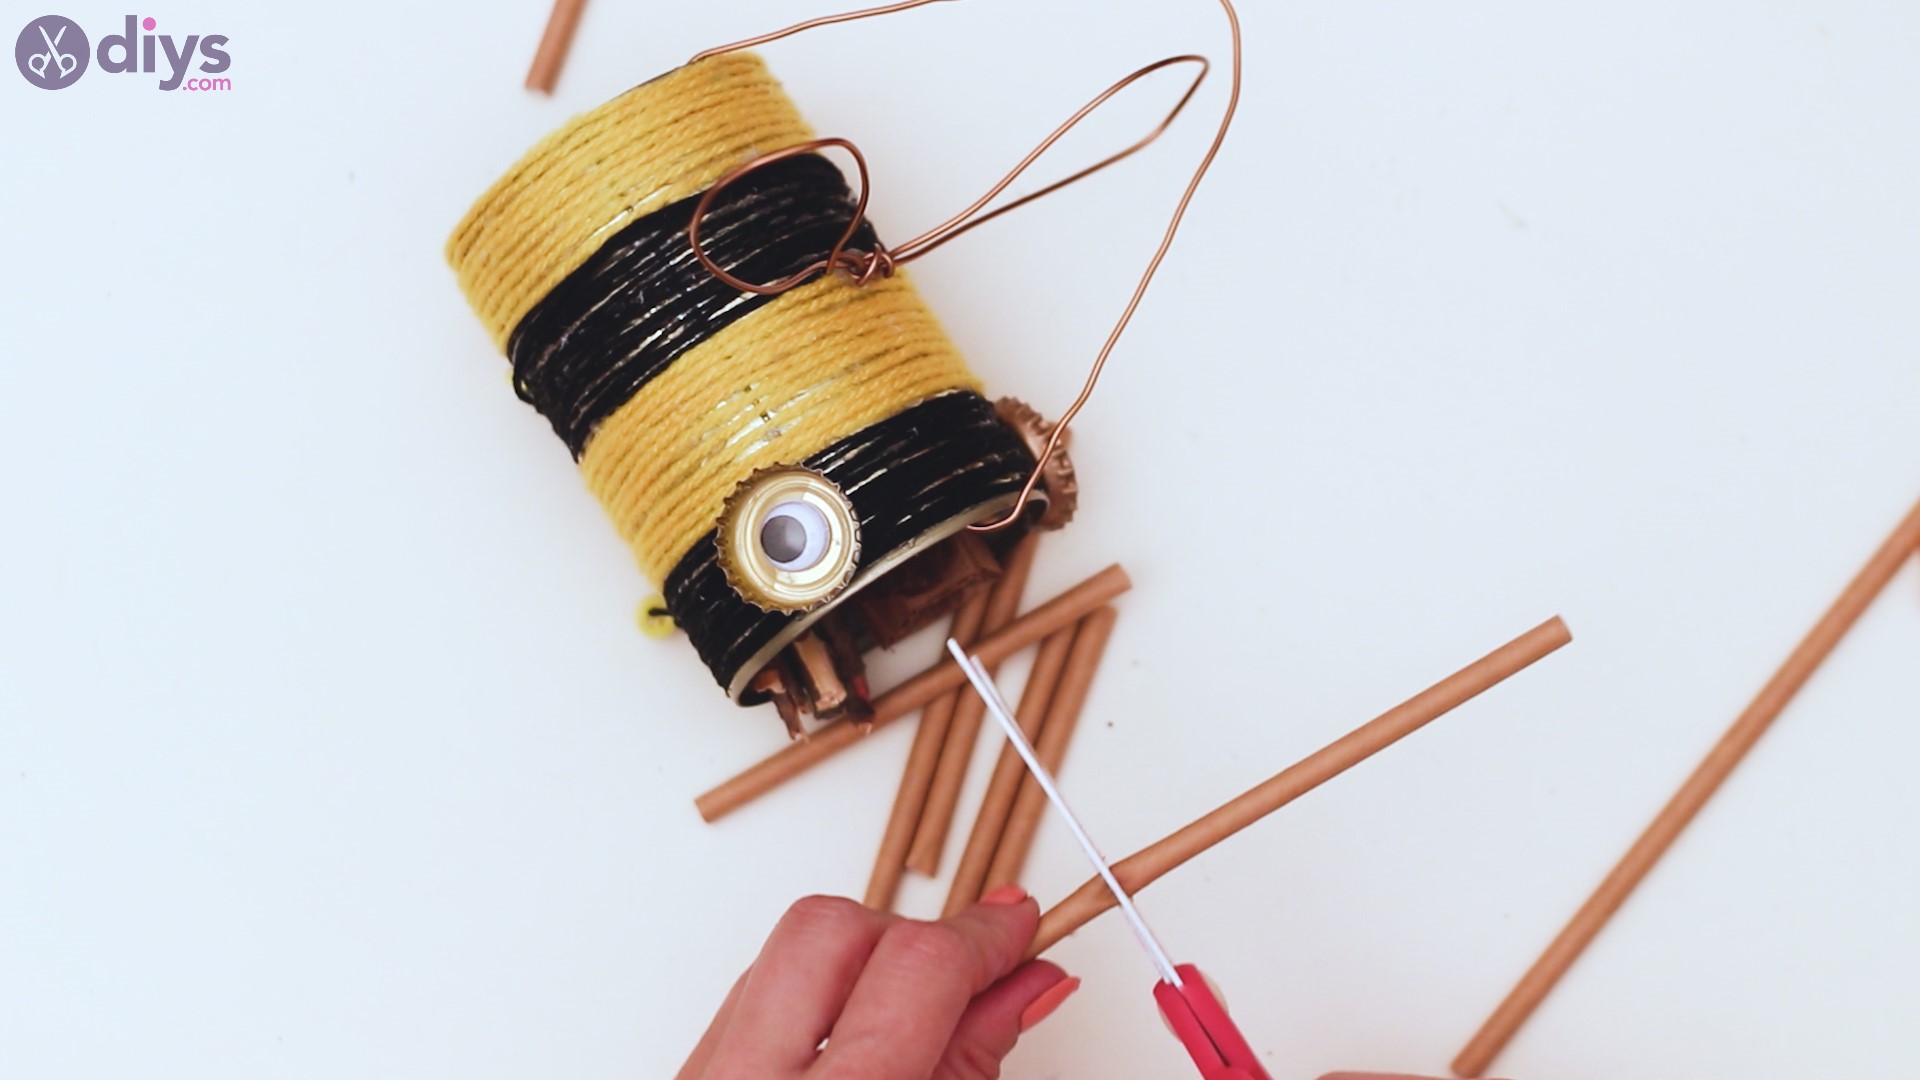
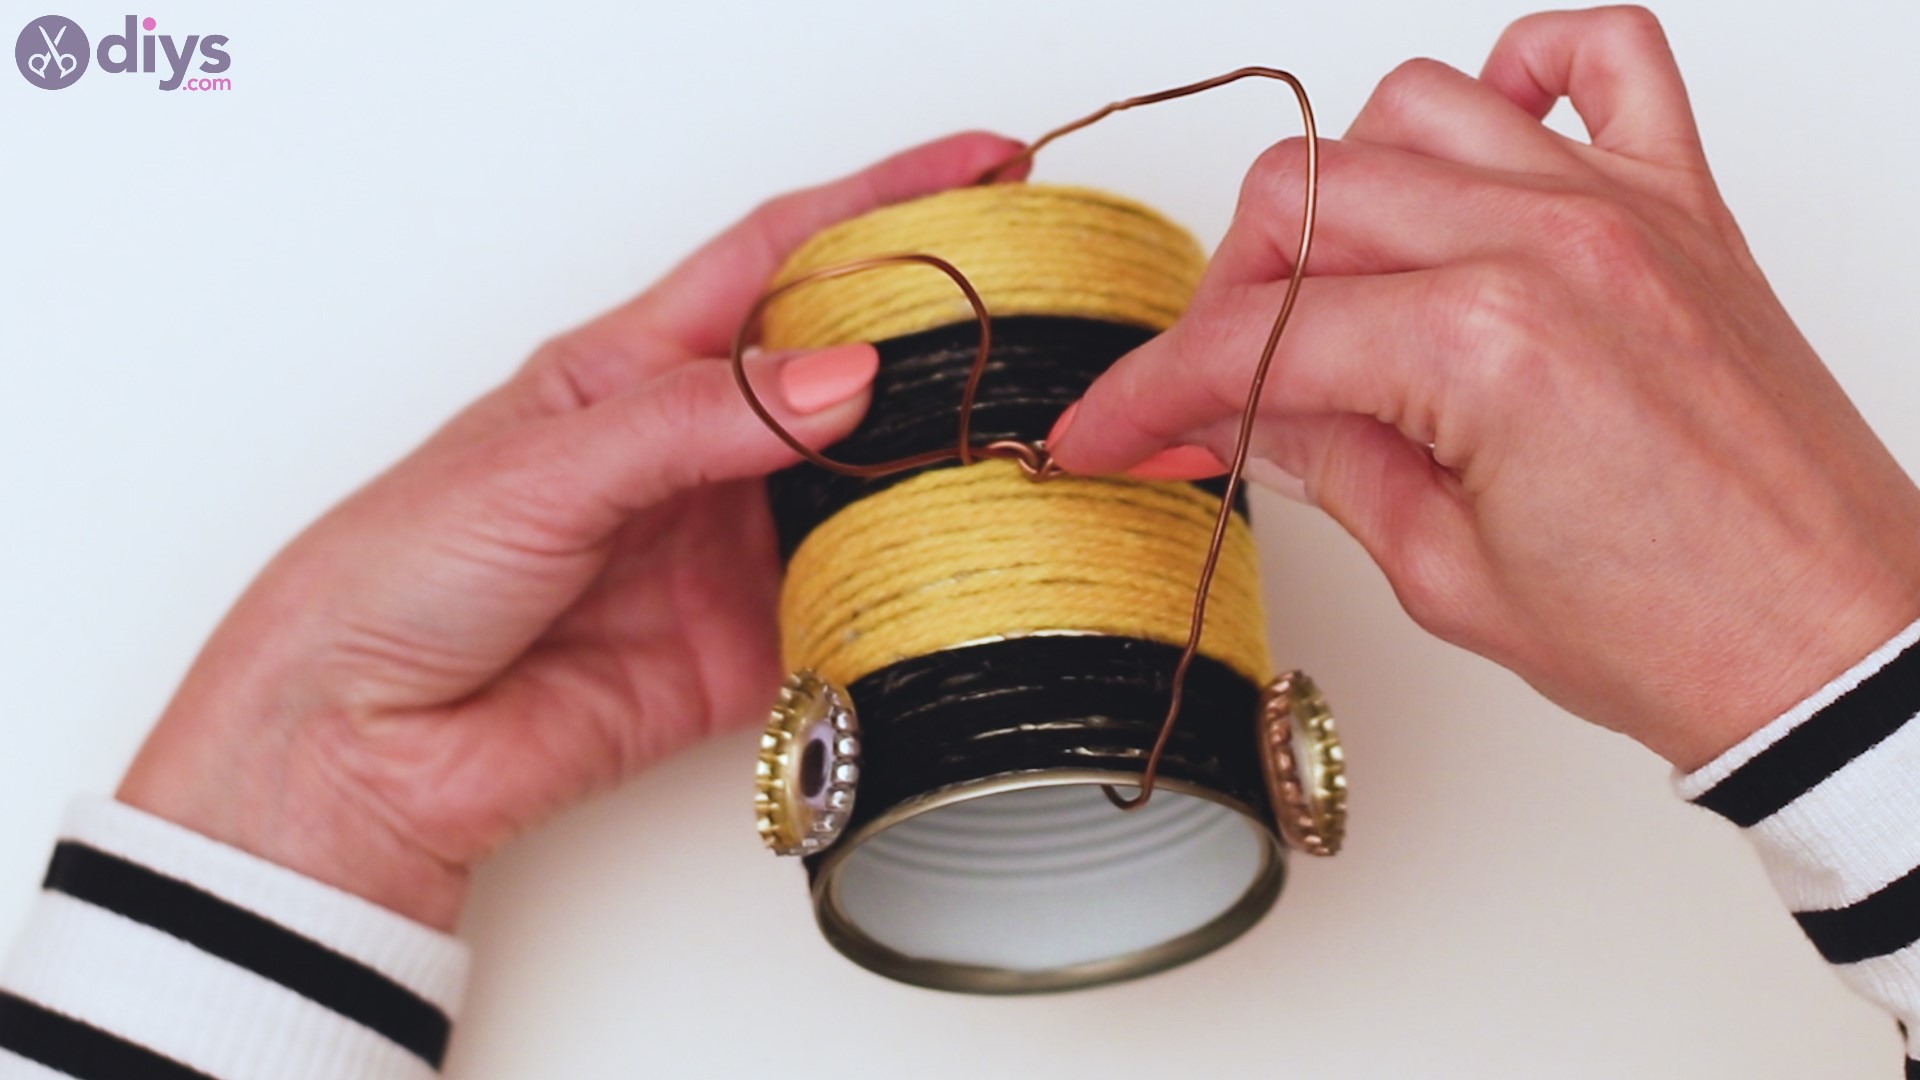
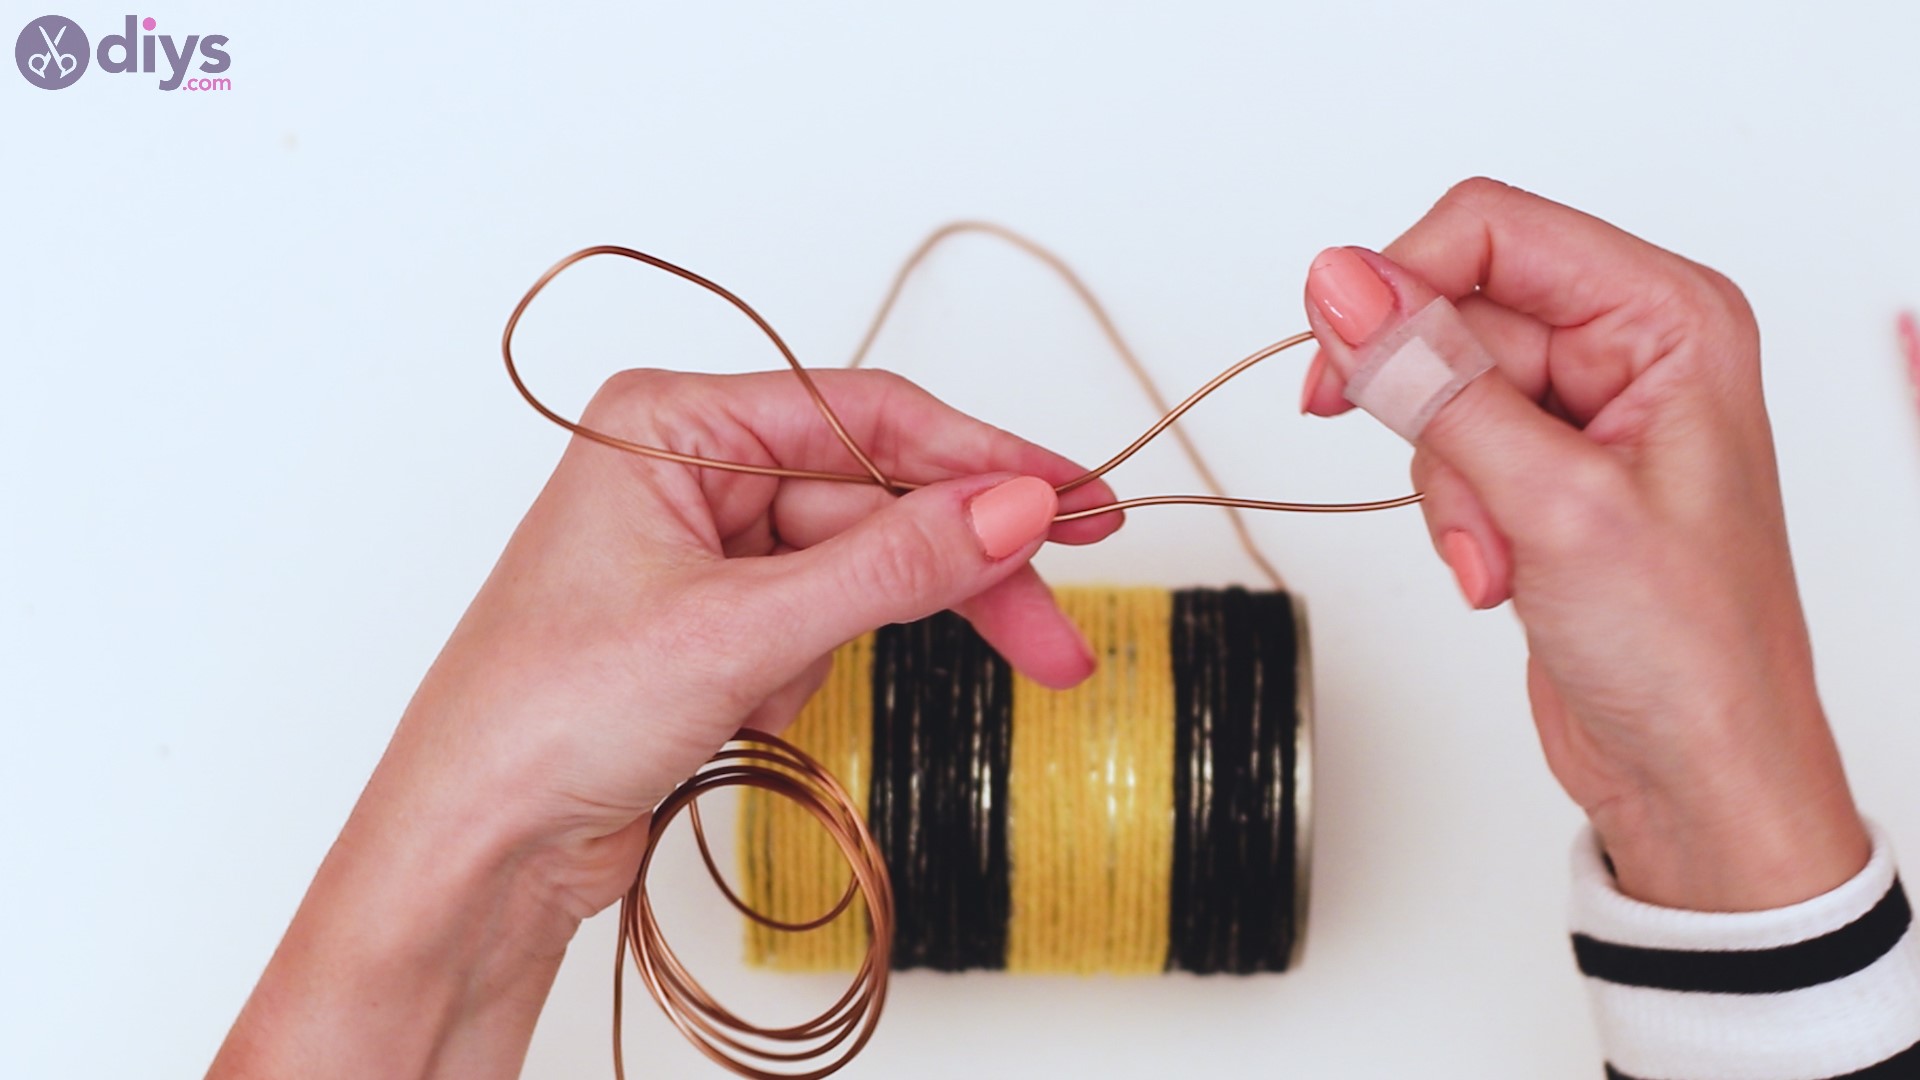
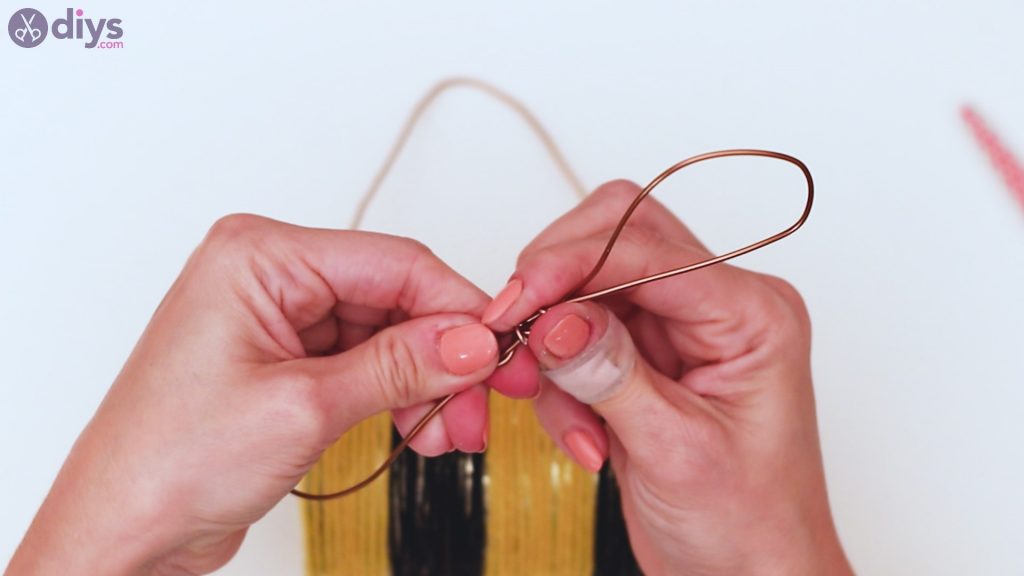
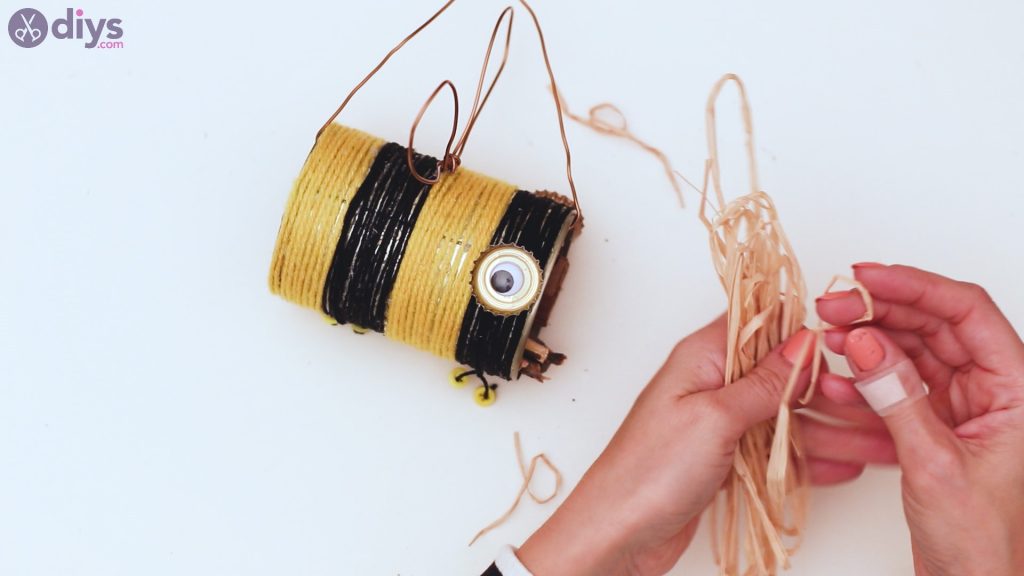
Step 6: Make some wings
Every been needs some wings, and since we’re already using the wire, why not make it some? Grab the wire and make a long loop. Once you’re happy with the size, twist the wire, so the shape stays.
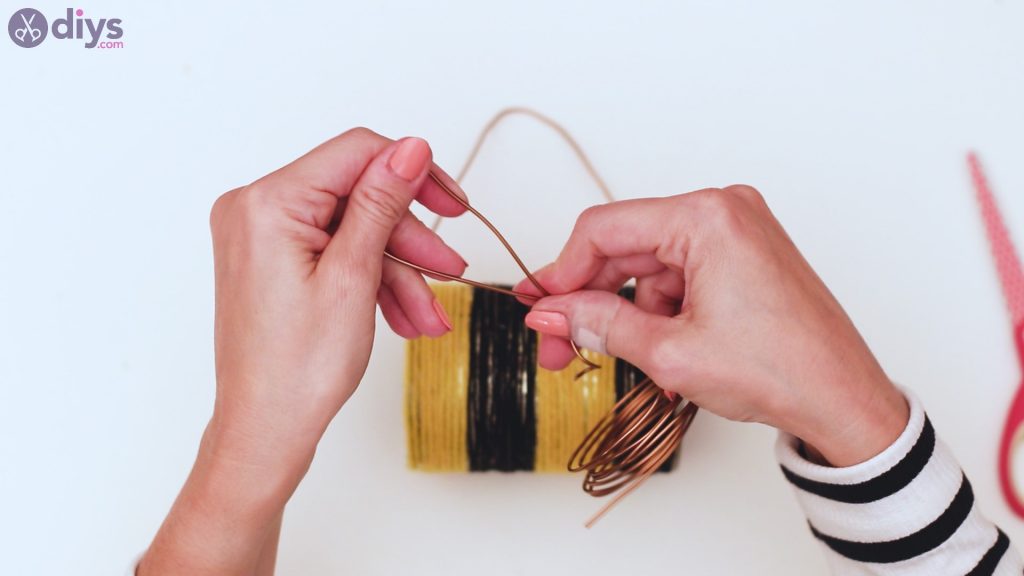

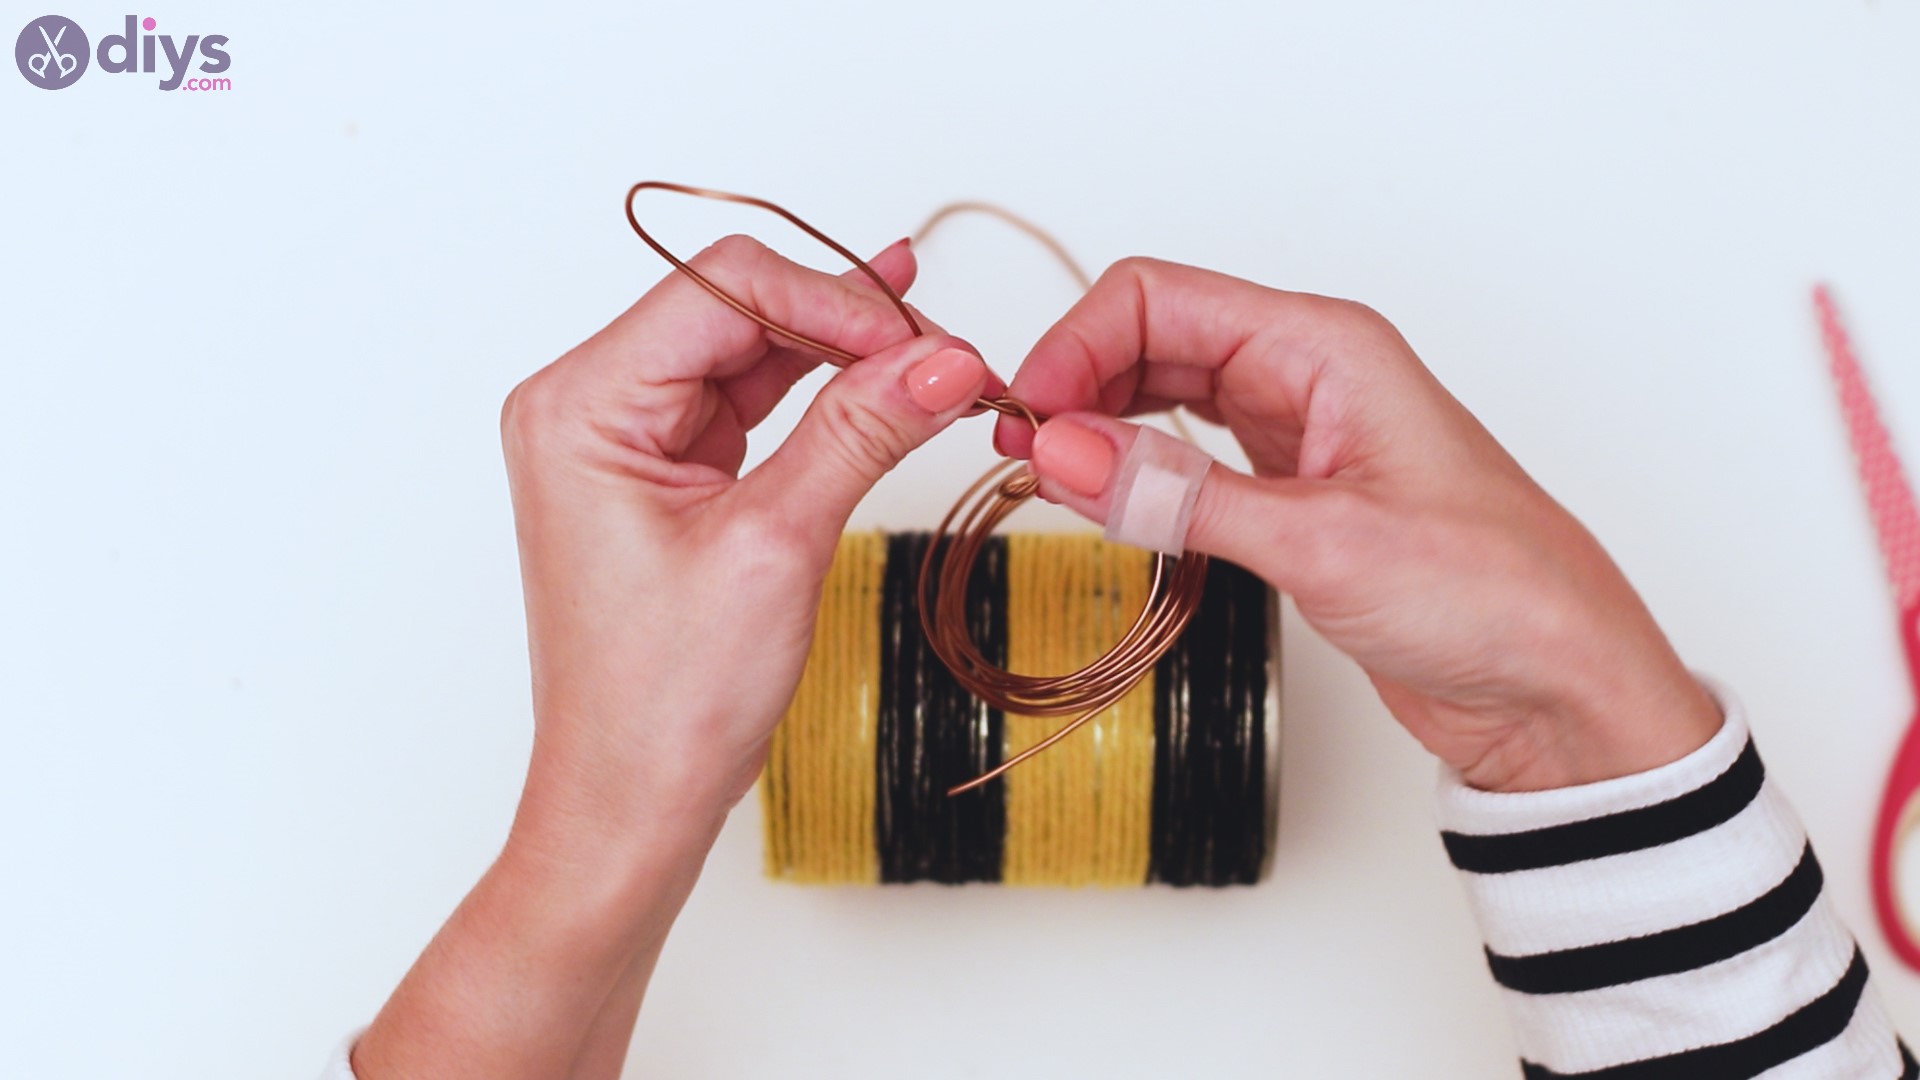
Unravel some more wire and measure it out, so the ‘wings’ have the same size. Once more, twist the metal wire.

Cut the wire when you’re happy with the shape and size of the wings.
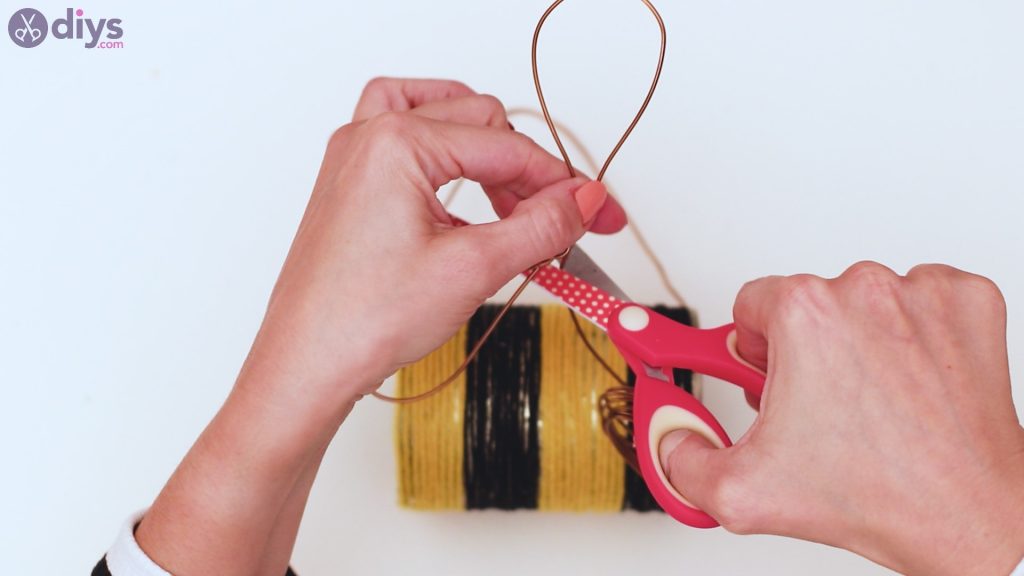
Use the ends of the wire to secure the wings’ shape and size by twisting them all together and looping them around the center of the wings.
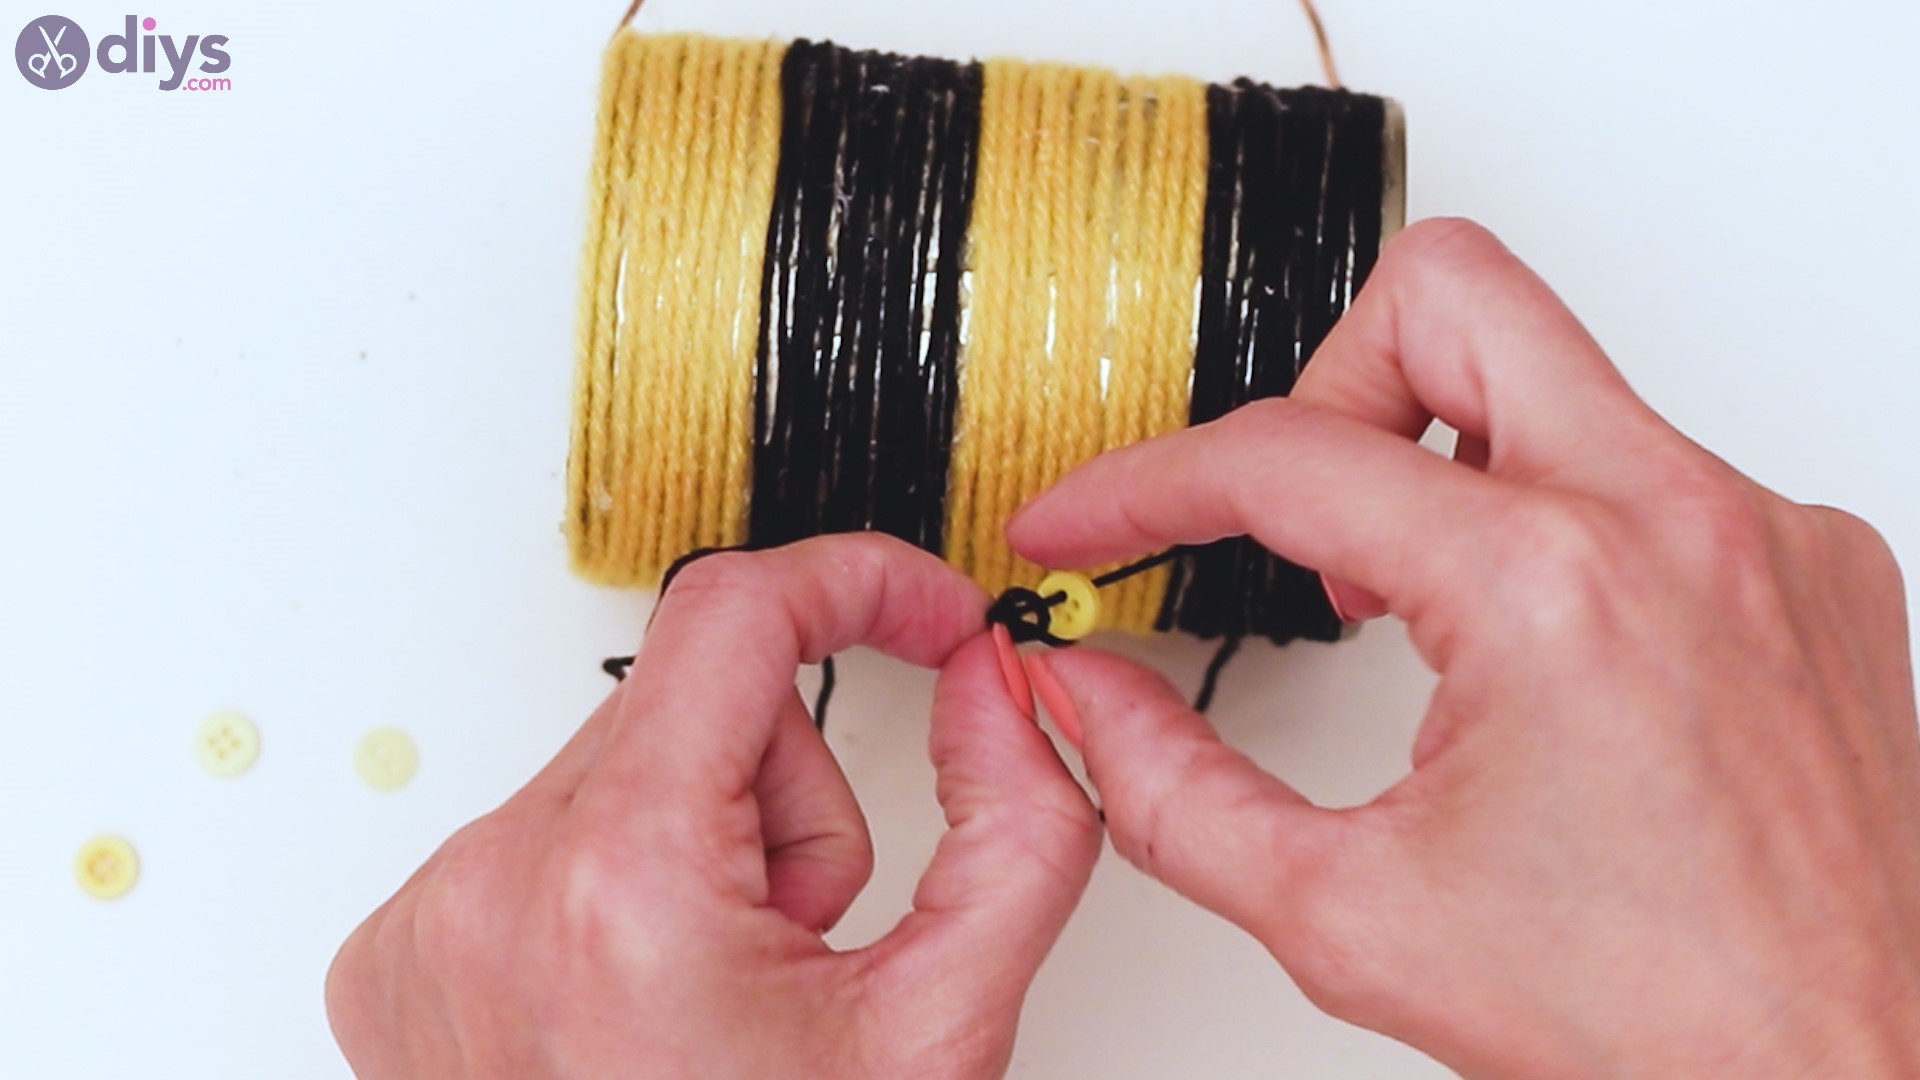
Step 7: Give this bee some legs
Bees have these adorably cute legs, so ours should too. Get some of theblack yarn and wrap it around the tin. Make a knot at the base of the tin and allow two longer ends after the knot.
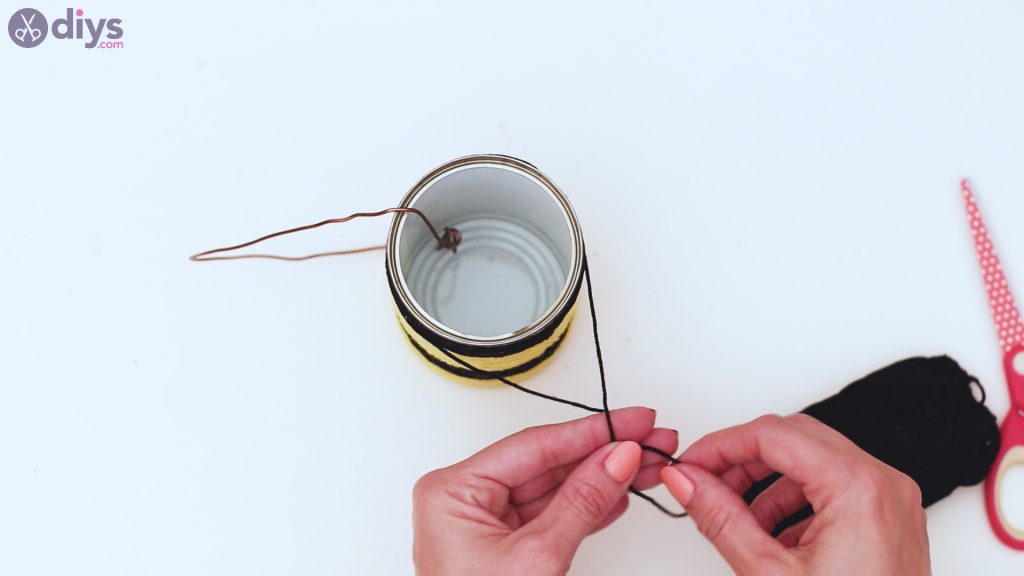

Repeat the process over the next area where you used black yarn.
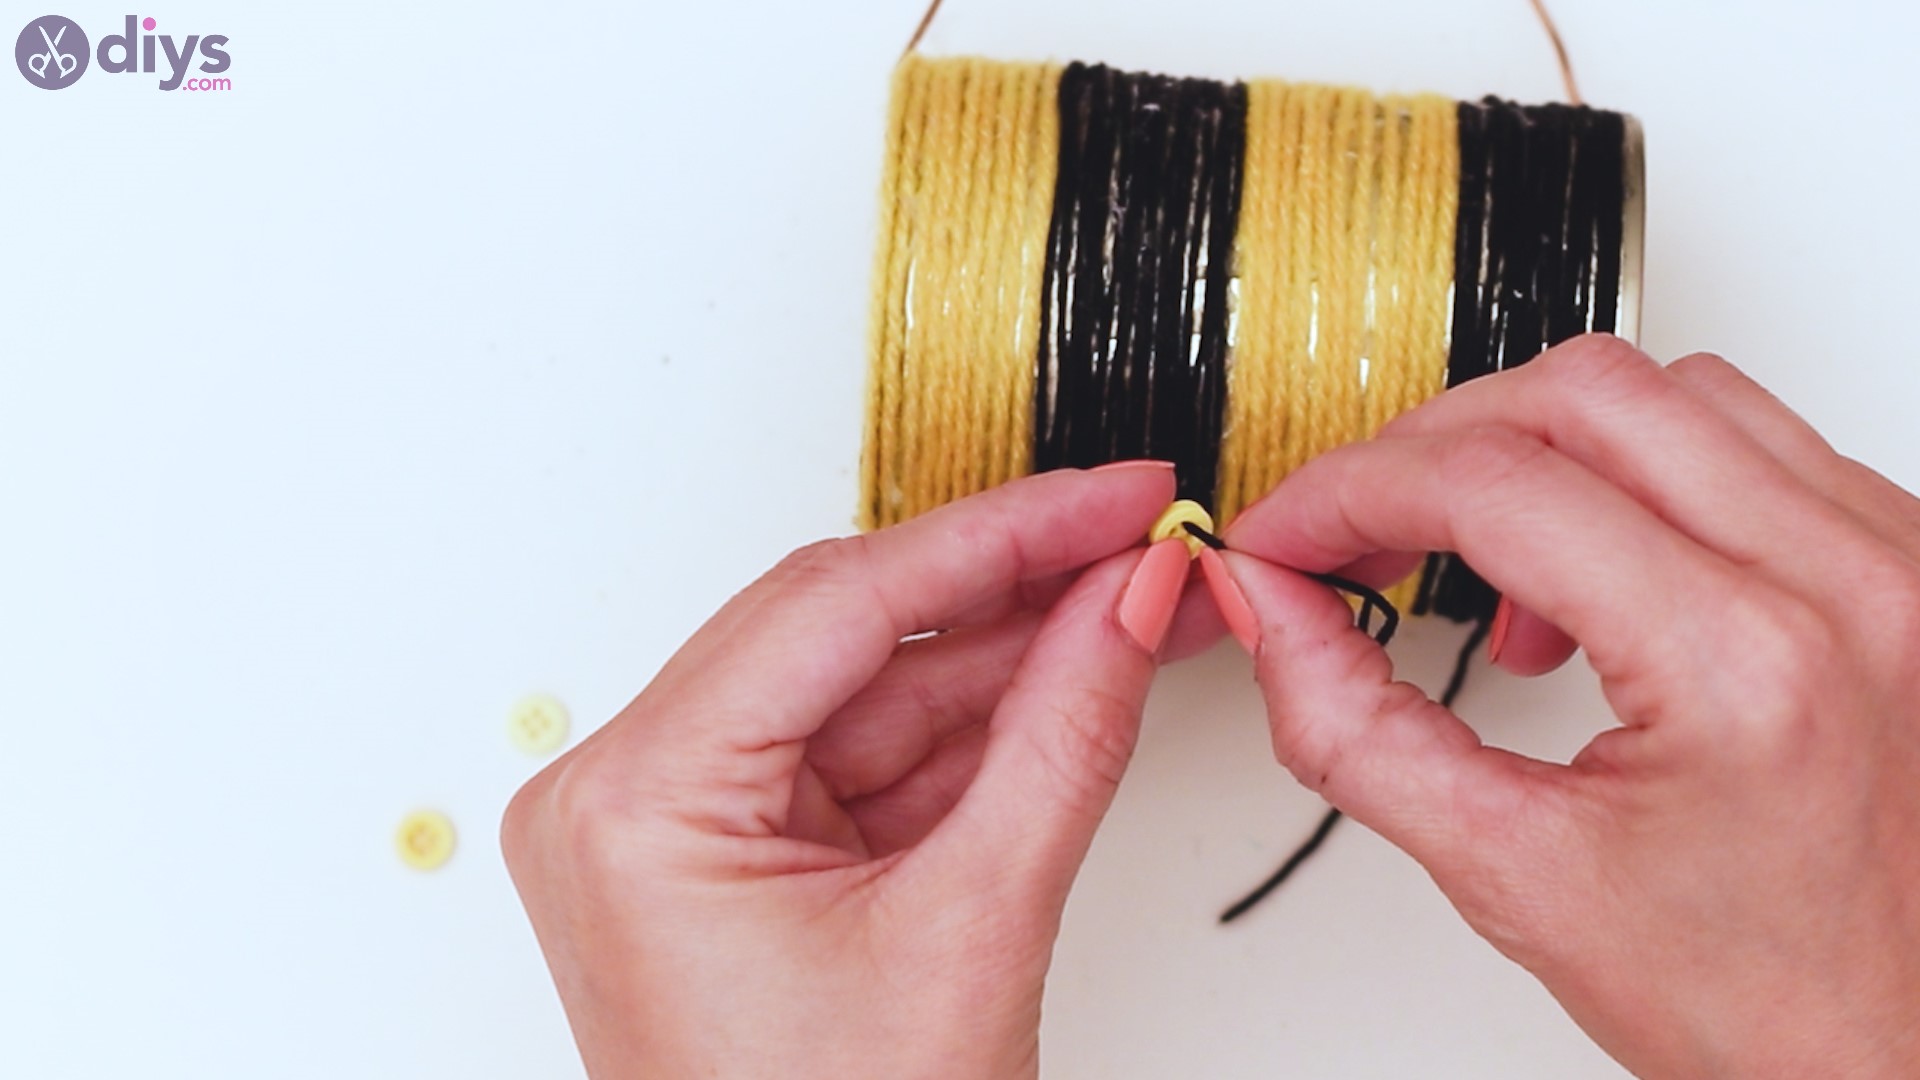
Get the yellow buttons and push the end of the thread through one of the holes. Make a knot on the other end to secure the button.


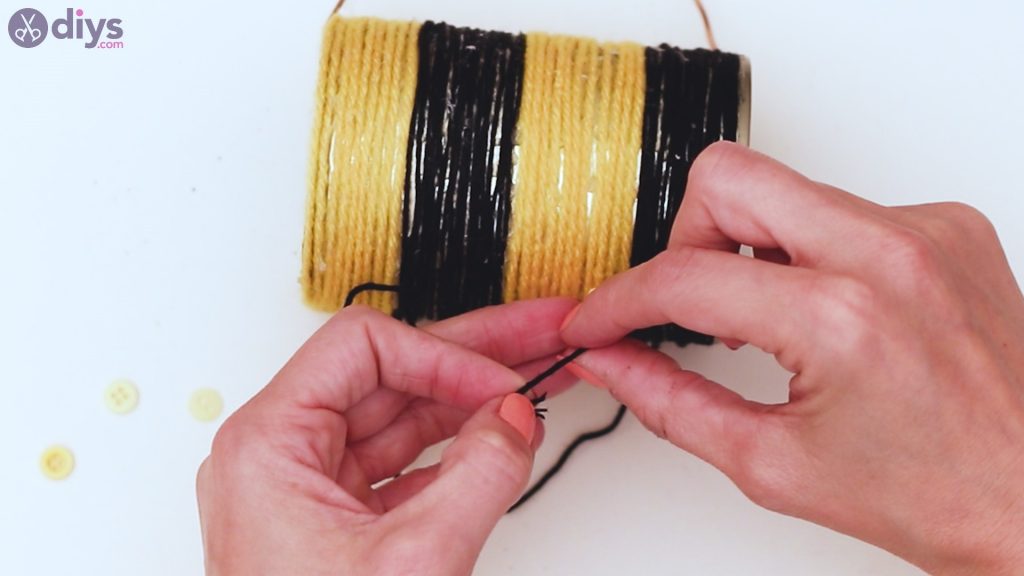
Cut off the excess thread once you’re happy with the size of the bee leg.

Repeat the process for the other “legs” as well.

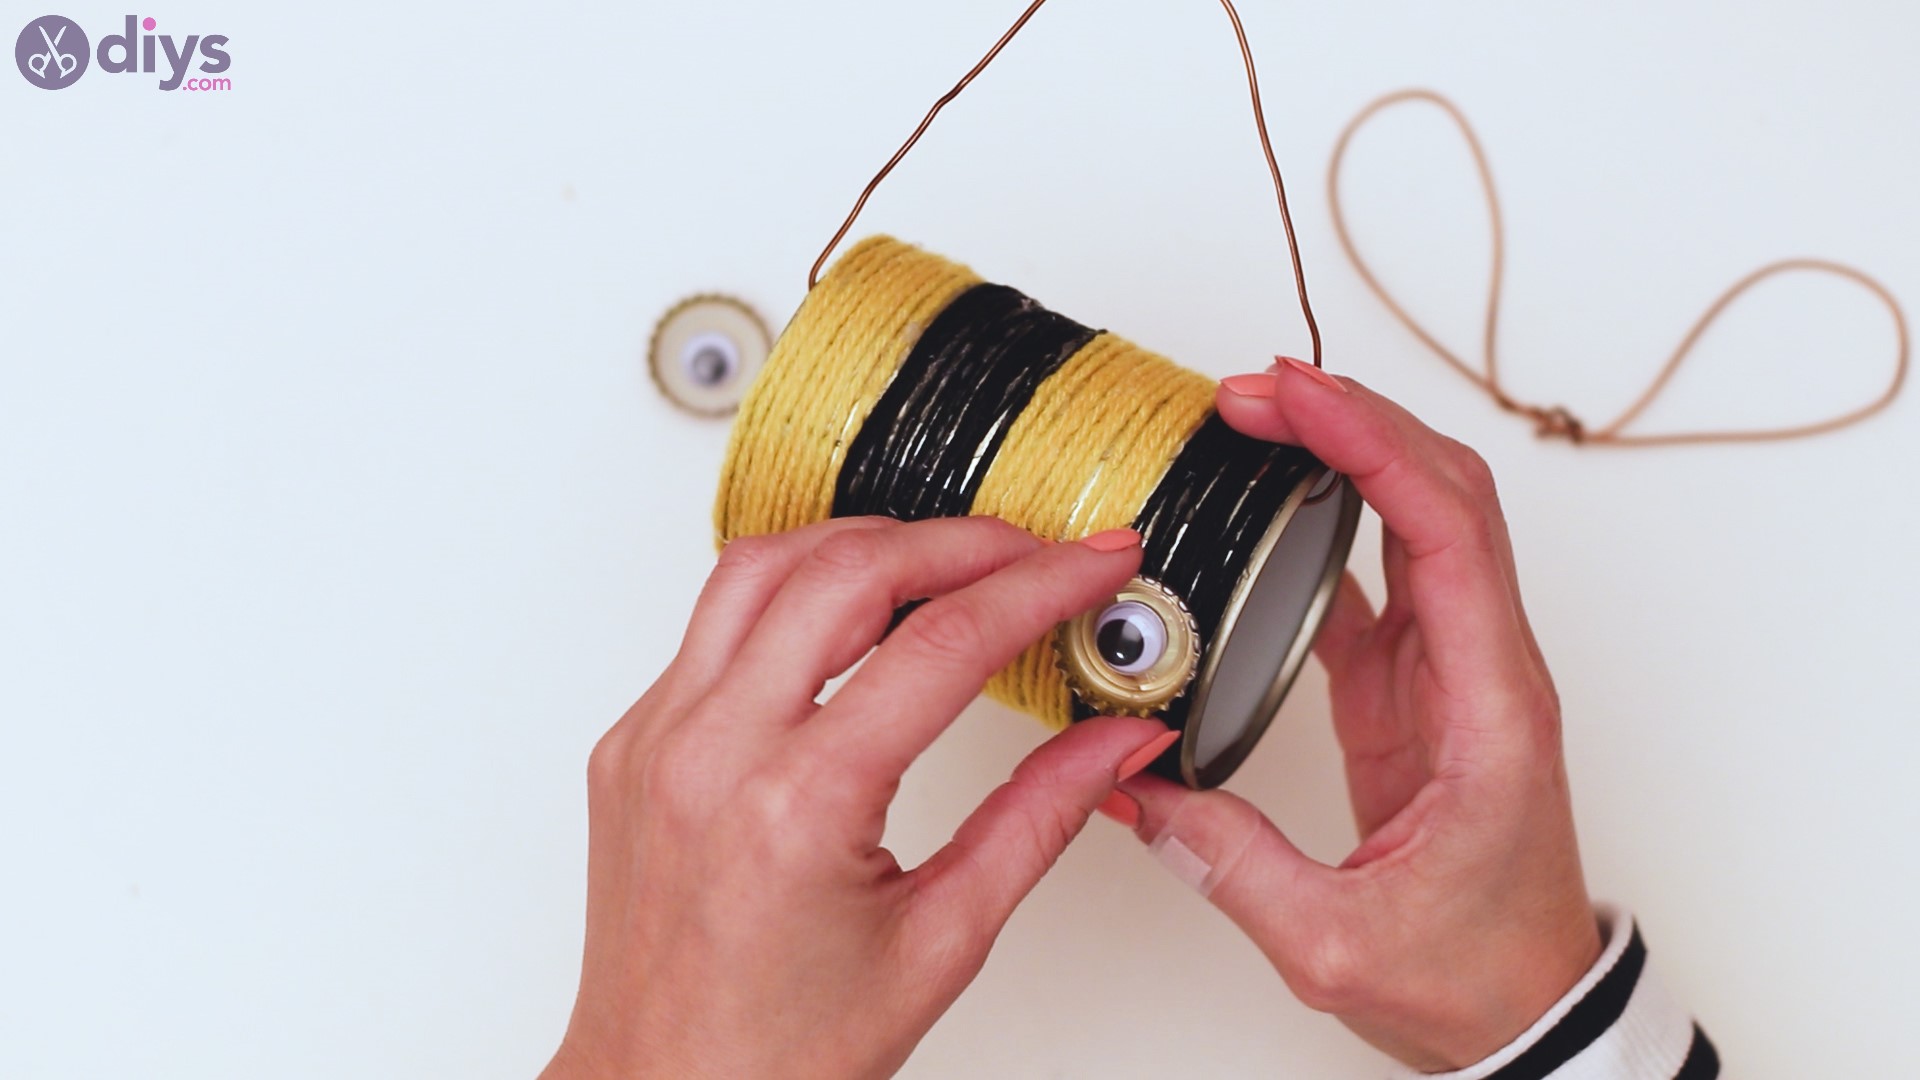
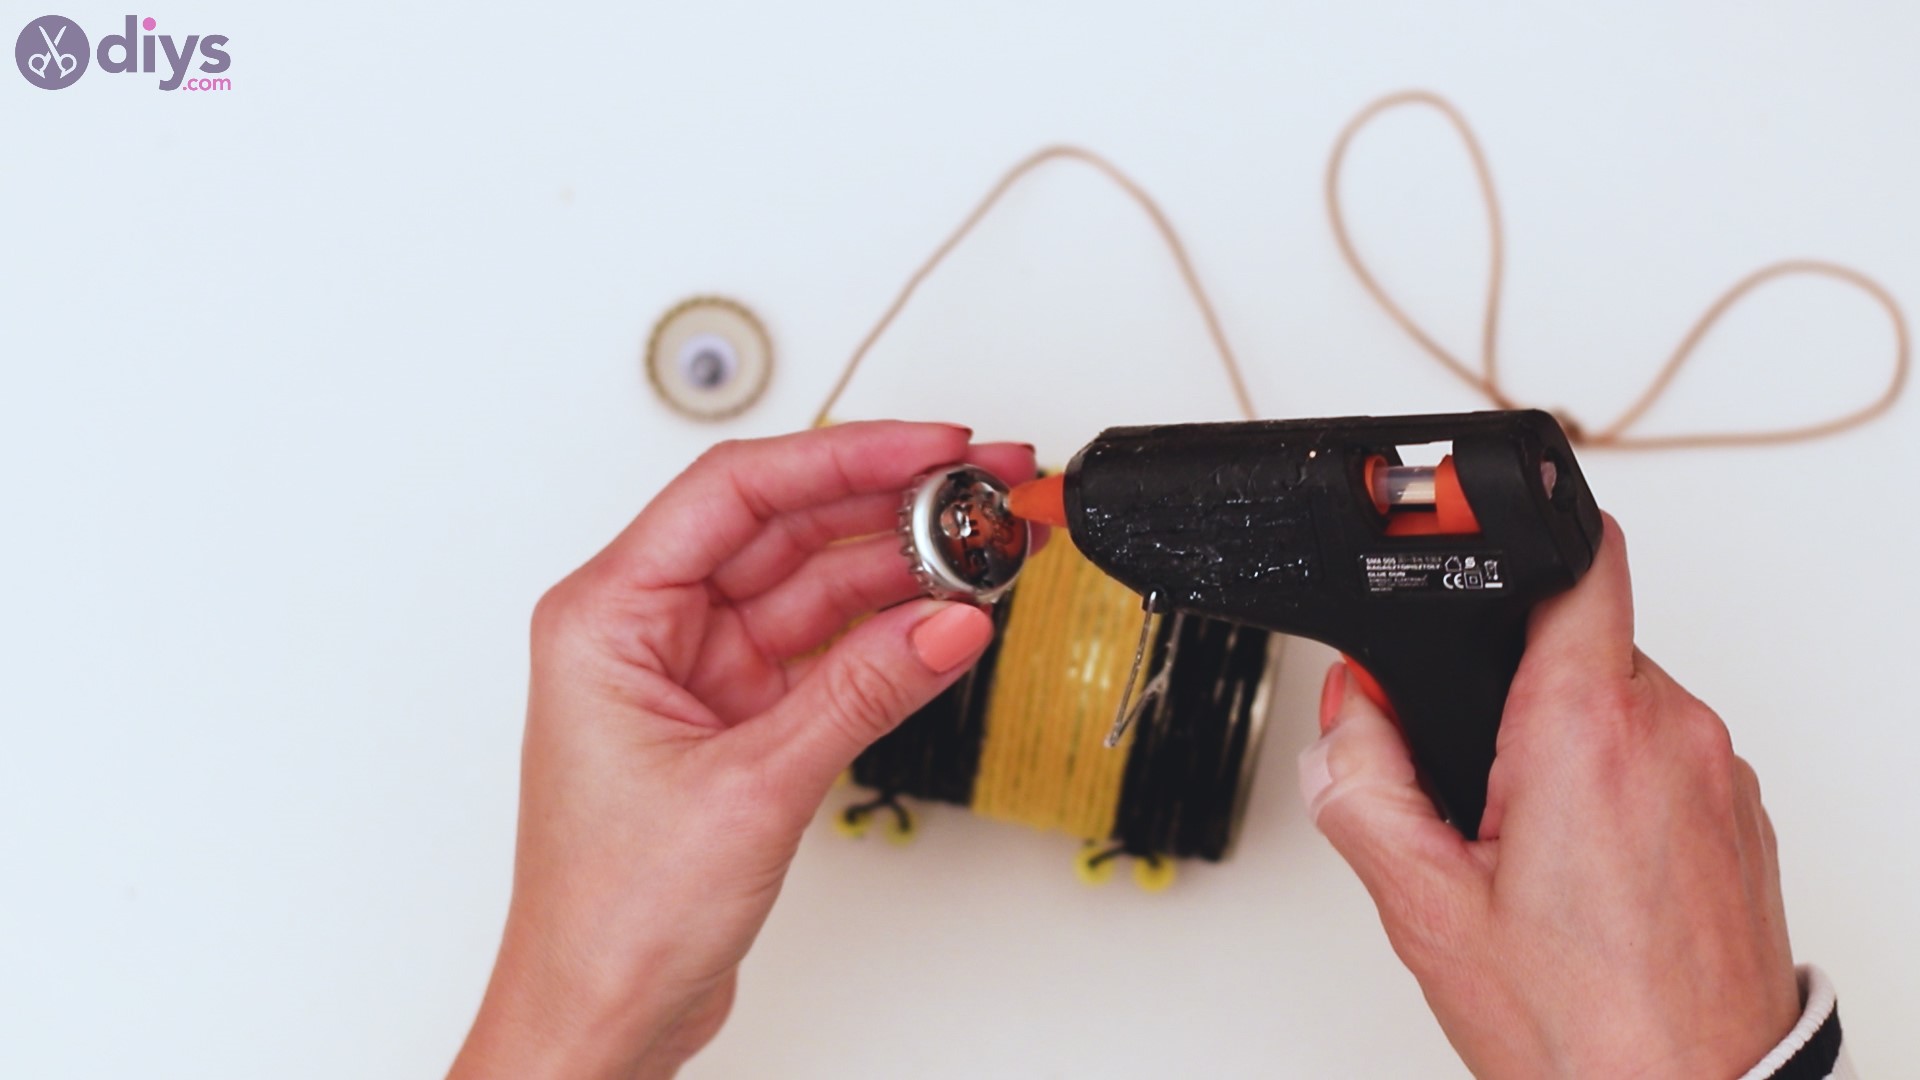
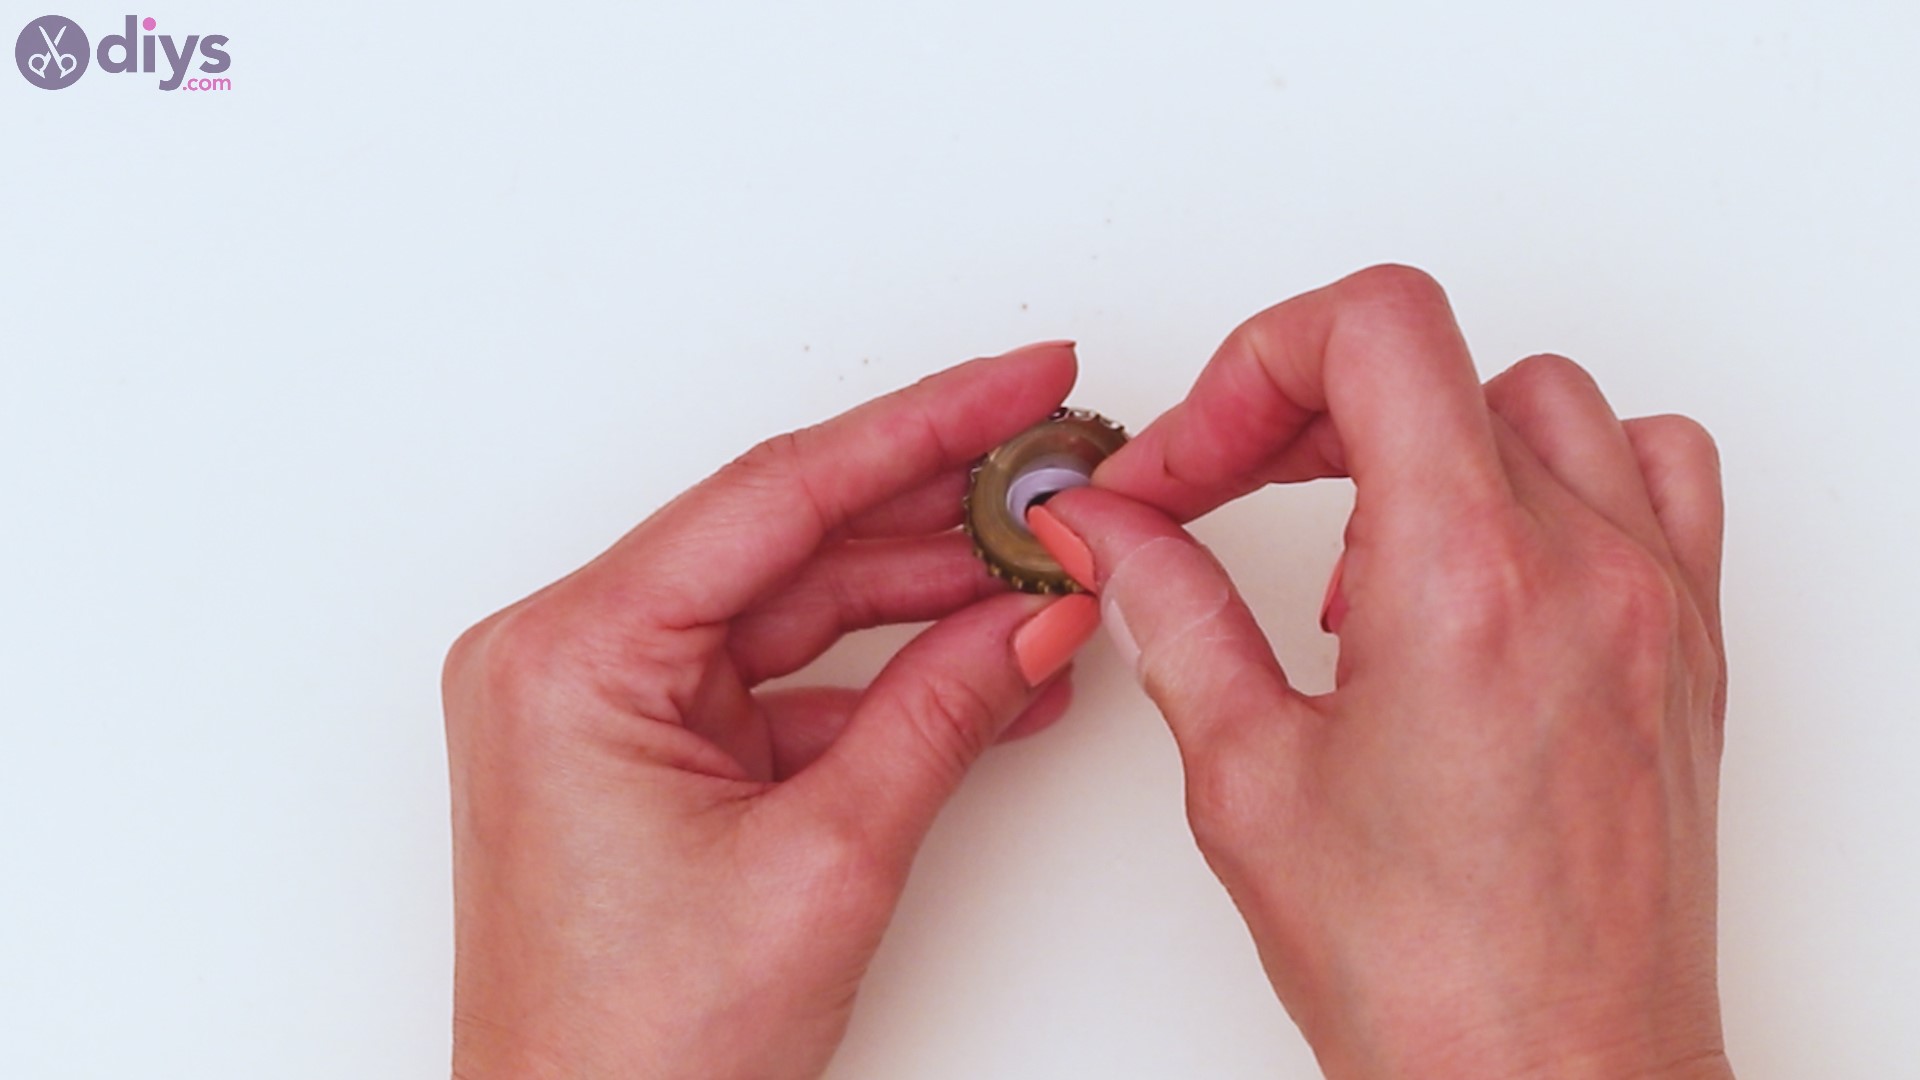
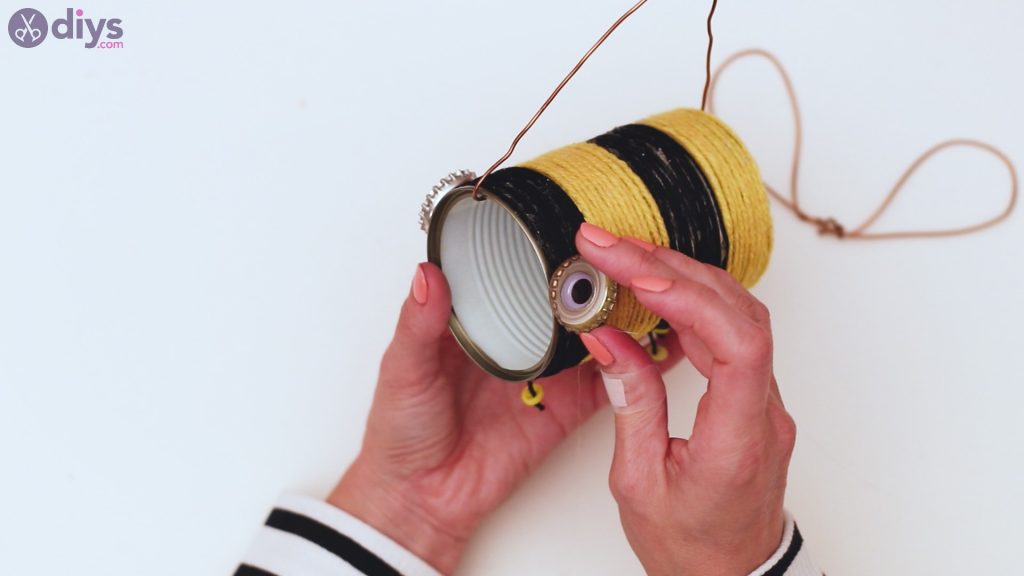
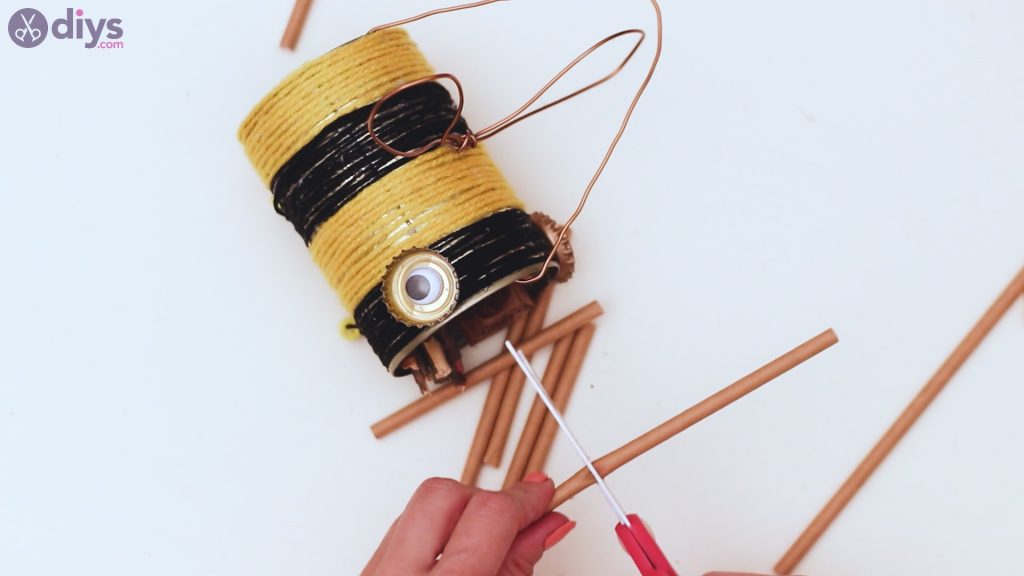
Step 8: Make some eyes
Your bee needs to have some eyes, too, so let’s make some. Take one of the metal bottle caps and place some hot glue on the inside.
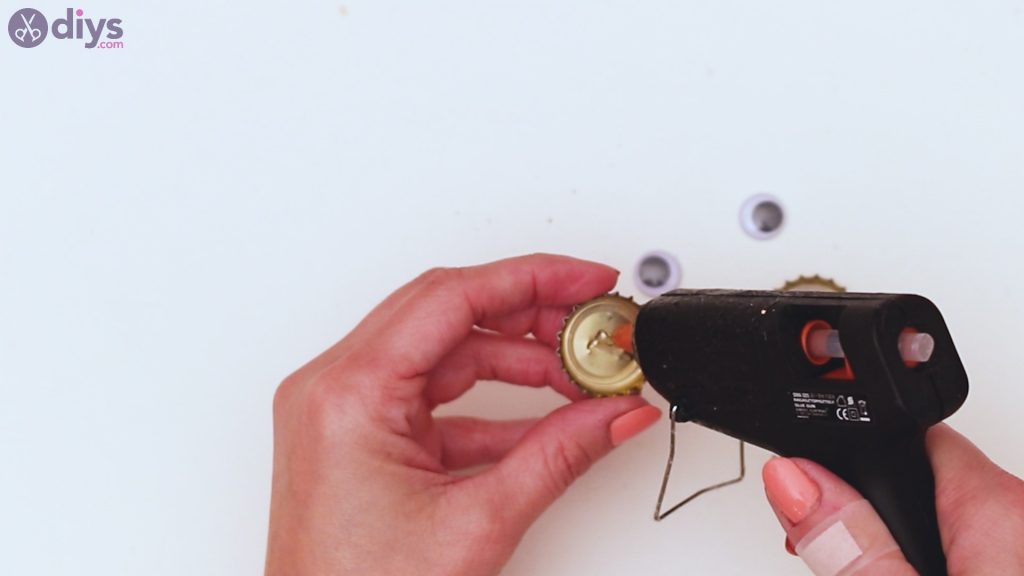
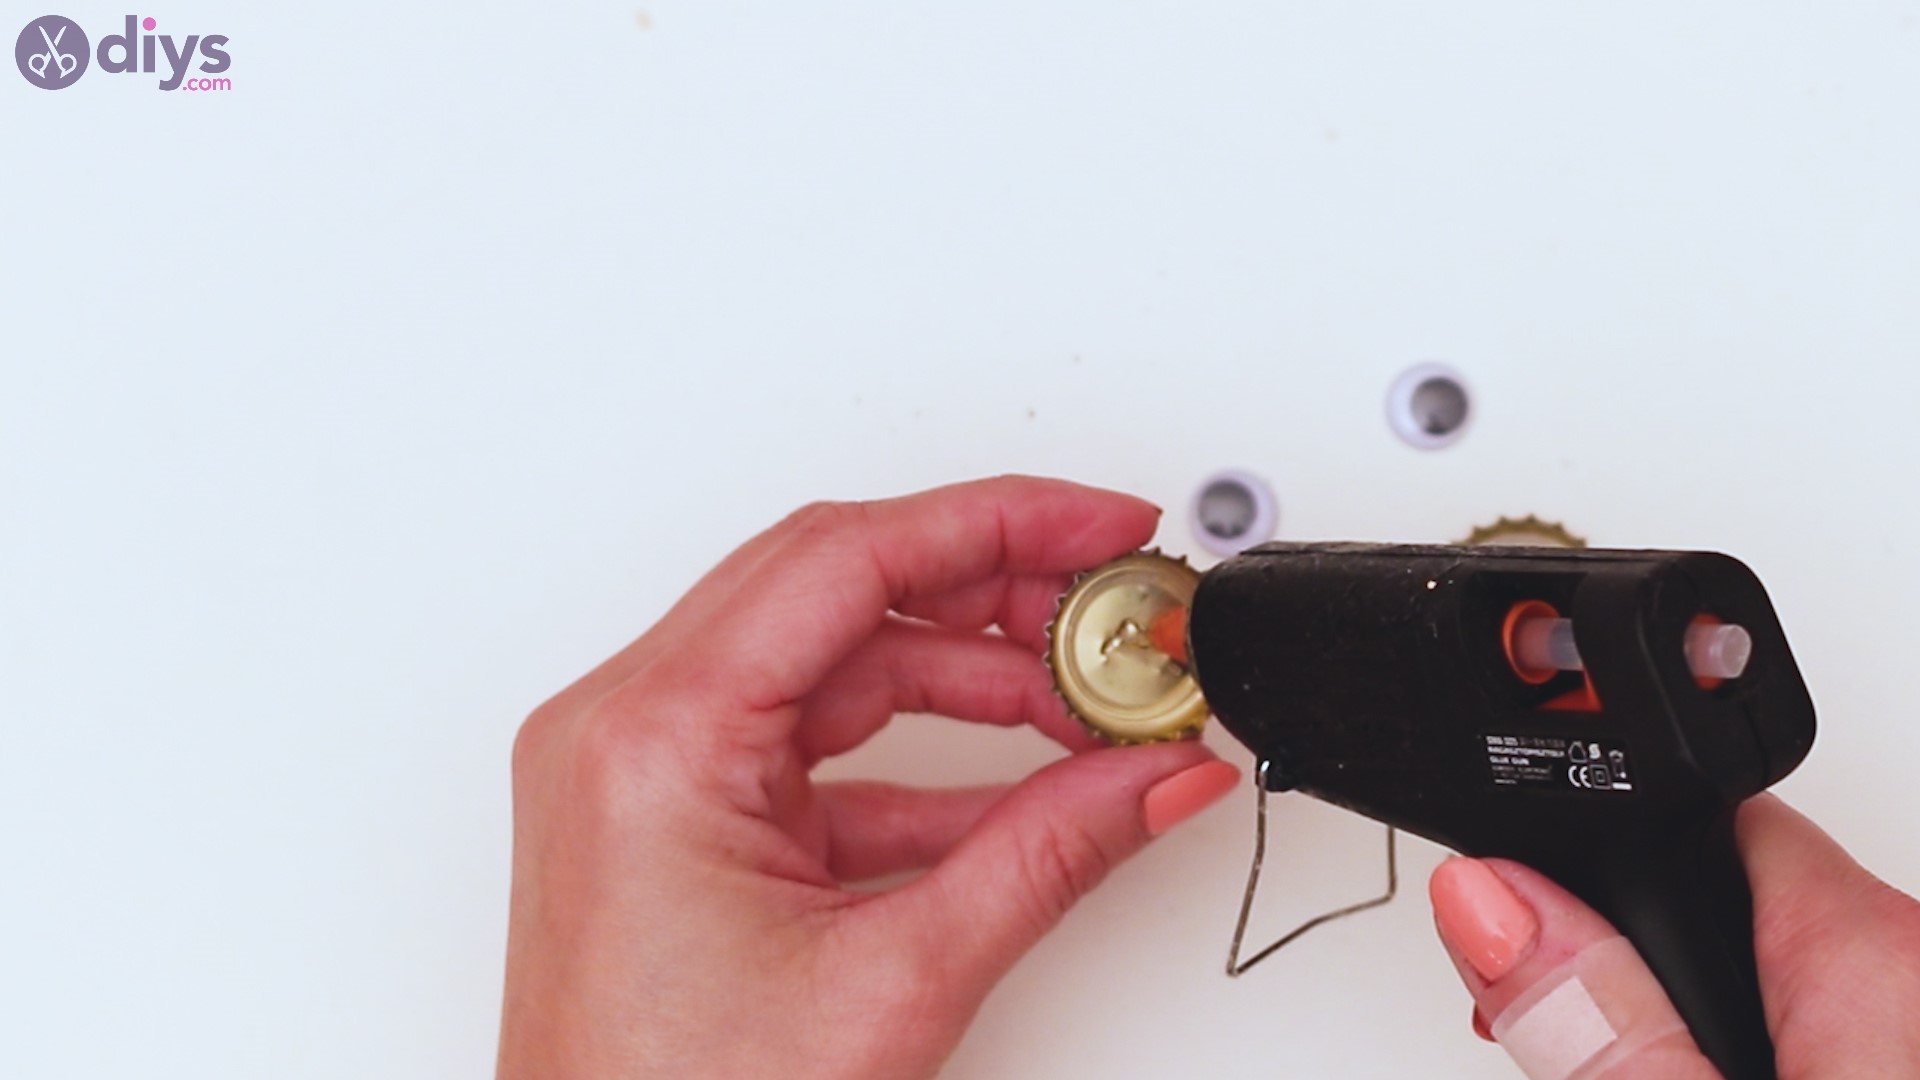
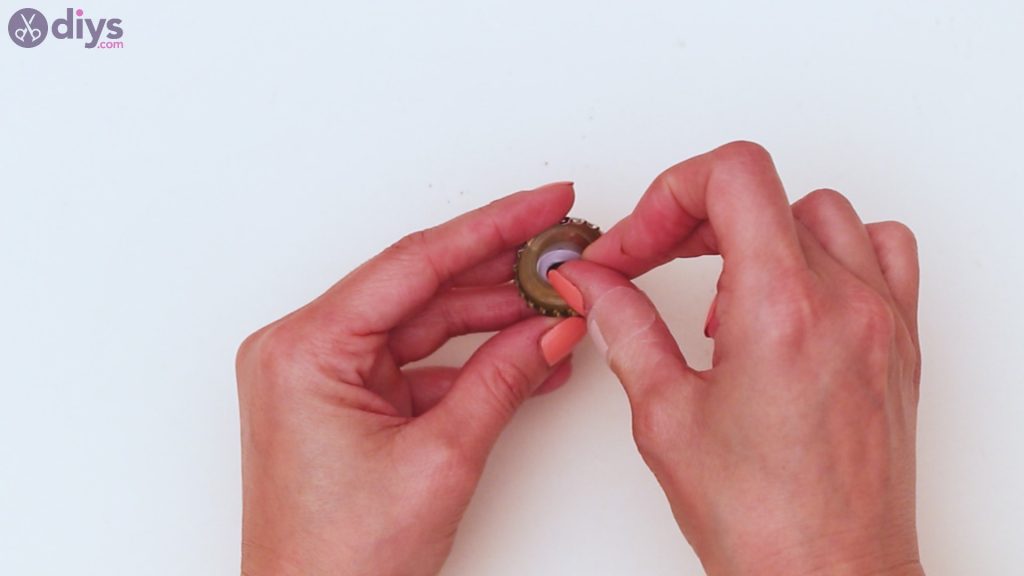
Then pick up one of the googly eyes and press it over the hot glue. Make sure to apply pressure for a couple of seconds, so the glue sets. Make two of these!
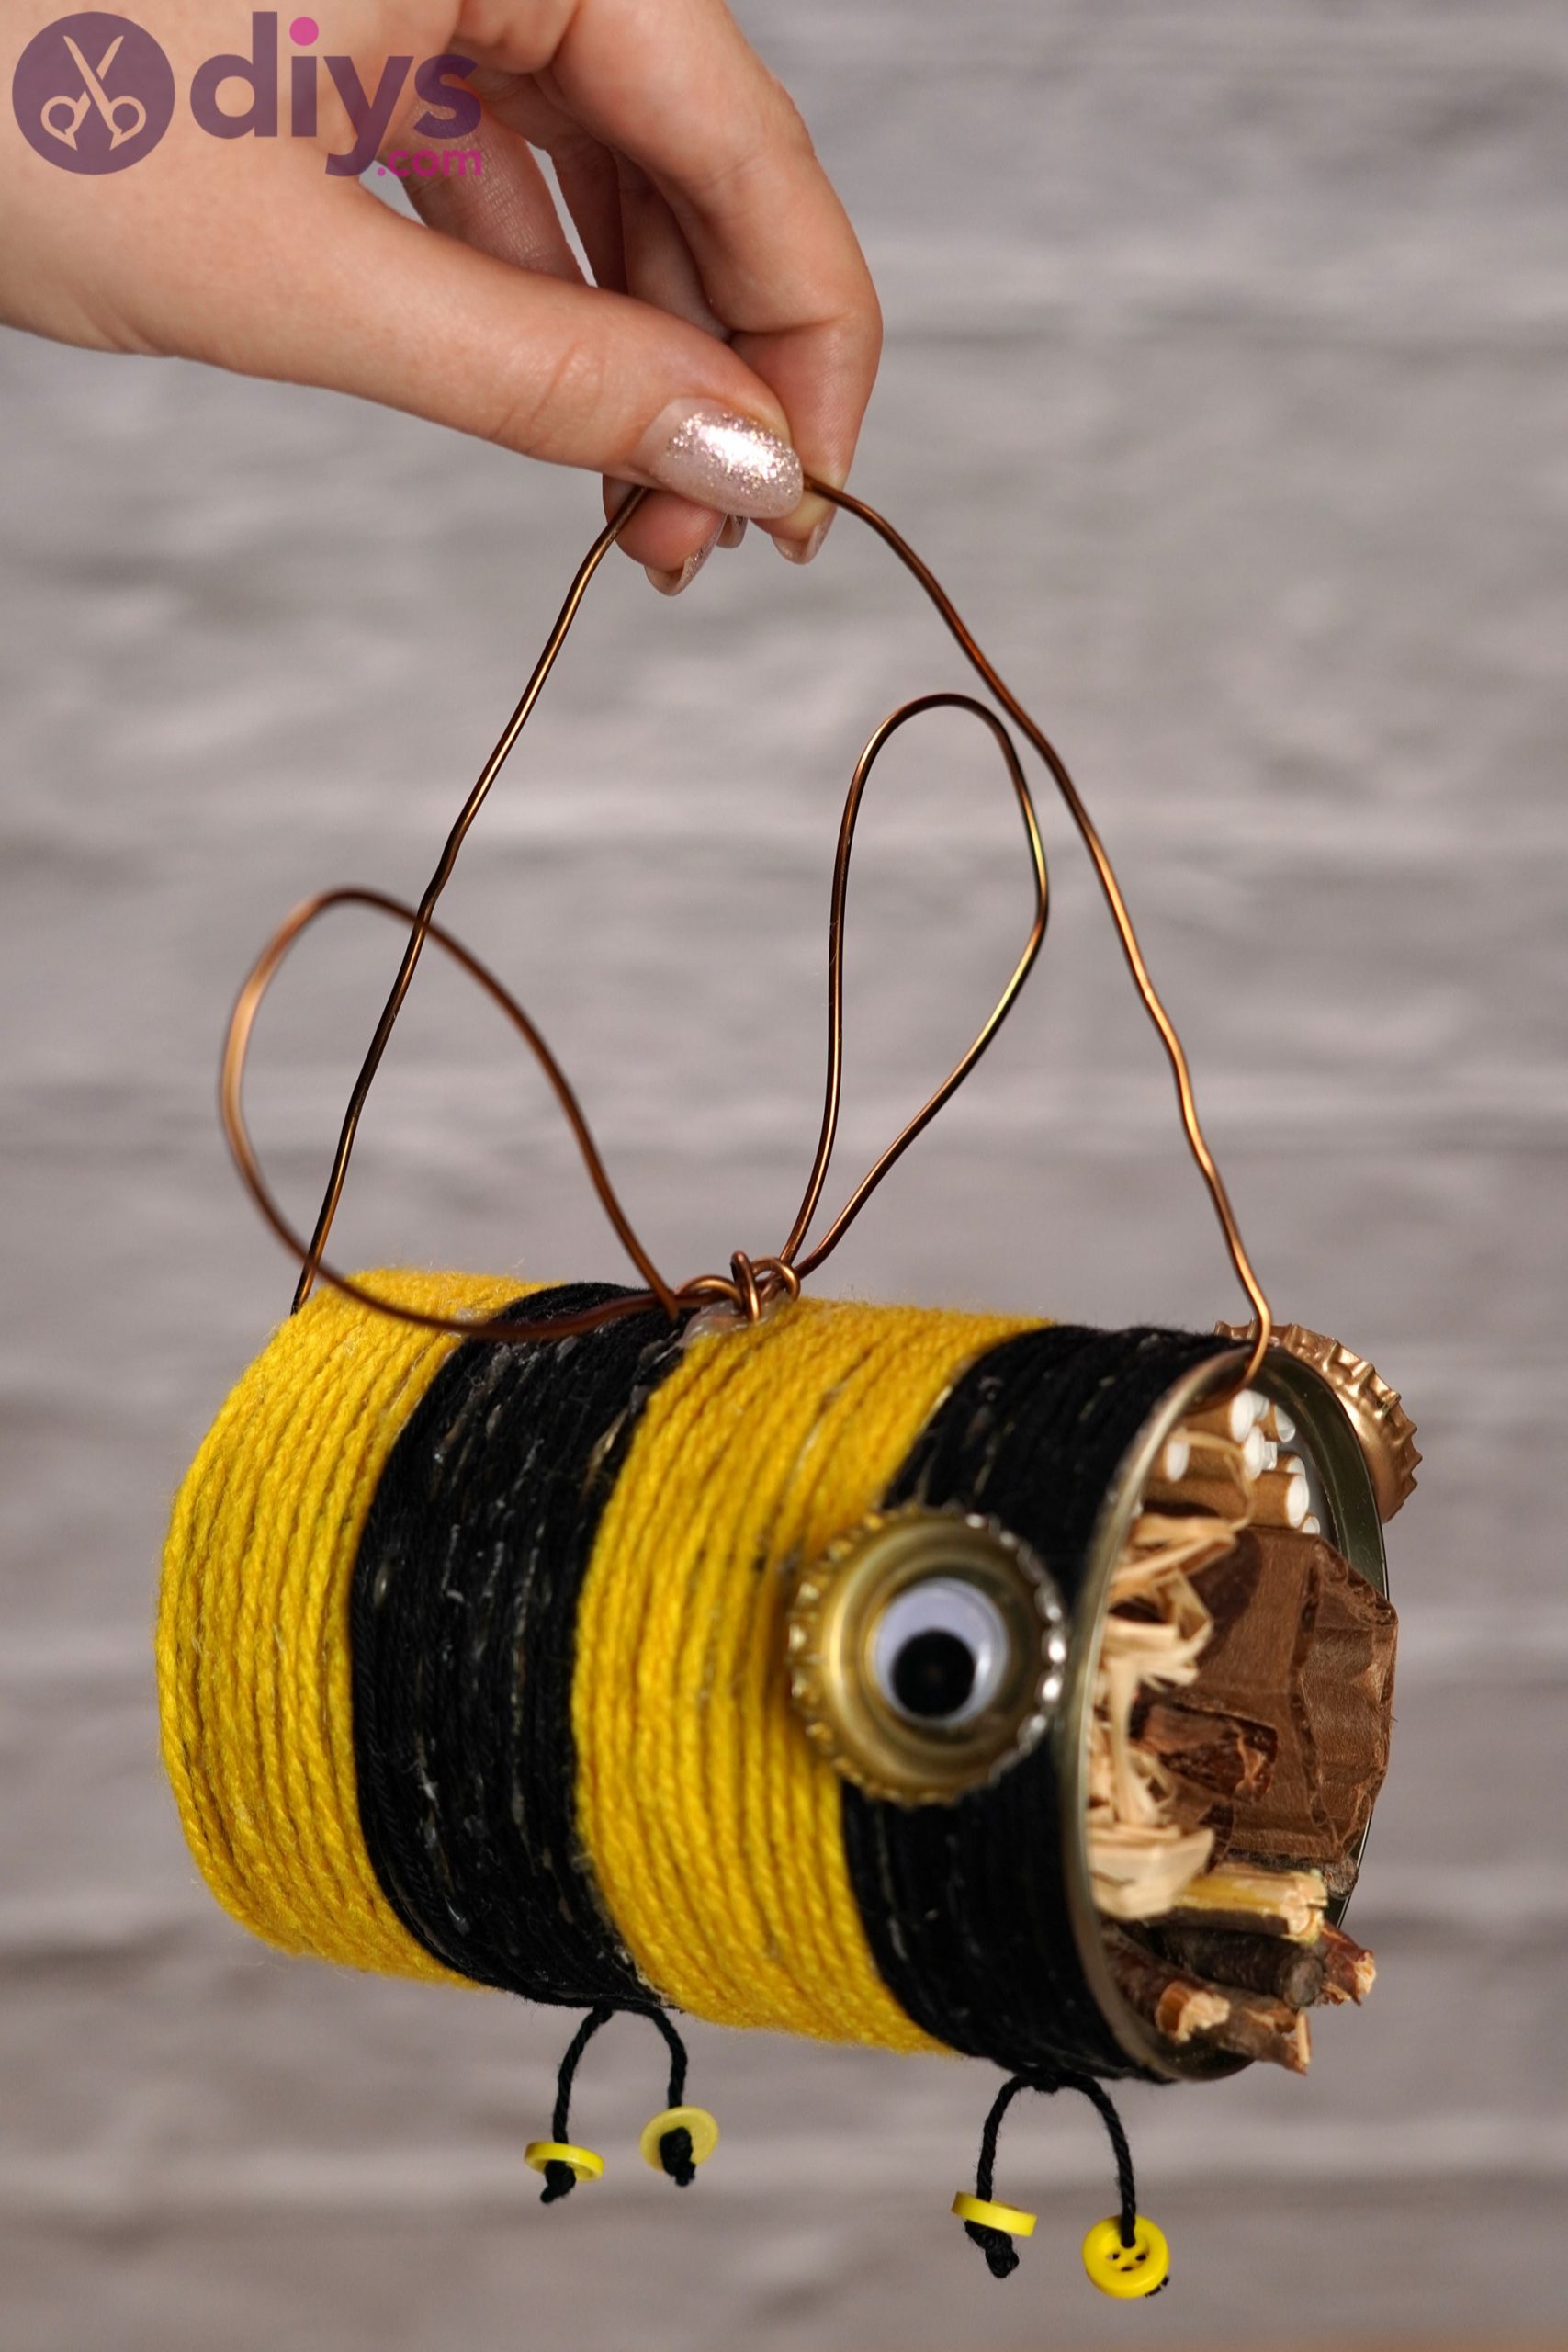
Then, once the googly eyes are set on the metal bottle caps, get the glue gun once more and add some hot glue to the back of the back and place it on one of the bee’s sides. Make sure you lift the tin can by the hanging wire to detect the middle line for this creation, and you know where to place the ‘eyes.’


There we go! Super cute!
Step 9: Place the wings
Now that the bee has eyes, it’s time we also placed those wings we made earlier. Apply some hot glue to the middle of the tin, right under the hanging wire.
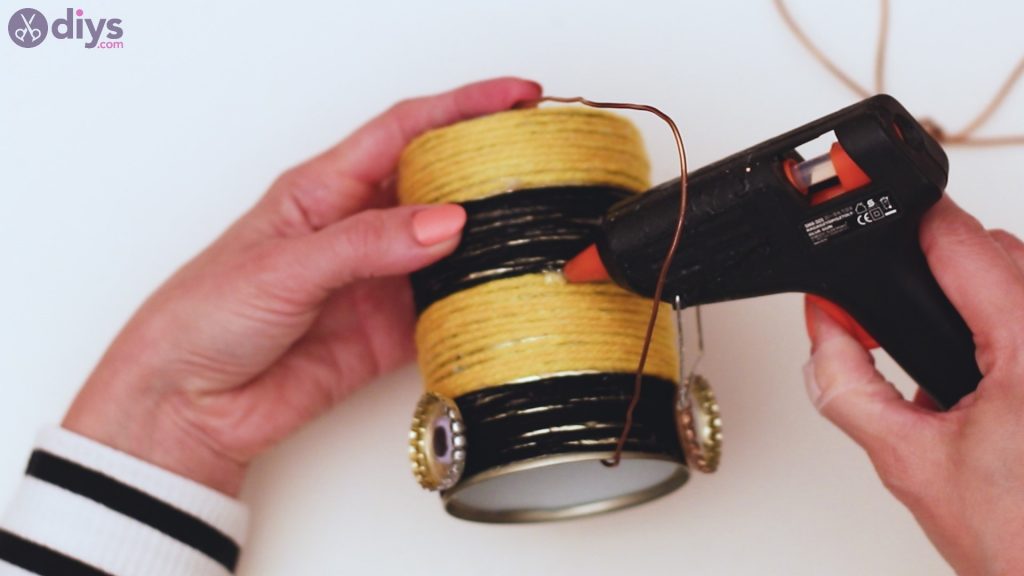
Place the wings over the hot glue and hold it there for a while to make sure the glue is all set.

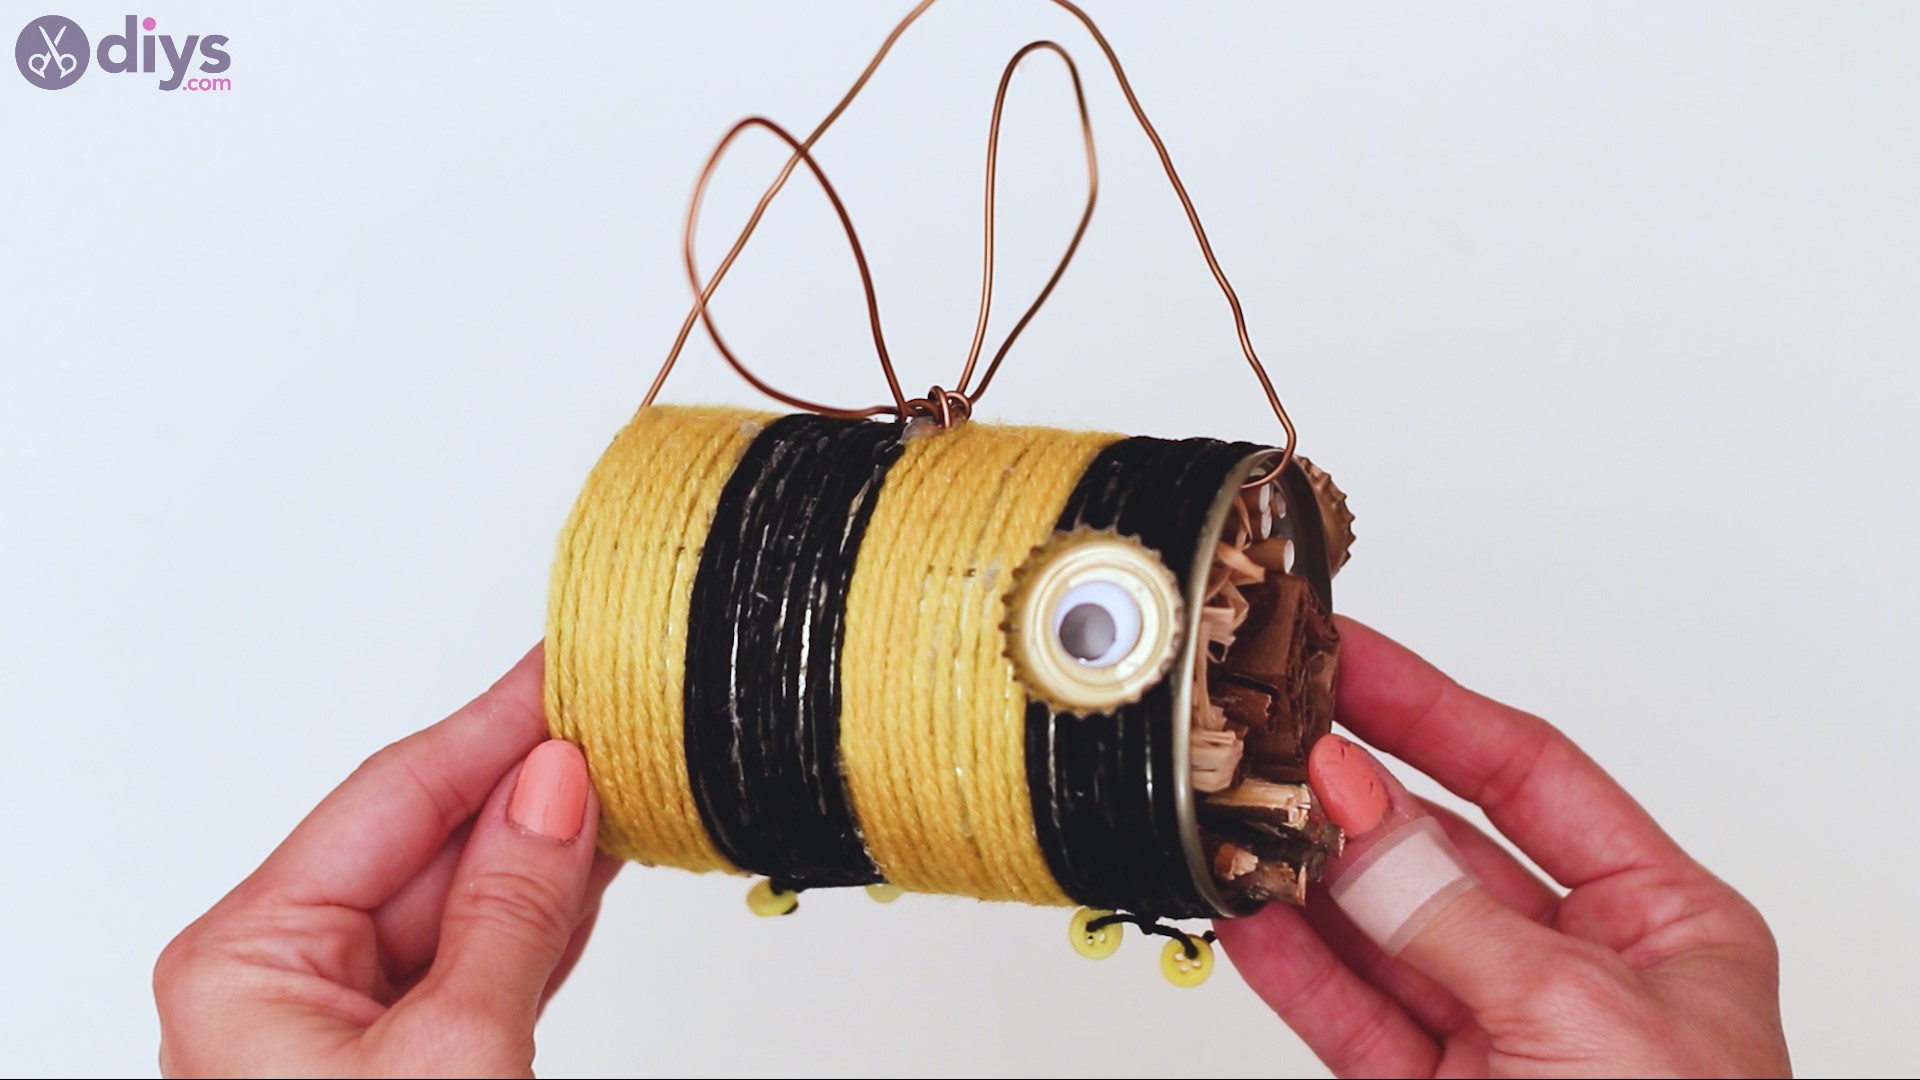
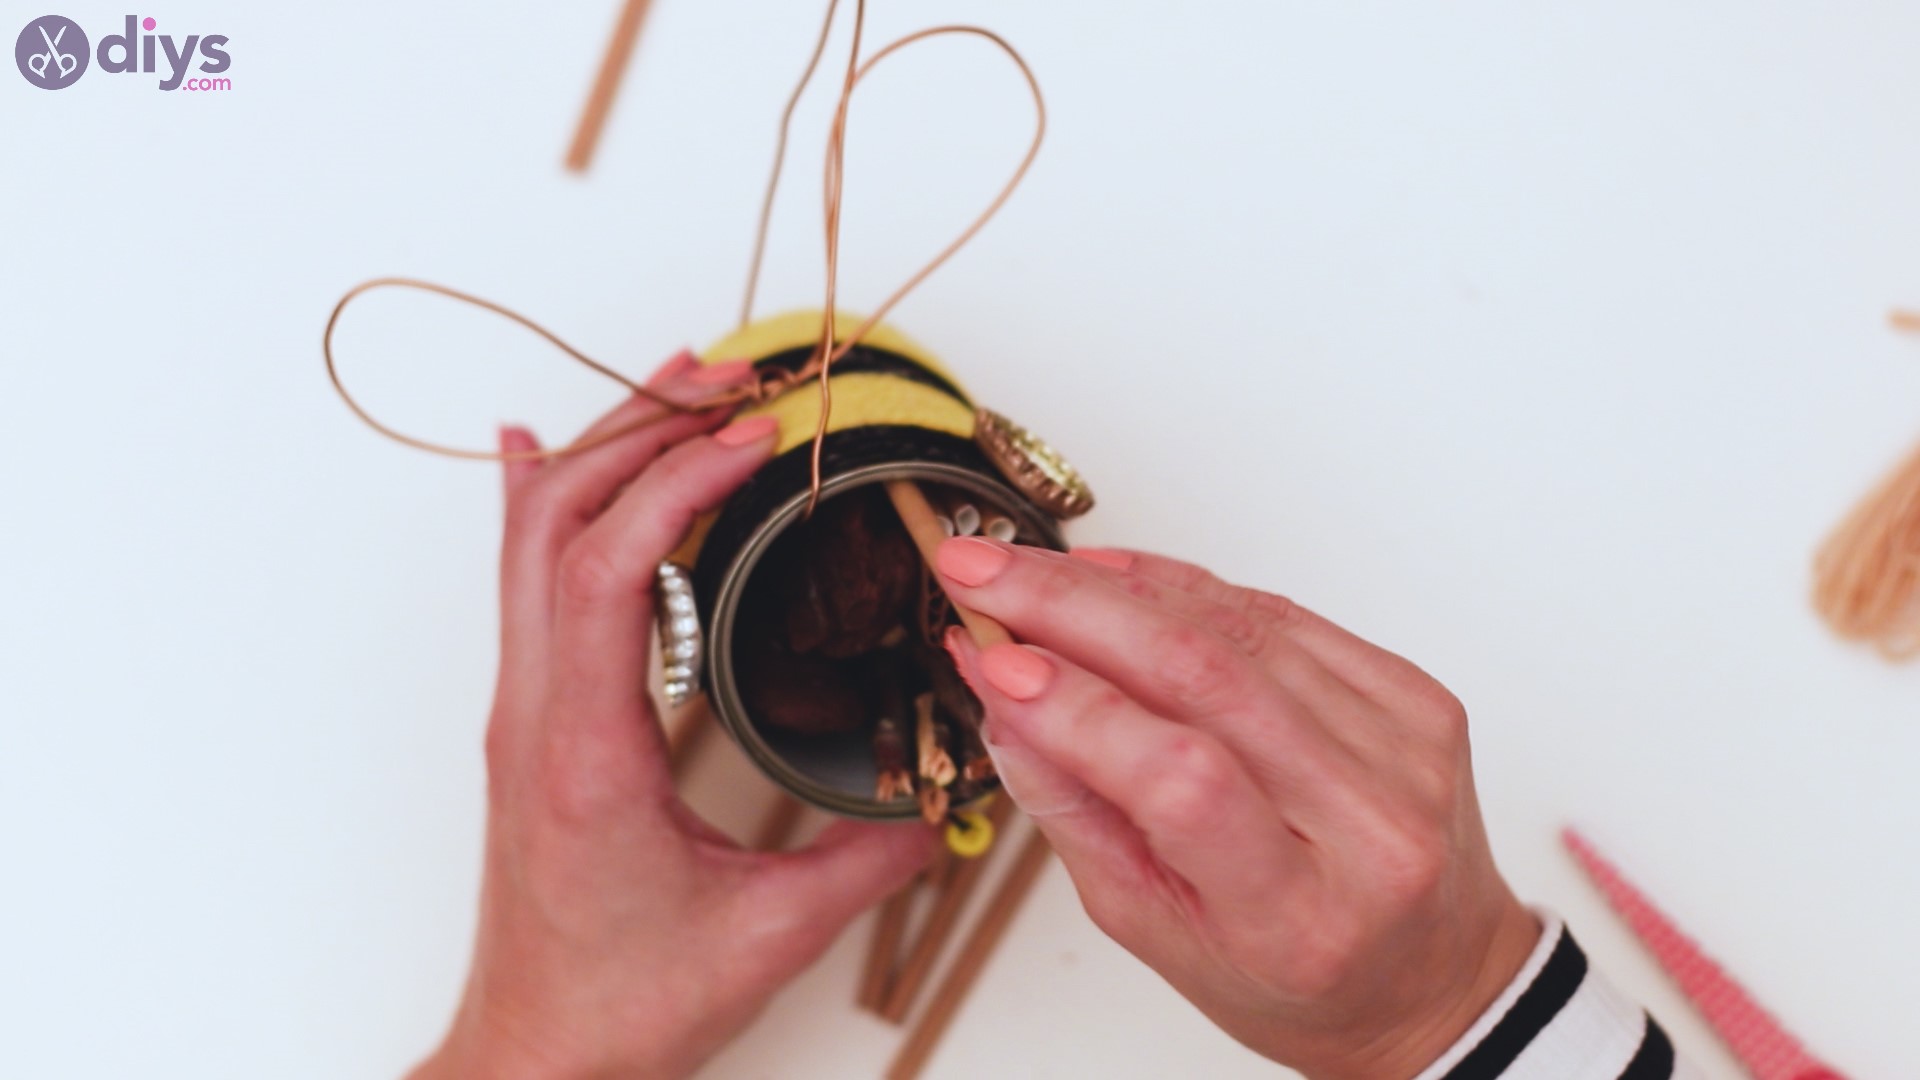
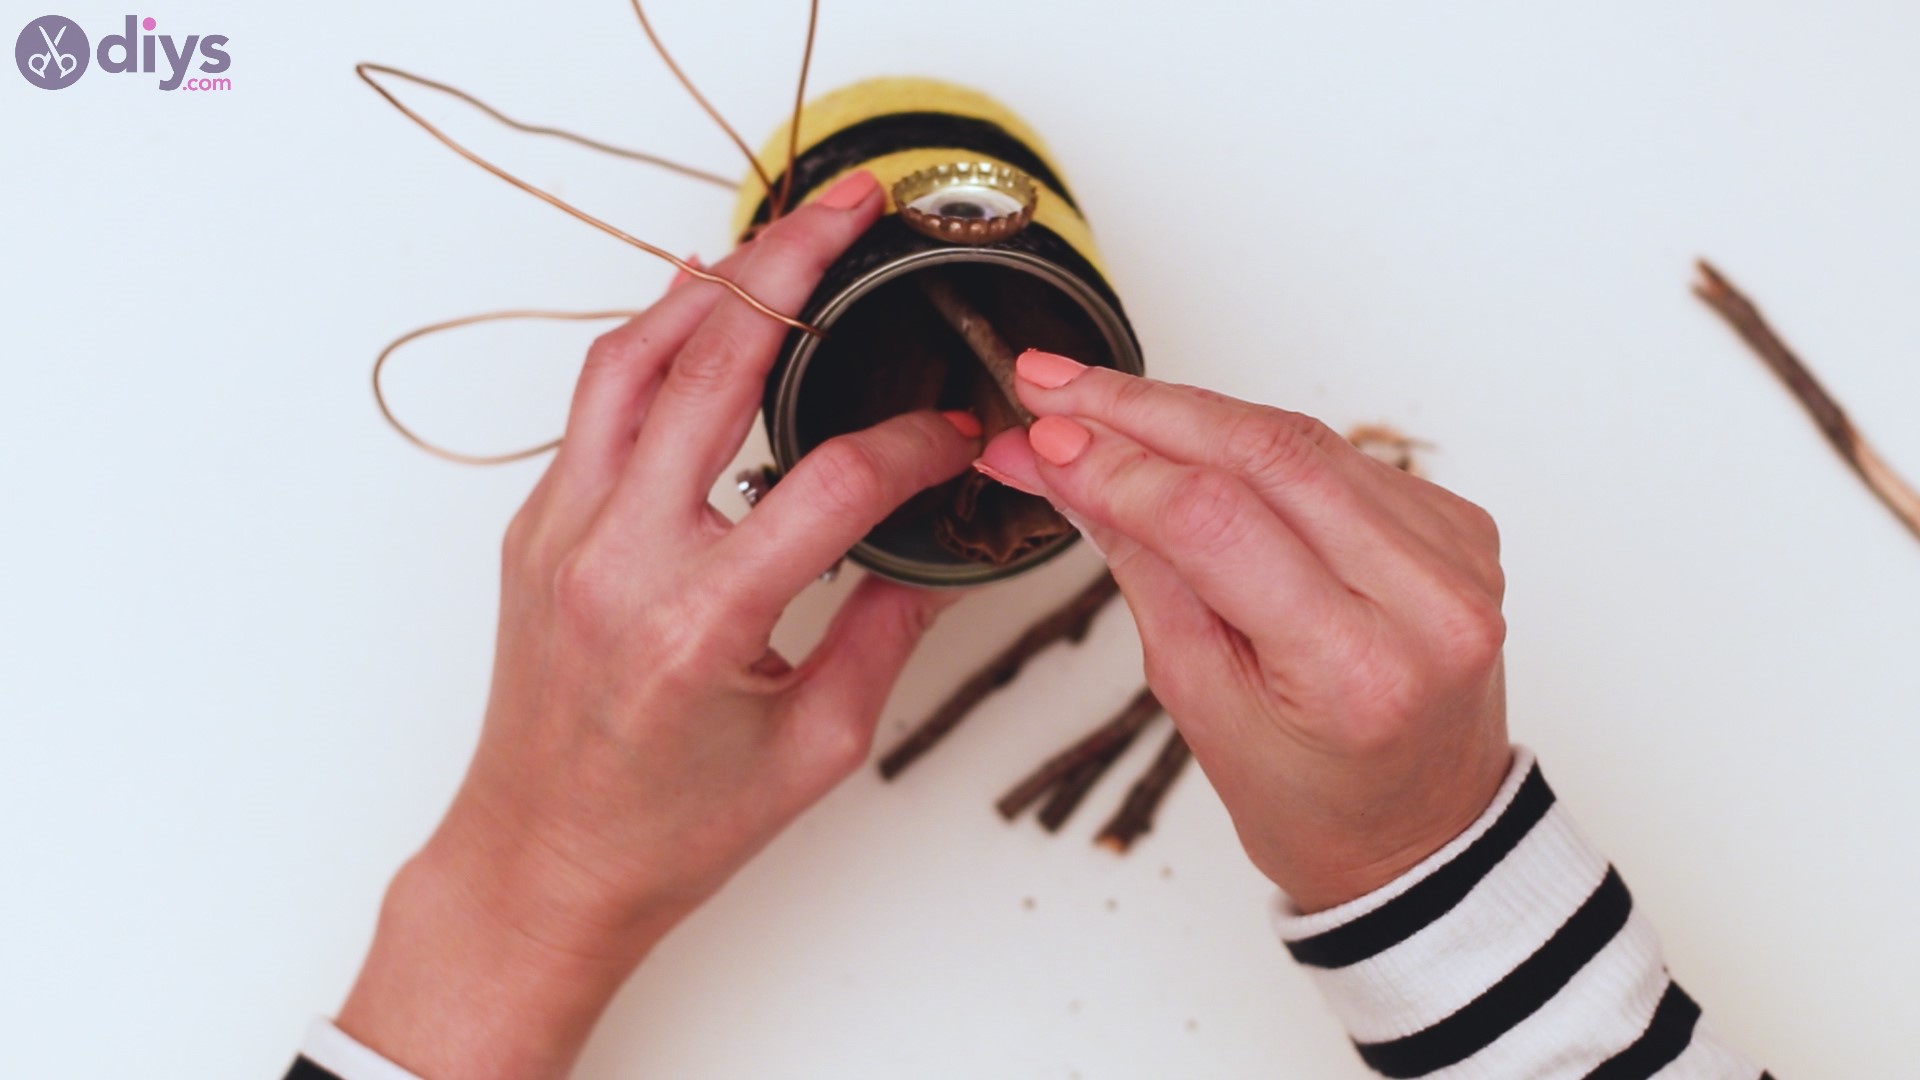
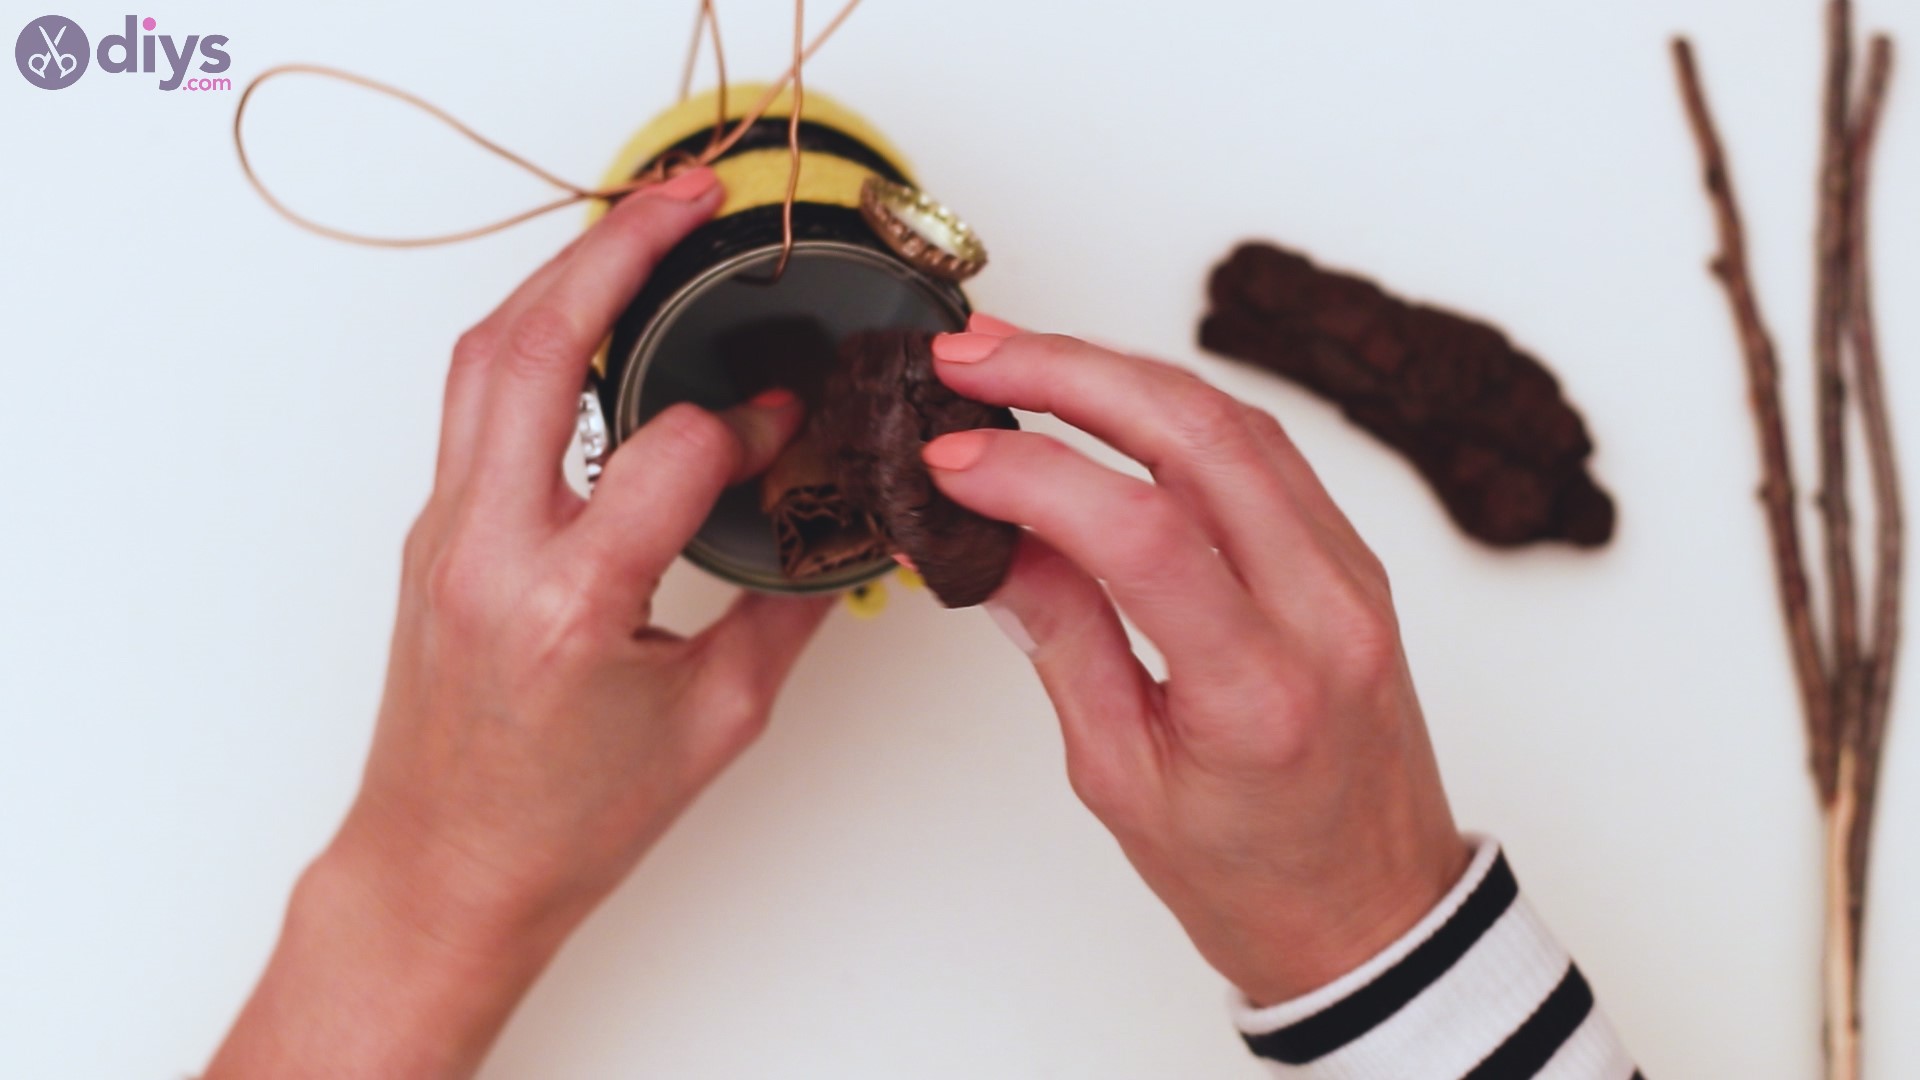
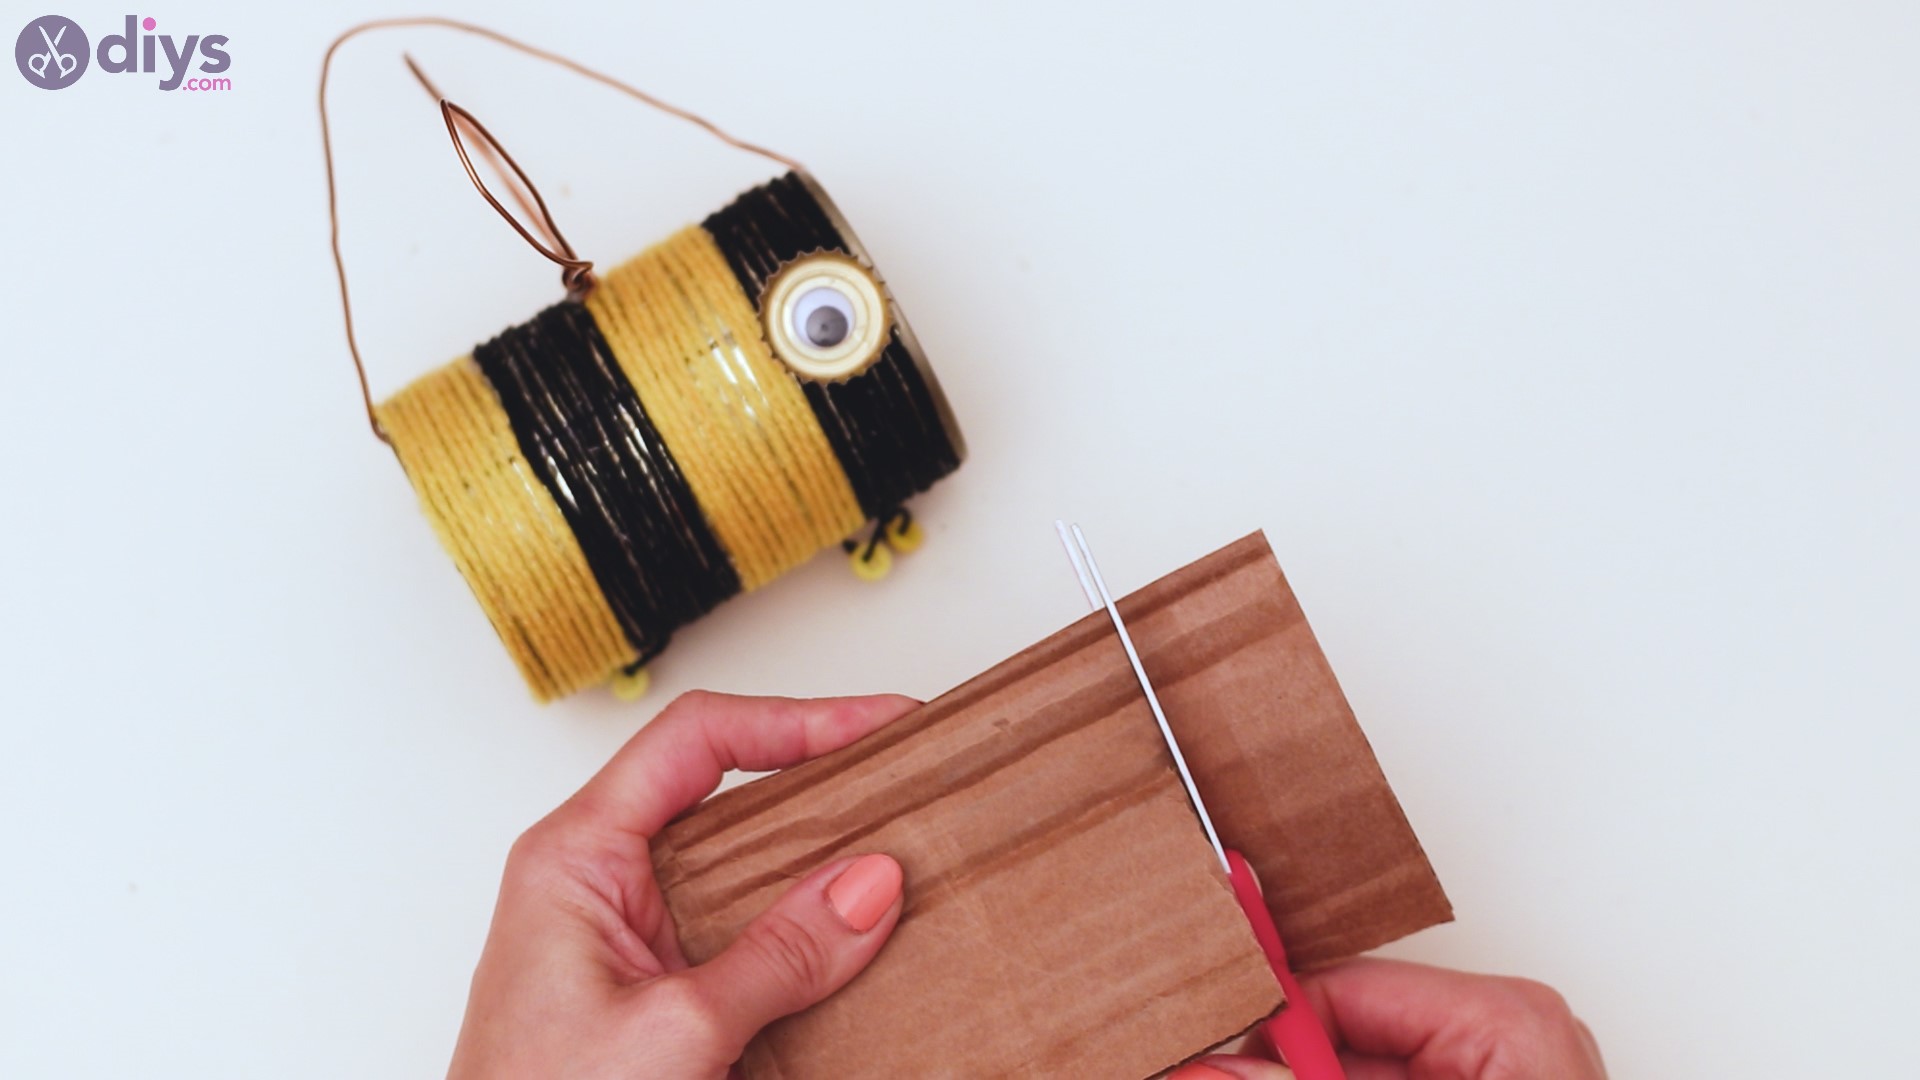
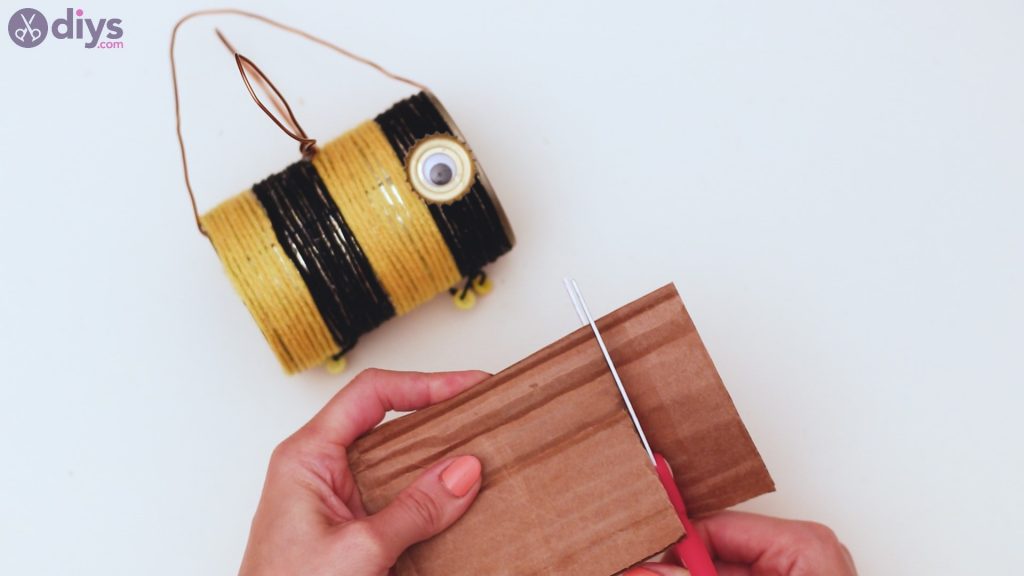
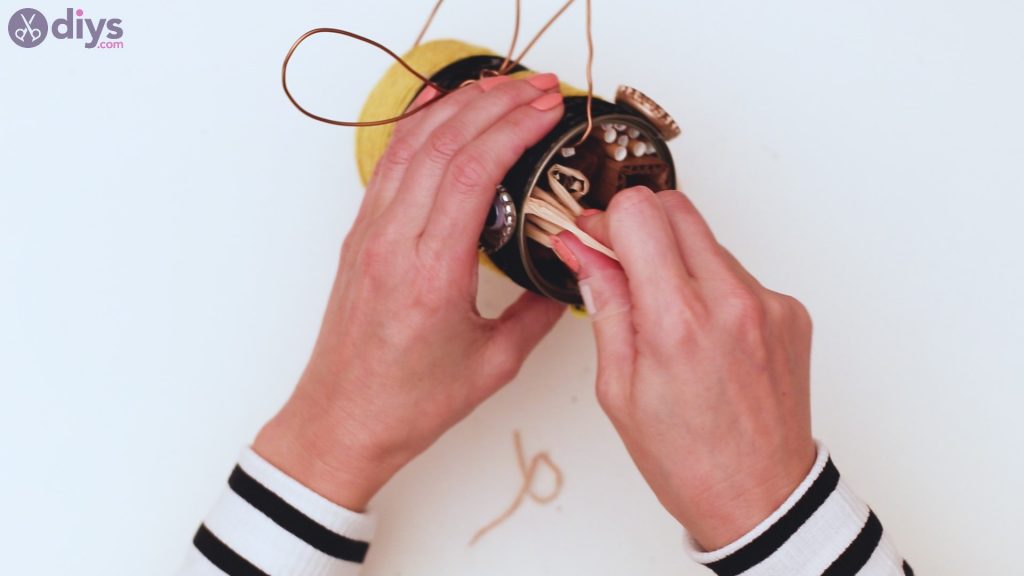
Step 10: Make the hotel rooms
Now that your small hotel looks like a pretty bee, it’s time we also make the “rooms” for the bugs. Get the cardboard and some scissors and start cutting out, so you have a piece that’s as long as the tin is.
Roll up the cardboard and place it inside the tin can.
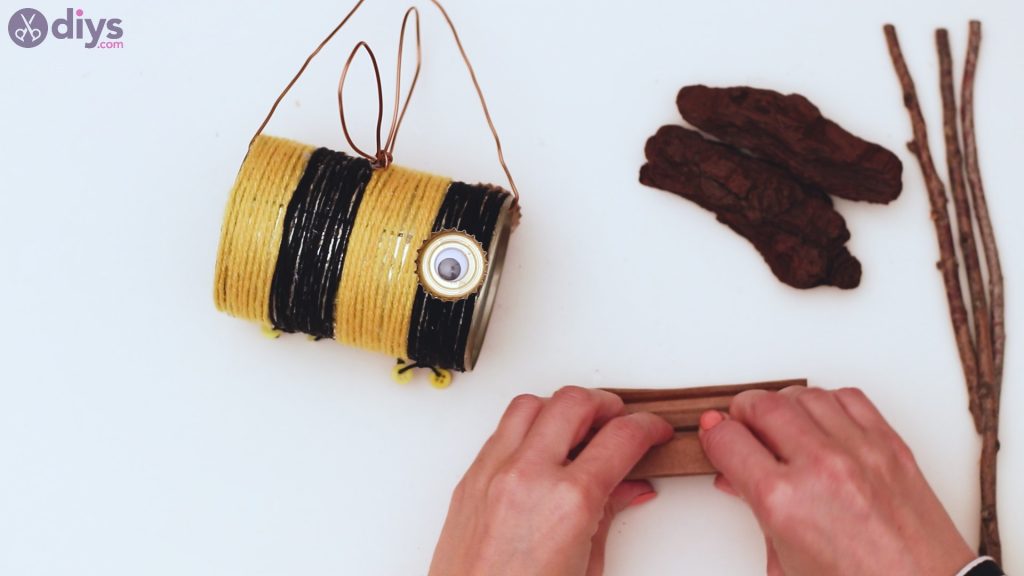
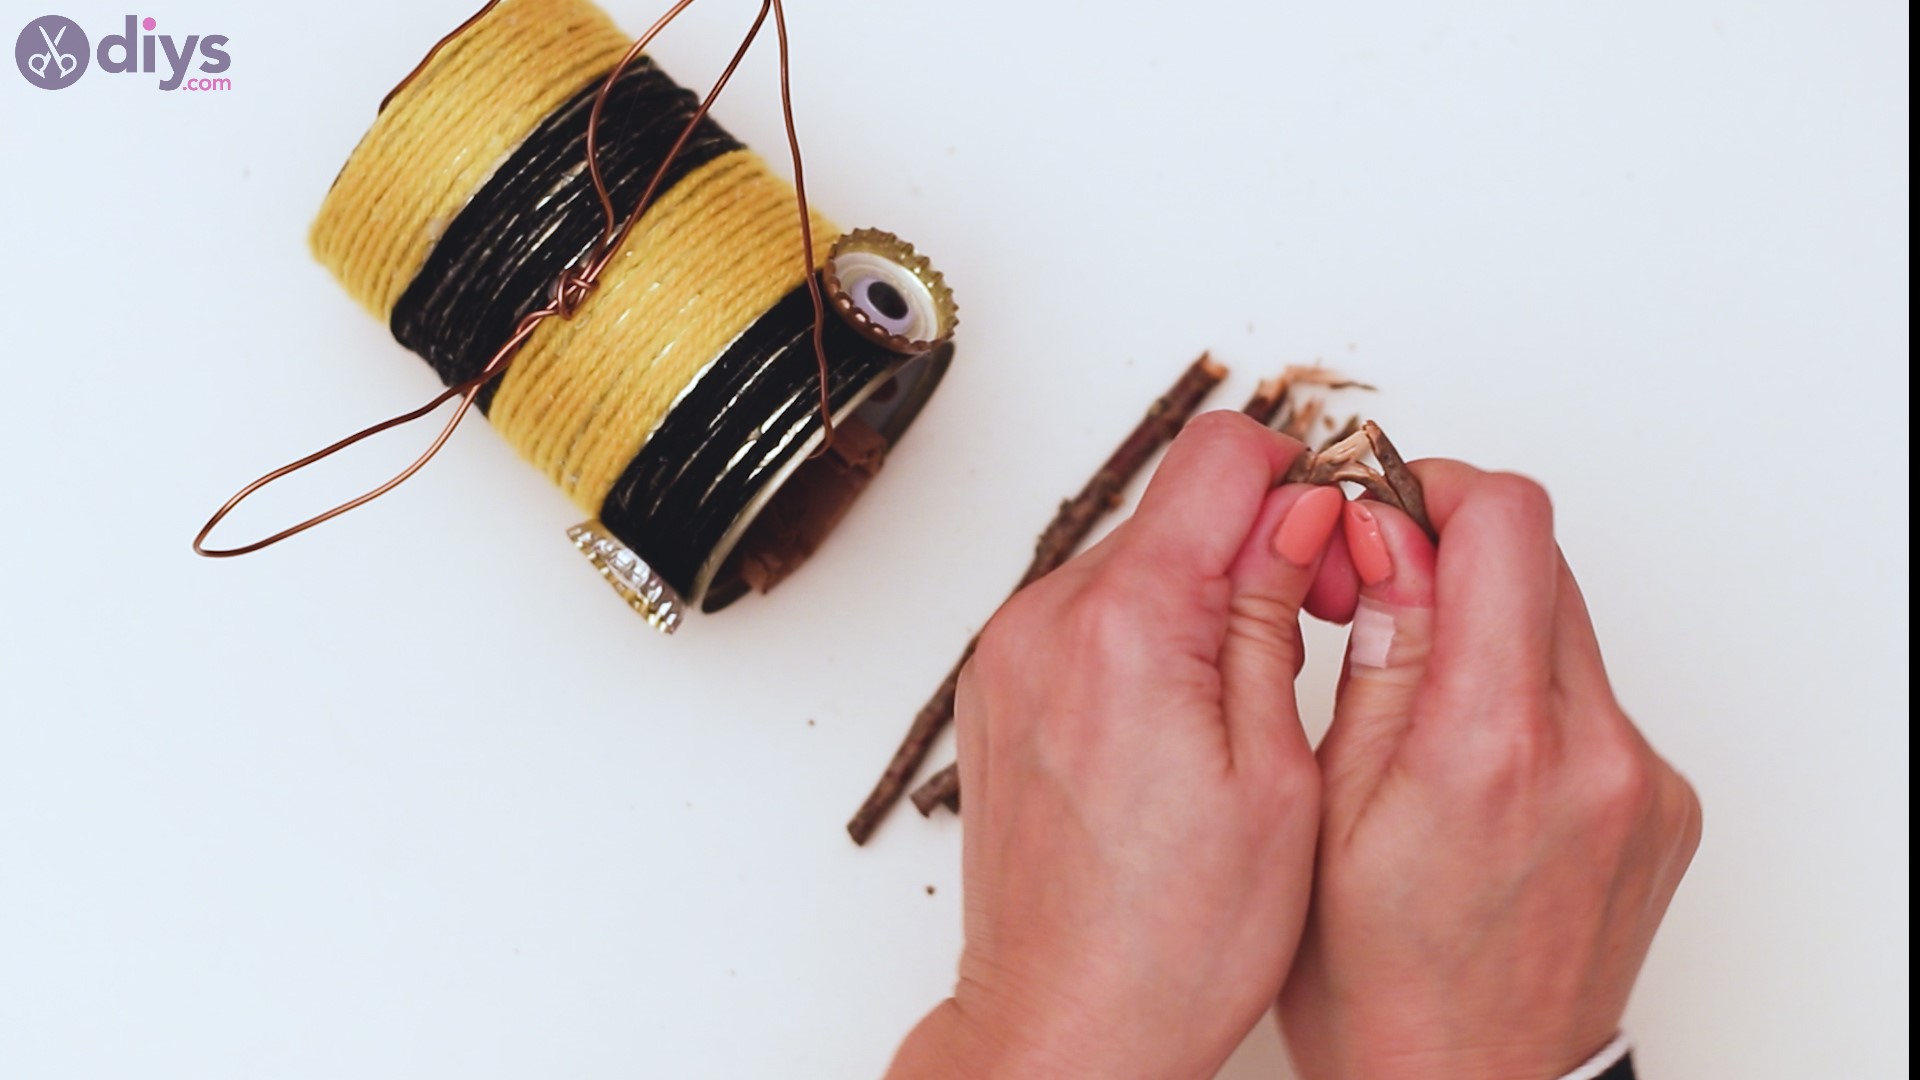
Making sure to keep a finger on the rolled-up cardboard, add in some tree bark.

Break up some sticks and push them in the tin as well.


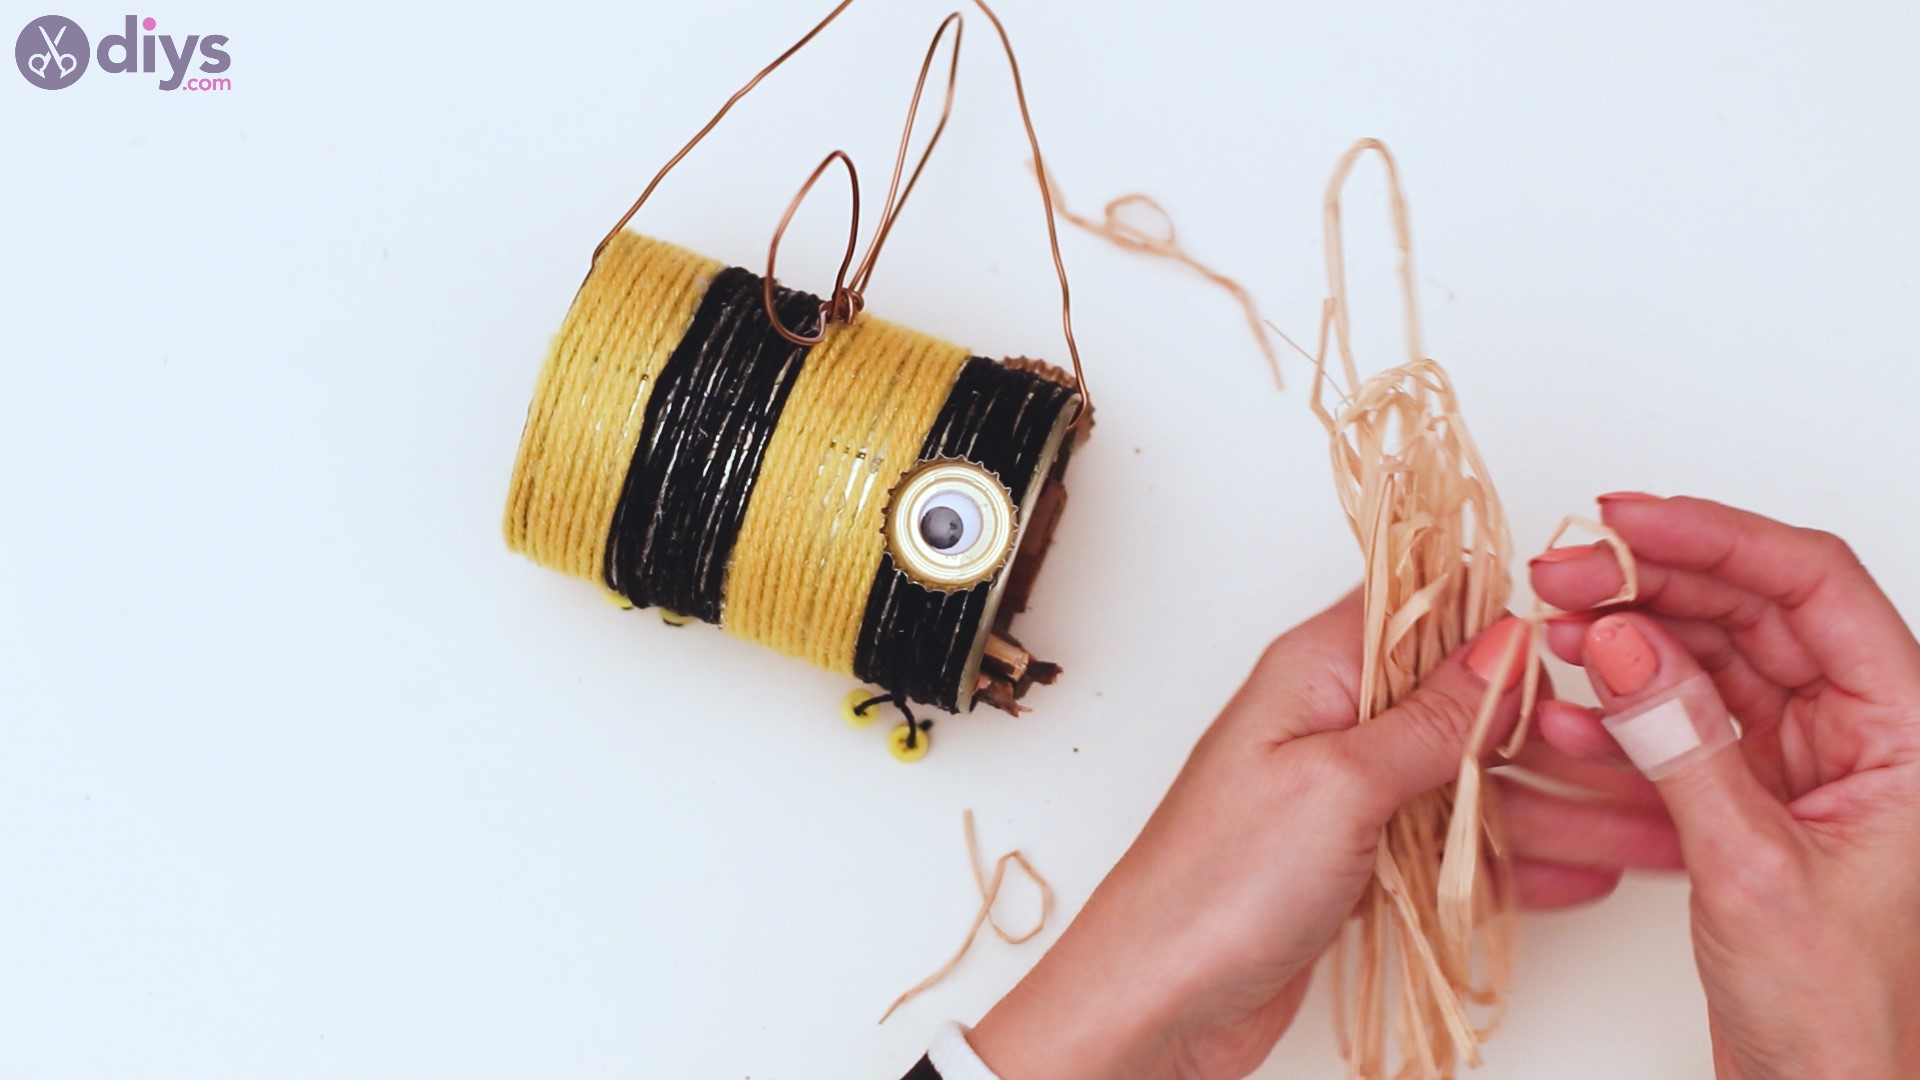
Cut the paper straws and push them inside the tin as well, creating separate areas for each type of material.

Next, get the raffia ribbons and bunch them up. Place them in the tin as well, shoving the material inside.
And you’re done! Look how cute your tin bee hotel looks like! It will go nicely out in your garden, allowing the bugs to have a little home of their own.

We hope you enjoyed making this tin bee hotel and that you’ll be sharing your pics with us over social media!
Tin Bee Hotel
How about we make a tin bee hotel? It's going to be perfect for the bugs in your garden!
Materials
- tin
- yellow and black yarn
- branches
- paper straw
- tree bark
- raffia
- metal caps
- buttons
- googly eyes
- cardboard
- wire
- black acrylic paint
Tools
- paintbrush
- scissors
- hammer
- nail
- glue gun
Instructions
- Make a hole in the tin.
- Paint the tin lid black.
- Wrap black and yellow yarn around the tin and glue it down. Make the tin look like the body of a bee.
- Use metal wire to create a way to hang the bug hotel. Also make some bee wings out of the wire.
- Create some legs for your bee by using extra black yarn and yellow buttons.
- Glue googly eyes inside metal bottle caps and glue them on the side of the tin can.
- Glue down the wings of the bee, as well.
- Place rolled-up cardboard, tree bark, sticks, paper straws, and raffia inside the tin can to finish up the bug hotel.