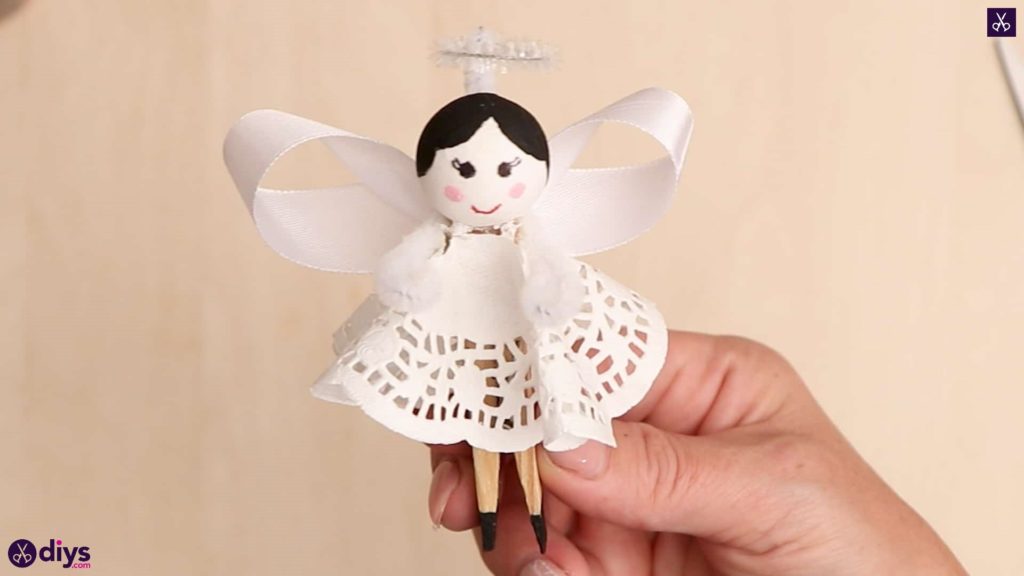
DIY Clothespin Angel Ornament for Christmas Tree
Updated on November 19, 2025

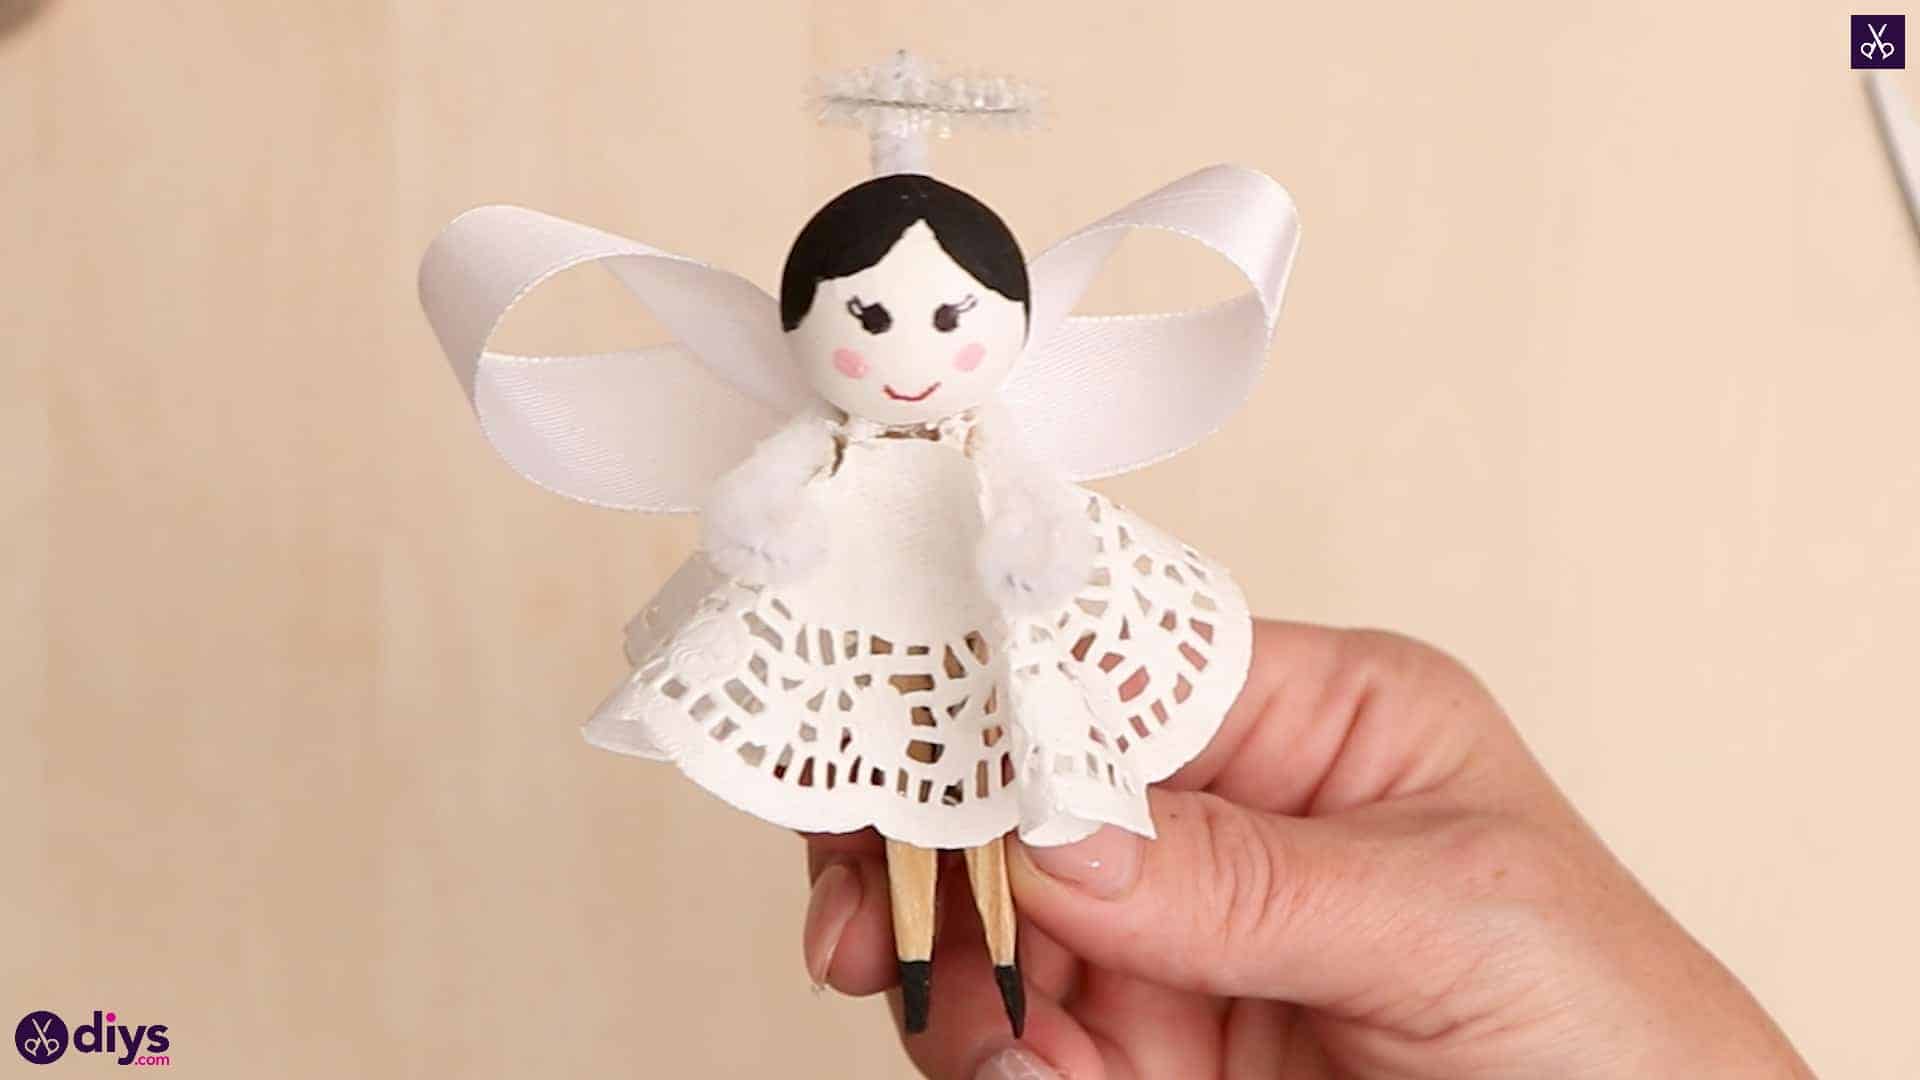
Like me, are you the kind of person who can’t get enough of making DIY Christmas ornament crafts around this time of year but you’re also a total lover of upcycling. Well, I can certainly understand that, cause I’ll turn just about anything into an opportunity to repurpose some kind of regular household item into something pretty. My latest endeavour was to transform a regular clothespin into an adorable little angel to hand on my Christmas tree!
Just in case you like the clothespin angel just as much as I did, here are full instructions and photos of the steps I took to make it happen. Scroll to the end of this post if you’d prefer to follow a video tutorial!
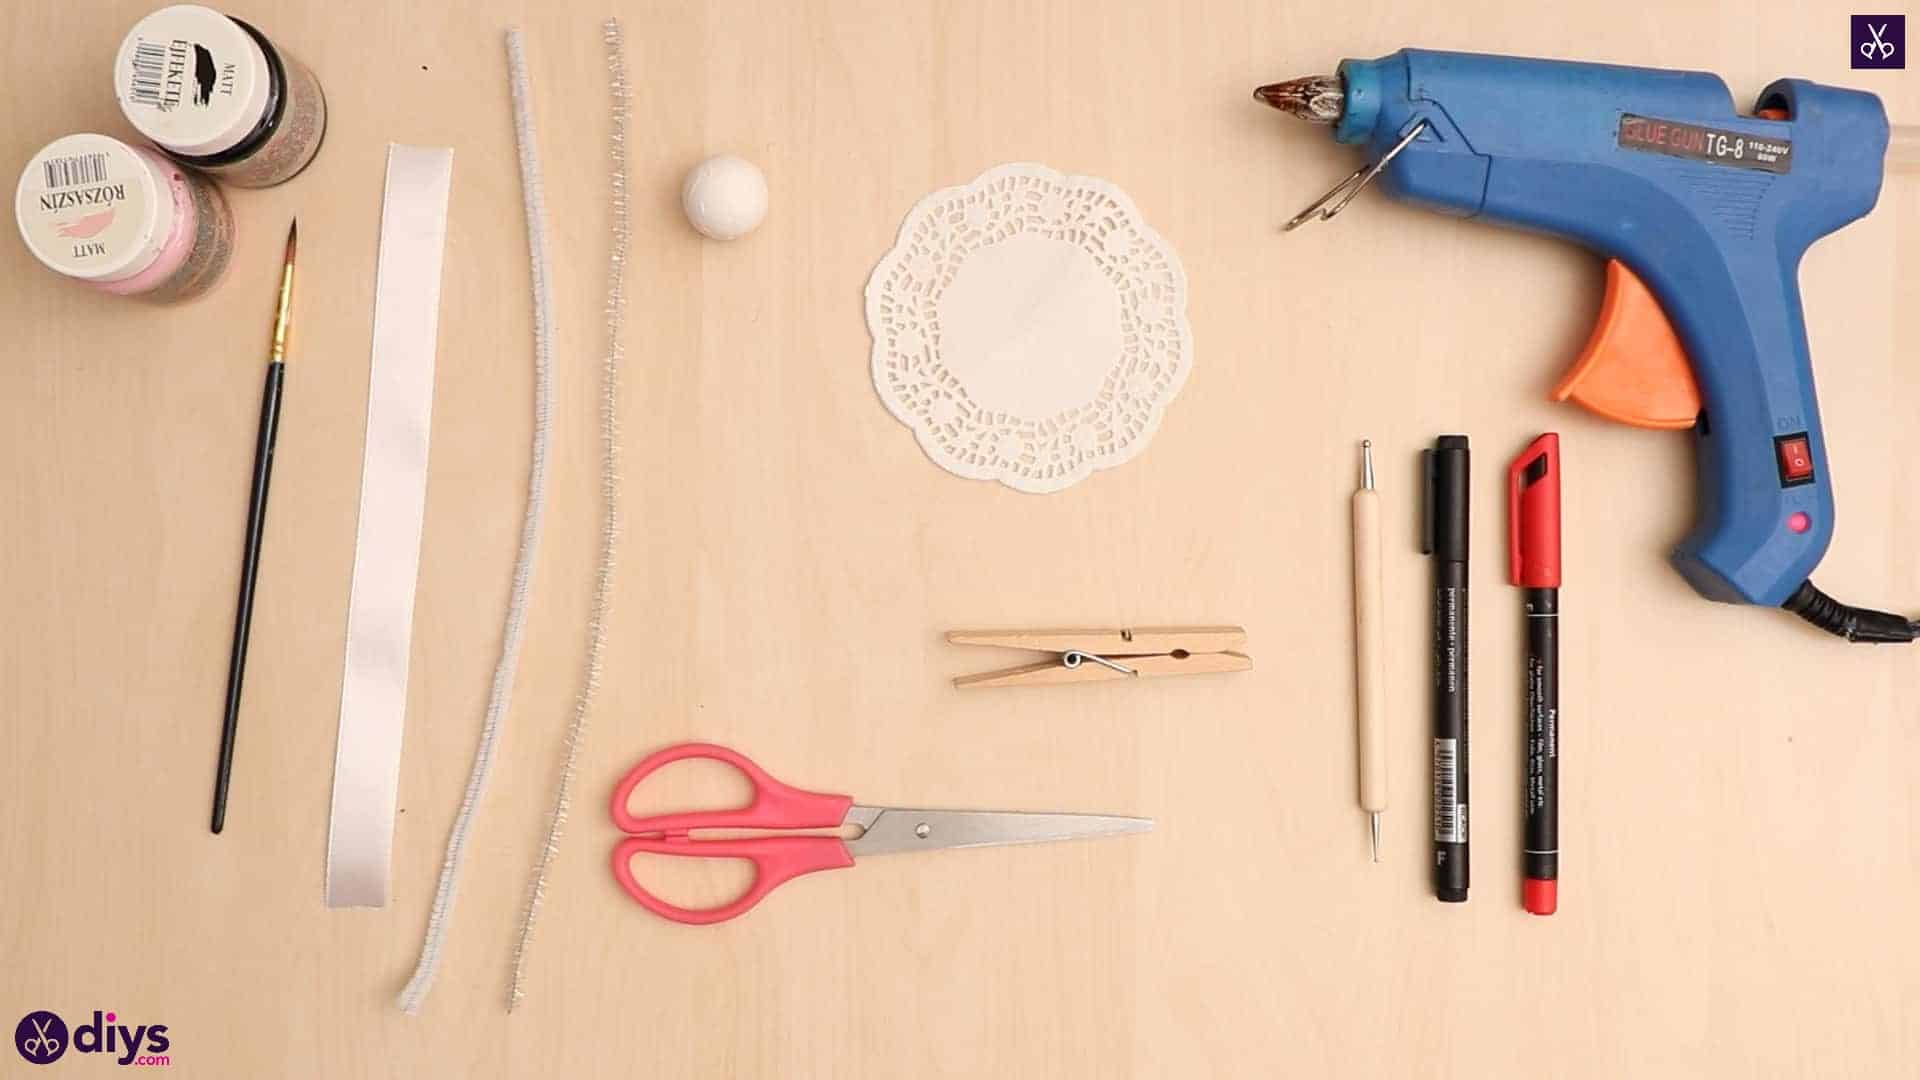
For this project, you’ll need:
- A spun cotton ball
- Paint (black and pink)
- A paintbrush
- Markers (black and red)
- A hot glue gun
- A dotting tool
- A small lace paper doily
- A white ribbon
- Pipe cleaners (white and sparkly or silver)
- Scissors
- A clothespin
Step 1: Gather your materials!
I like to make sure I have everything I need before I start.

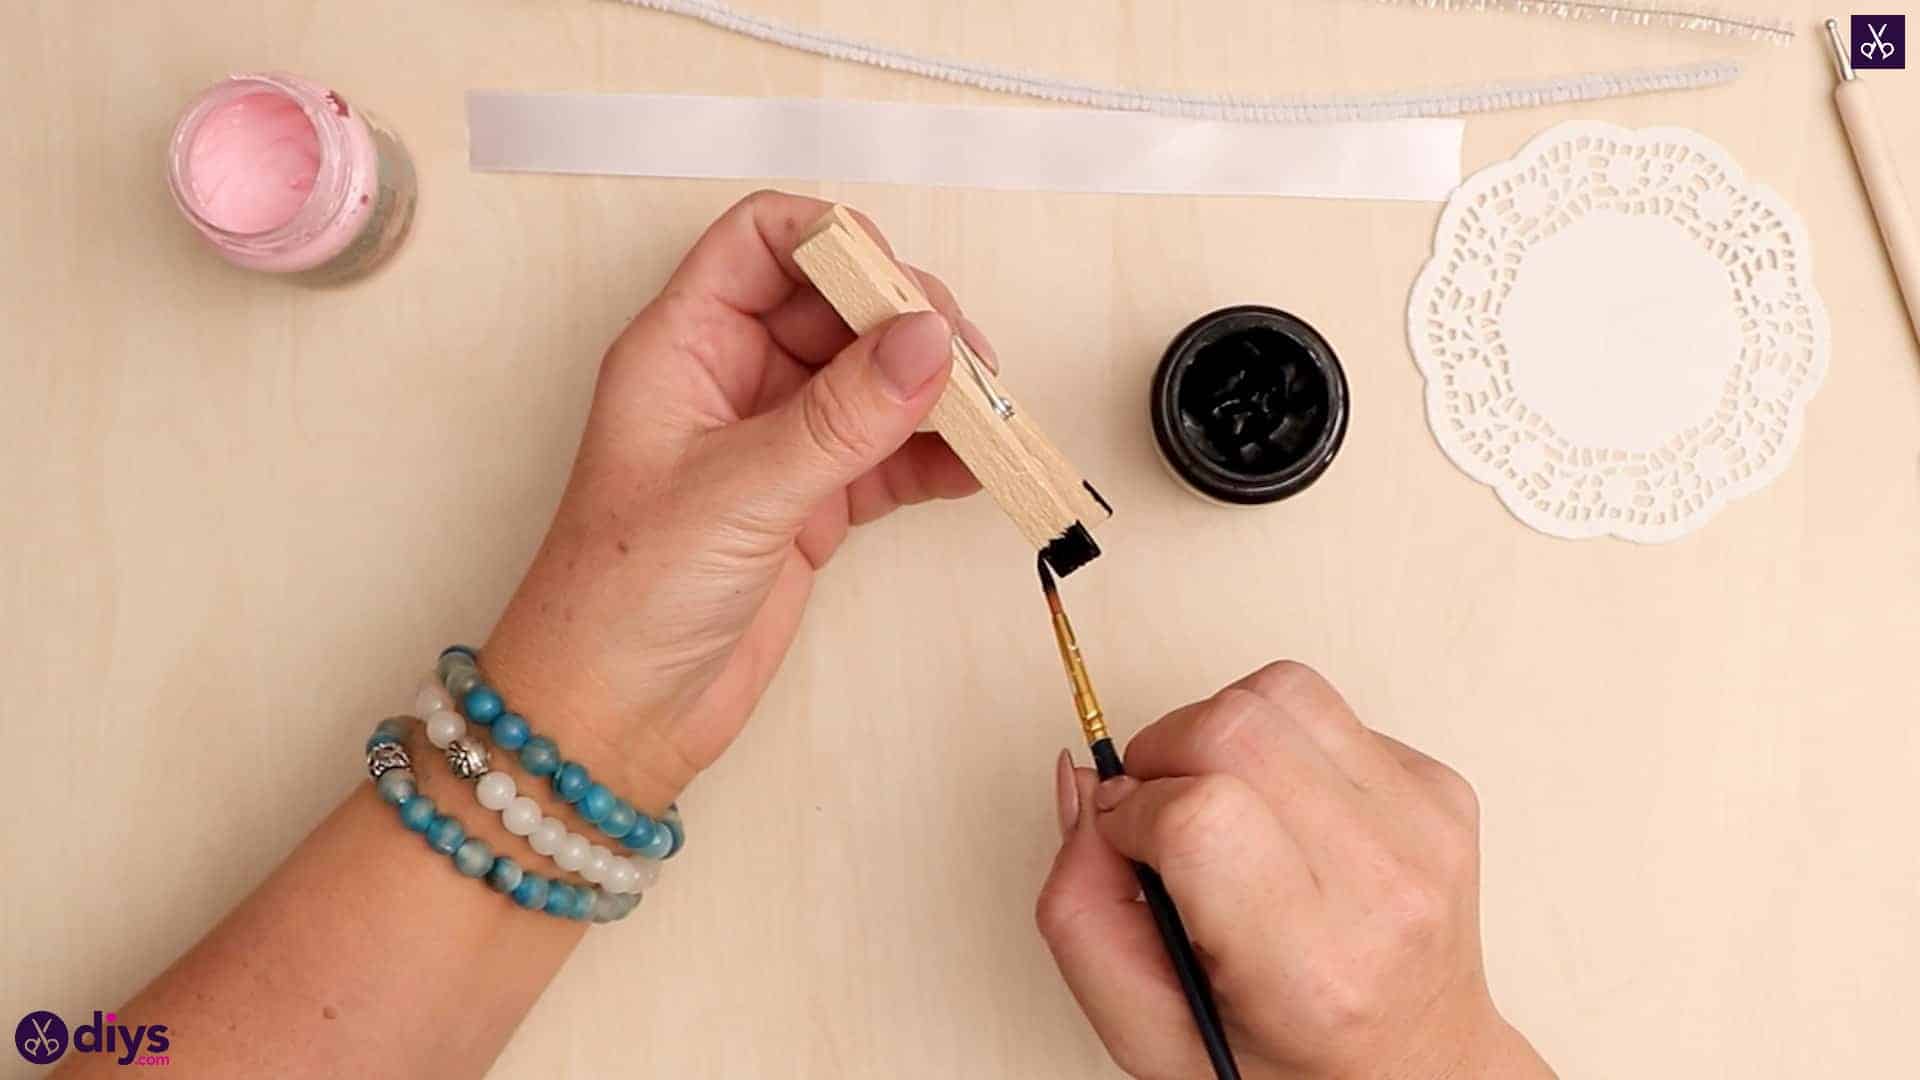
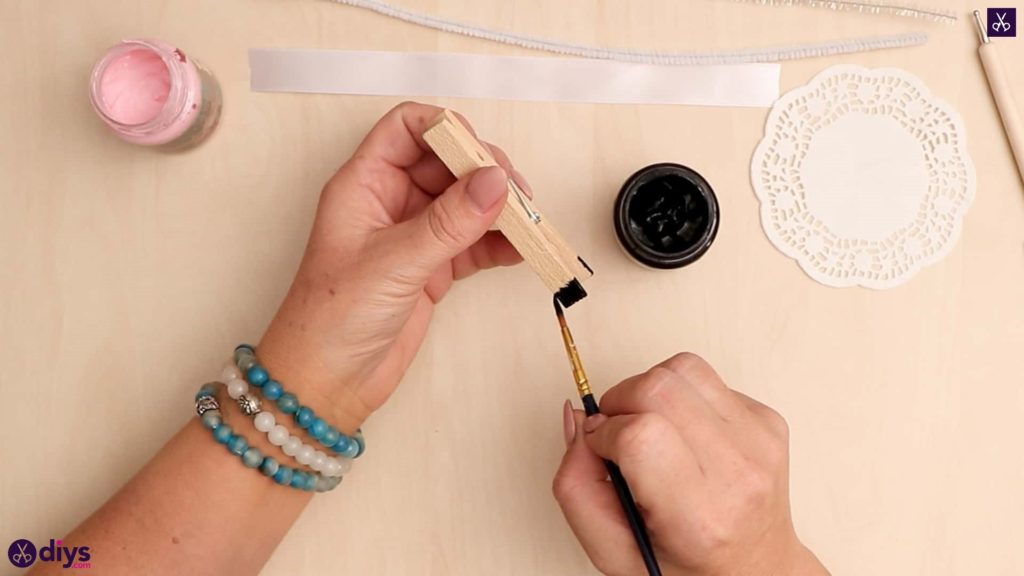
Step 2: paint the shoes
Paint a small section at the ends of your clothespin handles, where you’d pinch to open it, black. These will be your angel’s little feet in small black shoes.
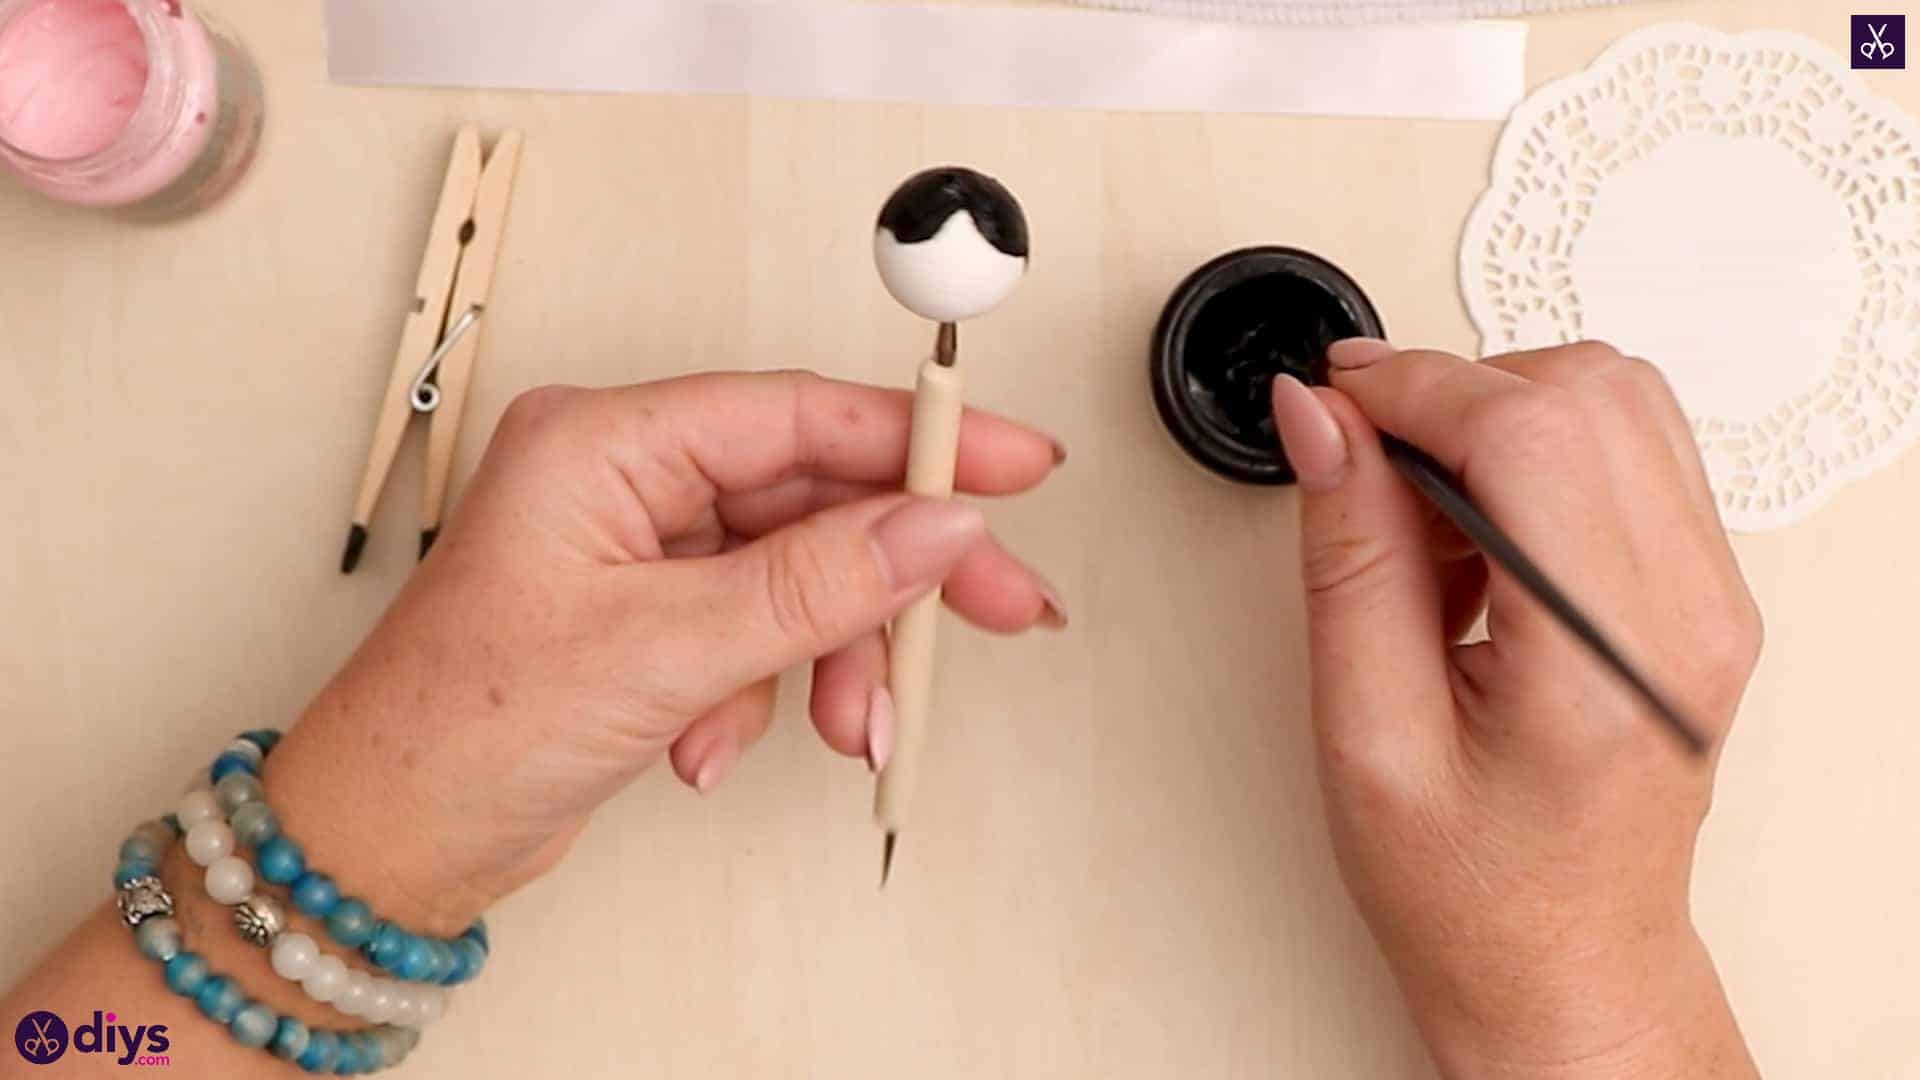
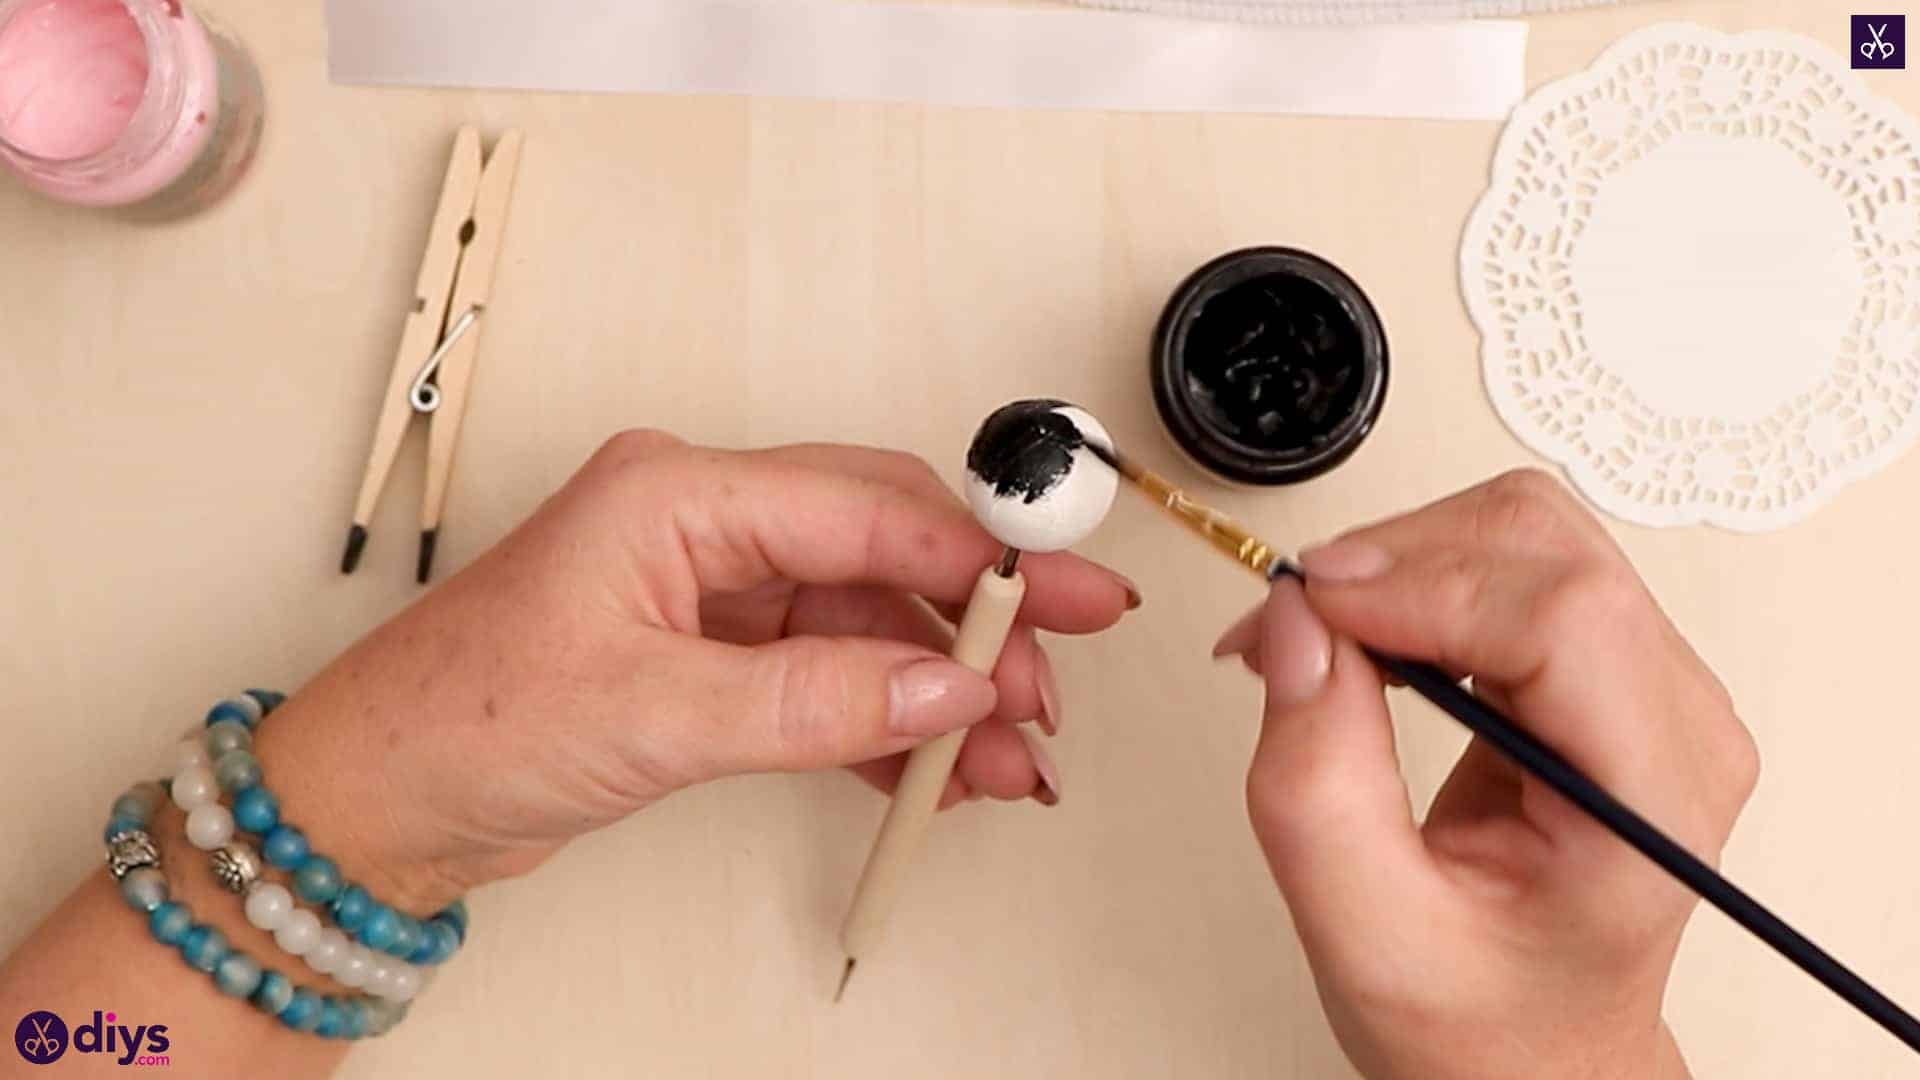
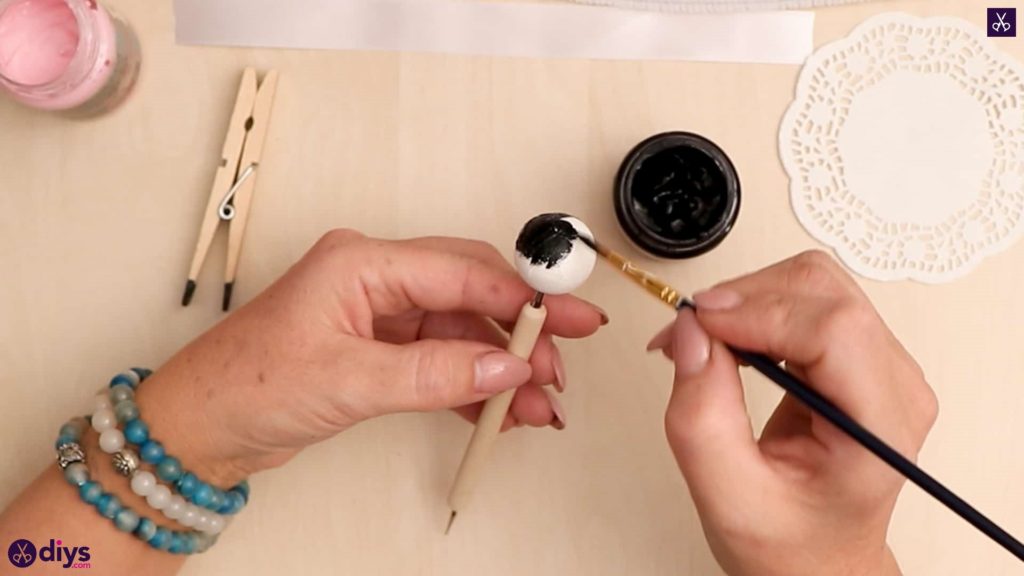
Step 3: paint the head
Poke your white spun cotton ball onto the end of your dotting tool and paint the top of it black, like hair. I made a waving shape at the front like the angel has cute little bangs.

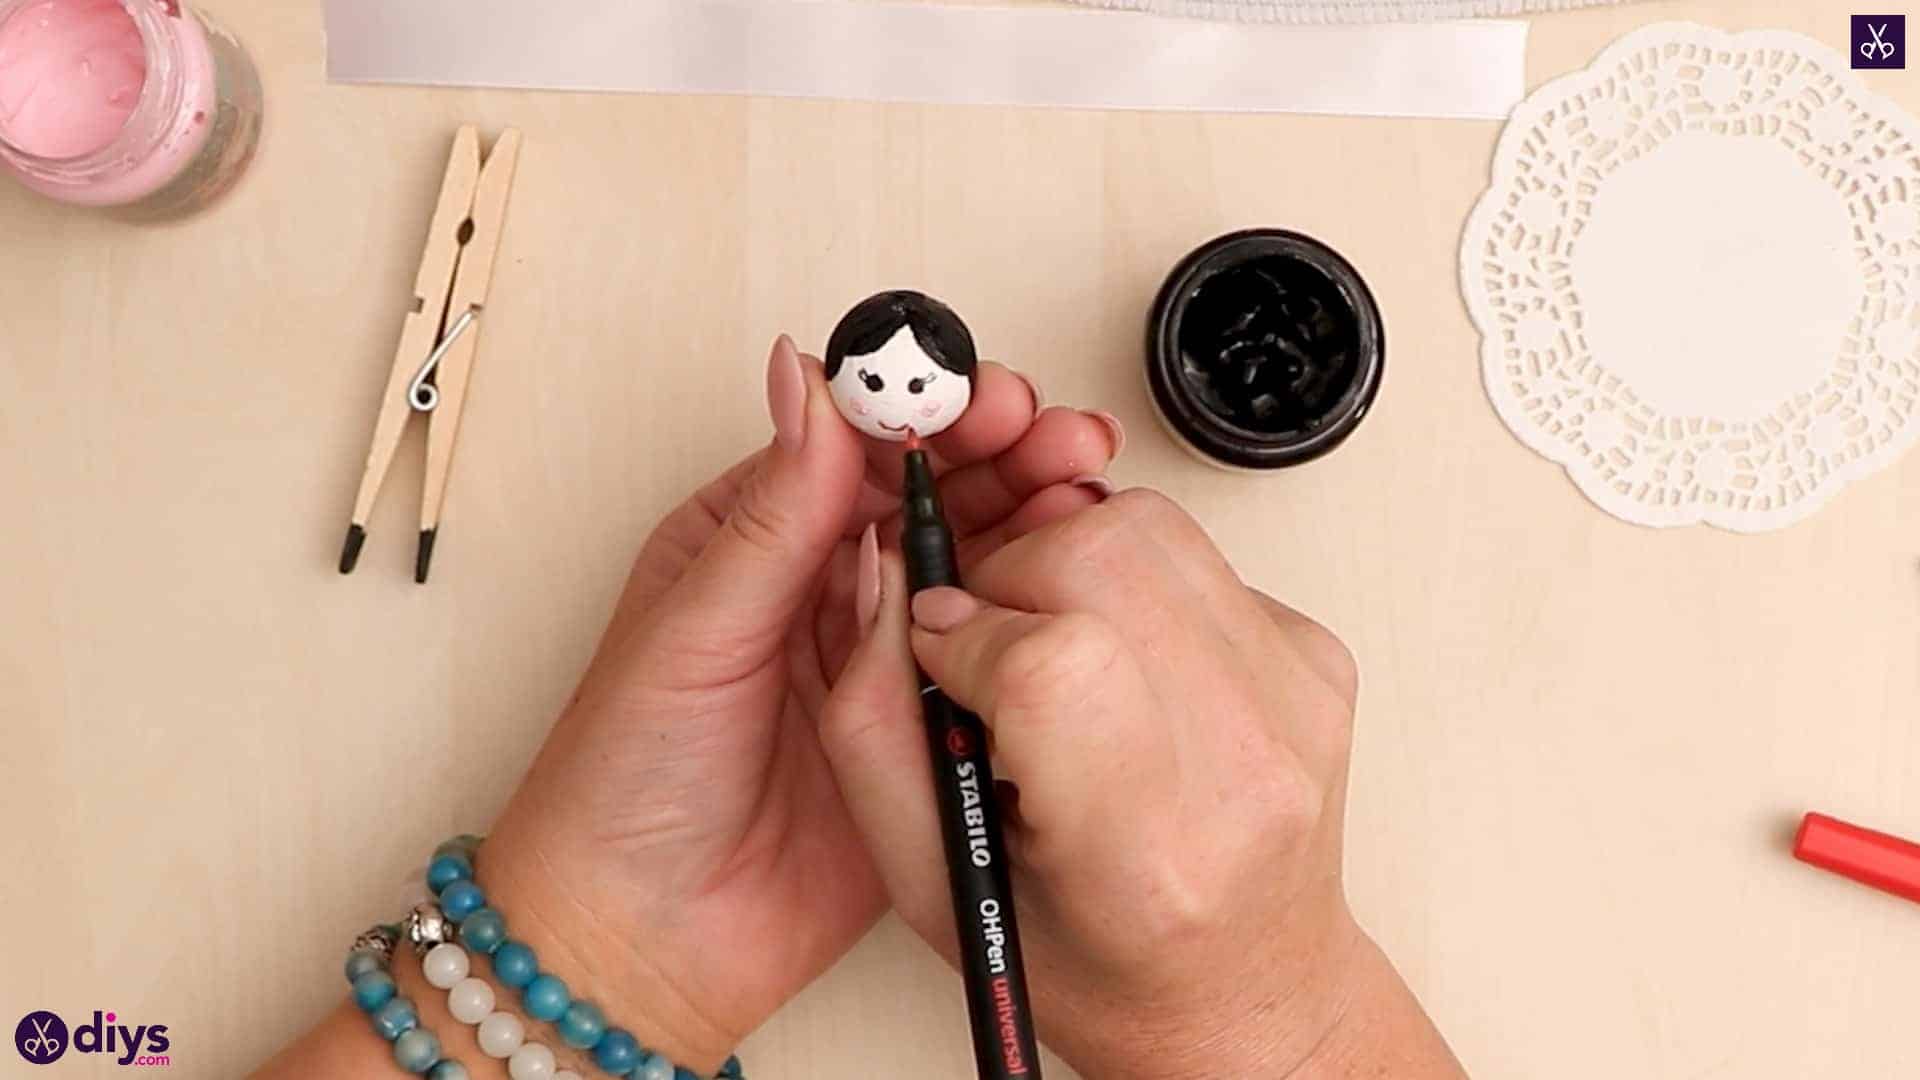
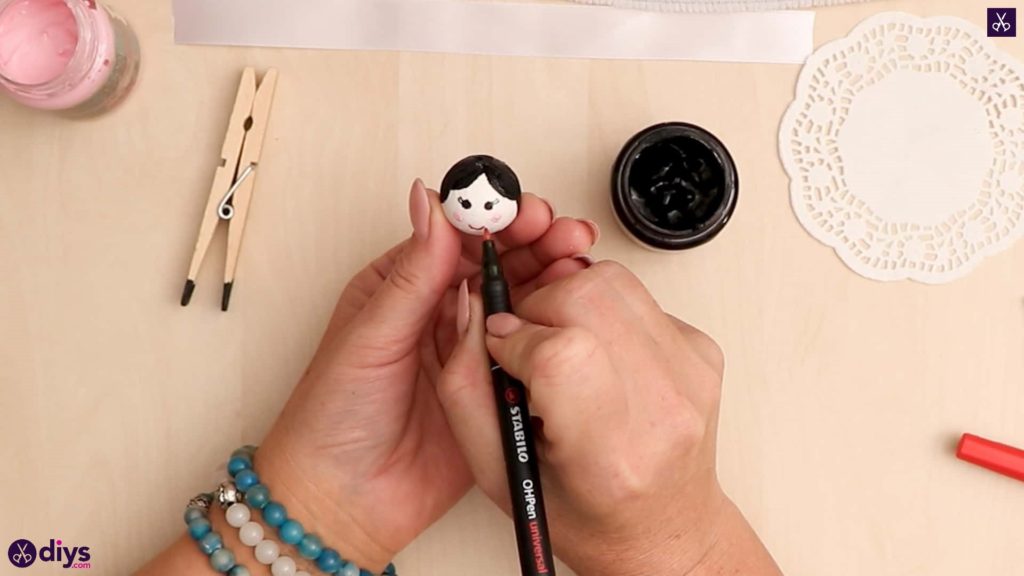
Step 4: add the face
Still holding your dotting tool, use your felt tip pens to draw your angel’s face. I used black for the eyes and little lashes, red for the smile, and then I dipped the end of my dotting tool in light pink paint to make little cheeks. Set your head aside to let the paint dry.
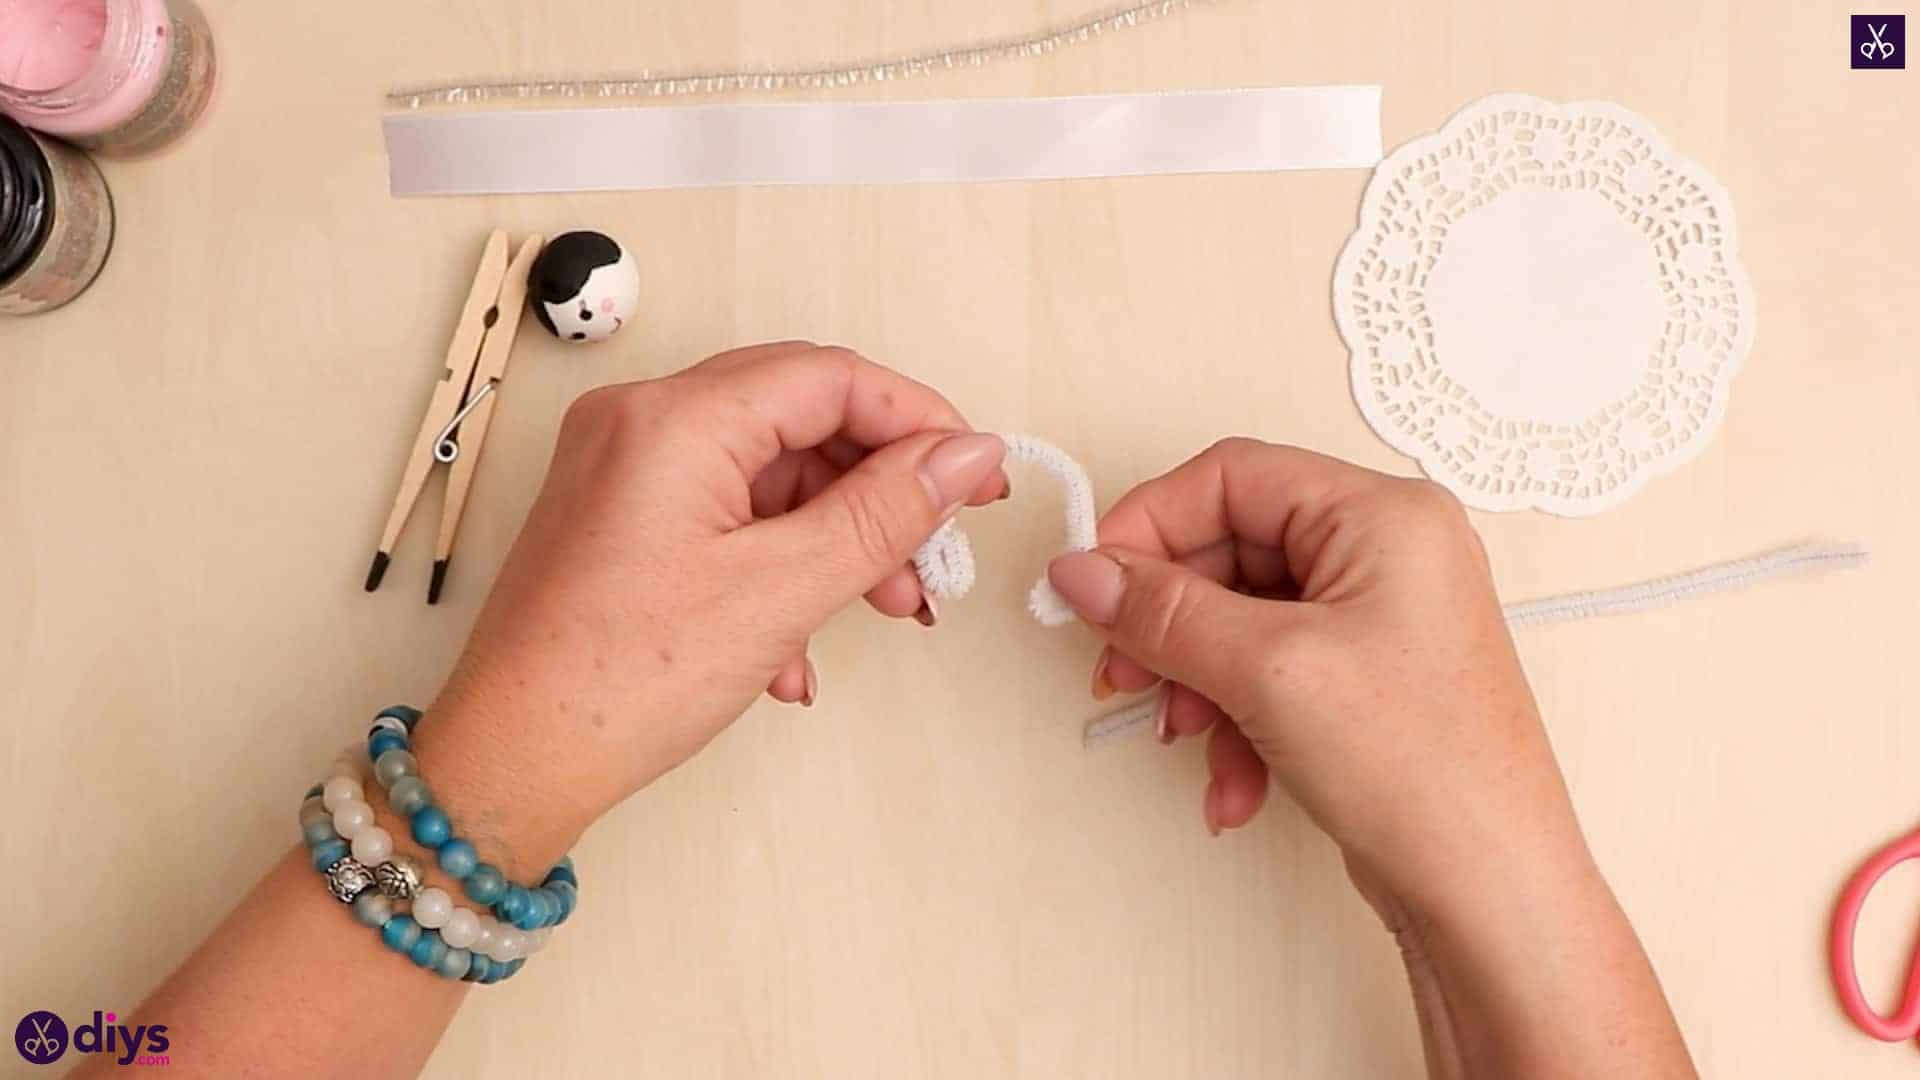
Step 5: make the arms
Cut a two inch piece from your white pipe cleaner and set the rest side for later. Round the ends of this piece inwards like little curls to make your angel’s hands and curve the piece like arms. Cut one more piece, about one inch long, from your white pipe cleaner and set that and the arms you made aside for later.

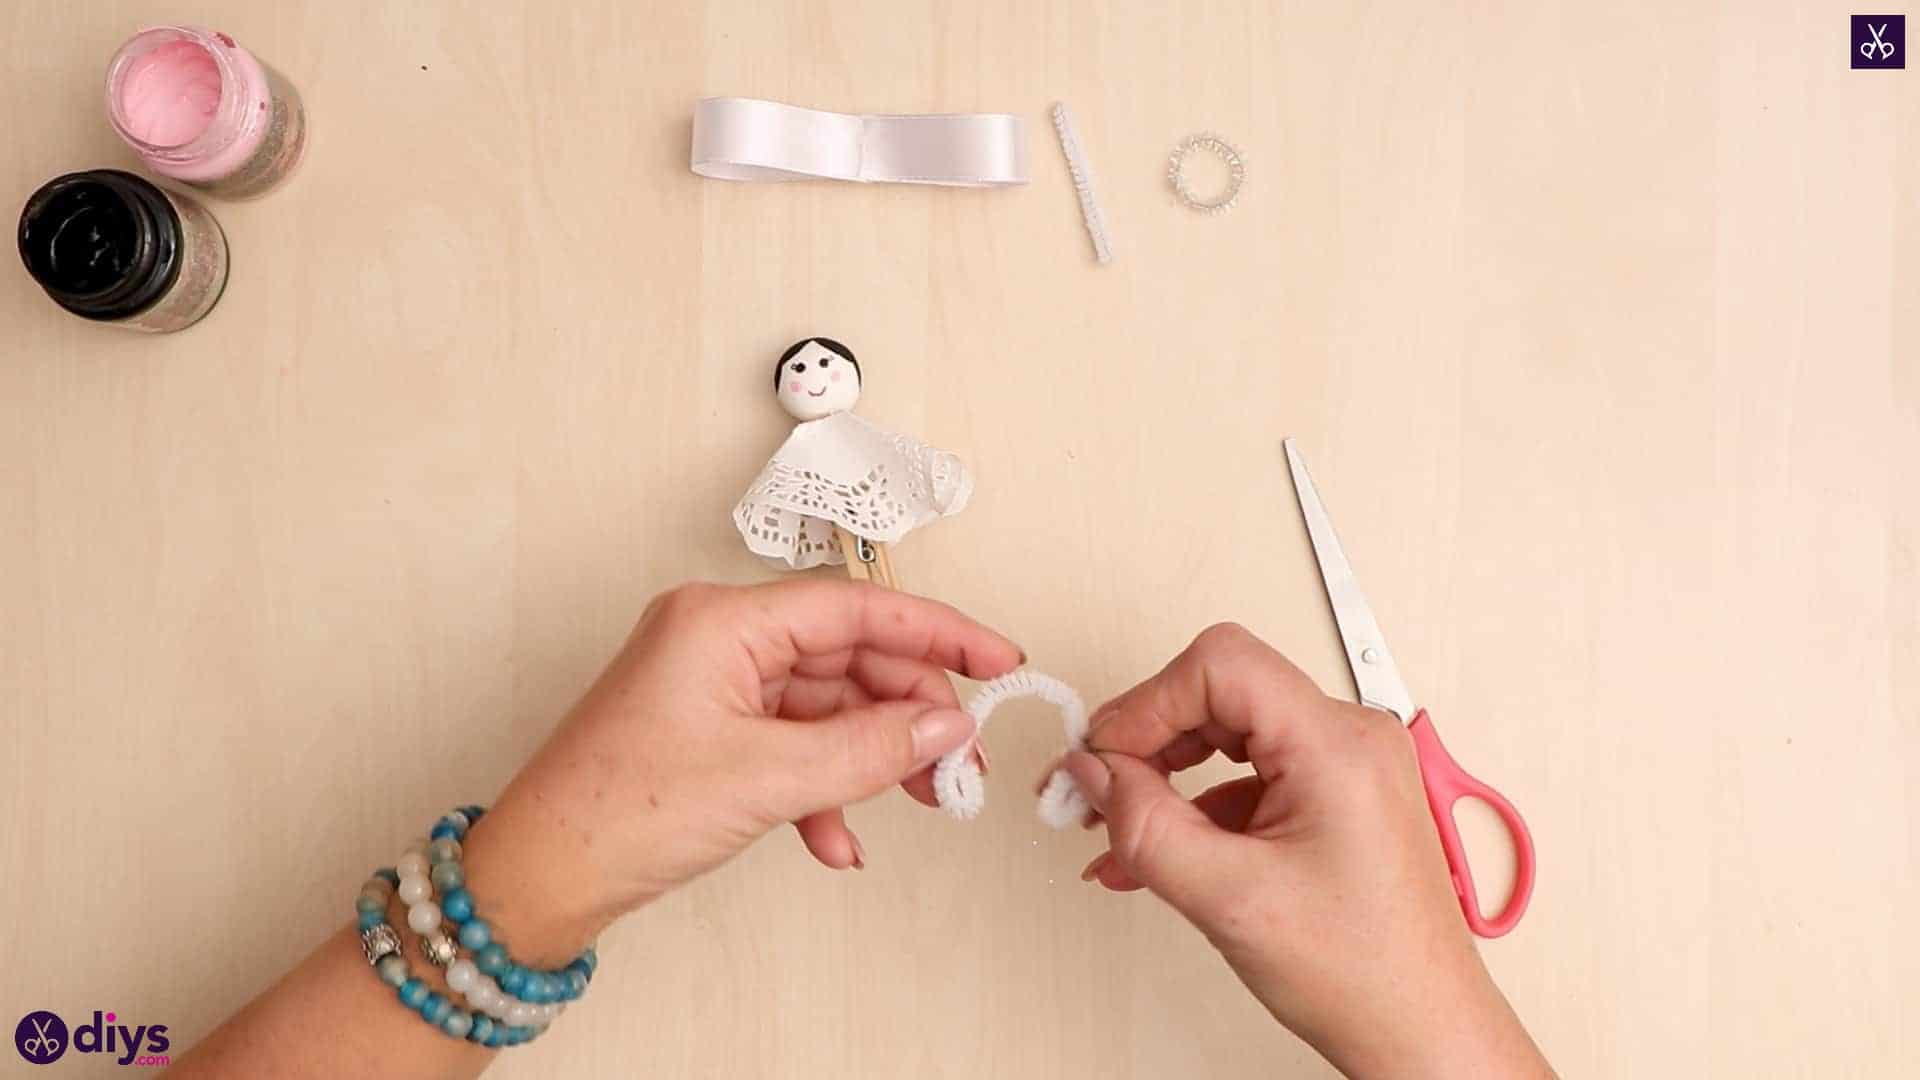
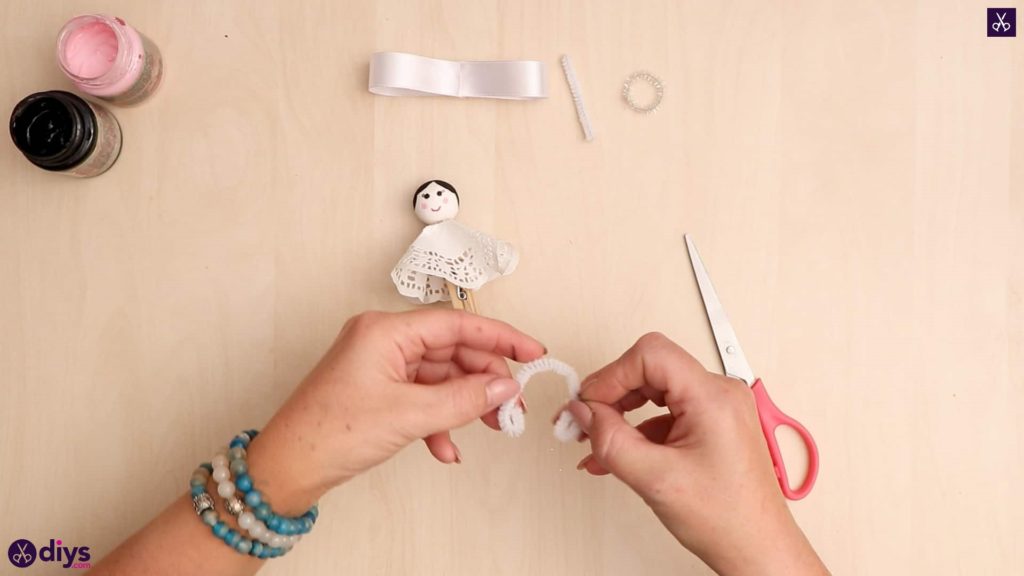
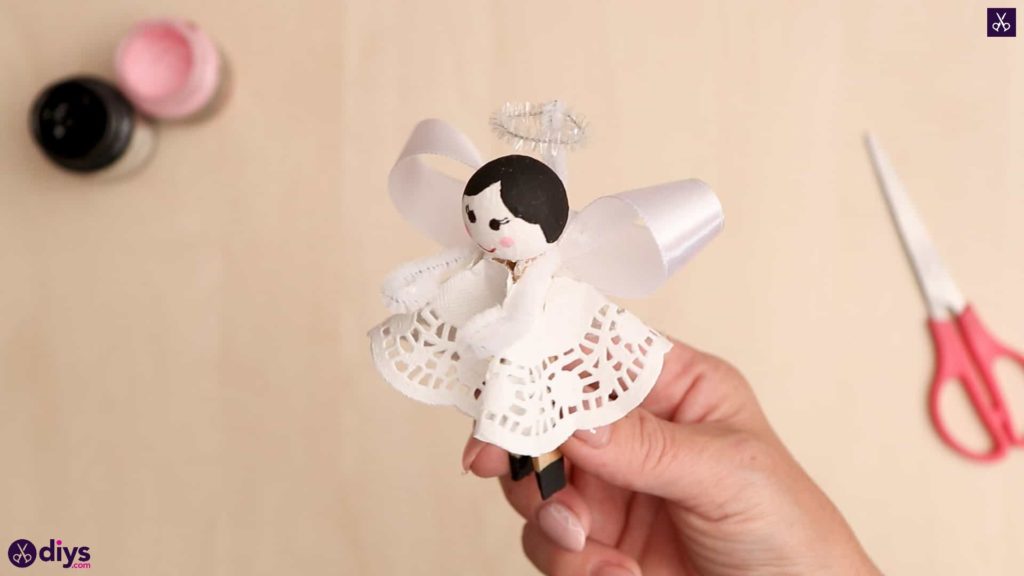
Step 6: make the halo
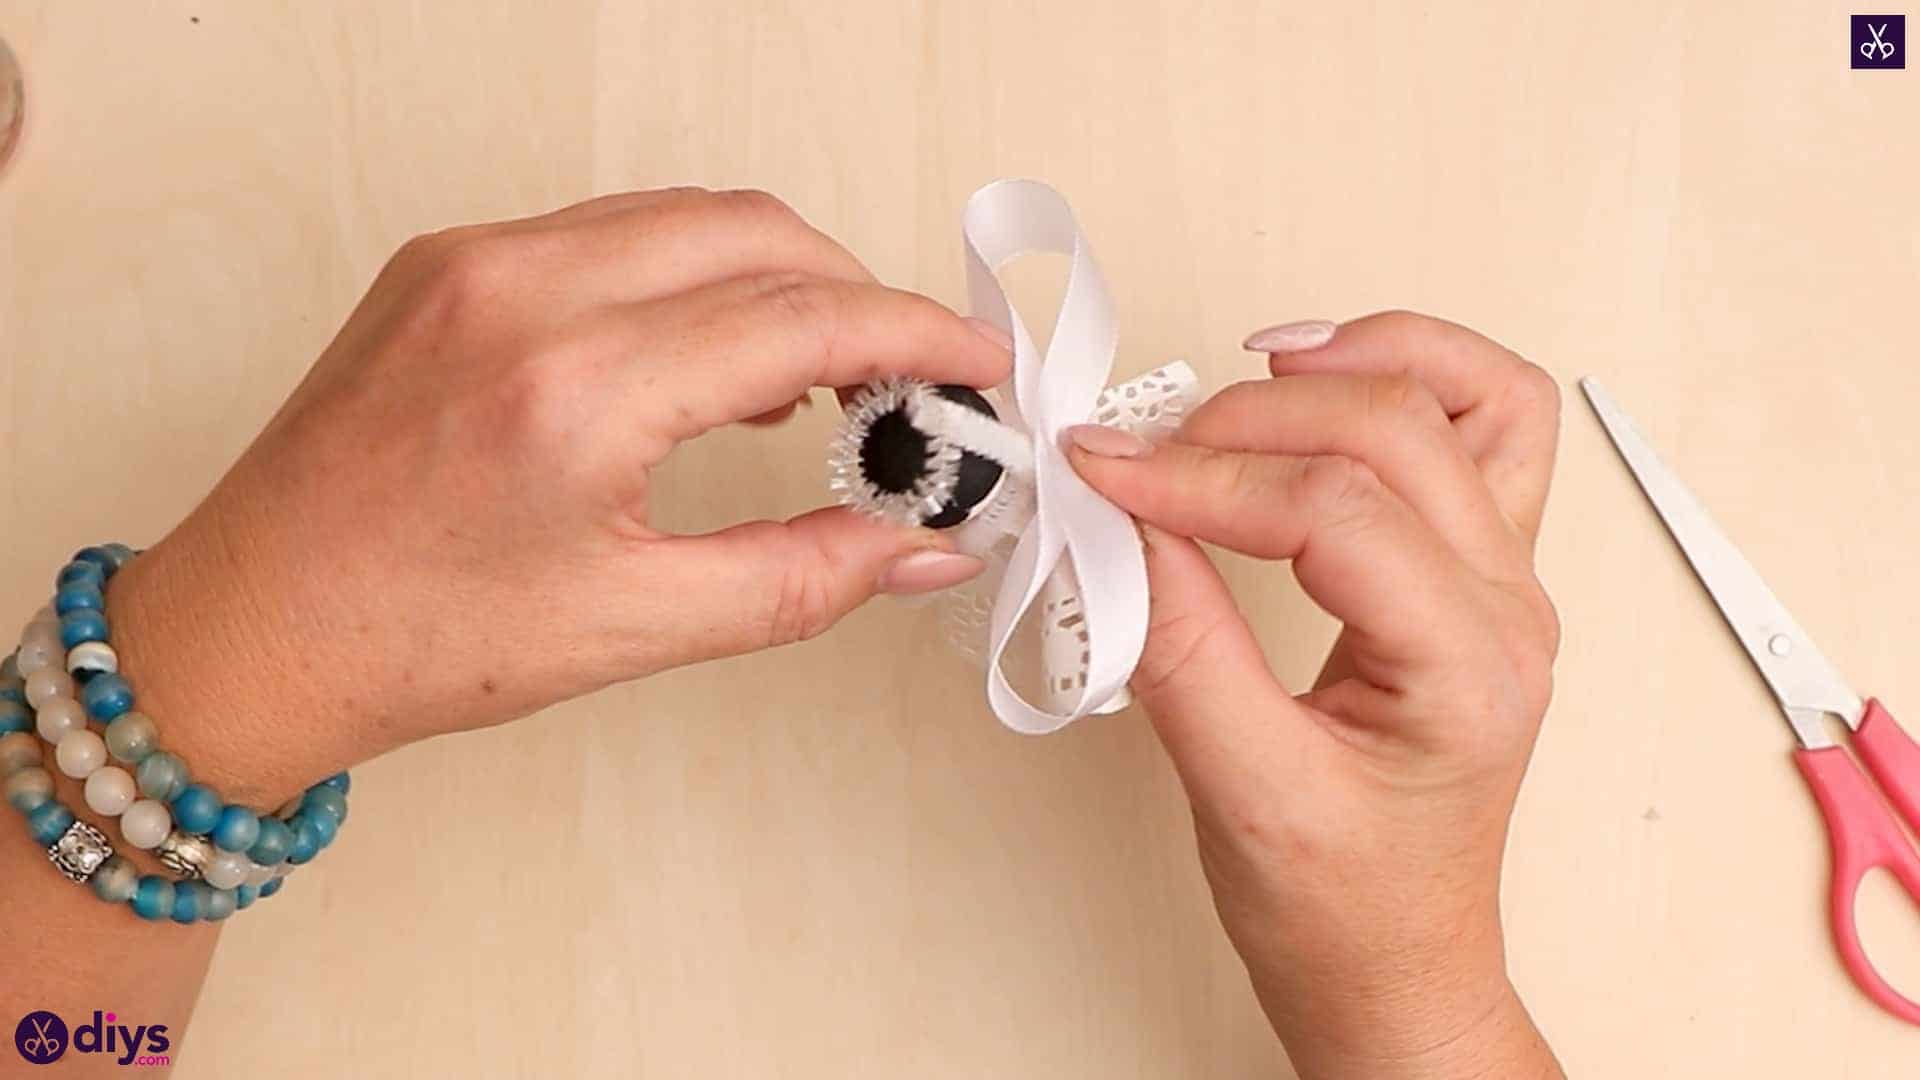
Cut a two inch piece off your sparkly pipe cleaner and curve it round to make a circle. Apply a small dab of hot glue to one end and stick your other end into it. Set this aside with your other pipe cleaner pieces.

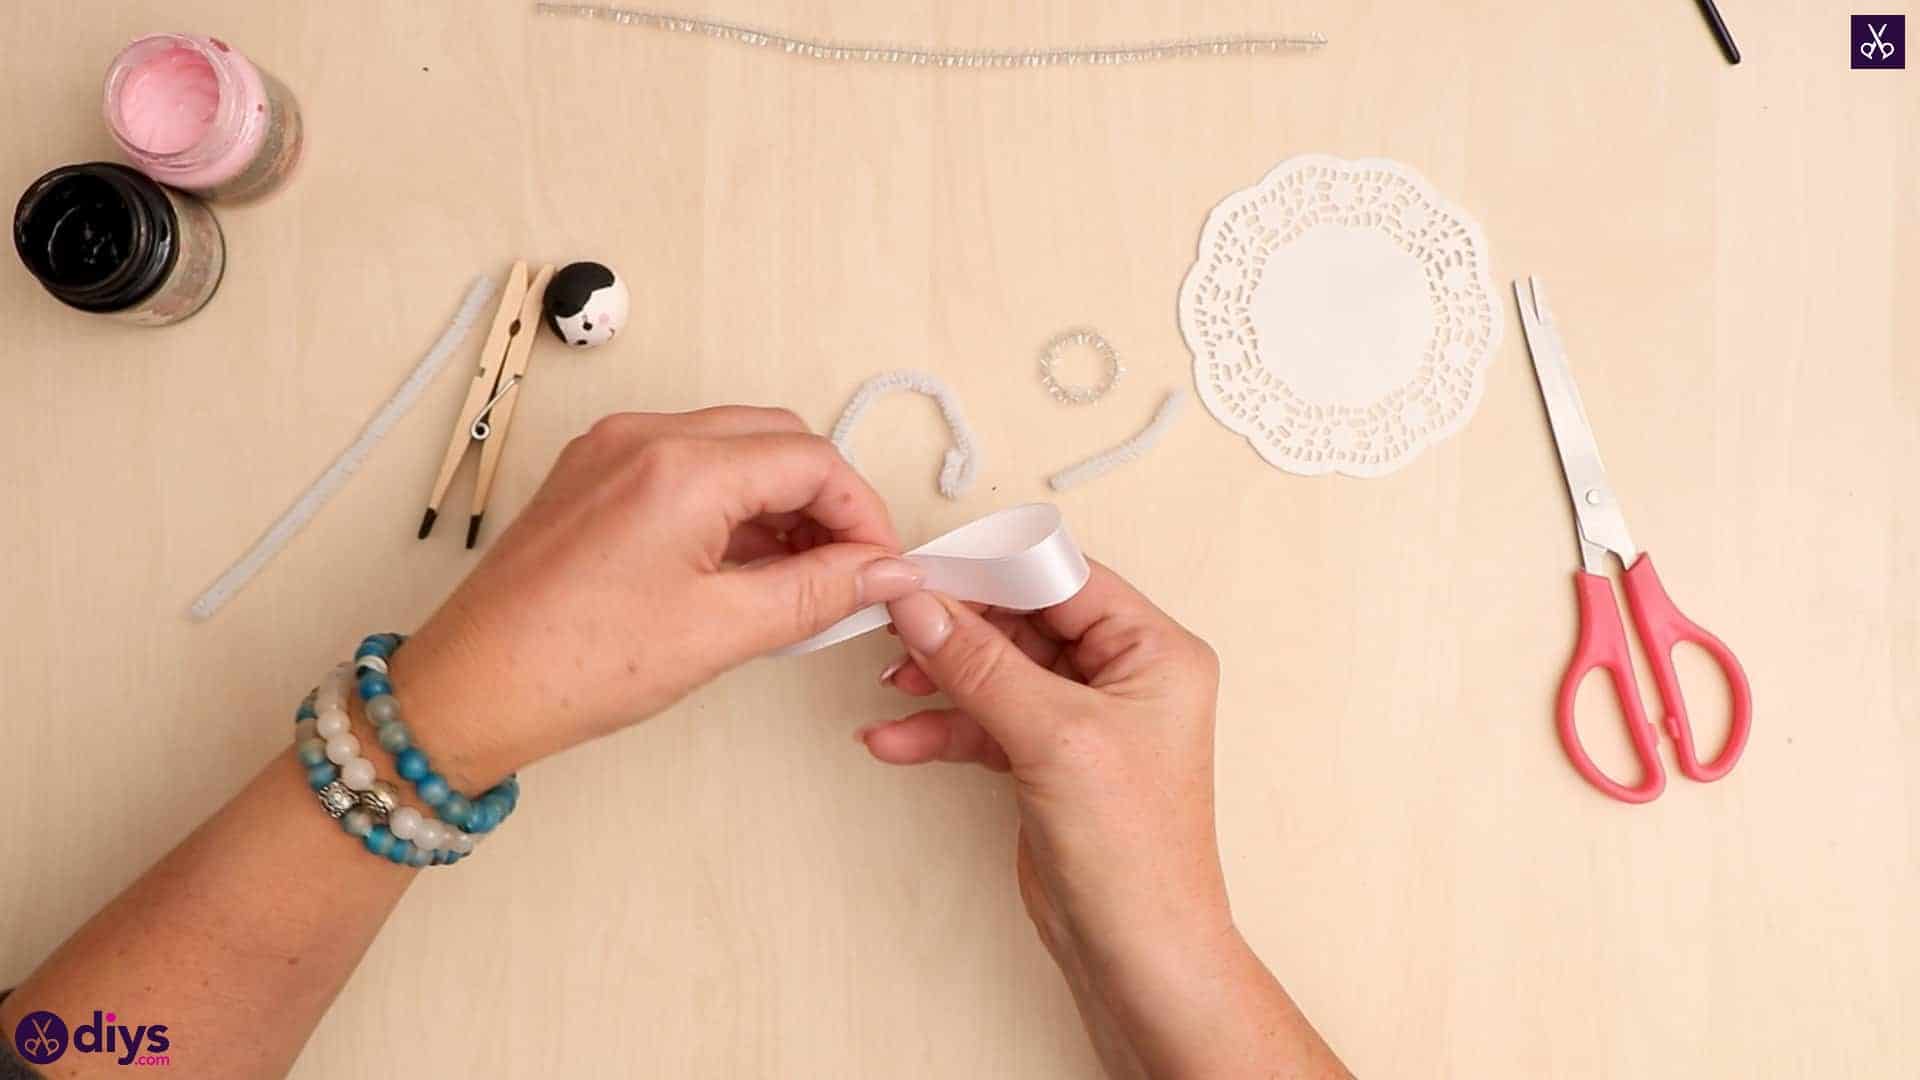
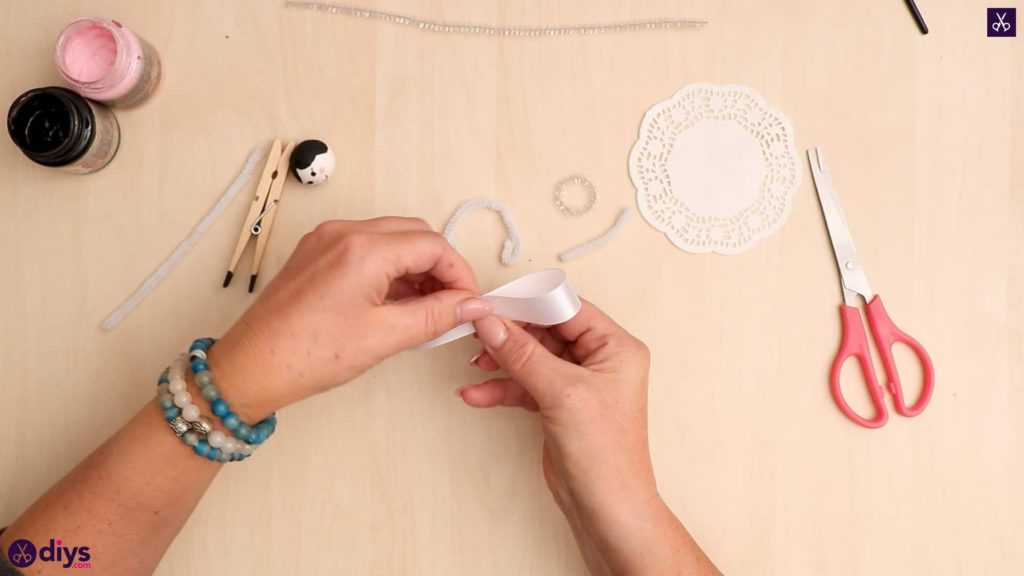
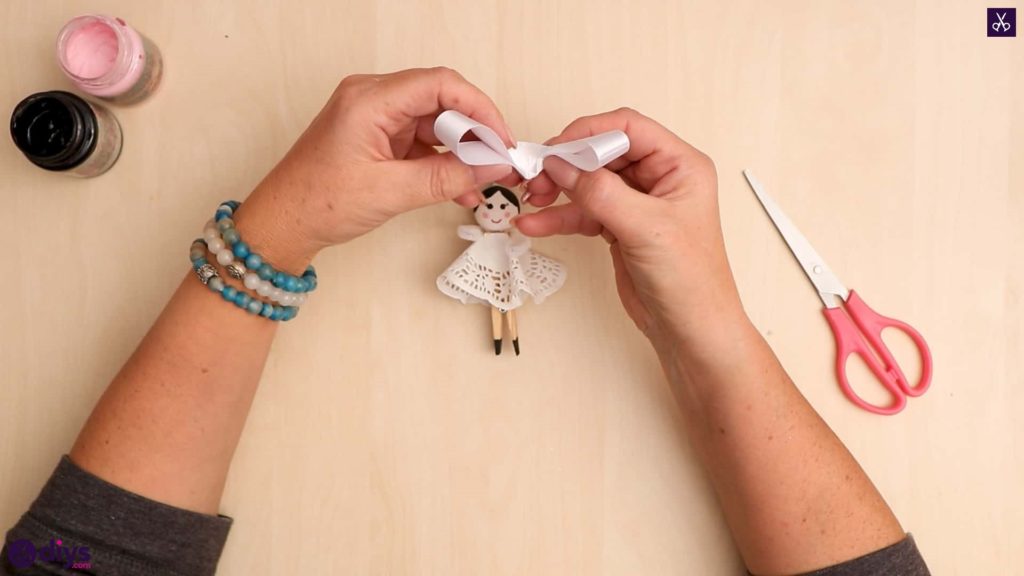
Step 7: create the wings
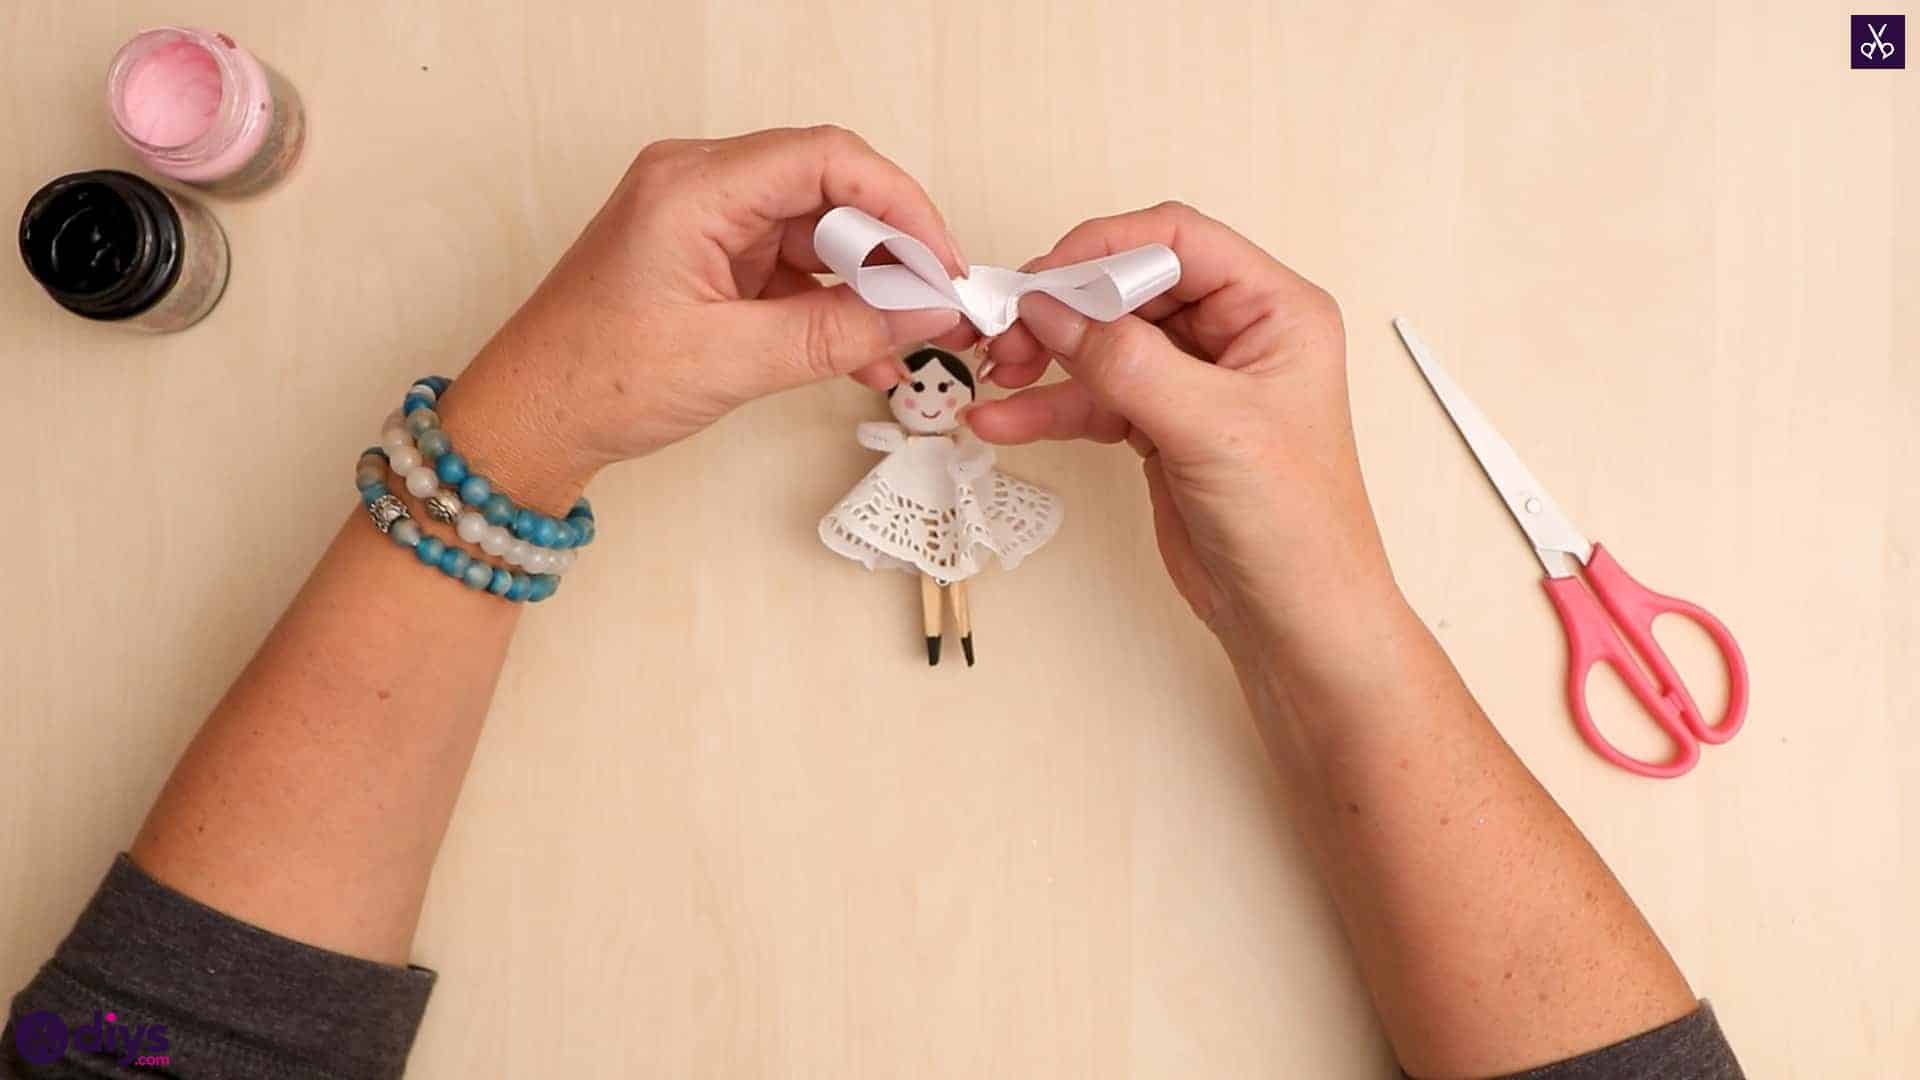
Make bow loops with your white ribbon by applying glue in the middle and curving each end inward to stick there in the center.
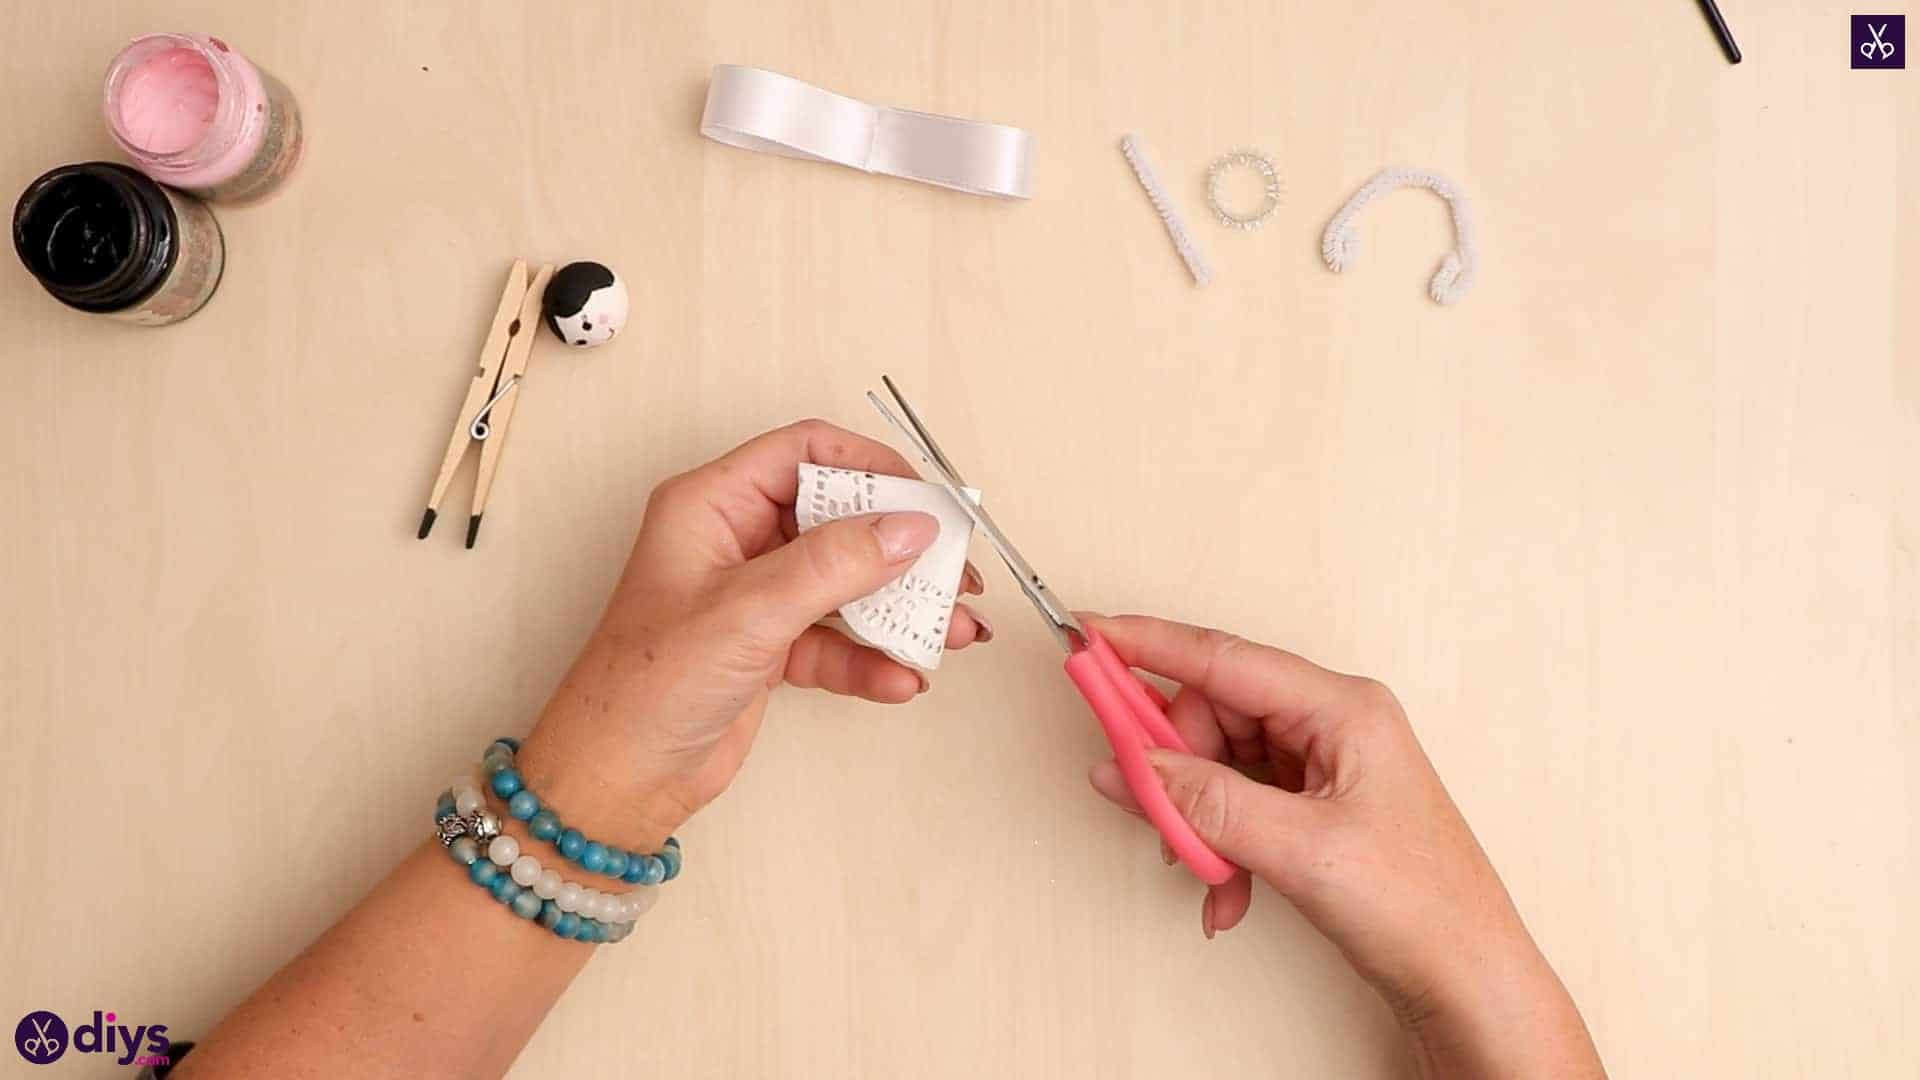
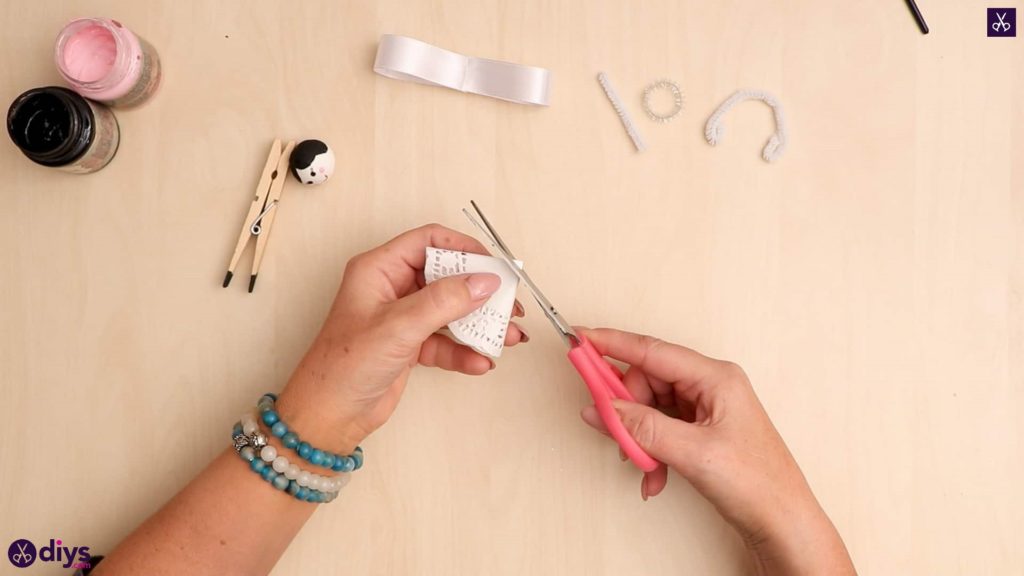
Step 8: cut the dress
Fold your lace paper doily into quarters so you have a shape that kind of looks like a slice of pizza. Cut the pointed tip of this piece off so that you have a hold in the very center of the doily when you unfold it.
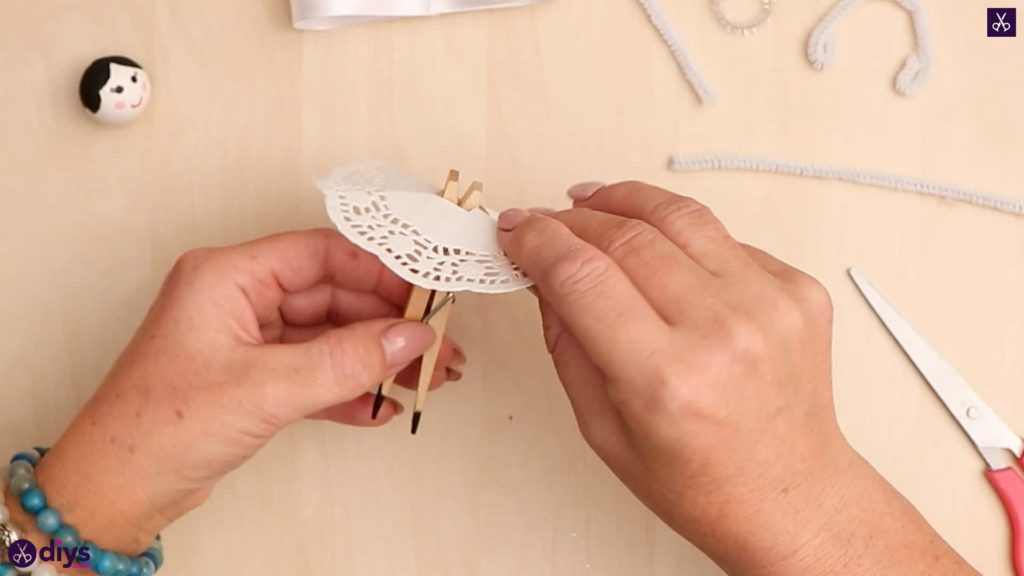
Step 9: start assembling
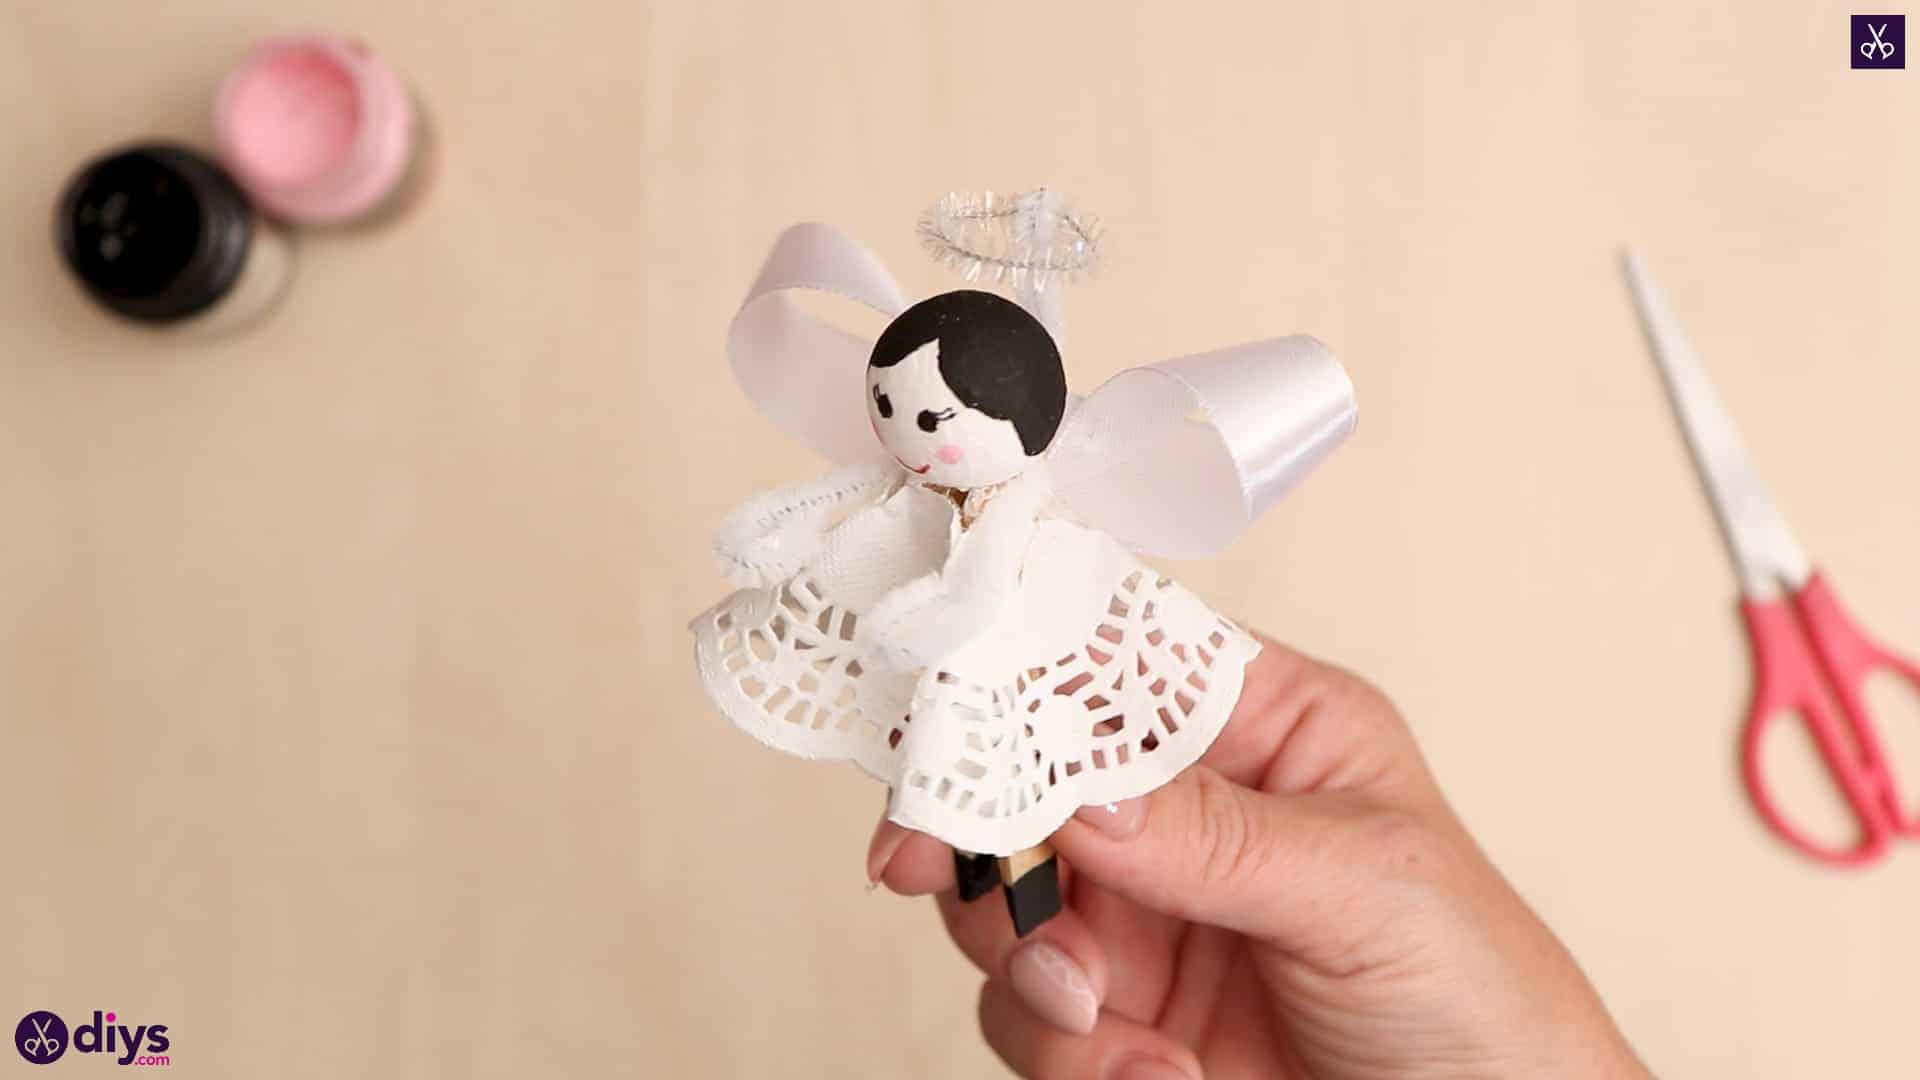
Apply some glue all the way around your clothespin right about where the hinges are or just above. Slide your paper doily over the opening of the clothespin so it pokes through the hole and the doily rests around the hinges. Press each of the four sides into the glue so the doily looks like a little skirt.
Step 10: glue the arms
Apply some glue to the bottom of your spun cotton ball and stick the angel’s head snuggly on the tip of your upright clothespin, so it nestles right in the spot where it would open if you squeezed its ends. Next, apply some glue in the bend of the arm and hand piece you made earlier and hook it around the back of the angel so it sticks right behind the base of the head and the hands stick forward.
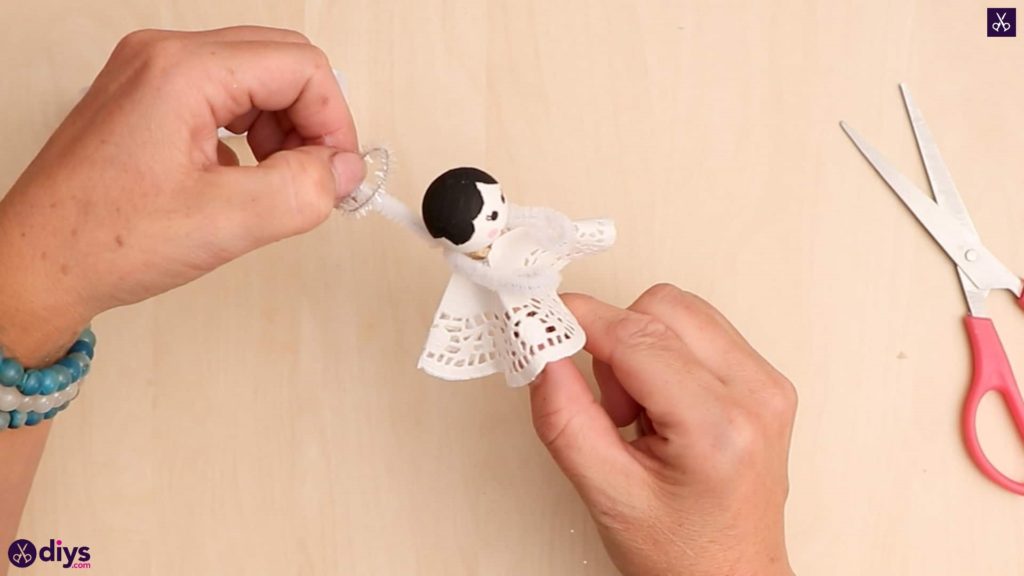
Step 11: add the accessories
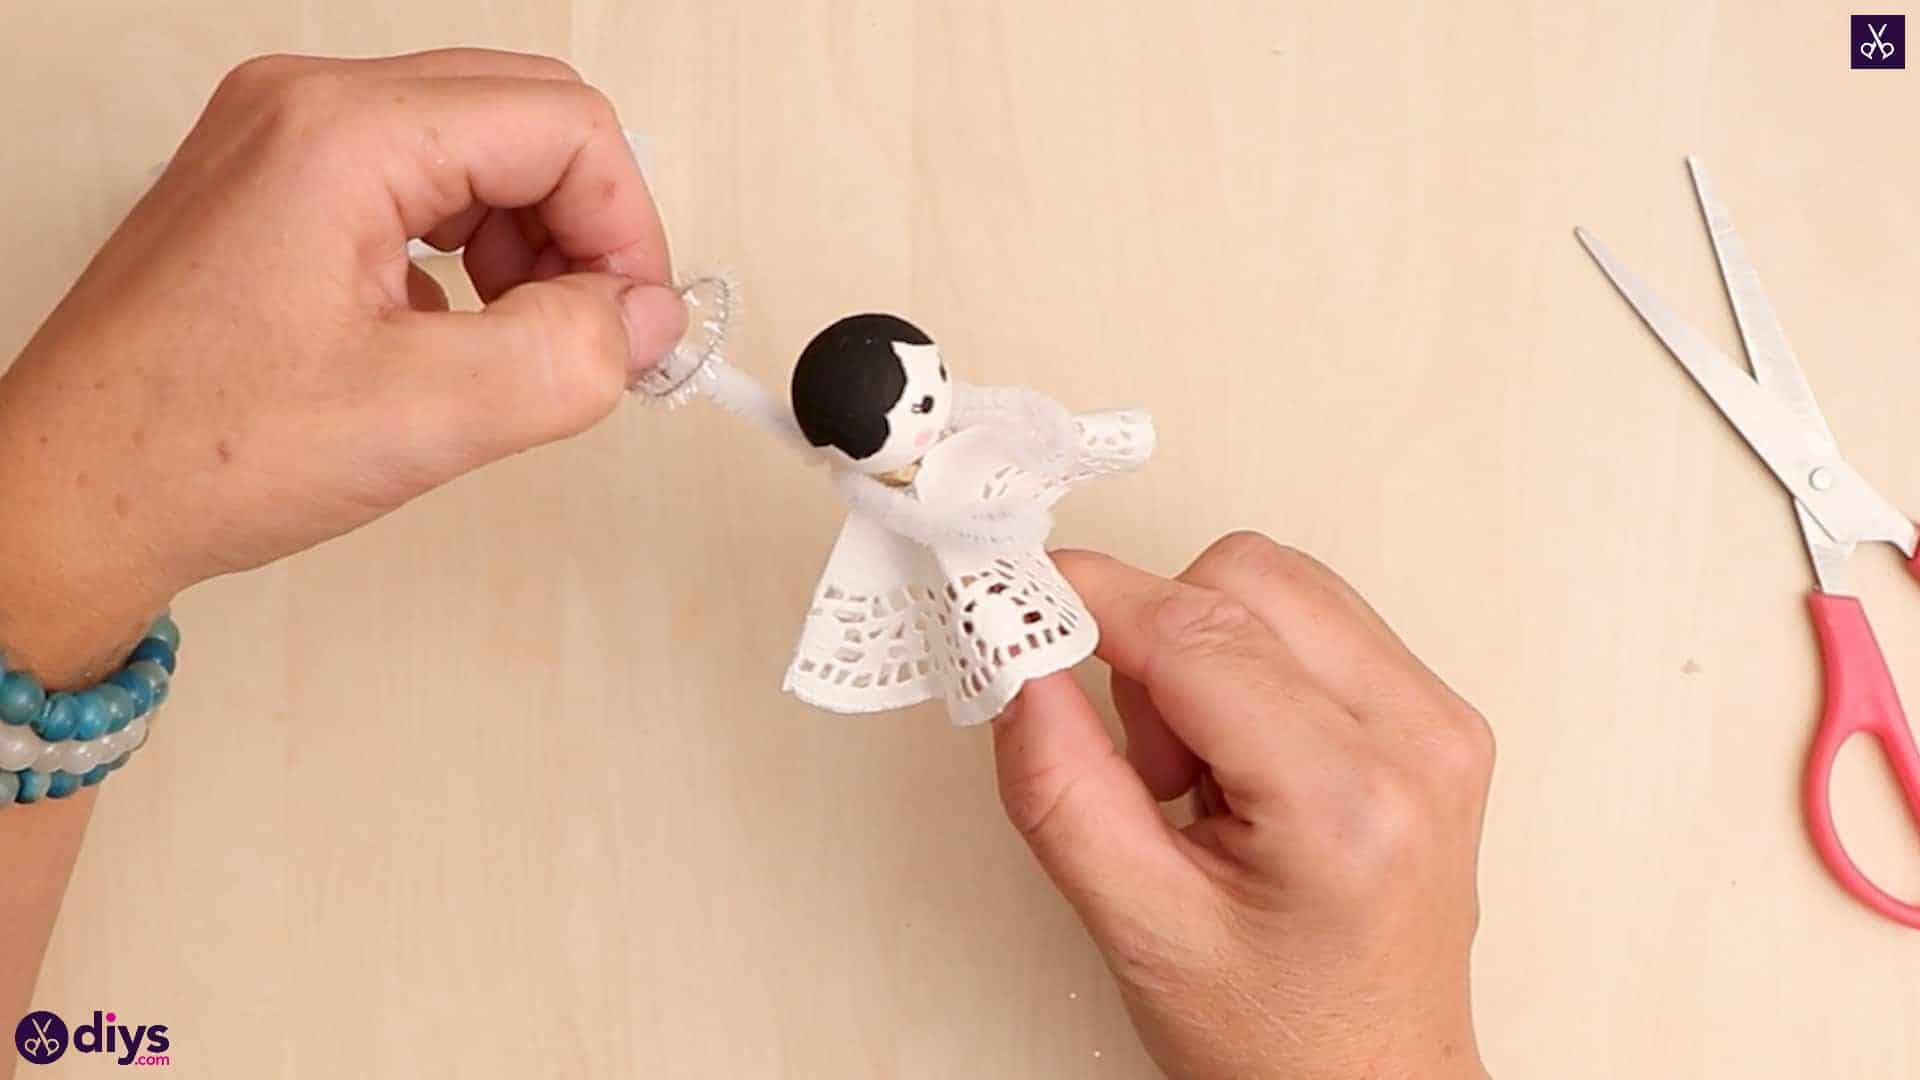
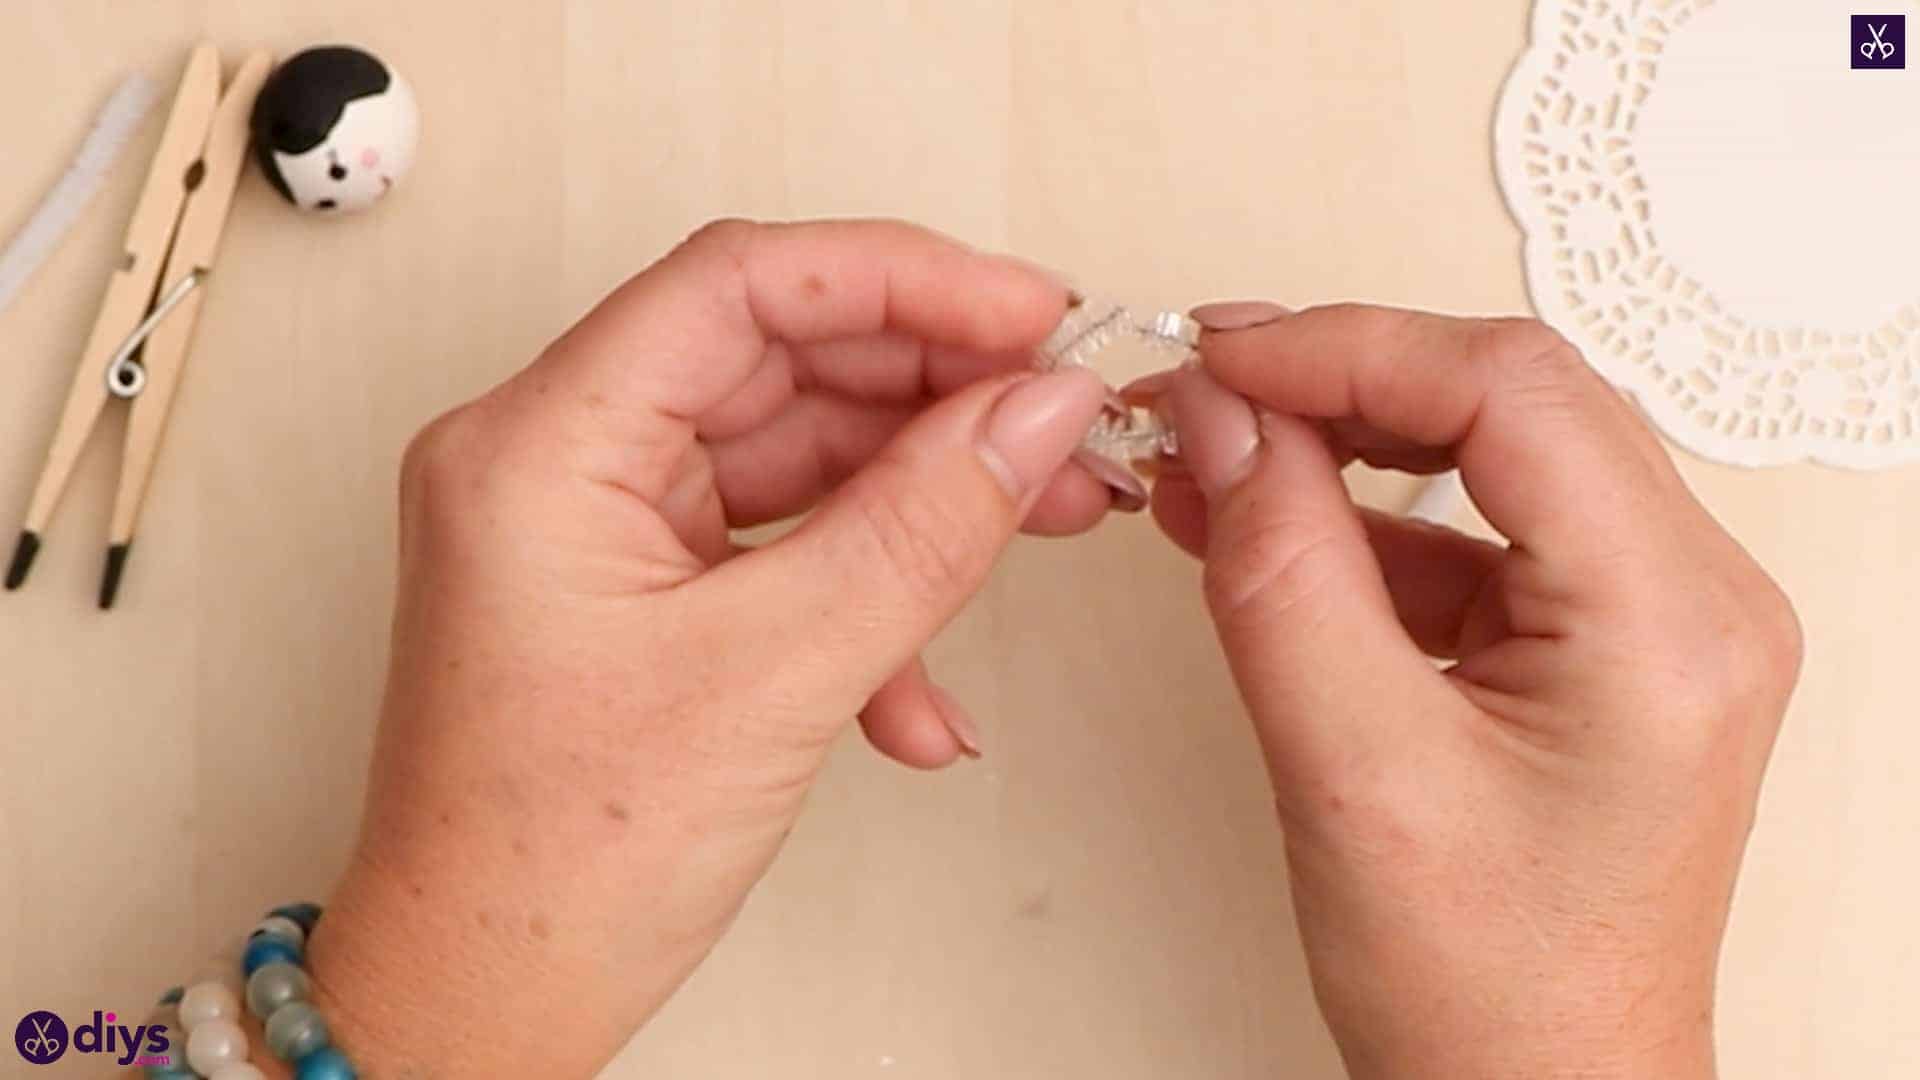
Apply some glue on the inside of the pipe cleaner ring you made from the sparkly kind earlier, right where your ends meet, and press the end of the smaller piece you still have left over into it. This makes your angel’s halo! Now, apply some glue to the halo’s stand that you just glued now, near its bottom end, and glue that to the back of the angel’s head so the halo hovers right above its hair. Trim the length first if necessary.
Step 12: add the wings
Apply glue to the center of the bow loops where you stuck your edges down before and fold a bit of the bottom edge up on each side to make the loops perk up a little at a jaunty angle. Apply more glue in the middle if needed and press the loops onto the back of the angel, over the end of the halo stand and the arms. The loops will stick out the side to be seen at the front; your angel now has wings!

With that, you’re all finished! Just in case you’d like to try this project out for yourself, here’s a fantastic tutorial video to help you!