DIY Christmas Bow Ornament
Updated on November 19, 2025
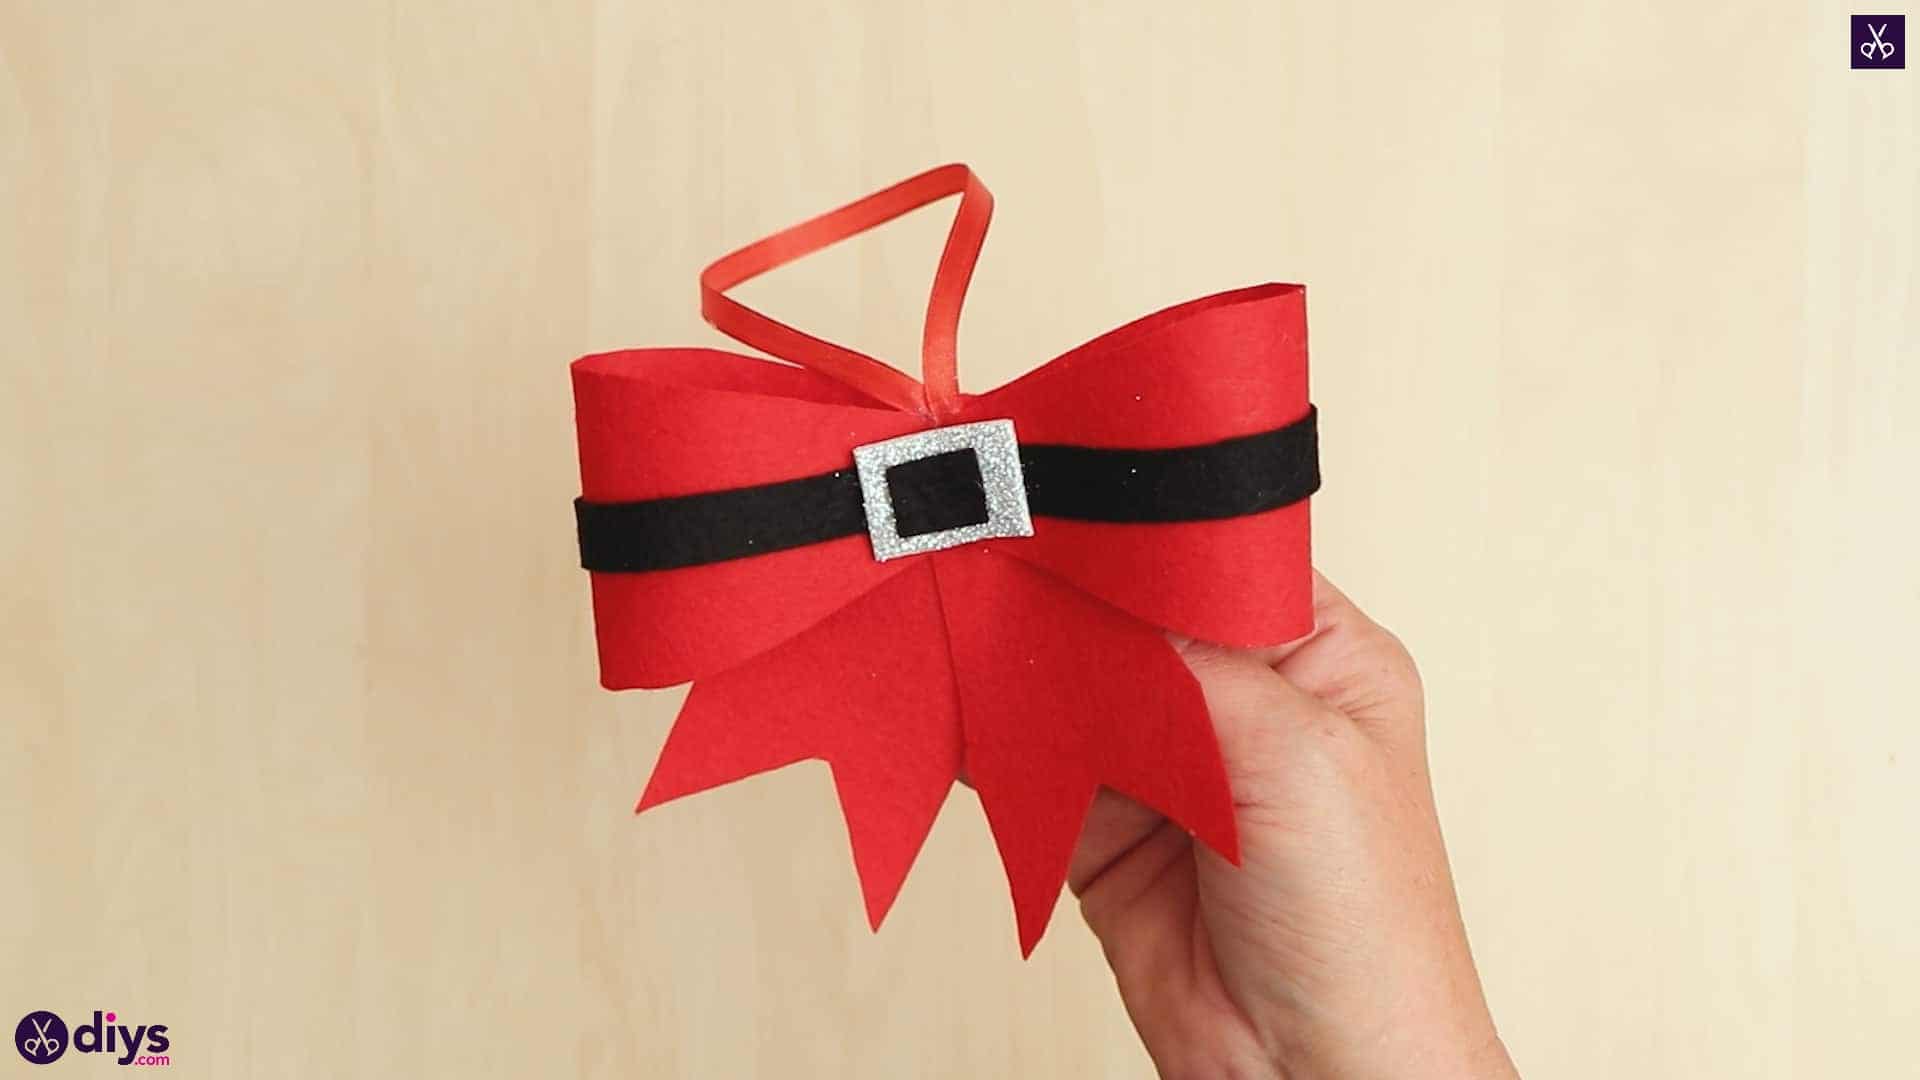


Now that the Christmas season is on its way, my household in full swing when it comes to making our own DIY ornaments and decor. Of course, my kids love to get in on the creative fun as well, so I’ve been trying to come up with all kinds of different simple, fun projects that they can make with ease. That’s where these adorable paper Christmas bow ornaments that look like Santa’s suit came from!

If you’re interested in learning more about how we made these little bows together, check out these photos and full instructions. Just in case you’d rather follow along with a video tutorial, there’s one at the end of this post for your viewing pleasure!
For this project, you’ll need:
- A red ribbon
- Felt (red and black)
- Silver foam paper
- Scissors
- Hot glue
Step 1: get ready
Gather your materials!

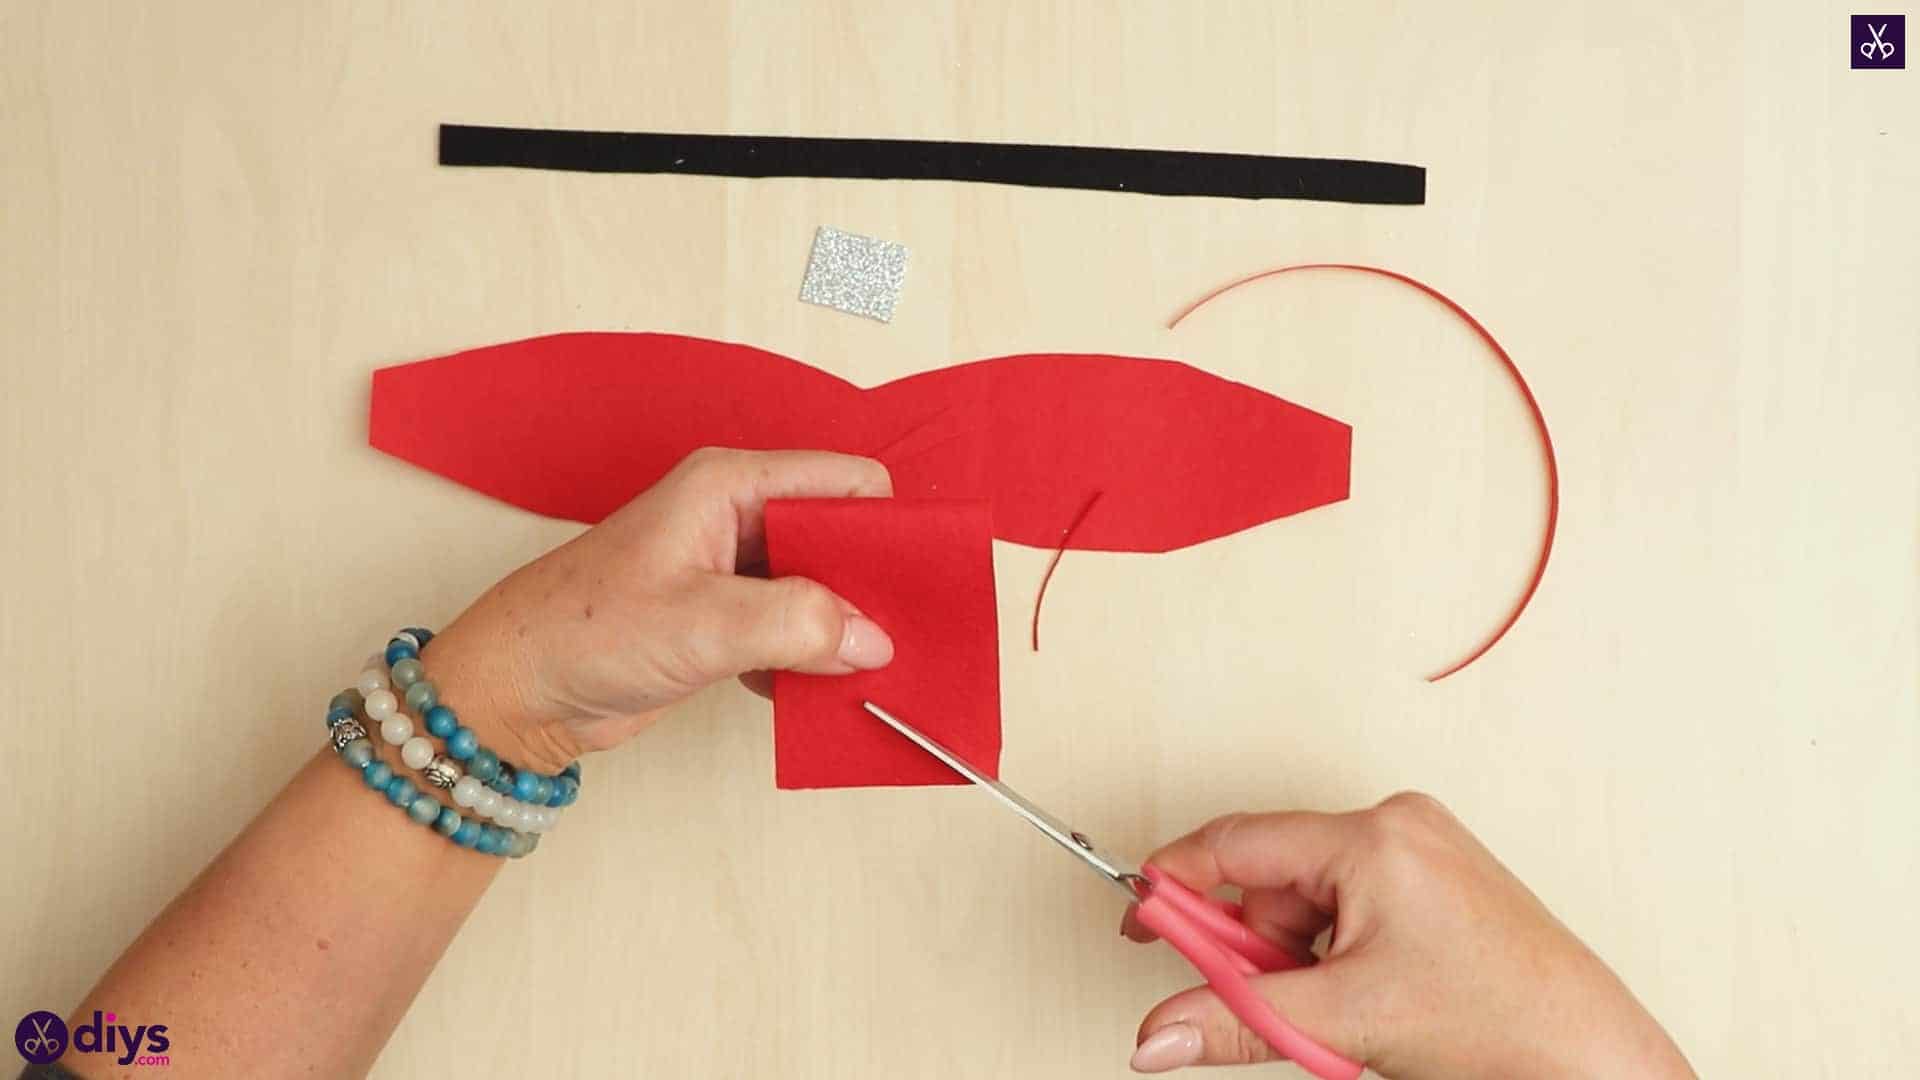
Step 2: cut square
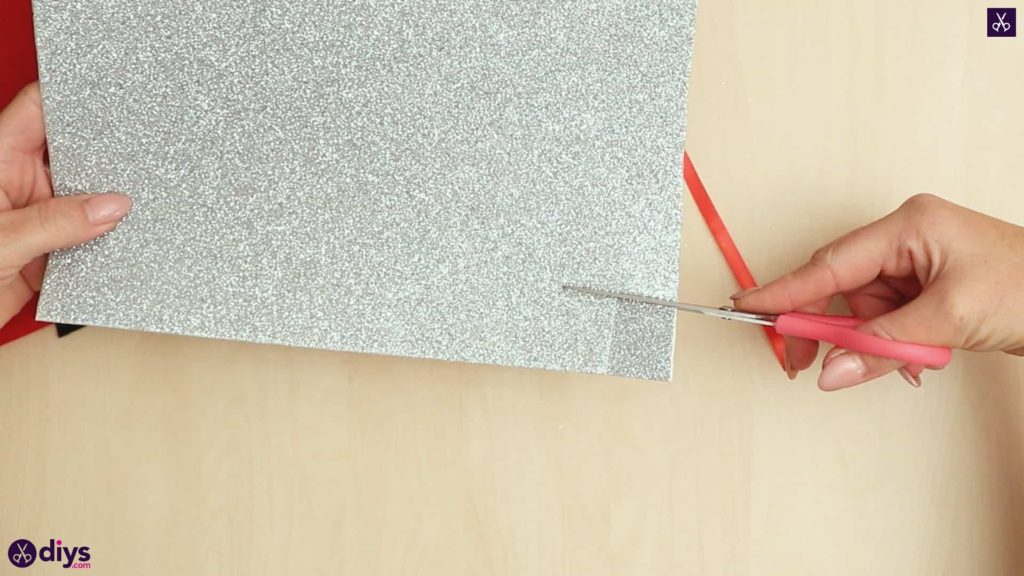
Cut a small square, about half an inch by half an inch, from the corner of your sparkly silver foam paper.
Step 3: cut a balck strip
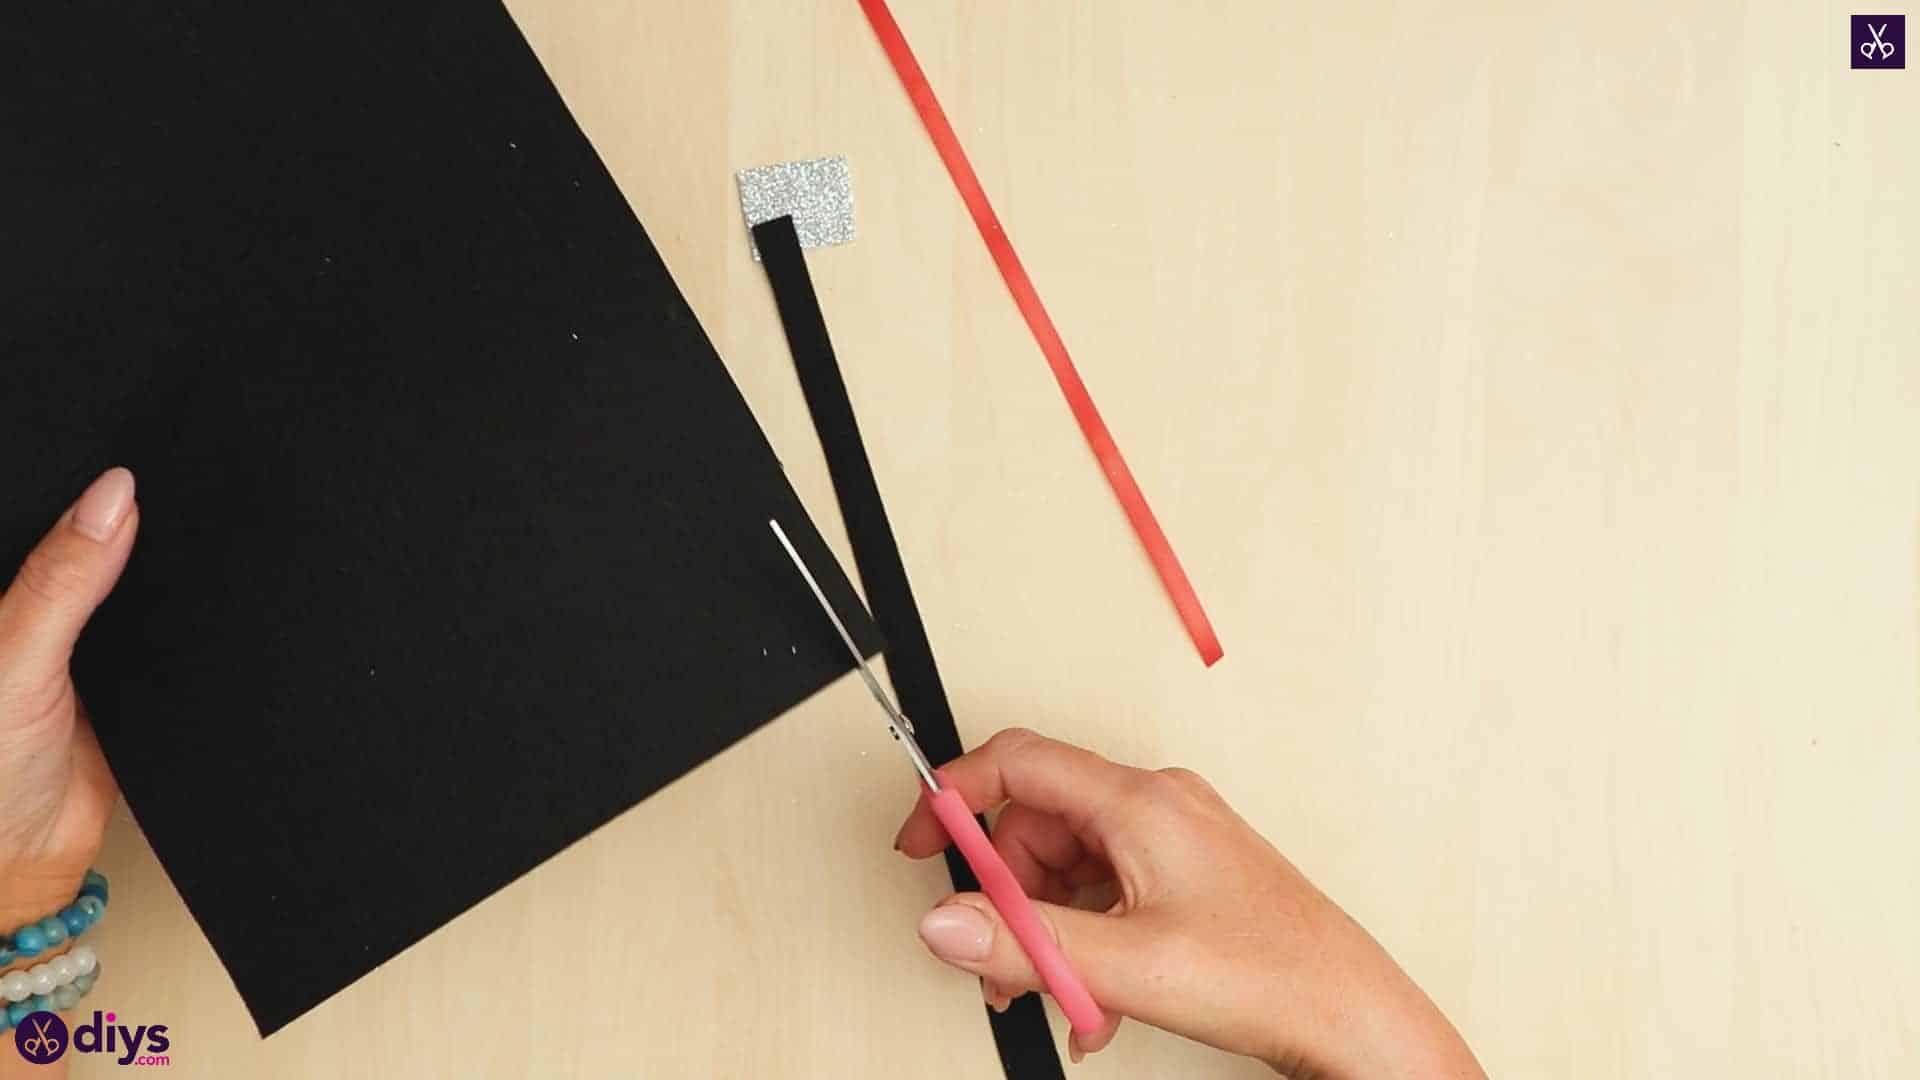
From your black page, cut a skinny strip that’s the full length of the page’s side, followed by a black square that’s slightly smaller than the silver one you just made.

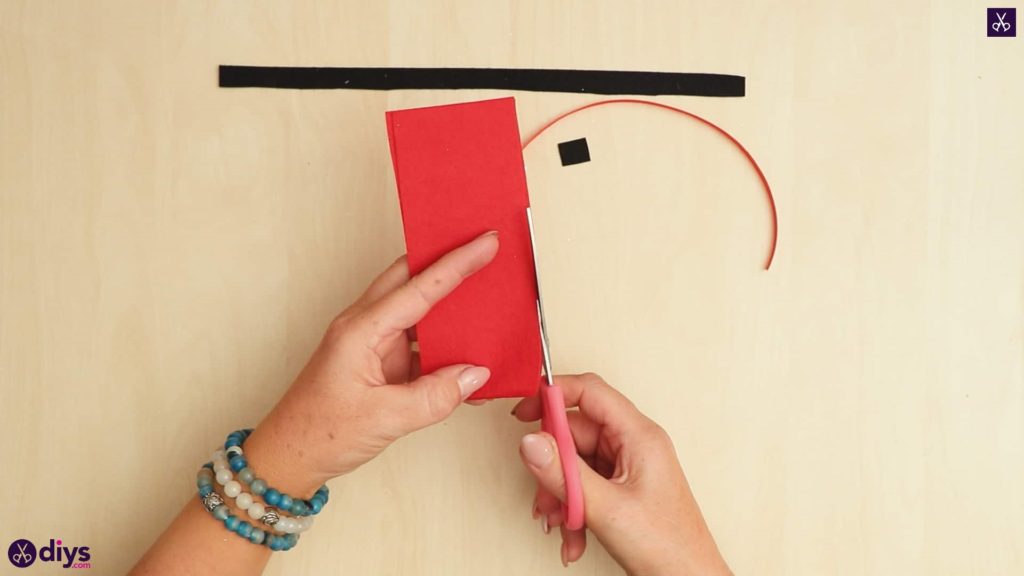
Step 4: cut wider strips of red
Cut a two inch wide strip the full length of your red page and then fold it in half length-wise. Starting at the creased end, round the corners off near the crease, continuing the rounded shape halfway down the edge, then taper each side in towards the other end, leaving it about an inch wide. This piece will be folded later to make the loops of your bow!
Step 5: make the ends
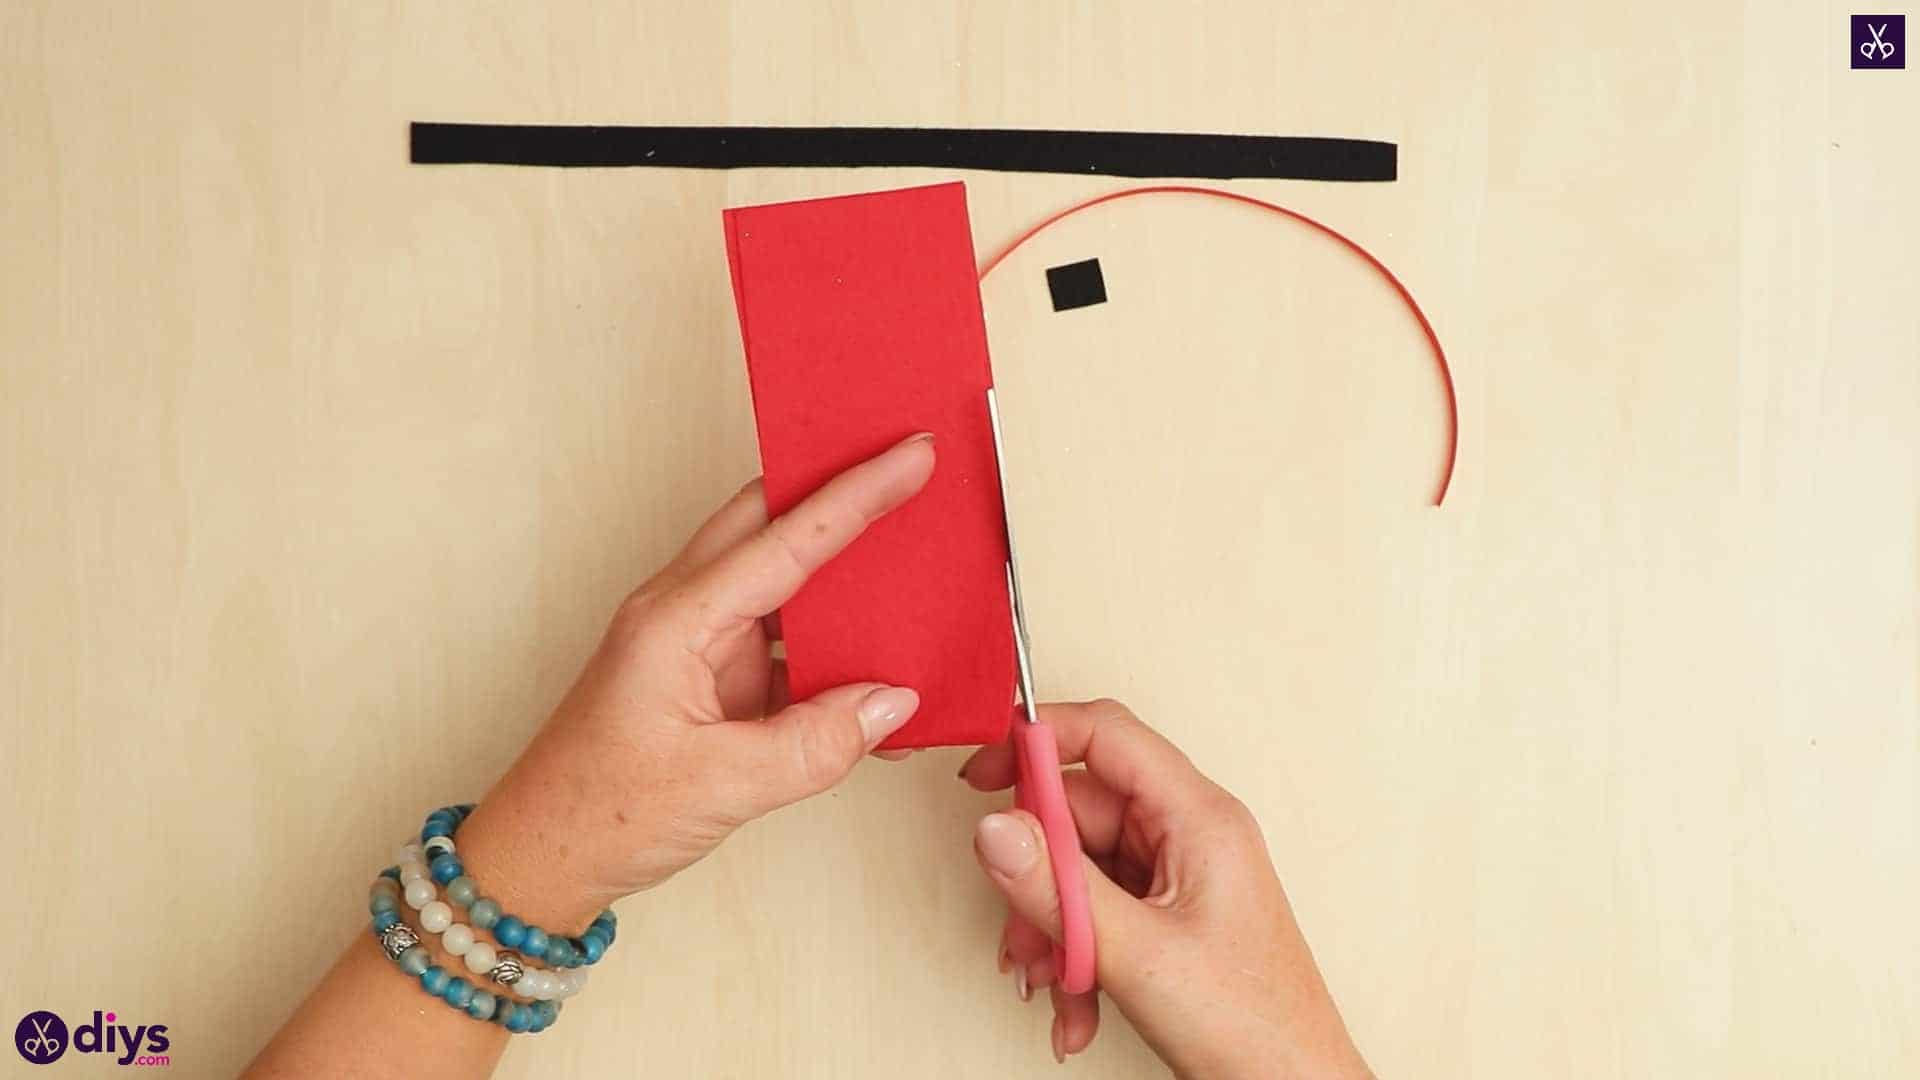
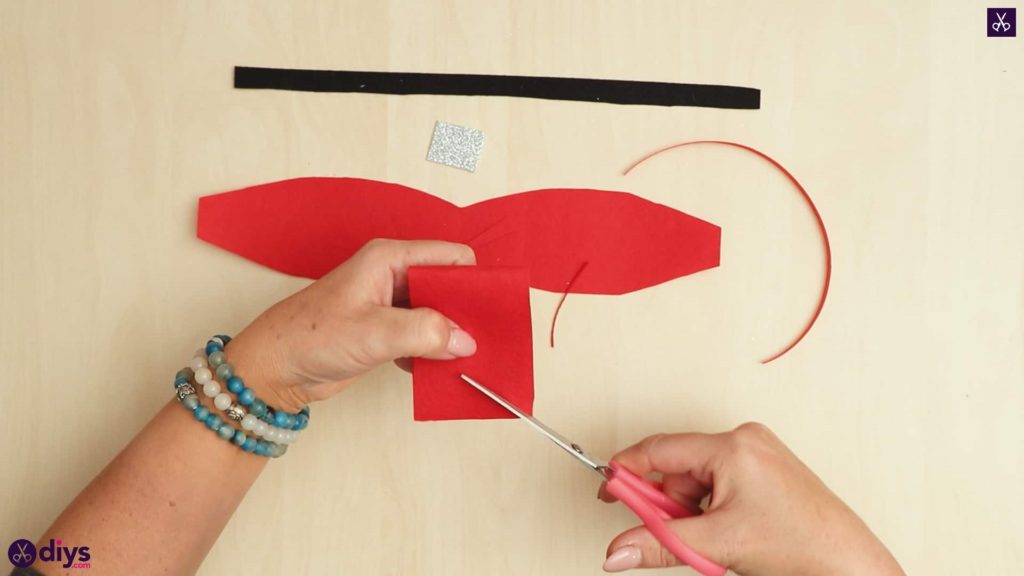
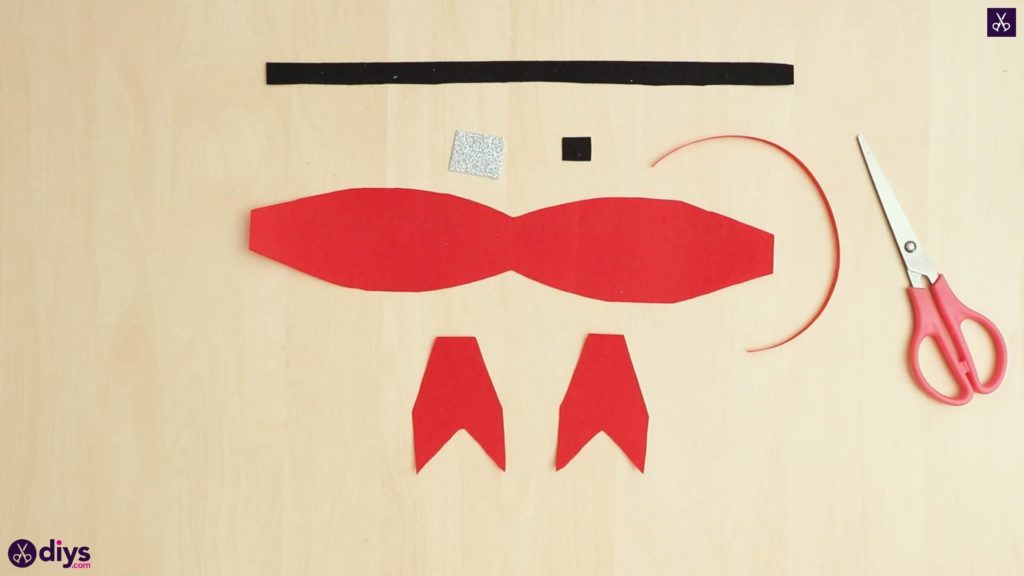
Cut another strip from your red paper about the same width as before but this time half the length (so, about half the length of the page held the same portrait direction as previously). Fold this piece in half lengthwise and, at the free ends, cut a triangular shape out of the edge’s center but angling your scissors diagonally inward from the corners. At the other end where your paper is folded, cut the corners off at an angle so the piece tapers like the previous one. Then, cut the two layered sides free into two pieces by cutting the crease. These will be the tails of your bow. You now have all of your pieces cut out and ready to be assembled!
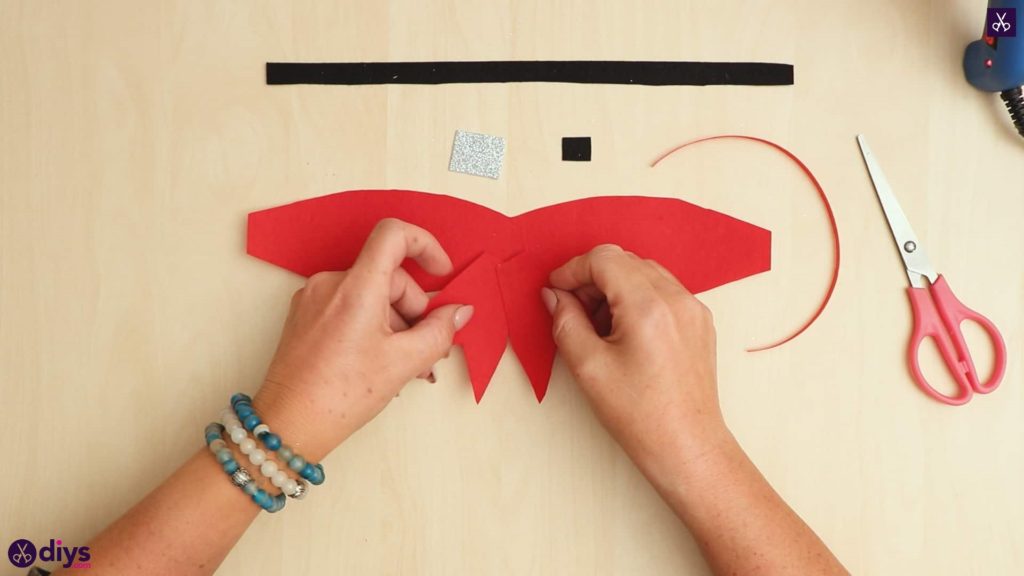
Step 6: start assembling
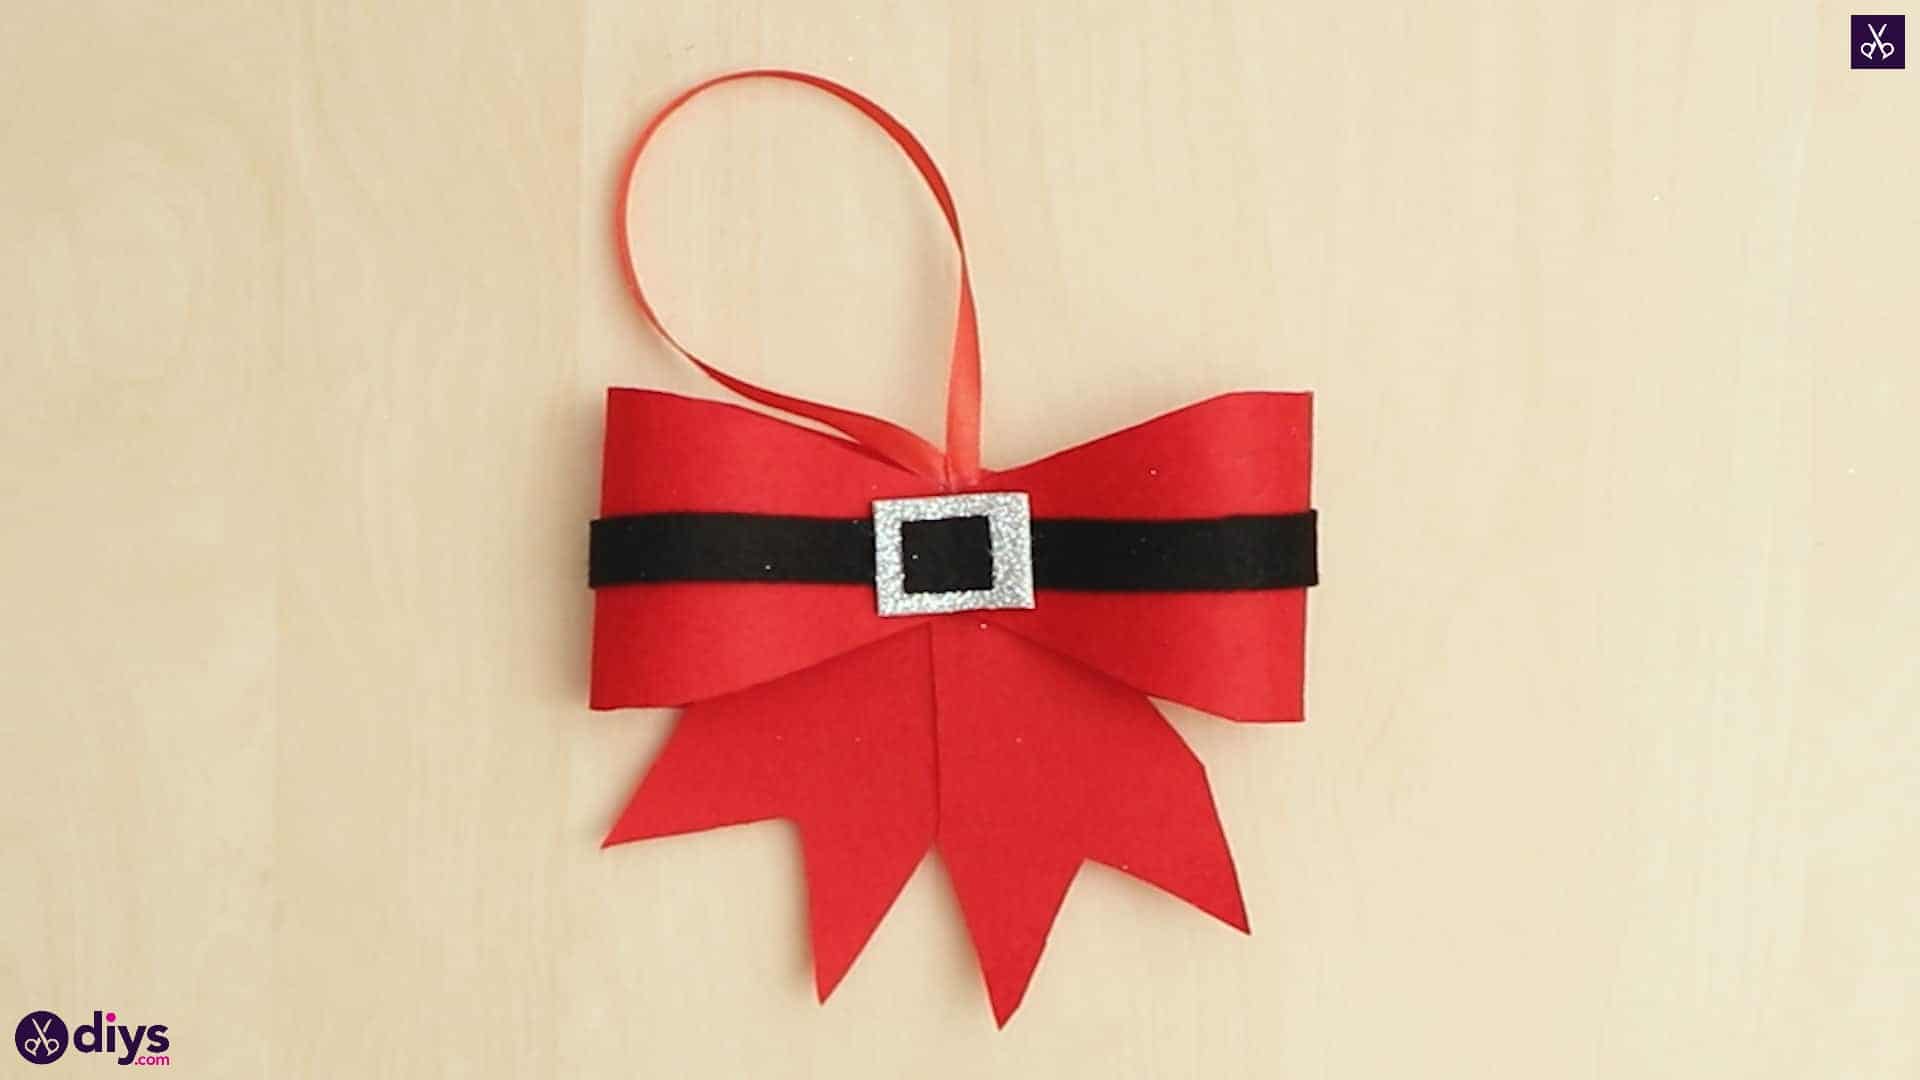
Attach your tail pieces together first. Put the two pieces next to each other with their bottom points where you cut the triangle out facing downward and their straight top edge where you cut the crease facing upward. Apply a dot of hot glue in the top right hand corner of the left tail piece. Then, press the top left hand corner of the right tail piece into that glue, so they overlap at their closest corners diagonally, the way the ends of an actual bow might sit.
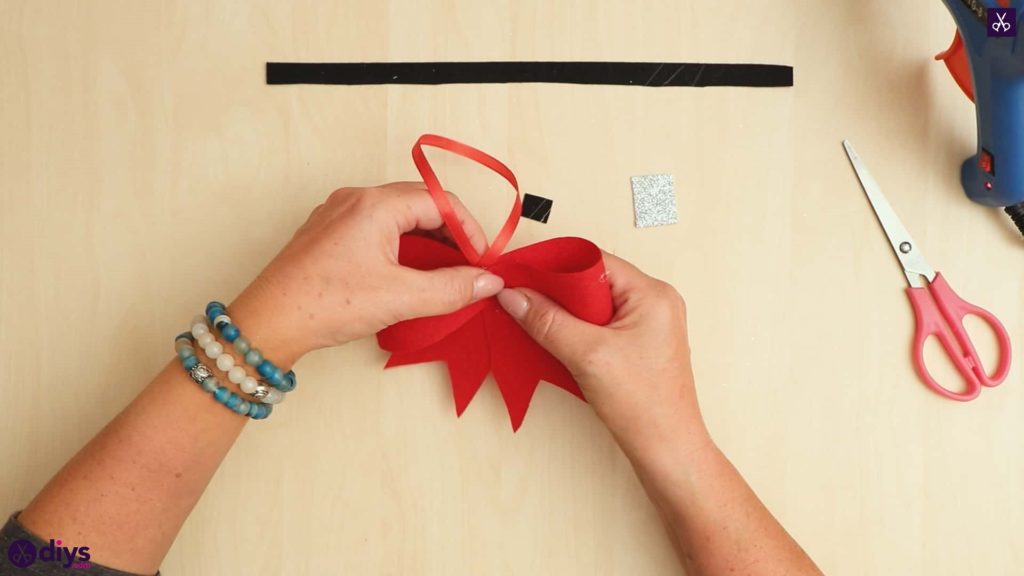
Step 7: make the bow
Apply some glue on the backside of the newly joined tails, near the top, and press them into the center of your still-flat bow piece. Apply more glue in the middle over your bow tails’ top and bring first one end of the loops piece in to the center and then the other. This will create arching shapes inwards just like at the top of a bow. Finally, add a dab of glue to the ends of your little red ribbon, stick them together, and pressed them both into the center of the bow as well.
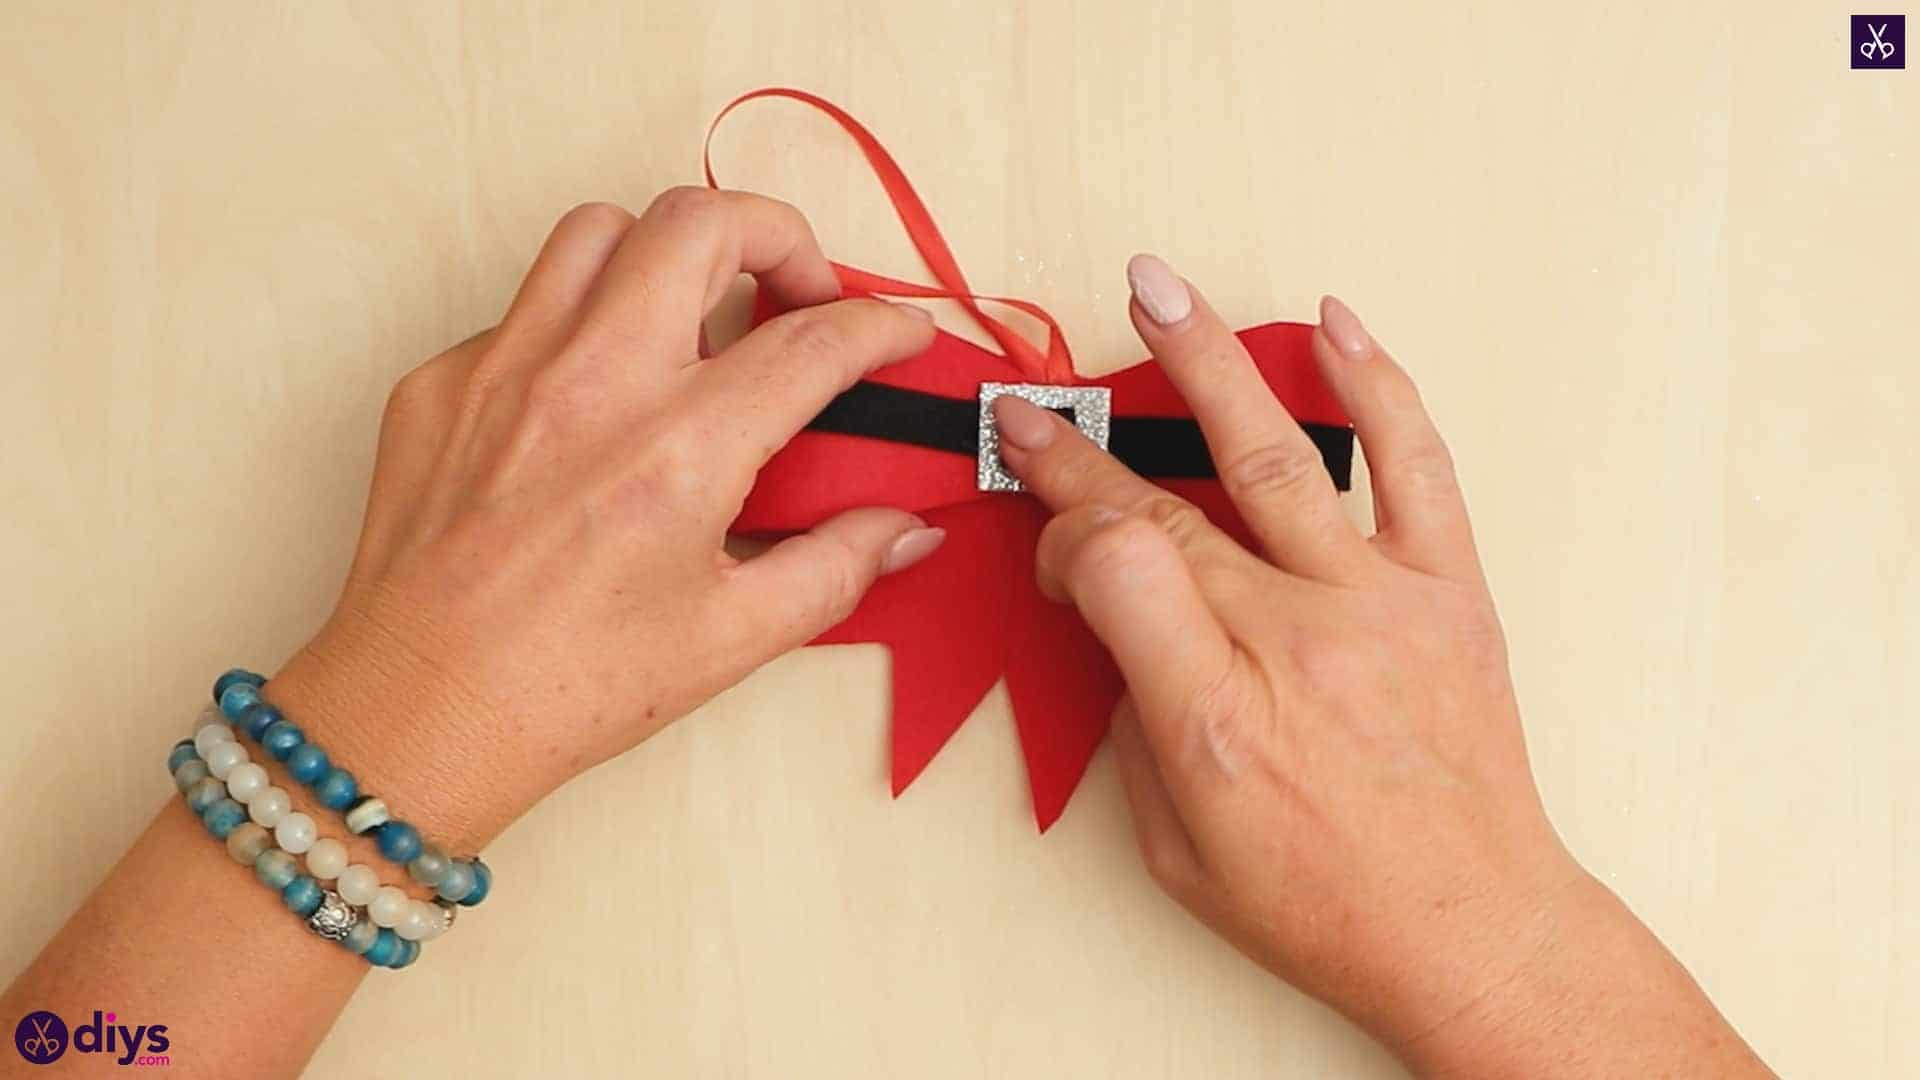
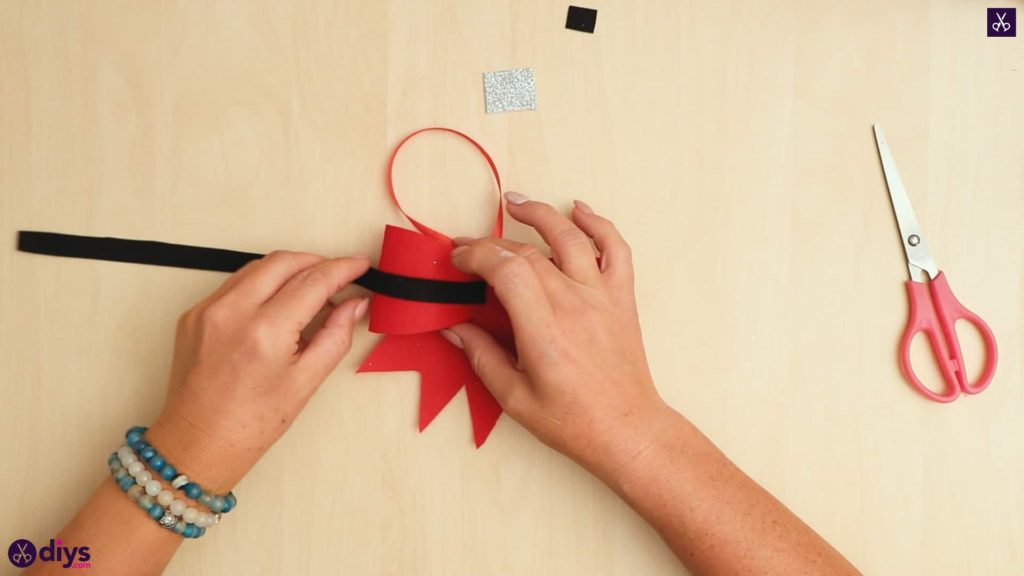
Step 8: add the belt
Attach the black strip to look like Santa’s belt! It will go all the way around the outside of the bow’s looped. Apply some glue to one end and stick it in the center, curving it over one loop, around the back, and continuing around the second loop. Glue that end down in the center with the other one. I also added a dab of glue at the back for the strip to pass through, just to make sure it stays in place well and doesn’t slide around.
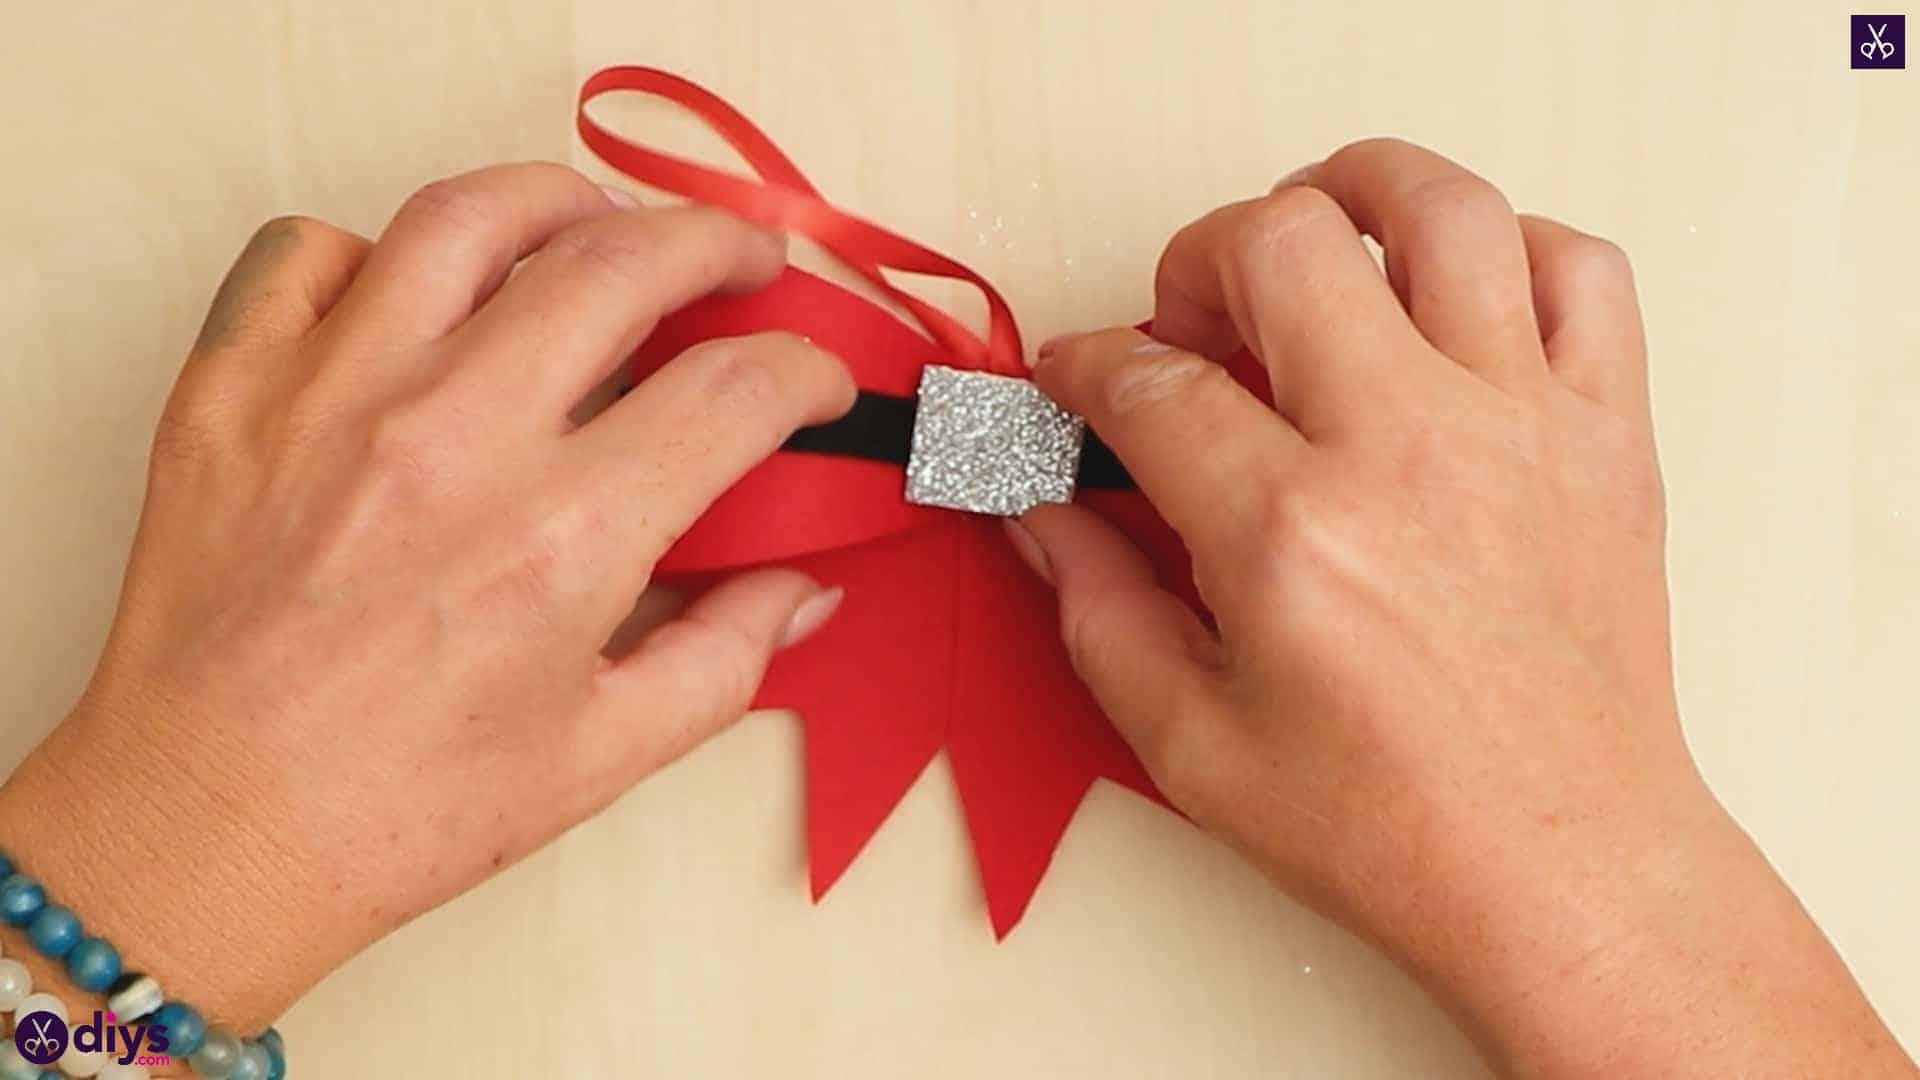
Step 9: add buckle
Apply glue to the back of your silver square and stick it down in the center, covering all the ends of he other things you’ve stuck there and anchoring it all in place.
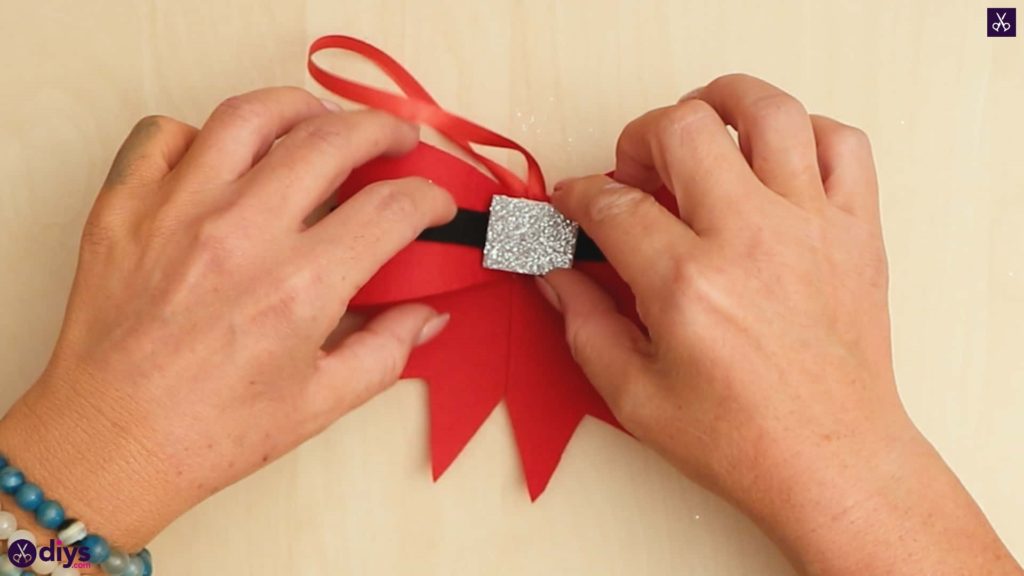
Step 10: add black sqaure
Apply glue to the back of your little black square and stick it in the center of the silver square so that it looks like part of the belt, while the silver becomes the belt buckle on Santa’s suit.

That’s really all there is to it! Just in case you’d like to try this project out for yourself, here’s a fantastic tutorial video to help you!
