Calandiva Plant: How to Care for the Kalanchoe Calandiva
Updated on September 12, 2020
If you’re reading this guide, there are probable chances you’re pretty much familiar with this flowering plant.
The Calandiva plant is botanically known as Kalanchoe blossfeldiana and was originally developed in the Netherlands. But what’s far more intriguing is it belongs to the Crassulaceae family—making it native to Madagascar.
As you probably know, most succulents are less demanding when it comes to growing and nurturing conditions. And that’s exactly what thrills many homeowners looking to adopt one or two Calandiva plants.
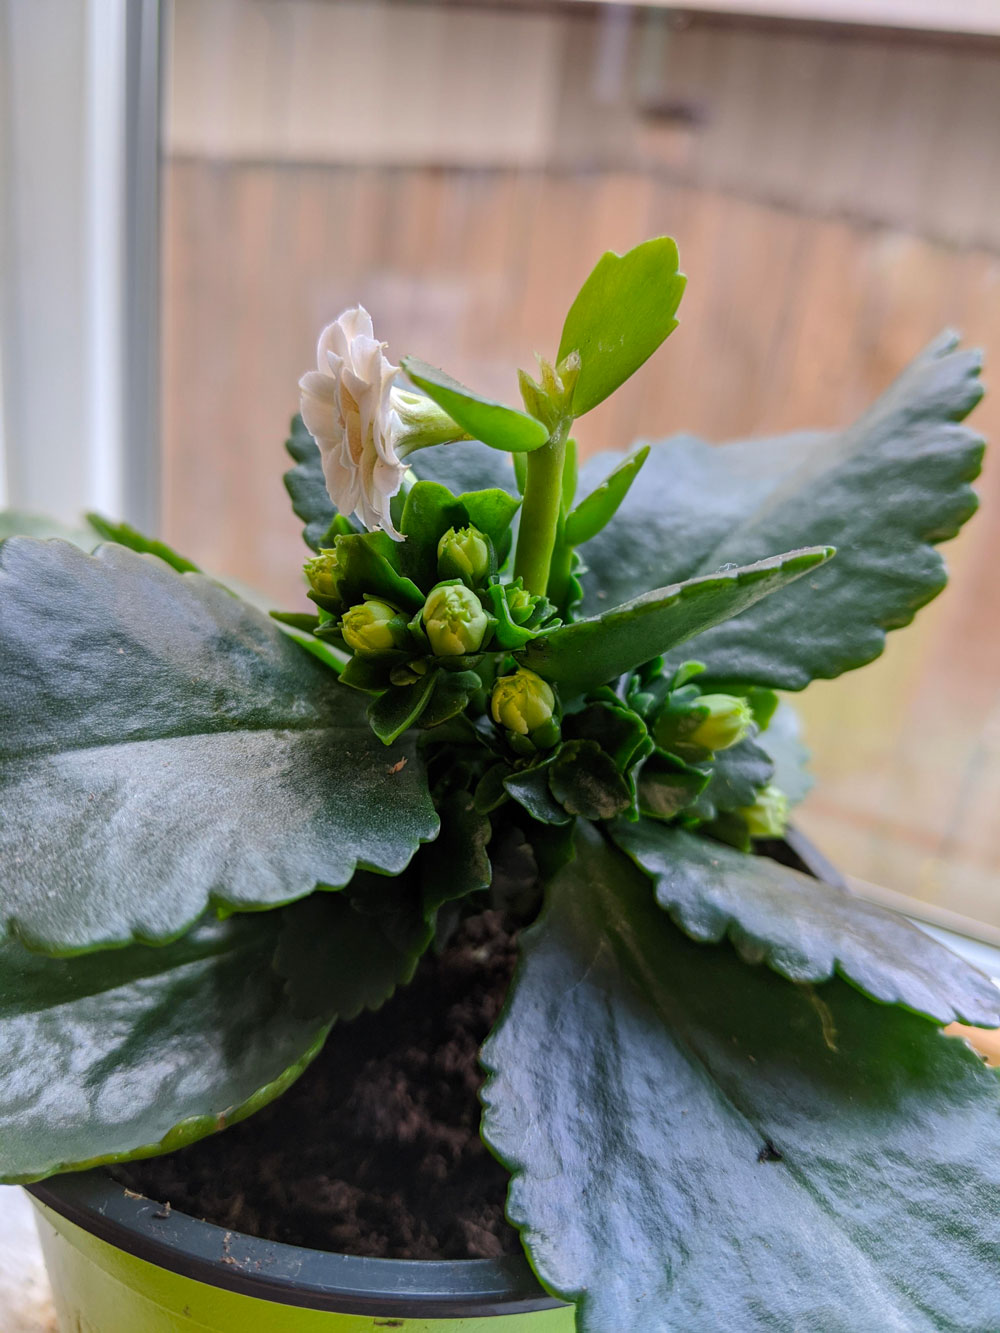
Same as other succulents like the cacti plant, it’s quite popular especially during holidays since it holds the ability to produce bright flowers that resemble roses. Other common names the Calandiva plant goes by include; the Florist Kalanchoe, Flaming Katy, Madagascar Widow’s-thrill, or the Christmas Kalanchoe.
In this guide, we’ll look at some of the best practices to help you maintain your plant’s capacity to blossom a few colorful flowers every summer. You’ll also learn how to take care of it’s green and glossy leaves that make a very attractive foliage aesthetic in your home.
More About the Calandiva Plant
This succulent produces flowers for about 6 weeks during late winter and spring. With USDA hardiness zones of 10 to 12, the Calandiva is a fitting outdoor plant and can also thrive as a houseplant during colder seasons.
Calandivas are botanically infused to grow larger with a double set of flowers on each stem—hence why many gardening enthusiasts call it the Rosebud Kalanchoe. They have an unusual and long bloom time that extends for a period of between 6 to 8 weeks.
You can purchase your Calandiva plant in a wide range of sparkling colors, and learn how to keep up with its foliage needs using the growing and caring hacks below:
Calandiva Care & Growing Tips
Light & Temperature
Most succulents, both those growing outdoors or on a windowsill, ideally need 3 hours of direct light from the sun every day. For optimal growth and cell rejuvenation, the Calandiva plant needs full access to light, but when it’s too hot and dry, this could deteriorate the color of the leaves—so you want to grow it under a shaded patio during summer.
If you want to adopt it as an indoor plant, you can choose a spot that gives it access to the full sun—preferably a south-facing windowsill—throughout the day.
Placing the growing medium under a low lighting environment causes the stems to grow feebly, causing the plant to produce less to zero flowers, and since you don’t want to have a spindly looking houseplant, try to give it the most appropriate light conditions.
Size & Maturity
The green foliage of the Calandiva plant hardly crumbles if you give it the growth requirements it needs. It roughly grows to about 12″ – 18″ inches in height, and with a diameter of between 4″ – 20″ inches wide—depending on the level of precision you’ll observe while taking care of it right from its tender years.
Despite having a slower growth rate in contrast to other succulents, the Calandiva eventually exhibits signs of maturity if you follow its growing requirements from scratch. It grows to have a soft texture, radiant foliage, and holds onto its green color all year round.
Soil Requirements
One thing you’ll note with most succulents is they vigorously grow in well-draining soil. And with the Flaming Katy, this is no different. It needs potting soil with a mixture of perlite and compost, to improve the soil structure which helps the plant have a healthy root development.
A well-draining mixture helps your roots to not get soaked in water for too long since they’ll begin to rot.
Fertilizer
Candalivas need fertilizer especially when grown indoors at least once or twice a month starting from the spring season to the end of fall. Avoid fertilizing your plant during winter since its hormones are largely dormant at this time due to the freezing temperatures.
You want to use soluble fertilizer that’s concisely made for indoor flowering plants, to keep your plant from any alarming side effects.
You can opt to follow the user-guide from the fertilizer’s manufacturer, or mix 1/2 tablespoon of the chemical with 1-gallon per plant. Pour the solution directly to the soil and skip one watering session after fertilizing. If you’re growing your Calandiva outdoors, you only need to fertilize it once per year during the spring season.
Pest Control Tips
Calandivas aren’t prone to the most harmful pests and diseases that are common with other popular houseplants. You’ll, however, need to watch out for aphids and mealybugs since they mostly affect succulents during their blooming stages.
To keep your plant entirely free from pests and diseases, do a routine inspection and weed out any aliens you see on the leaves, stems, and flowers. You can use a spray bottle or a shower head to wash off any possible existence of aphids.
This guide also gives a heedful description of how aphids look like, alongside various remedies to eliminate them from your Calandiva plant. If you see lump or warts on the stems, your plant could probably be infested with aphids. Mealybugs on the other side tend to suck the sap on the leaves, hence the foliage loses its radiant look, and the leaves begin to shrink continuously.
You can also cure a mealybug attack using water. But if this remedy doesn’t achieve effective results, use a synthetic insecticide made of pyrethrins and dilute it with water.
Spray the solution directly to the insects for about two weeks until you start to see significant results. Since there are a ton of options in the market, you want to read the guidelines on the label of the insecticide before using it in your plants.
Avoid any contact with your eyes or nose while using the insecticide and always remember to wash your hands—to avoid any allergic reactions—after using this remedy. Most insecticides are harmful to pets and kids, so it’s best to spray your plants outdoors where there’s adequate air circulation.
Watering
You need to moderately water your plant twice a week, but this depends on the season. If it’s freezing, you want to trim down the watering sessions. For Calandivas growing indoors, it’s worth waiting for the topsoil to dry out thoroughly before watering them once again.
Although this plant is drought tolerant, overwatering it could be so detrimental to its growth rate and amplitude to blossom a few flowers every spring season. This plant has fleshy stems and roots that are prone to rotting if exposed to excess water for too long.
If you’re growing your Calandiva plant outdoors, you can water it till the soil gets soaked up to 6 inches deep, since the direct sun exposure will help dry it up way quicker. Another pointer to keep in mind is using a growing medium with enough drainage holes.
Grooming & Maintenance
Same as other houseplants, you need to schedule a pruning routine for your Calandiva plant.
Calandivas naturally grow bushy if you don’t trim them, especially when they reach their peak blooming phase. You can pluck off the dead blooms on the flower stems to give your plant room for the growth of new cells and tissues.
When it’s winter, move your plant indoors to prevent it from frosting.
How to Propagate Your Calandiva Plant
Propagating your Calandiva plant comes with a very gentle learning curve, so you won’t need a gardening expert to help you out with this exercise.
You can propagate this plant using divisions, seeds, or stem cuttings. I tend to find division to be one of the most effective and easy-to-learn techniques amongst them all.
Propagating your Calandiva plant using seeds takes the longest to produce results and if you’re not patient enough, then you better not go down this route.
To get started, you need to:
- Use a sharp knife to cut the baby stems from the base point of the mother plant.
- Make sure to sterilize the knife so you don’t transmit your newly propagated Calandiva plant with growth-diminishing diseases. Harmful bacteria or living microorganisms that pest around your baby plant restrain it from reaching its optimal yield potential—more precisely during the photosynthesis process.
- Remove any leaves from the stem cuttings and put it on the sun to harden and have a robust healing process. Your stem cuttings should ideally be about 4-5″ inches long.
- The healing period would take about one or two weeks.
- Use well-drained soil to plant the freshly cut stem. Water it regularly to enhance the growth of roots which form a solid support system for your plant.
- Use potting soil that’s highly suitable for succulents in your growing medium. I’d highly vouch for using one with cacti mix since it forms a better support point for roots than typical soil. Amending your soil with coarse sand is also quite useful for the baby succulents since it helps with drainage.
- In about 3 weeks, the roots will firmly begin to form right beneath the soil. Avoid overhead watering during the rooting period for it can ruin the long-anticipated foliage yield.
Most importantly, the best time to propagate your Calandiva plant is during spring or summer.
While you’re at it, make sure to take note of the caring tips we listed above.
Is the Calandiva Plant Toxic?
It’s needless to say that if a plant grows in your living space, I hypothesize that this question will highly likely arouse an intense feeling somewhere your subconscious—even more so if you have kids or pets around.
Sadly, the American Society for the Prevention of Cruelty to Animals (ASPCS), has labeled the Calandiva plant toxic to pets if ingested. Common signs of poisoning you’d see after your pet ingests stems or leaves from this plant include diarrhea and prolonged vomiting.
If your pet begins to exhibit such symptoms, you need to contact the emergency veterinary unit—to give it the best chance of survival.
Where Should I Grow My Calandiva Plant?
There’s no debating that Calandivas, mostly those that produce flowers, look stunning when raised and bred indoors in a medium container. They flourish and produce more flowers when placed on a windowsill where there’s a controlled light source.
If you want to grow the Calandiva plant in your garden, make sure to place it somewhere with temperature levels of between 60-75°F.