Breadfruit Care – How To Grow And Harvest Breadfruit
Updated on October 4, 2021
High in carbohydrates and vitamin C, breadfruit has been an excellent food source in the tropical regions when wheat and corn were scarce. If you’re gluten intolerant and wheat and oats are off the menu, you can safely consume the gluten-free breadfruit flour.
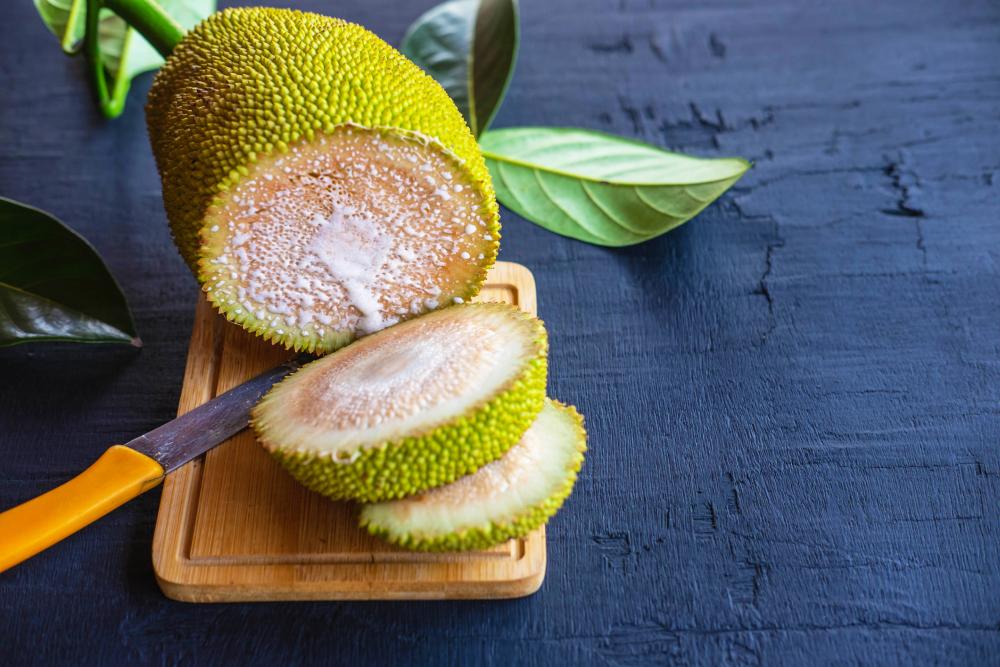
Besides vitamin C, the vegetable has decent amounts of protein, thiamine, and potassium. Not to mention that the flowers of the tree are excellent mosquito repellents and both the sap and bark of the tree are used to make all types of latex and fabrics. So all in all, the breadfruit is a versatile tree to grow in your garden. And even if practical purposes are not at the top of your list, the tree has ornamental qualities with its lush and dense canopy and low maintenance.
Read more to find out how to grow, care for, and harvest the tropical breadfruit.
All About Breadfruit
Native to New Guinea, breadfruit (Artocarpus altilis) soon spread to the rest of the tropical regions of the world as explorers and merchants introduced the highly valuable vegetable to every new territory they visited.
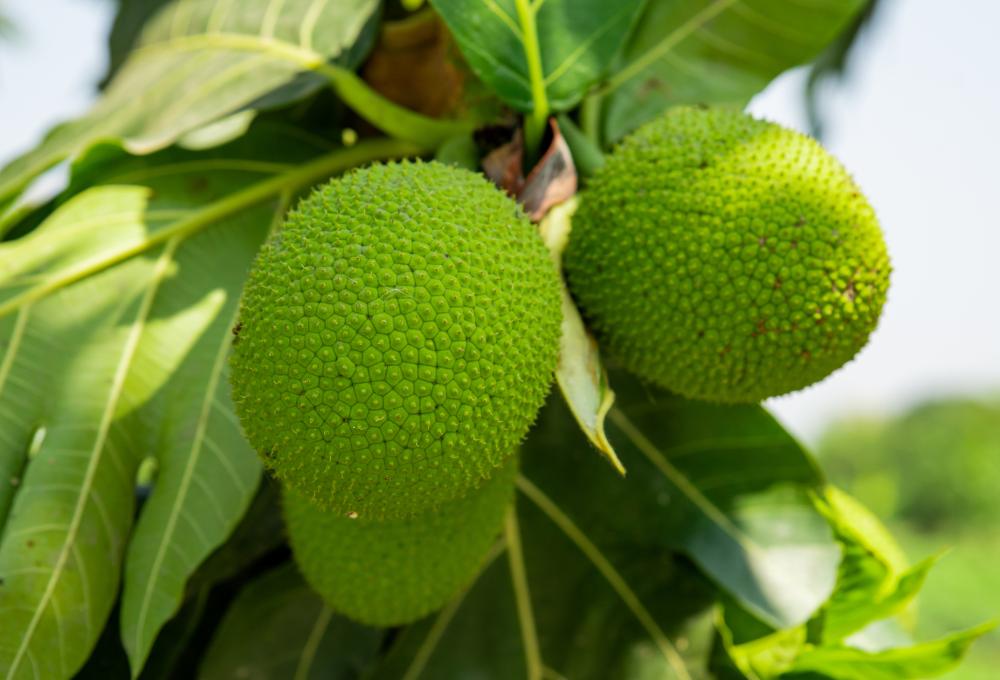
The average tree can grow to about 85 feet tall if the conditions are favorable. With dense and lush foliage, the tree offers decent shade in the garden and cuts a fine figure in your landscape. The leaves are dark green and heavily lobed.
Both male and female flowers grow on a single tree, so you won’t need to grow more than one tree in the garden. Usually, male flowers emerge first then female flowers follow after them. Pollinators such as bees and butterflies are responsible for pollinating the female flowers so your annual crop relies heavily on the presence of these useful insects.
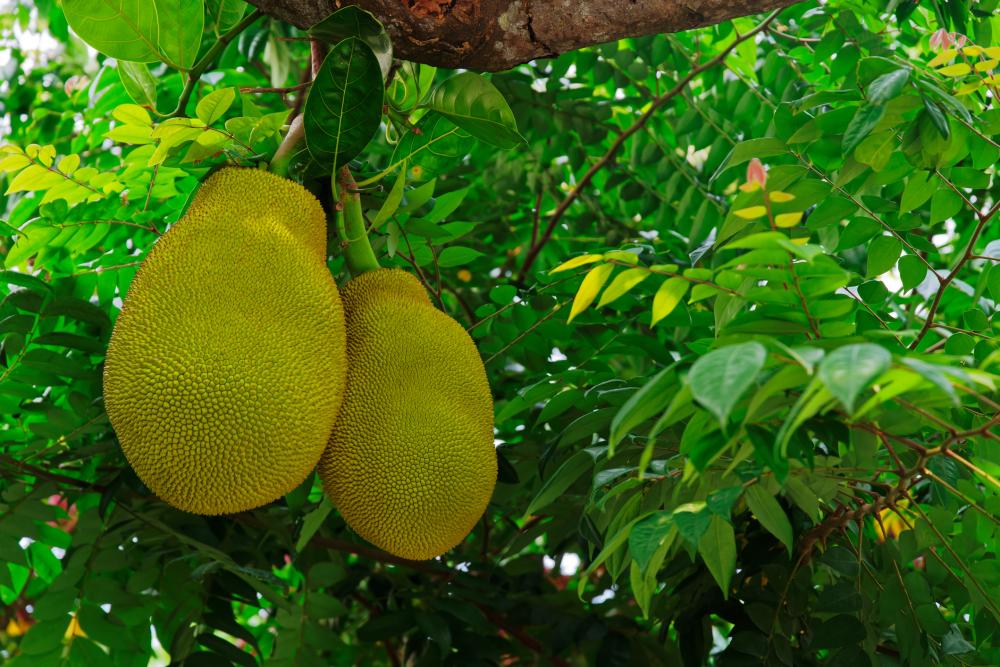
Once the breadfruit starts fruiting, you can expect anything from 75 to 150 fruits every year. And with each fruit weighing about one pound on average, you will have plenty of breadfruits to consume and give to your neighbors. In the tropics, it is estimated that one breadfruit tree can feed a family of 4 for 50 years nonstop.
Breadfruit Varieties
Although the original species have seeds, new cultivars have emerged that are seedless. Much like watermelons and bananas, botanists have outsmarted Mother Nature and produced a better hybrid. And if you’re wondering which breadfruit varieties are good for your garden, here are some of the popular ones.
- Otea: A popular variety with fruits that vary in shape from oval to round or heart-shaped. The flesh has a smooth texture and is creamy. When ripe the fruit stays firm although the flesh is tender. The average fruit weighs more than 3 pounds although the tree is more compact in size.
- Puaa: Although the fruits average 2 pounds when ripe, they are no less tasty than Otea varieties. You can either boil or steam the fruits to get the most flavor out of them. This seedless variety originates from French Polynesia and the fruiting season starts in September and the ripe fruits are ready to harvest in November.
- Ulu Fiti: This variety comes from Fiji and tends to fruit in clusters. The pale yellow flesh of the ripe breadfruit has high concentrations of sugar and the rich aromas are released when the fruit is exposed to heat. And these are large fruits that can weigh more than 5 pounds when ripe. They have few seeds on average and can either be round or heart-shaped.
- Ma’afala: Native to Samoa, this breadfruit tree is smaller than other varieties and the fruit is also small in size. With rough skin and less dense flesh, the average ripe fruit weighs anything from one to two and a half pounds. It’s often seedless although you might come across the odd seed every now and then. The tree starts fruiting early in July and continues until December. Even after the fruit season is over, a few fruits might continue to grow throughout the first half of the year.
How to Grow Breadfruit
Although you can start a breadfruit tree from seeds, experts frown on that method. For one thing, the seeds are hard to come by since many varieties are seedless, and growing a tree from seeds will produce fruits full of seeds. Another reason to choose other ways to start the tree is that as with many hybrids, the seeds will often produce a different plant from the one you got the seeds from. So I recommend you start the breadfruit from a root cutting. Here’s how to do that in easy steps.
- To start the tree from a root cutting look for suckers growing out of the roots. If the tree hasn’t produced suckers yet, partially uncover the roots and injure them slightly. That will trigger root suckers’ growth.
- You can also coax the tree to grow suckers by pruning it heavily. Within a couple of months, suckers will emerge on the roots.
- Look for the feeder root that’s connected to the sucker and cut off any lateral roots coming out of it. Then cut off the sucker with the feeder roots attached.
- Fill a pot with a general-purpose potting mix with plenty of sand and peat moss in it.
- Dig a deep hole in the potting mix and plant the sucker at the same depth as its original place before you cut it.
- Fill the hole with the potting mix and firm it to push out air pockets.
- Water the pot immediately to help the soil settle and make it moist.
- Move the pot to a shady spot away from direct sunlight and strong winds.
- As the sucker sprouts, keep it in the shade for the next 8 weeks.
- Gradually expose the sapling to sunlight to harden it.
- Prepare the soil in a sunny spot in your garden and dig a hole as deep as the root ball of the sapling.
- Ease the sapling out of the pot and ruffle the roots to disentangle them.
- Ease the sapling into the hole and spread the roots to fill it up. Backfill with soil and firm it.
- Water the sapling immediately after transplanting it.
Breadfruit Care
The sapling you grow from a cutting at home is usually not strong enough to withstand the elements. So you’ll need to shield them from strong winds and the glare of the afternoon sun for the first 4 months. Partial shade is recommended to prevent damage to the young tree. Once the tree is about 6 months old, you can allow it to get 6 to 8 hours of direct sunlight.
Soil
When planting the cutting, you should use a potting mix composed of peat moss, shredded bark, or coconut coir. You can also use composted bark if you have it. After the cutting develops roots, it’s still too weak to handle the regular garden soil. So before transplanting it to the garden, mix the soil with the same potting mix you used to start the cutting. The soil pH should be more acidic than neutral. Get a reading of 6.0 to 6.5 before you plant the sapling. Both peat moss and lime are good ingredients to amend the soil pH as the tree grows stronger.
Water
As thirsty plants, the breadfruit trees require plenty of water during the first year of their lives. This is usually the time when they’re developing their root system. So watering the tree regularly is required to avoid stunted growth. On average, you should give the young tree between 1.5 to 2 inches of water a week. That’s the quota during the growing season. If you get a decent rainfall, you should consider that as part of the water quota. During the fall and winter, you should cut back on watering and check that the top 3 inches of the soil are dry before you irrigate the tree.
Fertilizer
When you have soil that’s rich in nutrients and organic materials, you will have less use for fertilizers. This is why you need to prepare the soil beforehand and mix in plenty of composted bark and coconut choir. Using fertilizer alone in impoverished soil will not help the plant grow healthier. In general, you should use organic fertilizers such as aged manure and homemade compost over chemical fertilizers. And since the breadfruit tree is known for its longevity, you’ll need to revitalize the soil on a regular basis. Some ways to freshen up the soil include mulching, applying organic compost, and introducing cover crops near the tree.
Pruning
Although some varieties are compact by nature, most breadfruit trees require annual pruning to keep them in shape and encourage robust canopy growth. But even compact varieties such as Ma’afala, they too need pruning once they’ve been in the ground for 5 years or so. The earlier you start pruning the tree, the bushier it gets. This not only improves lateral growth but also makes harvesting a lot easier. You won’t need to climb on a ladder or use hooks to reach the topmost fruits. Pruning usually should be done after the harvest to increase the next year’s crop. Focus on the main leader and later branches to keep the tree in good shape.
Pests and Diseases
For a tree that can live up to 100 years and keep fruiting until a ripe old age, breadfruit trees are surprisingly vulnerable in the first year of their lives. Both slugs and snails can cause serious damage to the young tree and if you don’t protect it, the tree might die. Clear away debris and fallen leaves around the tree and don’t keep potted plants in the vicinity where the pests might hide under. In cases of high infestation, you can apply commercial pesticides to eliminate snails and slugs.
Whiteflies and mealybugs are two other pests to look out for. They feed on the sap in the leaves which could stunt the growth of the young tree. Improve air circulation around the tree and use a neem oil spray to control the spread of those bugs.
Good ventilation is also crucial for preventing fungal infections and diseases such as mildew and Botrytis. Use fungicides with copper sulfate as the main ingredient to treat these diseases and others that infect the roots of the tree.
Harvesting Breadfruit
The ripe breadfruit tastes better when cooked, but you shouldn’t let the fruit ripen on the tree. It becomes soft and bruises easily. So you need to wait for the fruits to mature and pick them before they’re ripe. However, you might want to allow some fruits to ripen on the tree to get the most flavor and taste out of them. As the fruit ripens, sugar concentrations increase in the flesh.
Ripe breadfruit usually turns yellow and the sap flows out of it. The trick is to pick it just at the right time and now allow it to fall to the ground. Fallen fruits usually get damaged and invite pests and wildlife to your garden.
To pick the ripe fruits, hold each one with both hands and twist the stem attached to it. If the fruits are high up the tree canopy, you might need loppers or a ladder to collect them.