Astragalus Herb – How To Grow And Harvest Astragalus
Updated on November 2, 2021
Astragalus is a herb for more seasons than one cares to count. For centuries, people relied on practically all situations that required nutrition, healing, or decoration. It’s the go-to plant if you’re looking for alternative medicine. Even if modern science and recent research have some reservations about the herb. It is rich in nutrients and vitamins making it a decent food source. And it has lush foliage and captivating flowers which fit well in every landscape. So what’s not to like about astragalus?
And like many herbs that grow in the wild, astragalus is quite adaptable. In many cases, all you need to do is throw the seeds on the ground and watch them grow. It doesn’t require a special setup or a specific type of soil. In short, it’s a versatile herb that has a place in every garden and setting. This article covers astragalus in more detail including how to grow, harvest, and use the herb at home.
All About Astragalus
Astragalus is a member of the legume family with over 3,000 species. That makes it a close relative of peas, and beans. Most of the species grow in the wild with little human assistance. This makes it readily available to grow in your garden as long as you live in zones 5 to 9.
Depending on whom you ask, astragalus always has a different name in different regions of the world. It goes by many names including locoweed, milkvetch, and goat’s-thorn. That’s because the plant has two types, as a herb and a small bush. So if you have a small space in the garden or backyard, you can grow the herb variety. But if you want to get the most out of its green and lush foliage, then the bush variety is ideal for you.
The leaves of the plant are small but with vivid green shades that shimmer under the light. Then in the spring and just as the foliage is dense and full, clusters of small yellow flowers emerge. They dot the top of the foliage and create an astonishing visual festival of colors and reflections.
If you prefer more colorful blooms, then astragalus alpinus and astragalus hypoglottis are good candidates. These varieties have purple flowers that last longer on the plant. Also, they’re grown strictly for ornamental purposes and their leaves and roots have no use either for medicine or as food.
But if you want to grow the plant for its medicinal and cuisine values, then you have lots of options for the other varieties. As long as you pick the herb types. The roots are the only edible part of the herb. It can be consumed as food, added to soups, sauces, and stews to give them flavor, and used in medicinal concoctions.
What is Astragalus Good For?
Astragalus has been a staple of many diets and cuisines. The roots of the herb have deep and rich flavors that both taste good on their own and when added to different dishes. For ages, traditional medicine has found many uses in the roots of the herb. However, a word of caution, you should take the following benefits with a grain of salt. Scientific research is still on the fence about this herb. Moreover, if taken in large doses, the roots can have some adverse side effects. And if you have a health condition, you should avoid astragalus altogether.
- In ancient times, folklore recipes recommended extracts from the roots for nursing mothers. It was believed to increase lactation.
- Astragalus is at the heart of Chinese traditional medicine where it’s used to treat everything from fatigue and anorexia to cancer and hepatitis.
- You can grow it in the garden as a perennial for its ornamental value. The lush green foliage and colorful flowers are a sight for sore eyes.
- Although it’s consumed as food, it might have side effects including diarrhea, blood pressure, and irregular blood sugar levels.
- People who should not take astragalus are those suffering from diabetes, heart conditions, or hypertension.
How to Grow Astragalus
As a versatile herb, you can grow astragalus either from seeds or by division. Both methods work fine in most situations. The good news is, whichever way you choose, the plant is easy to grow. That said, seeds can sometimes be difficult to germinate. This is true of old seeds. So if you cannot get your hands on fresh seeds, dividing a mature plant is the best way to go. In most cases, I recommend you use growing by division since it has a higher success rate than seeds. But if you don’t have access to a mature plant, then try the following steps to start the herb from seeds.
- Scrape the outer shell of the seeds with the back of a knife. This allows moisture to access the inside of the seed and improves the chances of germination.
- Fill a jar with warm water and drop the seeds in it. Soak them overnight.
- Get rid of any seeds that stay afloat for more than 5 minutes. These are bad seeds that will not sprout.
- Fill a shallow tray with a general-purpose potting mix. You can also use regular soil from the garden.
- Plant the seeds an inch deep in the soil and space them an inch apart. Water the soil to get it moist.
- Keep the tray near a window that gets the morning sun until the seeds germinate.
- If the soil dries out, add some water to get it moist again. The seeds will germinate within one to two weeks depending on how fresh they are.
- Astragalus grows well in rich sandy soil with pH levels between 6.0 and 7.0.
- Prepare the soil in the garden choosing a spot that gets full sun for about 6 hours per day.
- When the seedlings are 3 inches tall with 2 sets of true leaves, transplant them to the garden.
Astragalus Care
It’s easy to take care of the herb once you get over the complex steps of starting the seeds. You can grow more than one astragalus seedling in the garden. But make sure to space the herb varieties one foot apart and the bush types at least 15 feet away from each other. The rest of the plant care is rather straightforward.
Soil
It’s true you can start the seeds in regular garden soil. Even clay soil will do for that purpose. But if you want to transplant the herb or bush to the garden, you need to amend that heavy soil and loosen its texture. One easy way to do that is to add coarse sand or perlite to the soil. How much sand or perlite you need depends on the soil type. But you’ll know you got the right texture when the soil stays loose in your fist and doesn’t become compact.
As for soil pH, you should get a reading between 6.0 to 7.0. That’s as close to neutral or slightly acidic as possible. You can use lime to increase the acidity of the soil.
Water
For a hardy perennial plant, astragalus prefers the soil to be moist. So your goal would be to keep the soil moist throughout the growing season. And since it favors sandy soil that doesn’t retain water well, you need to water it once a day during the spring and summer. This is true for warm zones where the summer sun is merciless and the moisture dries out quickly.
As for the water quote, the herb needs the same amount of water as many other plants in your garden. Give it about one inch of water a week and increase it in the case of the small bush type. Don’t let the soil dry out since their herb has a low tolerance for drought. Always strive to water the plant deep and aim for the roots. Avoid sprinkling the foliage or flowers with water since that would trigger fungal infections. Astragalus doesn’t do well in high humidity either, so you need to improve air circulation around the plants.
Fertilizer
Astragalus is a moderate feeder and the richer the soil, the greener the leaves get and brighter the blooms. You can side-dress the herb with any kind of homemade compost or aged manure. Chemical fertilizers tend to stress out the plant with sudden growth spurts, so I advise you to avoid them. However, if you’re growing the plant for its foliage, use a high-nitrogen fertilizer with a 10-5-5 label in moderate doses. As for ornamental varieties, you can use phosphorus-rich fertilizers with 5-10-10 ratios also in small doses.
Apply the fertilizer once a month. If the plant is not growing well, then increase the dose and apply it once every two weeks. Cover the beds with a 2-inch layer of mulch in the summer. It will help with water retention and serve as fertilizer when the good bacteria in the soil break down the organic materials.
Pruning
As a perennial herb, astragalus can grow out of control if left unattended. This is true of the bush types rather than the herb types. However, you still need to prune the plant regularly to keep it in good shape. The best time to prune this perennial is in the fall after the flowers have faded and dropped. Start by removing any damaged, broken, and entwined stems. For bush varieties, trim the wayward branches to maintain the shape of the bush. Also, make inroads in the foliage to improve air circulation for the inner stems and branches. And if you don’t want the self-seeding plant to multiply and reclaim every inch of the garden then deadhead the flowers to prevent the plant from producing seeds and becoming invasive.
Harvesting Astragalus
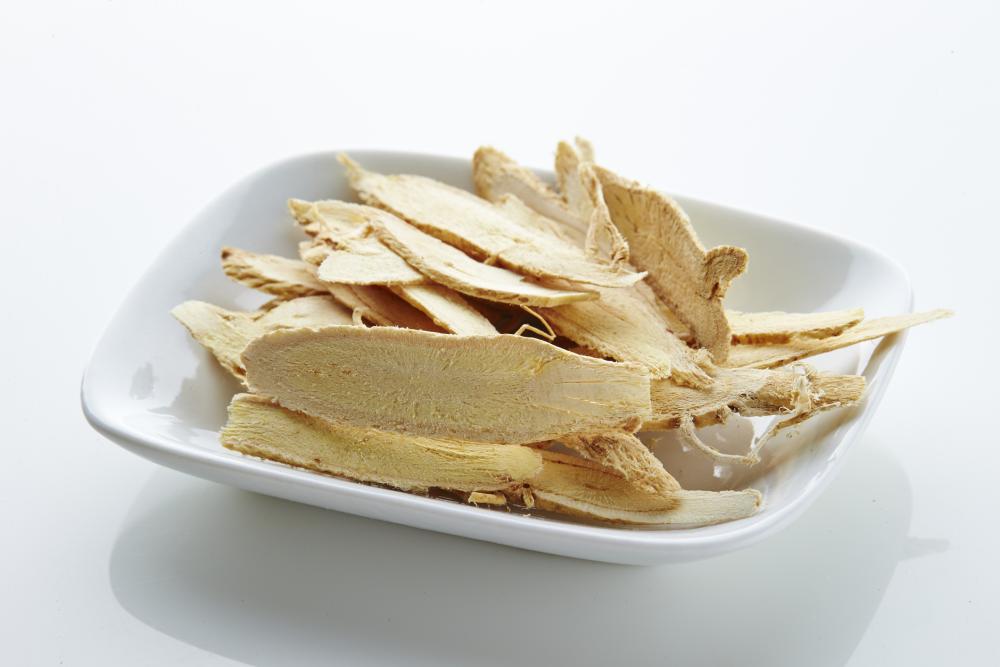
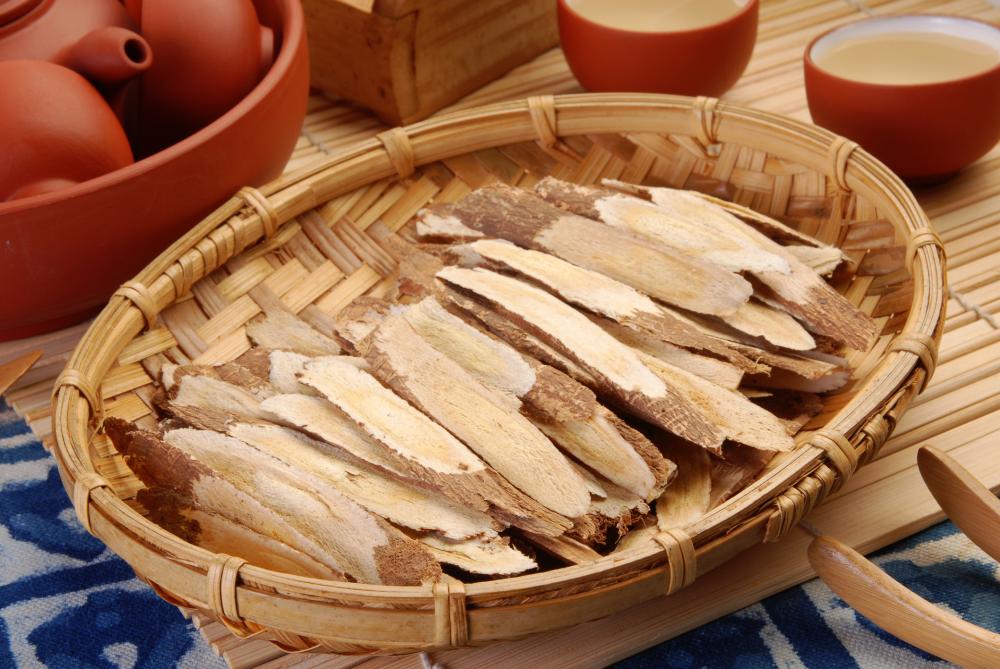
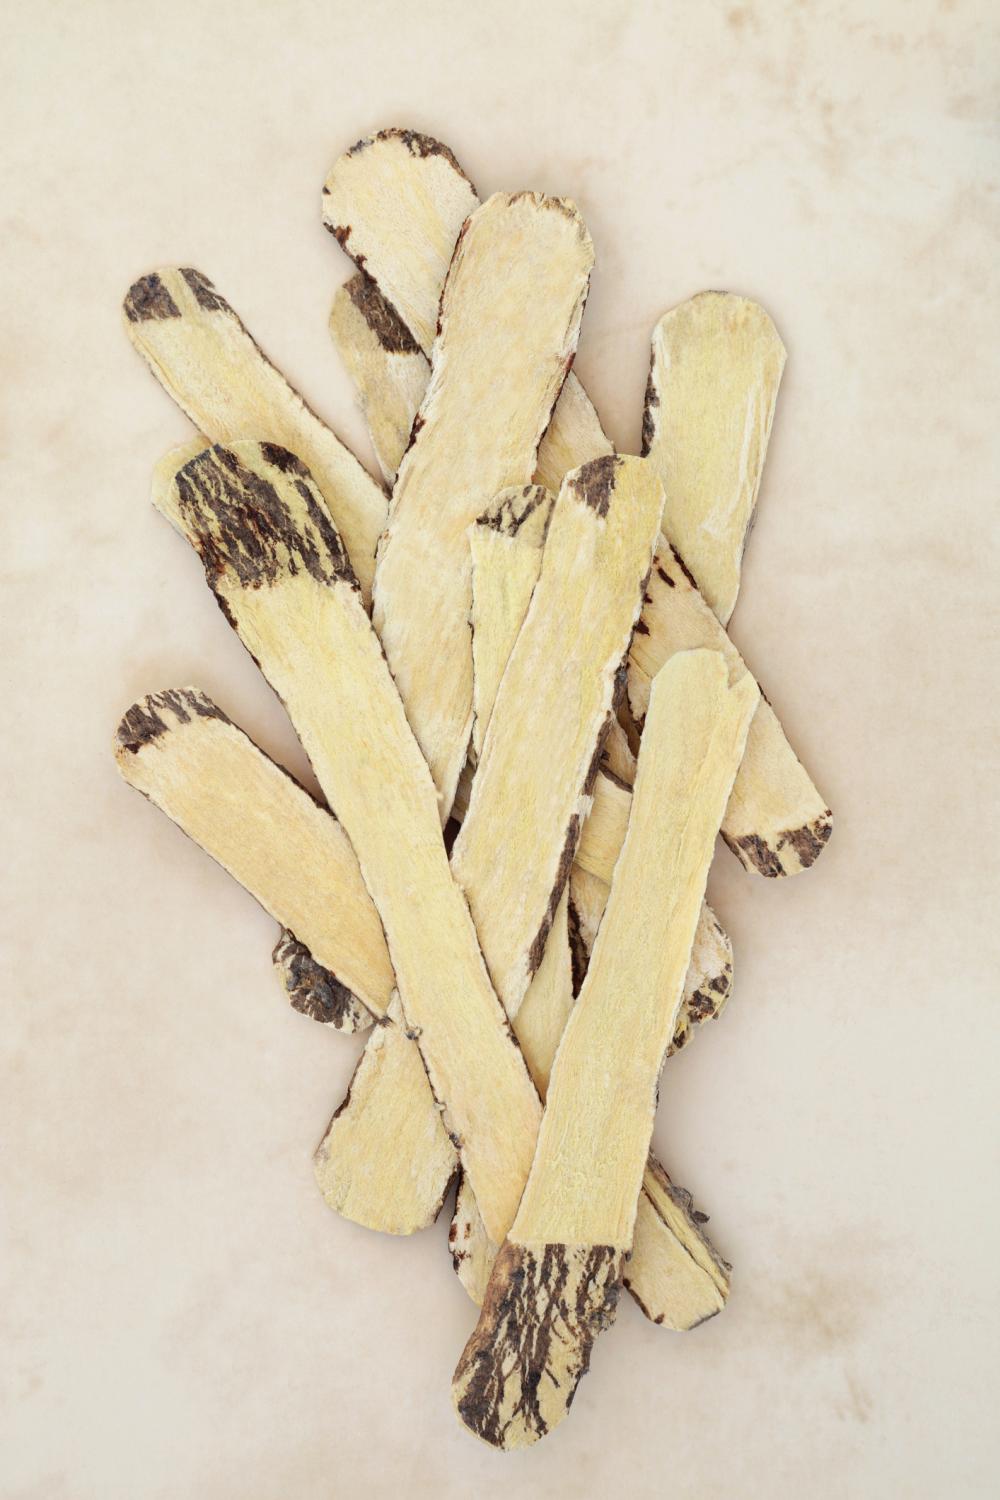
You can harvest the roots of astragalus for culinary use once the plant has established. Since the roots are the most valuable part of the plant, you need to give them time to develop and grow. You don’t want to harvest the roots too early otherwise it could impact the growth of the plant. Most experts recommend that you start harvesting astragalus roots once it reaches its third year. That gives it enough time for the root system to develop fully.
To collect the roots, gently uncover the soil and harvest the tender roots closer to the surface. Don’t harvest more than 30 percent of the root system at one time. Also, you shouldn’t use chemical fertilizers if you’re interested in harvesting the roots. After the harvest, cover the roots back with soil then fertilize with organic compost and water the plant.
As a word of advice, you should only harvest the roots about three weeks after the last fertilizer application. Don’t harvest the roots immediately after fertilizing. They’ll have funky flavors.
To use the harvested roots, place them in a bowl full of warm water and keep them there for one day to remove any undesirable odors. Then rinse them well and slice them and place them on a sheet of paper to dry. Keep the sliced roots in a warm and dry place for up to three weeks. When they’re fully dry, store them in a tight-sealed jar. They’ll stay fresh for up to a year at regular room temperature.