DIY Wine Cork Butterfly Decor – How to Make a Butterfly Decoration With Wine Corks
Updated on November 19, 2025


If you love butterflies, then a wine cork butterfly decoration for your home will fit right in. It’s easy to make, requires just a little of your time and it’s just so beautiful.
Whether this will be for yourself or your best friend who absolutely loves butterflies, that’s up to you, but keep in mind that everyone loves a handmade gift. In fact, once you’ve made your first one, you’ll likely want to start over again.
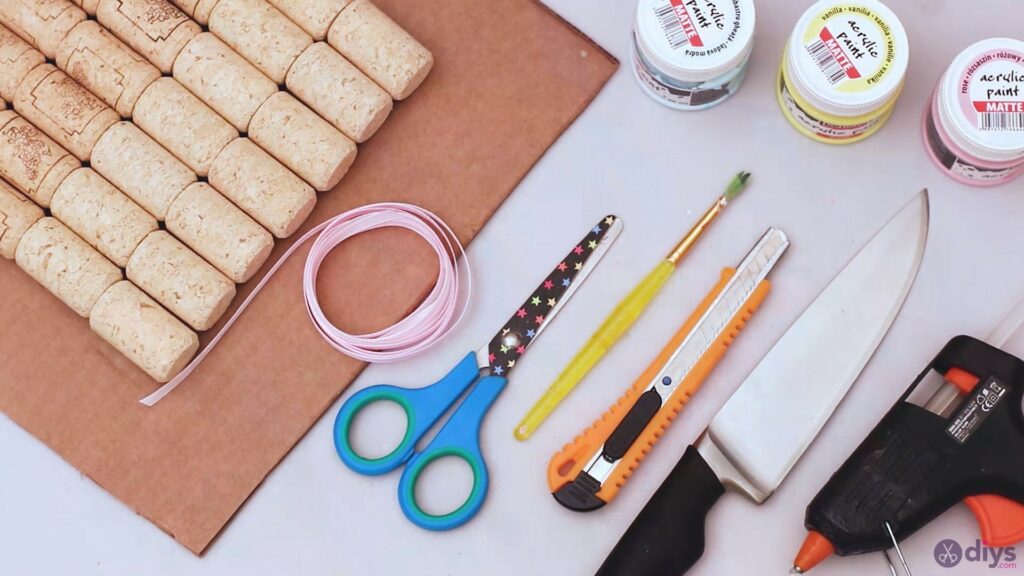
Materials for DIY wine cork butterfly decor
- wine corks
- cardboard
- scissors
- paintbrush
- silk ribbon
- folding utility knife
- knife
- glue gun
- yellow, rose and light blue acrylic paint
How to make wine cork butterfly decor
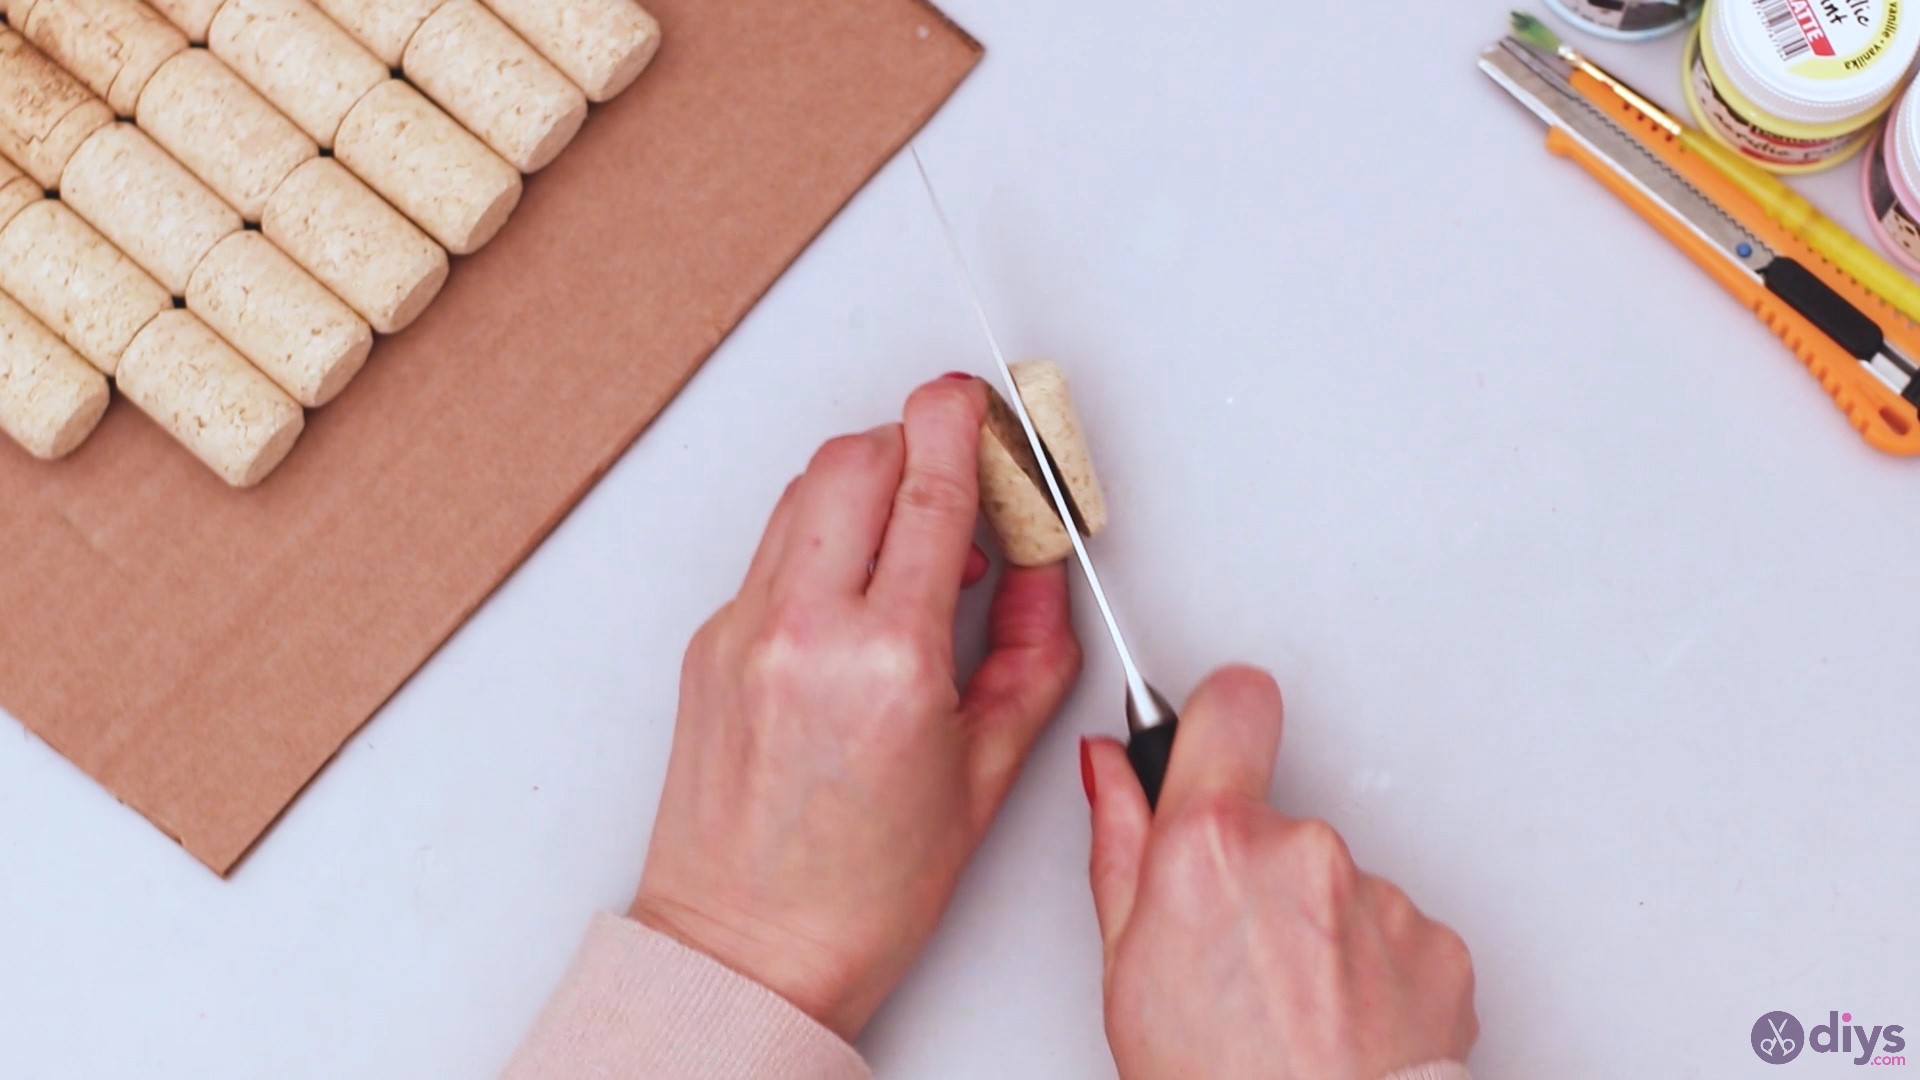
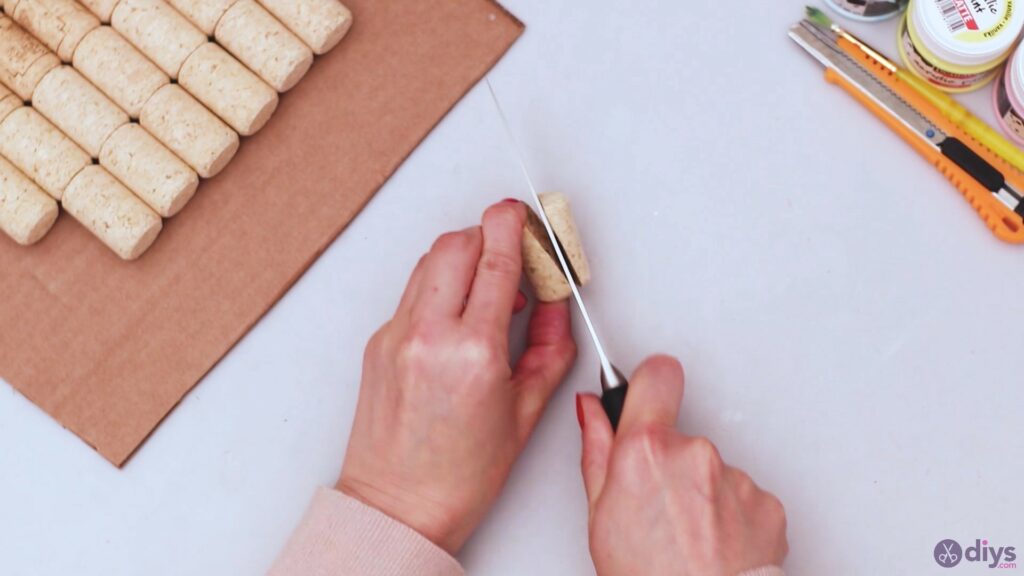
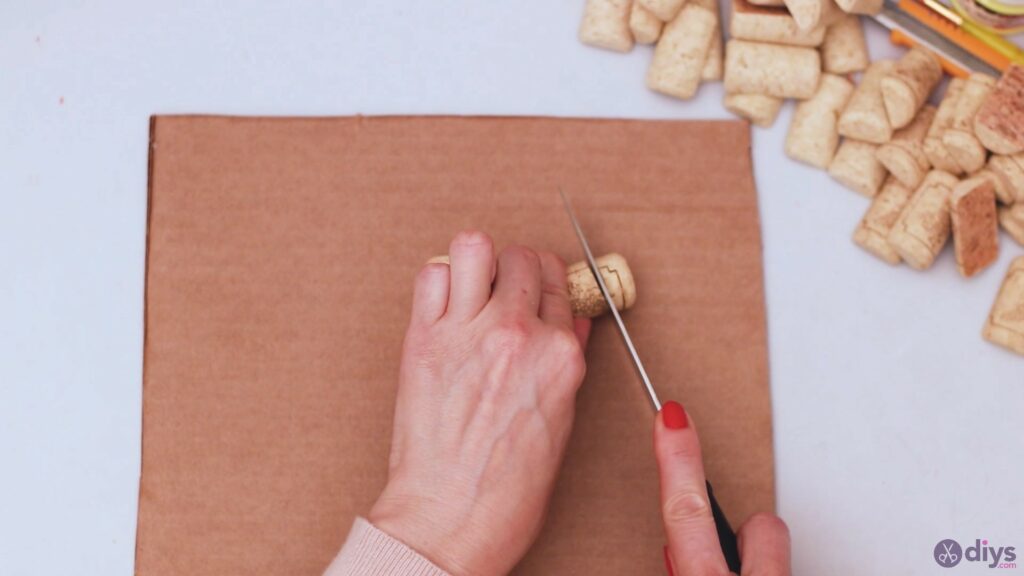
Step 1: Cut the Corks
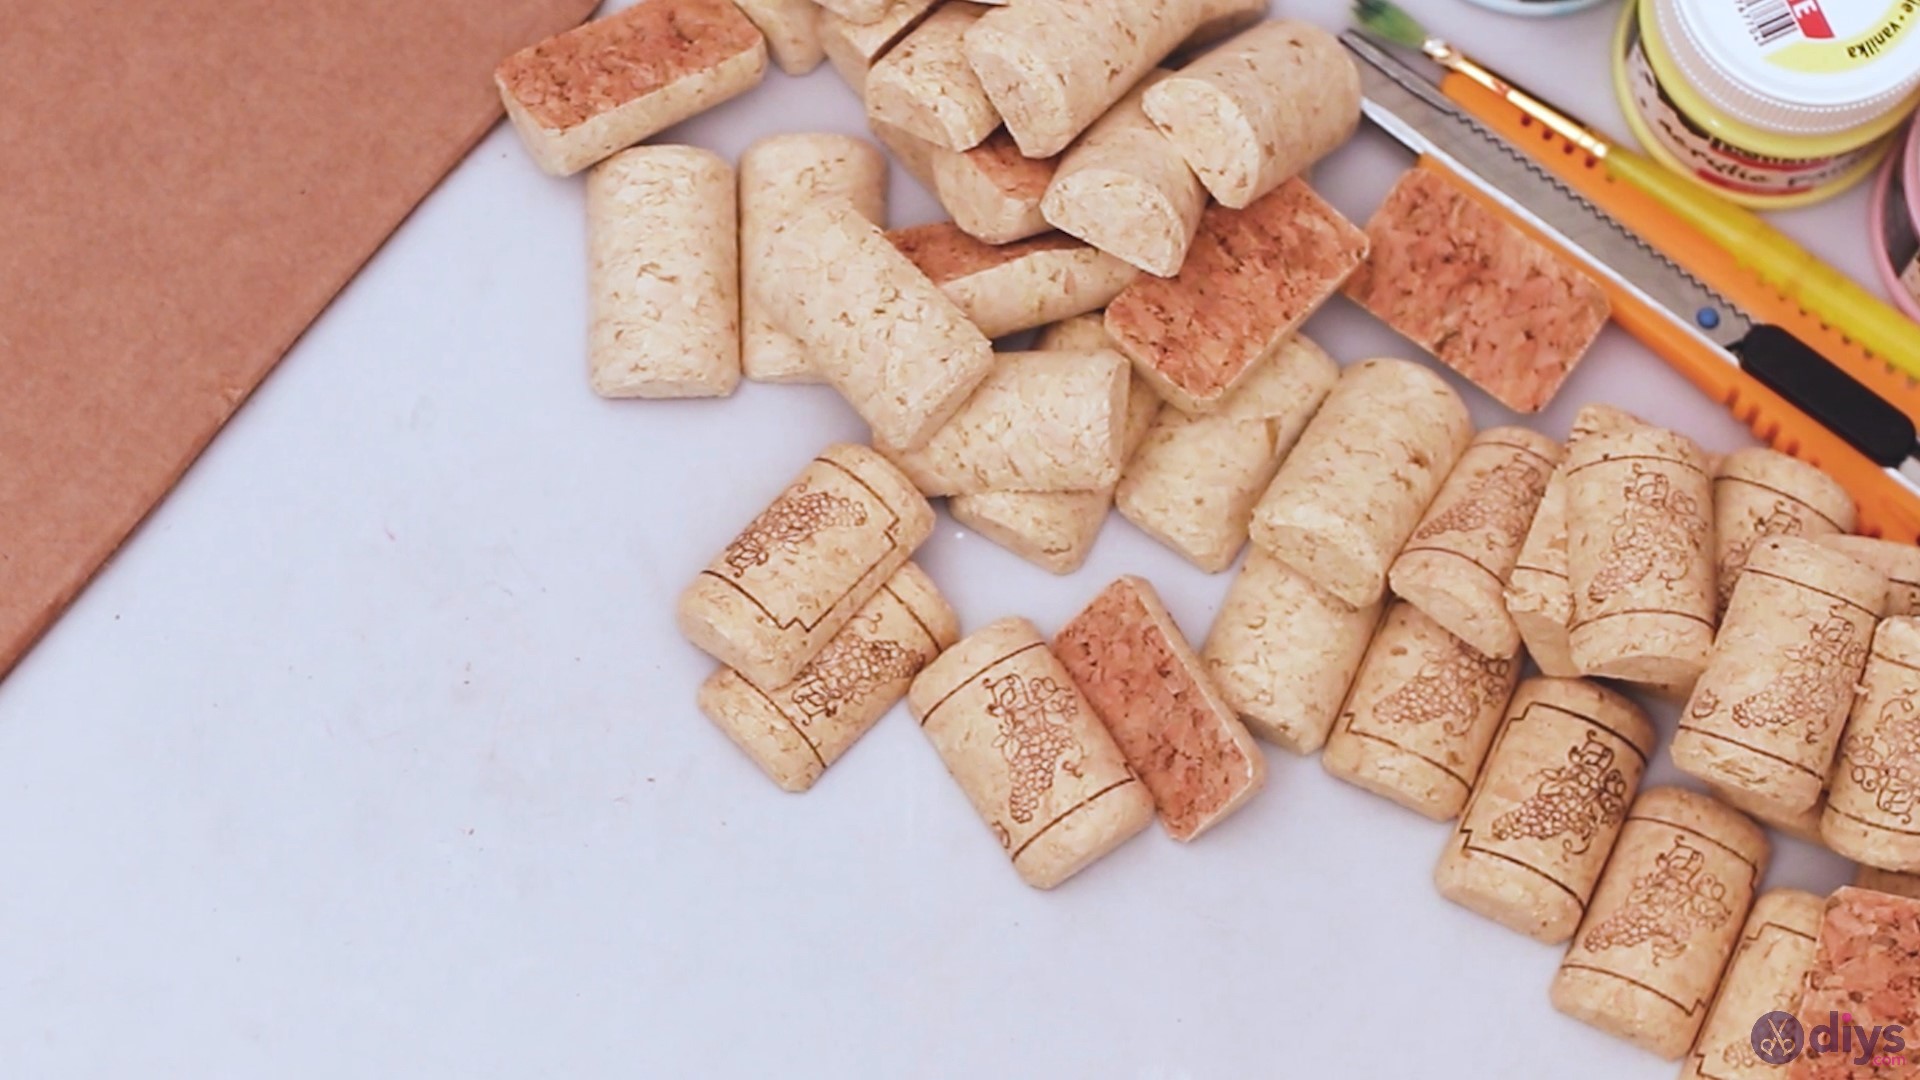
In order to start this project, you’re going to have to cut your corks across. You’re going to want to cut them as straight down the middle as possible so you have equal-sized pieces. Some variation will not ruin the design of course, but it’s best to avoid that. So, get yourknifeand thewine corksand start cutting them vertically. Make sure you leave a few whole so you can use them later.

There you go! You’ve gone through almost the whole lot of wine corks, so you can proceed to the next step.

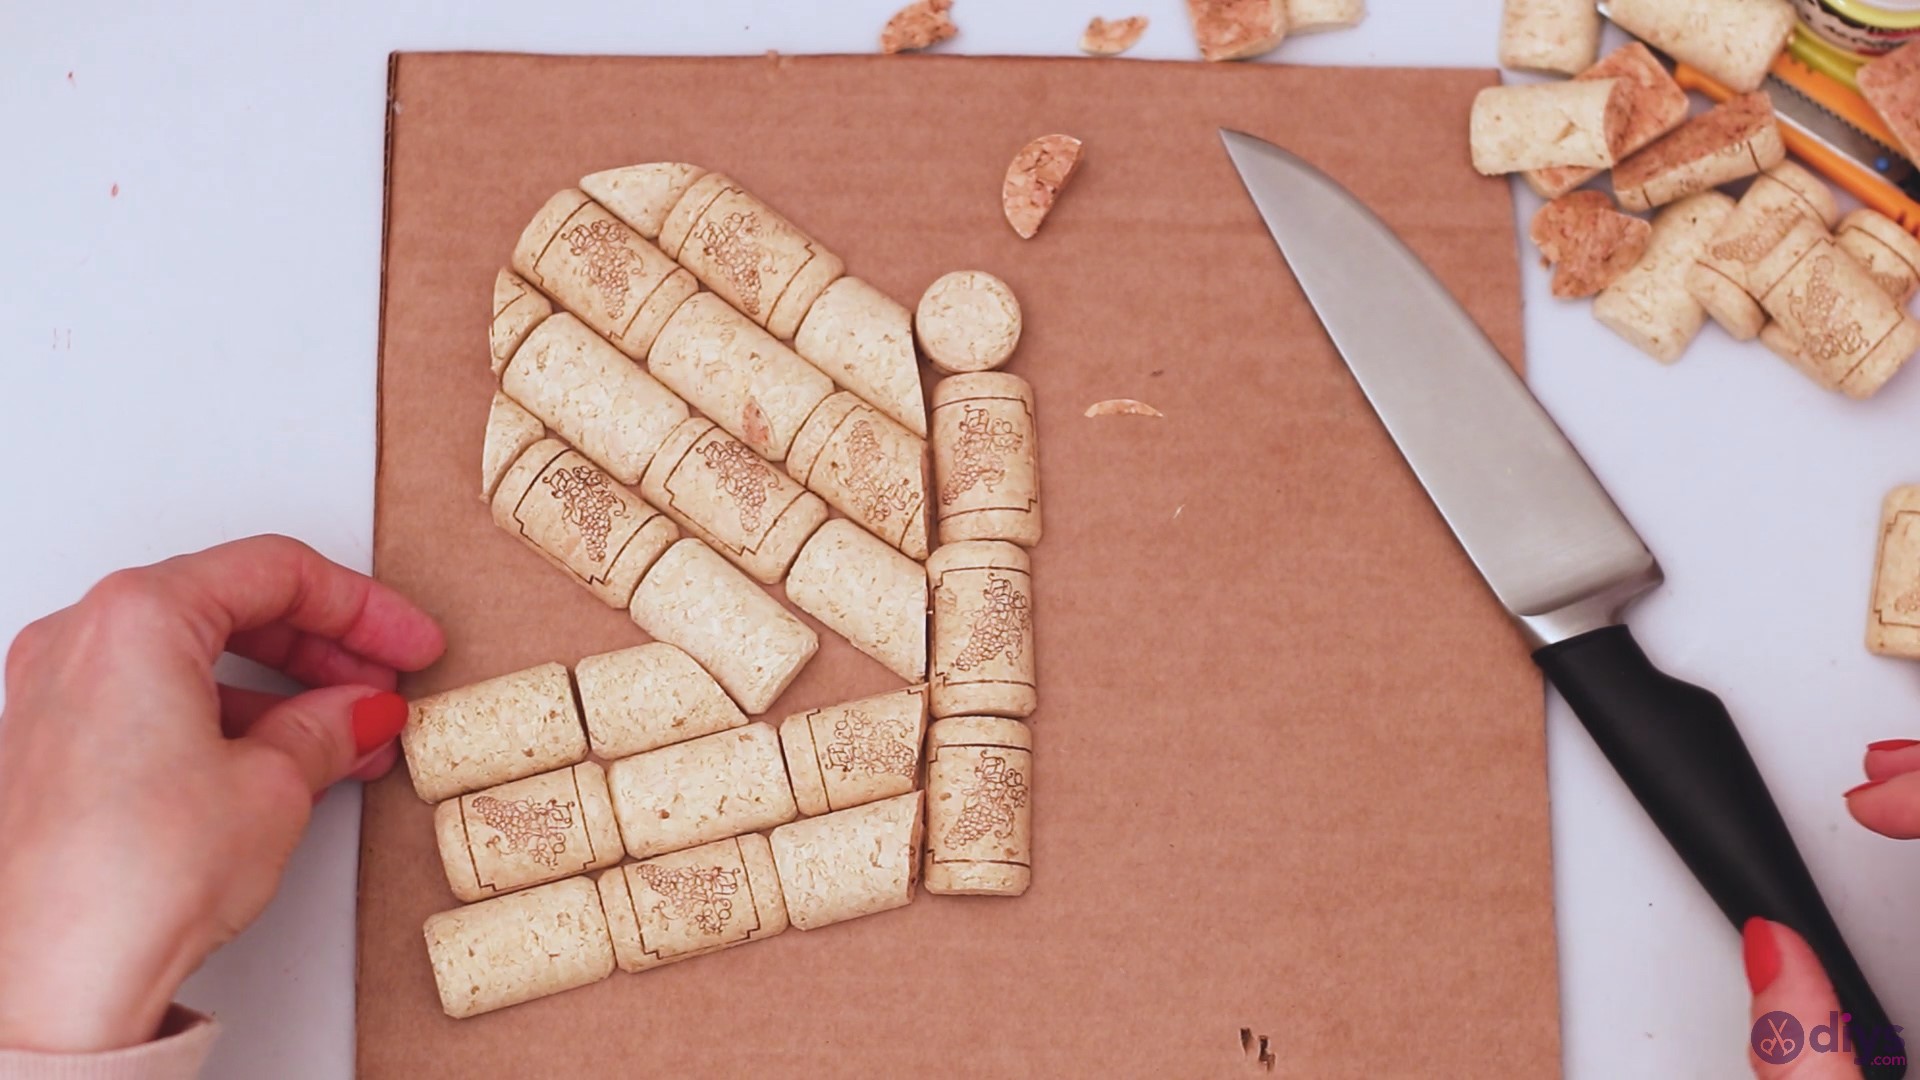
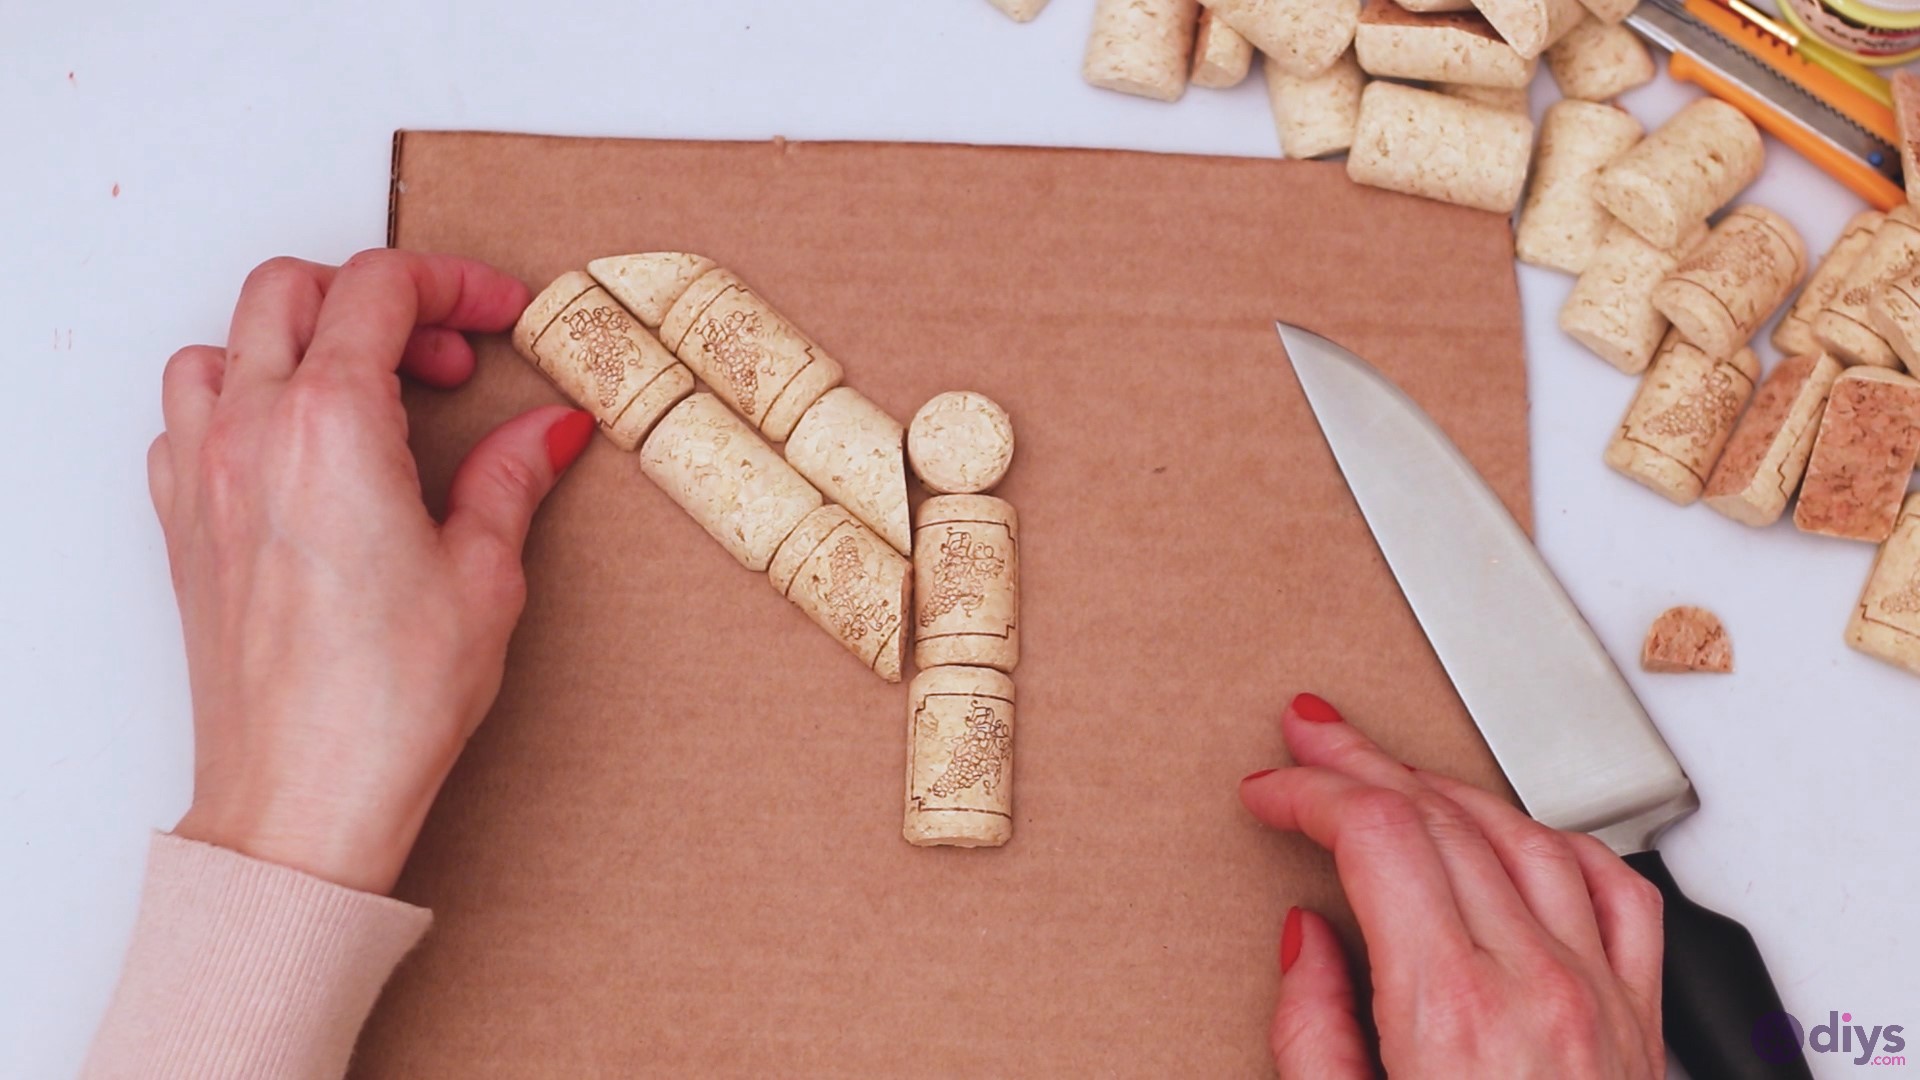
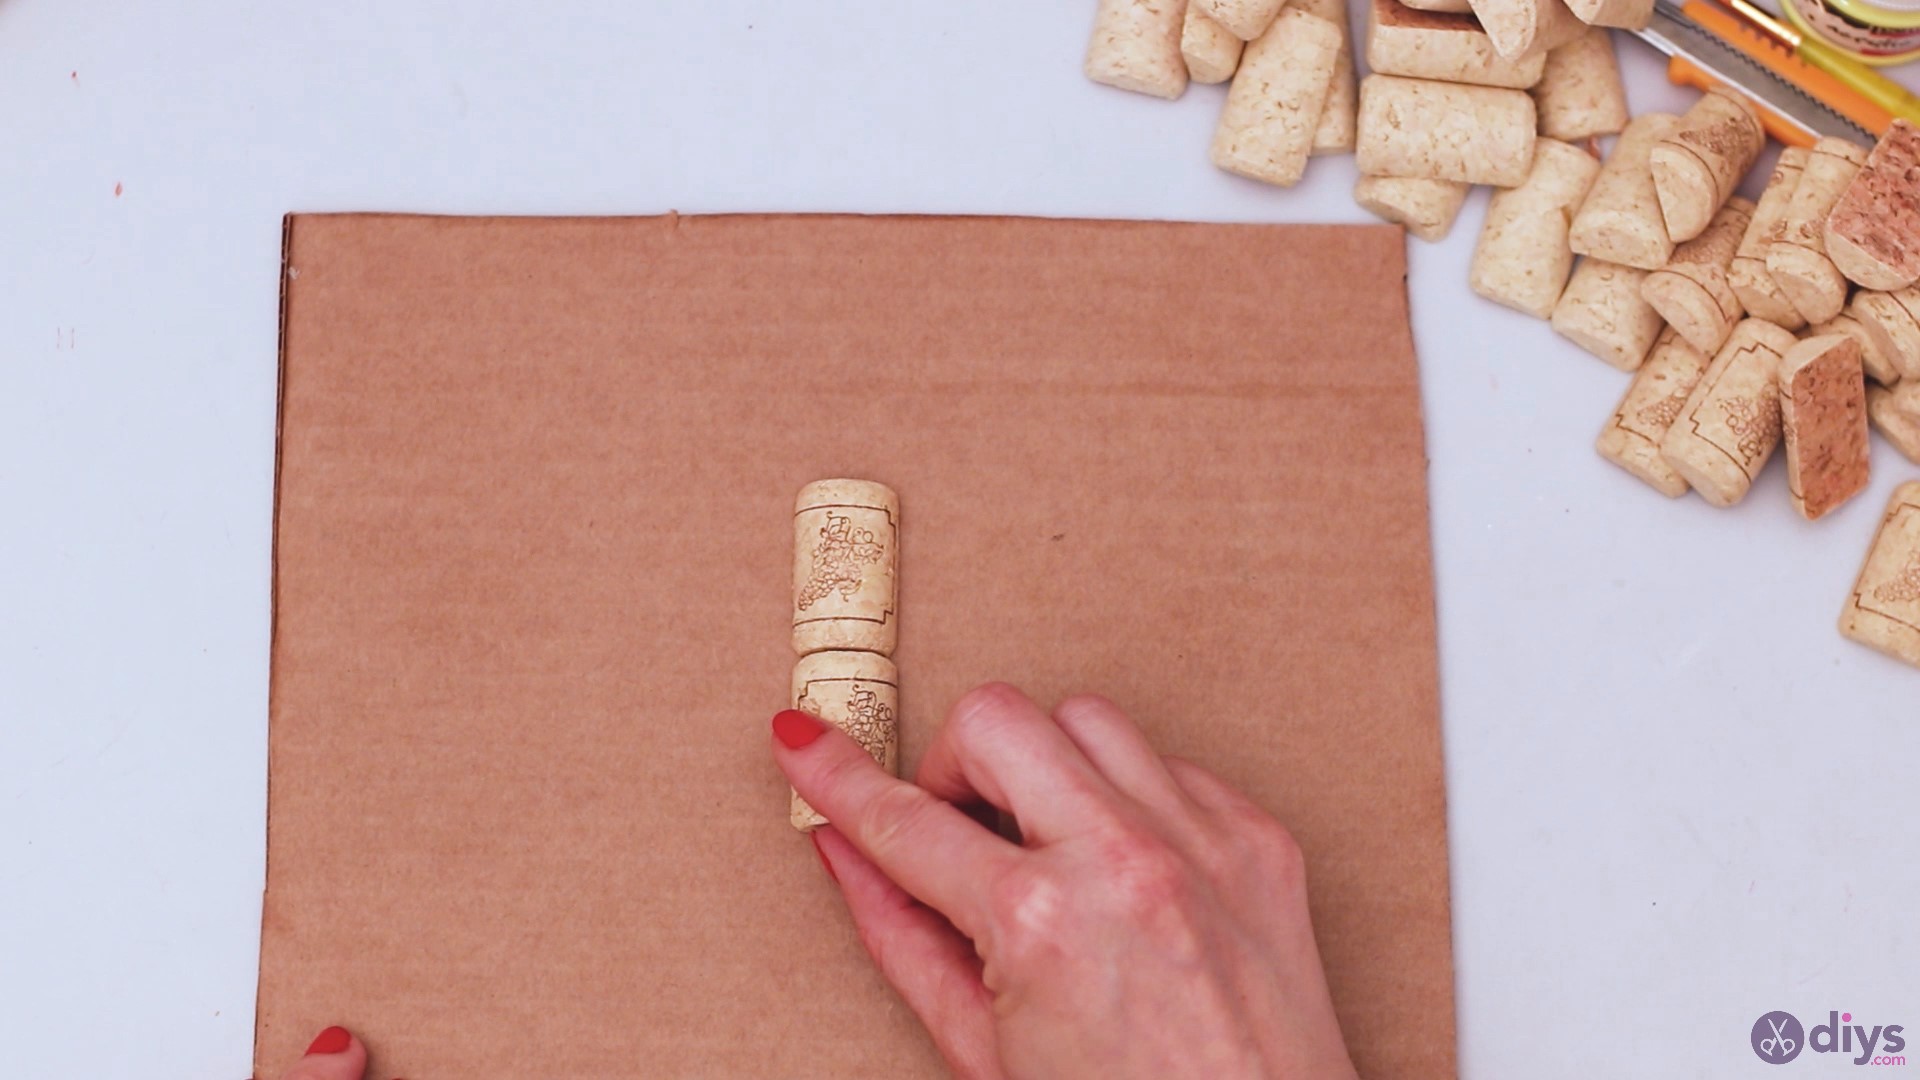
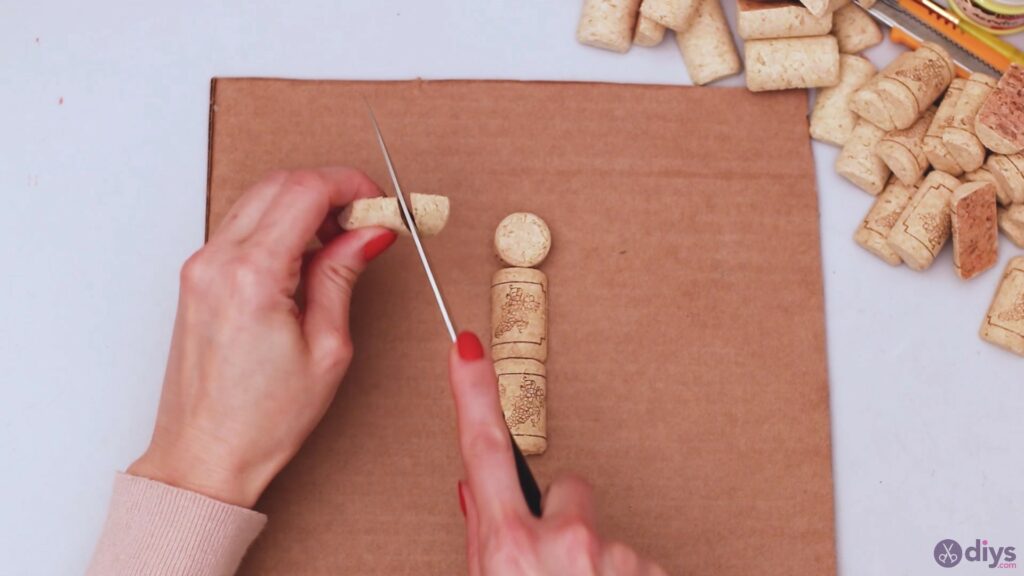
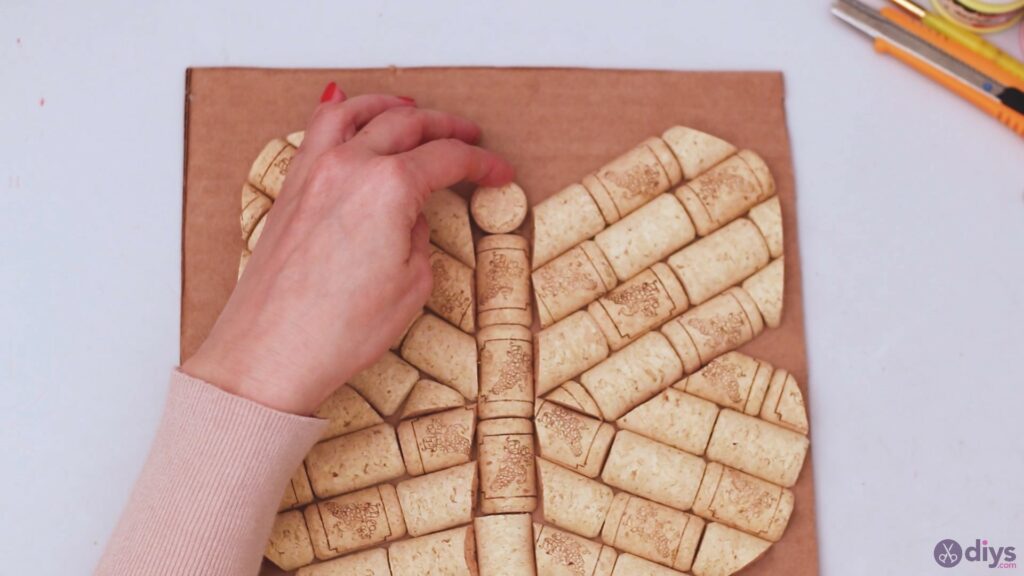
Step 2: Create the butterfly body on the cardboard
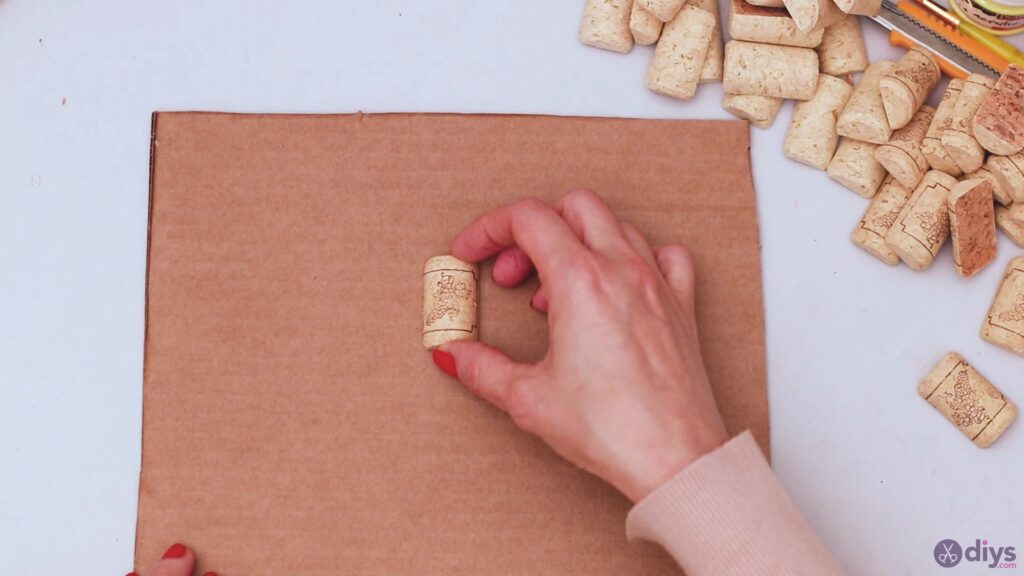
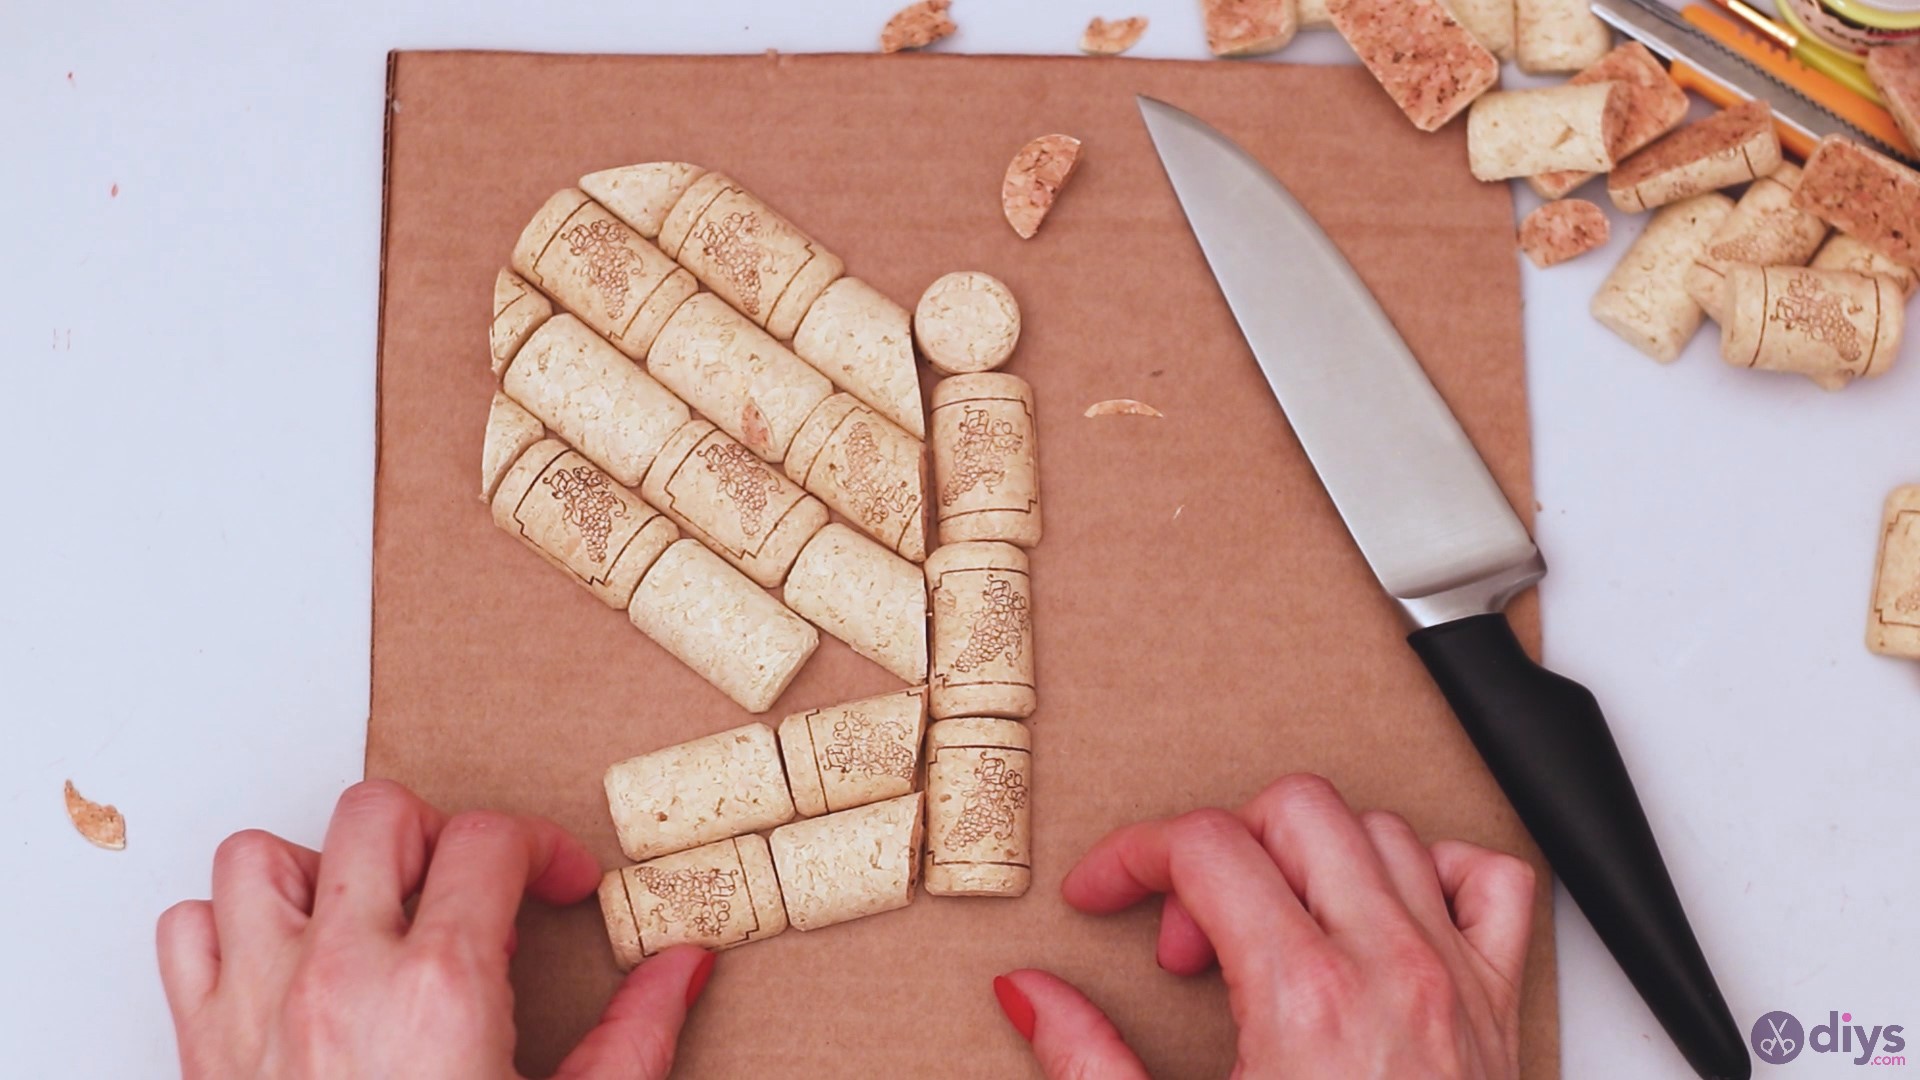
For the next step, you’ll want to get the cardboard piece and start arranging the wine cork halves in the shape of a butterfly. Start with a couple of pieces to represent the body of the butterfly.
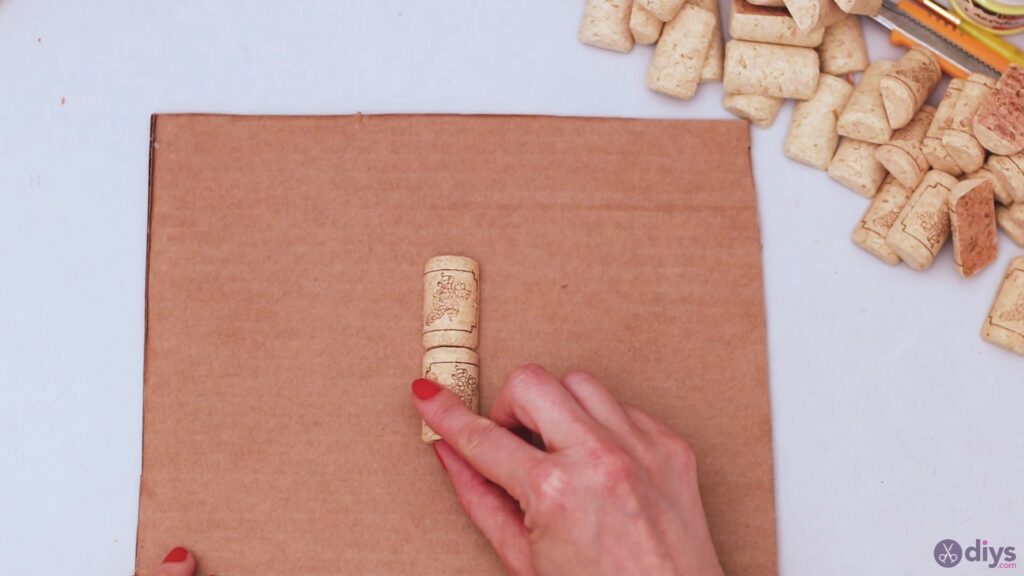
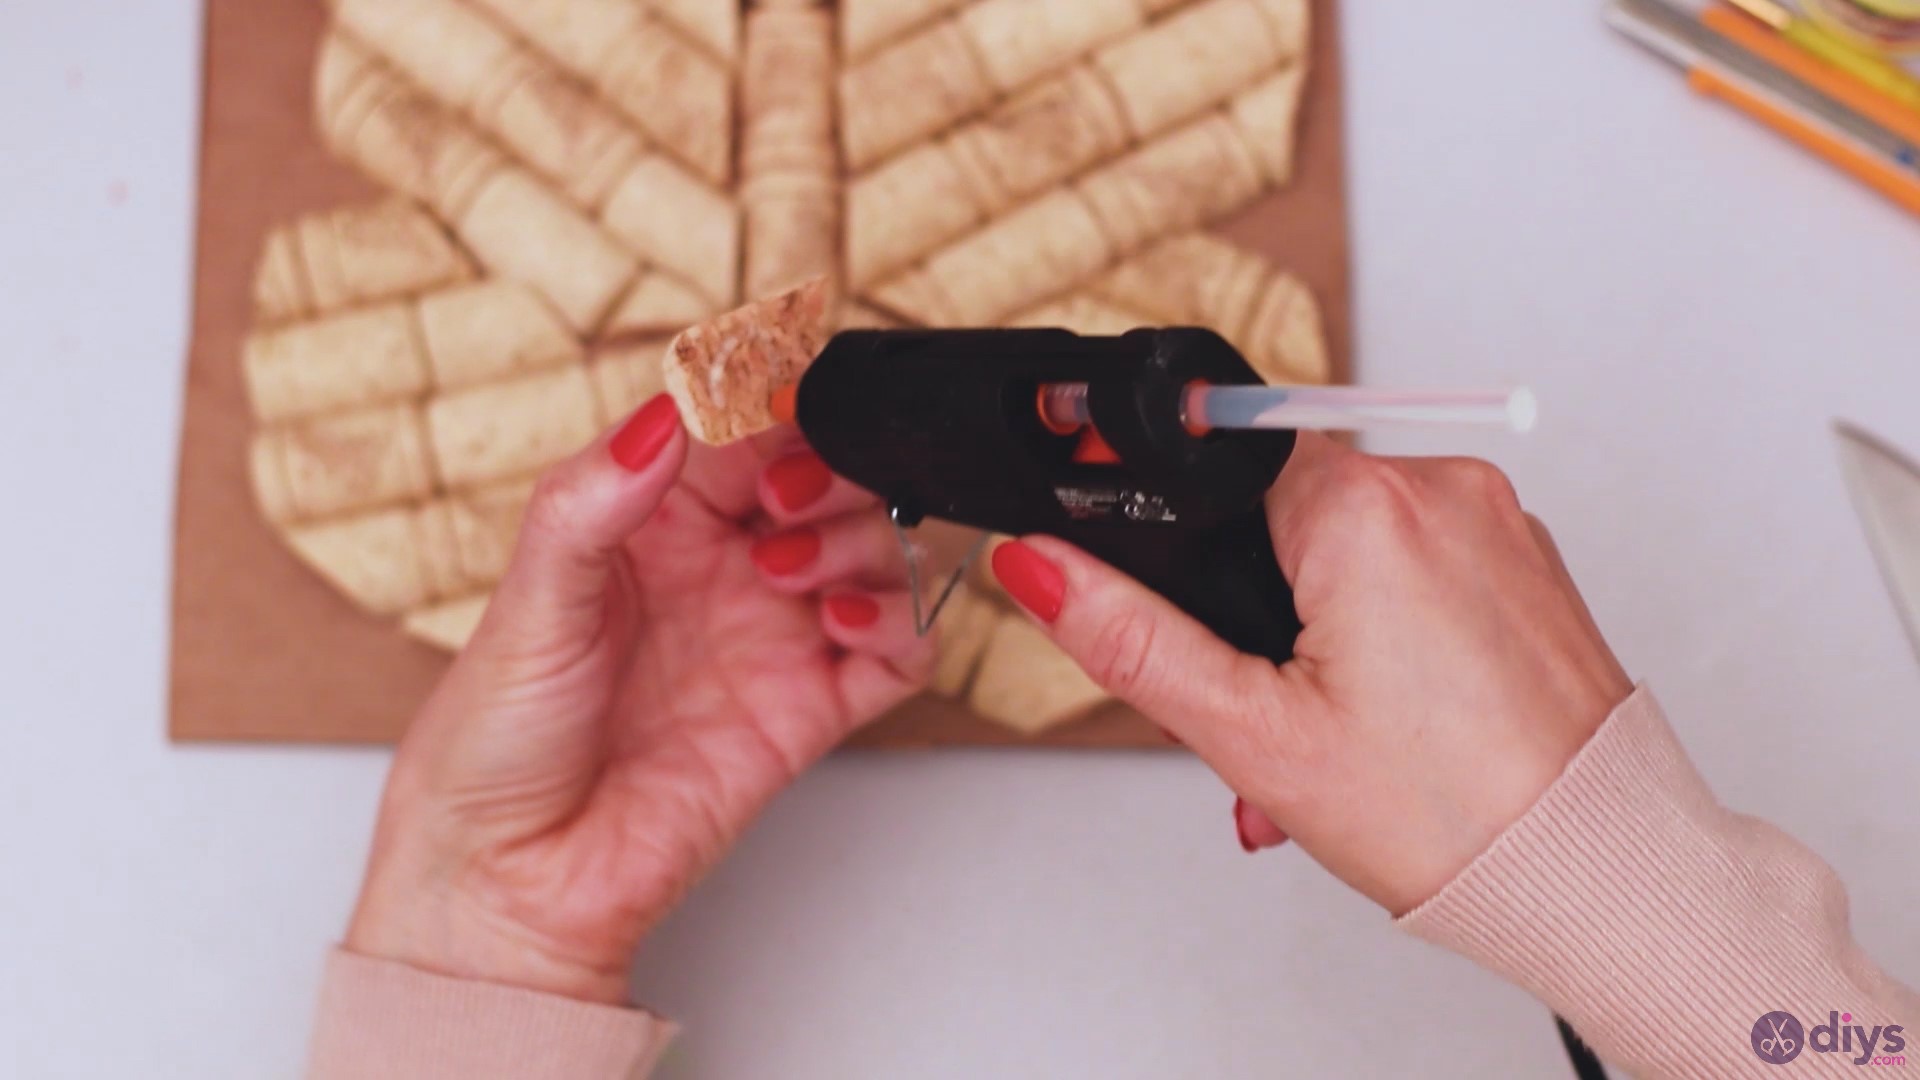
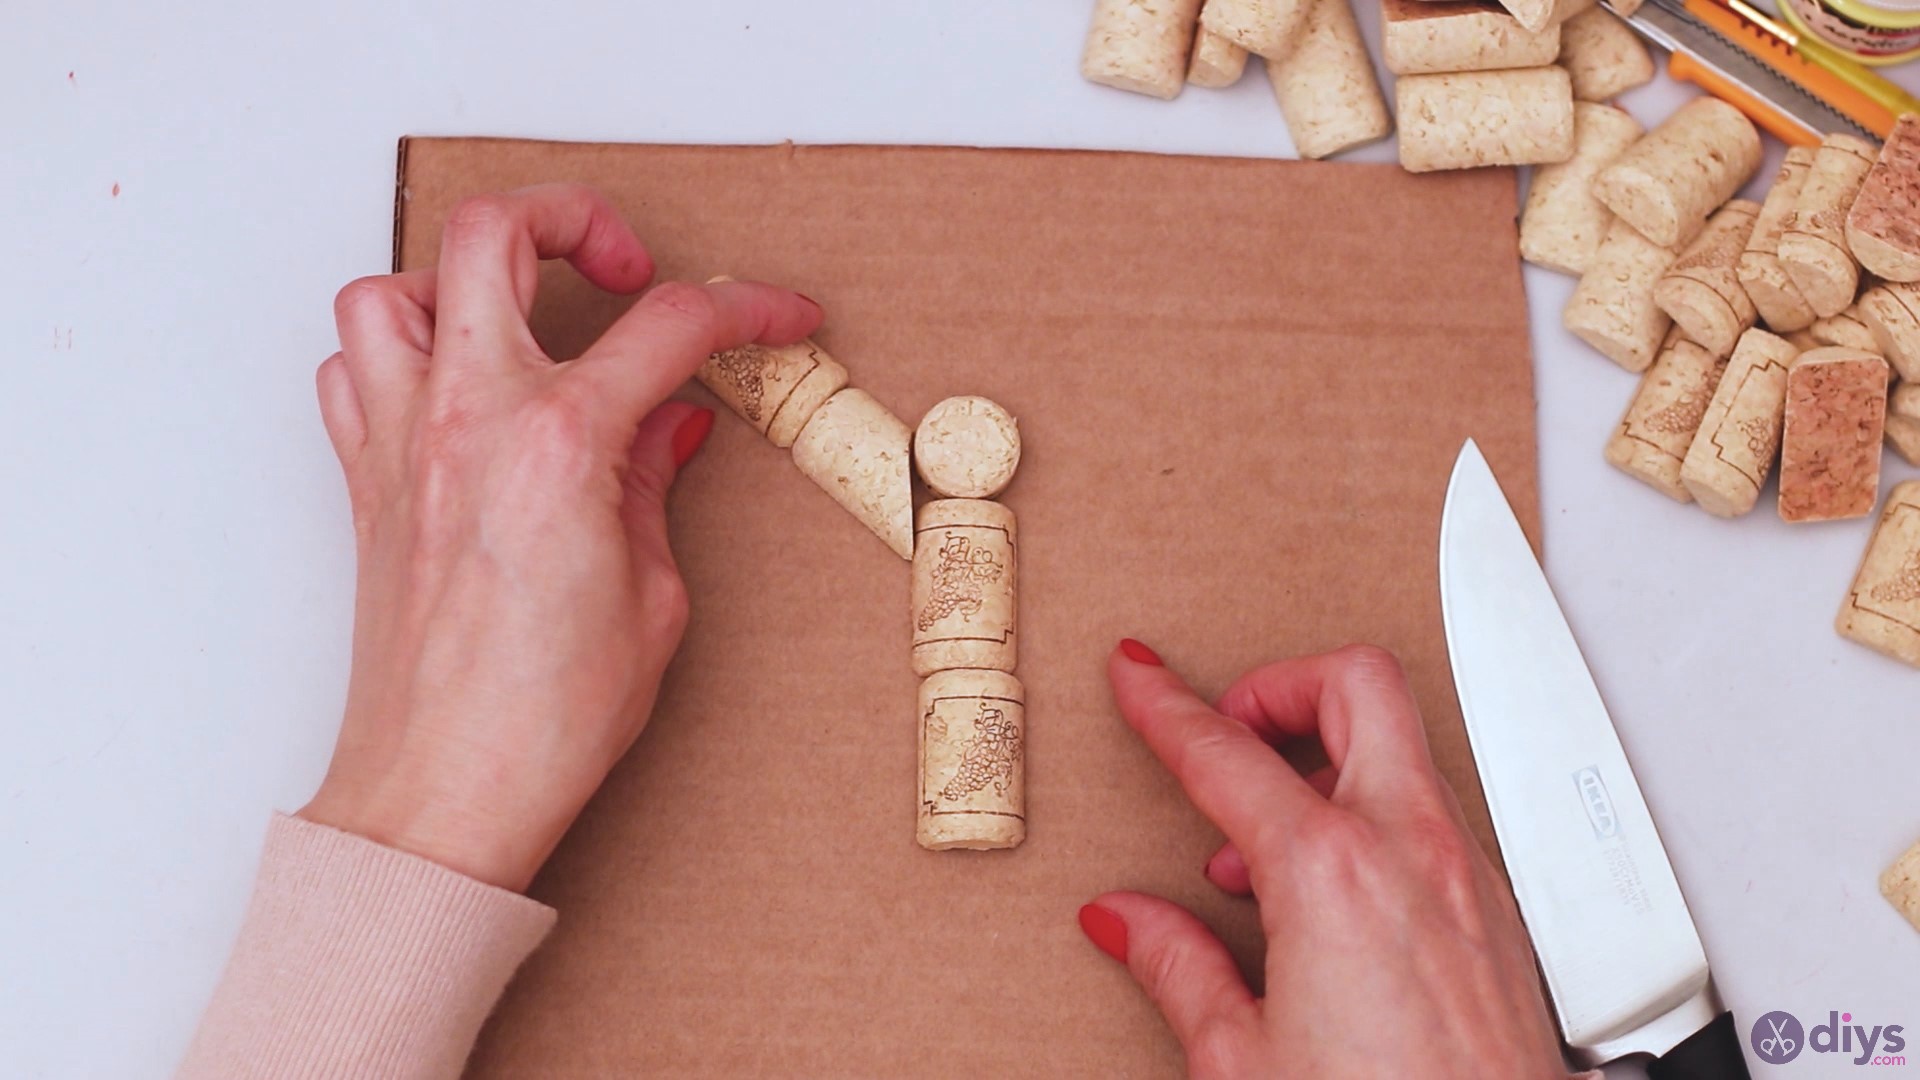
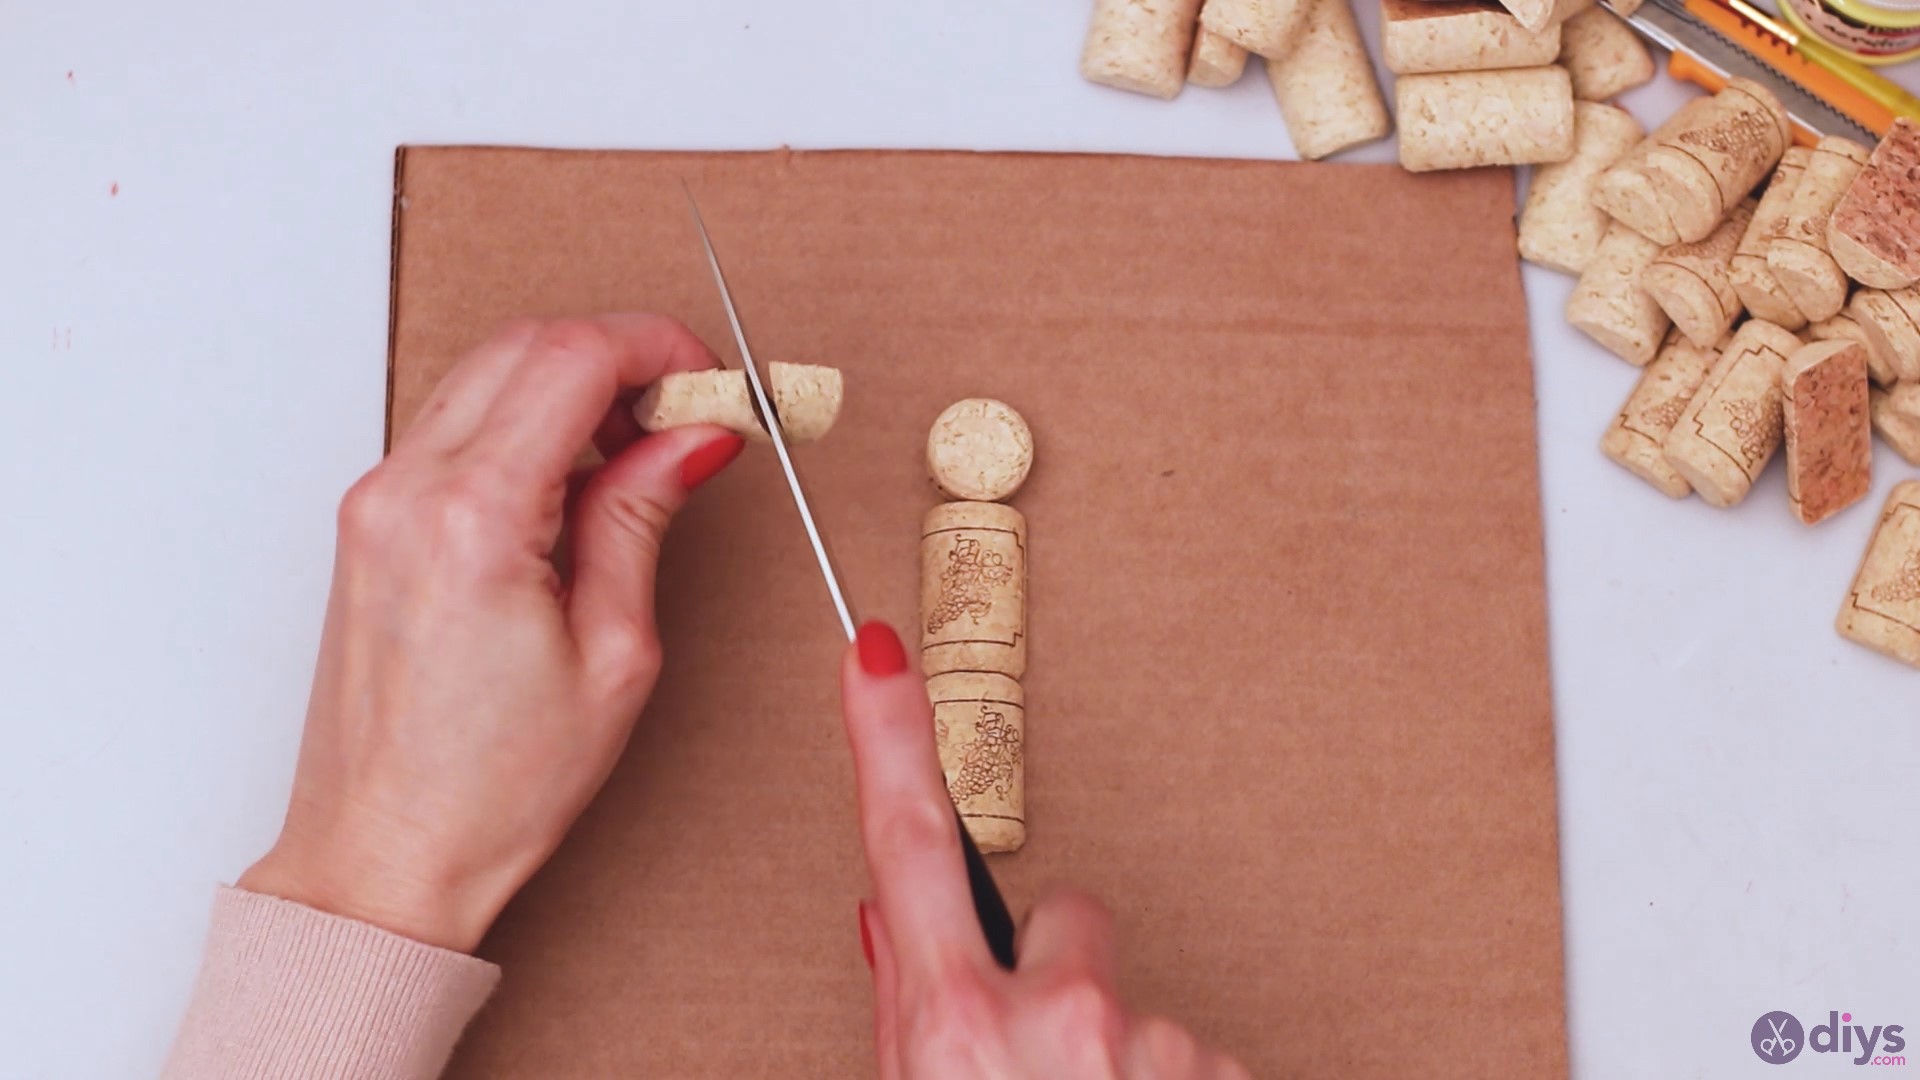
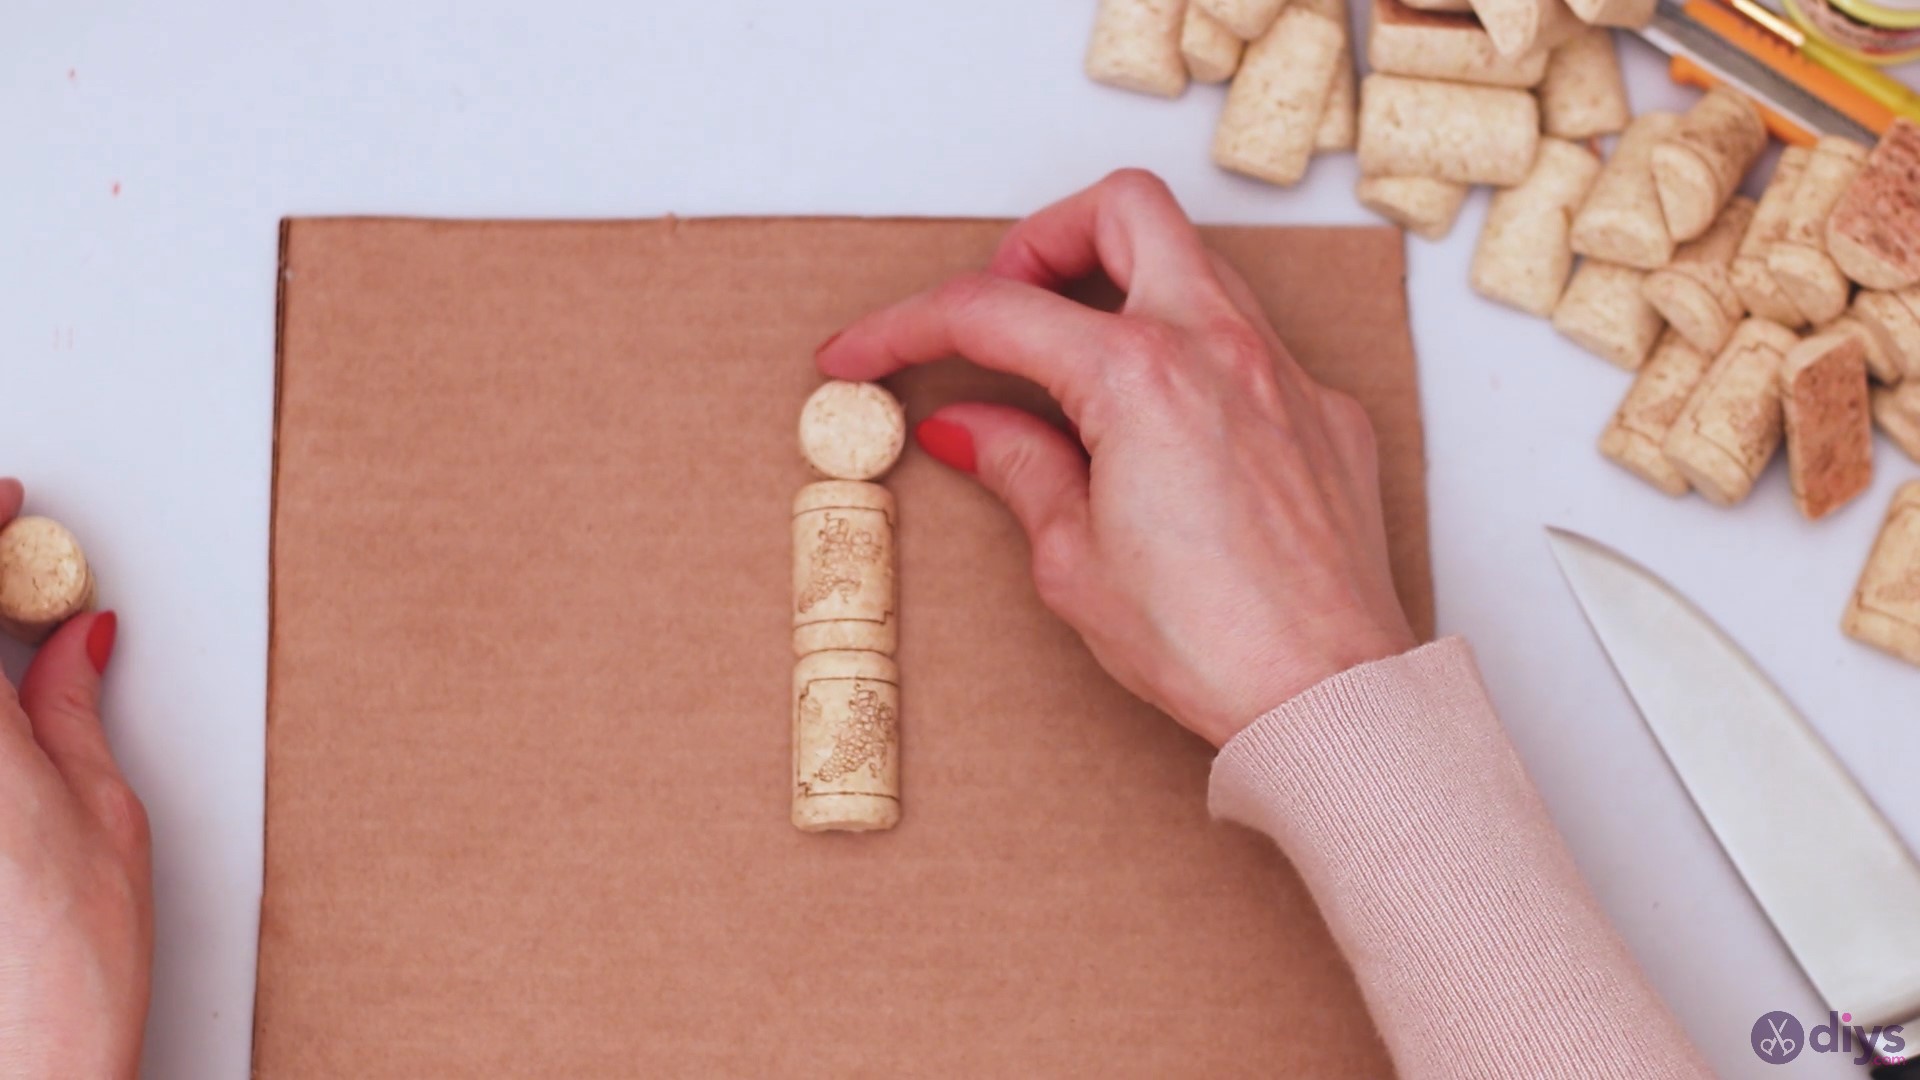
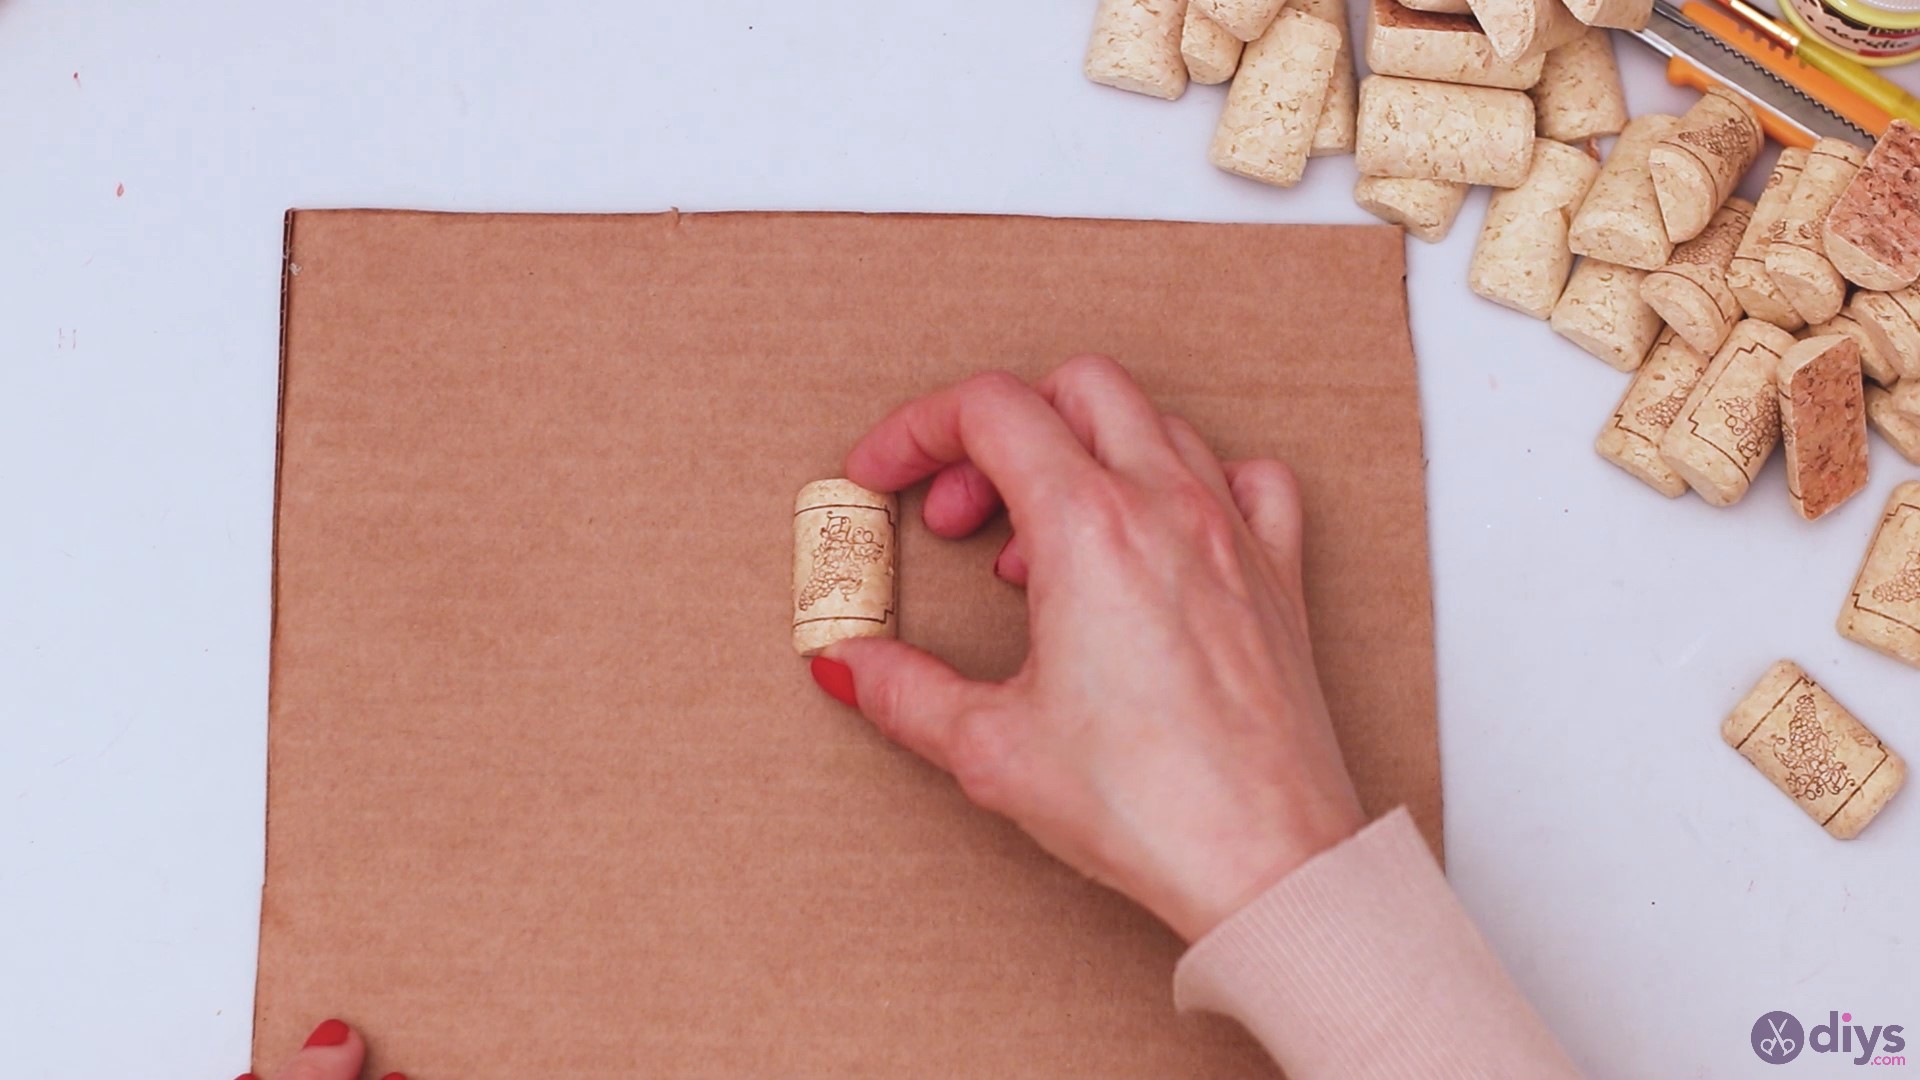
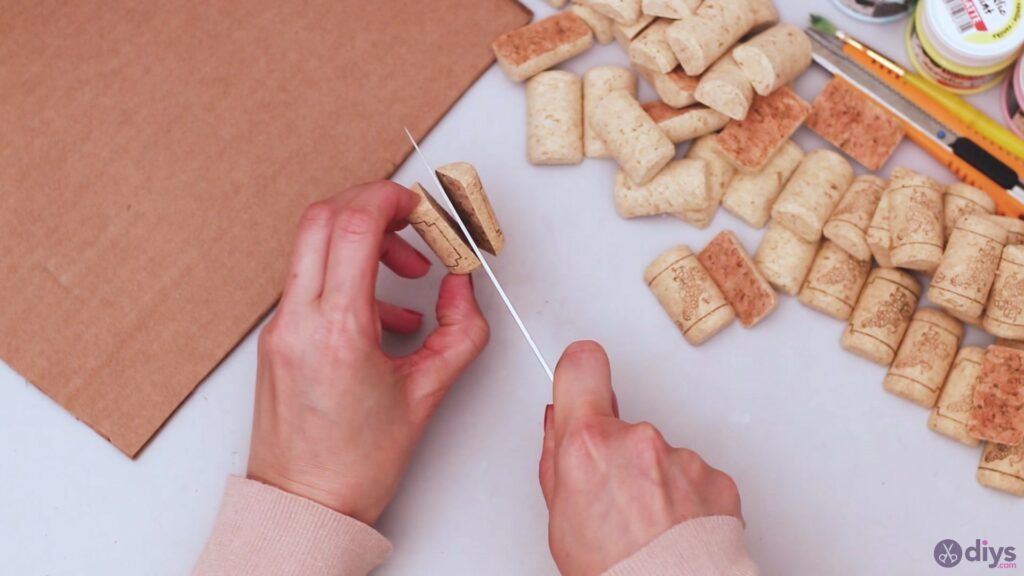
Take a wine cork that hasn’t been cut and slice off a piece horizontally. You’ll want the piece to be about as thick as the cork halves are.
Place it just above the two pieces you placed earlier. This one will be the butterfly’s head.

Step 3: Start building the butterfly wings
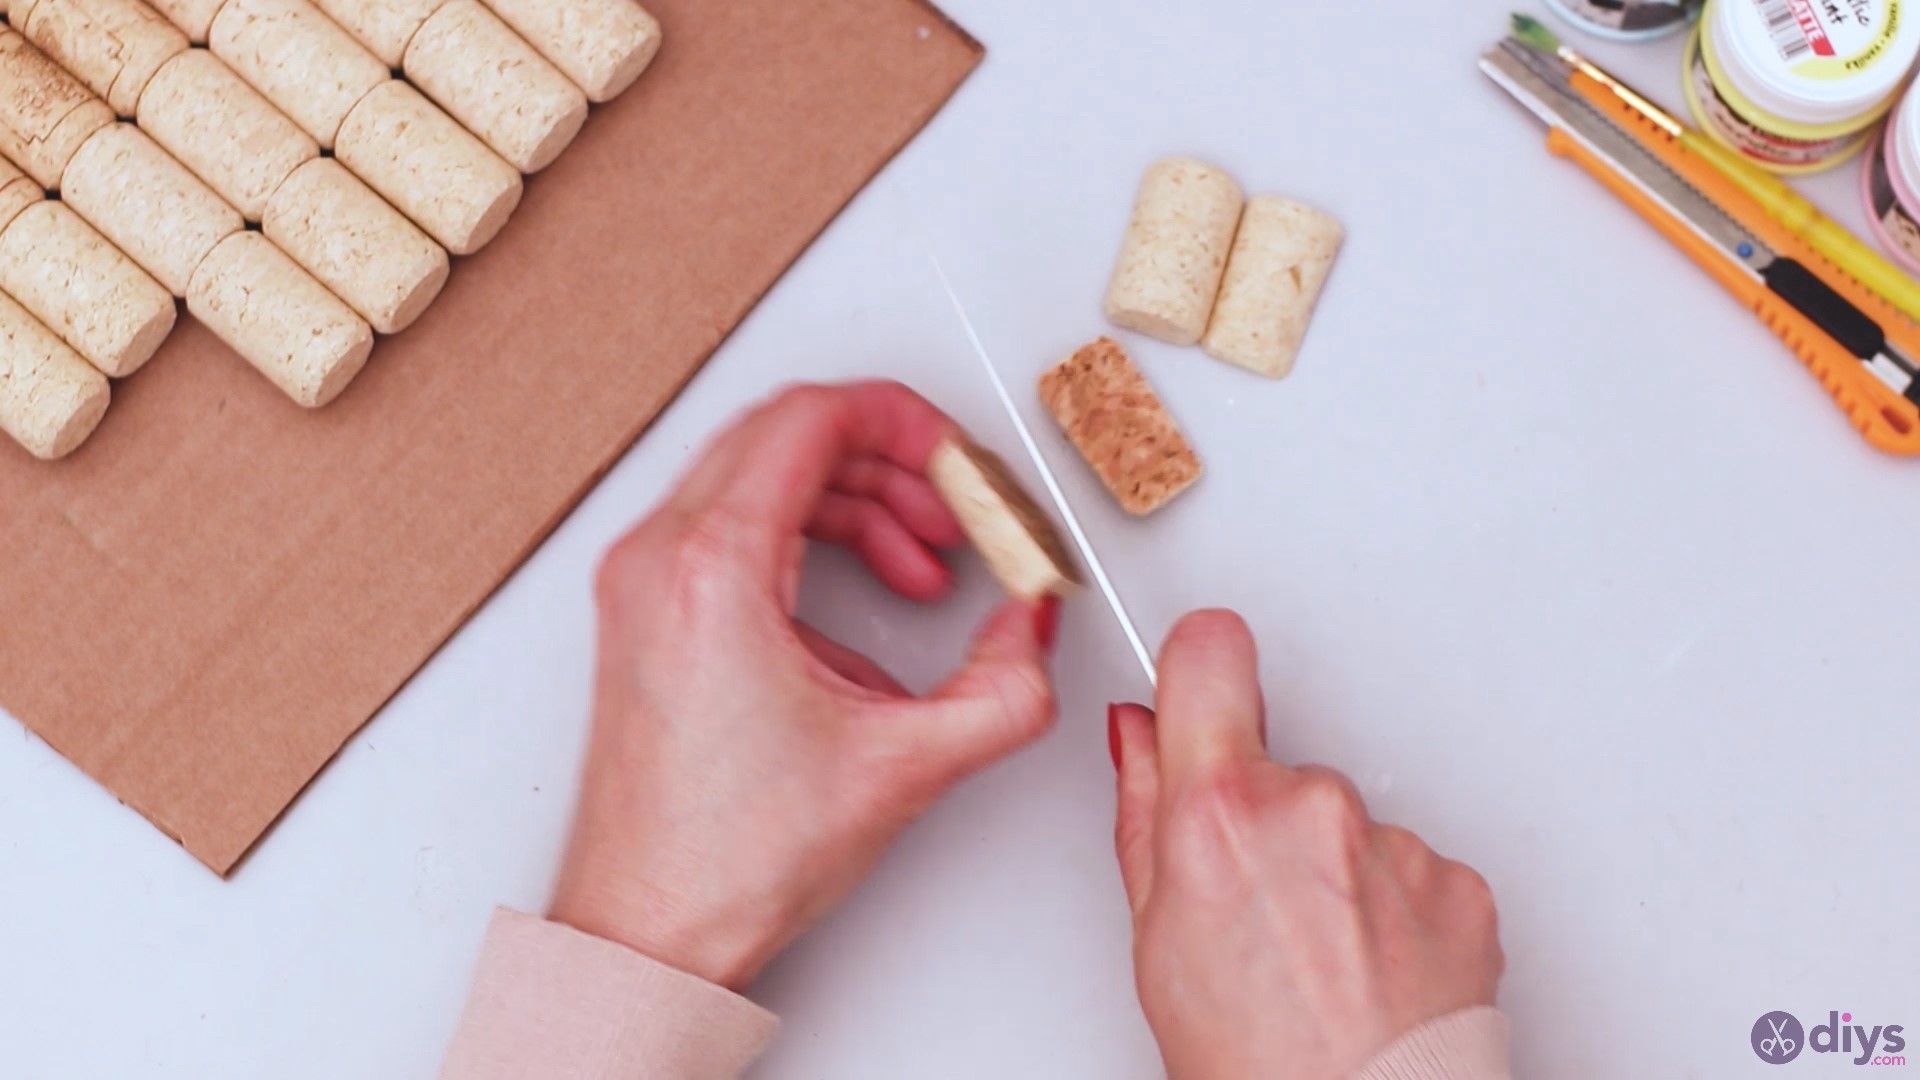
Take one of the wine cork halves and the knife and cut off a piece like shown in the picture. Start the cut around the middle point of the cork and go diagonally towards one of the ends. Align the piece with the head and body of the butterfly.
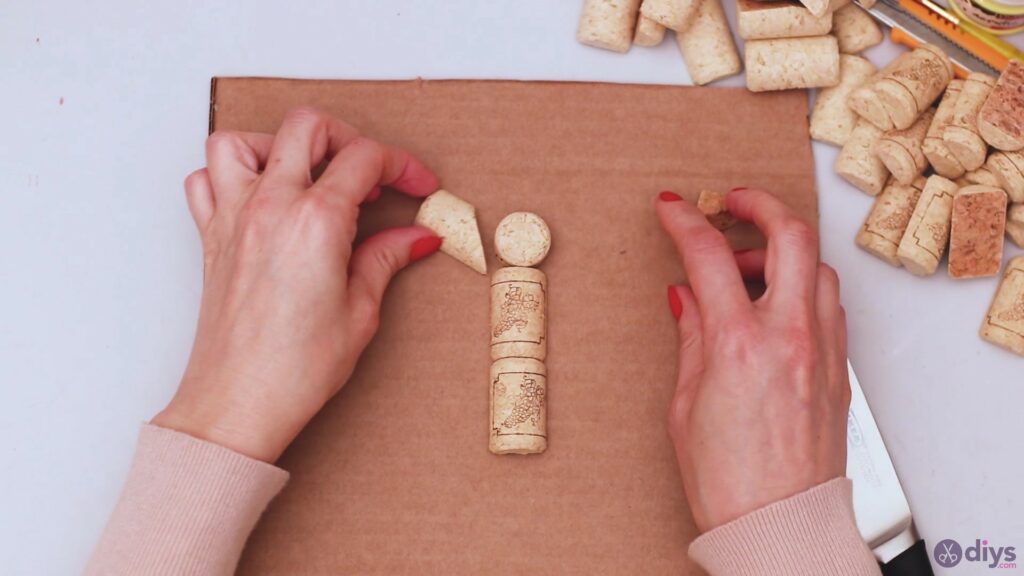
Add another piece above the one you just placed to built up the wing.

Cut the wine corks where needed to help create the shape of the wing. You want to make the wings dynamic, but you also want to make sure they follow the line of the body.
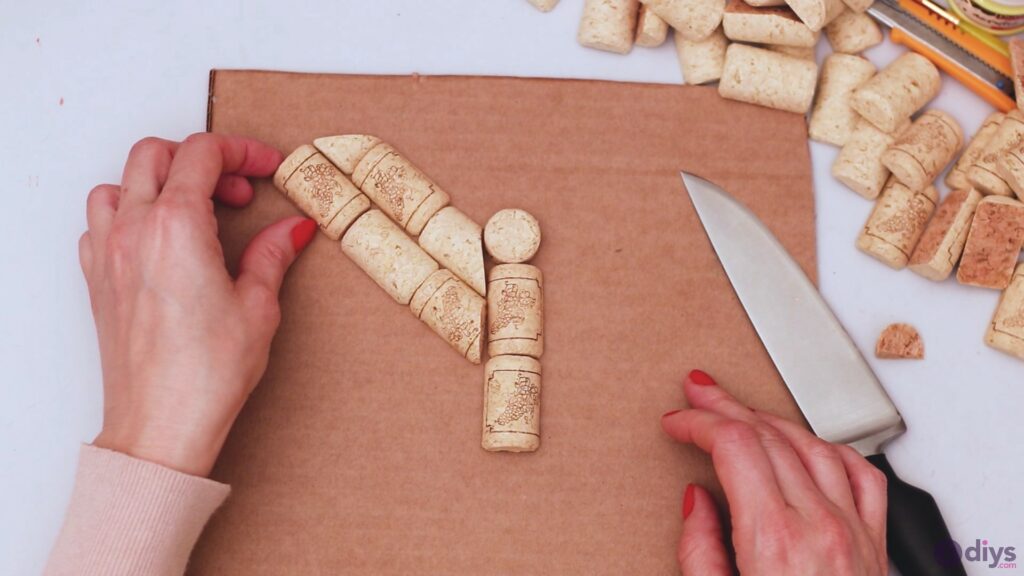
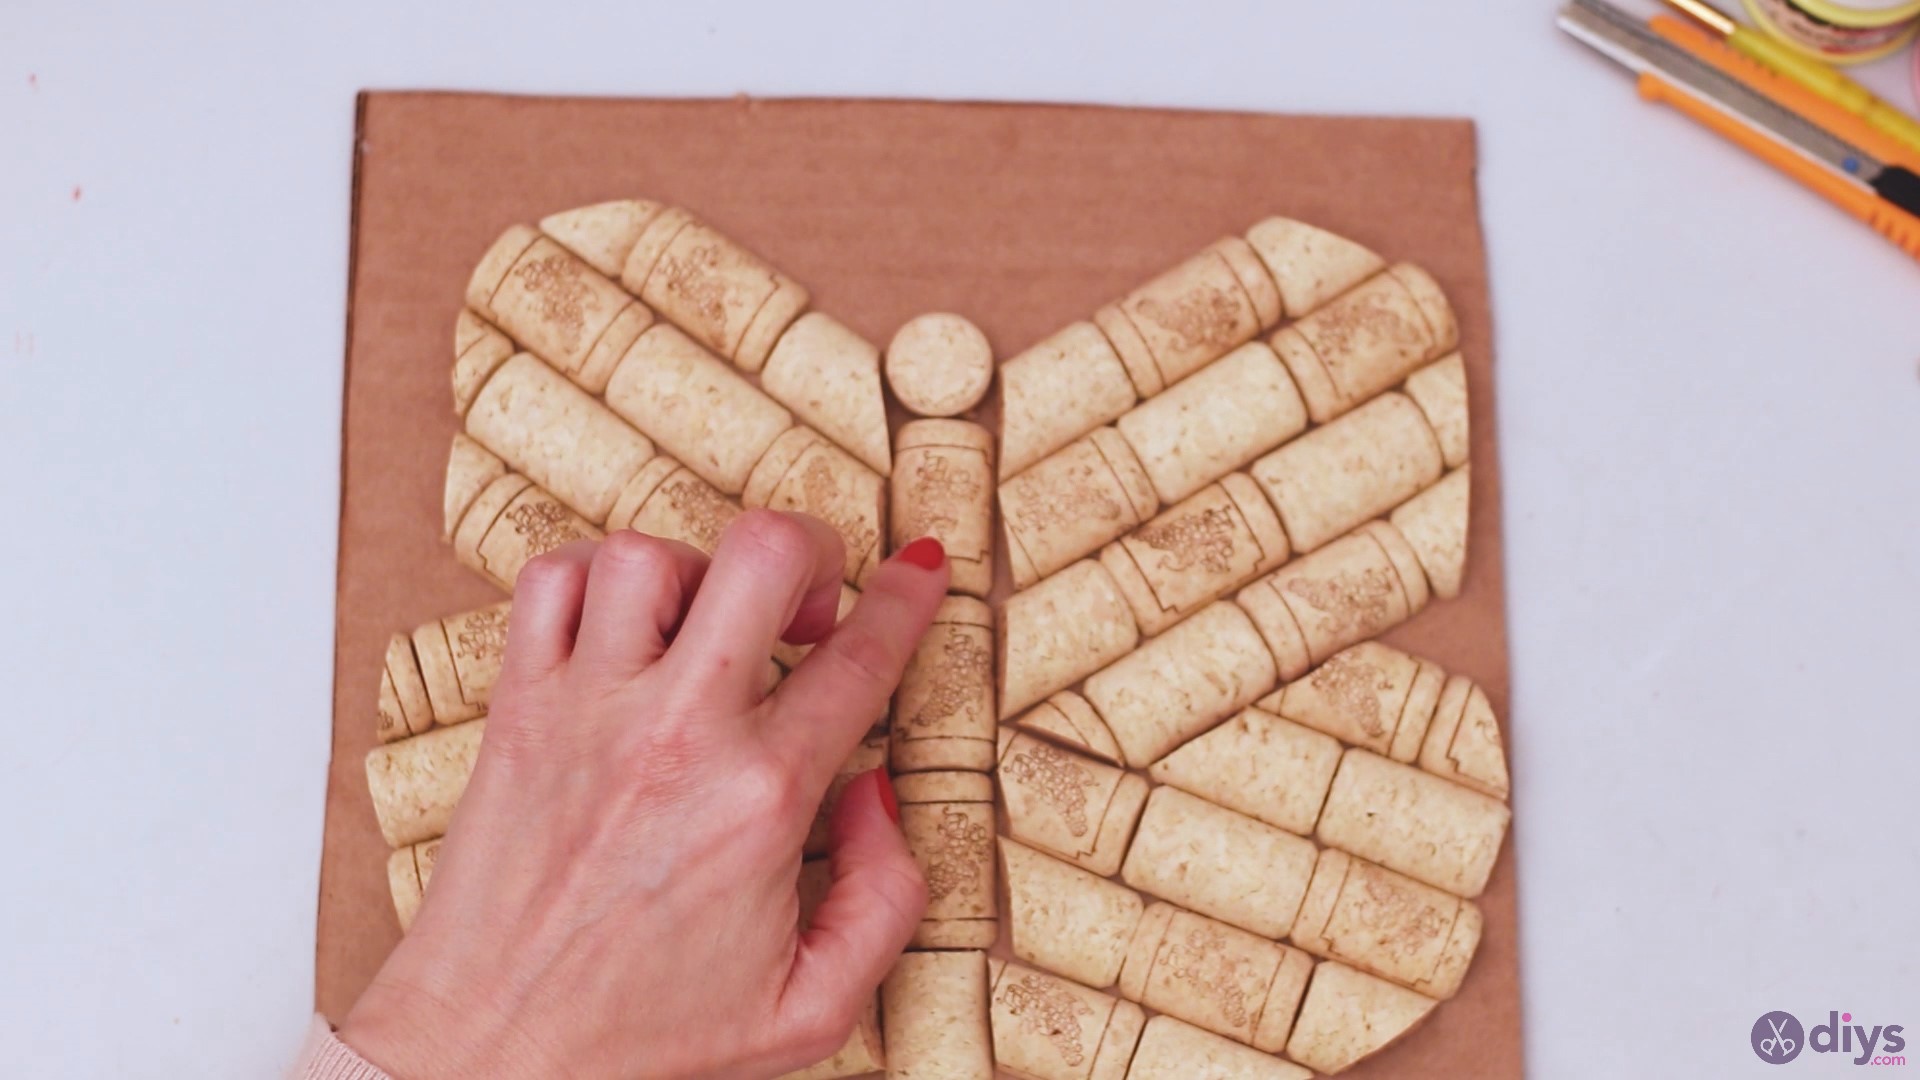
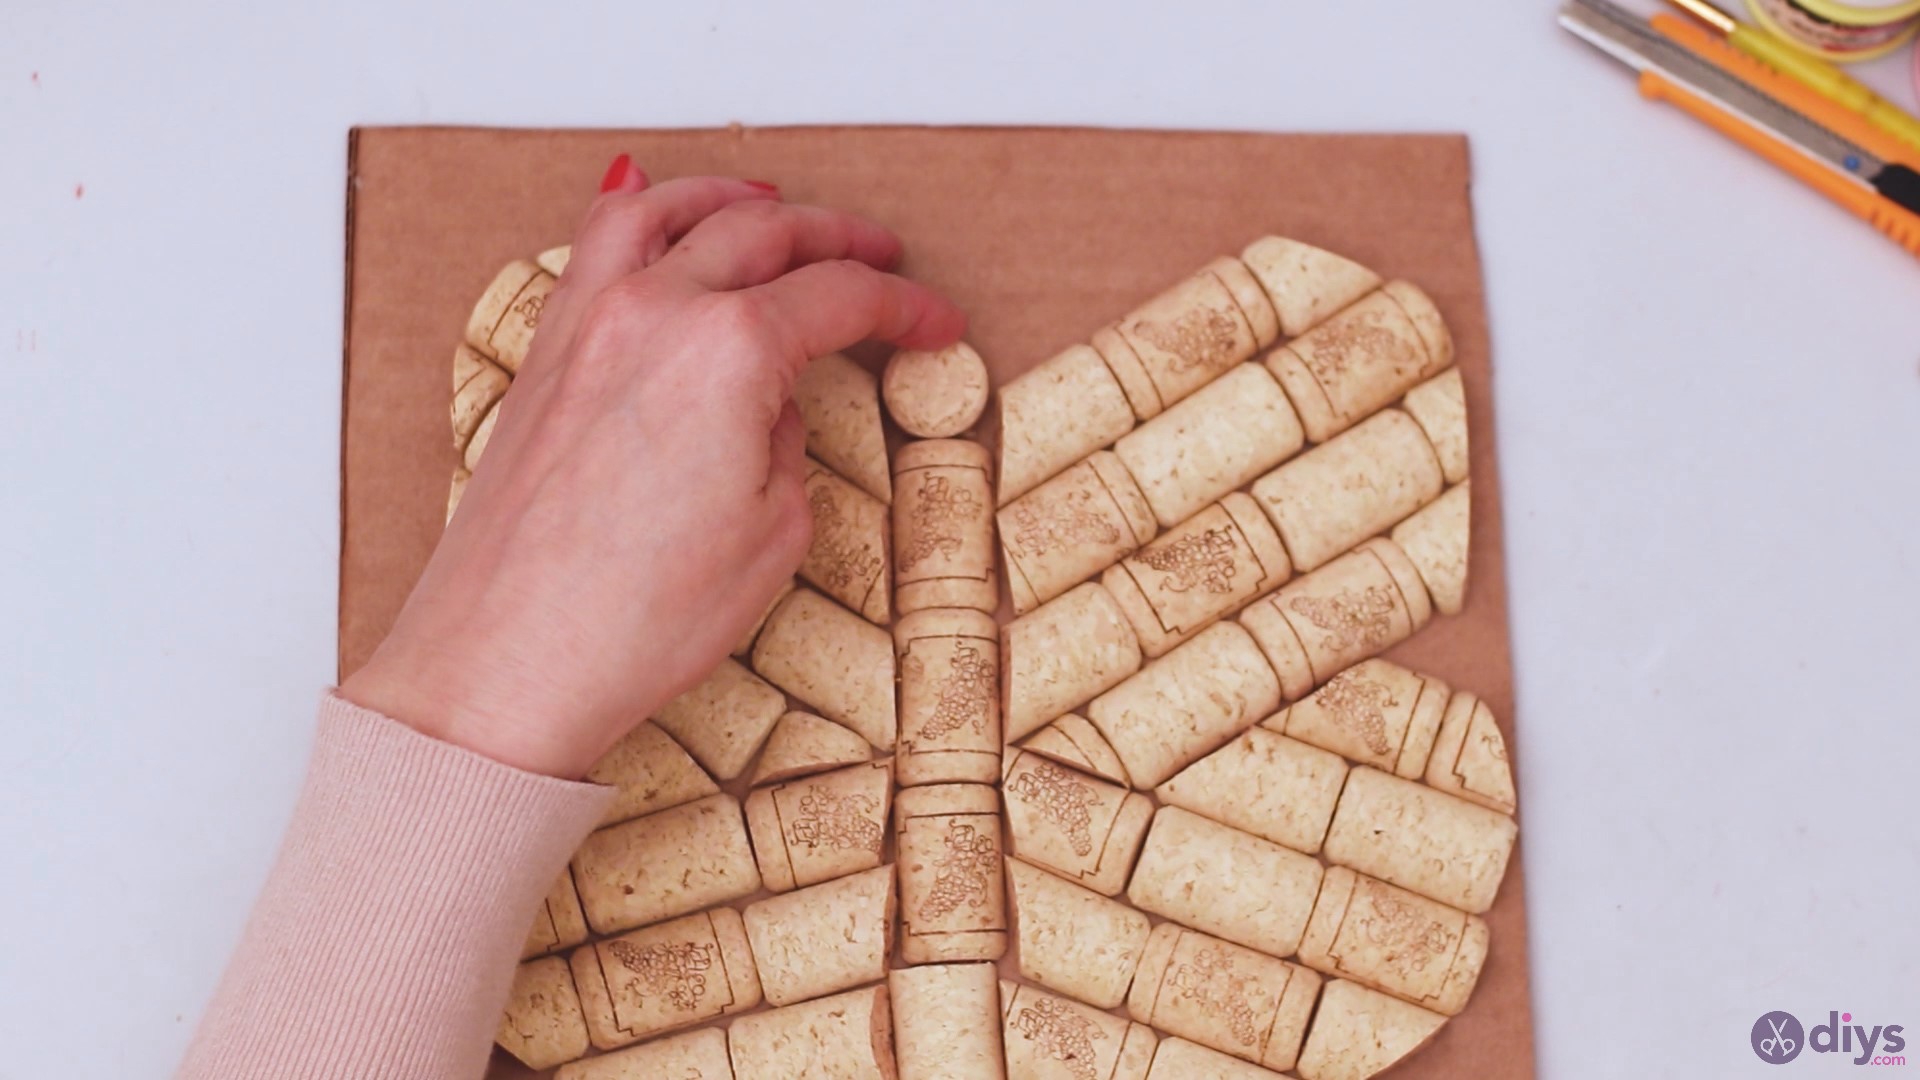
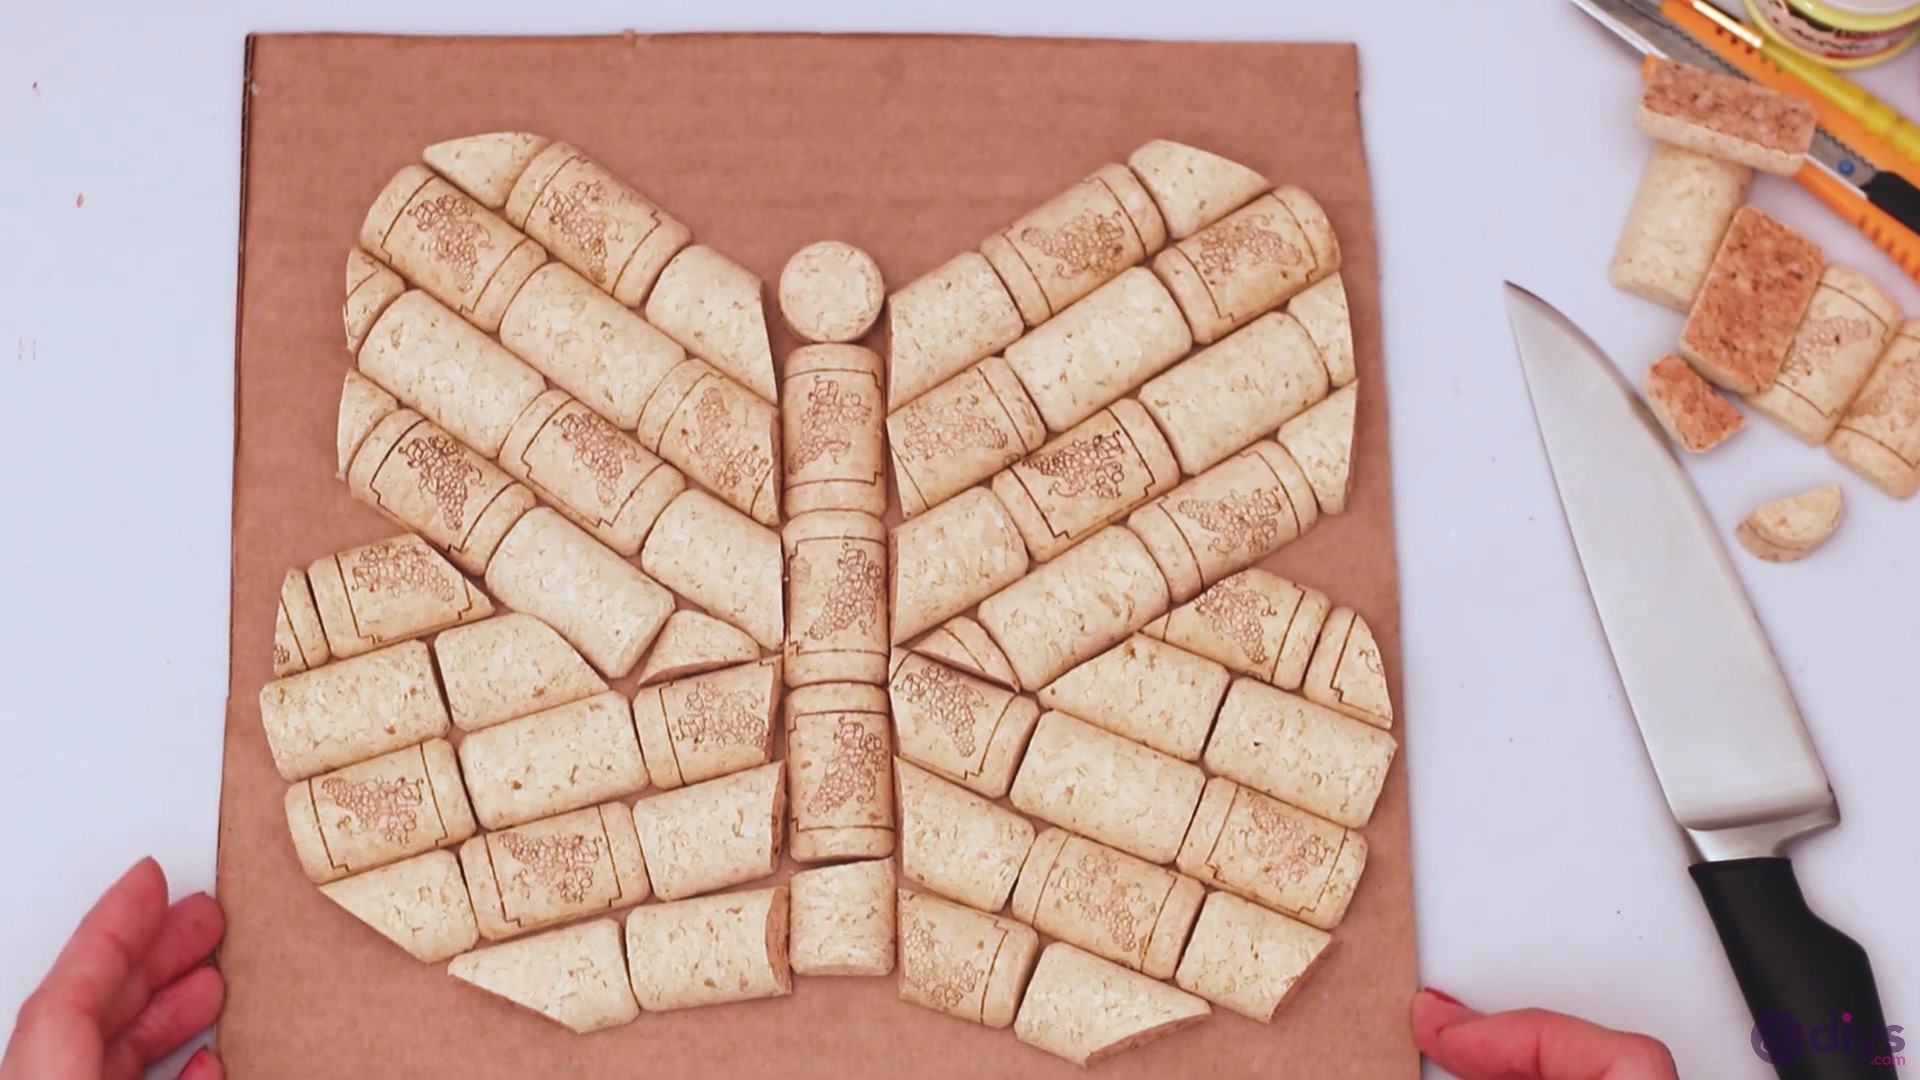
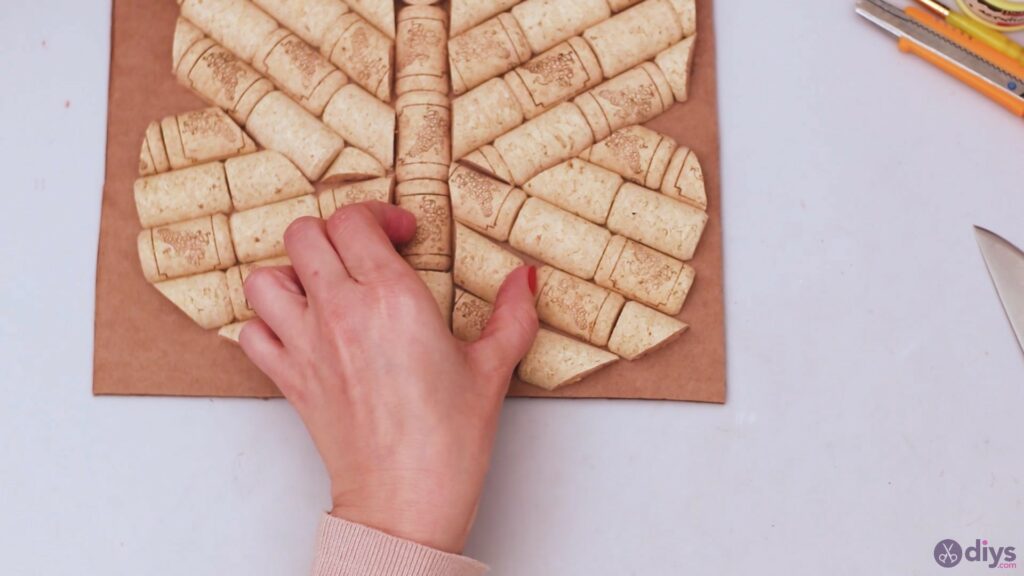
Add a third piece for the body of the butterfly and keep building the wings. You want the top part of the wing to be a bit bigger. Ours has four layers of corks, as you can see from the picture.

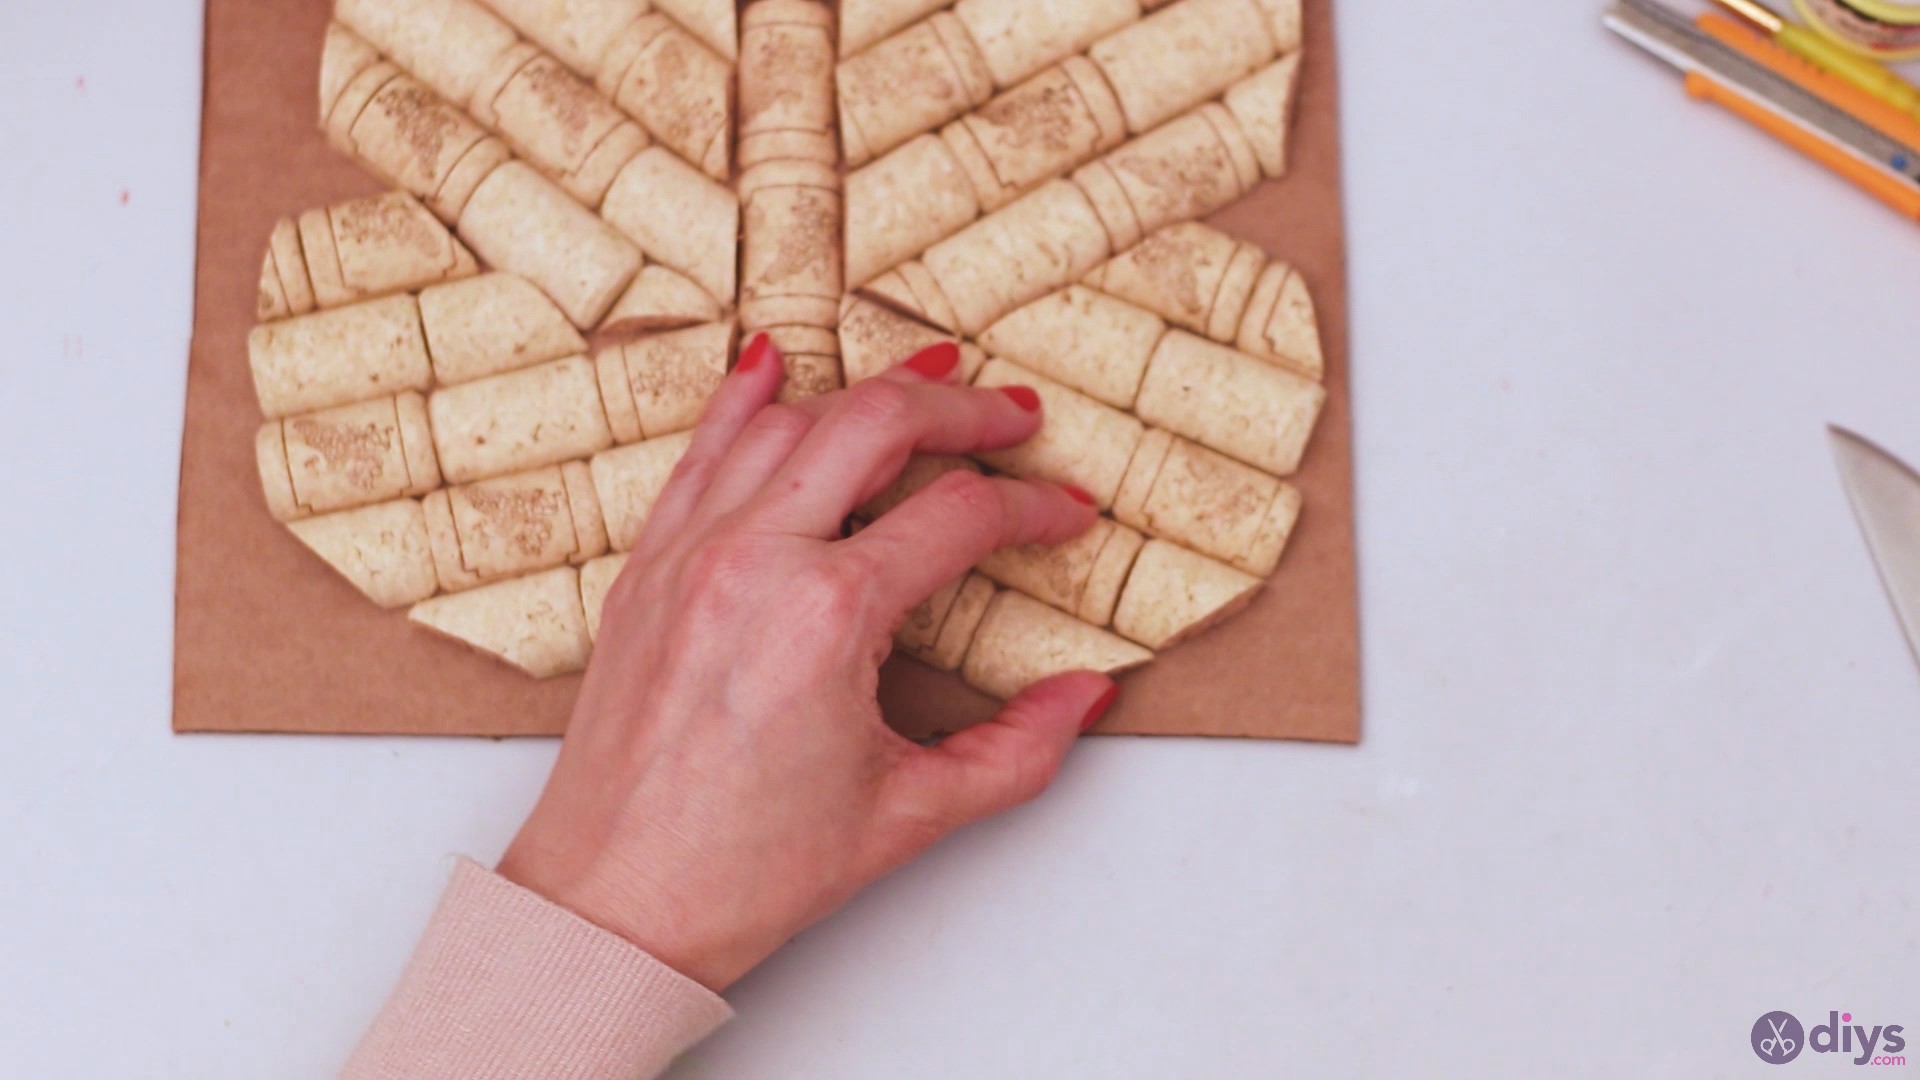
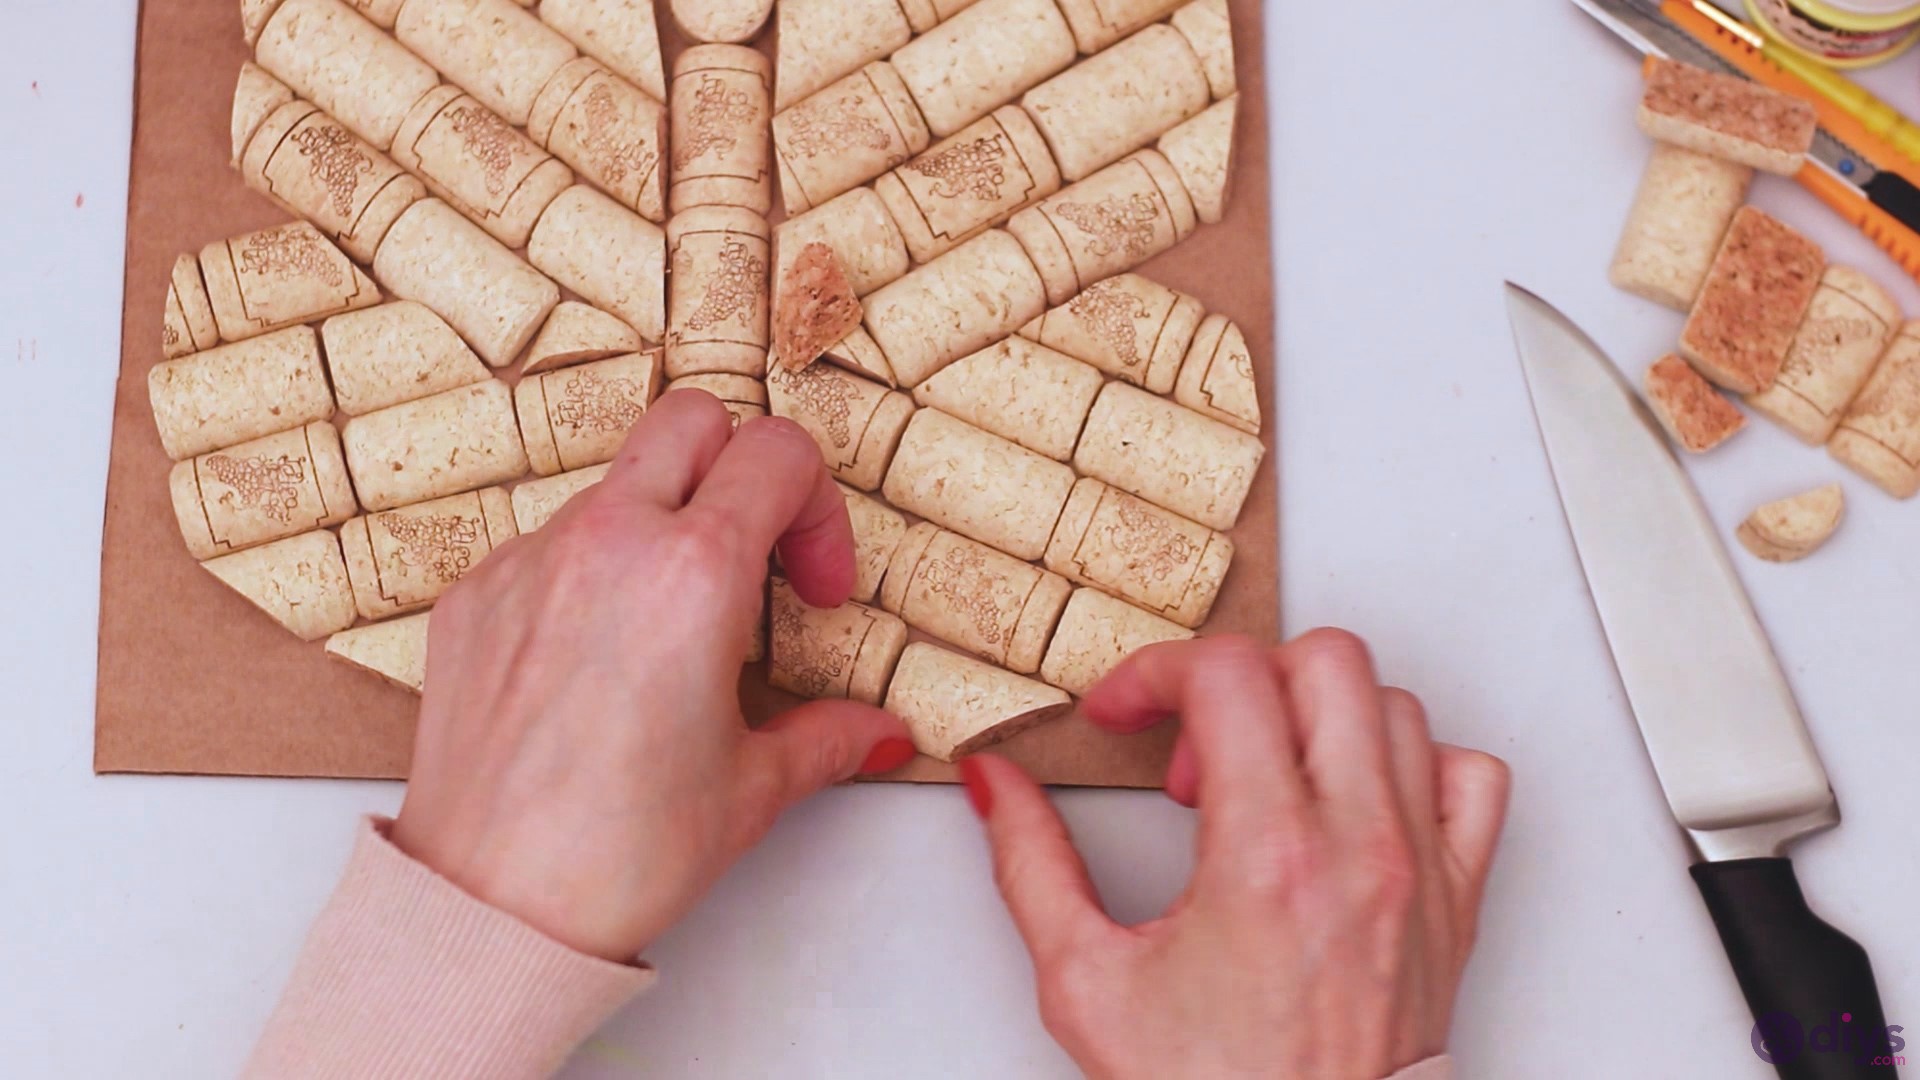
Keep adding more corks to figure out how the design will look with the body of the butterfly. Then, go ahead and cut the corks to fit the shape you want to create, and fill in gaps with leftover pieces.

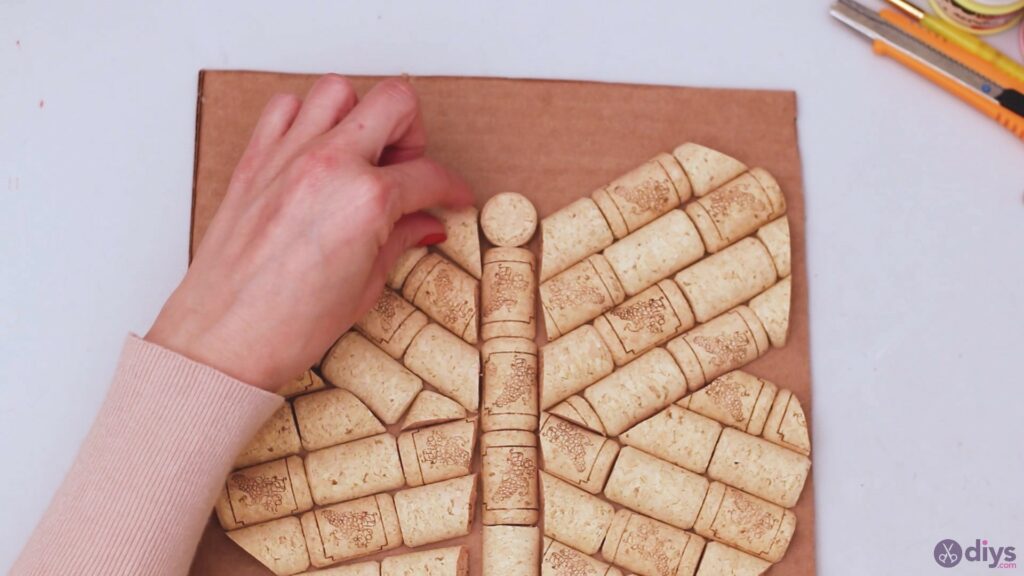
Once you’re roughly done with one of the wings, replicate what you did on the other side. Add the corks in the same positions, and make the cuts as similar as possible.

This is our final butterfly design! We know where everything goes and what shape the butterfly will have when we’re done with it.

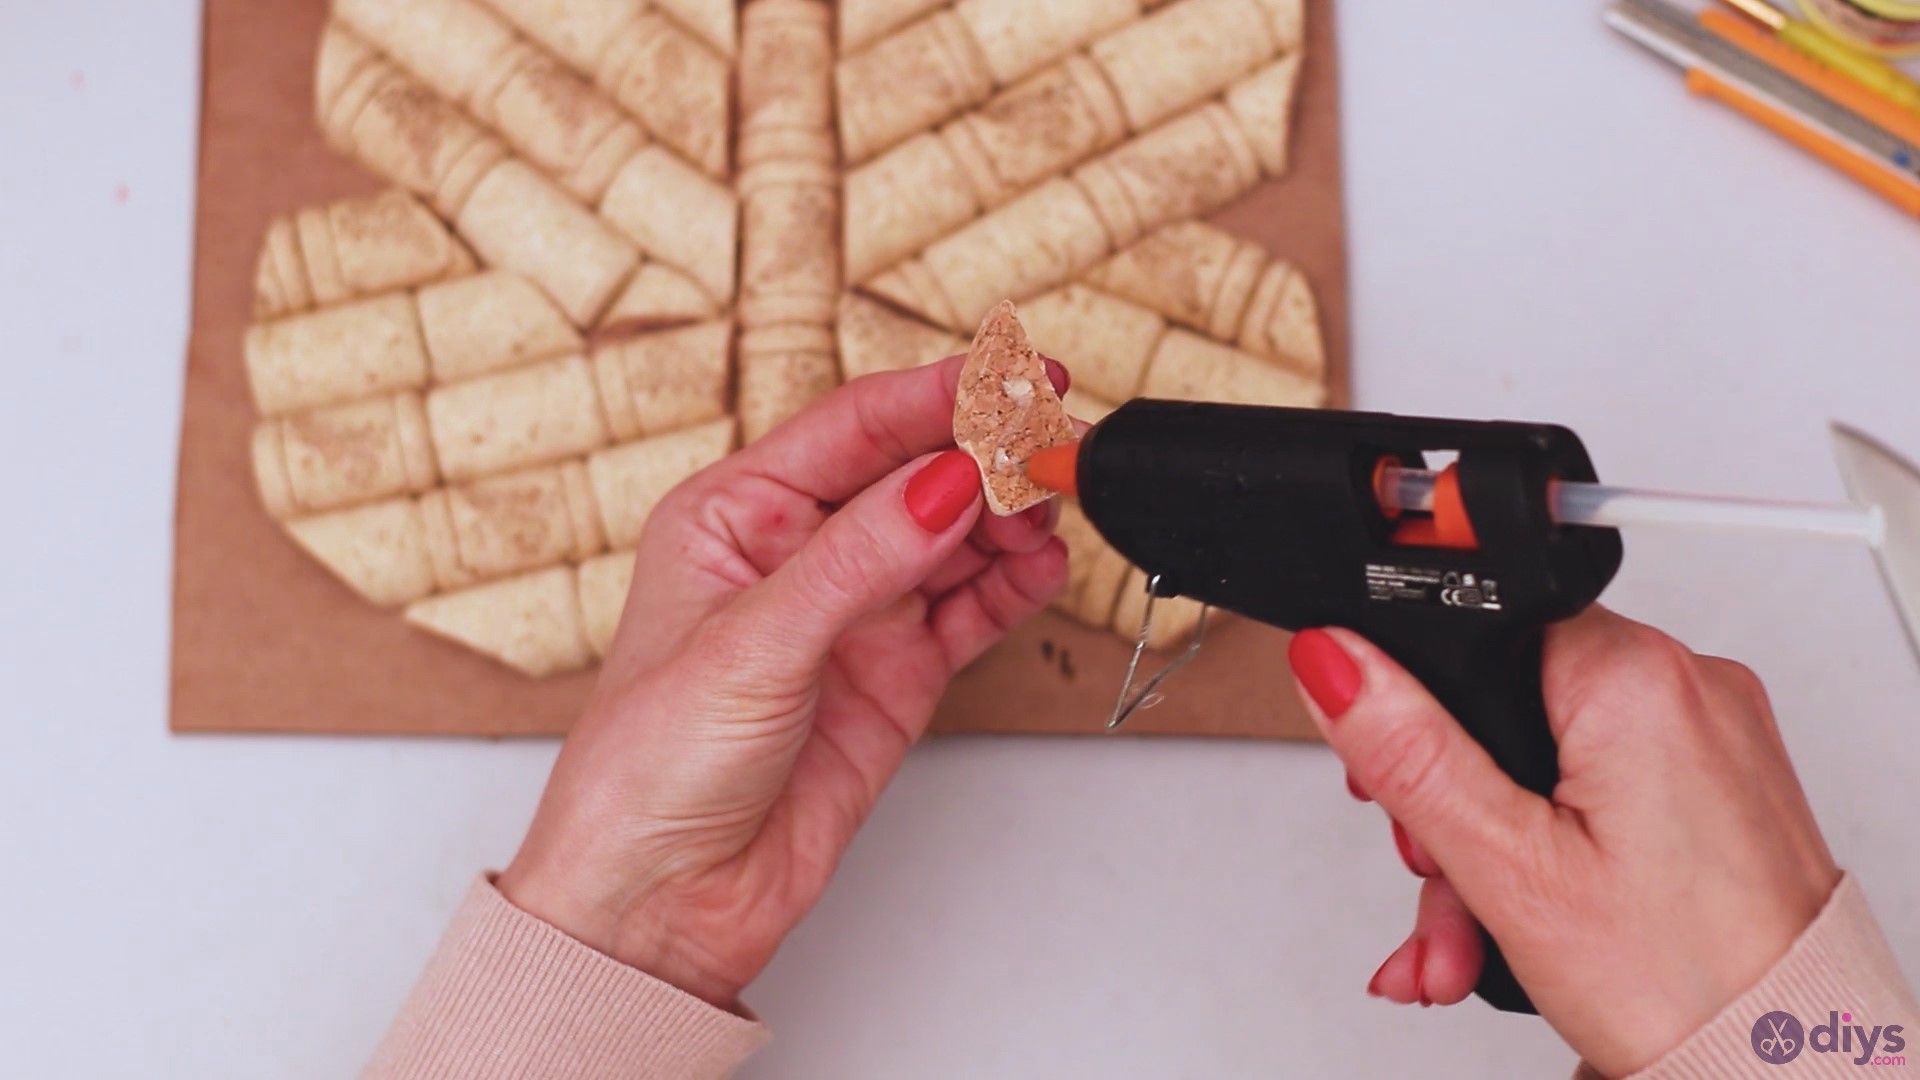
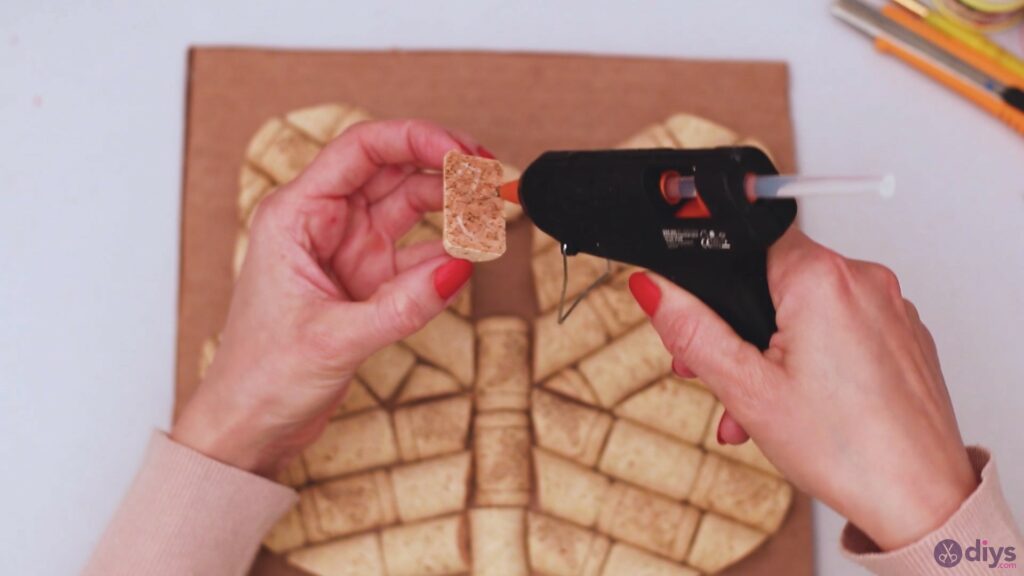
Step 4: Glue the wine corks

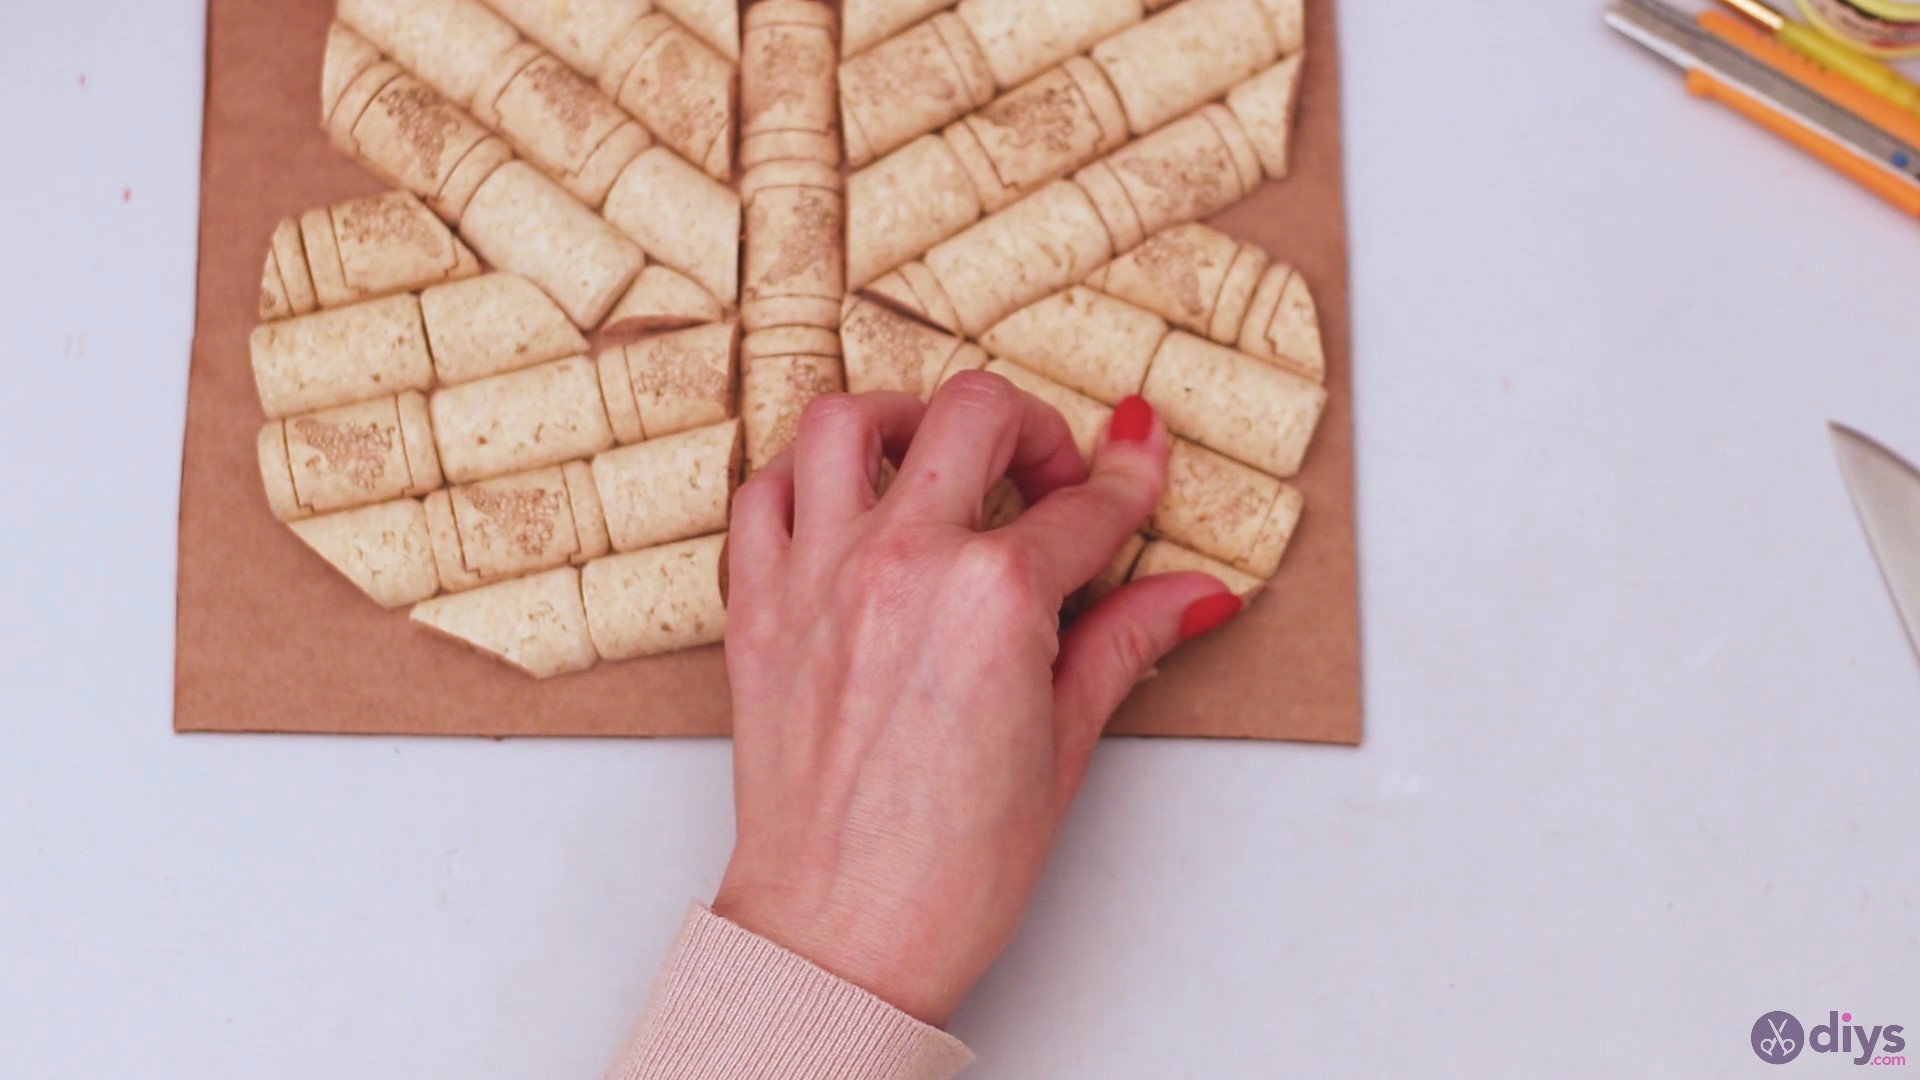
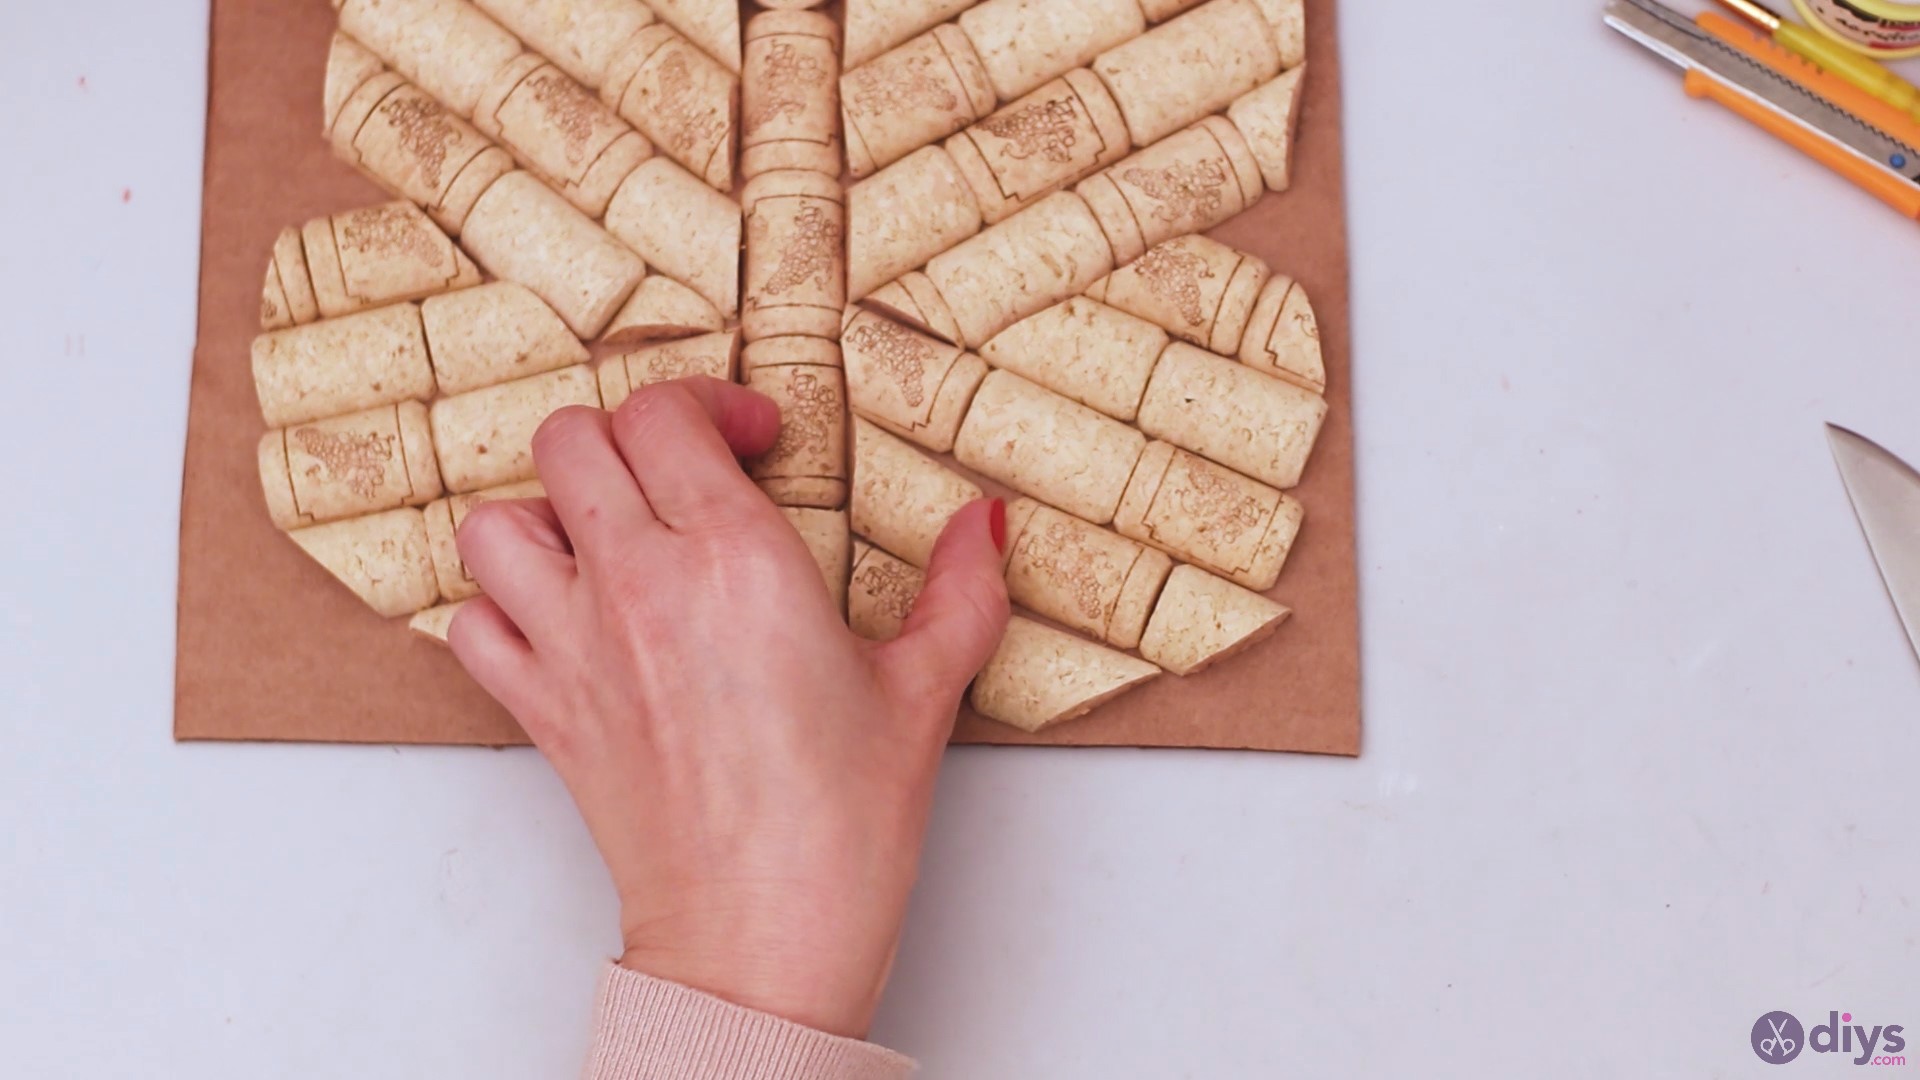
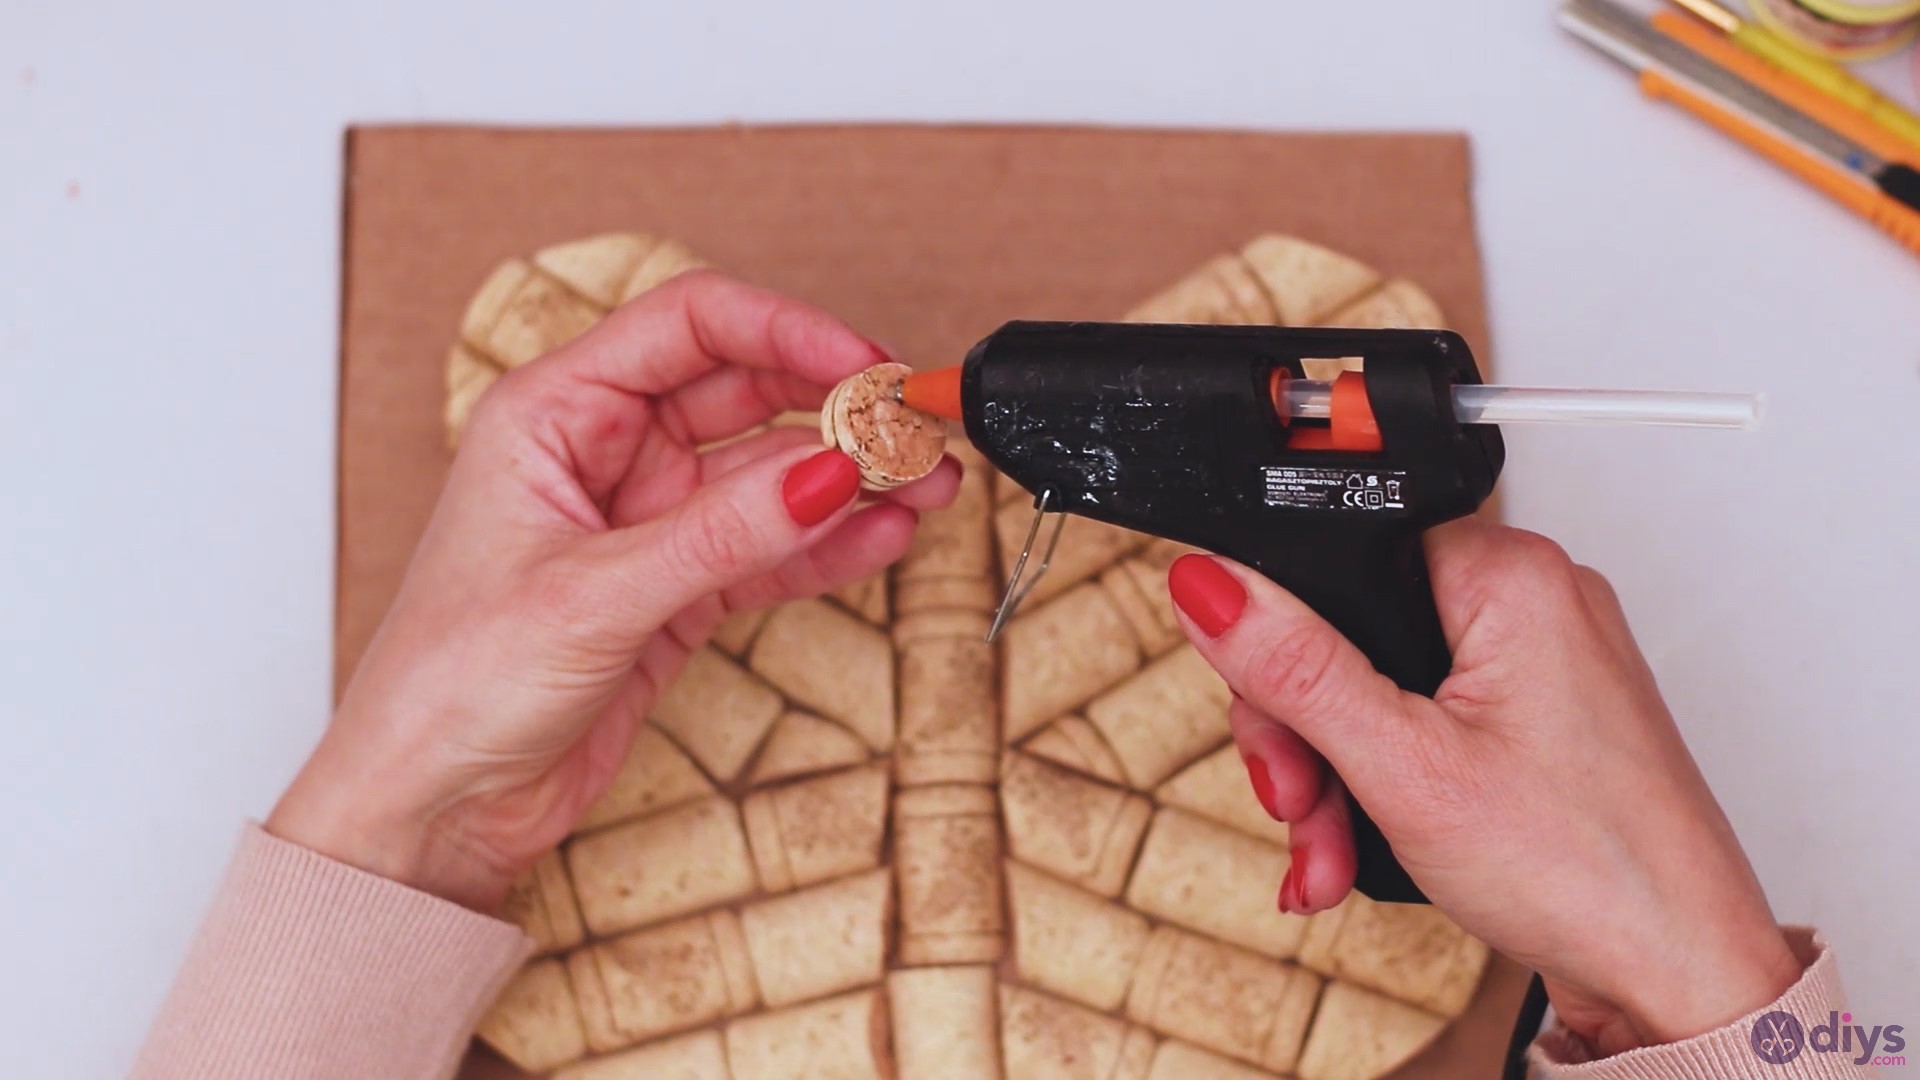
Now that we’re sure we’re done cutting the wine corks and puzzling them together, it’s time to start gluing them to the cardboard. Pick up piece by piece, add some hot glue to the back and stick it to the cardboard. Make sure you press the pieces a little bit so the glue sets.
After gluing the head, continue with the body pieces. Add enough glue to make sure that it will stick to the cardboard and not fall off later on.

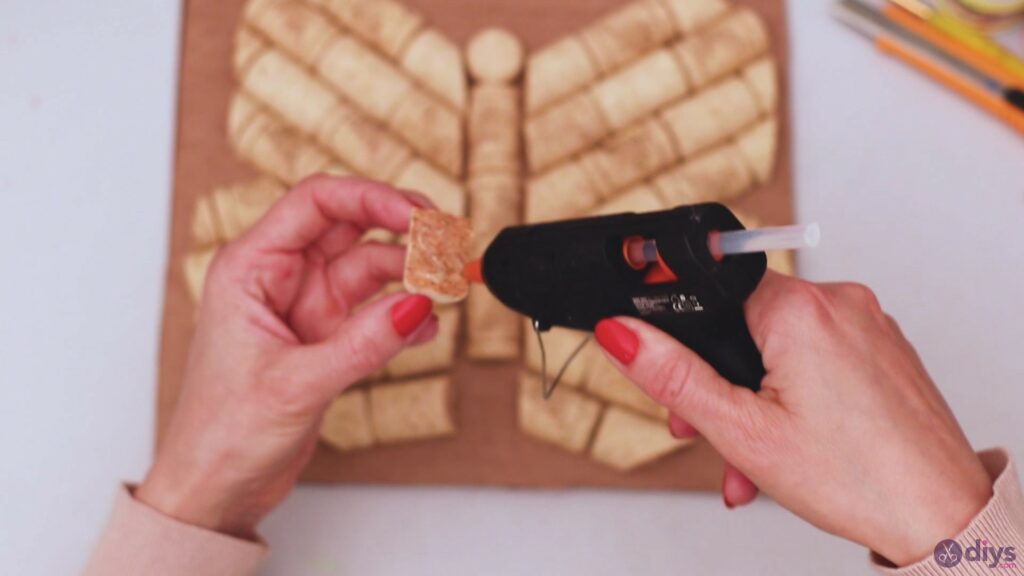

Now it’s time to start adding hot glue to the wing pieces. There’s a lot of them and you want to make sure that when you press them into the cardboard, they’re in the right position. Since you’re picking the pieces one by one, you shouldn’t have any issues in remembering their correct spot.
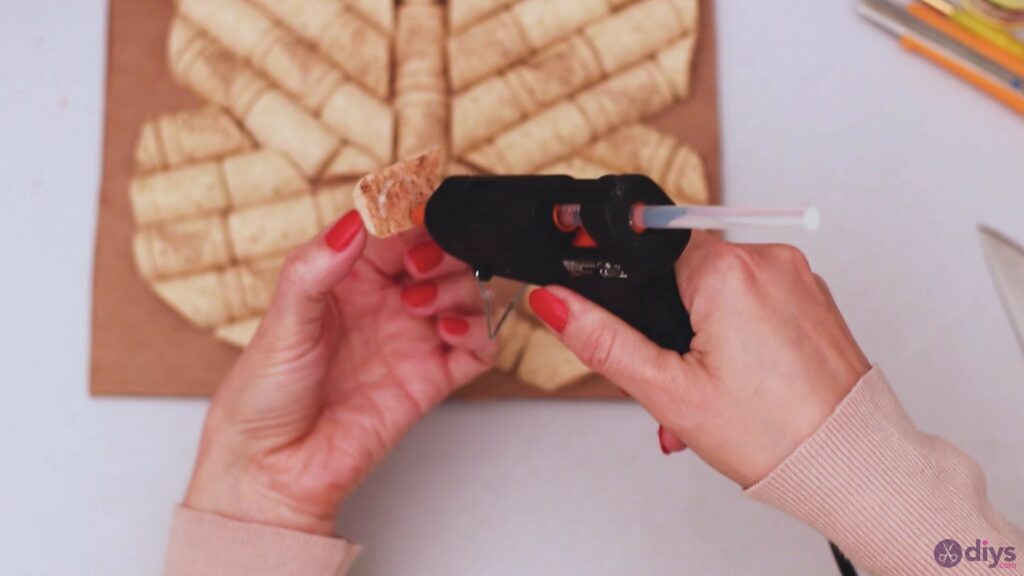

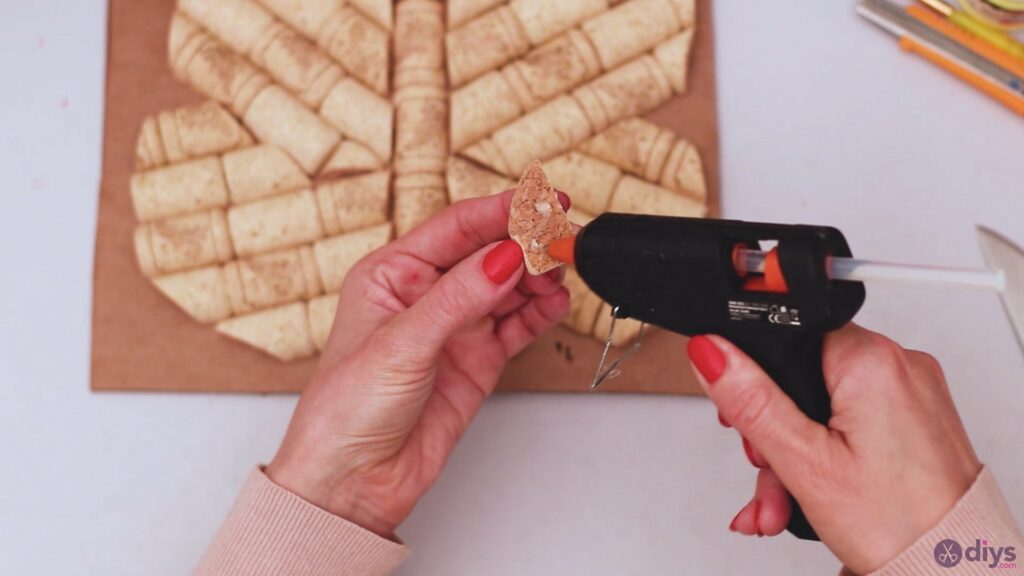
When you add the wine corks, make sure you also press them together by pushing them a little into the neighboring pieces, so the design looks tight.

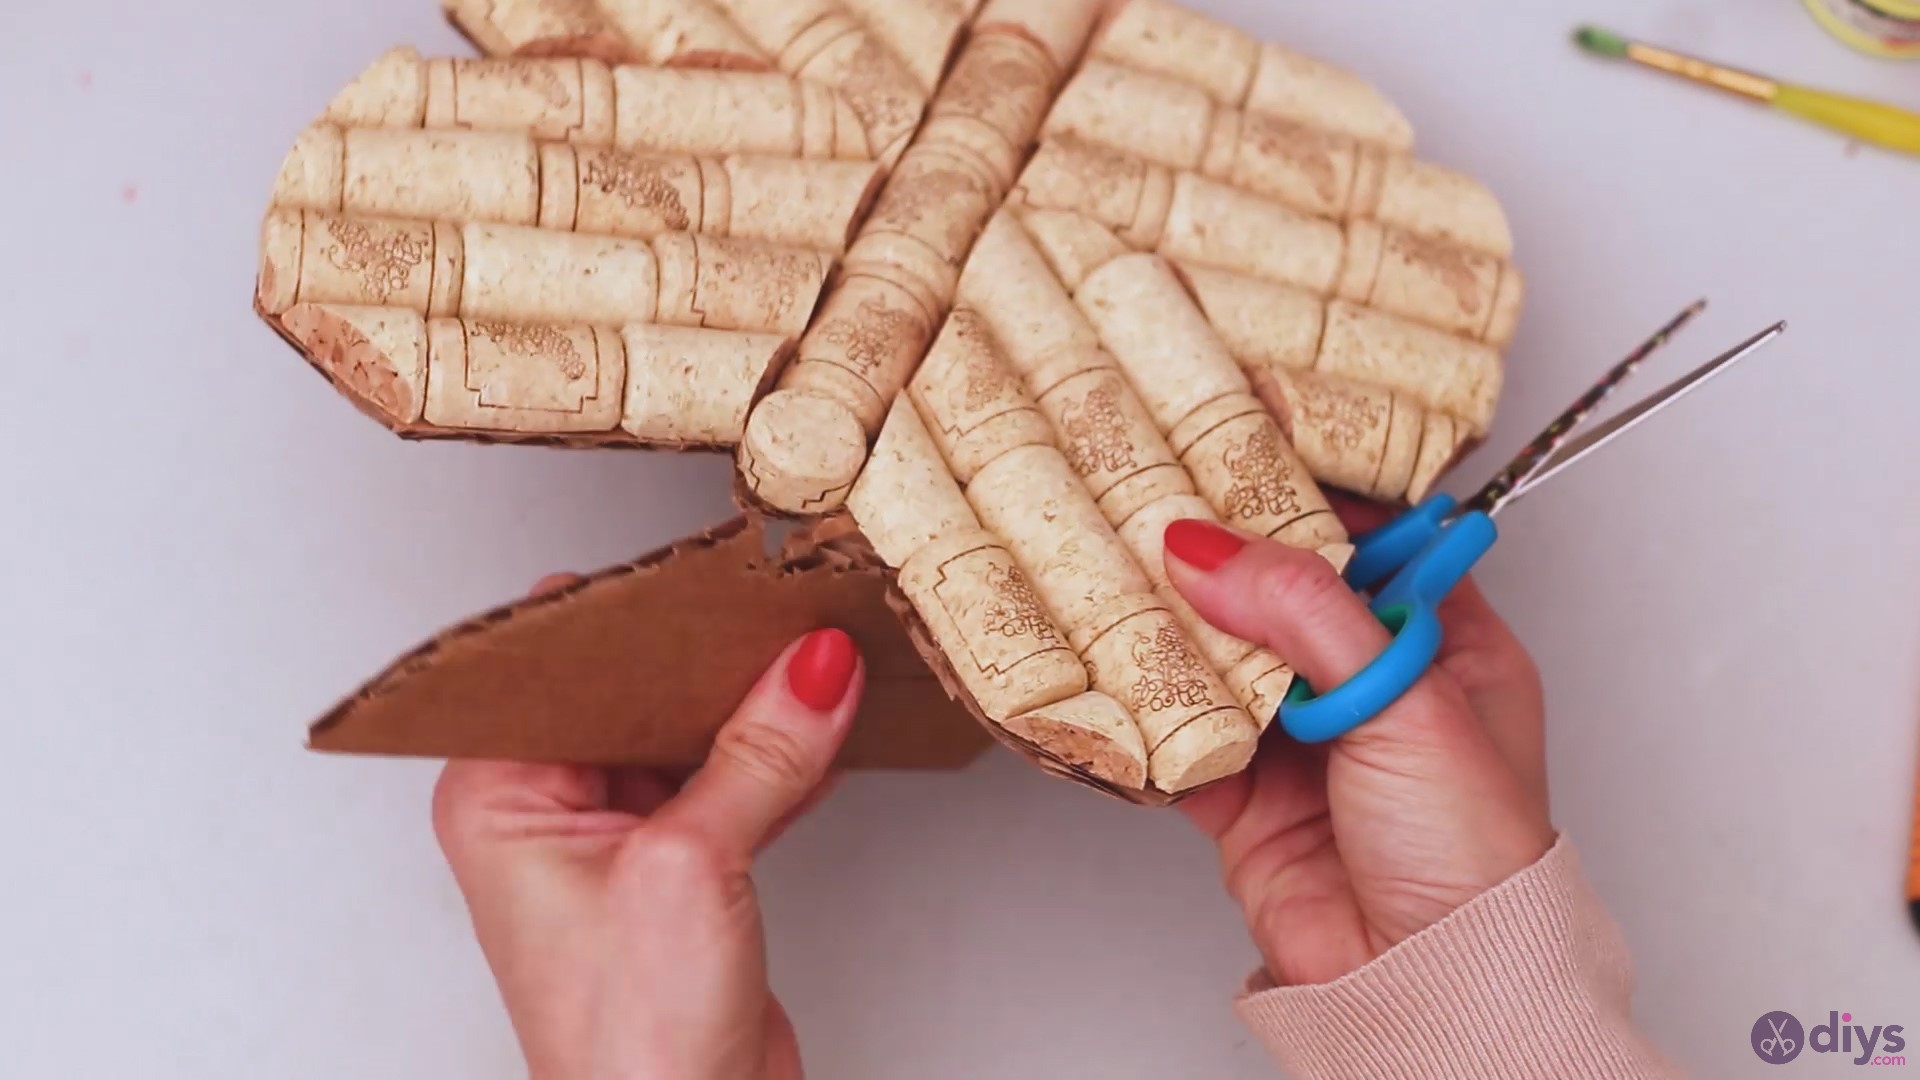
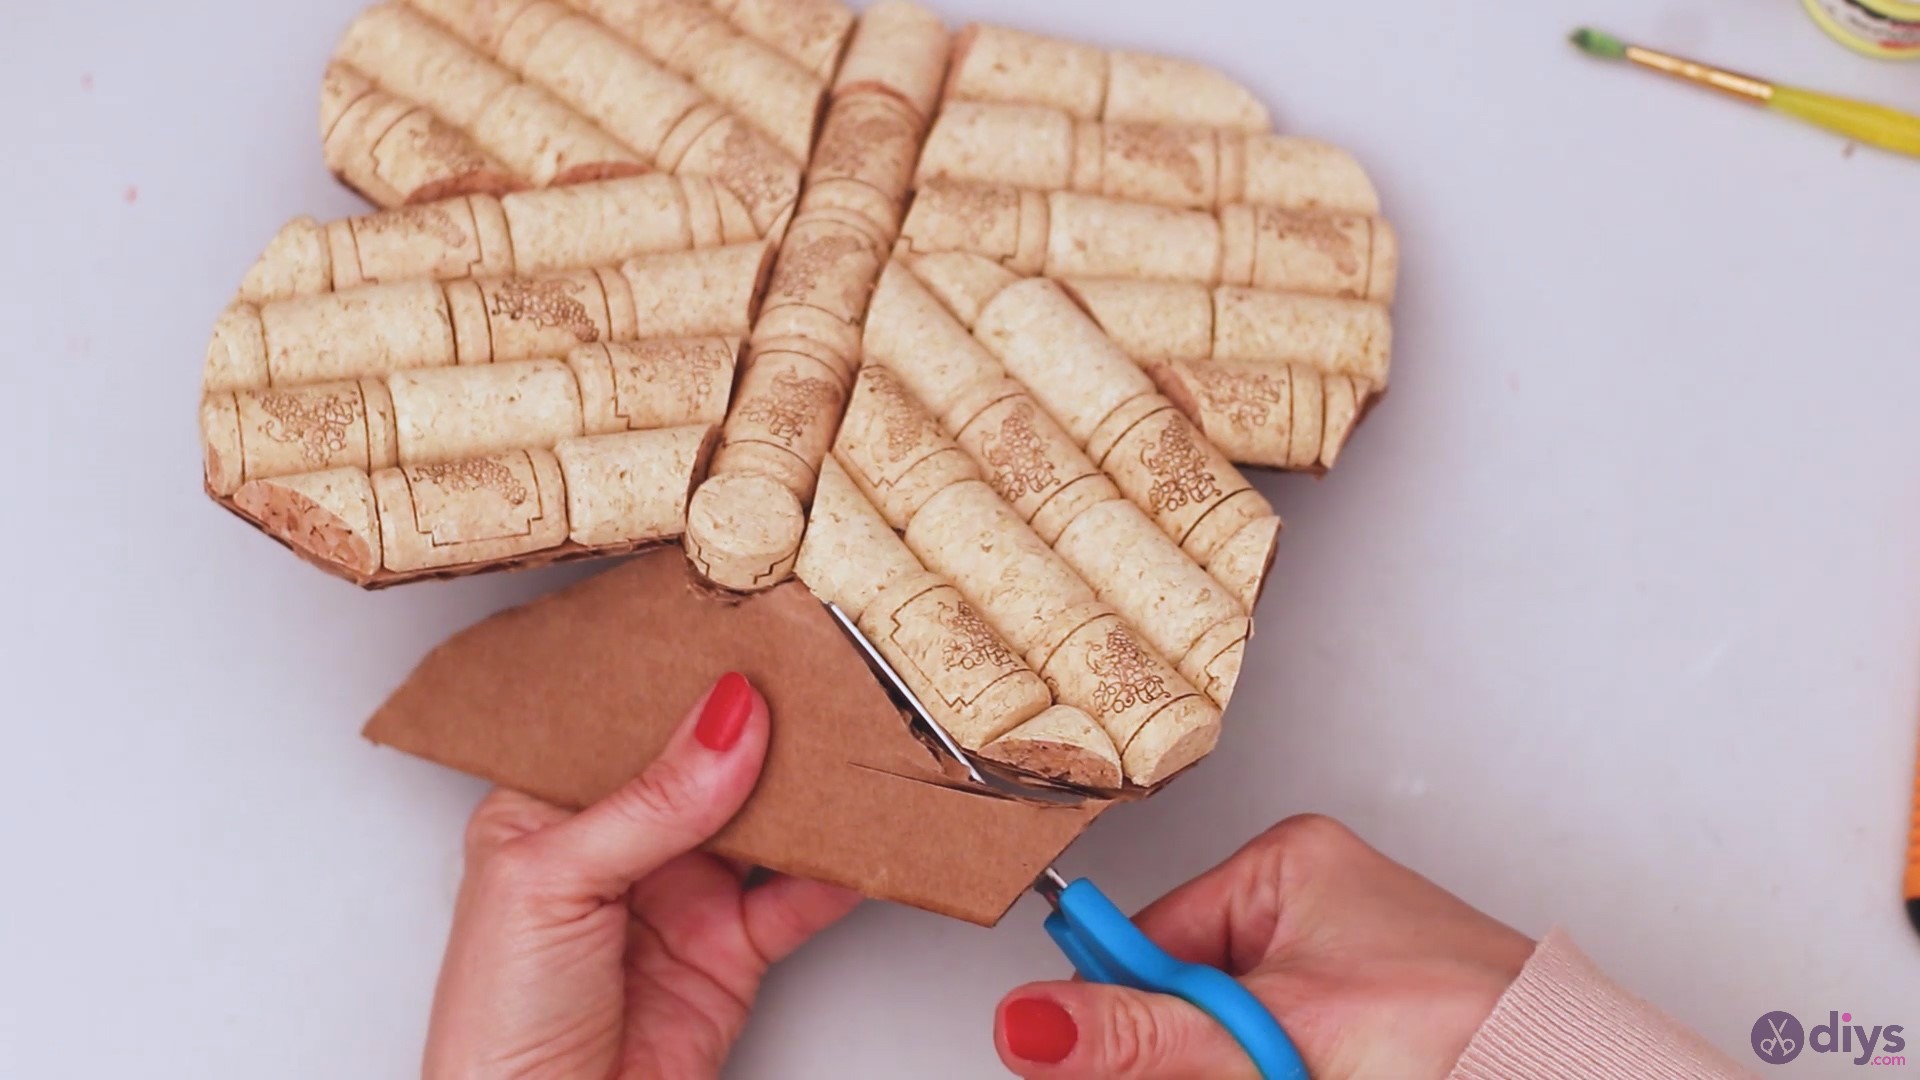
Step 5: Cut the cardboard
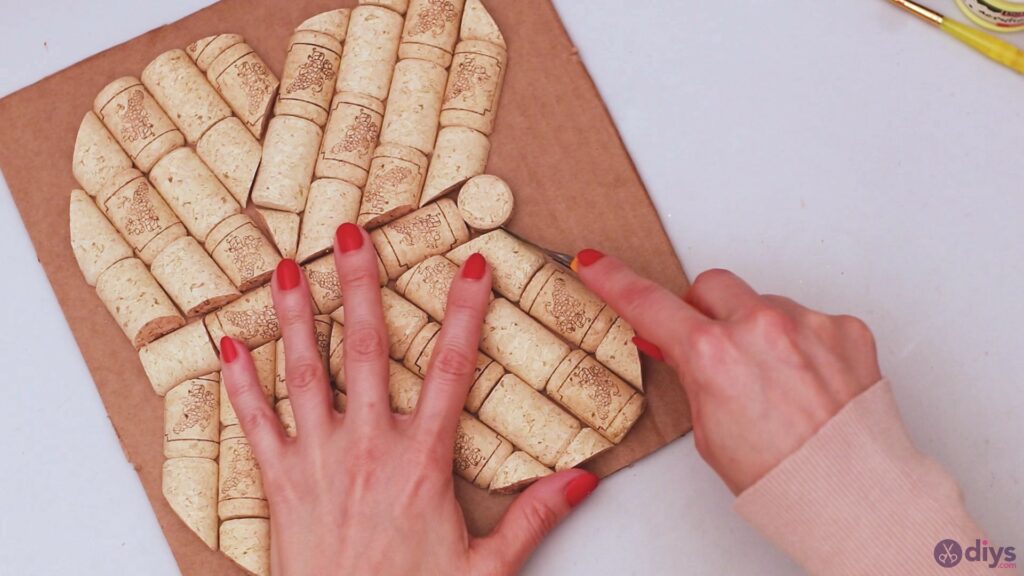
Now that you’ve glued all the pieces, it’s time you take out your utility knife and start cutting the outline of the butterfly. Move the blade slowly into the cardboard – you don’t want it to cut through and damage your table, but you do want to mark the material enough that you know where to use the scissors on.

Now it’s time to get thescissorsout and cut the outline of the butterfly. Since you already traced the shape with the knife, it will be easier to use your scissors now.
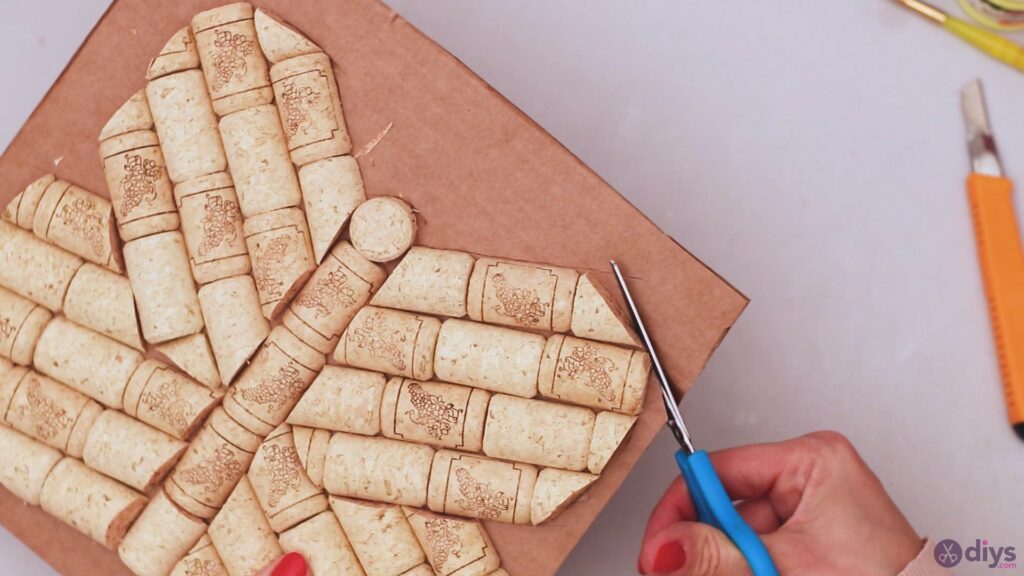
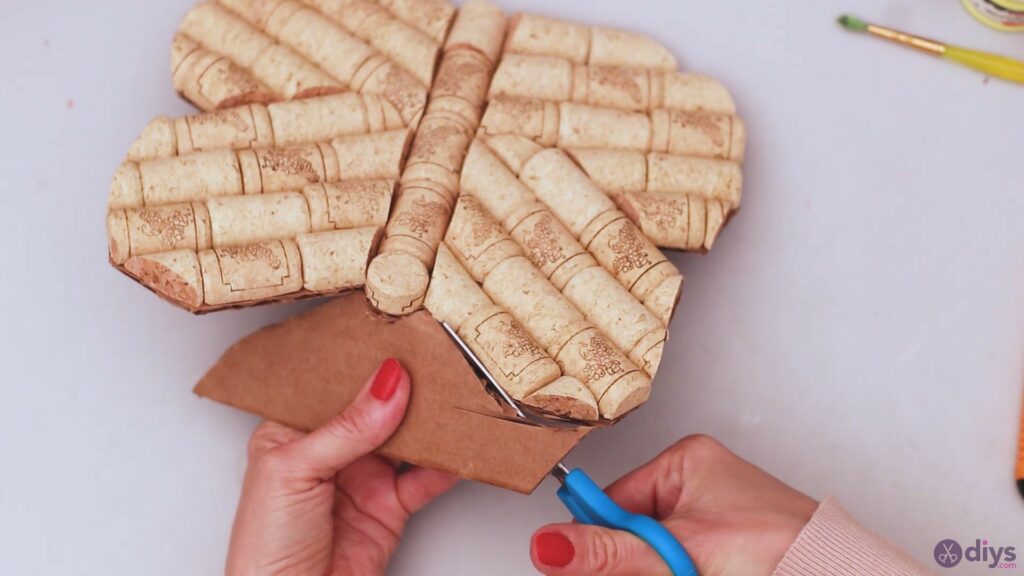
Since the head of the butterfly is round, you’ll want to be extra careful with cutting the cardboard here as it will be trickier.

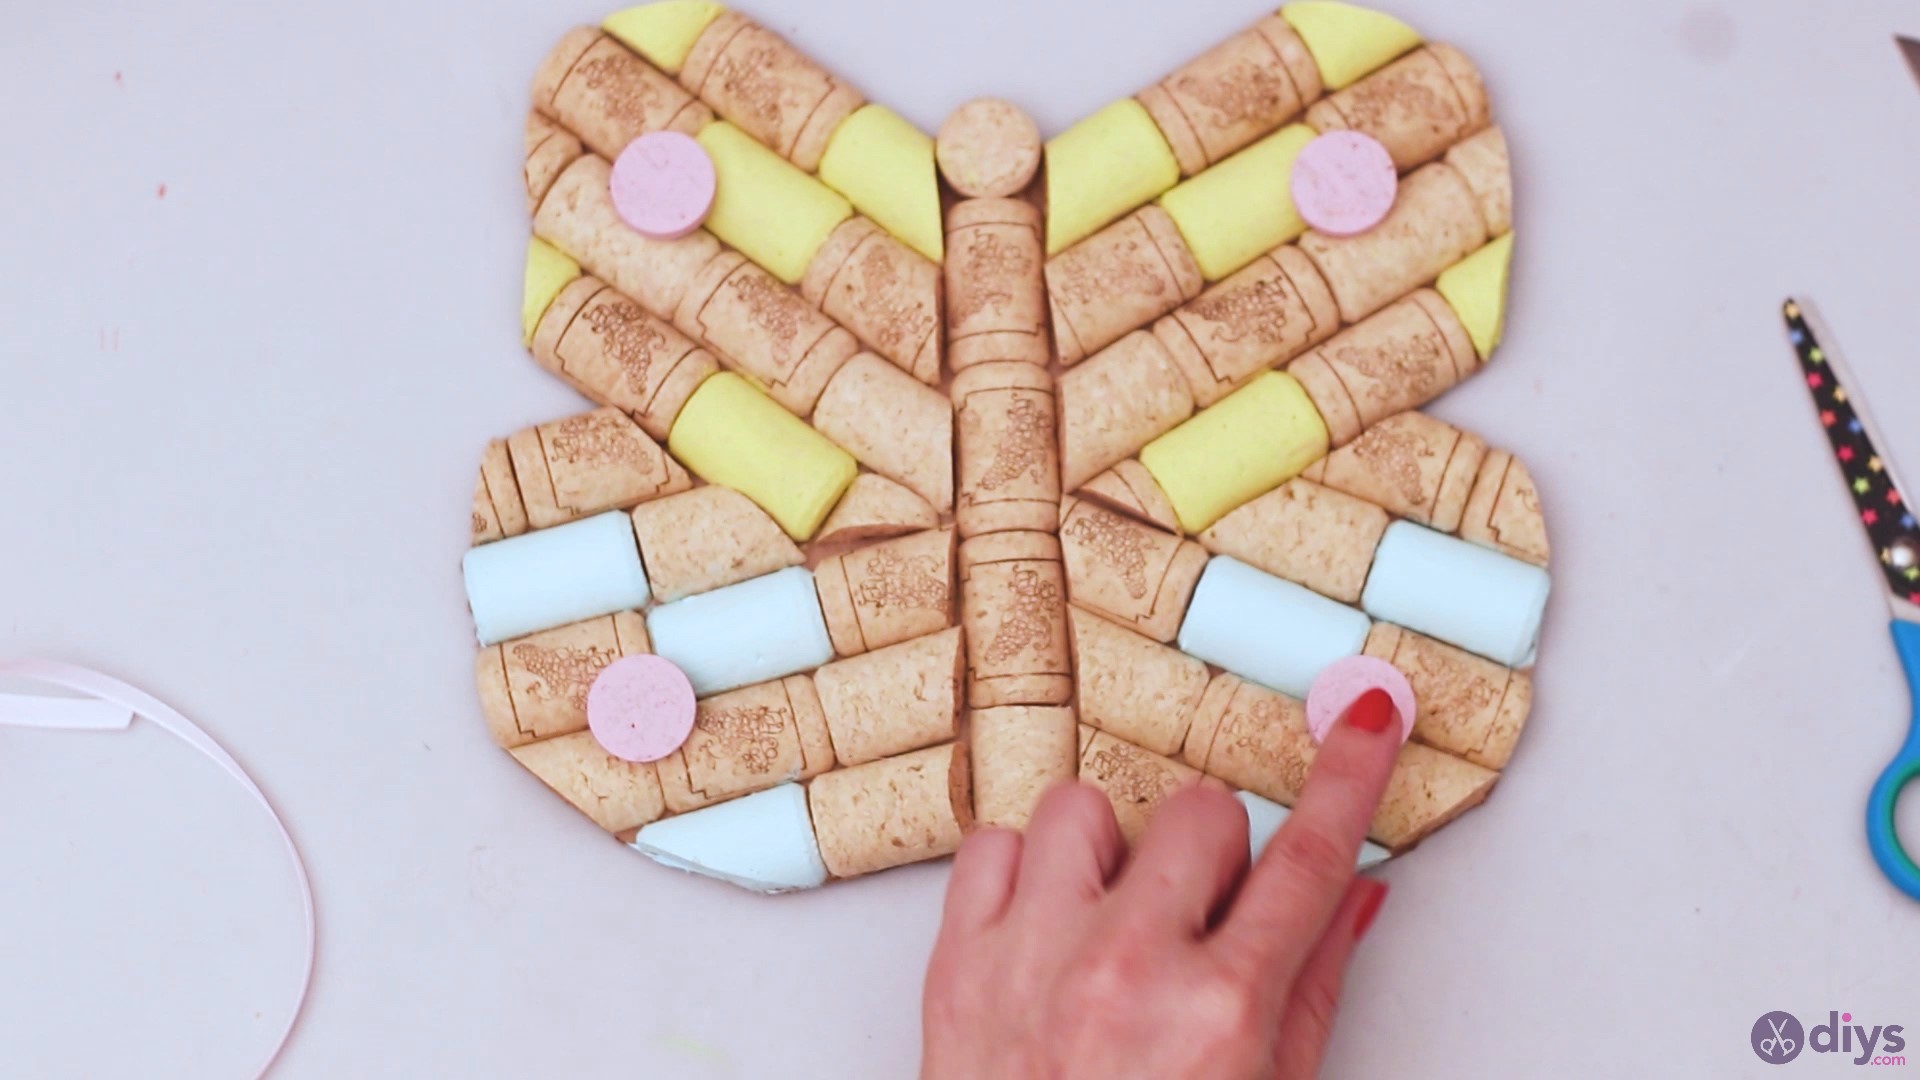
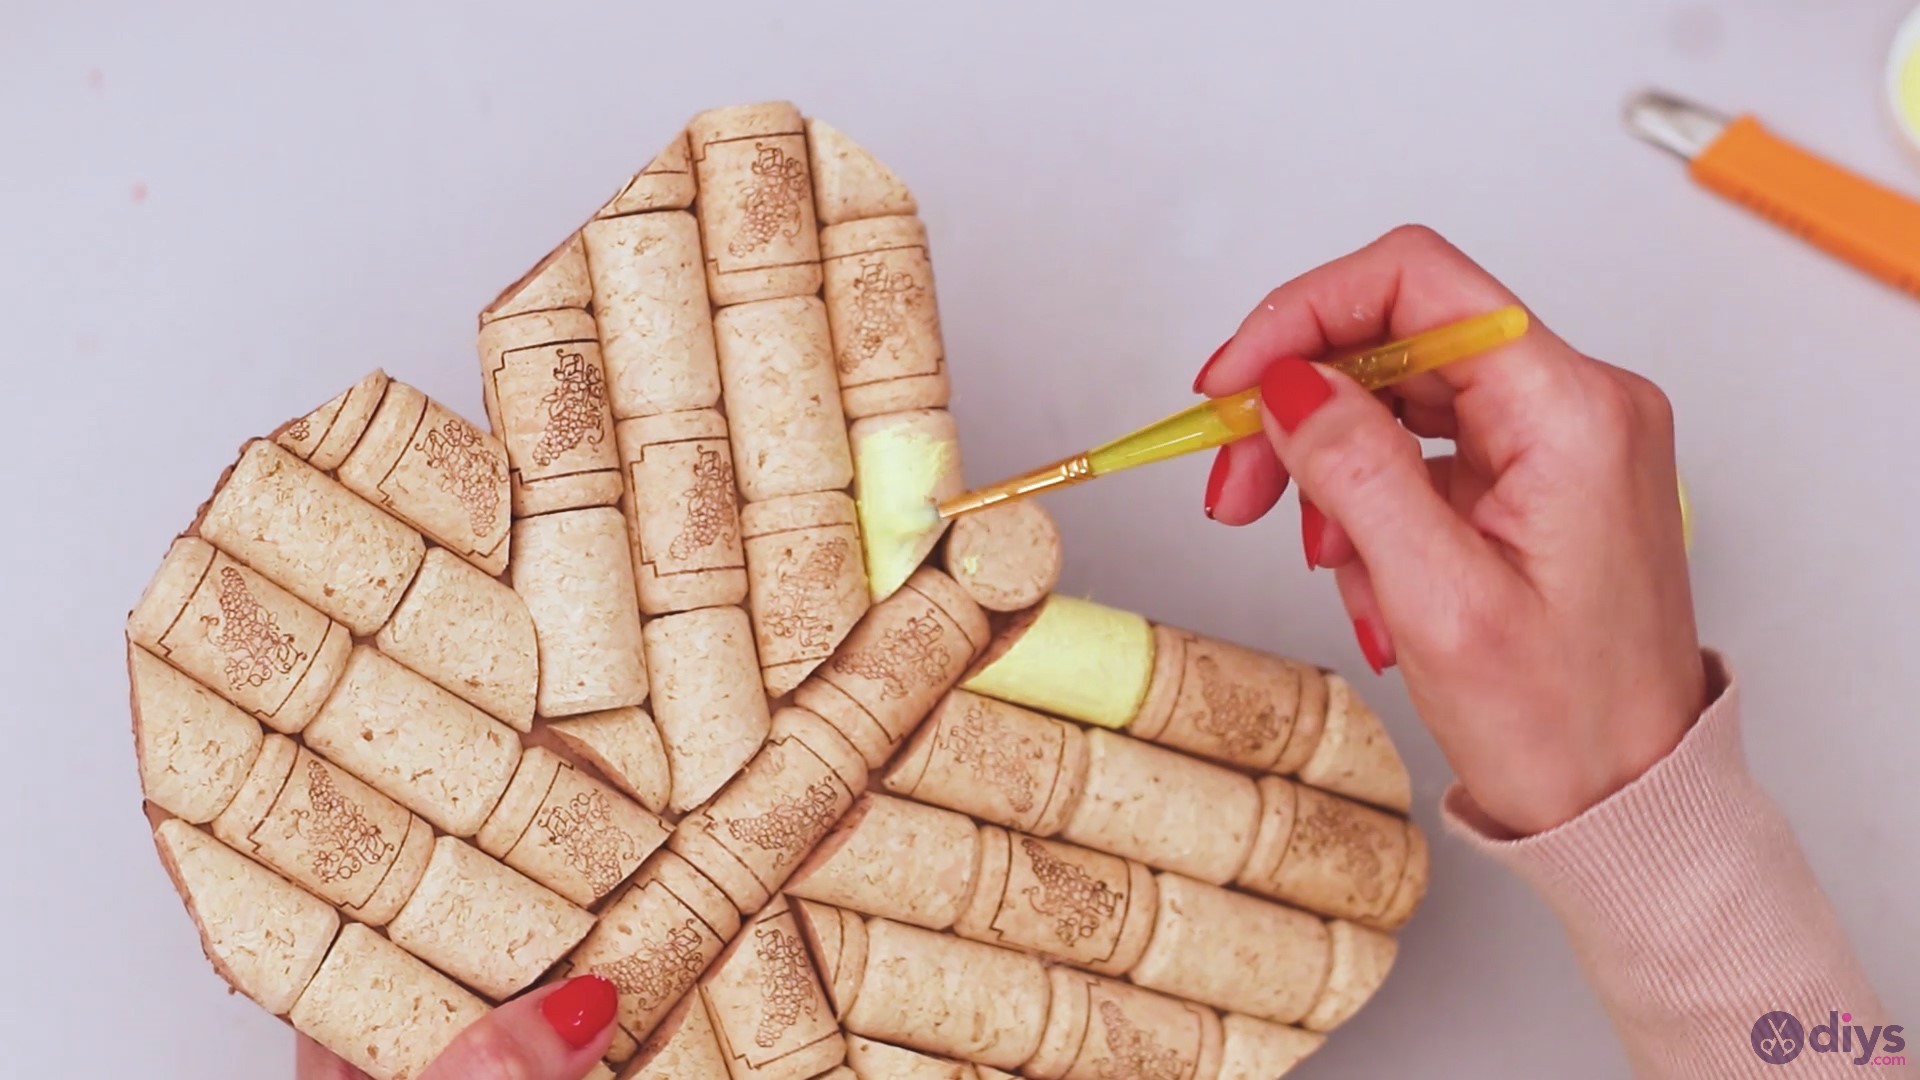
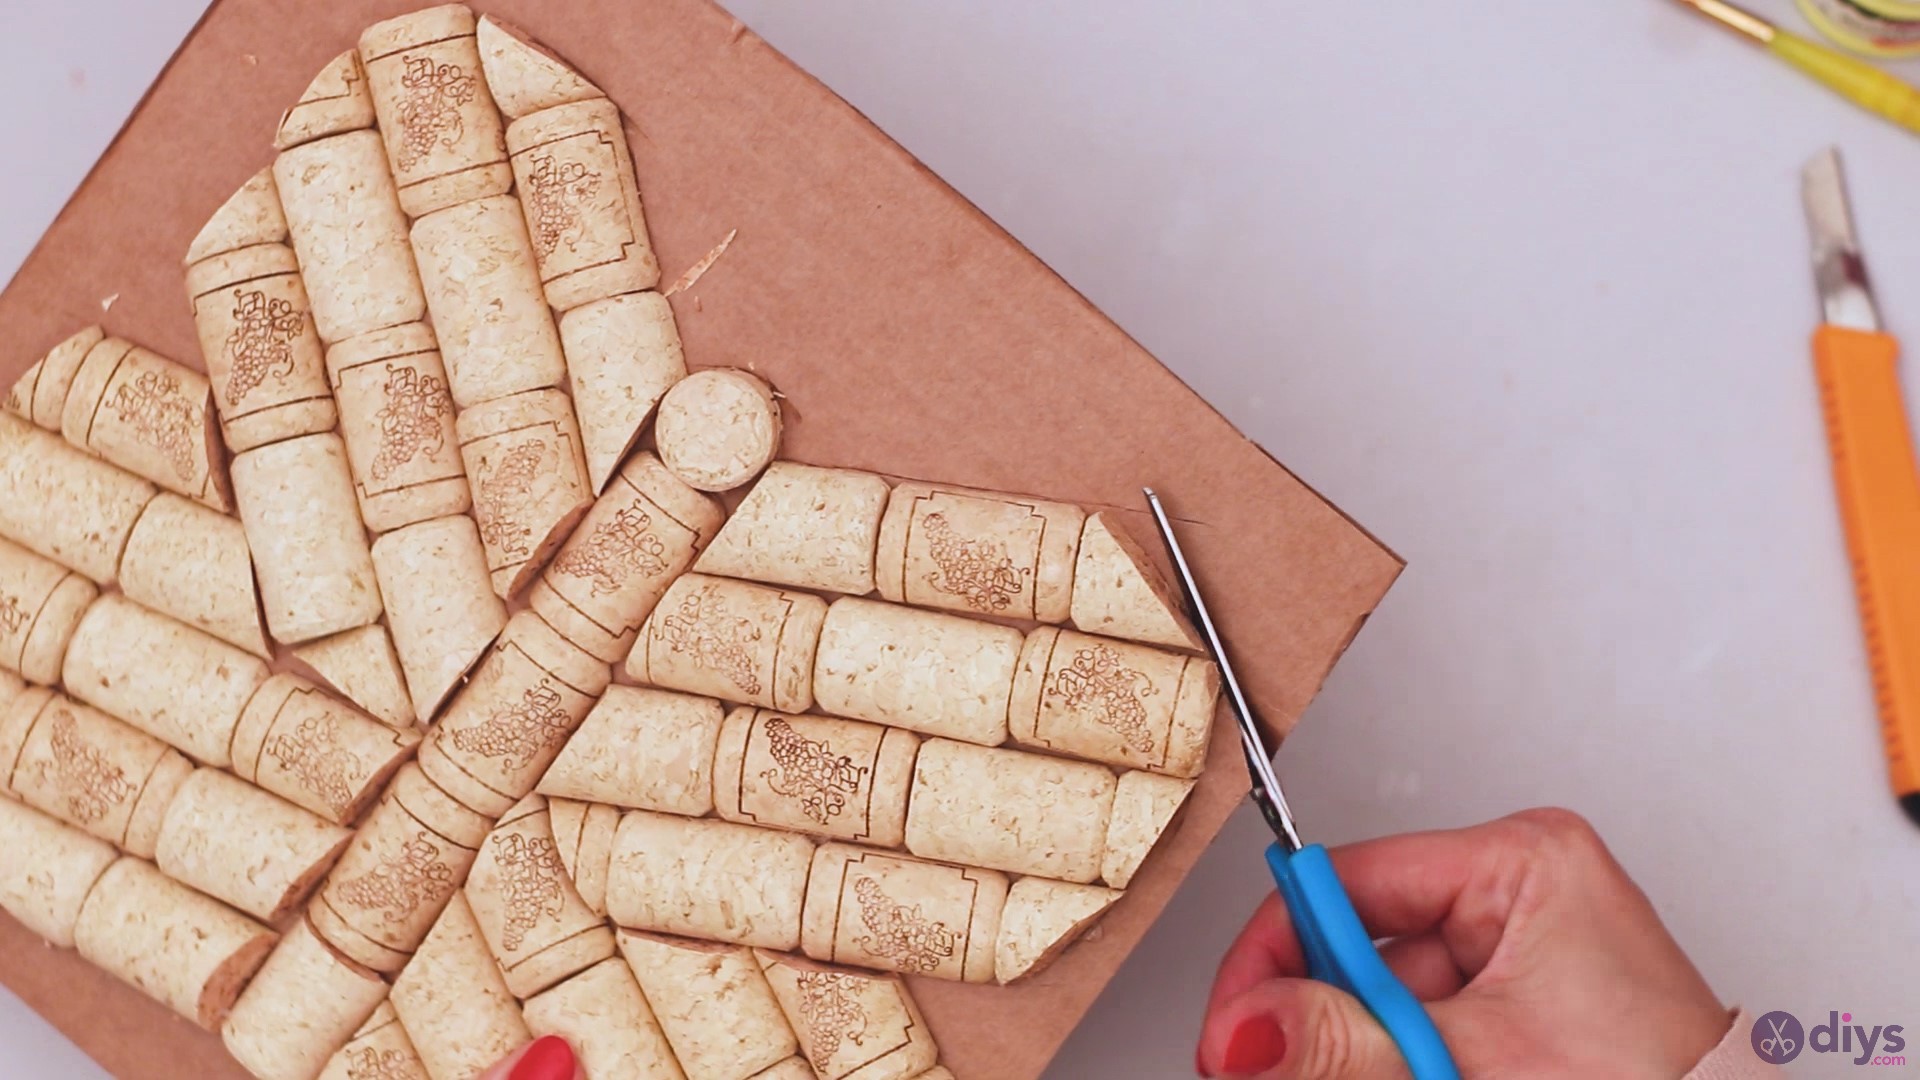
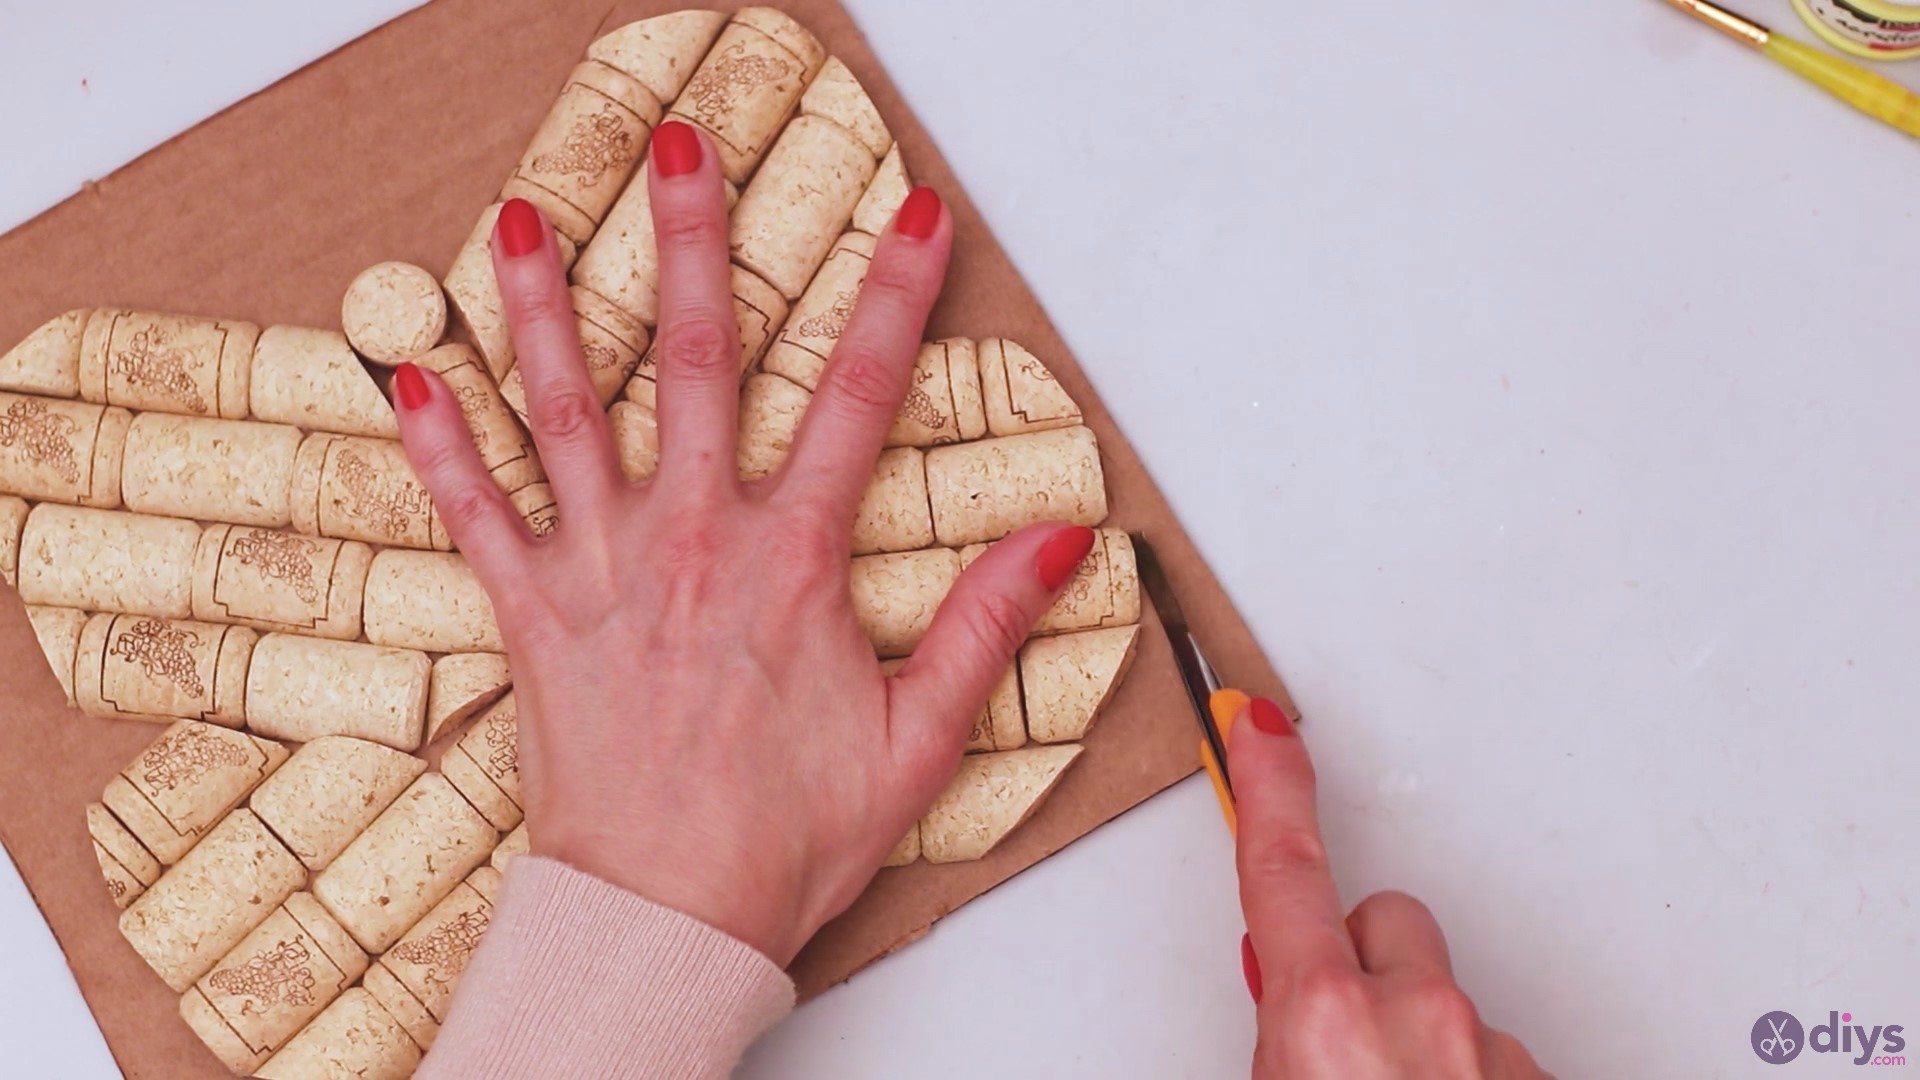
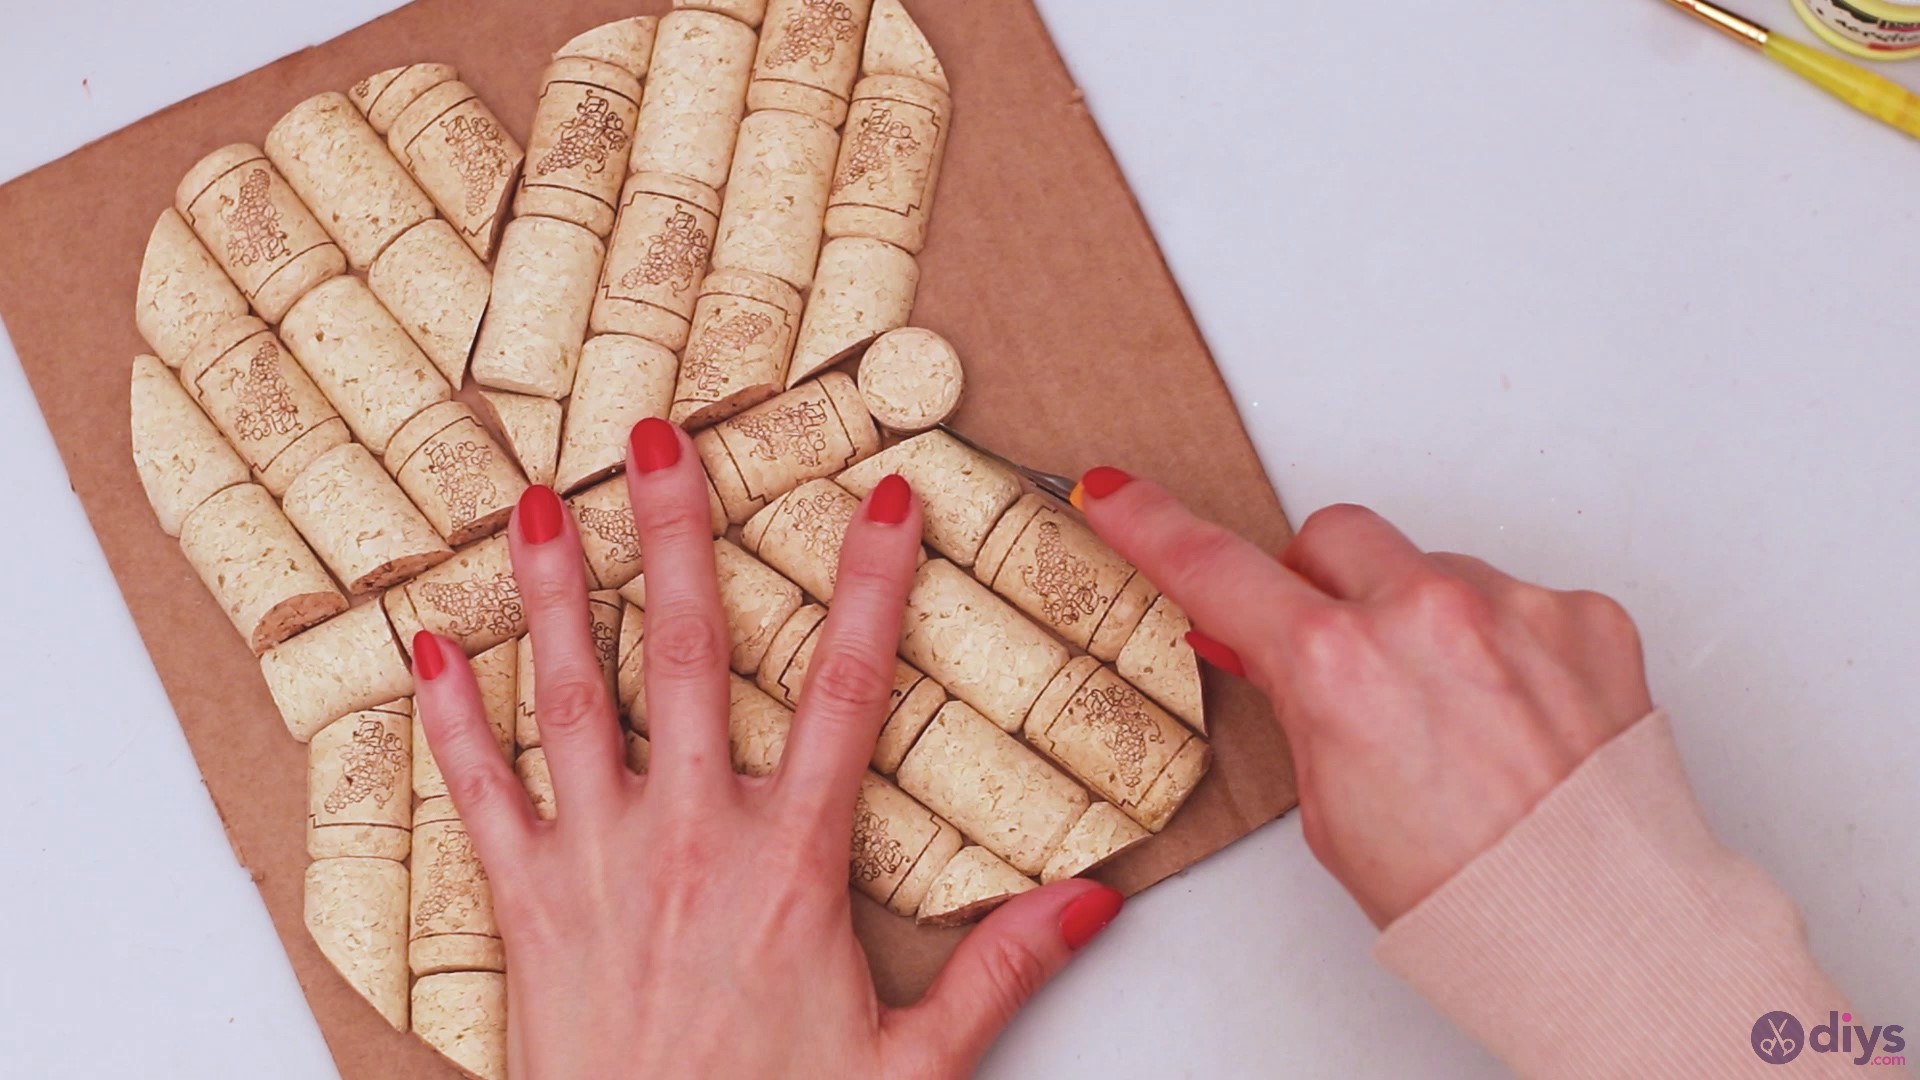
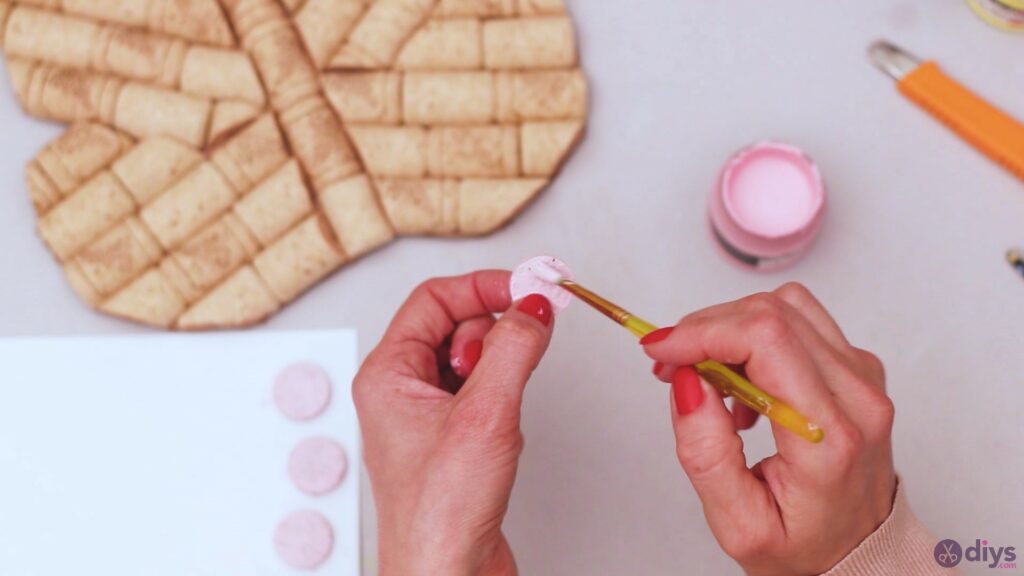
Step 6: Add the details on the butterfly
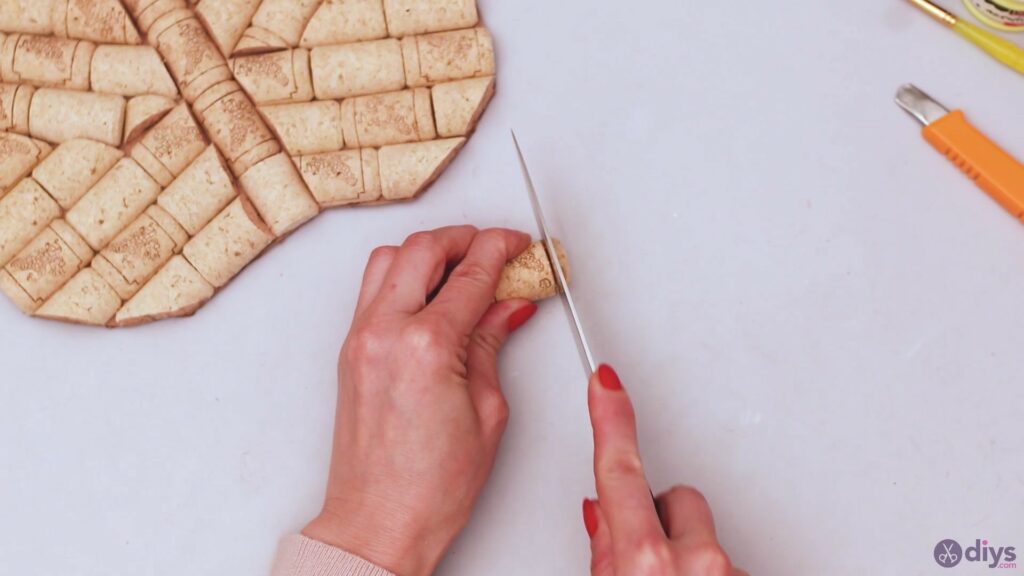
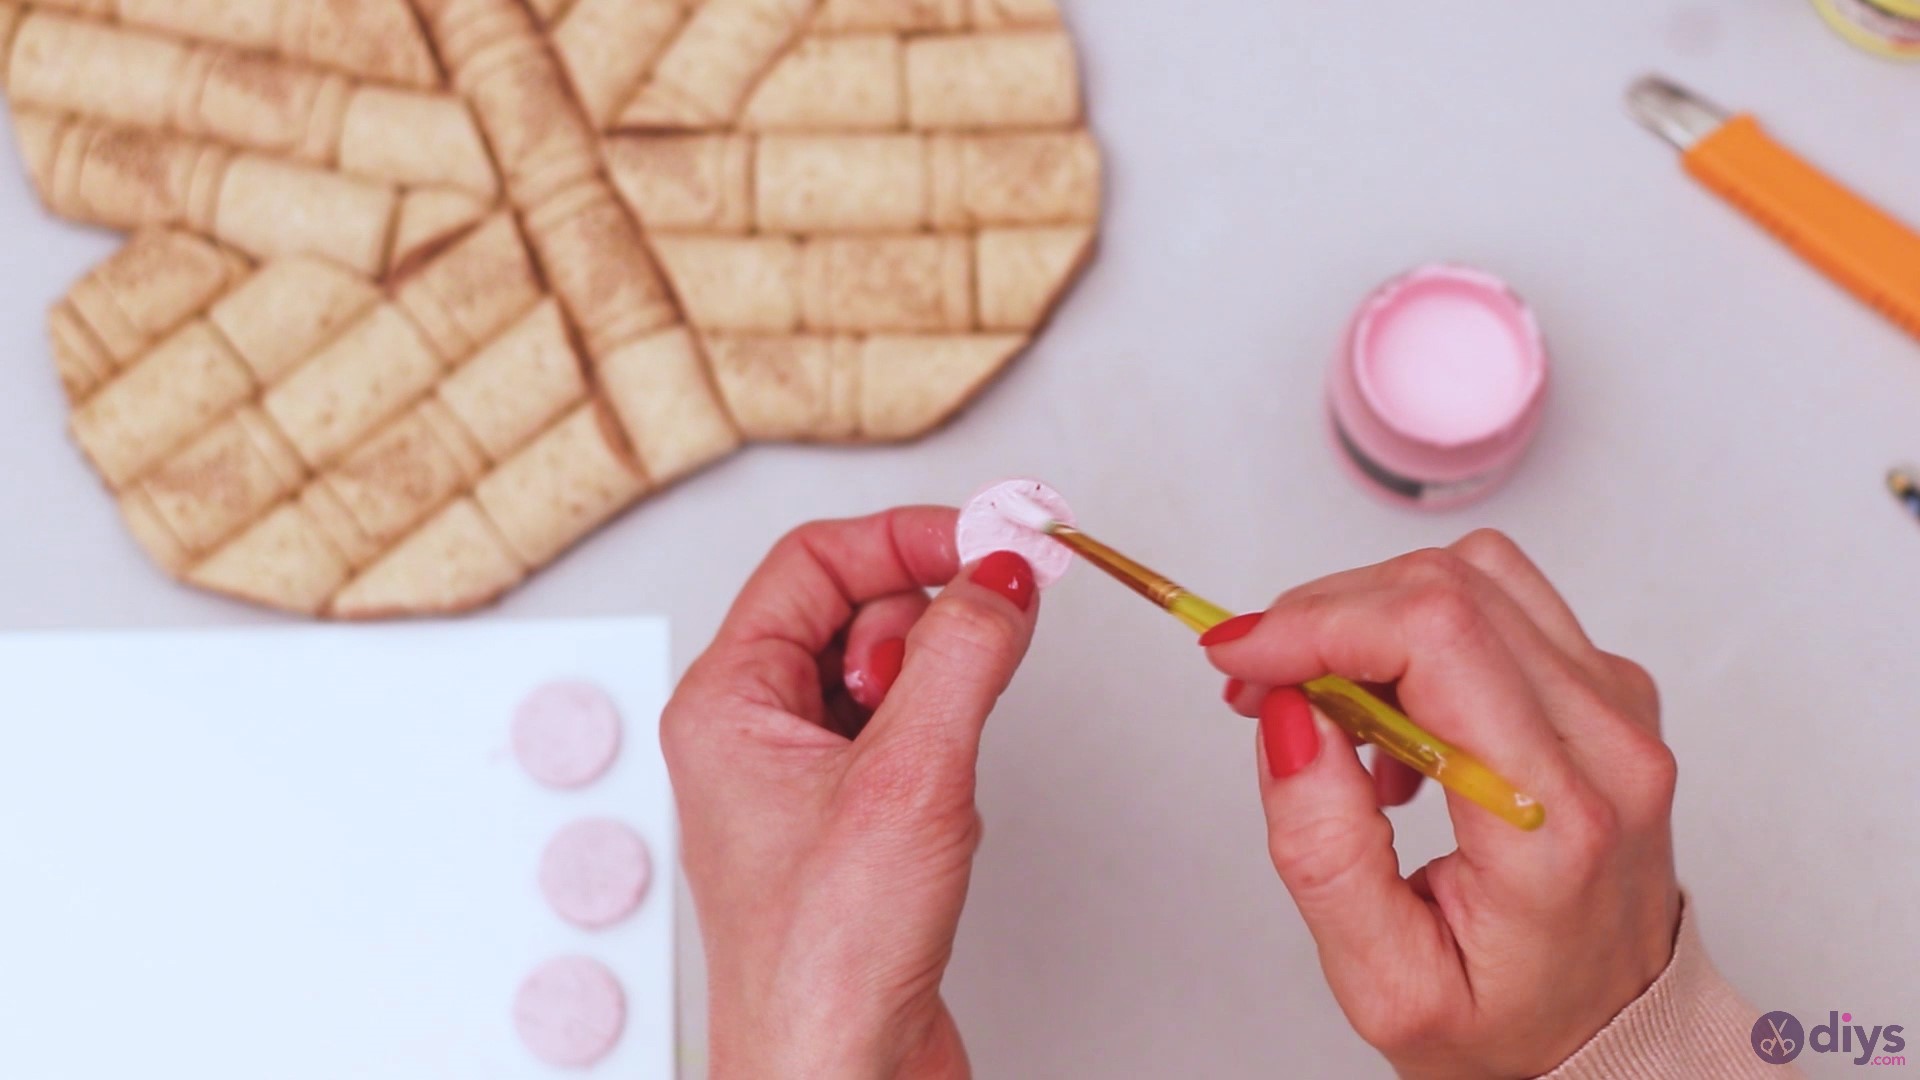
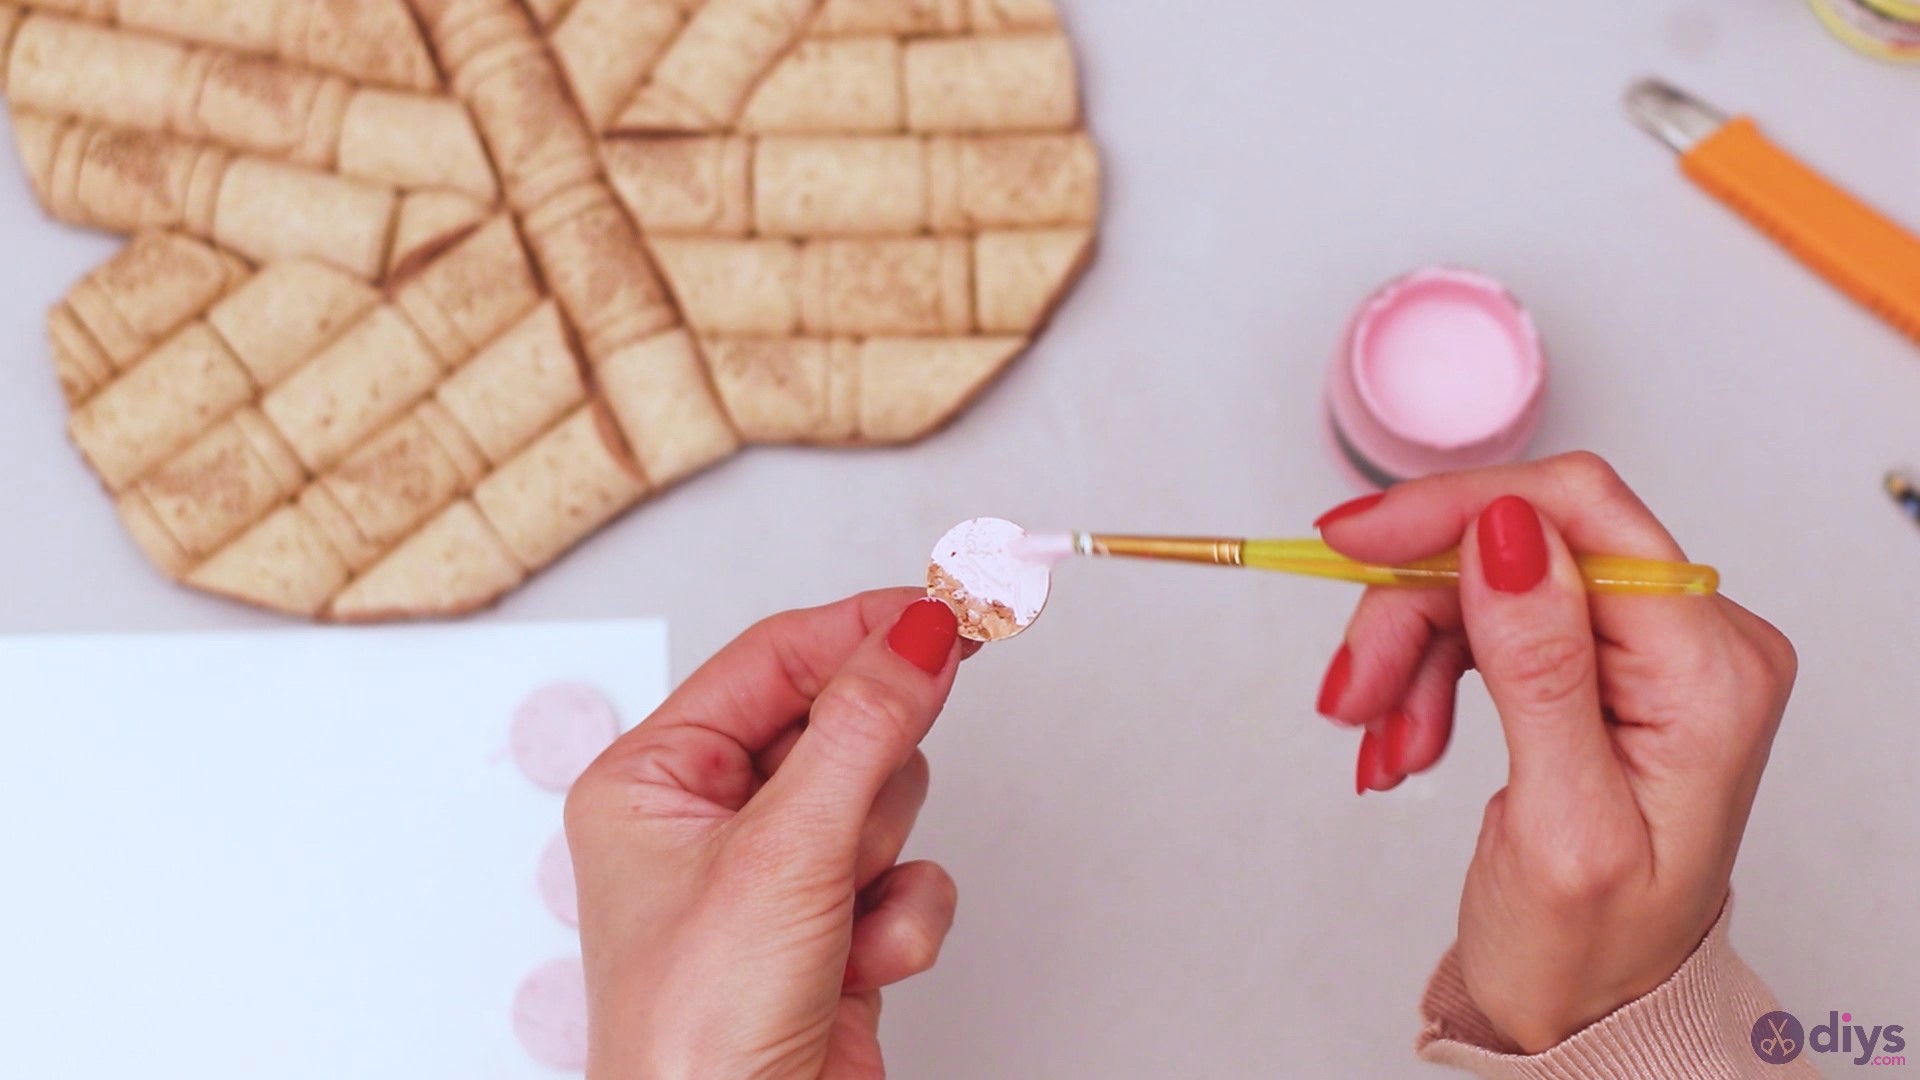
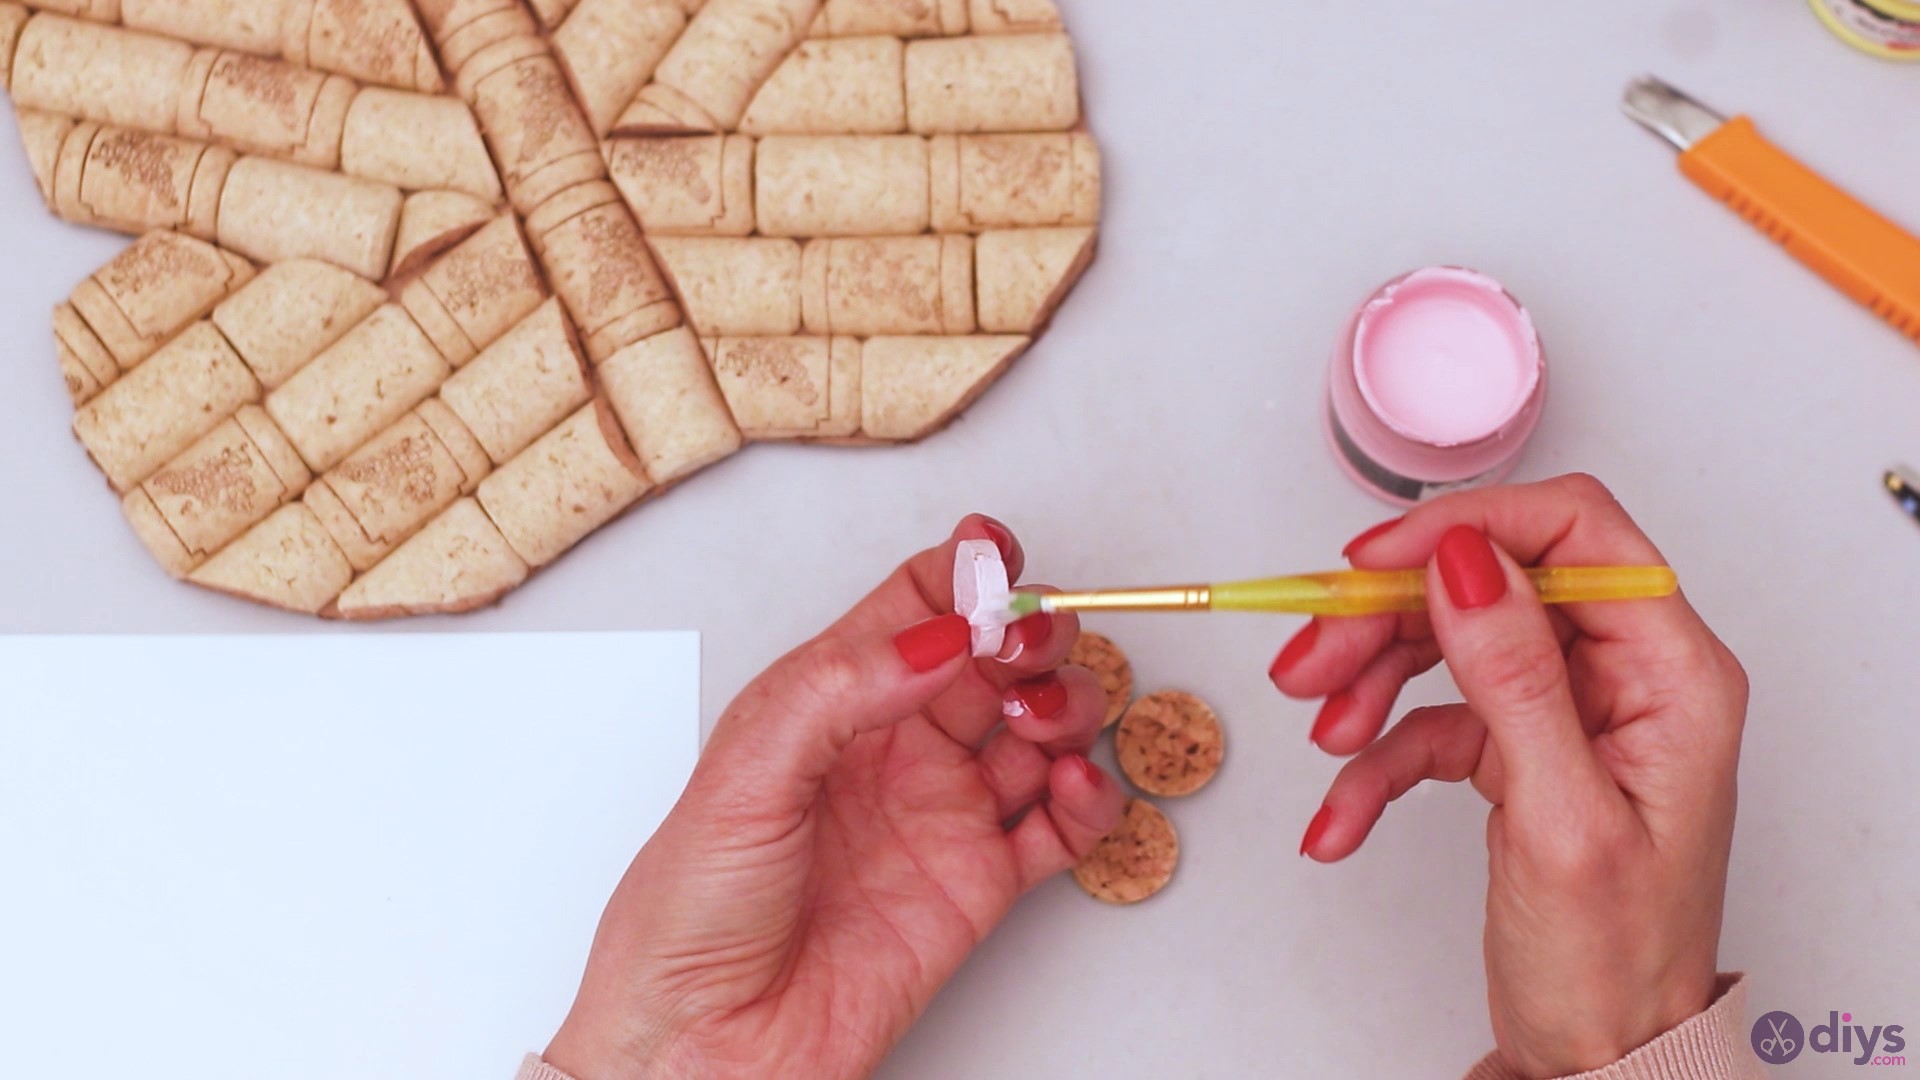
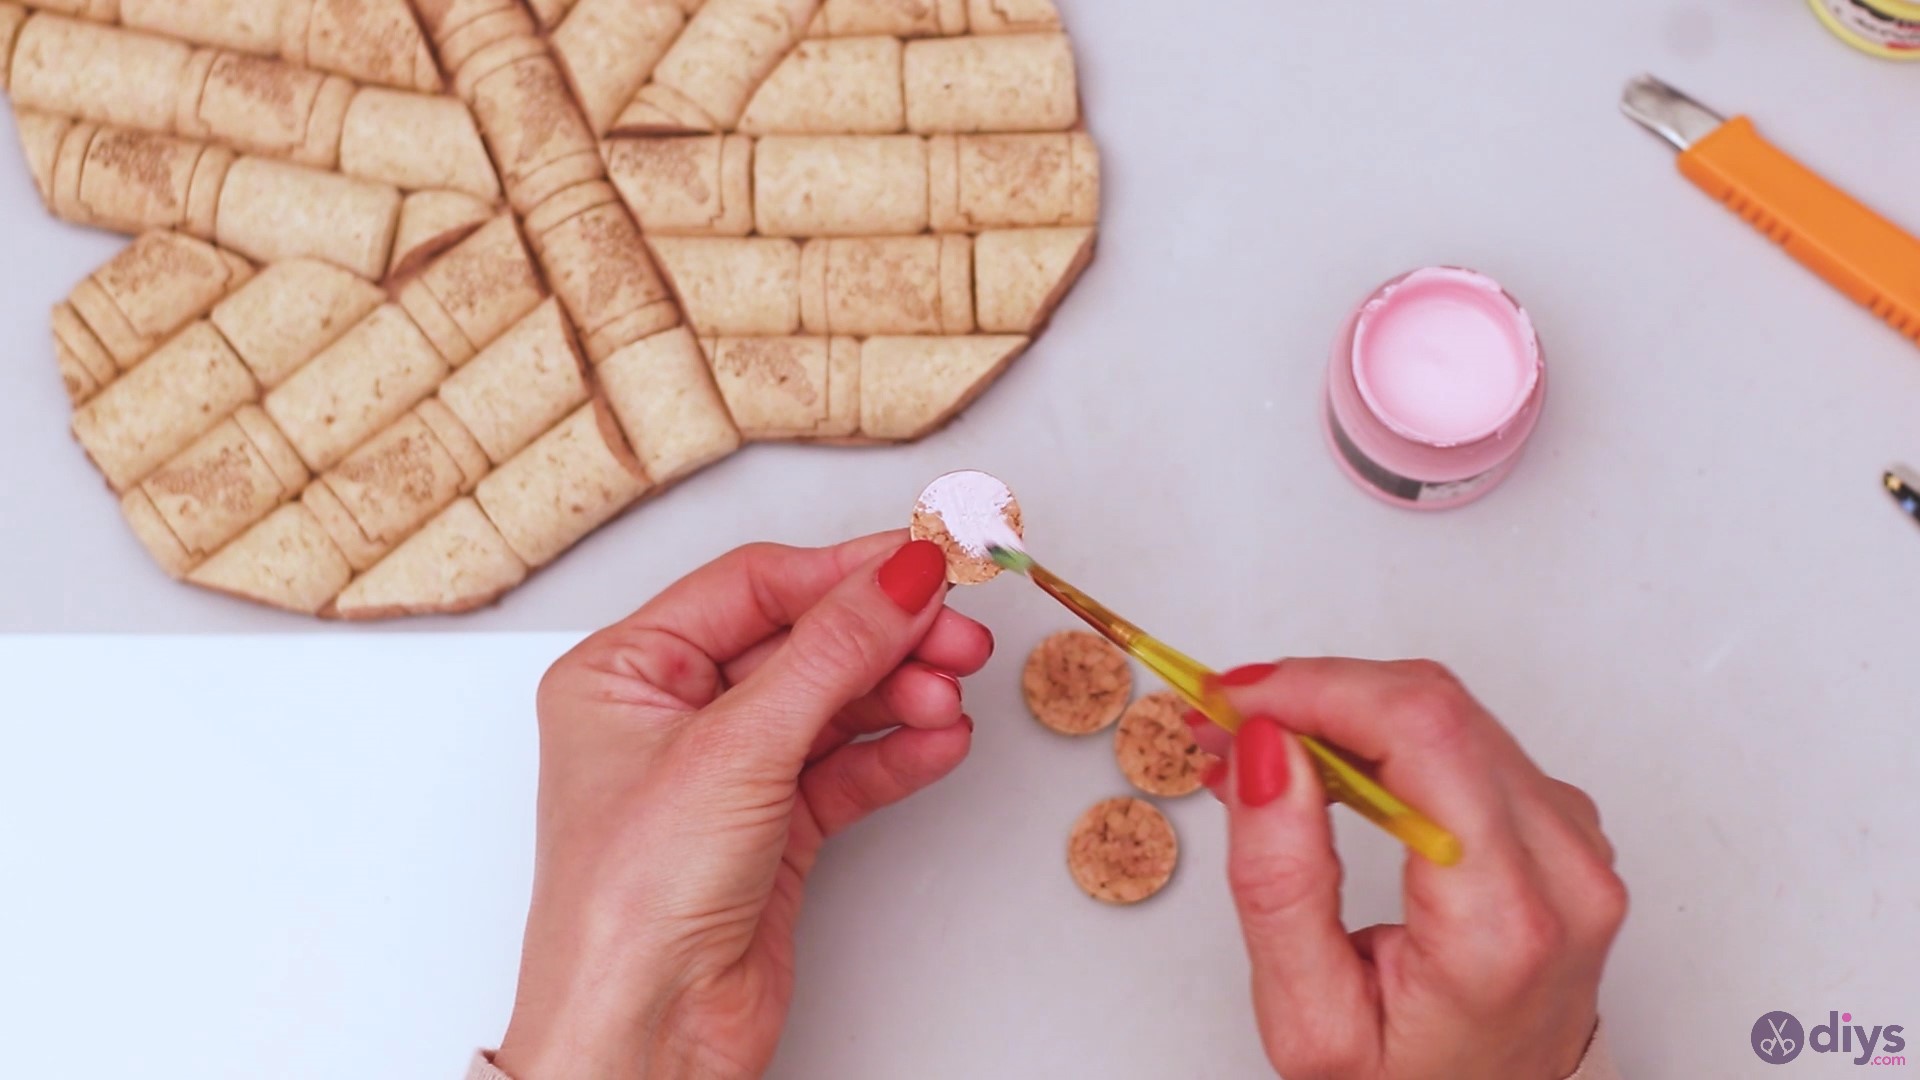
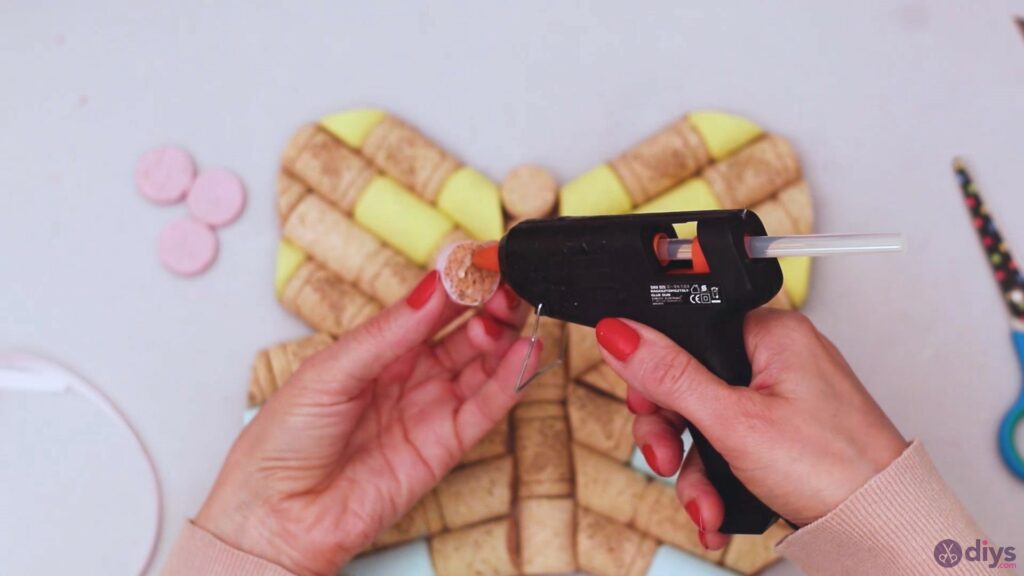
Many butterflies have dots on their wings, distinctive shapes that you can use to tell apart the various species. Since we’re using wine corks, we can’t exactly create a completely realistic design, but it will be nice nonetheless. So, take the knife again and a wine cork you haven’t cut up earlier and slice it up. We’ve cut one cork into six pieces.
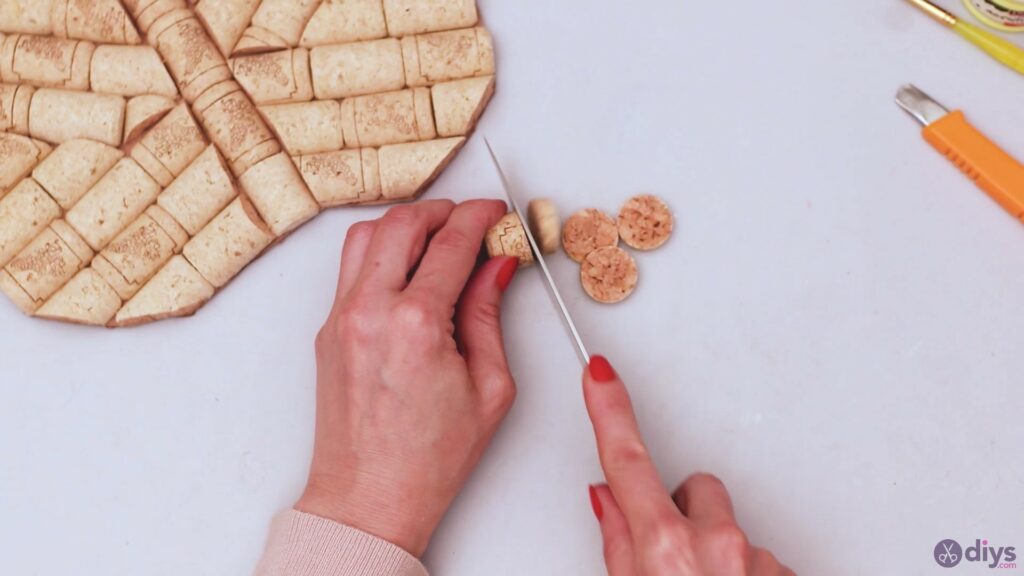
Take the rose acrylic paint and the paintbrush and start painting these cork slices. Once you’ve covered them up except for one side, place them on a piece of paper and leave them off to dry.


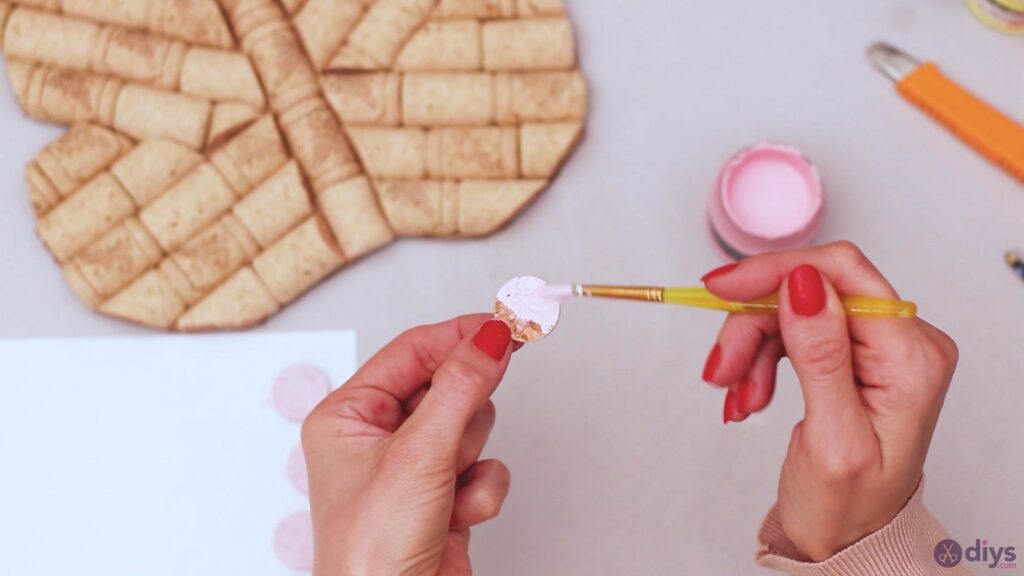
For our design, we ended up using four of the six slices, but you can add more if you want to.
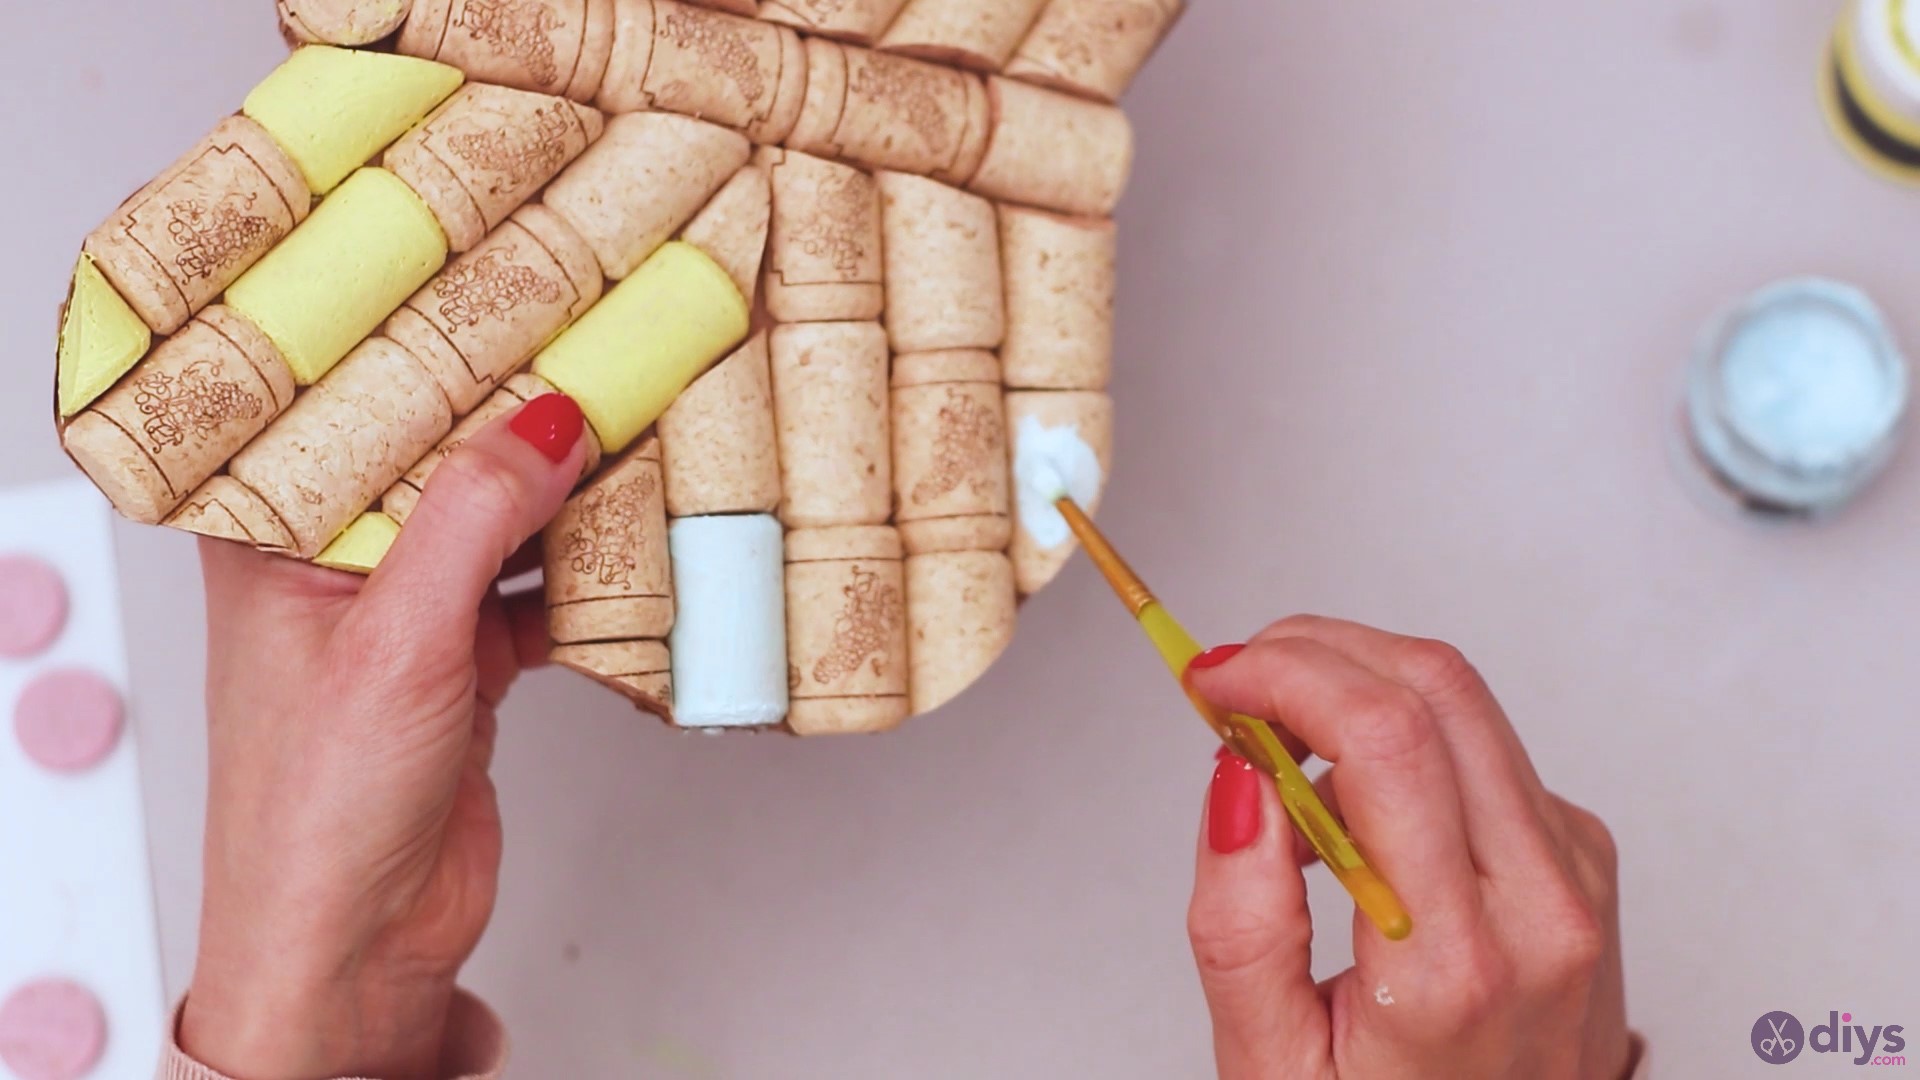
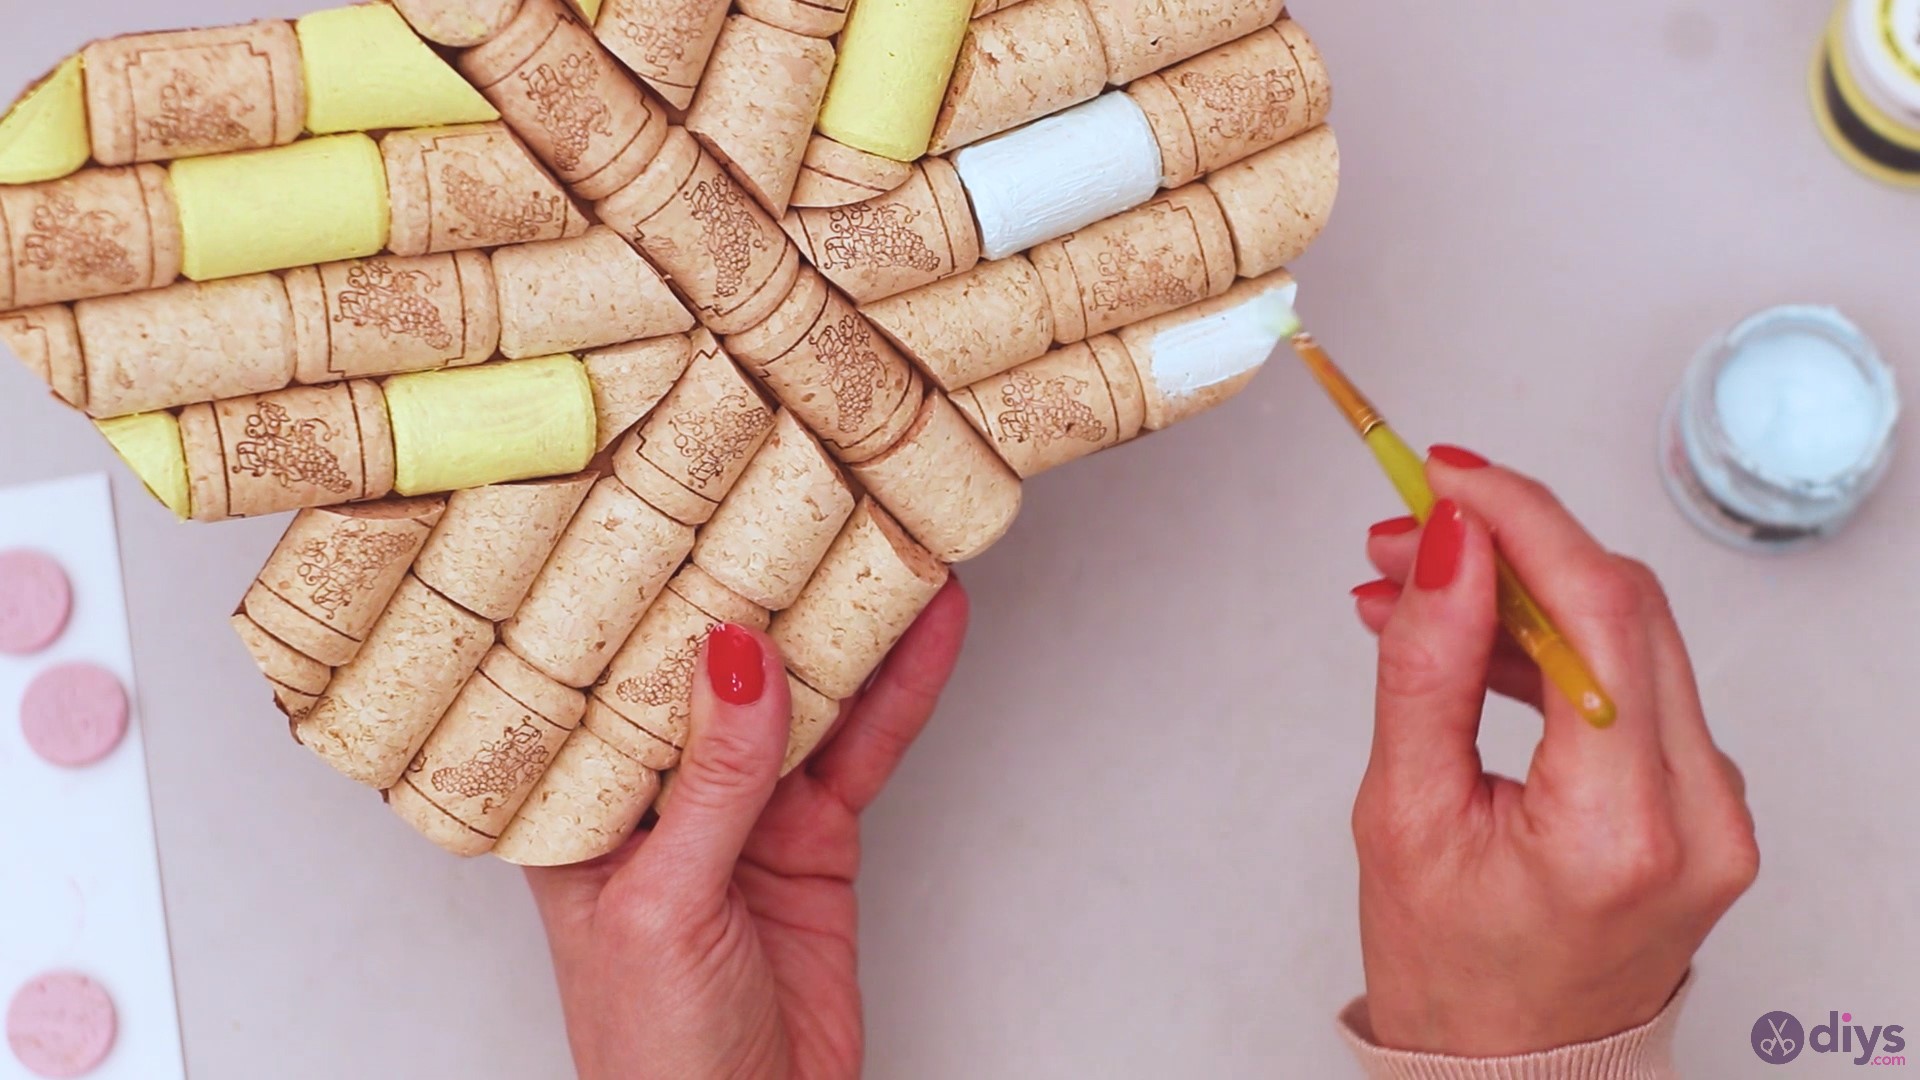
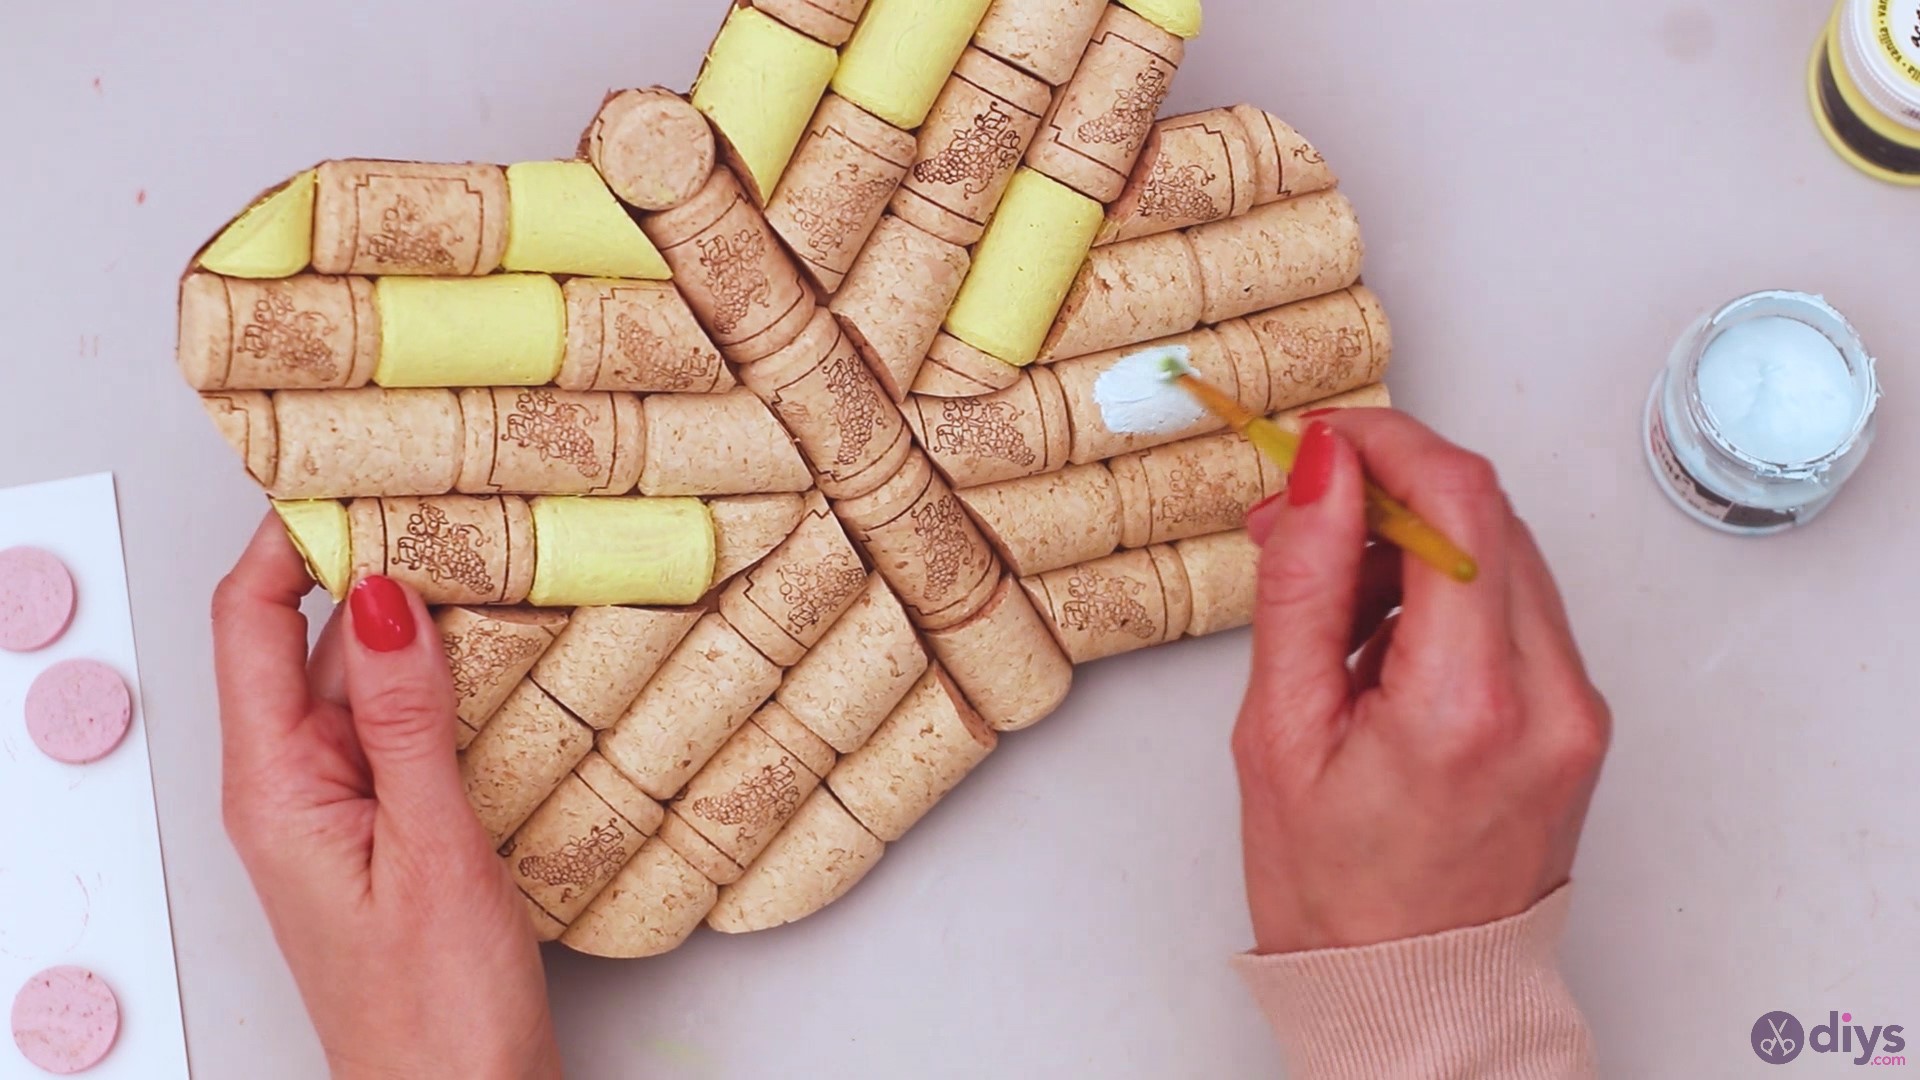
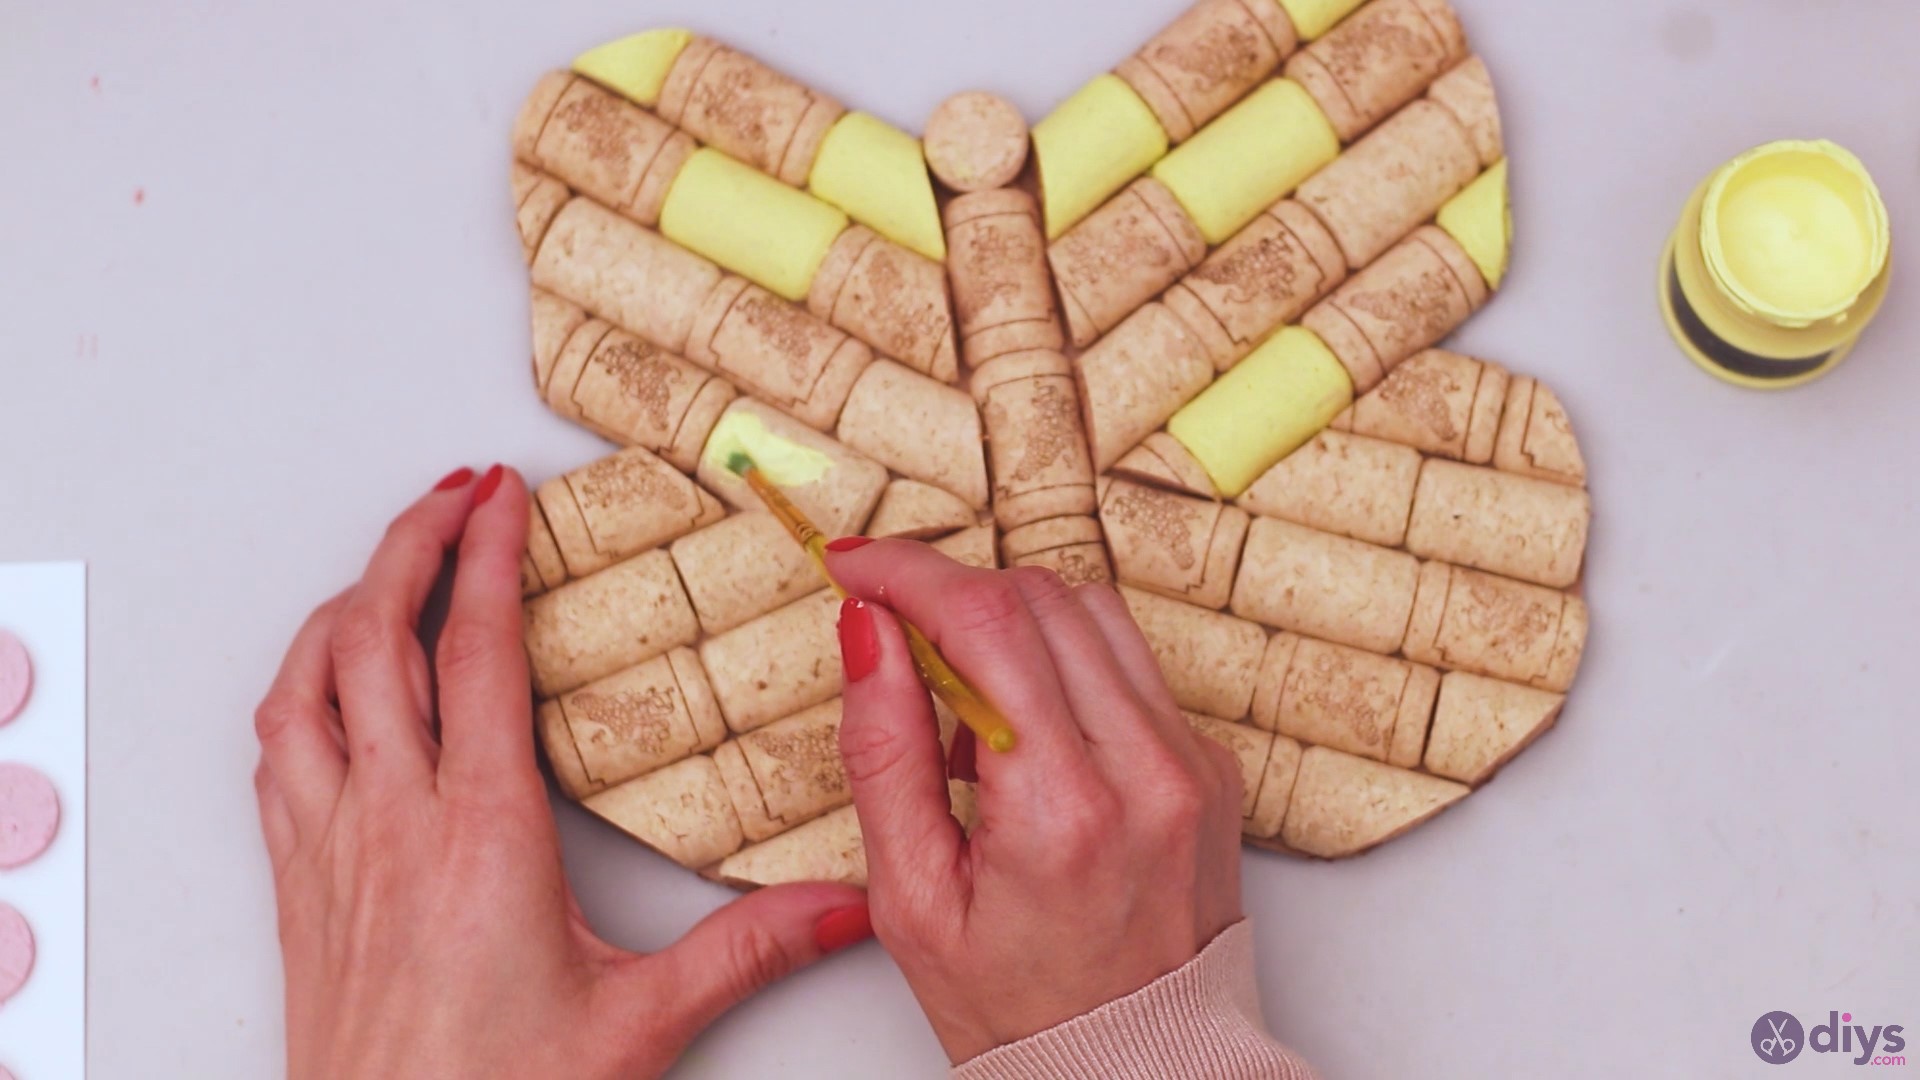
Step 7: Paint the butterfly
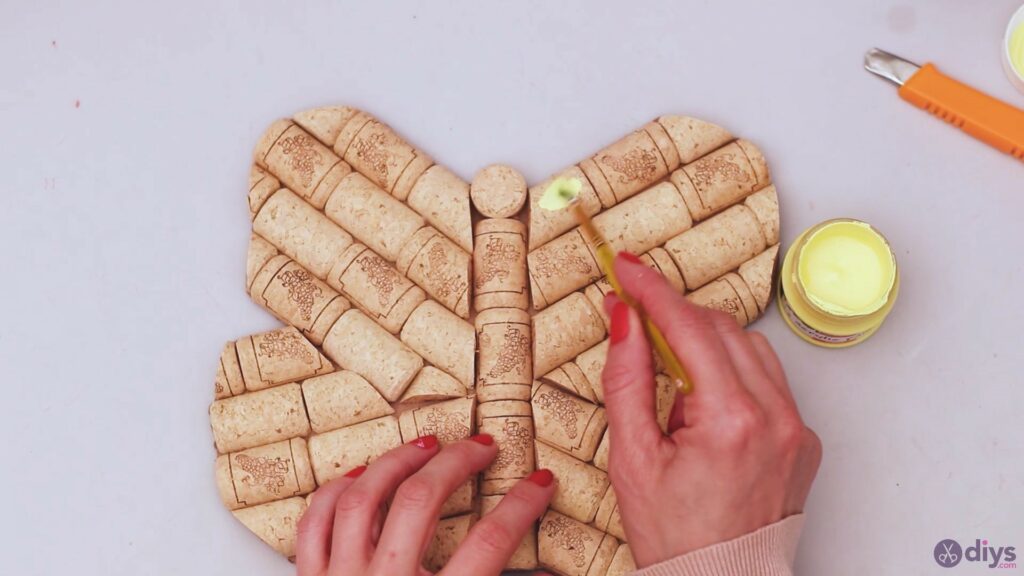
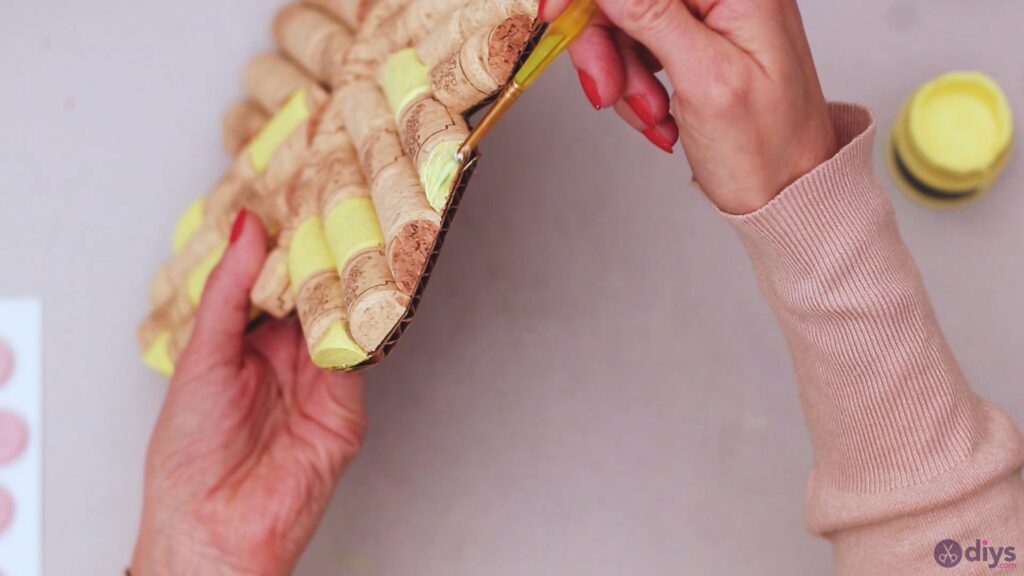
Butterflies are colorful creatures and they’re so beautiful to watch. So, ours will be just as colorful. Take theyellow acrylic paint and your paintbrush andstart adding color to the design.

We tried to maintain a pattern here. We painted the corresponding pieces the same color on both wings. We only added yellow to the upper area of the wings.

When you’re painting the corks placed on the exterior of the butterfly, make sure you also paint the sides to give it a more finished look.
Get thelight blue acrylic paint and add it to the corks forming the bottom wings.

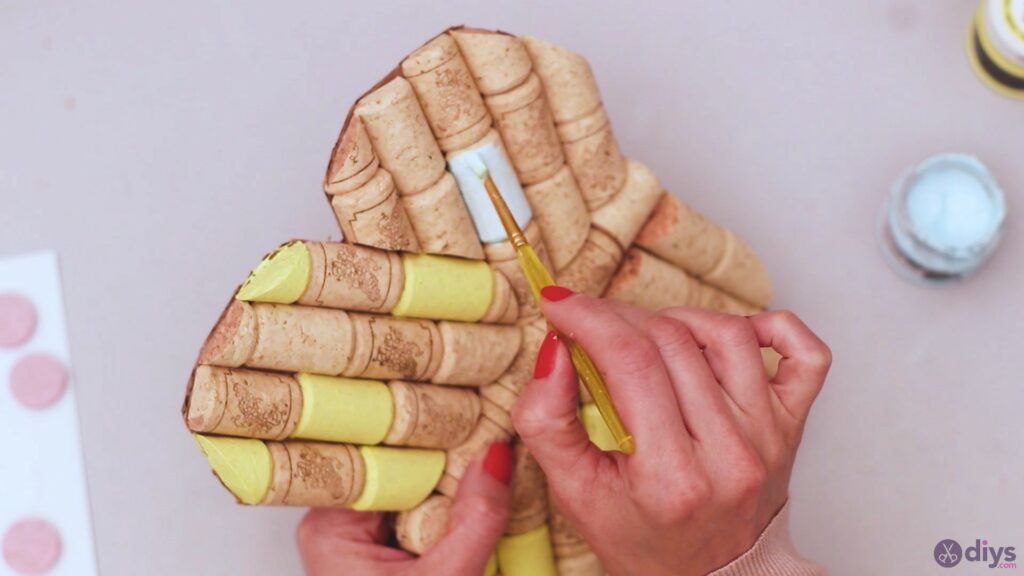
Just like we did with the first color, you want to layer it down. Don’t add water as it’s rarely necessary with acrylic paint, and you also want the color to look solid.


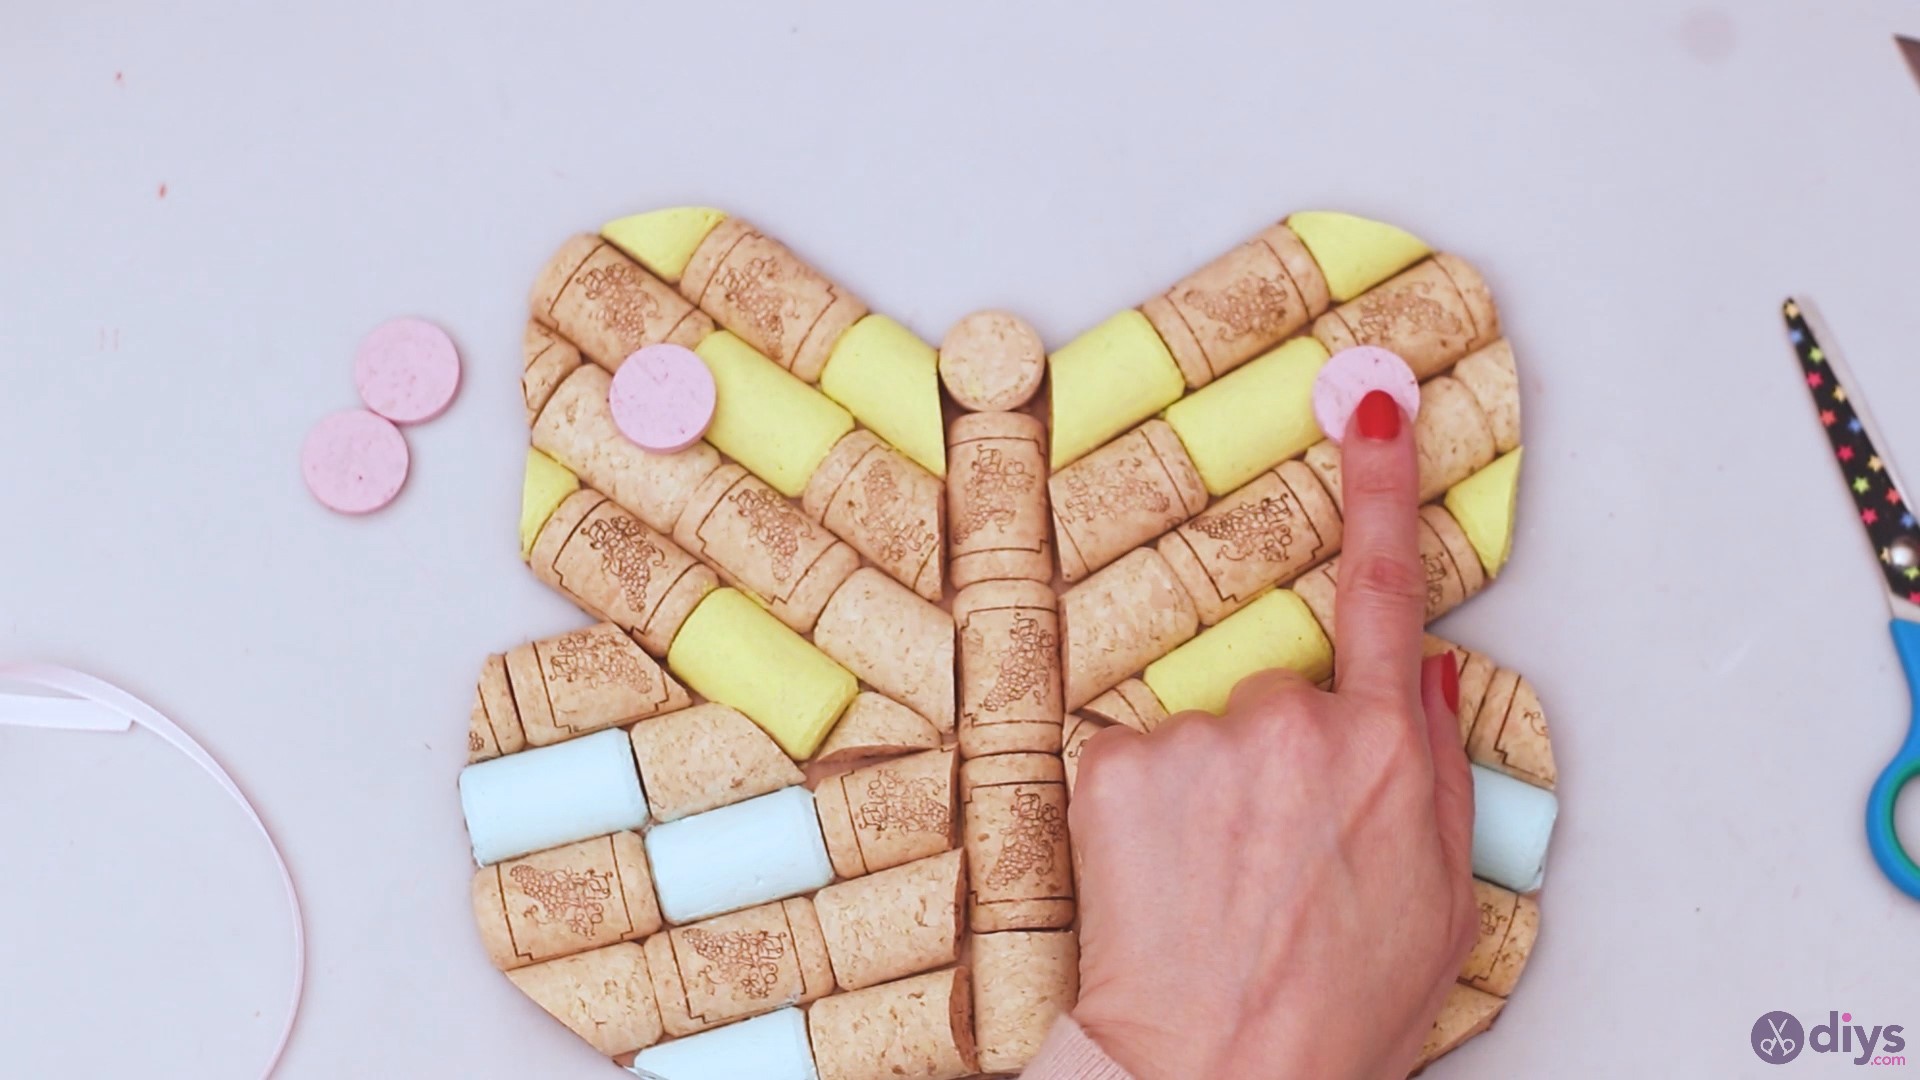
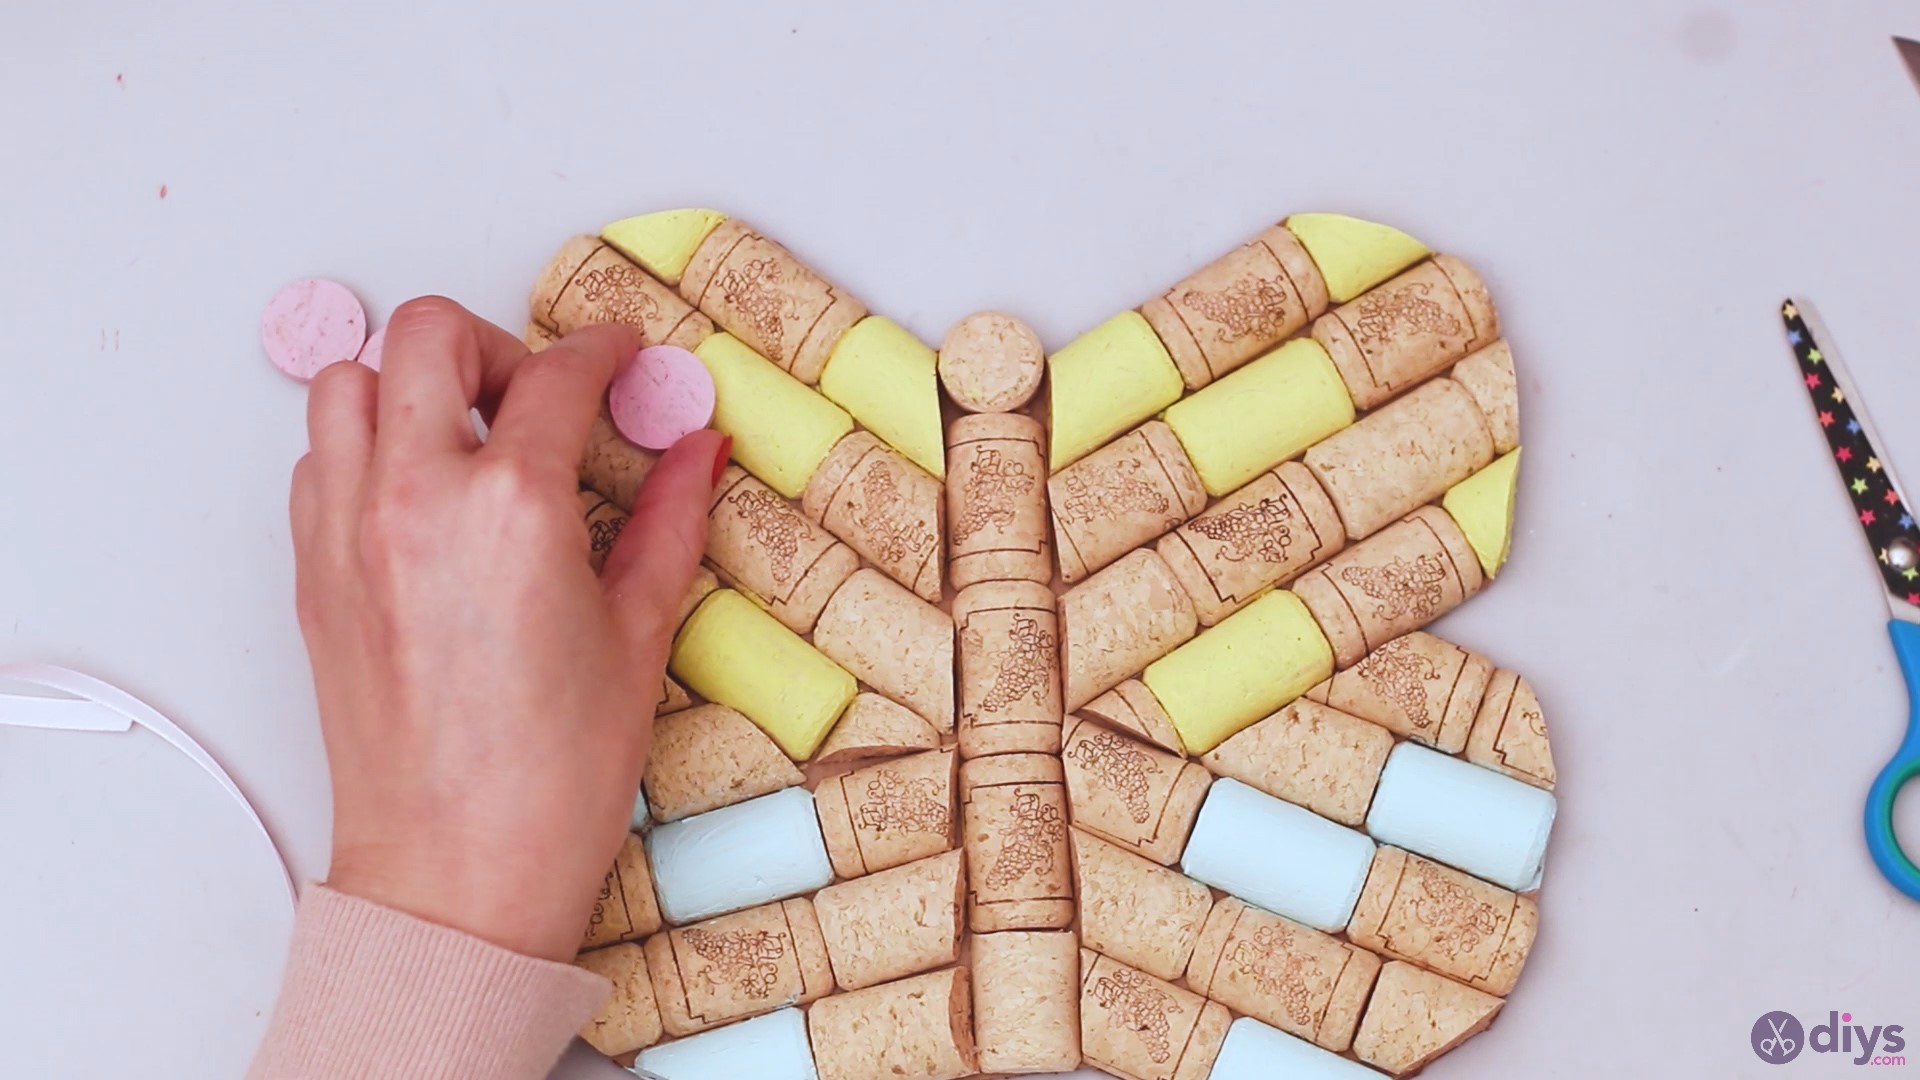
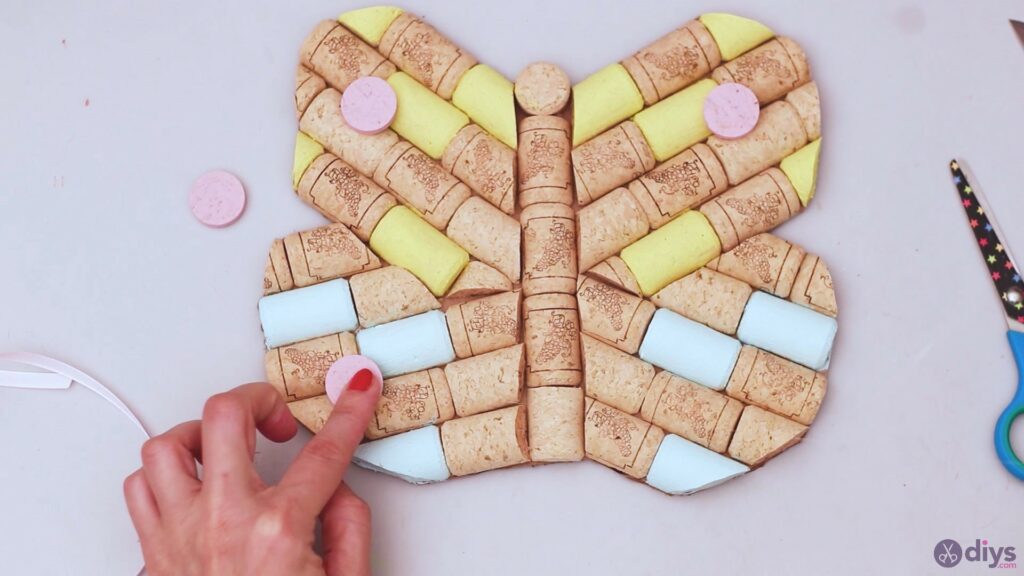
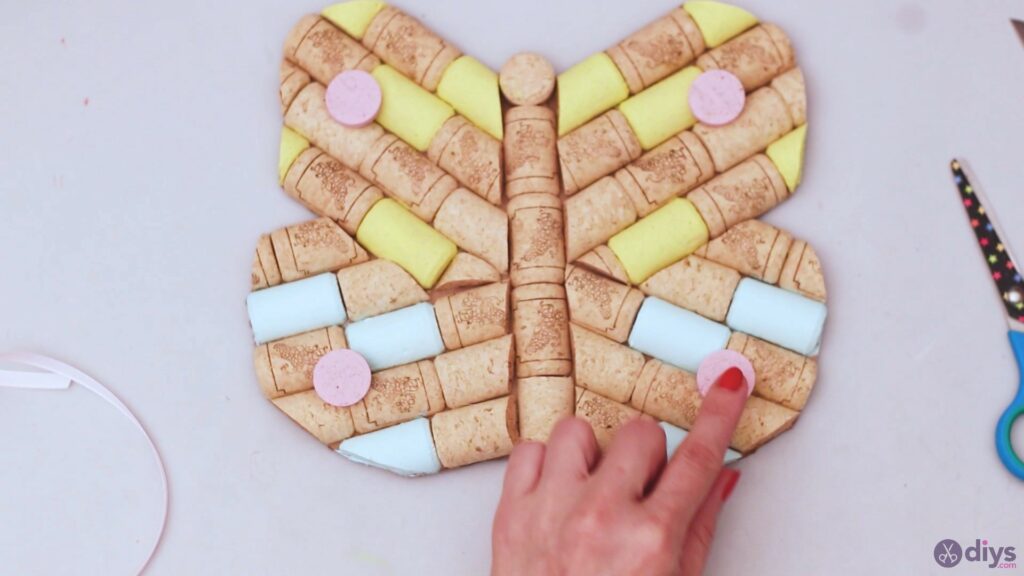
Step 8: Glue the rose dots
Now that you’re done painting the butterfly, it’s time you get those rose cork slices and the glue gun. We placed them towards the exterior of the wing, in the middle area. Check the pictures to see how we proceeded.


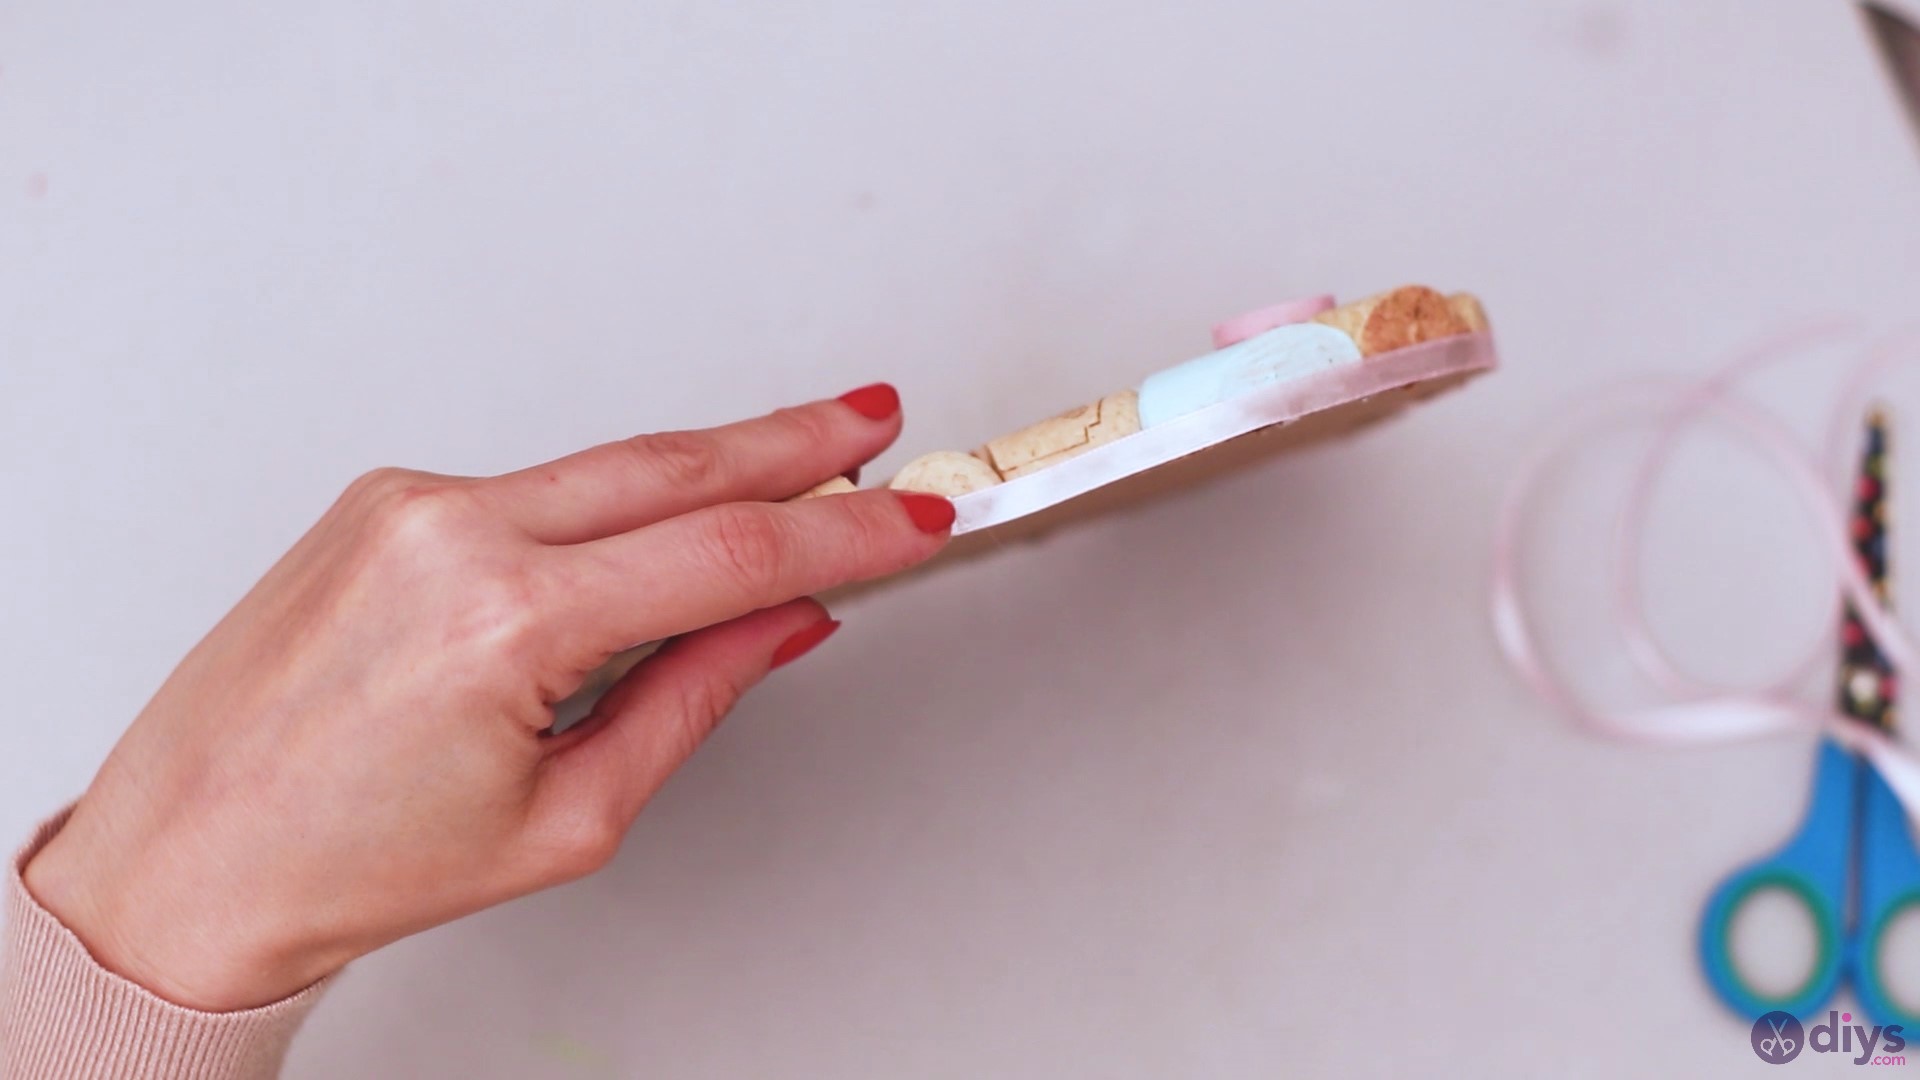
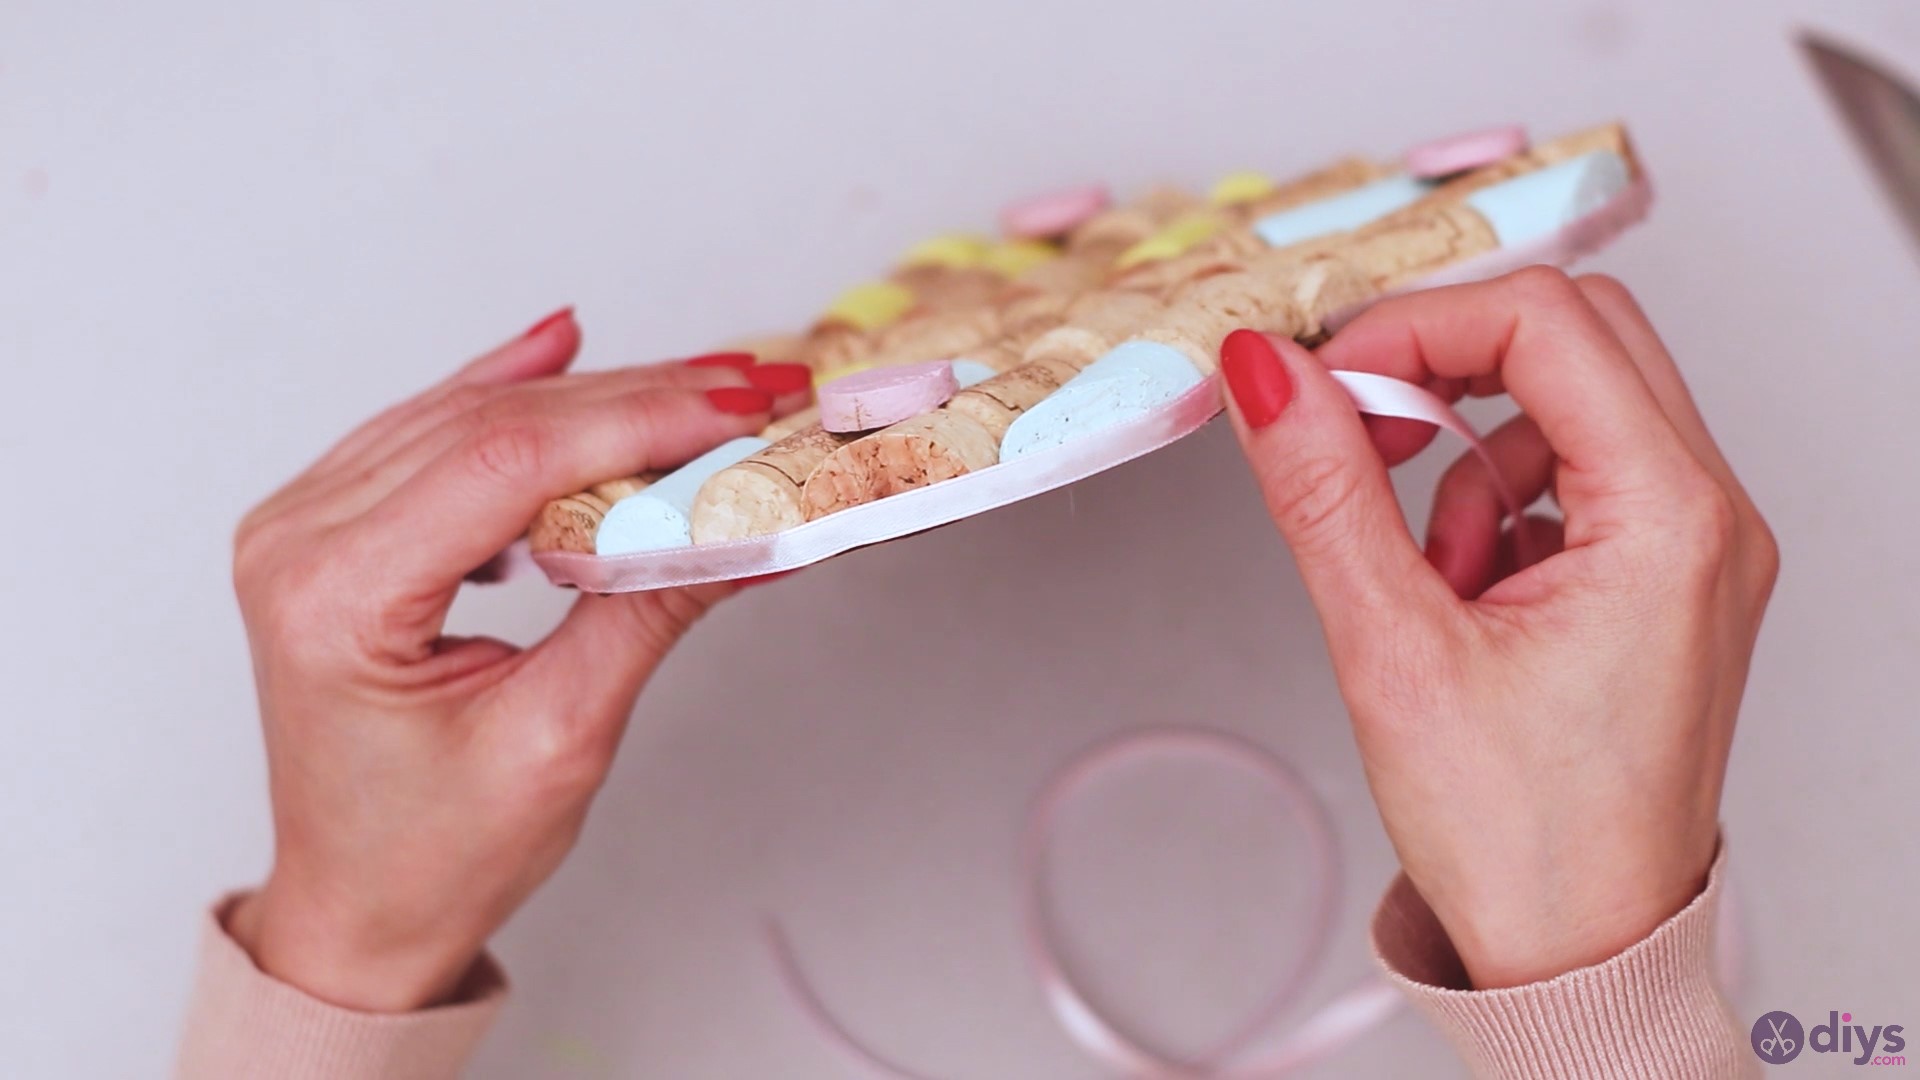
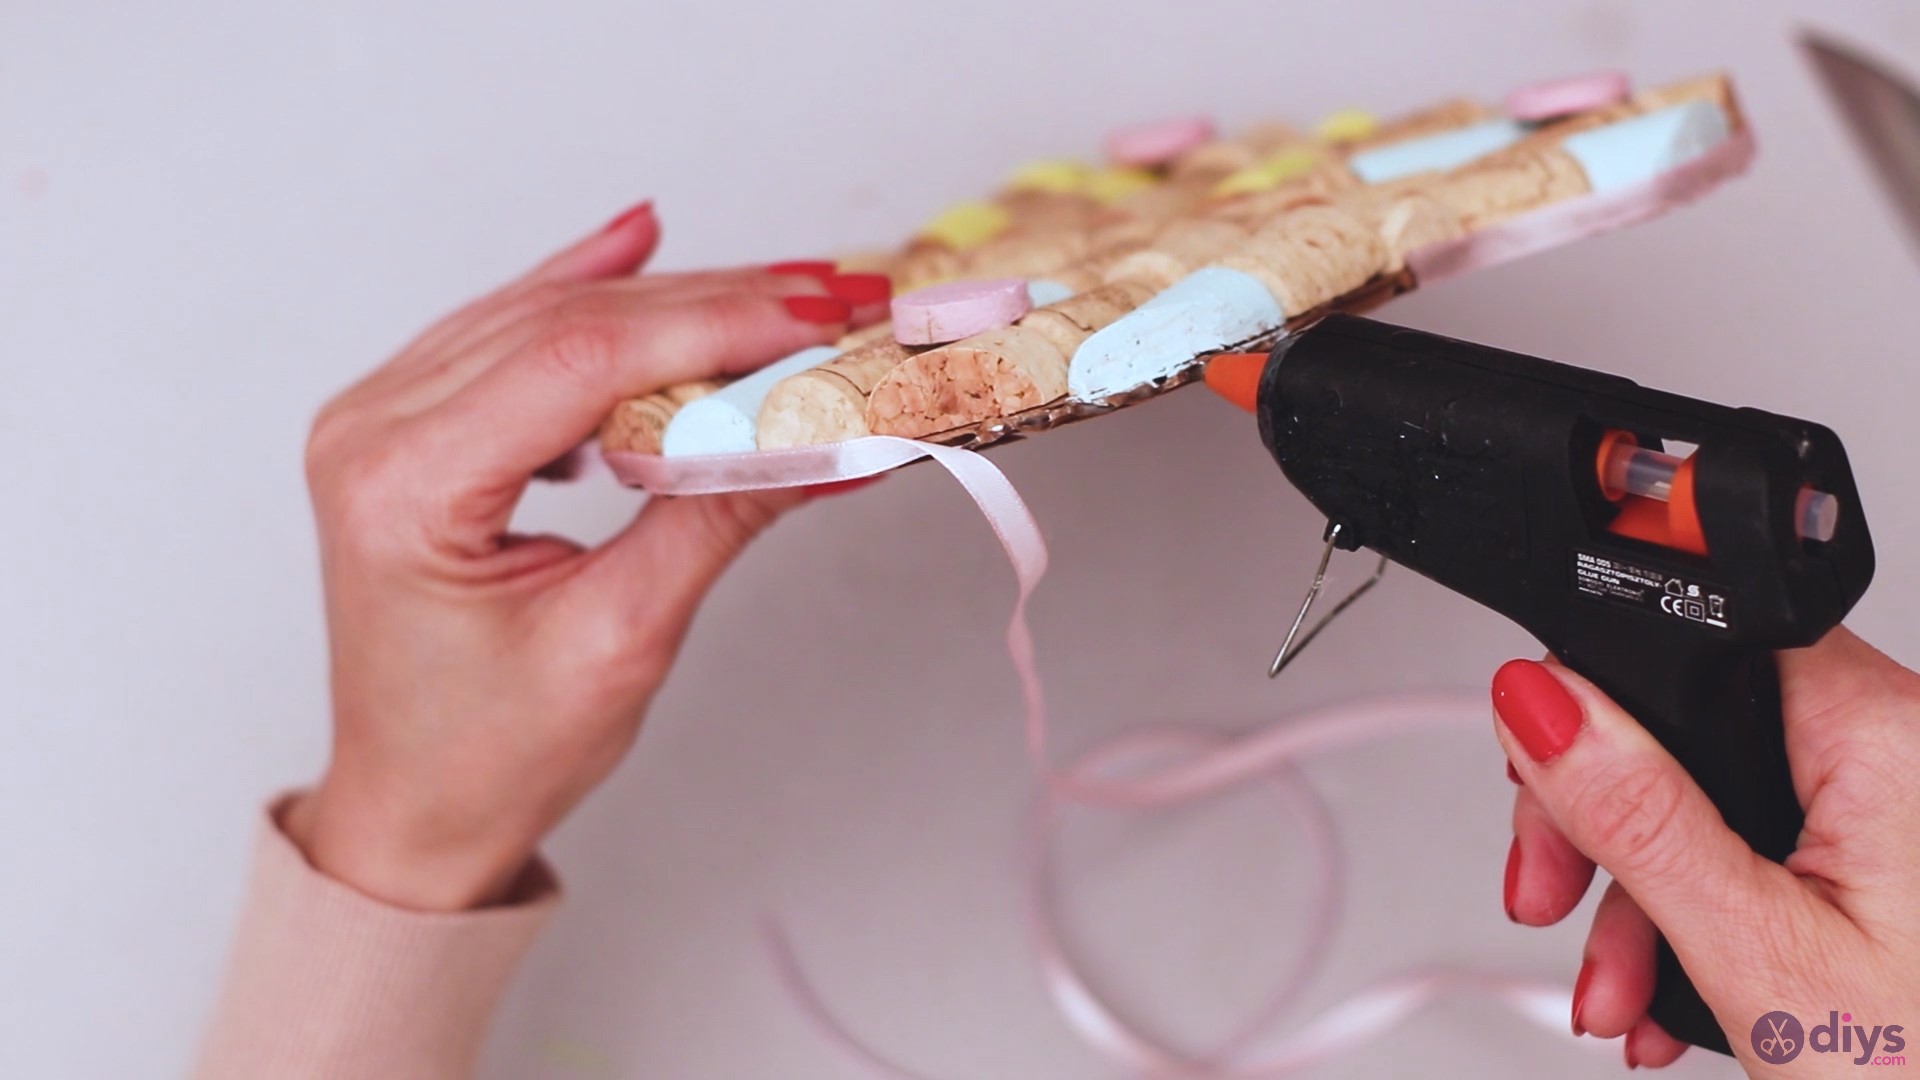
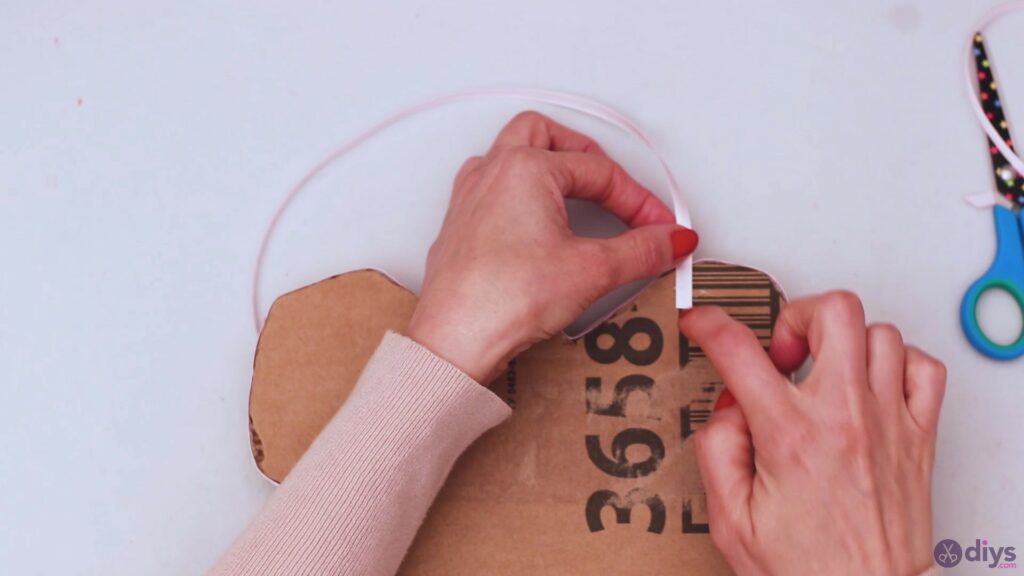
Step 9: Add the ribbon
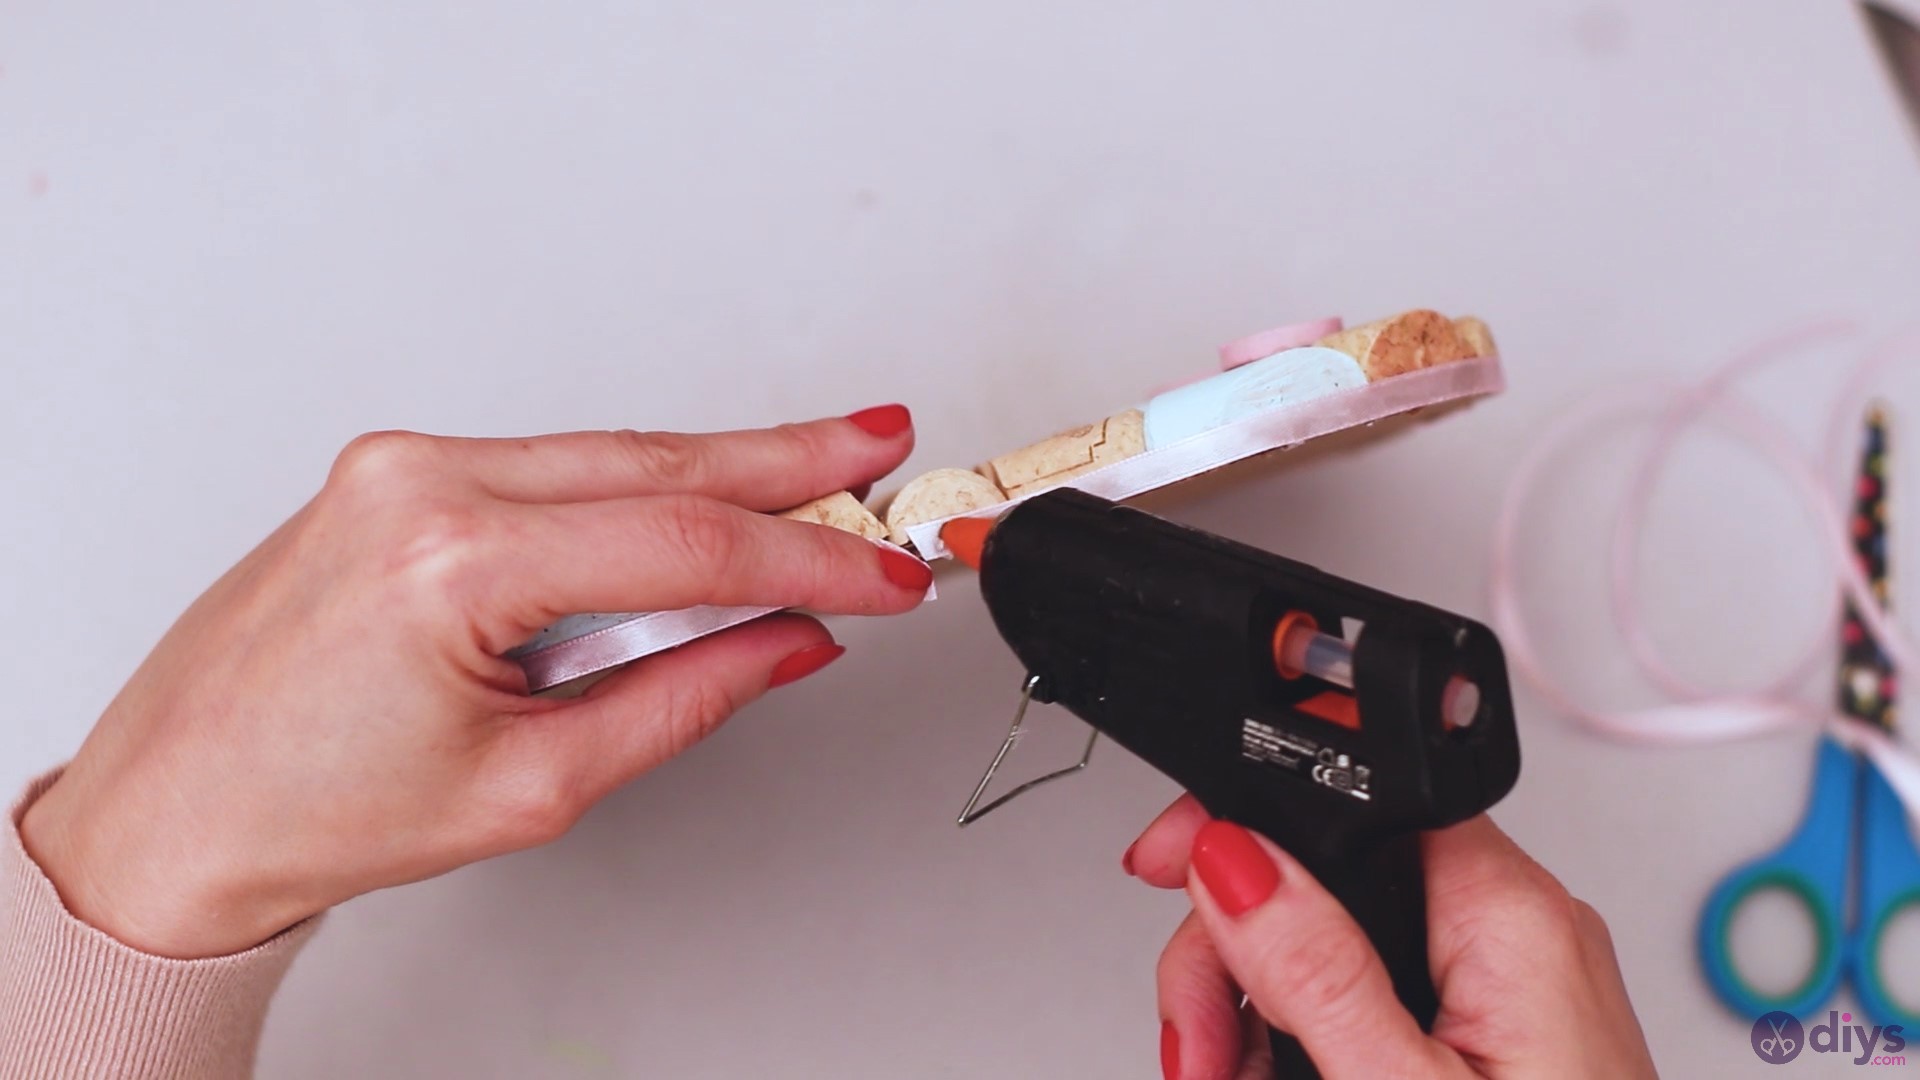
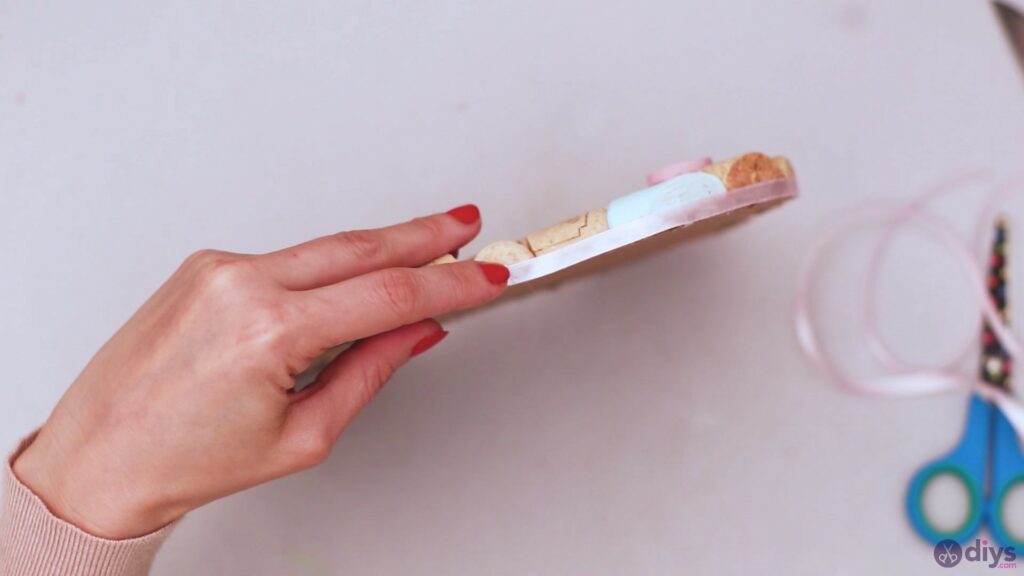
We’re down to the finishing touches now. Get the glue gun and start adding glue right on the edge of the butterfly decor. You want to get glue over the cardboard background and a little over the bottom of the wine corks. Add the silk ribbon over the glue, going inch by inch and neatly pressing the material.
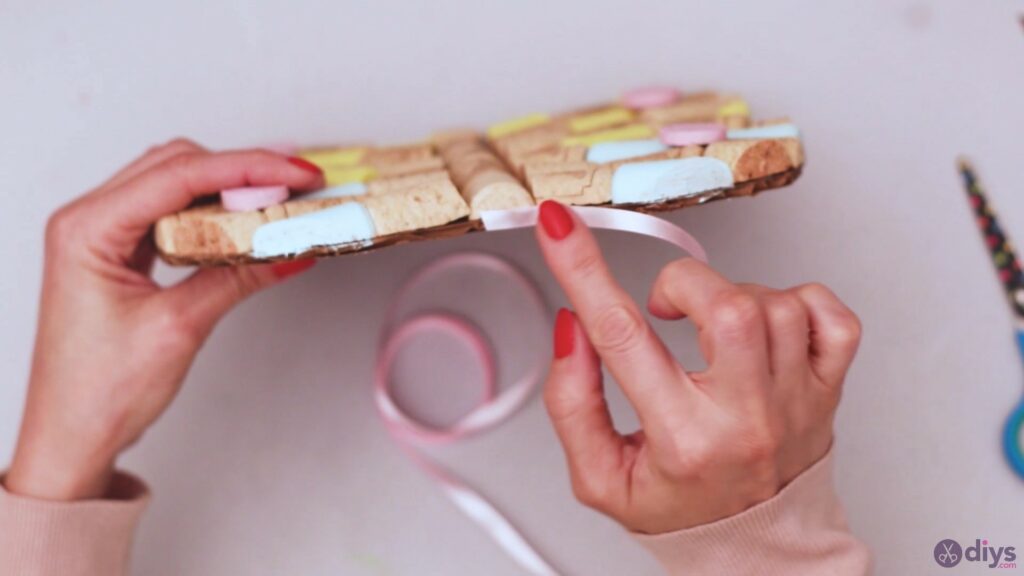

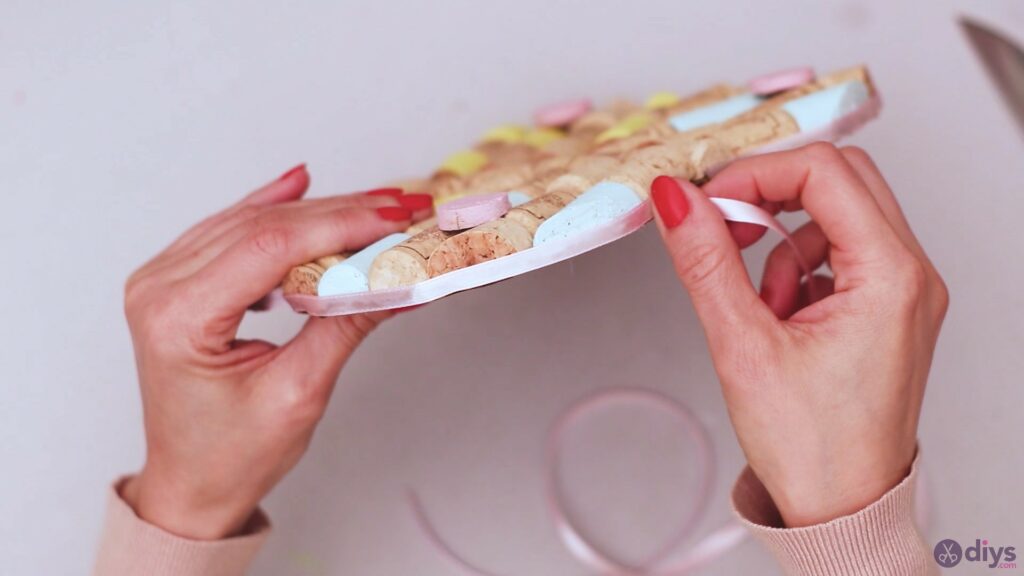
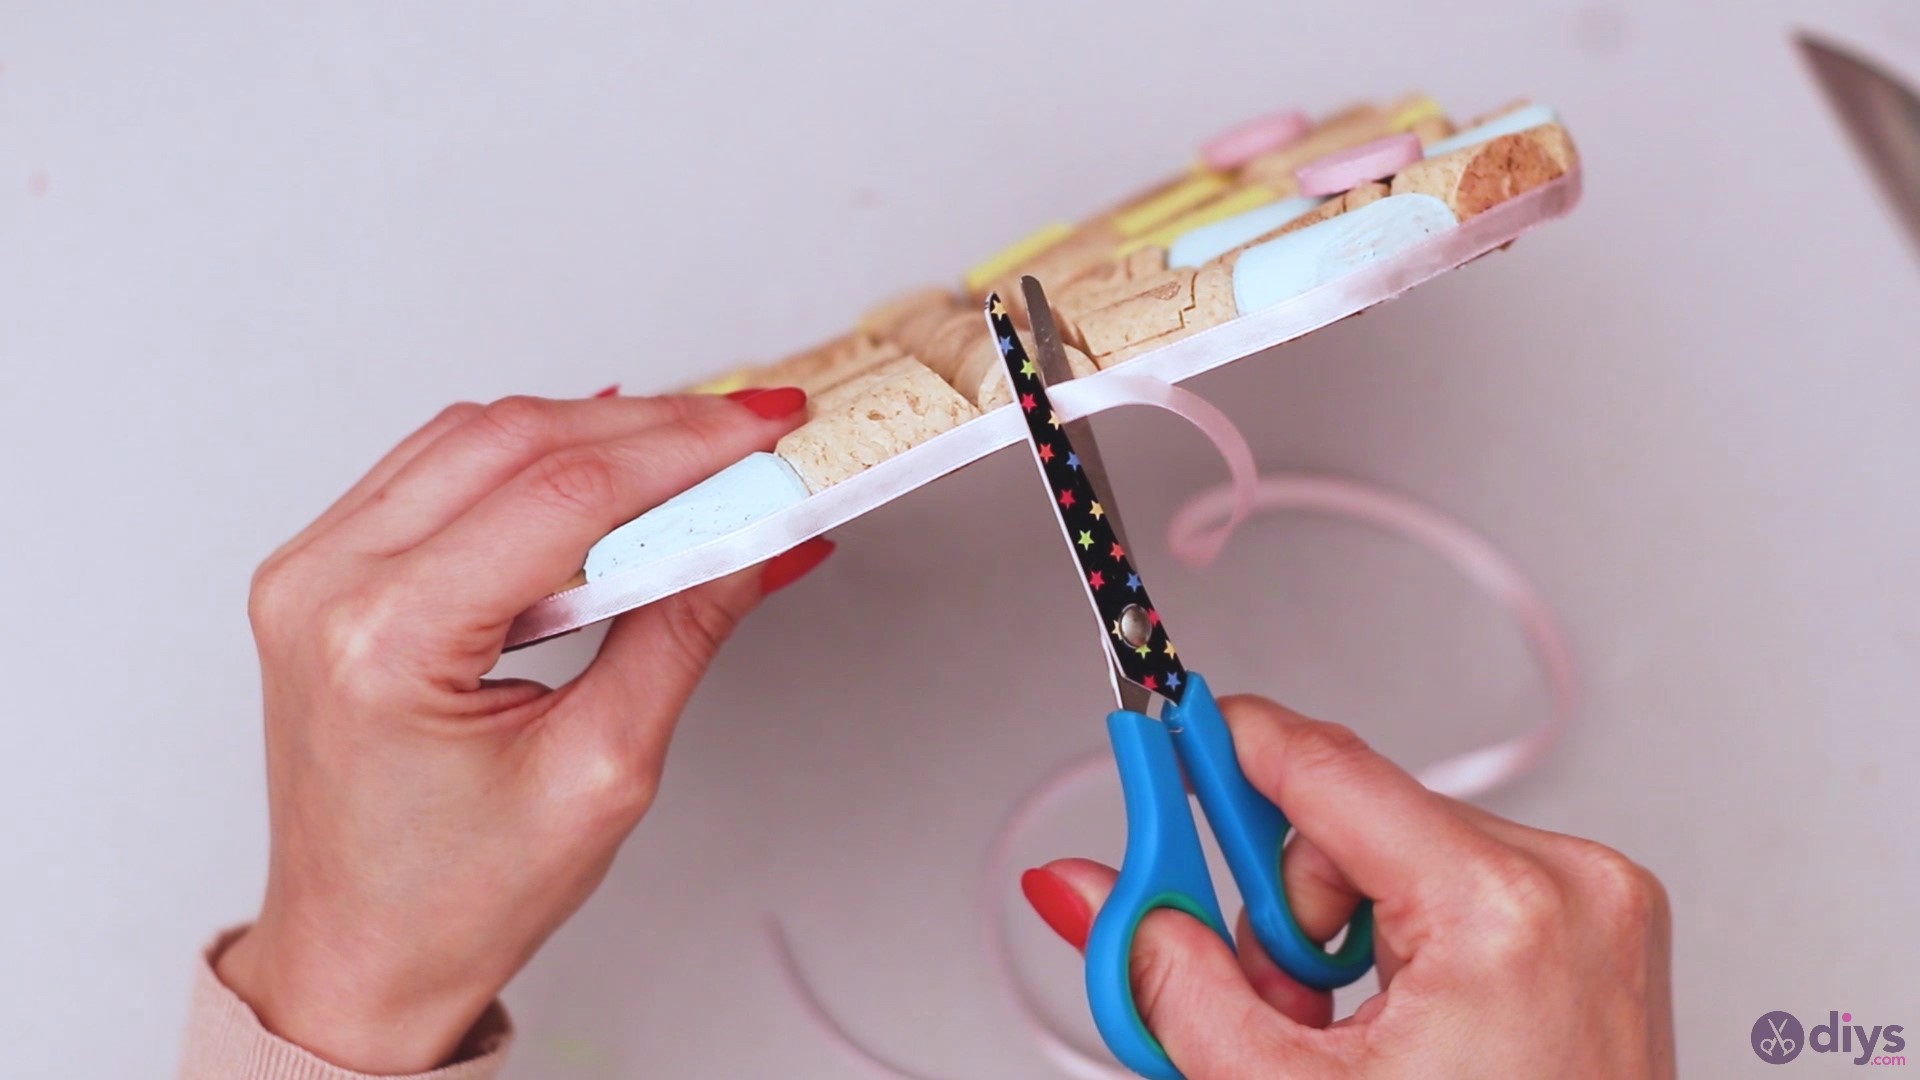
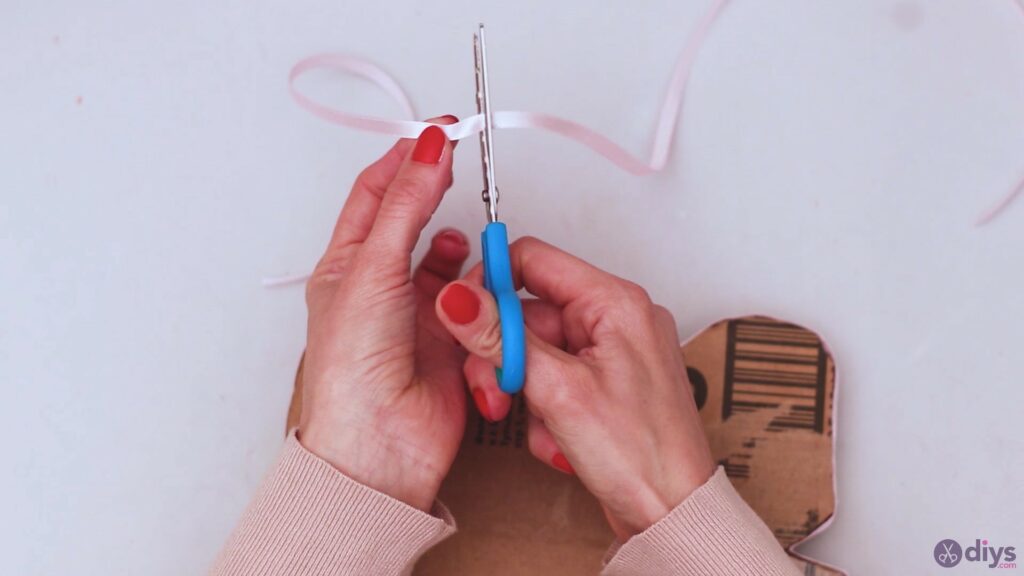
When you’re nearly done, measure up the ribbon and cut it so it overlaps a little with the first area you glued down.

Add a little extra hot glue over that part and press the ribbon over it, closing down the design. Hold it pressed for a few seconds so you’re sure it sets.

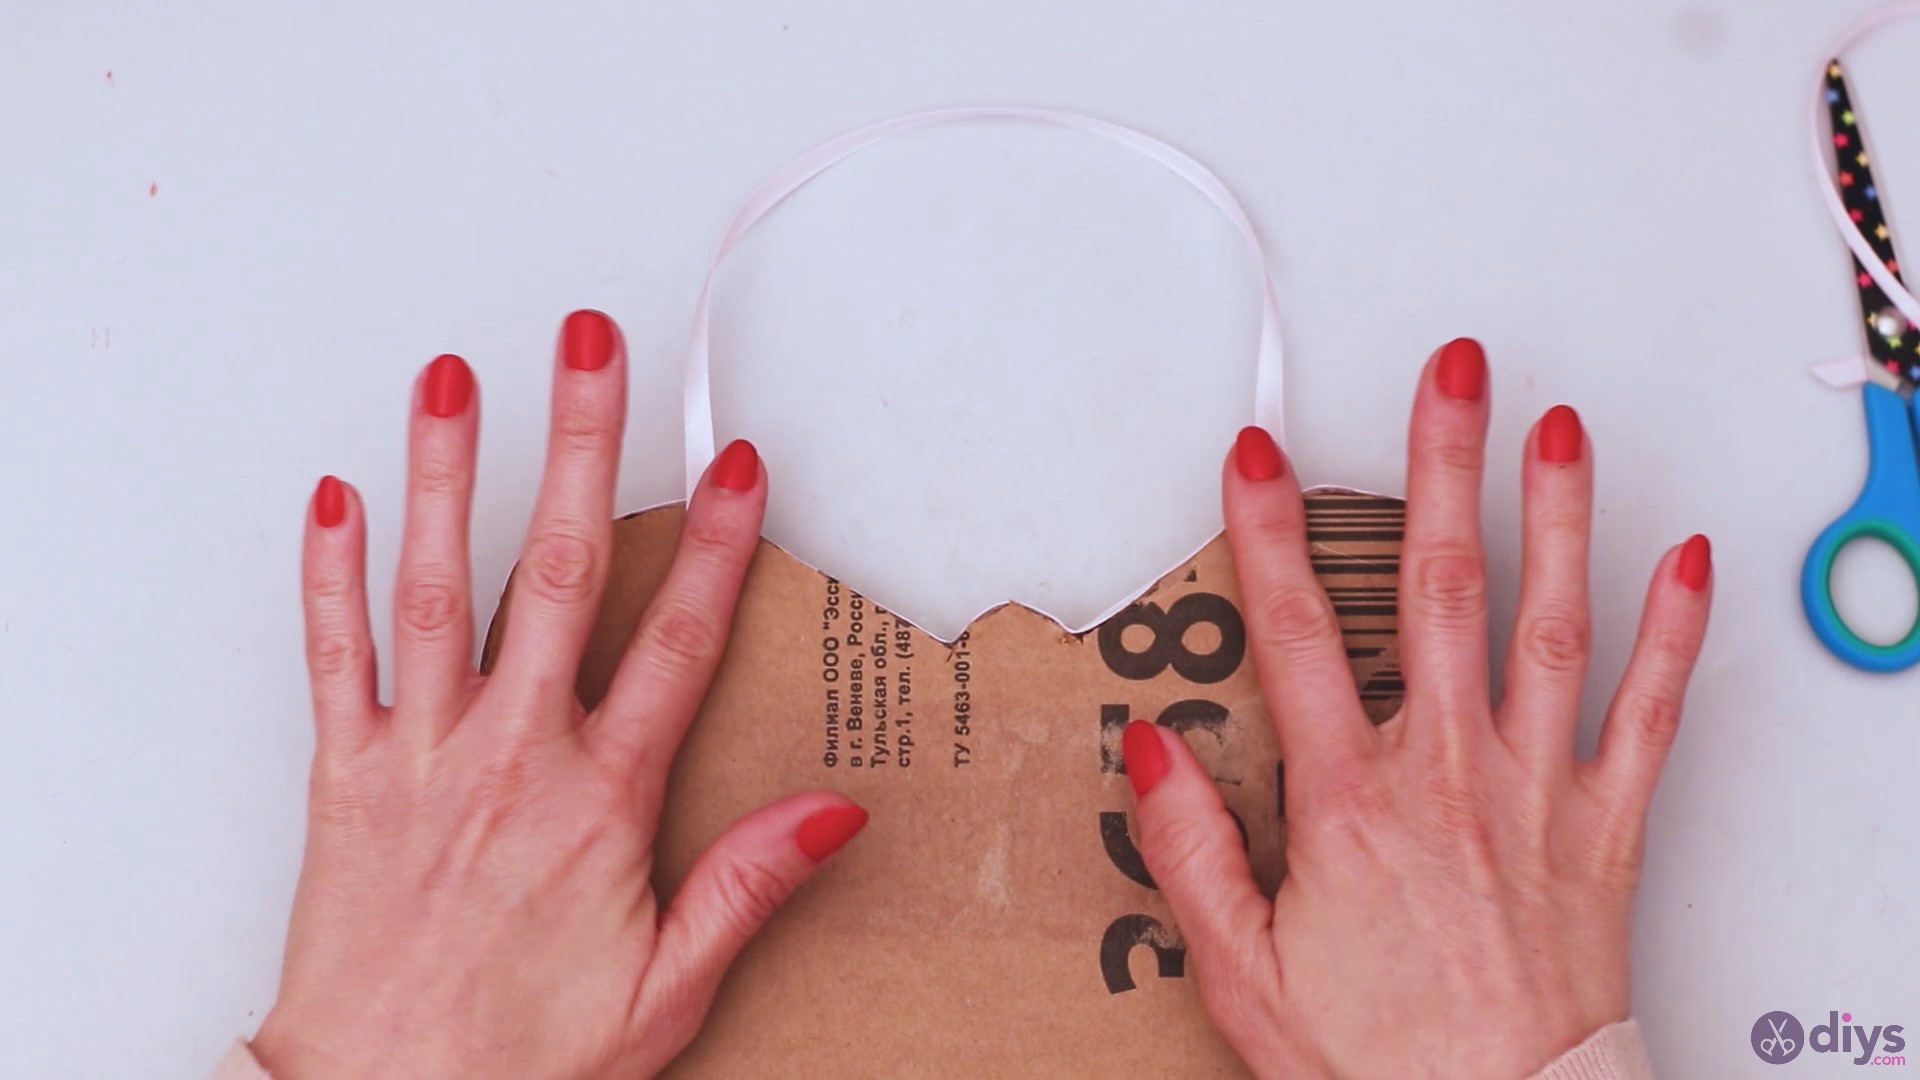
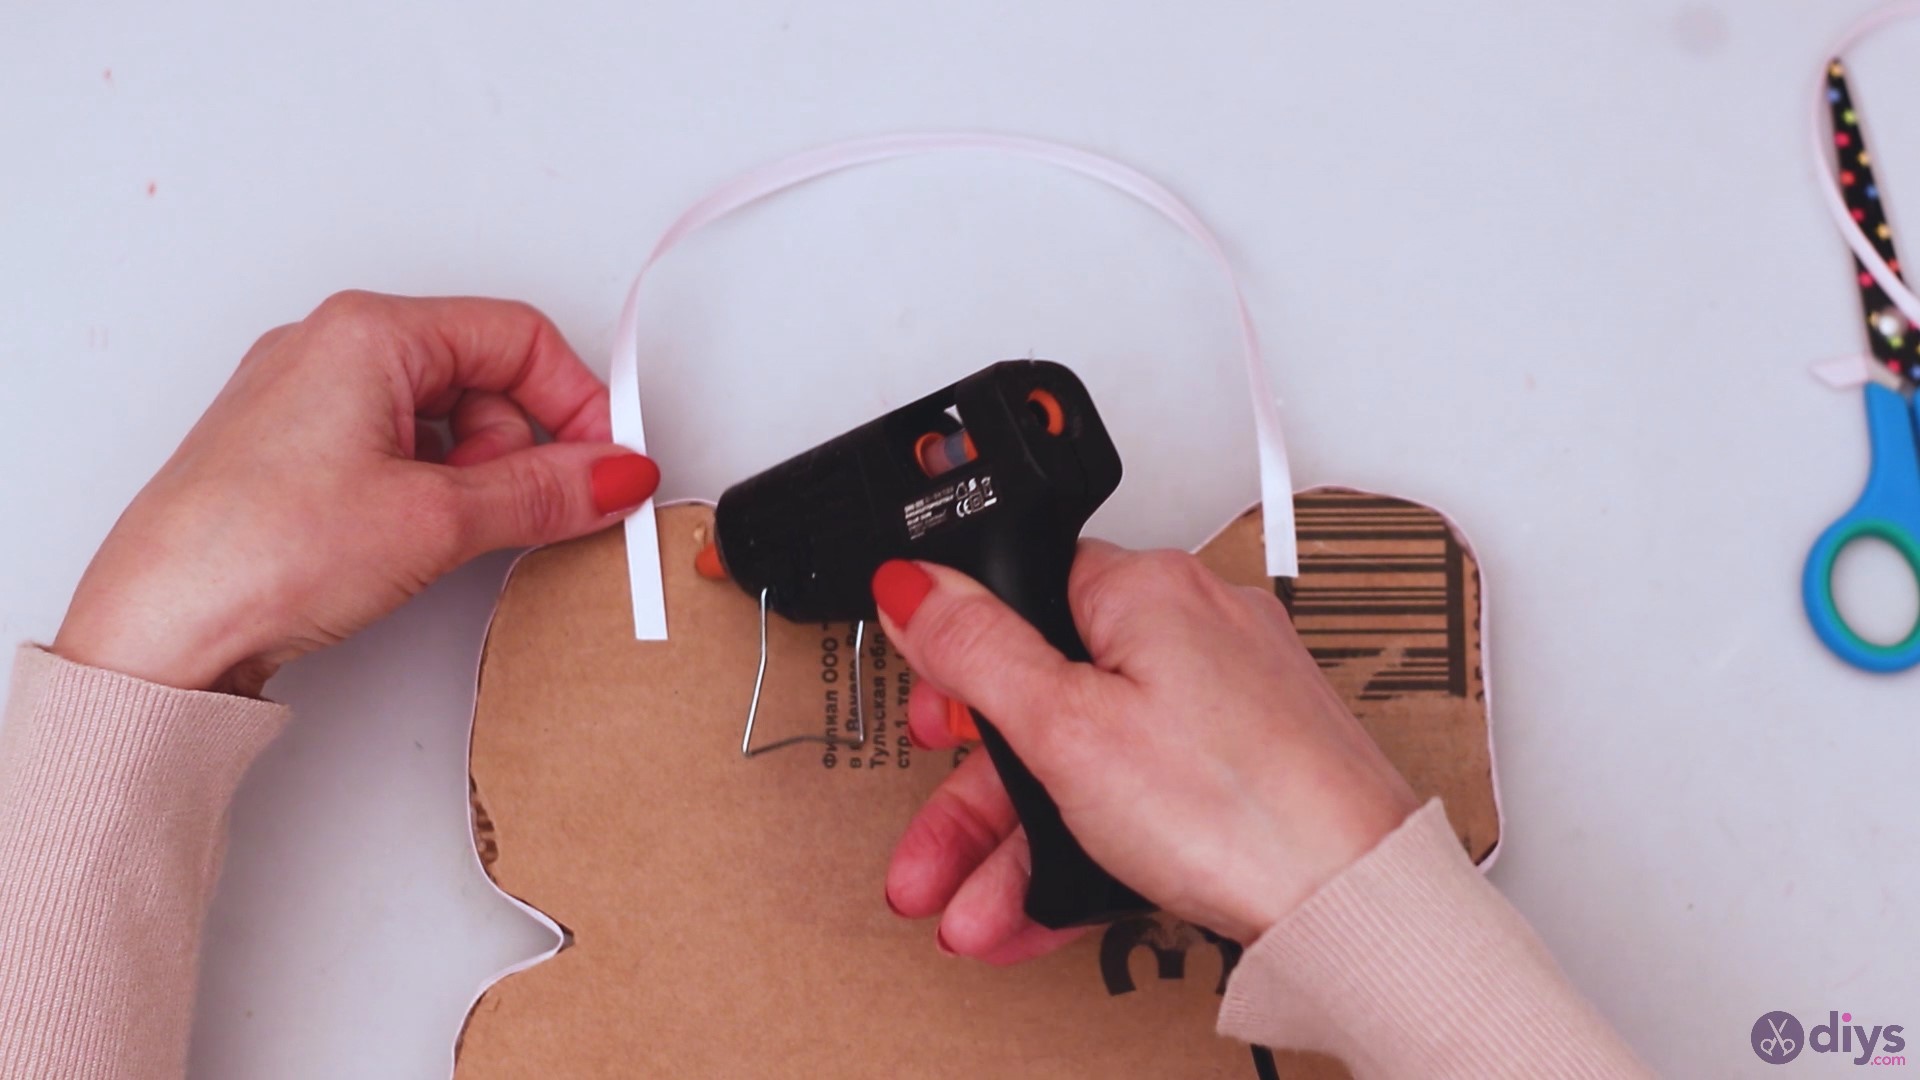
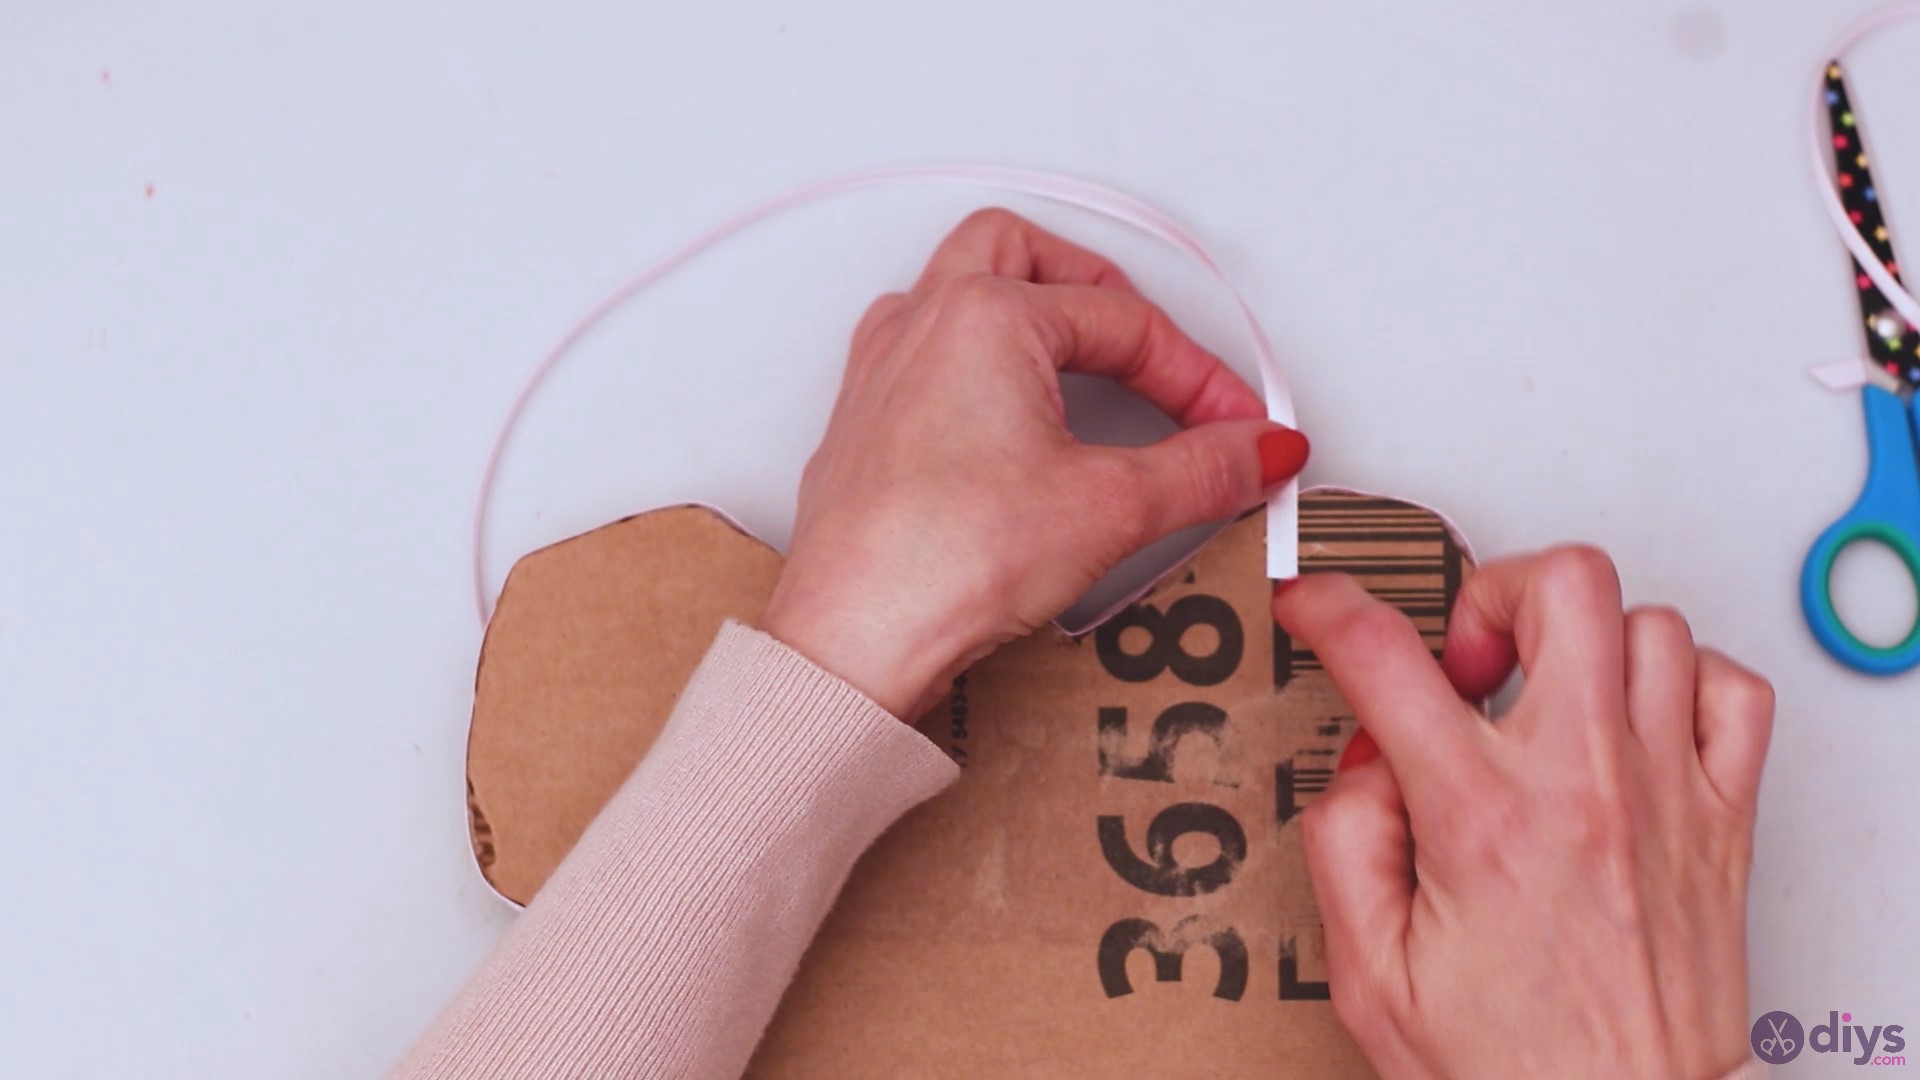
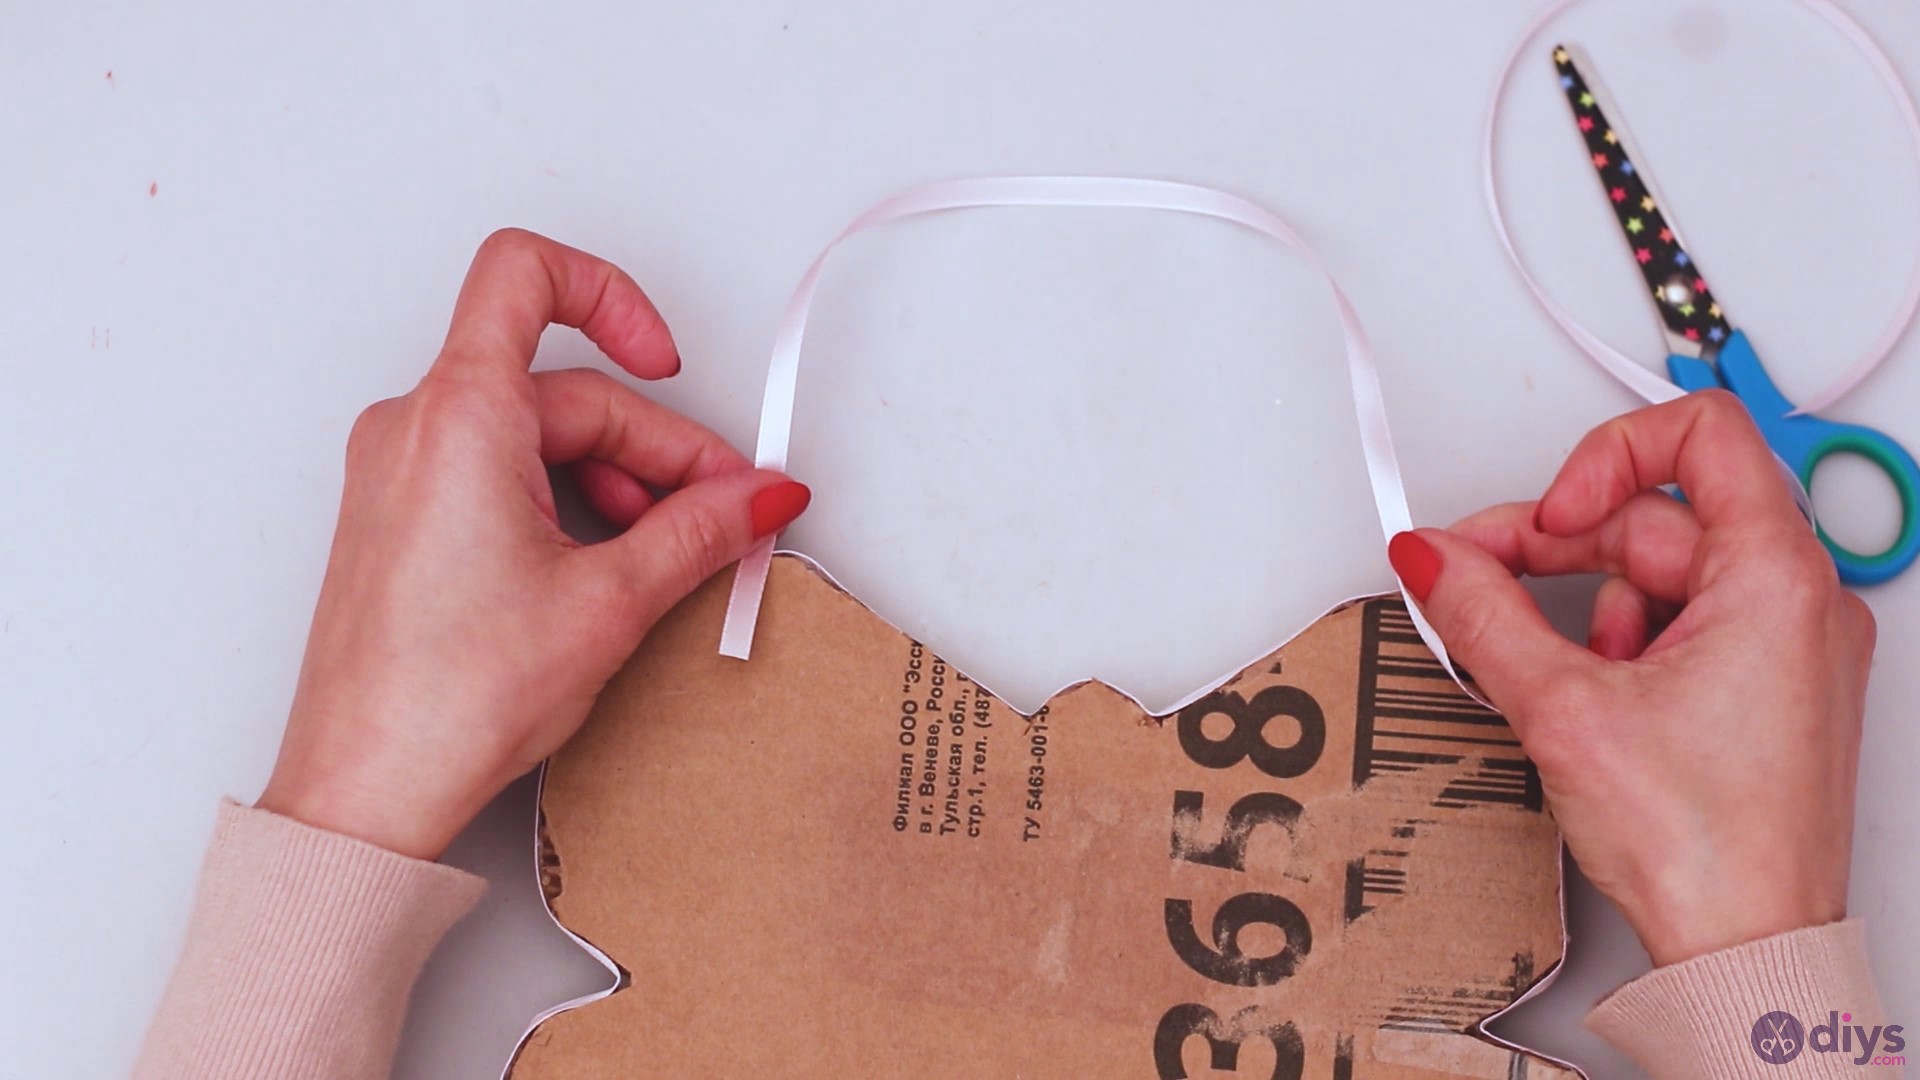
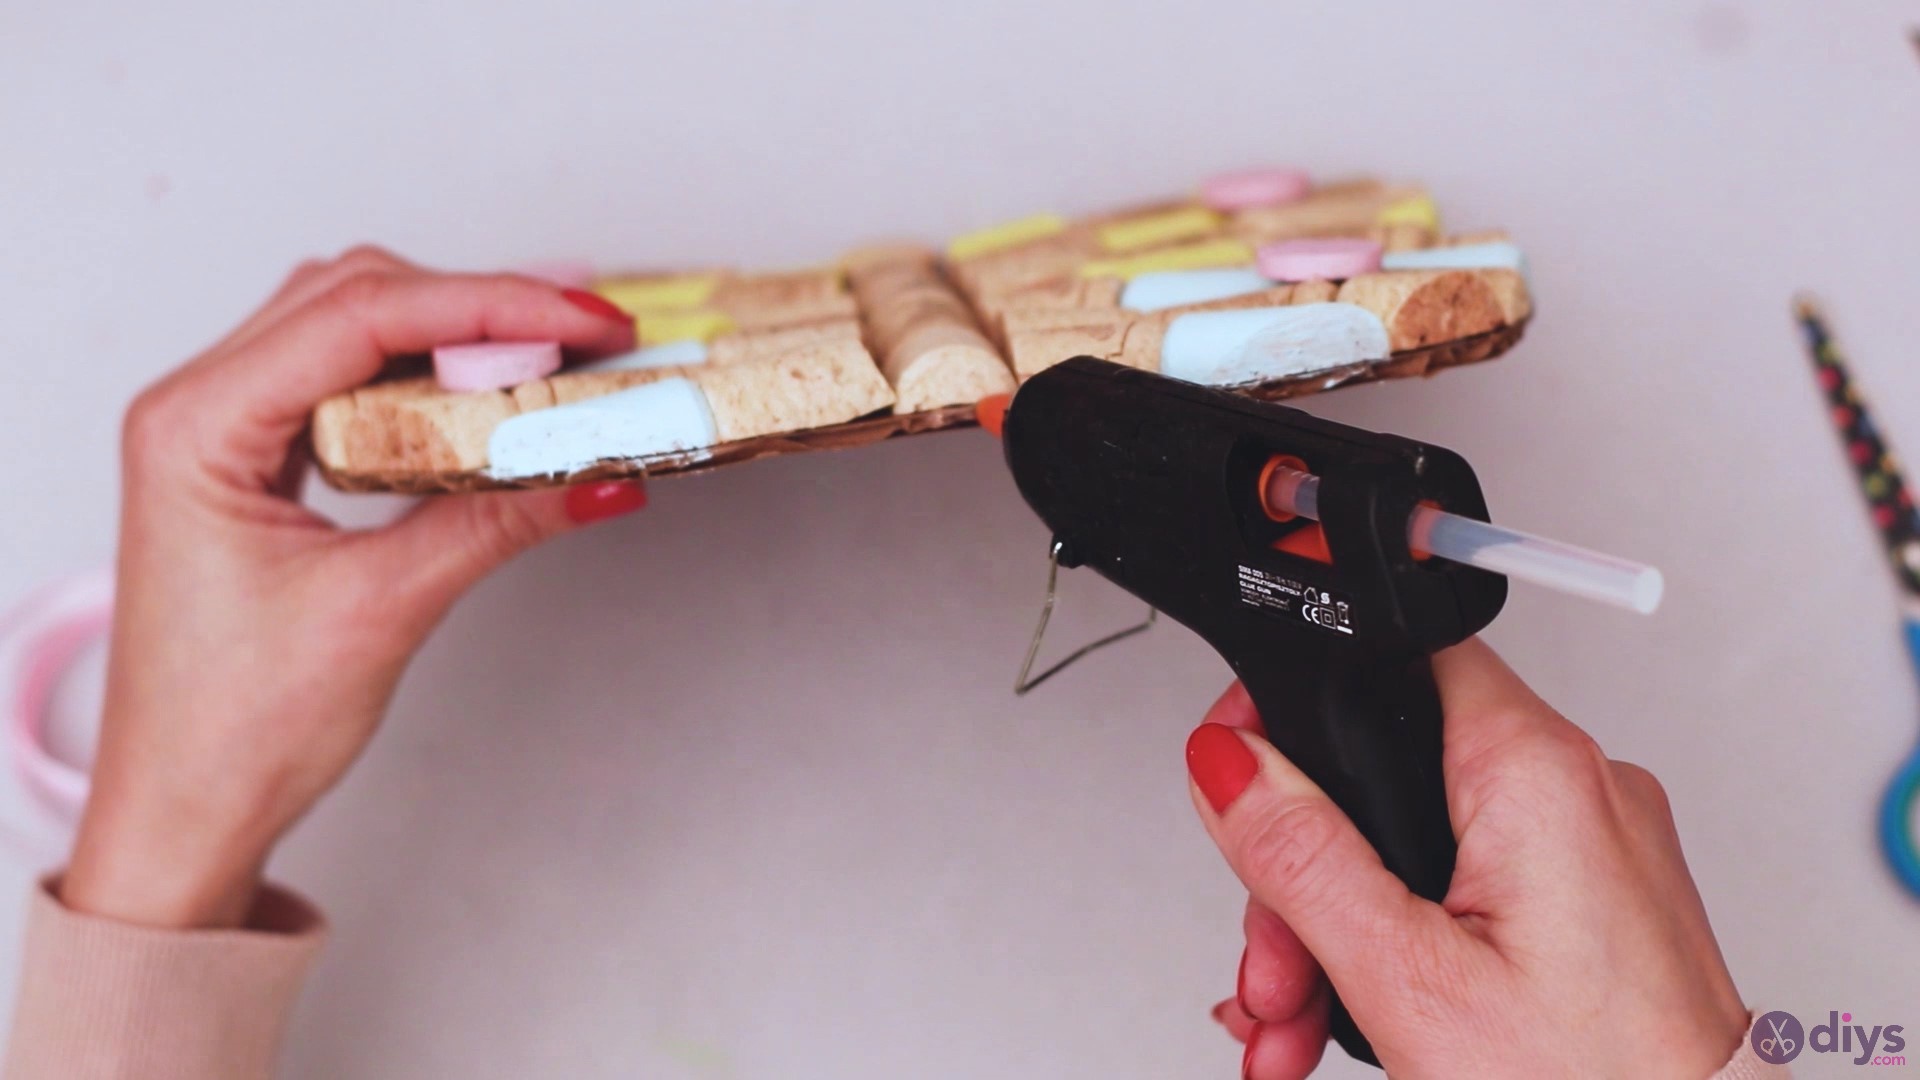
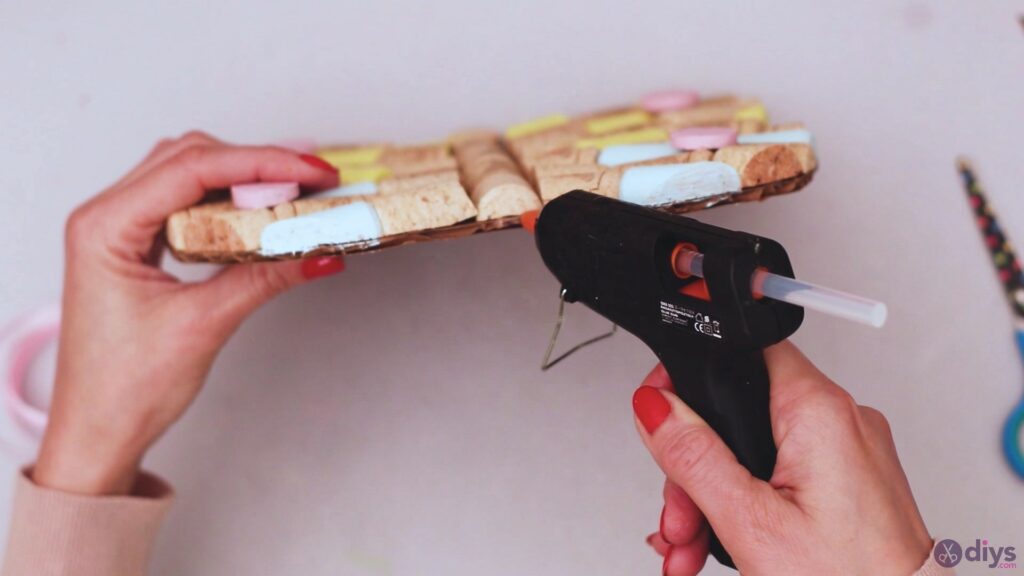
Step 10: Add ribbon to hang the wine cork butterfly decor
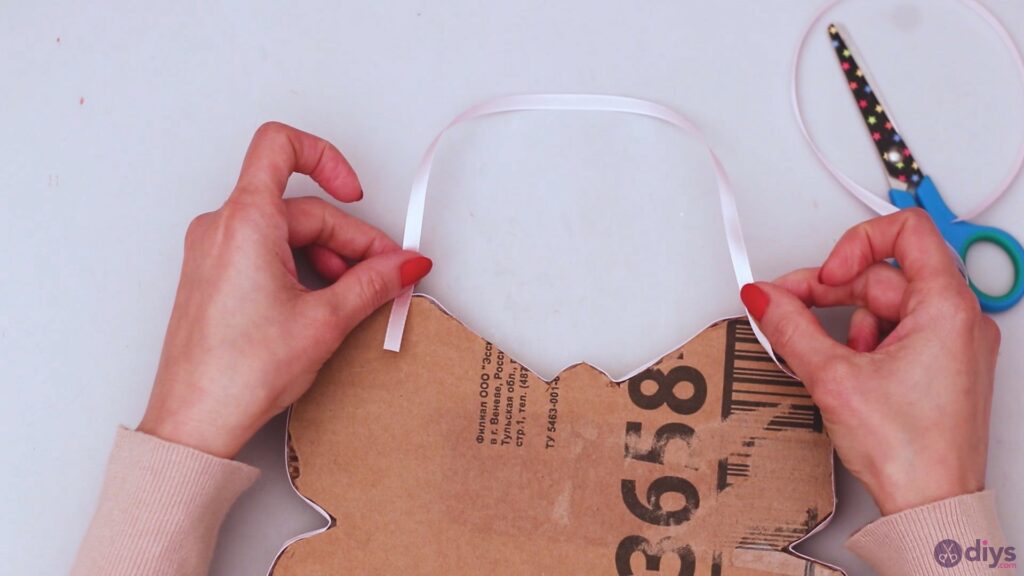
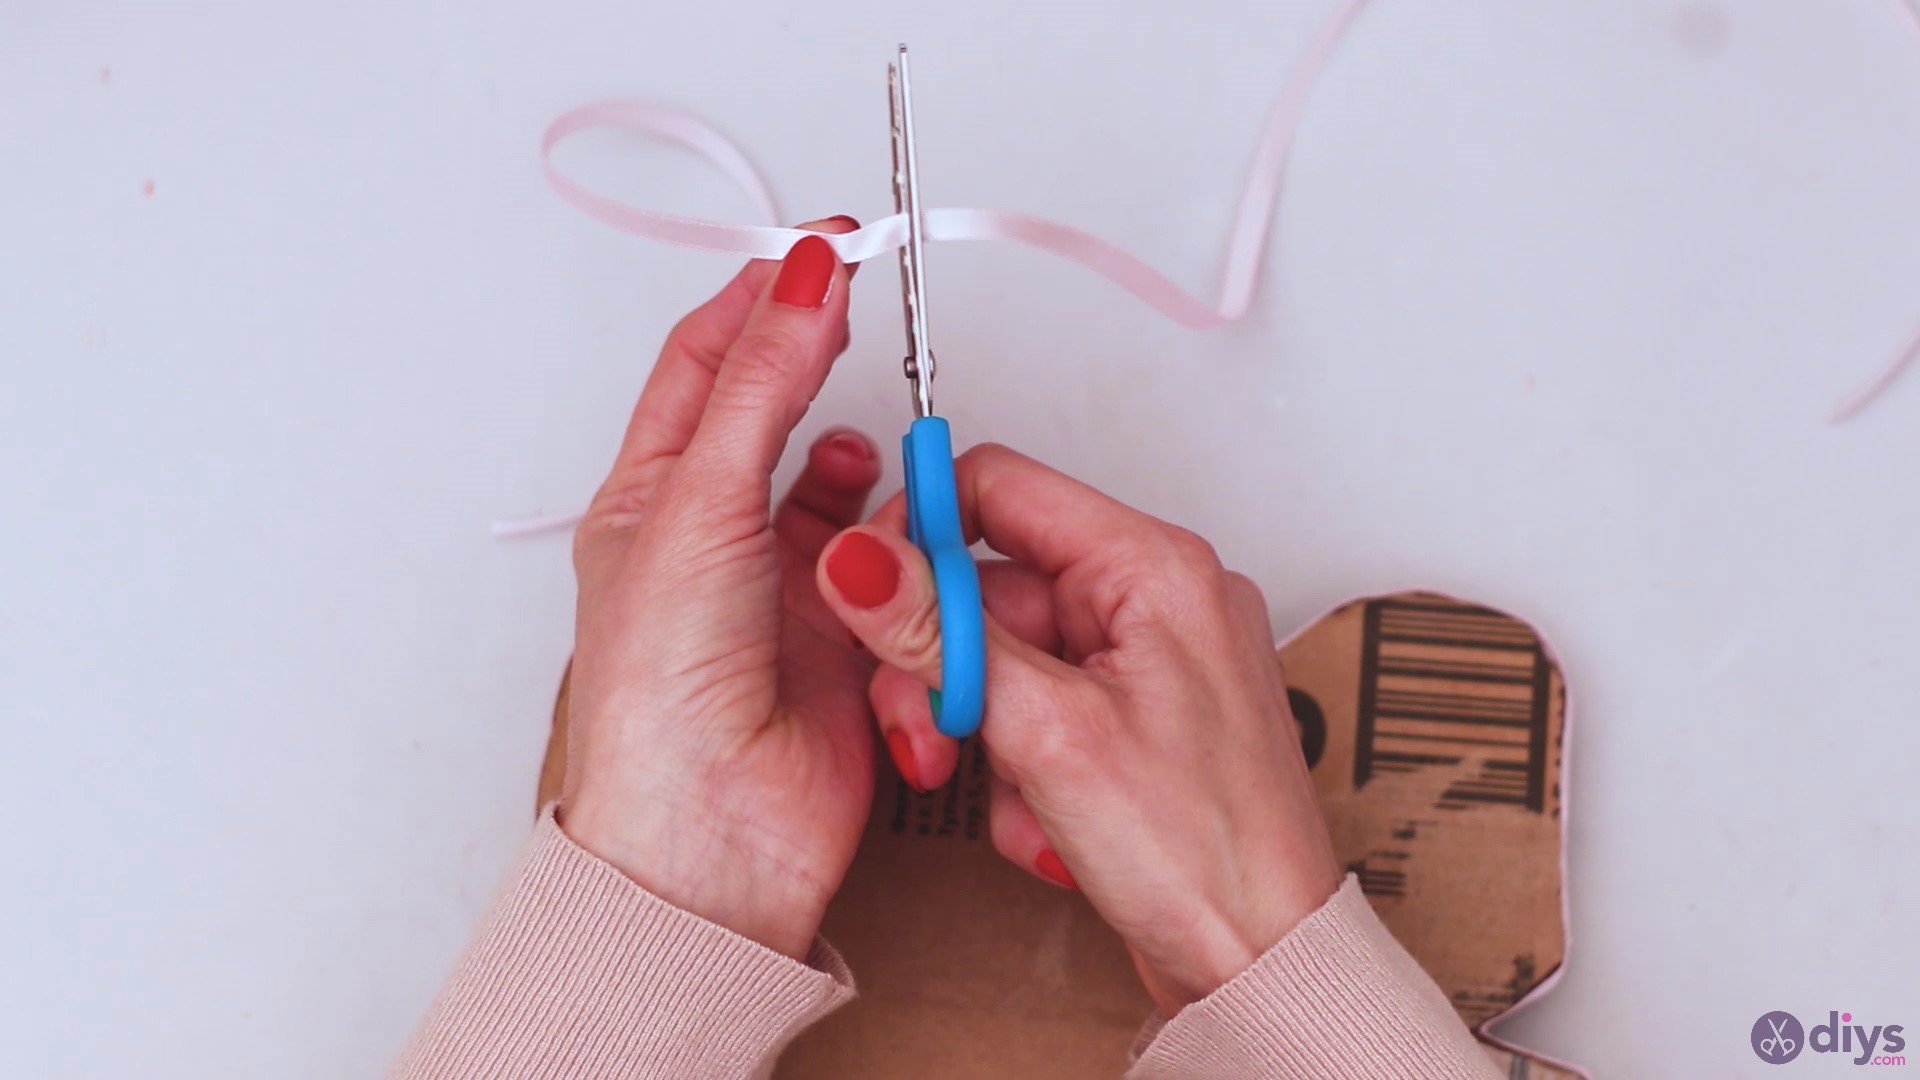
We wanted to hang the butterfly decor on the wall, so we used some of that extra silk ribbon to make a loop. Measure it out so you’ll know how much ribbon you need and cut off any excess material.
Get the glue gun and add a line on the cardboard and press the silk ribbon into it. Make sure to keep it pressed for a few seconds so the hot glue sets.


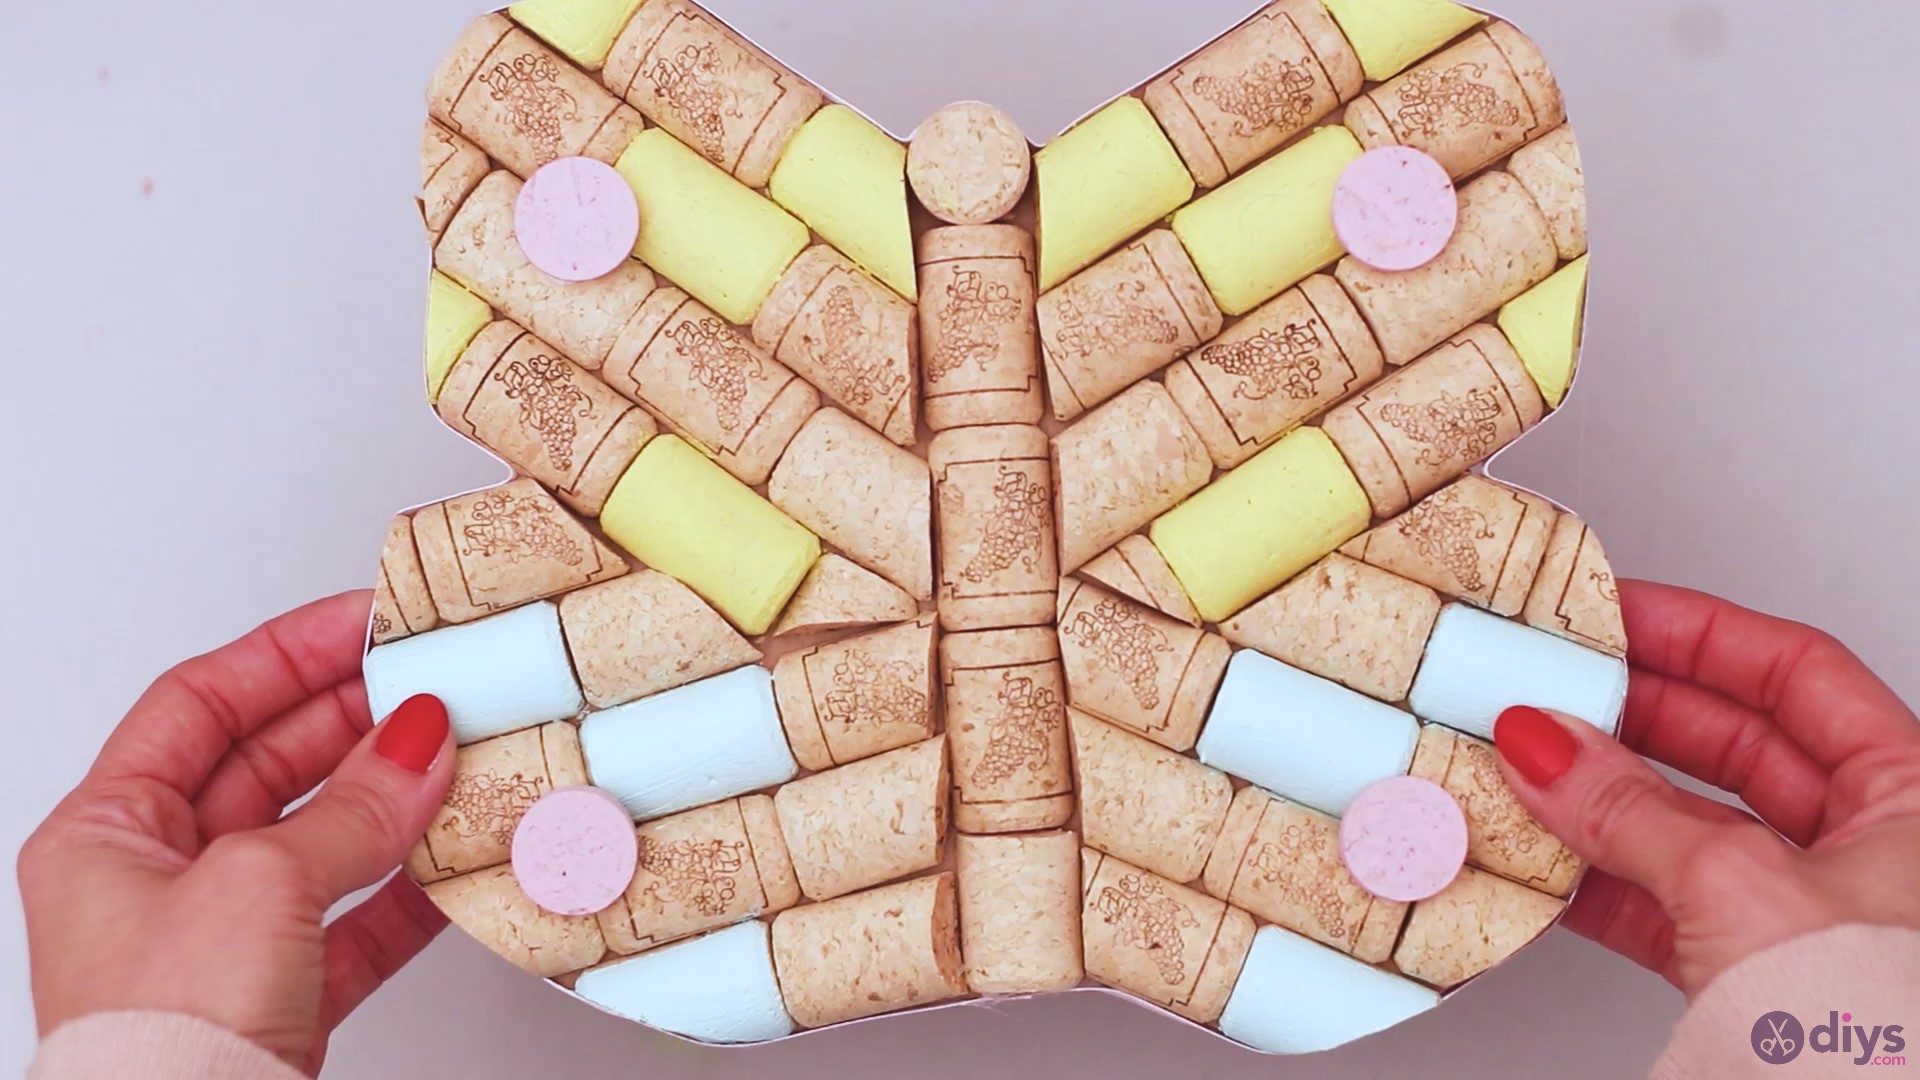
That’s it! You’re done! It looks amazing and it gives you the opportunity to customize it however you see fit. We love how it came out and can’t wait to put it up on the wall next to some other cool wine cork decor designs!
We would love to see how yours turned out, but we’re sure it’s going to be just as pretty. Whether you want to keep it to yourself or gift it to your friend, it’s super easy to make and the result looks great. Share your creations with us!