Wheatgrass Care – How To Grow And Harvest Wheatgrass
Updated on November 19, 2025
Wheatgrass juice is the main staple of juice bars everywhere. If you’re health-conscious and put health benefits over taste when it comes to food, then wheatgrass must be a part of your daily diet. But did you know that you can grow wheatgrass at home? Why go to a pricy juice bar when you can grow the wholesome plant at home and juice it yourself?
And you don’t have to have a garden to plant it. Wheatgrass doesn’t need much space and will grow perfectly well in a seedling tray or a planter that you can keep on the window sill or the balcony. Read on to find out how to grow, care for, and harvest wheatgrass without spending a fortune.
All about Wheatgrass
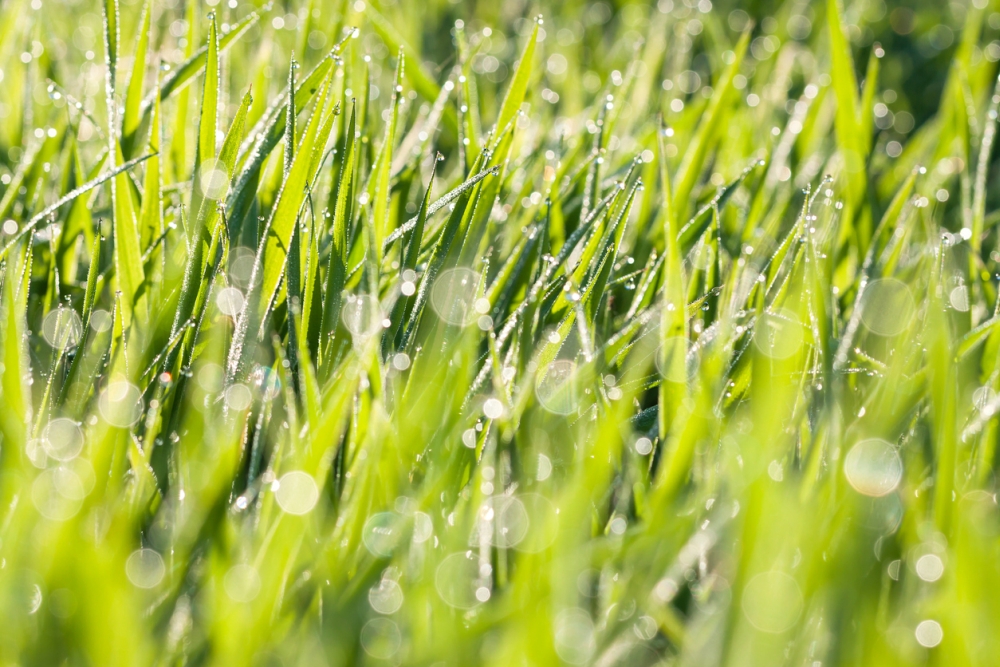
The hype around wheatgrass (Triticum aestivum) grows by the day so much that some people think it’s a newly discovered species. But the truth is wheatgrass is nothing more than the young version of the wheat plant. Before wheat grows and develops the seeds we grind into flour and make cookies and pasta, it first goes through a tender phase. During that phase, the first shoots of the plant are green, supple, and very juicy.
The first leaves of wheat look very much like grass which explains the name. And before it was touted as the next health fad, wheatgrass has been eaten, celebrated, and offered in rituals in many different cultures around the world for thousands of years.
From the middle of the twentieth century, wheatgrass started to gain popularity as the source of many health and medicinal properties. These days you can get wheatgrass commercially in different forms. It comes packaged as a drink, a snack, a powder, a spray, a gel, and an ointment. But since you’ll be growing it at home, you will have a fresh supply of the nutritious plant all year round if you like.
Benefits of Wheatgrass
From dieticians to scientists and entrepreneurs, everybody seemed to have something to say about the benefits of wheatgrass and contribute to the hype. While some of these benefits seem exaggerated at best, others have scientific studies and research to back them up. You should take these benefits with a pinch of salt especially when it comes to the medicinal properties of the plant.
- Nutrients: Even if it looks like blades of grass, wheatgrass is packed with nutrients. These include iron, phosphorus, calcium, potassium, and magnesium. It is also chock full of vitamins, especially vitamins B12, C, and E. If you don’t like to eat broccoli or spinach, but have to anyway, you’ll be happy to know that wheatgrass has more protein and iron than either of those veggies.
- Antioxidants: This is probably one of the best health benefits of wheatgrass. If you like blueberries and green tea, you’ll love wheatgrass for that very reason. Antioxidants prevent heart disease and keep your cardiovascular system in good shape.
- Living Chlorophyll: Chlorophyll is in leafy green plants and it helps reduce inflammations and detoxify the body. If you make your juice out of fresh wheatgrass, then you’ll get about 70 percent of its content in chlorophyll. All the more reason to grow it at home.
- Blood Sugar Regulation: Studies have proved that the fresh juice also helps regulate the sugar levels in the blood. However, these studies mostly involved animals. So whether it works the same way on humans or not is anybody’s guess.
- Cholesterol Reduction: While there’s no research to back up this property, there’s evidence to suggest that having the fresh juice will fill you up and reduce your cravings for fatty and unhealthy foods.
- Weight Loss: Following the same logic from the previous point, if you go down that path of wheatgrass juice and other healthy foods, then you’re on your way to losing weight.
How to Grow Wheatgrass
To grow wheatgrass you’d follow the same process of growing any other grain. First, you’ll need to get some organic seeds from a reliable source. You could buy them online or from a health food store. Old seeds don’t germinate well, so make sure the seeds are fresh or at least less than one year old. Then you can follow these simple steps.
- For a 10 by 10 inches tray, you’ll need one cup of wheatgrass seeds.
- Rinse the seeds in cool water to remove any spores or other seeds.
- Fill a bowl with room-temperature water and soak the seeds in it. Make sure you have three times more water than seeds in the bowl then cover it and keep it aside.
- Keep changing the water every day for the next three days.
- By the end of the third day, the seeds would have sprouted in the water. Drain them out and prepare your seedling tray.
- Line the bottom of the seed tray with a paper towel. This prevents the roots of the plants from growing through the holes of the tray.
- Fill the tray with a couple of inches of mixing pot with organic compost. As much as possible avoid using any chemically-treated components or ingredients.
- Spread the seeds on the surface of the soil. Make sure there are no empty spots in the tray.
- Press the seeds lightly with your hand to ensure each seed has contact with the soil. Don’t worry about spacing them out. The more crowded the better.
- Water the tray lightly to get the soil moist then cover it with moist paper towels.
- Keep the tray in a dark room with the air temperature between 60 to 75 degrees Fahrenheit. Wheatgrass seeds germinate in the dark.
- Although the seeds are already sprouting, they still need a few days to develop roots that set in the soil. Keep the soil moist until that happens. Also, spray the soil and the paper towels with water every day and don’t let them go dry.
- Once the seeds sprout leaves, remove the paper towels covering them and continue to sprinkle them with water every morning.
- Move the tray to a window that gets partial sun.
Wheatgrass Care
One of the best things about growing wheatgrass indoors is that you can start it any time of the year. It needs little care and before you know it, the tray of wheatgrass is ready to harvest. No flowers or pollinating problems to worry about and it certainly won’t put you out with pruning or fighting off pests and diseases. Another advantage is that it usually takes anything from 10 to 12 days from the time you plant the seeds until you’re ready to harvest your batch.
Soil
The type of soil or potting mix you use will impact the taste, nutrients, and flavors of the wheatgrass you grow. So as much as possible, try to stay organic. Use good-quality organic and sterile soil or potting mix. Wheatgrass also prefers slightly acidic soil. So check the soil pH and bring it up or down to 5.5 to 6.0. Any changes in the soil pH will impact the flavors and taste of the juice.
Light
The seeds of wheatgrass need to germinate in total darkness. That’s why you cover the tray with a paper towel to cut off the light. Once the germinating seeds sprout, remove the towel and place the tray on a window that gets about 6 hours of sunlight per day. Wheatgrass thrives in full sun and the leaves turn bright green under sunlight. If you don’t get enough sunlight, make up for it with a grow light. Keep the lights on for up to 8 to 10 hours every day until you harvest the succulent plants. Light deprivation can lead to yellowing leaves and sickly stems.
Water
You’ll need to spray the wheatgrass plants every morning to keep the soil moist. Buy a spray bottle and keep it near the tray. If the soil goes dry under the sun, spray it again two or three times a day. Don’t let the soil get wet or waterlogged. This could happen easily since you’re not using a thick layer of soil and the holes of the seedling tray are covered with a paper towel. Signs the plants are struggling with overwatering include yellow leaves and wilting stalks. Hold off watering until the plants recover.
Fertilizer
Again here you should stick to organic compost and avoid chemical fertilizers. Mix a generous dose of slow-release fertilizer into the potting mix before sowing the seeds. That should give the plants a good start, but it’s not enough considering the small amount of soil available for so many seedlings. So side-dress the plants with rabbit manure tea or liquid kelp fertilizer. Fill a spray bottle with the fertilizer and apply it every other morning before you water the plants.
Harvesting Wheatgrass
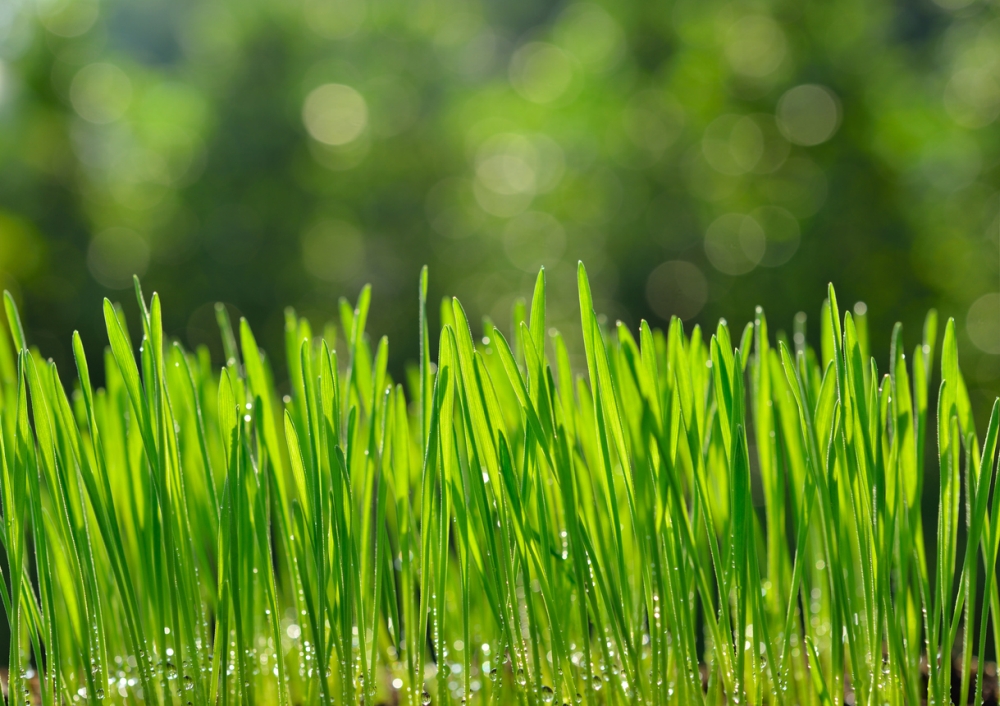
Here’s the fun part. When your wheatgrass plants grow to about 4 to 6 inches, they’re ready to harvest. You wouldn’t want them to grow any longer since they lose many of their nutrients and the leaves become less tasty. It usually takes anything between 9 to 10 days for the tray to become ready to harvest.
Some people recommend that you wait until the plants split. That’s when a new leaf shoots out of the first and main leaf. While that definitely doubles your harvest, it might come at a cost since the leaves would be too coarse and slightly bitter by then.
Use a clean and sterilized pair of scissors to cut the wheatgrass just an inch or two above the roots. Make sure not to damage the roots since you can grow a second crop out of them. The fresh leaves are ready to be juiced immediately which gives you the best taste and most nutrition. When done harvesting the plants, water the tray and watch another crop start growing in a couple of days.
How to Juice Wheatgrass
While it’s recommended that you juice your fresh wheatgrass once you’ve cut it, you can still keep it in the fridge for up to a week. After washing the leaves, dry them out on a paper towel and put them in a zip lock bag then store them in the fridge.
When you want to juice a batch, take it out of the zip lock bag and drop it in a wheatgrass juicer. These are different from regular juicers as they don’t get clogged by the leaves. Once the juice gets an even texture and you don’t see bits of leaves floating in it, then it’s ready.