DIY Painted Burlap Favor Bags for Wedding or Party
Updated on November 19, 2025
This DIY project is perfect for those of you who are looking for a creative way to give out wedding/party favor bags or just thinking about a thoughtful way to give a gift. This entire project takes about 15-20 mins to make and it doesn’t cost much to whip up a couple of these baggies. Using muslin fabric is really easy to work with and it gives you a clean canvas to really let your creative juices flow. When it comes to the design you can use different patterns, shapes, or even personalize it with letters.
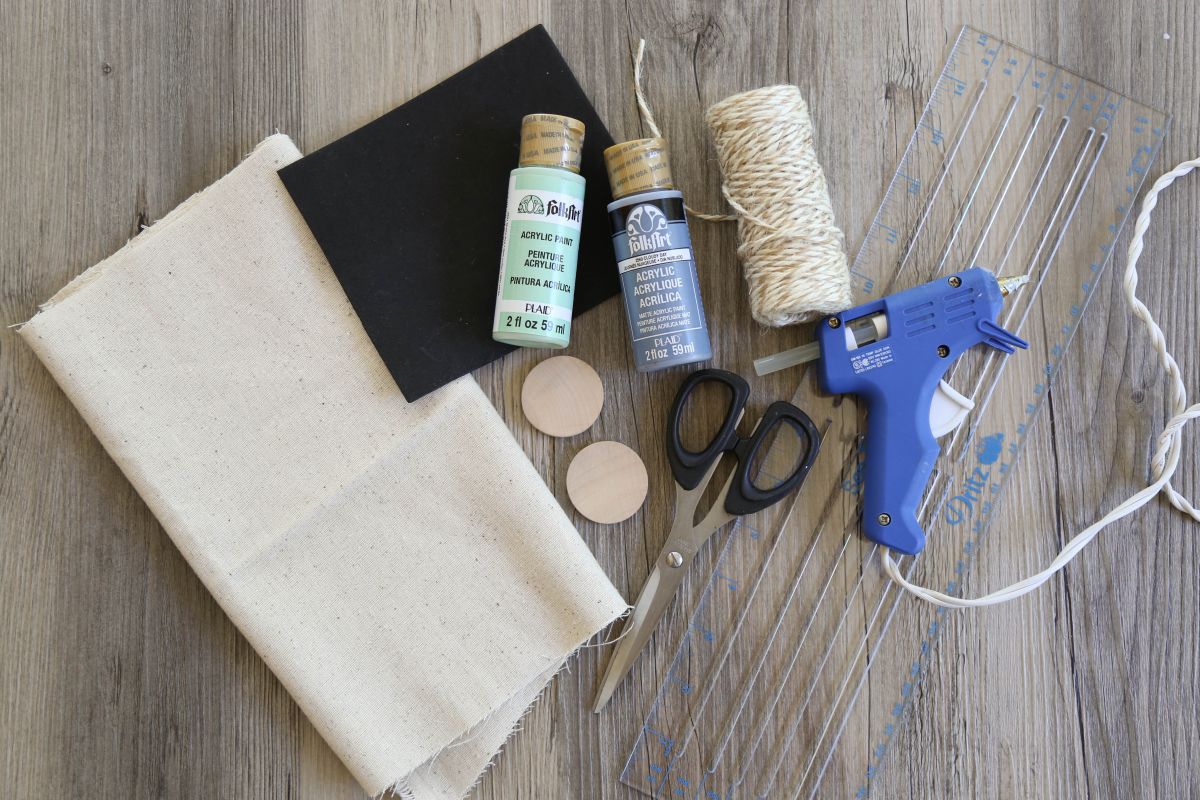
Materials You Will Need To Craft The Favor Bags:
- Scissors
- String or Twine
- Muslin fabric
- Craft foam
- Glue gun
- Wood crafting blocks
- Sewing machine
- Straight pins
- Iron
- Acrylic paint
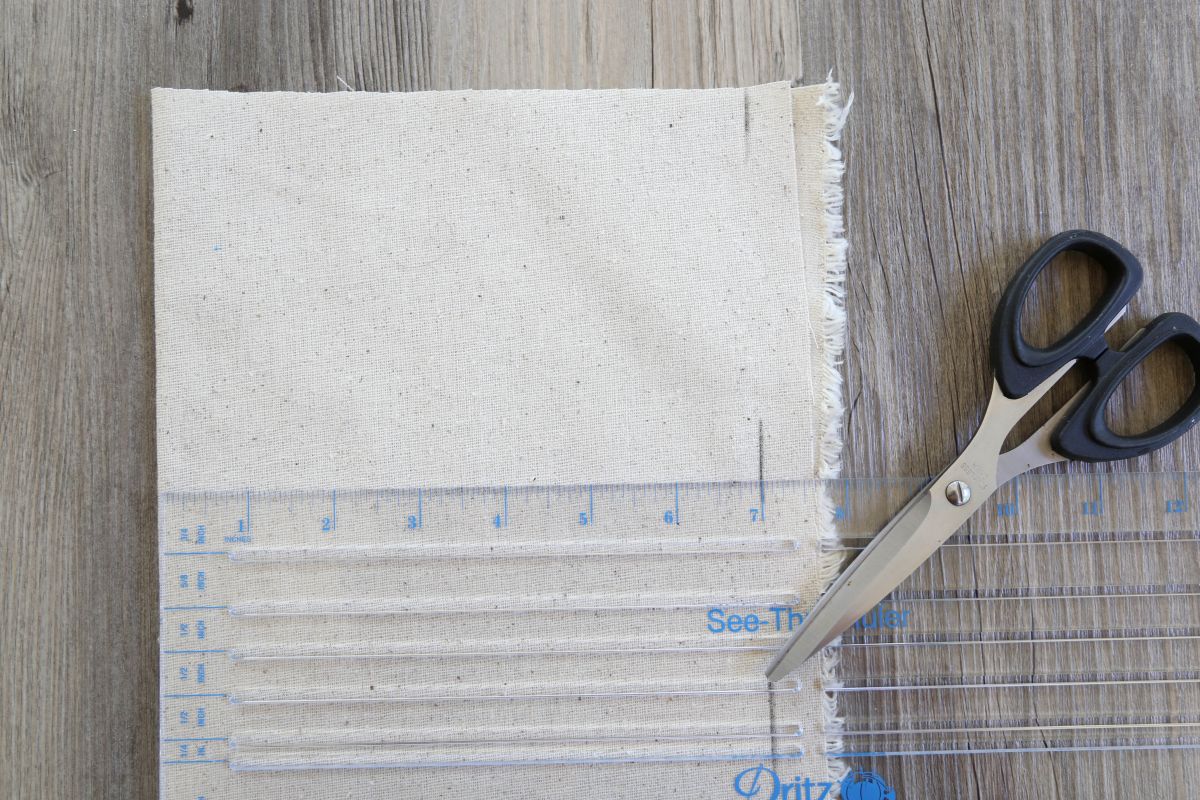
Step 1: prepare the burlap muslin fabric
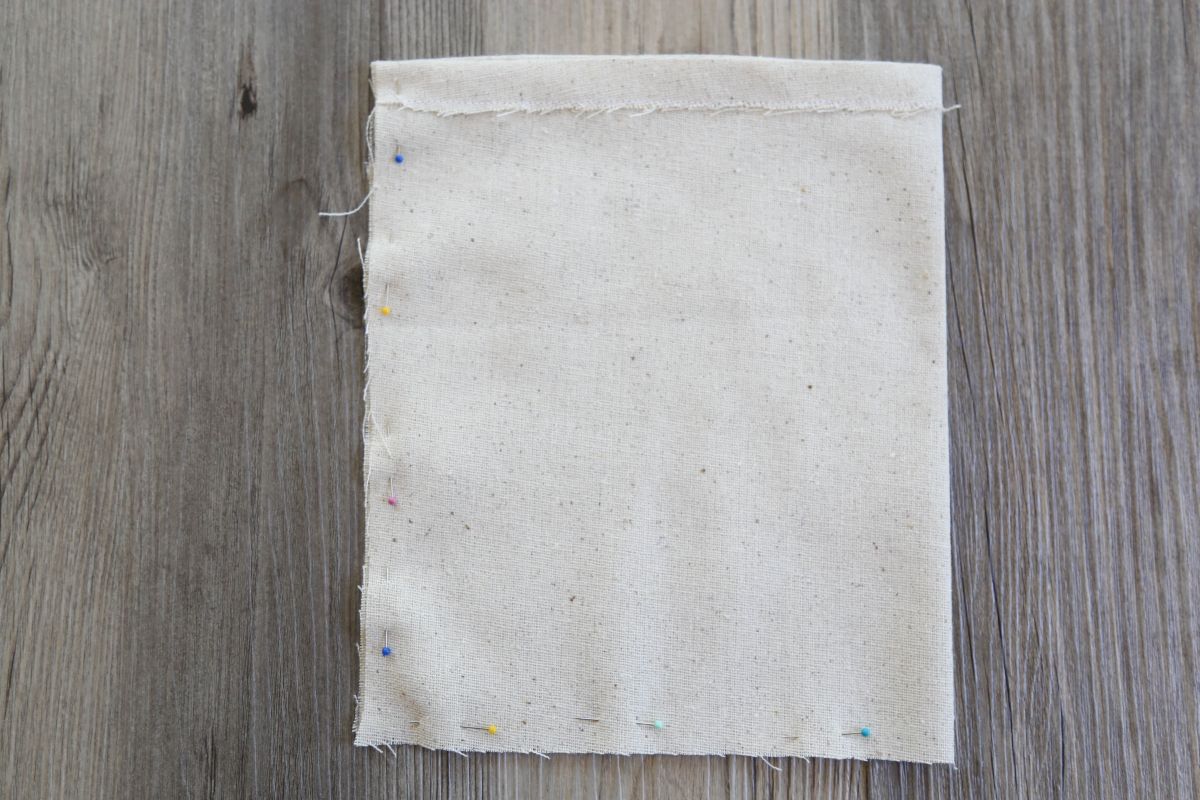
Take the muslin fabric and measure out 7 inches across (starting from the folded area) and 9 inches tall. Once you have measured and cut the fabric, make sure the inside of the fabric is facing you.The entire fabric should measure 14 inches wide.
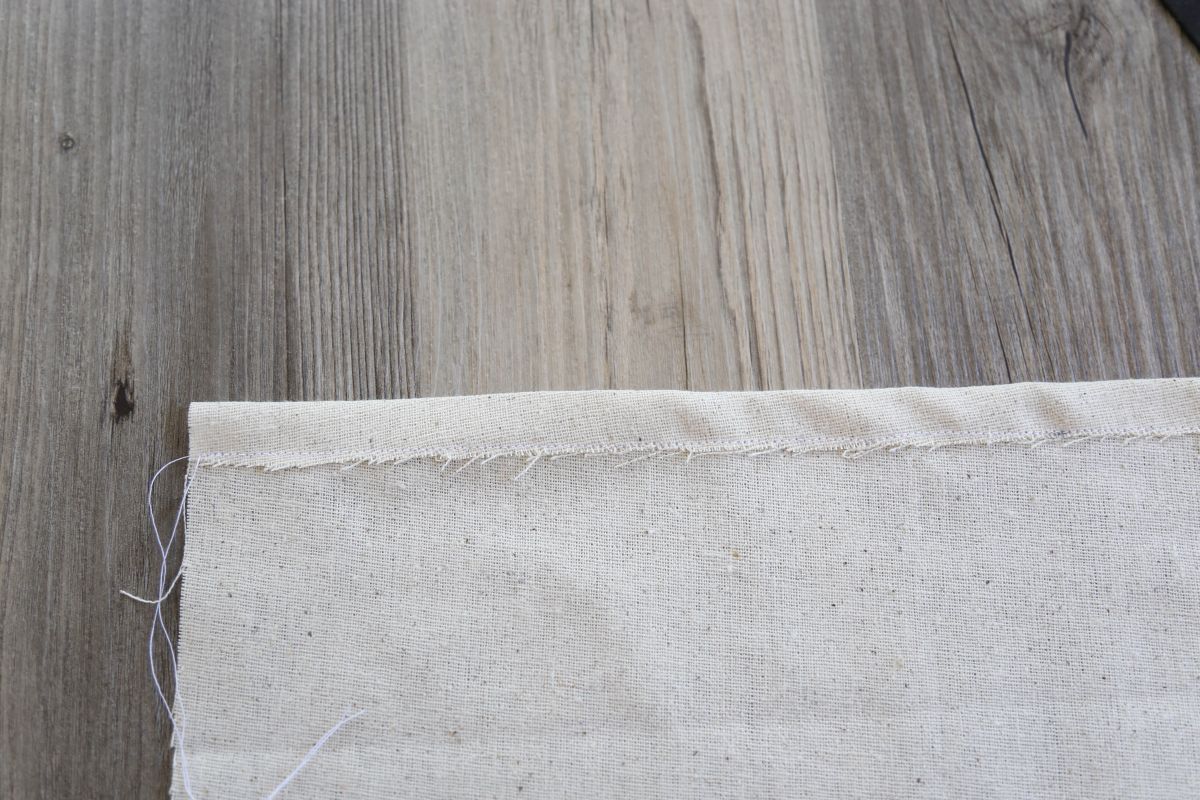
Step 2: iron the folded fabric
Measure and mark 1 inch all across the top of the fabric. Fold the top edge of the fabric to the mark and iron the folded fabric down. Now stitch all along the line.
Step 3: sewing process
Fold over the fabric right sides facing each other. Now sew the open sides of the fabric( left bottom & bottom). Make sure not to sew the folded side of the bag.
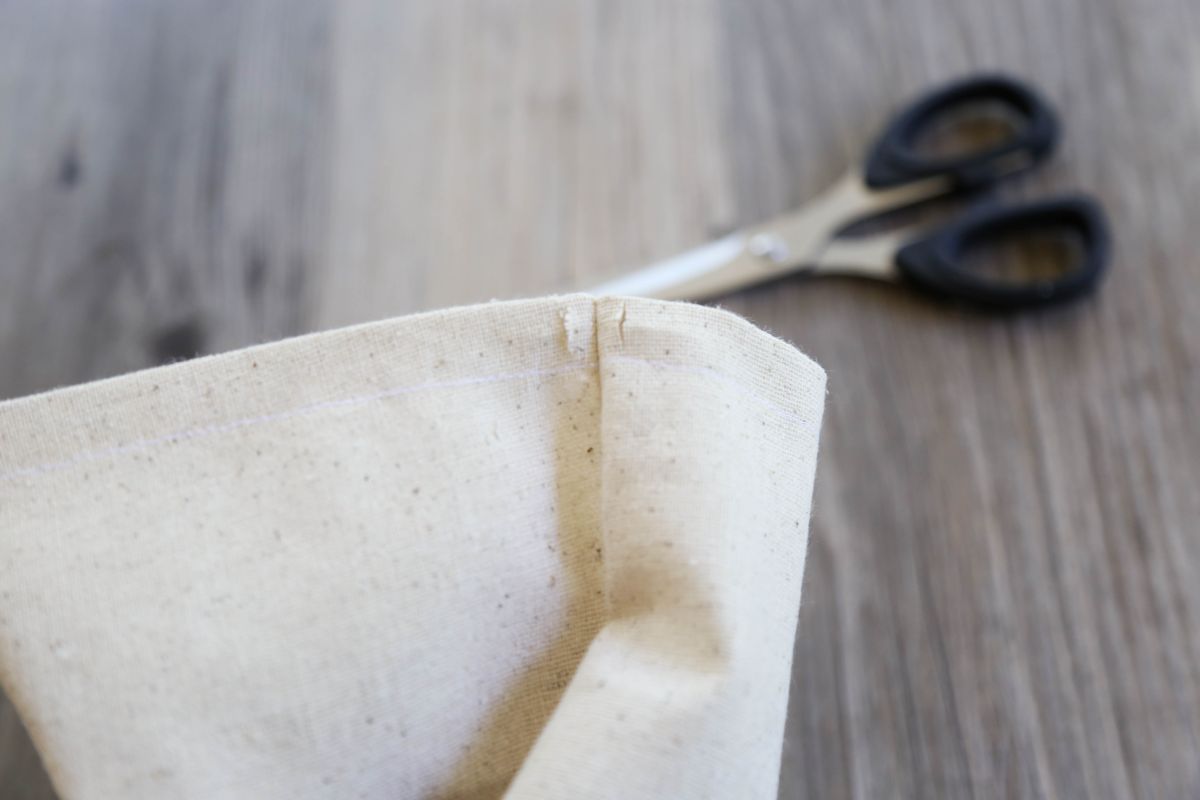
Step 4: cut 2 tiny slits
After sewing the sides turn the bag inside out. Grab your scissors and cut 2 tiny slits, one on opposite sides of the stitched line. Make sure your only cutting the first layer of fabric.
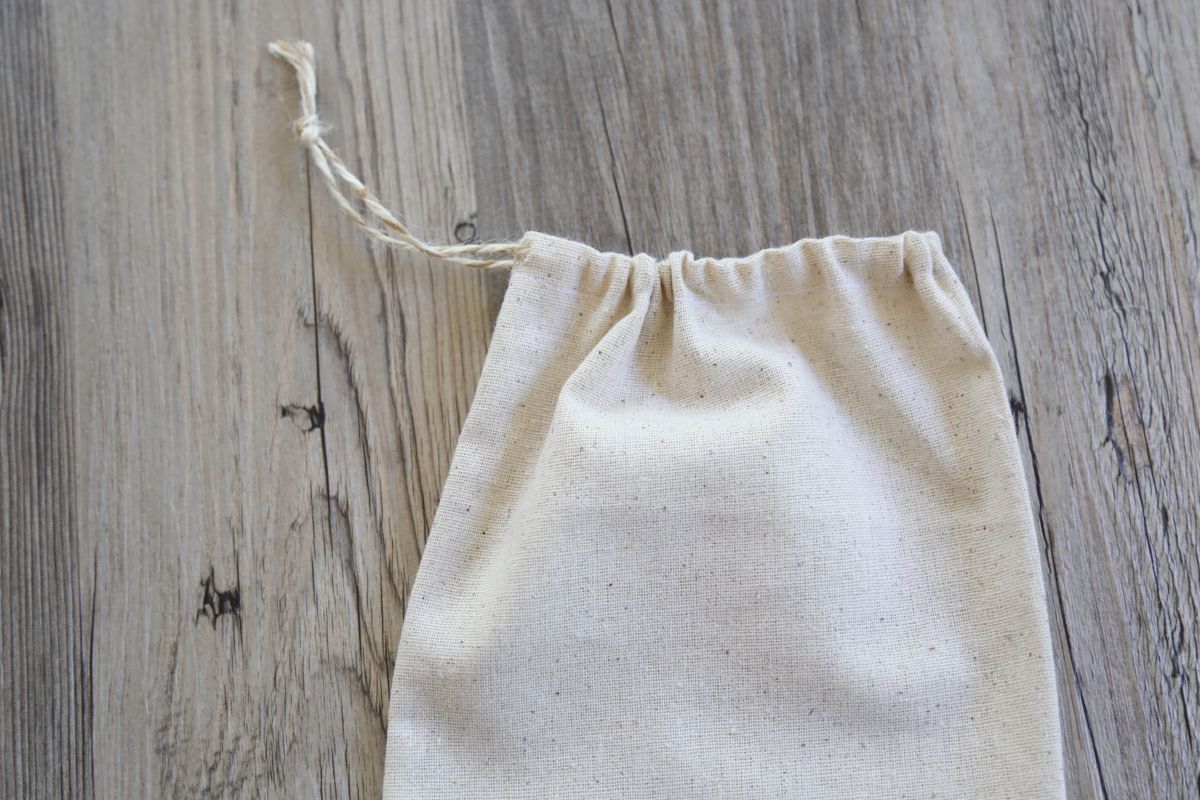
Step 5: add string
Cut 10 inches of the twine/string and take the safety pin and attach it to the end of the twine. Take the safety pin and put it through the hole and pull through to the other side. Once the you got the twine through, remove the safety pin and tie a knot towards the end.
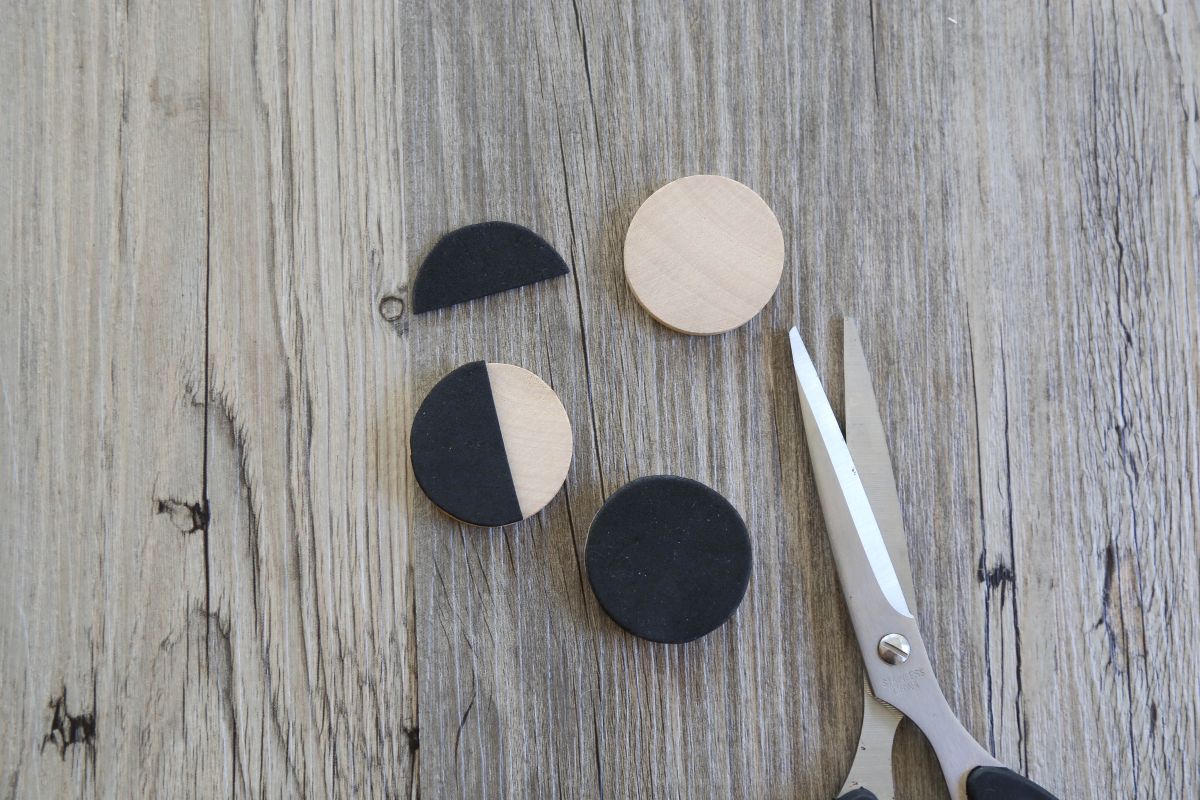
Step 6: prepare the stamp
Take the sheet of craft foam and cut out a 1 ½ inch circle and cut half a circle. Grab your glue gun and glue the cut-outs to the wooden craft blocks
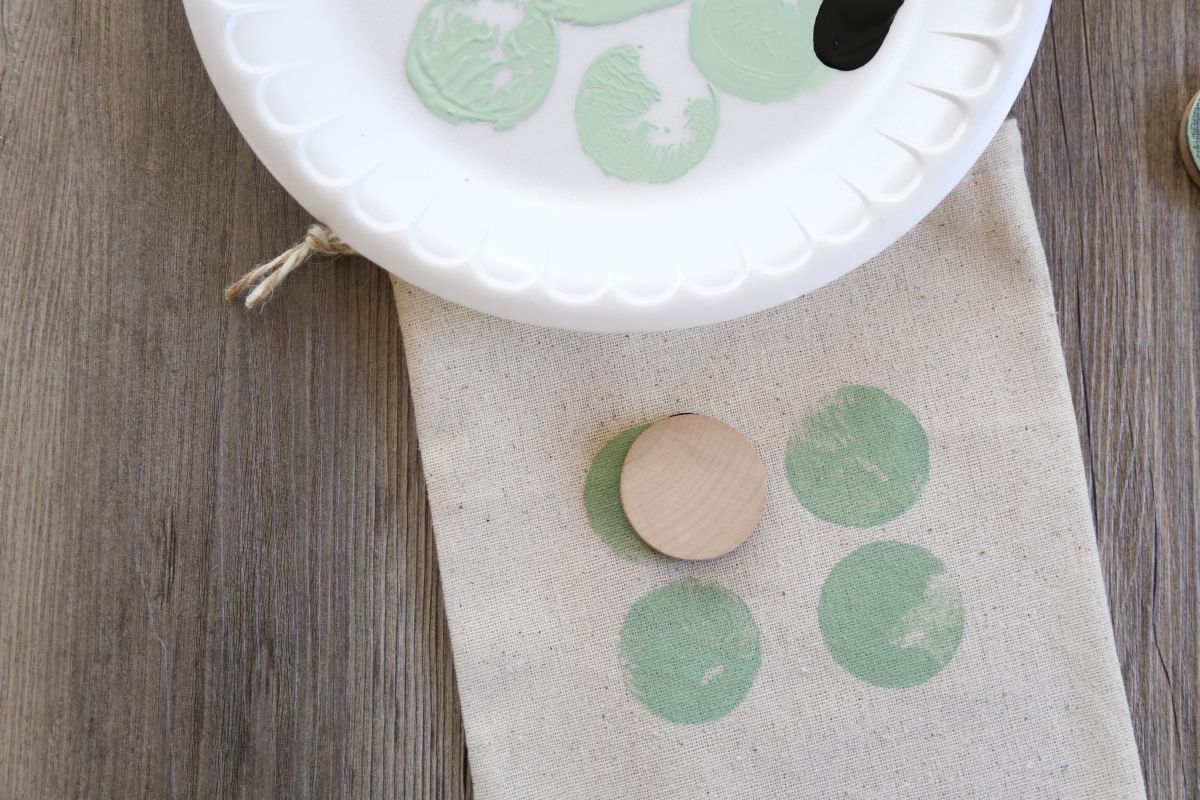
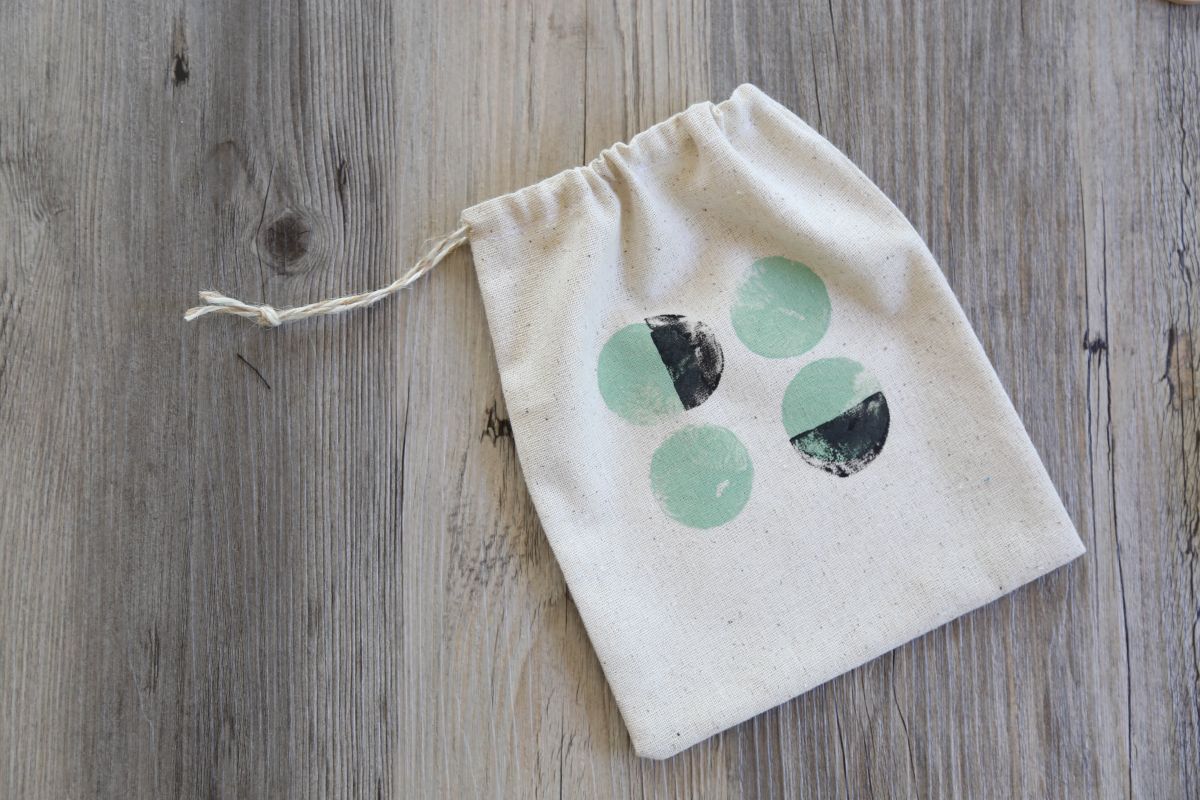
Step 7: stamping process
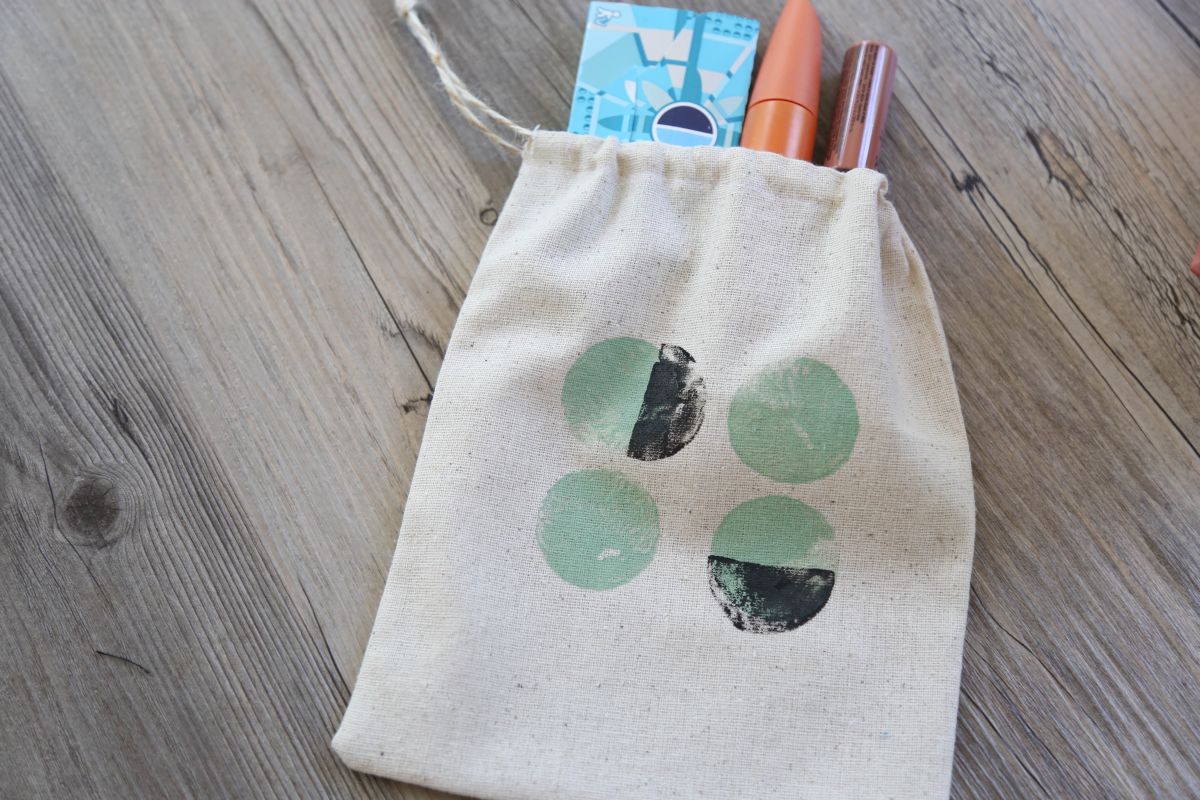
Before you design the pouch, place a piece of paper inside to protect the other side of the fabric. Take your paint and pour it onto a plastic plate and carefully dip you circle stamp on the paint. Test it out on a piece of paper before you stamp it on the pouch. Of course you don’t have to stick with this exact design.
Conclusion
Once all the paint is all dried, your bag is all set to give out. Go ahead and stuff your creation with goodies and gifts. Hope this tutorial was fun and easy to follow.
Happy crafting!