DIY Minnie Mouse Tin Can Container – How To Recycle Tomato Cans
Updated on November 19, 2025


In my house, the only thing that gets the kids more excited than the idea of spending the afternoon making crafts together is anything Disney themed. There’s just something about the whole world of Disney and all its characters that makes them feel as happy as can be! That’s why I’m always trying to come up with simple, fun ways to help them make Disney themed DIY projects, just to keep them excited about getting creative with me by merging their favourite things in one place. Our most recent of these projects, which was inspired by their need for a place to put their pencils and markers on their homework desk in the play room, was this super cute and very sparkly Minnie Mouse tin can container!

The container was actually such a huge hit that I ended up having two playmate parents ask me how we did them. That’s why I decided to map out the process for other people who liked the idea to try their hand at, but with a little bit of guidance. Check out these step by step instructions complete with photos! If you’d rather follow along with a video tutorial instead of written words, scroll to the bottom of this post to find just what you’re looking for.
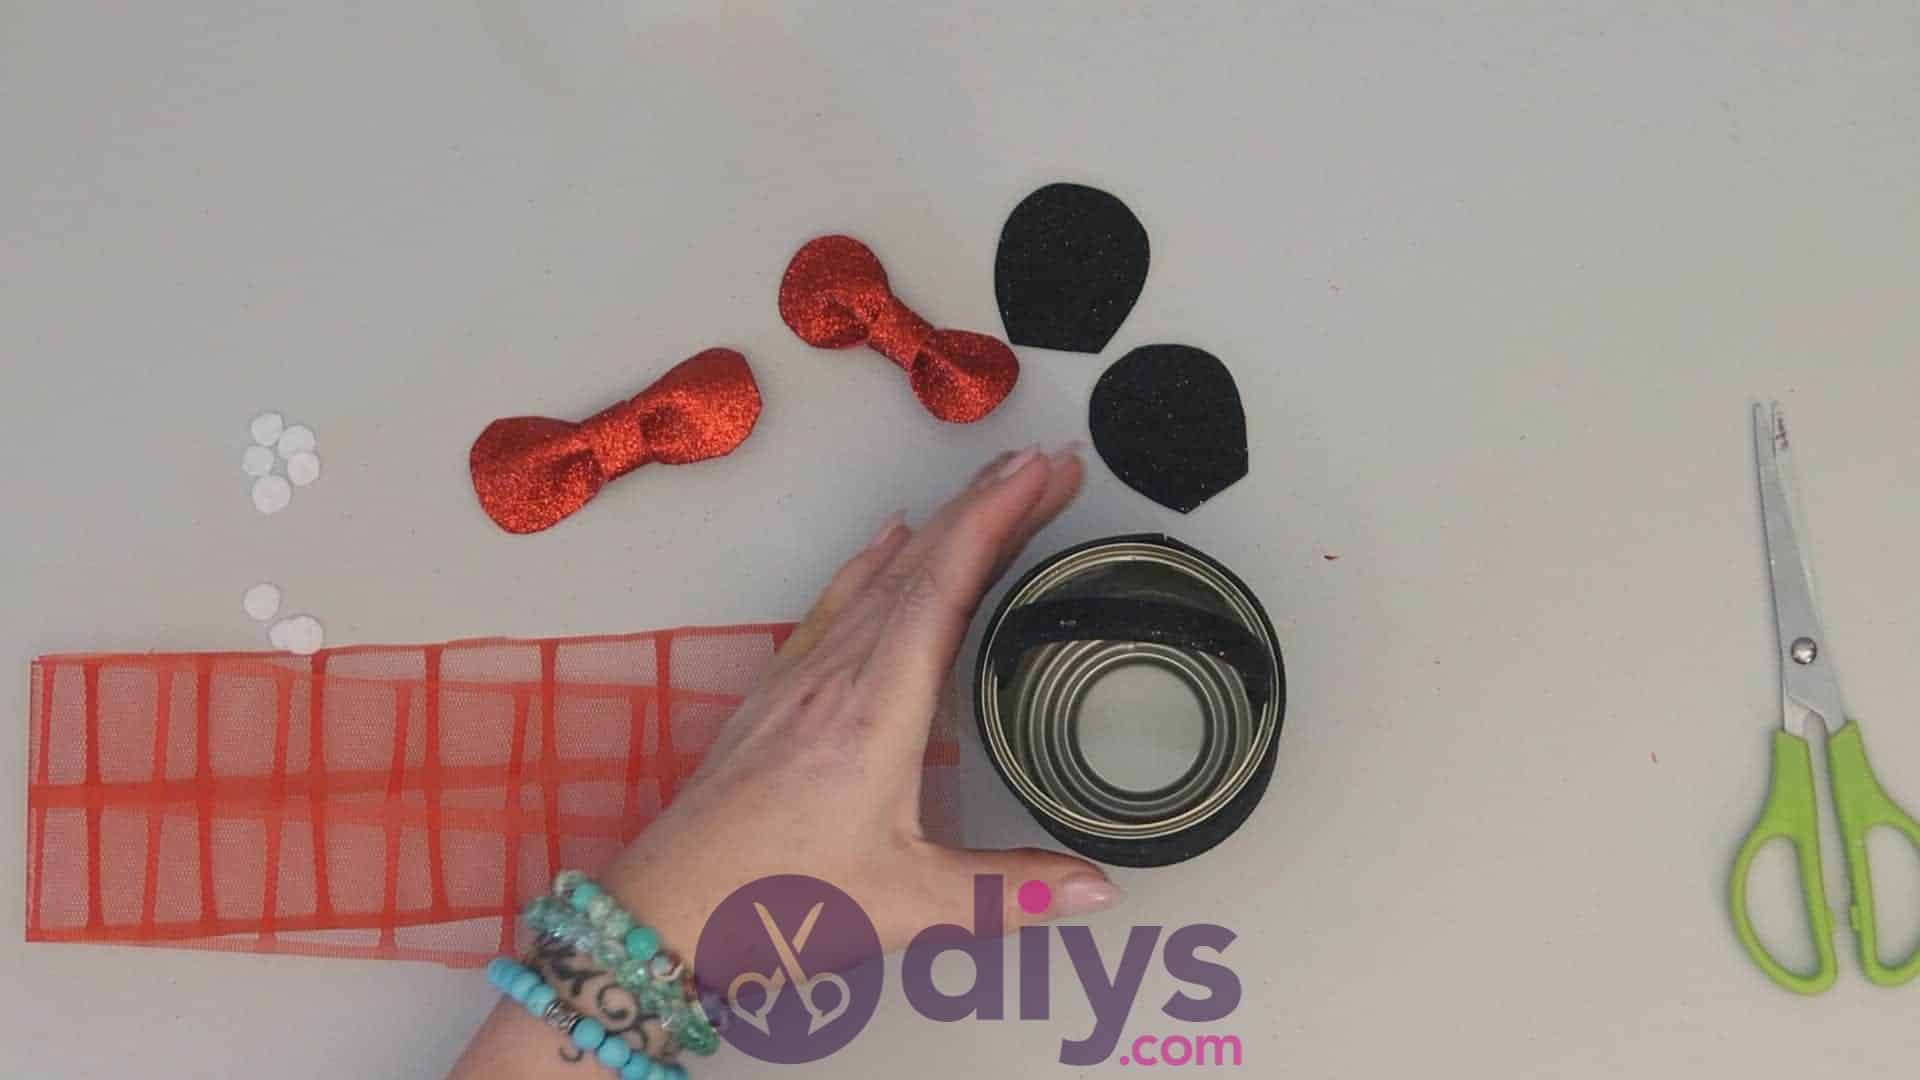
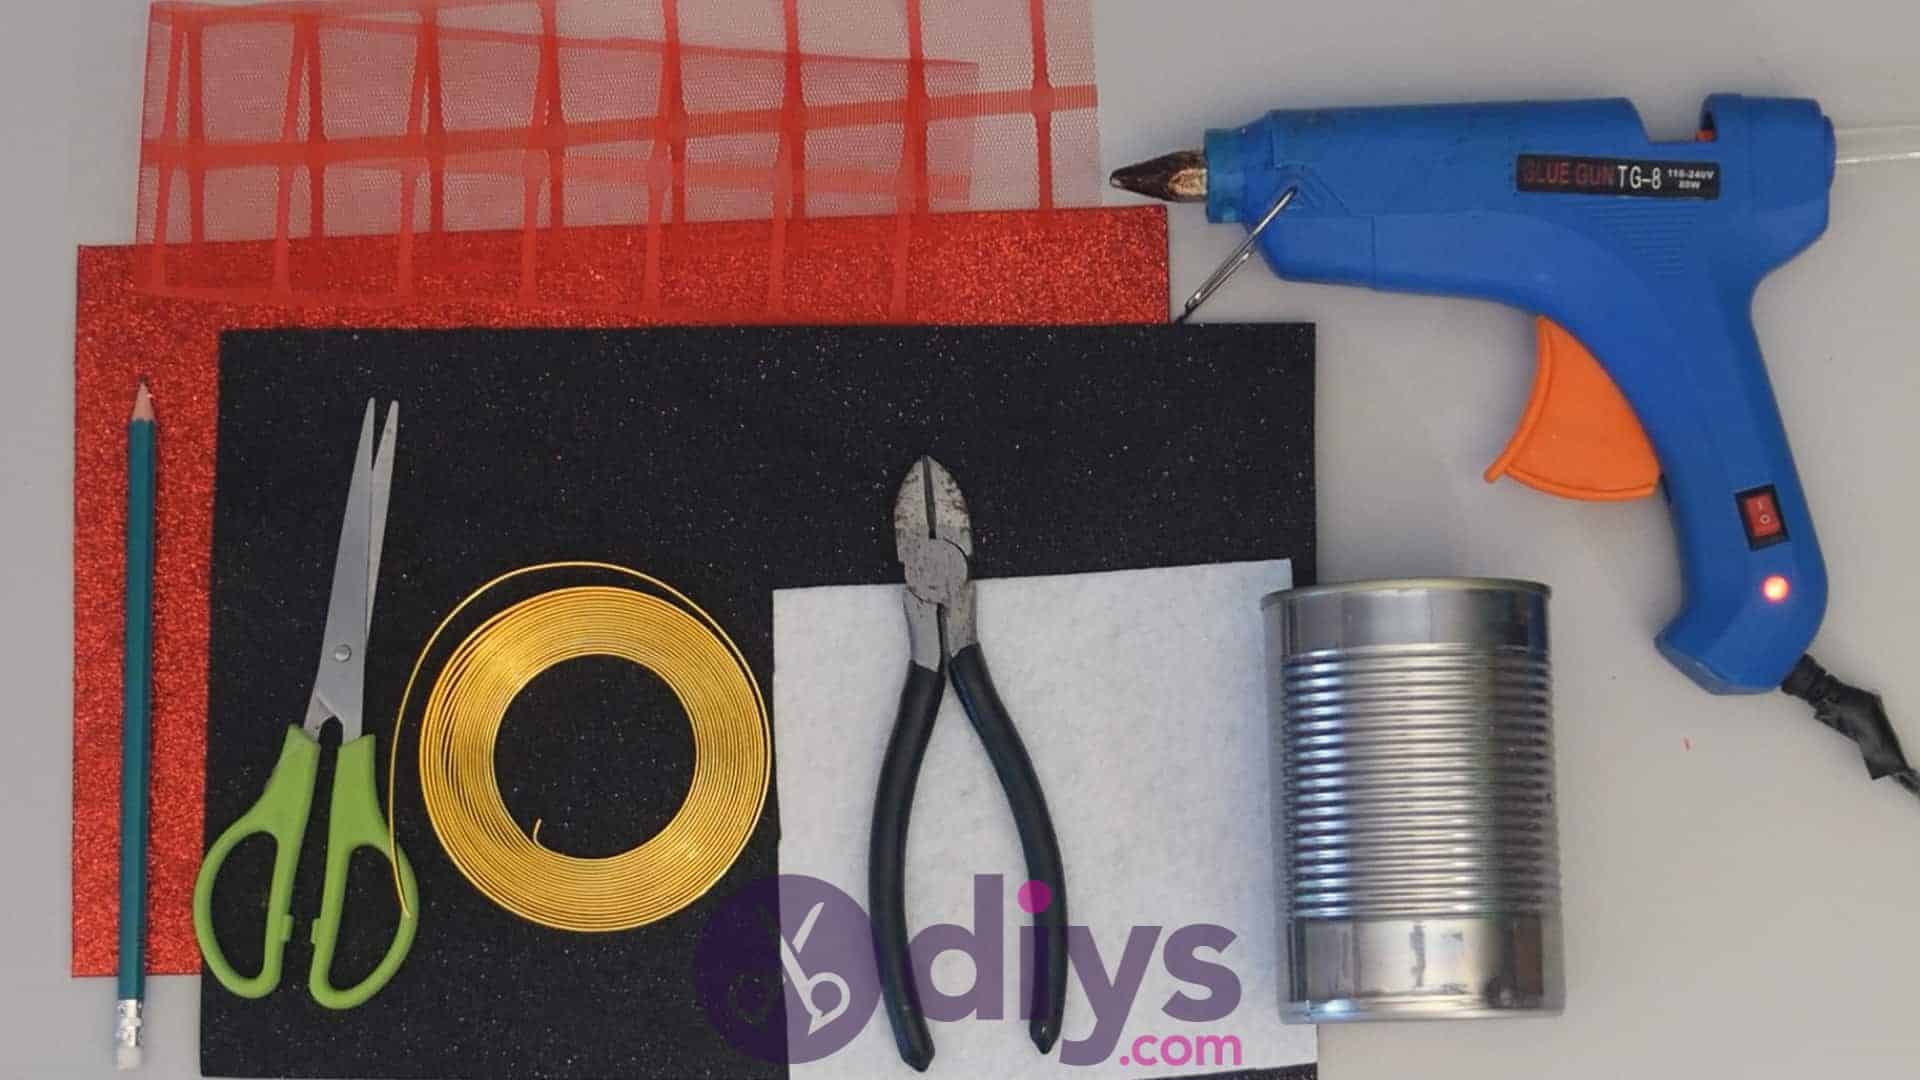
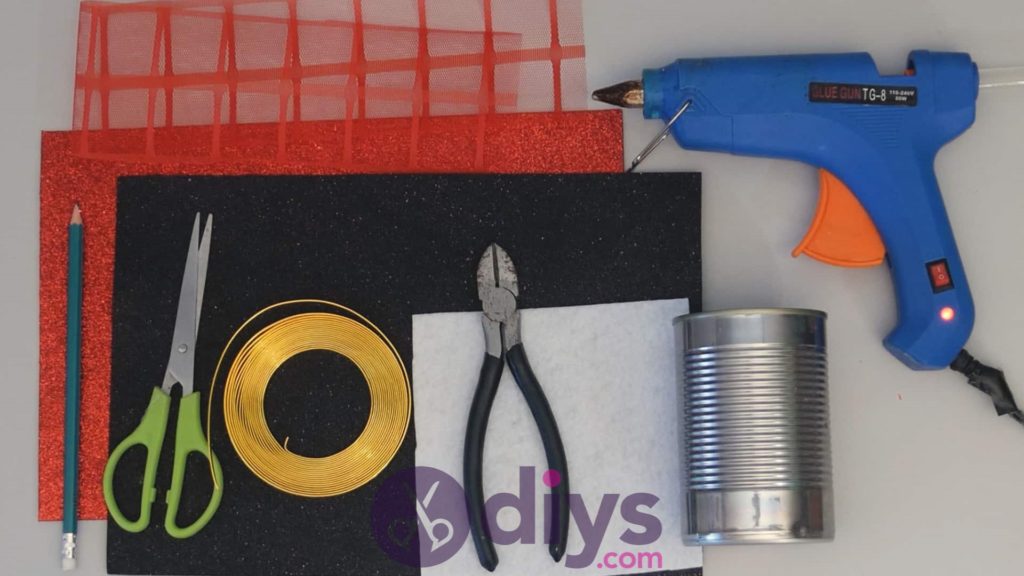
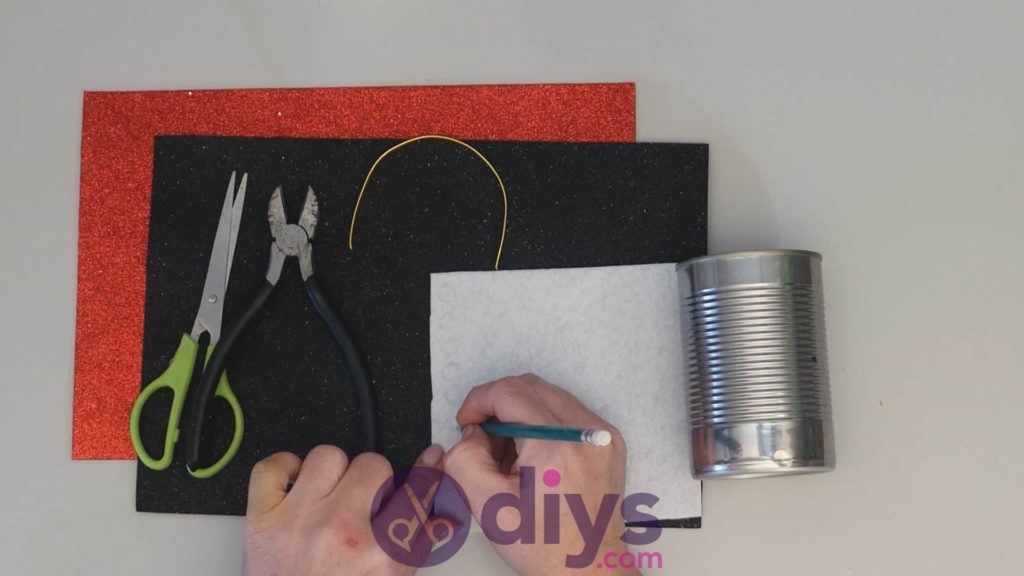
For this project, you’ll need:
- An empty tin can
- Sparkly foam paper (red and black)
- Wire
- Hot glue
- A pencil
- Scissors
- White felt
- Pliers
- Red sheer trim


Step 1:
Gather your materials!
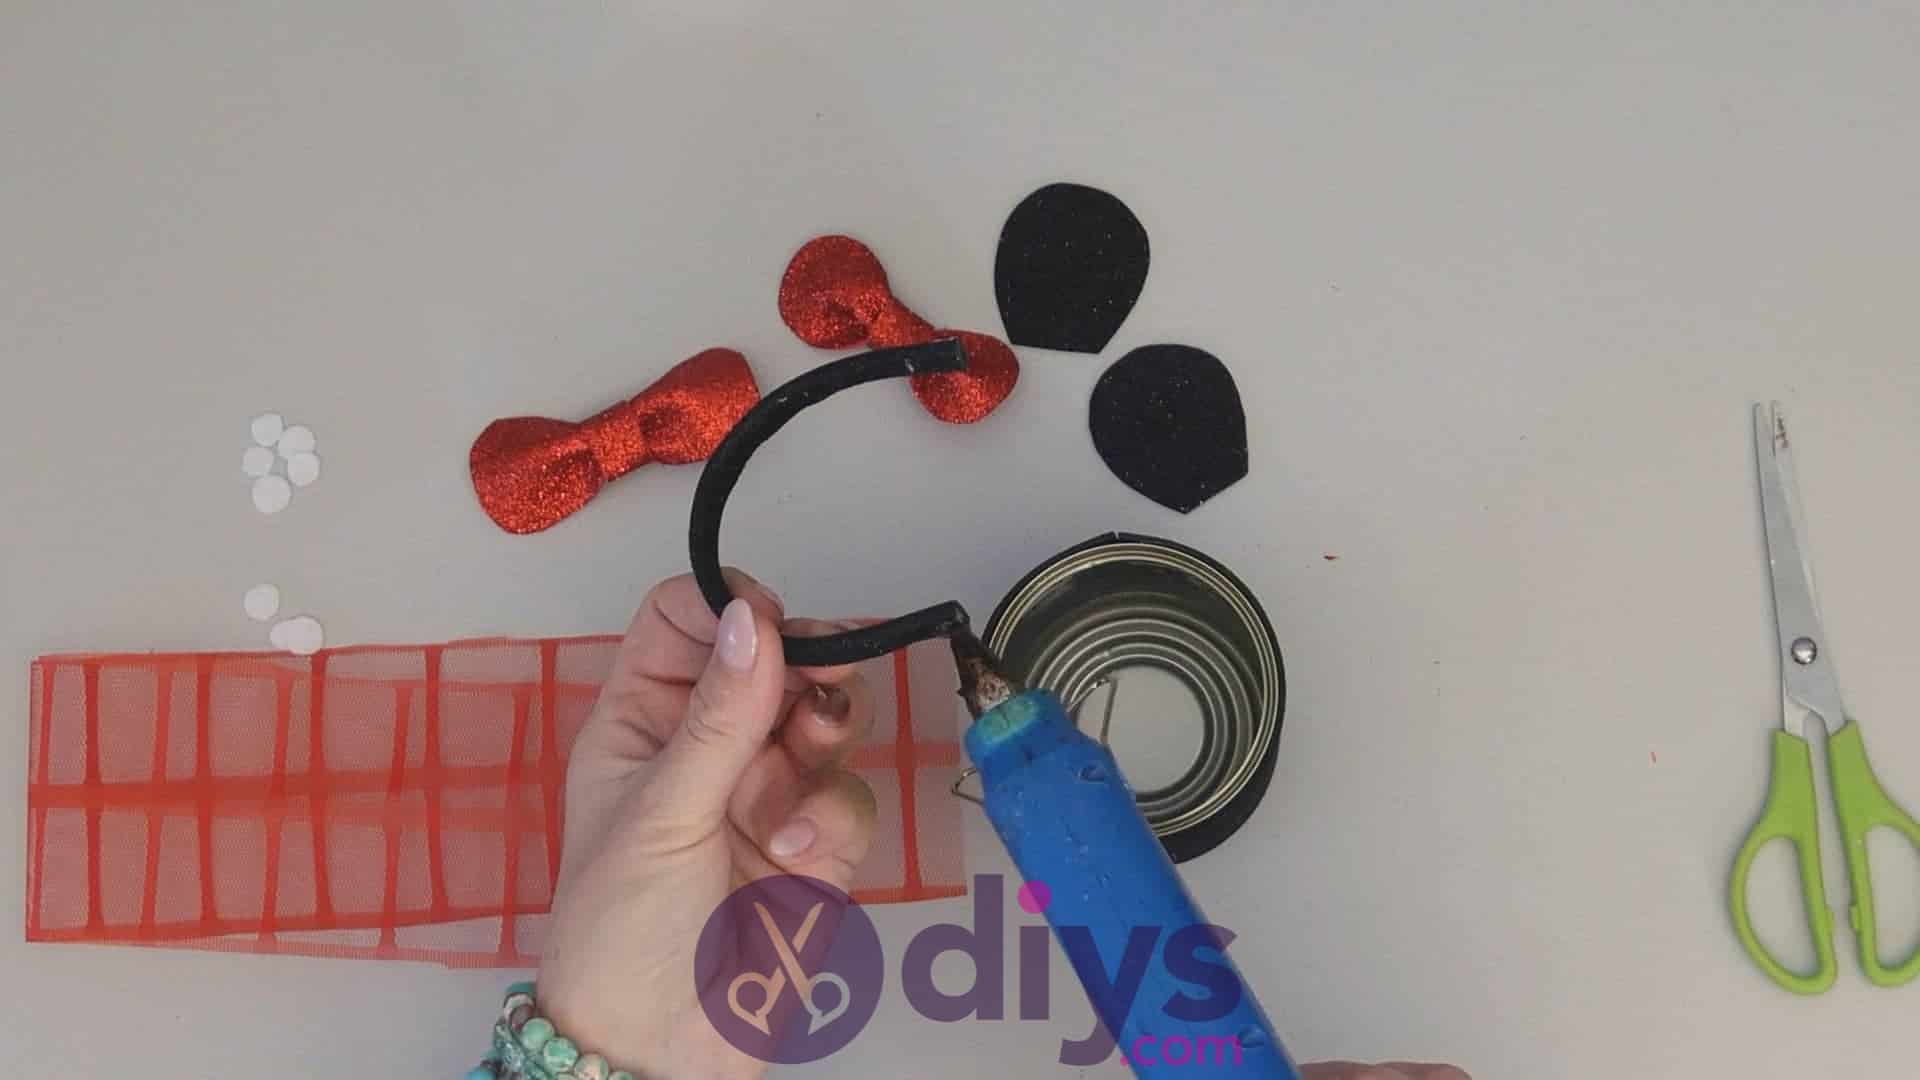
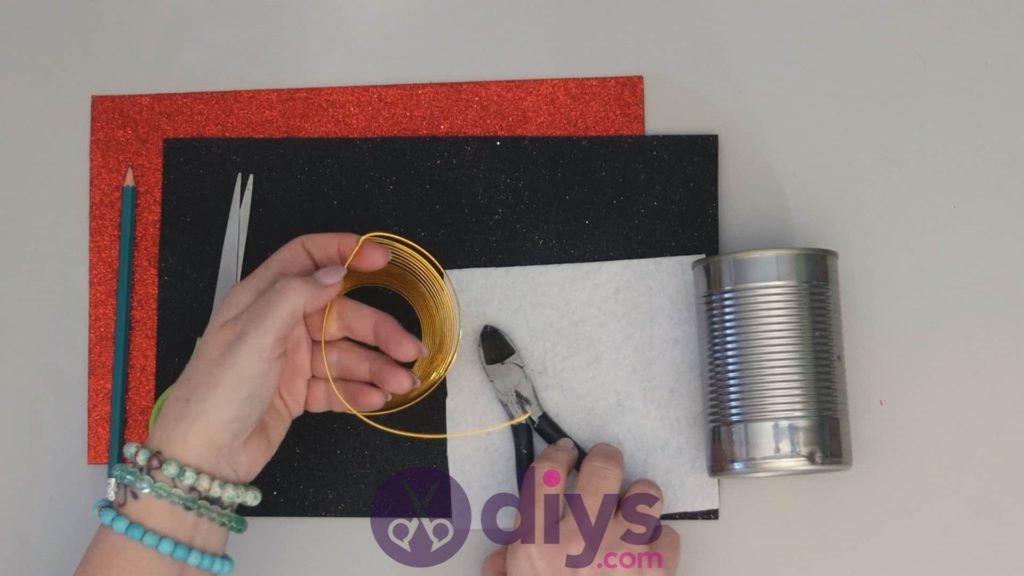
Step 2:
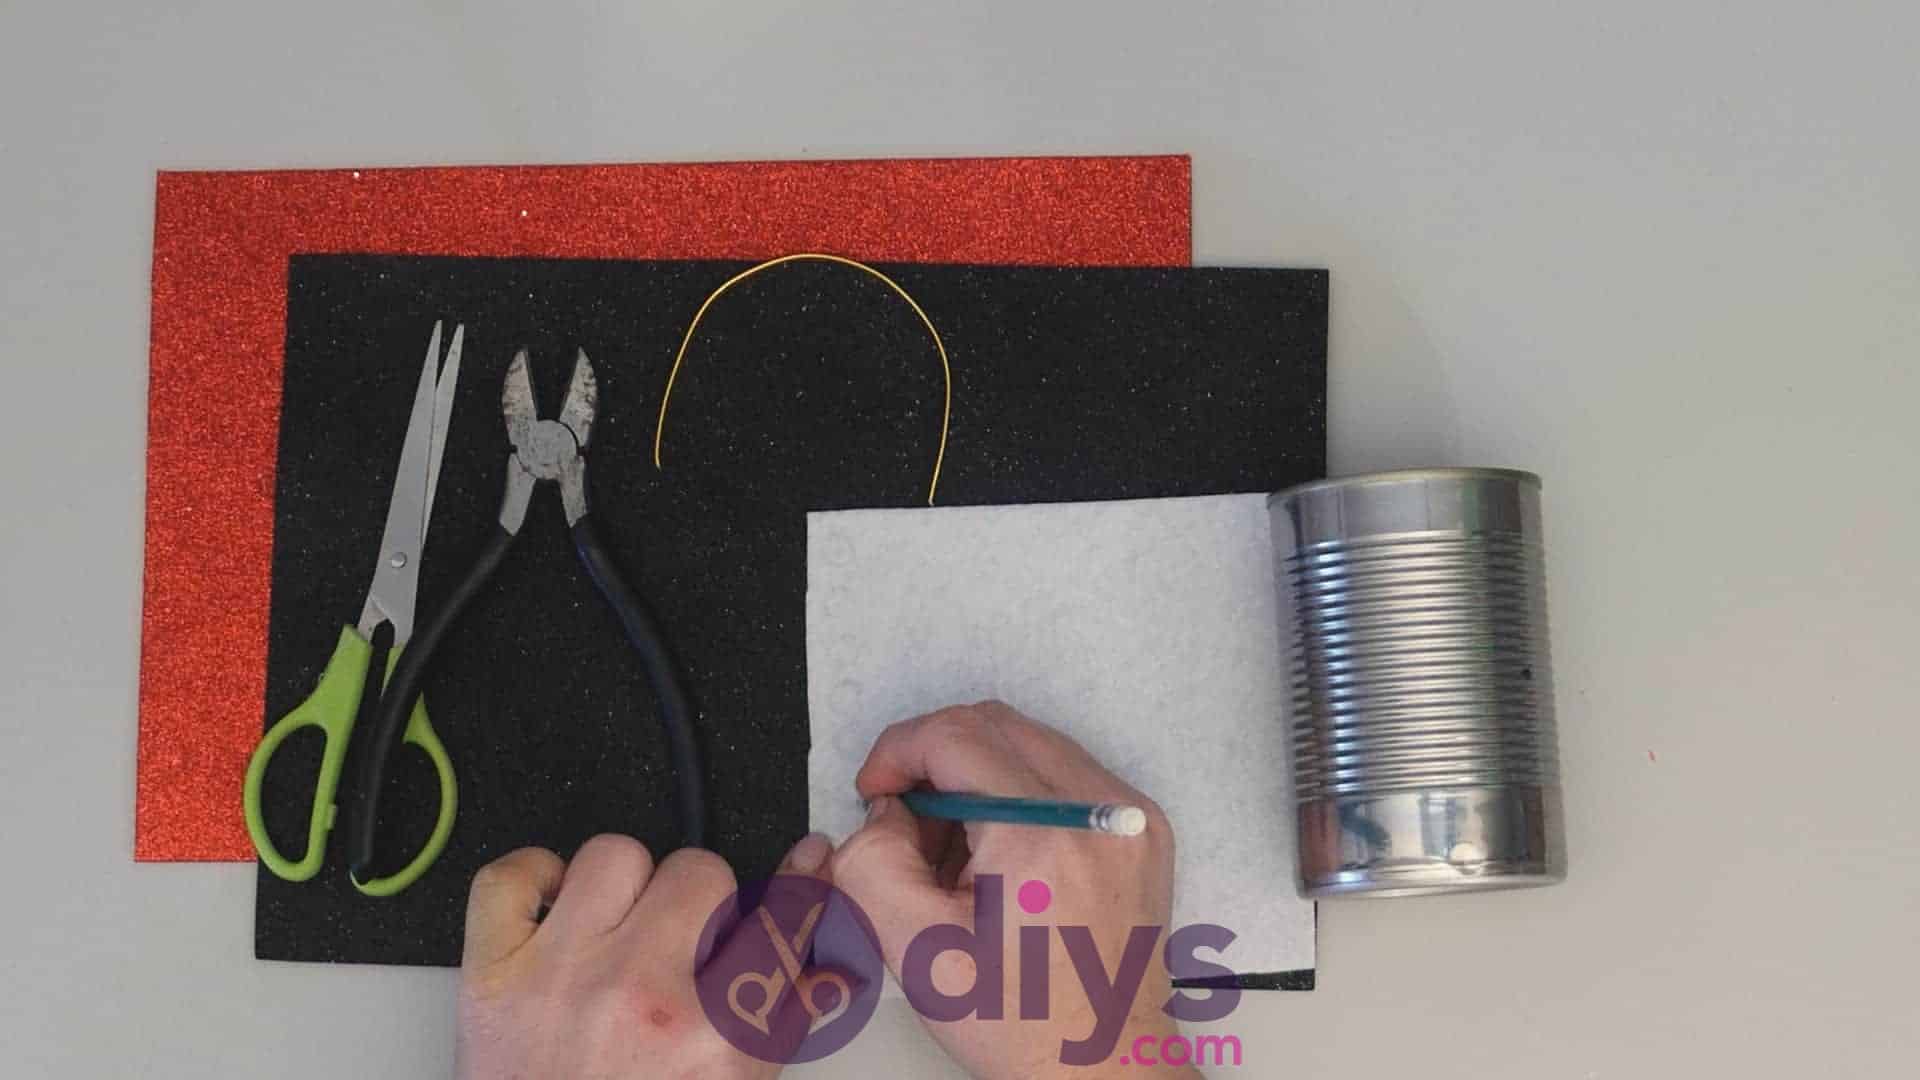
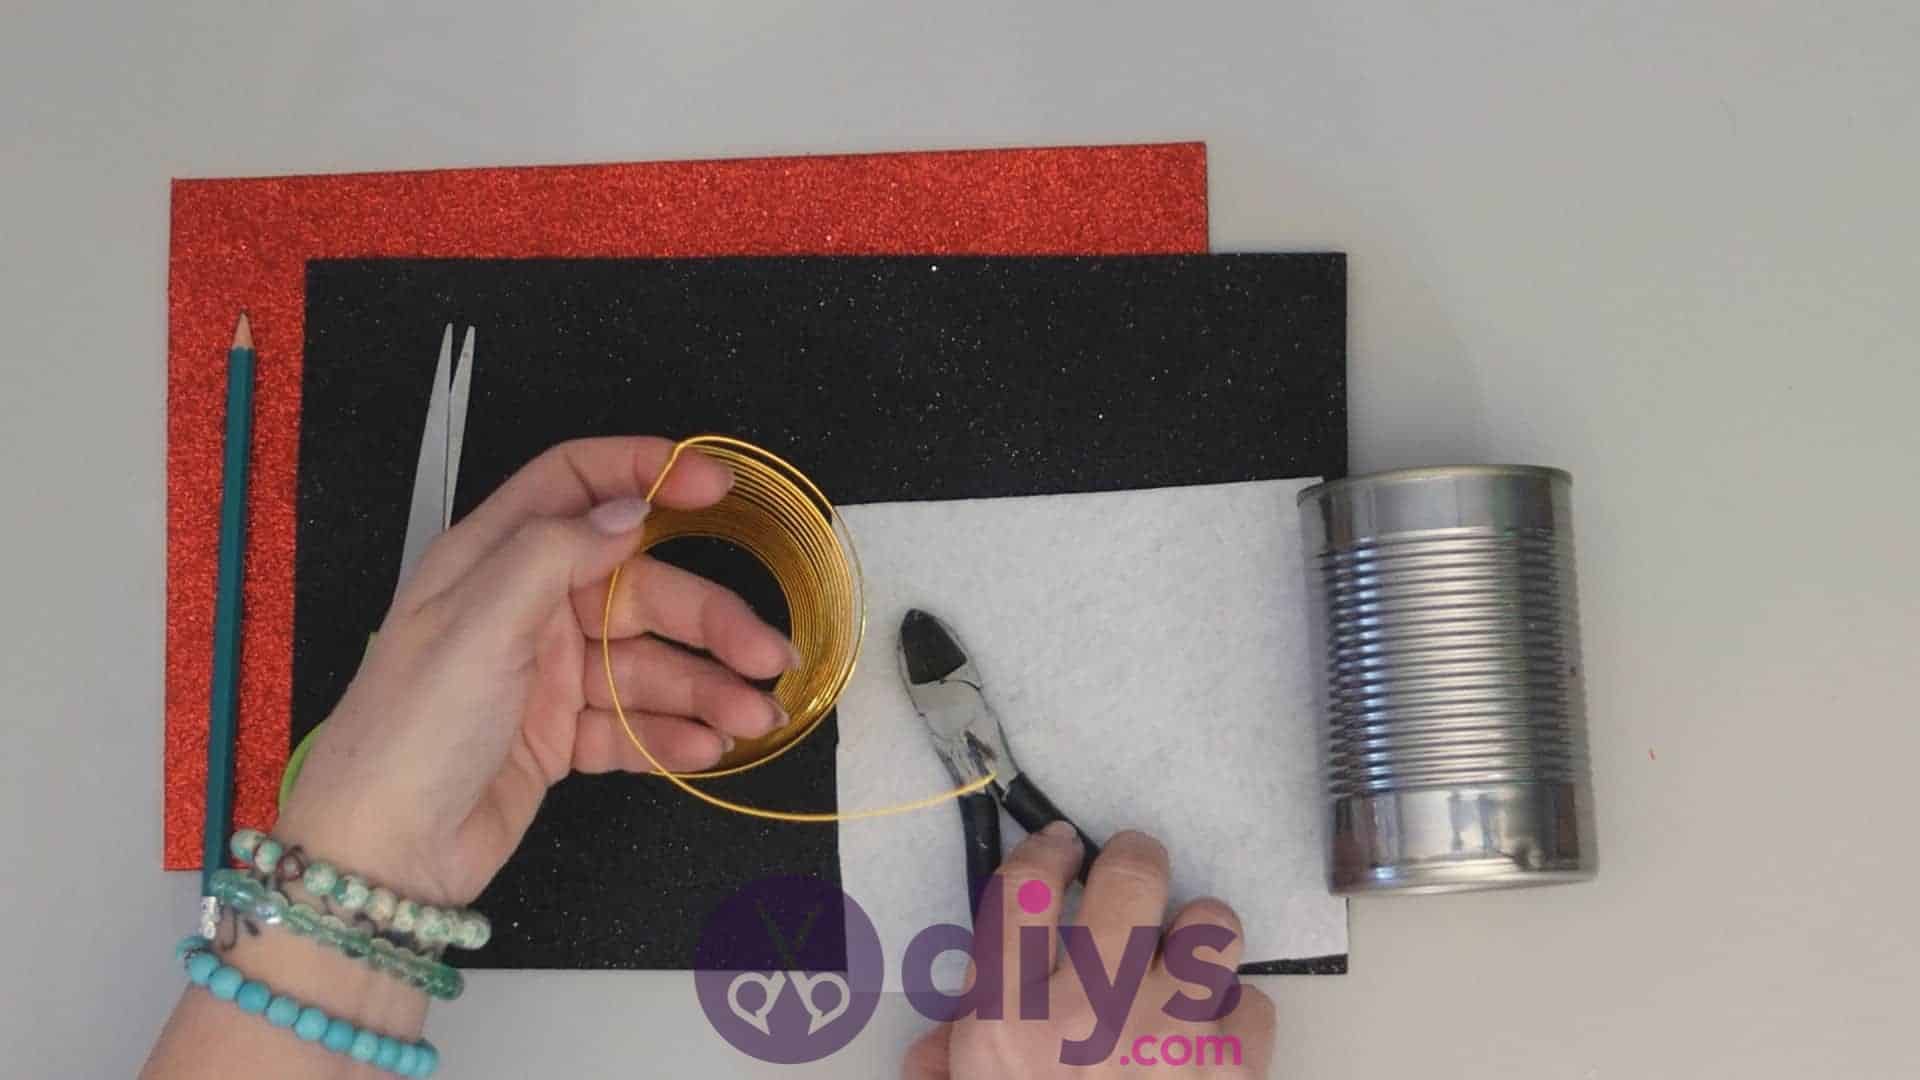
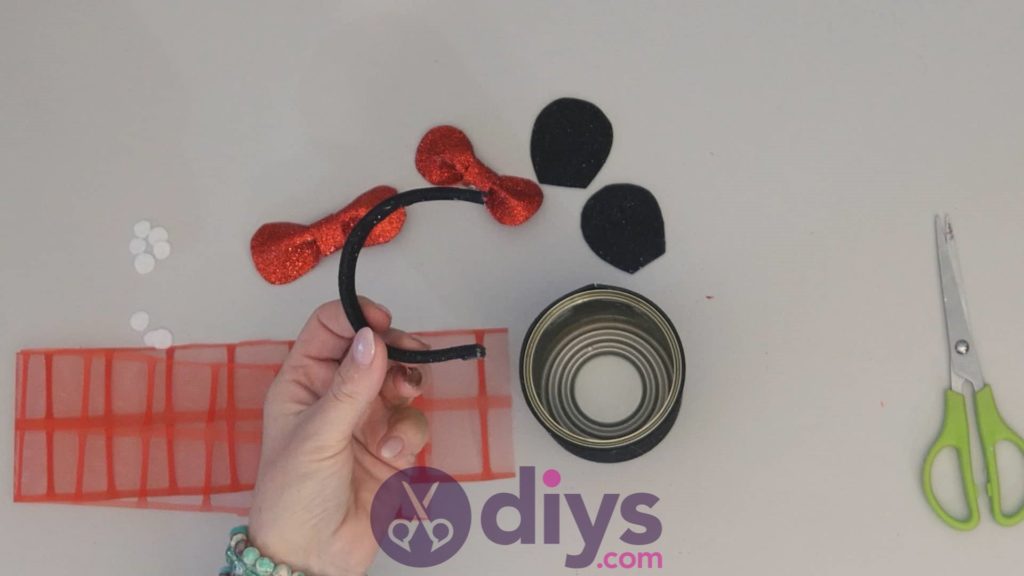
Cut a piece of crafting wire about four inches long and arch it over in a semi-circle shape. This will be the handle of the candy bucket. Set it aside for the moment.
Step 3:
Draw about eight little circles, all the same size, on your white felt using your pencil and cut them out. These will be the polka dots on your Minnie Mouse’s bow later. Set them aside for the moment.
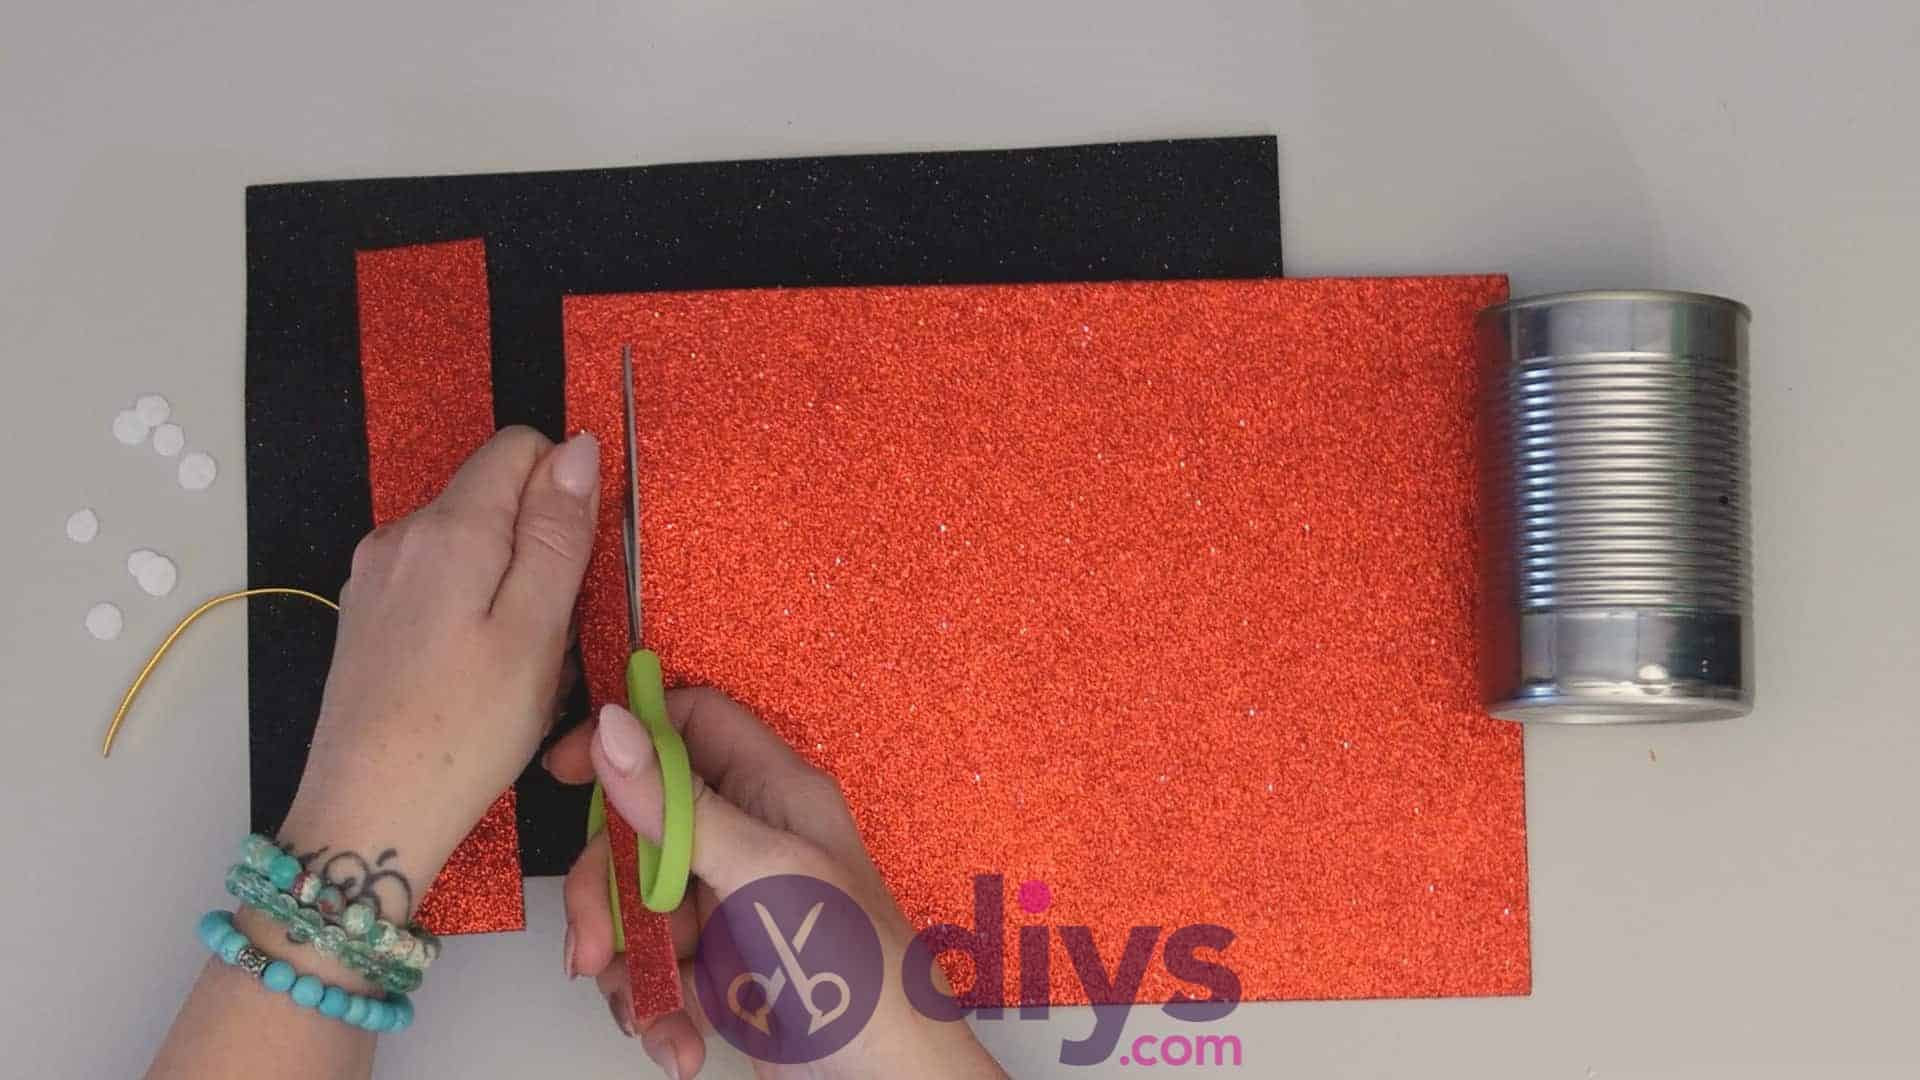
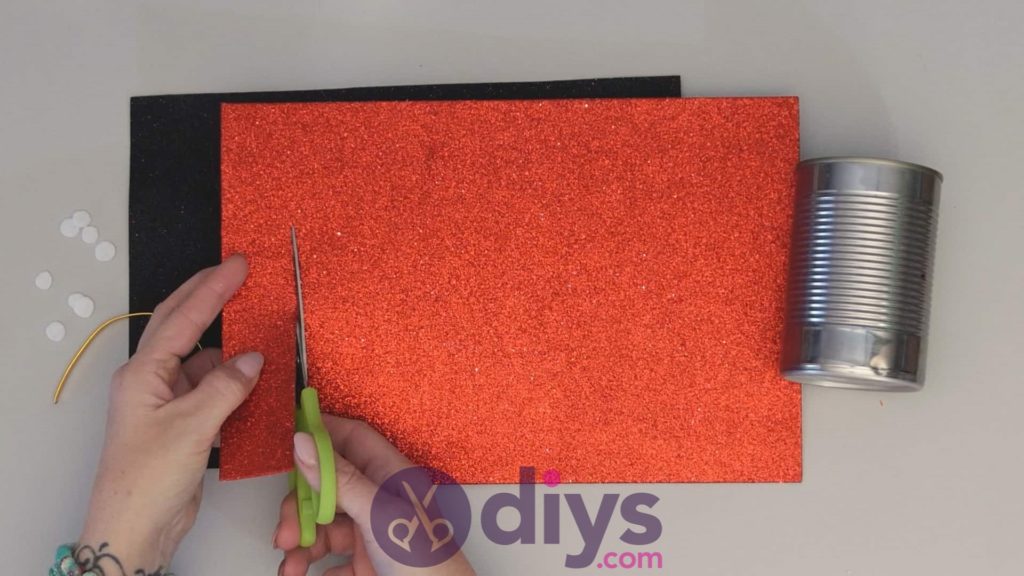
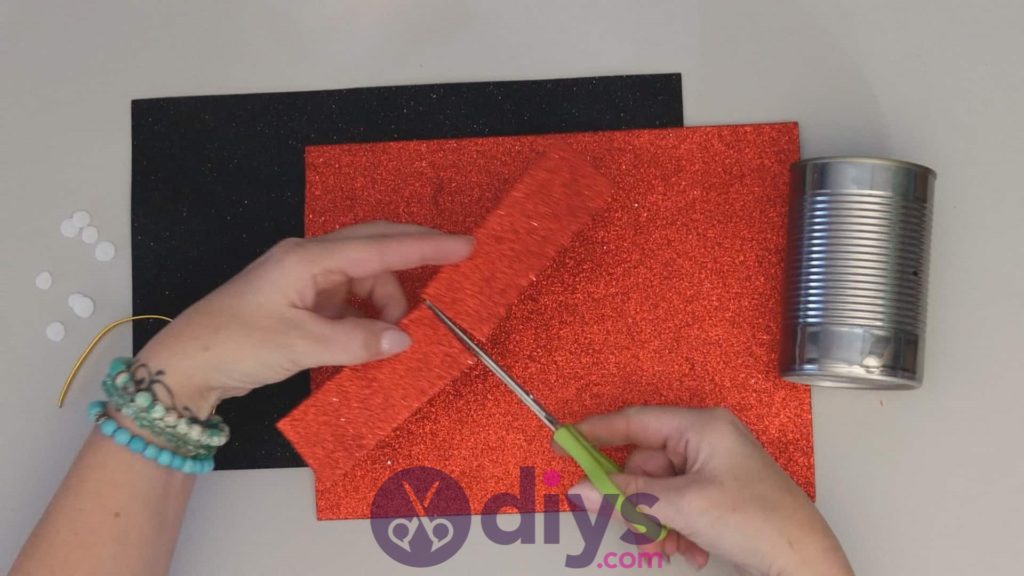
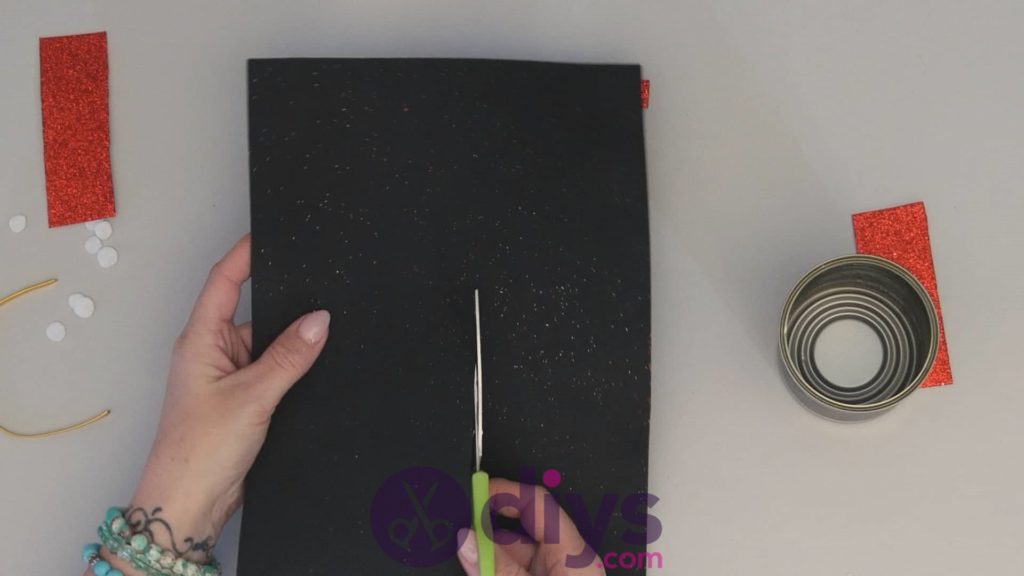
Step 4:
Turn your piece of red sparkly foam paper landscape-wise so the long edges become the top and bottom and the short edges become the two sides. From one side, cut a strip the whole height of the page that’s about half an inch wide. Then cut this strip in two right at its halfway point so you have two smaller rectangles the same size. Next, cut a thinner strip the same length (i.e. the whole height of the page), this time about a quarter of an inch thick. You’ll leave this one whole, but set it aside with the other pieces for now. These will be Minnie’s bows and belt.

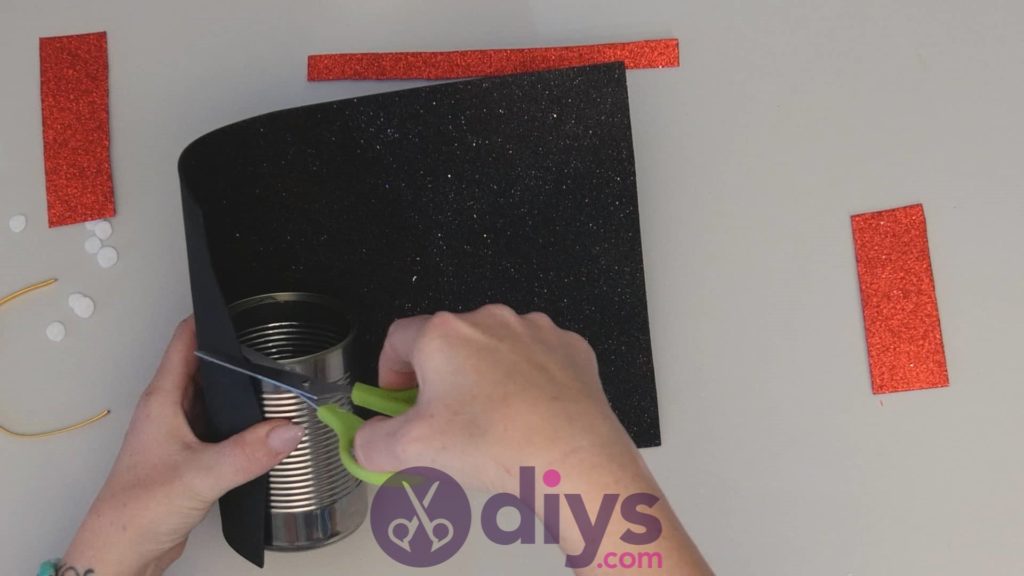
Step 5:
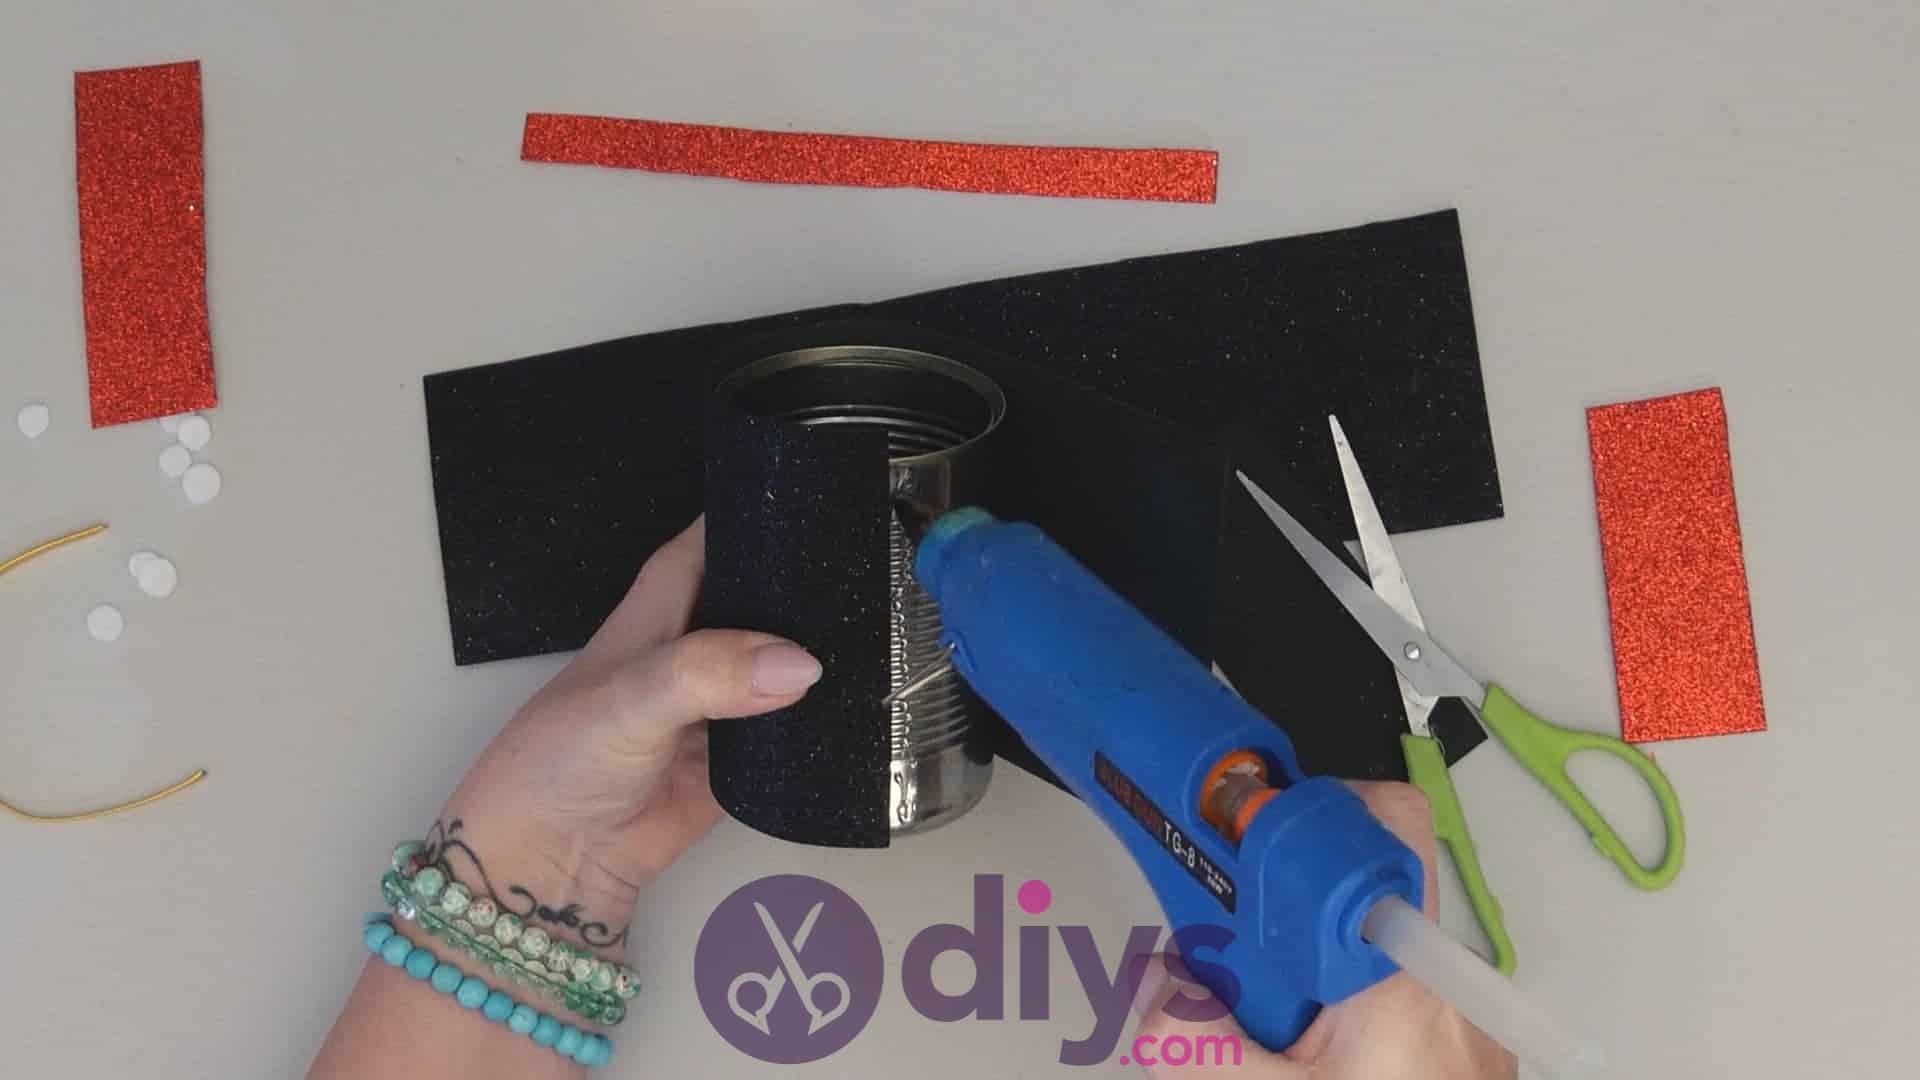
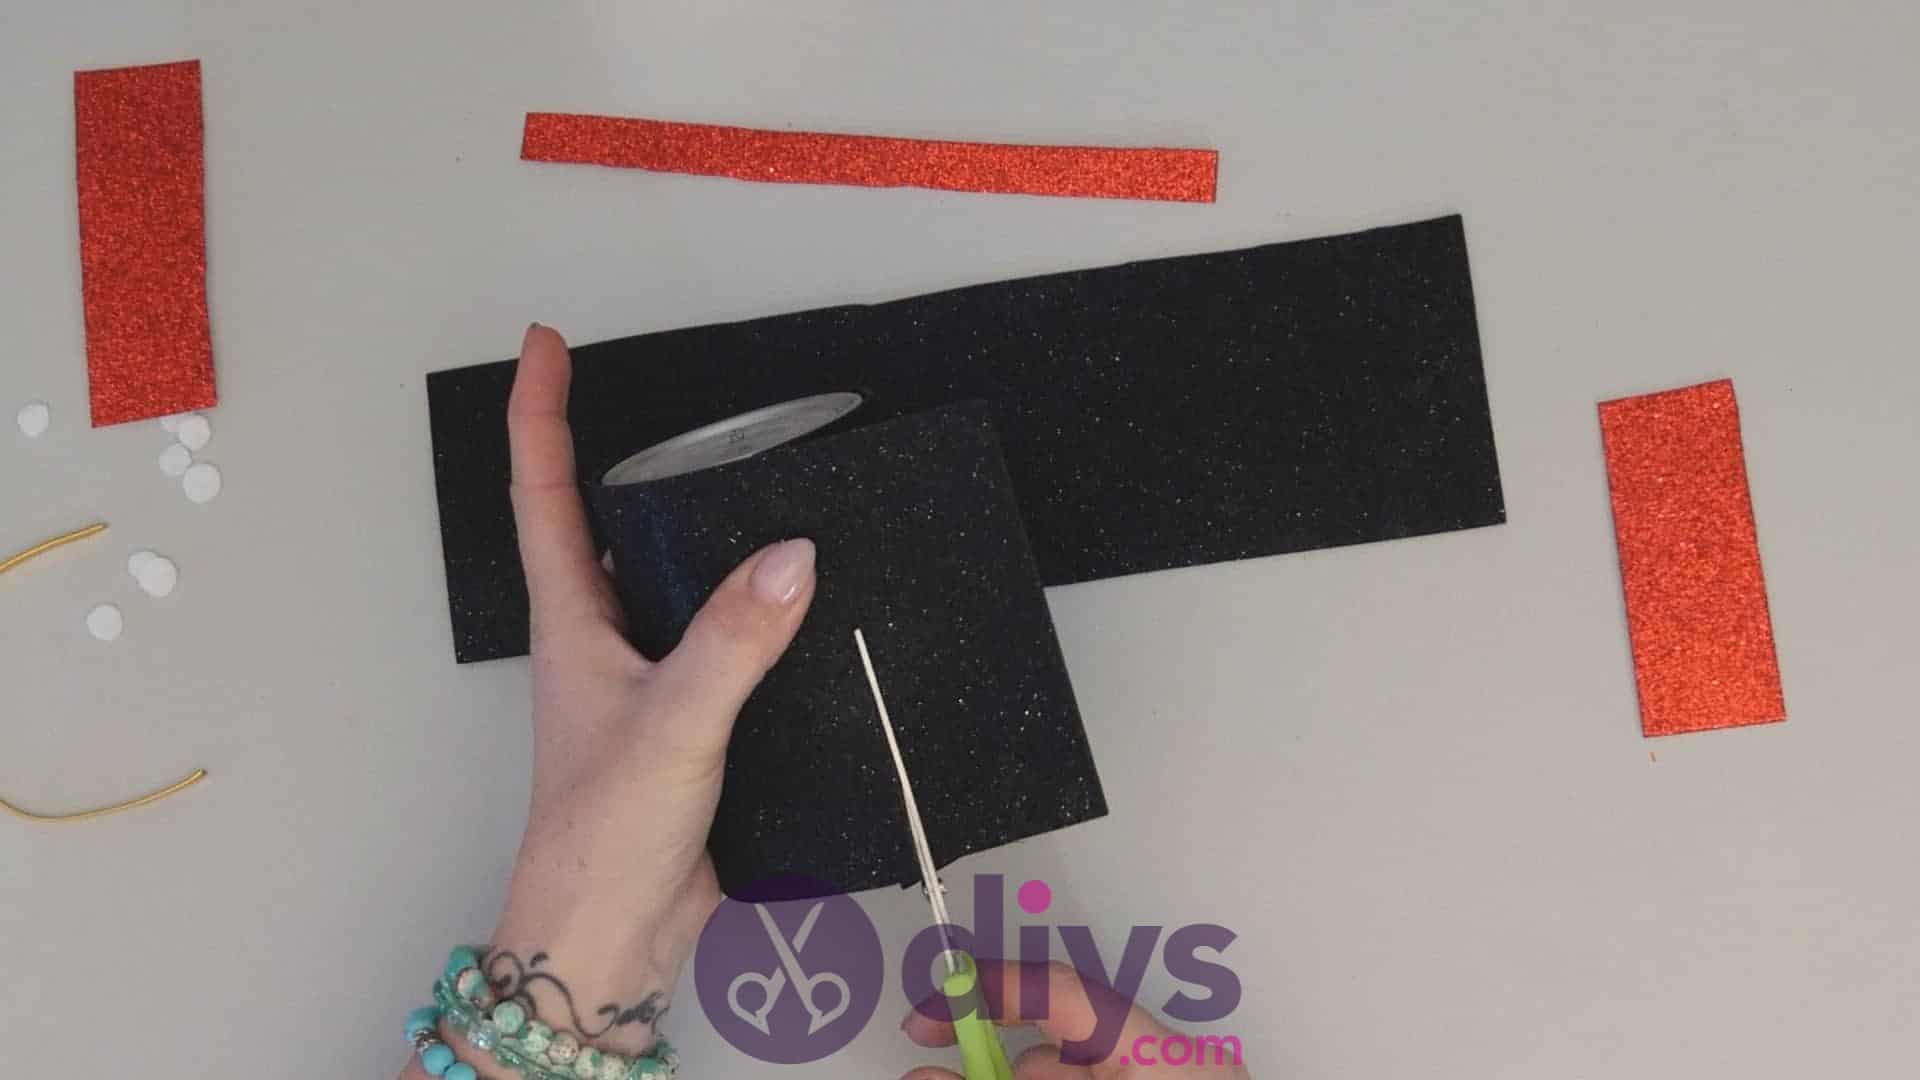
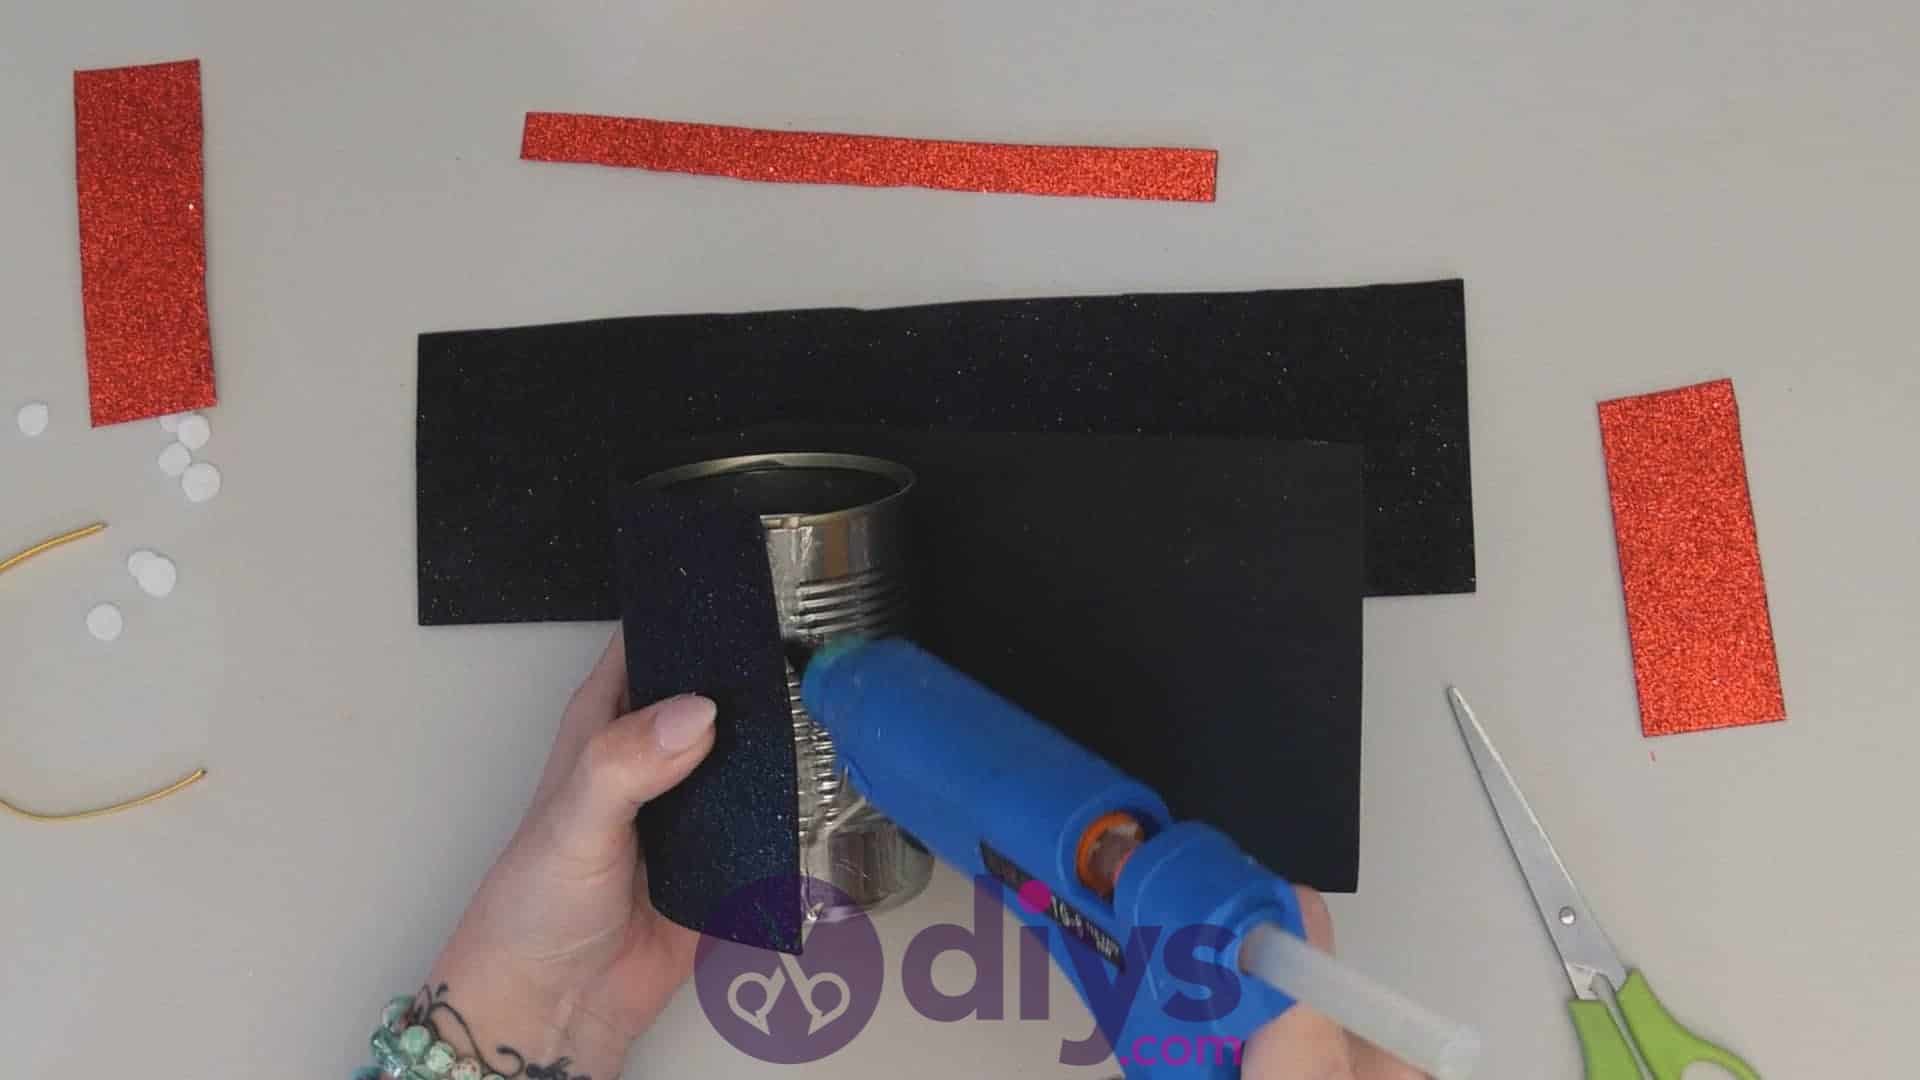
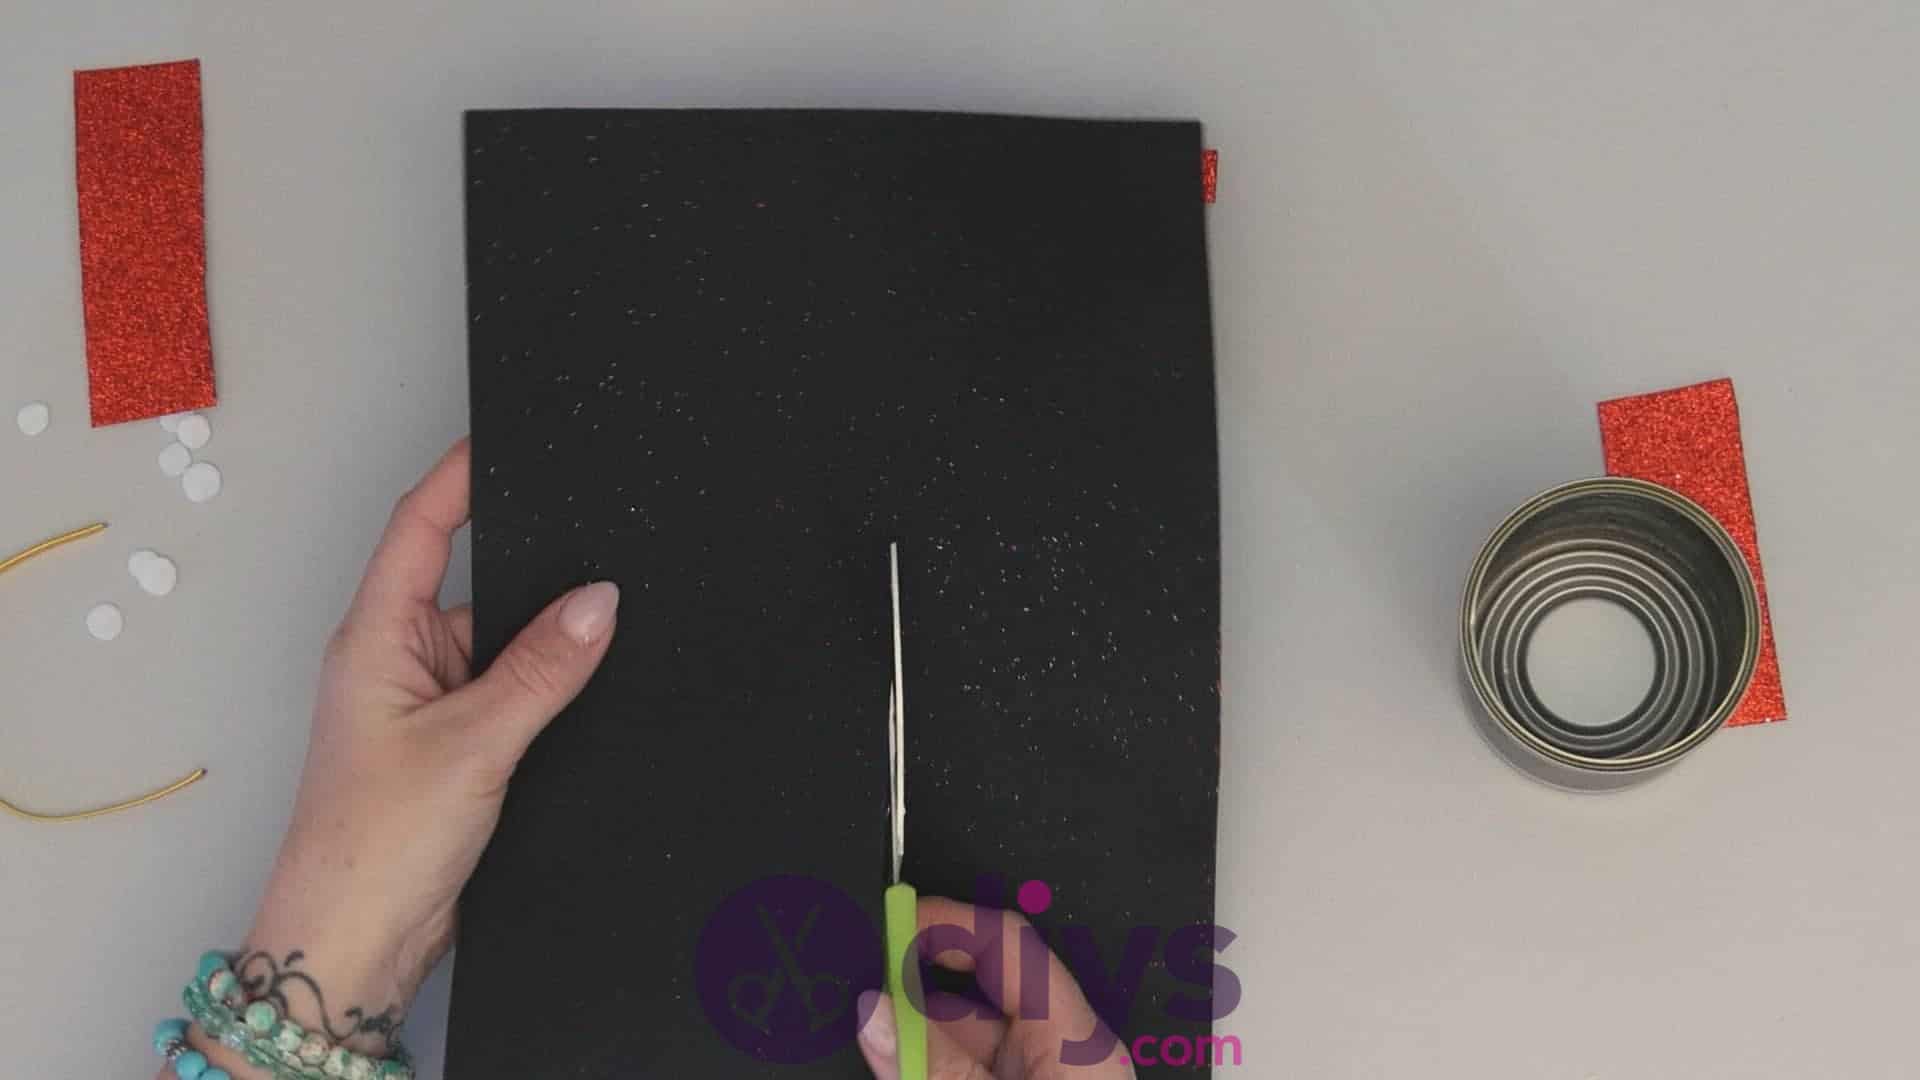
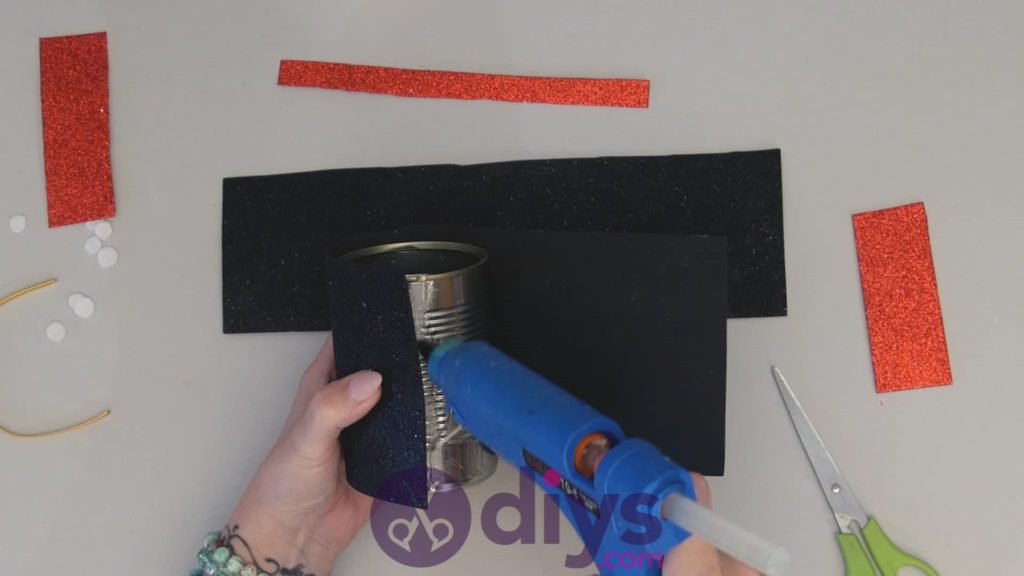
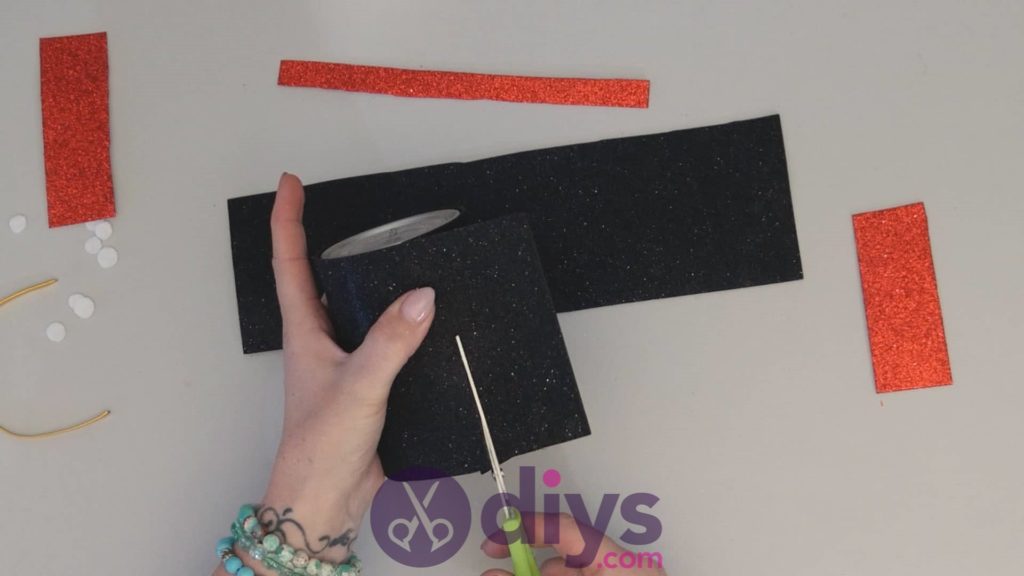
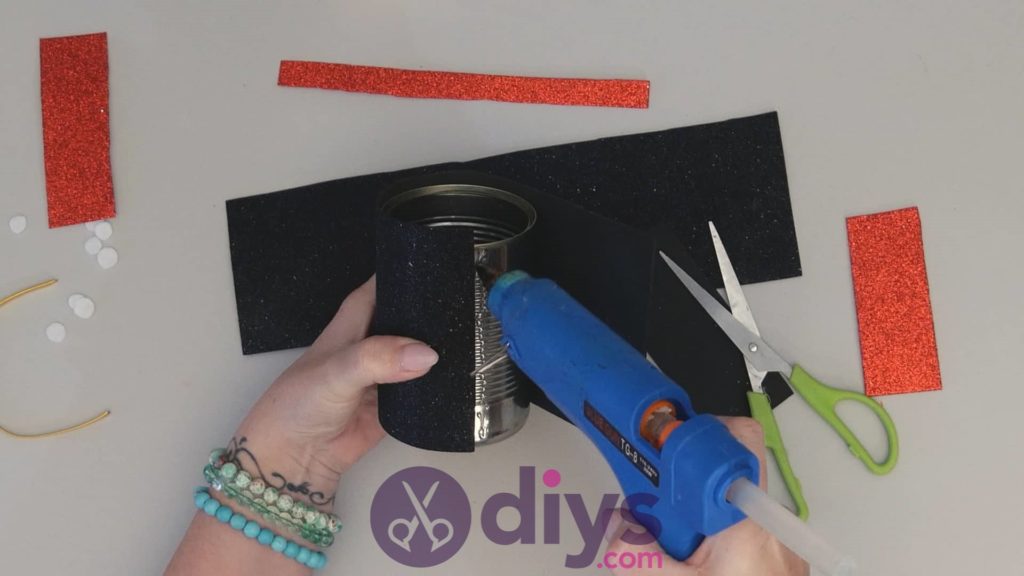
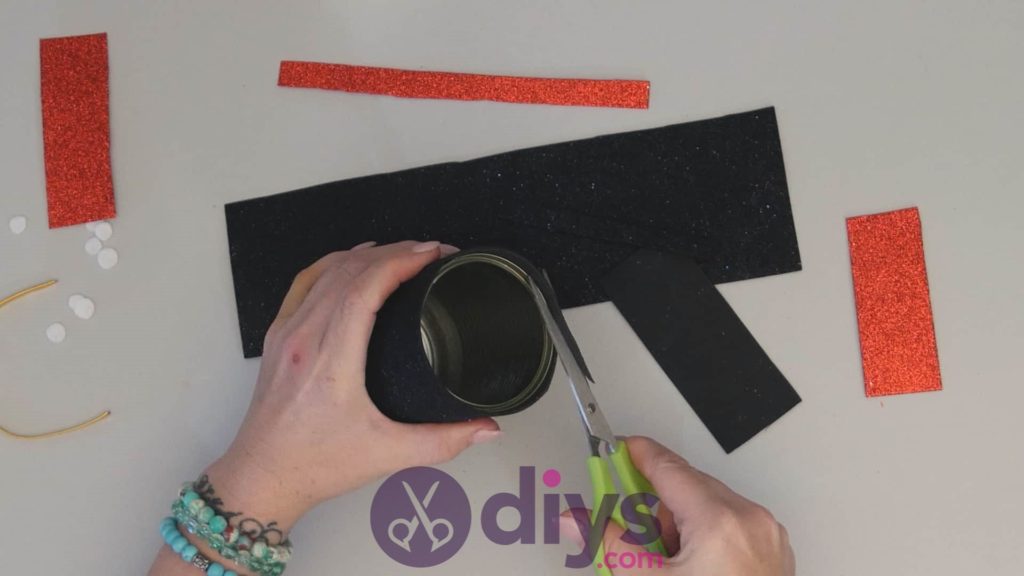
Now you’ll cover the outside surface of your tin can with your black sparkly foam paper. Turn the sheet the same landscape direction you turned your red one before. Line the bottom edge of your can up with the bottom edge of the page at the left corner and, on the place where the top edge of the can hits the foam page, make a cut in the left edge to mark the can’s height Set the can aside and turn the page portrait so you can cut all the way across the page to make a strip that’s as thick as the height of your can. Next, apply hot glue in a line all the way up the can from bottom to top and anchor the short edge of the strip you just cut there so you can wrap the rest around the outside of the can. Once you’ve wrapped it all the way around and get back to your starting point, leave a little bit of excess so the two ends overlap and trim the rest off. Apply glue to the underside of the edge you just trimmed and stick it down over the first edge. Trim excess around the top or bottom edge of the can if you have any; we find that sometimes we end up with a less than perfect fit even when we measure beforehand.

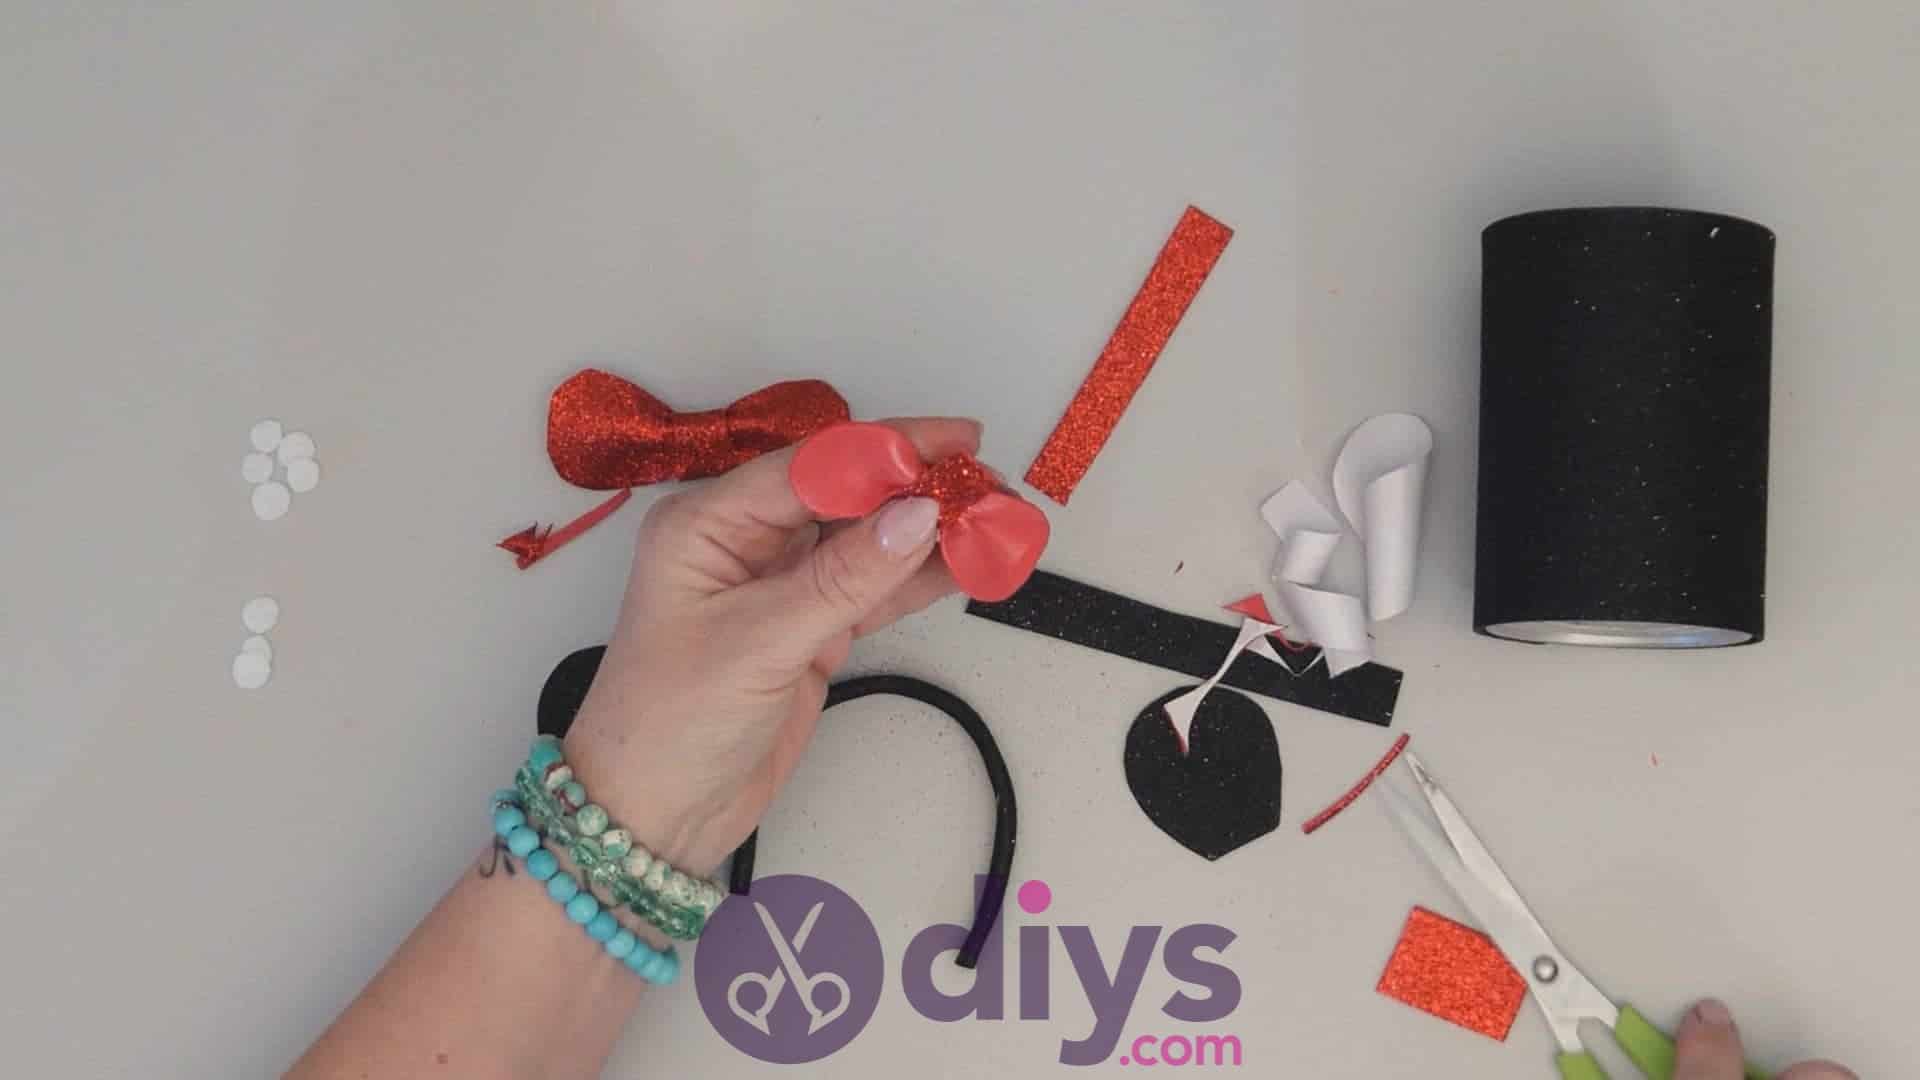
Step 6:
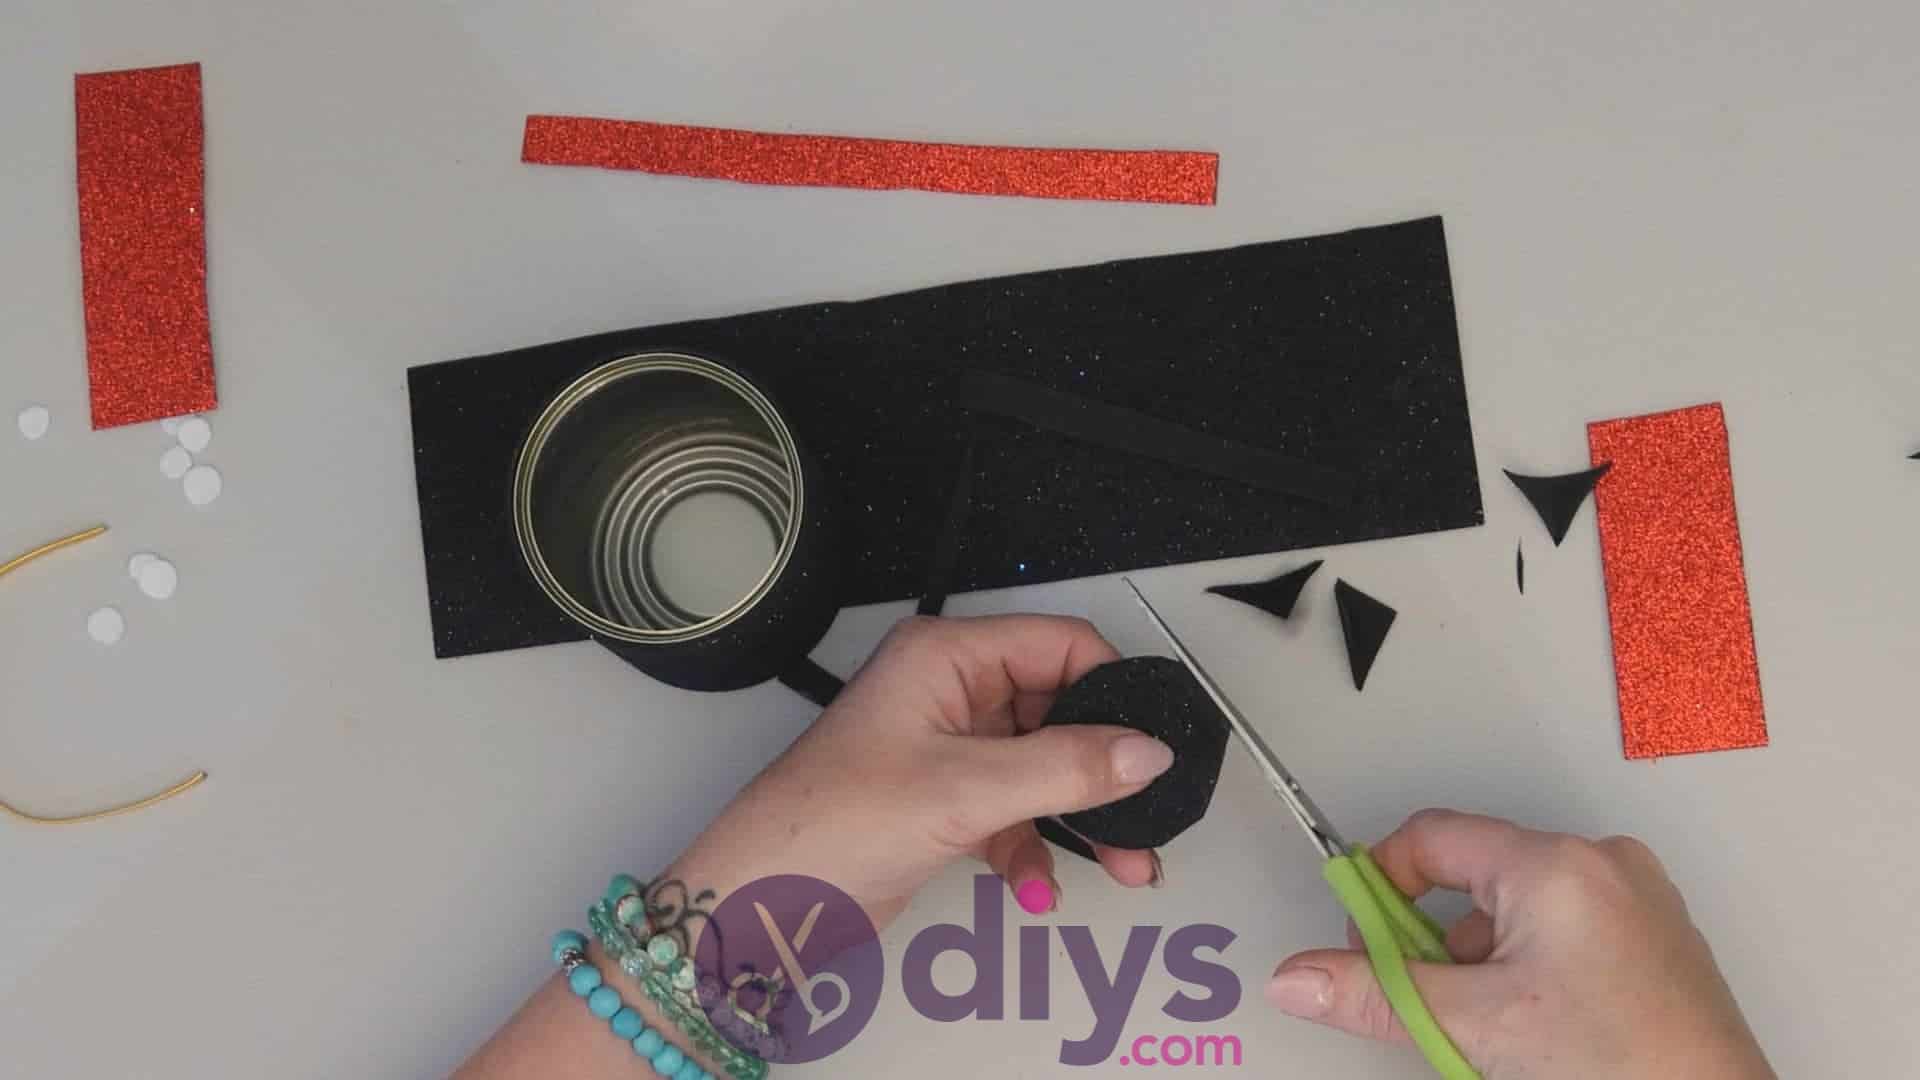
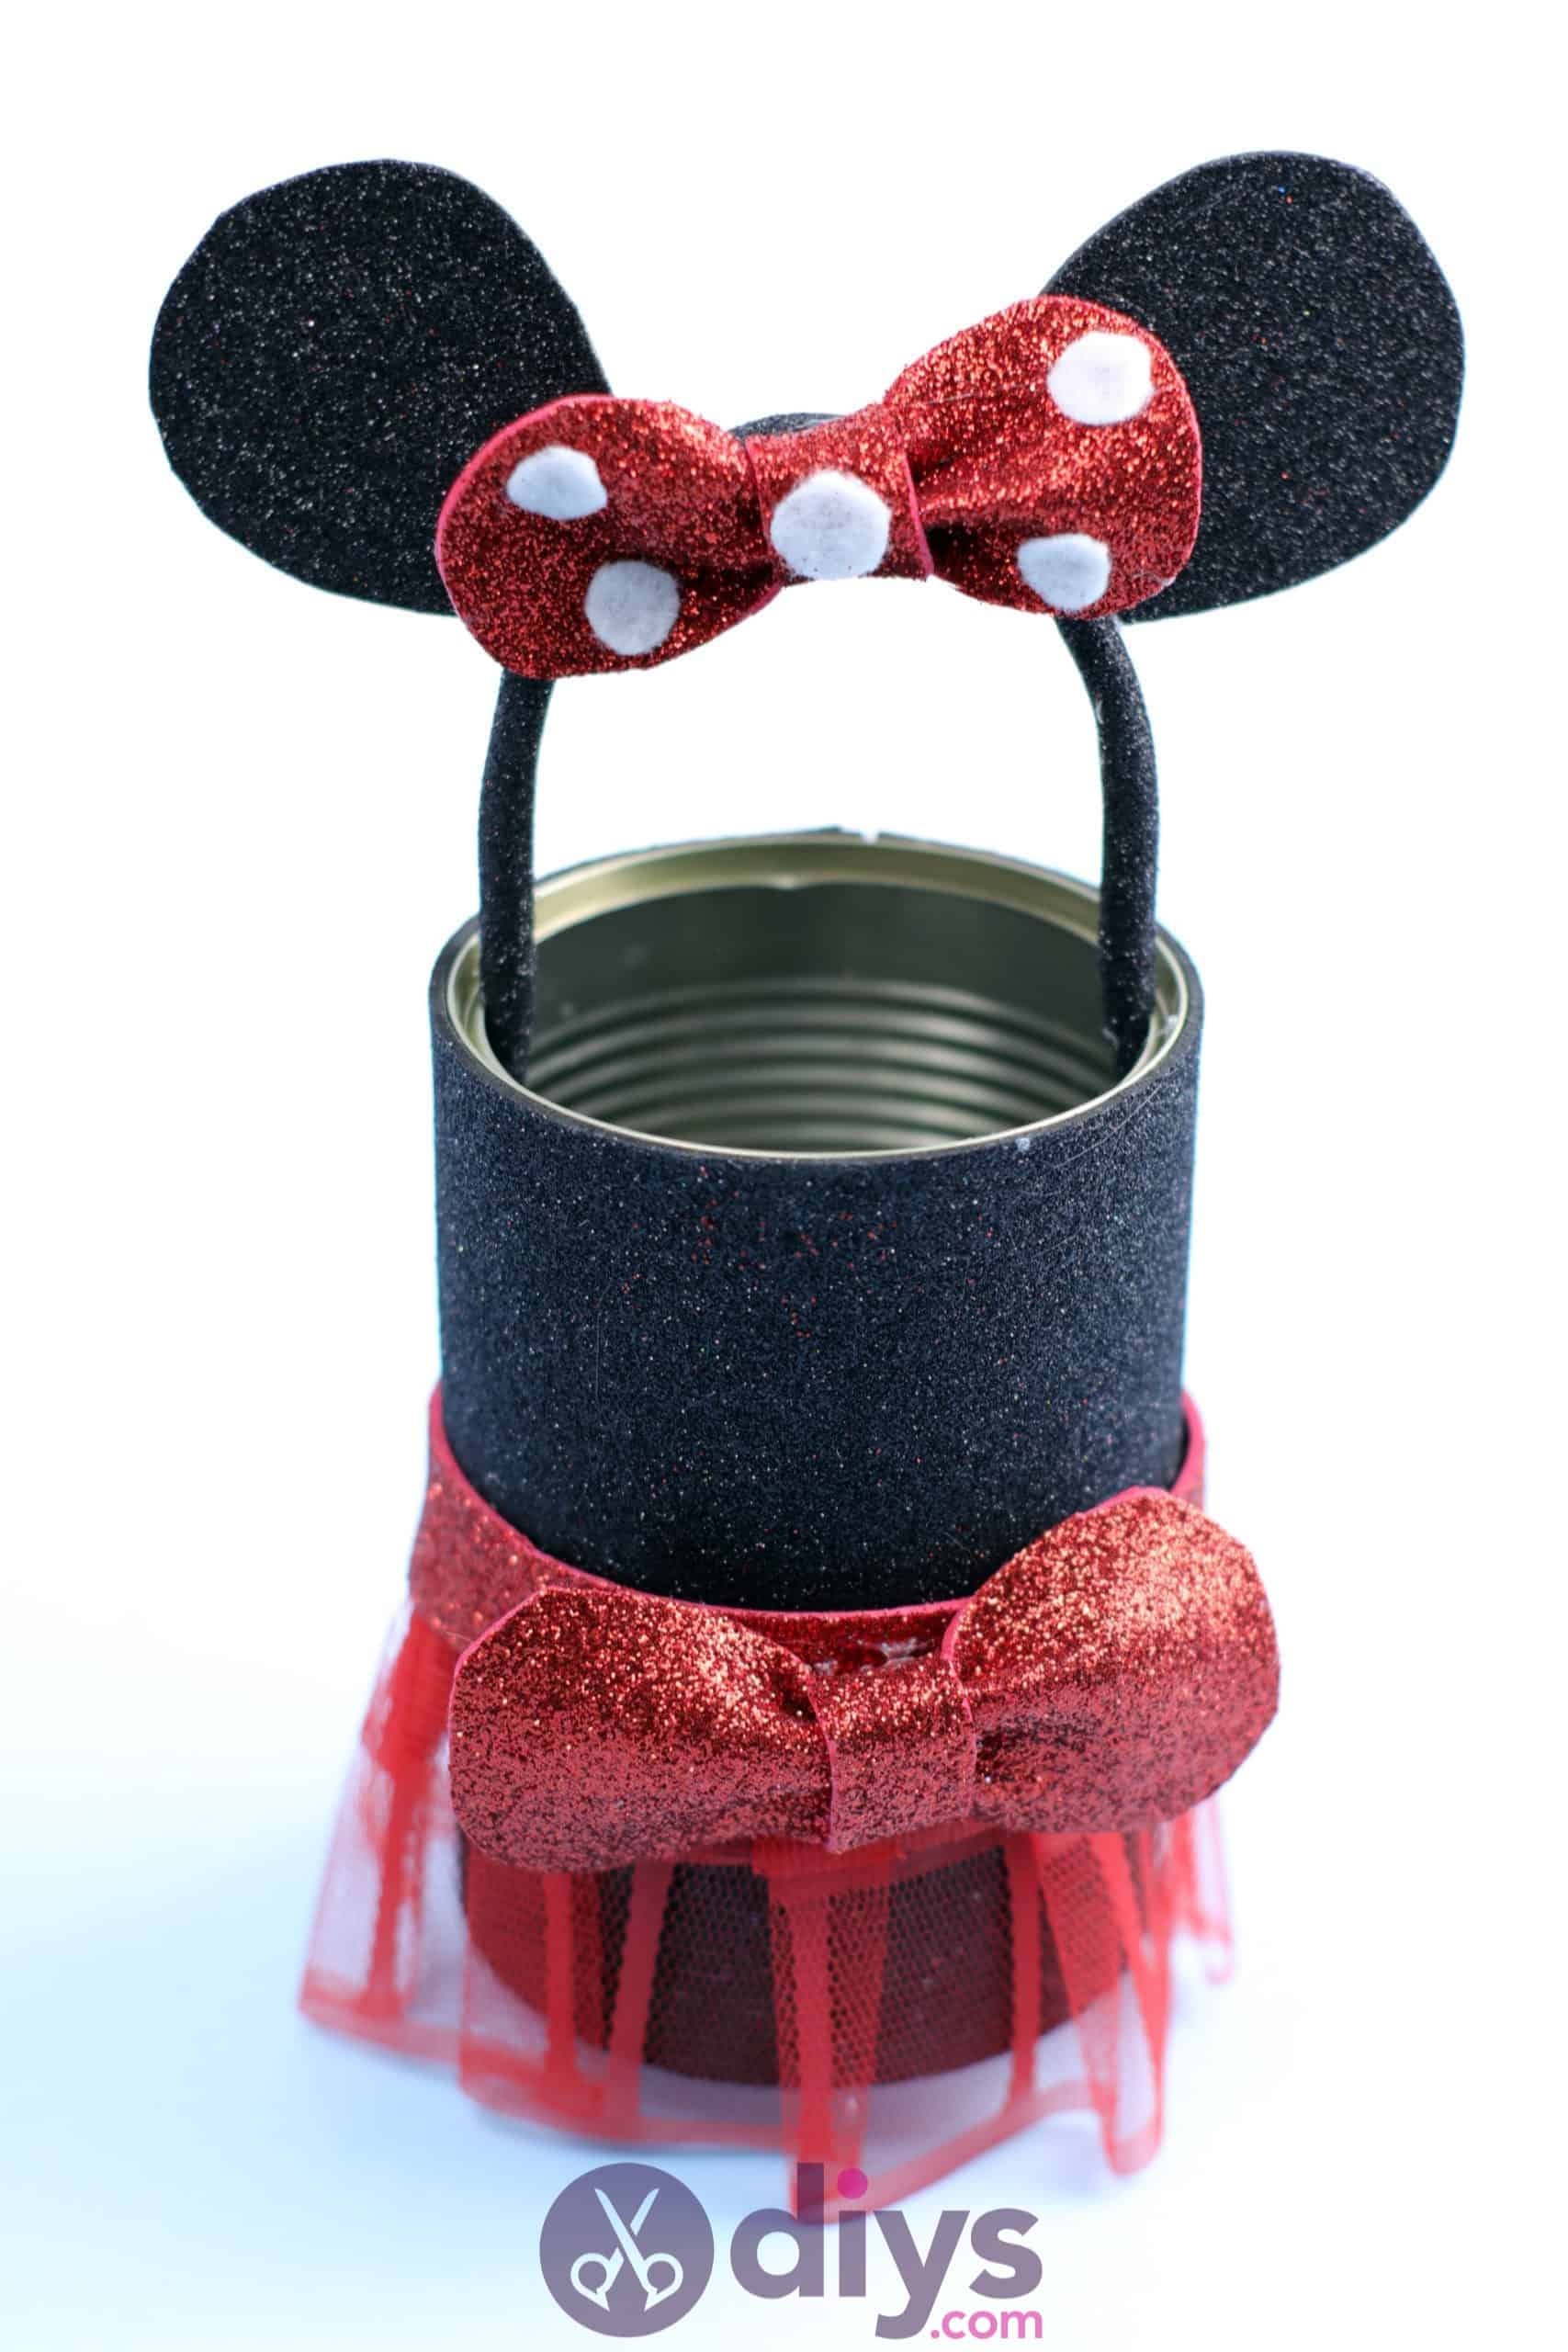
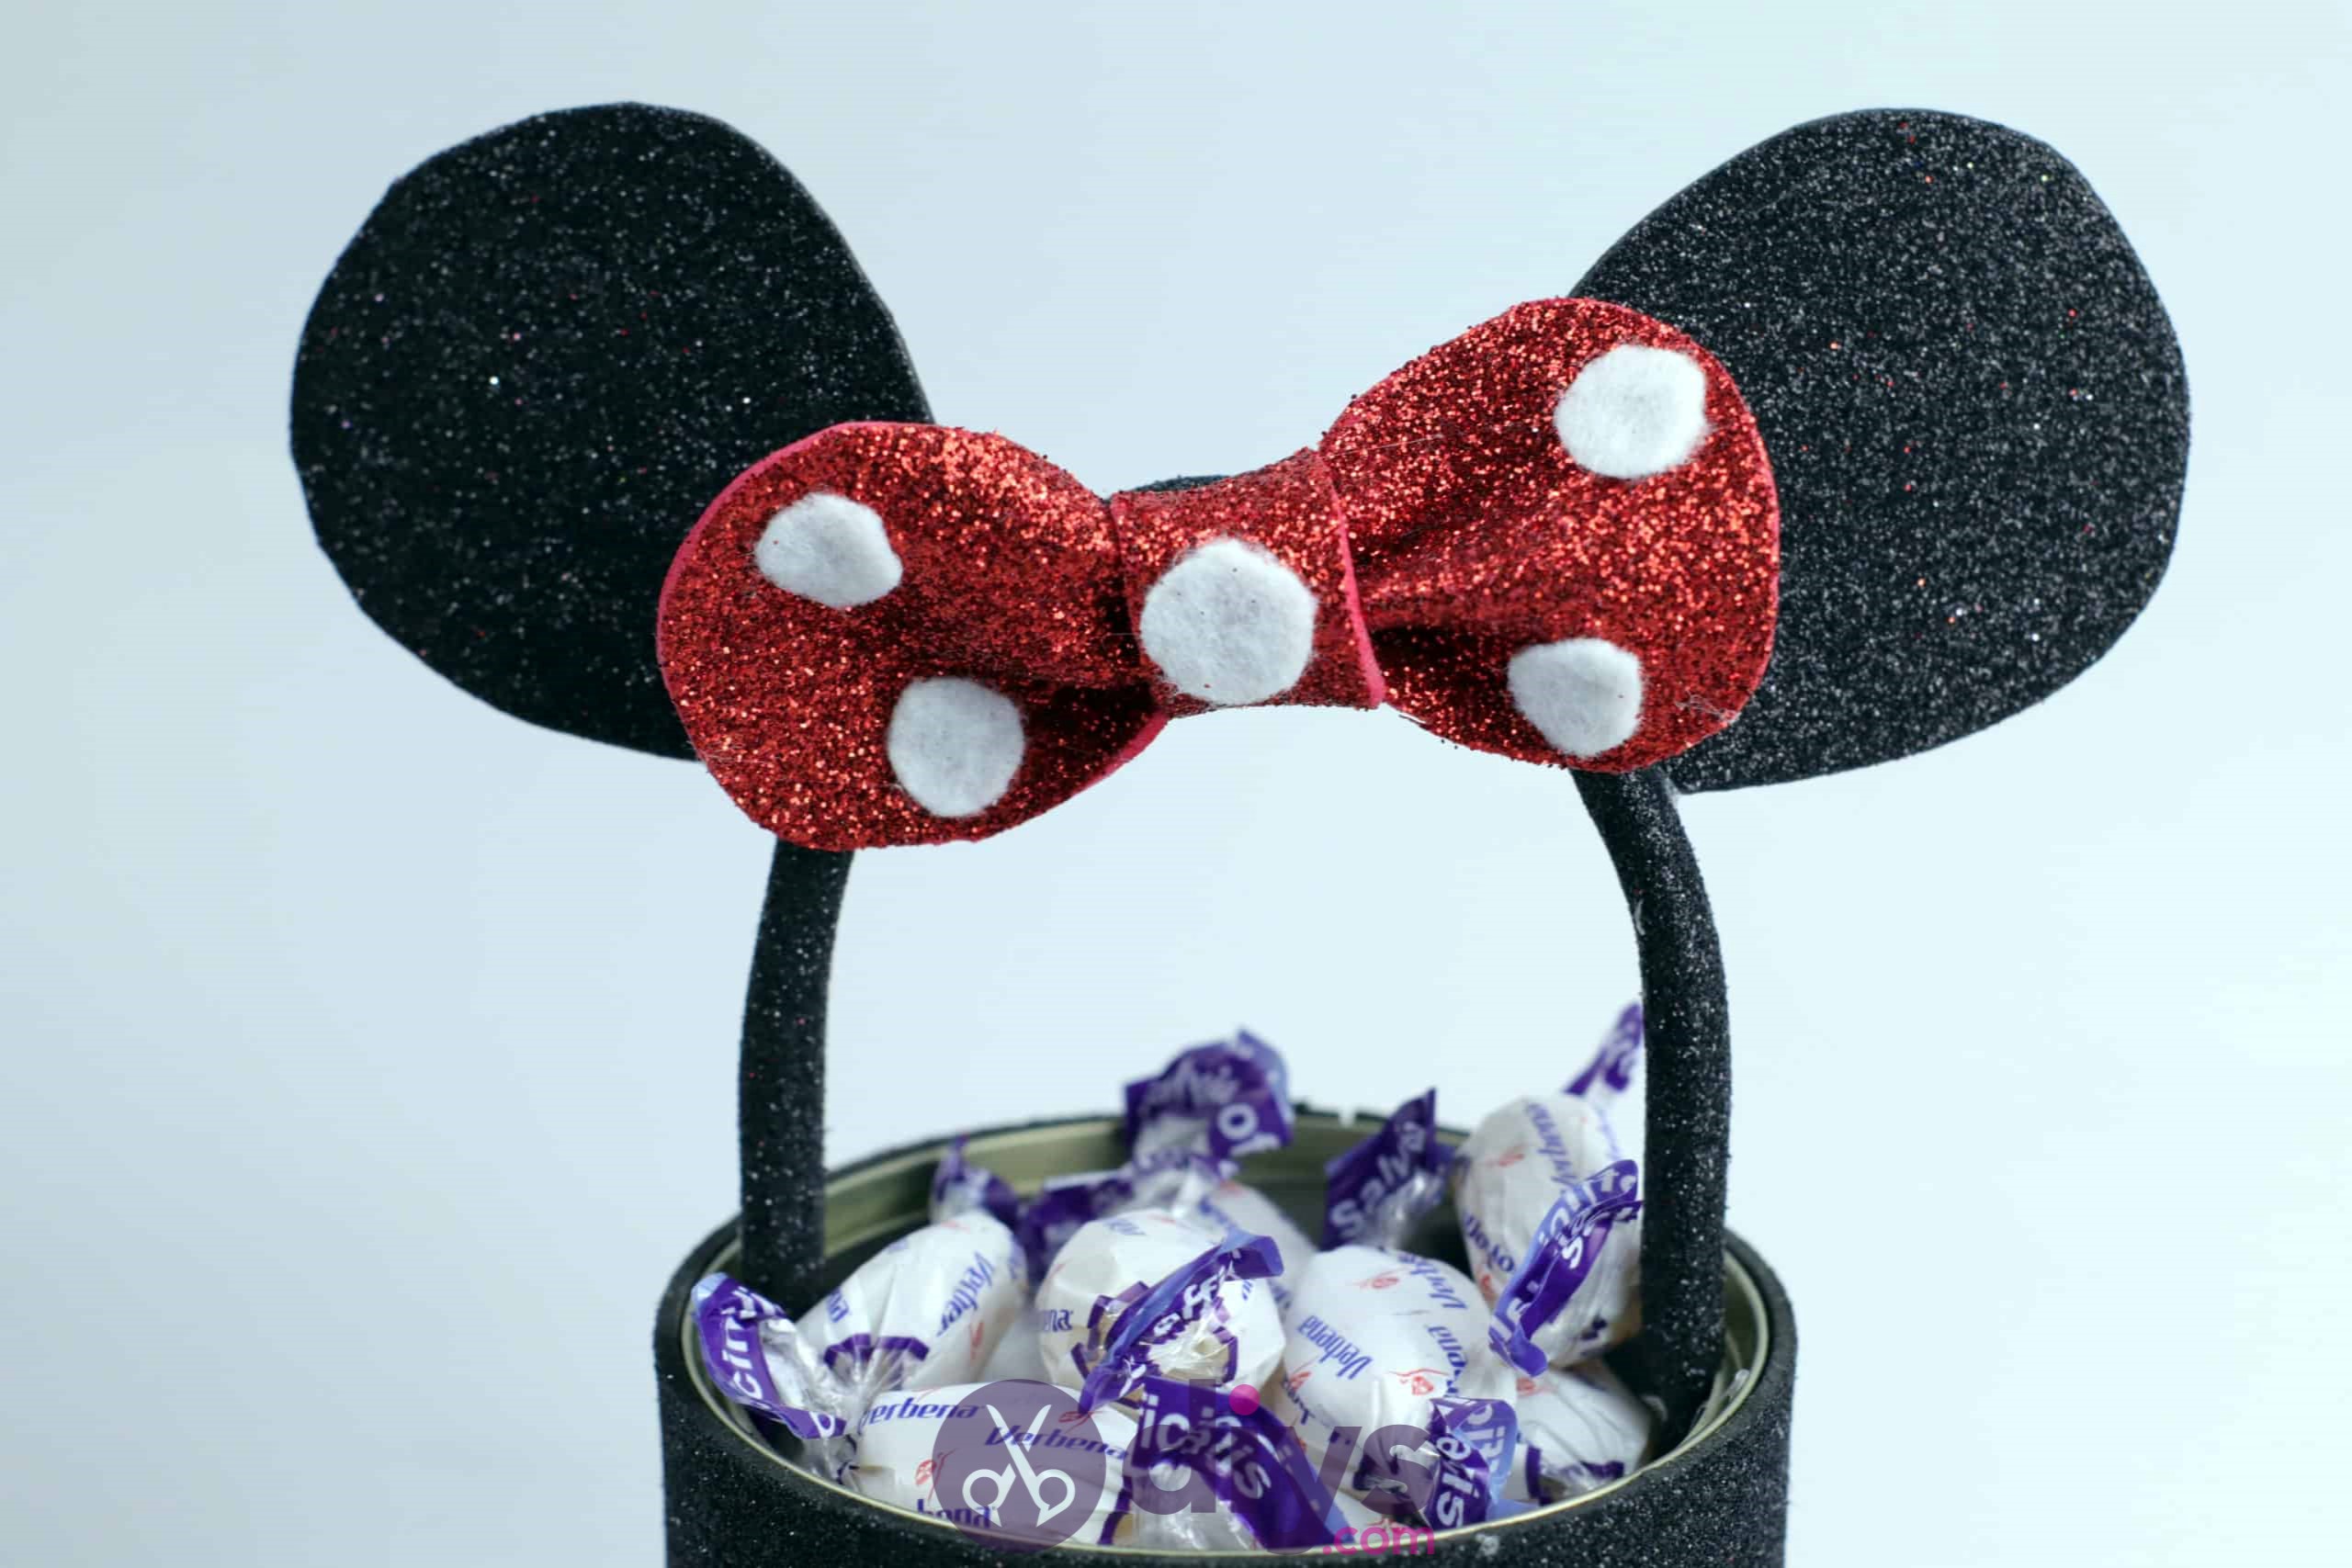
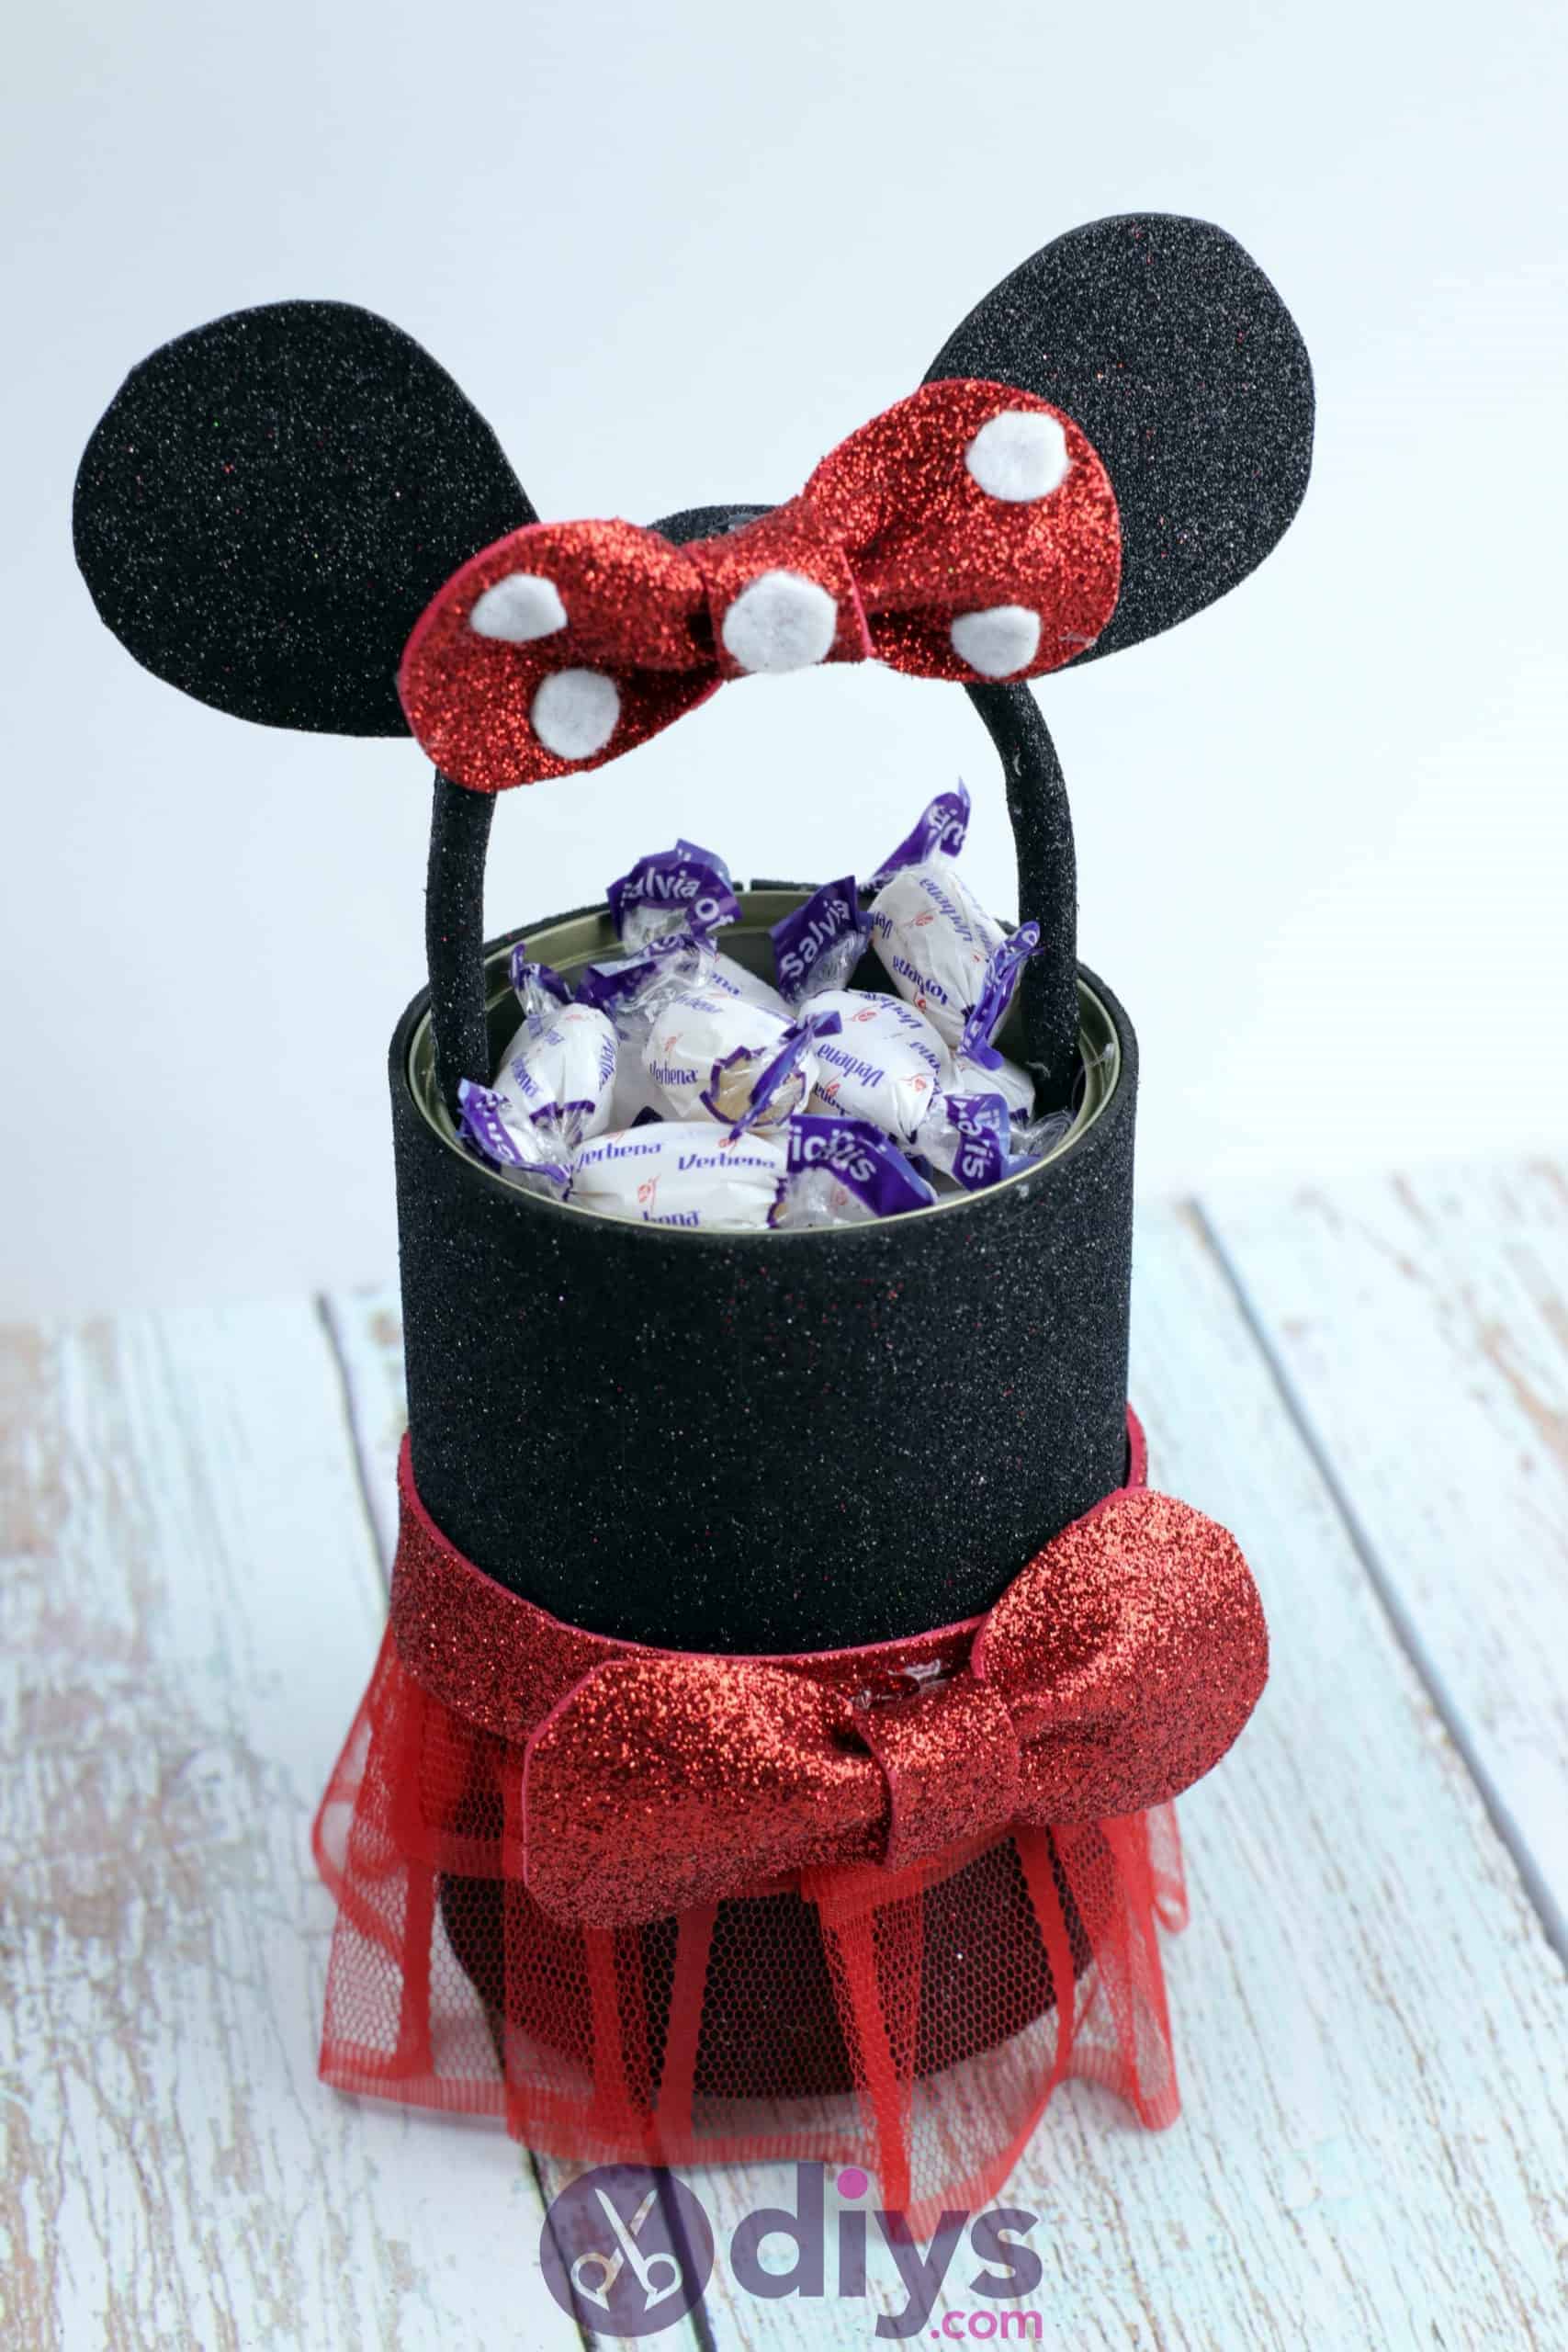
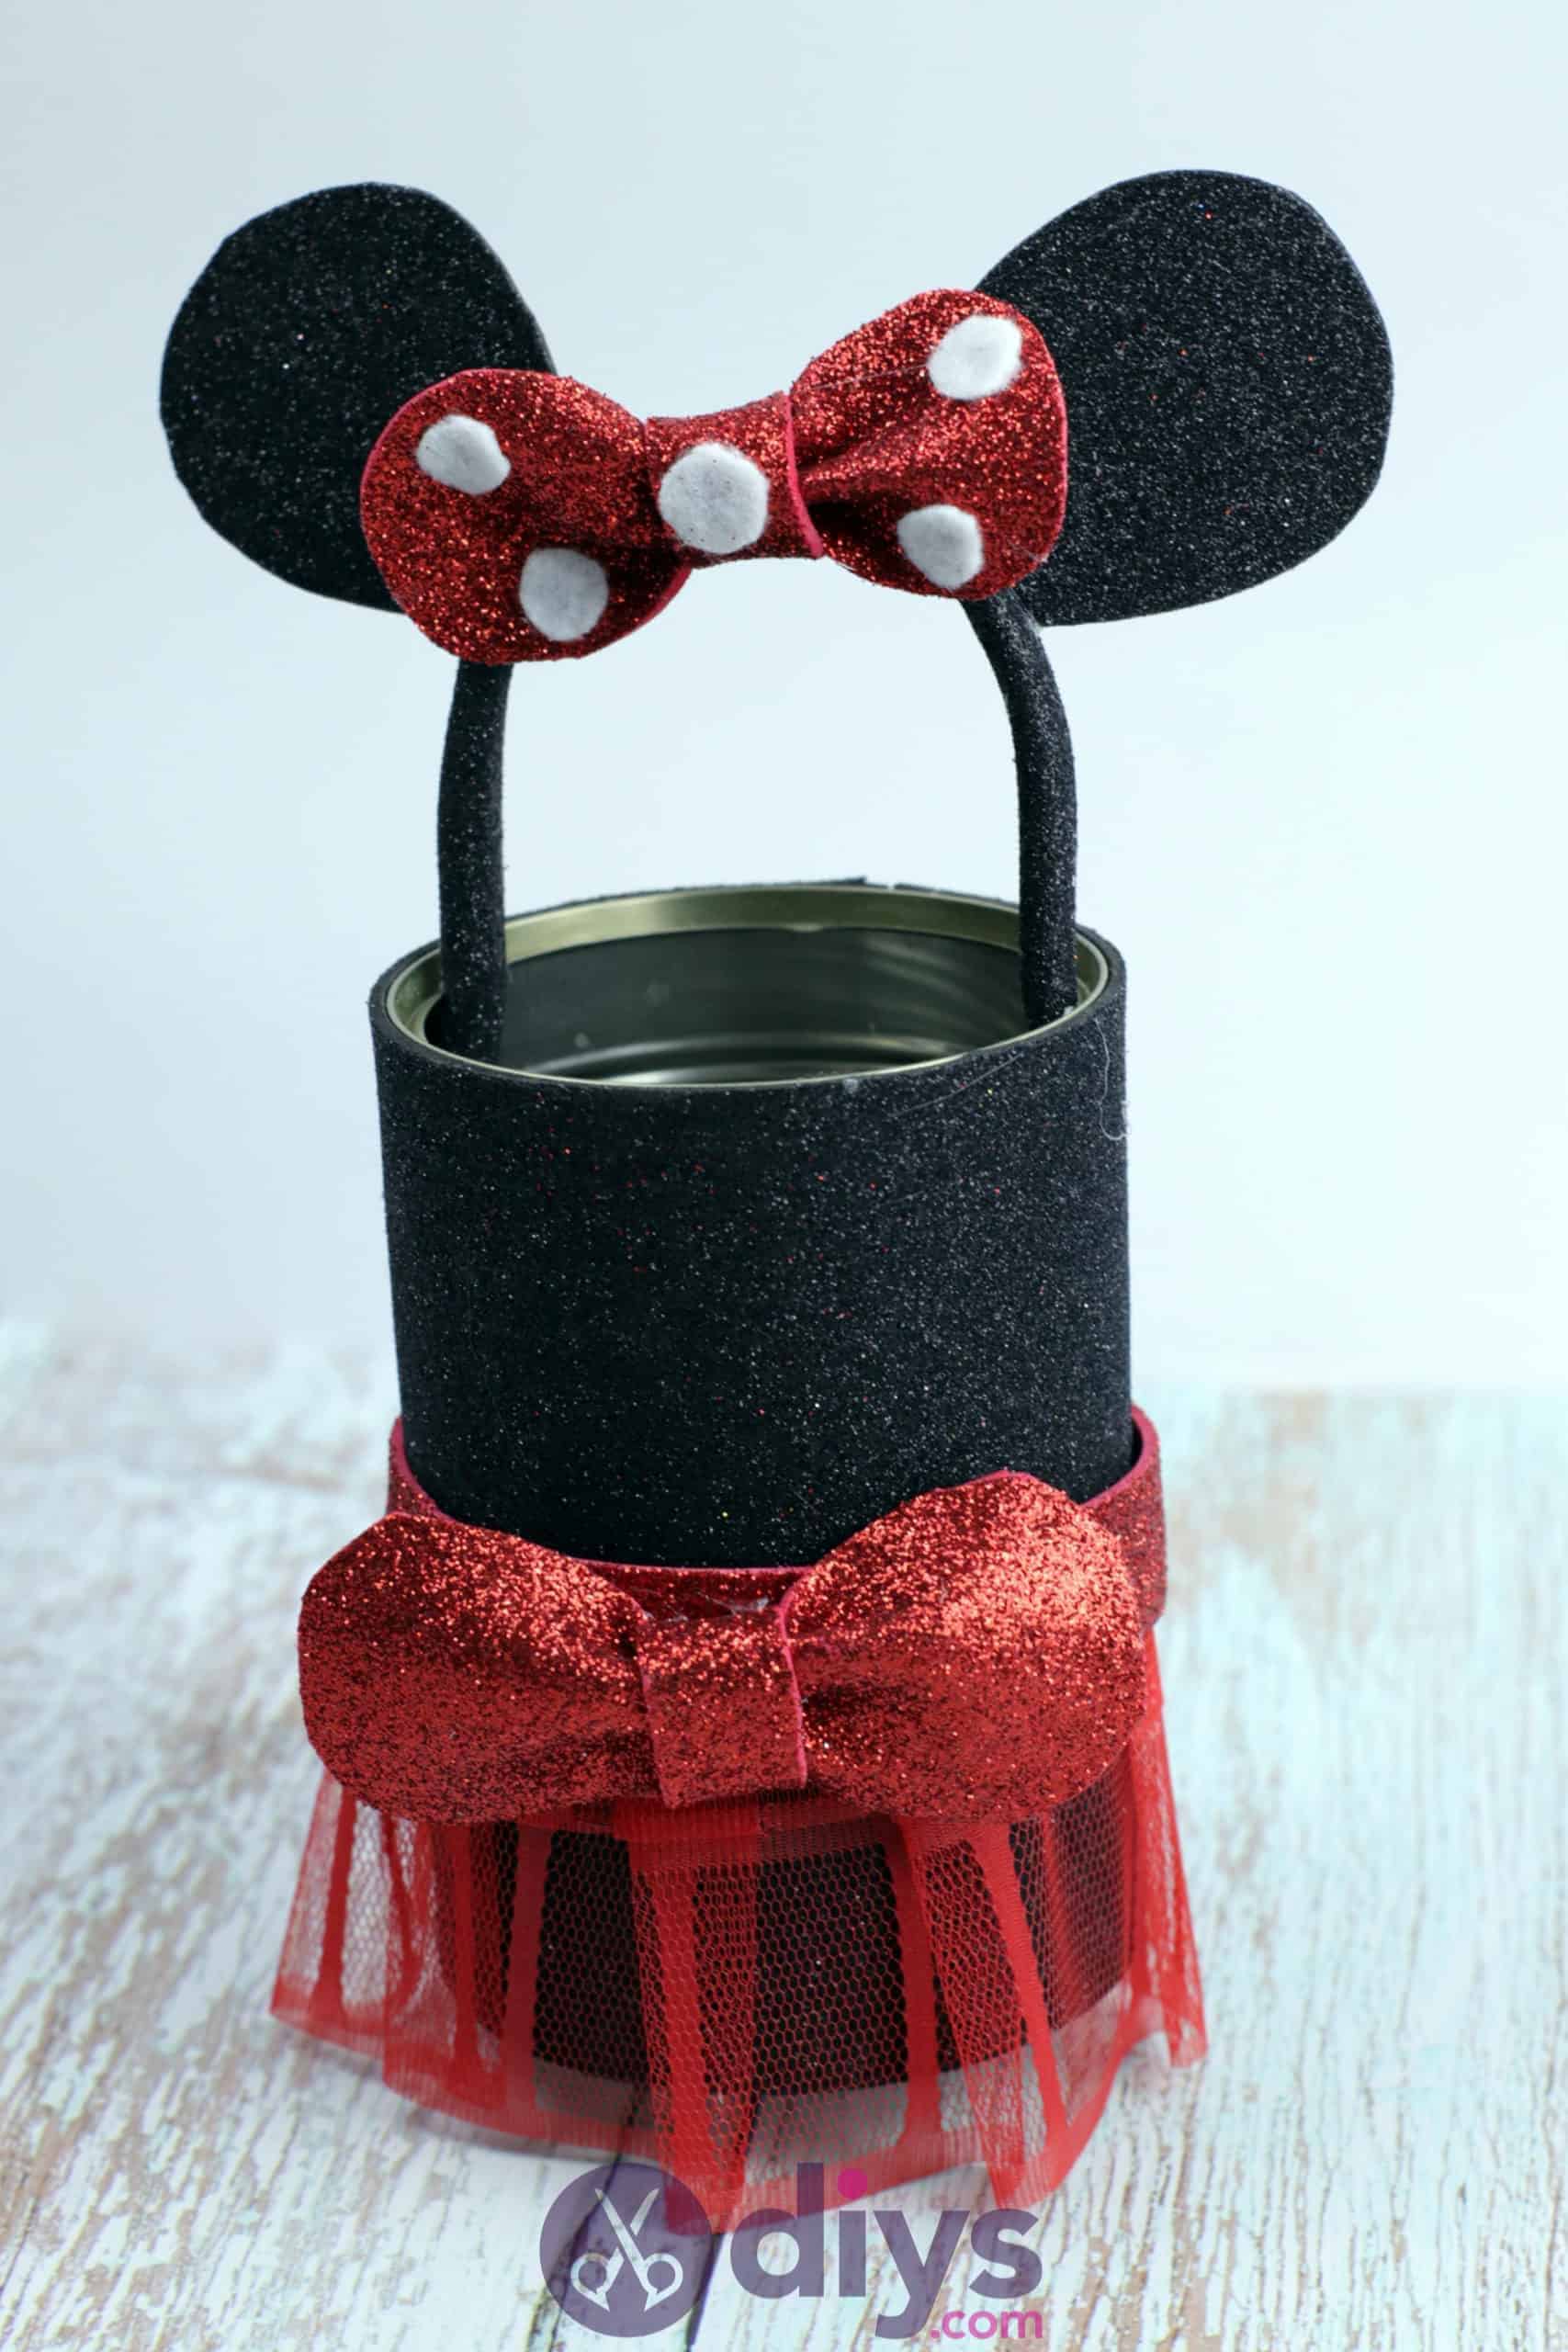
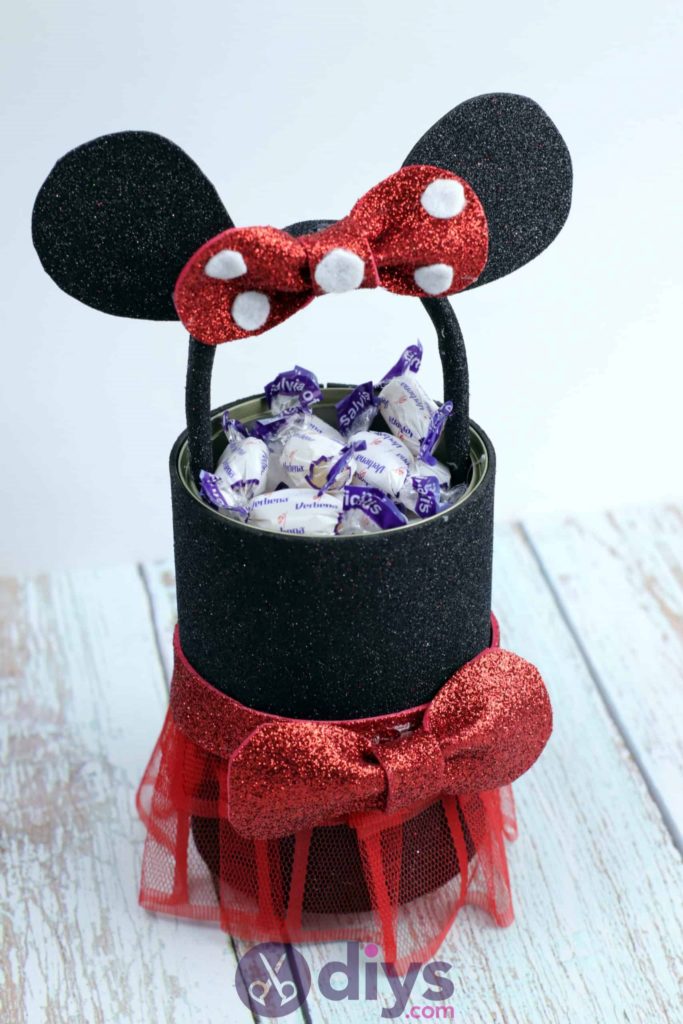
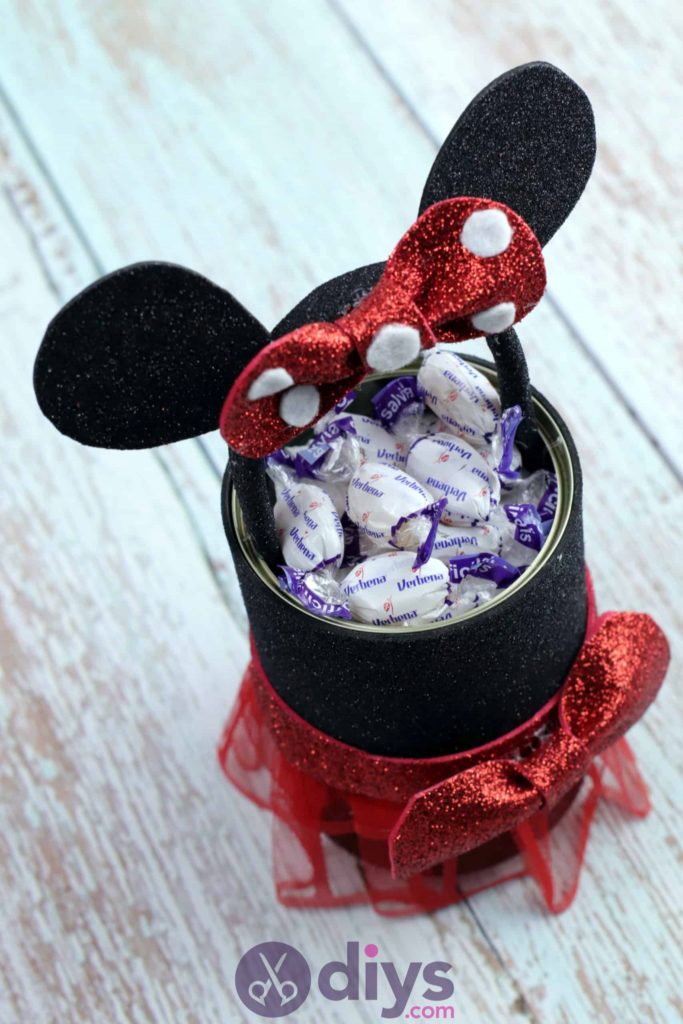
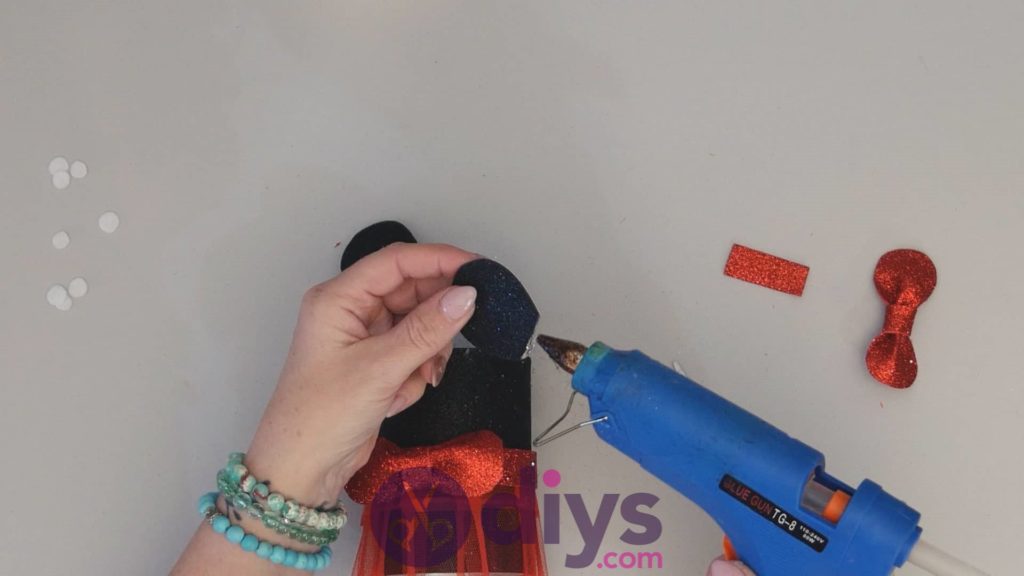
Use your scissors to cut out two mouse ears from your black foam. Make them rounded at the top and tapered towards the bottom to a flat edge. I did this by folding a black piece over and cutting the same shape once through both layers to get two pieces exactly the same shape and size.

Step 7:
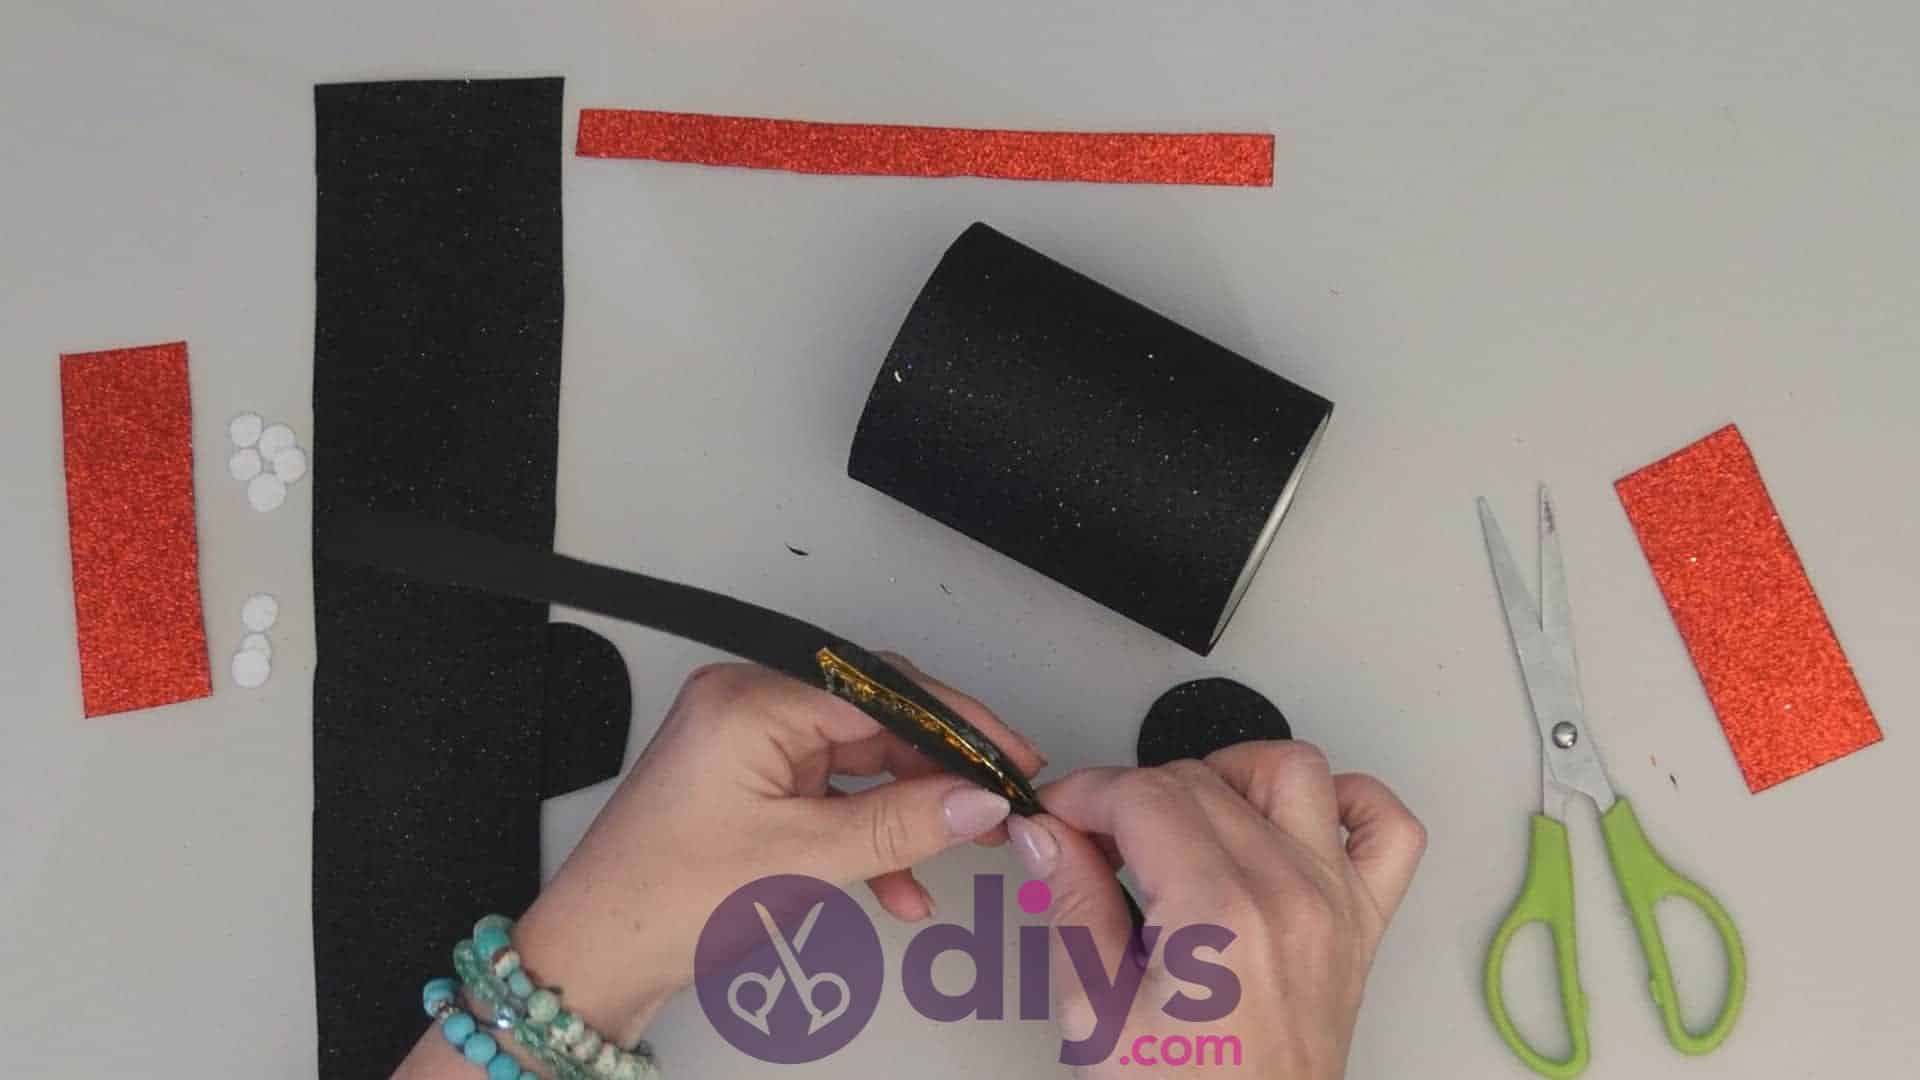
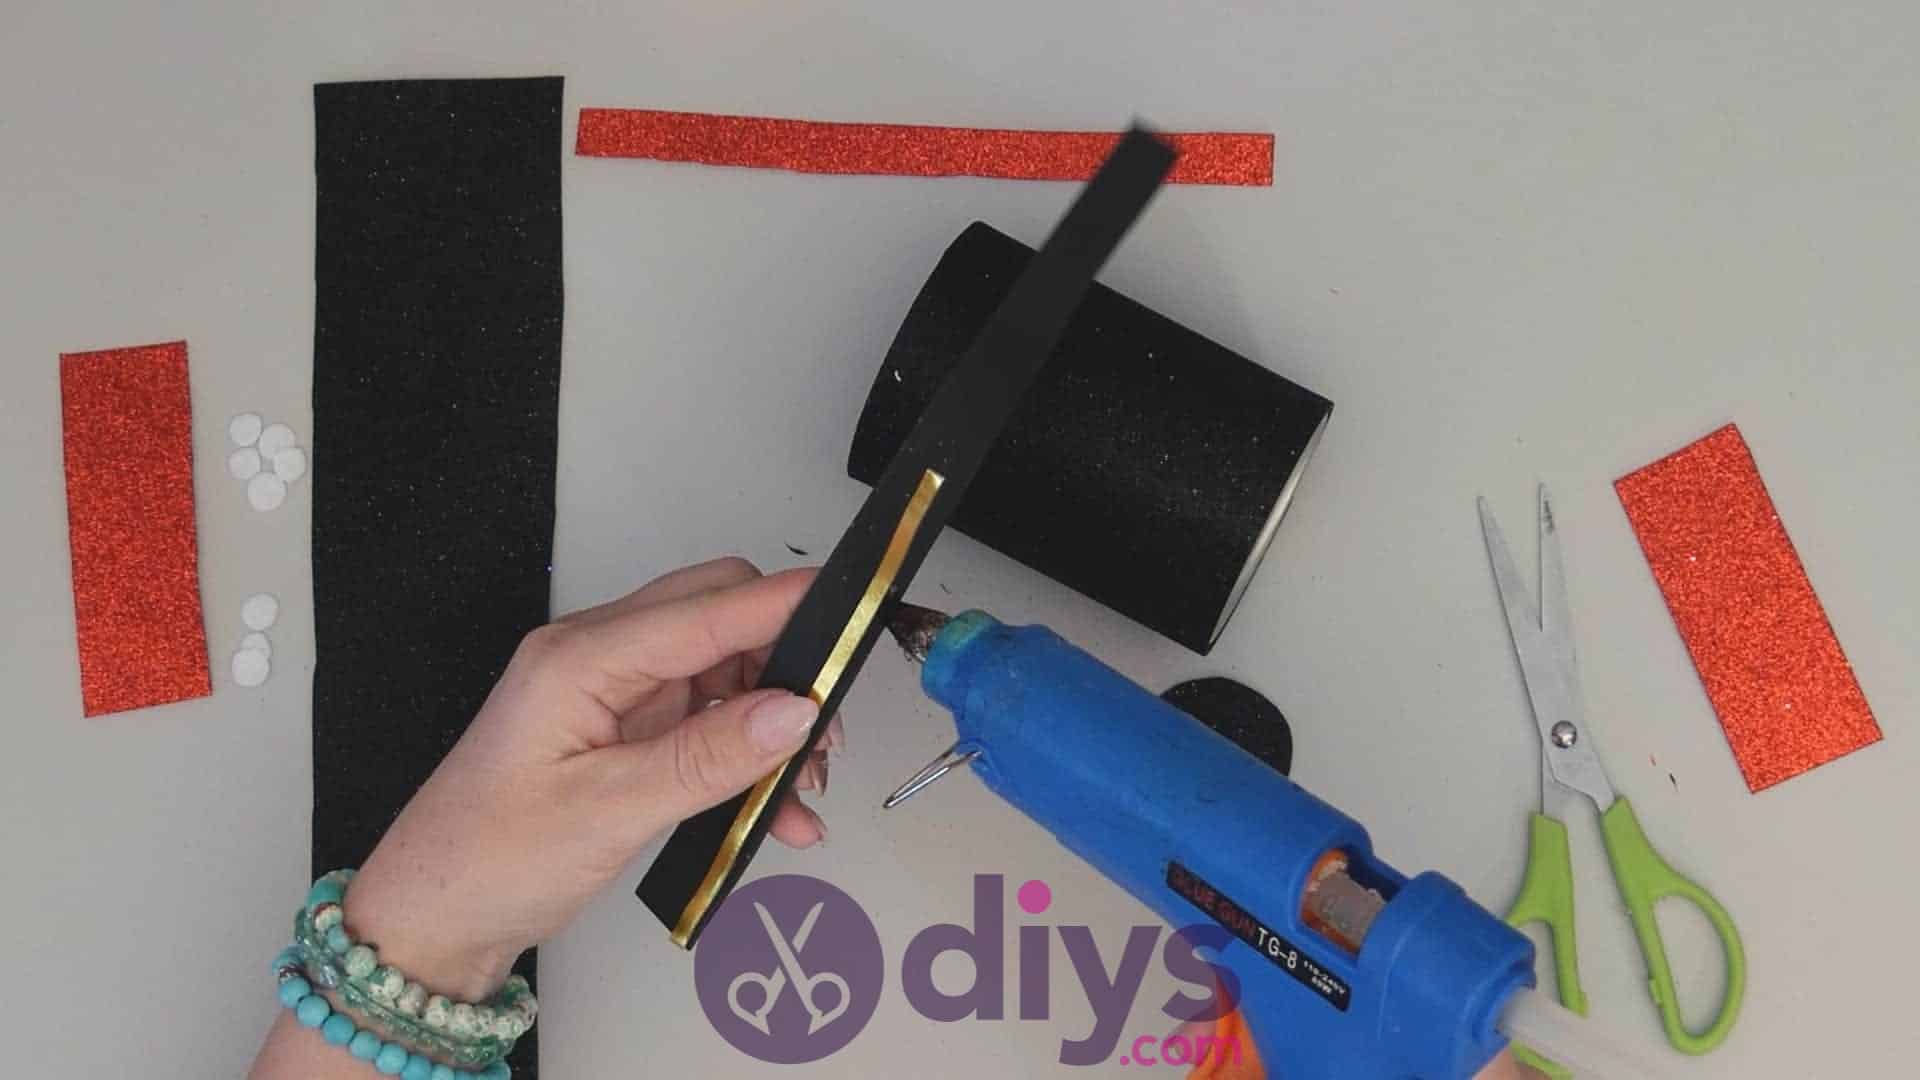
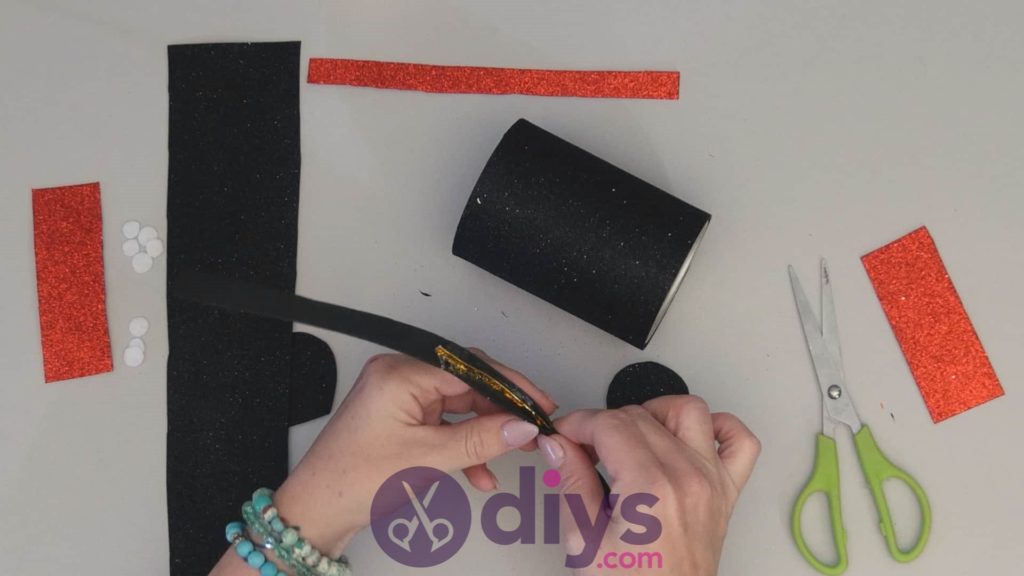
Cut a trip of black foam paper that’s the same length as your wire handle piece but double its thickness. Flatten the wire back out for the moment. Apply glue to one side of the strip on the side that’s not sparkly and stick the wire down there. Then apply glue on top of the wire, fold the foam strip in half over it, and stick the other half down there to wrap the wire in sparkly foam. Curve the wire again back into its semi-circular handle shape. Set it aside once more.
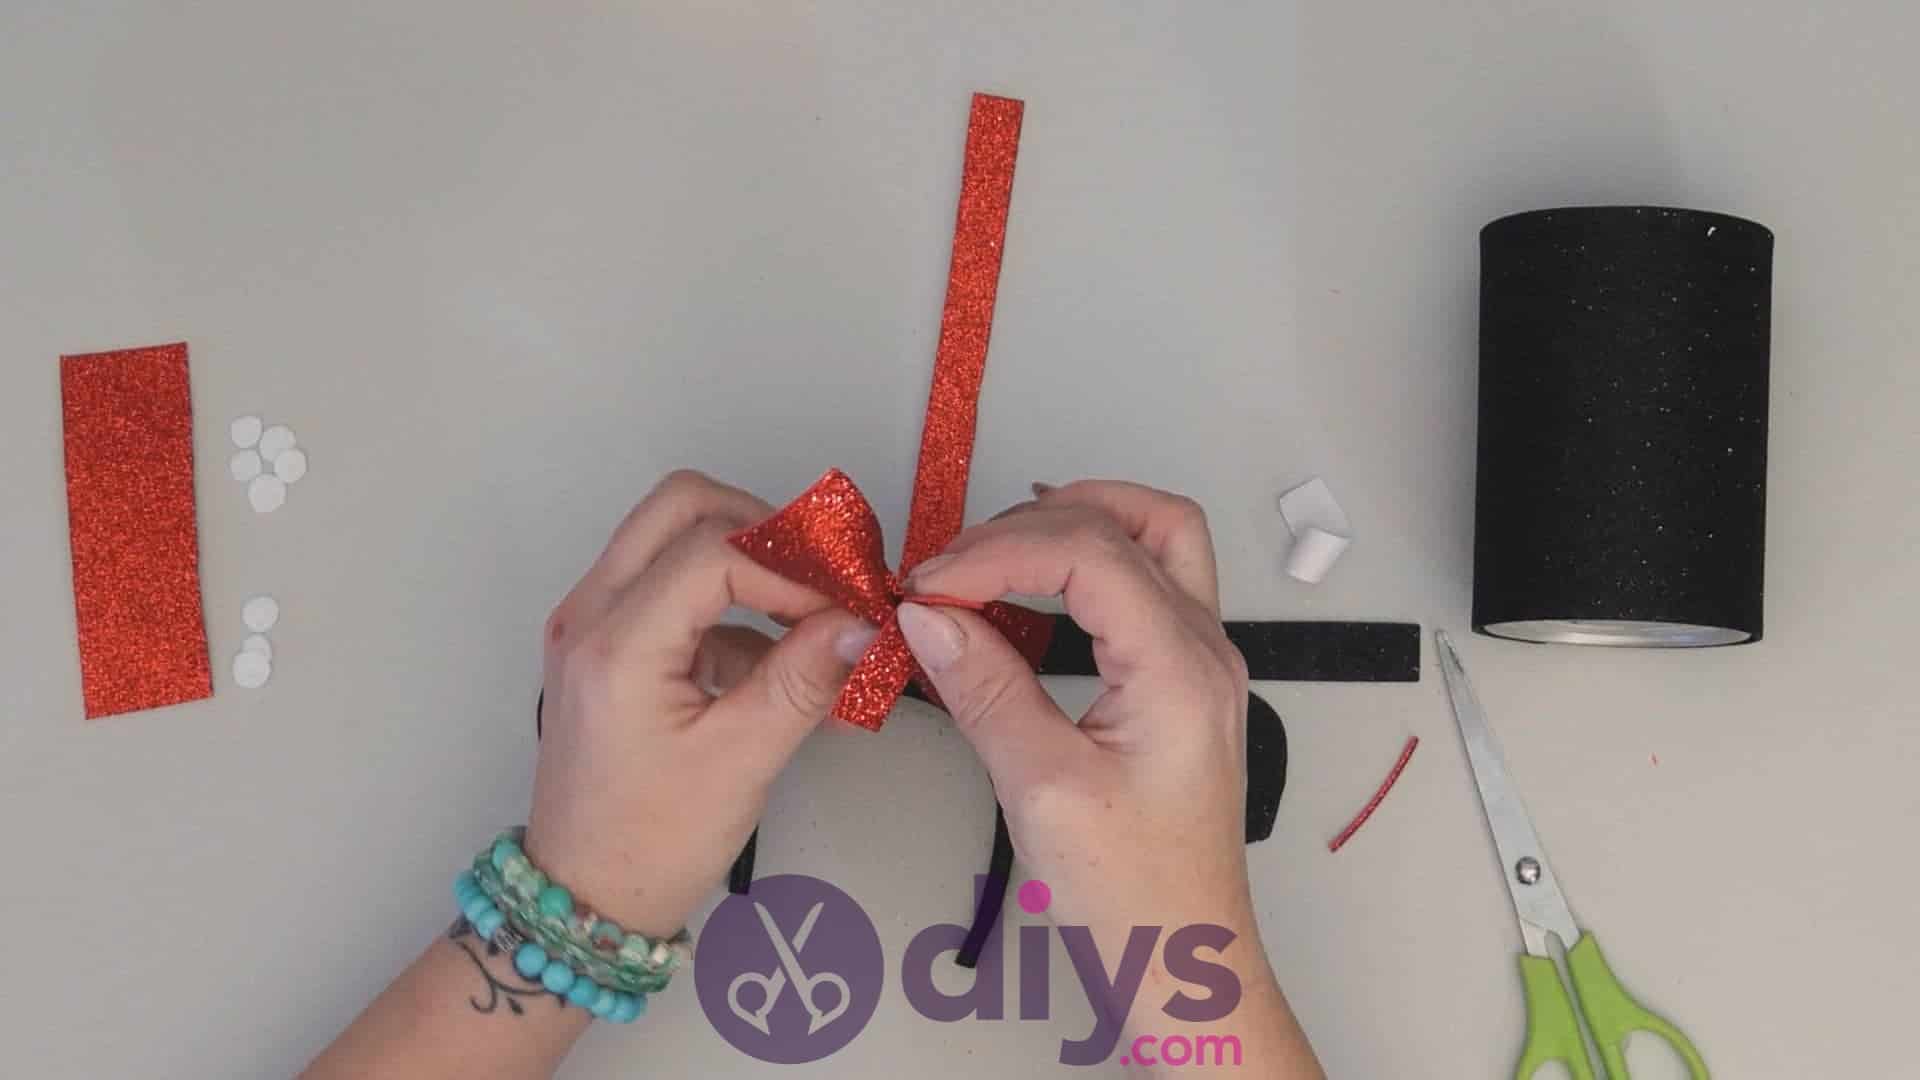
Step 8:
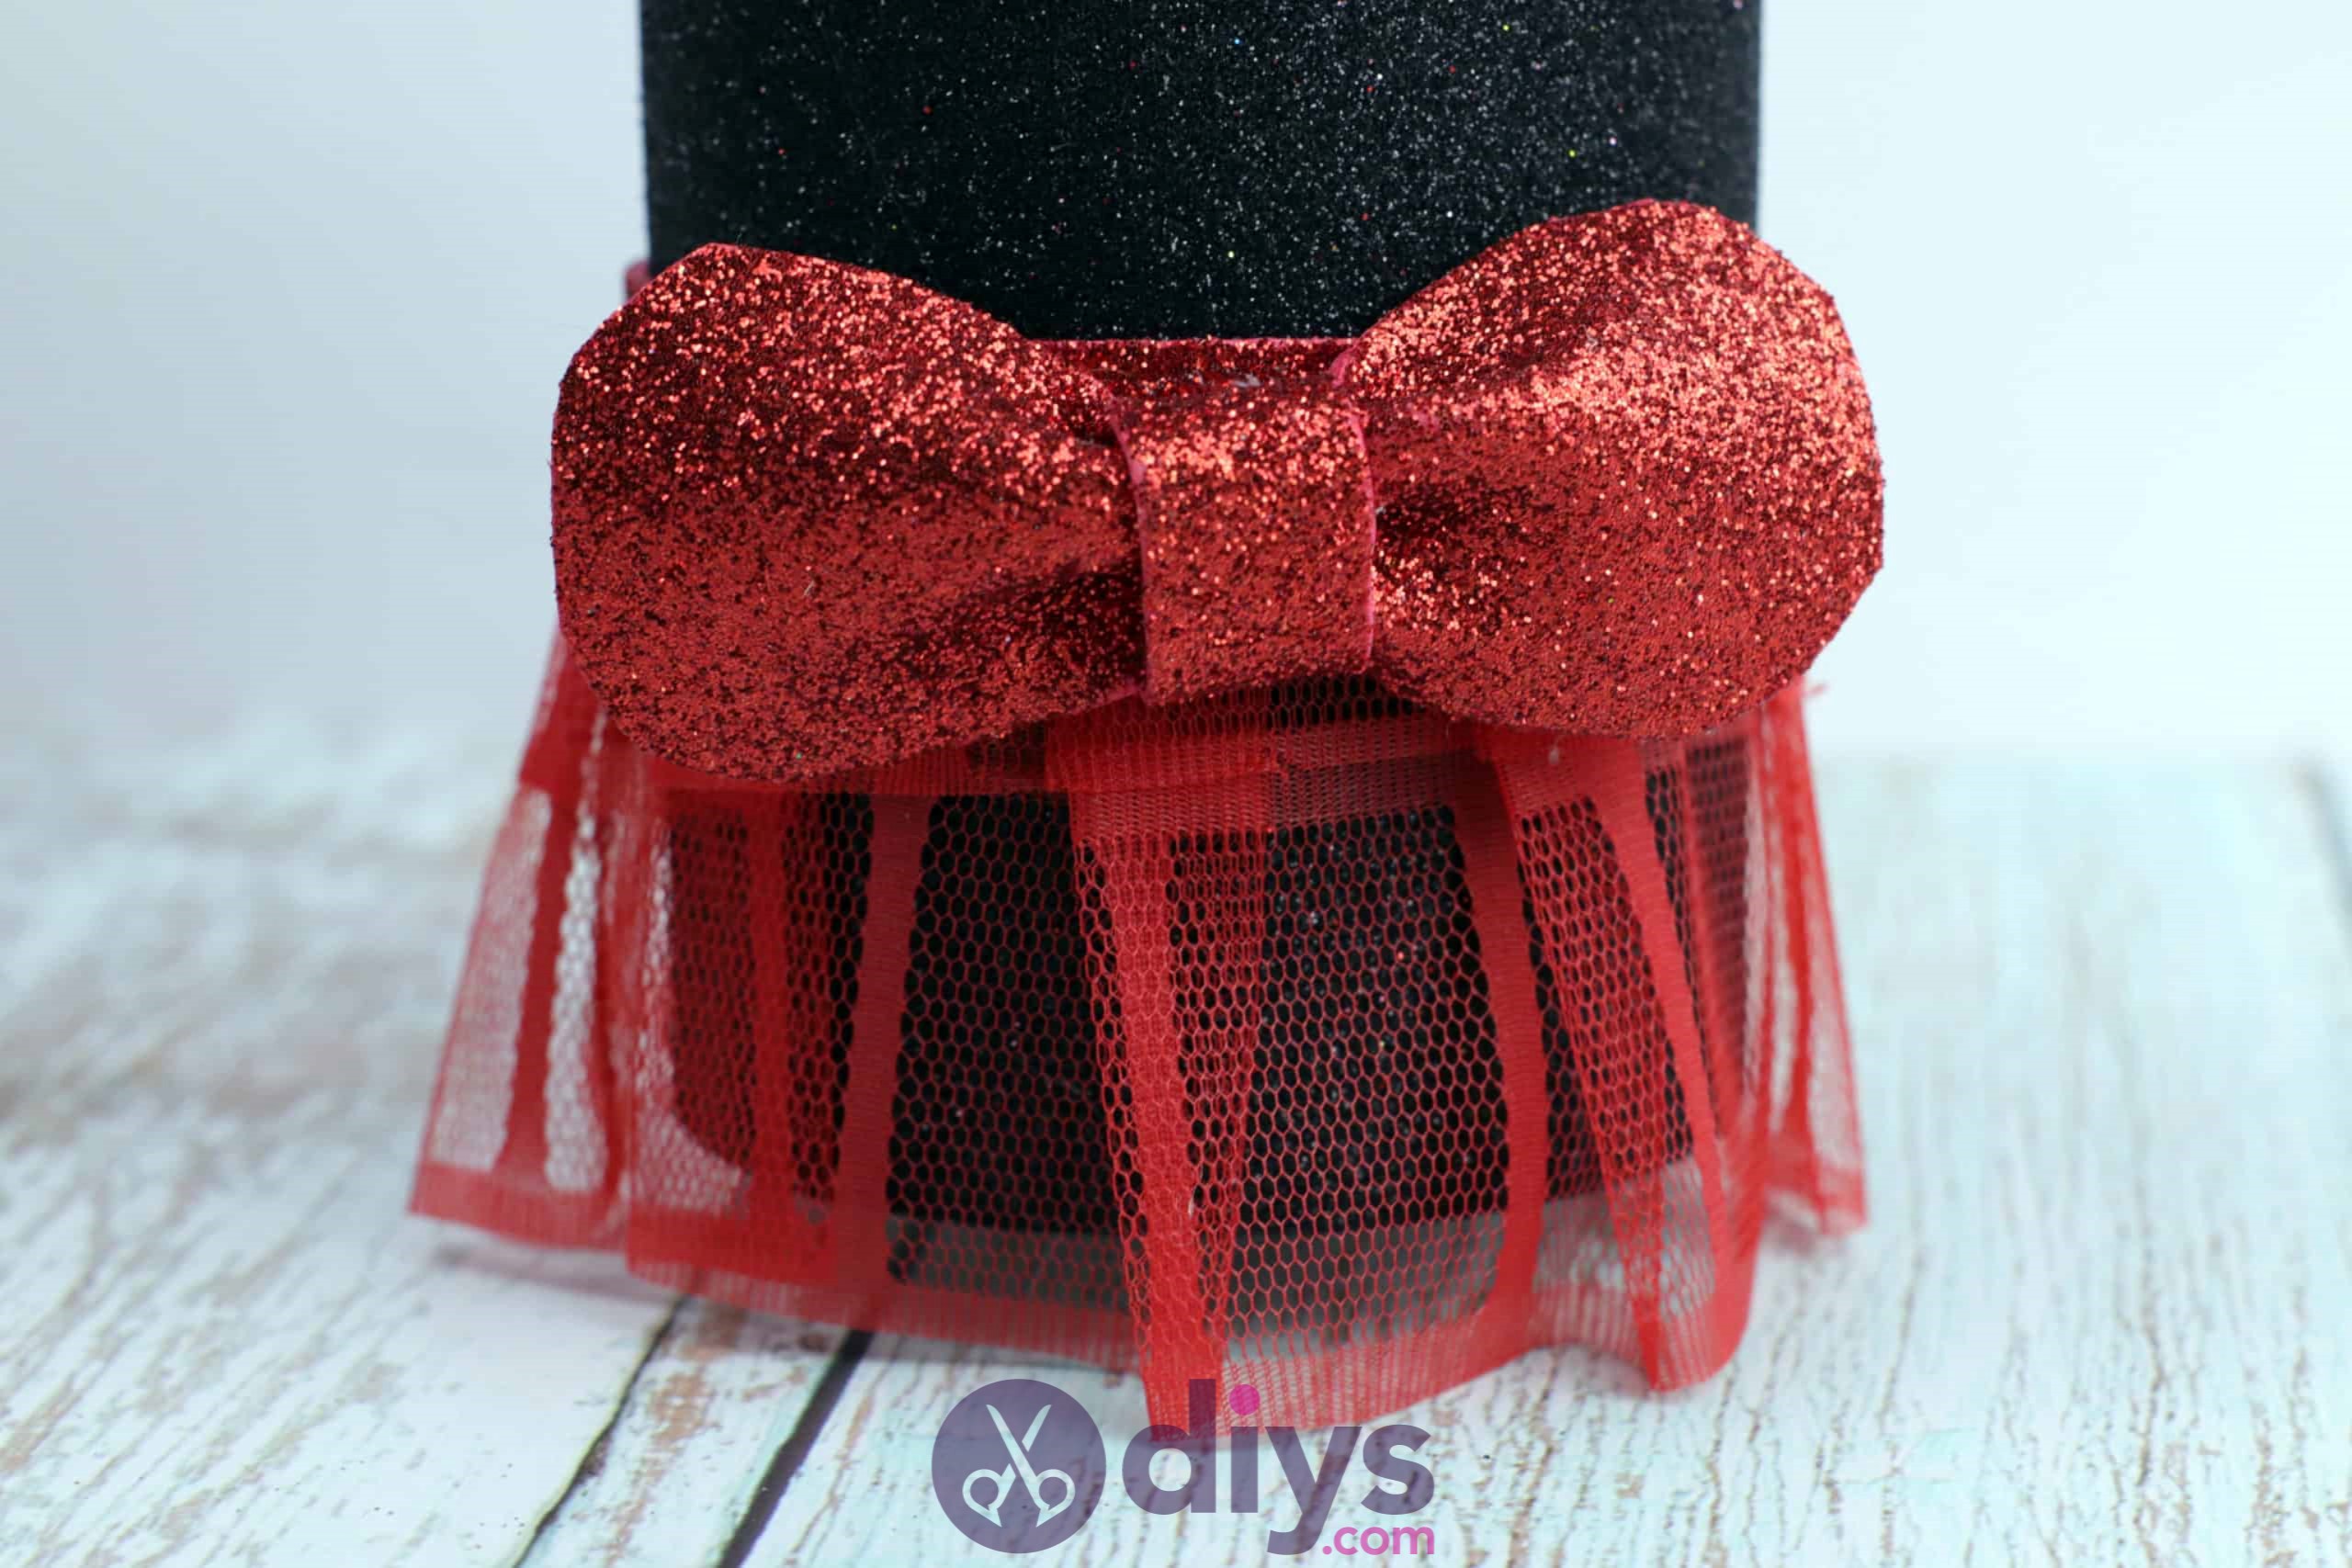
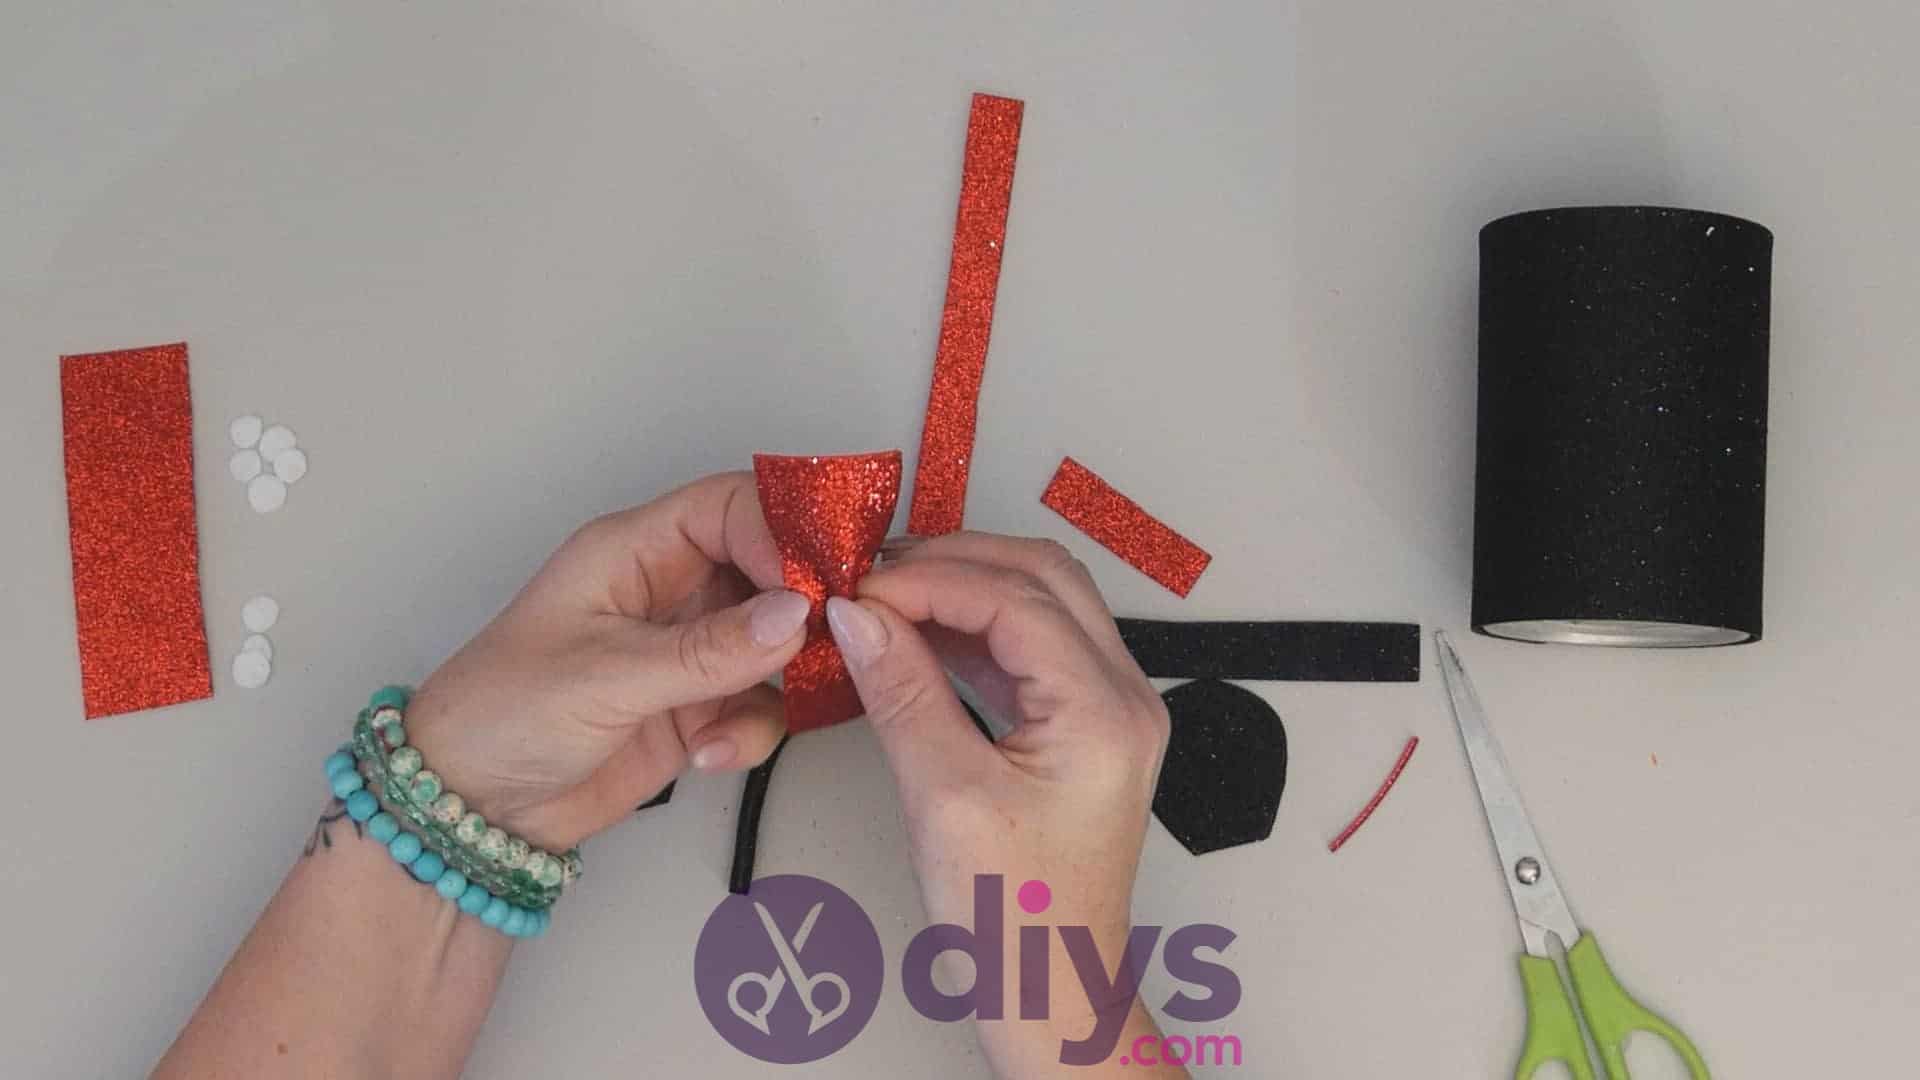
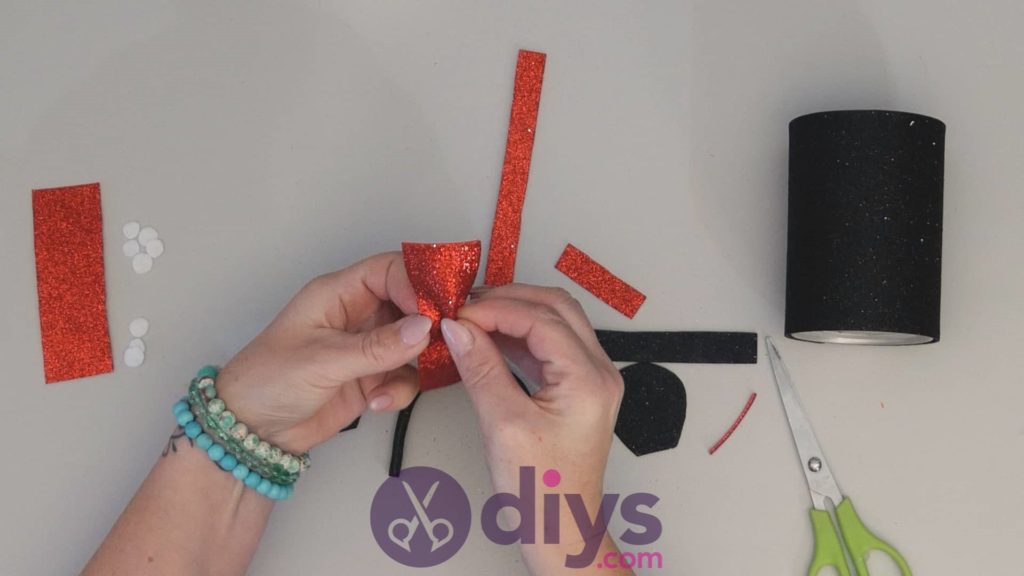
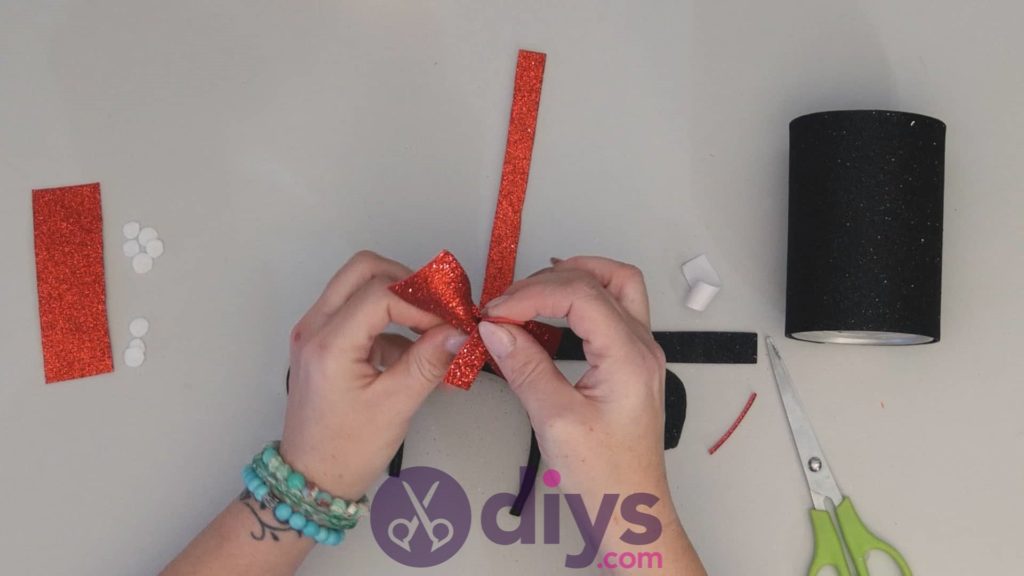
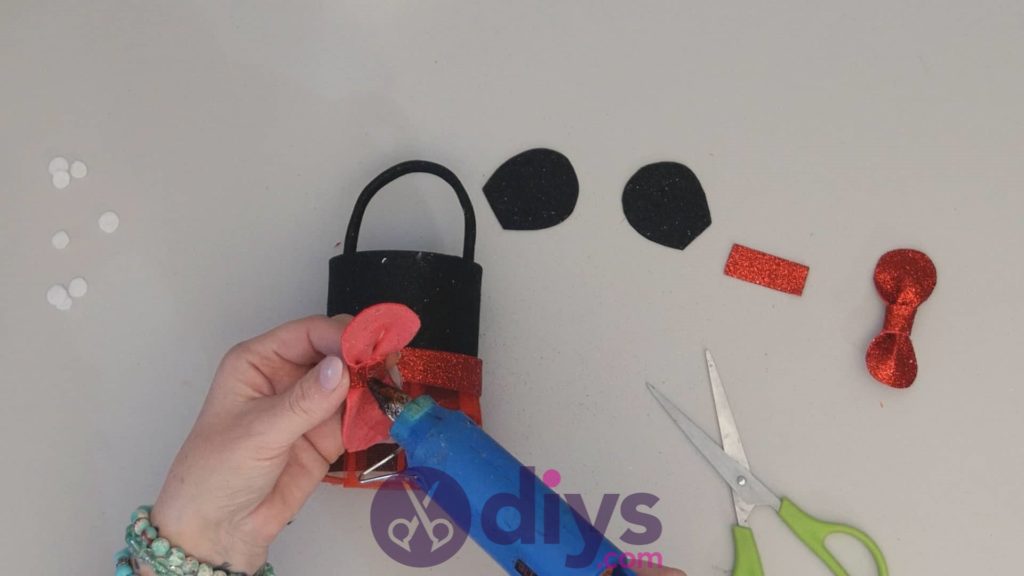
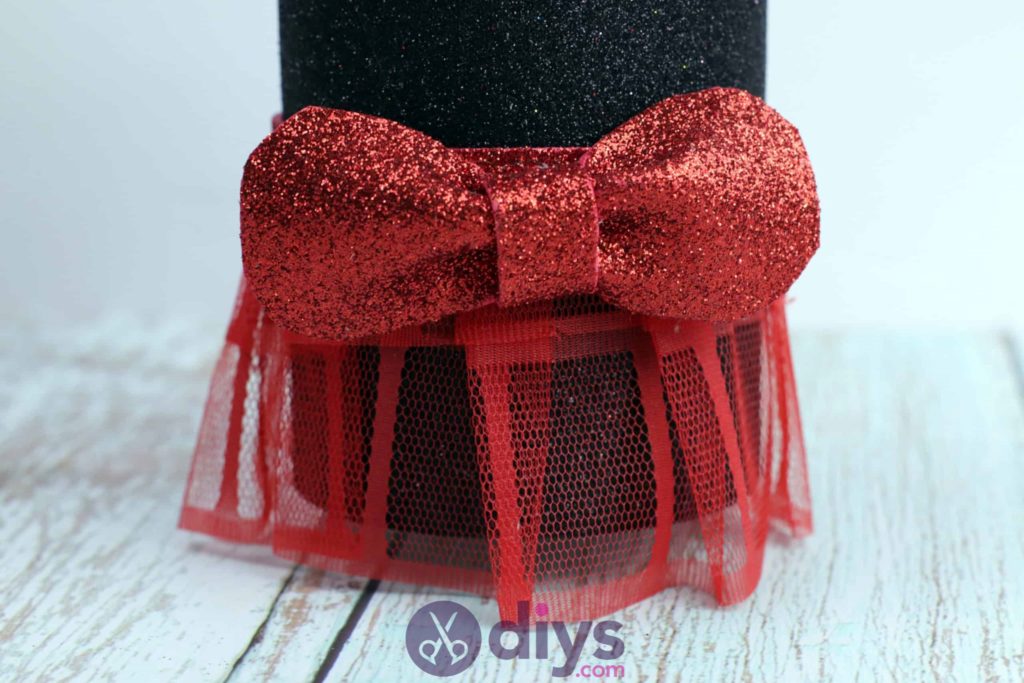
Make your Minnie Mouse’s bows! You’ll make one for between the ears and one for the top of the tutu skirt. Take your first rectangle that you cut before and pinch it in the middle, with the two ends splaying wide on either side. Cut a piece a few inches long from the thinner red strip you cut earlier and wrap it around the middle of the other piece where you cinched it to hold the pinch in place. Apply glue to the end of the wrapped strip to keep it anchored behind the bow, wrap it all the way around, and then apply glue in that spot again to glue the other end down, trimming the excess. Next, use your scissors to round off the corners on either side of the bow so they’re rounded, more like how a ribbon curves. Repeat this entire process with the second red sparkly rectangle and the rest of the red strip to make a second bow. If your foam paper is the kind with an adhesive back, you can help all of thee processes along by peeling the backing off and using the sticky back side in the process of pinching and wrapping.

Step 9:
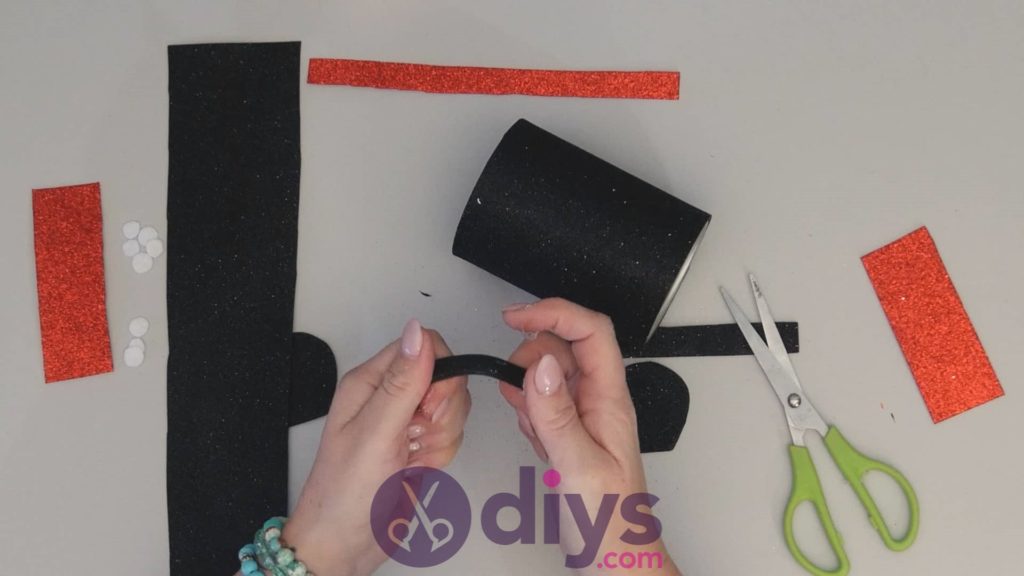
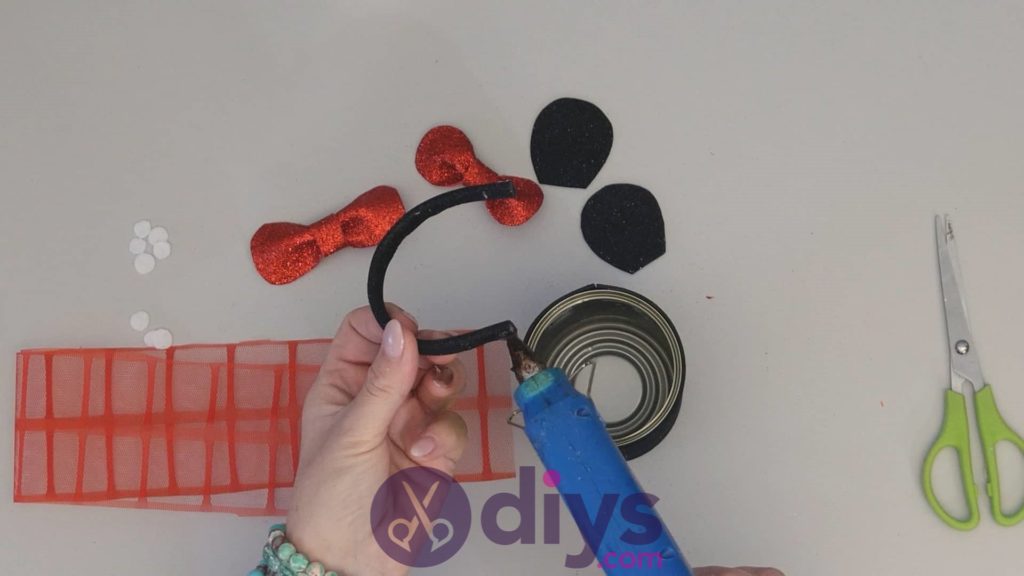
Apply hot glue to each end of your curved and foam covered wire handle, on the outside edge on each side. Slide the ends into the inside edges of the tin can and stretch the wire so the outside spots with the glue rest against the inside edges of the can and stick there.
Step 10:
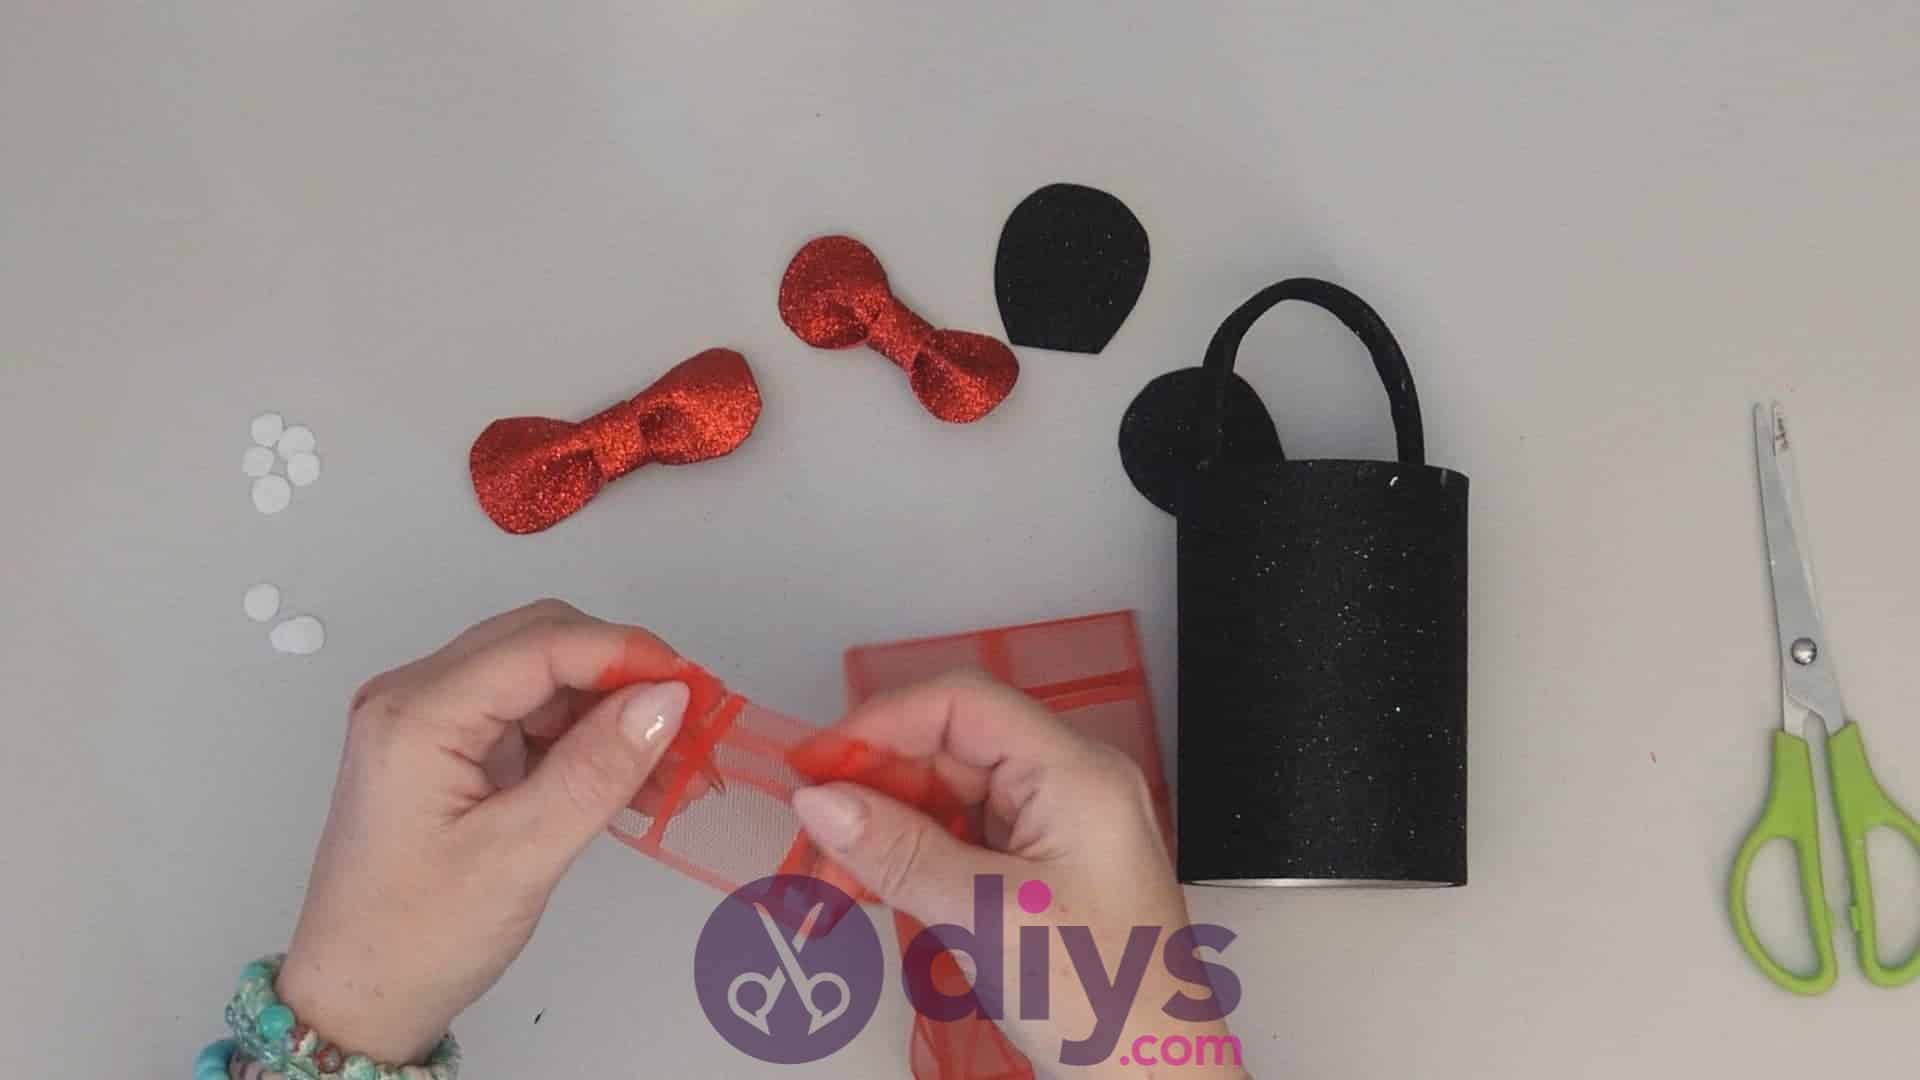
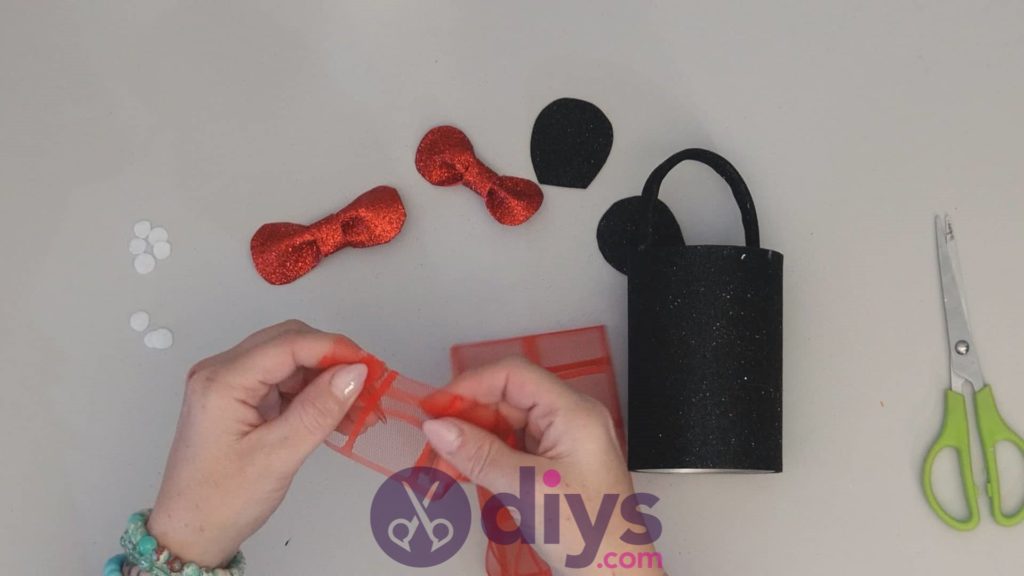
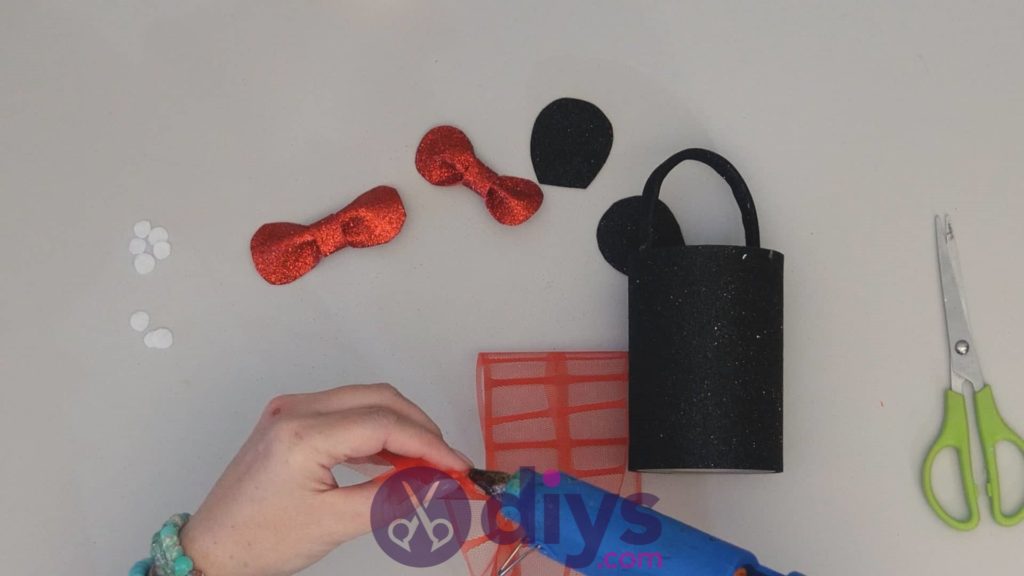
Turn your trim horizontally so you can create ruffles all along the longer edge to create a tutu skirt. Pinch about a half inch of the edge back in on itself to create a fold in the trim below it. Apply a little dot of glue in that pinch to stick it in place. That’s one ruffle! Continue this process until you have a ruffled piece the same length as the circumference of the outside of the can. Make sure it reaches all the way around and then cut the trim of the trim that isn’t ruffled off.
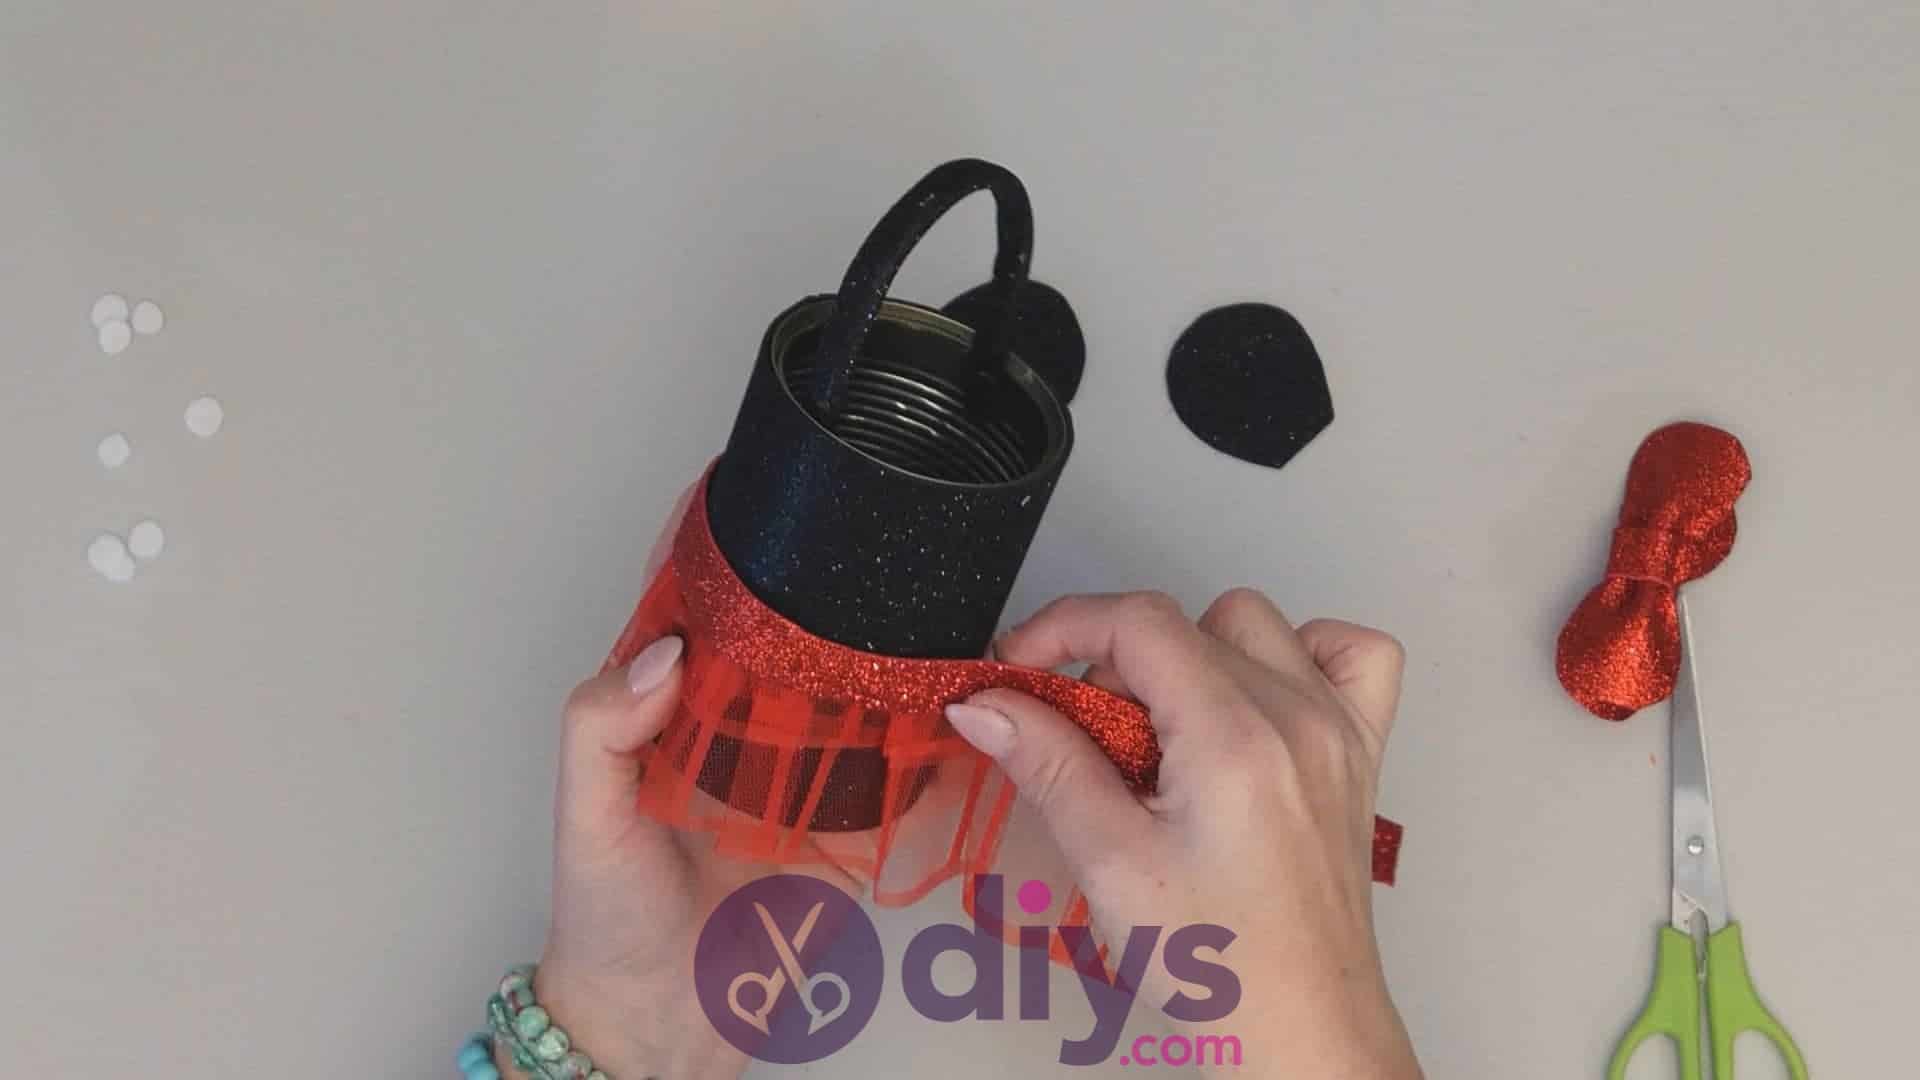
Step 11:
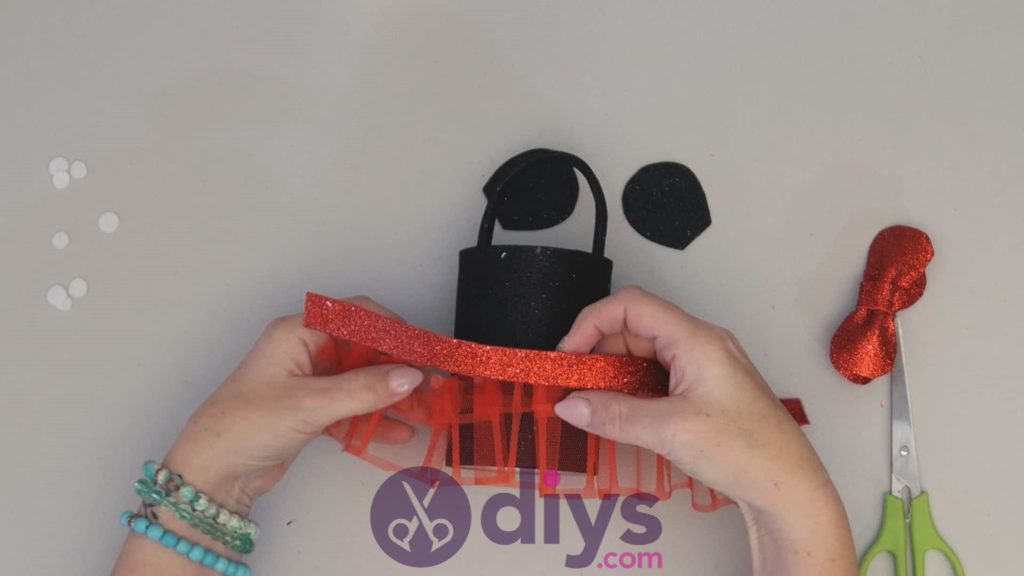
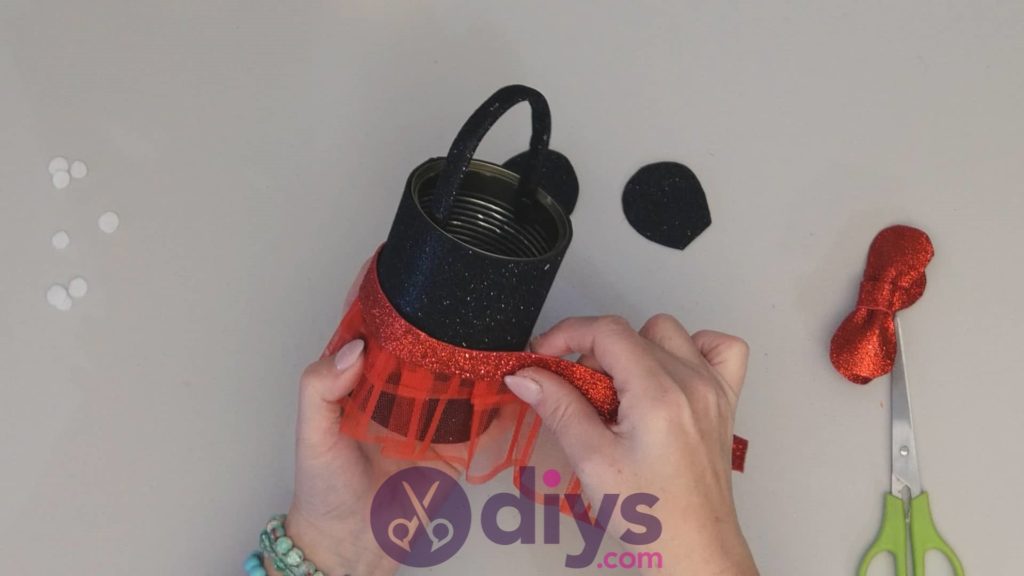
Cut a strip of red sparkly foam that’s the same length as the top ruffled edge of your tutu skirt, where you made and glued all those folded pinches. Apply glue all along the back of your sparkly strip (or just use the adhesive backing, if yours has it) and stick the pinched edge of the tutu down there. Now your skirt has a belt. Apply more glue along the length of the back side of the belt, where you just glued the skirt, and stick it down all the way around the outside of the can, about halfway up its height. Now your mouse (the black can is your Minnie’s body) is actually wearing the skirt.

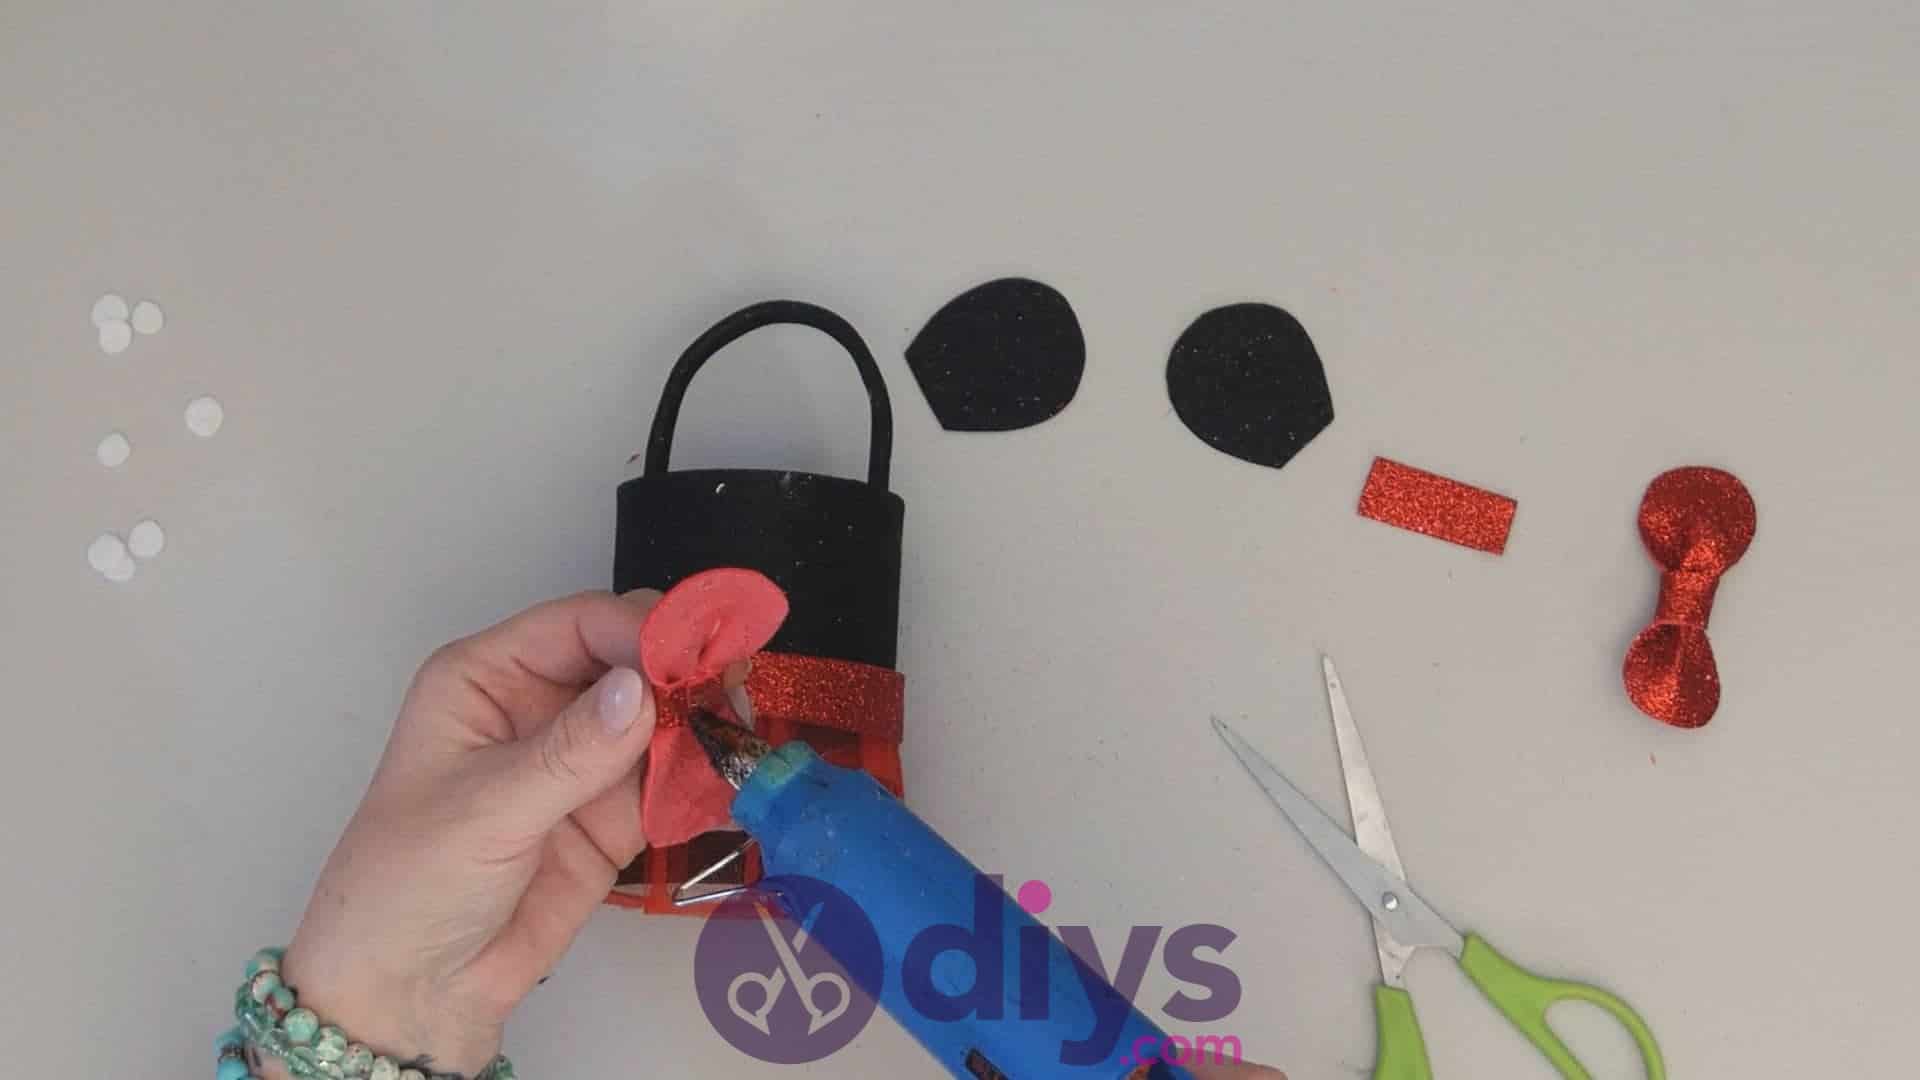
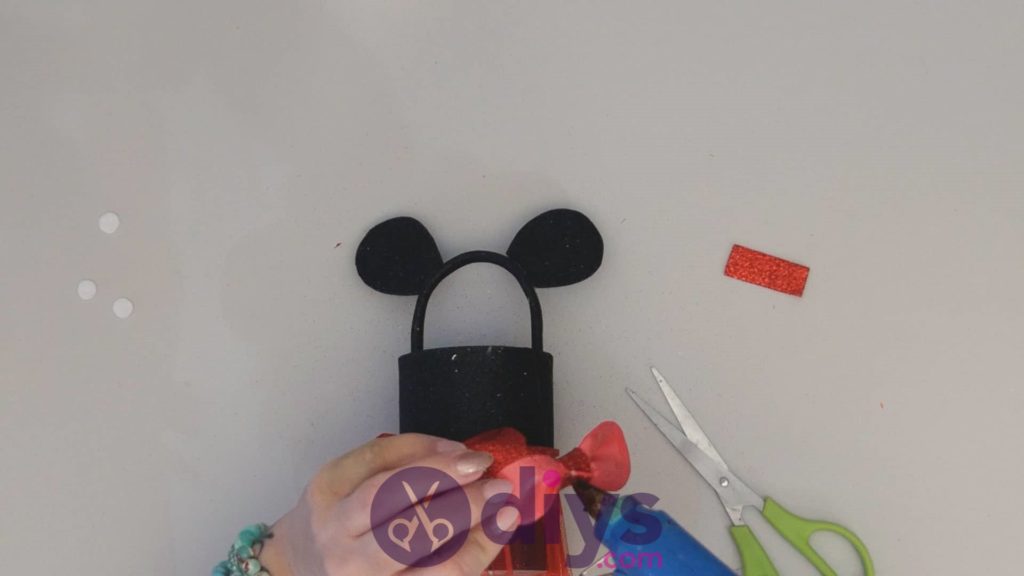
Step 12:
Apply glue to the band of one of your red bows, on the back. Stick it down on the belt or top sparkly band of the skirt, right on the front (on the opposite side of the split in the belt where you glued your ends down).
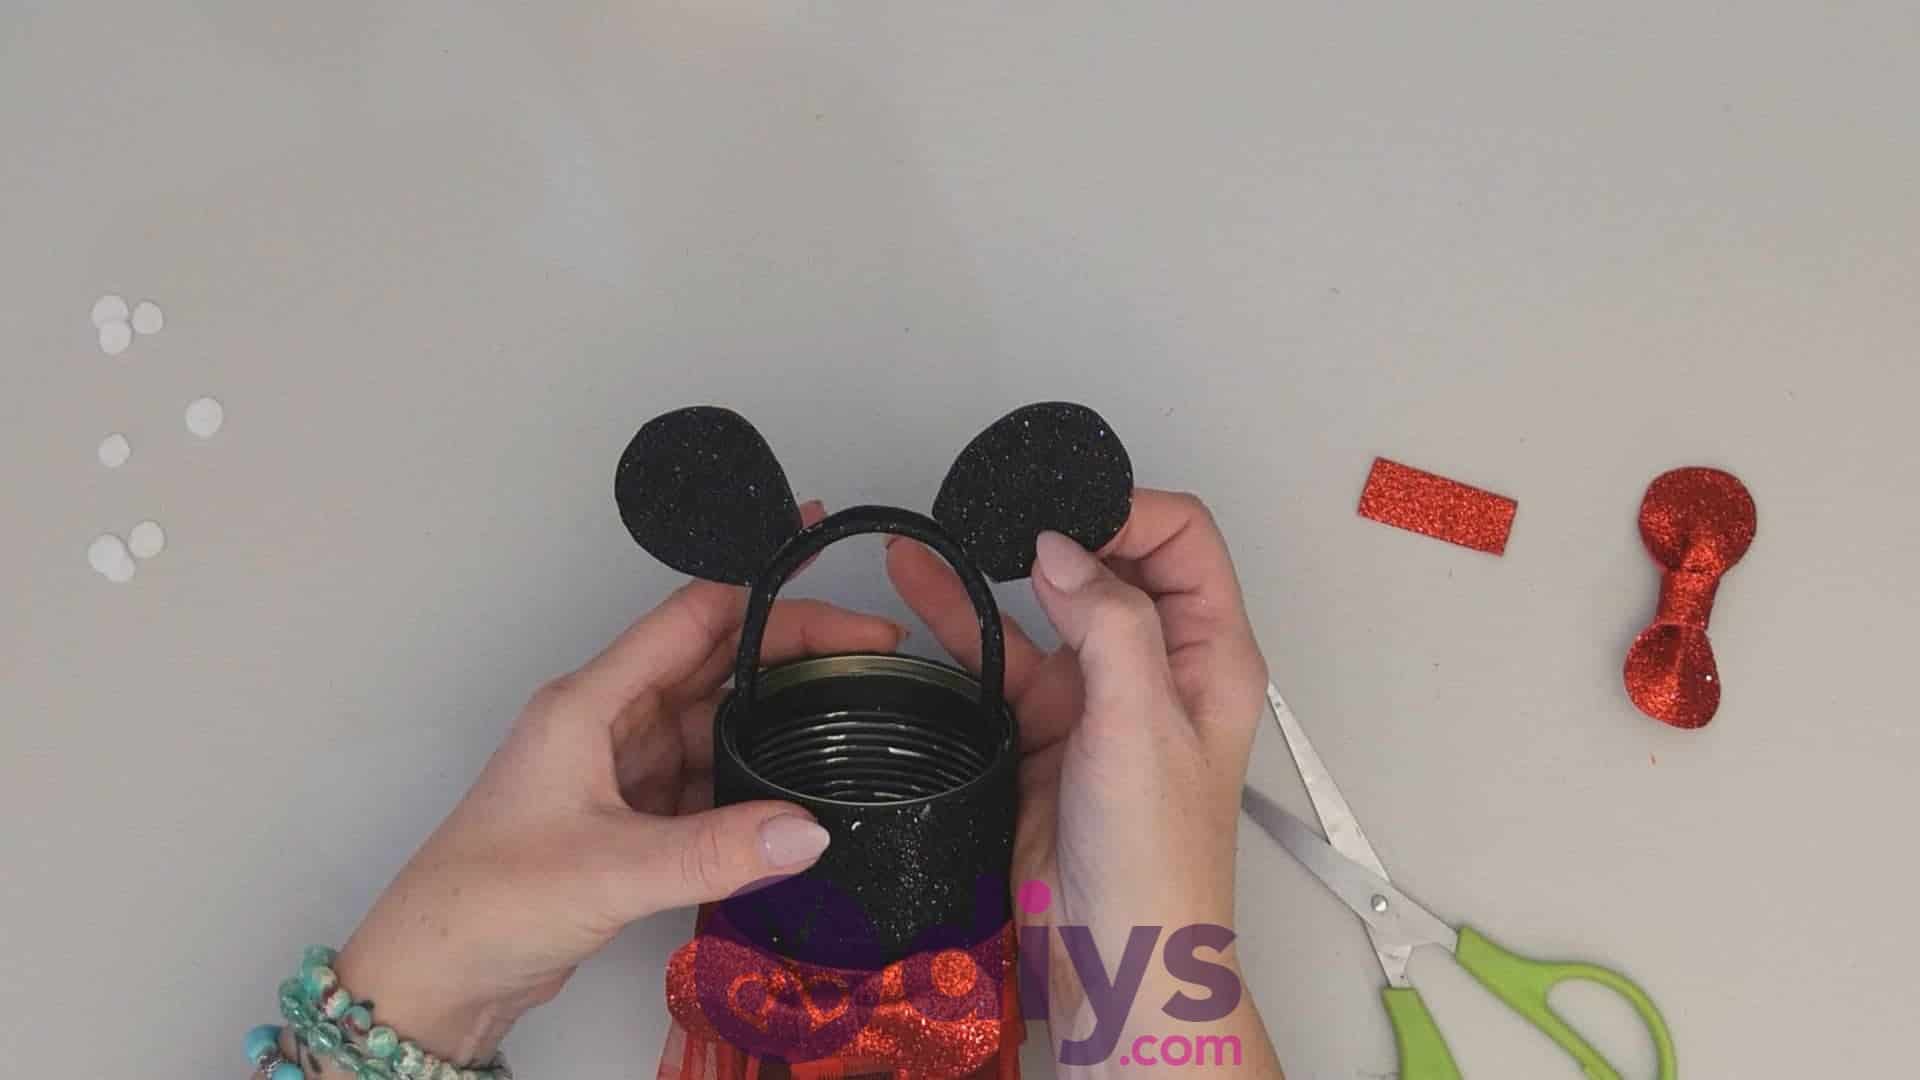
Step 13:
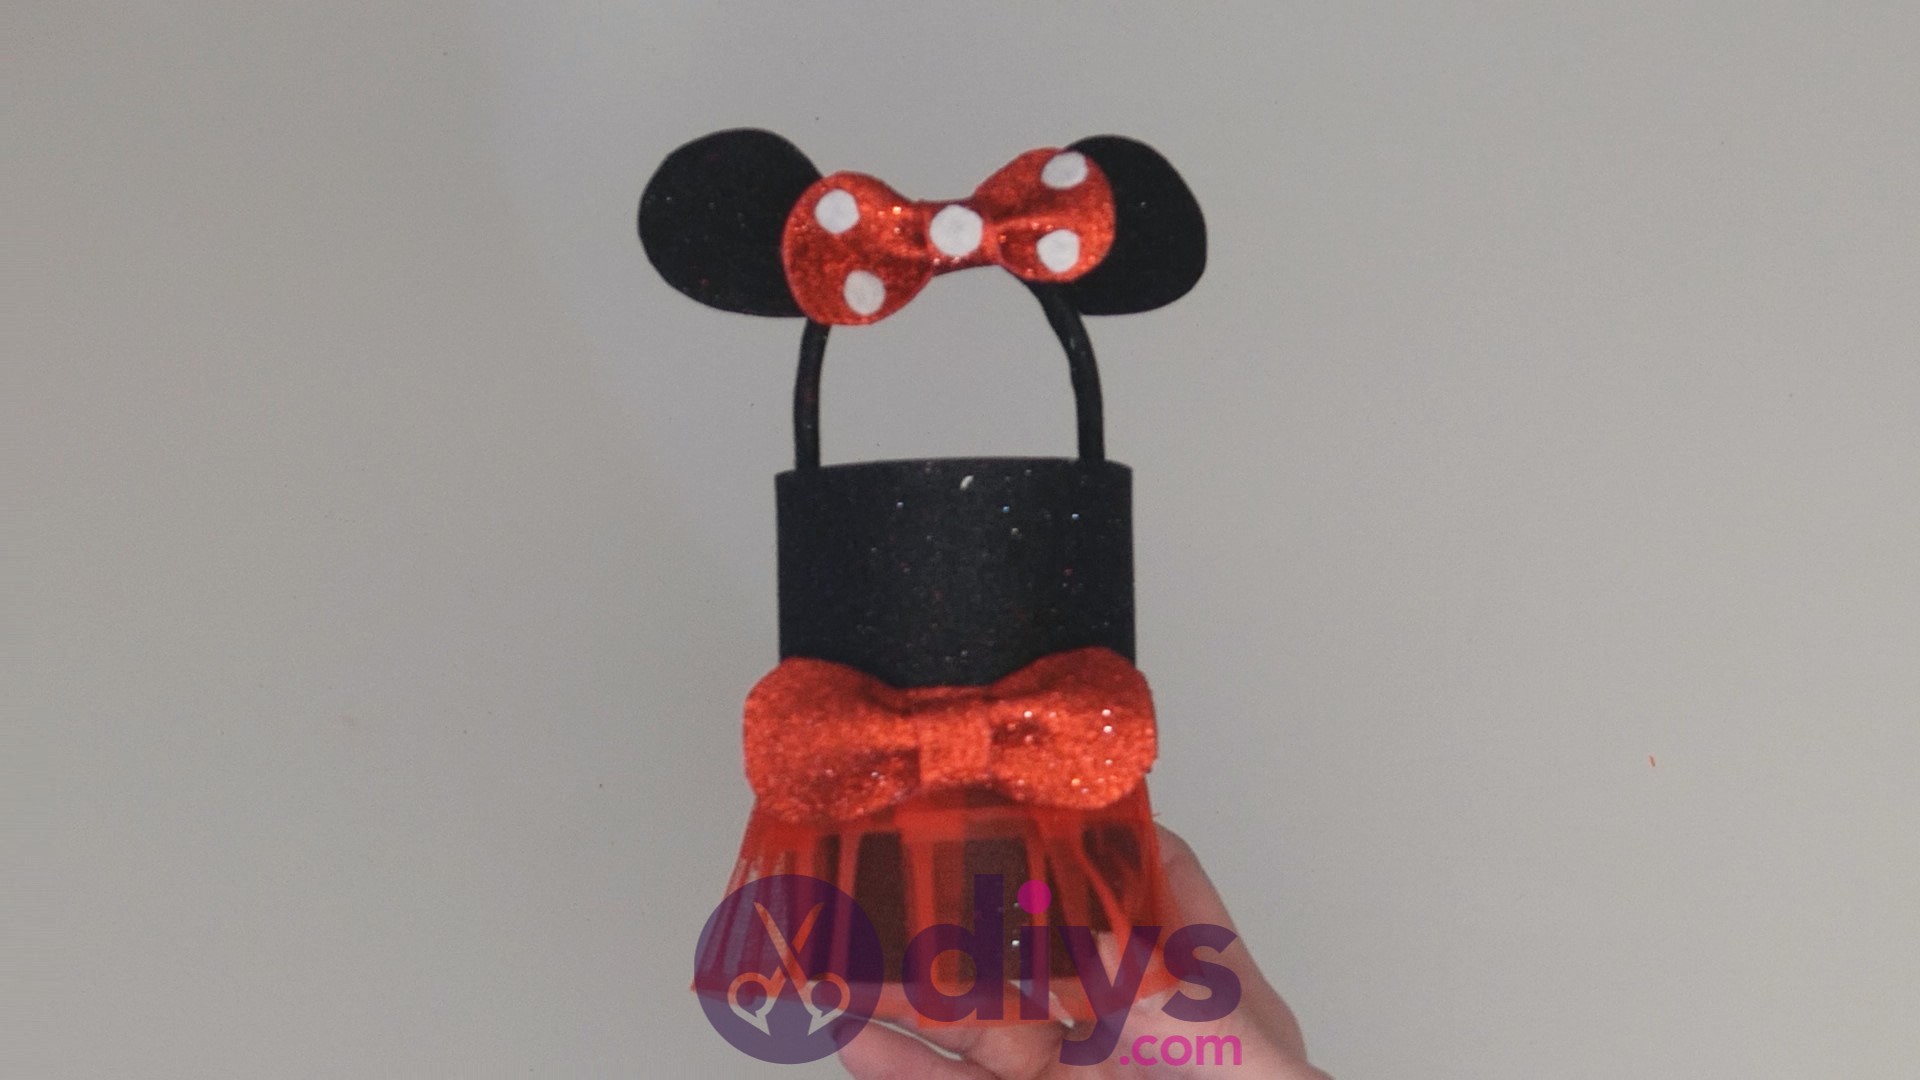
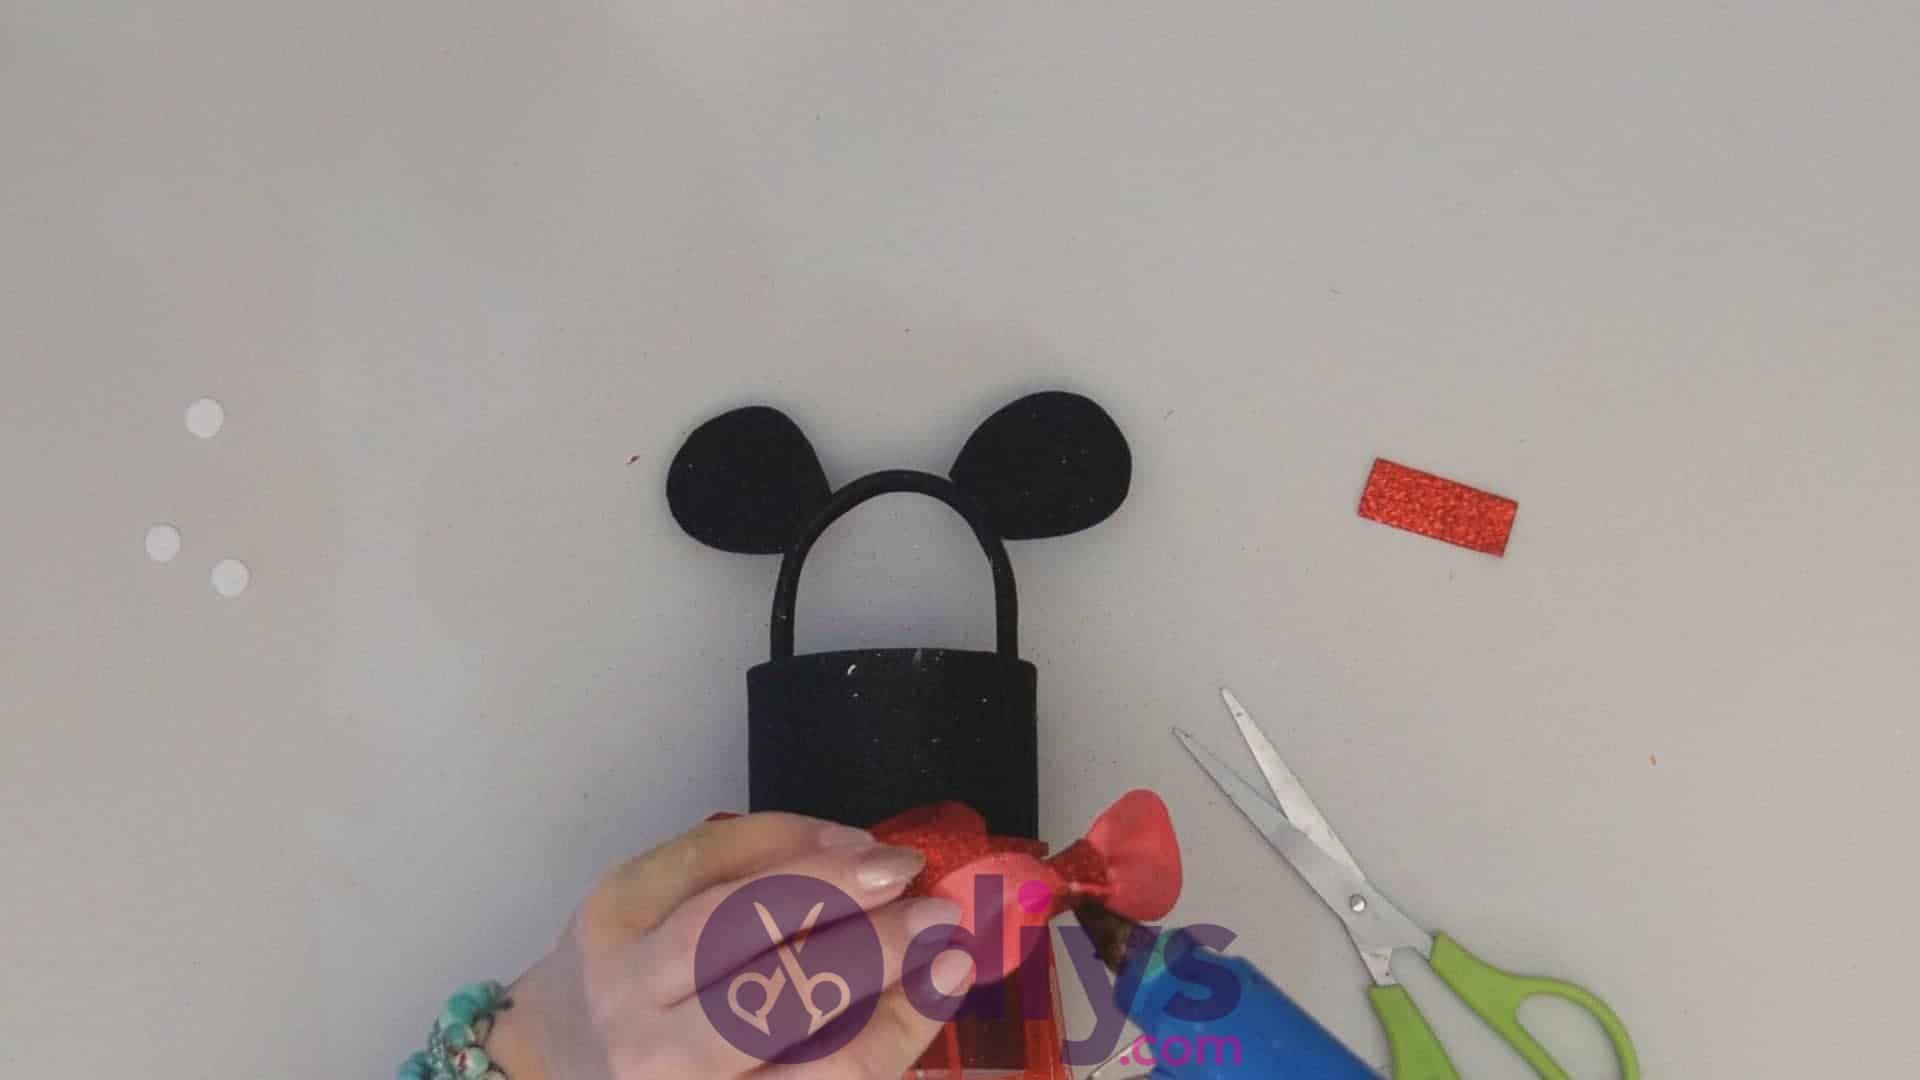
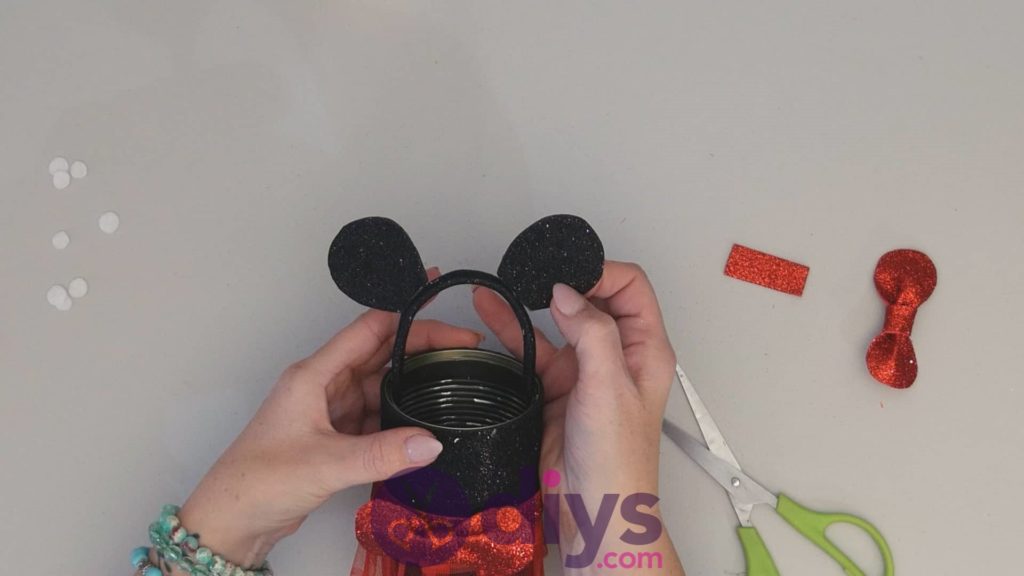
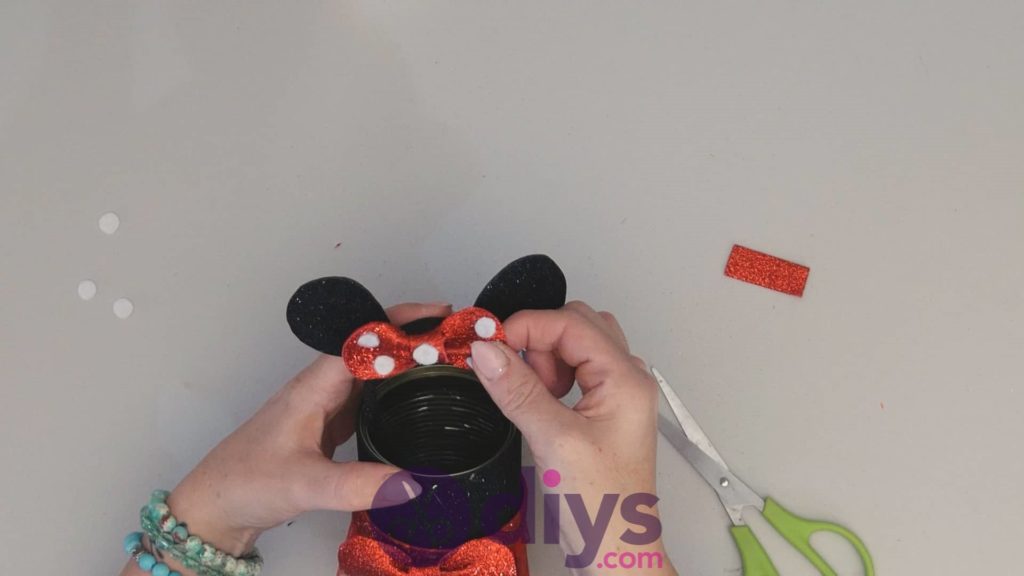
Apply glue along the flat bottom edges of your black sparkly foam mouse ears and glue them to either side of the can’s semi-circular handle, perpendicularly so they stick up just like a mouse’s actual ears.

Step 14:
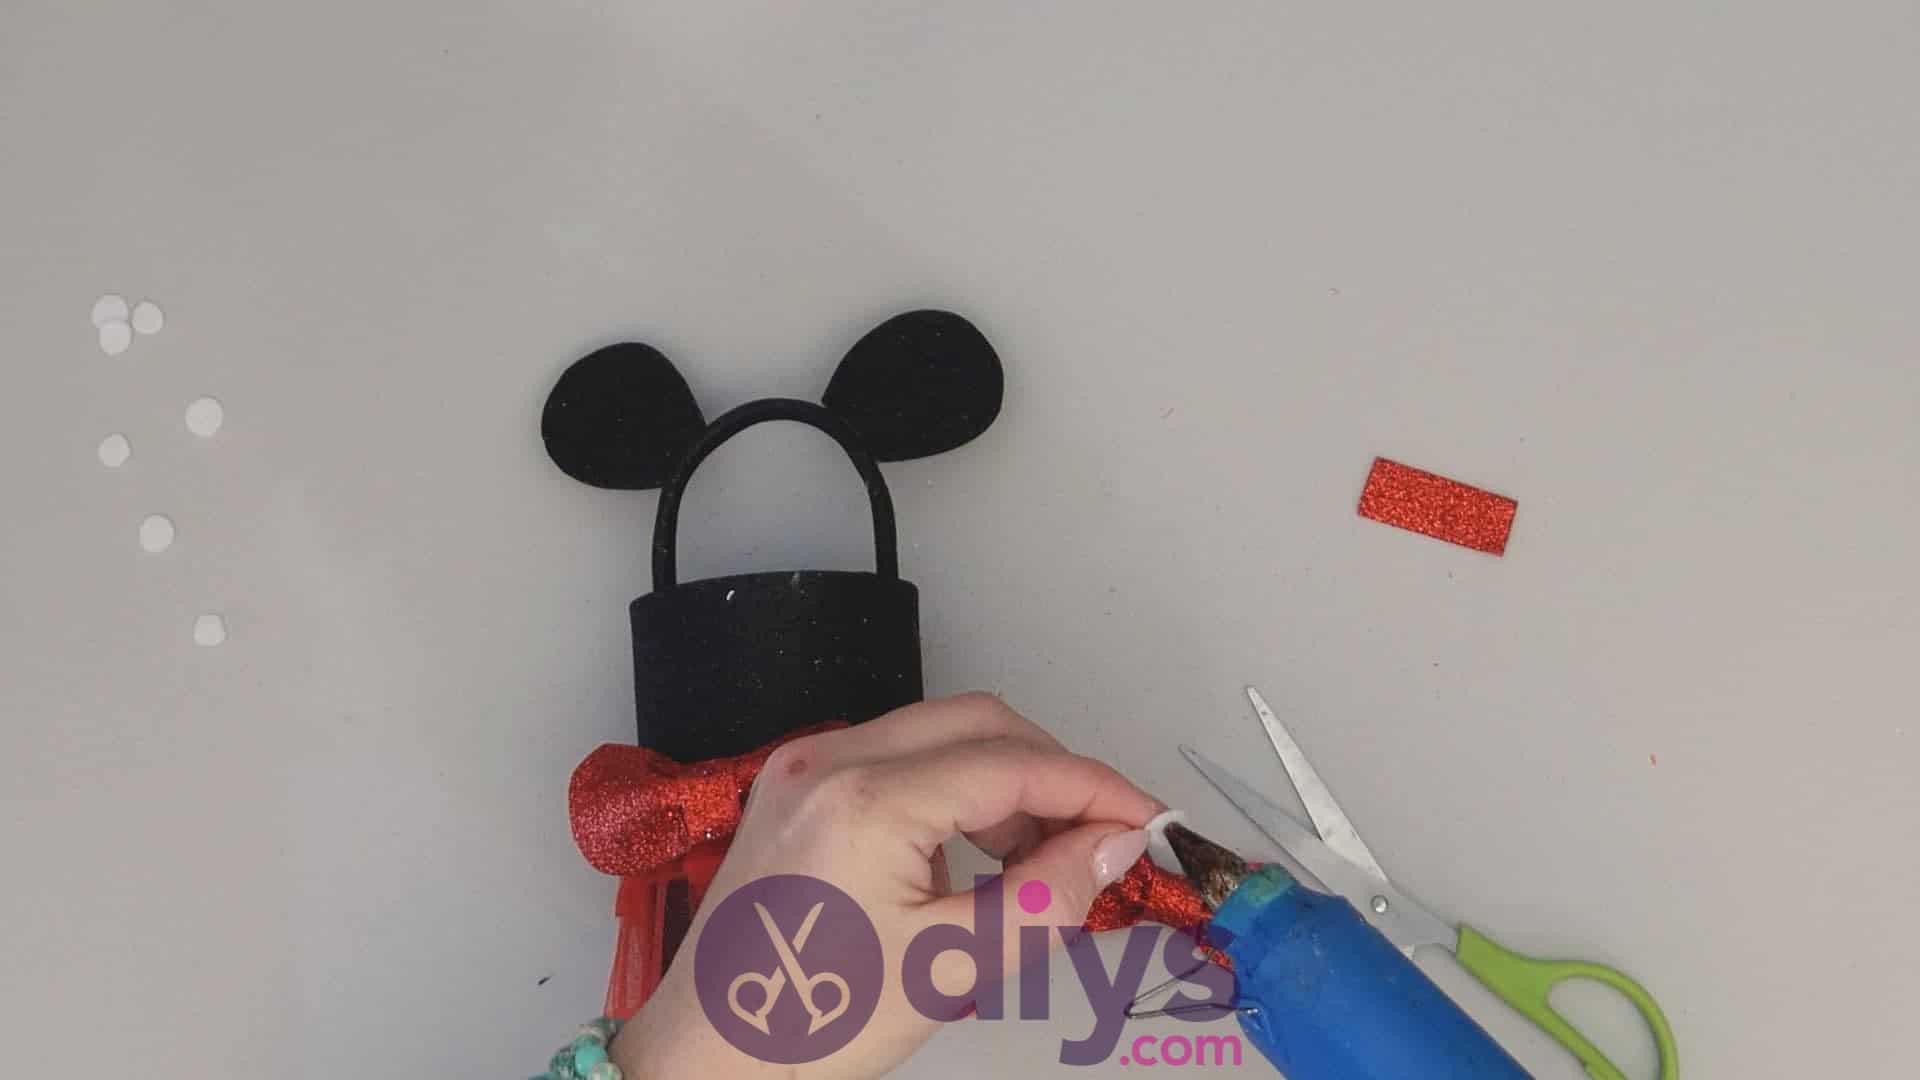
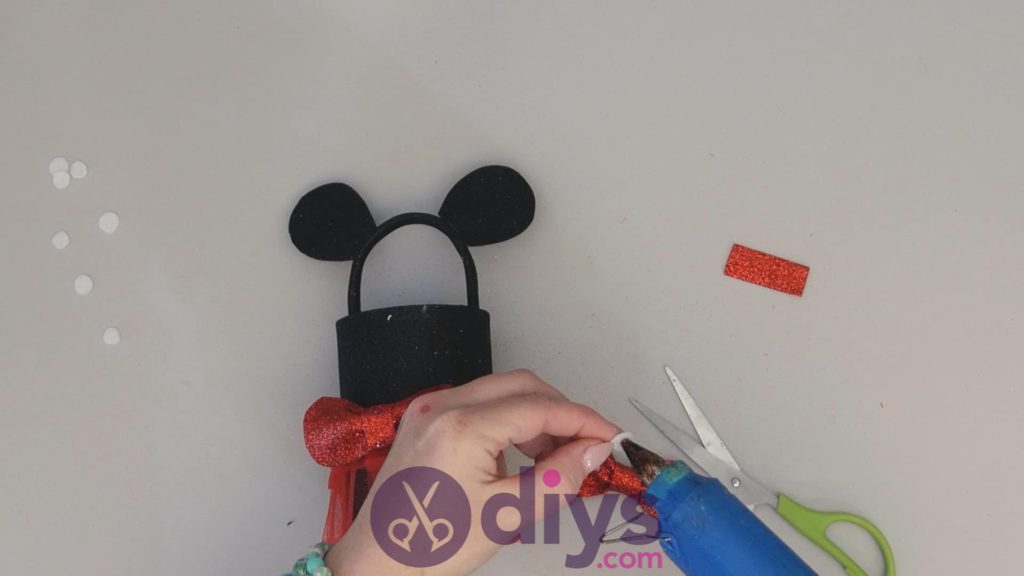
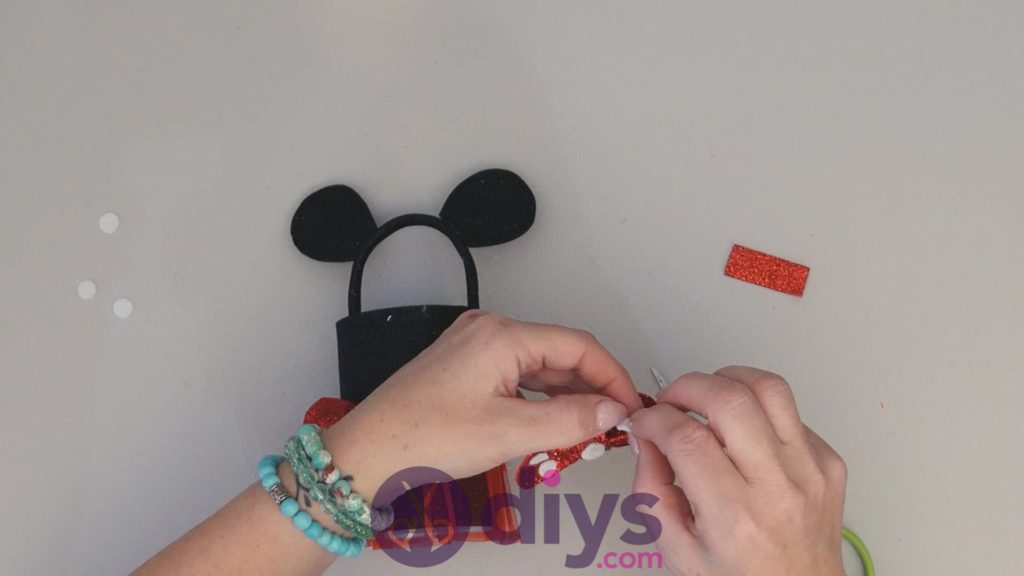
Apply glue to the backs of the white felt circles you cut out earlier and stick them all over your remaining red sparkly foam bow. I scattered mine like polka dots; you can get creative here and use as many or as few as you like. When you’re done, apply glue on the back of the bow, right on the band, and stick it down on the semi-circle handle right between the mouse’s ears.
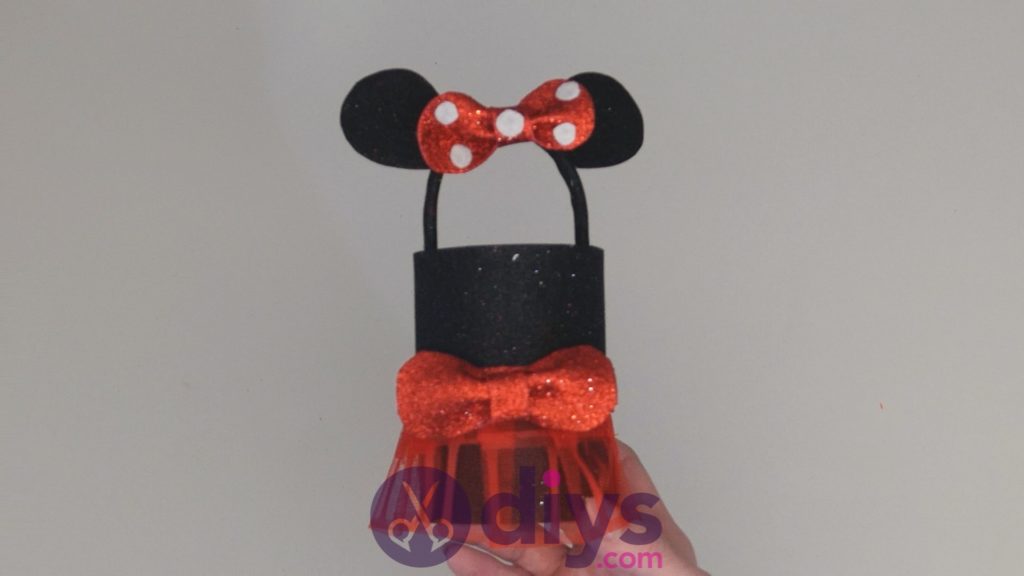
You’re all finished! If you’re feeling really adventurous, you could use the basic techniques and idea that you saw here but embellish differently and in different colours to make a tin can container themed after Mickey instead of Minnie, or a different Disney character entirely. Just in case you’d like to try this project out for yourself, here’s a fantastic tutorial video to help you!