How to Make a Paper Hedgehog on a Fall Leaf
Updated on February 28, 2021


I’ve been trying to think of as many ways as a I can to get crafty with the leaves they just can’t get enough of. That’s how we found ourselves making these adorable paper and leaf hedgehogs that I made sure to outline for sharing with you as well!

Check out these photos and step by step instructions for making cute little hedgehogs that kept my little leaf-lovers busy for hours. If you’re the kind of crafter who prefers following video tutorials instead, keep scrolling to the end of this post!
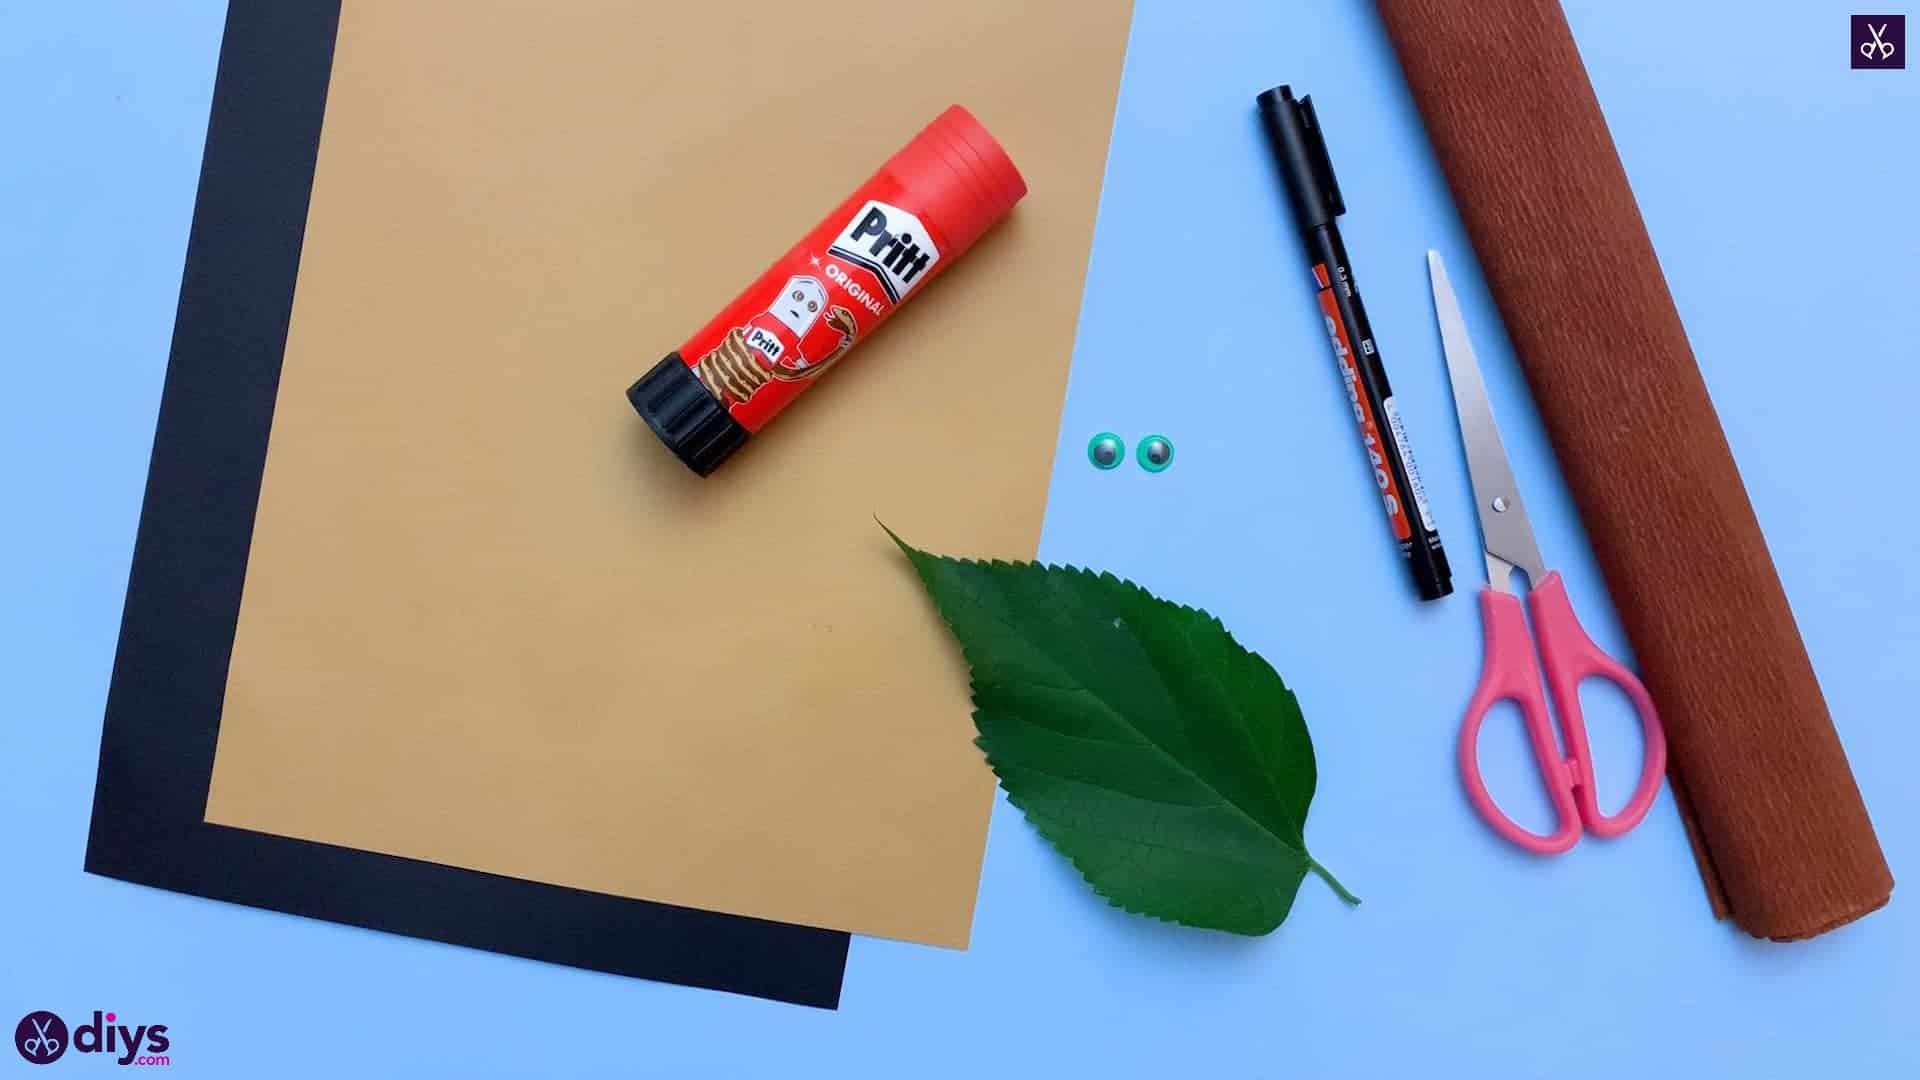
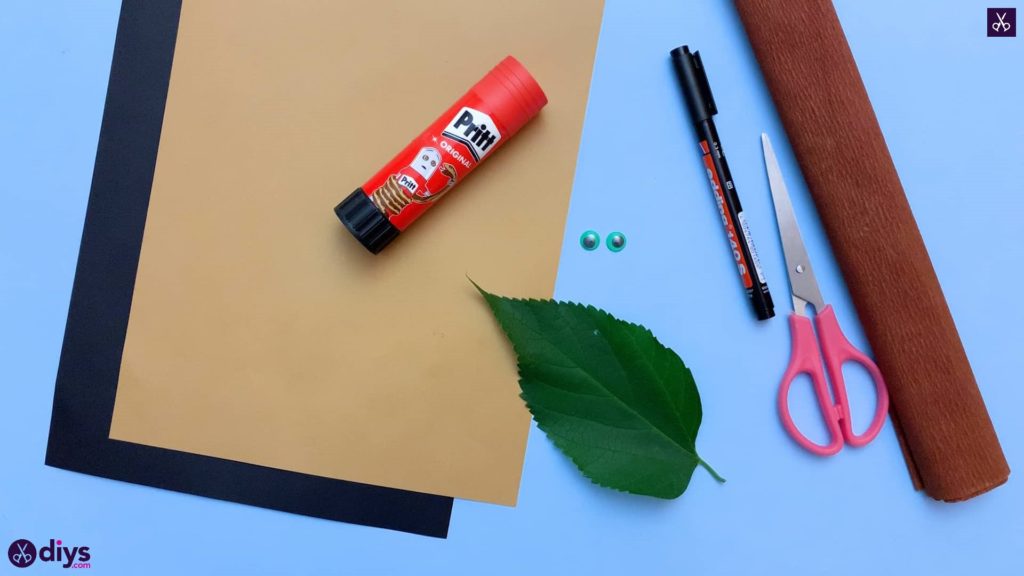
For this project, you’ll need:
- Construction paper (black and tan)
- Crepe paper (brown)
- A glue stick
- Two googly eyes
- A black marker
Step 1: get ready
Gather your materials from your item list and have everything in front of you!
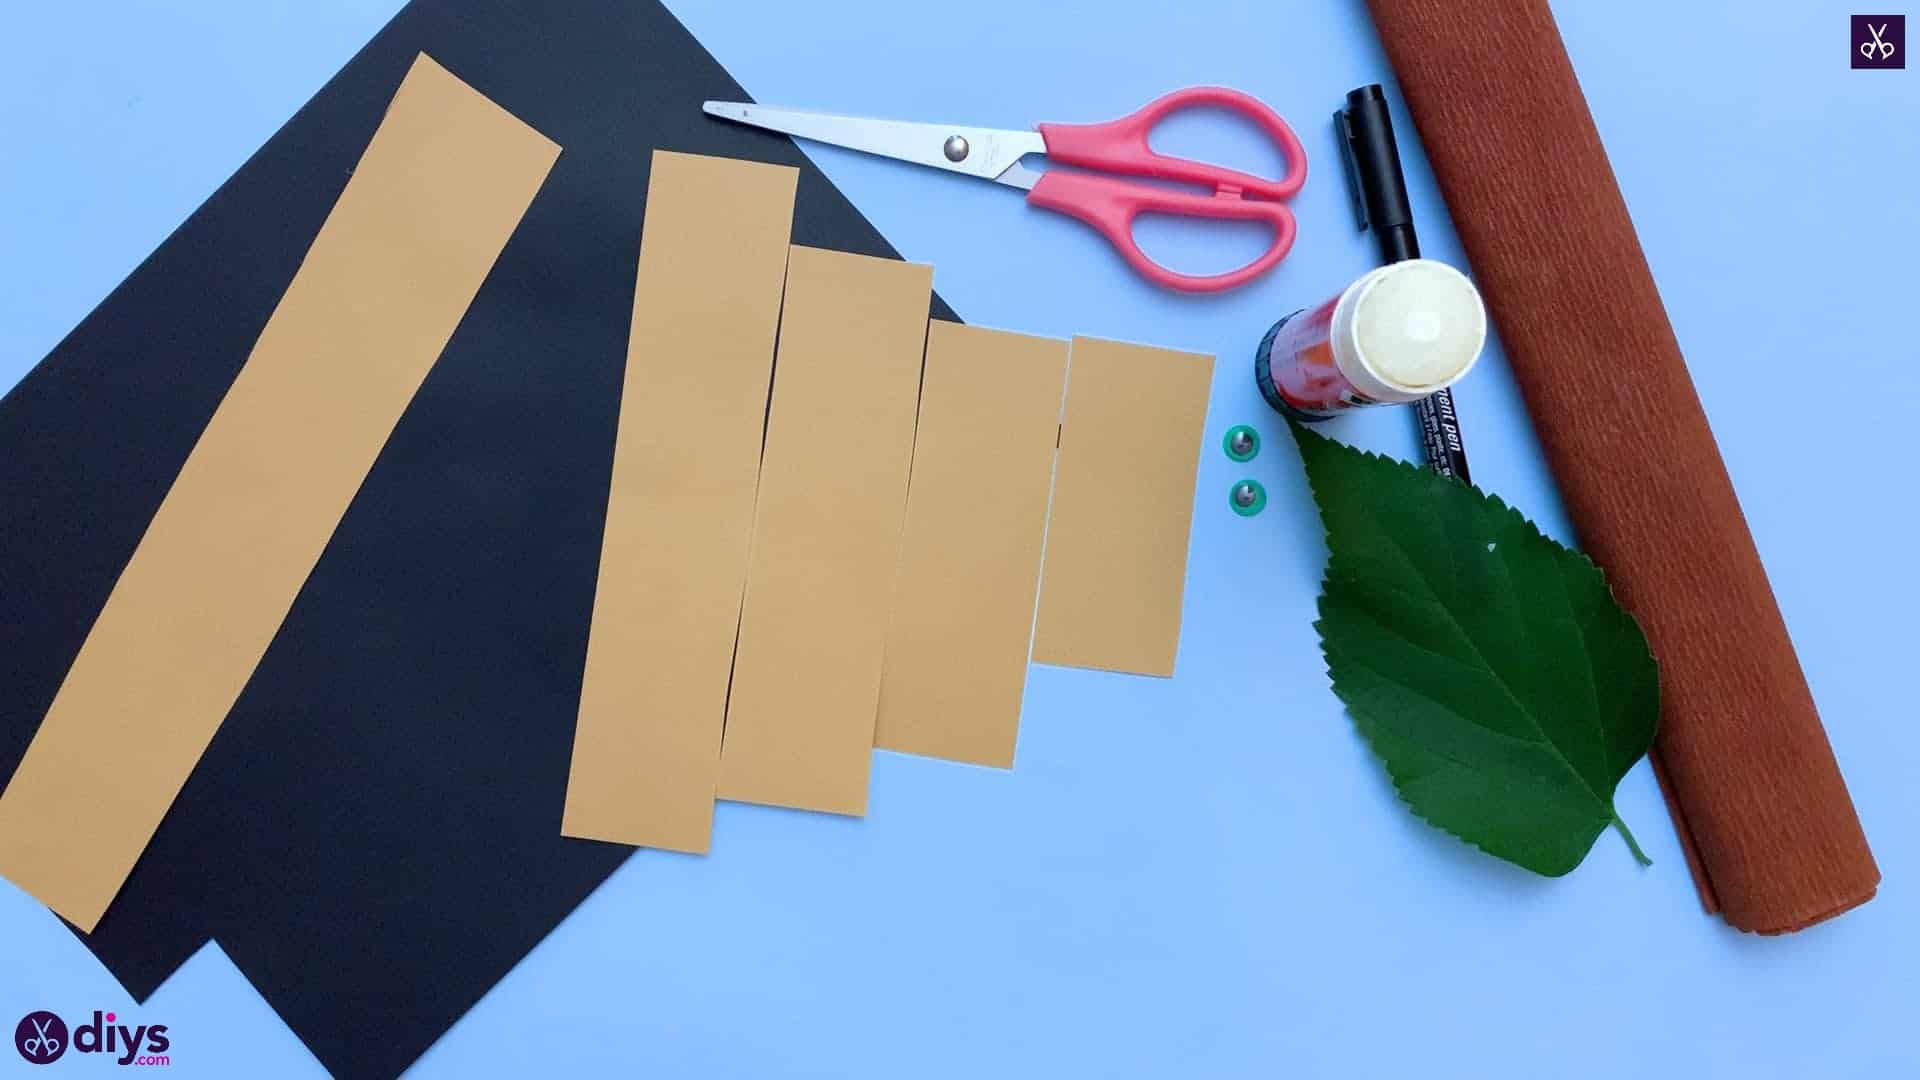
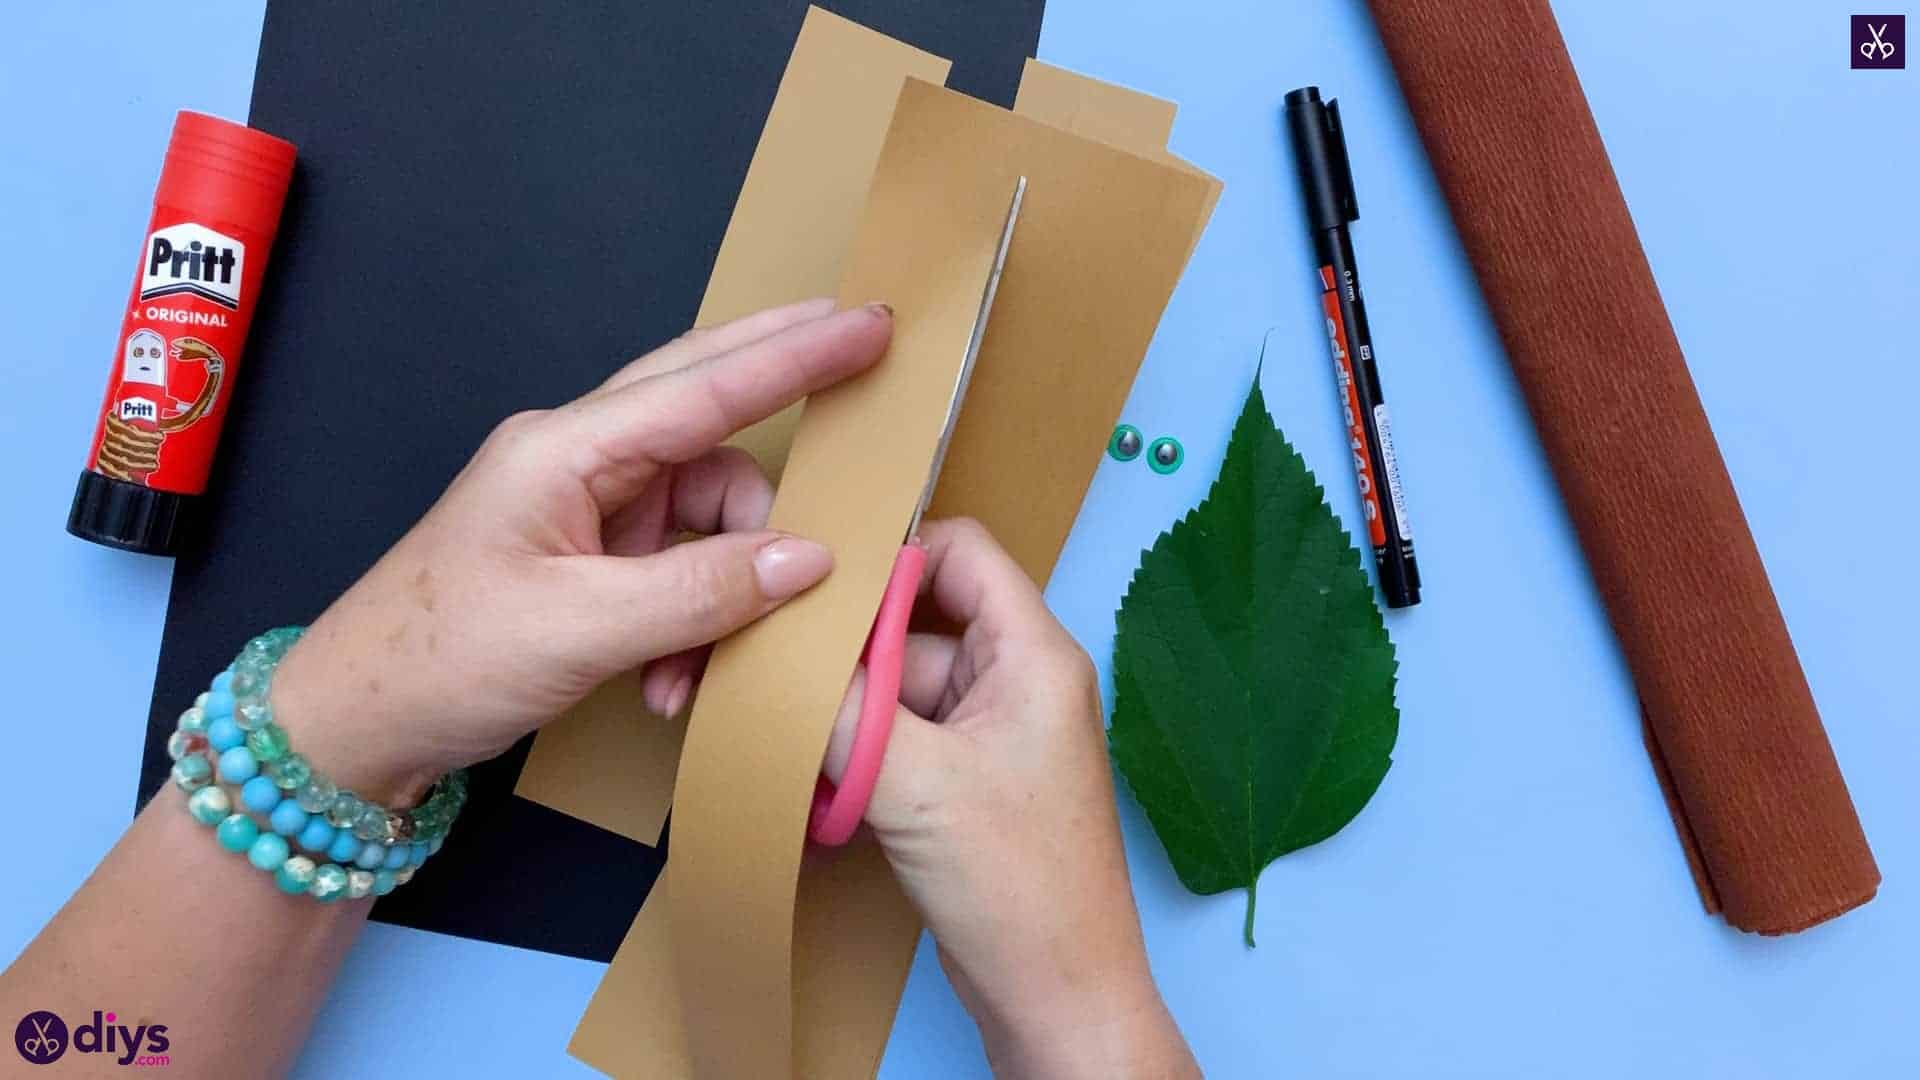
Step 2: cut 5 strips
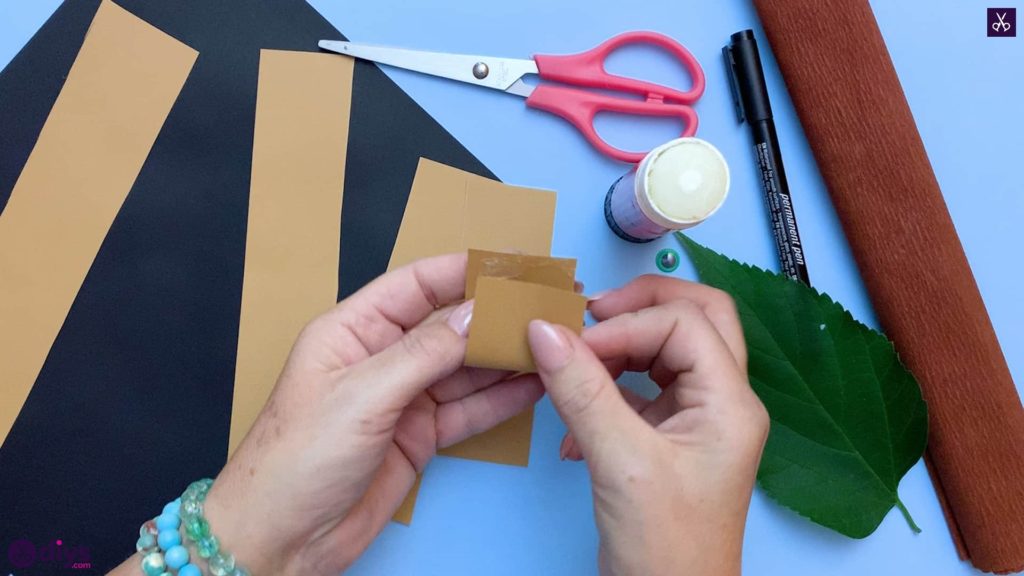
Cut your tan coloured construction paper into five rectangular strips.

Step 3: trim
Trim the length of your strips so they decrease in size. I made my second strip about an inch shorter than my first and so on until I had five differently sized rectangles.

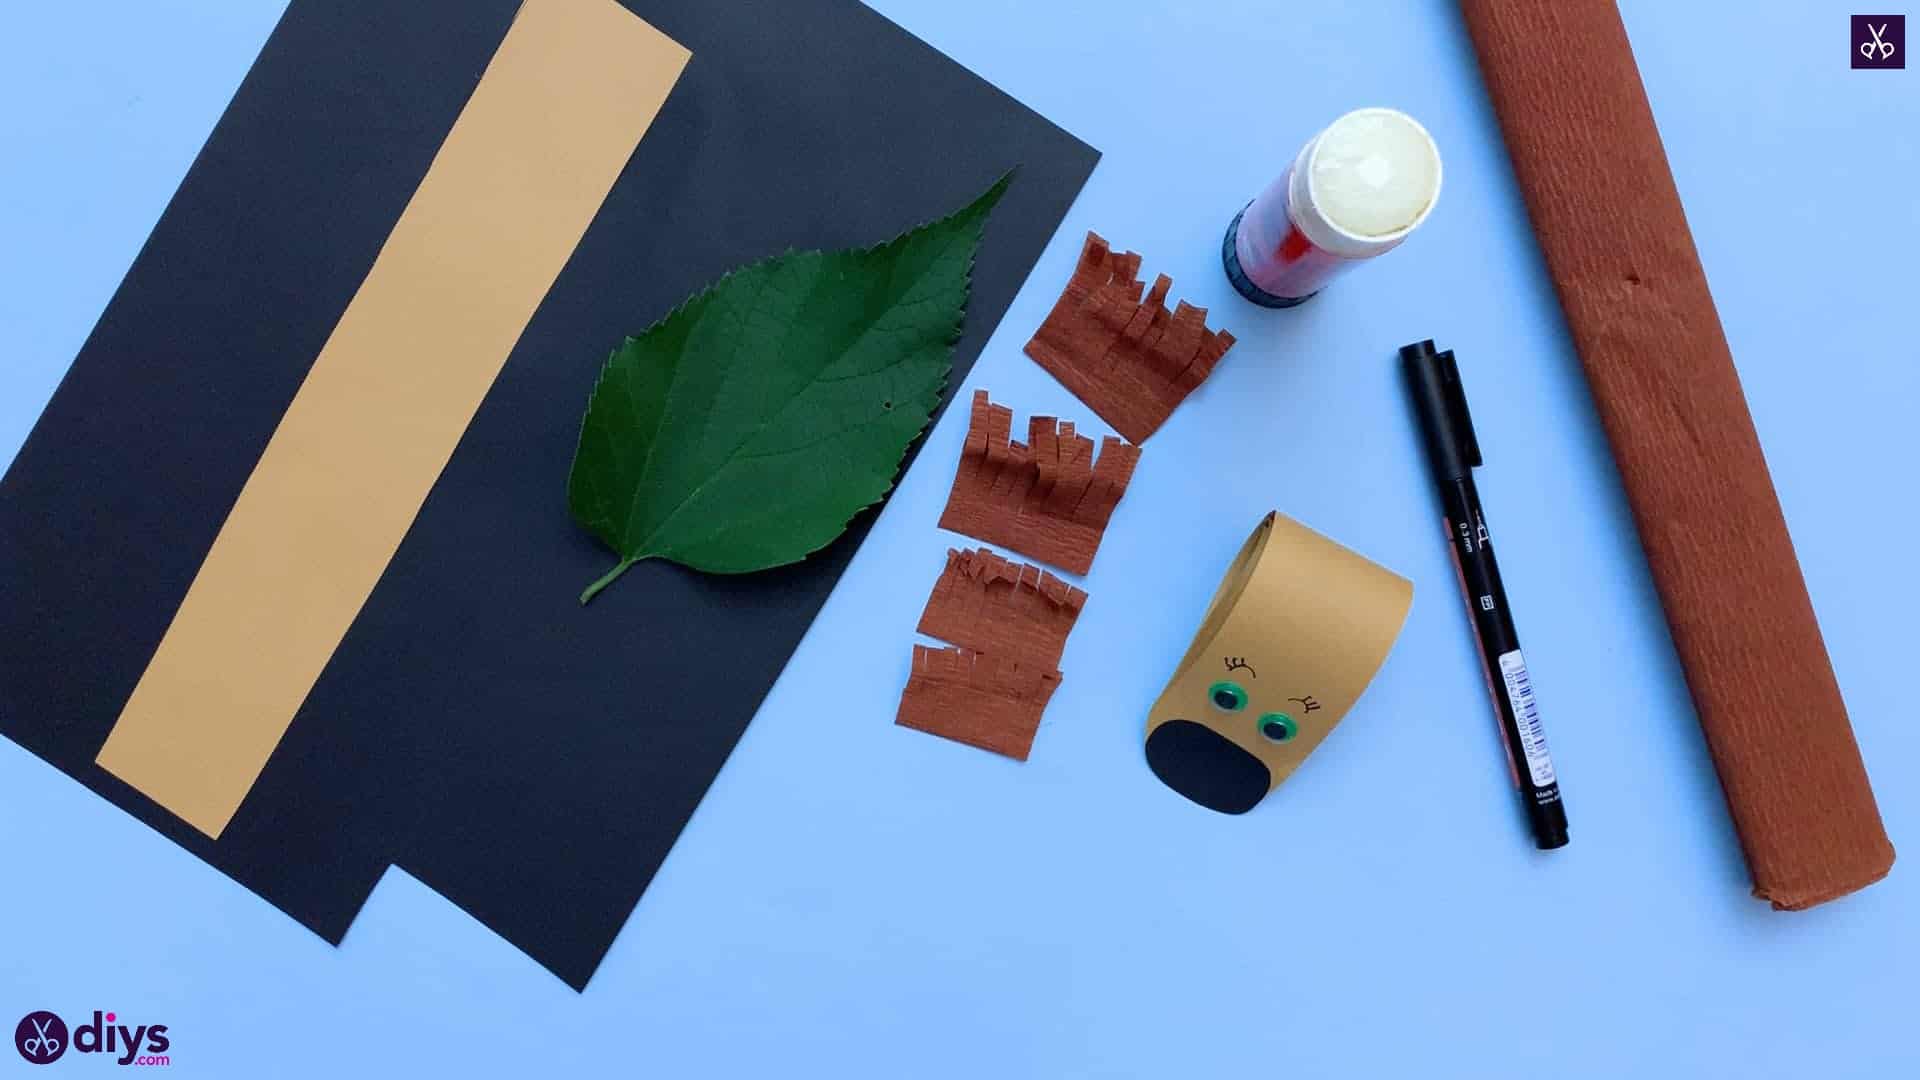
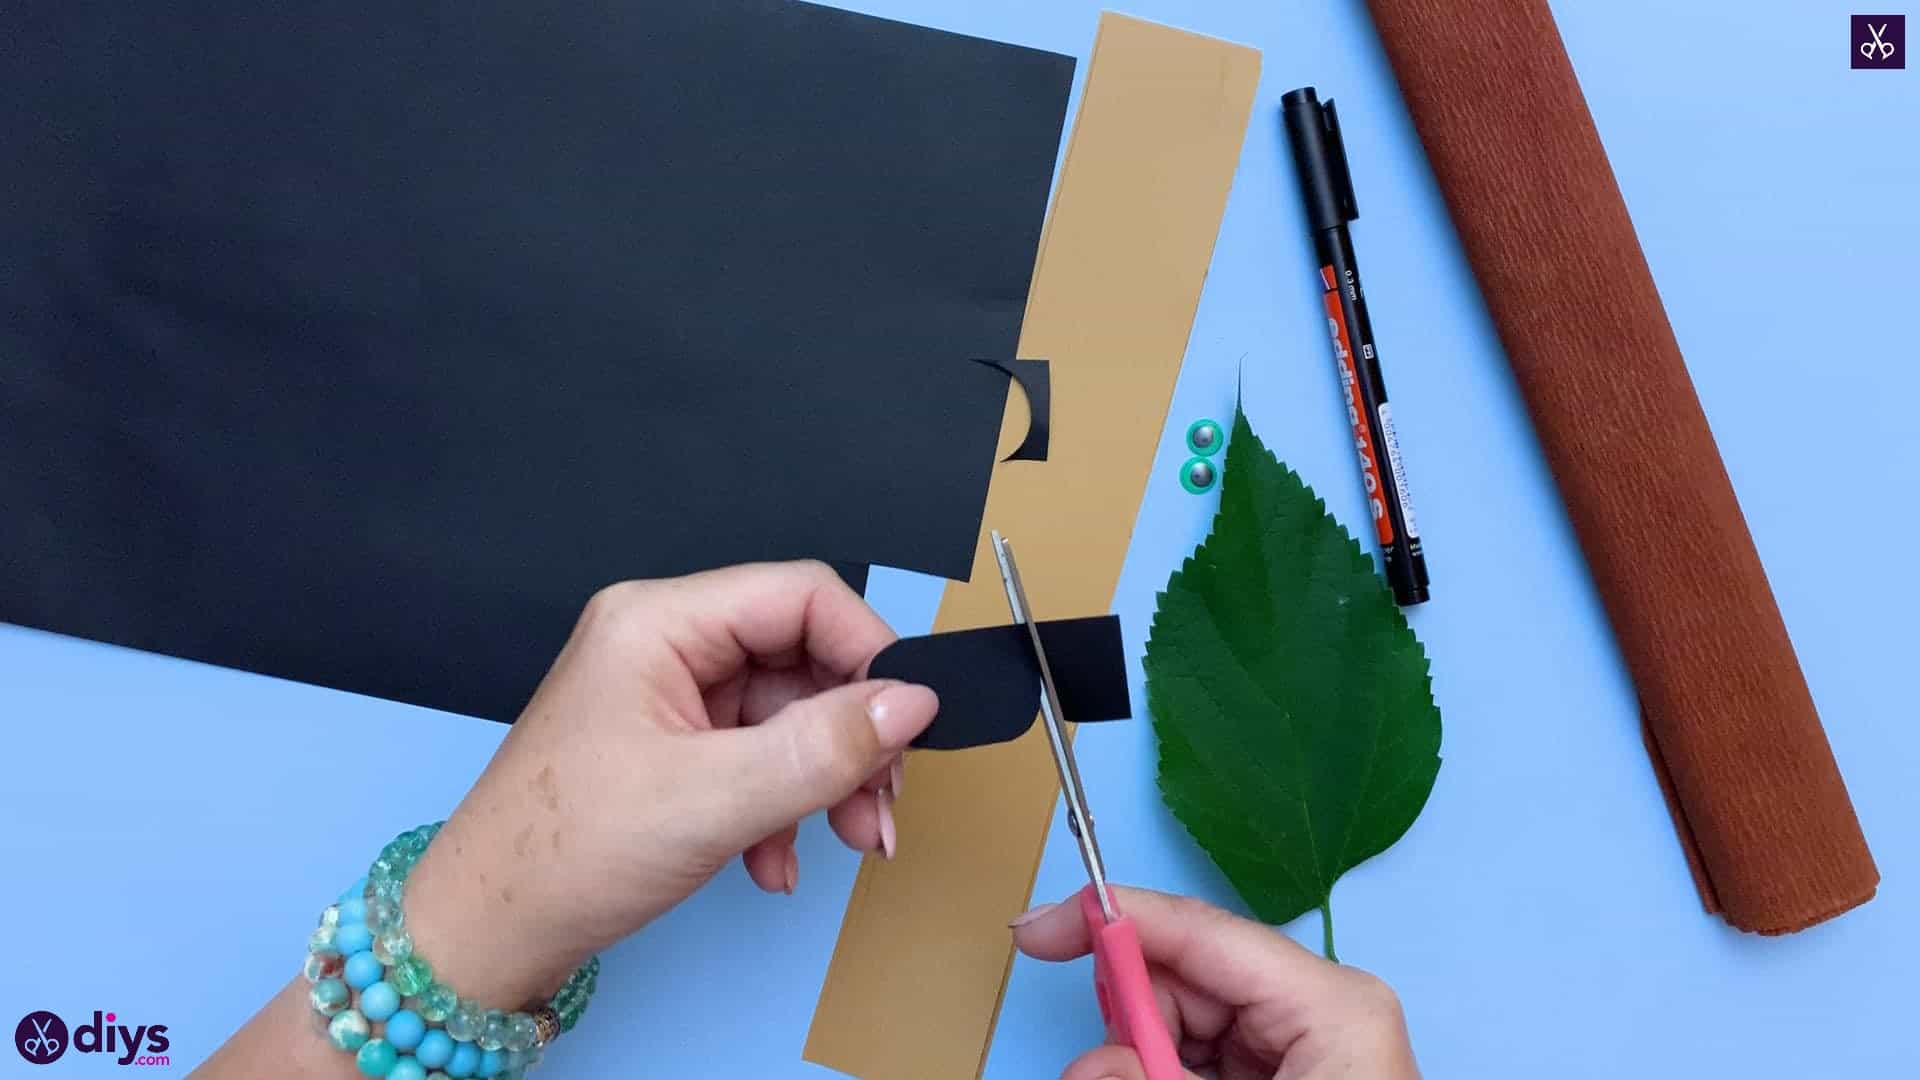
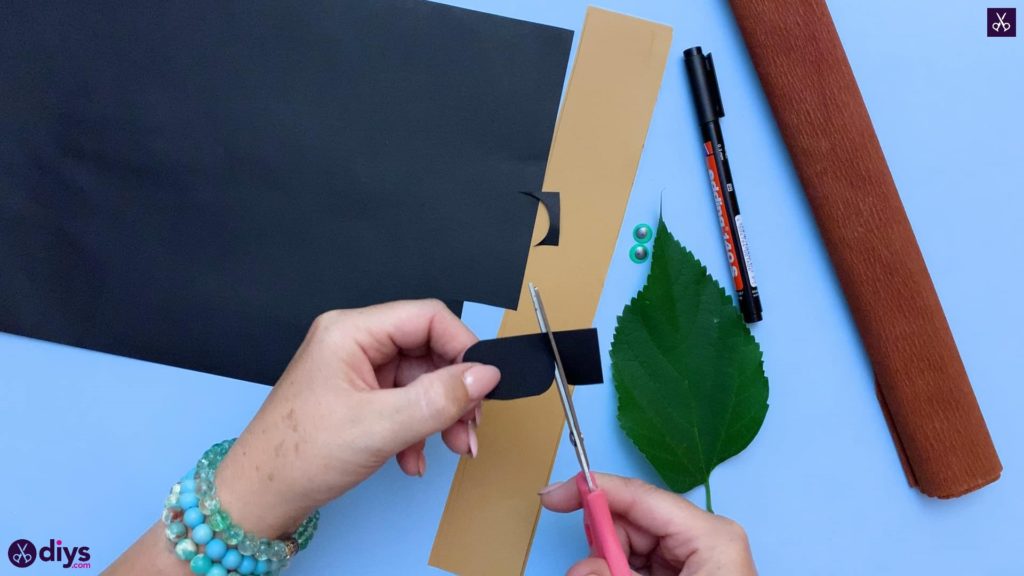
Step 4: cut black oval
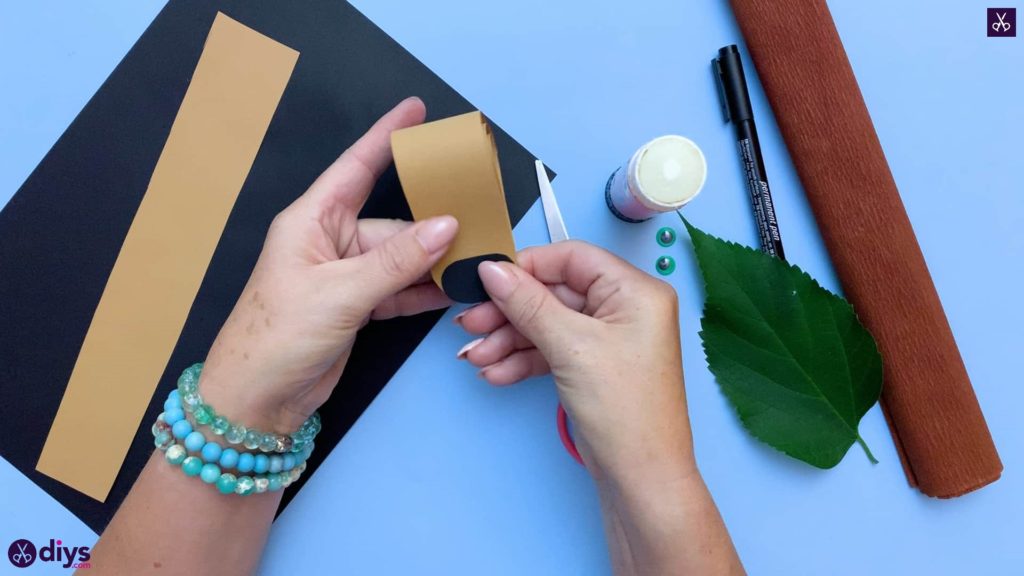
Cut an oval shape from your black paper! I found that the easiest way to do this and get an even shape was to cut a small rectangle out and then begin rounding the corners and edges off until I got the oval shape I wanted in the right side (about the same width as the tan paper rectangles I cut out earlier).
Step 5: loop them
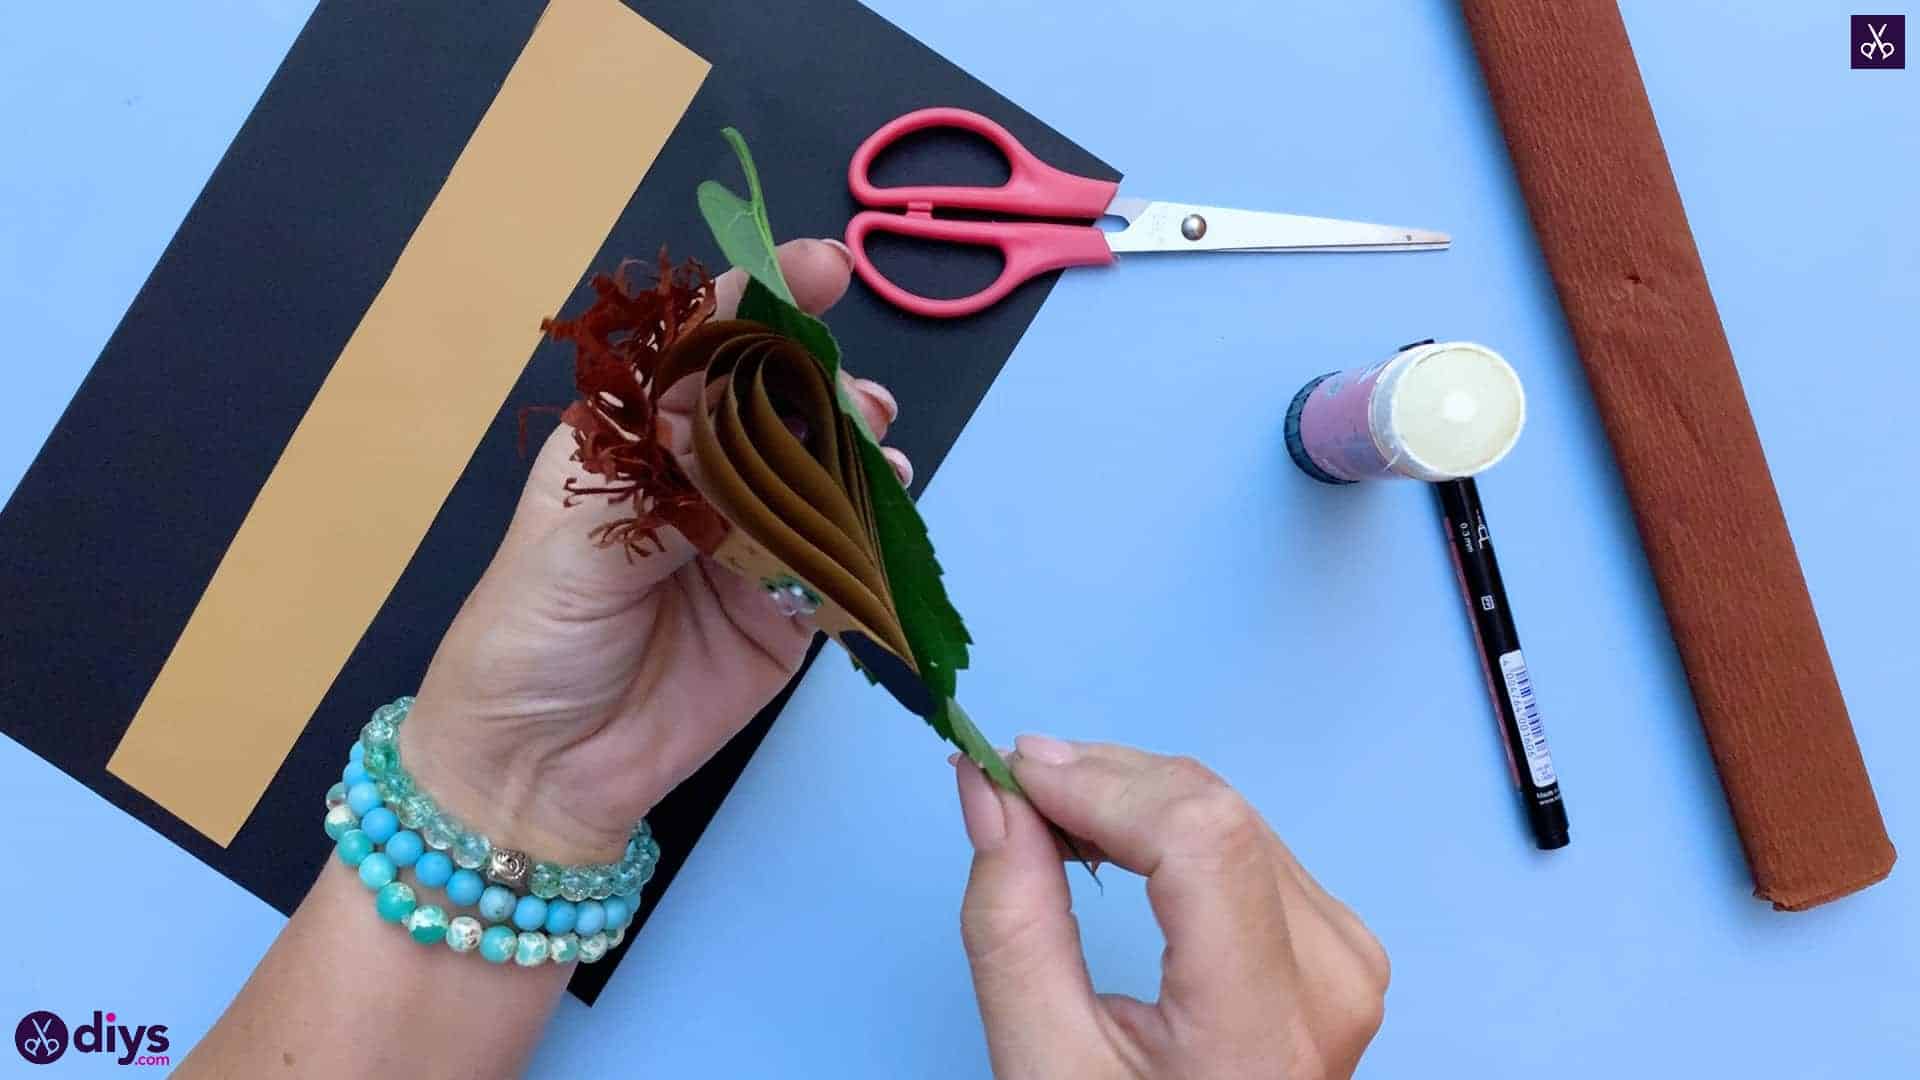
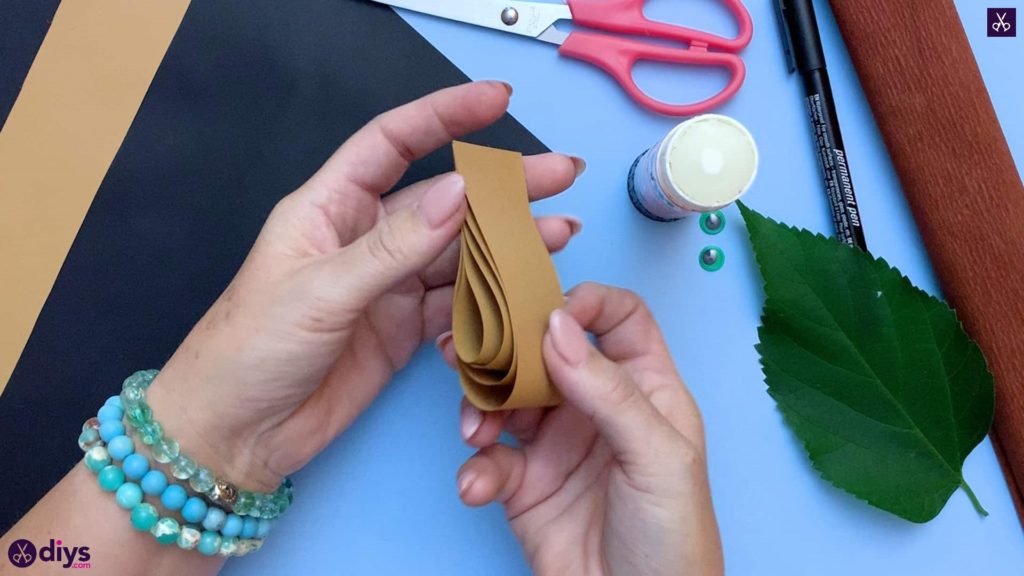
Starting with your shortest tan coloured strip of paper, apply glue to one end and curl the rectangle inward and over to stick the other end to it, with the edges sitting evenly. Repeat this process around and over this piece using the next longest strip, nesting the rectangles together in layered loops. Glue the end of the new strip under the end of the previous one but moved forward a few centimetres, curl it around the outside of the base shape, and then glue the other end down on top of the previous one so it sits level with its other side.
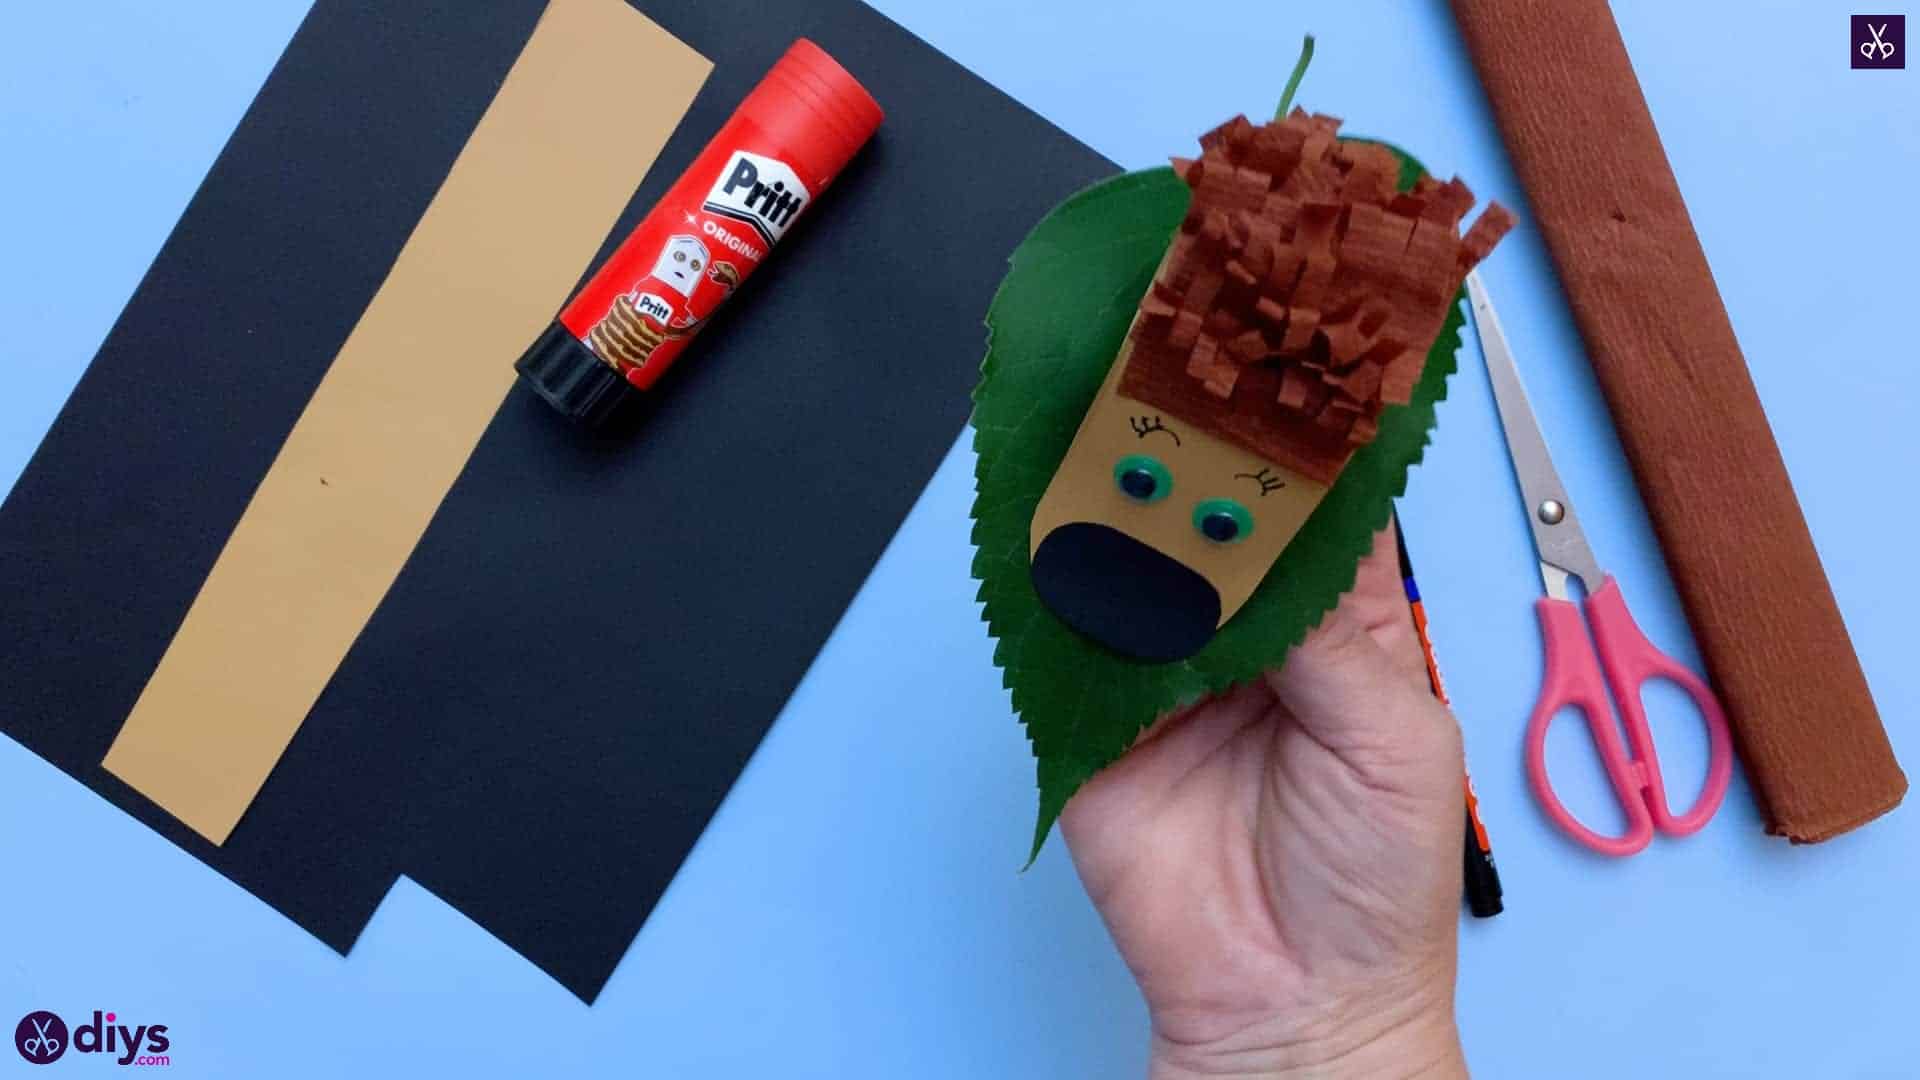
Step 6: apply the nose
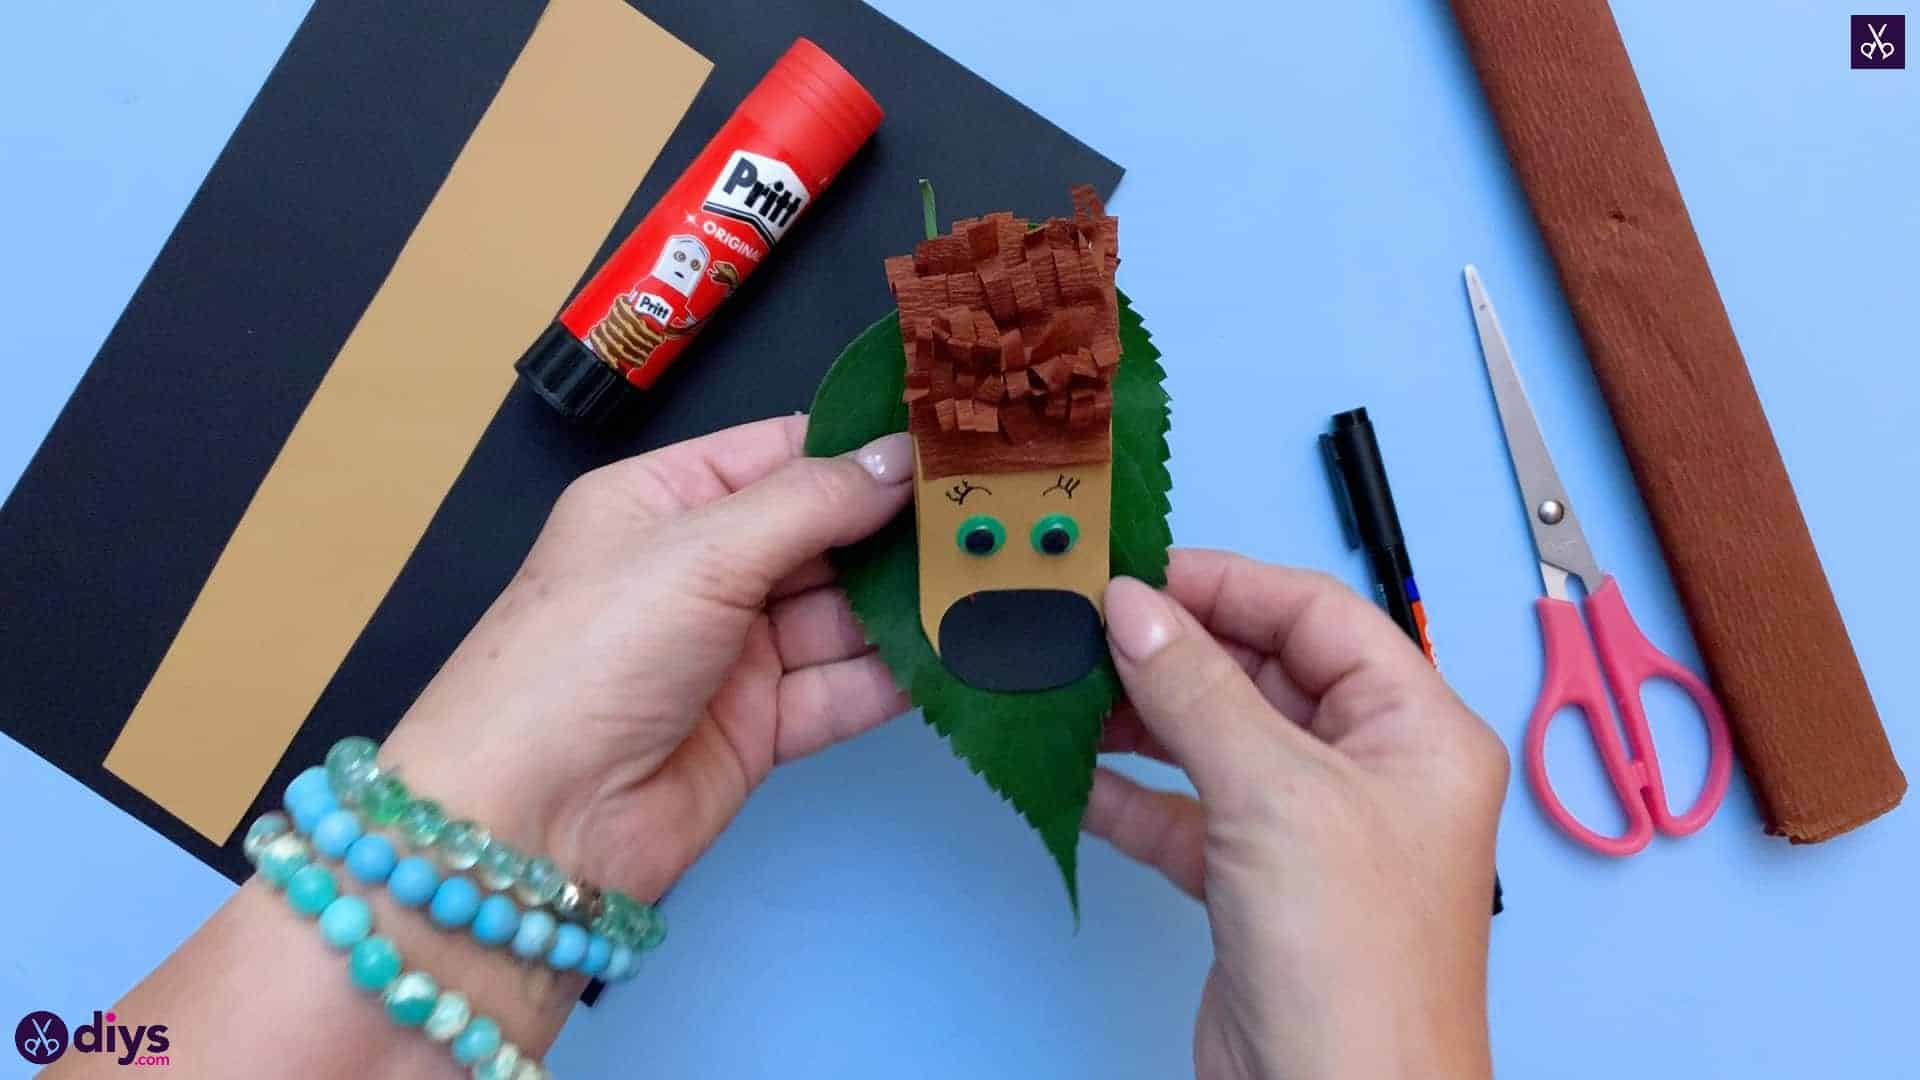
One you’ve layered all of your tan rectangles (or as many as you choose, depending on how big you want your hedgehog to be compared to your leaf), round off the corners of your glued edges. Your hedgehog now has a body and a snout! Glue the black oval shape you cut out earlier onto the edge you just rounded off to give your hedgehog a nose too.
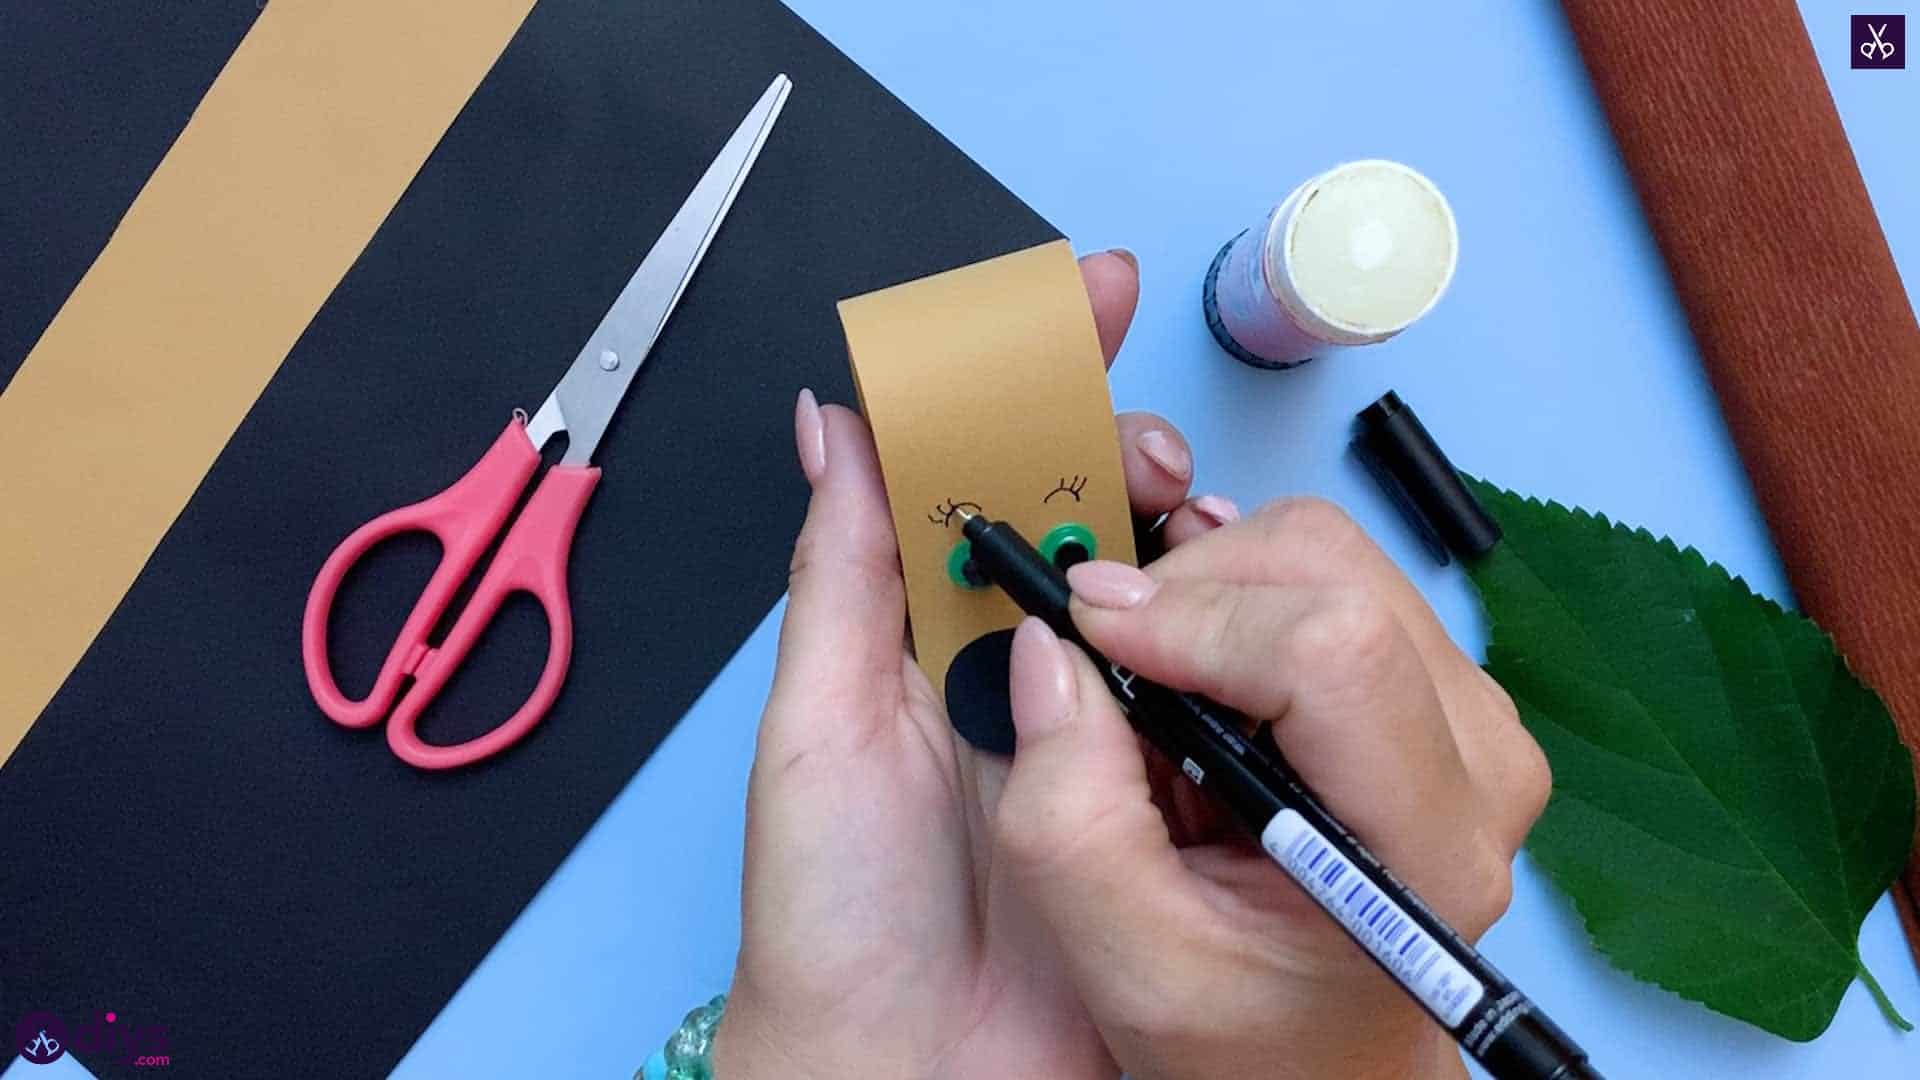
Step 7: add eyes
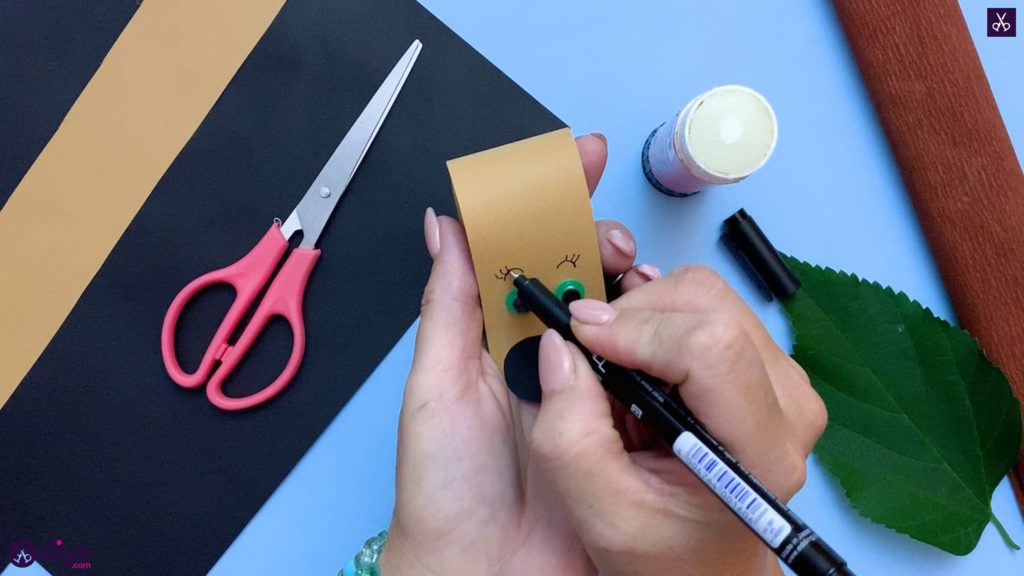
Glue your googly eyes to your hedgehog’s face just above the nose. Next, use your marker or felt tipped pen to draw eyebrows or eyelashes over the googly eyes for some cute detail and to give your hedgehog some expression.
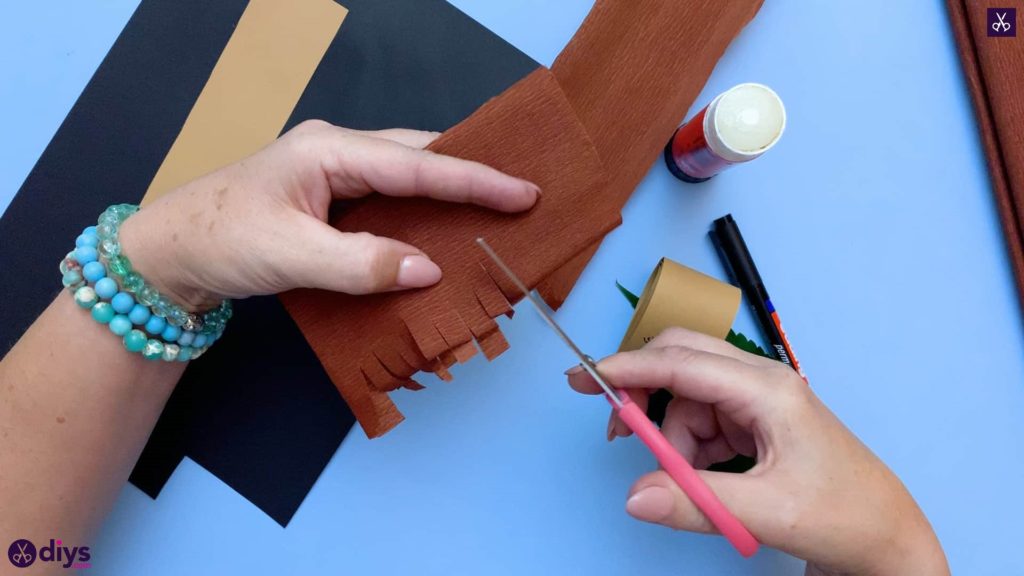
Step 8: make the quils
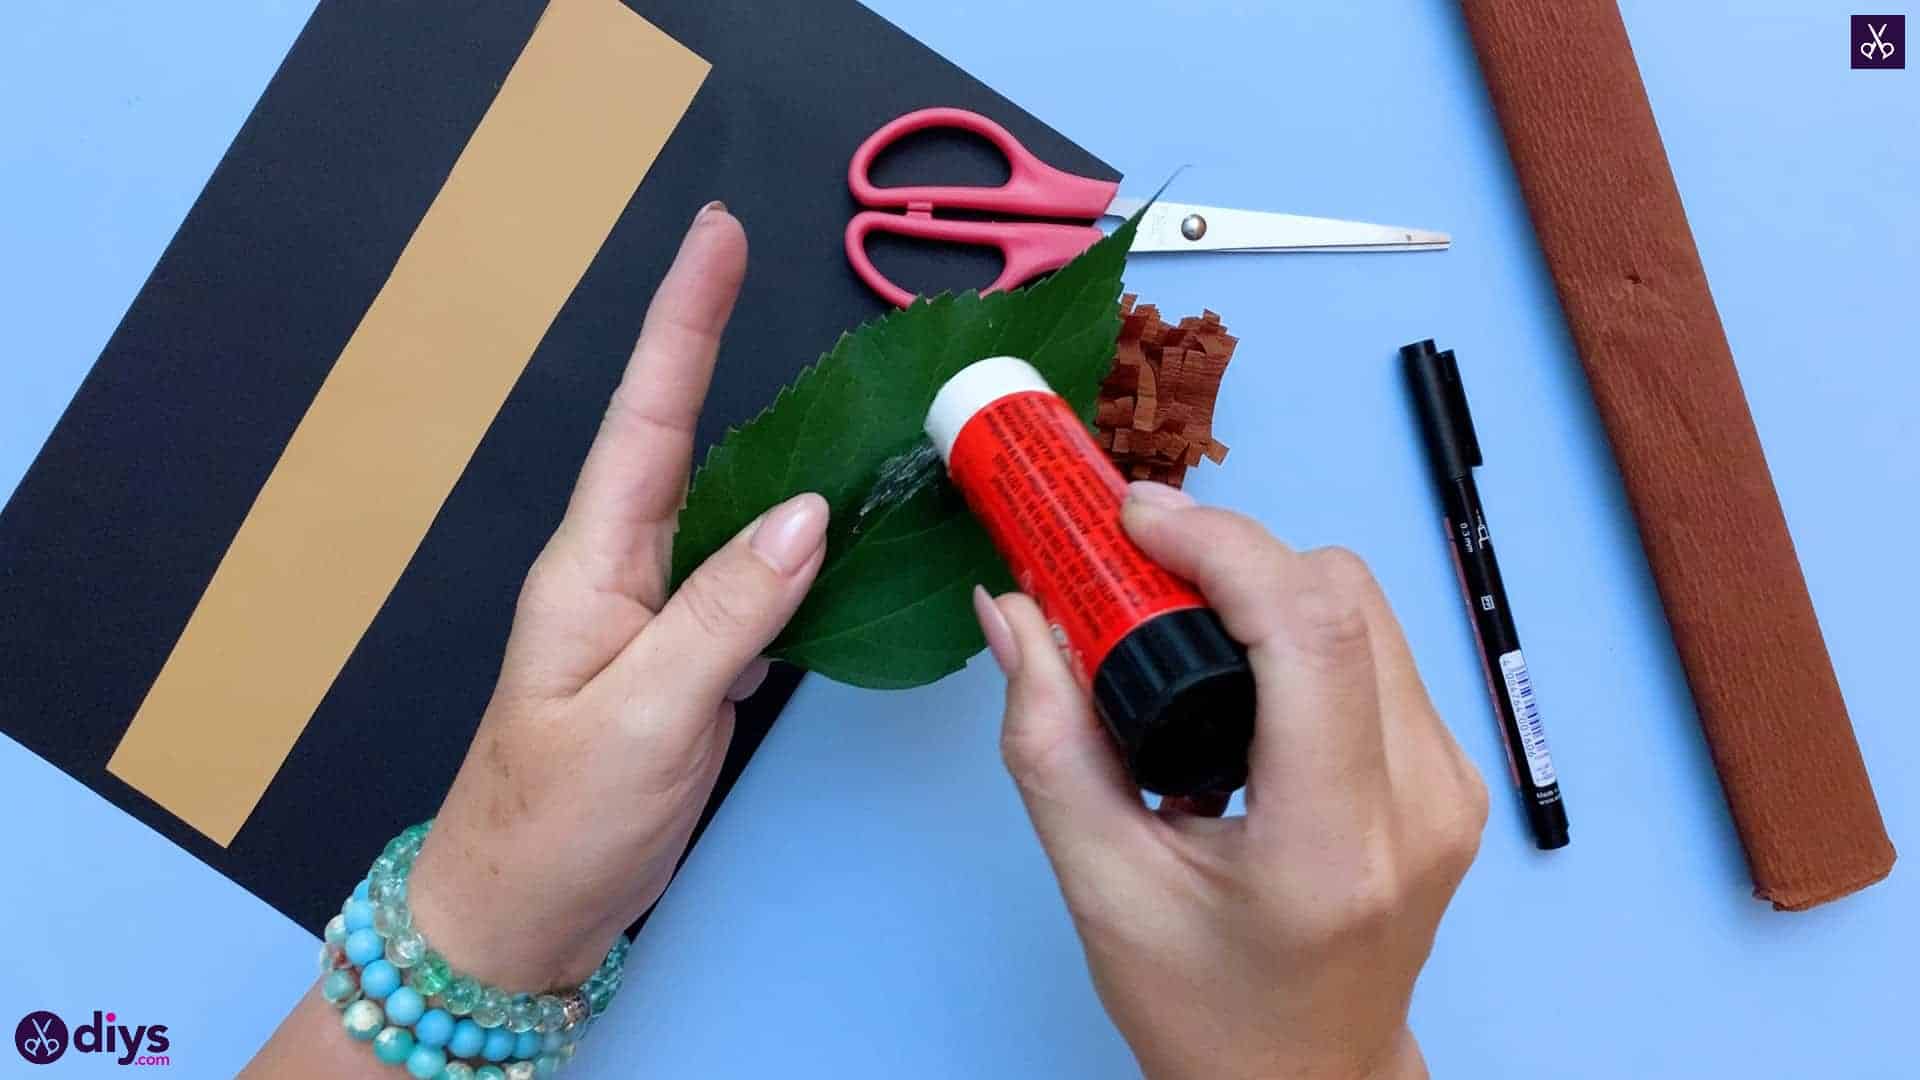
Cut a strip from the length of your roll of brown crepe paper. Apply glue on one side and fold it over length wise to double its thickness, just to make the colour look more opaque. Cut off the folded end and discard it and then cut the doubled rectangle you’re still using into a fringe all the way down one of its long sides. Cut the fringed rectangle into about four smaller strips that are solid on the bottom and fringed at the top.

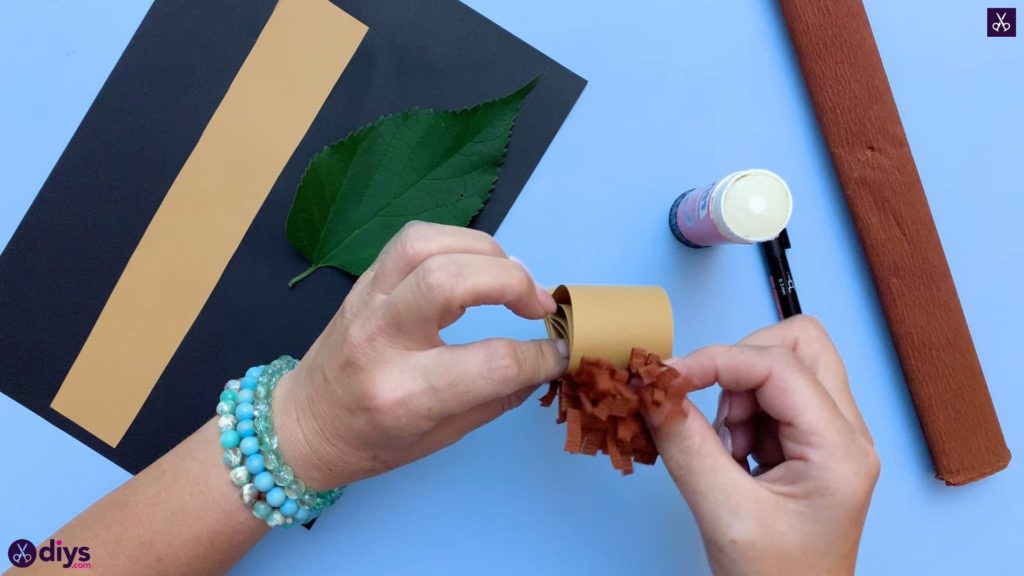
Step 9: add the quills
Apply glue to the bottom straight edge of one of your brown crepe paper pieces and stick it to the rounded part of your hedgehog’s body just above the eyebrows. Repeat this process with the rest of your pieces, placing each one a little bit above and behind the previous one, so the straight edge sits under its fringe. Your hedgehog now has quills on its back!

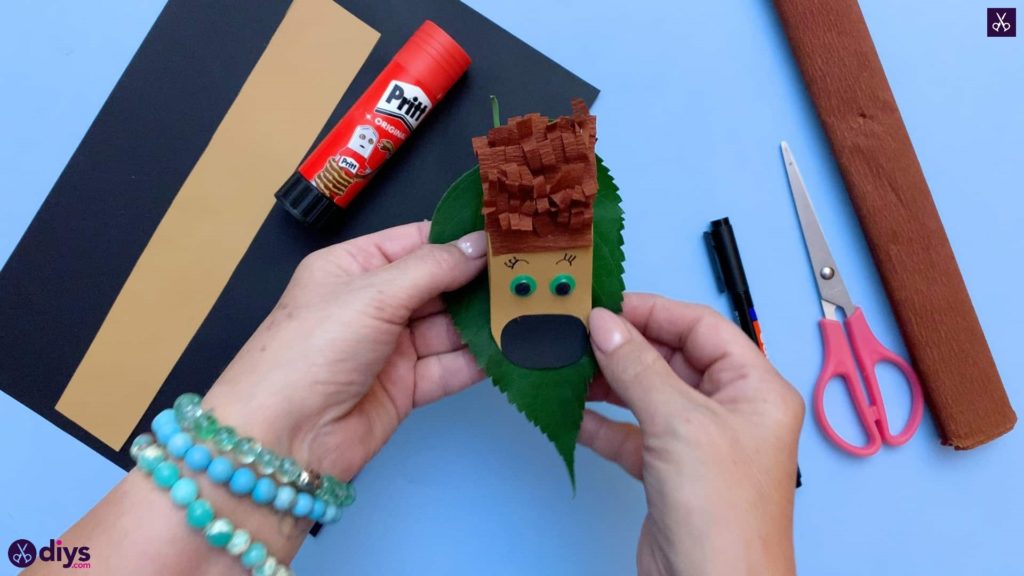
Step 10: glue to leaf
Apply some glue onto the top side of your leaf in the center and stick the bottom of your paper hedgehog down into the glue. Your hedgehog now sits on the leaf like it’s ready to take a nap there!

That’s all there is to it! Just in case you’d like to try this project out for yourself, here’s a fantastic tutorial video to help you!
