DIY Letter Transfer Tote Bags
Updated on November 19, 2025
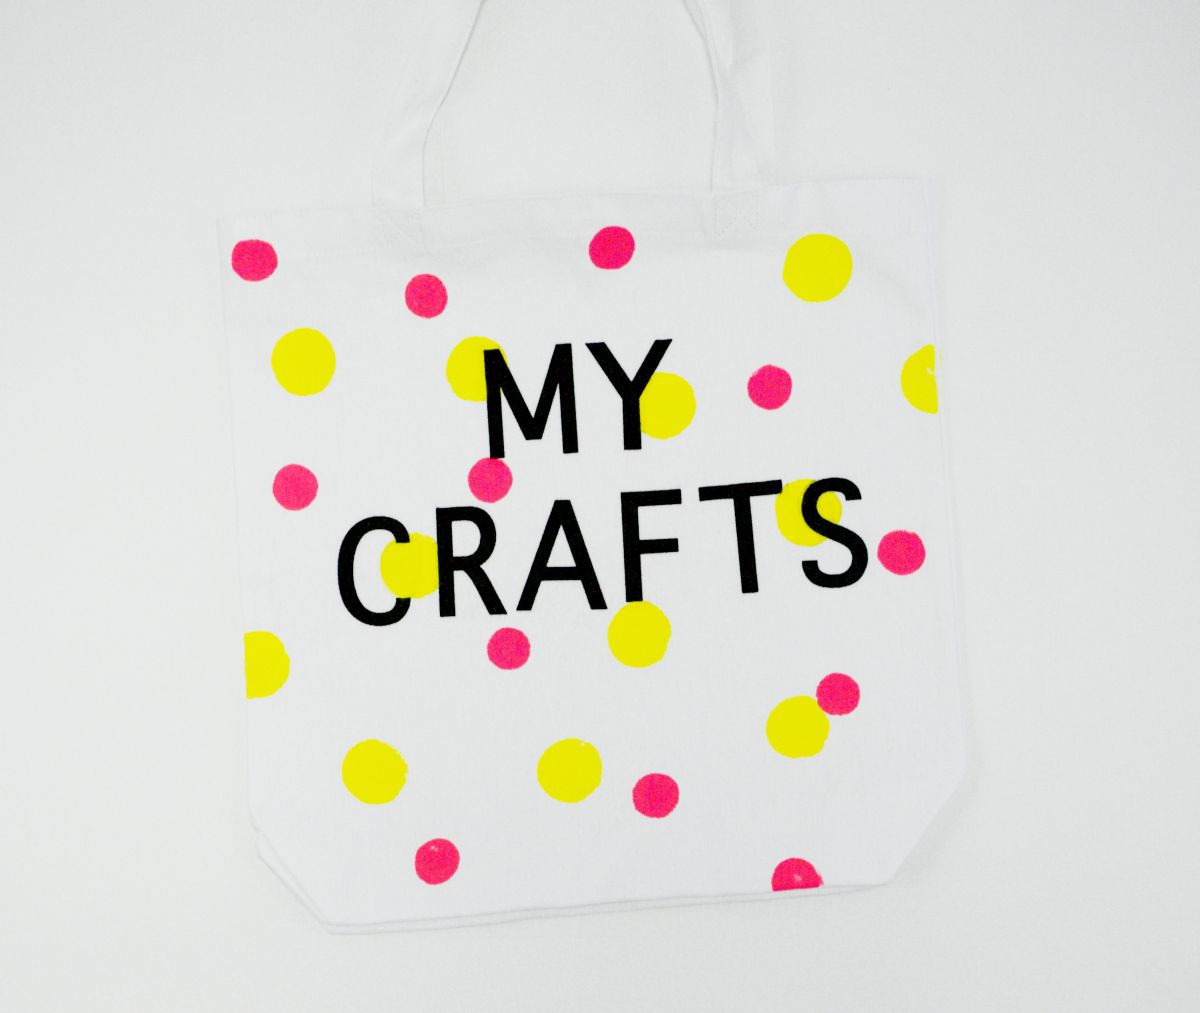
The other day I was at the craft store, and I bought so many different items. So much so that I had a ton of bags when I left. I remembered how at the grocery store, sometimes they let you buy the recyclable bags that you can reuse over and over again. So I thought, why not use a tote bag to help me carry my craft items when shopping? I can reuse the bag and it’s so cute to personalize and make it unique. Try creating this tote bag if you looking to do the same thing!
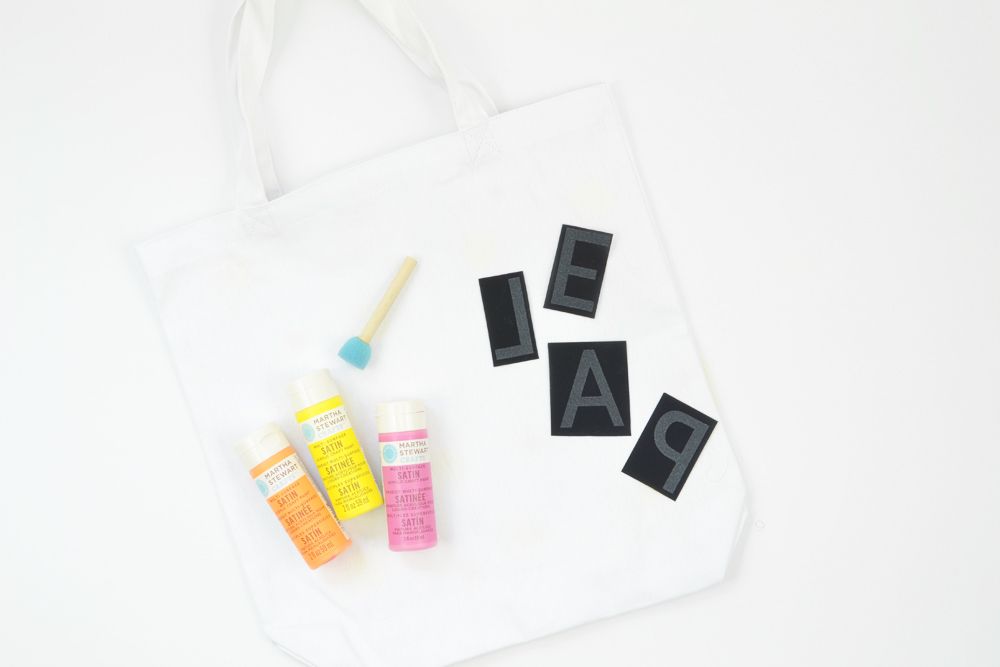
For this DIY, you’ll need:
- A plain tote bag
- Iron-on transfer letters
- Fabric Paint
- Sponge brush
- Iron
- Scrap piece of cardboard or paper
Step 1:
First, iron your bag so that it’s free of wrinkles. This helps, so that when you’re painting, it spreads evenly and the letters adhere flatly.
Insert a scrap piece of cardboard inside the bag so the paint doesn’t transfer to the opposite side. Make sure this cardboard piece is large enough to fill all the empty space inside.
Step 2:
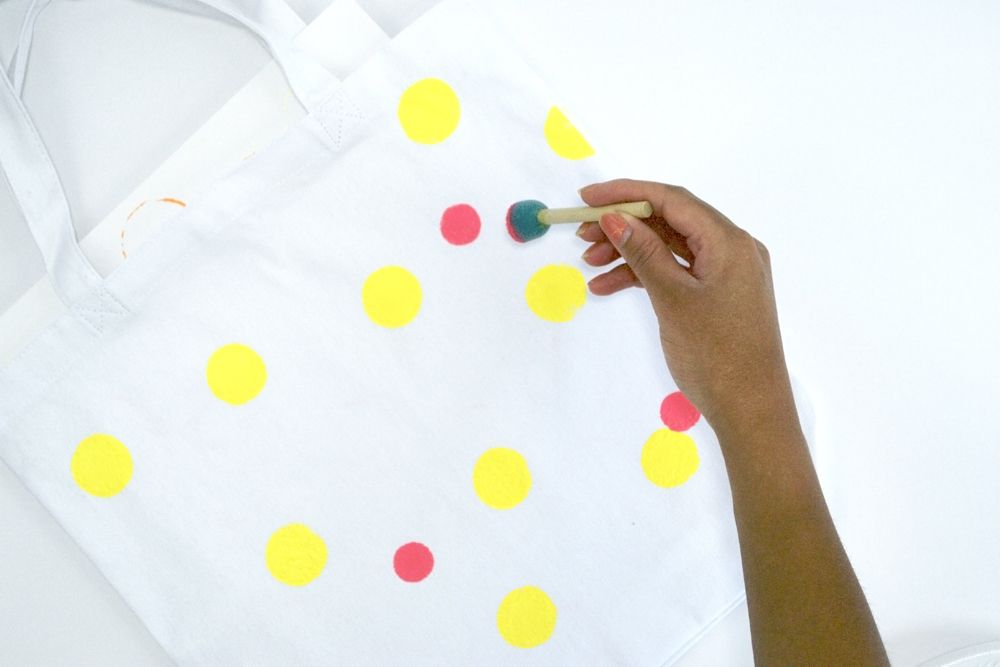
Here comes the fun part. Paint the bag any way you’d like. Obviously, this step is optional, but it does add some fun and color to a plain white bag. I chose to create small polka dots all over the bag with acrylic paint. I’m using Martha Stewart’s multi-surface paint, which works beautifully for this craft. Set the bag aside to dry for about 30 minutes.
Step 4:
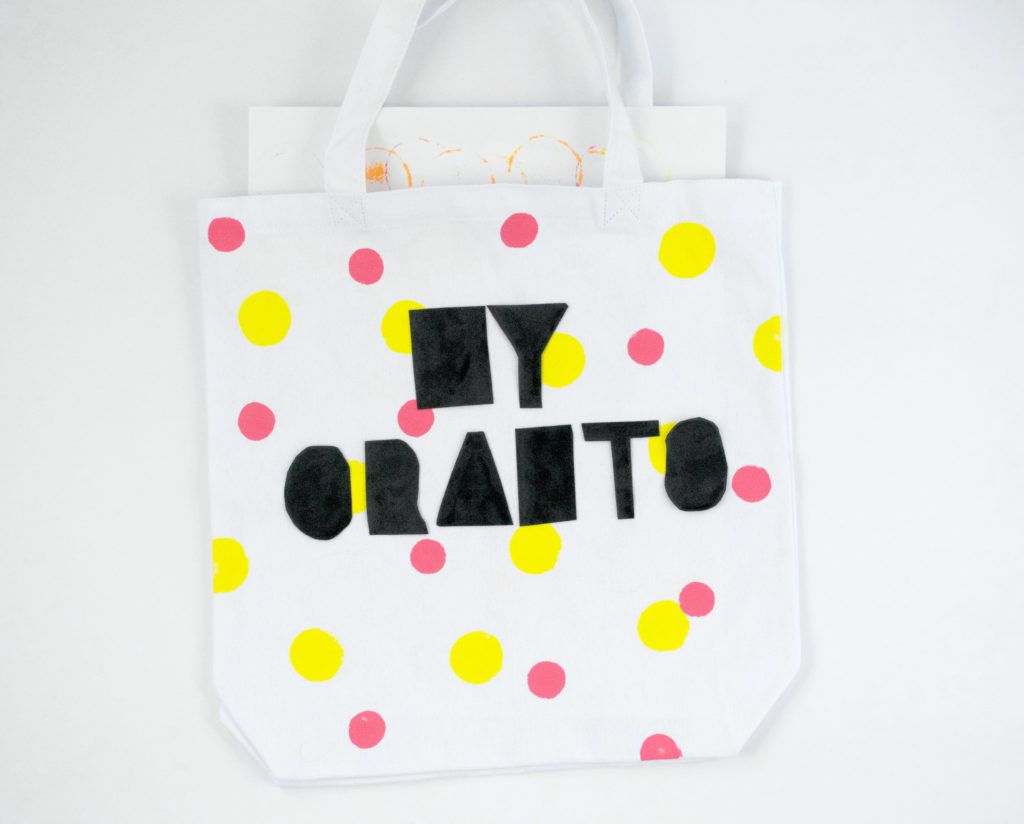
There are different types of iron-on transfer letters. Iron them on according to the manufacturer instructions. For these letters, cut out each letter individually, as close to the outline of each letter as possible. Lay them face down on the bag, showing the message that you want. Keep the letters fairly close together but try to make sure they are all evenly spaced apart.
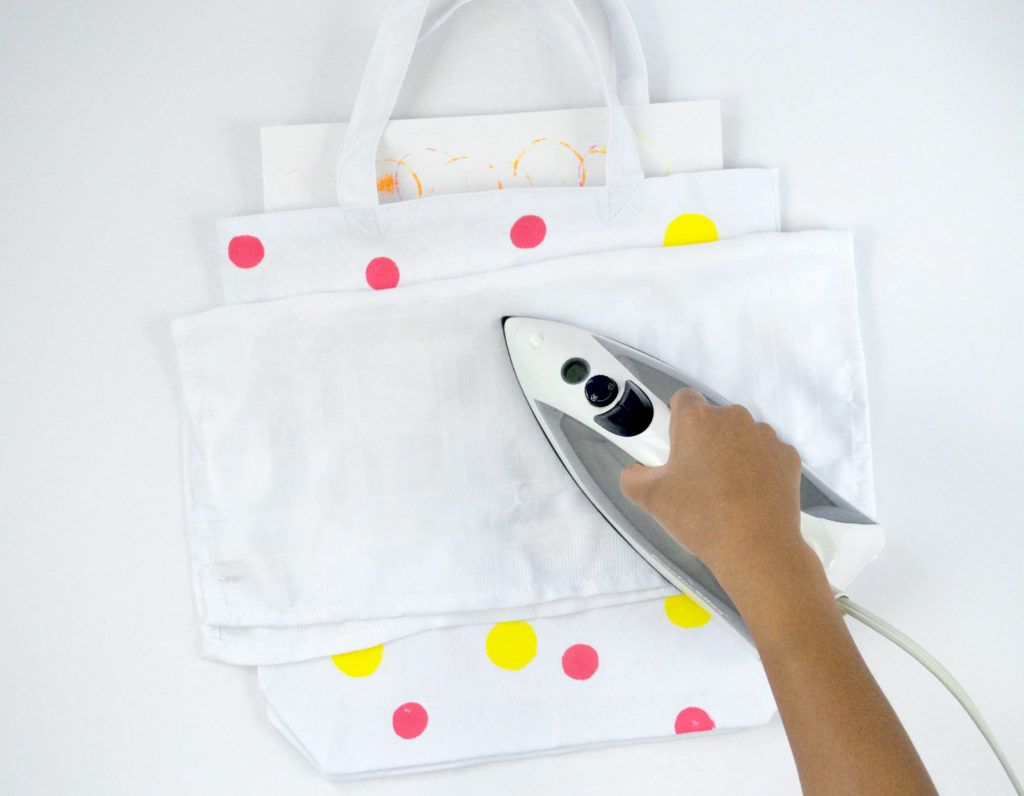
Step 5:
Place another piece of relatively thick fabric on top of the letters, being careful not to move any of them. Place your iron on the setting that is correct for the type of bag you purchased. For most bags, that would be the cotton/linen setting. Firmly press the iron down on each letter, being sure to get the edges. Go over each letter a few times to be sure it’s fully adhered.

Step 6:
The fabric will be hot, so be careful! As it cools, remove the cloth and excess backing from each letter. If a letter comes up, just lay the fabric back on top and run the iron back on it again.
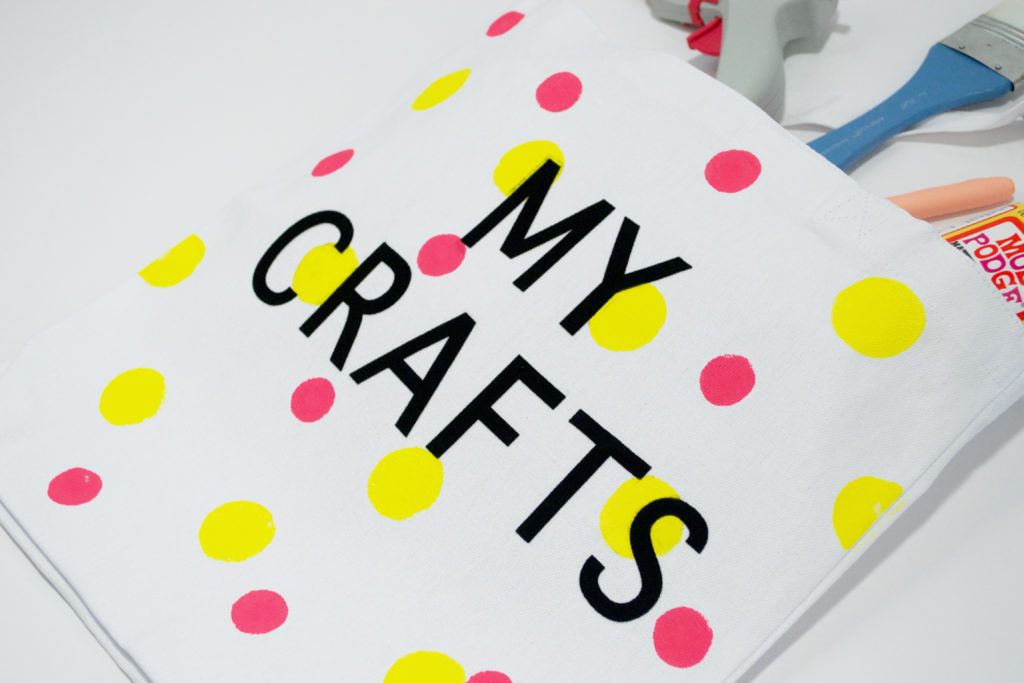
Let the bag completely cool before using it. Now you have a tote bag that you can carry all of your craft items in. This makes a great gift and you can personalize it by creating a unique message for the recipient. Happy crafting!