How to Use the Cricut Explore Air 2 Cutting Machine – Figure Out All the Details
Crafting things at home require you to have imagination, the materials needed for crafting, and the tools needed to process the materials.Now, we can’t provide you with imagination, aside from the occasional lists of ideas, since that is inherently present. However, when it comes to crafting materials and tools, we can go ahead and showcase some that have worked for a lot of other users around the world.
For example, you may have heard about Cricut and their extensive line of cutting machines, primarily the Cricut Explore Air 2, but knowing what it is and how to use the Cricut Explore Air 2 are two very different stories.
That being said, we went ahead and created this in-depth guide so that you can learn everything there is to know about using the Cricut Explore Air 2, and how you can get the most out of its capabilities.
Table of Contents
What Is the Cricut Explore Air 2?

Cricut is a world-famous brand of cutting plotters and PC-controlled cutting machines, and their devices cater to both professionals that are looking for machines that can help in large-scale production, as well as average homeowners that want to just craft and tinker with materials from time to time.
Of course, Cricut doesn’t just make cutting machines, they also make heat presses like the Cricut EasyPress 2, and they even make specializes heat presses for mugs, like the Cricut MugPress.
We’ve mentioned earlier in the article that Cricut has several lines of cutting machines, and these include the following:
- Cricut Maker
- Cricut Explore
- Cricut Joy
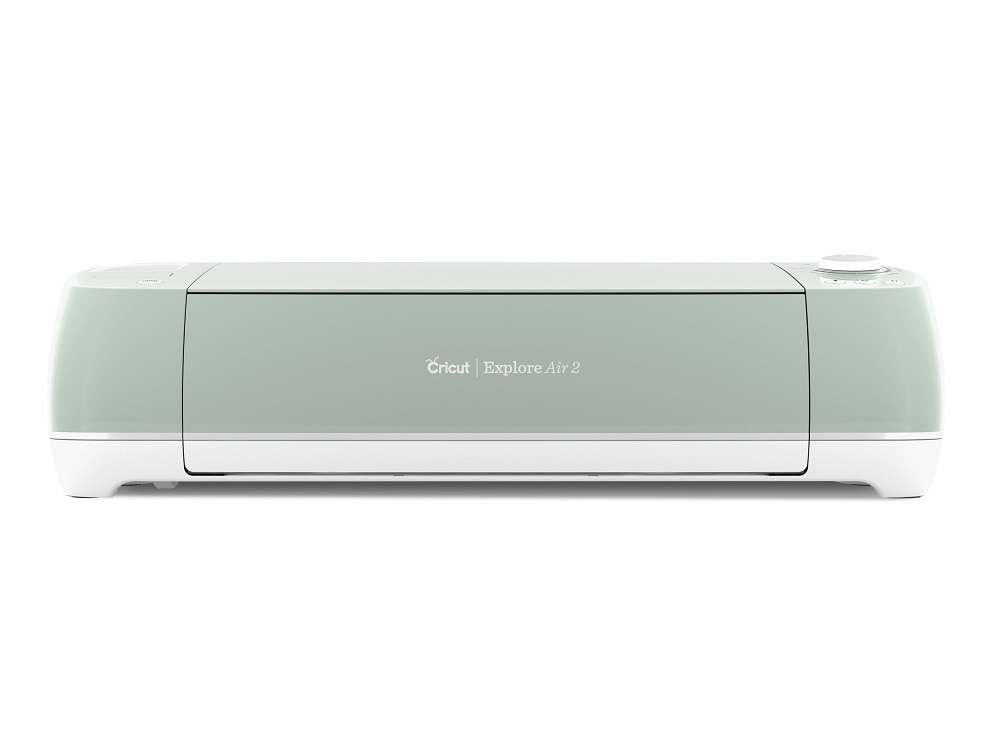
As you have probably figured out for yourself from the name, the Cricut Explore Air 2 is part of the Explore family. It is the latest available model since the original Cricut Explore Air has already been discontinued.
How Does a Cricut Explore Air 2 Work?
For those unfamiliar with what a cutting machine is, imagine that it is a printer, or a sewing machine, only that it cuts the materials that you place inside, and all of the actions are already programmed thanks to specializes PC software.
However, the range of materials that can be used is far much larger, since the machine can also be used on paper, felt, vinyl, all manner of fabrics, and even harder materials such as leather.
If you’re familiar with other Cricut machines, know that it is very similar in terms of functionality to the Cricut Maker 3. However, it features reduced cutting speeds, a smaller cutting force, and its overall features make it better suited for small-scale manufacturing of homemade goods.
Through a combination of models created via software, cleverly picked materials, and a lot of imagination, the Cricut Explore Air 2 can be used to create custom designs that can be later assembled to form various household items used to decorate your home.
More so, if you feel like showcasing your crafting prowess, you can also use it to create custom gifts for your friends and family and even make the occasional dollar on the side by selling your goods.
How Do I Use the Cricut Explore Air 2?
So now you know a bit about what the Cricut Explore Air 2 is and what it can do, and now it’s time we get to the part where we actually show you in a step-by-step manner how you can take the Cricut
However, don’t be alarmed by the fact that there may be a lot of steps ahead in this tutorial since Cricut did their best to make their machines as easy to use as possible, and the Explore Air 2 is among the easiest to understand of them all.
Learn About Cricut’s Design Space
The first step that you need to take when creating something at home, even if you’re not using a cutting machine, is to take your idea and make a sketch of it on paper so that you have a better idea of what the end result will look like.
Once you’ve done the initial sketches, you’ll probably spend a lot of time tweaking the design over and over until you finally get a result that feels right (if you’re like me, you’ll probably spend 3 hours drawing and designing for every 10 minutes actually using the Cricut machine).
Well, this process of preparing before actually executing applies to the Cricut Explore Air 2 as well, since the machine is exclusively controlled via a proprietary software called Design Space, and you’ll need to learn some basics about Design Space if you hope to excel at using your Explore Air 2 efficiently.
What Is Design Space?
Design Space is a free graphics design tool made to work exclusively with Cricut cutting machines, and it works with all currently supported models, as well as older ones too.
Because it is a graphics design tool, you can use it to create designs and patterns from scratch. However, if you’re having a moment where inspiration is lacking, you can always simply browse the Cricut Image Library for free images, predesigned Make It Now projects, or even fonts.
It is available for PC on both Windows and Mac, and it can also be downloaded as a mobile app for both Android and iOS, and both the PC and mobile versions of the app look almost identical, making it easy to switch from one platform to another whenever needed.
Design Space is a cloud-based tool, and using it requires that you log in with a Cricut ID, which in turn allows you to sync your progress between devices and programs and use your Explore Air 2 even when on the road.
However, there are certain limitations for the mobile app, such as the inability to use it to update your Cricut firmware.
Note:Design space is installed locally on your PC, meaning you can design any time, anywhere, even without an Internet connection. However, you won’t be able to browse any of the resources from the Cricut Image Library.
Learn How to Use Design Space
If the Cricut Explore Air 2 are the hands that do the cutting, Design Space is the brain of the operation since it is the only way to program a Cricut machine.
Since you can even use your Explore Air 2 to cut a simple piece of cloth in half without the software, we’ll teach you some of the basics of using Design Space, and then you can go ahead and explore some of the extra features by yourself.
However, don’t be alarmed about having to learn how to use this software, since Cricut’s Design Space is among the most user-friendly software of its kind, greatly outclassing similar tools like Silhouette Studio.
Here’s how to use Design Space on your Cricut Explore Air 2:
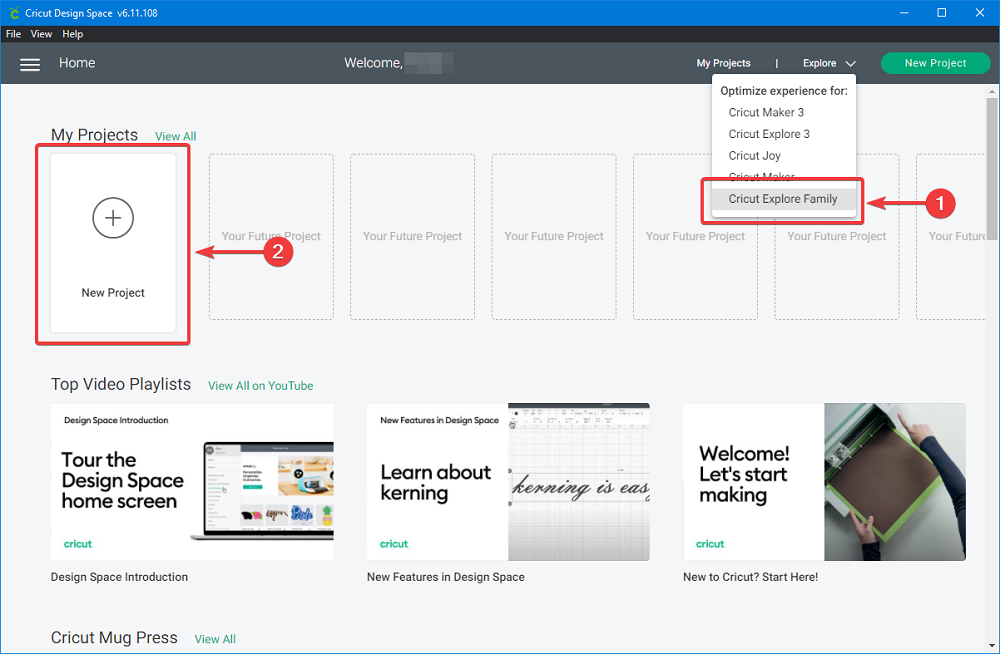
- Launch the Design Space app and log in using yourCricut ID.
- In the top-right corner of the menu, selectOptimize experience for:
- Select on Cricut Explore Family.

- Click onNew Project.
Using the tools from the 2 toolbars placed on the left and on the top of the UI, you can create pretty much anything you want since some of the tools help you create some very complex designs or create designs that involve mixing different materials together.
There’s nothing much I can tell you about using this tool starting from this point since it is purely up to you and your imagination.
However, if you think that you do need a bit of help in the form of inspiration and ideas, you can always opt to check out the Cricut Library to gain access to user-created content.
Preparing the Cricut Explore Air 2
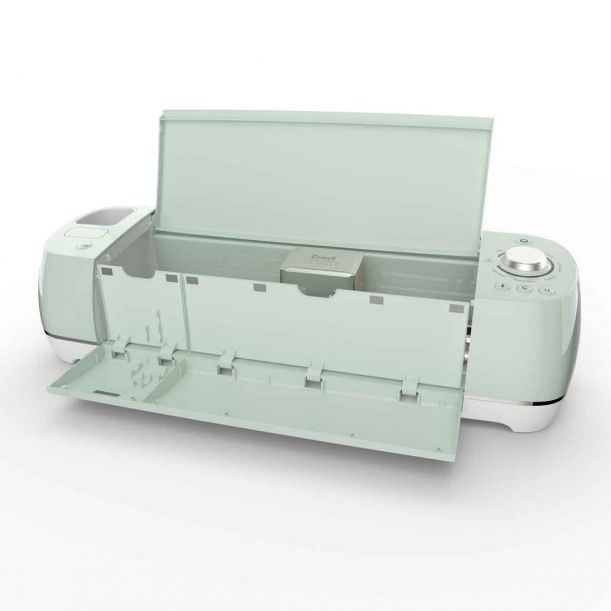
If you decided to purchase a Cricut Explore Air 2 cutting machine, you’d need to know how you can prepare it before actually using it, and we’ll start out with how you will place the machine.
You see, Cricut prides itself on not only making some of the best used-grade cutting machines on the market but also creating some of the quietest ones as well, and the Cricut Explore Air 2 is arguably the most silent of them all.
However, the Cricut Explore Air 2 comes with a feature called Fast Mode, and once you activate it, the machine will perform all of the cutting at twice the speed.
Of course, there’s no way such a feature would come without a cost, otherwise, everyone would just keep Fast Mode activated permanently.
That being said, while Fast Mode does increase cutting speed significantly, it also makes the Explore Air 2 a lot noisier, so if you think that you will be using the cutting machine consistently, you’d better find it a room where it won’t bother anyone.
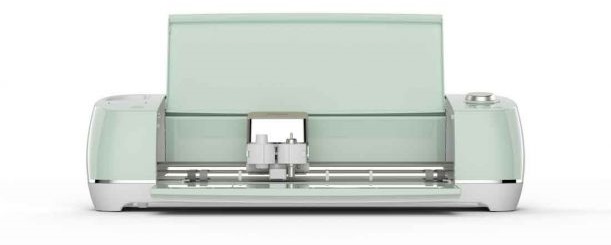
Fortunately enough, the Explore Air is a lot smaller and lighter than some of the other Cricut machines, so you don’t have to worry about it taking too much space in the room or about placing it on a piece of furniture that needs to be too sturdy.
However, keep in mind that we are talking about a machine that is used for cutting and embossing all kinds of materials, so wherever you place it, make sure that it can handle vibrations, especially over long periods of time.
As soon as you found a place for the Explore Air 2 and laid it on a solid surface, you can go ahead and plug it in.
Connect to the Internet and Update Firmware
Cricut does a good job not only when it comes to creating and designing new machines but also at improving their current ones as well, and this is something that you can tell by the frequent firmware updates that they release.
Because of these frequent updates, the first thing you’ll need to do when you unbox and plug your Explore Air 2 for the first time is to go ahead and update the firmware.
You can do this both via a wired (USB) connection, as well as a wireless (Bluetooth) one, with the latter being something that was only added in recent Cricut cutting machines.
However, there’s no telling when your device was boxed and how many firmware updates were released since then, so the chances are that quite a few may have piled up over time.
In that case, it’s safe to assume that your first round of updates will take some time, so we recommend that at least this time, you used a wired connection to ensure the best transfer speeds.
Here’s how to set up and update the firmware of your Cricut Maker 3:
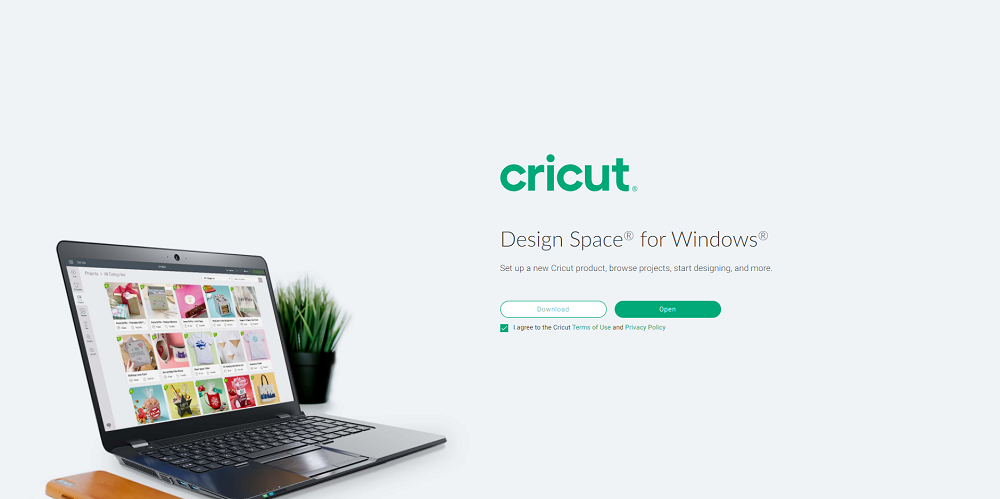
- Visit the Cricut Design Space webpage.
- Download and install the Design Space app on your PC.
- For the Android and iOS versions, visit the Google Play Store and the App Store.
- Follow the on-screen instructions to install the software.
- Log in or create a Cricut ID.
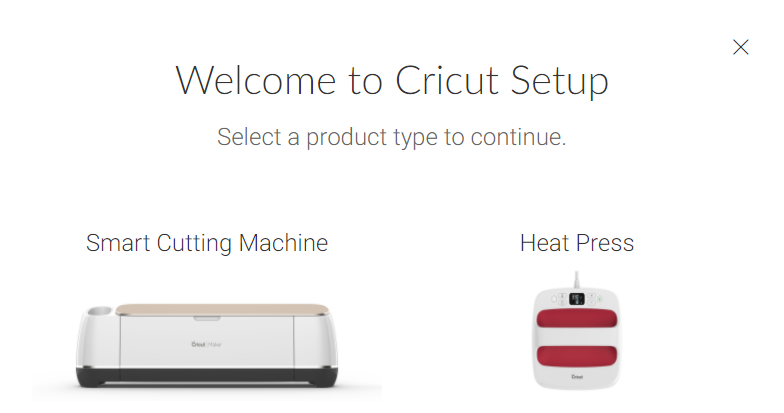
- Set up your new Cricut Explore Air 2 machine.

- Design Space will then scan your Cricut Explore Air 2 and check if it needs any firmware updates.
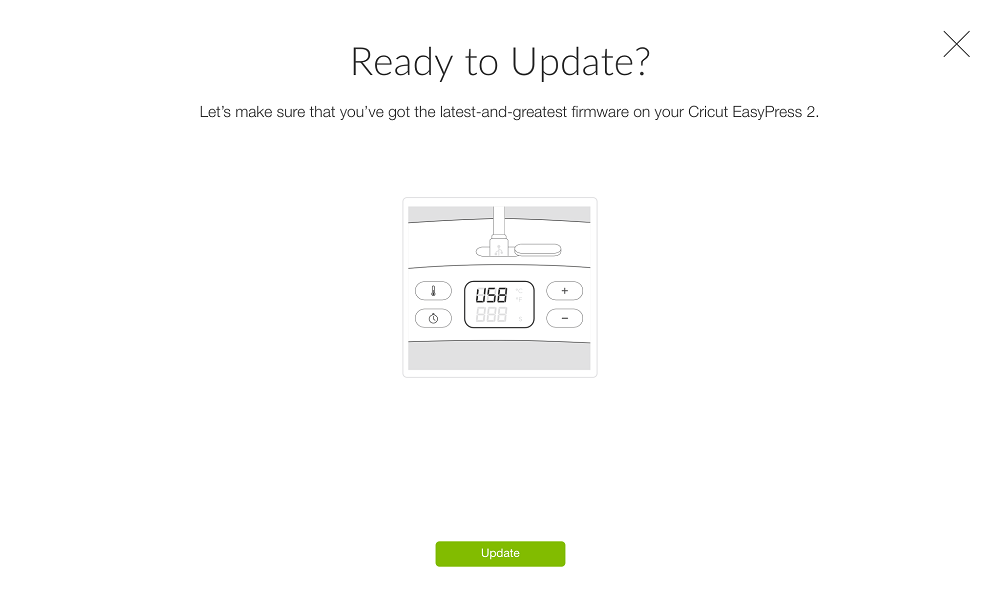
- Design Space will then show you a list of all available firmware versions.
- Click onUpdate.

- Wait for the progress bar to fill up.
- Your Cricut Explore Air 2 will restart by itself as soon as it is done updating.
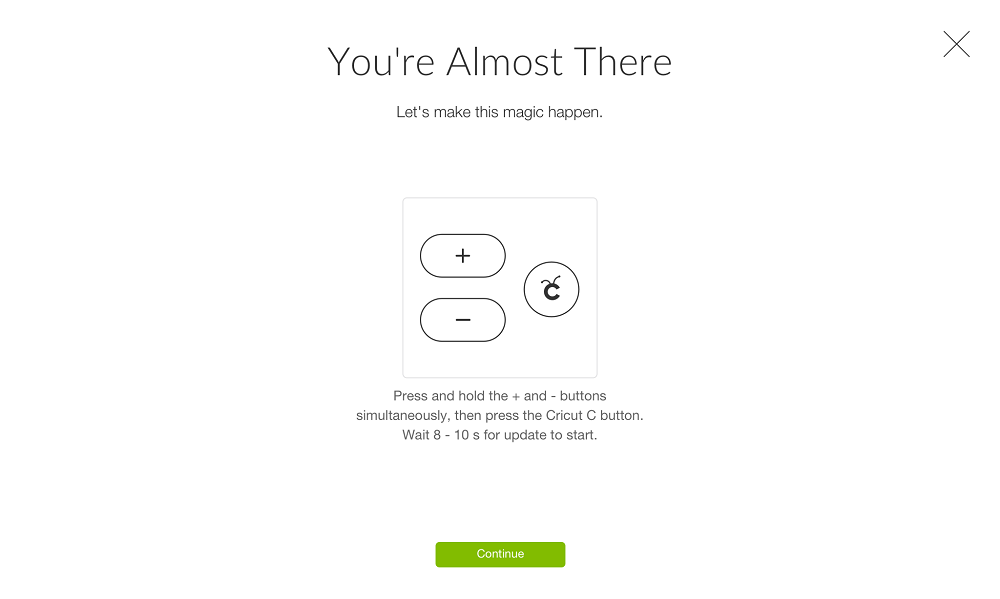
- Click on Continue.

Note: Design Space will prompt you to perform a few test cuts as soon as the setup is done to let you know that the installation is complete.
Learn About the Cricut Explore Air 2’s Accessories
Since the Explore Air 2 is made for the average user, it was designed to work with fewer types of materials (100+) compared to its more powerful cousin, the Cricut Maker 3 (300+).
However, a machine is only as good as its accessories, and this is especially the case with a cutting machine like the Cricut Explore Air 2 since there is a reason why they use certain tools for certain jobs.
You see, you can’t use a fine and brittle blade to cut hard materials, and using a harder and more durable blade on softer materials would be overkill.
Because of this, you’ll need to always keep in mind that the life expectancy of a blade depends on the type of materials you will be cutting most of the time, as harder materials will dull the blade faster.
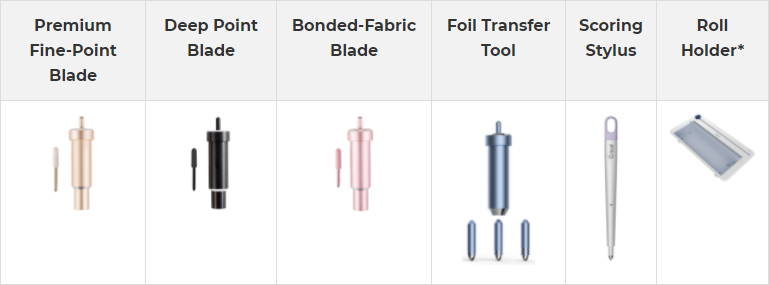
That is why the Cricut Explore Air 2 is made to work with 6 different attachable tools that can help with cutting, designing, and more.
Here’s a brief rundown of the 6 tools:
Premium Fine-Point Blade
Also known as the German Carbide Premium Blade, it can be used to cut materials that are either very thin or of a medium-weight:
- Paper
- Cardstock
- Posterboard
- Vinyl
- Iron-on
You can always buy replacements separately from the Cricut website, as they are available in packages of 5 and 10 pieces.
Note: The Premium Fine-Point Blade is the only one that comes packaged with the Explore Air 2 as a default, and the rest of them need to be bought separately.
Deep Point Blade
Unlike the other blades used by Cricut cutting machines that are placed at a 45-degree angle, the Deep Point Blade is a bit different since it is placed at a much steeper 60-degree angle.
More so, that it is built from is made to be harder and much more durable, making it better suited for deeper cuts in much harder materials such as:
- Magnet
- Chipboard
- Stamp material
- Thick cardstock
- Stiffened felt
- Foam sheets, and more.
Note: The blade is colored black so that it is easier to tell apart from the rest, and this also makes switching blades easier.
Bonded-Fabric Blade
Mostly used for designs and crafts that are made out of bonded fabrics as the base materials, this blade is created to handle finer and more complicated cuts.
Note: The blade is colored pink so that it is easier to tell apart from the rest, and this also makes switching blades easier.
Now that we’ve covered the cutting accessories, we’d like to remind you that the explore Air 2 can do more than just cut, although that is what it does best. For example, it can also be used to add various effects and textures to the materials that you are working on, and here are the tools that can make that happen:
Foil Transfer Tool
Used to add foil effects to the materials that you are working with, this tool also comes with 3 different interchangeable heads that change how hard the foil transfer is imprinted on the material:
- Fine
- Medium
- Bold
Scoring Stylus
Besides cutting and adding foil transfers, the Cricut Explore Air 2 has a tool that can handle fine and intricate material folding, and that’s where the Scoring stylus comes into play.
Fine-Point Pencil
The last task that the Cricut Explore Air 2 can perform besides cutting, engraving, and folding are adding graphic designs on your materials, which is another way of saying that it can basically draw on your materials.
This makes the Fine-point pencil an ideal tool when you what to create holiday cards, as it can perfectly emulate stylized handwriting.
Using the Cricut Explore Air 2 the First Time
The first time you use any machine is probably when you’re most anxious about what results you will get, and you need to be prepared to run into a few failures before you actually get the hang of using the machine.
However, you can minimize the failure rate and get started with using this device faster if you follow a simple set of rules.
Use the Right Tools
Now that you know about the 6 tools that are compatible with the Cricut Explore Air 2, you also need to be very careful when it comes to using them.
Fortunately enough, Cricut took a lot of the guesswork out of the equation. For starters, as soon as you create a new project in Design Space, you will be asked to input the materials that you will be working with, at which point Design Space will automatically assign the right tool for the job.
More so, The Explore Air 2 has a feature that alerts you whenever the wrong tool is attached to the machine, although you still have the option of leaving it as it is. However, using the wrong tools can result in bad cuts, improper designs, and a shorter lifespan for the tools themselves.
For example, using a delicate blade on a hard material will make it dull very fast or even break during the cutting process. Also, even the pens are specialized as well, as some are made to work on certain surfaces, or how some are washable, and others are permanent.
Note: The Cricut Explore Air 2 allows you to multitask thanks to its dual carriage feature, which allows you to attach two tools at a time, and therefore perform 2 actions simultaneously.
Another great example of using the right tools is choosing the cutting mats that you will be using (presuming that you aren’t using Smart Materials) as there are 3 different kinds made for 3 different categories of materials.
Besides, keep in mind that cutting mats are consumables, so it’s good that you know which to use in different situations so that you can get your money’s worth with each of them.
Setting Up Your First Cut
Now that you’ve got your project set up, your Explore Air plugged in, and you’ve installed the right tools, it’s time you prepare for the very first cut with your Cricut Explore Air 2.
Start by placing your cutting mat into the machine and then the material over the mat so that it adheres perfectly to its surface. You will then load both the mat and the material into the machine and then input your project via Design Space.
The Cricut Explore will then check whether you attached the right tool for the designated project (it doesn’t hurt to double-check), and only then will it proceed to start cutting.
Smart Materials
If you like being efficient and wasting as little time as possible with cutting the materials, then you should definitely consider using Smart Materials which are specialized consumables that work without a cutting mat.
They are basically materials that come preattached to their own backers that can feed through the Explore Air 2, and this allows you to load them directly into the machine and start cutting.
Cricut has Smart Material version of a lot of popular consumables, including:
Besides, the Explore Air 2’s Fast Mode is optimized to work best with Smart Materials, allowing the fastest cutting speeds possible.
Weed Out Excess Material
So you’ve finally made your first cut, and now you have a rectangular piece of material made up of both the cut-out design as well as the leftovers, so the next obvious step is to weed out the excess material.
Unfortunately, with all of its clever features and updates, one thing the Cricut Explore Air 2 cannot do is weed out excess materials for you, so you’ll need to do it manually.
More so, if you’re working with intricate and fine designs, you’ll need to arm yourself with a lot of focus, have a steady hand, and be able to maintain focus for a good couple of minutes.
One quick way to do this is placing the cut material against a bright surface, such as a window, and then looking at the outlines to guide you where you need to remove any material.
However, this means staying in a rather uncomfortable position until you’ve finished weeding, and this won’t be easy, especially if you have more than just one project waiting in line.
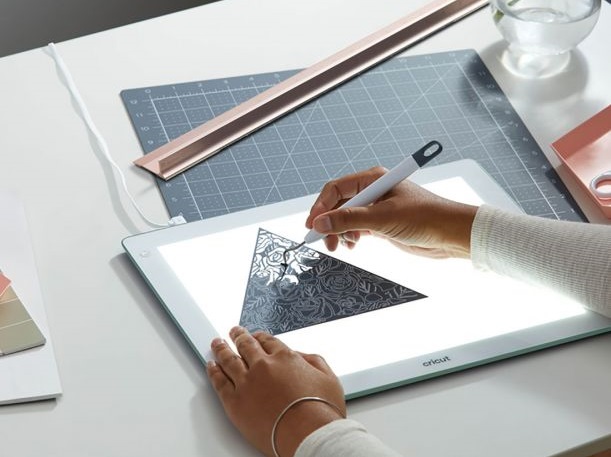
However, Cricut thought about this as well, and that’s why they created the Cricut BrightPad, which basically acts as a tablet that has the sole purpose of acting as a background light to make weeding excess materials easier.
Finishing Your Project
Now that your design was designed, cut, and weeded out the excess materials, you can go right ahead and use them in your projects, and Cricut has plenty of other machines that can help you further, allowing you to complete a project from A to Z using just Cricut machines.
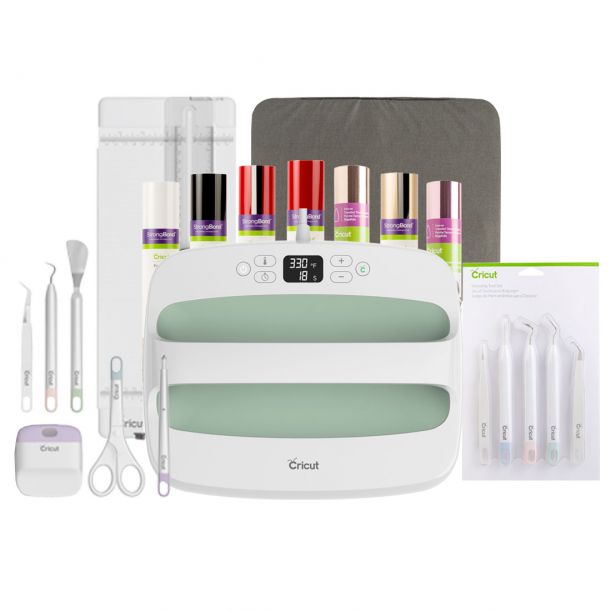
One great example is if you were planning on printing an amazing new design on a T-shirt since you will need more than just a cutting machine, you’ll also need a heat press.
This is because you will be using the Explore Air 2 to cut out the vinyl into whatever design you like, and you will then use the heat press to actually transfer the design onto the fabric of your shirts.
Fortunately, Cricut has plenty of tools in the heat press department as well, one perfect example being the Cricut EasyPress 2.
Get Used to Your Cutting Materials
We’re drawing close to the end of our guide, and at least in theory, you’ve grasped the basics of using the Cricut Explore Air 2.
However, there is one thing that you need to remember, and that is that the Explore Air 2 reacts differently depending on what materials you are working with.
For example, certain materials will take longer to cut, they will require different cutting blades, and the noise levels will also differ.
Because of so many variations, our one and only piece of advice that we require you to follow is that you practice with one material at a time until you feel as if you’ve mastered all of the tips and tricks involving it, and only then moving on to new materials.
With over 100 different materials and 6 different tools to work with, it’s easy to get enthusiastic about trying everything but not being able to learn or do any project properly.
Cricut Explore Air 2 FAQ
What can you do with Cricut Explore Air 2?
The Cricut Explore Air 2 is primarily a cutting machine, although what it can do is a matter of what tools you decide to attach since it can also be used for engraving, as well as drawing on various materials.
Whichever the case, the Explore Air 2 is a core element that should be present in anyone’s crafting room, especially if they like to bring their creative side to life.
Is Cricut discontinuing the Explore Air 2?
Cricut is constantly reinventing itself, and this means that eventually, some of their older machines will become obsolete and therefore unsupported at one point or another.
Several such examples are the original Cricut Explore,Cricut ExploreOne, andCricut Explore Air machines which were discontinued and are no longer available for purchase (except as second-hand machines.
However, as of the writing of this article, the Cricut Explore Air 2 is currently the newest Explore model, and with it being very popular among users, there are few signs that it will be discontinued any time soon.
Is the Cricut Explore Air 2 worth it?
While the answer to this question is purely subjective, our own short answer would be yes.
Not only is the machine incredibly affordable compared to other machines of the same or similar class, but it is very silent, fast, and the software that powers it is very intuitive and easy to use.
What is the best Cricut to buy in 2021?
If you’re deadset on buying a Cricut machine, knowing which is the best depends entirely on what exactly you want to use it for:
- Cricut Maker 3
- Powerful, fast, and can handle large projects
- Ideal for those that want to make a living using it
- Cricut Joy
- Affordable and capable of handling basic tasks
- Ideal for those that need to carry it around to make projects on the road.
- Cricut Explore Air 2.
- Fast, silent, and affordable
- Almost as powerful as the Cricut Maker 3, but more portable and made for smaller projects, like the Cricut Joy.
What is a good price for a Cricut Explore Air 2?
If you’re looking to buy the most affordable Explore Air 2 package that contains just the Cricut Explore Air 2 along with some basic tools and consumables, you can get it from the official Cricut website for only $249.99, although it currently is on sale for the extremely low price of $169.99.
Can I cut wood with Cricut Explore Air 2?
The short answer would be yes, although it depends on what type of wood you are interested in (it won’t work on harder types), as well as the wood’s thickness.
Can the Cricut Explore Air 2 engrave?
As long as you know how to use the Foil-Transfer Tool properly and you are aware of what materials it supports, then yes, you can use the Explore Air 2 for engraving.
Does Cricut Explore Air 2 require a subscription?
Once you’ve bought any Cricut machine, you can use it as much as you want with no limitations without having to pay a dime, and the software that powers the Cricut Explore Air 2 is completely free.
However, Design Space can be used to access online content created by other users or content that belongs to an exclusive Cricut library, and these will require that you subscribe to Cricut Access.
Fortunately enough, Cricut Access also has a free subscription plan, although it is greatly limited compared to the paid ones.
Is there a monthly fee for Cricut?
Cricut Access is a subscription plan that grants users access to a lot of exclusive content that would otherwise be unavailable, and as far as pricing is concerned, it is available in 3 subscription plans:
- Cricut Access Free
- Free
- Cricut Access Standard
- $9.99 / mo
- $95.88 / yr ($7.99 / mo)
- Cricut Access Premium
- $119.88 / yr ($9.99 / mo)
What is the best Cricut for beginners?
If you’re new to Cricut cutting machines and are afraid of investing in something that might overwhelm you from the very beginning, our advice is to start off with a Cricut cutting machine that has a few features and is as affordable as possible, the perfect example being the Cricut Joy.
Once you’ve learned how to use this device by heart, you can go ahead and advance to a Cricut that is a bit more complex, the perfect example being the Cricut Explore Air 2.
How To Use the Cricut Explore Air 2: Closing Thoughts
Our guide has come to an end, and we hope that we’ve covered every aspect of using this machine in a way that will make it easier for you to get your very first project started as soon as possible.
As you can see, using the Cricut Explore Air 2 is as easy as it can get, and the only true obstacle is the fact that you need to remember what are the machine’s limitations.
For those of you that want to learn more about the machine itself, we’ve written a complete in-depth review on the Cricut Explore Air 2, and we’ve also compared it to the Cricut Maker 3, another Cricut machine that is bigger, more powerful, and more geared towards large-scale manufacturing.
We’ve covered plenty of other articles that involve Cricut machines, but if there are other related topics you’d want to read about that we haven’t yet covered, let us know about it, and we’ll make a similar guide immediately.