Garlic Info: How To Grow And Harvest Garlic
Updated on June 10, 2022
Garlic is one of the most popular herbs in any kitchen and any cuisine. No chef worth their salt can do without it and your dishes won’t taste the same if you don’t use garlic. Both Italian and French cuisines are famous for using garlic in just about any recipe. And while you can find cloves of garlic at the store, you might be tempted to grow it in your garden. Of course, there’s nothing like growing your own food. So let’s see how you can grow and harvest garlic right there in your garden.
Garlic Varieties to Grow in your Garden
The first thing you need to know about garlic is that it has many varieties. You probably noticed that the garlic you buy at the supermarket isn’t always of the best quality. Sometimes the cloves are white and look clean and solid. Other times, they are yellow and smell awful. So before you embark on this garlic growing adventure, it’s important that you pick the right variety.
- Hardneck garlic: The leaves and stem come straight out of the center of the bulb. It often has a strong smell and is a hardy plant that you can grow in mild to cold climates without issues. The only drawback is the bulbs don’t have a long shelf life the way other varieties do. Popular varieties include Blanco Veneto and Early Purple Wight.
- Softneck garlic: As the name implies, the stem and leaves are much softer in this variety. Most garlic cloves sold in supermarkets often belong to this type. It doesn’t have a strong smell or flavor as hardneck garlic types. It’s more suitable for warm climates. Once harvested, you can store it for months without fear it might spoil or rot. Best varieties to grow include Albigensian Wight, Iberian Wight, and Solent Wight.
- Elephant garlic: Famous for its huge bulb. While it looks in every way like garlic, it is actually a close cousin to leek.
In short, the best garlic variety to grow in your garden would the softneck type. It’s easy to grow, doesn’t waste nutrition on the hard stem, and the garlic bulbs have a smoother texture. It doesn’t have a strong smell or aroma and has a longer shelf life on average.
Best Times to Plant Garlic
We saw that some garlic varieties such as the hardneck type are more suitable for cold climates while the softneck garlic variety prefers moderate to warm weather. This brings up the question of the best times to plant garlic. In general, the moderate seasons are the best times for garlic planting.
Fall Garlic
Whether you’re growing hardneck or softneck garlic, the fall is often a much milder season than the spring. You need to find a sunny spot in your garden to plant your garlic in late October. The soil needs to be warm enough for the garlic to set roots. If the temperature drops at night, you can cover the soil with a thick layer of mulch to protect the plants.
Spring Garlic
As soon as the last frost is over and the soil becomes workable, you can start planting your garlic cloves. There won’t be any need for mulch unless you live in a very cold area and you worry about the plants freezing at night.
How to Plant Garlic
In many cases, the weather in your area is the decisive factor when it comes to whether you plant your garlic in the spring or fall. If you choose the fall, then make sure you have between six to eight weeks before the soil freezes. Here’s how to grow garlic in easy steps.
- Start by tilling the soil. You need to break the surface for up to 8 inches.
- Add in about a thin layer of slow-release fertilizer or you can go with organic compost for best results. Mix well with the soil.
- Divide your garlic bed into rows for better management and irrigation. The rows should about between one to one and a half feet apart.
- Break the garlic into cloves and make sure each clove has enough natural covering as possible. Don’t peel off the thin papery veneer before planting.
- Push each clove into the soil about 3 inches deep. Keep the pointy end upwards.
- Space the cloves about 4 to 6 inches from each other. This gives them enough space to grow without having their roots compete over food.
- Water the rows gently to help the soil settle. Avoid aiming the water directly at the garlic cloves to avoid exposing them.
- Depending on the weather, you might need to cover the bed with mulch. Sugarcane straw works best to preserve the temperature and moisture in the soil. In Spring you won’t need mulch.
- It would take anything between 3 days to a week for the garlic cloves to sprout.
- Keep an eye out for weed and maintain moist soil until the plants grow leaves and become strong.
Garlic Care
One thing to keep in mind about growing garlic is that you can either plant it in a container or in the garden. It all comes down to personal preference. However, once you have your garlic growing successfully, that’s when the hard work starts. Caring about the garlic plants can be the difference between a healthy crop and one that yields a few bulbs. Here’s what you need to pay attention to.
Soil
The best soil to grow garlic is a well-drained one. Clay soil doesn’t give the roots room to grow and lead to root rot since it becomes waterlogged easily. At the same time and thanks to the heavy bulbs, too loose a soil cannot hold the plant in place and it will fall and die. The soil needs to be fertile. Poor soil or one where you have just harvested another heavy feeder plant will not give you the best results you need. Check the pH in the soil and make sure it’s between 6 and 7. Acidic soil as well as alkaline types are not suitable for garlic growing.
Fertilizer
While compost is part of preparing the soil as we have seen, it’s far from enough to enrich your soil or give the garlic plants the nutrition they need. Like many bulb producing plants, garlic needs plenty of phosphorus to yield aromatic cloves. Look for bulb-specific fertilizers packed with phosphorus. Mix 3 spoons of the fertilizer per gallon of water and feed the garlic once a week. Hold the fertilizer when the bulbs grow and you get near to harvesting them. You can also use organic fertilizers as a substitute for chemical ones. However, they’re usually low in phosphorus and you’ll need to use larger amounts of the organic material.
Winter Care
If it gets cold quickly where you live and you still want to grow your own garlic, then you should grow it in a container. This makes caring for the garlic in the fall and winter so much easier. During the day, bring out the container to a spot that gets about 6 hours of sunlight per day. In mild climates, you won’t have to move the container. You can even grow it in the garden and use a mulch to keep the plants protected. Lay the mulch along the rows in the bed without actually covering the garlic plants themselves. You’re protecting the soil to preserve the heat, not trying to smother the plants.
Spring and Summer Care
In the spring, try to avoid exposing the garlic plants to the frost or occasional freezing night wind. Spring is also the best time to fertilize the garlic in anticipation of its growth. Also depending on the garlic variety you grow, pay attention to the hard stem in hardneck garlic varieties. Once you see that hard stalk growing out of the middle of the bulb, snap it off with your hand and throw it away. This preserves the energy of the plant and encourages it to grow larger bulbs. Keep weeding the soil and caring for the garlic until it’s time to harvest it.
Harvesting Garlic
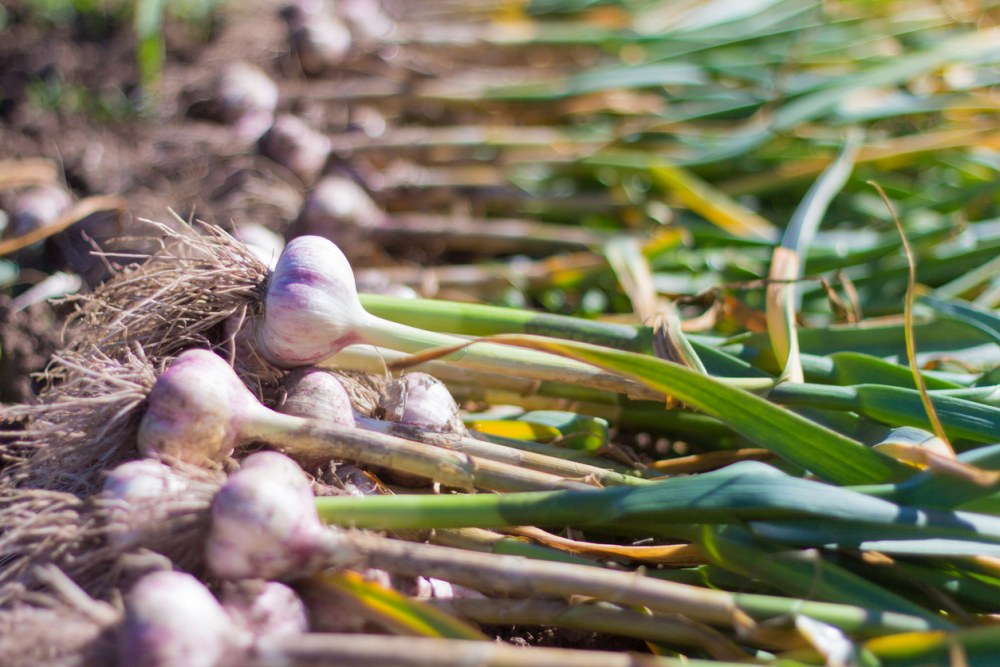
If all of the above seems like hard work, you should wait to hear about harvesting. Not that the process of collecting the garlic bulbs is difficult. It’s usually the timing of it that’s a little tricky. Most experts recommend that you wait for about 50 percent of the leaves to turn yellow before you harvest the garlic. If you try to gather the bulbs earlier, they will be too small and the cloves underdeveloped. If you wait too long, the cloves will come loose from the head.
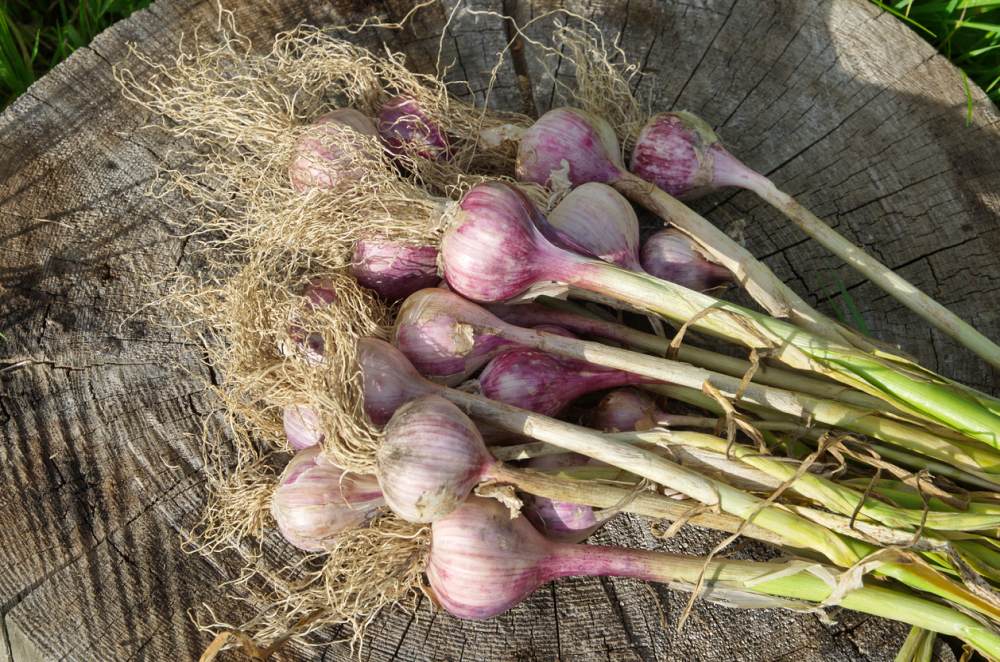
To harvest the garlic bulbs, dig them out of the earth with a trawl and collect them in a basket. Shake off the soil vigorously. You might need to use a sharp knife or shearing scissors to cut off the roots. Be careful not to damage the bulb itself. If the soil is loose enough, you can just grab the leaves of the plant near the soil and pull the bulb out.
What is a safe herbicide to use on actively growing garlic? Is Preen prevent ok or 2-4d or other type?