How to Make Concrete Flower Pot – DIY Concrete Planter
Updated on June 23, 2021


Every once in a while, I like to teach myself how to work with a new crafting material. Learning a new technique feels exciting and fresh when you’re someone who has been in the DIY fame as long as I have an has tried so many different things already! My latest obsession is making simple things from DIY concrete that you can mix at home. Recently, I had the idea to make my own miniature flower vase and I was so pleased with the outcome that I just couldn’t help making another one to outline so that everyone else can follow along as well.
Check out these photos and written instructions to learn how I made these lovely little concrete flower pot! If you’d prefer to follow along with a video tutorial instead, scroll to the bottom of this post to find one.
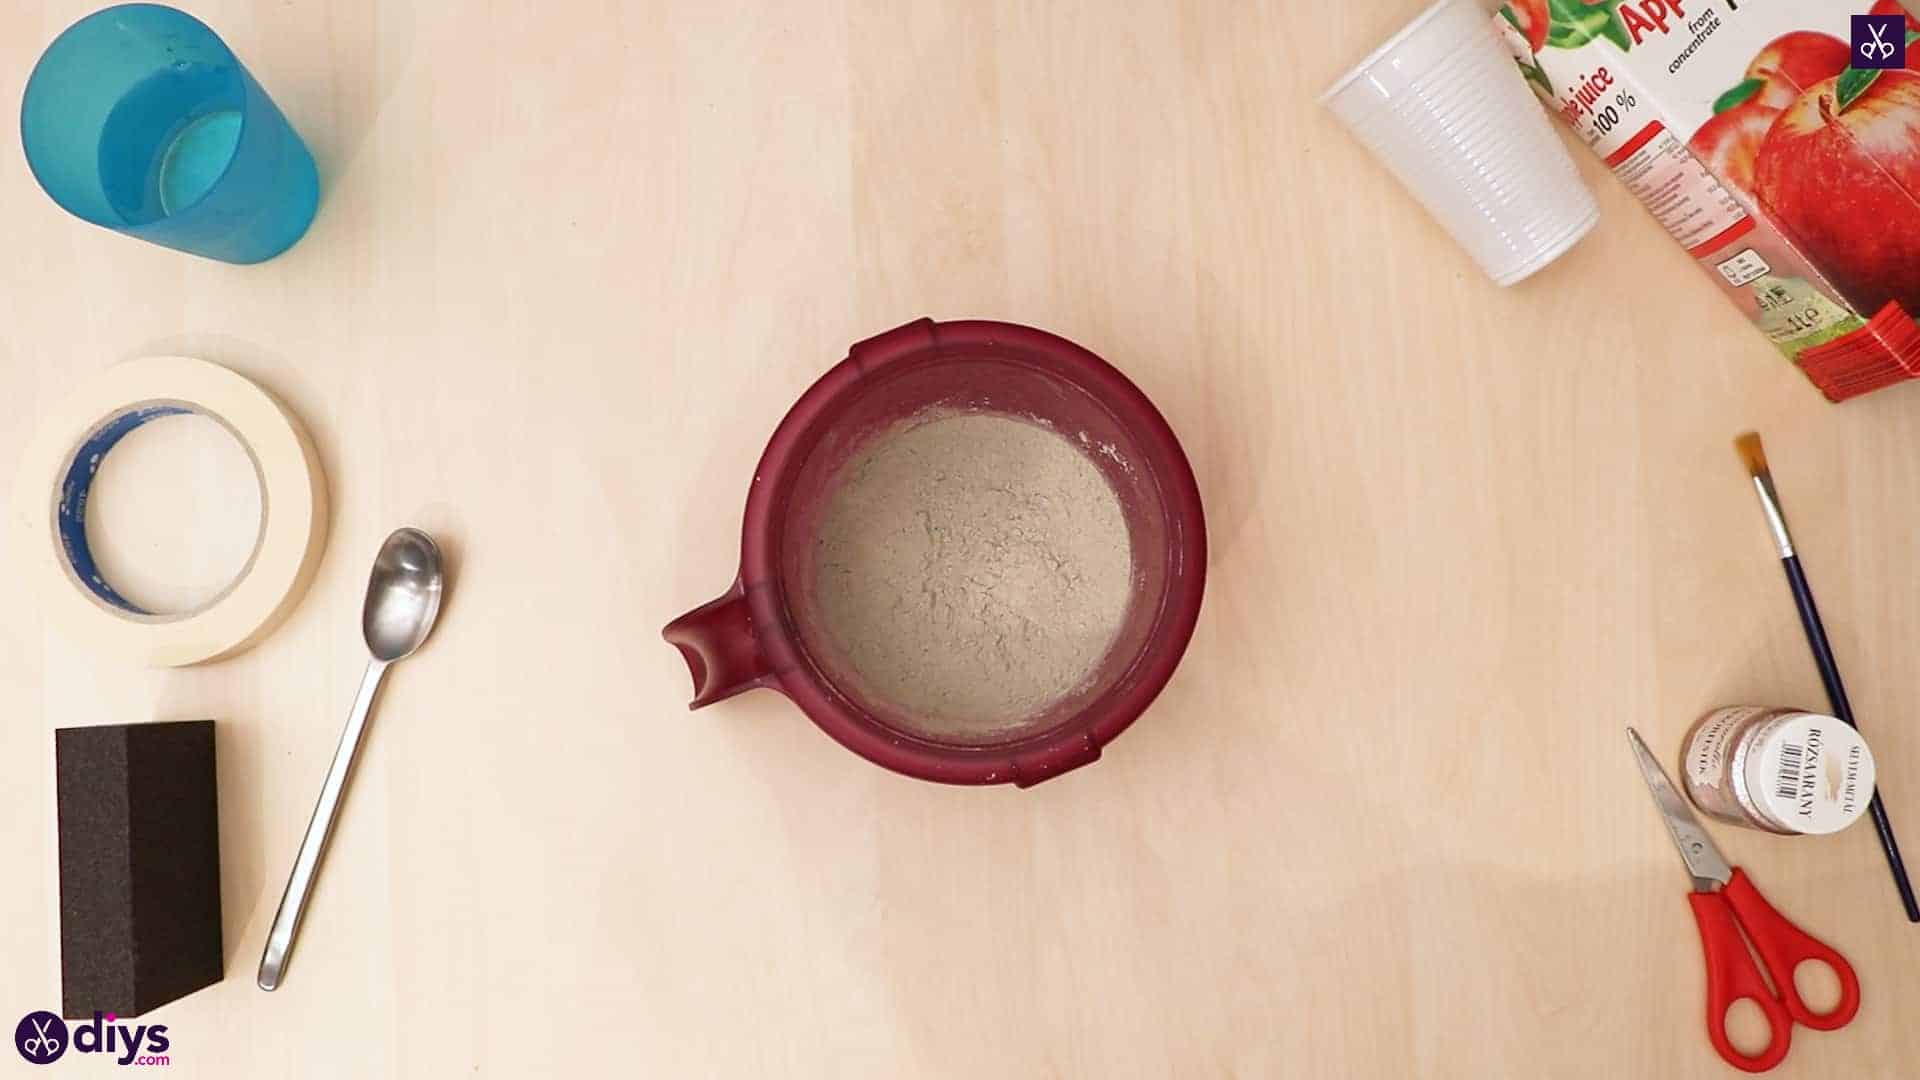
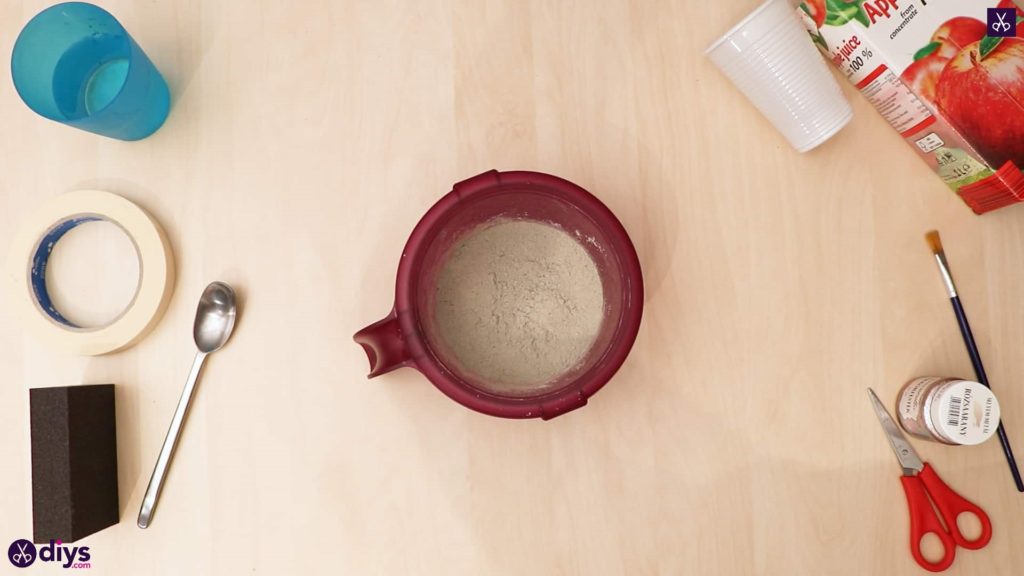
For this project, you’ll need:
- A juice box
- A plastic cup
- Fine particle cement
- Water
- A plate
- A spoon
- An abrasive block
- Scissors
- Tape
- Paint (dark and light blue)
- A paintbrush
Step 1: get ready
Gather your materials!
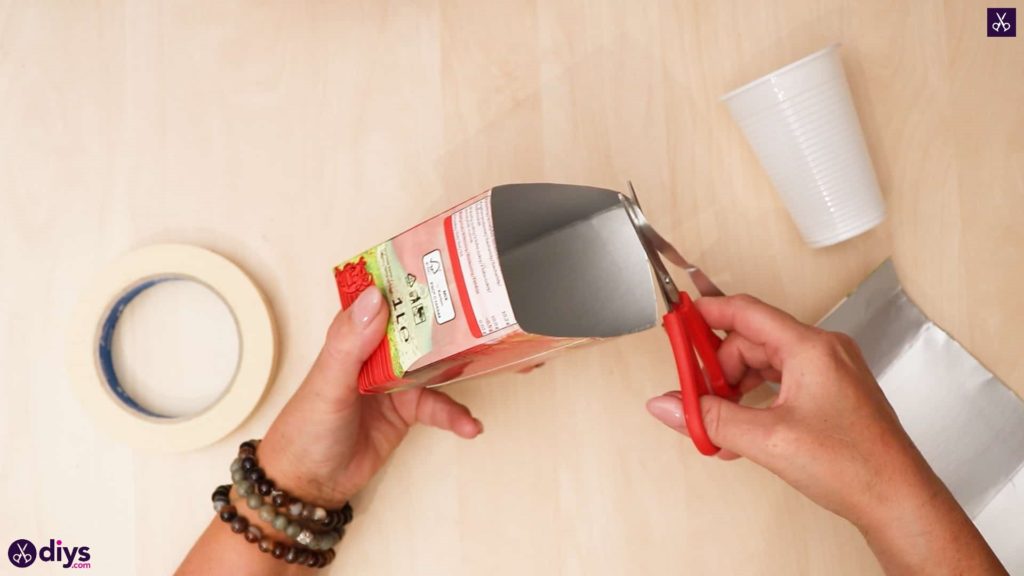
Step 2: cut your mold
Cut the top half of the juice box off so that you have an open tray piece a few inches tall.
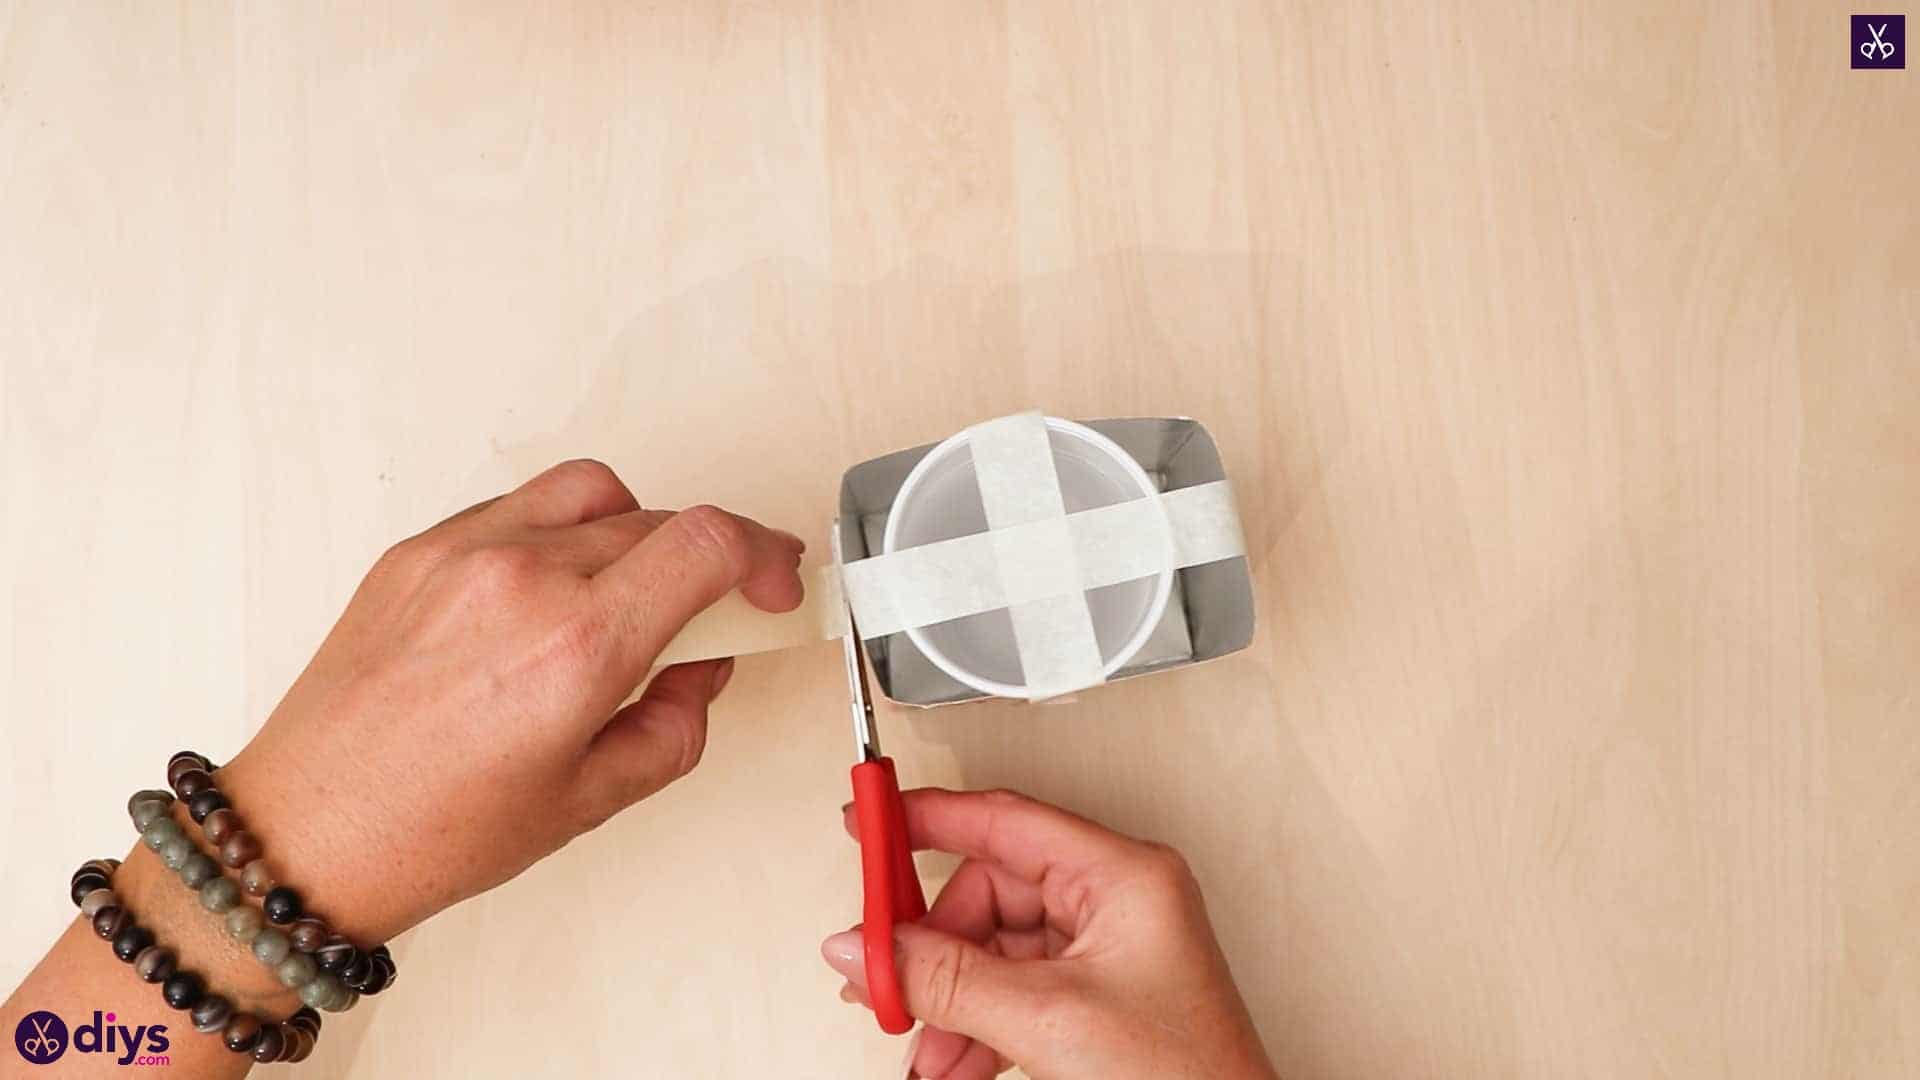
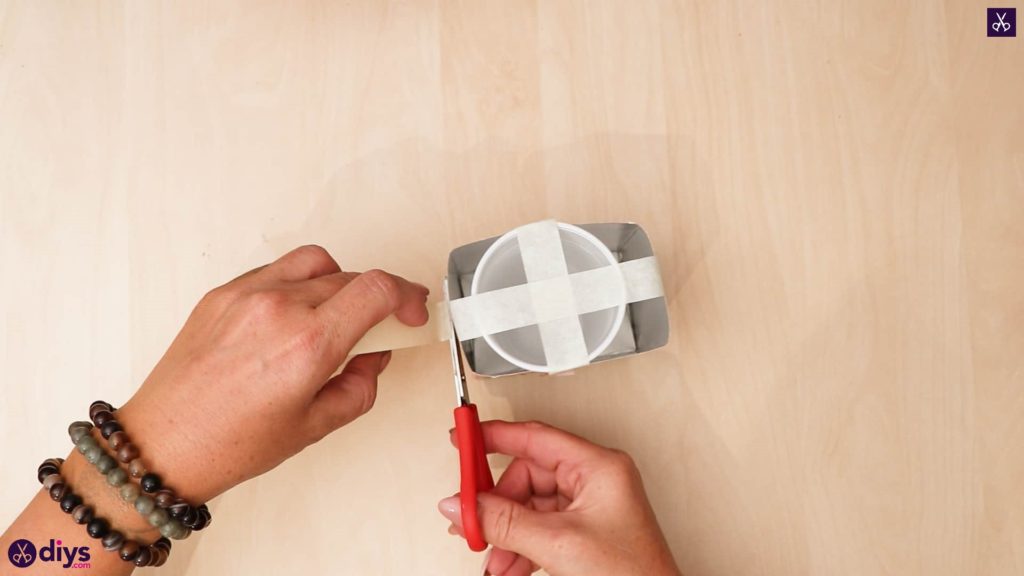
Step 3: put the cup inside
Place your plastic cup inside the open and newly cut box so it stands in the center. Cut two long strips of tape and use them to stabilize the cup in the center, stretching and crossing them over the top of the cup and sticking the ends down on the sides of the box.
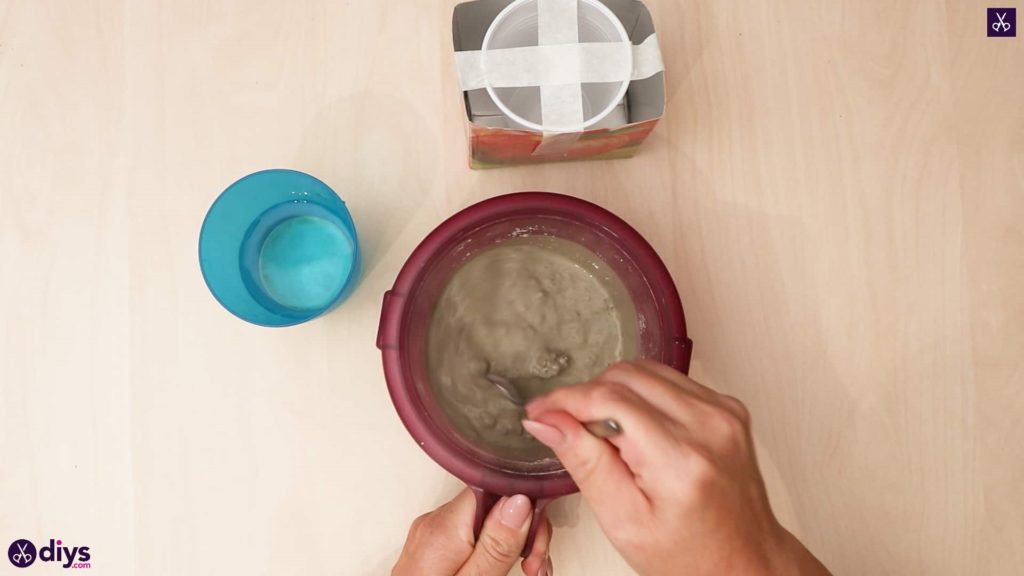
Step 4: mix the concrete
Pour water into your DIY concrete mix and stir it until the consistency is right. Follow the instructions on the package of the specific mix you bought to get the right ratio of water to powder, since different brands vary.
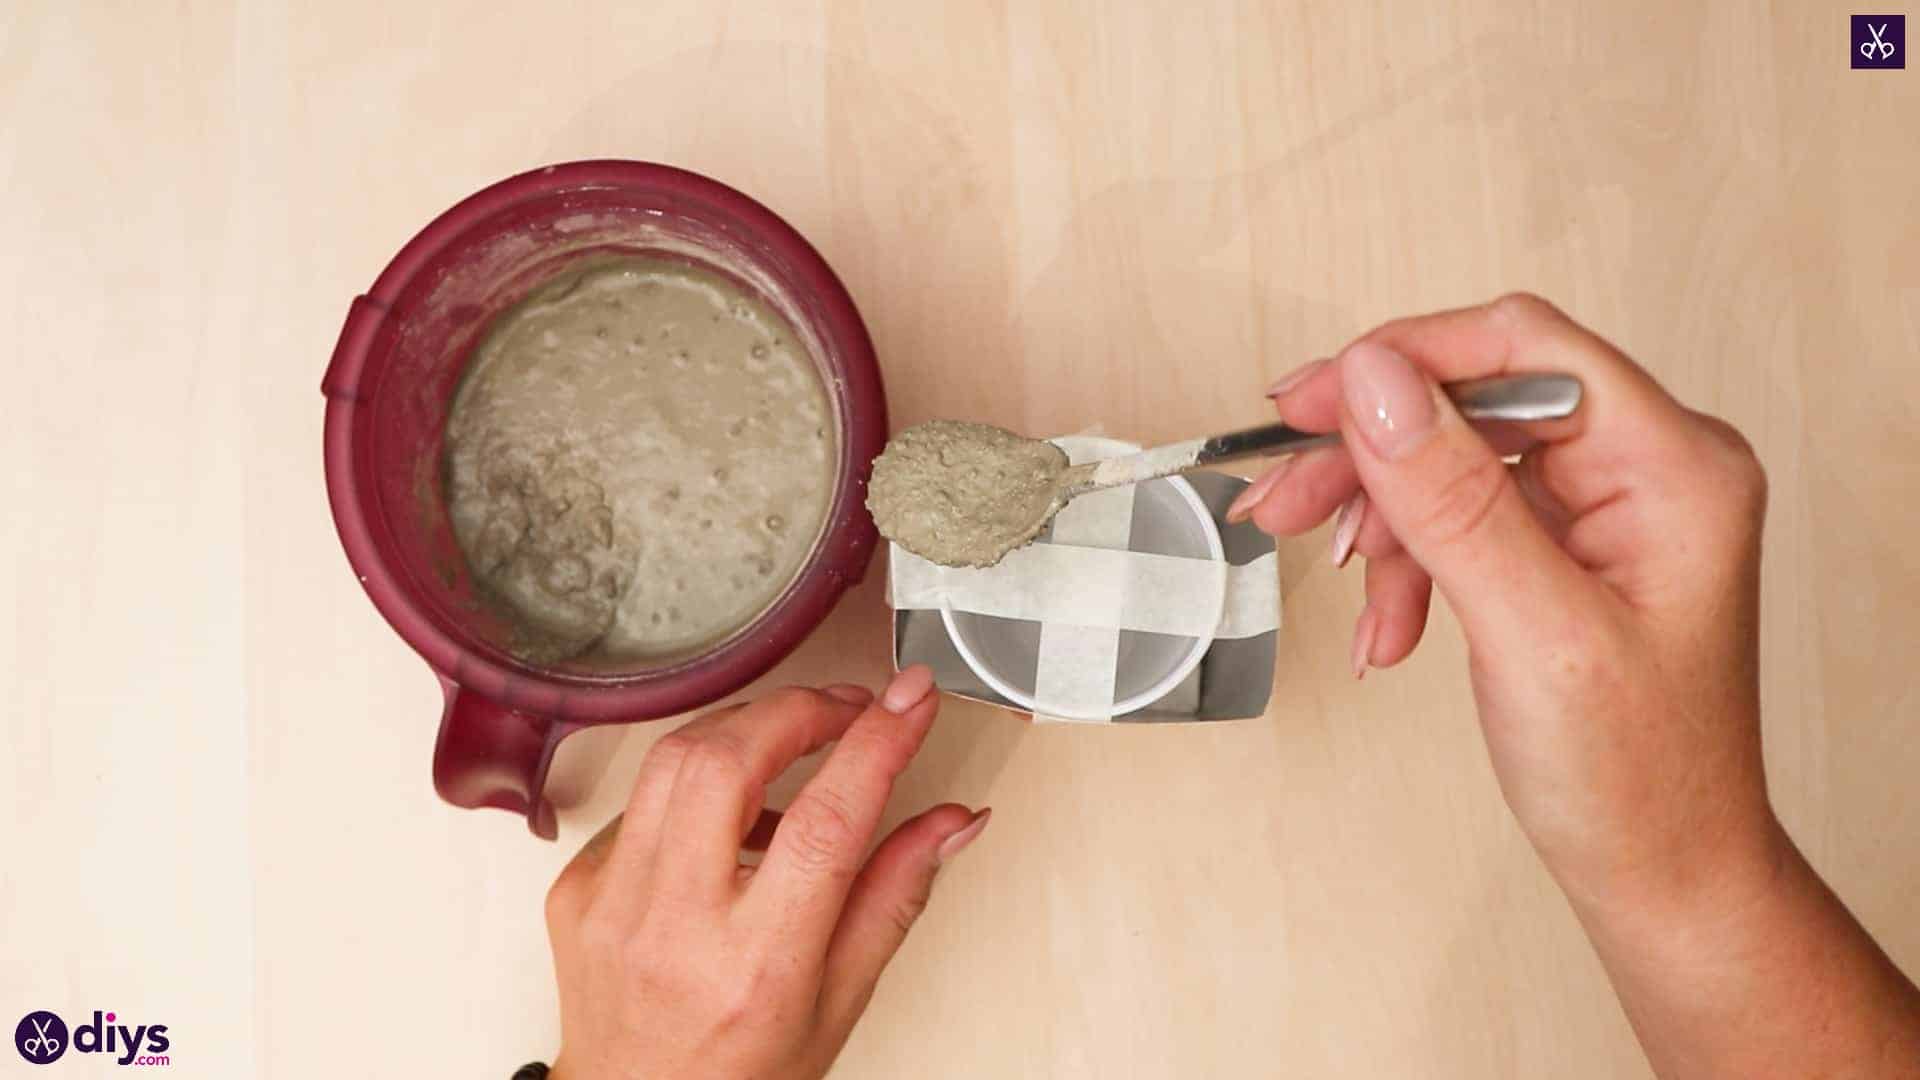
Step 5: fill the mold
Spoon the concrete mixture into the boxaround the cup. You want to fill up the space left outside of the cup but inside the box, leaving the inside of the cup itself empty. Fill the box until you have at least two inches of concrete. How much you fill it will determine the height of your vase. Set the whole thing aside to dry.

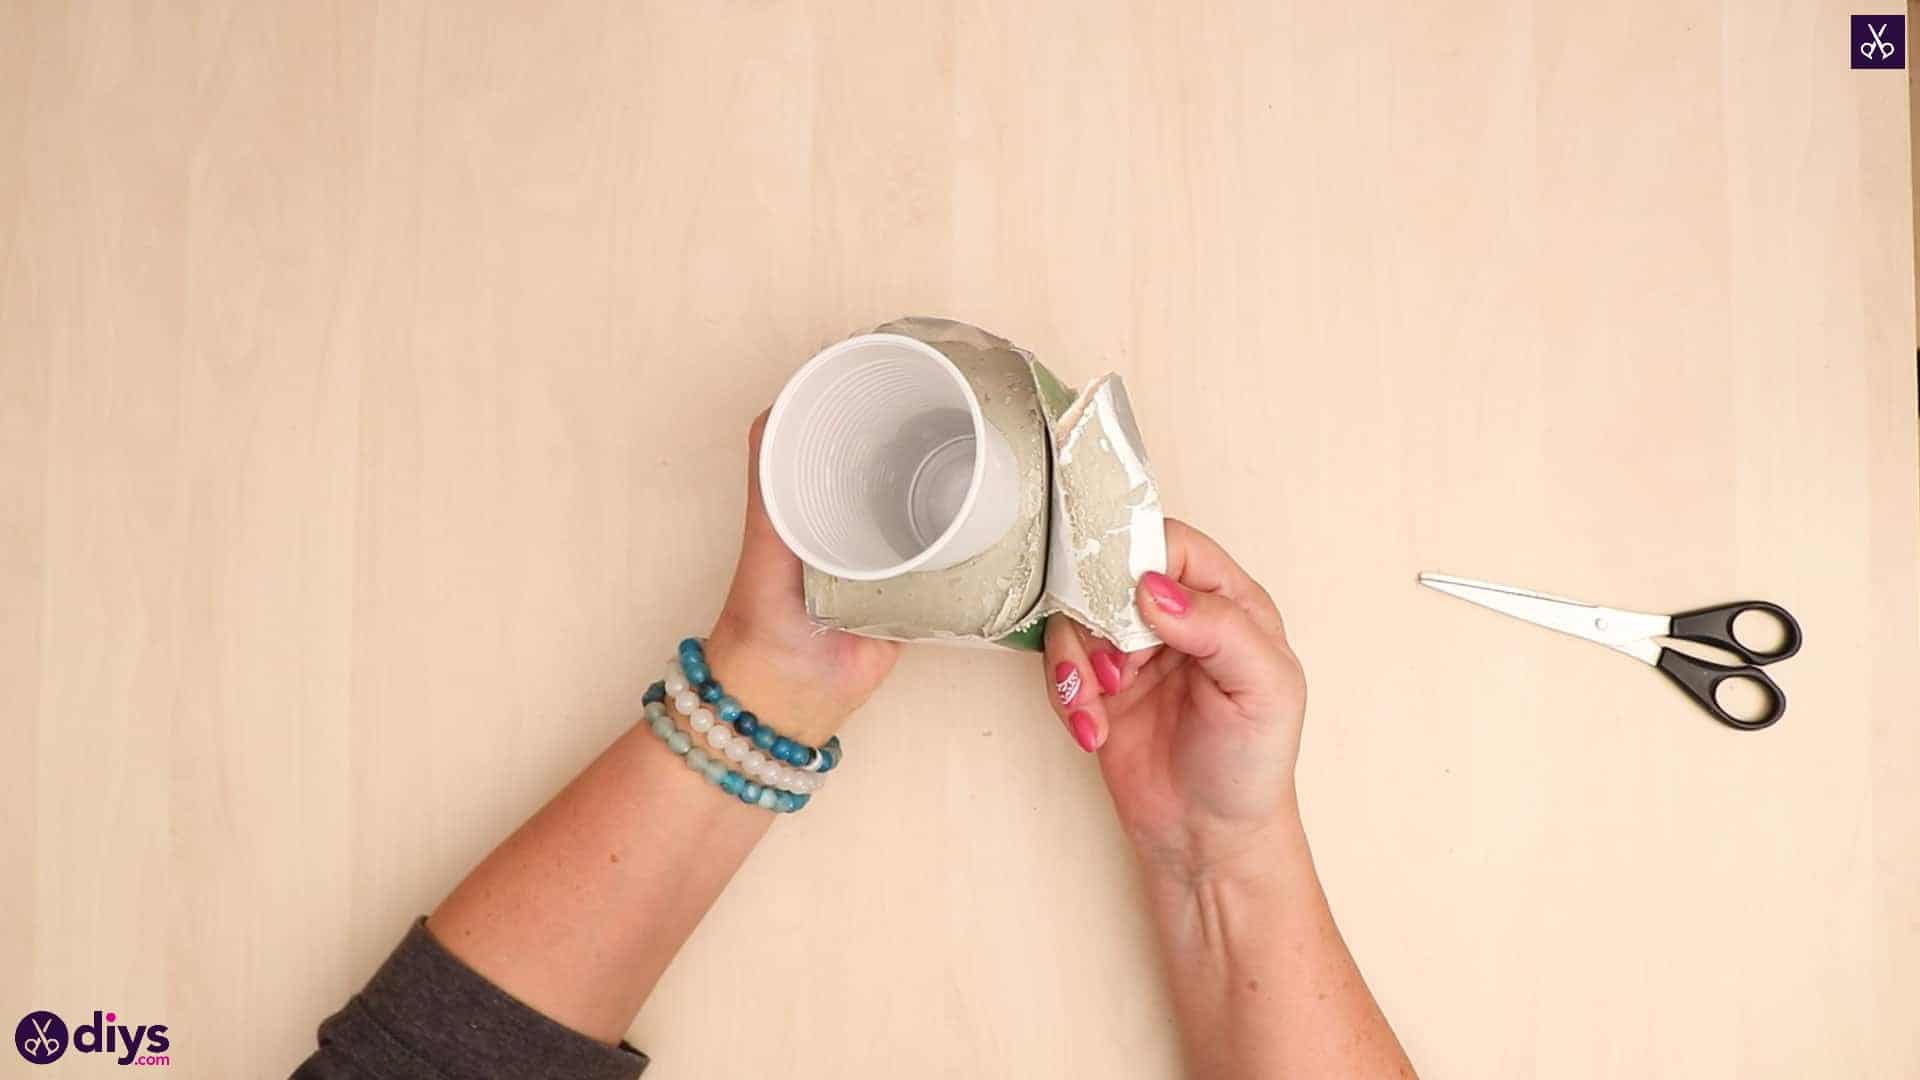
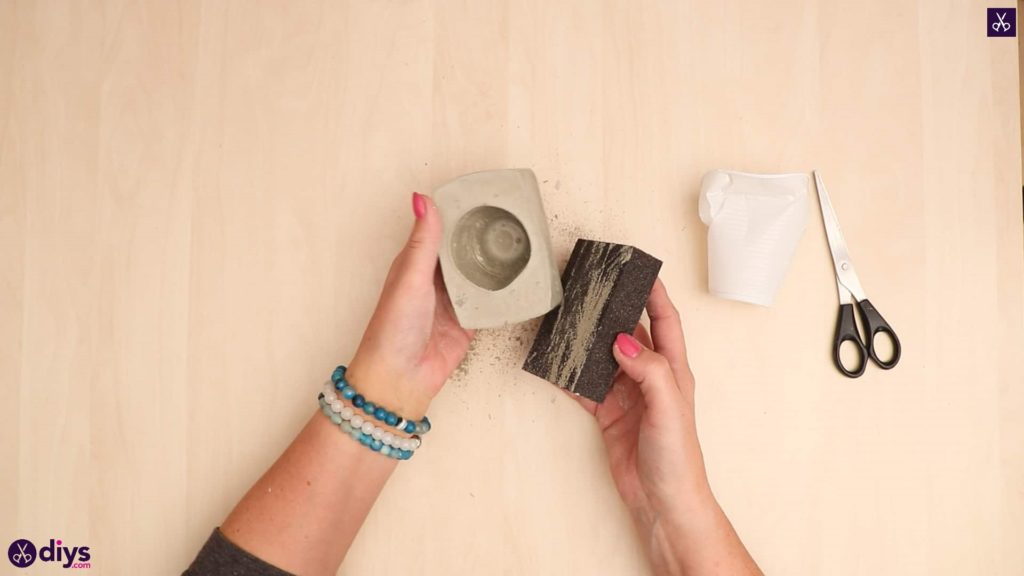
Step 6: remove
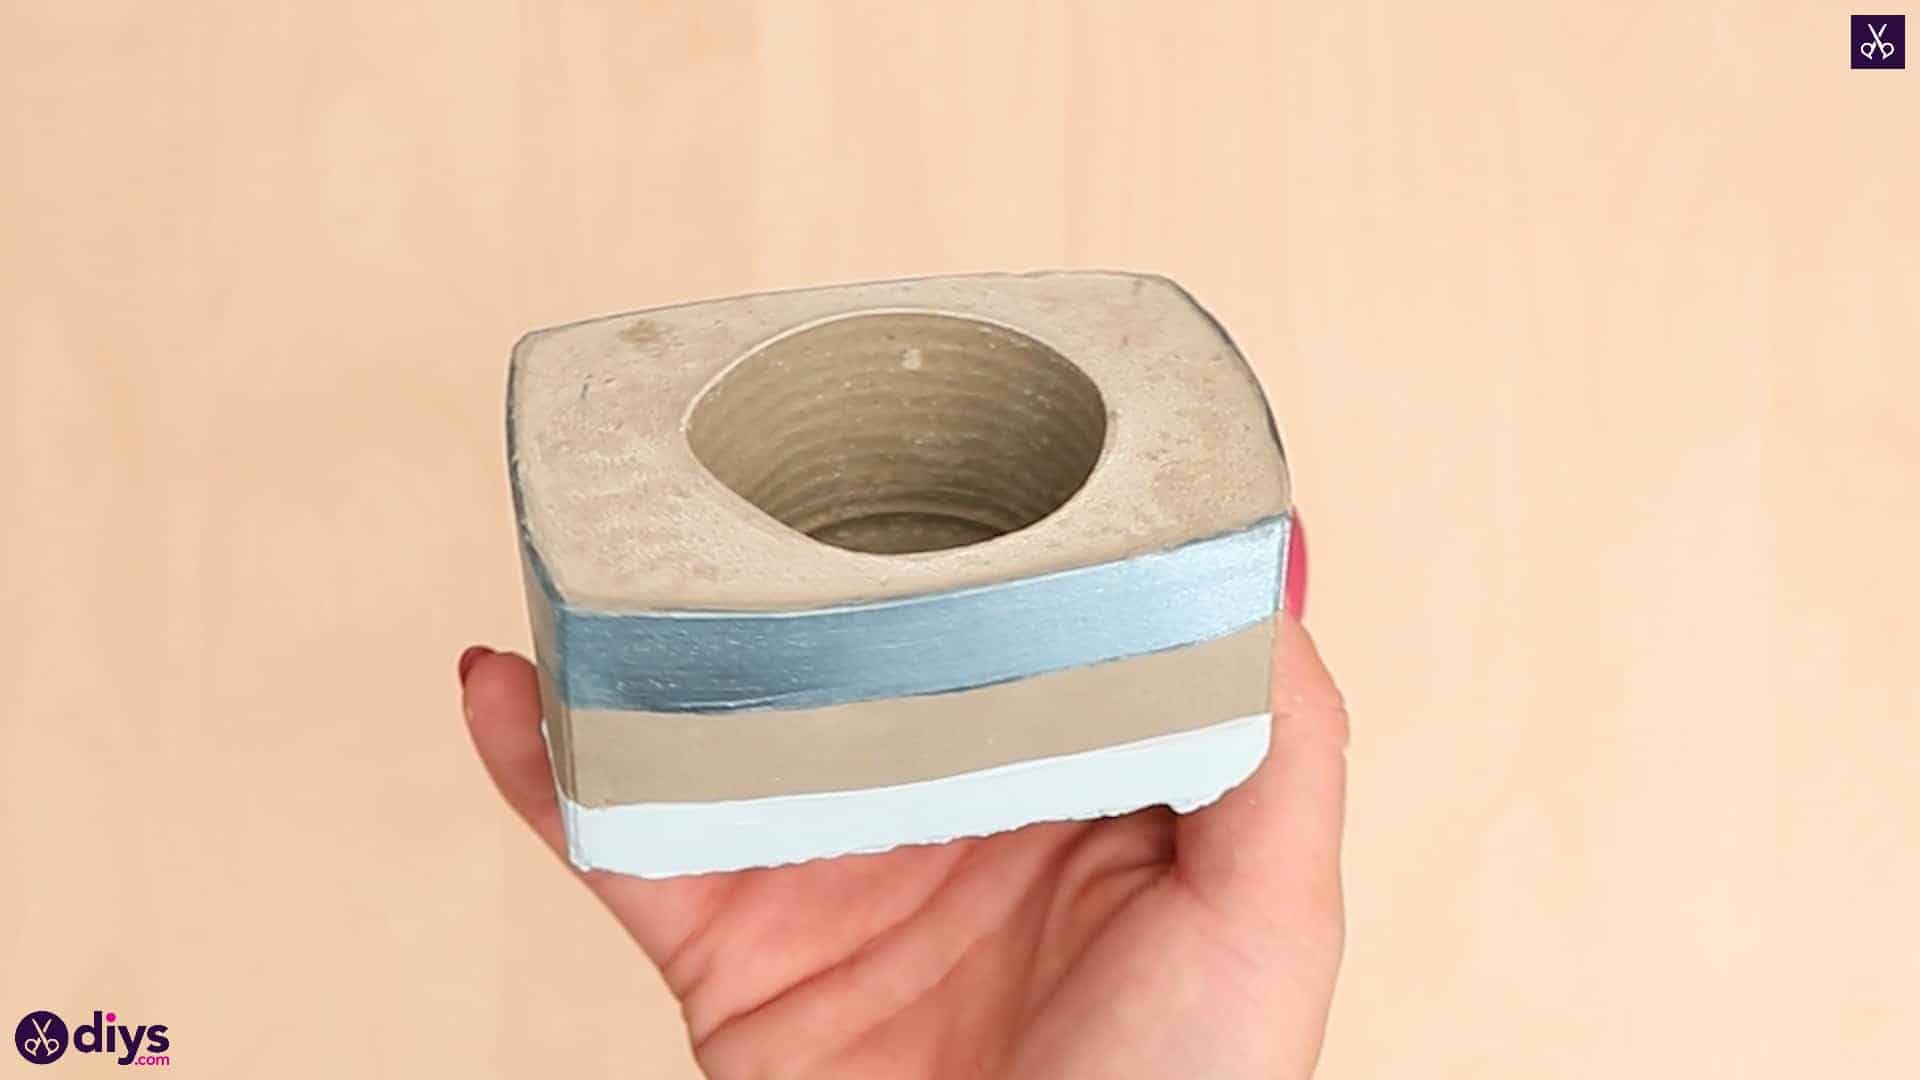
Once your concrete has completely dried, carefully peel the cardboard of the juice box off the outside to reveal your new shape. Then pull the plastic cup out of the center. You now have a black shape with a hole in the top.

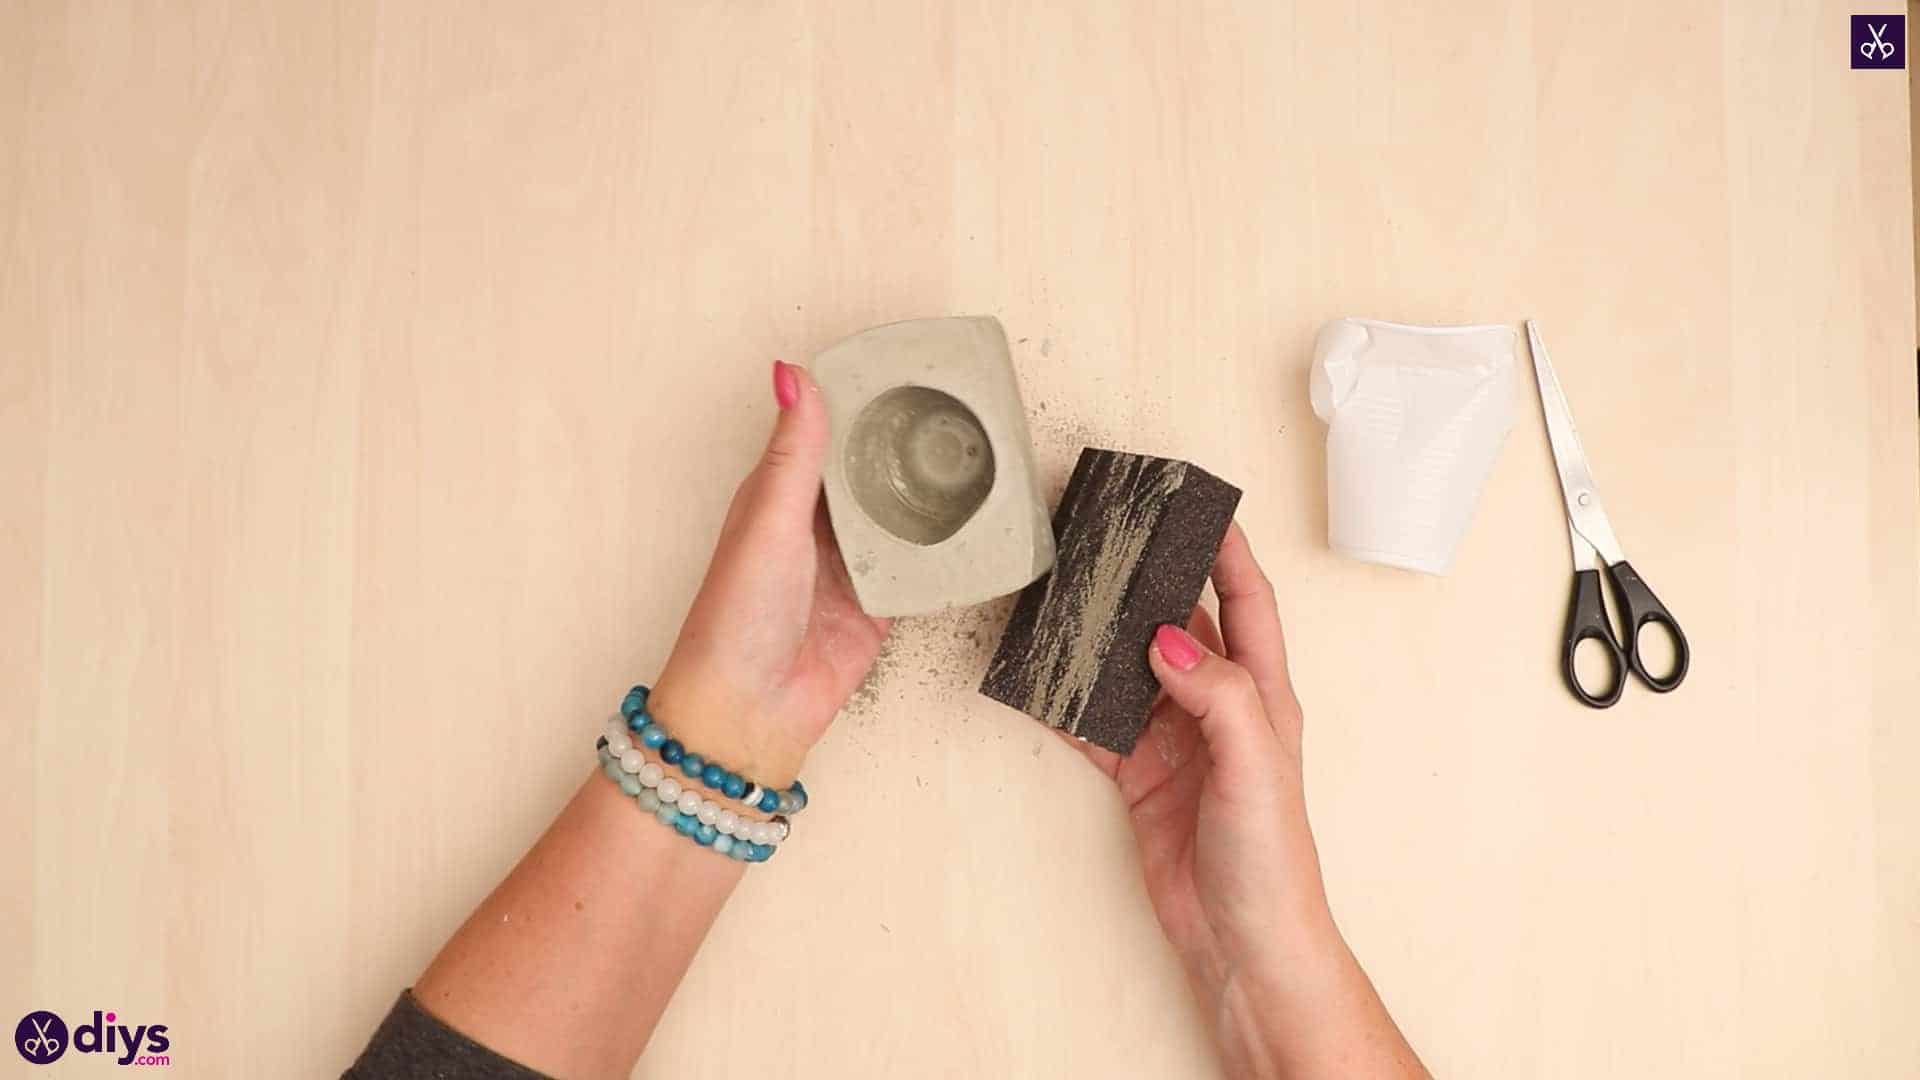
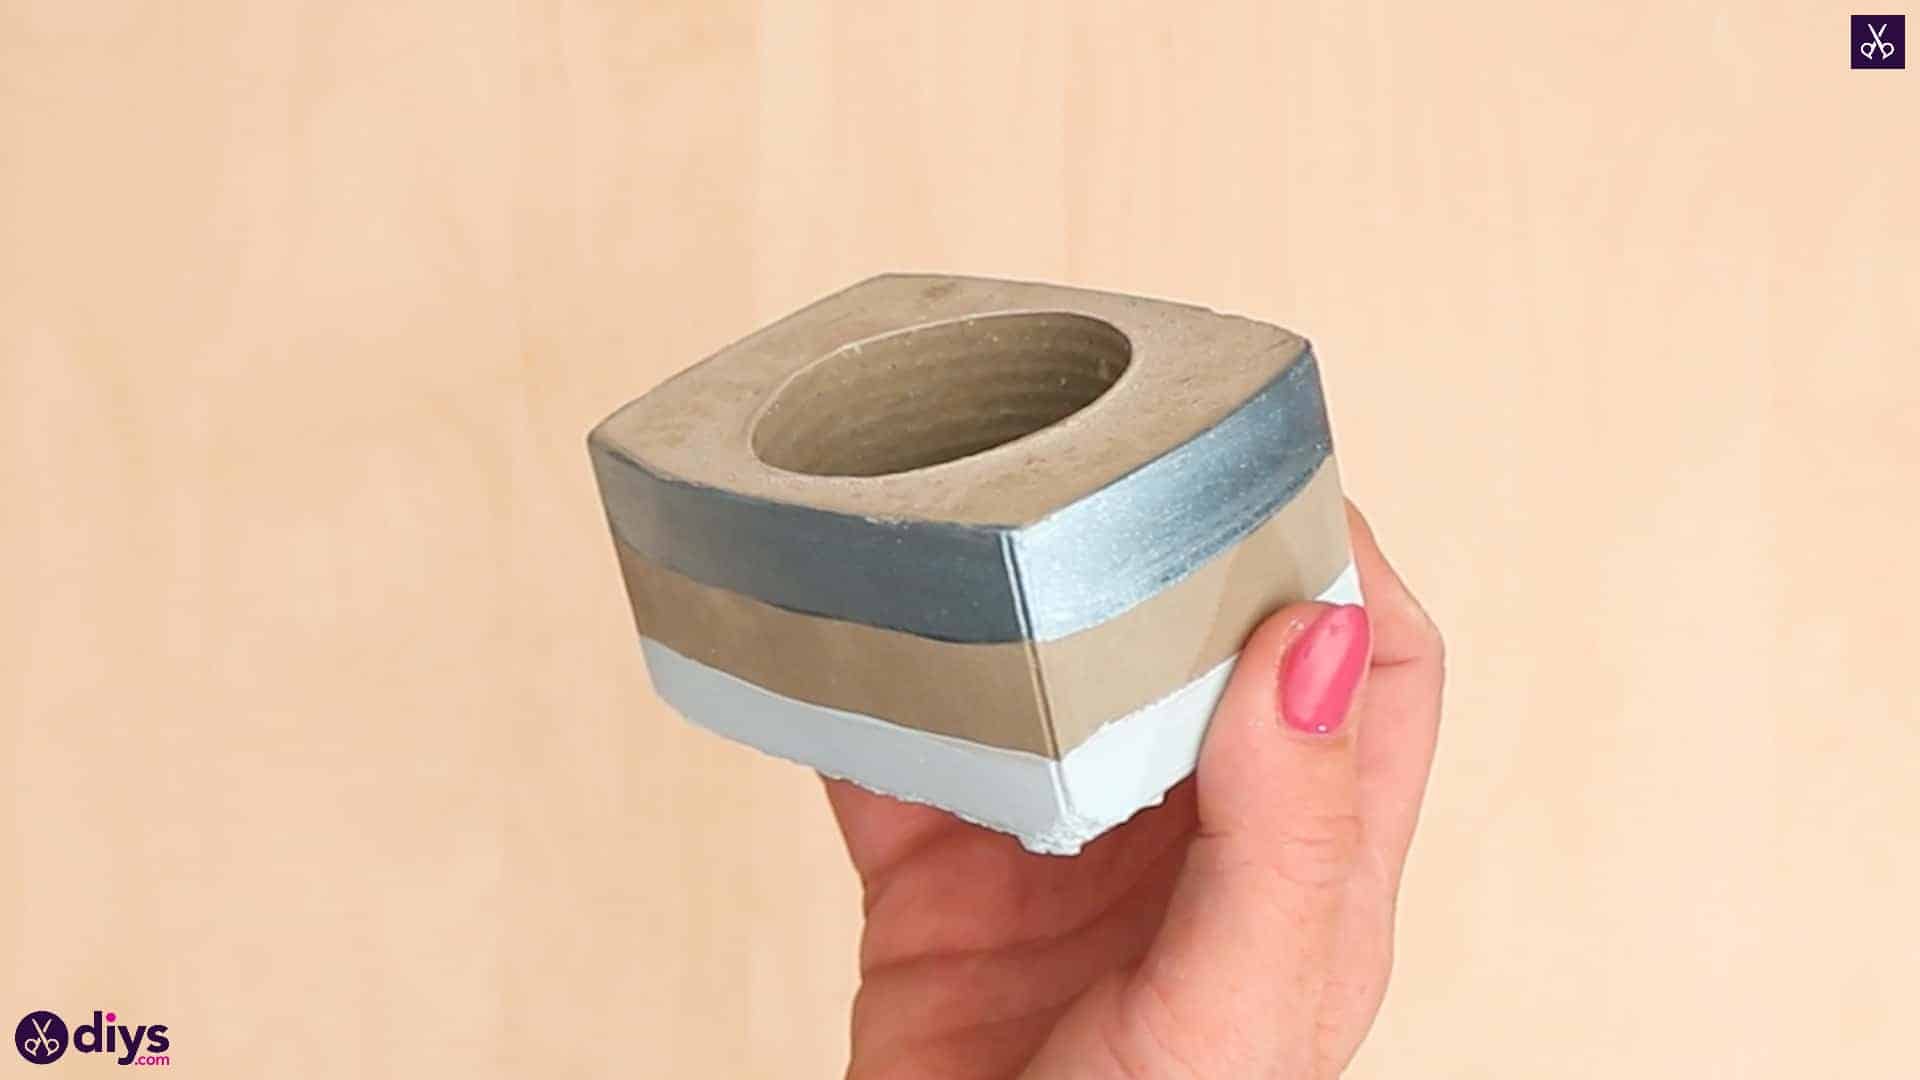
Step 7: sand
Use your abrasive block to smooth and sand down the texture on the outside of your concrete vase. You can even use it to even out the shape a little as well if you need to.
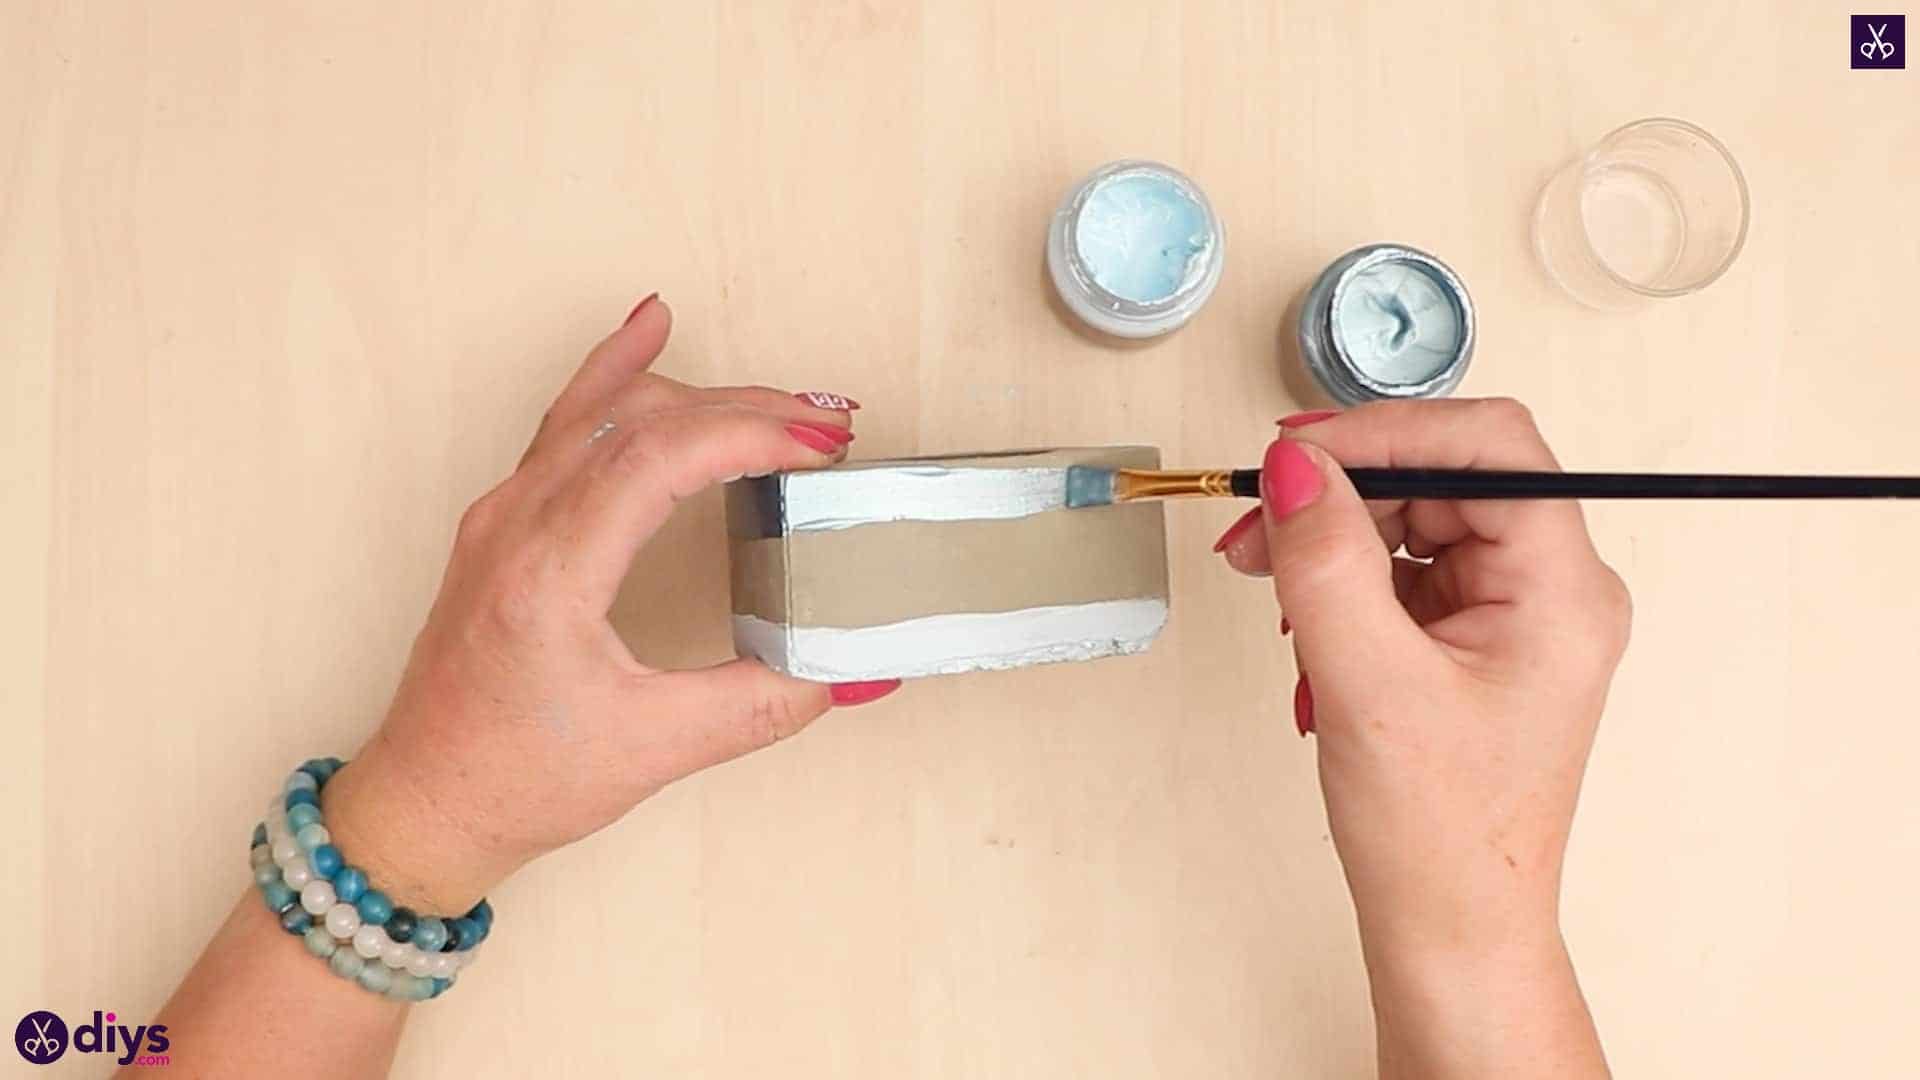
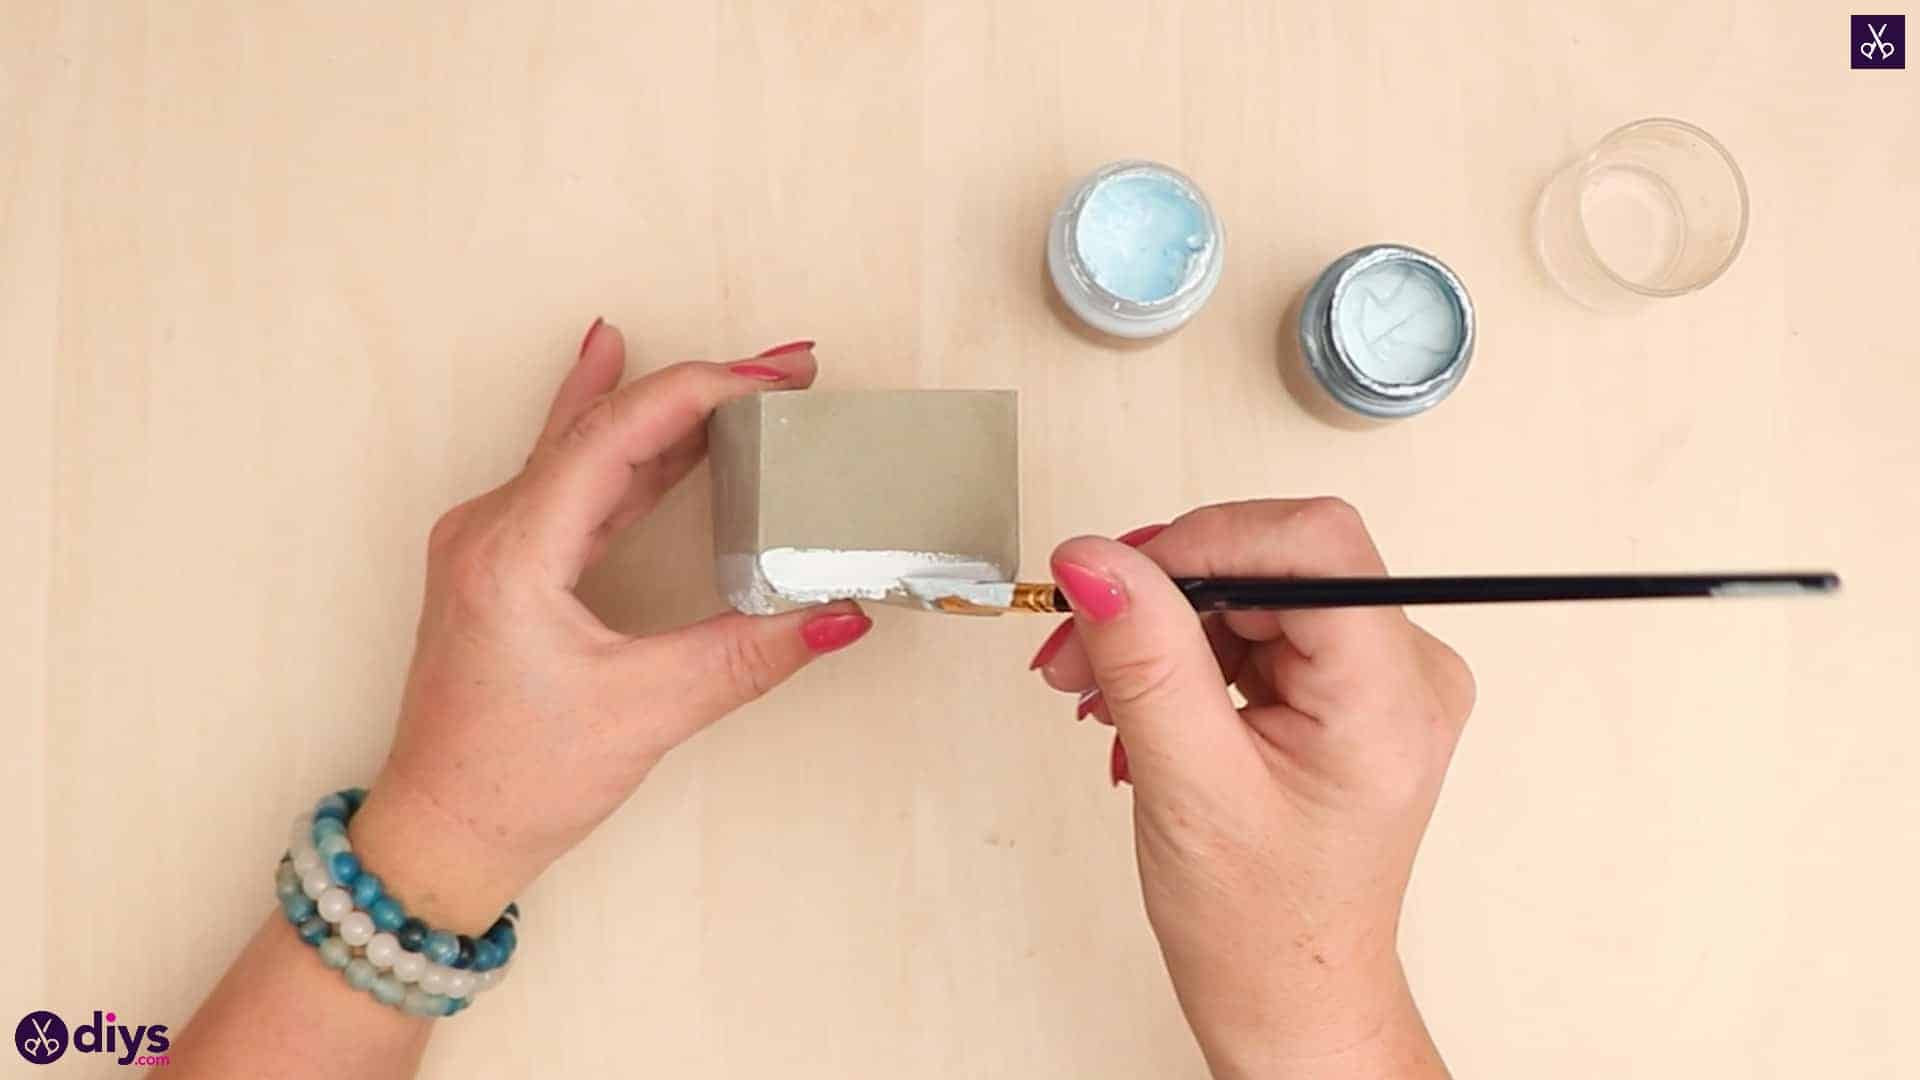
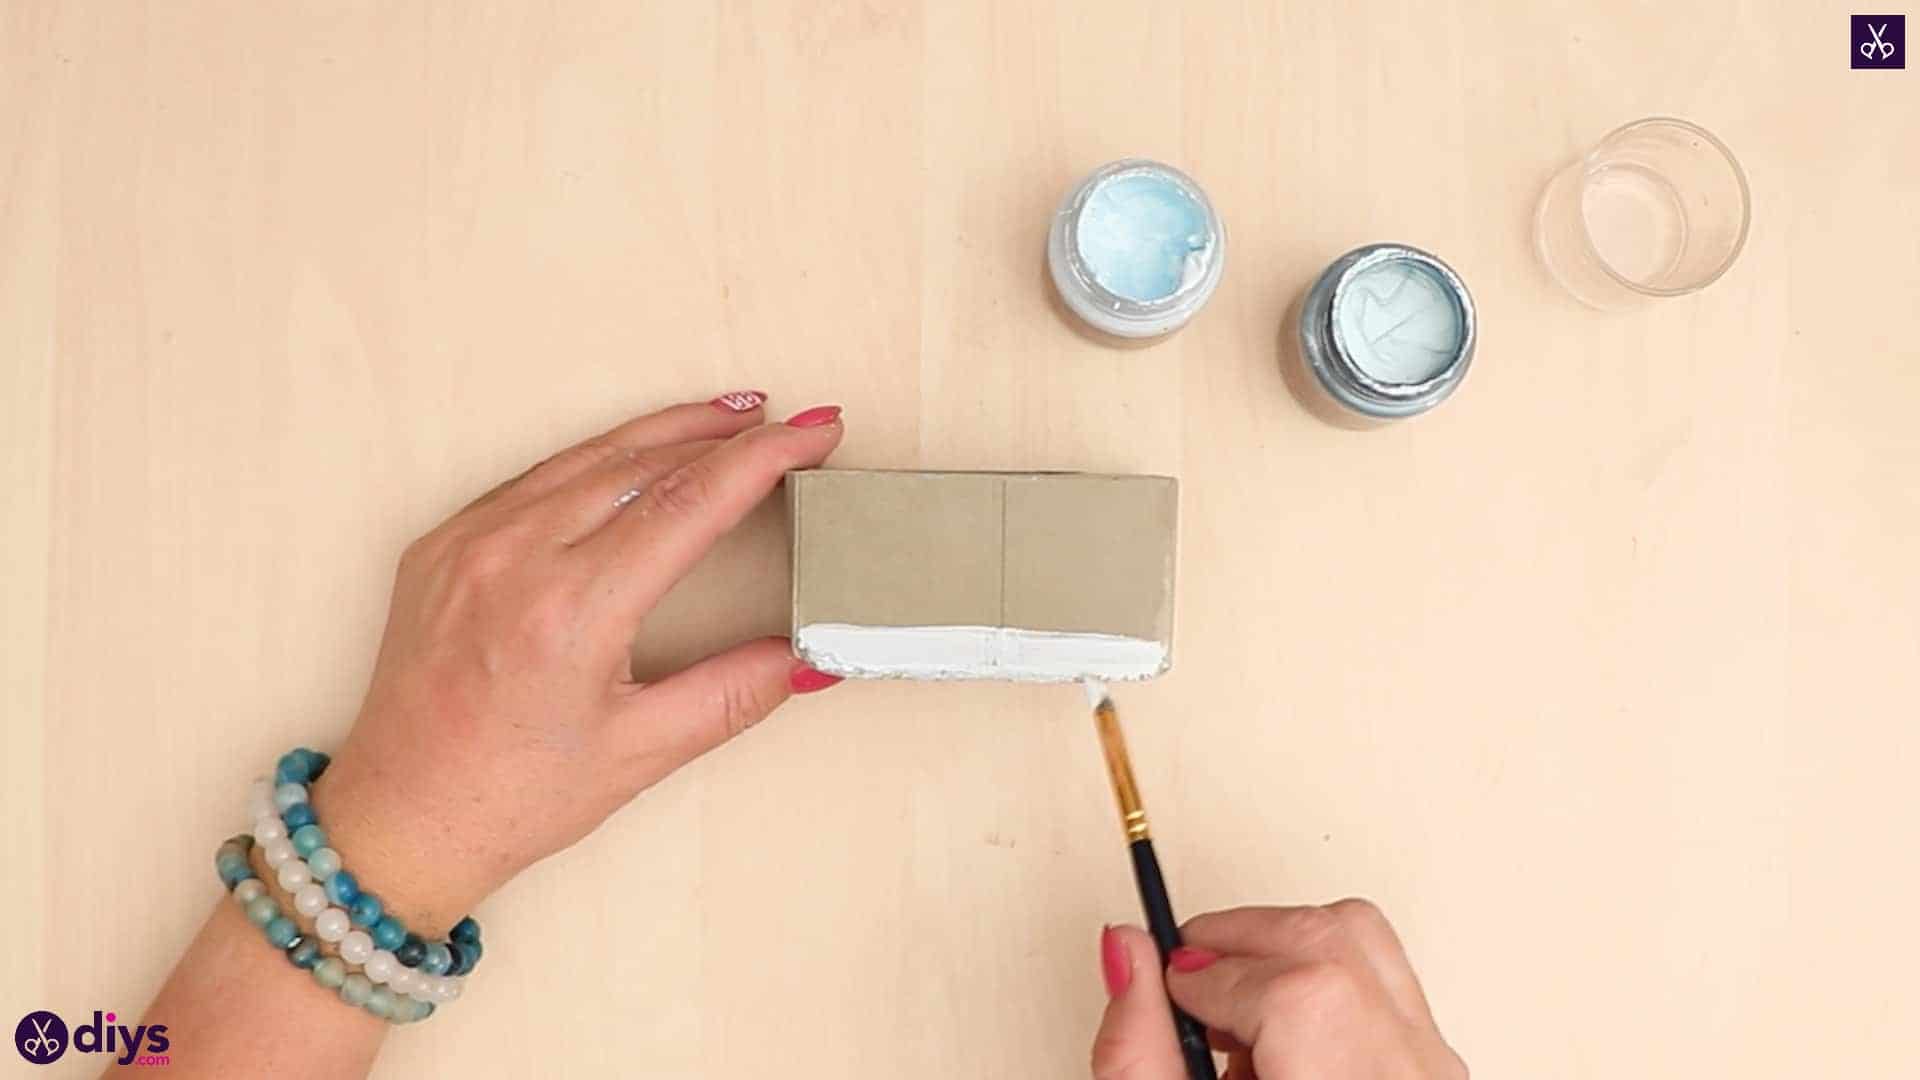
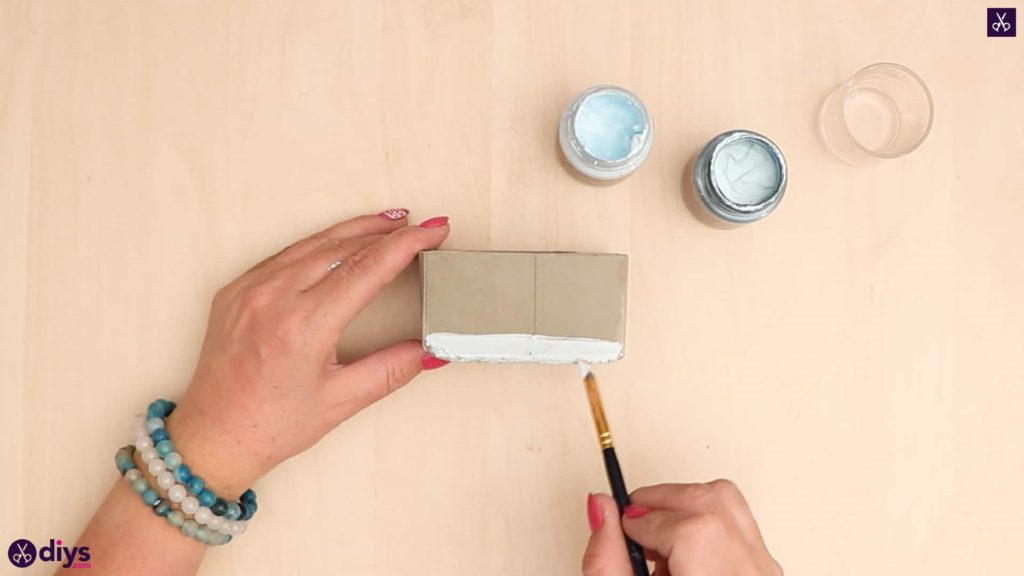
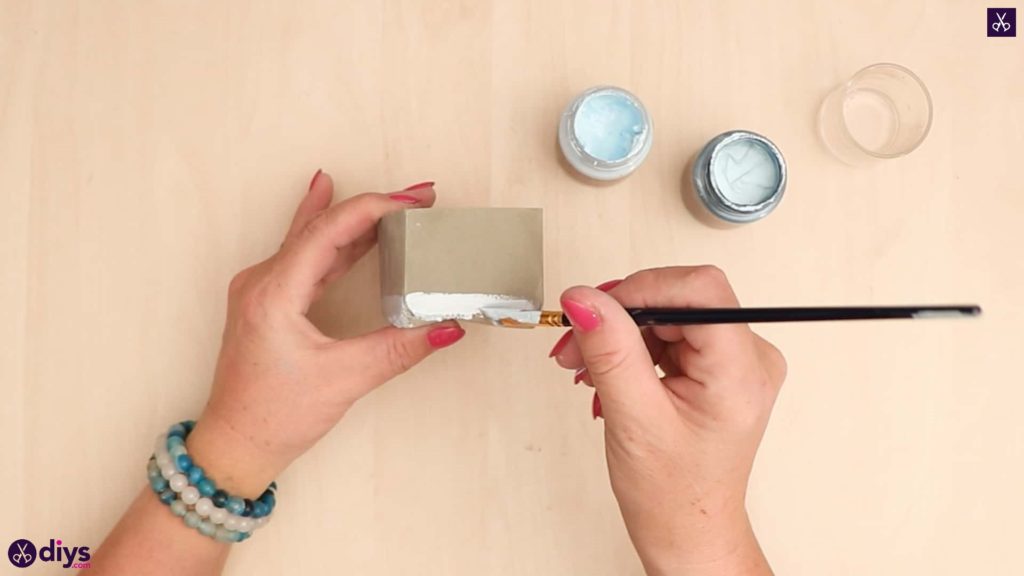
Step 8: paint
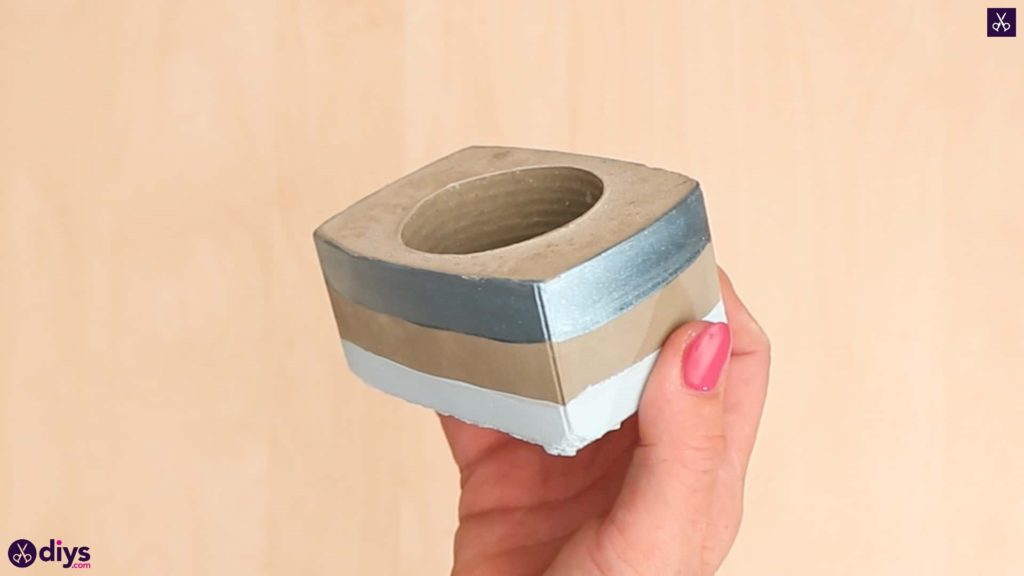
Use your paintbrush to add colour or paint a design onto your concrete vase! I chose to keep things minimalist and simple, with a white stripe around the bottom and a silver stripe around the top, but you might choose to decorate yours however you please.

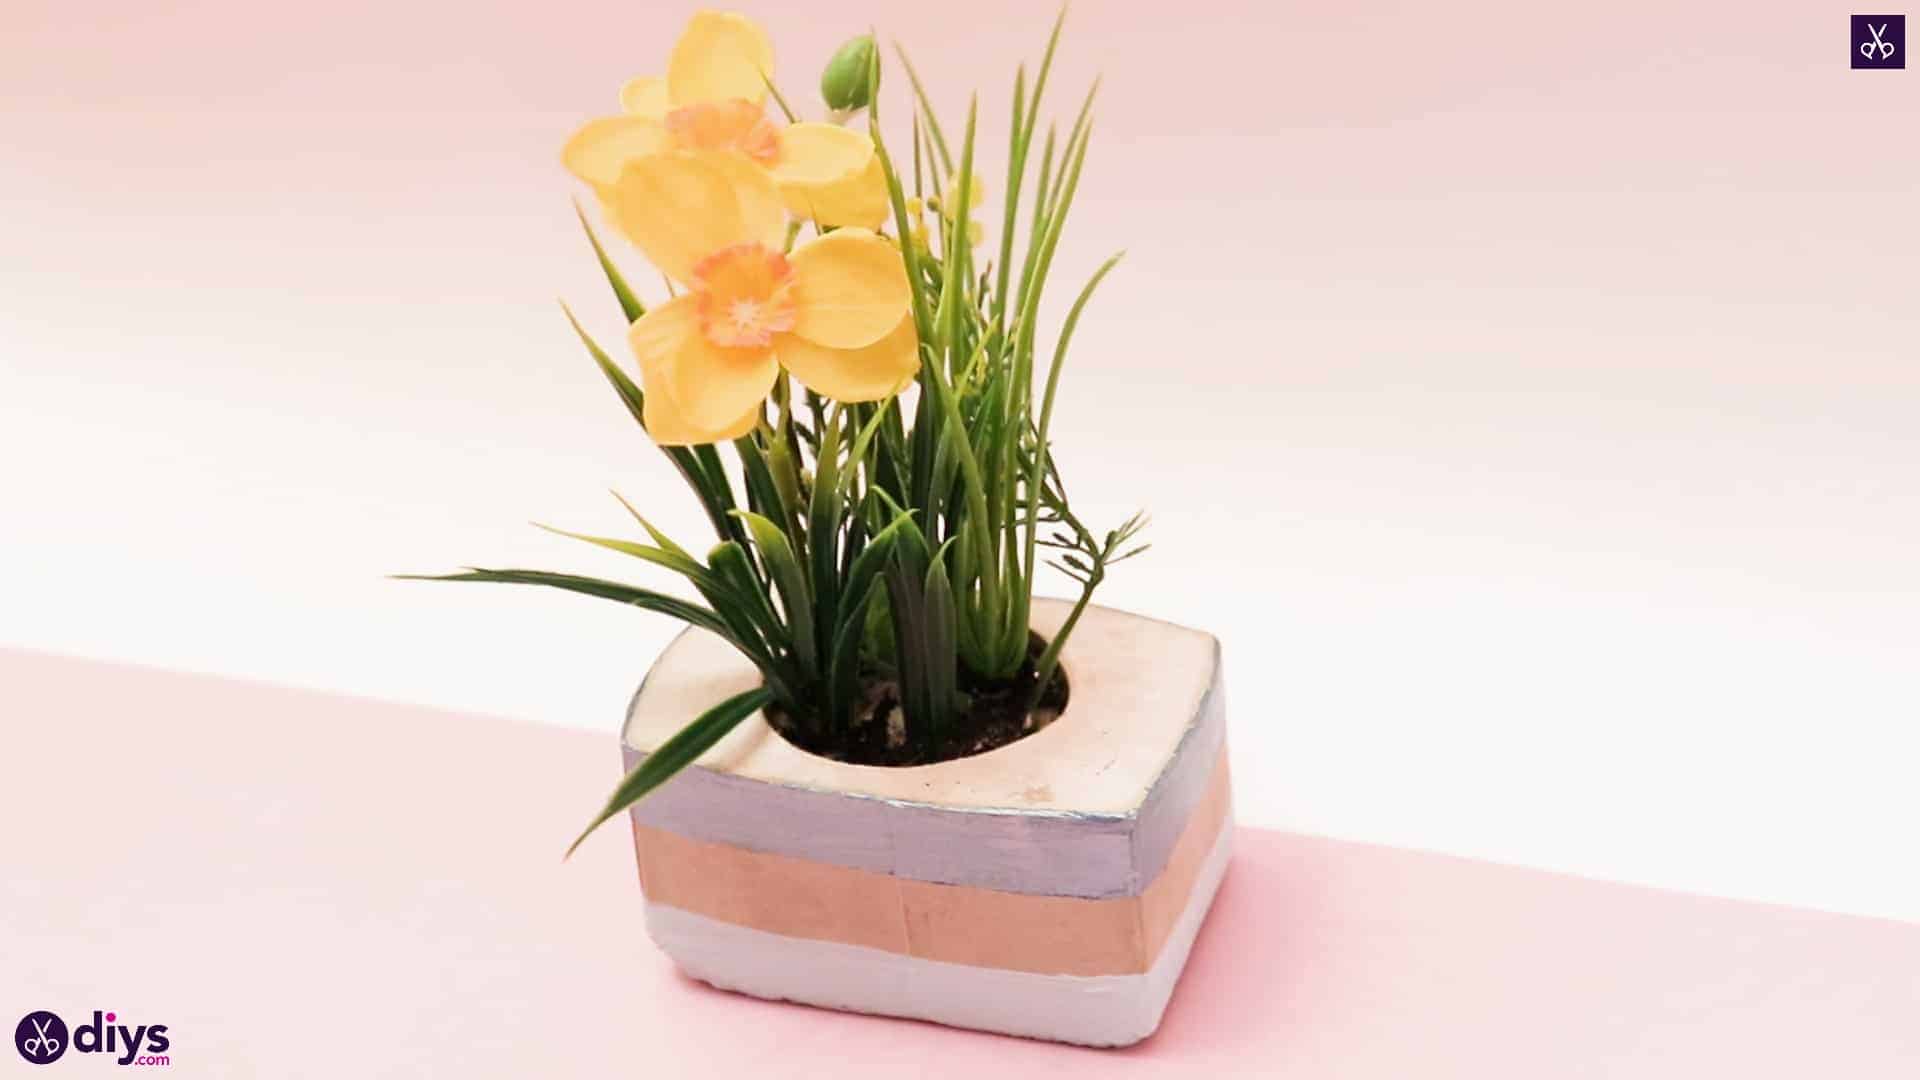
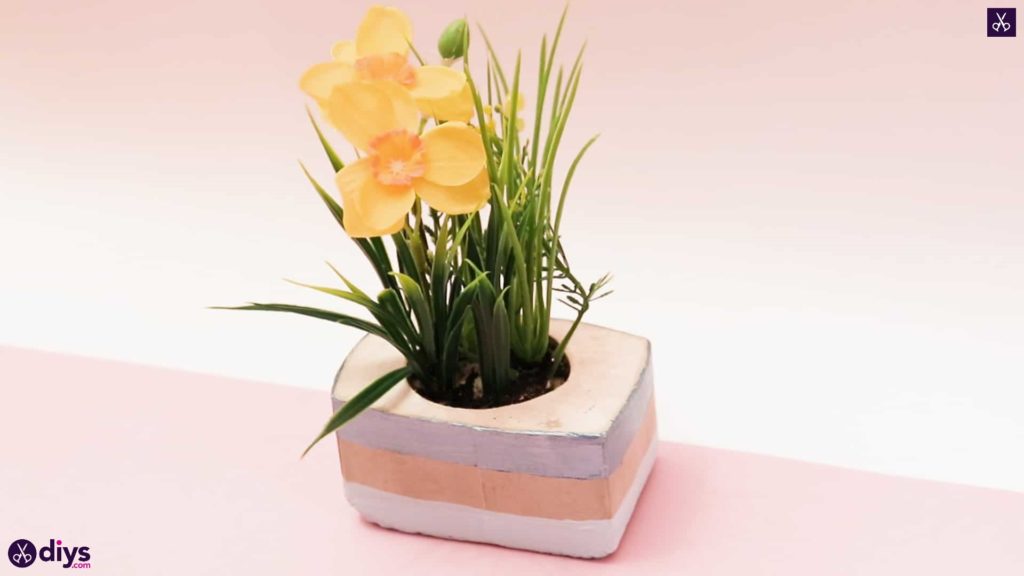
Your concrete vase is officially ready to fill with flowers! I bought a few very small blossoms and succulents that were already in their own miniature terra cotta pots, which I nestled right into the hole in the top.

Just in case you’d like to try this project out for yourself, here’s a fantastic tutorial video to help you!