DIY Concrete Letters
Updated on November 19, 2025


Like me, have you always been a fan of monogram based art? I’ve always just thought that the sense of personalization and customizing that comes with creating handmade initials feels quite satisfying. From there, I fell in love with just plain artistic lettering of all kinds! That worked quite well in combination with my newfound love for working with DIY concrete. That’s why, when I sat down to make some more concrete letter art recently, I decided to document the whole process so that other people can learn how it’s done as well.
If you’d like to try making concrete letters, check out these step by step instructions complete with photos! If you’d prefer to follow along with a video tutorial, scroll to the end of this post to find exactly what you’re looking for.
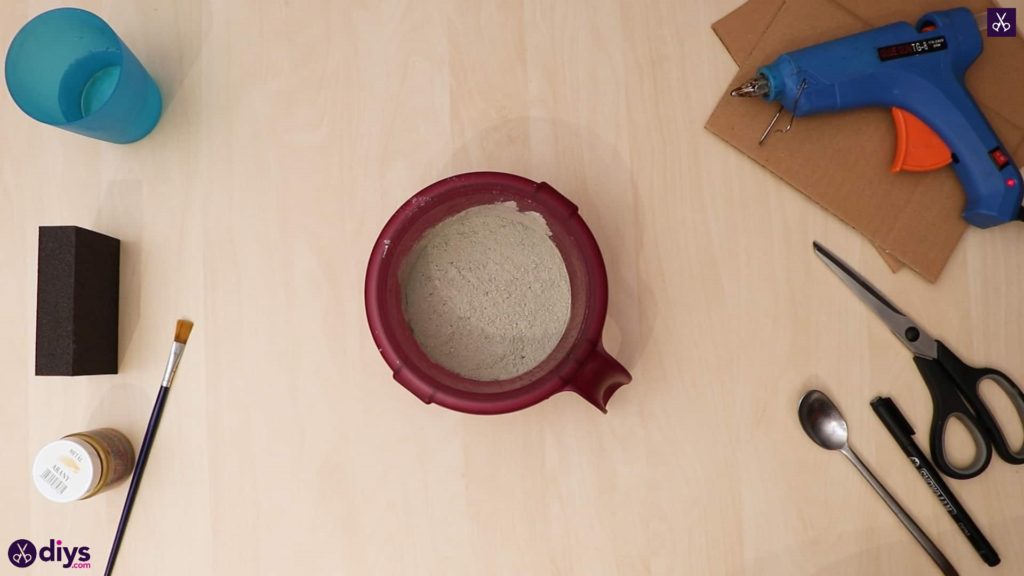
For this project, you’ll need:
- Cardboard
- Scissors
- Hot glue
- DIY fine particle cement
- Water
- A plate
- A spoon
- A paintbrush
- Gold paint
- Sand paper
Step 1: prep work
Gather all your materials you need to start!
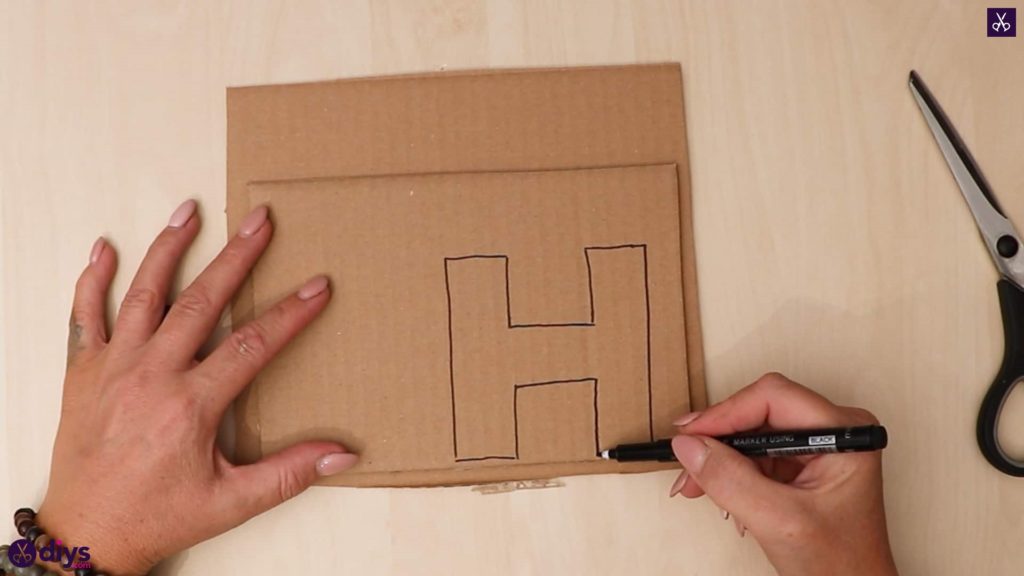
Step 2: make the letters
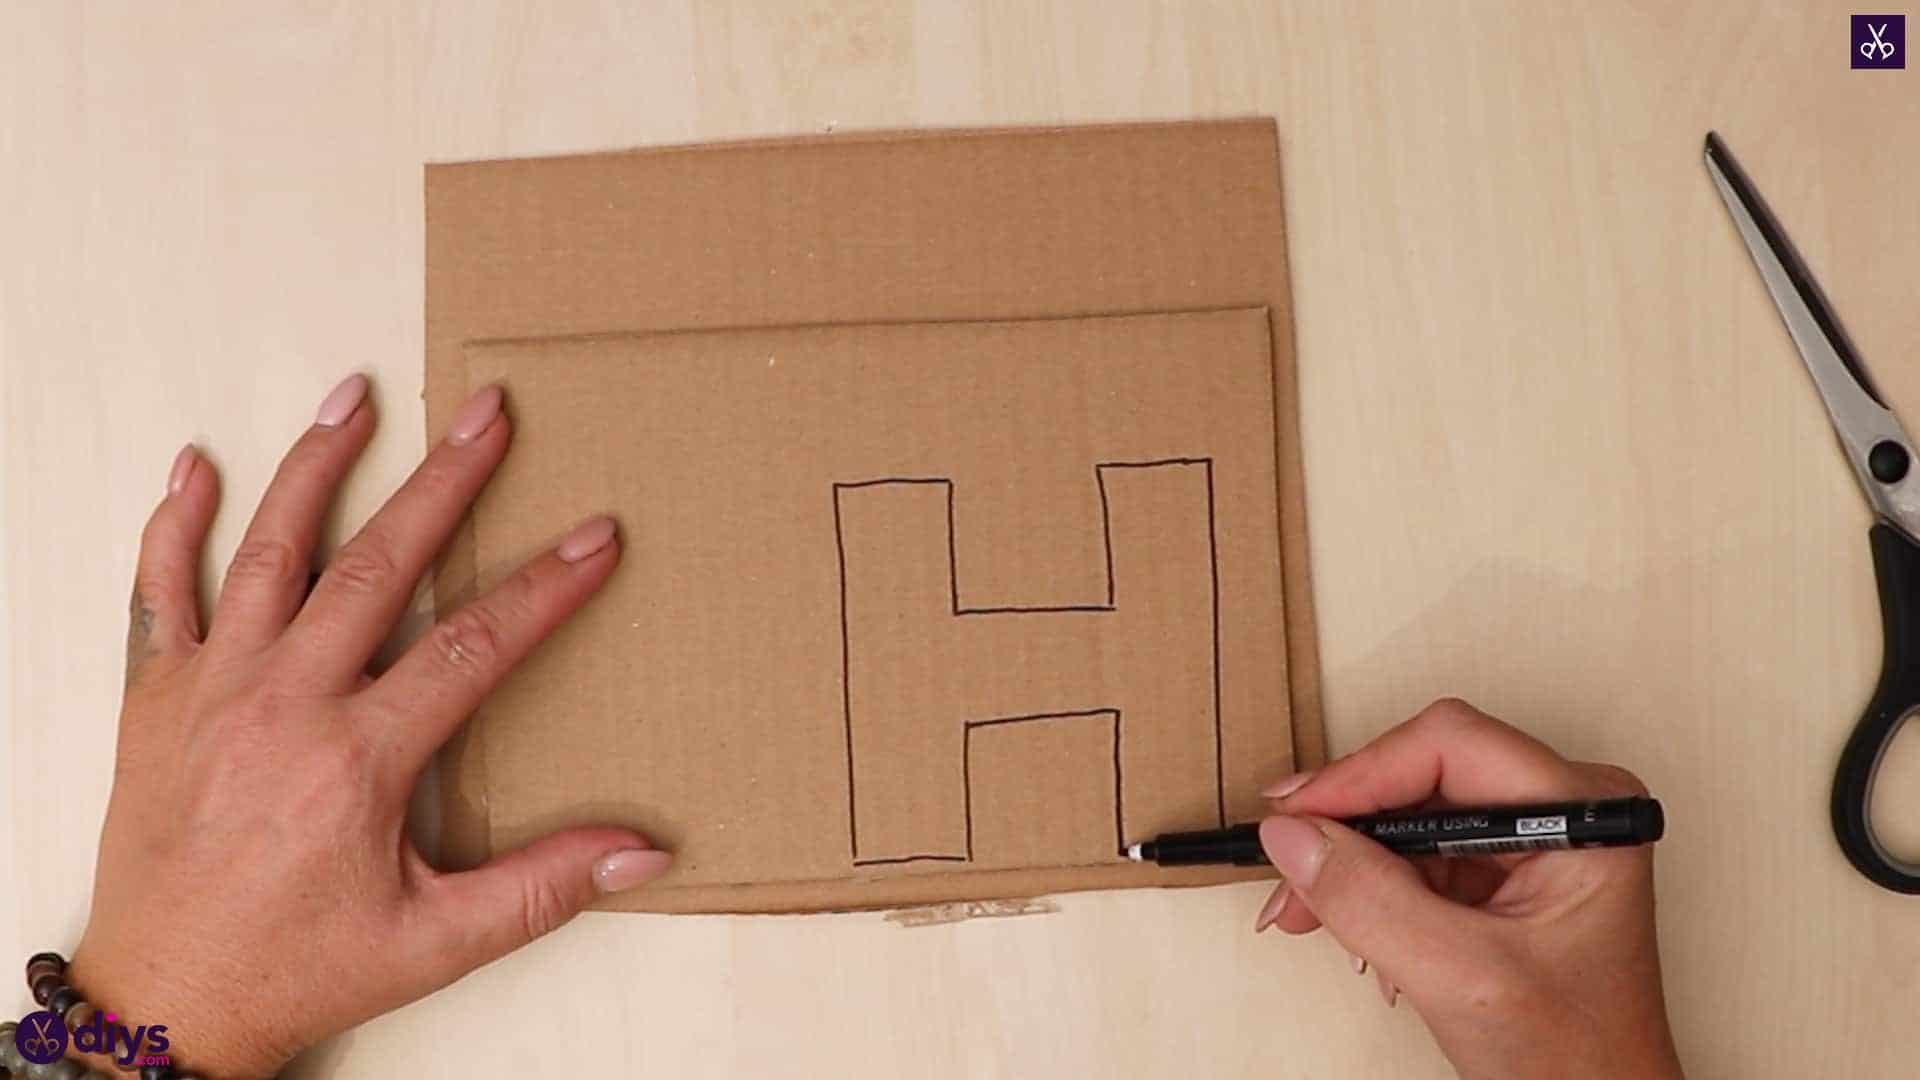
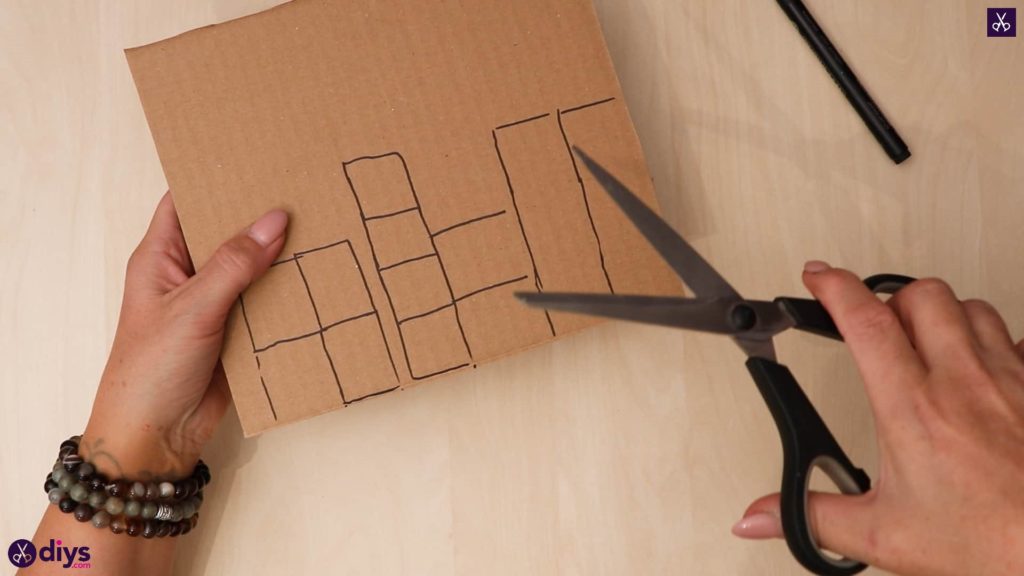
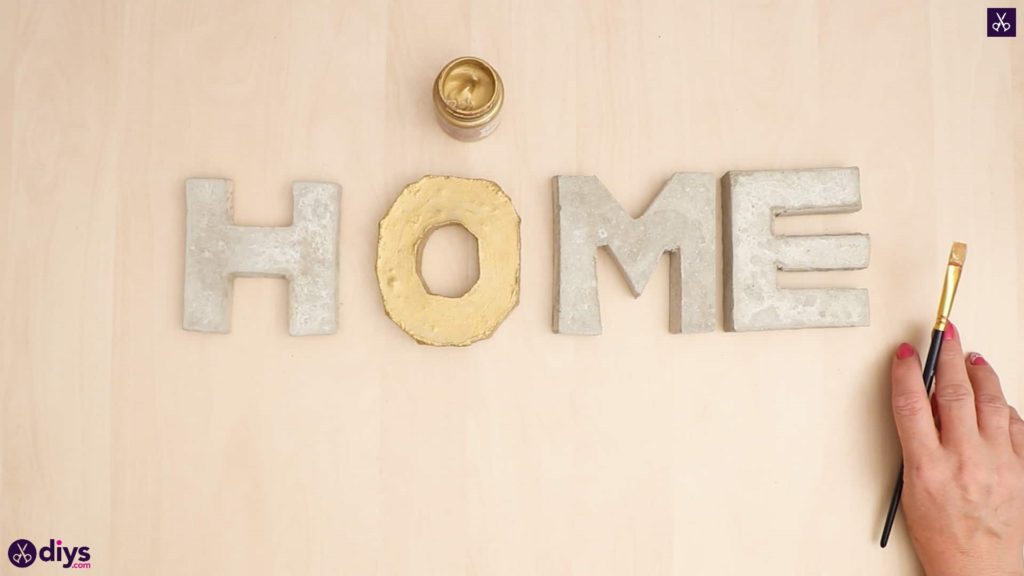
On one of your pieces of cardboard, draw out the block shape of your first letter. Here, I chose to create the phrase “Home”, so I started with an H.
Step 3: cut
Cut your letter H out with your scissors.
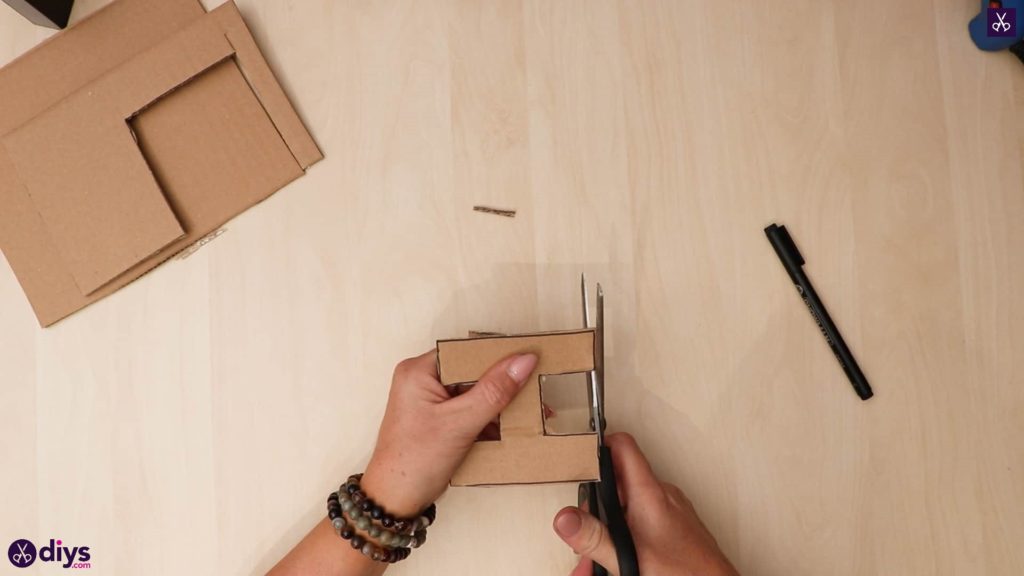
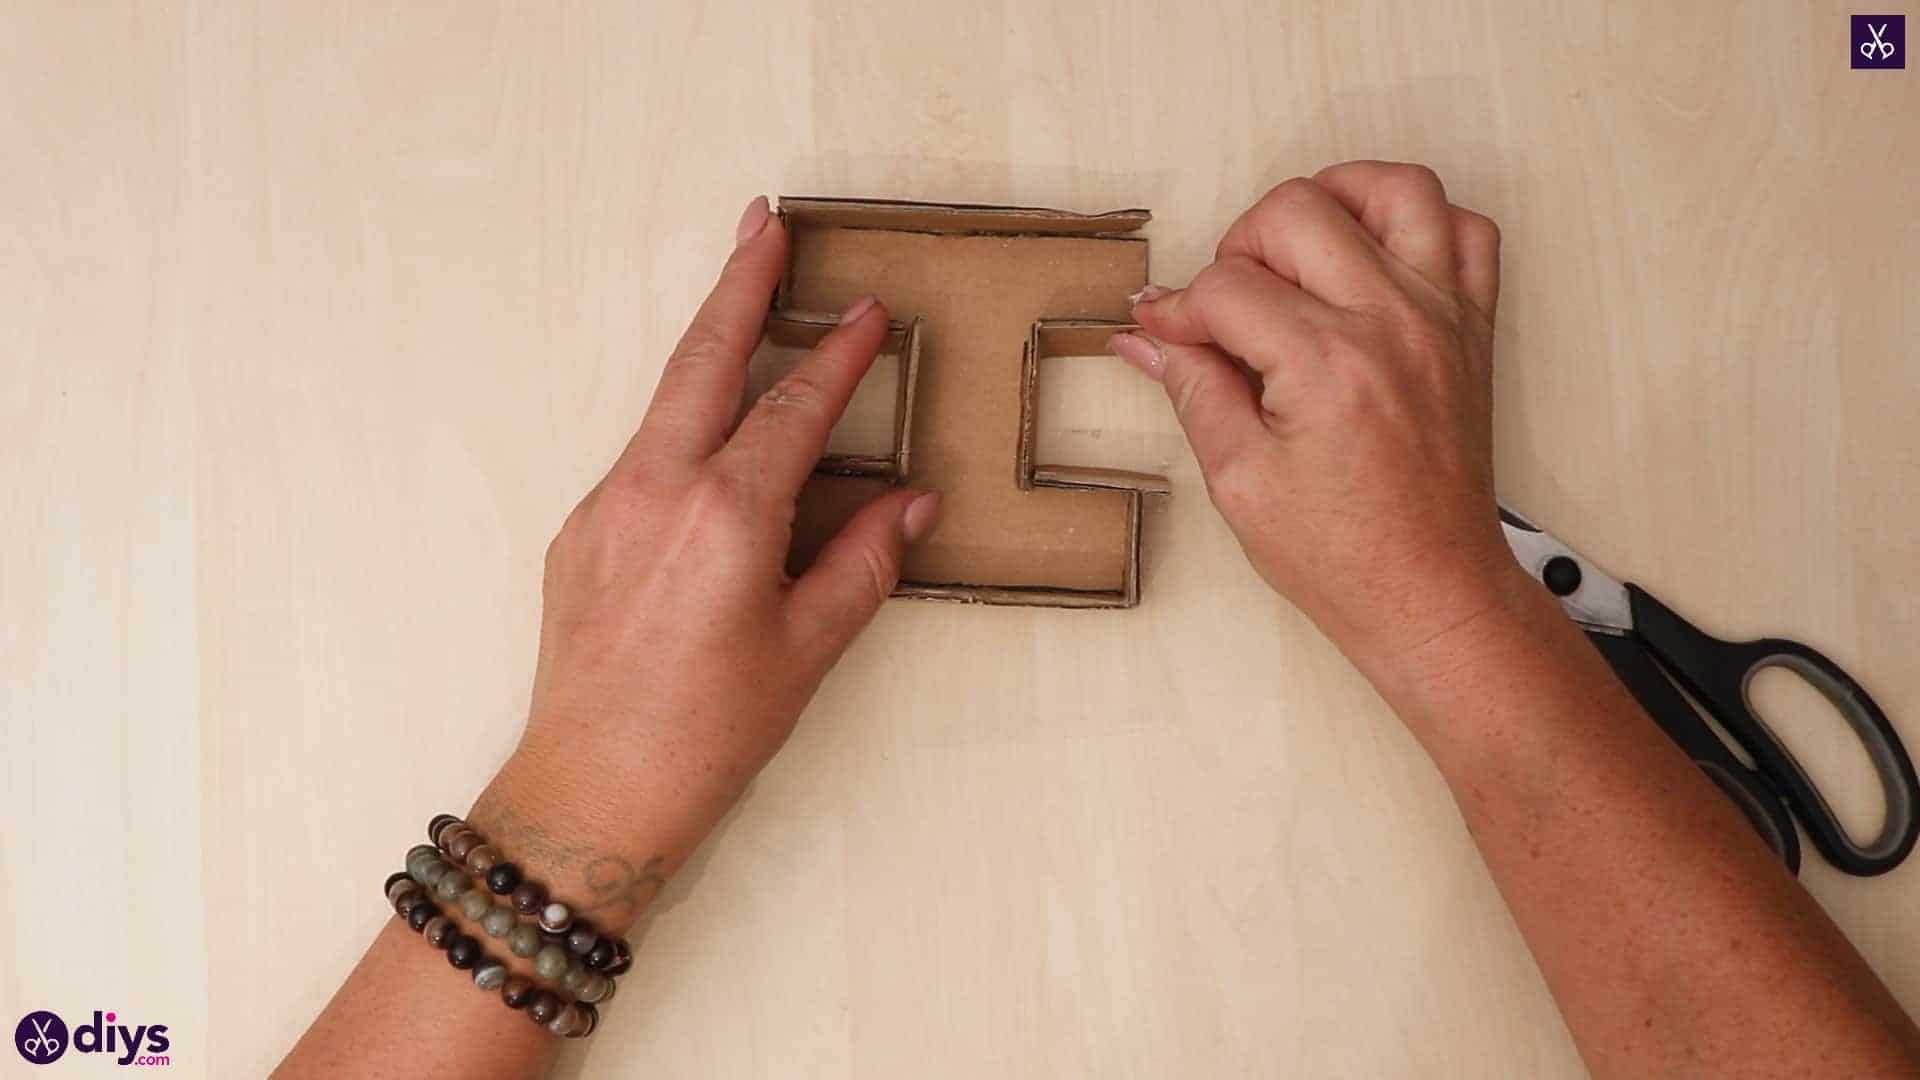
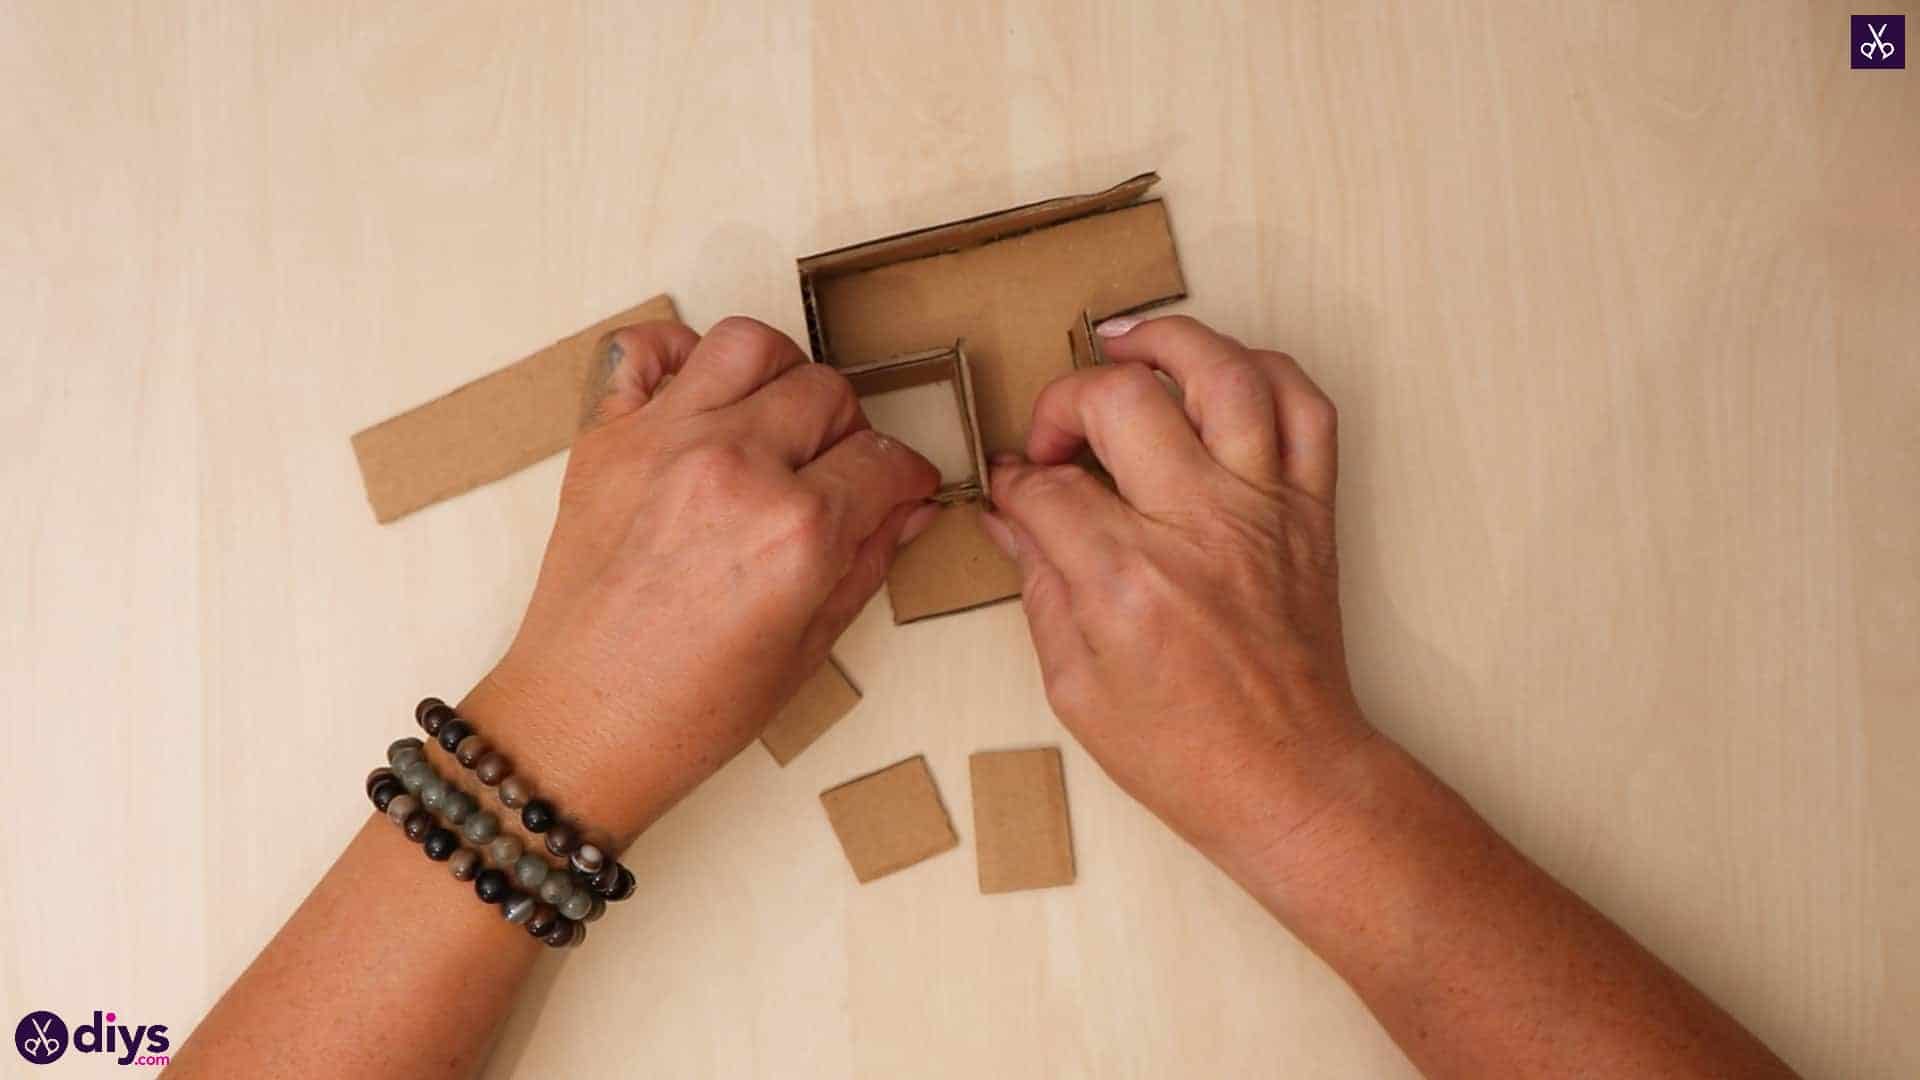
Step 4: cut the rest of the H
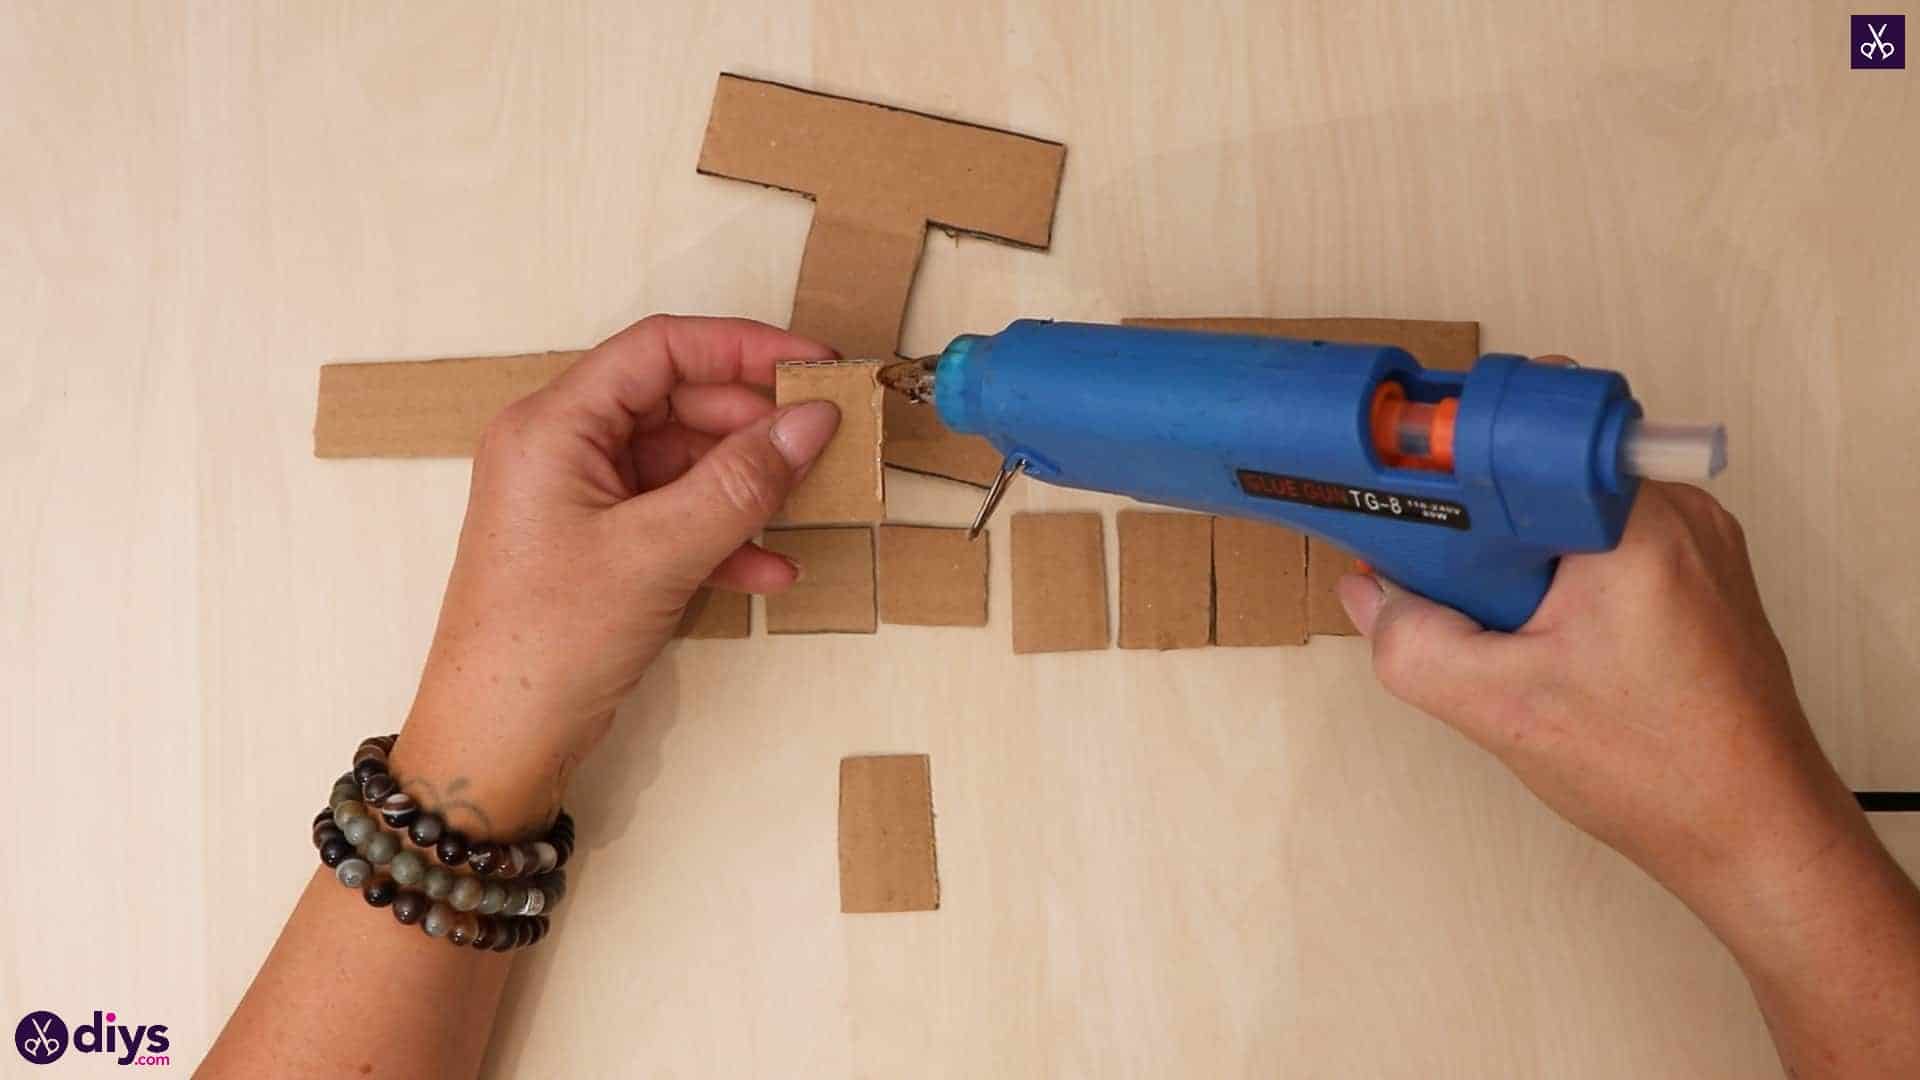
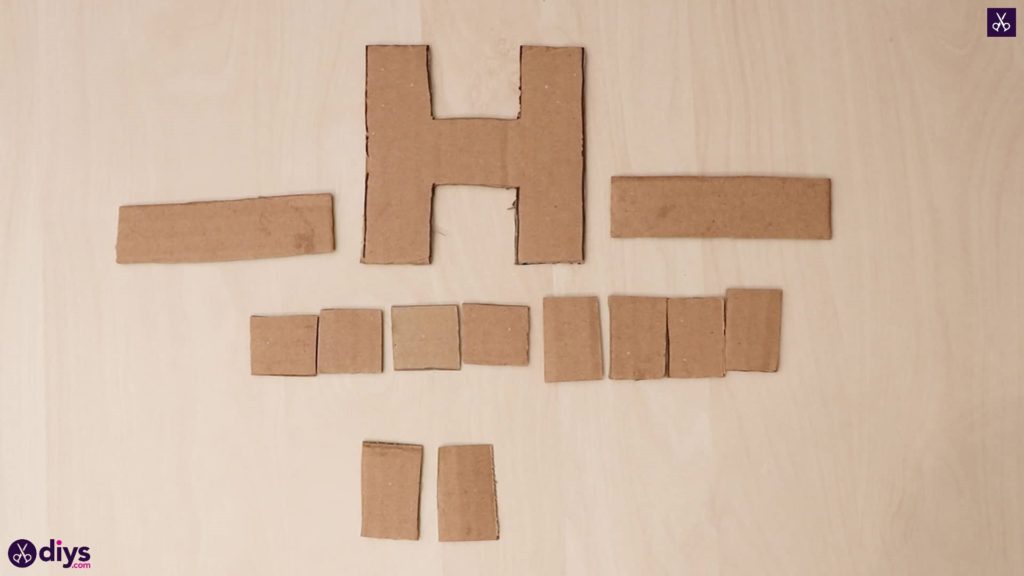
Use the edge of your H like a ruler to to sketch out pieces that are the same length and width of each of your H’s edges, drawn wide enough that, if propped against those edges, you’d have a hollow space inside about an inch deep. So, for my H, I needed two long pieces the length of the sides for the outer edges of my 3D letter, six shorter pieces for the inside edges and the horizontal crossing, and four square pieces for the top and bottom edges of the long pieces.
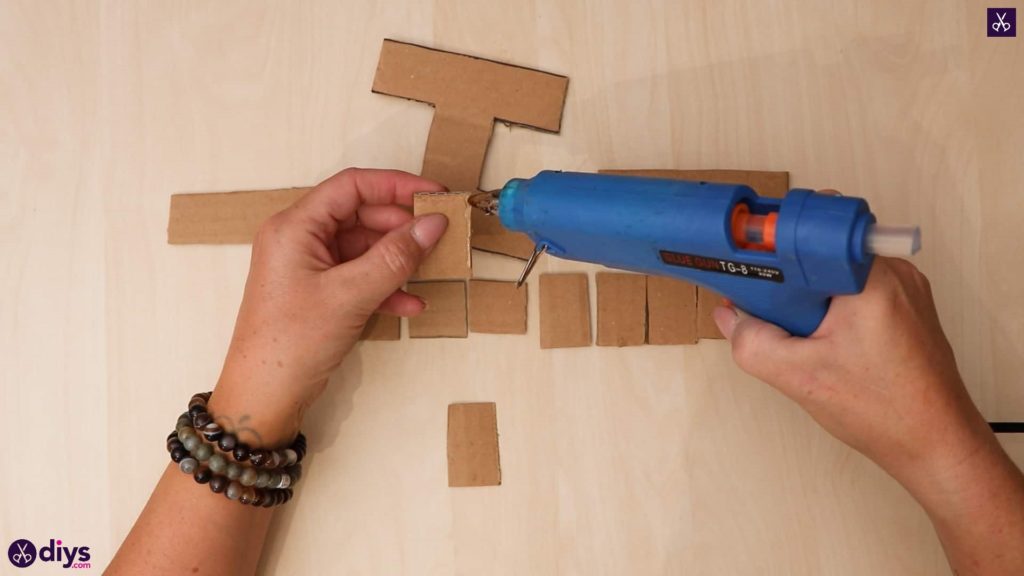
Step 5: glue together
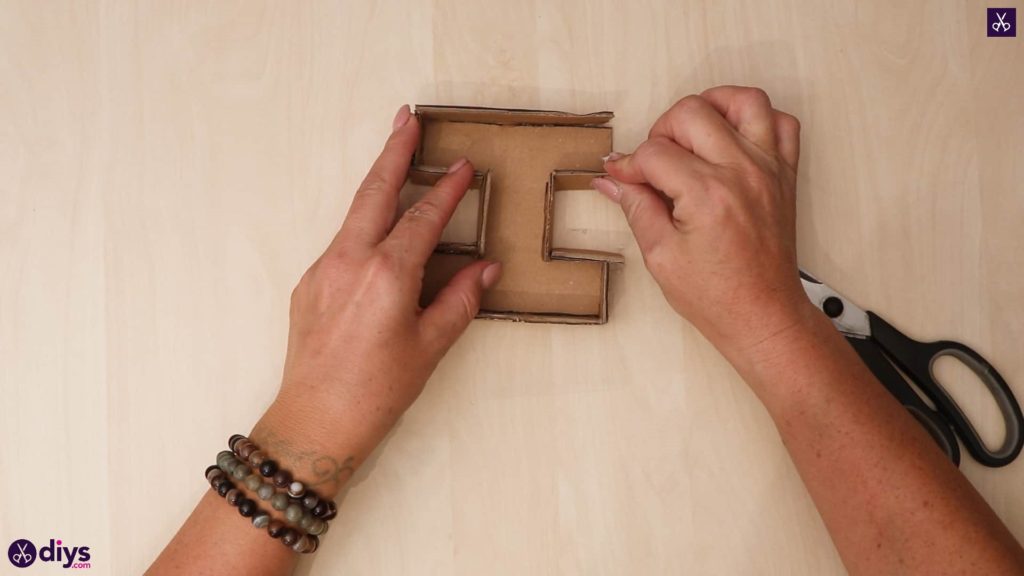
Cut all of your new edge pieces out. Use your hot glue gun to carefully apple glue to the edges of your cardboard H and stick the cut pieces of the corresponding into the glue, upright and perpendicular so they form an edge. When you’re finished, you’ll have a three dimensional letter instead of a flat one, with shape in the letter’s shape inside those newly added edges.

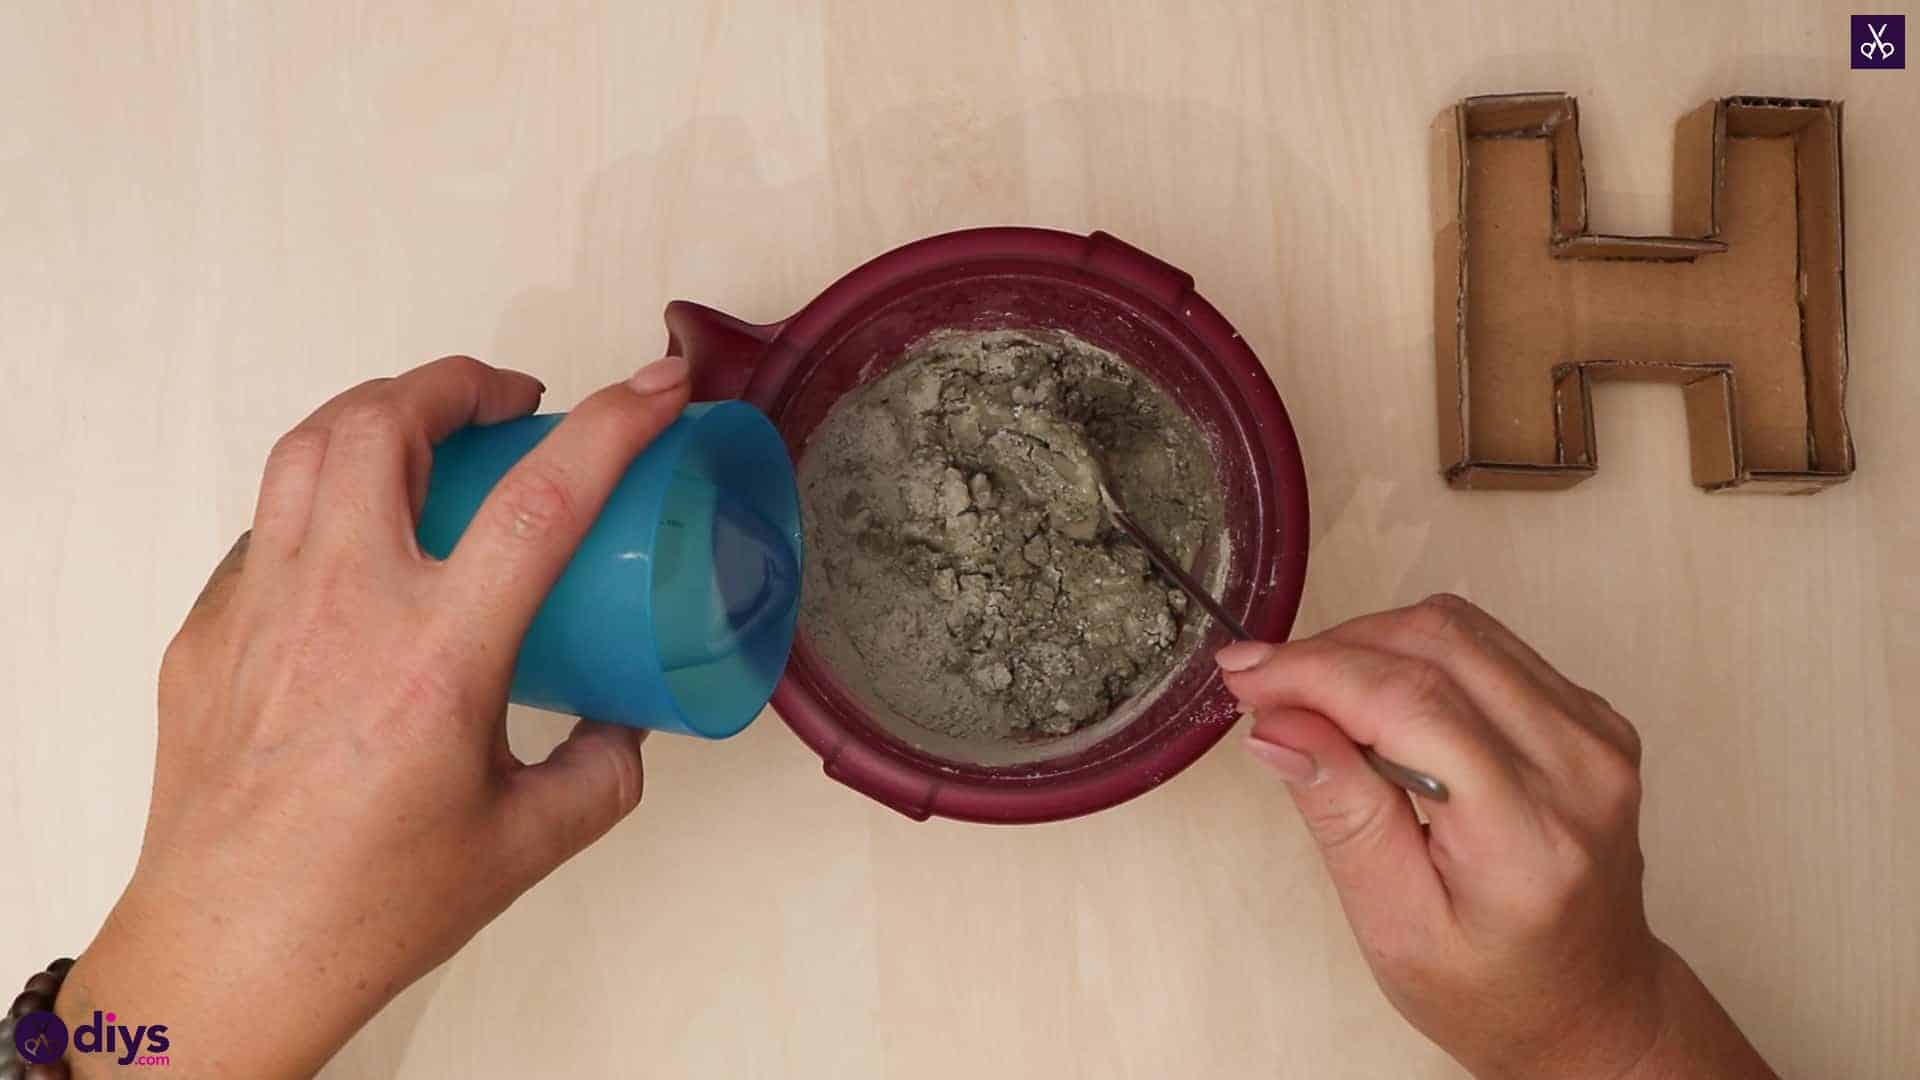
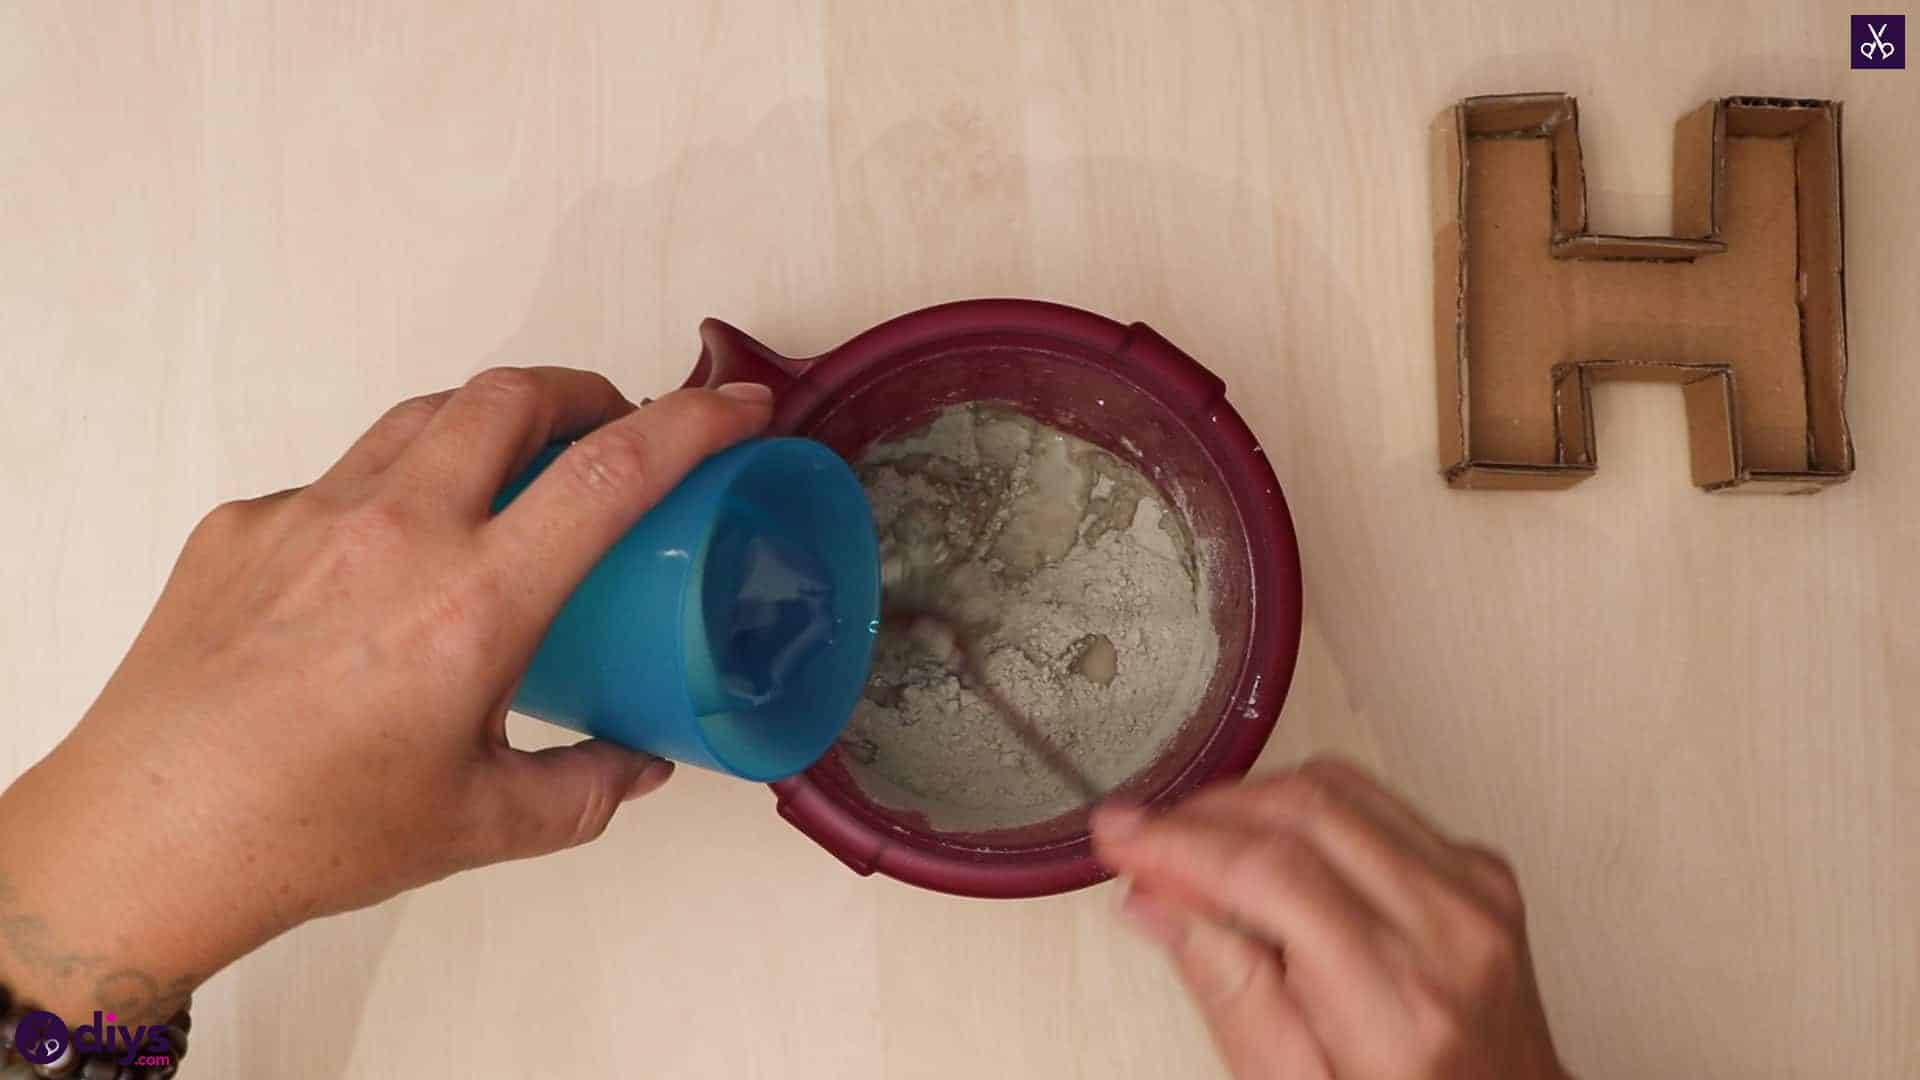
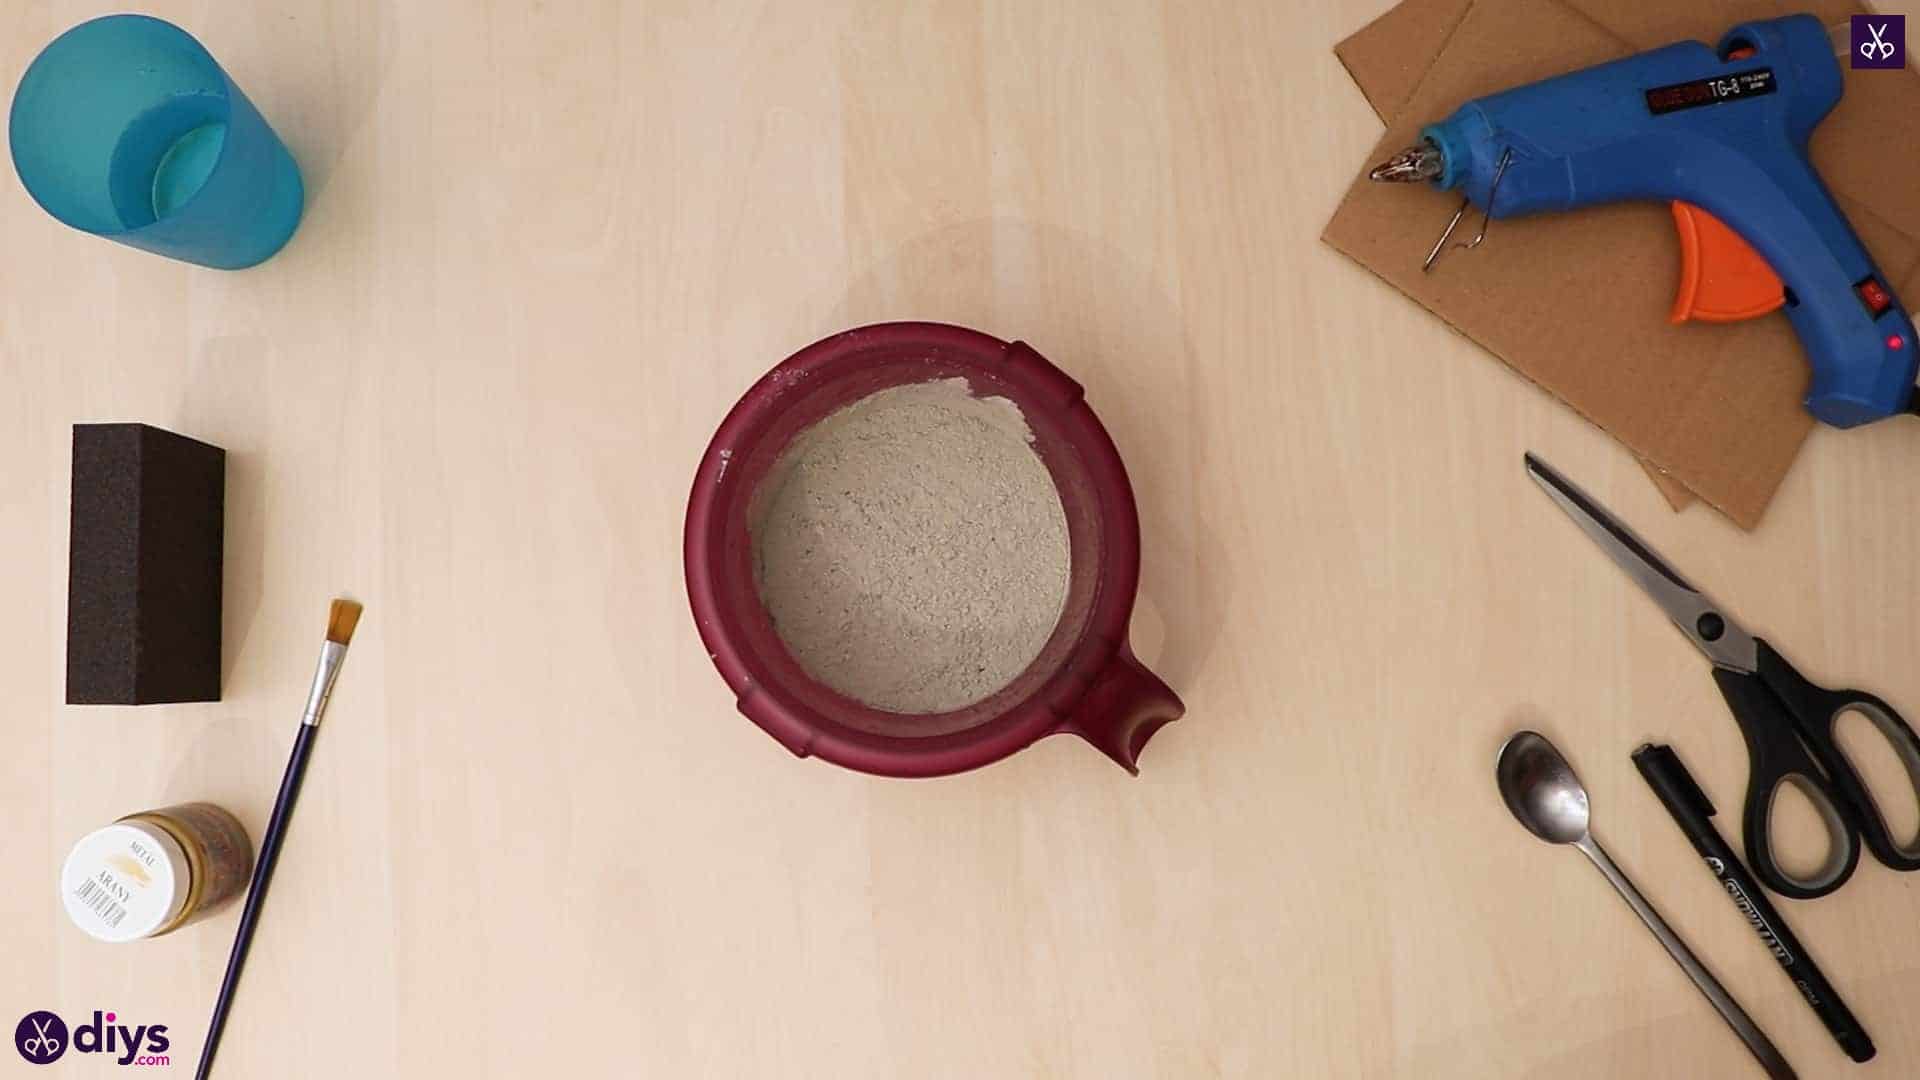
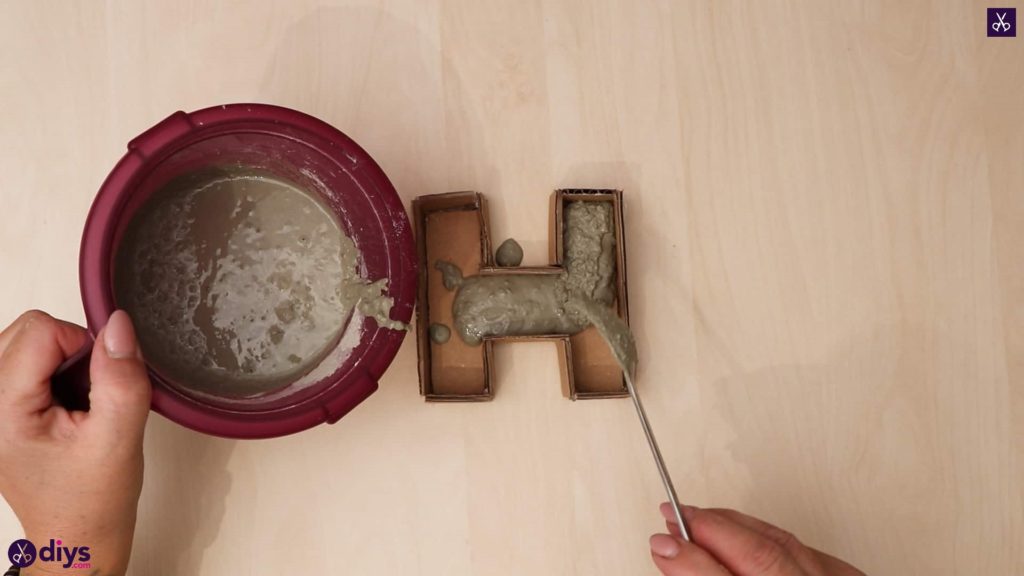
Step 6: mix the concrete
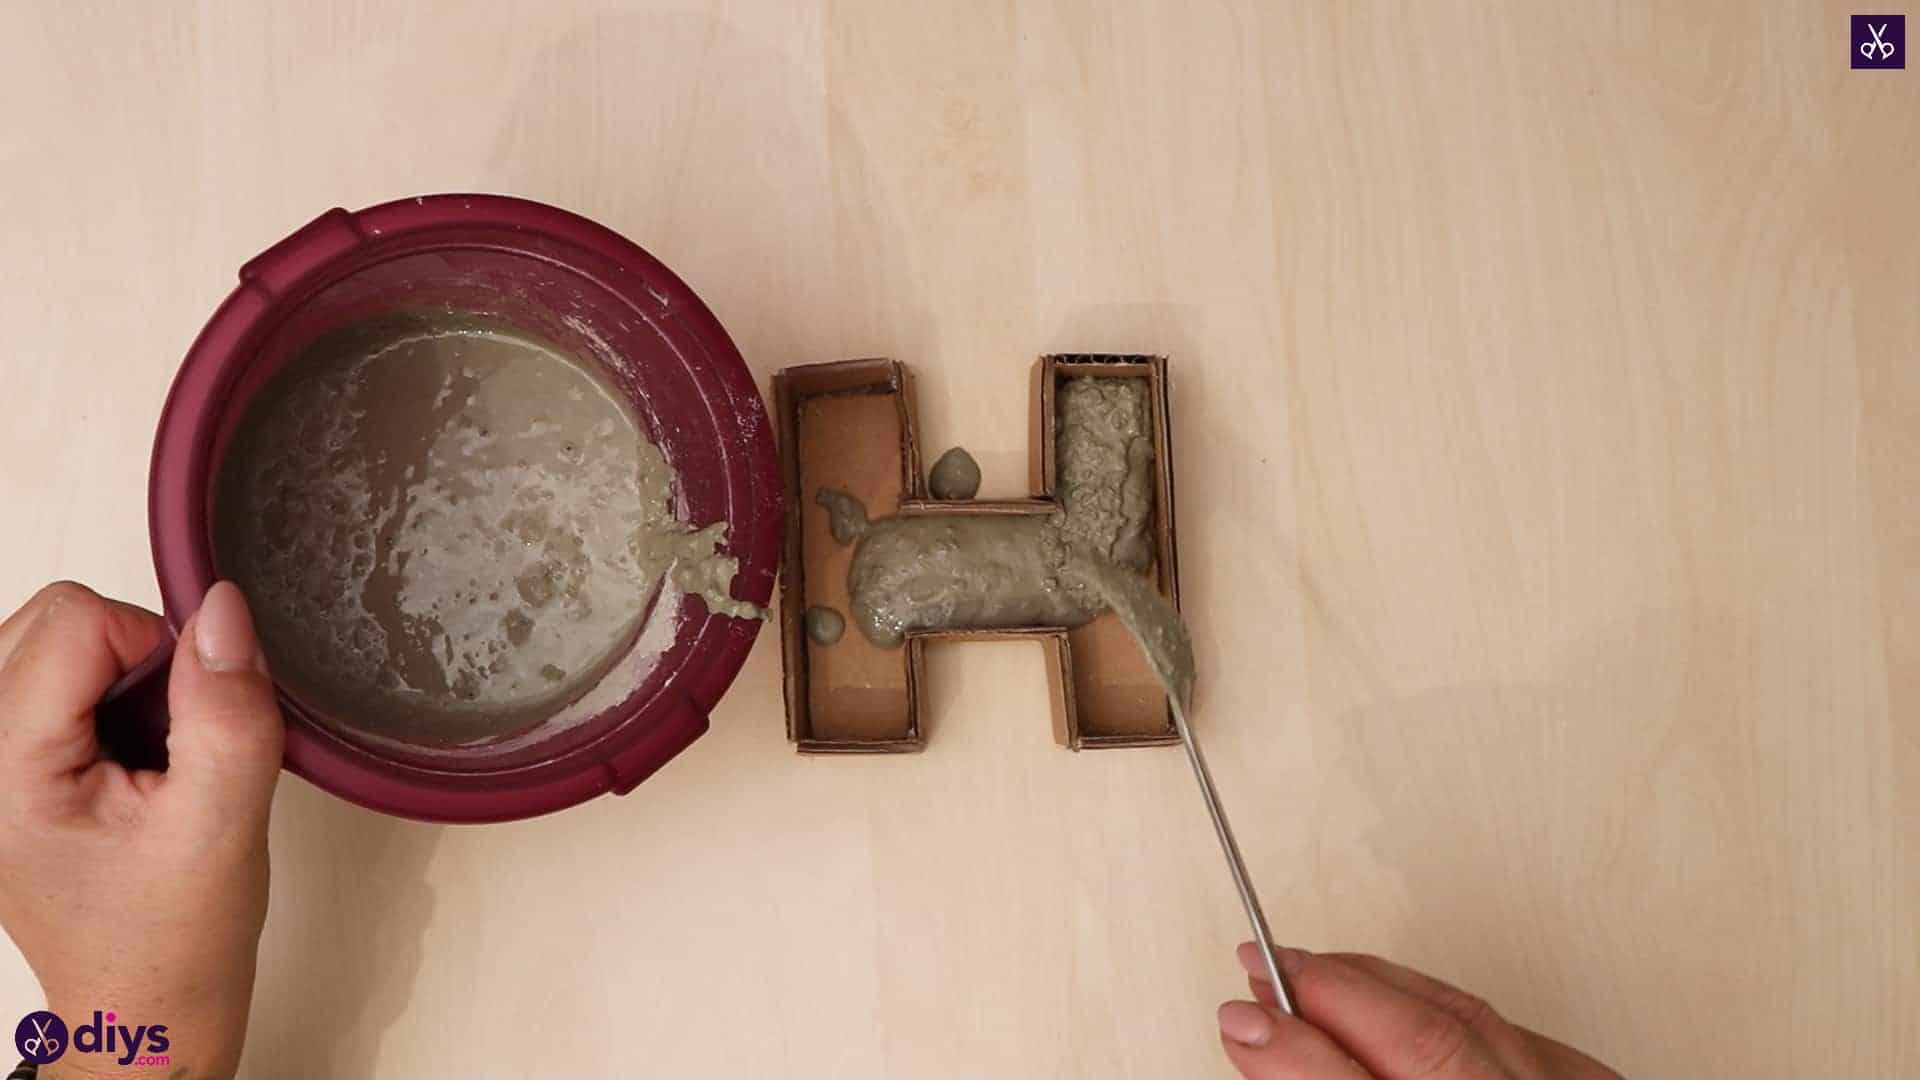
Pour your water into into your DIY concrete mix and stir it with your spoon. Follow the directions on your packaging to get the proper water to mixture ratio, since it varies from brand to brand when it comes to DIY concrete.


Step 7: fill the mold
Fill the empty inside of your letter with concrete, spooning it in until you’ve got it almost to the top edges, but smooth and even. Set your concrete letter aside to dry.
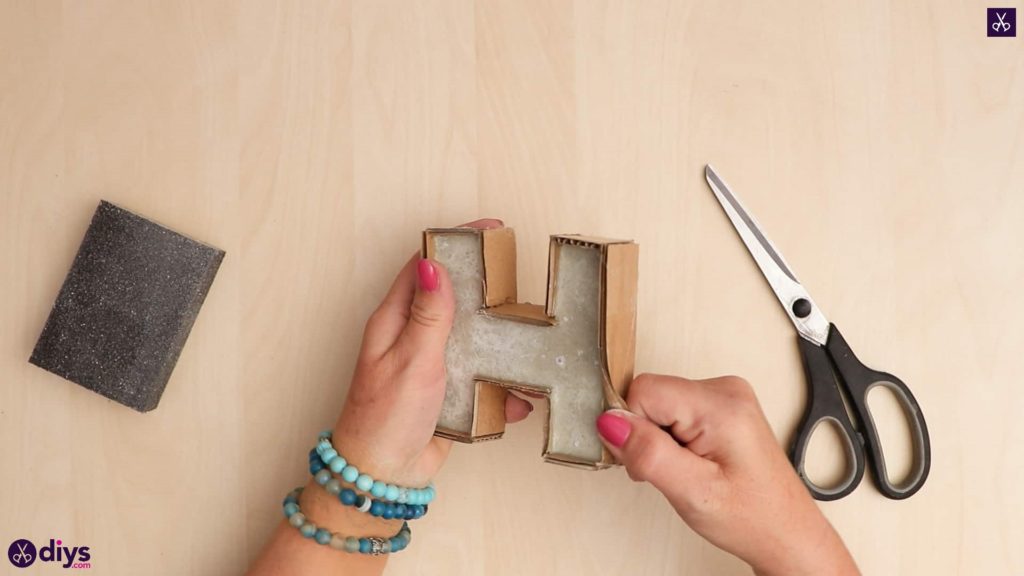
Step 8: remove from mold
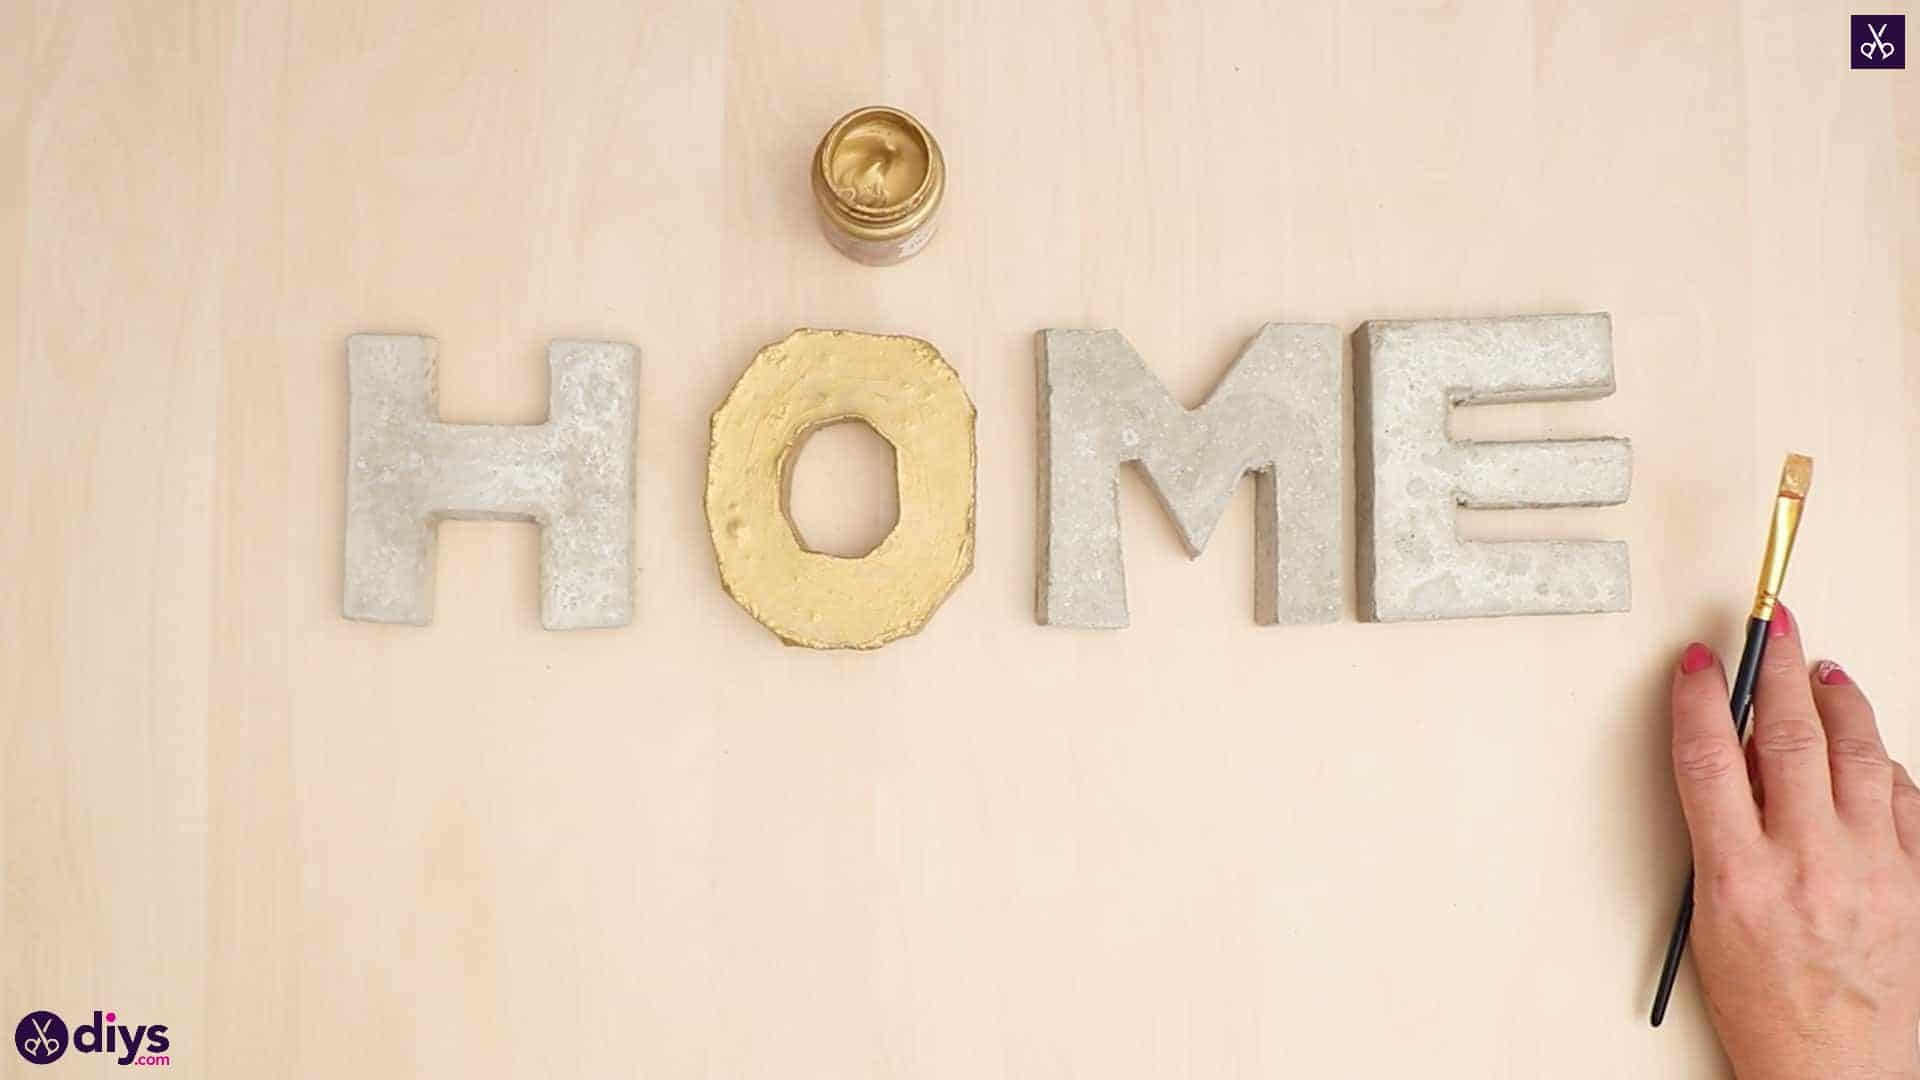
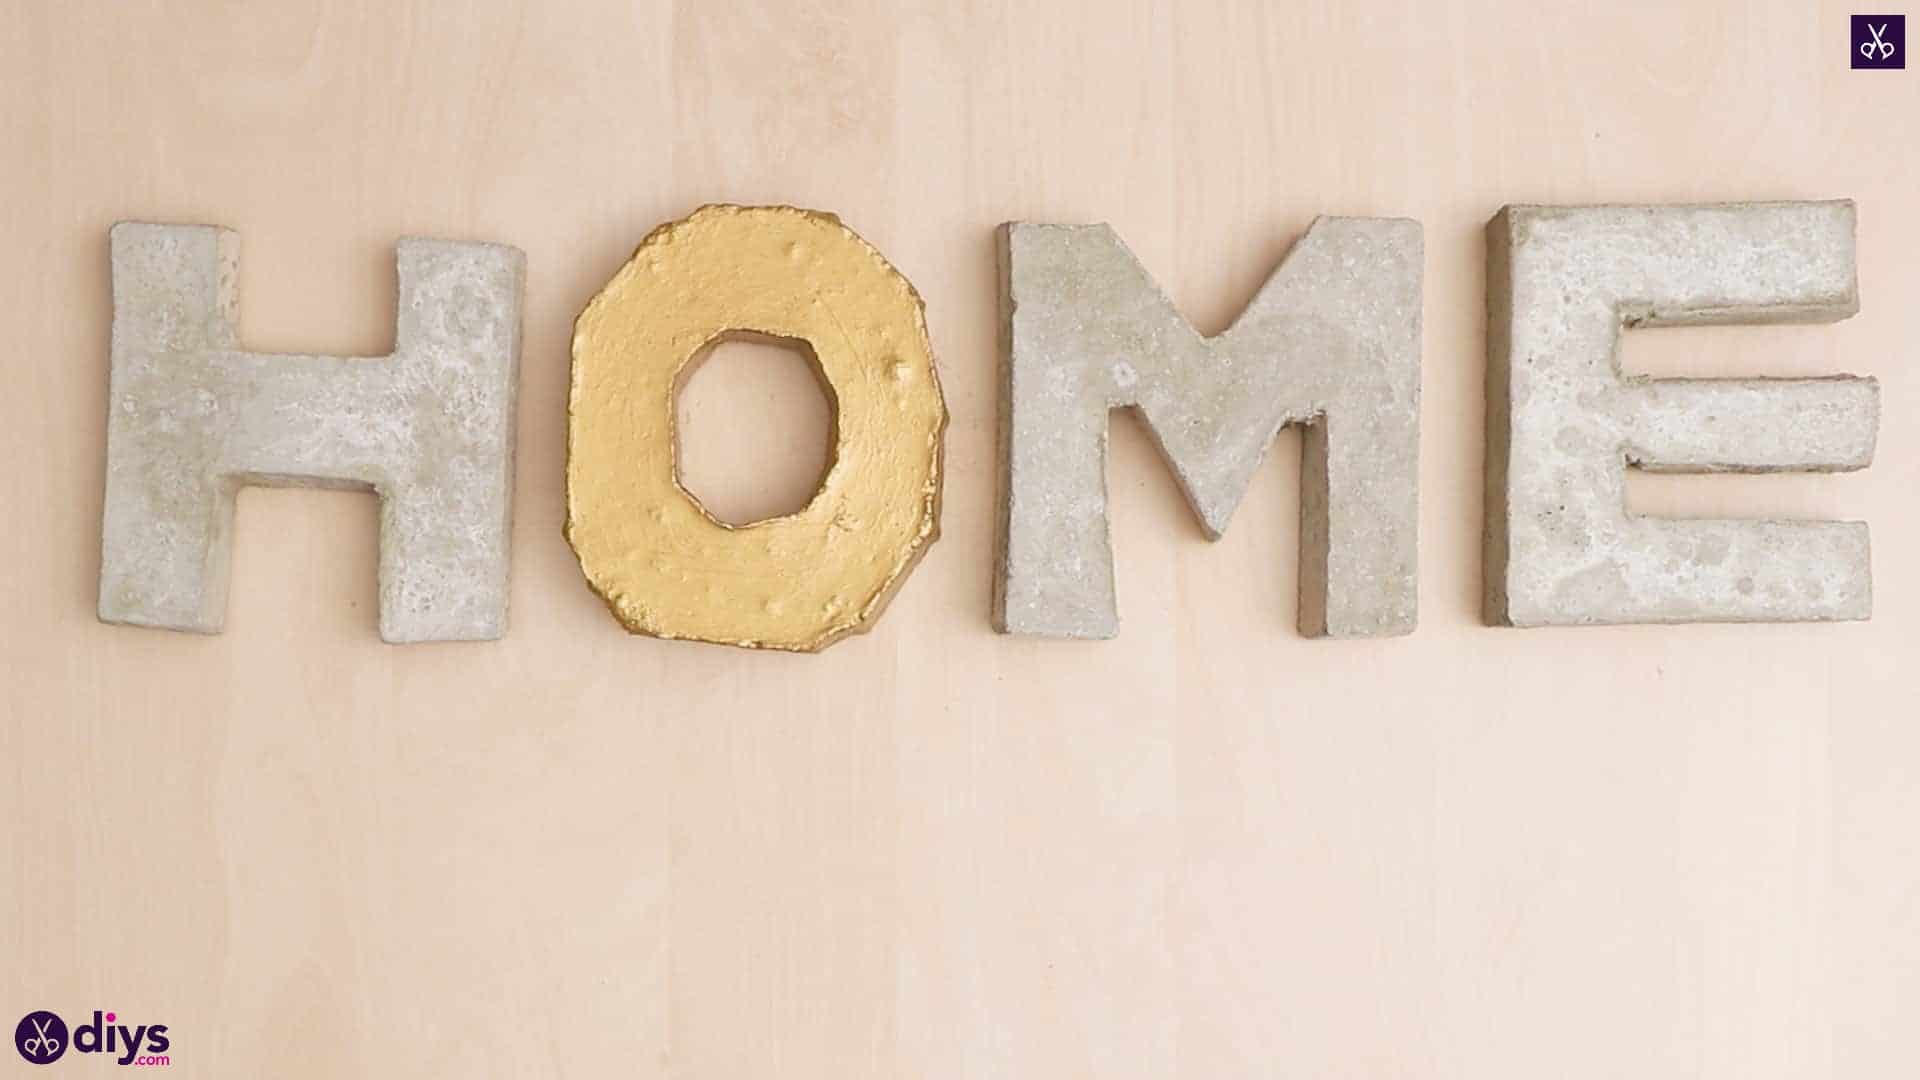
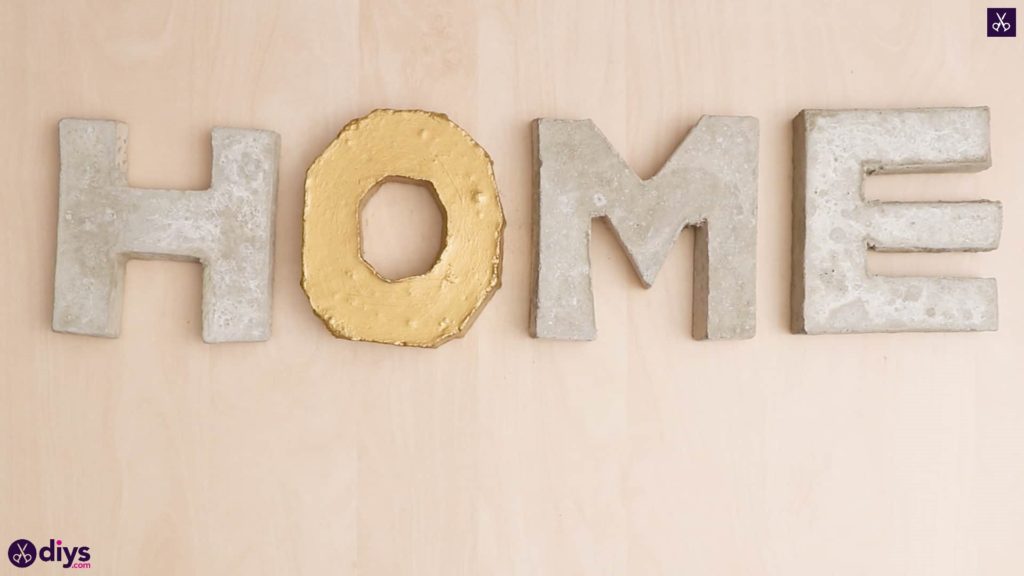
Once your concrete has dried all the way through, peel the cardboard off of the edges and back carefully. You’ll be left with the shape of a fully concrete H! The steps you’ve seen up until here are the ones you’ll repeat to make other letters in whatever shapes you please if you’d prefer to make a word or phrase rather than just one initial. I went on to make an O, M, and E in the same way to spell “Home”, but feel free to get creative.
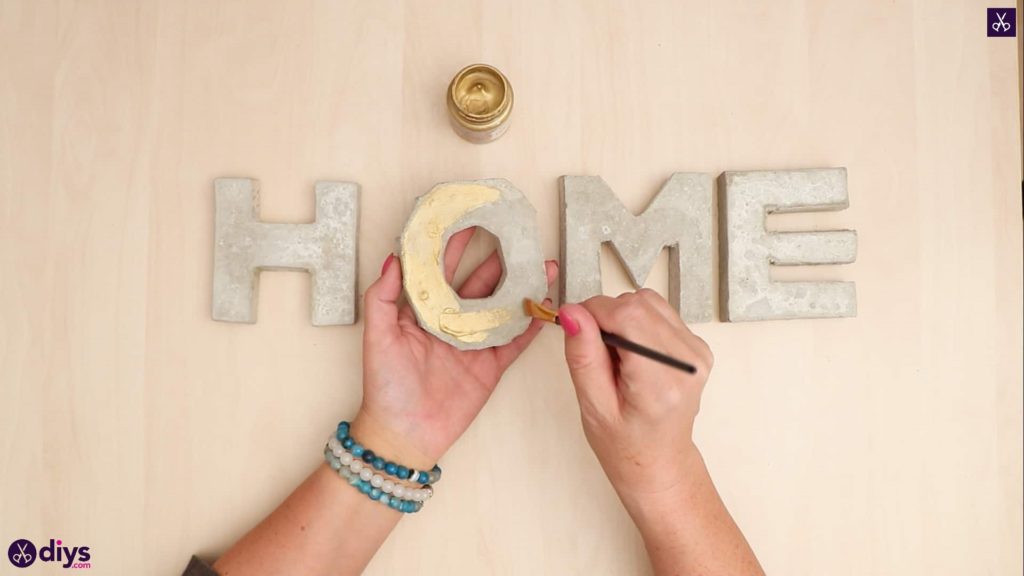
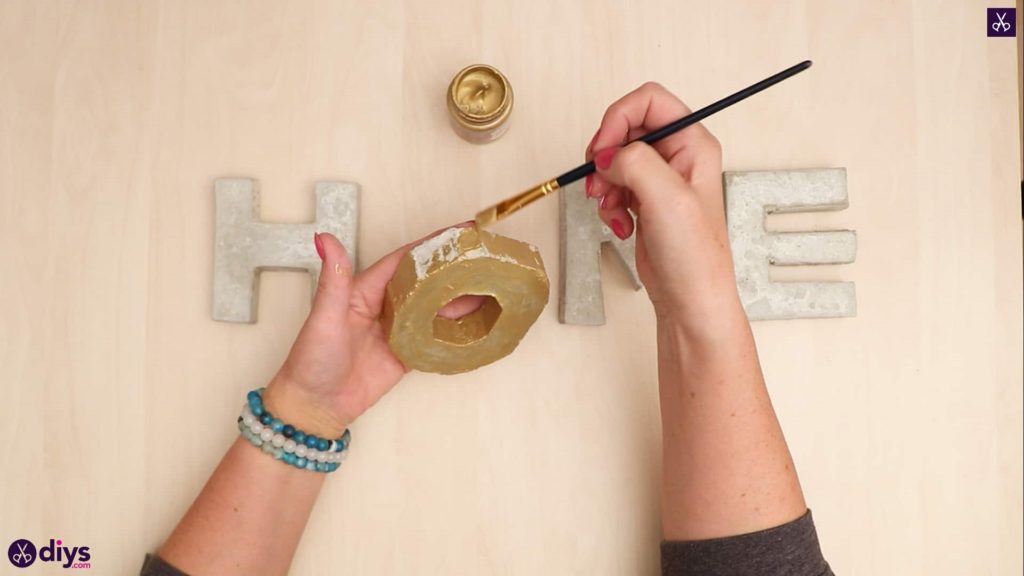
Step 9: paint
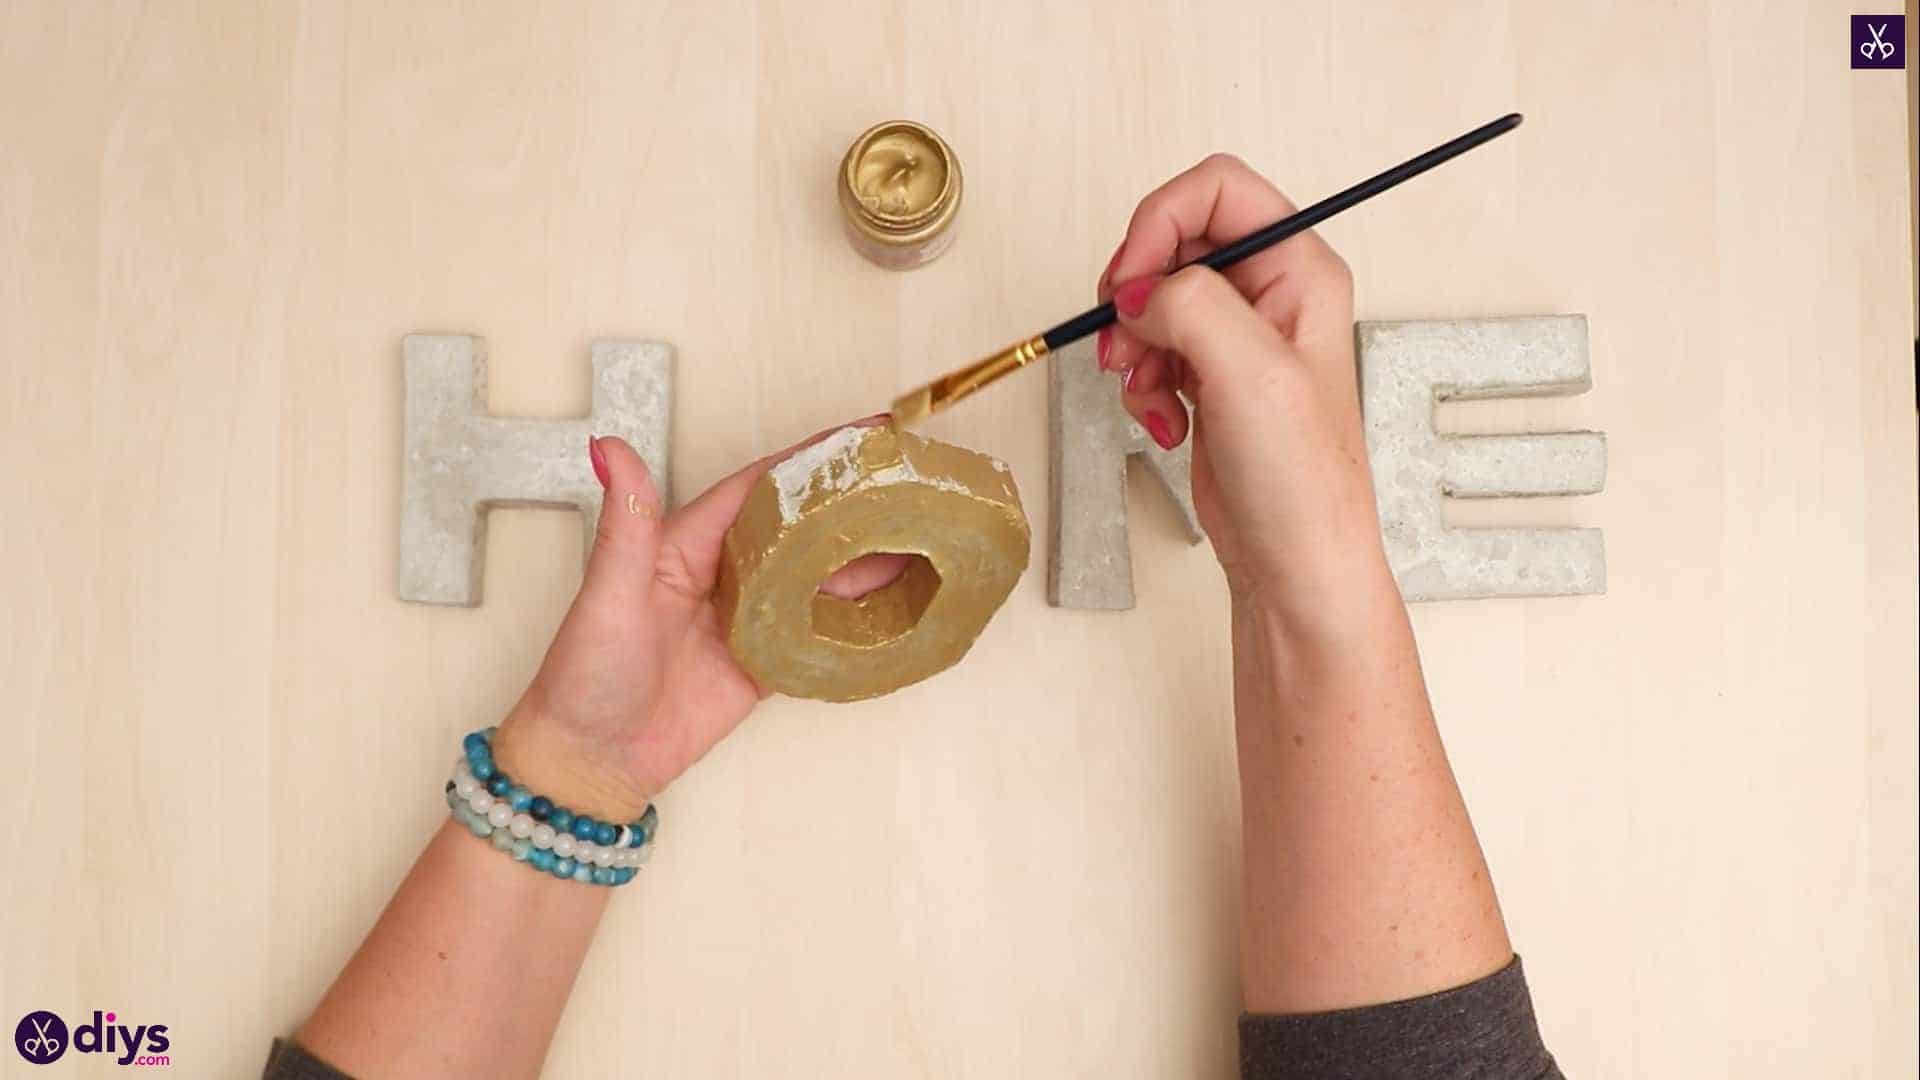
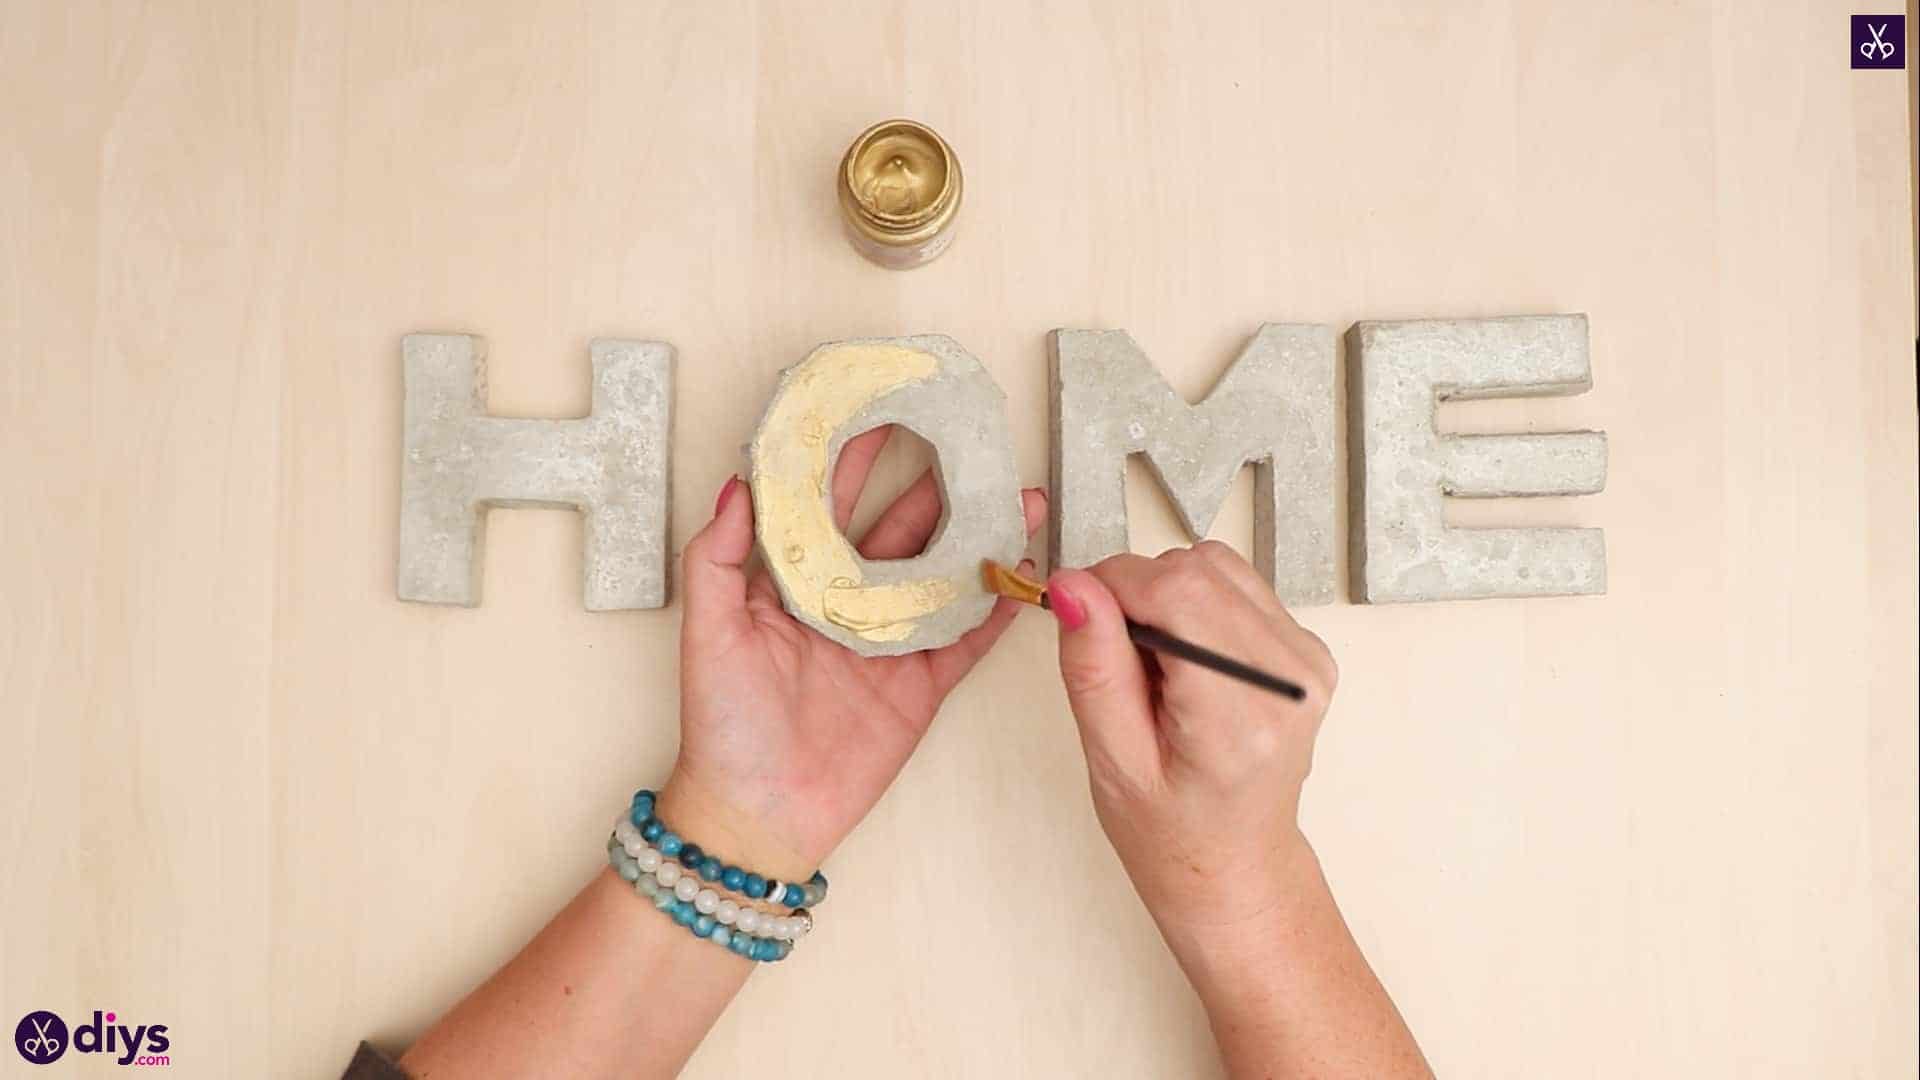
Once you’ve got all of your letters formed and dried, paint them however you please! I chose to keep some of mine plain because I like the subtle grey of the concrete, but to add some shine by painting my O metallic gold. Set the painted letters aside to dry.
That really is all there is to it! Just in case you’d like to try this project out for yourself, here’s a fantastic tutorial video to help you!