Astrantia Care – How To Grow And Care For Masterwort Plant
Updated on October 16, 2021
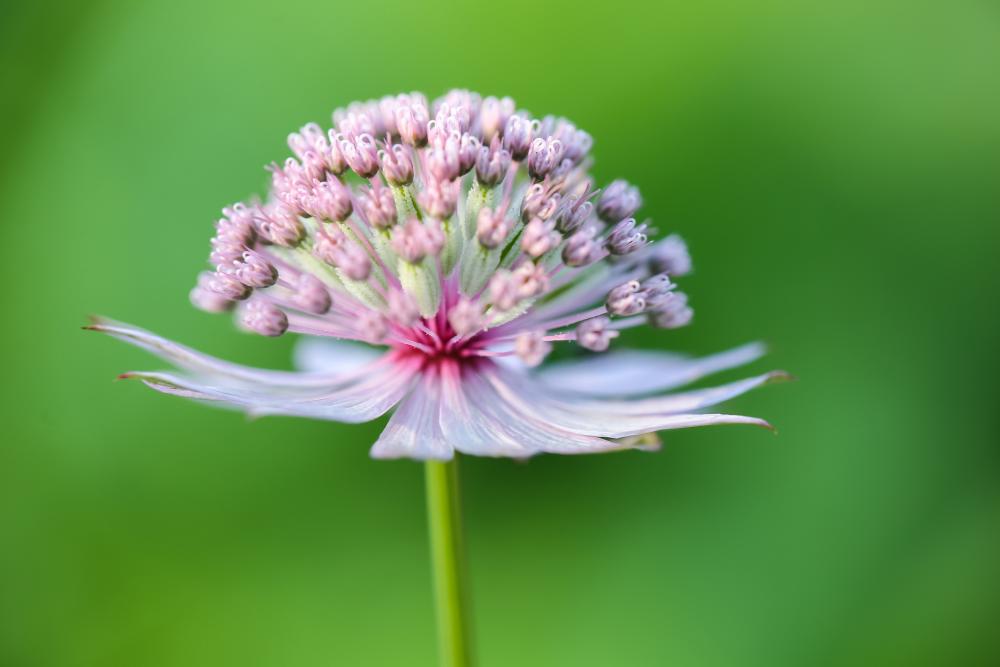
Astrantia is a charming plant to add some summer color and enjoy the delights of their branched heads. Their pincushion blooms are a pleasure to look at and admire as long as they’re in season. But for all its ornamental properties, masterwort was valued foremost for its medicinal values. Its aromatic roots were the source of a popular balsam for the stomach that helped with digestion and calmed a disturbed tummy.
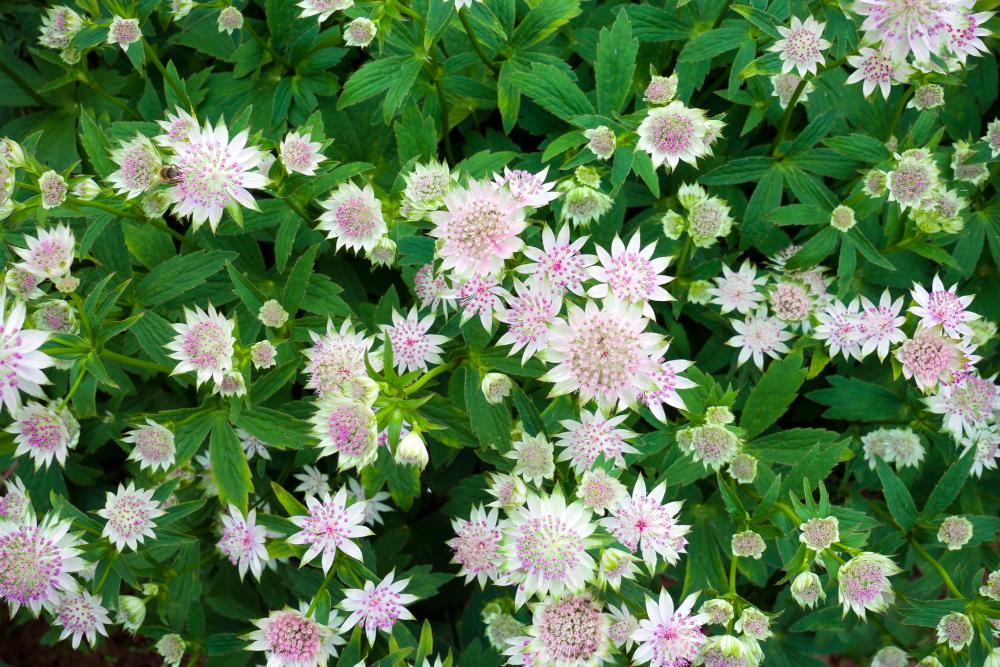
But we’re getting ahead of ourselves here since there’s more about this small perennial than meets the eye. It’s an excellent choice as a groundcover that protects the soil and creates a stunning landscape. And since it self-seeds and has a fast growth rate, you can cover up as much of your garden soil as you need without worrying about excessive care and maintenance demands. So what is the astrantia plant? And how do you grow it in your garden?
Astrantia at a Glance
A herbaceous perennial, astrantia originates from Europe. But its decorative values couldn’t be overlooked and as one of its cultivars, Astrantia Maxima, won the Award of Garden Merit from the illustrious Royal Horticultural Society, its popularity grew and crossed all borders. Today you can say this delicate perennial plant growing in gardens and as potted plants in balconies and patios.
It goes by many names including masterwort and Haiti’s Pincushion on account of its exotic-looking flowers. As a groundcover, the mature plant might not grow above 4 inches high. However, some cultivars can reach a whopping 20 inches high. As for their spread, the low-growing varieties have limited width that almost equals their height. So it’s all about choosing the right cultivar for your needs.
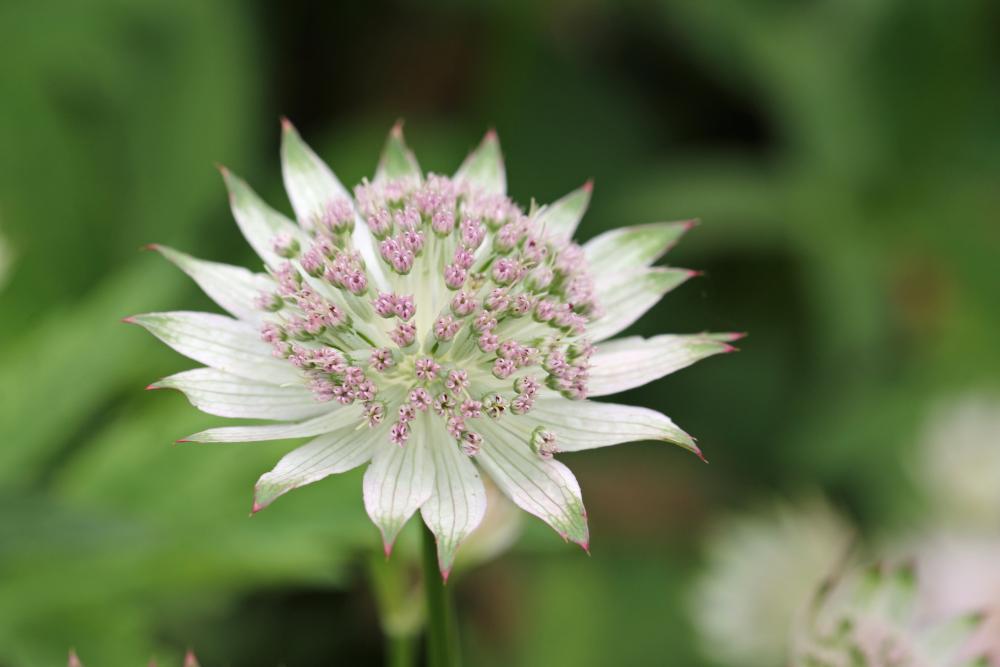
With its slender leaves, the dense foliage creates a lush green groundcover. But it’s the flowers that really make this perennial plant stand out. The flowers open in June and stay in bloom until late August. Each flower is actually a collection of small umbels with delicate shades of red and pink. They grow in clusters on top of a stalk and look like they have branched heads.
Add to that their natural ability to repel slugs and snails. For some reason, these pests stay away from a garden where masterwort plants grow. So that’s another reason you would consider growing this perennial in your garden.
Astrantia Varieties
We mentioned that one of the astrantia cultivars won a prestigious award from the Royal Horticultural Society. And there’s no surprise there that the cultivar would be appreciated more than the natural species. Varieties and hybrids are cultivated for one purpose: to outdo the natural plant and make it bloom longer, have a higher yield, or resist diseases better. The same applies to astrantia plants. The different varieties of the plant have larger blooms and have different sizes to fit in the space you have planned for them. Here are some of those varieties.
- Star of Fire: As the name implies, this cultivar grows red blooms with deep crimson bracts and dark tips. The leaves are green but with pink and dark outlines.
- Bloody Mary: The beauty of this multi-colored flower is as intoxicating as its alcoholic namesake. Between the red flower and divided bright green leaves, it’s hard to tell which adds more to the beauty of this cultivar. And since the red pincushions swim in a sea of silvery green, you know you got yourself a winner with this cultivar.
- Alba: If you prefer your masterwort to come in shades of white and slight hints of pink, then Alba is the cultivar for you. Because it has bright green leaves and cheerful white blooms that stay in bloom until October, you can pair it with dark green perennials.
- Buckland: The pink and green flowers of this cultivar sit on top of slender stems covered with lush green leaves. This is one of the largest astrantia cultivars as it rises more than 35 inches above the ground and covers an area of 20 square inches. It’s ideal for large spaces.
How To Grow Astrantia
As a native of the Caucasus and Europe, you’d expect the astrantia to be hardy and cold-tolerant. But that couldn’t be further from the truth. To grow this perennial, you’ll need to cold stratify the seeds then start them indoors long before the last frost and keep the saplings sheltered until the weather has warmed up.
Seeds are the best way to start masterwort. Here’s how to grow the plant in easy steps.
- Depending on when you get the last frost in your zone, you can start the seeds as early as February once they have been cold stratified.
- In the early winter, place moist peat moss in a zip lock bag and add between 5 to 7 seeds. Seal the bag and put it in the fridge.
- Check on the peat moss every few weeks and add a few drops of water to keep it moist.
- After about 3 months, the seeds have had their chill period and are ready to plant.
- Prepare a shallow tray and fill it up with a general-purpose potting mix.
- Press the potting mix with your finger to make a shallow hole about a half-inch deep.
- Place one seed in the hole and cover it with the potting mix.
- Space the seeds about one inch apart.
- Water the potting mix and keep the tray in a sheltered spot away from direct sunlight and cold winds.
- Keep the potting mix moist as the seeds germinate and grow.
- When the air temperature outside goes above 50 degrees F. you can transplant the seedlings to the garden.
- Choose a spot that gets partial or full shade and is sheltered from the elements.
- Turn up the top 5 inches of the soil and mix in aged manure to loosen up the soil texture.
- Dig up a hole in the soil as deep as the root ball of the seedling and slightly wider.
- Ease the seedling into the hole and backfill it with soil. Firm the soil around the plant.
- Water immediately to get the soil moist.
Astrantia Care
Starting astrantia can be an involved process if you want to grow it from seeds. However, you can also start it from a cutting and avoid the lengthy cold stratification process. In that case, you can start the cutting immediately indoors and transplant it to the garden when the weather warms up. As for astrantia care, the hardy perennial won’t put you out with some outlandish demands.
Soil
Once you have the astrantia seedling growing in your garden, you won’t have to worry about the soil or pH levels. It’s one of the advantages of growing this hardy groundcover. As long as the soil is rich in organic materials, you have nothing to worry about. That said, as usual, you’d want to create the ideal growing conditions for the plant and not put it through stress. So ensure that the soil is well-drained and has a loose texture. Heavy soil can slow down the growth of the root system of the plant and retain water for longer than the perennial prefers.
Watering
As soon as the summer heat picks up, you’ll need to take your watering can to the astrantia more often. The idea is to keep the soil moist and not too dry or too wet. To achieve that, keep your watering shallow, aim it at the base of the plant, and don’t allow the top 2 inches of the soil to go completely dry. How much water the plant needs depends on the weather conditions, the soil type, and whether the plant is exposed to the afternoon sun or not. On average, one inch of water every week is usually good enough for this herbaceous perennial. If you get decent rainfall during the growing season, that too counts as part of the weekly one inch of water quota.
Mulching
Mulching rarely requires mentioning except in passing. But with a plant that prefers the soil to be moist and doesn’t do well when surrounded by weeds, you need to take mulching a little more seriously. When it comes to astrantia, you need to cover the ground around it with any organic materials you have at hand. You could use pine needles, fallen leaves, organic compost, or even straw. But since this is a groundcover plant that practically rises a few inches above the ground, you should place the mulch in the vicinity of the plant’s parameters. In the case of taller varieties, you can keep the mulch close to the base of the plant without actually touching the stem.
Fertilizer
Astrantia is a heavy feeder. It needs plenty of nutrients in the soil to grow and thrive. This is why you will add organic compost or aged manure into the soil before planting the seedlings. And during the growing season, you’ll keep the perennial well fed. You can use any balanced fertilizer you like. However, experts recommend using liquid fertilizers instead of granular ones. Liquid fertilizers are easier to cut with water and make them mild. The young plant needs a much milder fertilizer than an established one. Apply the fertilizer once every 3 weeks during the growing season. Once the plant goes into dormancy, stop feeding it and wait until the next spring.
Deadheading
Deadheading astrantia works the same way it works with roses and other flowering plants. The idea is to prevent the flowers from developing seeds. Not only is this a resource-intensive process but it also means that the plant will not grow any more flowers. So cut the flowers once they start to shrivel to trigger more blooms. Another benefit of deadheading is that it keeps the plant from self-seeding. In most cases, you would want to keep the few astrantias growing in your garden without doubling or tripling them over time.
Astrantias are good showy blooms and you can dry them during the summer to preserve their beauty. One way to do that is to cut the flowers in full bloom and hang them upside down in a dry and warm room.
Pests and Diseases
Even though astrantia plants repel slugs and snails, they’re still an easy target for other pests such as aphids, scale, spider mites, and other garden-variety pests. The problem with these bugs is that on top of the damage they cause to the leaves and stems of the plant, they also carry pathogens that trigger fungal infections.
Besides the usual ways of treating the small insects including neem oil and rubbing alcohol, you can also use a homemade solution that works both on fungal infections and the pests that cause them. You’ll need 5 percent apple cider solution, tap water, and a spray bottle. Mix the apple cider in a gallon of water and spray the plants about once every 3 weeks during the spring and summer. You can also use commercial fungicides, but they tend to have a negative impact on the environment and if you’re growing veggies or fruits in the vicinity, the edible fruits might get contaminated.