Anemone Care – How To Grow And Harvest Anemones
Updated on November 19, 2025
The ubiquitous anemone is the novice gardener’s best friend. The flower practically grows with little to no effort on your part and delights you with its bright and rich colors. It’s the ideal plant for just about any spot in your garden. When you run out of ideas and don’t know what to grow in that spot between the rose bushes and the veggie garden, you can fill the gap with the anemone or windflower, as it’s sometimes called.
Near walls, fences, or lining up walkways, the versatile anemone is not finicky about its placement in the garden, nor does it ask for much in terms of care and maintenance. Read on to find out more about this literal salt of the earth of all flowering plants.
All About Anemone
The anemone is a member of the buttercup family and is distinguished with its open and smooth flowers balanced precariously on top of slender stems. Whenever a slight breeze blows off, the stems tremble, sending the flower swaying every which way. This is where it got the name windflower from.
The flower exists practically in every temperate and subtropical part of the world. The only places it hasn’t conquered are Australia and New Zealand due to their geographical seclusion. But no matter where it grows, the anemone will always have the same distinct features that are easy to recognize.
Along the slender stems, leaves grow in abundance. They might be simple and round with a pointy tip, or they could be divided and lobed. Different varieties have different leaf structures. But it’s the flower that is the main claim to fame for the anemone.
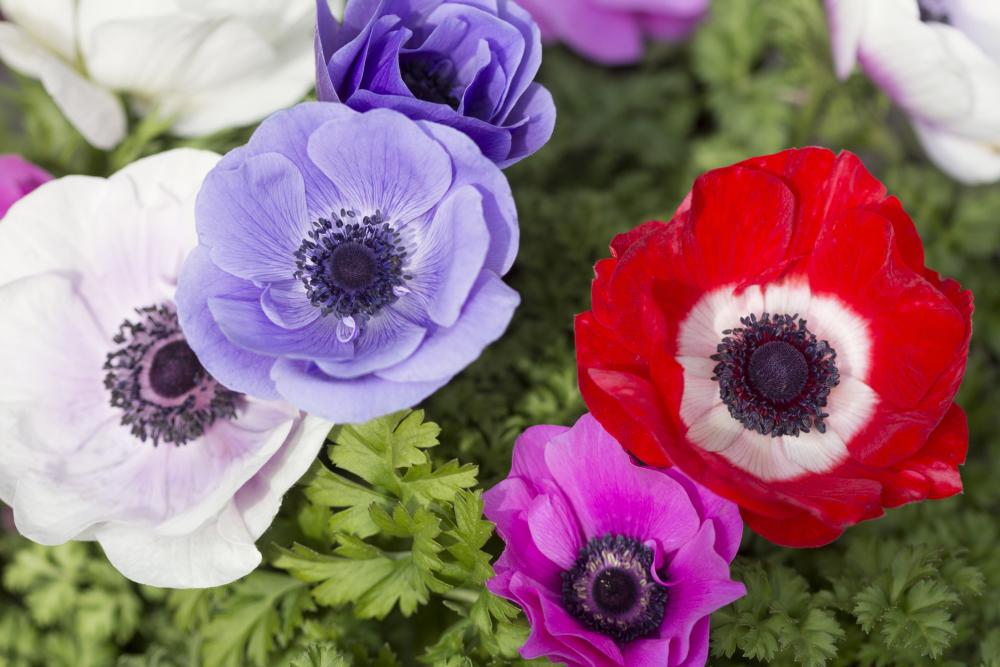
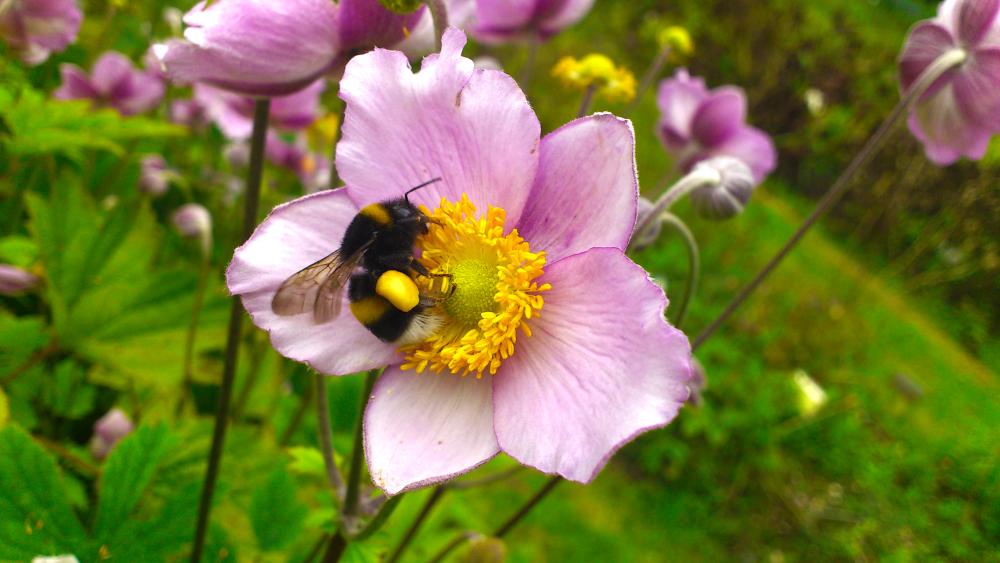
They bloom in the spring and summer and fill the place with different vivid colors. These range from red and white to purple, pink, gold, and creamy. Each stem carries just one flower with 5 petals and a dark disc in the middle.
After the flowers pollinate, they fade, and clusters of ovoid fruits develop at the center of the female flowers. The fruits are nothing more than sacs carrying the corms of the plant. By the fall, the fruits crack open, and the corms drop to the ground where they’re ready to sprout right away.
Anemone Varieties
Some anemone varieties are perennial, while others are annual. In general, there are two types of anemone, non-tuberous and tuberous. Under each type, you will find different species of the plant, each with its unique ornamental features. Here are some of those varieties.
- Meadow Anemone: This non-tuberous anemone is native to North America. It grows to about 24 inches at most and produces large flowers in clusters of twos. The center of the flower is white, unlike other anemones with dark centers. The blooming season starts in the early spring and continues until the early summer.
- Grecian Windflower: A tuberous anemone native to the East Mediterranean. The plant grows to about 12 inches at most and has beautiful flowers that come in shades of purple, red, white, and sky blue. The leaves are no less ornamental and are covered with fuzz.
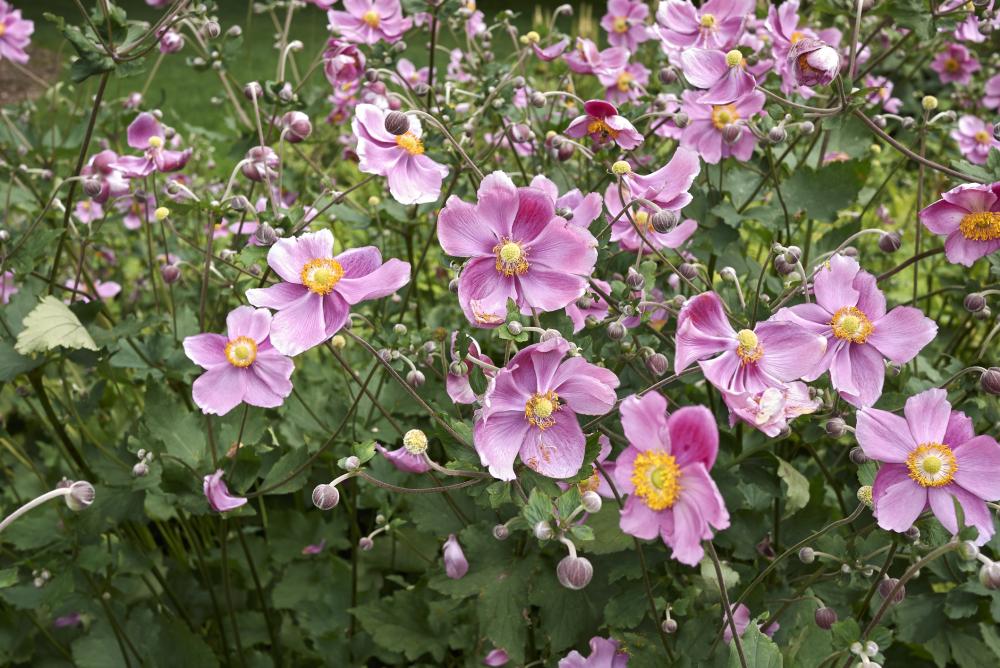
- Japanese Anemone: A non-tuberous hybrid first developed in Japan. The hybrid grows to about 2 feet and sometimes will reach 4 feet in the right conditions. It’s characterized by dark green and fuzzy leaves and cup-shaped flowers. The blooms can be white, purple, rose, or pink.
- Snowdrop Anemone: A non-tuberous species native to Europe. The mature anemone grows to 18 inches high, and each stem carries clusters of 2 flowers at most. The flowers, however are larger than other anemones and reach about 3 inches in diameter. They come in shades of purple, pink, and rose with yellow or white centers.
- Scarlet Windflower: A tuberous anemone with scarlet flowers and black centers. The mature plant grows to 12 inches high and only comes in limited shades of copper and rust.. Like many other anemones, it blooms in the spring until the early summer when the heat forces the flowers to seed.
How to Grow Anemone
Since anemones grow practically anywhere, the corms are readily available either in stores or if you take a stroll in nature, where the plants grow in abundance. The corms develop in the summer and are ready to plant in the fall. So you can plant them either in the fall or in the early spring before the bloom season. If the winter in your zone is mild, you can even plant them in the late winter, where they will be ready to bloom in the springtime. Here’s how to start the charming anemones in easy steps.
- Although you can start anemones any time of the year when the temperature is moderate, the fall is the ideal season, and the blooms are more abundant.
- The corms of anemones look like withered acorns. But they’re quite healthy and have a high success rate of germination.
- Soak the corms in room-temperature water for at least 4 hours before planting them. This softens the outer shell and fills up the withered skin with moisture which speeds up germination.
- Fill a tray with general-purpose potting mix to pre-sprout the corms. Plant the soaked corms in the soil half an inch deep and cover them with soil. Water the tray until it gets moist.
- Keep the tray in a cool room for 14 days. Don’t let the soil dry out. Keep it moist until the corms sprout.
- When the roots on the corm grow to about a half-inch, pull them out of the tray and plant them in the garden.
- Till the top 10 inches of the soil in a sunny spot in your garden and mix in two inches of organic materials for every one square foot of soil.
- Dig a 3-inch hole for every corm and plant the sprouted corm with the roots facing down.
- Space the corms 6 inches apart and water the soil thoroughly after planting to help it settle.
Anemone Care
Although starting anemones seems like a difficult task, it gets easier the more you do it. And once it’s growing in your garden, your job is almost done. The hardy plants don’t need much care and can survive on basic water and feeding. The one thing you’d need to pay attention to is winterizing the floral plant, especially if the winter gets rather cold at night.
Soil
Most anemones thrive in rich soil. The soil has to be well-drained as the anemone doesn’t do well in waterlogged soil. So if your garden soil is clayish, amend it with sand until it absorbs the water quickly. To test the soil texture, grab a fistful of the dry soil and clamp your hand on it. If it turns into a lump, the soil is heavy and needs more sand or perlite. Loose soil will slip between your fingers. Also, test the soil pH. The anemone prefers neutral to slightly acidic soil. Amend the soil with lime to bring the pH reading to something between 5.6 to 7.5.
Water
As well as liking to feed on high-quality nutrients, the anemone prefers the soil to be regularly moist. Dry soil sends the plant into a tizzy, and stress can play havoc with the flowering patterns. In severe cases, the plant will not flower at all. So keep it well hydrated with one inch of water every week, including rainfall. If it rains, hold off the water until the top one inch of the soil dries out. If it doesn’t rain, water, it is regularly between 2 to 3 times a week depending on how hot the weather is and how fast the water drains. Once the last flower has dropped, cut the water by half and allow the soil in the fall and winter to go dry between irrigations.
Fertilizer
The anemone likes to have plenty of organic materials in the soil. Their slow-release qualities keep the hungry plant fed for weeks on end. It also enjoys a quick-release chemical fertilizer, especially with high concentrations of nitrogen and phosphorus. But timing is of the essence so that you don’t accidentally suppress the flower buds and smother them with nitrogen. In the early spring, apply a nitrogen-high fertilizer to bring the plant out of dormancy and trigger root and foliage growth. Then from the mid-spring, switch to a phosphorus-high fertilizer to encourage the flower buds. Apply the fertilizer once every two weeks during the growing season. Side dress with aged manure and rabbit manure compost tea. In the fall and winter, the plant stops growing, so there’s no need for fertilizing during those seasons.
Winterizing
Although the anemone is a cool-season plant, when the temperature drops to frost level, the plant will not survive through the winter. So you need to intervene and prepare the plant for the cold winter months. If you’re growing anemones in containers, then winterizing means taking the pots inside until the last frost is over. If they’re growing in the garden, then prune them heavily, leaving a few inches of the main stalk above the ground. Use row covers to protect the plants from the frost and frigid temperatures at night. Cover the soil with a thick layer of mulch to prevent the roots from freezing over. After the last frost, remove the covers and mulch, then water the plant and feed it as usual.
Pests and Diseases
The main pest that gives the anemone a hard time is the nematode. These are tiny worms that are hard to detect with the naked eye. But just because they’re small doesn’t mean they won’t cause damage to the foliage. They feed on the inside of the leaf, causing it to wither and turn yellow. They block the vessels that carry nutrients and moisture to the leaf. This interferes with the plant’s ability to photosynthesize sunlight. Eventually, the plant succumbs and dies.
The nematodes hibernate in the soil and become active in the spring and summer. So one way to eliminate them is to turn up the soil before planting and let it rest in the sun. You should also remove infected leaves and stems to prevent the spread of the worms to other plants.
There are no notable diseases that afflict the anemone.
Harvesting Anemone
Anemones are known for their long vase life. And to get the most out of them, you need to wait for the flower to rise about a quarter-inch above its leaf collar before you cut it. Young anemones are not mature and wither quickly once cut. The same applies to older anemones that you leave on the plant for too long. So hit the sweet spot and cut the flowers at the right height.
Always use sterilized shears or scissors to cut the anemones. This prevents infecting the plants and the flowers themselves. Harvesting anemones regularly not only triggers more flowers to emerge but also allows the stems to grow between flowers.
Don’t harvest anemones during cold or rainy spells. This causes the petals to become blotchy, and these flaws won’t heal after you cut the flowers. Choose a sunny day to cut the flowers early in the morning.