Vanda Orchid: How to Grow and Care For Vanda Orchids
Updated on November 19, 2025
Think about it. You’re walking down a garden path, you take a sharp turn only to be confronted with billowing blooms like tufts of luminous clouds. Vanda orchids have the quality of transforming your garden into dream land. They don’t just bloom, they explode into a carnival of colors and joy.

Vanda orchids are perennial flowers with about 80 subspecies and more hybrids than one can count. Growing from a single pod, the monopodial orchids have alternating leaves on the stalk that go all the way up to the top. As the plant matures, it reaches heights between 1 and 3 feet and tends to branch out. So you need to divide it to maintain the elegance of the orchid. B
ut that’s not the only thing you need to do to keep the lustrous vanda orchid looking its best. Read on to find out how to grow and care for the vanda orchids.
Types of Vanda Orchids
According to the USDA plant hardiness zone map, vanda orchids are somewhere between zones 10 and 11 allowing them to withstand temperatures as low as 30 degrees Fahrenheit. But with so many species and hybrids, what are the best vanda orchid varieties to grow in your garden?
- Vanda coerulea: Known as blue vanda, autumn lady’s tresses, and blue orchid, this vanda is the only orchid with really blue flowers. The plant grows between 20 to 30 gorgeous and long-lasting flowers at a time.
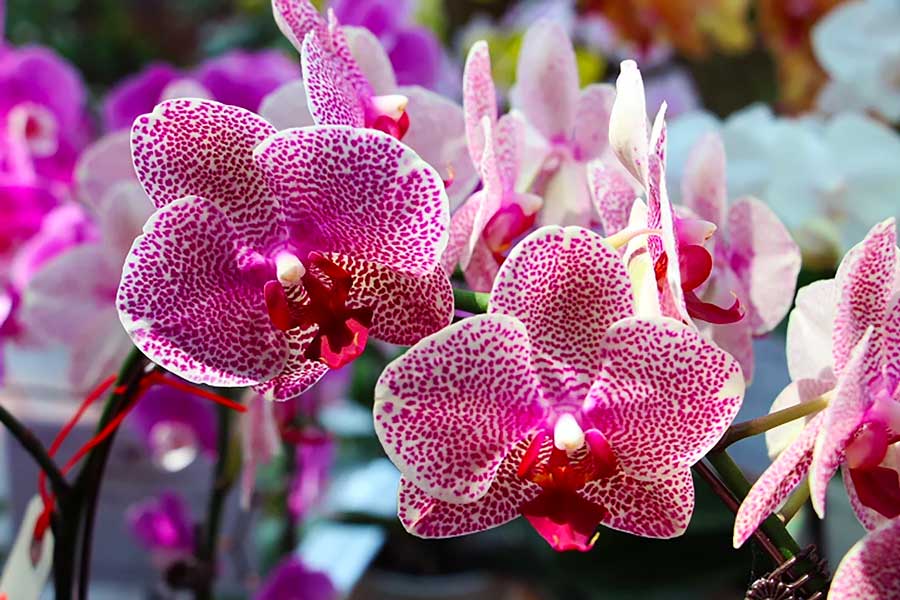
- Vanda tessellata: Commonly known among gardeners as the checkered vanda thanks to the intricate and multi-colored designs of the flowers. Most flowers have a bright yellow background with brown lines and white edges.
- Vanda sanderiana: Also known as waling-waling, this flashy orchid has exuberant pink and white flowers that add life to your garden.
- Vanda roeblingiana: sometimes known as Roebelen’s vanda, it has lush foliage and stunning red and yellow flowers with five elongated petals.
- Vanda scandens: another beautiful vanda that is considered an endangered species due to the loss of its original habitat in Mindanao island, Philippines.
- Vanda testacea: Best known for its tiny yellow flowers with their distinct blue lips, this species grows in high elevations of 1,500 feet and above. Flowers appear in clusters of 6 to 20 at a time and last for weeks.
Easy Steps to Grow Vanda Orchids
It’s fair to say that growing vanda orchids is an easy and straightforward process. You don’t have to have plenty of gardening experience or need to get too technical. All you’ll need is a vanda orchid in a basket, specialist orchid feed, and specialist orchid compost. The whole process of planting the vanda orchid doesn’t take more than 15 minutes on average. With that in mind, let’s begin.
- Make sure the specialized orchid compost is wet. The plant doesn’t benefit from dry compost.
- Arrange the baskets of vanda orchids in rows in a place that doesn’t get the direct sunlight. Partial shade is what the perennial plants need.
- Put holes in the bottom of the baskets to improve drainage.
- Add the specialist orchid compost and water the plant until water comes off the bottom of the basket.
- If you are using liquid fertilizer, add it to the watering can at half strength.
- Vanda orchids like all other orchids have strong fleshy root growth. Check the vanda regularly and move it to a larger basket if you see the roots filling the current one.
- Make sure the specialized orchid compost reaches the roots of the vanda. Mix it well with the soil every time you add it.
- Now just wait for the flowering bloom to brighten your day.
Vanda Orchid Care
If growing vanda orchids looks easy, that’s because it really is. However, vanda orchid care is a totally different story. While these orchid species are hardy by nature, they still need plenty of care to ensure they grow and flower on time. Here are the main factors to consider as you look after your vanda orchids.
Water
Fewer plants love water as much as vanda orchids. Since they originate from cold regions in Asia, when the temperature rises during the hot months, your vanda orchids need lots of water. Sometimes you would need to irrigate the plants twice a day. During the growing cycle and flowering season, it needs water once a day. Otherwise, you don’t need to water it so often during the winter months when the plant goes into dormancy.
Light
Direct sunlight does the vanda orchid more harm than good. So always choose a place that is partially shaded. While some vanda species can adapt to bright light, they don’t do as well as others that grow in shaded corners. Take note of the specific light needs of the vanda species you have in your garden. If it doesn’t need plenty of sunlight, just place an umbrella in that spot to keep the glare off the pots.
Soil
The fleshy root system of the vanda orchids allows them to latch on anything from wreckages to rocks and draw their nutrition. Vandas generally don’t need lots of soil. This is why you shouldn’t put them in a pot since that puts constraints on the meandering roots. A basket is more suited for the vandas since it allows plenty of ventilation. Fill the basket with peat moss and bark to keep the plant rooted in the basket.
Humidity and Temperature
On average try to keep the plants in high humidity levels of 60 percent or more. The high humidity gives the foliage and flowers a healthy sheen. It also protects the plant during the hot months against drought. As for temperature, vandals flourish in 65 degrees Fahrenheit and higher. They can withstand cold temperatures of 30 degrees Fahrenheit, but prolonged exposure can stunt the plant’s growth.
Fertilizer
Just as they love plenty of water, vandas need lots of nutrients to grow and bloom. During the growing and flowering season, vanda orchids need a dose of fertilizer once a week. To encourage it to produce stunning flowers, make sure to use a phosphorus-high fertilizer every third week. When the plant goes into dormancy during the winter, it only needs fertilizers once every 3 to 4 weeks.
Mistakes to Avoid when Growing Vanda Orchids
One of the issues some gardeners have with vanda orchids is that in some way these are atypical plants. The unusual root system alone and how the plants rarely need soil make growing them somewhat confusing to many. So let’s go through the most common mistakes people make when growing vanda orchids and what you can do about them.
- Using Pots: A common issue that gardeners encounter is when the plants seem to wither even though they have all the water, fertilizer, and light they need. The reason here is the pot. Vanda orchids don’t need pots due to their abnormal root growth. A basket or a vase will do. Some people hang them on a wire and let those wandering roots latch on the nearest objects.
- Poor Irrigation Practices: Even though vanda orchids thrive on plenty of watering, that doesn’t mean that they like to sit in soggy mediums all the time. In fact, too much water leads to root rot. So make sure the container is well ventilated and has plenty of drainage holes in it.
- No Deadheading: You grow your vanda because of its gorgeous flowers. So one way to make sure the bloom is at its highest is to deadhead the plant. When flowers die on the stem, remove them immediately to encourage new flowers to appear.
- Wrong Light: This is a tricky point and many gardeners just don’t get it right. On the one hand, vanda orchids need lots of bright light, but on the other, direct sunlight can scorch the leaves and make the flowers fade quickly. To complicate things further, different vanda orchid species and hybrids have different light needs. Make sure you’re giving your specific vanda subspecies the right amount of light that encourages its growth without impacting the bloom.